Japan Trove

Category: Uncategorized

  • Tendon: Japan’s Tempura Rice Bowl and Where to Order It

    Tendon: Japan’s Tempura Rice Bowl and Where to Order It

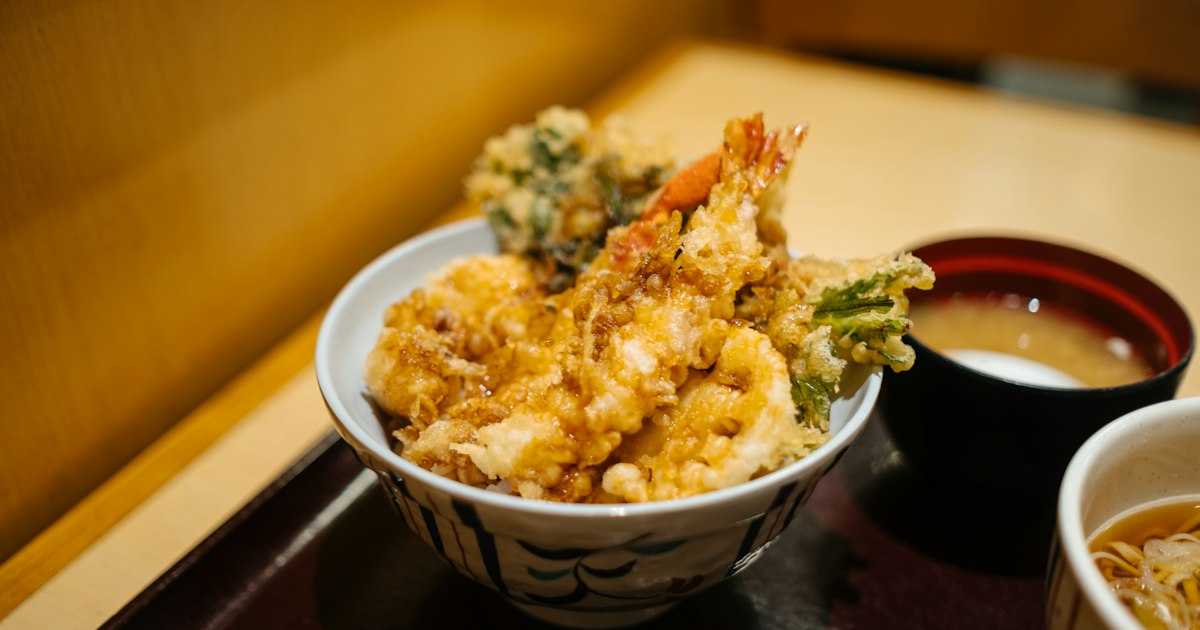
    Photo by bady abbas on Unsplash

    Tempura gets all the glory, but the dish most Japanese people actually crave on a weekday lunch break is tendon — a bowl of rice topped with freshly fried tempura and draped in a sweet-savory sauce called tare. It’s faster than a full tempura course, cheaper than a kaiseki dinner, and just as satisfying. Here’s how to find good tendon at every budget, when to go, and how to avoid the rookie mistakes that make first-timers miss the point of the dish.

    What Makes Tendon Different From Tempura

    Tempura on its own is usually served with a light dipping sauce called tentsuyu, meant to let the crisp batter stay crisp as long as possible. Tendon flips that logic entirely: the tempura — typically shrimp, kisu (sillago fish), kakiage (a mixed vegetable or seafood fritter), and sometimes anago (conger eel) — is laid over hot rice and finished with a thicker, darker sauce poured directly on top. The batter is meant to soak up some of that sauce, so the texture is softer and richer than standalone tempura. If you order tendon expecting shatter-crisp tempura, you’ll be disappointed; the whole appeal is the contrast between sauce-softened edges and the still-crunchy interior.

    Budget Option: Tenya and Fast Tendon Chains

    For a quick, reliable tendon, look for Tenya, a nationwide chain with locations in most major train stations and shopping streets in Tokyo, Osaka, and beyond. A basic tendon runs around ¥500-600, and a deluxe bowl with extra toppings like anago or a larger kakiage lands closer to ¥800-900. Most locations are open roughly 11:00 to 22:00, with counter or table seating and ticket-machine or staff ordering — no reservation needed, and turnover is fast even at lunch rush. This is the right choice if you want a satisfying, hot meal between sightseeing stops without planning around it. Other regional chains and standalone diners (often just called “tendon-ya”) offer similar fast-casual setups, so don’t hesitate to walk into one with a lunch sign out front.

    Mid-Range: Historic Tendon Specialists in Asakusa

    Asakusa is the best neighborhood in Tokyo for tendon with real history behind it. Daikokuya, founded in 1887 near Kaminarimon and Senso-ji, is famous for its distinctively dark, rich tsuyu sauce poured generously over the tempura — a style that’s stayed almost unchanged for over a century. Expect a tendon course in the ¥2,000-3,000 range and a line out the door on weekends, especially around lunch; going right at opening or in the mid-afternoon lull (roughly 14:00-16:00) cuts the wait significantly. Funabashiya, also in Asakusa, is another century-old tempura specialist worth comparing against Daikokuya if you want to taste how sauce style varies between old-guard shops. Both are a short walk from Asakusa Station, served by the Ginza Line, Asakusa Line, and Tsukuba Express. In Shinjuku, Tsunahachi (founded 1923) is a well-known alternative with tendon in a similar ¥1,800-2,500 range, useful if Asakusa isn’t on your itinerary.

    Splurge: Counter Tempura Lunch Sets

    Some of Tokyo’s highest-end tempura counters — the kind that serve an omakase course for ¥20,000 or more at dinner — offer a simplified tendon-style rice bowl at lunch using the same ingredients and oil, for roughly half the dinner price or less. These lunch sets typically need to be booked in advance or require arriving right at opening, since seating is limited to a dozen or so counter seats. It’s a worthwhile splurge if you want to taste chef-grade tempura technique without committing to a multi-hour dinner course, but go in understanding you’re paying for ingredient quality and frying precision, not bigger portions.

    Best Time to Go and Seasonal Ingredients

    Tendon is eaten year-round, but the tempura itself shifts with the seasons: kisu and other delicate white fish are best in spring, anago (conger eel) is a summer specialty, and autumn kakiage often incorporates mushrooms like maitake. Lunch is almost always the better value window — many tempura specialists, including the higher-end counters, offer lunch sets that cost noticeably less than the same ingredients served at dinner. If you’re visiting a famous shop like Daikokuya, weekday lunch (avoiding the 12:00-13:00 peak) is your best shot at a short wait.

    Common Mistakes to Avoid

    • Confusing tendon with tempura teishoku: a teishoku (set meal) serves the tempura on a separate plate with rice, miso soup, and pickles on the side, dipped in tentsuyu. Tendon is the sauce-topped rice bowl version — ask specifically for “tendon” if that’s what you want.
    • Waiting too long to eat: tendon is built to be eaten promptly. The sauce continues softening the batter the longer it sits, so a bowl left untouched for photos will taste noticeably soggier by the time you dig in.
    • Assuming it’s available everywhere: unlike ramen or onigiri, tendon isn’t a convenience-store staple (though frozen versions exist in supermarket freezers). You’ll generally need a dedicated tempura shop or donburi restaurant.
    • Skipping the pickles and miso soup if included: many tendon sets come with a small side of pickles or a miso soup — eat the pickles between bites to cut the richness of the sauce, a trick locals use without thinking about it.

    Other Japanese Comfort Foods Worth Trying

    If tendon has you interested in Japan’s everyday comfort-food scene beyond sushi and ramen, a few other dishes are worth seeking out on the same trip. Napolitan, the ketchup-based spaghetti served in old-school kissaten cafés, is a similarly nostalgic, home-grown classic. In Okinawa, goya champuru offers a completely different but equally essential regional dish. And if you’re exploring convenience stores during colder months, don’t miss nikuman, the steamed buns sold at the register that have their own small ritual attached to ordering them.
  • Tomonoura: Hiroshima’s Historic Port Town That Inspired Ghibli’s Ponyo

    Tomonoura: Hiroshima’s Historic Port Town That Inspired Ghibli’s Ponyo

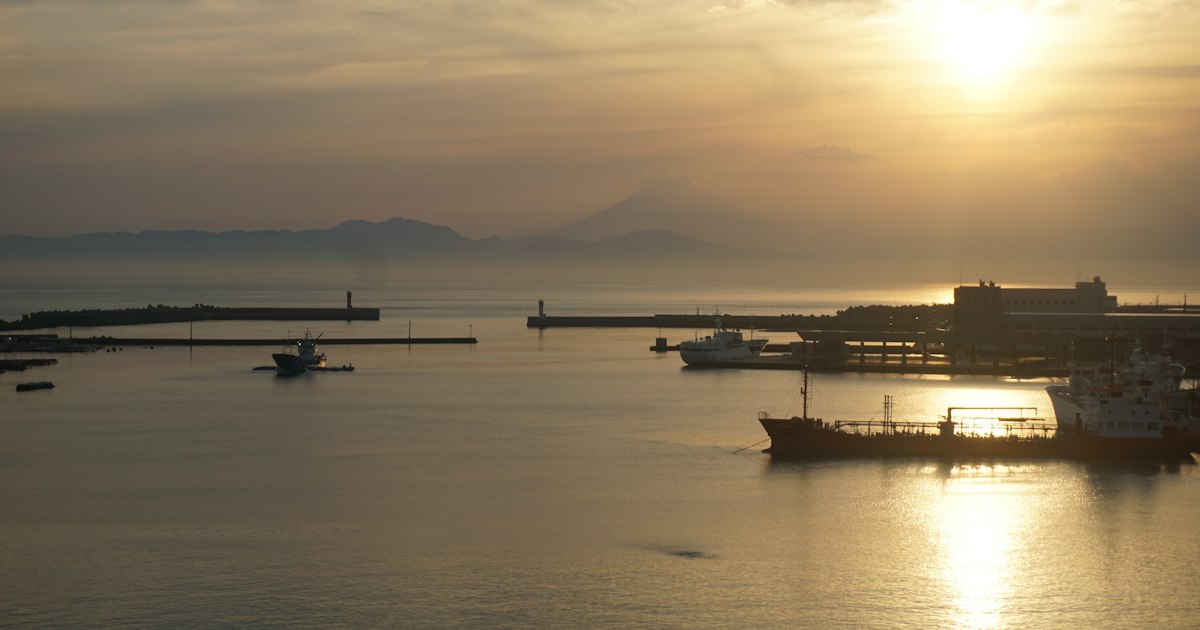
    Photo by wanderplans.com on Unsplash

    Most visitors to Hiroshima Prefecture split their time between the Peace Memorial Park and Miyajima’s floating torii, and never hear the name Tomonoura. That’s a shame, because this small fishing port on the Seto Inland Sea has barely changed since the Edo period — stone lanterns still mark the harbor, wooden merchant houses still lean over narrow lanes, and the tides still move fishing boats in and out of a 300-year-old stone quay. It’s also the town where Hayao Miyazaki holed up in 2005 while developing Ponyo, and the cliffside views and cluttered harbor geography show up, lightly disguised, throughout the film. Tomonoura rewards a half-day visit with almost none of the crowds you’ll fight at Japan’s bigger “preserved townscape” destinations.

    Why Tomonoura, and why Ponyo fans care

    Tomonoura sits at the mouth of the Seto Inland Sea, a body of water so tide-dependent that sailing ships historically had to wait here for favorable currents before continuing toward Osaka or Shimonoseki — which is exactly why the port grew rich and built the stone infrastructure you can still see today. Miyazaki reportedly stayed for roughly two months at a harborside guesthouse while sketching the town, its fishing boats, and its sea cliffs, and the setting fed directly into Ponyo on the Cliff by the Sea (2008). The studio never officially pinned every location to a real-world spot, so treat the connection as inspiration rather than a shot-by-shot map — but standing on the breakwater watching the tide pull at the boats, the resemblance is unmistakable.

    How to get there

    Tomonoura has no train station of its own — it’s a bus or car trip from JR Fukuyama Station, which sits on the Sanyo Shinkansen line (about 50 minutes from Osaka on a Sakura or Kodama, around 20–30 minutes from Hiroshima). From Fukuyama Station’s south side, catch a Tomotetsu bus bound for “Tomo-ko” (鞆港); the ride takes about 30 minutes and costs roughly ¥500–550 one-way, paid in cash or with an IC card as you exit. Buses run at least two or three times an hour on weekdays, less often on weekends, so check the posted timetable rather than assuming a quick turnaround. If you’re road-tripping the Seto Inland Sea coast — something increasingly popular with travelers who’ve looked into renting a campervan or RV in Japan — Tomonoura is an easy, parkable stop, though the old town’s lanes are narrow and some are closed to cars entirely, so use one of the pay lots near the port rather than trying to drive in.

    What to see in the old town

    Tomonoura rewards slow walking more than a checklist, but a few sites anchor a visit:

    • Jōyatō stone lantern — an 1859 stone lighthouse standing right at the harbor’s edge, one of the oldest and tallest surviving Edo-period stone lanterns in Japan and the single most photographed spot in town.
    • Taichōrō at Fukuzenji Temple — a wooden guest hall whose open veranda frames a view over the harbor and islands that a Joseon-dynasty Korean envoy once called the most beautiful scenery in Japan. Entry is a small fee (around ¥200), and the view alone justifies the climb up from the port.
    • Tomo Castle ruins and the local history museum — on the hill above the harbor, with a small folk-history museum inside; modest admission, closed on Mondays.
    • Ōta Residence — a former sake brewer’s merchant house, now a small museum you can walk through to see how a wealthy Edo-period trading family actually lived.

    Sensuijima: the island just offshore

    A tiny passenger ferry crosses from Tomonoura port to Sensuijima island in about five minutes, running frequently and cheaply (a few hundred yen round trip). The island has swimming beaches on its far side in summer and a quiet hiking path up to Senkōji temple, where a wooden observation deck looks back over the port and out across the Inland Sea — arguably the best sunset viewpoint in the area. If you’ve enjoyed watching Japan’s coastline from the water on something like the Osaka Suijo Bus, this short hop has the same appeal at a fraction of the scale and cost.

    What to buy: Homeishu and local sake

    Tomonoura’s signature product is homeishu, a sweet, mildly medicinal herbal liqueur that’s been brewed here since the 1600s using a shochu base infused with more than a dozen botanicals. Several old shopfronts along the harbor street sell it in small tasting cups before you buy, with bottles typically running ¥1,000–2,000 depending on size. It travels well in checked luggage (it’s a liqueur, not a tincture, so no special declaration is needed) and makes a more distinctive souvenir than another box of standard-issue omiyage sweets.

    Best time to visit and common mistakes

    Spring (cherry blossoms along the waterfront, mild temperatures) and early autumn are the most comfortable seasons; midsummer is hot and humid with little shade in the old town, though it’s also when Sensuijima’s beaches are worth the trip. Tomonoura hosts a Gion-style summer festival in late July with floating lanterns and fireworks over the harbor — a good reason to visit if your dates line up, but expect the last buses back to Fukuyama to be packed.

    The most common mistake is treating Tomonoura as a quick photo stop on the way to somewhere else. Buses back to Fukuyama Station thin out in the early evening, and missing one means a long wait or an expensive taxi, so check the return timetable before you wander off toward Sensuijima or up to Taichōrō. The second mistake is skipping food: there’s no convenience store cluster here, so eat at one of the small harborside restaurants serving fresh Seto Inland Sea seafood (a set lunch runs roughly ¥1,200–2,000) rather than hoping to grab something later. Finally, don’t expect English signage at the level of Kyoto or Tokyo — a translation app helps, and shop owners selling homeishu are generally happy to explain the product with gestures and a tasting cup even without shared language.

    Pairing it with the rest of your trip

    Tomonoura works well as a half-day add-on if you’re already routing through Hiroshima or Okayama. Travelers continuing on to Okayama sometimes combine it with Kojima Jeans Street for a denim-shopping detour, since both are reachable from the same stretch of the San’yō rail corridor. If sleepy, preserved townscapes are your thing, it’s also worth comparing Tomonoura’s seaside version of old Japan with inland examples like Chiran’s samurai garden town in Kagoshima — different region, different history, but the same reward for travelers willing to go a little out of their way.

  • Chiran: Kagoshima’s Samurai Garden Town and Kamikaze Peace Museum

    An hour south of Kagoshima City, the small town of Chiran holds two of Kyushu’s most affecting sights side by side: a street of Edo-period samurai gardens still owned by descendants of the families who built them, and a museum that preserves the letters and photographs of teenage kamikaze pilots who trained nearby. It’s not a flashy stop, and it takes some effort to reach, but few day trips in Japan deliver this much historical weight in one afternoon.

    Why Chiran Is Worth the Detour

    Chiran (now part of Minamikyushu City) was a minor castle town for the Shimazu clan, and in the 1700s several retainer families laid out small karesansui (dry landscape) and borrowed-scenery gardens behind their stone walls. Seven of these survive largely intact along a single street and are collectively designated a National Place of Scenic Beauty. In the 1940s, the town’s airfield became the Imperial Japanese Army’s largest kamikaze base, and more than 1,000 young pilots departed from Chiran on one-way missions in the final months of World War II. The peace museum built on the former airfield site tells their story in unflinching, personal detail — photographs, farewell letters home, and the mess hall where pilots ate their last meal.

    The Samurai Garden Street (Chiran Bukeyashiki)

    The Chiran Samurai Residence Gardens sit along a roughly 700-meter stone-walled lane lined with hedges clipped into rounded shapes. Seven gardens are open for viewing (the houses themselves are private residences, so you view gardens from the veranda or a set path, not the interiors). Each garden is different — some use Mt. Kaimon in the distance as “borrowed scenery,” others are pure rock-and-sand compositions in the kaiyu-shiki (stroll garden) or karesansui style.

    • Hours: roughly 9:00–17:00 daily, last admission around 16:30.
    • Admission: about ¥530 for adults, with reduced rates for students and children; a single ticket covers all seven gardens.
    • Time needed: 45–75 minutes to walk the street and step into each garden.

    Go slowly here — these are private family properties, and the point is quiet contemplation, not a checklist. Early morning or late afternoon light is best for photos, and the street is far less crowded before 10am.

    The Kamikaze Peace Museum (Chiran Tokko Heiwa Kaikan)

    About a 10-minute walk or short drive from the garden street, this museum occupies part of the former Chiran Army Air Base. Inside are hundreds of photographs and final letters written by pilots — most in their late teens and early twenties — along with a replica Zero fighter and personal effects recovered from the area. There’s an English audio guide and some English signage, but a large share of the written material is Japanese-only, so renting the audio guide or using a translation app on your phone makes a real difference.

    • Hours: 9:00–17:00, last entry around 16:30.
    • Admission: about ¥500 for adults, with discounted tickets for students.
    • Time needed: 60–90 minutes for a thorough visit; the museum is dense and emotionally heavy, so budget time to sit with it rather than rushing through.

    This is a solemn space rather than a war-glorifying one — most visitors, Japanese and foreign alike, leave quiet. If you’re traveling with children, read a bit about the content beforehand to judge whether it’s right for their age.

    Getting to Chiran

    There’s no train station in Chiran, which is the main reason it sees fewer foreign visitors than its history deserves.

    • By bus: Iwasaki Bus runs a direct line from the Kagoshima Chuo Station bus terminal (Yamakataya bus center) to Chiran, taking about 1 hour. Buses run roughly hourly through the day; check return times before you go, since evening service thins out.
    • By car: About 40–50 minutes from central Kagoshima via the Minami-Kyushu Expressway, or closer to an hour on local roads. This is by far the most flexible option if you want to combine Chiran with nearby Ibusuki’s sand baths or the Satsuma Peninsula coastline. If you’re comfortable driving in Japan, see our guide on renting a car or campervan in Japan for license requirements before booking.
    • Getting around once there: the garden street, the museum, and the town center are all walkable from each other (10–15 minutes between them), so you don’t need a car once you’ve arrived.

    Best Time to Visit and How Long to Stay

    Spring (late March–early April) brings cherry blossoms along the samurai street and is the most popular season; early autumn (October–November) brings cooler, comfortable walking weather and good light for the gardens without the summer humidity. Summer is viable but genuinely hot and sticky — bring water and expect to move slower between sights. Plan for a half-day minimum: 3–4 hours covers both the gardens and the museum at a reasonable pace, including lunch in town. Most visitors treat Chiran as a half-day add-on to a Kagoshima City or Ibusuki itinerary rather than a full standalone trip.

    Budget, Mid-Range, and Splurge Options

    • Budget: Combined garden-and-museum admission runs under ¥1,100 per person, and a simple local lunch (soba, tonkatsu, or a set meal) costs ¥800–1,200. The Iwasaki bus round trip from Kagoshima is roughly ¥1,800–2,000 per person.
    • Mid-range: Rent a car for the day (from around ¥5,000–7,000 for a compact plus fuel) and combine Chiran with a stop at Ibusuki’s sand-bath onsen or the Chiran tea fields, some of Japan’s largest green tea growing areas.
    • Splurge: Stay overnight in nearby Ibusuki or Kinko Bay and hire a local guide-driver for a full day covering Chiran, the tea fields, and Cape Sata — useful if your time in Kagoshima is short and you want a tightly packed, English-narrated day.

    Common Mistakes to Avoid

    • Assuming there’s train access. There isn’t — plan the bus schedule or car rental in advance, since missing the last return bus means an expensive taxi back to Kagoshima.
    • Treating it as a quick photo stop. Both sights reward slowing down; rushing the museum in particular can feel disrespectful given the subject matter.
    • Not bringing cash. Ticket counters and some town restaurants are cash-friendly but not universally card-friendly — carry a reasonable amount of yen.
    • Running out of phone battery on translation duty. With a lot of Japanese-only signage at the museum, you’ll likely lean on your phone for translation all afternoon — a portable charger or a ChargeSPOT rental (available in larger Kagoshima convenience stores) is worth grabbing before you head out, since Chiran itself has no rental kiosks.

    If regional day trips built around a single strong theme appeal to you, Chiran pairs well conceptually with other first-timer guides like Dewa Sanzan in Yamagata — both reward visitors willing to go beyond Tokyo and Kyoto for a slower, more concentrated slice of Japanese history.

  • Noh Theatre: Japan’s Ancient Masked Drama and Where to See a Performance

    Noh Theatre: Japan’s Ancient Masked Drama and Where to See a Performance

    Photo by Artan on Unsplash

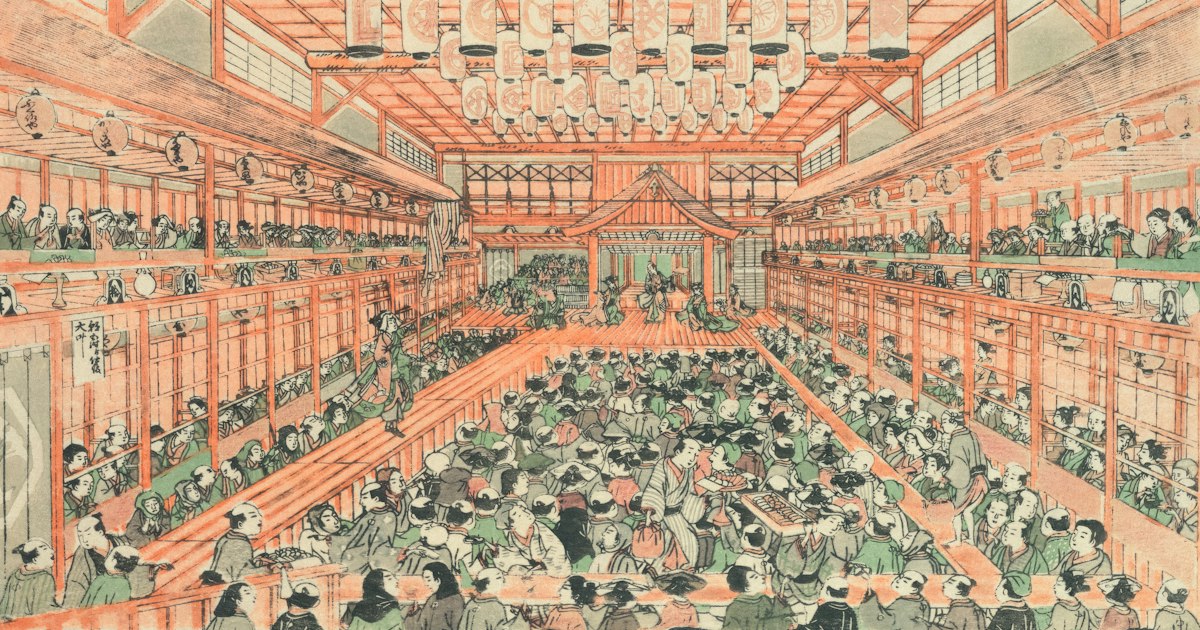
    Noh is the oldest continuously performed theatre form in the world, and it looks it — performers in carved wooden masks move at a fraction of normal speed across a bare cypress stage, accompanied by flute, drums, and a chanting chorus that sounds more like wind than song. It’s not an easy watch for everyone, but seeing even one act live is one of the most singular cultural experiences you can have in Japan, and it’s far more accessible to visitors than most people assume. Here’s what Noh actually is, which theaters welcome foreign guests, and how to get the most out of an afternoon or evening at a performance.

    What makes Noh different from other Japanese theatre

    Noh took shape in the 14th century under the actor-playwrights Kan’ami and his son Zeami, with patronage from the Ashikaga shoguns, and it has barely changed since. The core cast is small: a masked lead (shite), who often plays a ghost, deity, or spirit, and an unmasked supporting actor (waki), usually a traveling priest who draws the story out of them. There’s no scenery beyond a painted pine tree backdrop, and the “action” is largely suggested through stylized gesture — a tilted mask can read as grief, a raised fan as a sudden gust of wind.

    Between Noh acts, you’ll usually get a Kyogen piece — short, broad comic sketches performed without masks that poke fun at monks, servants, and husbands. If you’ve enjoyed the comic timing of rakugo storytelling, Kyogen is Noh’s equivalent palate-cleanser, and it’s usually the most approachable part of the program for first-timers.

    Where to watch Noh in Tokyo

    The National Noh Theatre (Kokuritsu Nogakudo) in Sendagaya is the easiest entry point for visitors. It’s a short walk from JR Sendagaya Station (Chuo-Sobu Line) or Kokuritsu-Kyogijo Station on the Toei Oedo Line. Regular programs run most weekends and several weekday evenings, typically lasting 3 to 4 hours including Kyogen, with tickets generally ranging from about ¥3,000 for cheaper unreserved-style seats up to ¥7,000–¥9,000 for the best reserved seats, depending on the program and performers. The theater rents English-language earphone guides (usually a few hundred yen) that explain the plot in real time, which makes a huge difference — without one, the archaic classical Japanese chanting is genuinely hard to follow even for native speakers.

    In central Tokyo, the Kanze Noh Theatre, relocated into the basement of Ginza Six, and the Umewaka Noh Theatre in Nakano also host regular public performances, generally in the same ¥4,000–¥8,000 range. Programs are published monthly on each theater’s site a few weeks ahead, and seats for popular actors or well-known plays like “Dojoji” or “Aoi no Ue” sell out, so book as soon as a schedule is posted rather than assuming you can walk up.

    Kyoto and Osaka options

    Kyoto’s main venue is the Kongo Noh Theatre, near the Kyoto Imperial Palace at Karasuma-Shimodachiuri, and the Kyoto Kanze Kaikan in the Okazaki area near Heian Shrine. Both run regular programs at similar prices to Tokyo. Kyoto also hosts one of the country’s best-known outdoor torchlit performances — more on that below.

    In Osaka, the Ohtsuki Noh Theatre in Chuo-ku stages monthly programs and is one of the oldest private Noh theaters in the city. If you’re spending the day in that part of Osaka, it pairs nicely with a slower-paced afternoon on the water — the Osaka Suijo Bus canal cruise is a quiet, scenic way to fill the hours before an evening show.

    Torchlit outdoor Noh: Takigi Noh

    If your trip timing allows it, seek out Takigi Noh — outdoor performances lit by bonfires, traditionally held on temple and shrine grounds after dark. The most famous is at Kofuku-ji in Nara, usually held in May, with a centuries-old history behind it. Kyoto’s Heian Shrine hosts a well-attended Takigi Noh in early June, and Itsukushima Shrine on Miyajima stages one in spring as well. These outdoor shows are seasonal, weather-dependent, and announced only a few months ahead, so check shrine and city tourism sites directly once you have travel dates rather than planning around them this far in advance. Tickets for Takigi Noh tend to run ¥3,000–¥5,000 and often sell through local tourism associations rather than the theaters themselves.

    What a mask actually tells you

    Noh masks (nohmen) are carved from Japanese cypress and repainted over generations; a single theater’s collection can include masks centuries old. Each mask type signals a category of character — a young woman (ko-omote), a vengeful female spirit (hannya), an old man (okina) — and skilled actors subtly tilt the mask (“using” it, in Noh terminology) to shift its expression between sorrow and rage under the stage lighting. It’s worth arriving early enough to look at the masks and costumes often displayed in theater lobbies before the show; most theaters allow this and it gives you something concrete to watch for once the mask is in motion. The theatricality of a carved, expressive face will feel familiar if you’ve encountered Japan’s other masked traditions, like the fearsome visiting demons of the Namahage folklore festival in Akita — different context entirely, but the same cultural instinct for a mask as a character in itself.

    Common mistakes and how to avoid them

    • Expecting subtitles or a fast pace. Noh moves deliberately — a single scene can take ten minutes to cover what a spoken line would in ten seconds. Read a one-paragraph plot summary before you go (most theater programs and ticket sites include one) so you’re not lost from the opening chant.
    • Skipping the English guide when one’s available. At the National Noh Theatre, renting the earphone guide is the single best thing you can do as a first-time visitor; without it, you’re watching mood and movement with no access to the words.
    • Booking the cheapest seat for a famous program. Noh stages are small and most seats have a reasonable view, but for a sold-out program with a well-known actor, a mid-tier reserved seat is worth the extra ¥1,000–¥2,000 over an unreserved one.
    • Nodding off and feeling embarrassed about it. The slow pace and drone of the chanting puts plenty of people, including Japanese regulars, to sleep for a stretch. It happens; just try not to snore through the quiet parts.
    • Assuming you need formal dress. Smart casual is completely fine at every theater listed here — this isn’t an opera house dress code situation.

    Budget, mid-range, and splurge at a glance

    Budget (¥2,000–¥3,500): unreserved or rear seats at a monthly program, or a shrine-hosted Takigi Noh performance.
    Mid-range (¥4,000–¥7,000): reserved seating at the National Noh Theatre or a city Kanze/Kongo theater, ideally with an English earphone guide.
    Splurge (¥8,000–¥15,000+): premium seats for a celebrated actor’s performance, a rare full-day program featuring multiple plays, or a special anniversary staging — these are announced further in advance and worth booking the day tickets go on sale.

    However much you spend, give yourself the full run time rather than planning to duck out early — the slow build is the point, and the final act of a Noh play is usually where the emotional payoff lands hardest.

  • Rakugo: Tokyo’s Comic Storytelling Theaters and How to Watch a Show

    Rakugo: Tokyo’s Comic Storytelling Theaters and How to Watch a Show

    Photo by Art Institute of Chicago on Unsplash

    Long before manzai duos and late-night variety shows, Japan had rakugo — a single performer, kneeling on a cushion, who conjures an entire cast of characters using nothing but a folding fan, a small cloth, and impeccable comic timing. It’s one of the oldest living performance arts in the country, and Tokyo still has working theaters where you can watch it almost every single day of the year. You don’t need to understand Japanese fluently to enjoy an afternoon at one — you just need to know which theater to pick and what to expect once you’re inside.

    What Is Rakugo, Exactly?

    Rakugo (“falling words”) is comic storytelling built around a punchline. A performer called a rakugoka sits on a small platform called a kōza, dressed in kimono, and acts out every character in a story — switching voices, posture, and facial angle to show who’s speaking — using only a hand fan (sensu) and a small cloth (tenugui) as all-purpose props. A fan becomes a chopstick, a pipe, a letter; a cloth becomes a wallet or a book. Stories range from centuries-old classics about foolish merchants and sharp-tongued wives to newly written material about smartphones and tourists. The craft is less about the plot and more about delivery — rhythm, pauses, and a final twist that lands the whole thing.

    The Four Classic Yose Theaters in Tokyo

    Rakugo is performed in dedicated variety theaters called yose, where a rotating lineup of storytellers, jugglers, magicians, and musicians takes the stage one after another for hours. Tokyo has four historic yose still running full-time:

    • Suzumoto Engeijo (鈴本演芸場) — Ueno. The oldest yose in Japan, dating to 1857, a 3-minute walk from JR Ueno Station’s Hirokoji exit. Day session roughly 12:30–16:30, night session 17:00–20:30.
    • Shinjuku Suehirotei (新宿末廣亭) — a 5-minute walk from Shinjuku-sanchome Station, near Golden Gai. A beautifully preserved wooden building with box seating on tatami plus regular chairs. Day roughly 12:00–16:30, night 17:00–20:30.
    • Asakusa Engei Hall (浅草演芸ホール) — on Asakusa’s old Rokku entertainment strip, 5 minutes from Asakusa Station and an easy pairing with a Senso-ji visit. Runs continuously, roughly noon to 9pm.
    • Ikebukuro Engeijo (池袋演芸場) — a small, intimate hall near Ikebukuro Station’s east exit, seating under 100 people.

    Expect to pay around ¥3,000 for adults at Suzumoto, Suehirotei, and Asakusa Engei Hall, with discounts of a few hundred yen for seniors and students and roughly ¥1,500 for children; Ikebukuro runs slightly cheaper. Programs change in 10-day blocks (1st–10th, 11th–20th, 21st–end of month), each with a different headline performer, so the same theater can feel completely different a week apart.

    What a Night at the Yose Is Actually Like

    A full session runs four to five hours and features 10–15 acts: several rakugo storytellers interspersed with “variety” turns — a juggler, a paper-cutting artist, a kamikiri performer, or musicians playing the banjo-like shamisen. No one expects you to sit through the whole thing. Seating is unreserved (unless you buy an advance reserved ticket), and locals routinely slip in and out, grab a bento or a canned beer from a side counter, and chat quietly between acts. If you only have 90 minutes, that’s a completely normal way to experience a yose — just know that the headline act (shin-uchi) usually performs last, so arriving too early and leaving too soon means missing the best storyteller of the day.

    Finding an English-Friendly Show

    Most yose performances are entirely in Japanese with no subtitles, which is part of the authentic experience but a real barrier if you’re starting from zero. A few workarounds exist. Katsura Sunshine, a Canadian-born rakugoka who trained under a Japanese master, performs English-language rakugo shows in Tokyo and on international tours — his sets translate the wordplay and cultural context as he goes, which makes the jokes land even for first-timers. Smaller English rakugo sessions also pop up at community halls and cultural centers aimed at tourists, often bundled with a short explainer on the art form before the stories begin. These are worth searching for by date rather than venue, since schedules shift month to month. If you go to a standard Japanese-language yose instead, treat it like live jazz: you won’t catch every word, but the physical comedy, voices, and crowd reactions carry a surprising amount of the humor on their own.

    Tickets, Timing, and Getting There

    Same-day tickets are sold at the theater box office and are usually available right up to showtime — rakugo isn’t a sellout-crowds kind of event, except for a famous shin-uchi’s debut show or a New Year’s program. You can also show up partway through a session and pay a prorated or standard entry fee at the door; ask the staff, as policies vary slightly by theater. There’s no strong “best season” for rakugo since every show is indoors and runs year-round, but December and early January programs tend to be livelier, with special New Year’s lineups and a festive atmosphere. Winter is also a good time to combine a Suzumoto or Asakusa Engei Hall visit with other cold-weather plans — Ueno and Asakusa are full of cozy places to warm up before or after the show.

    Etiquette and Common Mistakes

    The biggest mistake first-timers make is treating a yose like a quiet kabuki performance — formal, hushed, every seat assigned. It isn’t. Talking during a changeover is fine, eating a snack is fine, and laughing loudly at the punchline is the entire point. What actually matters: no flash photography or video recording during performances, keep your phone silent, and don’t walk directly in front of the stage while a storyteller is mid-story. A fully charged phone matters more than you’d think for a four-hour sit — if your battery’s low before you head out, grabbing a rental from a ChargeSPOT kiosk near the station beforehand is an easy fix. And if you want to dress the part for photos outside a traditional wooden theater like Suehirotei, a kimono paired with proper kanzashi hairpins fits the setting well, though plenty of visitors just come in regular clothes.

    Budget vs. Splurge Options

    On a budget, a standard yose ticket at Suzumoto or Asakusa Engei Hall is one of Tokyo’s best entertainment deals — around ¥3,000 buys several hours of live performance, no reservation needed. For a mid-range option, look for an English-narrated or English-performed rakugo event, which typically runs a bit higher but removes the language barrier entirely. For a splurge, some cultural tour operators arrange small-group rakugo experiences with a private interpreter and a post-show Q&A with the performer, sometimes paired with a kimono-dressing session or a traditional meal — a good fit if you’re already building a culture-focused day similar to reading your omikuji fortune at a shrine or catching a regional folklore event like Namahage elsewhere in Japan. Whichever route you take, rakugo rewards patience — the funniest line is almost always the one you didn’t see coming.

  • Omikuji: Japan’s Fortune-Telling Paper Slips and How to Read Yours

    Omikuji: Japan’s Fortune-Telling Paper Slips and How to Read Yours

    Photo by Heng Chiu on Unsplash

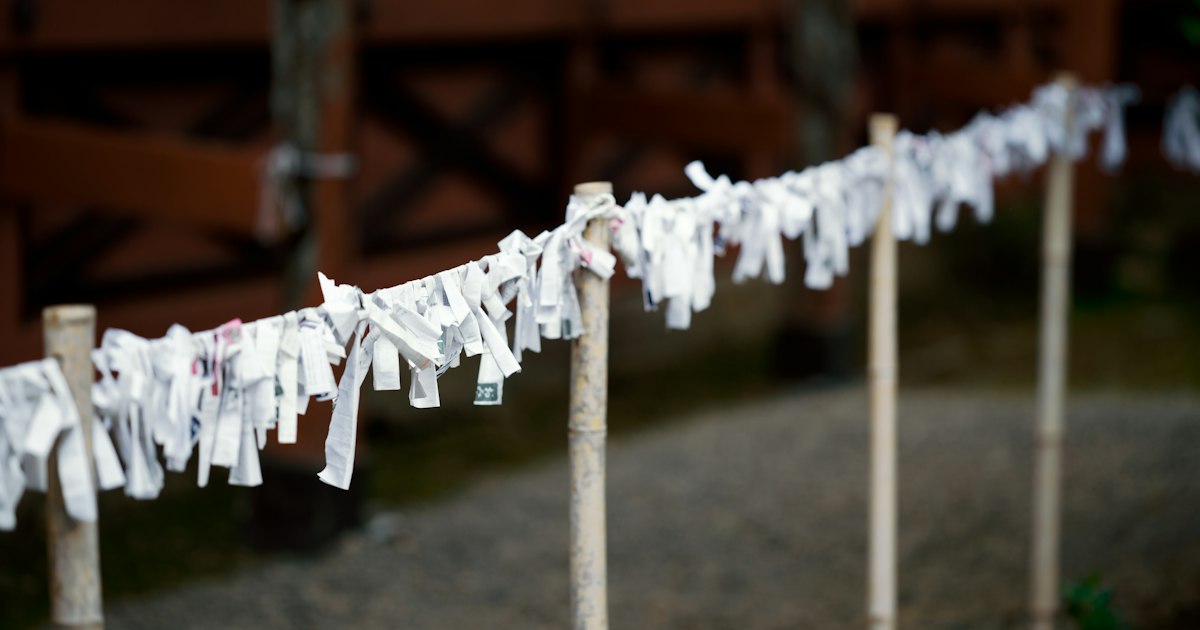
    At almost every Shinto shrine and Buddhist temple in Japan, you’ll spot a wall or rack fluttering with thin white paper strips tied in neat rows. These are omikuji (おみくじ), random fortune slips that visitors draw for a small fee, and they’re one of the easiest, cheapest rituals a traveler can take part in without any special knowledge of Japanese. Here’s how they work, what your result actually means, and how to do it right.

    What Exactly Is an Omikuji?

    Omikuji are paper fortunes that forecast your luck in general life as well as specific categories — love, health, work, money, travel, and sometimes study or childbirth. They date back centuries as a way of consulting the gods (kami) or Buddha for guidance, and today they function as a light-hearted but genuinely respected part of a shrine visit, especially around New Year. Unlike a horoscope you read passively, omikuji are interactive: you physically shake a box, extract a numbered stick, and trade it for the matching paper slip at the counter.

    The cost is almost always coins — typically ¥100 at Senso-ji in Asakusa, and ¥200–300 at most other shrines and temples nationwide. Many smaller or rural shrines run on an honor system: a wooden box of slips sits unattended with a small payment slot, and you leave your coin before taking one.

    How to Draw Your Fortune, Step by Step

    • Pay first. Drop your coin into the box or hand it to the shrine attendant.
    • Shake the container. It’s usually a hexagonal wooden box with a small hole, filled with thin numbered sticks. Shake it (don’t dump it) until one stick slides out of the hole.
    • Read the number on the stick, usually in kanji numerals.
    • Find the matching drawer in the cabinet of small numbered boxes nearby and take one folded paper slip from it.
    • Return the stick to its original container so the next visitor can draw.

    Some busier spots, including sections of Senso-ji and Fushimi Inari Taisha in Kyoto, simplify this with a self-service shaking cylinder that drops a numbered ball directly, or with coin-operated omikuji vending machines. Either way, the whole process takes under a minute and needs zero Japanese ability.

    Reading the Ranking: From Daikichi to Daikyo

    Near the top of your slip is a ranking word in bold kanji — this is the headline result. Rankings vary slightly by shrine, but the common scale runs roughly:

    • Dai-kichi (大吉) — great blessing, the best outcome
    • Chu-kichi (中吉) — middle blessing
    • Sho-kichi (小吉) — small blessing
    • Kichi (吉) — blessing
    • Han-kichi / Sue-kichi (半吉・末吉) — half blessing / future blessing
    • Kyo (凶) — bad luck
    • Dai-kyo (大凶) — great bad luck, rare

    Below the ranking, the slip breaks things down by category with short poetic verses — these are the genuinely useful part, offering specific advice like “a journey now is favorable” or “wait before starting new business.” Many temples popular with foreign tourists, including Senso-ji, Fushimi Inari Taisha, and Kiyomizu-dera, print bilingual or fully English versions specifically for overseas visitors, so you don’t need to rely on a translation app to get the nuance.

    What to Do With a Good (or Bad) Fortune

    If you draw a good result, it’s common to fold the slip and tuck it into your wallet, bag, or phone case as a small good-luck charm to carry home. If you draw kyo or dai-kyo, the traditional response isn’t to panic — it’s to tie the paper onto the designated metal rack or wire frame set up near the drawing spot. The idea is that leaving the bad fortune at the shrine allows it to be “neutralized” or corrected by the deity rather than following you out the gate. You’re welcome to tie up a good fortune too if you’d rather leave it as an offering; neither choice is wrong.

    One etiquette note: tie slips only to the provided racks or wire frames, not to living trees or shrubs, even if you see older, informal photos showing trees covered in paper. Most shrines have moved drawing points away from trees specifically to protect them, and staff will quietly untie anything attached to plants.

    Best Times and Places to Draw Omikuji

    Omikuji can be drawn year-round, but the single most popular window is hatsumode, the first shrine or temple visit of the new year, typically January 1–3, when millions of people across Japan line up specifically to draw their first fortune of the year. If you’re visiting then, expect long queues at famous sites and bring extra ¥100 and ¥500 coins, since lines move faster with exact change.

    Outside New Year, reception desks at major sites generally operate during daylight hours — Senso-ji’s main hall area runs roughly 6:00–17:00 depending on season, and most shrines close their omikuji counters by early evening even if the grounds stay open later. If you’re building a shrine-heavy itinerary, sites with a strong spiritual pilgrimage tradition, like the Dewa Sanzan sacred mountains in Yamagata, are worth pairing with an omikuji stop, since drawing a fortune fits naturally into the same contemplative mindset as the hike itself.

    Omikuji Souvenirs Worth Buying

    Beyond the plain paper slip, many shrines sell novelty omikuji holders that double as souvenirs — small ceramic or wooden figurines (animals, Daruma dolls, deer at Nara-area shrines) that come pre-loaded with a tiny rolled fortune inside, priced around ¥300–600. These make better take-home mementos than a folded paper slip, since you keep the whole object rather than just the reading. If you enjoy collecting folk-craft items tied to regional culture, this pairs well with browsing seasonal and folklore-driven souvenirs, similar in spirit to the demon costumes and masks sold around the Namahage folklore festival in Akita.

    Common Mistakes to Avoid

    • Treating a bad result as a bad omen for your whole trip. Locals generally see kyo as a prompt for caution in a specific area, not a curse — don’t let it color your mood for the rest of the day.
    • Drawing twice to “fix” a bad result immediately. It’s considered poor form to pay again right away hoping for a better slip; if you want to try again, wait for a different visit or shrine.
    • Losing the translation. If your slip isn’t in English, take a photo and ask your hotel staff or a translation app to help later — the specific advice lines are often more interesting than the headline ranking.
    • Forgetting coins. Many smaller shrines have no card payment option at all for omikuji, so carry ¥100 and ¥500 coins, the same habit worth keeping if you’re road-tripping between rural shrines where cashless payment is rare.

    Omikuji cost less than a vending-machine drink and take seconds to draw, but they’re a genuinely memorable way to slow down during a shrine visit and engage with a tradition that’s still very much alive for Japanese visitors, not just performed for tourists. Keep a coin ready at your next torii gate and give it a try.

  • Lolita Fashion in Japan: Where to Shop for Gothic and Sweet Lolita Brands

    Lolita Fashion in Japan: Where to Shop for Gothic and Sweet Lolita Brands

    Photo by Jesus Esteban on Unsplash

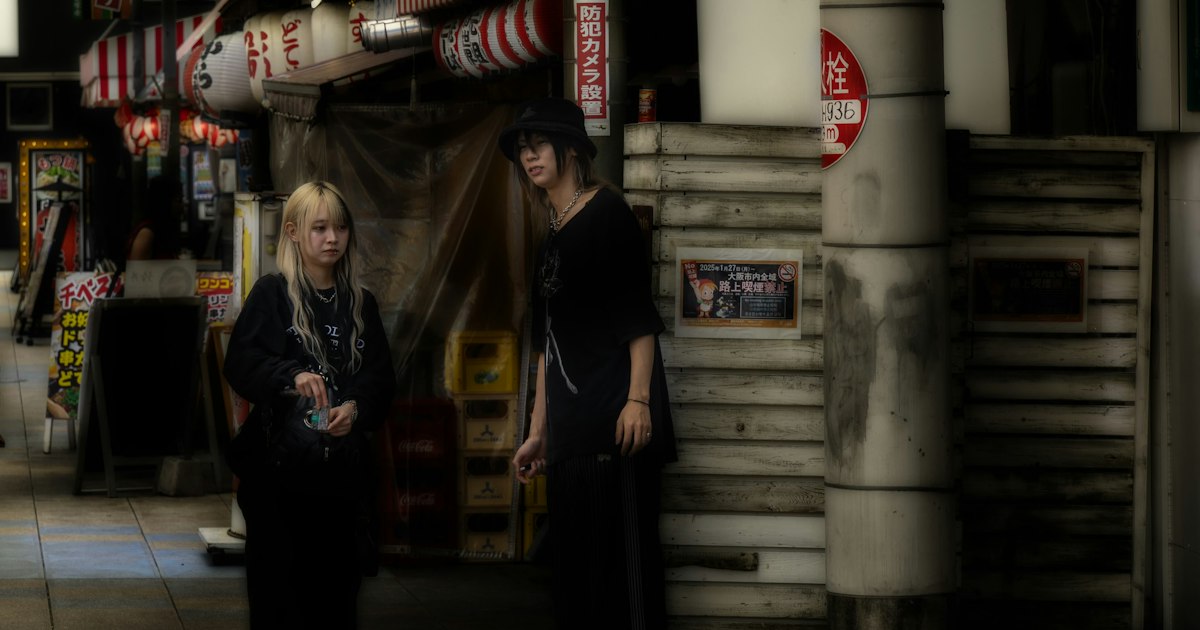
    Lolita fashion — the Victorian-doll-meets-street-style look born in 1990s Harajuku — is still very much alive, and Japan remains the only place to buy it straight from the source. Whether you’re after the pastel bows and cupcake prints of Sweet Lolita or the black lace and crosses of Gothic Lolita, this guide covers exactly where to shop, what things cost, and the mistakes that trip up most first-time buyers.

    What “Lolita Fashion” Actually Means

    Before you shop, it helps to know the substyles, since brands and shops specialize:

    • Sweet Lolita — pastel colors, fruit and sweets prints, lace. Leading brands: Angelic Pretty, Baby the Stars Shine Bright, Metamorphose temps de fille.
    • Gothic Lolita — black, burgundy, and navy, with crosses, roses, and corset-style bodices. Leading brands: Alice and the Pirates (Baby’s gothic sister line), h.NAOTO, Victorian Maiden.
    • Classic Lolita — muted colors, floral jacquards, a more “antique doll” look. Leading brand: Innocent World.

    Knowing this matters because a shop that’s great for Sweet Lolita (think Angelic Pretty’s signature strawberry prints) may carry almost nothing gothic, and vice versa.

    Harajuku: The Center of the Lolita World

    Harajuku is still ground zero. Get off at Harajuku Station (JR Yamanote Line) or Meiji-jingumae Station (Chiyoda/Fukutoshin Lines) and head toward the backstreets around Laforet Harajuku. Several core brands run their own standalone boutiques within a few blocks of each other, generally open 11:00–20:00. Store layouts are small — often a single room with racks along the walls and one changing room — so expect to queue slightly during weekends and holidays.

    While you’re in the neighborhood, it’s worth building the rest of the look: @cosme Store in Harajuku stocks the dolly-eyed makeup (circle lenses aside, think false lashes and pearl highlighters) that Lolita styling leans on, and Kiddy Land Harajuku is a five-minute walk away if you want character goods to match a sweeter wardrobe.

    Marui One Shinjuku: The One-Stop Alternative

    If you only have time for one shopping trip, go to Marui One in Shinjuku (east side of Shinjuku Station, Marui-area exit). Several floors are dedicated to Japanese subculture fashion, with in-store corners for multiple Lolita and gothic brands under one roof — useful for comparing Angelic Pretty against Alice and the Pirates without crossing the city. Hours run roughly 11:00–20:00; go on a weekday morning to avoid the worst crowds, since weekend afternoons draw serious queues at the fitting rooms.

    Secondhand and Resale: Closet Child and Mandarake

    New brand dresses (called JSKs — jumper skirts) run ¥25,000–¥45,000, and limited prints often sell out online via lottery before they ever reach a physical shelf. Secondhand is how most collectors actually build a wardrobe:

    • Closet Child — the main secondhand Lolita/gothic/visual-kei chain, with branches in Harajuku, Shinjuku, and Osaka’s Amerikamura. Stock turns over constantly; expect JSKs from ¥8,000–¥20,000 and blouses from ¥3,000–¥8,000, with rare discontinued prints priced much higher.
    • Mandarake — better known for manga and figures, but its Nakano and Osaka Nipponbashi branches carry cosplay and gothic/Lolita-adjacent clothing and accessories worth checking if you’re already there for other finds.

    For a true splurge, sold-out “grail” prints from brands like Angelic Pretty or Baby can resell for ¥50,000–¥150,000+ when a specific colorway has a cult following — treat secondhand browsing as treasure hunting, not a guaranteed bargain bin.

    Building the Rest of the Look

    Lolita outfits are assembled from more than just the dress. Budget separately for:

    • Headwear — bonnets and headdresses run ¥6,000–¥12,000 at brand shops; for a Wa-Lolita (kimono-influenced) take on the style, traditional kanzashi hairpins make an authentic and often cheaper substitute for a Western-style headdress.
    • Shoes — Mary Janes and platform boots from brand lines cost ¥8,000–¥15,000; generic platform Mary Janes from general shoe stores are a budget-friendly stand-in.
    • Petticoats and blouses — often the easiest items to buy secondhand since sizing is more forgiving than with structured bodices.

    Best Time to Shop

    Brands release new seasonal lines roughly four times a year, with Gothic-leaning “Halloween” collections typically dropping in September and October — the best window if you specifically want gothic prints, since gothic stock thins out the rest of the year in favor of sweeter releases. Japan’s two national bargain seasons, January and July, are when existing stock (including past-season Lolita pieces) gets marked down at brand shops, so plan a trip around those months if price matters more than getting the newest print.

    Common Mistakes to Avoid

    • Assuming S/M/L sizing. Japanese Lolita brands size by bust/waist measurement in centimeters (standard JSKs usually fit roughly an 82–88cm bust); always check the cm chart rather than guessing from a US/UK size.
    • Expecting walk-in stock of new releases. Hyped prints sell out through online preorder (yoyaku) lotteries before a single piece reaches the shop floor — if you want a specific new print, check the brand’s website before your trip rather than counting on finding it in-store.
    • Forgetting tax-free rules don’t apply to secondhand. New brand shops can process the consumption-tax exemption with your passport on purchases over ¥5,000 (pre-tax) in a single visit, but Closet Child and most resale shops cannot offer this.
    • Machine-washing delicate pieces. Most brand dresses have structured bodices, boning, or delicate lace that should be hand-washed or dry-cleaned — ask staff before you buy if you’re unsure of care requirements.

    Quick Budget Guide

    • Budget: secondhand blouse or accessory at Closet Child, ¥3,000–¥8,000.
    • Mid-range: a secondhand JSK in good condition from a mainstream print, ¥10,000–¥20,000.
    • Splurge: a new-season brand dress bought direct from Angelic Pretty, Baby, or Alice and the Pirates, ¥25,000–¥45,000, or a rare discontinued print at resale value well above that.

    However much you spend, give yourself a full afternoon rather than rushing — between Harajuku’s standalone boutiques and the brand corners inside Marui One, Lolita shopping in Japan rewards slow browsing far more than a quick in-and-out stop.

  • Kanzashi: Japan’s Ornamental Hairpins and Where to Buy Them for Kimono Styling

    Kanzashi: Japan’s Ornamental Hairpins and Where to Buy Them for Kimono Styling

    Photo by Damian Hutter on Unsplash

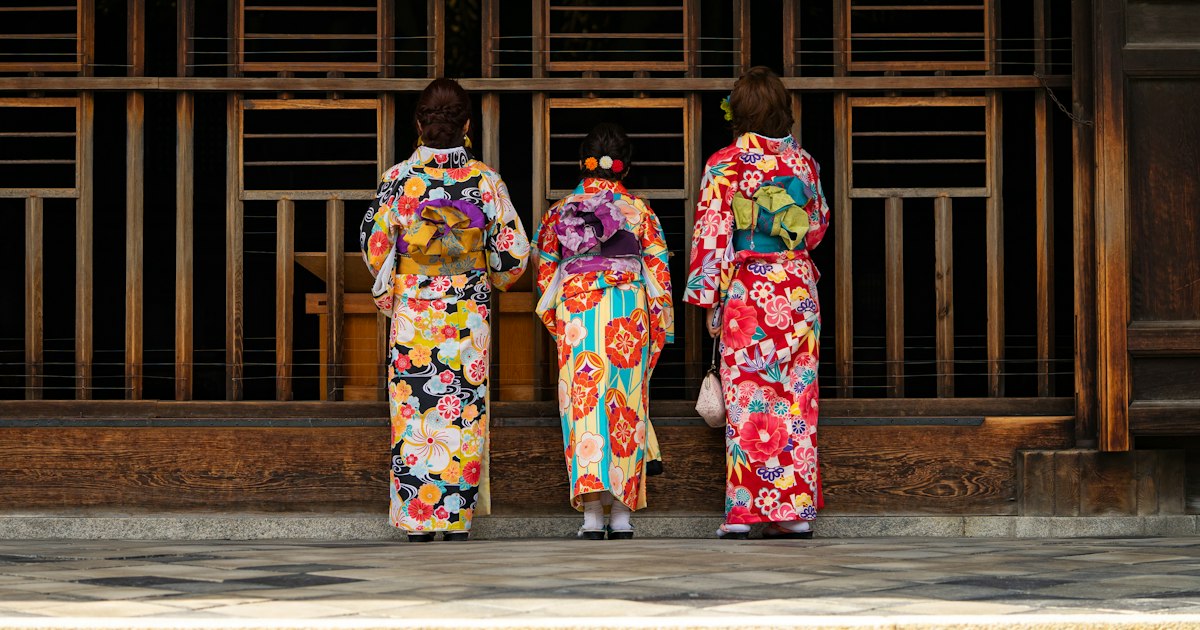
    If you’ve seen a maiko gliding through Gion with a cascade of silk flowers trembling in her hair, you’ve seen kanzashi doing their job. These ornamental hairpins have dressed Japanese hairstyles for centuries, and today they’re one of the most satisfying souvenirs a visitor can bring home — wearable, photogenic, and available at every price point from a few hundred yen to genuine craft-level investment pieces. Here’s how to shop for them without overpaying for plastic or underbuying the real thing.

    What Exactly Is a Kanzashi?

    Kanzashi (簪) is a catch-all term for Japanese hair ornaments, but it covers a surprisingly wide family of objects: combs (kushi), sticks with a single ball or flower on the end, U-shaped pins, and elaborate dangling pieces that swing when you move. They’re used to hold up traditional hairstyles worn with kimono and yukata, but they’re also collected on their own as decorative art — some antique pieces in silver and tortoiseshell are museum-grade.

    For most travelers, the version you’ll actually buy is tsumami kanzashi — hairpins made from small squares of silk or synthetic fabric folded and pinched (tsumami means “pinched”) into flower petals, then assembled into a cluster and mounted on a pin or clip. This is the technique behind the famous maiko hair flowers, and it’s what you’ll see for sale in kimono districts.

    The Main Types You’ll Encounter While Shopping

    • Tsumami kanzashi — folded-fabric flowers, the most common souvenir type, sold singly or in seasonal clusters.
    • Bira-bira kanzashi — metal pieces with thin dangling strips that chime softly, traditionally silver or gilt, often antique.
    • Kushi — decorative combs, usually lacquered wood or resin, worn at the crown of an updo.
    • Hana kanzashi — the monthly maiko flower sets, each tied to a specific season (more on that below).

    Tourist shops also sell plastic or resin versions styled to look like tsumami kanzashi. They photograph fine but feel noticeably different in hand — lighter, stiffer, and shinier than real chirimen silk crepe. Knowing the difference matters when you’re comparing a ¥600 piece to a ¥6,000 one that otherwise look identical in a photo.

    What They Actually Cost

    Prices vary enormously depending on material and craftsmanship:

    • Budget (¥500–¥1,500): mass-produced resin or polyester clips sold in souvenir shops and kimono rental counters. Fine for a one-day photo shoot, not meant to last.
    • Mid-range (¥2,000–¥8,000): genuine tsumami zaiku made from silk or good-quality chirimen, often sold in small flower clusters on a clip or U-pin. This is the sweet spot for most visitors.
    • Splurge (¥10,000–¥50,000+): fully handmade kyo-kanzashi by a craftsperson, multi-tiered maiko-style seasonal sets, or antique bira-bira pieces in silver. Specialty ateliers in Kyoto sell made-to-order pieces that can run well past ¥30,000.

    Vintage kanzashi found at flea markets sit in their own category — a tarnished antique silver piece might go for ¥2,000 or ¥20,000 depending on age, maker, and condition, so it pays to compare a few stalls before buying.

    Where to Buy in Kyoto

    Kyoto is the natural home base for kanzashi shopping, since it’s also the center of maiko and geiko culture. The Gion and Hanamikoji area has several small shops specializing in tsumami zaiku, often run by the same families that supply the maiko houses, with pieces ranging from a simple single flower to full seasonal sets. The Nishijin Textile Center, in the historic weaving district, is worth a stop too — alongside kimono fabric and obi, it stocks hair accessories and occasionally runs kimono-dressing demonstrations, generally open daily from around 10:00 to 17:00 (hours can shift around holidays, so it’s worth a quick check before you go). The Kyoto Handicraft Center near Heian Shrine is a reliable one-stop option if you want kanzashi alongside other crafts under one roof, with English-speaking staff used to tourists.

    If you’d rather try making one than just buying it, several kimono studios in the Gion and Higashiyama area offer short tsumami-zaiku workshops (roughly ¥3,000–¥5,000 for about an hour), which also makes a nice rainy-day activity.

    Where to Buy in Tokyo

    Asakusa is Tokyo’s equivalent kanzashi district. The shops along and just off Nakamise-dori, the approach to Sensoji Temple, sell everything from inexpensive clip-on flowers to nicer silk pieces, and many sit right next to kimono and yukata rental counters — convenient if you’re already dressing up for the day and want a matching hairpin on the spot.

    For a more fashion-forward, less traditional take, Harajuku’s Takeshita-dori has hair-accessory shops selling kanzashi-inspired clips aimed at street fashion rather than kimono styling — fun for layering into an everyday look rather than a formal kimono outfit. It’s an easy add-on if you’re already heading that way to check out @cosme Store’s beauty rankings. If your taste runs toward character or anime-style hair accessories rather than traditional florals, secondhand otaku shops like Mandarake sometimes carry novelty kanzashi-style clips tied to idol and anime merchandise, which is a different vibe entirely but worth a browse if that’s your interest.

    Flea Markets and Vintage Hunting

    For genuinely old kanzashi — the kind with real patina and silver that’s gone slightly dark — flea markets beat shops on both price and character. Kyoto’s Toji Temple flea market runs on the 21st of every month, and the Kitano Tenmangu flea market (locally called Tenjin-san) runs on the 25th; both draw antique dealers who set out trays of old hairpins, combs, and obi accessories alongside pottery and textiles. In Tokyo, the Oedo Antique Market at the Tokyo International Forum, held on the first and third Sunday of most months, is a similarly good hunting ground. Bring cash, expect to haggle a little, and inspect clasps closely — antique mechanisms can be fragile.

    Common Mistakes to Avoid

    • Matching formality wrong: an elaborate maiko-style seasonal set looks out of place with a casual summer yukata. Save the showpieces for a proper kimono outing or just for display.
    • Assuming “silk-look” means silk: rub the fabric between your fingers — synthetic versions feel stiffer and shinier than real chirimen crepe. If the price seems too low for the detail shown, it’s probably synthetic.
    • Ignoring hair type: many kanzashi are designed for thick, styled updos. If you have fine or short hair, pair the clip with a few bobby pins so it doesn’t slide out mid-day.
    • Packing them loose: fabric petals crush easily in a soft suitcase pocket. Ask the shop for a small box (most will provide one) and pack it in your carry-on.
    • Skipping the season check: traditional hana kanzashi follow a monthly calendar — plum blossoms in January–February, cherry blossom in March–April, wisteria in May, hydrangea in June, morning glory in July–August, bellflower and silver grass in September, chrysanthemum in October–November, and maple or bamboo in December. You don’t have to follow this rigidly as a visitor, but it’s a nice detail to know when choosing a piece, and shop staff often use it to recommend what’s in season.

    Spend a full day moving between kimono rental, a shrine visit, and kanzashi shopping, and a portable charger becomes genuinely useful — renting one from a ChargeSPOT kiosk near Asakusa or Gion means you won’t be scrambling for an outlet mid-photoshoot. Whichever piece you end up with, a well-chosen kanzashi is one of the few souvenirs from Japan that’s both decorative and genuinely wearable long after the trip ends.

  • Dewa Sanzan: A First-Timer’s Guide to Yamagata’s Three Sacred Mountains

    Deep in Yamagata Prefecture, three mountains have been drawing pilgrims in white robes for over a thousand years. Dewa Sanzan — Mount Haguro, Mount Gassan, and Mount Yudono — is the spiritual home of Shugendo, a mountain-ascetic practice that blends Shinto nature worship with esoteric Buddhism. Climbing all three in sequence is said to symbolize death and rebirth: the present life at Haguro, the past (and the afterlife) at Gassan, and a new birth at Yudono. You don’t need to be religious to find the experience genuinely moving — cedar-lined stone staircases, a National Treasure pagoda, and a shrine so sacred that photography is forbidden inside it. Here’s how to actually plan the trip.

    What Is Dewa Sanzan? The Three Mountains of Rebirth

    “Dewa Sanzan” simply means “the three mountains of Dewa,” the old name for this part of Tohoku. For over a millennium, yamabushi (mountain ascetics) have trained here through fasting, waterfall meditation, and long treks between the summits. Today you’ll see yamabushi in white robes and conch-shell horns leading groups, but you’ll also see plenty of regular hikers and tourists doing some or all of the pilgrimage independently — no special training or guide is required for Haguro or Yudono, though Gassan is a genuine hike.

    Mount Haguro — The Easiest and Most Rewarding Climb

    Haguro (414m) is the most accessible of the three and the only one open year-round. From the vermilion Zuishinmon gate, a stone staircase of 2,446 steps winds uphill through old-growth cedar forest to the Gosaiden shrine hall at the summit, which enshrines all three Dewa Sanzan deities together (useful if you can’t make it to Gassan or Yudono). About 15–20 minutes up from the gate you’ll pass the Five-Story Pagoda (Goju-to), a weathered wooden pagoda dating to the 14th century and designated a National Treasure — it’s one of Tohoku’s oldest buildings and worth the detour alone.

    The climb takes most people 60–90 minutes one way at a relaxed pace. There’s no entrance fee to walk the steps or visit the pagoda. Wear proper shoes: the stone steps are uneven, worn smooth in places, and genuinely slippery when wet or mossy — flip-flops or smooth-soled sneakers are a common and avoidable injury here. If you don’t want to climb, a toll road lets drivers reach the summit parking lot directly for a small fee.

    Mount Gassan — Summer-Only Summit and Spring Skiing

    At 1,984m, Gassan is the tallest and most demanding of the three, and it’s only open for hiking roughly from late June through early October — snow blocks the trail and access road the rest of the year. Most hikers start from the 8th Station (Hachigome) parking lot, reachable by car or seasonal bus, then take the Gassan summer lift partway up (a one-way or round-trip ticket runs roughly ¥1,000–1,800) before hiking the remaining 2–3 hours to the summit shrine, Gassan Jinja. Budget a full day; bring water, layers, and real hiking shoes, since the upper trail crosses exposed rock and lingering snowfields even in midsummer.

    Ironically, Gassan is also famous as one of Japan’s few places to ski into early summer — the Gassan Snow Park operates on a massive spring snowfield from roughly April through early July, a bucket-list stop for ski and snowboard enthusiasts chasing the last powder of the season.

    Mount Yudono — Japan’s Most Secret Shrine

    Yudono is the innermost and most sacred of the three, and the one with the strictest rules: there is no building at all. The shrine itself is a large, naturally warm, reddish-brown rock with hot spring water flowing continuously over it, and worshippers walk across it barefoot as an act of purification. Photography of the sacred rock is strictly prohibited, and tradition holds that what you experience there should not be described afterward — “do not speak of it, do not ask of it” is the old rule.

    Cars can’t drive all the way to the shrine; from the parking area you take a short mandatory shuttle bus (a few hundred yen round trip) to the shrine precinct, pay a purification fee of around ¥500, remove your shoes and socks, and receive a paper figure (hitogata) to rub against your body before releasing it into the stream. The access road is open only from around mid-May to early November — it’s the first of the three to close for winter and the last to reopen.

    Getting There and Getting Around

    The gateway city is Tsuruoka in Yamagata’s Shonai region. From Tokyo, the fastest option is flying into Shonai Airport (around an hour from Haneda), then taking a taxi or rental car onward. By train, take the Joetsu Shinkansen to Niigata and transfer to the limited express Inaho to Tsuruoka — roughly 3.5–4 hours total. Overnight highway buses from Shinjuku also run to Tsuruoka for less but take 7–8 hours.

    From Tsuruoka Station, local buses run to Haguro’s Zuishinmon gate in about 35–40 minutes. The catch is connecting the three mountains: there’s no convenient public transit linking Haguro, Gassan, and Yudono directly, and a seasonal tourist shuttle only runs on a limited schedule in summer. For a trip covering all three, renting a car is by far the most practical option — see our guide to renting a campervan or RV in Japan if you’d rather combine the pilgrimage with a wider Tohoku road trip, sleeping at michi-no-eki rest stops along the way.

    Where to Stay: Shukubo Pilgrim Lodges

    The village of Toge, at Haguro’s base, has run shukubo (temple pilgrim lodges) for centuries — some families have hosted pilgrims for over 30 generations. A night typically costs ¥10,000–15,000 per person with dinner and breakfast, and the meal is the highlight: multi-course shojin ryori using foraged mountain vegetables, local mushrooms, and Haguro-grown konnyaku, entirely vegetarian in keeping with Buddhist practice. Booking ahead is essential, especially around the Hassaku Matsuri in August or the Shorei-sai fire festival on New Year’s Eve, when yamabushi perform dramatic fire rituals at Haguro — one of Japan’s most striking winter festivals if you can time a visit for it. If you’re in the region in cold weather afterward, warming up with a bowl of botan nabe wild boar hot pot is a very Tohoku way to end the day.

    Best Time to Go and Common Mistakes

    Late June through September is the only window to do all three mountains in one trip, since Gassan and Yudono are snowed shut otherwise. Haguro alone is doable any season, including a snowy, atmospheric New Year’s visit. The biggest mistake travelers make is trying to cram all three summits into a single day — Haguro’s steps, Gassan’s multi-hour hike, and Yudono’s shrine ritual plus the drive time between them realistically need two full days. Other easy-to-avoid errors: no cash on hand (rural shrines and shukubo often don’t take cards), wrong footwear for Haguro’s slick stone steps, and pulling out a camera at Yudono’s shrine — staff will stop you, and it’s considered a serious breach of the site’s rules. If you’re building a longer Tohoku itinerary around Dewa Sanzan, Akita’s Namahage demon folklore on the Oga Peninsula makes a natural extension a couple of hours further north.

  • Nikuman: Japan’s Convenience Store Steamed Buns and the Winter Checkout Ritual

    Nikuman: Japan’s Convenience Store Steamed Buns and the Winter Checkout Ritual

    Photo by Zakaria Zayane on Unsplash

    Walk into almost any Japanese convenience store between October and March and you’ll spot it near the register: a fogged-up glass steamer case, a handwritten sign, and a line of people pointing and saying a number instead of a name. That’s nikuman, Japan’s steamed pork bun, and buying one correctly — including the slightly awkward verbal exchange with the cashier — is one of the small rituals that makes convenience store food here so satisfying to figure out.

    What exactly is nikuman?

    Nikuman (肉まん) is a fluffy white steamed bun filled with seasoned ground pork, onion, and sometimes bamboo shoots or shiitake mushroom, built on the same lineage as Chinese baozi but adapted to Japanese convenience store logistics decades ago. “Niku” means meat, “man” (from manju) means bun. You’ll also see variations stacked in the same case: pizaman (pizza-flavored, with cheese and tomato sauce), anman (sweet red bean paste), curry-man, and seasonal oddities like mentaiko-mayo or matcha-filled buns that rotate in and out depending on the chain and the month.

    The major chains all have their own branded versions. 7-Eleven’s nikuman, Lawson’s, and FamilyMart’s each use slightly different dough and filling ratios, and regulars tend to have a strong preference. Price is typically 150–250 JPY for a standard nikuman, with pizaman or premium versions running 200–280 JPY. It’s one of the cheapest hot meals you can get in Japan, and it requires zero preparation on your end.

    How to actually order one

    This is the part that trips up first-timers. The steamer case sits behind the counter, not on a shelf you can browse freely, so you can’t just grab one and scan it yourself at checkout. Instead:

    • Point at the bun you want through the glass, or say its name/number if there’s a numbered menu posted (common at Lawson and FamilyMart).
    • The staff member will ask if you want a small paper bag or sleeve for it — say “hai” (yes) if you want something to hold it without burning your fingers.
    • Pay as part of your total transaction; it’s rung up like any other item, no separate queue.
    • They’ll hand it to you fresh out of the steamer, so eat it within a few minutes or it cools quickly.

    If there’s a line and you’re holding up checkout trying to decide, step aside, decide, then rejoin — it’s considered polite to not deliberate at the register itself. This is a good moment to also brush up on how self-checkout machines handle hot food items, since nikuman almost always requires staff assistance even at stores with self-checkout lanes; see Self-Checkout & Bagging Your Own Groceries in Japan for how that interaction usually goes.

    Best season and timing

    Nikuman is sold year-round in theory, but in practice the steamer cases often disappear from smaller or rural stores in summer due to low demand and go back out around late September or early October, staying until March or April. Peak season is December through February, when stores push nikuman hardest alongside oden (the simmered hot pot items sold in the same checkout area) as cold-weather comfort food. Morning commute hours (7–9am) and evening hours after dark (6–9pm) are when the steamer case gets refilled most often, so that’s when you’ll find the widest selection and freshest batches. Late at night, options thin out to whatever’s left.

    Budget, mid-range, and splurge options

    Because nikuman is inherently a budget food, the “splurge” tier here is relative:

    • Budget (150–180 JPY): Standard plain nikuman at any 7-Eleven, Lawson, or FamilyMart. Reliable, filling, and available at essentially every store in the country.
    • Mid-range (200–250 JPY): Pizaman, curry-man, or regional limited editions — these often have thicker filling or a premium dough and are worth trying once per chain to compare.
    • Splurge (280–400 JPY): Seasonal collaboration buns, sometimes tied to a prefecture’s local specialty (black pork from Kagoshima, miso-based fillings in Nagano) or a convenience store anniversary campaign. These sell out fast and aren’t restocked once gone, so if you see an unusual flavor, grab it immediately rather than deciding to “come back later.”

    Common mistakes to avoid

    • Biting in immediately. The filling retains heat far longer than the dough suggests — give it a minute, especially with pork fat content, or you’ll burn your mouth.
    • Assuming all flavors are meat. Anman (red bean) looks nearly identical to nikuman from the outside. If you don’t want a sweet surprise, confirm with staff or check the label tag clipped to the steamer tray.
    • Expecting to eat it while walking far. Eating while walking on the street is generally discouraged in Japan outside of designated festival-food zones. Most people eat nikuman standing just outside the store or back at a hotel room.
    • Not asking for the paper wrap. Without it, the thin paper base sticks to your fingers and the bun’s structural integrity suffers fast.

    Where to find the best versions

    Quality is fairly consistent nationwide since nikuman is centrally manufactured and distributed by each chain, but a few notes: 7-Eleven’s version tends to have a slightly sweeter dough; Lawson leans savory with more visible onion; FamilyMart’s pizaman is considered a standout by many regulars. Department store basement food halls (depachika) and some train station kiosks sell artisanal steamed buns at 350–600 JPY that are a notch above convenience store quality if you want to compare the high end. If you’re already exploring other convenience store carb staples during your trip, nikuman pairs naturally with a look at Yakisoba Pan: Japan’s Noodle-Stuffed Bread and Convenience Store Carb Culture, another cheap, filling option built around the same quick-turnover convenience store logic.

    For winter trips in particular, nikuman is worth factoring into your food budget alongside other seasonal cold-weather dishes — if you’re traveling somewhere rural or mountainous, it’s worth comparing to heavier regional winter fare like Botan Nabe: Japan’s Wild Boar Hot Pot and Where to Eat It in Winter, which gives a sense of how differently “winter comfort food” scales from a 200 JPY convenience store bun to a sit-down hot pot meal.

    And if you’re stacking up small convenience store purchases throughout your trip — nikuman, drinks, snacks — it’s worth understanding how point programs at these chains work, since many foreign visitors don’t realize they can accumulate value even on short trips; see Japan’s Store Point Card Culture for the basics.