Japan Trove

Author: JapanTrove Editorial

  • Best Gifts from Japan: 15 Ideas Under $30

    Best Gifts from Japan: 15 Ideas Under $30

    Some links below are affiliate links. If you buy through them, Japan Trove may earn a small commission at no extra cost to you.

    Whether you’re bringing back souvenirs or shopping for a Japan-loving friend from home, these gift ideas hit the sweet spot: distinctly Japanese, genuinely useful or delicious, and mostly under $30. Here’s what to get and where.

    Edible gifts (crowd-pleasers)

    • Regional Kit Kats — matcha, sake, and local flavors in gift boxes; see our Kit Kat guide.
    • A Japanese snack box — the easiest “wow” gift, delivered monthly; compare the best snack boxes.
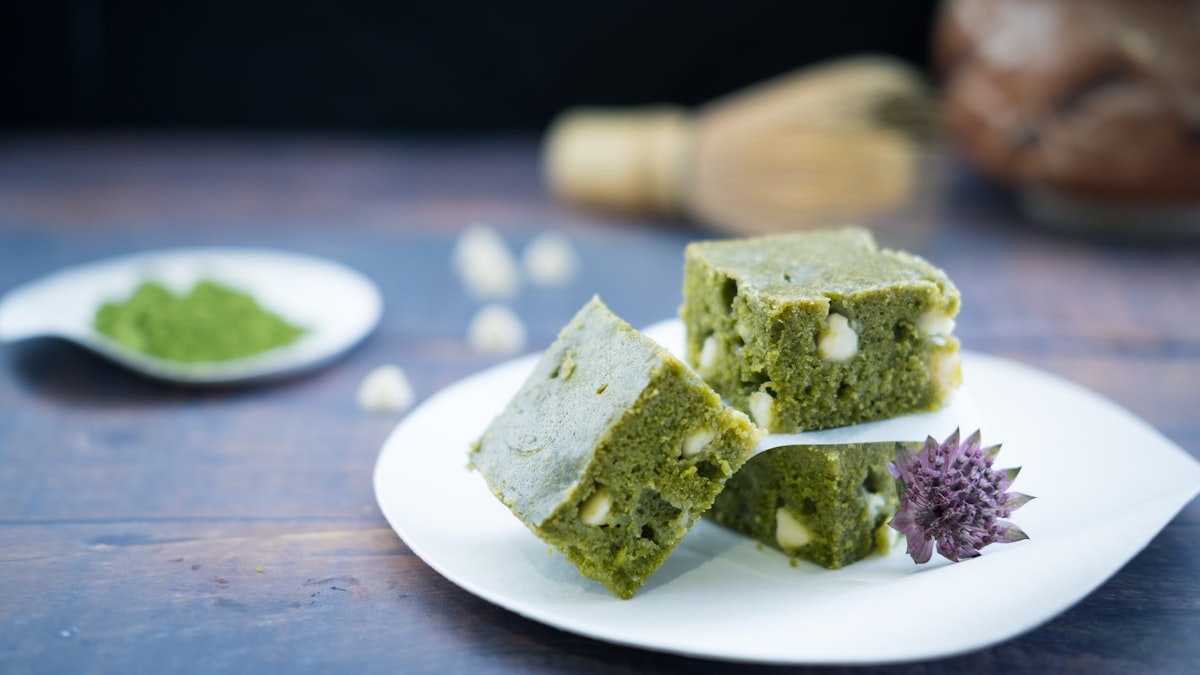
    • Matcha or sencha tea — a small tin of good green tea is elegant and light to carry.

    Beauty & self-care

    • Japanese sunscreen — the cult textures make a great, affordable gift; see the best Japanese sunscreens.
    • Sheet masks & skincare — a little set from our J-beauty guide.
    • A quality nail clipper or beauty tool — Japan’s are famously precise.

    Things they’ll actually use

    • A great pen or notebook — from our stationery guide; the JetPens gift sets are perfect.
    • A furoshiki (wrapping cloth) or tenugui (patterned towel) — beautiful and flat-packing.
    • Ceramics or chopsticks — a nice pair of chopsticks with a rest feels special.

    For the hobbyist

    Anime and gaming fans love a figure, a keychain, or a beginner Gunpla kit — see how to buy figures from Japan.

    Where to buy from abroad

    Many of these are on Amazon and YesStyle . For anything Japan-only, use a proxy — see how to buy from Japan.

    Tip: gift-intent shoppers convert best on pre-packaged sets (snack boxes, tea tins, stationery kits) — they look premium and travel well.

    What things typically cost

    • Regional Kit Kat gift boxes run JPY 800-1,500 for 8-12 pieces, comfortably under the $30 budget with room to add a second small item.
    • A quality tea tin (sencha or matcha) runs JPY 1,500-3,000, elegant enough to feel like a considered gift rather than a generic snack purchase.
    • A good pen or small stationery set from a specialty shop runs JPY 1,500-4,000, often the most-used and longest-lasting gift on this entire list relative to its price.

    Common mistakes to avoid

    • Buying only edible gifts for a large group — while safe and crowd-pleasing, mixing in at least one non-edible item (stationery, a furoshiki cloth) gives variety and avoids everyone receiving nearly identical snack boxes.
    • Choosing skincare or beauty items without checking the recipient’s skin type or preferences — unlike snacks, beauty products carry some risk of mismatch; a neutral pick like a nail clipper or fragrance-free item is safer for someone whose preferences you don’t know well.
    • Underestimating how well pre-packaged sets perform as gifts — a station or airport-bought snack box or stationery set already looks put-together and gift-ready, saving you the effort of assembling and wrapping several loose items yourself.

    Matching the gift to the recipient

    For a coworker or acquaintance, an individually wrapped snack box keeps things easy and shareable; for a close friend or family member with a specific interest (cooking, stationery, anime), a more targeted pick from this list — a good pen, a Gunpla kit, or quality tea — reads as more thoughtful than a generic omiyage box.

    Packing gifts to survive the trip home

    Flat items (stationery, furoshiki, tea tins) pack far more reliably than anything glass or ceramic; if you’re buying breakable items as gifts, wrap each one individually in clothing and pack centrally in your suitcase rather than near the edges, where the risk of impact damage is highest.
  • Japanese Etiquette: 15 Rules Every Visitor Should Know

    Japanese Etiquette: 15 Rules Every Visitor Should Know

    Japan is famously polite, but the “rules” are mostly common sense once you know them. You won’t offend anyone by making an honest mistake — locals are forgiving with visitors — but knowing these will help you blend in and travel smoothly.

    Trains & public spaces

    • Keep quiet on trains. No phone calls; set your phone to silent (“manner mode”).
    • Queue neatly on the marked lines, and let people off before you board.
    • Escalators: stand on one side (left in Tokyo, right in Osaka), walk on the other.
    • Backpacks off in crowded trains; hold them in front or on the rack.

    Eating & drinking

    • No tipping — it’s not expected and can confuse staff.
    • Say “itadakimasu” before eating if you like; “gochisousama” after.
    • Chopstick manners: don’t stick them upright in rice or pass food chopstick-to-chopstick (funeral symbolism).
    • Slurping noodles is fine — even encouraged.
    • Don’t eat while walking in most places; step aside or eat where you bought it.

    Shoes, temples & onsen

    • Shoes off where you see a step up and slippers (ryokan, some restaurants, homes, temples).
    • At shrines/temples, be quiet and respectful; follow posted photo rules.
    • Onsen (hot springs): wash thoroughly before entering; no swimsuits; keep the small towel out of the water. Tattoos can be an issue at some places — check ahead.

    Everyday courtesy

    • Carry your trash; public bins are rare. A small bag helps.
    • Cash handling: place money on the little tray, not into the hand.
    • A small bow or nod goes a long way; “arigatou” and “sumimasen” cover a lot.

    That’s it — nothing scary. For more practical basics, see our first-time-in-Japan tips, then start planning with the 7-day itinerary.

    Situations that trip up first-timers

    • Elevators and doorways: Japan generally follows a “let others exit first” norm more strictly than many countries; hanging back a beat before entering an elevator or train car is a small habit that reads as considerate.
    • Business cards (meishi): if you’re on any kind of business trip, receive a card with both hands, look at it before putting it away, and don’t write on it in front of the giver — a formal ritual worth knowing even for a brief professional encounter.
    • Pointing: use an open hand rather than a single finger when indicating direction or an object, a subtle but noticeable difference in politeness.

    Common mistakes to avoid

    • Overcorrecting into rigid formality — most etiquette “rules” are about basic consideration, not strict ceremony; visibly relaxed, polite behavior is received far better than stiff, anxious over-formality.
    • Assuming a mistake will cause real offense — locals are consistently described by visitors as forgiving of honest tourist errors; the goal is smoother travel, not flawless performance.
    • Forgetting regional differences — the escalator-standing side (left in Tokyo, right in Osaka) is a good reminder that even “rules” can vary by region; watching what locals around you do is always a safe fallback.

    When you inevitably make a mistake

    A quick, sincere “sumimasen” covers nearly every minor etiquette slip — it functions as both apology and acknowledgment, and using it promptly when you realize an error (wrong escalator side, phone ringing on a train) resolves the moment far better than an elaborate explanation or embarrassed silence.

    Etiquette that varies by generation and setting

    Some traditional rules (like strict silence on trains) are followed more consistently by older generations and in formal settings, while younger crowds in nightlife districts are noticeably more relaxed — reading the room, rather than treating every rule as universally rigid in every context, is often the more accurate approach.

  • Where to Stay in Kyoto: Best Areas & Ryokan for First-Timers

    Where to Stay in Kyoto: Best Areas & Ryokan for First-Timers

    Some links below are affiliate links. If you book through them, Japan Trove may earn a small commission at no extra cost to you.

    Kyoto’s sights are spread out, so where you sleep really matters. Pick the right base and you’ll walk to temples in the morning and reach the train easily. Here’s a first-timer’s guide to Kyoto’s best neighborhoods and what to book.

    Best areas to stay

    Near Kyoto Station — most convenient

    Best for easy arrivals/departures (the Shinkansen stops here), buses to everywhere, and a wide range of hotels. Less atmospheric but the most practical base, especially for short stays.

    Downtown (Kawaramachi / Gion) — central & atmospheric

    Walkable to shopping, restaurants, the Nishiki food market, and the geisha district of Gion. The best all-round location if you want to stroll in the evening. Pricier.

    Higashiyama — traditional & scenic

    Steps from Kiyomizu-dera and the old lanes. Quieter at night and full of character; ideal for early temple mornings.

    Arashiyama — nature retreat

    The bamboo grove and riverside. Beautiful and calm, but further from the center — great for a night, less ideal for your whole stay.

    Stay in a ryokan at least once

    Kyoto is the place to try a ryokan (traditional inn) with tatami rooms, a kaiseki dinner, and sometimes a private onsen. Even one night is memorable. Filter for ryokan and machiya (townhouse) stays on Booking.com and Agoda .

    Booking tips

    • Book very early. Kyoto sells out first in cherry blossom and autumn seasons.
    • Mind the buses. Kyoto relies on buses; staying central saves a lot of transit time.
    • One-night ryokan + central hotel is a great combo: splurge once, stay practical otherwise.

    Coming from Tokyo? See whether the JR Pass is worth it, and slot Kyoto into your 7-day itinerary. Staying in Tokyo too? Here’s where to stay in Tokyo.

    What accommodation typically costs

    • Business hotels near Kyoto Station run JPY 8,000-15,000/night for a comfortable double, while the same quality in Downtown Kawaramachi/Gion runs JPY 12,000-20,000 given the more central, atmospheric location.
    • A ryokan or machiya townhouse stay runs JPY 20,000-50,000+ per person with dinner and breakfast, with Higashiyama-area properties commanding a premium for their proximity to the famous temple lanes.
    • Arashiyama accommodation, being further from the center, often prices slightly lower than downtown for comparable quality, a reasonable trade-off if you’re prioritizing a quiet, scenic night over central convenience.

    Common mistakes to avoid

    • Choosing Kyoto Station for a longer, exploration-focused stay — it’s genuinely the most convenient area for arrivals and departures, but staying there for multiple nights while exploring Higashiyama and Gion means longer daily bus or train rides than a more central base would require.
    • Underestimating how much Kyoto relies on buses rather than a dense subway network — unlike Tokyo, getting around Kyoto efficiently depends more on bus routes, and staying somewhere with easy bus access matters more here than in most other Japanese cities.
    • Booking a Higashiyama ryokan without confirming late check-in flexibility — some traditional properties have earlier check-in windows than standard hotels; if your arrival time is uncertain, confirm this before booking a traditional-style stay.

    A practical two-base strategy

    Splitting a Kyoto stay between one night at a special ryokan in Higashiyama and the remaining nights at a practical, well-located hotel downtown gives you both the memorable traditional experience and the convenience needed for day-to-day sightseeing and transit, without paying ryokan prices for every night of a longer stay.

    Booking timing for peak seasons

    Kyoto’s cherry blossom and autumn leaf seasons see hotels and ryokan booked out 2-3 months ahead for the best properties, sometimes longer for particularly famous ryokan — if your travel dates fall in either window, treat accommodation booking as the very first task on your planning list, before flights or a detailed itinerary.

  • Best Day Trips from Tokyo: Hakone, Nikko & Mt. Fuji

    Best Day Trips from Tokyo: Hakone, Nikko & Mt. Fuji

    Some links below are affiliate links. If you book through them, Japan Trove may earn a small commission at no extra cost to you.

    Tokyo is amazing, but some of Japan’s best experiences are a short train ride away. These three day trips — Hakone, Nikko, and the Mt. Fuji area — are all doable as round trips and give you mountains, hot springs, and shrines without changing hotels.

    Hakone — hot springs & Mt. Fuji views

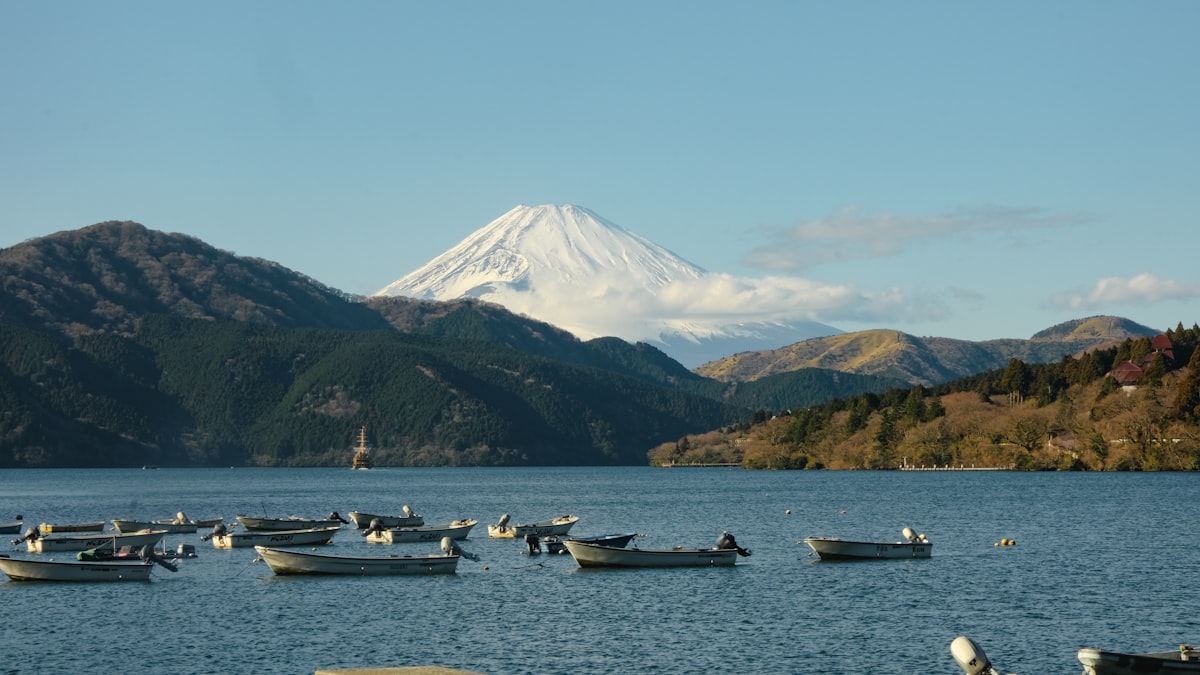
    About 90 minutes from Shinjuku, Hakone is the classic onsen escape. Do the scenic “loop”: mountain railway, cablecar, a pirate ship across Lake Ashi, and (on a clear day) Fuji views. Soak in an onsen before heading back. The Hakone Free Pass covers most of the transport and is easy to buy in English on Klook .

    Nikko — shrines in the mountains

    Two hours north of Tokyo, Nikko is a UNESCO World Heritage town of ornate shrines set in cedar forest, plus waterfalls and a scenic lake up the mountain. Toshogu Shrine is the highlight. Best in autumn for the foliage.

    Mt. Fuji area (Kawaguchiko) — the iconic view

    For that postcard Fuji shot reflected in a lake, head to the Fuji Five Lakes (Kawaguchiko). Great for photos, a ropeway, and lakeside cafés. Note: Fuji is clearest in the colder months and early mornings; summer often hides it in cloud.

    How to choose

    • Want hot springs + Fuji + variety? Hakone.
    • Love temples & nature? Nikko.
    • Chasing the perfect Fuji photo? Kawaguchiko.

    Tips

    • Go early. First train out beats the crowds and the afternoon clouds.
    • Check the pass math. Regional day passes usually beat singles — related: is the JR Pass worth it?
    • Book guided tours if you want zero logistics; compare on GetYourGuide or Klook.

    Fitting these into a week? See our 7-day Japan itinerary and sort your eSIM and Tokyo base first.

    What each day trip costs

    • The Hakone Free Pass runs about JPY 6,100 (2-day) from Shinjuku, covering round-trip transport plus unlimited use of the local loop — generally cheaper than piecing together individual tickets for the train, cablecar, ropeway, and boat.
    • Nikko’s combined shrine ticket runs JPY 1,300-1,600 for the main three sites, plus JPY 1,150-1,700 each way for the bus up to Lake Chuzenji and Kegon Falls if you extend beyond the shrine complex.
    • Kawaguchiko round-trip bus fare from Shinjuku runs about JPY 4,000-4,400, with the Kachi Kachi Ropeway (JPY 900-1,000 round-trip) as a worthwhile add-on for elevated lake views.

    Common mistakes to avoid

    • Trying to combine two of these three destinations in one day — each is a genuine day-trip commitment on its own; attempting Hakone and Nikko together, for instance, means rushing both and spending most of the day in transit.
    • Choosing Kawaguchiko on a whim during summer haze season — Fuji’s visibility drops significantly in summer humidity; if seeing the mountain itself is the entire point, autumn and winter mornings offer far better odds.
    • Underestimating Nikko’s UNESCO shrine complex as “just shrines” — Toshogu’s carvings and scale genuinely surprise many first-time visitors expecting a modest religious site rather than an elaborately decorated mausoleum complex.

    Turning any of these into an overnight

    All three destinations reward an overnight stay more than a rushed round trip — a Hakone or Kawaguchiko ryokan lets you soak in an onsen and catch an early clear-morning Fuji view, while Nikko’s highland lake area feels genuinely different once day-trippers have left for the evening.

    Booking guided tours versus DIY

    A guided day tour typically costs more than the equivalent regional pass and self-guided transport, but removes all logistics planning — a reasonable trade for travelers on their first trip or short on planning time, while the self-guided route rewards those comfortable navigating Japanese transport and wanting more flexibility over timing at each stop.

  • Best Japanese Stationery: Pens, Notebooks & Where to Buy

    Best Japanese Stationery: Pens, Notebooks & Where to Buy

    Some links below are affiliate links. If you buy through them, Japan Trove may earn a small commission at no extra cost to you.

    Japanese stationery has a cult following for good reason: pens that write like a dream, notebooks with paper so smooth it feels wrong, and clever little tools you didn’t know you needed. Here’s where to start — whether you’re a note-taker, a bullet journaler, or just curious.

    Pens worth the hype

    • Uni-ball Kuru Toga — a mechanical pencil whose lead rotates to stay sharp. Genius.
    • Pilot Juice / Uni Signo — smooth gel pens in gorgeous colors.
    • Pentel EnerGel / Zebra Sarasa — fast-drying, buttery writers.
    • Pilot Kakuno / Lamy-alternative fountain pens — a friendly, cheap way into fountain pens.

    Notebooks & paper

    • Kokuyo Campus — the everyday student notebook; excellent paper for the price.
    • Midori MD — minimalist, fountain-pen friendly.
    • Hobonichi Techo — the beloved daily planner with ultra-thin Tomoe River paper.

    Clever extras

    • Washi tape — decorative paper tape for journaling and gifts.
    • Sticky notes & page markers (Post-it Japan, Kanmido) in shapes you won’t find elsewhere.
    • Desk tools — precise scissors, staple-free staplers, and tiny organizers.

    Where to buy

    JetPens is the specialist most fans use outside Japan — a curated catalog of Japanese pens, paper, and tools with detailed guides and worldwide shipping. → JetPens . Amazon also stocks many Uni, Pilot, and Zebra pens. → Amazon

    Want a monthly surprise?

    Stationery subscription boxes (like ZenPop) send a themed set each month — a fun way to discover new brands. In Japan, visit Itoya in Ginza or a Loft/Tokyu Hands store. New to buying from Japan generally? See how to buy from Japan.

    What things typically cost

    • Most gel pens and mechanical pencils run JPY 150-500 each, making a well-rounded pen collection of 8-10 items cost JPY 2,000-4,000 total.
    • Premium notebooks like Hobonichi Techo planners run JPY 3,000-4,500, priced higher than standard notebooks specifically for the ultra-thin Tomoe River paper that makes them a cult favorite among fountain pen users.
    • Washi tape and smaller decorative items run JPY 150-400 per roll, cheap enough to buy several patterns without a real budget impact.

    Common mistakes to avoid

    • Buying a fountain pen without testing the nib width — Japanese fountain pens (like the Pilot Kakuno) often run finer than Western equivalents; if you’re used to broader Western nibs, trying before buying (or reading detailed nib comparisons) avoids an unexpectedly scratchy first impression.
    • Overlooking Kokuyo Campus notebooks as “just” student notebooks — their paper quality genuinely rivals pricier specialty brands at a fraction of the cost, making them one of the best value items on this entire list.
    • Not checking ink compatibility before buying refills — Japanese pen refill systems aren’t always interchangeable between brands even when pens look similar; confirm the specific refill type your pen uses before buying replacements.

    Visiting Itoya as a stationery pilgrimage

    Ginza’s multi-floor Itoya flagship organizes stationery by type across several floors, making it possible to compare dozens of pen brands and paper weights side by side in one visit — a genuinely efficient way to build an informed stationery haul rather than guessing from online descriptions alone.

    Building a stationery gift set

    A mid-range gel pen, a Kokuyo Campus notebook, and a roll or two of washi tape together make a well-rounded, inexpensive gift set that appeals even to people who wouldn’t call themselves stationery enthusiasts — the quality difference from typical Western office supplies is noticeable enough to make an impression on its own.

  • Best Japanese Sunscreens: Anessa, Biore & More (Buyer’s Guide)

    Best Japanese Sunscreens: Anessa, Biore & More (Buyer’s Guide)

    Some links below are affiliate links. If you buy through them, Japan Trove may earn a small commission at no extra cost to you.

    If you buy one thing from Japanese skincare, make it sunscreen. Japanese sunscreens are famous for feeling weightless — no white cast, no greasy film — which is why people actually reapply them. Here’s what to know and which cult bottles to try.

    Why Japanese sunscreens are different

    They pioneered elegant, high-protection formulas (look for SPF50+ PA++++) that dry to a near-invisible finish. Many double as a smooth makeup base. The textures are the reason people are obsessed.

    Cult sunscreens to try

    • Anessa Perfect UV Sunscreen Skincare Milk — the gold standard; sweat- and water-resistant, great for travel and beach days.
    • Biore UV Aqua Rich Watery Essence — the famous budget hero; feather-light and cheap enough for daily generous use.
    • Skin Aqua (Rohto) — light, affordable, several finishes (tone-up, moisture).
    • Allie / Nivea Sun Protect (Japan) — solid daily options with nice textures.

    How to use it right

    • Use enough. Most people underapply — two finger-lengths for the face.
    • Reapply every few hours outdoors; that’s the whole point of a nice texture.
    • Last step in the morning, after moisturizer.

    Where to buy

    • YesStyle — wide range of Anessa, Biore, Skin Aqua. → YesStyle
    • Amazon — carries the popular Biore and Anessa lines. → Amazon

    Note: formulas sold in Japan may differ slightly from versions in other markets. Buying in Japan? Drugstores have the best prices. Pair sunscreen with the basics in our Japanese skincare guide.

    What things typically cost

    • Biore UV Aqua Rich runs JPY 700-900 for a full-size bottle, genuinely one of the best value sunscreens available anywhere given its texture and protection level.
    • Anessa’s premium formula runs JPY 2,000-2,800, pricier than budget options but formulated specifically for sweat and water resistance, making it a favorite for beach days and summer activity.
    • Buying multiple bottles at a Japanese drugstore is noticeably cheaper than ordering the same products through overseas resellers like YesStyle once shipping is factored in, making sunscreen a smart bulk-buy while actually in Japan.

    Common mistakes to avoid

    • Underapplying because the texture feels “too light” to be working — the lightweight finish is a formulation achievement, not a sign of reduced protection; still use the full recommended amount (roughly two finger-lengths for the face) rather than a thin layer.
    • Skipping reapplication because Japanese sunscreens feel comfortable enough to forget about — feeling great is precisely why reapplying every few hours is easier here than with heavier formulas, so don’t let the pleasant texture become a reason to reapply less often.
    • Assuming all Japanese sunscreen formulas are identical to their overseas-market versions of the same brand name — reformulations for different markets do happen, so if a specific known formula matters to you, check that you’re buying the Japan-domestic version.

    Choosing between chemical and mineral formulas

    Most of the famous cult Japanese sunscreens (Anessa, Biore UV) use chemical filters prized for their light texture, while a smaller but growing number of mineral (physical) filter options exist for sensitive skin — if you have known sensitivities, ask drugstore staff or check the ingredient list specifically rather than assuming all “Japanese sunscreen” means the same formulation type.

    Stocking up for the trip home

    Because these products are lightweight, non-liquid-restricted in checked luggage, and significantly cheaper in Japan than through overseas resale, many repeat visitors buy a year’s worth of their favorite formula each trip — checking expiration dates on the packaging to confirm the full stock will remain usable before your next visit.

  • Best Japanese Skincare (J-Beauty): A Beginner’s Guide & Where to Buy

    Best Japanese Skincare (J-Beauty): A Beginner’s Guide & Where to Buy

    Some links below are affiliate links. If you buy through them, Japan Trove may earn a small commission at no extra cost to you.

    Japanese skincare (J-beauty) is loved for one reason: effective, no-nonsense products at fair prices. The philosophy is gentle, consistent care — hydration and sun protection over gimmicks. Here’s a beginner’s guide to the categories and cult products worth buying, and where to get them abroad.

    The J-beauty approach

    Where some routines pile on ten steps, J-beauty focuses on cleanse, hydrate, protect: a good cleanser, a hydrating lotion (a watery essence, not a Western “lotion”), a moisturizer, and — non-negotiable — daily sunscreen.

    Cult products to know

    • Hada Labo Gokujyun Hyaluronic Lotion — the iconic hydrating lotion; cheap and beloved.
    • Hatomugi (Job’s Tears) lotion — big bottle, gentle, great for layering.
    • Cleansing oils (DHC, Shu Uemura, Bioré) — Japan does oil cleansing exceptionally well.
    • Melano CC vitamin C essence — a budget cult favorite for brightening.
    • Sheet masks — Lululun and others sell daily-use packs.
    • Sunscreen — the crown jewel; see our best Japanese sunscreens guide.

    How to build a simple routine

    1. AM: gentle cleanse → hydrating lotion → moisturizer → sunscreen.
    2. PM: oil cleanse (if wearing sunscreen/makeup) → water cleanse → lotion → moisturizer.

    Add treatments (vitamin C, retinol) slowly, one at a time.

    Where to buy outside Japan

    • YesStyle — huge J-beauty (and K-beauty) range, ships worldwide, frequent deals. → YesStyle
    • iHerb — reliable for many Japanese/Asian skincare and health items. → iHerb
    • Amazon — carries many Hada Labo, Melano CC, and cleansing oils. → Amazon

    Visiting Japan? The best prices are at drugstores like Matsumoto Kiyoshi — a drugstore haul guide is coming. Meanwhile, don’t skip the one step that matters most: sunscreen.

    What a starter routine typically costs

    • A complete basic routine (cleanser, hydrating lotion, moisturizer, sunscreen) using drugstore staples like Hada Labo and Biore runs JPY 4,000-6,000 total, genuinely affordable for four full-size products covering the entire routine.
    • Adding a treatment step (Melano CC vitamin C, a retinol product) adds JPY 700-2,000 per item, reasonable given how concentrated and long-lasting these products tend to be with regular use.
    • Sheet masks for occasional treatment use run JPY 100-300 each, cheap enough to use several times a week without meaningfully affecting a skincare budget.

    Common mistakes to avoid

    • Adding too many treatment products at once — introducing vitamin C, retinol, and exfoliating acids simultaneously makes it hard to identify what’s causing irritation if your skin reacts; add one new active ingredient at a time, waiting a couple of weeks between additions.
    • Skipping sunscreen on cloudy or indoor-heavy days — UV exposure continues through cloud cover and even some windows; the “non-negotiable” daily sunscreen step in J-beauty philosophy applies regardless of visible sun.
    • Confusing Japanese “lotion” with Western lotion — in J-beauty terminology, a lotion is a watery, toner-like hydrating step applied after cleansing, not a thick moisturizing cream; using it in the wrong order in your routine reduces its effectiveness.

    Building a routine gradually while traveling

    Rather than committing to a full multi-step routine on day one, many first-time J-beauty buyers start with just a hydrating lotion and sunscreen, then add a cleansing oil and treatment step over the following weeks once they’ve confirmed the basics suit their skin — a lower-risk way to build a new routine than buying everything at once.

    Shopping for skincare while in Japan

    Drugstore chains like Matsumoto Kiyoshi consistently offer the best prices on these products, often 30-50% below what the same items cost through overseas resellers — worth planning a dedicated drugstore stop specifically for skincare rather than treating it as an afterthought during a broader shopping day.

  • Japanese Kit Kat Flavors: Which to Try & How to Get Them

    Japanese Kit Kat Flavors: Which to Try & How to Get Them

    Some links below are affiliate links. If you buy through them, Japan Trove may earn a small commission at no extra cost to you.

    Japan has made hundreds of Kit Kat flavors — many exclusive to regions or seasons — and they’re one of the most popular edible souvenirs in the world. Here’s a guide to the flavors worth trying and, if you’re not in Japan, how to actually get them.

    Why Japan is Kit Kat obsessed

    “Kit Kat” sounds like kitto katsu (“you’ll surely win”) in Japanese, so they became a good-luck gift — especially for students taking exams. That cultural hook plus relentless limited editions turned them into collectibles.

    Flavors worth trying

    • Matcha (Uji green tea) — the classic; rich and slightly bitter. A must.
    • Strawberry — sweet, reliable crowd-pleaser.
    • Sake — subtle rice-wine notes; a fun grown-up one.
    • Wasabi — sweet-then-warm; better than it sounds.
    • Hojicha (roasted tea) — toasty and mellow.
    • Regional exclusives — Tokyo Banana, Shinshu apple, Hokkaido melon, and more, sold only in their home areas or airports.

    Where to buy them

    In Japan

    Convenience stores and supermarkets for everyday flavors; Don Quijote and airport shops for the widest variety and regional gift boxes.

    From abroad

    Two easy options:

    Gift tip

    Regional Kit Kat assortment boxes make excellent, affordable souvenirs — they’re pre-packaged as gifts and travel well. Pair them with other picks from our Japanese snack guide.

    What things typically cost

    • Standard multi-packs of everyday flavors (matcha, strawberry) run JPY 300-600 for a bag of several mini bars, cheap enough to buy as a casual snack rather than a dedicated souvenir purchase.
    • Regional exclusive gift boxes run JPY 800-1,500, priced higher for the specific regional branding and limited availability rather than any real difference in the chocolate itself.
    • Rare or highly limited collaboration boxes (seasonal or region-specific releases) can command resale markups well above retail once they sell out, so buying at the source when you see them is smarter than assuming you can find them later.

    Common mistakes to avoid

    • Waiting until the airport to buy regional exclusives — while airports do stock a good range, region-specific flavors (Hokkaido melon, Tokyo Banana-flavored) are genuinely tied to their home area and may not appear at every airport; buy in the region if a specific flavor matters.
    • Assuming all “matcha” Kit Kats taste the same — there are actually different tiers of matcha intensity and quality across various matcha Kit Kat releases, with some higher-end versions using better-quality tea than the standard bar.
    • Buying chocolate-heavy flavors in peak summer without insulation — like other chocolate products, Kit Kats can melt in a hot bag or car; save chocolate-based purchases for closer to your return flight or keep them in air-conditioned spaces.

    Building a flavor-tasting gift box yourself

    Rather than buying one pre-made regional box, picking up several individual flavors across different convenience stores and one Don Quijote visit lets you build a custom variety box featuring a wider flavor range than any single pre-packaged set offers — a more personal and often better-value approach for a Kit Kat enthusiast back home.

    The exam-season gifting tradition

    Because “Kit Kat” sounds like a Japanese good-luck phrase, they’re genuinely given as exam-season gifts to students, and some limited packaging even includes small motivational messages — a fun bit of context worth mentioning if you’re gifting a box to a student or anyone facing a challenge back home, adding meaning beyond the novelty flavor itself.

  • How to Buy Anime Figures from Japan (HLJ, AmiAmi & CDJapan)

    How to Buy Anime Figures from Japan (HLJ, AmiAmi & CDJapan)

    Some links below are affiliate links. If you buy through them, Japan Trove may earn a small commission at no extra cost to you.

    Want that anime figure, Gunpla kit, or piece of merch straight from the source? Buying from Japan is easy once you know the right stores. Here’s how to order authentic figures and hobby goods and get them shipped home — without overpaying.

    The two ways to buy

    1. Dedicated hobby retailers that ship internationally — the simplest route for most items.
    2. A proxy service for things that only sell domestically (limited lottery prizes, Mercari, store exclusives) — see how to buy from Japan with a proxy.

    Best stores that ship worldwide

    HobbyLink Japan (HLJ)

    A veteran hobby store with a massive catalog of figures, Gunpla, and model kits, plus a “Private Warehouse” that lets you consolidate orders to save shipping. Great prices on pre-orders. → HLJ

    AmiAmi

    Famous for deep discounts on figures and pre-orders, and a huge selection. A go-to for collectors chasing value. → AmiAmi

    CDJapan

    Best when you also want music, Blu-rays, art books, and merch alongside figures. Reliable international shipping and points. → CDJapan

    Pre-orders: how they work

    Most sought-after figures sell as pre-orders months before release. You reserve, then pay near ship date. Reserve early — popular figures close fast and resell for far more later.

    Save on shipping (the real cost)

    • Consolidate. Use a store’s warehouse feature to combine items into one box.
    • Pick the right courier. Surface/economy for heavy kits; air/EMS for urgent, light items.
    • Mind customs. Check your country’s duty threshold before a big order.

    New to building?

    If figures led you to model kits, start with a beginner-friendly Gunpla grade (HG or EG) and a basic tool set — guide coming soon. For snacks and other goodies from Japan, see our picks for the best Japanese snack boxes, or learn the proxy method for anything that won’t ship abroad.

    What things typically cost, shipping included

    • A mid-tier scale figure runs JPY 8,000-20,000 before shipping, with international shipping typically adding JPY 2,000-6,000 depending on weight, courier choice, and destination country.
    • Consolidating multiple items into one warehouse shipment (a feature most major hobby retailers offer) can cut per-item shipping cost significantly compared to several separate small orders sent individually.
    • Customs duty varies by country and order value — checking your destination’s specific duty-free threshold before placing a large order avoids an unexpected bill on delivery.

    Common mistakes to avoid

    • Missing a pre-order window for a popular figure — highly anticipated releases can close pre-orders within days or weeks of announcement; following a retailer’s release calendar or mailing list is the only reliable way to avoid missing a limited release entirely.
    • Choosing the cheapest shipping option for a fragile item — surface/economy shipping takes longer and involves more handling than air couriers; for delicate figures, the extra cost of a faster, better-tracked service is often worth it.
    • Not checking a figure’s scale before ordering — figures are sold in varying scales (1/7, 1/8, and others) that produce very different final sizes; checking the listed height in centimeters avoids a size surprise on arrival.

    Building toward a Japan hobby-shopping trip

    If you’re planning an actual Japan visit, ordering ahead from these same retailers for in-store pickup (where offered) or simply window-shopping their catalogs beforehand helps you build a target list for physical stores like Mandarake and Akihabara’s specialist shops, making an in-person visit far more efficient than browsing cold.

    Trying before you commit to a big order

    If you’re new to a specific figure line or brand, ordering a single lower-cost item first to check quality, packaging, and how a retailer handles shipping to your country is a low-risk way to build confidence before placing a larger, more expensive pre-order.

  • Suica vs Pasmo: Which IC Card to Get (and How)

    Suica vs Pasmo: Which IC Card to Get (and How)

    Some links below are affiliate links. If you book through them, Japan Trove may earn a small commission at no extra cost to you.

    An IC card is the single most useful thing you’ll get in Japan. Tap it to ride any train, subway, or bus, and use it to pay at convenience stores, vending machines, and lots of shops. Here’s how Suica, Pasmo, and the tourist versions compare.

    Suica vs Pasmo — what’s the difference?

    Honestly, almost none. Both are rechargeable tap cards that work nationwide on nearly all transit and at the same shops. Suica is run by JR East, Pasmo by the private railways. Pick whichever you can get first.

    Mobile Suica/Pasmo — the best option for many

    If you have an iPhone (or Apple Watch), you can add a Suica or Pasmo straight into Apple Wallet and top it up with your credit card — no physical card, no queue, no deposit. This is often the easiest route for visitors. Some Android/Google Pay setups support it too, depending on region.

    Physical cards for tourists

    Due to a chip shortage, standard plastic Suica/Pasmo have had limited availability at times. Tourist versions to look for:

    • Welcome Suica — no deposit, valid 28 days, for visitors.
    • Pasmo Passport — similar tourist card.

    You buy these at airport stations and major terminals. If mobile Suica works on your phone, though, you may not need a physical card at all.

    How to use it

    • Top up at any station machine (cash) or, on mobile, with your card.
    • Tap in and out at train gates — it calculates the fare automatically.
    • Pay at konbini by saying the card name and tapping.

    Do you still need a rail pass?

    IC cards handle city travel and short hops perfectly. For long-distance Shinkansen trips, that’s a separate decision — see whether the JR Pass is worth it. For everything else, an IC card plus an eSIM covers your day-to-day. New to Japan? Start with our first-timer tips.

    What an IC card typically costs

    • A physical Suica or Pasmo requires a JPY 500 deposit (refunded when you return the card before leaving Japan, along with any remaining balance minus a small handling fee).
    • Mobile Suica/Pasmo through Apple Wallet has no deposit at all, and top-ups happen instantly via your linked credit card rather than requiring a station machine.
    • Welcome Suica and Pasmo Passport tourist cards skip the deposit but expire after a fixed period (typically 28 days), after which any remaining balance is simply lost — fine for a single trip, but worth knowing if you’re a repeat visitor who might want a card usable across future trips.

    Common mistakes to avoid

    • Buying a physical card unnecessarily when mobile Suica would work — if you have a compatible iPhone, setting up Mobile Suica before you land is genuinely faster and avoids ever needing to find a card issuing machine or queue at the airport.
    • Forgetting to refund a physical card’s deposit before departure — station service counters (not ticket machines) process the deposit-and-balance refund, and this isn’t available at every station, so plan the return for a major hub before your final departure.
    • Assuming a low balance will always work — while it’s largely true that IC cards handle any short trip fare, an insufficient balance at some gates can trigger a stop; keeping a small buffer (JPY 1,000+) avoids this friction.

    Using your IC card beyond trains

    Nearly every konbini, many vending machines, and a growing number of restaurants and shops accept IC card taps for payment, not just transit — treating it as a general-purpose tap-to-pay card for small purchases throughout the day, not only for train fares, makes it even more valuable during a trip.

    What happens if your card gets lost

    A registered (named) physical Suica or Pasmo can have its remaining balance transferred to a replacement card if lost, while an anonymous or mobile card generally cannot be recovered the same way — registering your card at purchase, where offered, is a small extra step worth taking if you’re loading a significant balance.