Japan Trove

Author: JapanTrove Editorial

  • Japan Cherry Blossom Guide: When & Where to See Sakura

    Japan Cherry Blossom Guide: When & Where to See Sakura

    Some links below are affiliate links. If you book through them, Japan Trove may earn a small commission at no extra cost to you.

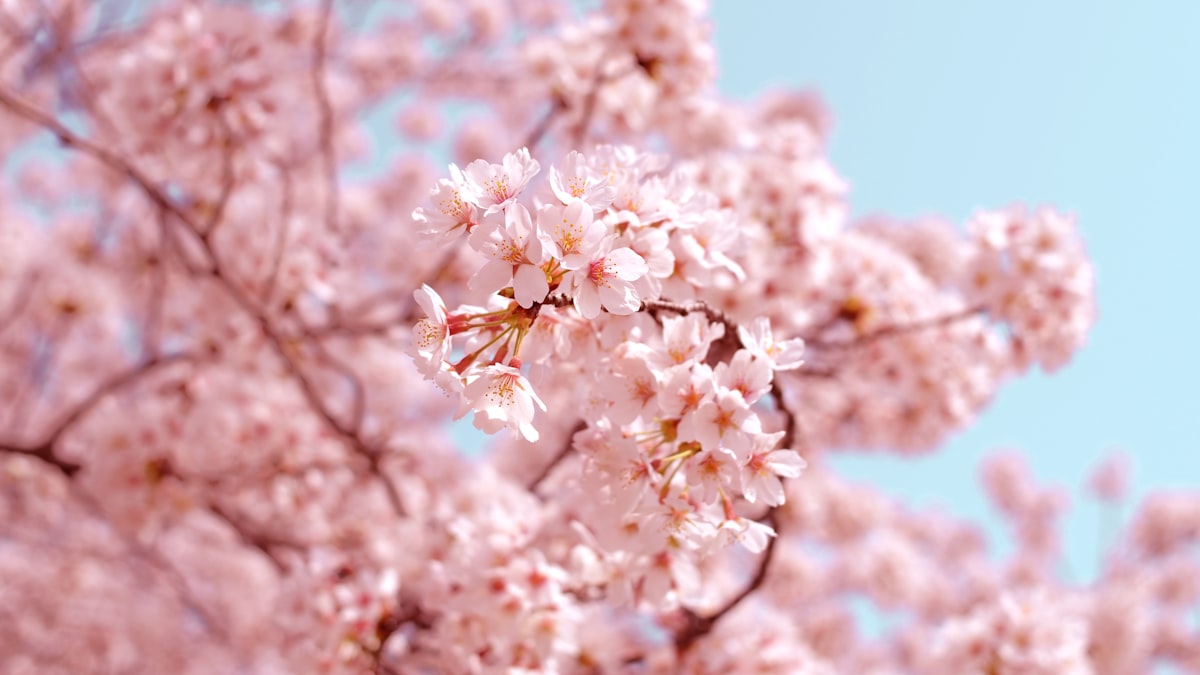
    Cherry blossom season (sakura) is Japan at its most beautiful — and its most crowded. With a little planning you can catch the bloom and still enjoy it. Here’s how the season works and how to plan around it.

    When do the cherry blossoms bloom?

    It varies by year and region, but as a rough guide:

    • Tokyo & Kyoto: late March to early April.
    • Southern Japan (Fukuoka): a little earlier, from mid–late March.
    • Northern Japan (Tohoku, Hokkaido): late April into May.

    Full bloom (“mankai”) lasts only about a week, and rain or wind can end it fast — so build in flexibility.

    How to plan around the forecast

    • Watch the forecasts published each spring, but treat them as estimates.
    • Chase the bloom by latitude: if you miss it in Kyoto, it may still be going north.
    • Book everything early. This is peak season — hotels and flights sell out months ahead. Lock in your base via Booking.com .

    Where to see them

    • Tokyo: Ueno Park, Chidorigafuchi (rowboats under the blossoms), Meguro River.
    • Kyoto: the Philosopher’s Path, Maruyama Park, Arashiyama.
    • Beyond: Himeji Castle, Yoshino (mountains of cherry trees), Hirosaki in the north.

    Hanami etiquette

    Hanami (flower viewing) is a picnic tradition. Bring a mat, take your trash with you, don’t shake the trees or pick blossoms, and claim only the space you need. See our etiquette guide for the basics.

    Prefer fewer crowds?

    If sakura isn’t a must, autumn foliage is just as stunning with less pressure — compare seasons in our best time to visit Japan guide. Either way, plan the days with the 7-day itinerary.

    What a sakura trip costs

    • Peak cherry blossom week hotel rates in Tokyo and Kyoto can run 30-50% above baseline, and the best rooms with a view or garden setting sell out 2-3 months ahead — book lodging before finalizing other trip details during this window.
    • Hanami picnic supplies (a tarp, snacks, drinks) cost very little if bought at a konbini, making the classic blossom-viewing experience one of the cheapest things to do during an otherwise expensive travel week.
    • Paid evening illumination events at gardens and temples run JPY 300-600 extra on top of standard admission, worth it for the genuinely different atmosphere of blossoms lit up after dark.

    Common mistakes to avoid

    • Fixating on a single city’s forecast — bloom dates shift by 2-3 weeks between Kyushu and Hokkaido; a rigid single-destination plan risks missing peak entirely if the forecast shifts, while a flexible route can chase the bloom north or south as needed.
    • Trying to picnic at the most famous, most photographed spots without arriving early — popular hanami parks fill from dawn on weekends, with groups reserving tarp space hours ahead; a quieter neighborhood park is often more relaxing and still beautiful.
    • Underpacking for cool mornings — late March and early April mornings can sit near 8-10°C even when afternoons feel mild; a packable layer matters even during a “warm” spring visit.

    Sakura beyond the famous cities

    Yoshino’s mountainside, covered in an estimated 30,000 cherry trees across different elevations, blooms in a rolling wave over roughly two weeks rather than all at once — a genuinely different, less crowded way to experience the season compared to a single park’s week-long peak in Tokyo or Kyoto.

    Cherry blossom trees beyond the famous varieties

    Most people picture the pale pink Somei Yoshino variety that dominates parks and forecasts, but Japan has over 100 cultivated cherry varieties — some, like the deeper pink Kanzan, bloom up to two weeks later, giving a second, less-publicized viewing window for travelers who miss the main Somei Yoshino peak.
  • Best Things to Do in Kyoto: A First-Timer’s Guide

    Best Things to Do in Kyoto: A First-Timer’s Guide

    Some links below are affiliate links. If you book through them, Japan Trove may earn a small commission at no extra cost to you.

    Kyoto is Japan’s cultural heart — over a thousand temples and shrines, geisha districts, and gardens that define the seasons. It’s also busy, so a little planning goes a long way. Here’s what’s genuinely worth your time.

    The essentials

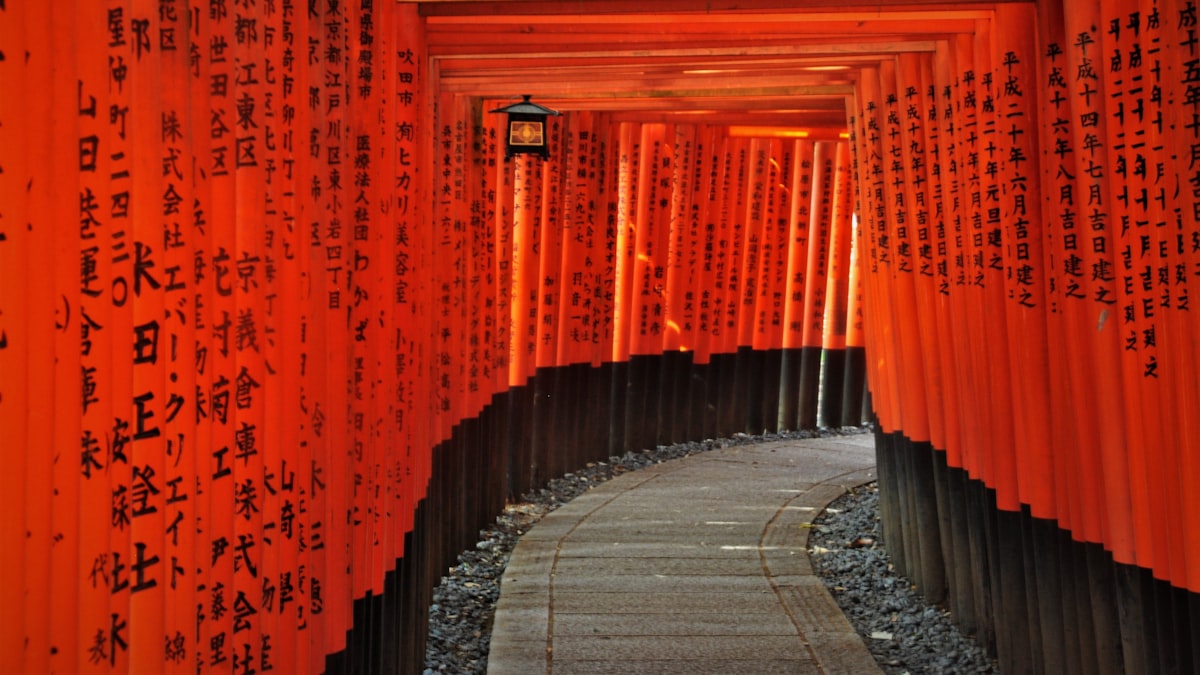
    • Fushimi Inari Taisha — the endless red torii gates; go at sunrise to have them nearly to yourself.
    • Kiyomizu-dera — a hillside temple with sweeping views; wander the old Higashiyama lanes below.
    • Arashiyama Bamboo Grove — plus the monkey park and riverside; again, early is best.
    • Kinkaku-ji — the Golden Pavilion, dazzling on a clear day.
    • Gion — the geisha district; stroll the lantern-lit streets in the evening (respectfully — no chasing geiko for photos).

    Beat the crowds

    • Start at dawn. The famous spots are magical and empty before 8am.
    • Go north. The moss temples and Ohara in the northern hills stay quiet.
    • Pick a theme per day (east Kyoto, west Kyoto, north) to cut down on backtracking.

    Experiences

    • A tea ceremony or matcha experience — book in English on Klook .
    • Kimono rental for a day of photos in Higashiyama.
    • Nishiki Market for street food and — see our Japanese green tea guide — excellent tea to take home.

    Where to sleep & how to get around

    Kyoto relies on buses, so stay central — see where to stay in Kyoto. Coming from Tokyo, check whether the JR Pass is worth it; a Kansai regional pass is often better. And Kyoto pairs naturally with Osaka and Nara.

    Slot it all into our 7-day Japan itinerary.

    What things typically cost

    • Most major temples charge JPY 400-600 entry; Fushimi Inari is free and open 24 hours, one of the best-value major sights in the entire country.
    • A kimono rental for a Higashiyama photo walk runs JPY 4,000-8,000 for a basic half-day set, more with hair styling add-ons.
    • A tea ceremony experience runs JPY 3,000-6,000 for a beginner-friendly session, typically including a sweet and a bowl of whisked matcha as part of the demonstration.

    Common mistakes to avoid

    • Trying to see all five essentials in one rushed day — Kyoto’s sights are spread across the city, and cramming Fushimi Inari, Kiyomizu-dera, Arashiyama, Kinkaku-ji, and Gion into one day means mostly transit time; grouping by geographic area across 2-3 days works far better.
    • Visiting Arashiyama’s bamboo grove at midday — it’s one of the most crowded single photo spots in Kyoto by late morning; arriving at opening gives you a genuinely different, peaceful version of the same path.
    • Approaching Gion hoping to photograph geiko or maiko up close — this is treated as harassment in parts of the district and some lanes now ban tourist photography entirely; admire respectfully from a distance or book a proper cultural performance instead.

    Grouping sights by area to save time

    A geographic day-by-day structure — east Kyoto (Kiyomizu-dera, Higashiyama lanes, Gion) one day, west Kyoto (Arashiyama, bamboo grove) another, and north Kyoto (Kinkaku-ji, quieter temples) a third — cuts backtracking dramatically compared to jumping between areas based on a list of “must-sees” without regard to location.

    A quiet alternative to the big five

    If the essential sights feel too crowded even with good timing, Kyoto’s northern hills around Ohara and the moss temples of the western hills offer a genuinely quieter, equally beautiful alternative — worth a half-day for travelers on a second or third Kyoto visit who’ve already covered the headline sights.

  • Best Japanese Green Tea: Matcha, Sencha & Where to Buy

    Best Japanese Green Tea: Matcha, Sencha & Where to Buy

    Some links below are affiliate links. If you buy through them, Japan Trove may earn a small commission at no extra cost to you.

    Japanese green tea is one of the best things to bring home: light to pack, long-lasting, and a daily reminder of your trip. But “green tea” covers a lot of styles. Here’s a simple guide to the main types and how to buy good ones.

    The main types

    • Sencha — the everyday green tea; fresh, grassy, slightly sweet. Start here.
    • Gyokuro — shade-grown and premium; rich, sweet, and umami-heavy. A treat.
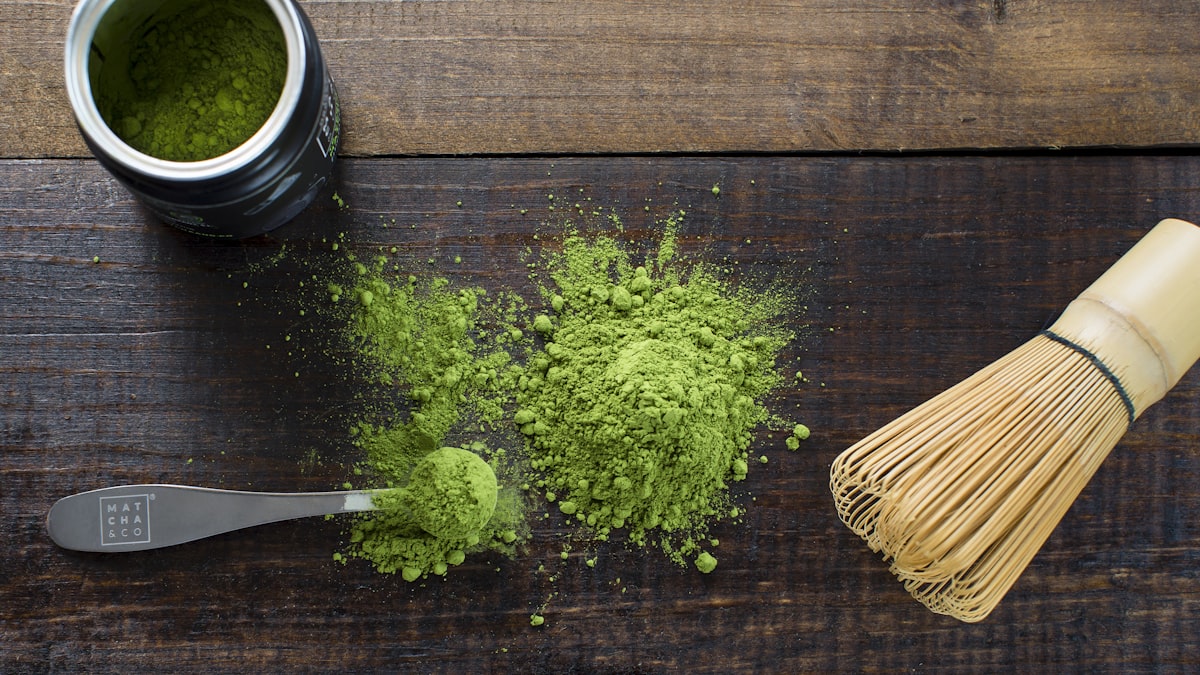
    • Matcha — stone-ground powder whisked into water; vivid and full-bodied, also great in lattes and baking.
    • Hojicha — roasted green tea; toasty, low in caffeine, lovely in the evening.
    • Genmaicha — green tea with roasted brown rice; nutty and comforting.

    How to choose good tea

    • Look for origin — Uji (Kyoto), Shizuoka, and Kagoshima are famous regions.
    • Buy recent harvest and reseal well; green tea fades with time and air.
    • For matcha, “ceremonial grade” is for drinking; “culinary grade” is for lattes and baking — don’t overpay for baking.

    Brewing basics

    • Sencha: cooler water (about 70–80°C) for ~1 minute — boiling water makes it bitter.
    • Gyokuro: even cooler (~50–60°C), longer steep.
    • Matcha: sift, add a little near-boiling water, and whisk to a froth.

    Where to buy

    Good Japanese tea is available on Amazon and specialty tea retailers that ship worldwide; look for named regions and recent harvest dates. Buying in Japan? Department-store food halls (depachika) and specialist tea shops in Kyoto are ideal, and a nice tin makes a great gift.

    Pair your tea habit with other Japanese treats, or learn to order Japan-only items via a proxy service.

    What good tea typically costs

    • Everyday sencha runs JPY 800-2,000 for 100g, while premium single-origin Uji or Shizuoka sencha can run JPY 3,000-6,000 for the same amount depending on harvest grade.
    • Ceremonial-grade matcha runs JPY 2,000-6,000 for a small 30-40g tin — genuinely different from and pricier than culinary-grade matcha (JPY 800-1,500), which is fine for lattes and baking but noticeably harsher for straight drinking.
    • Gyokuro, the shade-grown premium tea, runs JPY 3,000-8,000 for 100g and is priced closer to a luxury purchase than an everyday one given its labor-intensive cultivation.

    Common mistakes to avoid

    • Buying culinary-grade matcha for drinking — it’s formulated for baking and lattes where other ingredients mask bitterness; straight-drinking matcha specifically calls for ceremonial grade, and the price difference reflects a real quality gap for this use.
    • Brewing sencha with boiling water — this is the most common mistake and makes the tea genuinely bitter; letting water cool to roughly 70-80°C first (or simply waiting a minute or two after boiling) makes a noticeable difference.
    • Storing tea loosely in a cupboard for months — green tea fades in flavor from light and air exposure faster than black tea; buying smaller amounts more frequently, or resealing tightly in an airtight container, preserves quality much better.

    Building a tea-tasting flight to bring home

    Buying a small amount each of sencha, hojicha, and genmaicha lets you compare grassy, roasted, and nutty profiles side by side — a more interesting souvenir for a tea-curious friend than a single large bag of one style, and it fits easily within typical airline liquid/powder carry restrictions since it’s all dry leaf.

    Visiting a tea region in person

    Uji, just outside Kyoto, is worth a half-day trip specifically for tea enthusiasts — specialty shops there offer tastings and sell direct-from-farm sencha and matcha at prices often better than department store counters, alongside a chance to see the terraced tea fields that don’t come across in a packaged tin.

  • Japanese Drugstore Must-Buys: Best Matsukiyo Finds

    Japanese Drugstore Must-Buys: Best Matsukiyo Finds

    Some links below are affiliate links. If you buy through them, Japan Trove may earn a small commission at no extra cost to you.

    Japanese drugstores — Matsumoto Kiyoshi (“Matsukiyo”), Welcia, Don Quijote — are a shopping destination in their own right. Prices are low, the range is huge, and many cult beauty and health products are cheapest here. Here’s what to fill your basket with.

    Skincare & beauty

    • Sunscreen — the famous light-textured formulas at drugstore prices; see the best Japanese sunscreens.
    • Hydrating lotions (Hada Labo, Hatomugi) and Melano CC vitamin C — cornerstones of a J-beauty routine.
    • Sheet masks (Lululun) in daily-use packs — cheap and great for gifts.
    • Cleansing oils (DHC, Bioré) and steam eye masks (Megrhythm).

    Health & daily-life items

    • Cooling/heat patches and muscle-relief plasters (Salonpas).
    • Kabá / cold remedies and vitamins — check ingredient rules before flying home.
    • Foot-care goods and blister plasters — genuinely useful after temple-hopping.

    Snacks & extras

    Drugstores often sell discounted snacks and drinks too, plus quirky gadgets. Don Quijote (“Donki”) is the maximalist version — open late, chaotic, and full of souvenirs and Kit Kats (see our Kit Kat guide).

    Shopping tips

    • Tax-free is available for tourists above a spend threshold — bring your passport.
    • Bring a foldable bag; you’ll buy more than you planned.
    • Note formulas differ from overseas versions — that’s part of why people stock up.

    Can’t get to Japan?

    Many of these are available abroad on YesStyle , iHerb , and Amazon . For drugstore-only items, use a proxy service.

    What things typically cost

    • Sheet masks run JPY 100-300 each, cheap enough to buy a large multi-pack for daily use during a trip and still have extras to bring home as gifts.
    • Skincare staples like Hada Labo lotions and Melano CC vitamin C serums run JPY 700-1,500, often half the price of comparable Western drugstore skincare with similarly researched formulas.
    • A well-rounded drugstore haul covering skincare, a few health items, and sheet masks typically runs JPY 5,000-10,000, easily clearing the tax-free minimum spend threshold in one visit.

    Common mistakes to avoid

    • Assuming a product works identically to its overseas version — Japanese-market formulas of familiar international brands sometimes differ in ingredients or concentration from export versions; that difference is often exactly why Japan-bought versions have a cult following, but check ingredient lists if you have specific sensitivities.
    • Buying cold or allergy medicine without checking your home country’s import restrictions — some common Japanese over-the-counter ingredients (like certain stimulant-containing cold remedies) are restricted or banned elsewhere; research before stocking up heavily.
    • Skipping smaller neighborhood branches assuming they’re all identical — larger flagship drugstores near major stations carry a noticeably deeper range than small local branches, worth the extra few minutes’ walk for a serious shopping trip.

    Building a skincare gift set from the drugstore

    A cleansing oil, a hydrating lotion, and a pack of sheet masks together make a complete, giftable J-beauty starter set for well under JPY 3,000 — a genuinely thoughtful gift for a skincare-curious friend that costs far less than it looks like it should.

    Shipping a large drugstore haul home

    If your shopping run grows beyond suitcase space, larger drugstore branches and Don Quijote locations can often arrange shipping, or a hotel concierge can point you to a nearby shipping service — worth considering for a genuinely large skincare and health-item haul rather than risking excess baggage fees.

  • Best Gunpla for Beginners: Grades, Kits & Where to Buy

    Best Gunpla for Beginners: Grades, Kits & Where to Buy

    Some links below are affiliate links. If you buy through them, Japan Trove may earn a small commission at no extra cost to you.

    Gunpla — Gundam plastic model kits — are the perfect gateway hobby: cheap to start, no glue or paint required, and weirdly relaxing. Here’s how the grades work and which kit to buy first.

    Understanding the grades

    • Entry Grade (EG) — the easiest; snap-fit, minimal parts, great for a first build.
    • High Grade (HG) — 1/144 scale, affordable, huge variety; the sweet spot for beginners.
    • Real Grade (RG) — 1/144 but highly detailed and complex; step up once you’re comfortable.
    • Master Grade (MG) — 1/100 scale, inner frames, more advanced and satisfying.
    • Perfect Grade (PG) — huge, expensive, expert-level showpieces.

    What to buy first

    Start with an EG or HG kit — an EG RX-78-2 or an HG of a design you like. They cost little, build in an evening, and teach you the basics without frustration.

    Tools you actually need

    • A good side cutter (nipper) — the one upgrade that matters most for clean parts.
    • A hobby knife or file to tidy nub marks.
    • Optional: panel-line marker and Gundam markers for detail; no paint needed.

    Where to buy

    The best selection and prices come from Japanese hobby stores that ship worldwide — see our guide to buying figures and kits from Japan (HLJ , AmiAmi, CDJapan). Amazon also stocks popular HG and EG kits and nippers. Buying in Japan? Yodobashi and hobby shops in Akihabara are a paradise.

    Tips for a clean first build

    • Take your time cutting parts from the runner — cut away from the part, then trim the nub.
    • Follow the manual; it’s picture-based and easy even in Japanese.
    • Panel-lining is the easiest way to make a kit look pro.

    Looking for a gift for a fan? A beginner kit plus a nipper is perfect — see best gifts from Japan.

    What Gunpla typically costs

    • Entry Grade kits run JPY 500-1,000, genuinely cheap enough to buy several to try different designs before committing to pricier grades.
    • High Grade kits, the sweet spot for most hobbyists, run JPY 1,500-3,500 depending on the specific mobile suit and level of detail included.
    • Master Grade kits run JPY 4,000-10,000, and Perfect Grade showpieces can run JPY 15,000-50,000+, reflecting the significant jump in parts count and engineering complexity at each tier.

    Common mistakes to avoid

    • Jumping straight to a Master Grade kit as a first build — the inner-frame assembly and higher parts count can be genuinely frustrating without first learning basic techniques on an EG or HG kit; starting smaller pays off in enjoyment, not just cost.
    • Using regular household scissors or kitchen knives instead of a proper side cutter — this is the single most common cause of visible white stress marks and rough nub marks on finished kits; a dedicated hobby nipper is a small, worthwhile investment.
    • Rushing the parts removal from the runner — cutting too close in one pass often damages the part; cutting away from the part first, then trimming the remaining nub flush, gives a noticeably cleaner result.

    Where to shop for kits in Japan

    Yodobashi Akiba and the dense cluster of hobby shops throughout Akihabara offer the widest selection, including exclusive and limited-run kits not easily found overseas — worth setting aside a dedicated hour if Gunpla is a genuine trip interest rather than treating it as a five-minute browse alongside other electronics shopping.

    Building a kit-building routine while traveling

    A compact EG or HG kit fits easily in a suitcase and makes a genuinely relaxing hotel-room evening activity between busy sightseeing days — some travelers specifically buy a kit early in a Japan trip just to have something calm to build during downtime, rather than saving it strictly as a souvenir for after returning home.

  • Japan Packing List: What to Bring (by Season)

    Japan Packing List: What to Bring (by Season)

    Some links below are affiliate links. If you buy through them, Japan Trove may earn a small commission at no extra cost to you.

    Japan is a “pack light” country: you’ll walk a lot, hotel rooms are small, and you’ll want space for shopping. Here’s a practical packing list, plus the season-specific extras that actually matter.

    The essentials (any season)

    • Comfortable walking shoes — you’ll easily do 15,000+ steps a day.
    • Slip-on shoes help at temples, ryokan, and restaurants where you remove them.
    • Type A power adapter (Japan uses 100V, flat two-pin) and a power bank.
    • An eSIM so your phone works on arrival.
    • A small day bag and a foldable tote for shopping (and carrying trash — bins are rare).
    • Cash card that works at 7-Eleven ATMs, plus a coin purse (you’ll accumulate coins).
    • Any prescription meds — check Japan’s rules, as some common ingredients are restricted.

    Season-specific

    • Spring/Autumn: layers and a light jacket; mornings and evenings are cool.
    • Summer: breathable clothes, a good sunscreen, a hand fan, and a small towel (locals carry them). It’s hot and humid.
    • Winter: a warm coat, layers, and Uniqlo Heattech-style base layers; it’s cold but rarely snowy in the big cities.
    • Rainy season (June): a compact umbrella (or buy a cheap clear one at any konbini).

    What you can leave at home

    • Too many toiletries — Japanese drugstores and konbini have everything, often better.
    • Heavy guidebooks — Google Maps and your phone do the job.
    • Lots of cash from home — withdraw yen as you go from konbini ATMs.

    Leave room for the trip home

    You will buy things — snacks, skincare, stationery. Consider luggage forwarding (takkyubin) between hotels, and read how to buy from Japan for anything you spot but can’t carry.

    Most items above are easy to grab on Amazon before you fly. Then follow the first-timer tips and 7-day itinerary.

    What packing essentials typically cost if bought locally

    • A clear konbini umbrella costs about JPY 500-700 — genuinely fine to buy on arrival rather than pack, especially during rainy season when you may want a backup anyway.
    • A Type A power adapter runs JPY 500-1,500 at any electronics store if you forget one, though buying one before departure is usually cheaper and saves a stop upon arrival.
    • Basic toiletries (travel-size shampoo, toothpaste, sunscreen) run JPY 300-800 each at any drugstore, often better formulated than what you’d pack from home, making it reasonable to travel with less and restock on day one.

    Common mistakes to avoid

    • Packing a full toiletry kit “just in case” — Japanese drugstores and konbini stock everything you’d need, often at lower prices and higher quality than what most travelers pack; use the space for souvenirs instead.
    • Bringing shoes that aren’t broken in — with 15,000+ daily steps common on a Japan trip, new or stiff shoes can genuinely derail a trip through blisters; break in any new walking shoes for at least a few weeks before departure.
    • Forgetting a physical copy of key documents — while apps handle most things, having a backup photo or printout of your passport, hotel confirmations, and insurance details saves stress if your phone dies or gets lost.

    Packing differently by trip length

    A short 5-7 day trip supports packing lighter and doing laundry rarely if at all, while a 2+ week trip benefits from planning at least one laundry stop (many hotels and konbini-adjacent laundromats make this easy) rather than packing enough clothing for the entire trip, which usually means an overweight, overstuffed suitcase for no real benefit.

    A carry-on-only strategy

    Given how much shopping most travelers do in Japan, many experienced visitors deliberately pack a smaller bag than they think they need on the way out, planning to either buy a cheap additional bag or use luggage forwarding for the return trip — a strategy that avoids paying for excess space you won’t fill until the final days anyway.

  • Best Things to Do in Osaka (Beyond Dotonbori)

    Best Things to Do in Osaka (Beyond Dotonbori)

    Some links below are affiliate links. If you book through them, Japan Trove may earn a small commission at no extra cost to you.

    Osaka is Japan’s kitchen and its friendliest big city — louder, funnier, and hungrier than Tokyo. Most visitors only see Dotonbori, but there’s a lot more. Here’s what to do, eat, and where to look beyond the neon.

    The must-sees

    • Dotonbori — yes, do it: the giant signs, the Glico runner, and street food at night.
    • Kuromon Ichiba Market — a fresh-food market; go in the morning for seafood and fruit.
    • Osaka Castle — the park is lovely, especially in cherry blossom season.
    • Umeda Sky Building — a striking floating-garden observatory.

    Beyond Dotonbori (the local side)

    • Shinsekai & Tsutenkaku — retro, gritty, and full of kushikatsu (deep-fried skewers).
    • Nakazakicho — a hipster pocket of indie cafés and vintage shops.
    • Hozenji Yokocho — a tiny lantern-lit alley just off the chaos of Dotonbori.

    Eat like an Osakan

    • Takoyaki (octopus balls) and okonomiyaki (savory pancake) — Osaka’s signatures.
    • Kushikatsu in Shinsekai — remember: no double-dipping the sauce.
    • Kitsune udon — Osaka claims it as its own.

    Day trips from Osaka

    Osaka is a great base for the Kansai region: Nara (bowing deer and a giant Buddha), Kobe (beef and port views), and of course Kyoto — see where to stay in Kyoto if you split your nights. Book tours easily on Klook .

    Practical tips

    • Kansai has its own regional passes — often better value than the nationwide one; see the JR Pass guide.
    • Grab an IC card and an eSIM on arrival.

    Osaka usually closes out our 7-day Japan itinerary — a tasty way to end the trip.

    What things typically cost

    • Kuromon Ichiba Market street food runs JPY 300-1,500 per item, with premium seafood skewers (like grilled scallop or a small portion of wagyu) at the higher end of that range.
    • Osaka Castle’s main tower entry costs JPY 600, though the surrounding park and moat views are free and arguably just as photogenic, especially during cherry blossom season.
    • Kushikatsu in Shinsekai runs JPY 100-300 per skewer, with a satisfying meal of 8-10 skewers plus a drink costing JPY 1,500-2,500.

    Common mistakes to avoid

    • Double-dipping kushikatsu skewers in the shared sauce — this is one of the most commonly cited etiquette slips in Osaka specifically; use the provided cabbage to scoop extra sauce instead of re-dipping a bitten skewer.
    • Only visiting Dotonbori and missing Shinsekai — the retro, slightly gritty neighborhood around Tsutenkaku Tower offers a genuinely different, less polished side of Osaka that many visitors find more memorable than the more famous neon strip.
    • Visiting Kuromon Ichiba Market in the late afternoon — like most fresh food markets, the best selection and liveliest atmosphere are in the morning; many stalls wind down or close by mid-afternoon.

    Osaka as a food-first city break

    Osaka rewards visitors who prioritize eating over sightseeing checklists — a day built around Kuromon Ichiba Market breakfast, a Dotonbori street food crawl, and a Shinsekai kushikatsu dinner covers more of what makes the city special than trying to fit in every landmark on a tight schedule.

    Combining Osaka with a wider Kansai loop

    Osaka’s central position makes it a genuinely practical base for day trips beyond Nara, Kobe, and Kyoto — Wakayama’s Koyasan and Himeji Castle are both within a comfortable day-trip radius, meaning a longer Osaka stay can anchor an entire Kansai region exploration rather than just the city itself.

  • Best Things to Do in Tokyo: A First-Timer’s Guide

    Best Things to Do in Tokyo: A First-Timer’s Guide

    Some links below are affiliate links. If you book through them, Japan Trove may earn a small commission at no extra cost to you.

    Tokyo can feel overwhelming — it’s really dozens of distinct neighborhoods stitched together by trains. Here’s a first-timer’s shortlist of the things genuinely worth your time, mixing the icons with a few local favorites.

    The icons (do at least these)

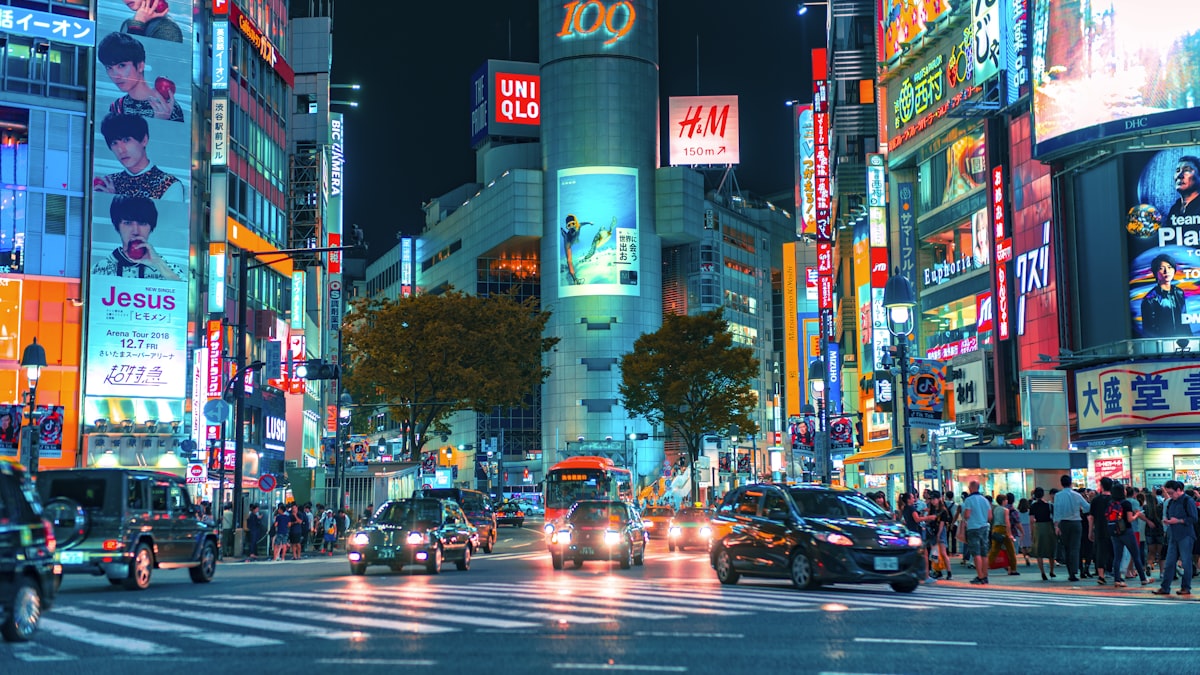
    • Shibuya Scramble Crossing — the famous intersection; view it from above at a nearby café or Shibuya Sky.
    • Senso-ji, Asakusa — Tokyo’s oldest temple; go early to beat crowds, then explore the old-town lanes.
    • Meiji Shrine + Harajuku — a forest shrine next to Tokyo’s wildest street fashion.
    • teamLab — the immersive digital-art museum; book tickets in advance.

    Neighborhoods to wander

    • Shinjuku — nightlife, Golden Gai, and the free observation deck at the Metro Government Building.
    • Shimokitazawa — vintage shops and cafés, relaxed and local.
    • Yanaka — old Tokyo alleys that survived the wars; quiet and charming.
    • Akihabara — anime, games, and electronics; see how to buy figures.

    Food experiences

    • Tsukiji Outer Market for a seafood breakfast.
    • Standing sushi, ramen shops, and depachika (department-store food halls) — some of the best cheap eats anywhere.
    • Konbini snacks count too — see our konbini must-buys.

    Easy escapes

    When you want a break from the city, Tokyo has brilliant day trips (Hakone, Nikko, Mt. Fuji).

    Practical tips

    Fitting Tokyo into a bigger trip? Use our 7-day Japan itinerary.

    What things typically cost

    • teamLab tickets run JPY 3,800-4,800, and Shibuya Sky runs JPY 2,000-2,500 — both benefit from advance booking not just for availability but sometimes slightly better online pricing than day-of purchase.
    • Senso-ji is free, and the free observation deck at the Tokyo Metropolitan Government Building in Shinjuku offers a comparable city view to paid decks costing JPY 2,000-3,000 elsewhere.
    • A satisfying half-day of neighborhood wandering (Yanaka, Shimokitazawa) costs very little beyond transport and snacks, a good budget balance against pricier ticketed attractions elsewhere in the itinerary.

    Common mistakes to avoid

    • Trying to cover too many distant neighborhoods in one day — Tokyo is vast, and grouping sights geographically (Asakusa with Akihabara, or Harajuku with Shibuya and Shinjuku) saves significant transit time compared to jumping between opposite sides of the city.
    • Booking teamLab or Shibuya Sky for a midday slot when a sunset or evening slot would show the venue at its best — both are considerably more atmospheric after dark, and tickets cost the same regardless of time.
    • Skipping neighborhood wandering entirely in favor of only “must-see” landmarks — some of the best Tokyo experiences (a quiet Yanaka alley, an unplanned Shimokitazawa cafe stop) aren’t on any top-10 list but define what makes the city rewarding beyond checklist sightseeing.

    Building a realistic first Tokyo day

    A well-paced first day might start in Asakusa for temples and old-town atmosphere, move to Akihabara for an afternoon of electronics and anime culture, and end back near your hotel for an early dinner and rest — resisting the urge to also squeeze in Shibuya or Harajuku on the same day, which is easily its own separate, equally full day.

    Tokyo in bad weather

    Tokyo’s extensive underground shopping arcades beneath Tokyo, Shinjuku, and Ginza stations let you cover real ground and shopping without stepping outside on a rainy day, and teamLab’s digital art is arguably better suited to a rainy afternoon than any outdoor sightseeing alternative you’d be skipping.

  • Japanese Convenience Store Must-Buys: Konbini Snacks & Essentials

    Japanese Convenience Store Must-Buys: Konbini Snacks & Essentials

    Some links below are affiliate links. If you buy through them, Japan Trove may earn a small commission at no extra cost to you.

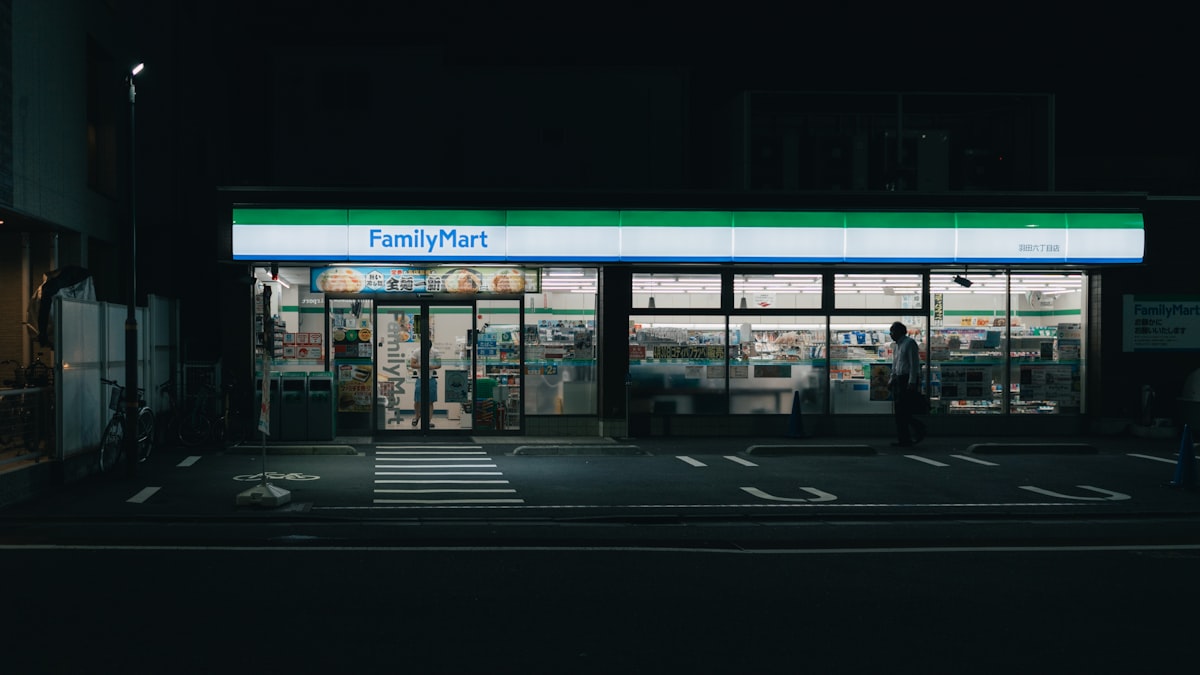
    Japan’s convenience stores (“konbini”) — 7-Eleven, FamilyMart, and Lawson — are a genuine highlight of any trip. The quality is astonishing and prices are low. Here’s what to grab on your first konbini run, from meals to snacks to little life-savers.

    Meals & hot food

    • Onigiri (rice balls) — cheap, delicious, and the wrapper keeps the seaweed crisp; tuna-mayo and salmon are classics.
    • Sandwiches — the egg salad (“tamago sando”) is legendary.
    • Hot counter — FamilyMart’s fried chicken (“Famichiki”) and Lawson’s karaage-kun are must-tries.
    • Oden (winter) and fresh bento boxes — surprisingly good for the price.

    Snacks & sweets

    • Seasonal Kit Kats and chocolate — see our Kit Kat guide.
    • Konbini sweets — the pudding, roll cake, and mochi desserts rival dedicated shops.
    • Umaibo, Jagariko, and regional chips — cheap, fun, and shareable.

    Drinks

    • Bottled green tea and barley tea — unsweetened and refreshing.
    • Canned coffee (hot or cold from the machine) and unique sodas.
    • Chilled dashi/soup and vitamin drinks for when you’re worn out.

    Non-food life-savers

    • ATMs (7-Eleven and Japan Post accept foreign cards), ticket machines, and clean toilets.
    • Umbrellas, phone chargers, socks, toiletries — whatever you forgot.
    • Tax-free at some larger stores if you spend enough — bring your passport.

    Want konbini snacks at home?

    You can recreate the experience abroad with a Japanese snack box, or order specific items via a proxy service. New to Japan? Start with our first-timer tips and 7-day itinerary.

    What things typically cost

    • Onigiri run JPY 130-180 each, sandwiches JPY 250-450, and hot counter items like Famichiki or karaage-kun run JPY 180-250 — a filling konbini meal for one person typically totals JPY 500-800.
    • Bento boxes run JPY 500-900 depending on contents, often discounted 20-50% in the evening as stores mark down items nearing their sell-by time, a genuinely good budget dinner strategy.
    • Drinks (bottled tea, canned coffee) run JPY 120-160, and most konbini stock a wide enough range that a full day’s meals and drinks can realistically run under JPY 2,500 per person.

    Common mistakes to avoid

    • Skipping the hot counter because it looks like ordinary fast food — Famichiki and karaage-kun are genuinely well-regarded, not just convenient; many visitors rank them among their favorite quick meals of the whole trip.
    • Not checking discount timing — many konbini mark down perishable food in the evening (often after 7-8pm), and timing a visit for this window can mean a genuinely good meal at a steep discount.
    • Assuming all three chains are identical — 7-Eleven, FamilyMart, and Lawson each have their own signature items and slightly different strengths (7-Eleven’s onigiri, FamilyMart’s fried chicken, Lawson’s desserts are commonly cited favorites), so trying all three is worth it rather than sticking to whichever is closest.

    Konbini as a genuine meal solution, not just snacks

    For budget-conscious or time-pressed days, building a full breakfast, lunch, or dinner entirely from a konbini run is a completely normal and satisfying choice in Japan, not a compromise — many locals eat this way regularly, and the quality bar is high enough that it holds up to repeated use across a multi-day trip.

    Konbini for practical travel needs

    Beyond food, a konbini run often solves an unexpected travel problem in one stop — a forgotten charger cable, a dead phone needing a portable battery, a sudden rain shower needing an umbrella, or simply needing cash from a reliable ATM — making it worth building a mental habit of “check the nearest konbini first” for small trip hiccups.

  • Best Japanese Kitchen Knives for Beginners (and Where to Buy)

    Best Japanese Kitchen Knives for Beginners (and Where to Buy)

    Some links below are affiliate links. If you buy through them, Japan Trove may earn a small commission at no extra cost to you.

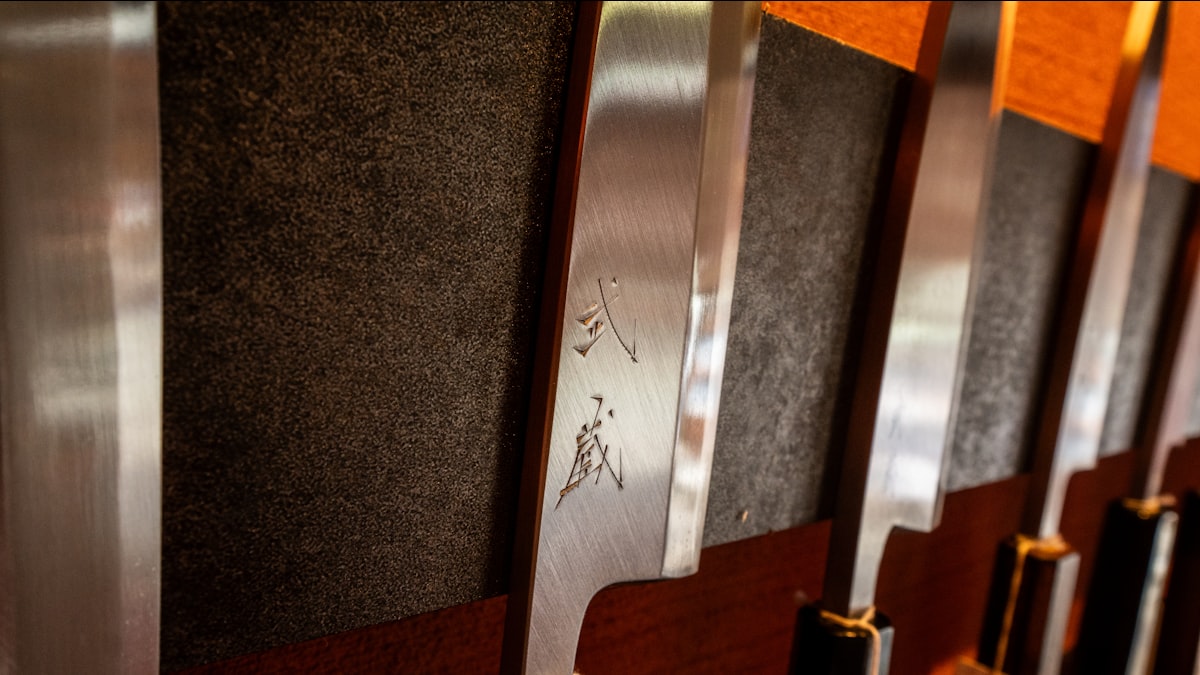
    A Japanese kitchen knife is one of the best things you can bring home — or buy online. They’re prized for razor-sharp edges, light weight, and precision. Here’s a beginner’s guide to the styles worth knowing and how to choose your first one.

    Knife styles to know

    • Santoku — the all-purpose “three virtues” knife; great first choice for meat, fish, and veg.
    • Gyuto — the Japanese take on a Western chef’s knife; longer, versatile.
    • Nakiri — flat blade for vegetables; effortless chopping.
    • Petty — a small utility knife for detail work.
    • Deba / Yanagiba — specialist knives for breaking down and slicing fish (for the more serious).

    Steel & construction (the basics)

    • Stainless — easy care, rust-resistant; best for beginners.
    • Carbon steel — takes a keener edge but needs drying and occasional oiling; it patinas over time.
    • Handle: Western (heavier, bolstered) vs Japanese “wa” (light, wood). Try to hold before buying if you can.

    Choosing your first knife

    For most people: a stainless Santoku or Gyuto around 165–210mm. It covers 90% of home cooking and is forgiving to maintain. Add a Nakiri later if you chop a lot of vegetables.

    Care

    • Hand wash and dry immediately — never the dishwasher.
    • Cut on wood or plastic, not glass or stone.
    • Hone regularly; learn to use a whetstone for sharpening.

    Where to buy

    Reputable knives are available on Amazon (look for established makers) and specialist Japanese knife retailers that ship worldwide. Buying in Japan? Kappabashi in Tokyo and knife shops in Kyoto/Osaka are famous — and you can carry it home in checked luggage. For anything Japan-only, use a proxy service.

    Cooking-curious after your trip? A good knife also makes a memorable present — see our best gifts from Japan.

    What a good knife typically costs

    • A solid entry-level stainless Santoku or Gyuto from a reputable maker runs JPY 8,000-15,000, a genuine step up from mass-market knives without entering premium territory.
    • Mid-range knives with better steel and craftsmanship run JPY 15,000-35,000, often the sweet spot for a serious home cook’s first “real” Japanese knife.
    • Handmade, artisan-forged knives from named smiths can run JPY 40,000-150,000+, priced as much for the maker’s reputation and craftsmanship as for pure cutting performance.

    Common mistakes to avoid

    • Buying carbon steel without understanding the maintenance commitment — carbon steel takes an excellent edge but rusts if left wet even briefly; if you’re not ready to dry and occasionally oil a blade after every use, stainless is the more forgiving, realistic choice.
    • Choosing a knife based on looks alone without holding it — handle shape and knife balance vary significantly between Western and Japanese “wa” handle styles; if you can visit a shop like those in Kappabashi, holding several options before buying makes a real difference to long-term comfort.
    • Skipping a honing rod or whetstone purchase — a great knife dulls without maintenance; budgeting for basic sharpening tools alongside the knife itself is part of the real cost of ownership.

    Bringing a knife home safely

    Kitchen knives must go in checked luggage, never carry-on, and should be wrapped securely (many shops provide a proper blade guard or box) to avoid injury to baggage handlers or damage to the edge — keep the original packaging if possible, since it’s specifically designed for this kind of transport.

    Trying a knife-sharpening class

    Some Kappabashi shops and specialty stores offer short whetstone sharpening demonstrations or beginner classes, sometimes free with a purchase — worth asking about specifically, since learning the correct angle and motion from a demonstration is far more effective than trying to learn from written instructions alone once you’re home.