Japan Trove

Author: JapanTrove Editorial

  • Best Japanese Coffee: What to Drink & Bring Home

    Best Japanese Coffee: What to Drink & Bring Home

    Some links below are affiliate links. If you buy through them, Japan Trove may earn a small commission at no extra cost to you.

    Japan has a deep, quietly world-class coffee culture — from meticulous pour-over cafés to the canned coffee in every vending machine. Here’s what to drink on your trip and what to bring home.

    Japan’s coffee scene

    Alongside tea, Japan has a century-old kissaten (traditional coffee house) tradition and a modern specialty scene rivaling anywhere. Expect careful hand-brewing, siphon coffee, and beautiful cafés built for slowing down.

    What to try in Japan

    • Pour-over / hand drip at a specialty café — precise and delicious.
    • Siphon coffee at an old-school kissaten, often with fluffy “morning set” toast.
    • Canned coffee from vending machines (hot or cold) — BOSS, Georgia, and more; a fun, cheap ritual.
    • Convenience-store coffee — surprisingly good and very cheap; see konbini must-buys.

    What to buy & bring home

    • Drip-bag coffee — single-serve pour-over sachets; light, easy, and a great gift.
    • Beans from a specialty roaster — ask for whole beans and a recent roast date.
    • Japanese brewing gear — Hario V60 drippers, gooseneck kettles, and glassware are made here and prized worldwide.

    Where to buy

    Hario and other Japanese coffee gear (and drip-bag coffee) are widely available on Amazon . In Japan, department-store food halls, Loft, and specialty roasters are your best bets. A Hario dripper plus drip-bags makes a lovely gift from Japan.

    Prefer leaves to beans? Don’t miss our Japanese green tea guide.

    What things typically cost

    • A pour-over at a specialty cafe runs JPY 600-1,200, while a full kissaten “morning set” (coffee plus toast and egg) runs JPY 500-900 and is usually only available before 11am, a genuinely good-value tradition worth timing your morning around.
    • Canned and bottled vending machine coffee runs JPY 120-160, some of the best-value hot drinks available anywhere in Japan on a cold day.
    • Drip-bag coffee gift sets run JPY 1,000-3,000 for 8-12 sachets, a genuinely practical and lightweight souvenir that survives packing far better than whole bean bags.

    Common mistakes to avoid

    • Buying whole beans without asking about roast date — specialty roasters in Japan take freshness seriously; asking specifically for a recent roast (within 1-2 weeks) makes a real difference if you’re bringing beans home for later brewing.
    • Skipping kissaten because they look old-fashioned from outside — some of the best siphon and hand-drip coffee in the country comes from decades-old kissaten that haven’t changed their approach in 40+ years, and the atmosphere is part of the appeal.
    • Assuming all Japanese coffee gear is expensive — Hario’s entry-level V60 dripper and basic gooseneck kettles are genuinely affordable (often under JPY 3,000) and make a practical, not-just-decorative souvenir.

    Building a home brewing setup from Japan

    A V60 dripper, a simple gooseneck kettle, a scale, and a bag of drip-bag coffee together make a complete, gift-worthy home brewing starter kit that fits easily in a suitcase — a more thoughtful souvenir for a coffee-loving friend than a generic bag of beans alone.

    Combining coffee shopping with a wider tour

    Loft, department store food halls, and independent roasters are often clustered near major shopping districts, so a coffee-focused stop pairs easily with a wider shopping day in Ginza or similar districts rather than requiring a separate dedicated trip.

  • Where to Buy Pokemon Merch in Japan (and From Abroad)

    Where to Buy Pokemon Merch in Japan (and From Abroad)

    Some links below are affiliate links. If you buy through them, Japan Trove may earn a small commission at no extra cost to you.

    Japan is the home of Pokémon, and the merch here is on another level — exclusives, seasonal drops, and whole stores dedicated to it. Whether you’re shopping in Japan or from abroad, here’s where to find the good stuff.

    Pokémon Centers & Stores (in Japan)

    Official Pokémon Centers are the flagship destinations — plushes, cards, apparel, and location-exclusive items. Major ones include Tokyo (several, plus the Pokémon Café), Osaka, Kyoto, and more. The smaller Pokémon Stores appear in malls and stations. Expect region- and store-exclusive designs.

    Beyond the official stores

    • Yodobashi & Bic Camera — big toy and card sections.
    • Don Quijote — random finds and gifts.
    • Akihabara & Nakano Broadway — vintage cards and collectibles; see our Tokyo guide.
    • Card shops for singles and sealed TCG products.

    A note on trading cards

    Japanese Pokémon cards are hugely popular for their art and value. Buy sealed product from reputable shops, be wary of too-good-to-be-true “rare” deals, and check your country’s import rules if buying in bulk.

    Buying from abroad

    Can’t get to Japan? You have options:

    Great with kids

    A Pokémon Center visit is a highlight for younger travelers — see Japan with kids. And a plush or card set makes an easy gift from Japan.

    What things typically cost

    • Standard plush toys run JPY 1,500-3,500, while location-exclusive plush designs (specific to a single Pokémon Center) can command resale premiums once that store’s exclusive run sells out.
    • Sealed trading card booster packs run JPY 200-800 depending on the set, with special/premium box sets running JPY 3,000-15,000 — prices for older, discontinued sets can run far higher on the secondary market.
    • A Pokémon Cafe experience (themed food and drink, not just merchandise) runs JPY 2,000-4,000 per person for a meal, and requires advance reservation since walk-in availability is limited.

    Common mistakes to avoid

    • Buying “rare” loose cards from unofficial street vendors — reputable card shops and official stores are safer bets; overpriced or counterfeit cards are a genuine risk with informal sellers targeting tourists specifically.
    • Assuming every Pokémon Center has the same exclusive merchandise — each flagship location runs its own region-specific exclusive items, so visiting only one store (even a large one) means missing designs unique to other cities.
    • Not checking your home country’s import rules for bulk card purchases — some countries apply duty thresholds that a large TCG haul can trigger, worth checking before buying in serious volume.

    Timing a visit around new releases

    Pokemon Centers regularly rotate seasonal and collaboration merchandise, and popular new releases can sell out within days — if there’s a specific item you’re after, checking Japanese social media or the official site shortly before your trip helps confirm it’s still in stock before you build a shopping stop around it.

    Visiting with kids in mind

    Pokemon Centers are genuinely designed with young fans in mind, with interactive photo spots and hands-on displays alongside the merchandise — worth budgeting real time here rather than treating it as a quick five-minute stop if traveling with children who are Pokemon fans.

  • Best Japanese Beauty Tools Worth Buying

    Best Japanese Beauty Tools Worth Buying

    Some links below are affiliate links. If you buy through them, Japan Trove may earn a small commission at no extra cost to you.

    Japan is quietly brilliant at beauty tools — the little precision items that make a routine easier. They’re affordable, well-made, and pack flat, making them great souvenirs and gifts. Here’s what’s worth buying.

    Skincare & face

    • Facial razors (kamisori) — Feather and others; gentle dermaplaning for smooth skin and better product absorption.
    • Konjac sponges — soft, natural sponges for gentle daily cleansing.
    • Facial rollers & gua sha — for a relaxing massage (pair with your J-beauty routine).
    • Pore/blackhead tools and quality tweezers — Japanese precision shines here.

    Hair & body

    • Wide-tooth combs and cushion brushes — well-finished and gentle.
    • Body towels (awa/exfoliating cloths) — the long nylon towels that make a great lather.
    • Foot files & heel care — genuinely useful after long temple-walking days.

    Nails & grooming

    • Nail clippers — Japanese clippers (like GREEN BELL/Suwada-style) are famously sharp and precise; a cult buy.
    • Grooming scissors and files — small, durable, and beautifully made.

    Where to buy

    Find these at Japanese drugstores, Loft, and Tokyu Hands in Japan, or online abroad via YesStyle and Amazon . A nice nail clipper or facial razor set makes a smart, affordable gift from Japan.

    Round out your beauty haul with the best Japanese sunscreens and cult skincare picks.

    What things typically cost

    • Facial razors and konjac sponges run JPY 300-1,000 each, cheap enough to buy several as small gifts for different people without much budget impact.
    • Quality nail clippers (GREEN BELL, Suwada-style) run JPY 800-3,000 depending on the precision grade — genuinely sharper and longer-lasting than typical drugstore clippers elsewhere, and a popular repeat-purchase item for return visitors.
    • Facial rollers and gua sha tools run JPY 1,000-4,000, with jade or higher-end stone versions at the top of that range; basic plastic or metal rollers work nearly as well for most casual users.

    Common mistakes to avoid

    • Buying a facial razor without checking blade replacement availability at home — some Japanese razor brands sell replacement blades that aren’t easily found overseas; check whether your home country stocks refills or whether you’ll need to reorder from Japan.
    • Assuming all beauty tools are one-size-fits-all — foot files and combs in particular come in different grit or tooth-spacing options for different skin and hair types; ask staff for a recommendation rather than grabbing the first one you see.
    • Overlooking these as gift options because they seem mundane — a well-chosen beauty tool is genuinely one of the most-used, longest-lasting souvenirs a recipient will own, quietly outlasting most snack or trinket gifts.

    Building a complete beauty tool gift set

    Pairing a facial razor, a konjac sponge, and a pair of precision tweezers together in a small pouch (a furoshiki cloth works well) makes a cohesive, genuinely useful gift set that costs relatively little but reads as thoughtfully curated rather than a single random item.

    Where to find the best selection

    Drugstore chains carry the everyday essentials at the lowest prices, while Loft and Tokyu Hands stock a wider, more curated range including higher-end and novelty tools not found at a typical pharmacy — worth checking both if you have a specific tool in mind rather than assuming one store type covers everything.

  • Nara Day Trip: Deer, the Great Buddha & How to Visit

    Nara Day Trip: Deer, the Great Buddha & How to Visit

    Some links below are affiliate links. If you book through them, Japan Trove may earn a small commission at no extra cost to you.

    Nara was Japan’s first permanent capital, and it packs a giant bronze Buddha, ancient temples, and a park full of famously polite (and cheeky) deer into an easy day trip from Kyoto or Osaka. Here’s how to do it.

    Getting there

    Nara is about 45 minutes from Kyoto or Osaka by train. The Kintetsu line drops you closest to the park; JR works too and may be covered by a regional pass. It’s an easy half- or full-day.

    The deer of Nara Park

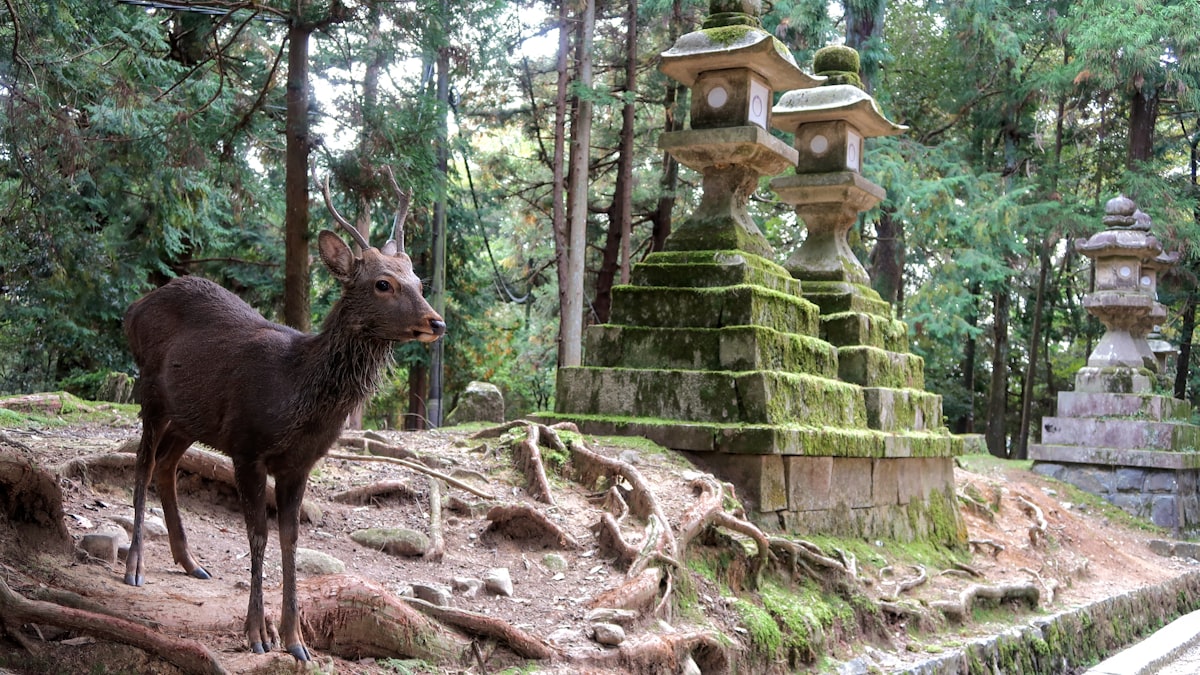
    Hundreds of free-roaming deer are the star attraction. You can buy shika senbei (deer crackers) to feed them — and yes, many will bow for a cracker. Tips:

    • Keep crackers hidden until you’re ready; the deer are bold and will nudge you.
    • They’re wild animals — gentle is best, and watch small children.
    • Feed and move on; don’t tease them with food you won’t give.

    Don’t miss

    • Todai-ji — a colossal wooden temple housing the Great Buddha (Daibutsu). Genuinely awe-inspiring.
    • Kasuga Taisha — a shrine famous for thousands of bronze and stone lanterns.
    • Isuien Garden — a serene stroll garden if you want a quiet break.

    How much time?

    Half a day covers the deer and Todai-ji; a full day lets you add the shrine and gardens at a relaxed pace. Most sights are walkable from the park.

    Fit it into your trip

    Nara pairs perfectly with a Kansai base — see where to stay in Kyoto or our Osaka guide. Great with kids, too — see Japan with kids. Book a guided Nara tour in English on Klook if you’d rather not plan the logistics.

    Slot it into the wider 7-day itinerary.

    What things cost

    • Todai-ji entry runs JPY 600, and Kasuga Taisha’s main shrine grounds are free (the inner sanctuary and lantern-lit hall of the Mantoro festival cost extra on special occasions).
    • Deer crackers (shika senbei) cost about JPY 200 per bundle from the many stalls around the park — a small, worthwhile cost most visitors budget for multiple times over a visit.
    • Isuien Garden’s modest entry fee (around JPY 900) buys a genuinely quiet contrast to the busier deer park and temple areas nearby.

    Common mistakes to avoid

    • Waving a cracker at a deer without intending to give it — this is one of the most common ways visitors get head-butted or nudged; once a deer sees the cracker, commit to feeding it or hide it away completely.
    • Visiting Todai-ji at midday on a weekend — like most famous single sights, an early arrival avoids both the worst crowds and the peak heat if visiting in summer.
    • Assuming all the deer are equally docile — most are gentle, but mating season (autumn) and areas with newborn fawns (spring) can see more defensive behavior; keep a respectful distance regardless of season.

    Nara as more than a quick stop

    While many visitors treat Nara as a rushed half-day squeeze between Kyoto and Osaka, a full day lets you add Kasuga Taisha’s forest approach and Isuien Garden’s quiet paths to the more famous deer-and-Buddha combination, giving a genuinely fuller sense of the city beyond its most photographed moment.

    A rainy-day version of Nara

    Nara’s deer park and temple approaches are pleasant even in light rain, and Todai-ji’s main hall itself offers substantial covered space to shelter and take in the Great Buddha without rushing — a genuinely workable rainy-day plan rather than one that needs a full reschedule.

  • Japan with Kids: A Family Travel Guide

    Japan with Kids: A Family Travel Guide

    Some links below are affiliate links. If you book through them, Japan Trove may earn a small commission at no extra cost to you.

    Japan is one of the easiest and most rewarding countries to visit with kids: safe, clean, endlessly novel, and full of things children love. Here’s how to plan a family trip that works for everyone.

    Why Japan is great for families

    • Safety and cleanliness are exceptional; kids can have a lot of freedom.
    • Trains are a highlight in themselves — the Shinkansen thrills most kids.
    • Convenience stores and vending machines mean snacks and drinks are always close.
    • Novelty everywhere — from robot cafés to character shops.

    Kid-friendly highlights

    • Tokyo: teamLab digital art, Ueno Zoo, character stores in Harajuku, and the Ghibli Museum (book far ahead).
    • Osaka: Universal Studios Japan, the Aquarium (Kaiyukan), and easygoing street food in Dotonbori.
    • Nara: the friendly bowing deer are a guaranteed hit — see our Nara day trip.
    • Anywhere: Pokémon Centers and Nintendo/character shops — see where to buy Pokémon merch.

    Practical tips

    • Pack light and use luggage forwarding (takkyubin) between hotels — much easier with kids.
    • Family rooms and rooms for 3–4 fill up fast; book early via Booking.com .
    • Strollers: stations have elevators but they can be a hunt; a compact stroller or carrier helps.
    • Baby supplies — diapers, formula, and food are easy to buy at drugstores and konbini.
    • Slow down. Fewer stops, more time; build in park and playground breaks.

    Getting around

    Kids often ride trains cheaply or free depending on age. Grab an IC card each for easy tapping, and check the JR Pass math for your route. Then build your days with the 7-day itinerary.

    What a family trip costs

    • Kids under a certain age (typically 6 and under) ride most trains free, and elementary-age children usually pay half fare — a genuine cost saving that adds up on a multi-city itinerary with several long train legs.
    • Family-sized hotel rooms run JPY 15,000-30,000/night in mid-range hotels, though many standard Japanese hotel rooms are compact enough that families of 4+ need to specifically confirm room capacity rather than assume a “family room” fits everyone comfortably.
    • Kid-focused attractions (teamLab, aquariums, Pokemon Centers) run JPY 1,500-4,000 per child, generally reasonable compared to similar attractions in other major tourist destinations.

    Common mistakes to avoid

    • Overpacking the daily schedule — this is the single most common family-trip mistake; children tire faster than adults expect, and building in park time, hotel downtime, or an early dinner prevents meltdowns that derail an otherwise good day.
    • Not researching stroller-friendly routes in advance — while most major stations have elevators, they’re not always the most obvious route from the ticket gate; asking station staff for the accessible route saves real frustration with a stroller in tow.
    • Assuming all restaurants welcome young children — some smaller counter-style restaurants (particularly high-end sushi or ramen counters) aren’t well suited to kids; family restaurants (like Gusto or Saizeriya) and casual chain restaurants are safer, kid-friendly defaults.

    Building in downtime kids actually need

    Japan has excellent, well-maintained playgrounds and parks in nearly every neighborhood, and building in even 30-45 minutes of unstructured park time between sightseeing stops does more for a family trip’s overall mood than any single attraction — a detail easy to overlook when planning around famous sights alone.

    Handling picky eaters

    Konbini and depachika food halls are a genuine lifesaver for families with picky eaters, offering familiar-looking options (plain rice balls, simple noodle dishes, fruit) alongside more adventurous choices — a practical backup that removes the pressure of every meal being a new food experience for a reluctant child.

  • Japanese Phrases for Travelers: The Ones Worth Knowing

    Japanese Phrases for Travelers: The Ones Worth Knowing

    You don’t need to speak Japanese to travel Japan — English signage and translation apps cover a lot. But a handful of phrases go a long way and are genuinely appreciated. Here are the ones actually worth memorizing.

    The essentials

    • Arigatou gozaimasu — thank you (polite). The single most useful phrase.
    • Sumimasen — excuse me / sorry / thank you (to get attention or apologize). Incredibly versatile.
    • Konnichiwa — hello (daytime).
    • Onegaishimasu — please (when requesting something).
    • Hai / Iie — yes / no.

    Eating out

    • Kore o kudasai — “this one, please” (point at the menu).
    • Oishii! — delicious!
    • Okaikei onegaishimasu — the bill, please.
    • Gochisousama deshita — “thank you for the meal” (as you leave).
    • Vegetarian desu / ___ arerugī desu — “I’m vegetarian” / “I’m allergic to ___”.

    Getting around & shopping

    • ___ wa doko desu ka? — “where is ___?”
    • Ikura desu ka? — “how much is it?”
    • Eigo o hanasemasu ka? — “do you speak English?”
    • Daijoubu desu — “it’s fine / no thanks / I’m okay.” Very handy.

    Pronunciation tips

    Japanese is pronounced consistently: vowels are a (ah), i (ee), u (oo), e (eh), o (oh). Keep it flat and even — no strong stress. Even a rough attempt is warmly received.

    Tech that helps

    Download a translation app with camera mode for menus and signs, and set up an eSIM so it works everywhere. For the cultural side of communicating politely, see our etiquette guide.

    Ready to plan? Start with our first-timer tips and 7-day itinerary.

    Phrases for specific situations

    • At a ryokan or onsen: “Sumimasen, taoru wa arimasu ka?” — “Excuse me, do you have a towel?” — useful shorthand for asking staff about any missing item using the same simple pattern.
    • At a train station: “Kono densha wa ___ ni ikimasu ka?” — “Does this train go to ___?” — a quick way to confirm you’re boarding correctly before the doors close.
    • Shopping: “Kore, chiisai/ookii saizu arimasu ka?” — “Do you have this in a smaller/bigger size?” — handy for clothing shops where sizing runs differently than expected.

    Common mistakes to avoid

    • Over-relying on formal textbook phrasing — real interactions move faster than a phrasebook; single words like “sumimasen” plus pointing usually communicate intent just as well as a full grammatically perfect sentence.
    • Assuming louder or slower English helps — speaking clearly at normal volume, paired with a translation app for anything complex, generally works better than repeating English more forcefully.
    • Skipping numbers — learning to count to 10 in Japanese (ichi, ni, san…) helps with everything from ordering quantities to understanding prices read aloud, and is a quick, useful addition to a basic phrase list.

    Using translation apps effectively

    Camera-mode translation (pointing your phone at a menu or sign) works remarkably well for printed Japanese text, but voice translation for live conversation can struggle with fast or accented speech — typing into a translation app rather than relying on voice recognition often produces a cleaner, more accurate result in a noisy restaurant or station.

    Phrases that build goodwill, not just function

    Beyond purely functional phrases, small courtesy expressions — “osaki ni shitsurei shimasu” when leaving a room before others, or a simple “otsukaresama desu” to acknowledge someone’s effort — aren’t strictly necessary for a tourist to know, but locals notice and appreciate them enough that even one used correctly can visibly improve an interaction.

  • Best Japanese Instant Ramen: Flavors to Try & Where to Buy

    Best Japanese Instant Ramen: Flavors to Try & Where to Buy

    Some links below are affiliate links. If you buy through them, Japan Trove may earn a small commission at no extra cost to you.

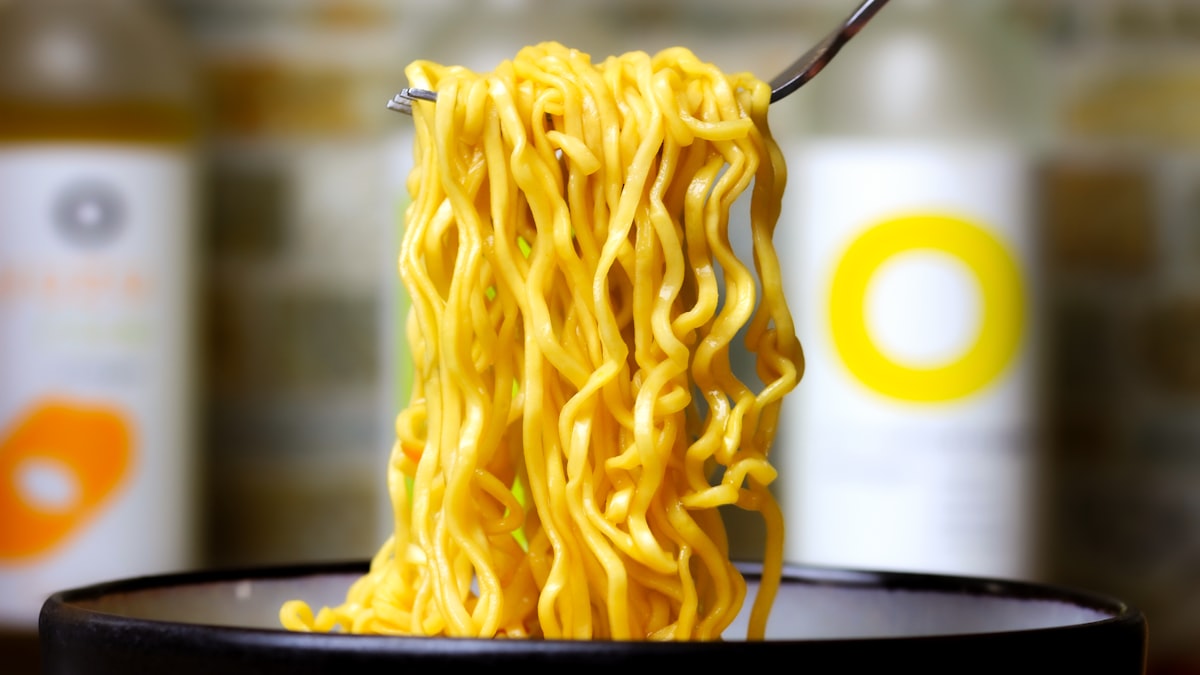
    Instant ramen was invented in Japan, and the local versions are a world apart from what most people grew up with. They make cheap, fun souvenirs and a great way to taste regional flavors at home. Here’s what to look for and where to buy.

    Cup vs bag — and the tiers

    • Cup noodles — convenient; just add hot water. Great for trying lots of flavors.
    • Bag noodles — cook on the stove; usually better texture.
    • Premium “raw-style” (nama) — fresh-style noodles and richer soup packets; the closest to a real ramen shop.

    Flavors & brands to try

    • Nissin — the original Cup Noodle and Raoh (premium).
    • Ichiran & Ippudo — famous tonkotsu chains sell instant versions of their bowls.
    • Regional ramen — Sapporo miso, Hakata tonkotsu, shoyu, and spicy tantanmen.
    • Yakisoba — the stir-fried noodle cups (Ippei-chan, UFO) are a must.

    Make it better

    Upgrade a pack with a soft-boiled egg, sliced pork, corn, spring onion, or a knob of butter (Sapporo-style). Even the cheapest cup shines with a fresh topping.

    Where to buy

    • In Japan: supermarkets, konbini (see our konbini must-buys), and Don Quijote for the widest range and multipacks.
    • From abroad: variety packs on Amazon , or specific Japan-only flavors via a proxy service.
    • Snack boxes sometimes include ramen too — see the best snack boxes.

    Fun fact for your trip: Osaka has a Cup Noodles Museum where you can design your own — a great stop on our Osaka guide.

    What things typically cost

    • Standard cup noodles run JPY 150-250, while premium “raw-style” (nama) cups from Nissin’s Raoh line or chain-branded versions (Ichiran, Ippudo) run JPY 300-500, genuinely closer to real ramen shop quality.
    • Bag noodles for stovetop cooking run JPY 100-200, often cheaper per serving than cups but requiring a pot and a few extra minutes.
    • A well-stocked variety box of 10-15 different cups and bags runs JPY 2,000-3,500, an efficient way to sample many regional flavors without committing to a full case of any single one.

    Common mistakes to avoid

    • Not checking the water-fill line inside the cup — overfilling or underfilling changes the broth balance significantly; most cups have a clearly marked internal fill line that’s easy to miss on a first attempt.
    • Assuming premium and standard cups cook the same way — some raw-style premium cups need longer soak times (5+ minutes versus 3) to properly hydrate the thicker noodles; check the specific instructions rather than assuming a universal timing.
    • Packing cups instead of bags when weight matters — cup noodles include the bulky cup itself, while bag noodles pack flat and are lighter for a return flight if you’re bringing home a large haul.

    Building a tasting flight at home

    Buying one cup each of Sapporo miso, Hakata tonkotsu, Tokyo shoyu, and a shio variety recreates a rough tour of Japan’s major regional ramen styles in a single sitting — a fun, cheap way to revisit a trip’s food highlights or introduce friends back home to the range instant ramen can actually offer.

    Visiting the Cup Noodles Museum

    Beyond shopping for instant ramen, the Osaka museum (and a similar one in Yokohama) lets visitors design and package their own custom cup noodle flavor combination as a hands-on souvenir — a fun activity for both kids and adults that turns a grocery-aisle product into an actual attraction worth building into an itinerary.

  • Uniqlo vs Muji: What’s Actually Worth Buying in Japan

    Uniqlo vs Muji: What’s Actually Worth Buying in Japan

    Some links below are affiliate links. If you buy through them, Japan Trove may earn a small commission at no extra cost to you.

    Uniqlo and Muji are two of Japan’s most beloved exports, and both are cheaper and more complete in Japan than abroad. But they’re not the same — here’s what each does best and what’s actually worth buying on your trip.

    The quick difference

    • Uniqlo — affordable, high-quality basics and clever performance fabrics. Think wardrobe staples.
    • Muji — minimalist lifestyle: homeware, stationery, storage, snacks, skincare, and simple clothing.

    What to buy at Uniqlo

    • Heattech base layers — perfect for a winter trip and packing light.
    • AIRism for hot, humid summers.
    • Ultra Light Down — packs into a pouch; a traveler’s favorite.
    • UT graphic tees — Japan-exclusive anime and art collabs make great souvenirs.

    What to buy at Muji

    • Stationery & pens — simple and excellent; see our stationery guide.
    • Travel organizers & toiletry bottles — genuinely useful.
    • Snacks — the baumkuchen and rice crackers are cult favorites.
    • Skincare & aroma — affordable, fragrance-free basics and essential-oil diffusers.

    Why buy in Japan?

    Both chains are larger, cheaper, and better-stocked in Japan, with Japan-only items and tax-free shopping for tourists (bring your passport). Flagship stores (like Ginza) are worth a visit in their own right.

    Can’t get to Japan?

    Both ship in many countries, and you’ll find some items on Amazon . For Japan-only pieces, a proxy service works well. Pair your haul with picks from our best gifts from Japan.

    What things typically cost

    • Uniqlo basics run JPY 990-4,990, with Heattech and AIRism lines at the lower end of that range and Ultra Light Down jackets at the higher end — both categories are genuinely cheaper in Japan than most overseas Uniqlo branches.
    • Muji clothing and homeware run JPY 500-5,000 depending on category, with stationery and small storage items at the affordable end and clothing basics in the middle.
    • UT graphic tees (Uniqlo’s collaboration line) run JPY 1,500-2,500 and frequently feature Japan-exclusive anime, art, or franchise collaborations not sold in the same form overseas.

    Common mistakes to avoid

    • Assuming both brands overlap more than they do — Uniqlo is almost entirely clothing-focused while Muji covers a much broader lifestyle range; deciding which category (wardrobe vs. home/travel goods) you actually need saves time picking the right store first.
    • Skipping flagship stores for a specific limited item — UT collaboration designs and certain Muji seasonal goods are sometimes flagship-exclusive or sell out faster at smaller branches; a large store like Ginza’s often has better stock depth.
    • Not checking sizing before buying multiple pieces — both brands run closer to Japanese/Asian sizing standards, which can differ from Western size charts; trying one piece on first before buying several in the same size is worth the extra few minutes.

    Which to prioritize with limited time

    If you only have time for one store, choose based on your actual need: Uniqlo for wardrobe basics and travel-specific fabric technology (Heattech, AIRism), or Muji if you want lightweight travel goods, stationery, and snacks alongside simple clothing — most travelers find they genuinely want something from both rather than one covering all needs.

    Using Uniqlo pieces to pack lighter

    Heattech and AIRism layers specifically let you pack fewer, thinner items and rely on layering rather than bulky sweaters or jackets — a genuinely practical strategy for travelers trying to fit a multi-season Japan trip into a single carry-on, buying the appropriate layer locally rather than hauling heavier gear from home.

  • Best Japanese Whisky for Beginners (Bottles & Where to Buy)

    Best Japanese Whisky for Beginners (Bottles & Where to Buy)

    Some links below are affiliate links. If you buy through them, Japan Trove may earn a small commission at no extra cost to you. Please drink responsibly and follow the laws where you live.

    Japanese whisky has gone from niche to world-famous, winning top international awards — which also means the best bottles are scarce and pricey. Here’s a beginner’s guide to the styles, the big names, and how to buy without overpaying.

    Why Japanese whisky is special

    Modeled on Scotch but with a distinctly precise, balanced house style, Japanese whisky is prized for smoothness and delicate complexity. Demand has outstripped supply, so age-statement bottles from the famous distilleries can be very expensive.

    The major producers

    • Suntory — Yamazaki, Hakushu (single malts), and Hibiki (blends). The benchmark names.
    • Nikka — Yoichi and Miyagikyo single malts, plus the excellent-value “Nikka From The Barrel” blend.
    • Smaller distilleries — Chichibu (Ichiro’s Malt) and others, highly sought by collectors.

    Good bottles to start with (without remortgaging)

    • Nikka From The Barrel — punchy, complex, famously good value.
    • Suntory Toki or Hibiki Japanese Harmony — approachable blends, great in a highball.
    • Nikka Days — light and easy for newcomers.

    Watch out: some “Japanese” whisky is blended with imported spirit. Newer labeling standards are tightening this, but check the producer if provenance matters to you.

    How to enjoy it

    The Japanese highball (whisky + soda, lots of ice) is the national serve — crisp and food-friendly. Otherwise, neat or with a little water to open it up.

    Where to buy

    Reputable retailers and larger online stores stock the accessible bottles; be wary of wildly marked-up “rare” listings. Buying in Japan? Department stores, Bic Camera, and Don Quijote often have good prices — a bottle makes a memorable gift from Japan (mind duty-free allowances when flying home).

    Not a whisky person? Japan’s green teas travel just as well.

    What Japanese whisky typically costs

    • Accessible blends like Suntory Toki and Nikka From The Barrel run JPY 2,500-4,000, genuinely good value and widely available even at department stores and Don Quijote.
    • Age-statement single malts (Yamazaki 12, Hakushu 12) run JPY 15,000-30,000+ when you can find them at retail price — demand has pushed many onto allocation or lottery-style sales systems at Japanese retailers, making them harder to simply buy off a shelf.
    • Rare and discontinued bottlings from Karuizawa or older Hanyu releases can run into the hundreds of thousands of yen at auction, firmly collector territory rather than casual buying.

    Common mistakes to avoid

    • Assuming any Japanese-labeled bottle is genuinely Japanese-distilled — newer labeling standards have tightened this, but older or export-market bottles sometimes blend in imported Scotch or Canadian whisky; check the producer’s own disclosure if authenticity matters to you specifically.
    • Overpaying for “rare” bottles from unofficial resellers — flagship distillery age-statement releases are genuinely scarce, and inflated resale prices are common; reputable department store liquor floors and Bic Camera are safer, fair-priced options than street vendors or unfamiliar online sellers.
    • Forgetting duty-free liquor allowances when flying home — most countries cap how much alcohol you can bring in without declaring it; check your destination’s specific limit before buying multiple bottles.

    Trying before you commit to a bottle

    Whisky bars in Tokyo and Osaka often stock an extensive range of pours by the glass, letting you taste several distilleries’ styles for a fraction of a full bottle’s cost before deciding what to bring home — a smarter approach than buying a bottle sight-unseen based on reputation alone.

    Highball culture beyond the bottle

    Many Japanese restaurants and izakaya serve a whisky highball as a default drink option alongside beer, often at a lower price point than a dedicated whisky bar — trying it this casual, everyday way during your trip gives a more authentic sense of how the drink fits into daily life than a formal tasting alone.

  • Money in Japan: Cash, Cards, ATMs & Budgeting for Tourists

    Money in Japan: Cash, Cards, ATMs & Budgeting for Tourists

    Some links below are affiliate links. If you buy through them, Japan Trove may earn a small commission at no extra cost to you.

    Japan used to be famously cash-only. It’s modernized fast, but there are still quirks worth knowing so you’re never caught out. Here’s how money works for visitors — cash, cards, IC cards, and budgeting.

    Cash vs cards in 2026

    Cards and mobile payments now work at most hotels, chains, department stores, and convenience stores. But you’ll still hit cash-only spots: small restaurants, older shops, shrines and temples, some markets, and rural areas. Always carry some yen.

    Getting cash

    • 7-Eleven and Japan Post ATMs reliably accept foreign cards, 24/7, with English menus. They’re everywhere.
    • Bank ATMs can be pickier and keep limited hours; stick with konbini ATMs.
    • Withdraw as you go rather than carrying lots of cash from home.

    IC cards & mobile payments

    Load a Suica or Pasmo for trains and quick konbini purchases — you can even add one to your phone. Apple Pay and Google Pay work in many places, but don’t rely on them alone.

    Tax-free shopping

    Tourists can shop tax-free above a spend threshold at participating stores — bring your passport. It’s a real saving on electronics, cosmetics, and gifts. See our drugstore and gift guides for what to buy.

    Tipping & etiquette

    No tipping — service is included and tips can cause confusion. Hand money over on the small tray at the register rather than into the cashier’s hand.

    Rough daily budget

    • Budget: hostels, konbini and cheap eats, lots of walking — very doable.
    • Mid-range: business hotels, restaurant meals, the odd taxi and paid attraction.
    • Splurge: ryokan with kaiseki, fine dining, private tours.

    Trains are often the biggest single cost — run the numbers in our JR Pass guide, and don’t forget an eSIM. New here? Start with first-timer tips.

    Realistic daily cash needs

    • Carrying JPY 5,000-10,000 in cash covers most cash-only situations (small restaurants, temple entry fees, rural shops) for a typical day without needing a mid-day ATM run.
    • Konbini ATMs (7-Eleven especially) reliably accept foreign cards with a modest flat withdrawal fee, usually cheaper overall than exchanging large sums of cash at an airport counter before you leave home.
    • IC cards typically require a minimum top-up of JPY 1,000-3,000 at a time via station machines, so topping up periodically as you go is simpler than trying to load a large amount upfront.

    Common mistakes to avoid

    • Relying only on mobile payment apps — while increasingly common in cities, many smaller shops, temples, and rural spots still don’t accept Apple Pay or Google Pay; cash remains the reliable fallback everywhere.
    • Trying a random bank ATM assuming it accepts foreign cards — many Japanese bank-branded ATMs restrict foreign card use or keep limited hours; sticking to konbini and post office ATMs avoids this entirely.
    • Handing cash directly into a cashier’s hand — most registers have a small tray specifically for this; placing money there rather than hand-to-hand is the expected, polite norm.

    Currency exchange strategy

    Exchanging a small amount of cash before departure (enough for the first day or two) and then relying on konbini ATM withdrawals for the rest of the trip generally beats either extreme — exchanging a huge sum upfront at a poor rate, or arriving with no cash at all and hoping every stop takes cards.

    Setting a daily cash routine

    A simple habit — checking your cash total each morning before heading out and topping up at a konbini ATM if you’re running low — avoids the awkward situation of reaching a cash-only restaurant or shrine with an empty wallet late in the day, which is a genuinely common first-timer experience.