Japan Trove

Author: JapanTrove Editorial

  • Wa-Rousoku: Japan’s Traditional Handmade Candles and Where to Buy Them

    Wa-Rousoku: Japan’s Traditional Handmade Candles and Where to Buy Them

    Photo by LEONG YEE FOON on Unsplash

    Walk past a butsudan (Buddhist home altar) in Japan and you might notice the flame looks different — taller, teardrop-shaped, and flickering with a warmth that an ordinary paraffin candle doesn’t produce. That’s wa-rousoku (和蝋燭), Japan’s traditional handmade candle, made from plant wax instead of petroleum and built around a hollow paper-and-rush wick. They’re increasingly rare, mostly hand-dipped by a handful of family workshops, and make one of the more distinctive souvenirs you can bring home from a Japan trip. Here’s what they actually are and where you can watch them being made and buy them yourself.

    What Makes Wa-Rousoku Different From an Ordinary Candle

    Western candles are usually paraffin or beeswax with a braided cotton wick. Wa-rousoku are made from mokuro (木蝋), wax pressed from the berries of the sumac/wax tree (haze), hand-layered in repeated dipping or hand-pressing stages around a wick called a toshin — a rolled tube of washi paper wrapped around dried rush pith (igusa), the same plant used in tatami mats. Because the wick is hollow, it draws air up through the center, producing a larger, brighter, steadier flame that doesn’t easily gutter in drafts — part of why they’ve long been used in temples, tea ceremonies, Noh theater, and Buddhist altars rather than for everyday mood lighting. The wax also burns with less dripping soot residue than you’d expect, though it does drip wax (traditionally caught in a brass tray, not a surprise once you know to expect it).

    Plain, undecorated candles for altar use are the everyday product. The ones that catch travelers’ eyes, though, are e-rosoku (絵蝋燭) — candles hand-painted with seasonal flowers: peony, camellia, plum blossom. These painted candles became popular in snowy regions like Aizu and Yamagata centuries ago, when fresh flowers for altars weren’t available in winter, so people painted them onto candles instead.

    Kyoto: Nakamura Rosoku, a Meiji-Era Shop by Nishi Hongwanji

    The most accessible place for visitors to see wa-rousoku made and sold is Nakamura Rosoku, a small shop in Shimogyo-ku operating since 1887, a short walk from Nishi Hongwanji temple and about 10–15 minutes on foot from Kyoto Station. The shop is tiny and unassuming from outside — easy to walk past — but inside you’ll find shelves of candles ranging from plain altar sizes to elaborately hand-painted e-rosoku. Staff can explain (some English is available) how the dipping process builds up layers of wax by hand, which is why each candle is slightly irregular compared to a machine-molded one.

    Plan for weekday opening hours roughly 9:00–18:00, and note that many of these small family-run craft shops close on Sundays and national holidays, so check ahead or go on a weekday if your schedule allows — it’s a quick add-on to a Kyoto Station day rather than a destination requiring a whole afternoon. If you’re combining Kyoto with Osaka or Shikoku by rail, the reserved vs non-reserved Shinkansen seating guide is worth a look when you’re planning connections.

    Uchiko: Ehime’s Preserved Wax Merchant Town

    If you’re heading to Shikoku, Uchiko in Ehime Prefecture is the deeper dive. This small town grew wealthy in the Edo and Meiji periods on wax production, and its preserved merchant street, Yokaichi-Gokokuji, still has the whitewashed warehouse facades of that era. The Kamihaga Residence, a former wax merchant’s house turned museum (entry around ¥500), explains the historical wax trade with original tools and buildings. A short walk away, Taisei Candle Shop (Omori Wa-Rosoku) still hand-dips candles using methods largely unchanged for generations, and you can watch the process and buy directly from the workshop — plain candles start at a few hundred yen each.

    Uchiko is reached via JR to Uchiko Station (on the Yosan Line, roughly 25–40 minutes from Matsuyama depending on the train), then about a 20-minute walk to the old town, or a short taxi ride if you’d rather not walk in summer heat — see the taxi fares and etiquette guide if you haven’t used one in Japan before. Give yourself at least half a day here; it’s a quiet, uncrowded town, which is part of the appeal.

    How Much to Spend: Budget, Mid-Range, and Splurge

    Plain, unpainted votive-style wa-rousoku for everyday use run roughly ¥300–800 per candle, or ¥1,000–2,000 for a small boxed set — a reasonable, packable souvenir. Mid-range options are small hand-painted e-rosoku with a single flower motif, typically ¥1,500–4,000 depending on size and detail. At the splurge end, large decorative candles with elaborate multi-color floral painting, the kind displayed as ornaments rather than burned, can run ¥10,000–30,000 or more — these are usually bought as gifts or for display, not for lighting.

    If you can’t make it to Kyoto or Uchiko, department stores in Tokyo occasionally stock regional craft items including wa-rousoku in their gift and homeware floors; the historic shopping district around Nihonbashi’s flagship department stores is a reasonable fallback for traditional crafts if your itinerary doesn’t reach Kyoto or Shikoku.

    Best Time to Visit and Common Mistakes to Avoid

    There’s no strict seasonal requirement to buy wa-rousoku, but demand (and sometimes special stock) rises around Obon in mid-August, when candles are used for altar offerings and lantern-lighting rituals — if that overlaps with your trip, it’s worth reading up on Obon and its lantern and bon-odori traditions for context on why the candles matter culturally, not just decoratively.

    The most common mistake visitors make is assuming wa-rousoku will behave like a scented Western candle — they’re unscented, burn with a notably taller and brighter flame than you’d expect, and drip wax more than a modern dripless candle, so they’re meant to be burned in a holder with a catch tray, not freestanding on a tablecloth. The second common mistake is buying the cheapest plain candle thinking it’s representative of the craft — the plain altar candles are functional items, while the hand-painted e-rosoku are the actual showcase of the skill, so if you only have budget for one “real” souvenir, prioritize a painted one over several plain ones.

    Packing Wa-Rousoku Home Safely

    Wax softens in heat, so don’t leave a bag with candles in a hot car or check them in checked luggage in summer without padding — wrap them in clothing in your carry-on if you’re traveling during the warmer months. They’re not fragile in the way lacquerware or ceramics are, but painted ones can scuff against hard objects, so a shop bag or soft wrap is enough protection for the trip home. Customs-wise, plant wax candles don’t raise any red flags — they’re a straightforward souvenir, just treat them gently and keep them away for direct sun exposure once you’re home, the same as you would any wax product.
  • Business Hotel Chains in Japan: Toyoko Inn, APA & Dormy Inn Compared

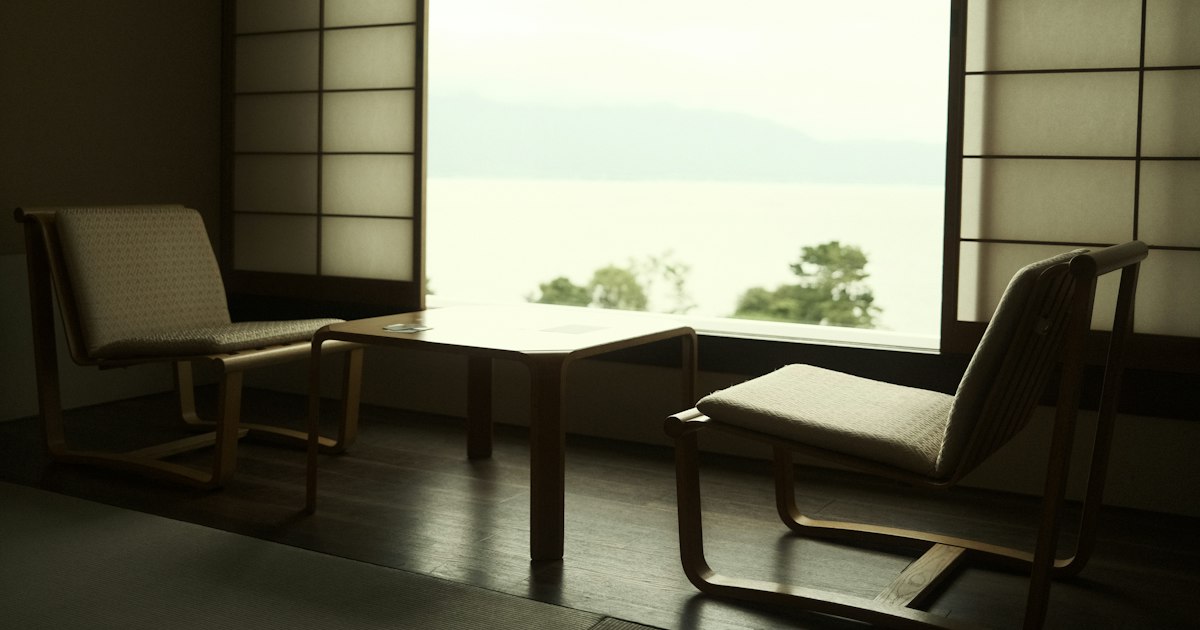
    Business Hotel Chains in Japan: Toyoko Inn, APA & Dormy Inn Compared

    Photo by ZENG YILI on Unsplash

    If you’ve ever searched for a place to stay in Japan, you’ve almost certainly stumbled across the same three names over and over: Toyoko Inn, APA Hotel, and Dormy Inn. These “business hotel” chains are the backbone of budget-to-midrange travel in Japan, with locations clustered around nearly every major train station in the country. They’re compact, efficient, and reliably clean — but they’re not identical, and picking the wrong one for your travel style can mean a cramped room with no bath when you really wanted a soak after a long day of sightseeing. Here’s how the three actually compare.

    What “Business Hotel” Means in Japan

    A “business hotel” (ビジネスホテル) is a no-frills hotel built around functionality: small single or double rooms, a unit bathroom (tub/toilet/sink combined into one molded plastic pod), and a location within a few minutes’ walk of a train station. They were originally designed for traveling salarymen on tight budgets and tight schedules, which is why rooms rarely exceed 15–20 square meters. Don’t expect American or European-style hotel room sizes — a “double” room is often just a slightly wider single bed, not two beds. If you’re arriving from the airport by train, check our guide on reserved vs non-reserved Shinkansen seats so you know what to expect when connecting onward to your hotel’s local station.

    Toyoko Inn: The Reliable Budget Standard

    Toyoko Inn is Japan’s largest hotel chain by number of properties, with well over 350 locations nationwide and a growing number overseas (Seoul, Honolulu, and several Chinese and Southeast Asian cities). The appeal is consistency: every Toyoko Inn follows almost the same floor plan, the same simple free breakfast (rice balls, miso soup, salad, and coffee served from around 6:30–9:00 AM), and the same no-nonsense pricing. Standard singles typically run ¥6,000–¥9,000 a night; doubles and twins are closer to ¥8,000–¥12,000, though Tokyo and Osaka locations near major stations can push higher during peak season.

    Joining the free Toyoko Inn Club membership (sign up at check-in or online) earns you a discount voucher after your first stay and member-only rates thereafter — worth doing if you’ll stay at more than one Toyoko Inn on your trip. Standard check-in is 16:00 and checkout is 10:00, both earlier than most chains, so plan your arrival accordingly if you’re coming straight from a late flight.

    Common mistake: booking a Toyoko Inn expecting a bathtub big enough to stretch out in, or blackout curtains that fully block city light — rooms are functional, not plush. If you want a proper soak, that’s where Dormy Inn has the edge.

    APA Hotel: Scale and City-Center Convenience

    APA Hotel is Tokyo’s biggest hotel operator and has an enormous footprint across the capital, plus strong coverage in Osaka, Nagoya, and other major cities. The chain leans into skyscraper-style properties right next to stations like Shinjuku, Shibuya, and Akasaka, so it’s a strong pick if your priority is minimizing walking distance with luggage. Rooms run a similar size to Toyoko Inn but often feel a touch more modern, with some locations offering larger “wide” rooms, in-room humidifiers, and — at select properties — rooftop or basement public baths and saunas separate from the standard unit bath.

    Pricing is more variable than Toyoko Inn because APA uses dynamic, demand-based pricing similar to airlines: a room that’s ¥7,000 three weeks out can jump to ¥15,000+ if booked the same week during a busy period (cherry blossom season, Golden Week, or major conventions). Check-in is usually 15:00, checkout 11:00. If you’re flexible on dates, booking 1–2 months ahead saves significantly. APA’s own app and website frequently beat third-party booking sites on price, so it’s worth comparing both before committing.

    Dormy Inn: The Midrange Upgrade

    Dormy Inn sits a notch above the other two in both price and amenities, and it’s the chain most frequent travelers to Japan tend to seek out specifically. The signature feature is a communal bath (often a proper hot-spring-style rotenburo or indoor onsen-style bath using mineral-added water) included free for all guests — a genuine treat after a day of walking, and a nice lower-effort alternative if a dedicated onsen trip like Kurokawa Onsen isn’t on your itinerary. Most locations also offer a free late-night bowl of soba or ramen (yonaki soba), typically served around 21:30–23:00, which is a genuinely useful perk if you’re coming back from dinner plans that ran long or an evening at a baseball game or izakaya crawl.

    Expect to pay ¥9,000–¥16,000 for a standard room depending on city and season, with breakfast (a hot buffet, not just rice balls) often included or available as a reasonably priced add-on around ¥1,500–¥2,200. Check-in is usually 15:00, checkout 11:00. Dormy Inn has fewer locations than Toyoko Inn or APA — around 100 nationwide — so availability in smaller cities can be limited, and popular locations in Tokyo, Kyoto, and Naha (Okinawa) book out weeks ahead during peak travel seasons.

    Side-by-Side: Which One Should You Book?

    • Budget priority, multi-city trip: Toyoko Inn — most consistent pricing and the widest network, so you can rely on the same experience in Sapporo, Osaka, or Fukuoka.
    • Need to be dead-center in a huge city: APA Hotel — best odds of finding a tower hotel steps from a major station, but book early to avoid surge pricing.
    • Want a bit of comfort and a bath to unwind: Dormy Inn — worth the extra ¥2,000–¥4,000 a night, especially after mountain or hiking days like Mount Takao.
    • Splurge option: Dormy Inn Premium properties (a step up from standard Dormy Inn) add larger rooms and nicer baths for roughly ¥14,000–¥22,000.

    Booking and Arrival Tips

    Book directly through each chain’s official website when possible — all three run loyalty programs and occasional direct-booking discounts that third-party sites don’t show. Rooms at all three chains are genuinely small, so if you’re traveling with large suitcases, look for photos confirming floor space before booking, or request a “wide” or “comfort” room category if offered.

    Since nearly every property sits within a few minutes of a train station, you’ll rarely need a taxi for the hotel itself — but if you’re hauling luggage late at night or arriving somewhere unfamiliar, it helps to know the basics in advance; see our guide on taking a taxi in Japan for fares and etiquette. One last common mistake: assuming check-in works like a Western hotel with 24-hour flexibility. All three chains enforce their check-in times fairly strictly, and if you arrive before 15:00–16:00, you’ll typically just be able to drop luggage, not enter your room — plan your itinerary for arrival day accordingly.

  • White Day in Japan: The Reverse Valentine’s Chocolate Frenzy

    White Day in Japan: The Reverse Valentine’s Chocolate Frenzy

    Photo by Olek Buzunov on Unsplash

    If you’re in Japan in mid-March and notice department store basements packed with men anxiously comparing gift boxes, you’ve stumbled onto White Day — one of the more delightfully specific customs you’ll encounter on a trip here. On February 14, it’s customary in Japan for women to give chocolate to men (coworkers, bosses, friends, crushes). A month later, on March 14, the men are expected to reciprocate with a gift of their own. For visitors, it’s a fun cultural quirk to witness and a genuinely good excuse to shop for beautifully packaged Japanese sweets.

    What Is White Day, and Why Does It Exist?

    White Day isn’t an import — it was invented in Japan. In 1980, the National Confectionery Industry Association (with marshmallow and cookie makers as key backers) promoted March 14 as a day for men to return the favor to women who’d given them Valentine’s chocolate, originally pitching marshmallows as the ideal gift (hence the old nickname “Marshmallow Day”). The marshmallow angle has faded, but the core idea stuck: White Day is now a fixture of the Japanese retail calendar, with department stores building entire seasonal campaigns around it from late February through March 14.

    It lands just 11 days after another women-and-girls-focused occasion, Hina Matsuri, Japan’s Girls’ Day doll festival on March 3 — so if your trip spans early-to-mid March, you’ll see a solid month of pink-and-white seasonal displays before shelves flip over to cherry blossom goods in late March.

    The Unwritten Rules: Giri Choco, Honmei Choco, and “Sanbai Gaeshi”

    To understand what men are shopping for, it helps to know the Valentine’s Day side of the equation. Japanese women typically give two categories of chocolate: giri choco (“obligation chocolate”) for coworkers and bosses, and honmei choco (“true feeling chocolate”) for a partner or crush. On White Day, the return gift is expected to roughly match the weight of the original gesture — and there’s a semi-serious guideline called sanbai gaeshi (“triple return”), meaning the return gift should be worth about three times what was received. In practice, most people don’t take this literally, but it does explain why White Day gifts often skew a bit more generous or elegant than the original box of convenience-store chocolate.

    Common White Day gifts go beyond chocolate: cookies, baked goods, candy, and historically marshmallows, plus non-edible add-ons like accessories or handkerchiefs for a honmei-choco partner. You’ll also see “flower and sweets” sets at florists and department stores during this window.

    What to Buy: Budget, Mid-Range, and Splurge Gift Guide

    If you want to pick up a White Day gift (or just a good edible souvenir using the same seasonal displays), here’s a realistic price range:

    • Budget (¥500–¥1,200): Convenience stores and standard supermarkets stock individually wrapped cookie and chocolate assortments in this range — fine for casual coworker gifts, less exciting as a souvenir.
    • Mid-range (¥1,200–¥3,000): This is where it gets interesting for travelers. Hokkaido’s Shiroi Koibito (“White Lover”) — a white chocolate-filled langue de chat cookie — is practically made for this holiday by name alone; a 12-cookie box runs about ¥1,200–¥1,500 and is sold at most major train station gift shops and department stores nationwide. Royce’ nama (raw) chocolate, also from Hokkaido, is another reliable mid-range pick at roughly ¥850–¥1,500 per box, widely available at airport shops and department store food halls even outside Hokkaido.
    • Splurge (¥3,000–¥10,000+): Depachika (department store basement food halls) carry limited-edition White Day boxes from patisseries like Henri Charpentier, Pierre Hermé Paris, and Japanese chocolatiers, often in elaborate seasonal packaging. These sell out fast closer to March 14, so shop early in the month if you want a specific design.

    If chocolate isn’t your target but you want a gift with Japanese character, a Sonny Angel or Smiski blind box is a popular, low-cost alternative gift among younger people in Japan and travels well in a suitcase without melting.

    Where to Shop for White Day Gifts in Tokyo

    The single best place to see White Day retail culture in full force is a depachika. Nihonbashi, Tokyo’s historic merchant district, is ideal for this: Mitsukoshi Nihonbashi’s basement food hall and Takashimaya Nihonbashi both run dedicated White Day pop-up sections from around late February through March 14, typically open the same hours as the store itself (roughly 10:00–20:00, though exact hours vary by section and day). Both stores are a short walk from Nihonbashi Station or Mitsukoshimae Station on the Tokyo Metro, so it’s an easy add-on to a central Tokyo itinerary.

    Shinjuku’s big terminal department stores (Isetan, Takashimaya Times Square) run similarly extensive campaigns if Nihonbashi isn’t on your route. For a quicker, lower-stakes option, any JR station’s “ekinaka” shopping concourse (Tokyo Station, Shinjuku Station) will have a seasonal White Day shelf stocked with Shiroi Koibito, Royce’, and regional specialty boxes.

    Timing and Common Mistakes

    Shop in the first half of March rather than waiting until March 13–14 — the best-designed boxes and limited collaborations sell out, and depachika aisles get genuinely crowded in the final 48 hours as the gift-giving deadline approaches. A few things visitors get wrong:

    • Assuming it’s romantic-only. Most White Day exchanges in Japan are between coworkers or friends, not couples — it’s closer to a workplace gift-exchange norm than a date-night occasion.
    • Buying something that needs refrigeration for a long trip. Nama chocolate and fresh cream-filled items are delicate; if you’re flying out within a day or two, baked cookies (Shiroi Koibito, butter sables) travel far more reliably than fresh truffles.
    • Confusing it with Valentine’s Day gifting direction. Remember the roles are reversed from what Western visitors expect: on February 14 women give, on March 14 men give back.

    White Day won’t be the headline event of your Japan trip, but if your dates happen to overlap with early-to-mid March, it’s worth detouring into a depachika for ten minutes — the seasonal packaging alone is worth seeing, and you’ll walk away with a box of something genuinely good to eat.

  • Obon: Japan’s Summer Festival of the Dead and Bon Odori Dancing

    Obon: Japan’s Summer Festival of the Dead and Bon Odori Dancing

    Photo by note thanun on Unsplash

    Every August, paper lanterns go up outside houses, families crowd onto trains back to their hometowns, and parks across Japan fill with drumbeats and circling dancers in yukata. This is Obon, Japan’s Buddhist festival honoring the spirits of ancestors — and its public face, the Bon Odori dance, is one of the most accessible, free, and genuinely fun cultural events a visitor can stumble into. Here’s what it actually is, when to catch it, and how to plan a trip around it without getting steamrolled by Japan’s single busiest travel week.

    What Obon Actually Celebrates

    Obon (お盆) is a Buddhist observance rooted in the belief that ancestral spirits return to visit their living relatives once a year. Families light small fires called mukaebi outside their homes on the first evening to guide spirits in, and visit and clean ancestral graves. On the final night, okuribi fires — or in some regions, floating lanterns set adrift on rivers (toro nagashi) — send the spirits back. It isn’t a solemn, hushed affair like a Western wake; it’s closer to a family reunion with a dance party attached, which is exactly where Bon Odori comes in.

    Obon is not an official national public holiday, but it functions like one. Many companies close for three to five days, and it’s one of the two biggest domestic travel weeks in Japan (alongside New Year’s and Golden Week).

    When It Happens — and Why the Dates Are Confusing

    This is the single biggest point of confusion for visitors. Obon’s timing splits into two camps:

    • Hachigatsu Bon (August Bon) — August 13–16, observed by most of Japan, including Kyoto, Osaka, and most rural regions. This is the main event most travelers plan around.
    • Shichigatsu Bon (July Bon) — July 13–16, observed in parts of Tokyo, Yokohama, and some other eastern areas that switched to the solar calendar’s equivalent month after the 1873 calendar reform.

    Because of this split, you can realistically catch Bon Odori events somewhere in Japan across both July and August — Tokyo neighborhoods often run their dances in mid-July, while the rest of the country peaks in mid-August. Local tourism sites and ward offices post exact dates each year; they shift slightly, so confirm before you build an itinerary around a specific festival.

    Bon Odori: How the Dancing Actually Works

    Bon Odori (“Bon dance”) is a circle dance performed around a raised wooden scaffold called a yagura, where drummers and sometimes singers set the rhythm. Dancers move in a loop around the tower, repeating simple, choreographed arm and step patterns set to regional folk songs — the most famous being “Tankō Bushi” (a coal miners’ song) and “Tokyo Ondo,” both danced in nearly identical form at festivals nationwide.

    You do not need to know the steps beforehand. Just join the outer edge of the circle and copy the people in front of you — most locals are relearning the moves themselves, and newcomers are welcomed, not judged. Many neighborhood festivals rent yukata on-site or nearby (roughly ¥3,000–6,000 for a basic rental including obi and sandals), though plenty of attendees come in regular clothes. Food stalls (yatai) selling yakisoba, kakigori shaved ice, and grilled corn ring the dance area, with most snacks priced ¥400–800.

    Where to Experience Obon

    Tokushima’s Awa Odori (August 12–15) is Japan’s largest and most famous Bon dance festival, drawing roughly a million visitors over four days. Choreographed dance troupes (ren) parade through the streets in distinctive sedge hats, accompanied by shamisen, drums, and flutes. Street viewing is free; reserved grandstand seats along the main routes cost around ¥2,000–4,500 and sell out well in advance through the official festival site.

    Kyoto’s Gozan no Okuribi (August 16) is the city’s dramatic send-off for Obon spirits — giant bonfires are lit in sequence on five mountainsides ringing the city, starting with the famous “大” (dai) character on Mount Nyoigatake at 8:00pm, followed by the others roughly five minutes apart. Free viewing spots line the Kamogawa riverbanks and various bridges; arrive at least an hour early for a clear sightline, as this is one of Kyoto’s most-watched summer events.

    Tokyo’s neighborhood festivals are smaller but numerous — local shrines, temples, parks, and even apartment complexes run their own Bon Odori through July and August, usually free to attend. These are lower-key than Tokushima’s spectacle but arguably the best way to dance alongside locals rather than watch from behind a rope line.

    If you’re interested in how Japan’s other seasonal festivals compare, Tanabata: Japan’s Star Festival and Where to Celebrate It covers the other major summer celebration, held in early July in most of the country.

    Planning Around Japan’s Busiest Travel Week

    Obon (mid-August especially) is one of the worst times to travel domestically in Japan if you haven’t planned ahead — and one of the best times if you have, since you’ll be sharing the experience with Japanese families rather than other tourists.

    • Shinkansen: Reserved seats on routes like Tokyo–Osaka or Tokyo–Hiroshima sell out days or weeks ahead for the Obon week. See Reserved vs Non-Reserved Shinkansen Seats: Jiyuseki Explained before you go — during Obon, even the unreserved (jiyuseki) cars can mean standing for an hour or more, so booking reserved seats the moment they open (one month ahead) is worth the extra cost.
    • Flights and hotels: Domestic flight prices and hotel rates in popular regions can roughly double compared to a normal week. Book accommodation as early as you can if your trip overlaps August 13–16.
    • Getting home after a late dance: Local trains often wind down by midnight, and Bon Odori festivals frequently run past that. If you’re stuck without a train, see Hailing a Taxi in Japan: Apps, Fares & Etiquette (GO, S.Ride) for ordering a ride home without the language barrier being an issue.
    • Budget alternative: If your trip dates are flexible and don’t strictly require travel during the Obon crunch, the Seishun 18 Ticket: Japan’s Budget Local Train Pass Explained is worth knowing about for unlimited local-train travel on a budget during its seasonal sale windows.

    Common Mistakes to Avoid

    • Assuming one date applies everywhere. Confirm whether you’re chasing July Bon (Tokyo area) or August Bon (most of the rest of Japan) before booking around a specific event.
    • Trying to book last-minute Shinkansen seats mid-August. Reserved seats on peak routes can be fully booked days out; have a backup plan or book early.
    • Skipping the free viewing spots for paid grandstands. At events like Awa Odori and Gozan no Okuribi, free street-level viewing is genuinely good — paid seating buys comfort and a guaranteed spot, not a meaningfully better view.
    • Treating it as purely a spectator event. Bon Odori circles are open to anyone who wants to join in; standing at the edge watching is fine, but dancing is half the fun and no one will mind if you’re off-beat.

    Obon rewards travelers who build a little flexibility into their schedule — the festivals themselves cost little or nothing, but the trains and hotels around them need booking well ahead. Time it right, and you’ll get neighborhood dancing, mountainside bonfires, and one of the most genuinely communal nights Japan’s festival calendar has to offer.

  • Kabuki Theatre: A First-Timer’s Guide to Watching a Show

    Kabuki Theatre: A First-Timer’s Guide to Watching a Show

    Photo by Pat Krupa on Unsplash

    Kabuki looks intimidating from the outside — the stylized makeup, the archaic language, the four-hour running times — but it’s one of the most accessible traditional art forms in Japan for a first-time visitor, precisely because theatres have built systems to let you drop in for a single act, rent an English guide, and leave understanding exactly what you watched. Here’s how to actually do it, without wasting money on the wrong ticket or showing up on the wrong day.

    What Kabuki Actually Is (In Plain Terms)

    Kabuki is a form of stylized theatre that began in the early 1600s, performed entirely by male actors, including those playing female roles (onnagata). Stories mix historical drama, revenge plots, dance, and comedy, told through exaggerated poses (kata), rhythmic dialogue, and live shamisen-and-drum music. You don’t need to follow every line of dialogue — the visual storytelling, the sudden quick-change costume reveals (hikinuki), and the stylized freeze-frame poses (mie) carry a lot of the meaning on their own.

    Where to Watch Kabuki in Japan

    You have four realistic options, depending on your itinerary:

    • Kabuki-za (Tokyo, Ginza) — the main stage, with performances nearly every month. Address: 4-12-15 Ginza, Chuo-ku. Exit directly from Higashi-Ginza Station (Toei Asakusa or Hibiya Line, Exit 3). Box office generally opens around 10:00, with matinee programs starting near 11:00 and evening programs around 16:30; each program runs roughly four hours including two or three intermissions.
    • Minamiza (Kyoto, Gion) — Japan’s oldest kabuki theatre site, most famous for the “Kaomise” grand lineup every December, when top actors’ names are displayed on the kanban signboard outside.
    • Shochikuza (Osaka, Dotonbori) — hosts occasional kabuki runs, usually a few times a year, worth checking if you’re based in Osaka.
    • Kanamaru-za (Kotohira, Kagawa) — Japan’s oldest existing kabuki playhouse, built in 1835. It operates as a museum you can tour year-round for about ¥550, but once a year in April it hosts the “Konpira Grand Kabuki” with major Tokyo actors — a genuinely special, hard-to-repeat experience if your trip timing lines up.

    If a trip to Kyoto or Shikoku is part of the plan, check how you’re routing there — our guide to reserved vs non-reserved Shinkansen seats is useful for deciding whether to book ahead for a performance day when trains run fuller than usual.

    Buying Tickets: Full Program vs. Single-Act

    This is the part most first-timers get wrong. At Kabuki-za, you have two very different ways to buy in:

    • Full program tickets cover an entire matinee or evening program (multiple acts). Prices vary by seat class and show but typically range from around ¥4,000 for upper balcony seats to ¥20,000+ for the best first-floor seats. Book these online in advance through the official Kabuki-za website, especially for popular months.
    • Single-act tickets (hitomaku kenbutsu / “ichimaku-mi”) let you watch just one act from a dedicated fourth-floor gallery. These are sold same-day only, in person, at a separate entrance beside the main doors, generally for around ¥2,000–¥2,500 per act, cash only, and they’re not bookable in advance. This is the best option if you just want a taste of kabuki without committing a whole afternoon or a large budget — arrive at least 30–45 minutes before the act starts, as the allotment for popular acts sells out.

    What to Expect Once You’re Inside

    Rent the English earphone guide (usually around ¥1,000 plus a refundable deposit) at a counter near the entrance — it gives real-time plot explanation and cultural notes synced to the performance, not a subtitle translation, so it’s genuinely useful rather than distracting. A separate Japanese-language program guide (program booklet, “program”) is sold for a few hundred yen and worth it even if you don’t read Japanese, for the cast photos and scene summaries.

    Dress is casual — there’s no dress code. Latecomers are held outside the auditorium until the next scene break or intermission, so build in buffer time getting to the theatre. Photography and video during the actual performance are prohibited, though photos are usually fine in the lobby and at the signboards outside.

    One quirky detail: the term “makunouchi bento” (the standard boxed lunch sold at train stations and convenience stores across Japan) originated from bento eaten during kabuki intermissions (“maku” = act). Kabuki-za’s basement food hall sells a range of these, along with sweets, and you can also pre-order a bento to pick up during intermission — worth doing if you’re staying for a full program, since intermissions run 15–30 minutes and the food hall gets crowded fast.

    Budget, Mid-Range, and Splurge Options

    • Budget (~¥2,000–¥2,500): A single-act ticket at Kabuki-za’s fourth-floor gallery. Seats are further from the stage but the view is still clear, and it’s the lowest-commitment way to try kabuki.
    • Mid-range (~¥6,000–¥12,000): A second- or third-floor seat for a full program. Good sightlines, full story arc, manageable cost.
    • Splurge (~¥15,000–¥22,000+): First-floor seats close to the stage (often called “ichikai” or similar depending on the theatre), or the once-a-year Konpira Grand Kabuki at Kanamaru-za in April, which combines a historic 1835 wooden theatre with top-tier actors — a bucket-list pairing rather than a routine outing.

    Best Time to Go and Common Mistakes

    Kabuki-za runs programs most months, so there’s no single “best season” — the better question is which show. December’s Kaomise lineup in Kyoto and April’s Konpira Grand Kabuki in Shikoku are the two calendar-fixed highlights worth planning a trip around; otherwise, check the current Kabuki-za or Shochikuza lineup a few weeks before your trip and pick based on which actors or plays are running.

    Common mistakes first-timers make: buying a full-program ticket without realizing it’s 4+ hours when they only wanted a quick cultural taste (the single-act option solves this); skipping the earphone guide and then following nothing; and assuming you can walk up and buy a good seat the same day during a popular run — single-act tickets are same-day, but full-program good seats often sell out days or weeks ahead.

    Getting There and After the Show

    Kabuki-za’s Higashi-Ginza exit puts you right at the door, so there’s rarely a need for a taxi to get there — but if you’re coming from a hotel without convenient train access, or leaving late after an evening program ends past 20:30, it’s worth knowing the basics of taking a taxi in Japan for fares and etiquette. Ginza sits right next to Nihonbashi, so if your show lets out in daylight hours, it’s an easy walk or short ride into Nihonbashi’s historic merchant district and flagship department stores to extend the afternoon with some shopping before dinner.

  • Kawagoe: Tokyo’s “Little Edo” Day Trip and Sweet Potato Treats

    Kawagoe: Tokyo’s “Little Edo” Day Trip and Sweet Potato Treats

    Photo by Airu on Unsplash

    Less than an hour from central Tokyo, Kawagoe packs Edo-period warehouse streets, a 400-year-old bell tower, a candy-shop alley, and some of Japan’s best sweet potato desserts into a single, easy day trip. Locals call it “Koedo,” or Little Edo, because its merchant district survived the fires and rebuilding that erased most of old Tokyo. It’s compact enough to see on foot in half a day, which makes it one of the most efficient day trips out of the capital — especially if you pair sightseeing with a serious amount of snacking.

    Getting There from Tokyo

    Kawagoe has three realistic rail options, and the one you pick depends on where you’re staying:

    • Tobu Tojo Line from Ikebukuro — the fastest option. The limited express “Kawagoe” train covers the distance in about 30 minutes for a regular fare of around ¥480, with no extra limited-express surcharge. Regular rapid trains take closer to 35-45 minutes for the same fare.
    • Seibu Shinjuku Line from Seibu-Shinjuku Station — useful if you’re near Shinjuku. The “Koedo” limited express reaches Hon-Kawagoe Station in about 44 minutes but adds a seat-reservation fee on top of the roughly ¥480 base fare; regular trains take 50-60 minutes without the surcharge.
    • JR Saikyo/Kawagoe Line direct from Shinjuku or Ikebukuro — no transfer needed, arriving at Kawagoe Station in about an hour for roughly ¥620-650. This is the simplest option if you’d rather not think about which line to board.

    If you’re traveling on a wider JR itinerary and already have a rail pass that covers local lines, the JR route costs you nothing extra — worth checking if you’re using something like the Seishun 18 Ticket on a slower-paced, budget rail trip through the Kanto region. Note that Kawagoe Station (JR/Tobu) and Hon-Kawagoe Station (Seibu) are about 1km apart, so check which one your train actually uses before you book onward plans.

    Kurazukuri Street and the Old Town

    From either station, it’s a 20-25 minute walk (or a short bus ride) to Kurazukuri Street, the row of black-tiled kura (storehouse-style) merchant buildings that gives Little Edo its name. These thick-walled, fireproof warehouses date mostly from the Meiji era, after a major 1893 fire, and today house shops, cafés, and small museums. It’s free to walk the street itself; the Kurazukuri Shiryokan museum charges a small admission (around ¥100) to go inside one of the original buildings, but it’s closed on Mondays, so avoid planning your trip for that day if you want to see the interior.

    At the end of the street stands Toki no Kane, the wooden bell tower that’s become Kawagoe’s unofficial symbol. The current structure dates to 1894 and still rings four times a day — 6am, noon, 3pm, and 6pm — though you’re mostly there for photos rather than the sound itself, since the street gets busy with other visitors doing the same thing.

    Just off the main street is Kashiya Yokocho, or Candy Alley, a short lane of old-fashioned sweet shops selling hand-pulled candy, dagashi (penny candy), and rice crackers much as they would have decades ago. It’s free to wander and a good spot for small, cheap souvenirs in the ¥200-500 range.

    Kita-in Temple and Hikawa Shrine

    A 15-20 minute walk from Kurazukuri Street, Kita-in Temple is worth the detour for two reasons: its collection of roughly 540 stone Rakan (disciples of Buddha) statues, each carved with a different expression, and the fact that some of its buildings were actually relocated from Edo Castle in the 17th century — making them the only surviving structures from the original castle anywhere in Japan. Entry to the Rakan garden and historic hall area runs around ¥400 for adults.

    Kawagoe Hikawa Shrine, a bit farther out, is known for its “enmusubi” (matchmaking) blessings and, in summer, for hanging over 2,000 wind chimes across its grounds during a festival that typically runs from early July through mid-September. If your trip lands in that window, it’s a photogenic, free add-on to the main loop.

    Sweet Potato Treats to Try

    Kawagoe’s connection to sweet potatoes (satsumaimo) goes back to the Edo period, when the sandy, volcanic-ash soil of the surrounding Kanto plain proved ideal for growing them, and roasted “Kawagoe-imo” became a popular Edo-era snack. That legacy is everywhere on Kurazukuri Street and Candy Alley today:

    • Imo soft serve — purple or golden sweet potato soft-serve ice cream, typically ¥400-500, sold from stands along the main street.
    • Daigaku imo — bite-sized candied sweet potato chunks coated in a sugar-and-sesame glaze, usually sold by weight or in small bags around ¥400-600.
    • Imo chips and senbei — thin-sliced, baked or fried sweet potato crisps, a good packable souvenir at roughly ¥400-600 a bag.
    • Purple sweet potato Mont Blanc or tarts — richer, café-style desserts in the ¥600-900 range, found in a few of the sit-down shops on the side streets.
    • Yaki-imo (roasted sweet potato) — sold whole, especially in autumn, for around ¥300-500 depending on size.

    Autumn (roughly October through November) is harvest season and when the sweet potatoes taste best and are most widely available; some shops scale back the fresh offerings in late spring and summer. If dessert-hopping is your main goal, this is the season to prioritize.

    Best Time to Visit

    Kawagoe works as a day trip year-round, but a few windows stand out: autumn for sweet potato season and fall foliage, late March to early April for cherry blossoms along the Shingashi River near Kita-in, and early January for Kita-in’s lively Daruma market. Summer is workable but Kurazukuri Street has little shade and can feel brutal at midday — aim for a morning start and save indoor stops (museums, cafés) for the early afternoon heat. Weekends and holidays bring heavy crowds to the main street and long lines at the most popular soft-serve stands; a weekday morning gives you a noticeably calmer version of the same experience.

    Getting Around and Common Mistakes

    Everything described here is walkable from either station, though the “Koedo Loop” tourist bus (a one-day pass runs around ¥500) is handy if you want to save your legs or if it’s raining. A few things catch first-time visitors off guard:

    • Monday closures — several small museums and some shops close on Mondays; check before building your whole itinerary around indoor stops.
    • Underestimating the walk — Kurazukuri Street, Candy Alley, and Kita-in together add up to a few kilometers of walking on uneven stone paths; comfortable shoes matter more than they look like they would.
    • Kimono rental without a reservation — walking Kurazukuri Street in rented kimono is popular, and on weekends the walk-in shops can sell out of sizes; booking ahead avoids disappointment.
    • Treating it as a quick stop — the station-to-old-town walk eats real time in both directions; budget at least 4-5 hours total if you want to see the old town, eat properly, and visit Kita-in without rushing.

    If you’d rather not walk the station-to-town stretch at all, a taxi is a reasonable option for a small group splitting the fare — see our guide on taking a taxi in Japan for how fares and apps work outside central Tokyo.

    Budget, Mid-Range, and Splurge Options

    For a bare-bones trip, take the regular (non-limited-express) train, skip Kita-in’s admission, and stick to free streets plus a couple of ¥300-500 snacks — doable for well under ¥2,000 round-trip including food. A mid-range day adds the limited express train, Kita-in’s ¥400 admission, a proper sit-down lunch (Kawagoe is also known for unagi, with set meals typically ¥2,000-3,000), and a sweet potato dessert or two, landing somewhere around ¥4,000-6,000 per person. For a splurge, book a short kimono rental (roughly ¥3,000-5,000 for a few hours) to photograph the old town in costume, or treat yourself to a multi-course kaiseki-style lunch at one of the higher-end restaurants tucked into the kura buildings.

    Kawagoe rewards an unhurried pace more than a packed checklist — if you’ve already done a brisk nature-focused day trip like Mount Takao, this is a good contrast: slow streets, old buildings, and a lot of standing around eating. And if you enjoy wandering historic merchant districts, it pairs naturally with Tokyo’s own Nihonbashi, which tells the same Edo-era merchant story from the capital’s side.

  • Mount Takao: Tokyo’s Easiest Mountain Day Trip

    Mount Takao: Tokyo’s Easiest Mountain Day Trip

    Photo by Timur Garifov on Unsplash

    At just 599 meters, Mount Takao (Takaosan) is the mountain Tokyo built a subway line to. It’s less than an hour from Shinjuku, has six marked trails ranging from paved sidewalk to real scrambling, and tops out with a Michelin three-star view and a temple full of tengu statues. You don’t need hiking boots, a car, or a whole weekend — just a transit card and a few hours. Here’s how to do it right, including the mistakes that trip up first-time visitors.

    Getting There: Trains, Fares, and Timing

    The fastest route is the Keio Line from Shinjuku Station directly to Takaosanguchi Station, the last stop. The ride takes about 45–55 minutes depending on the train, and a regular one-way fare runs roughly ¥390–¥430. On weekends and holidays (and seasonally on weekdays), the Keio Liner limited express runs straight through with reserved seating for a small surcharge of a few hundred yen — worth it if you want a guaranteed seat on the way home when everyone else is also tired and descending at once.

    You can also take the JR Chuo Line from Shinjuku or Tokyo Station to Takao Station, then transfer to a short Keio bus or train to Takaosanguchi. If you’re using a JR regional pass or want the cheapest possible local-train option, the Seishun 18 Ticket covers the JR Chuo Line leg to Takao Station during its sale windows, which can shave the cost down further if you’re already planning other local-train travel that day.

    Once you’re at Takaosanguchi, the trailheads and cable car station are a five-minute walk from the ticket gates — there’s no need for a taxi on arrival, though if you’re staying late for dinner near the station or missed the last train, taxi apps work fine in this area for the ride back to a nearby station.

    Choosing Your Trail

    Mount Takao has six numbered trails (plus a couple of side routes), and picking the right one matters more than people expect:

    • Trail 1 (Omotesando): The main route, fully paved, passing Yakuoin Temple. About 3.8 km one-way, roughly 90 minutes up at a relaxed pace. This is the one 80% of visitors take, which means it’s crowded on weekends but completely manageable in sneakers or even sandals.
    • Trail 6 (Biwa Waterfall Trail): Follows a stream through a shaded valley, more scenic and quieter, but can close temporarily after heavy rain — check signage at the trailhead.
    • Inariyama Trail: Ridge-line route with the best open views on the way up; a little more physically demanding with some stairs and uneven footing.
    • Trails 3, 4, and 5: Shorter connector loops good for extending the hike or avoiding backtracking on the descent.

    A common combo: go up via Trail 6 or Inariyama for scenery, come down via Trail 1 for an easy paved finish. Total round trip for most combinations is 3–4 hours including summit time.

    Cable Car, Chairlift, and the Summit

    If you’d rather skip the climb (or just the first third of it), the Takao Tozan cable car and an open-air chairlift both run from Kiyotaki Station near the base up to the mid-mountain Takaosan Station, cutting the hike roughly in half. Expect to pay around ¥600 one-way or ¥1,200 round-trip per person; the chairlift is slightly cheaper but slower and exposed to weather. Both stop running in the early evening — typically between 17:00 and 18:30 depending on the season — so check the posted last-departure time when you arrive if you’re planning to ride down rather than walk.

    From the cable car’s upper station it’s still a 20–40 minute walk to the actual summit, passing Yakuoin Temple, a Buddhist temple founded in 744 whose guardian deity is the tengu — you’ll see tengu statues and masks throughout the grounds. The summit itself has an open plaza, a few rest houses, vending machines, and on clear days (most common in winter), a surprisingly large view of Mt. Fuji to the southwest.

    Best Season and Time of Day

    Mount Takao is a year-round hike, but timing changes the experience:

    • Autumn (mid-November to early December): Peak momiji (maple leaf) season and by far the busiest time. Trail 1 and the cable car queues can back up for 30–60 minutes on weekends. If autumn colors are your priority, go on a weekday and arrive before 9:00am.
    • Winter (December–February): Cold but clear, with the best odds of seeing Mt. Fuji from the summit, and almost no crowds.
    • Summer (June–October): Hot and humid on the climb, but the summit area runs a seasonal beer garden (the “Takao Beer Mount”) with all-you-can-eat-and-drink courses around ¥4,000–¥5,000, reservation recommended.
    • Spring: Pleasant hiking weather, moderate crowds, some cherry blossoms lower on the mountain.

    Whatever season, start by late morning at the latest — the last cable car and the fading daylight both become real constraints if you linger too long at the summit.

    Budget, Mid-Range, and Splurge Options

    Budget: Hiking is free. Skip the cable car entirely and walk both ways; total cost for the day is just train fare (under ¥1,000 round-trip from Shinjuku) plus whatever you eat.

    Mid-range: Ride the cable car one way (around ¥600–¥1,200) and eat at one of the summit-area soba shops — tengu-themed tororo or zaru soba typically runs ¥900–¥1,300.

    Splurge: Finish at Keio Takaosan Onsen Gokurakuyu, a hot spring bathhouse literally attached to Takaosanguchi Station, for a post-hike soak (around ¥1,100–¥1,400 entry) before the train home — one of the few trailhead-to-bath setups this convenient anywhere near Tokyo.

    Common Mistakes to Avoid

    • Going on a weekend during peak autumn colors without a plan: Crowds can turn a 90-minute climb into a 3-hour shuffle. Weekday mornings are dramatically better.
    • Assuming Trail 1 means no effort: It’s paved, but it’s a steady uphill grade for nearly 4 km — regular walking shoes are fine, flip-flops are not.
    • Missing the last cable car down: If you rode up and plan to ride down, confirm the last departure time at the base station before you start hiking — it shifts by season and isn’t always what you’d assume.
    • Not bringing cash for the cable car and food stalls: Many small vendors on the mountain are cash-only or have unreliable card readers.
    • Underestimating how early it gets dark in winter: Trails have minimal lighting; aim to be off the mountain by dusk.

    If Takao leaves you wanting a longer, wilder hike, Japan has far more serious terrain within reach of a long weekend — the ancient beech forests of Shirakami-Sanchi are a good next step up. But for a half-day escape from Tokyo that needs zero planning and zero gear, Mount Takao is hard to beat.

  • Taking a Taxi in Japan: Fares, Apps & Etiquette

    Taking a Taxi in Japan: Fares, Apps & Etiquette

    Photo by Matthieu Bühler on Unsplash

    Japanese taxis have a reputation for being expensive, and in big cities that’s often true — but they’re also spotlessly clean, scrupulously metered, and sometimes the fastest way to close the “last mile” between a train station and your hotel or a hard-to-find restaurant. Knowing the fare structure and a couple of app tricks before you land will save you both money and the awkwardness of not knowing which door to use.

    How Taxi Fares Work in Japan

    Every licensed taxi runs on a government-regulated meter, so there’s no haggling and no surge pricing like you’d see with rideshare apps elsewhere. In Tokyo, the flagfall is ¥500 for the first 1.096 km, then ¥100 for each additional 255 meters. When traffic crawls below a set speed, a time-based charge of roughly ¥100 per 1 minute 35 seconds kicks in instead of the distance charge — this is why a taxi stuck in Shibuya traffic can feel like it’s “ticking” even when you’re barely moving. Osaka and Kyoto use a similar ¥500–600 flagfall with slightly different per-metre increments. A late-night surcharge of about 20% applies between 22:00 and 5:00, and tolls (expressway, bridges) are added on top and shown separately on the receipt.

    For budgeting purposes: a short 2 km hop across central Tokyo typically runs ¥1,200–1,600; crossing a whole ward might be ¥2,500–4,000. Tolls make airport-to-airport or city-to-city runs the real splurge category — see the Airport & Station Transfers section below.

    Booking a Taxi: Apps vs. Street Hailing

    You can still flag a taxi on the street — look for a red “空車” (vacant) light in the windshield versus a green “迎車” (en route to pick someone up) — but apps are faster and remove any language barrier. The three worth having on your phone:

    • GO — Japan’s largest taxi-hailing app, covering most major cities. English interface, credit card payment built in, and a fare estimate before you confirm.
    • S.Ride — backed by major taxi operators including some Toyota-affiliated fleets; strong coverage in Tokyo and Osaka, similar functionality to GO.
    • Uber — in Japan, Uber doesn’t run private rideshare; it dispatches licensed taxis, so pricing is the same metered fare plus a small booking fee. Useful if you already have the app set up from home.

    All three let you set a pickup pin, see the car’s plate number and location in real time, and pay in-app so you don’t fumble with cash at the end. Expect a ¥400–500 “convenience” surcharge on top of the metered fare for app-based dispatch, which is standard and not a scam.

    Taxi Etiquette: What to Know Before You Get In

    A few habits will mark you as someone who’s done this before:

    • Doors open automatically — the driver controls the rear left door with a lever. Don’t yank it open or slam it shut; let the driver handle both ends.
    • No tipping. Tipping isn’t expected and can genuinely confuse a driver who then has to chase you down with change.
    • Pay at the end, by cash, IC card (Suica/Pasmo), or credit card — most fleets now accept all three, but smaller local or rural operators may be cash-only, so carry some yen as backup.
    • Sit in the back unless you’re traveling alone and the front passenger seat is offered; solo riders often get waved to the back regardless.
    • Keep conversation low-key. Drivers are professional and polite but not chatty by default — a quiet ride is normal, not rude.

    Airport & Station Transfers by Taxi

    Taxis from Narita Airport into central Tokyo cost roughly ¥20,000–23,000 and take 60–90 minutes depending on traffic — fine for a group of three or four splitting the cost with heavy luggage, but a poor choice solo when the Narita Express or Keisei Skyliner will get you there for a fraction of the price. Haneda is far more taxi-friendly: central Tokyo runs about ¥6,000–8,000 and 30–45 minutes, a reasonable splurge if you land late or are hauling shopping-trip luggage.

    Within cities, taxis shine for the final leg after a long train ride — say, from Kyoto Station to a ryokan in Arashiyama (roughly ¥2,500–3,000), or from a small rural station to an onsen town like Kurokawa Onsen or Atami, where bus schedules are sparse and a taxi rank is usually waiting right outside the station.

    Common Mistakes to Avoid

    • Trying to split a fare across two taxis to save money — group travel is almost always cheaper by taxi than by buying multiple train tickets, so do the math before defaulting to rail for a group of four.
    • Assuming credit cards work everywhere. Rural taxis and some older Tokyo cabs are still cash-only; always have ¥3,000–5,000 in small bills as backup.
    • Forgetting the address isn’t enough. Japanese addresses can be hard for drivers to locate directly; pull up the destination on Google Maps or have a hotel business card with the address in Japanese to show the driver.
    • Grabbing your own bags from the trunk. The driver handles the boot; reaching back to open it yourself is unnecessary and can startle them mid-maneuver.

    When a Taxi Beats the Train (and When It Doesn’t)

    Taxis win for short hops with luggage, late-night travel after trains stop running (most urban lines shut down around midnight to 1 a.m.), and groups of three or more splitting a fare. They lose badly for anything over about 10 km in heavy traffic, where even a non-reserved local train or the Shinkansen will be faster and cheaper — if you’re covering real distance between cities, compare against options like reserved vs. non-reserved Shinkansen seats or, for budget day-tripping, the Seishun 18 Ticket. The smartest approach on most Japan itineraries is to use trains for the backbone of your trip and taxis for the awkward, heavy-luggage, or late-night edges around it.

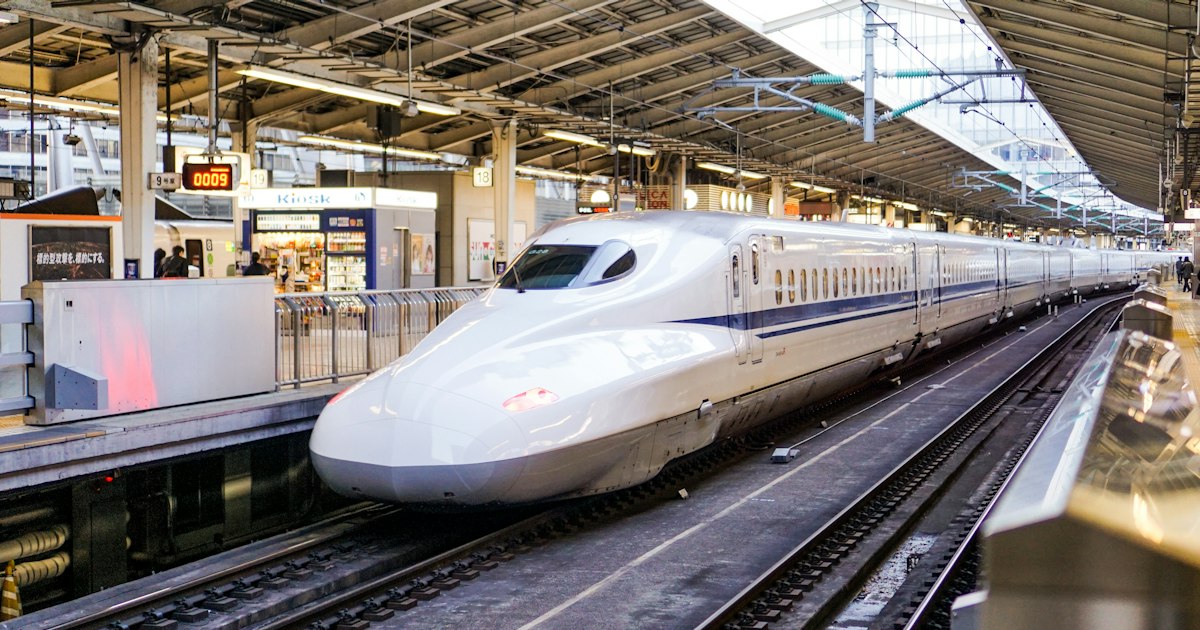
  • Reserved vs Non-Reserved Shinkansen Seats: Jiyuseki Explained

    Reserved vs Non-Reserved Shinkansen Seats: Jiyuseki Explained

    Photo by Fikri Rasyid on Unsplash

    If you’ve bought a Shinkansen ticket and seen two confusingly similar options at the vending machine — one cheaper, one not — you’ve run into Japan’s reserved vs. non-reserved seat system. Getting this choice right can save you money on a long trip, or it can leave you standing in the aisle for two hours with a suitcase wedged against your legs. Here’s how jiyuseki (non-reserved) and shiteiseki (reserved) actually work, what they cost, and how to pick the right one for your trip.

    What “Jiyuseki” Actually Means

    Jiyuseki (自由席) literally translates to “free seating” — it doesn’t mean the seat is free, it means seating is unassigned. You buy a jiyuseki ticket, walk to the designated non-reserved cars (usually clearly marked on the platform signage and on the side of the train itself), and sit in any open seat. First come, first served. If every seat is taken, you stand or sit on the floor near the doors, which does happen during peak travel.

    Shiteiseki (指定席) is the opposite: a specific seat, specific car, specific train, guaranteed. You pick your seat (window or aisle, sometimes even the exact row) at the time of purchase, and it’s yours regardless of how crowded the train is.

    How the Pricing Actually Breaks Down

    Every Shinkansen ticket is made up of two fares: the base fare (kijun unchin) and the limited express surcharge (tokkyu-ken). The reserved/non-reserved difference lives entirely inside that surcharge. As a concrete example, on the Tokyo–Shin-Osaka route aboard a Nozomi:

    • Non-reserved (jiyuseki), ordinary car: approximately ¥13,870
    • Reserved (shiteiseki), ordinary car: approximately ¥14,720
    • Green Car (reserved only, more legroom and quieter cabin): approximately ¥19,560

    So the premium for a guaranteed seat is roughly ¥850–¥1,000 on a long route like this — not huge, but it adds up for a family of four, and it drops to almost nothing on shorter hops between neighboring cities. Prices shift slightly by season and are higher on Nozomi/Mizuho services than on Hikari or Kodama, which are the only Shinkansen types the Japan Rail Pass covers.

    When Jiyuseki Makes Sense

    Non-reserved seating is genuinely the smarter choice in a few situations:

    • Short, frequent routes. Between Tokyo and Shizuoka, or Osaka and Kyoto on the Tokaido line, trains run every few minutes. If you miss one, the next is barely 10 minutes behind, so the risk of not finding a seat is low outside peak hours.
    • Flexible schedules. If you’re not sure which train you’ll catch — say, you’re finishing lunch at Kuromon Ichiba Market and don’t know exactly when you’ll leave — jiyuseki tickets don’t lock you into a specific departure. Any non-reserved car on any train that day works.
    • Budget trips. Travelers already squeezing costs with something like the Seishun 18 Ticket for local legs will appreciate that jiyuseki shaves a little more off Shinkansen segments too.

    Where it gets risky: Golden Week (late April–early May), Obon (mid-August), New Year (late December–early January), and Friday evenings/Sunday afternoons on popular routes. During these windows, non-reserved cars fill up at the originating station and stay full. If you’re boarding mid-route during one of these periods, strongly consider paying the small premium for a reserved seat.

    Finding and Boarding the Non-Reserved Cars

    Each Shinkansen has designated jiyuseki cars, almost always the lowest-numbered cars at one end of the train (commonly cars 1–3 on a 16-car Tokaido Shinkansen Nozomi, for example). The platform has floor markings and overhead signs showing exactly where each numbered car will stop, plus color-coded lines for reserved vs. non-reserved queuing. Arrive at least one train earlier than you plan to depart if you want a good shot at a seat, and line up at the marked spot rather than wherever looks convenient — queue order matters here and locals take it seriously.

    If you board with large luggage, note that oversized bags (any dimension sum over 160cm) technically require a free luggage reservation on Tokaido/Sanyo/Kyushu Shinkansen, and oversized racks are only in specific reserved cars — another point in favor of booking ahead if you’re hauling big suitcases full of souvenirs.

    Booking a Reserved Seat: Your Options

    You can reserve shiteiseki seats at any JR ticket counter (midori-no-madoguchi), at the green ticket vending machines found in most stations, or online through apps like JR East’s “Train Reservation” or the Smart-EX/EX-IC services (useful mainly for the Tokaido/Sanyo/Kyushu lines). Reservations open about a month in advance and are free to make beyond the surcharge itself — the only cost is the shiteiseki fare difference noted above. If you’re arriving into Tokyo and connecting onto a Shinkansen the same day, it’s worth comparing airport transfer options first — our Narita Express vs. Keisei Skyliner guide covers which service gets you into the city fastest to make that connection.

    Common Mistakes to Avoid

    • Sitting in a reserved seat with a jiyuseki ticket. The conductor will politely but firmly move you, and if the seat’s rightful occupant boards mid-route, you’ll be standing anyway. Always check the car number against the platform signage.
    • Assuming the Japan Rail Pass covers every train. It doesn’t cover Nozomi or Mizuho — only Hikari and Kodama — so Pass holders should default to those and check jiyuseki/shiteiseki car numbers, which differ by train type.
    • Not checking seasonal crowding. If your trip overlaps a national holiday week, reserve ahead rather than gambling on jiyuseki, especially for day trips where you need a guaranteed return seat.
    • Forgetting both tickets. A reserved Shinkansen trip requires the base fare ticket plus the tokkyu-ken limited express ticket (often printed as one combined ticket, but sometimes two separate slips) — keep both until you exit the gate.

    Budget, Mid-Range, and Splurge: Quick Picks

    For a short hop like a day trip to the retro hot-spring town covered in our Atami guide, jiyuseki is the easy budget call — trains run constantly and the savings are real. For long cross-country routes during busy season, mid-range travelers should spend the extra ¥800–¥1,000 for shiteiseki peace of mind. If you want the full splurge experience — guaranteed wide seats, quieter cabin, and no scramble for a window view of Mt. Fuji — book a Green Car seat in advance. And if you’re relying on taxis for the legs on either end of your Shinkansen ride, our guide to hailing a taxi in Japan covers the apps and fares worth knowing before you land.

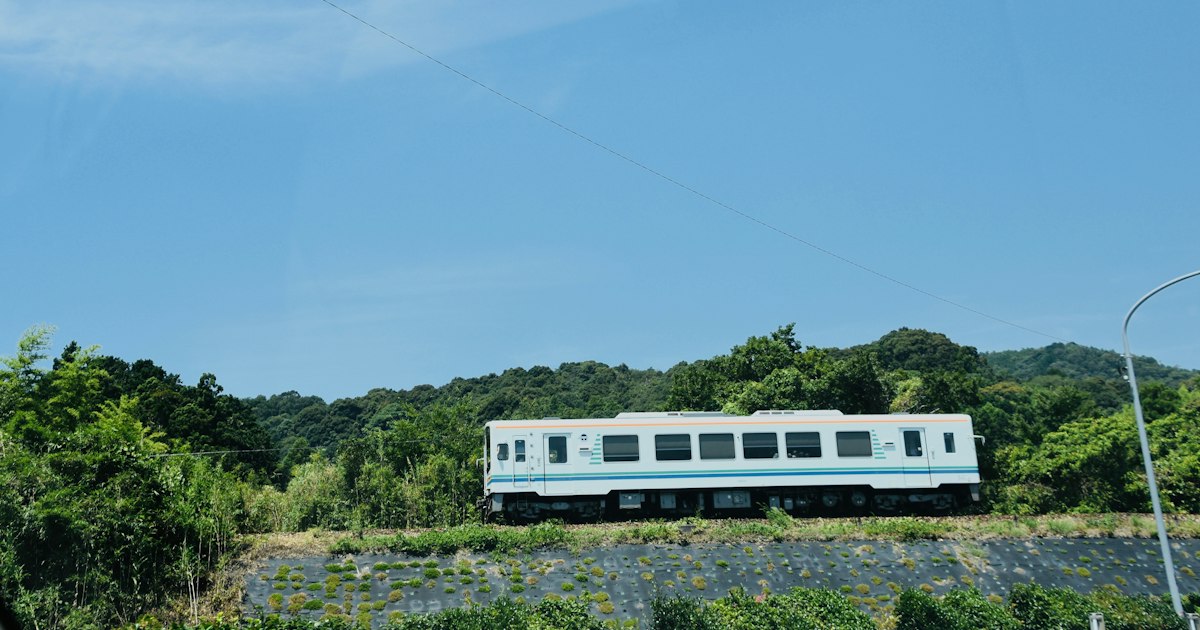
  • Seishun 18 Ticket: Japan’s Budget Local Train Pass Explained

    Seishun 18 Ticket: Japan’s Budget Local Train Pass Explained

    Photo by Yoko Correia Nishimiya on Unsplash

    If you’ve spent any time in Japanese train-enthusiast forums, you’ve seen people rave about the Seishun 18 Ticket (青春18きっぷ, Seishun Juhachi Kippu). It’s one of the cheapest ways to cover huge distances in Japan — but it only works on slow trains, only during a few weeks a year, and JR recently rewrote the rules. Here’s what it actually gets you, what it costs, and who should (and shouldn’t) bother with it.

    What the Seishun 18 Ticket Actually Is

    Despite the name (“youth 18”), it has no age limit — anyone can buy and use one. It’s a JR Group ticket that gives unlimited rides on ordinary local (futsu) and rapid (kaisoku) trains anywhere on the JR network nationwide, including JR ferries to Miyajima. The catch is right there in “local and rapid”: you cannot use it on shinkansen, limited express (tokkyu) trains, or sleeper trains. You’re riding the same trains commuters and students use, which means more transfers, longer journeys, and occasionally standing room only during rush hour.

    For travelers comfortable with slower travel, it’s a genuinely fun way to see the country — you end up passing through small stations and rural scenery that the shinkansen simply flies over. For anyone on a tight schedule trying to get from Tokyo to Osaka in an afternoon, it’s the wrong tool; that trip alone can take 8+ hours by local train versus about 2.5 hours on the Tokaido Shinkansen.

    How It’s Priced — and a Rules Change to Know About

    For decades the classic format was simple: one ticket, five one-day stamps, priced at ¥12,050 total (around ¥2,410 per day of unlimited travel), and usable by a group splitting the five days among multiple people on the same day. It was one of the best-value rail products in the country.

    In 2024, JR announced a significant overhaul of the ticket starting with the winter 2024–2025 sales period, changing it toward single-person use with a different day structure and pricing. Because JR revises these terms by season, don’t assume the old ¥12,050/five-day structure is still current — check the exact price, number of valid days, and whether sharing is allowed on JR’s official site or at a JR ticket counter (Midori no Madoguchi) before you build an itinerary around it.

    When You Can Buy and Use It

    This isn’t a year-round pass. It’s sold and valid only during three seasonal windows tied to Japan’s school holidays:

    • Spring: roughly late February through early April
    • Summer: roughly mid-July through early September
    • Winter: roughly mid-December through mid-January

    The sale period and the usable period overlap but aren’t identical — tickets usually go on sale a couple of weeks before the usable window opens. If your trip falls outside these three seasons, the Seishun 18 Ticket simply isn’t an option, and you’ll want to look at regional JR passes instead.

    What You Can (and Can’t) Ride

    Unlimited local and rapid trains on JR lines across Japan, including the New Rapid services in the Kansai area and most JR commuter lines in greater Tokyo. What’s excluded: shinkansen, all limited express trains (even for a short hop), sleeper trains, and non-JR private railways and subways (Tokyo Metro, Hankyu, Keikyu, etc. all require separate fares). If your plan involves the airport, note that the Narita Express and the Keisei Skyliner are both excluded from this pass — for airport transfers, compare your options in our Narita Express vs Keisei Skyliner guide rather than trying to stretch the Seishun 18 Ticket to the airport.

    How to Buy One

    Seishun 18 Tickets are sold at JR ticket counters (Midori no Madoguchi) inside major JR stations and at JR-affiliated travel agencies. You can’t buy them from a Shinkansen ticket machine or convenience store. At the counter, staff stamp the ticket with the date each time you start a day of travel, so keep it somewhere you won’t lose it — a damaged or illegible ticket can cause problems with conductors checking tickets along the route.

    Who This Pass Is Actually For

    It suits a specific traveler: someone with flexible time, a tolerance for long travel days, and an interest in the journey itself rather than just the destination. Classic uses include:

    • A one-day round trip from Tokyo to a seaside town like Atami via the Tokaido Line — about 1.5–2 hours each way by local/rapid train, well within a single day’s budget.
    • Multi-day loops through regional Japan for travelers chasing low cost over speed, including long hauls toward destinations like Kurokawa Onsen in Kyushu, which can take a full day of connections by local train alone.
    • Students and backpackers on a tight budget who have more vacation time than money.

    It’s a poor fit if you’re juggling hotel check-ins, tours, or dinner reservations with hard start times — local-train connections run less frequently than shinkansen and delays cascade. If your itinerary depends on precise timing, book a regular ticket or a JR regional pass instead, and save cash elsewhere — for instance by comparing taxi apps when you land, covered in our guide to hailing a taxi in Japan.

    Common Mistakes to Avoid

    • Assuming it covers limited express trains. It doesn’t — not even for one stop. Boarding a tokkyu by mistake means paying the limited express surcharge on top.
    • Forgetting the seasonal windows. The ticket isn’t sold or valid outside the three windows above; there’s no year-round version.
    • Not budgeting extra time. A route that takes 3 hours by limited express can take 5–6 hours by local trains with multiple transfers. Build slack into your plan, especially for the last train of the day in rural areas, where service can stop surprisingly early in the evening.
    • Buying without checking current terms. Given the 2024 rule changes, confirm the current price, day structure, and whether it’s still shareable before you commit — rules can differ by sales season.

    Used with the right expectations, the Seishun 18 Ticket turns a simple train ride into one of the more memorable, low-cost ways to see rural Japan — just go in knowing you’re trading speed for savings and scenery.