Japan Trove

Category: Travel

Practical, up-to-date guides for traveling in Japan — itineraries, rail passes, eSIMs, where to stay, seasonal timing, etiquette, and the local know-how that makes a trip smoother. Written with real Japanese sources so you get the answer that actually works on the ground, not the recycled tourist one.

  • One-Man Trains in Rural Japan: How to Pay the Fare Without a Station Gate

    One-Man Trains in Rural Japan: How to Pay the Fare Without a Station Gate

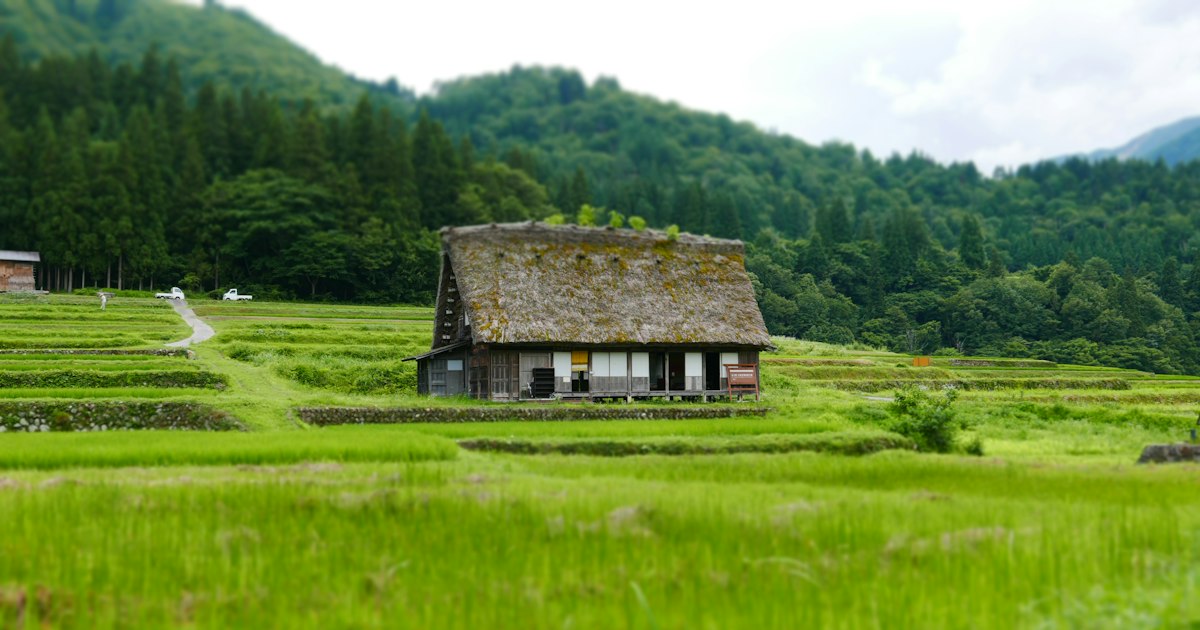
    Photo by Victor Lu on Unsplash

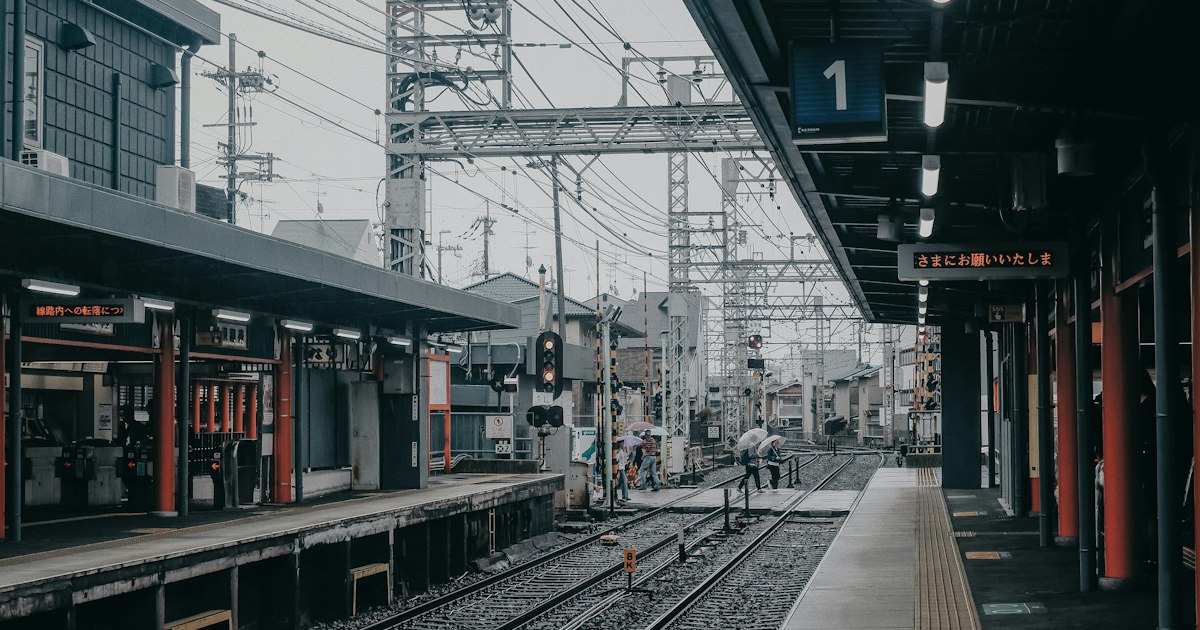
    Step off the shinkansen and onto a one-car rural train, and the rules you learned in Tokyo stop applying. There’s no ticket gate, no conductor walking the aisle, and sometimes no station building at all — just a platform, a pole, and a timetable. These are “wanman” (ワンマン, literally “one-man”) trains, where the driver handles everything a conductor and a station attendant would normally do. They’re common across rural JR lines and many regional private railways, and the payment system — while simple once you know it — trips up almost every first-time foreign visitor. Here’s exactly how it works.

    What “One-Man” Operation Means

    On a wanman train, there is only one staff member: the driver. There’s no conductor to check tickets mid-journey and no station staff at most of the stops along the line. Because of this, the fare-collection job that would normally happen at a ticket gate or with a conductor moves onto the train itself, and specifically onto the driver and a small set of machines near the front door. You’ll see this setup on countless JR local lines (JR Shikoku, JR Kyushu, JR West’s San’in and Kisuki lines, many JR East branch lines like the Tadami or Gono lines) and on regional private railways all over the country, especially anywhere the station platforms are unstaffed.

    If you’re planning a route that leans heavily on these lines — exploring Kochi’s coastline for katsuo no tataki, or chasing higanbana blooms in the countryside — budget extra time. These trains run far less frequently than city lines, often just one or two per hour, so check the timetable before you plan your day around one.

    Boarding: Take a Numbered Ticket, Not a Gate

    At an unstaffed station, there’s no gate to tap through. You simply walk onto the platform and board the train — usually through the rear door, not the front. As you step on, look for a small dispenser mounted near that rear door. Pull a numbered paper ticket, called a seiriken (整理券), from it. This ticket isn’t your fare; it just records which stop you got on at.

    If you’re using an IC card (Suica, PASMO, ICOCA, etc.), skip the paper ticket — instead, tap your card on the card reader mounted right by that same rear door as you board. This is the opposite of what you do in a city with gates, where you tap once walking in and once walking out through a gate. On a wanman train, both taps happen on the train itself.

    How the Fare Display Works

    Above and behind the driver’s seat, there’s an electronic board showing a grid of numbers and yen amounts. Each number corresponds to a boarding-zone number — the same number printed on your seiriken ticket. As the train moves between stations, the amounts next to each number climb, because you’re being charged by distance. Find the number matching your ticket, and the figure beside it is what you owe when you get off. On most rural lines, the shortest hop runs somewhere in the ¥150–200 range, climbing in roughly ¥100–200 increments as the zones increase — so a ride spanning several stops can land anywhere from around ¥300 to over ¥1,000 depending on the line and distance.

    IC card users don’t need to track this board at all — the system calculates the correct distance-based fare automatically when you tap off.

    Paying When You Get Off

    Exit through the front door, next to the driver. There’s a fare box (unchin-bako) mounted there with a slot for coins and notes and a separate slot for your seiriken ticket. Drop the ticket in first, then pay the exact amount shown on the board for your ticket’s number. If you don’t have exact change, the fare box has a built-in coin changer — but it typically only breaks ¥1,000 notes into coins, not ¥5,000 or ¥10,000 bills. Feed in the ¥1,000 note, take your change, then pay the correct fare. This is worth planning for: carry a stock of ¥1,000 notes and coins when you know you’ll be riding rural lines, since getting stuck at the front of a one-man train with only a ¥10,000 note is a genuinely common and avoidable headache.

    IC card riders simply tap their card again on the reader by the front door as they exit, and the fare is deducted automatically — no cash, no math.

    Common Mistakes Foreign Visitors Make

    • Boarding through the front door. On a wanman train, the front is reserved for exiting and paying. Boarding there confuses the driver and the people behind you.
    • Forgetting to take a seiriken ticket when not using an IC card. Without it, the driver has no way to know your boarding stop, and you may be charged for the full line regardless of where you actually got on.
    • Assuming IC cards work everywhere. Most JR regional lines and major private railways now accept Suica, ICOCA, and similar cards, but some very remote single-car lines still don’t. If you’re relying on an IC card for a rural day trip, it’s worth double-checking the specific line in advance, or carrying enough cash as a backup.
    • Trying to pay with a large bill. As above, the onboard changer usually caps out at ¥1,000 notes.
    • Standing too close to the driver’s cab out of habit from commuter trains. On a one-car train, this can genuinely block the exit flow for everyone else getting off.

    When You’ll Actually Encounter This

    If your itinerary stays within major cities and the shinkansen network, you may never see a wanman train. They show up once you head into the countryside: coastal Kochi, inland Shikoku, the San’in coast of western Honshu, much of rural Kyushu, and branch lines throughout Tohoku and Hokkaido. These are also exactly the areas where scenery, food, and seasonal sights tend to be best — tea-growing regions, hot-pot country, remote shrines — so it’s worth getting comfortable with the system rather than avoiding these lines altogether.

    If your rural plans involve multiple stops off the rail network entirely — tea fields, small-town food shops, temples without a nearby station — it’s often more efficient to pair a short train ride with a rental car for the last stretch. Renting a kei car is a popular way to cover that gap, especially around farming areas like Shizuoka’s tea fields, where the nearest station can be a fair walk or taxi ride from the plantation itself.

    Quick Tips for a Smooth Ride

    • Board at the rear, exit at the front — the reverse of boarding a bus in some other countries, but the same logic as a Japanese city bus.
    • Keep a few ¥1,000 notes and a handful of coins on hand specifically for rural train days.
    • Glance at the fare board as soon as you sit down so you’re not scrambling to find your number when your stop approaches.
    • If you’re unsure, ask the driver directly when boarding or before exiting — most are used to helping confused tourists and will point at the board or the fare box without hesitation.
    • Build slack into your schedule: these lines often run hourly, and missing one can mean a long wait at a platform with no shops, vending machines, or shelter beyond a small bench.
  • Haneda Airport Terminal 3: Lounges, Last-Minute Souvenirs & What to Do Before an International Flight

    Haneda Airport Terminal 3: Lounges, Last-Minute Souvenirs & What to Do Before an International Flight

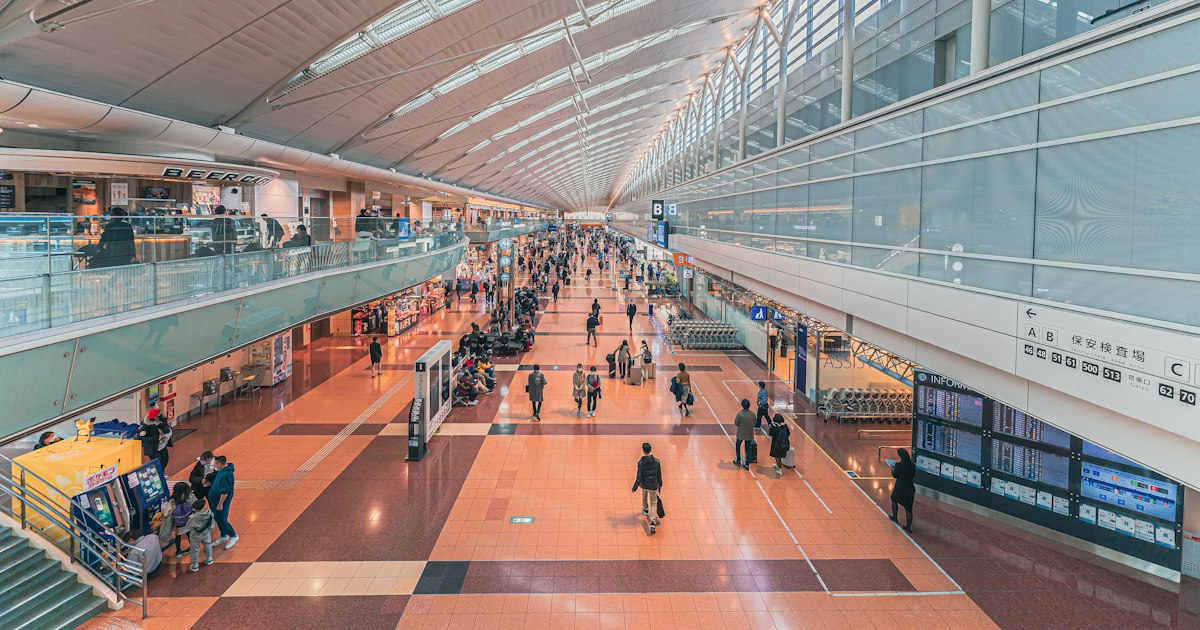
    Photo by mos design on Unsplash

    Haneda Airport’s Terminal 3 (formerly the International Terminal) is one of the most pleasant places in Japan to spend your last few hours before a long-haul flight. Unlike Narita, which sits an hour-plus outside central Tokyo, Haneda is close enough to the city that you can have lunch in Ginza and still make a 6pm flight with room to spare. But Terminal 3 is also deceptively large, and travelers who don’t plan their time well end up either sprinting to the gate or stuck in a mediocre chain restaurant because they didn’t know what else was there. Here’s what actually matters.

    Getting to Terminal 3

    Terminal 3 is served directly by both the Keikyu Line and the Tokyo Monorail, so you don’t need a shuttle bus like at some other terminals. From central Tokyo stations like Shinagawa, the Keikyu Airport Line takes about 15-20 minutes and costs roughly ¥300-330 one-way. The Tokyo Monorail from Hamamatsucho runs a similar time and price. If you’re coming from Shinjuku, Shibuya, or further out, the Limousine Bus is more comfortable with luggage and costs around ¥1,200-1,300, though it takes 45-75 minutes depending on traffic. Taxis from central Tokyo run ¥6,000-9,000 and are really only worth it for groups splitting the cost or very early/late departures when trains have stopped.

    A common mistake: assuming all Haneda flights use Terminal 3. Domestic flights use Terminals 1 and 2, and while there’s a free shuttle bus connecting all three terminals (about 15 minutes between T2 and T3), budget extra time if you’re connecting from a domestic flight rather than assuming it’s a quick walk.

    Lounges: Who Can Get In and What They Cost

    If you’re flying business or first class on a oneworld, Star Alliance, or SkyTeam carrier, you’ll have access to the alliance lounges on the 4th and 5th floors after security — JAL’s Sakura Lounge and First Class Lounge, ANA’s Suite Lounge, and partner lounges like Cathay Pacific’s. These are genuinely excellent, with Japanese and Western hot food, sake and whisky bars in the premium lounges, and shower rooms.

    For everyone else, Haneda has pay-per-use lounges that don’t require elite status or a specific airline ticket. The TIAT Lounge and similar facilities run roughly ¥3,000-5,500 for a few hours, depending on time of day and whether food is included, and can usually be booked same-day at the counter or in advance online. Priority Pass is also accepted at select lounges in T3 — worth checking before you fly if you hold a card that includes it, since it can make an otherwise ¥4,000 stop free. If you’re not flying premium and don’t have Priority Pass, the lounges generally aren’t worth the price just for wifi and snacks — the terminal’s own seating areas and restaurants cover that need for less.

    Last-Minute Souvenir Shopping

    This is where Terminal 3 genuinely shines compared to most airports. The departures floor (after security, 4th-5th floor) has a long stretch of shops replicating a traditional Edo-period street, called Edo Koji, alongside more conventional duty-free. A few notes on what’s actually worth buying here versus in the city:

    • Cosmetics and skincare — Duty-free prices on brands like Shiseido and SK-II are often comparable to or better than in-town prices once tax refund is factored in, and the airport shops stock travel-friendly sizes. If you didn’t get a chance to pick up DHC or Fancl cleansing oil during your trip, Haneda’s drugstore-style shops usually carry both.
    • Food gifts (omiyage) — Individually wrapped sweets like Tokyo Banana, Shiroi Koibito, and regional kit-kat flavors are all here, often at the same price as in the city. This is a fine place to grab last-minute boxes for coworkers if you ran out of time elsewhere.
    • Rice and specialty pantry items — Less common at the airport, so if you were hoping to bring home Koshihikari rice or other specialty varieties, it’s better to buy that in town before you fly, since vacuum-sealed travel packs aren’t always in stock here and selection is limited.
    • Traditional remedies and wellness items — A small number of shops sell kampo-adjacent wellness products, but the selection is nowhere near what you’d find at a dedicated kampo pharmacy in the city, so treat the airport as a backup, not the main stop.

    Shops on the departures floor generally open around 7:00am and stay open until the last flight departs, usually 9:00-9:30pm, so hours line up with almost any international departure.

    Food Before Your Flight

    Terminal 3 has a solid food hall on the 5th floor called Tokyo Pop Town, with ramen, sushi, tempura, and a few izakaya-style counters that serve proper meals rather than airport-grade fast food. A bowl of ramen runs ¥1,000-1,300, and a sushi set is typically ¥1,500-2,500. If you want a sit-down final meal in Japan, this is a far better option than the chain cafes scattered through the terminal — budget travelers should note there’s no Saizeriya or CoCo Ichibanya at Haneda T3 specifically, so if you were hoping for one last cheap curry or pasta fix, that’s a city errand, not an airport one.

    Timing and Security

    Haneda’s international security and immigration lines move quickly compared to Narita, but that’s exactly why travelers underestimate how early to arrive. Plan to be at the airport 3 hours before departure for an international flight — earlier during peak seasons like late December, Golden Week (late April-early May), and mid-August, when both check-in counters and the shops get genuinely crowded. If you’re checking bags, double-check your airline’s weight allowance before you get to the counter; excess baggage fees at Haneda are charged at the same rates as elsewhere, and ANA and JAL’s excess baggage fees can run tens of thousands of yen if you’re over the limit, so it’s worth weighing your suitcase at the hotel beforehand rather than finding out at the counter.

    Common Mistakes to Avoid

    • Leaving duty-free liquid purchases (sake, cosmetics in large sizes) for after security assuming you’ll have time — queues at the registers can be long in the final hour before peak departures.
    • Forgetting that some duty-free items must be collected at the gate rather than carried from the shop, which adds a few minutes to your boarding process.
    • Not checking whether your connecting domestic flight into Haneda lands at T1/T2, since the inter-terminal shuttle bus adds 15-20 minutes you may not have budgeted.
    • Assuming all restaurants take credit cards — most do, but a few of the smaller food hall counters are cash or IC card (Suica/Pasmo) only.

    Overall, Terminal 3 rewards a bit of planning: know your lounge access ahead of time, do your real souvenir shopping in the city and treat the airport as backup, and arrive early enough that a slow security line or a last sake purchase doesn’t turn into a sprint to the gate.

  • Renting a Kei Car in Japan: Driving the Tiny Cars Built for Backroads and Narrow Towns

    Renting a Kei Car in Japan: Driving the Tiny Cars Built for Backroads and Narrow Towns

    Photo by Loris Boulinguez on Unsplash

    If you’ve ever stood at the edge of a one-lane mountain road in rural Japan and watched a boxy little car with yellow plates squeeze past a delivery truck with inches to spare, you’ve seen a kei car in its natural habitat. These “light vehicles” — capped by law at 660cc engines and tight exterior dimensions — are Japan’s answer to narrow streets, steep switchbacks, and tiny parking spaces. For visitors planning a countryside trip, renting one is often cheaper and more practical than a standard rental car, and far more flexible than chasing bus timetables. Here’s what you need to know before you book.

    What exactly is a kei car, and why rent one

    “Kei” (軽) means “light,” and Japanese law defines the class strictly: engines no larger than 660cc, length under 3.4 meters, width under 1.48 meters. In exchange for those limits, kei cars get cheaper highway tolls, lower annual road tax, and — crucially for renters — they fit on roads that a mid-size sedan simply can’t navigate comfortably. Think the back lanes of Yakushima, the hairpin climbs around Mount Aso, or old post towns where buildings lean over streets barely wider than the car itself.

    Popular rental models include the Suzuki Hustler, Honda N-Box, Daihatsu Tanto, and Nissan Dayz — all tall-roofed, boxy hatchbacks with surprisingly roomy interiors for four passengers and a couple of suitcases. They’re slow on steep highway grades (don’t expect to merge aggressively) but ideal for the 40-60 km/h rural roads most countryside itineraries actually involve.

    License requirements and how to book

    Foreign visitors need either an International Driving Permit (IDP) based on the 1949 Geneva Convention, obtained in your home country before arrival, or a valid driver’s license from Switzerland, Germany, France, Belgium, Monaco, or Taiwan paired with an official Japanese translation (available from JAF offices or your embassy). US, UK, Canadian, and Australian licenses require the Geneva IDP — it cannot be obtained inside Japan, so arrange it before you fly.

    Major chains like Toyota Rent a Car, Nippon Rent-A-Car, and Times Car Rental all carry kei cars, usually as their cheapest category. Budget-focused operators like Niconico Rental or ToCoo! (a booking aggregator that compares small local agencies) often undercut the big names significantly, especially outside Tokyo and Osaka. Book at least a week ahead in peak seasons — Golden Week (late April–early May), summer Obon (mid-August), and New Year — since the smallest, cheapest cars sell out first.

    What it actually costs

    Expect roughly ¥4,000-¥6,000 per day for a kei car on a weekday, rising to ¥6,000-¥9,000 on weekends and holidays. Add mandatory insurance (compulsory liability is bundled in, but Collision Damage Waiver runs ¥1,000-¥2,000/day extra and is worth every yen) and a one-way drop-off fee if you’re not returning to the same branch — this can add ¥5,000-¥15,000 depending on distance. Gasoline is cheap to run: kei cars average 18-22 km per liter, so a full day of rural driving might cost ¥1,500-¥2,500 in fuel at current prices of roughly ¥170-¥180/liter for regular.

    Highway tolls for kei cars (the “K” category) are about 20% cheaper than for standard cars — useful if you’re connecting, say, Kochi’s coastal roads with a trip inland for katsuo no tataki at a riverside restaurant. For budget travelers already comparing transport costs, it’s worth cross-checking against discount ticket shops for bus and rail fares — in dense tourist corridors like Tokyo–Hakone, a train (including the Odakyu Romancecar) is often faster and less stressful than driving and parking. A kei car earns its keep once you’re off that corridor, in places with thin public transit.

    Where kei cars genuinely shine

    Anywhere with narrow roads, low parking availability, and spread-out sights. Satoyama countryside in Shikoku, the Kiso Valley’s old post towns, Kagoshima’s rural roads around samurai towns like Chiran, and coastal fishing villages like Tomonoura are all built on a scale that predates the automobile — streets were never widened for modern cars, and a kei car slips through where a rental sedan would be stuck reversing. Hokkaido’s farm roads and Okinawa’s smaller islands (Ishigaki, Miyako) are also popular kei car territory, partly because inter-town buses there run infrequently.

    They’re also genuinely useful for grocery runs and errands if you’re staying in a rural rental house for a few nights — a kei car fits easily into the small parking lot of a local AEON Mall or neighborhood supermarket, unlike a larger rental that might struggle in compact Japanese parking frames (many are sized specifically for kei dimensions).

    Common mistakes first-time renters make

    • Underestimating highway merging. A 660cc engine with four adults and luggage struggles on long uphill highway grades. Build in extra time rather than tailgating the car ahead.
    • Forgetting the ETC card. Most rentals include an ETC (electronic toll) card reader in the car, but you often need to request the card itself at pickup — ask explicitly, since paying cash at toll gates means losing the kei car discount in some cases.
    • Ignoring one-way restrictions in old towns. Historic districts with narrow lanes frequently have one-way systems with no visible signage in English. GPS apps like Google Maps generally route correctly, but local drivers reading narrow mirrors expect you to yield first in blind corners — flashing headlights briefly is the standard “I see you, go ahead” signal.
    • Booking a car too small for luggage. Kei hatchbacks have less trunk space than their tall cabins suggest. Two large suitcases plus carry-ons can be tight — check dimensions in the listing, especially if you’re already managing bags per airline rules like those covered in our ANA/JAL baggage guide.
    • Traveling with a pet without checking the rental’s policy. Not all agencies allow animals in the cabin, and those that do may require a carrier. If you’re road-tripping with a dog, confirm this ahead — our pet-friendly travel guide has more on rules and accommodation.

    Best season and timing for a kei car road trip

    Spring (April) and autumn (late October–November) offer the clearest mountain roads and best visibility for scenic driving, without the snow risk of winter or the humidity of summer. If you’re driving in Tohoku or Hokkaido between December and March, confirm the rental includes winter tires — it’s mandatory on snow routes and usually included automatically by local agencies, but double-check with Tokyo- or Osaka-based chains shipping a car to a cold region. Typhoon season (August–September) can close mountain passes with little warning, so build flexibility into rural itineraries during those months.

    Return the car with a full tank — nearly all Japanese rental contracts require this — and photograph the exterior at pickup and drop-off. Minor existing scratches are common on kei rentals given how often they brush against hedges and guardrails on narrow roads, and a quick photo avoids any dispute over damage charges later.

  • Japan’s Working Holiday Visa: Eligibility, Application & How It Differs from a Tourist Visa

    Japan’s Working Holiday Visa: Eligibility, Application & How It Differs from a Tourist Visa

    Photo by Glenn Carstens-Peters on Unsplash

    If you’re in your late teens, 20s, or sometimes early 30s and want to spend a year in Japan rather than two weeks, the Working Holiday Visa is almost certainly what you’re looking for — not the standard tourist exemption. The two get confused constantly, partly because both let you enter Japan without a traditional work or student visa, and partly because embassy websites explain the rules in dense bureaucratic language. Here’s what actually matters if you’re planning this trip.

    Working Holiday Visa vs. Tourist Visa: The Core Difference

    A tourist visa — or, for most Western nationalities, the visa-free entry stamp — allows a stay of up to 90 days in Japan for sightseeing, visiting friends, or short business trips. The catch is absolute: no paid work of any kind is allowed, full stop. Working a few shifts at a hostel or picking up casual farm labor “under the table” on a tourist stamp is a visa violation that can get you deported and barred from re-entry.

    The Working Holiday Visa flips that rule. It’s a special status created through bilateral agreements between Japan and around 30 partner countries and regions, designed for young people who want to fund an extended trip by working part-time or full-time alongside traveling. You get a residence card, you can legally take almost any job, and your stay is typically six months to one year — far longer than any tourist allowance. The tradeoff is that the application is more involved and must be completed before you leave home; you cannot walk into Japan as a tourist and convert to working holiday status once you’re already there.

    Who’s Eligible

    Requirements vary slightly by country, since each agreement is negotiated separately, but the common thread is:

    • Age: Generally 18 to 30 years old at the time of application. A handful of countries (Australia, Canada, South Korea among them) allow you to apply up to your 31st birthday, but check your specific country’s embassy page — some set the cutoff strictly at 30.
    • Nationality: You must hold a passport from a country with an active working holiday agreement with Japan. This includes Australia, New Zealand, Canada, the UK, Ireland, France, Germany, South Korea, Taiwan, Hong Kong, and a growing list of European countries (Poland, Spain, Austria, the Netherlands, and others have been added in recent years).
    • No prior working holiday visa for Japan. This is a one-time-only program; if you’ve already used it, you’re not eligible again.
    • No dependents traveling with you. Most agreements exclude applicants bringing children or a non-working-holiday spouse along for the full duration.
    • Primary purpose is “holiday,” not employment. On paper, work must be incidental to your travel plans, not the stated reason for the trip — which is why a cover letter explaining your itinerary matters (more below).
    • Sufficient funds and a return ticket (or the money to buy one) — see the next section.

    What You’ll Need to Apply

    Exact document lists differ by consulate, but expect to prepare:

    • A completed application form (available from your local Japanese embassy or consulate website) plus a passport-style photo.
    • Your passport, valid for the duration of the intended stay.
    • A resume or CV and a short written plan — essentially a cover letter — outlining what you intend to do in Japan: regions you want to visit, the kind of work you might pick up, and why you want to do a working holiday specifically.
    • Proof of funds. Most consulates want evidence of a few thousand dollars (or the equivalent) in a bank statement — commonly cited figures are in the range of 2,000–3,000 USD, though the exact threshold is set by each country’s agreement, so confirm with your own consulate.
    • Evidence of onward or return airfare, or enough additional funds to purchase one — you don’t necessarily need a booked ticket, but you should be able to show the means to leave Japan.
    • Some nationalities require a medical certificate or health declaration; check your specific consulate’s checklist rather than assuming.

    Processing after submission tends to take one to two weeks, though it can run longer during busy application periods. Several countries — South Korea, Canada, the UK, and France among them — cap the number of working holiday visas issued to their citizens each year. If your country has an annual quota, applying early in the program year (many reset around April, aligned with Japan’s fiscal calendar) meaningfully improves your odds of getting a slot before it fills.

    How to Apply: Step by Step

    You apply in person at the Japanese embassy or consulate with jurisdiction over your place of residence — not just any consulate convenient to you. Bring your full document set, pay any applicable visa fee (this varies by country; some agreements waive it entirely), and in most cases you’ll need to return a second time to collect the visa once it’s approved, since same-day issuance is rare. Once granted, the visa typically must be used to enter Japan within three months to a year of issuance, depending on the country — don’t apply six months before a trip assuming the visa will simply wait for you.

    On arrival, if you’re staying longer than 90 days you’ll receive a residence card (zairyu card) at the airport, which you’re required to carry at all times and use to register your address at your local municipal office within two weeks of settling somewhere.

    What You Can — and Can’t — Do Once You’re There

    With working holiday status, you can take part-time or full-time jobs in restaurants, retail, hospitality, farm work, English teaching, and most other sectors. What you generally cannot do is work in the adult entertainment or gambling industries — that’s an explicit carve-out in nearly every agreement. You also can’t treat the visa as a backdoor to permanent employment; it’s meant to be temporary and travel-oriented, not a long-term career visa, and most holders eventually either return home or transition to a different visa category if they want to stay on.

    Practically speaking, many working holiday makers spend their first few weeks setting up a life in Japan — opening a bank account, finding a share house, furnishing a room. If you’re kitting out a studio apartment, regional electronics chains like the ones covered in Yamada Denki and Edion are often cheaper and more convenient outside major cities than the big Tokyo flagship stores, and a nearby AEON Mall covers everything from groceries to household basics in one stop.

    Common Mistakes to Avoid

    • Assuming you can switch from a tourist stamp to working holiday status in-country. You can’t. The application has to happen at a Japanese embassy or consulate abroad before you fly.
    • Underestimating the funds requirement. Consulates do verify bank statements, and a borrowed lump sum deposited the day before you apply can raise questions.
    • Letting the visa expire unused. If you’re granted the visa but delay your trip past the entry window, you’ll need to reapply.
    • Overpacking for a year abroad. If you’re flying with gear for a full working holiday — laptop, work clothes, sports equipment — check your airline’s baggage allowance in advance; our guide to excess baggage fees on ANA and JAL breaks down what overweight bags actually cost.
    • Overspending on trains once you’re settled. Working holiday makers who travel domestically a lot can save significantly by checking discount ticket shops (kakuyasu kippu-ya) for cut-rate train and bus tickets rather than always buying full fare.

    Best Time to Apply

    Aim to submit your application three to four months before you want to leave, giving buffer room for processing and for quota-limited countries’ annual allocations. If your home country’s agreement resets its quota early in the calendar year, applying in the first few months after the reset — rather than waiting until summer — gives you the best shot at approval before slots run out.

  • Excess Baggage Fees on ANA & JAL: What International Flyers Need to Know

    Excess Baggage Fees on ANA & JAL: What International Flyers Need to Know

    Photo by Dimitri Karastelev on Unsplash

    You spent the whole trip buying Japanese snacks, a rice cooker, and three extra suitcases’ worth of souvenirs — and now you’re staring at a check-in agent who’s telling you your bag is overweight. Excess baggage fees on ANA and JAL catch a lot of travelers off guard, mostly because the rules differ depending on where you’re flying from and to, and the fee structures aren’t always intuitive. Here’s what actually matters before you get to the counter.

    Weight Concept vs. Piece Concept: Know Which Applies to Your Route

    Both ANA and JAL use two different baggage systems depending on your itinerary, and this single fact explains almost all the confusion around their fees.

    • Piece concept applies to flights to and from the United States, Canada, and a few other Americas routes. You get a set number of free checked pieces (usually two in economy), each with its own weight and size cap. Go over the piece count, weight, or size, and you pay a flat fee per violation.
    • Weight concept applies to most other international routes — Europe, Asia, Oceania, the Middle East. Instead of counting bags, the airline gives you a total weight allowance (commonly 20kg in economy, more in premium cabins), and you can split that across one or two bags however you like. Go over the total weight and you pay for the excess kilos.

    Always check your specific route on jal.co.jp or ana.co.jp before you pack, since the allowance printed on your e-ticket is route- and fare-specific, not universal.

    ANA’s Excess Baggage Fees

    On ANA’s North America flights (piece concept), economy passengers get two free checked bags, each up to 23kg and within 203cm total linear dimension (length + width + height). A third bag typically costs in the range of ¥25,000–¥30,000 (roughly USD 170–200), charged at the airport. If a bag is overweight (23–32kg) or oversized (203–292cm), expect a surcharge of roughly ¥13,000–¥20,000 per bag per violation — and a single bag can rack up both an overweight and oversize charge at once.

    On weight-concept routes (Europe, Asia, etc.), ANA economy passengers usually get a 20kg allowance (business class is higher, often 32–40kg). Exceed it and you’re billed per kilogram, with the per-kg rate varying by route — Asian routes tend to run cheaper per kilo than long-haul European ones. As a rough planning figure, budget ¥2,000–¥5,000 per excess kilogram depending on distance.

    JAL’s Excess Baggage Fees

    JAL’s structure mirrors ANA’s closely, since both follow IATA-style route rules. On North America flights, economy passengers get two free pieces up to 23kg and 203cm each. A third piece runs roughly ¥25,000–¥30,000, and overweight (23–32kg) or oversize (203–292cm) bags add a similar ¥13,000–¥20,000 surcharge per bag. Bags heavier than 32kg generally aren’t accepted at all as standard checked baggage — airport staff may ask you to repack or ship it separately.

    On weight-concept routes to Asia and Europe, JAL’s standard economy allowance is also commonly 20kg, with excess weight billed per kilogram at rates that scale with distance. Business and First Class passengers get noticeably more headroom — often 32kg per piece with two or three pieces allowed — so if you’re planning a big shopping trip, cabin class matters as much as the fare price.

    Both airlines’ websites have an official baggage calculator tied to your specific booking — always check it rather than relying on general figures, since fees get revised periodically and promotional fares sometimes carry reduced allowances.

    How to Weigh and Measure Your Bags Before the Airport

    Most hotels and even some convenience stores don’t have luggage scales, so your best bet is a cheap digital luggage scale (sold at Don Quijote, Yamada Denki, or online, around ¥1,000–¥2,000) that you clip onto the handle. For dimensions, remember airlines measure length + width + height combined, not the longest side alone — a bag that looks fine standing up can still exceed 203cm once you add the depth. If you’ve been shopping hard — say, picking up appliances at Yamada Denki or Edion or loading up on groceries at Kaldi Coffee Farm — weigh your suitcase a day or two before departure, not the morning of, so you have time to redistribute or ship items if needed.

    Common Mistakes That Trigger Surprise Fees

    • Assuming domestic allowances apply internationally. JAL and ANA domestic flights within Japan often allow 20kg with looser enforcement; international legs are stricter and fees are higher.
    • Not checking codeshare rules. If you booked through a partner airline (American, United, British Airways, etc.) but fly the actual segment on ANA or JAL, the operating carrier’s baggage rules usually apply — not the ticketing airline’s.
    • Packing large suburban-mall purchases without accounting for box weight. A trip to an AEON Mall for ceramics, kitchenware, or bulky souvenirs can add several kilograms you didn’t plan for — pack a flexible, expandable duffel as your second bag so you’re not stuck buying an emergency suitcase at the airport.
    • Forgetting connecting flights have their own limits. If your itinerary includes a connection on a different airline or cabin class, each segment can carry a different allowance — check all legs, not just the first.

    Smarter Ways to Handle Extra Luggage

    Budget option: Ship non-urgent items home via Japan Post’s EMS or a courier like Yamato (takkyubin), which can be cheaper than airline overweight fees for heavy, low-value items like books or kitchen goods — especially the oroshigane graters and other ceramic kitchenware souvenirs covered in our guide to Japanese grater, which are heavy but not fragile-fragile.

    Mid-range option: Pre-pay excess baggage online through ANA’s or JAL’s website before departure — both airlines offer discounted rates (sometimes 10–20% off) for pre-purchasing extra weight or pieces online versus paying at the airport counter.

    Splurge option: Upgrade to Premium Economy or Business Class on your outbound or return leg. The baggage allowance jump (often to 2 pieces at 32kg each, or 30–40kg total) can be worth more than the fare difference if you’re bringing home serious shopping hauls, and you get lounge access and better seats as a bonus.

    Timing Your Shopping Around Baggage Limits

    If big purchases are part of your trip — electronics, appliances, or bulk souvenirs — do that shopping with a few days of buffer before your flight, not the night before. That gives you time to weigh everything, decide what to ship versus carry, and avoid a stressful last-minute repack at the check-in counter. It’s also worth noting that most airport excess baggage payments in Japan are credit-card friendly but not always cash-flexible at self-service kiosks, so keep a card with available credit on hand just in case.

  • Odakyu Romancecar: Tokyo to Hakone’s Scenic Limited Express Train

    Odakyu Romancecar: Tokyo to Hakone’s Scenic Limited Express Train

    Photo by Jenna Neal on Unsplash

    If you’re heading from central Tokyo to Hakone’s hot springs, lakes, and mountain views, the Odakyu Romancecar is the single best way to get there. It’s faster and far more comfortable than local trains, cheaper than a taxi or private tour, and on a clear day it gives you a front-row seat to Mt. Fuji without needing a car. Here’s exactly how to book it, what it costs, and the mistakes that trip up first-time riders.

    What the Romancecar Actually Is

    The Romancecar isn’t a special pass or a tour — it’s Odakyu Electric Railway’s limited express train service running between Shinjuku Station in Tokyo and Hakone-Yumoto, Odawara, and other stops on the Odakyu line. “Romancecar” refers to several train models (the GSE 70000, EXE/EXEα, and the newer VSE replacement), all of which feature wide reclining seats, large panoramic windows, and — on most services — forward-facing seats rather than the sideways bench seating of commuter trains. Unlike Tokyo’s commuter rail, every seat is reserved, so you’re guaranteed a spot and a specific seat number.

    Total travel time from Shinjuku to Hakone-Yumoto is roughly 85–90 minutes on the fastest direct services, compared to well over two hours via local trains with transfers.

    Routes, Schedule, and Which Train to Pick

    Most tourist-bound Romancecars run the “Hakone” service from Shinjuku to Odawara and then on to Hakone-Yumoto, the gateway station for Hakone’s ropeways, Lake Ashi boats, and onsen towns. Trains depart roughly every 30–60 minutes during the day, starting around 7:00 AM and running until about 8:00–9:00 PM, though exact times shift seasonally — always check the live timetable on the Odakyu website or app before your trip, since schedules change a few times a year.

    A few practical tips on seat selection:

    • Odd-numbered car seats on the right side (facing Odawara) tend to offer better Mt. Fuji glimpses on clear days, roughly between Shin-Matsuda and Odawara stations — though this varies by train model and isn’t guaranteed.
    • The GSE model (70000 series) has forward-tilted panoramic front-row seats that are extremely popular; these sell out first and can’t be booked more than a month ahead in most cases.
    • Early morning trains (before 9 AM) are far less crowded than midday weekend departures, especially in spring and autumn.

    How Much It Costs

    You pay two separate fees: a basic fare based on distance, and a Romancecar specific “limited express” surcharge for the reserved seat.

    • Shinjuku to Hakone-Yumoto (one-way): basic fare around ¥1,230, plus a Romancecar surcharge of roughly ¥1,200–1,300 depending on the train, for a total around ¥2,470 one-way as of recent pricing. Fares are revised periodically, so treat this as a close estimate and confirm current prices at booking.
    • Shinjuku to Odawara (one-way): slightly less, since Odawara is a stop before Hakone-Yumoto.

    Budget tip: the Hakone Freepass (sold at Odakyu stations and travel centers) bundles round-trip travel between Shinjuku/Odawara and the Hakone area with unlimited rides on local Hakone buses, the Hakone Tozan cable car, ropeway, and Lake Ashi pirate ships — but it does not include the Romancecar surcharge, which you still buy separately. For travelers planning several days of Hakone sightseeing with multiple bus and ropeway rides, the Freepass usually works out cheaper overall; for a quick day trip, paying fares individually may be simpler. If you’re comparing ticket options across Japan generally, it’s also worth knowing that discount ticket shops exist for other regional lines — see this guide to discount ticket shops — though Odakyu’s own Freepass is typically the better deal for Hakone specifically.

    How to Book Your Seat

    Reservations open 1 month in advance at 10:00 AM Japan time and can be made several ways:

    • Odakyu’s official English booking site/app (EMot or the Odakyu Train Reservation site): the easiest option for foreign visitors — book and pay online, then show a QR code or pick up a ticket at the station.
    • Ticket machines at Shinjuku Station: machines have an English interface; look for the Romancecar ticket counter near the Odakyu line entrance on the west side of Shinjuku Station.
    • Staffed ticket counters: useful if the machines are sold out of your preferred train or you need help, though lines can be long on weekend mornings.

    Note that the Japan Rail Pass does NOT cover the Odakyu Romancecar, since Odakyu is a private railway, not JR. This is the single most common point of confusion for visitors — don’t assume your JR Pass gets you on board.

    Best Time to Ride

    For Mt. Fuji visibility, winter (December–February) offers the clearest, driest air and the best odds of an unobstructed view, though mornings are generally better than afternoons year-round. Autumn (mid-November) brings foliage color to the Hakone mountains themselves, while spring (late March–early April) adds cherry blossoms around Odawara Castle, visible briefly from the train. Summer is the least reliable for Fuji views due to haze, but it’s also the least crowded season for booking.

    Weekends and Japanese holidays (especially Golden Week in early May and the Obon period in mid-August) see the heaviest demand — book as early as the 1-month window allows if you’re traveling then.

    Common Mistakes to Avoid

    • Boarding without a reservation ticket: you cannot ride the Romancecar on a regular Odakyu line ticket or IC card (Suica/Pasmo) alone — you need the specific limited express ticket showing your car and seat number.
    • Confusing Hakone-Yumoto with Odawara: Odawara is a larger transfer hub with the castle; Hakone-Yumoto is the actual onsen town gateway. Many travelers get off too early.
    • Assuming all trains have panoramic front seats: only certain Romancecar models have them, and seat maps vary — check the train type when booking if window seats matter to you.
    • Not checking luggage space: Romancecars have limited overhead and between-seat storage. If you’re traveling with large suitcases, consider shipping luggage ahead via a delivery service (takkyubin) to your Hakone ryokan, or book the oversized-luggage seats near car doors where available.

    Where to Go Once You Arrive

    From Hakone-Yumoto, local Hakone Tozan trains and buses (often covered by the Hakone Freepass) connect you to Gora, the Hakone Ropeway, Owakudani’s volcanic valley, and Lake Ashi’s pirate ship cruises with Mt. Fuji views on clear days. Hakone is also a major onsen destination, and if you’re traveling with a dog, it’s worth checking which ryokan and cafes in the area are pet-friendly before booking — our pet-friendly travel guide covers what to look for. And if you need a quick, reliable meal near Shinjuku Station before your departure, both Saizeriya and CoCo Ichibanya have branches in the station’s surrounding shopping areas — see our guides to Saizeriya and CoCo Ichibanya for how to order.

    Whether you’re doing Hakone as a day trip or staying overnight, the Romancecar turns what could be a tedious transfer-heavy slog into a relaxing, scenic 90 minutes — book your seat in advance, pick a morning departure if Fuji views matter to you, and you’re set.

  • Pet-Friendly Travel in Japan: Hotels, Cafes & Rules for Traveling with Your Dog

    Pet-Friendly Travel in Japan: Hotels, Cafes & Rules for Traveling with Your Dog

    Photo by Yanhao Fang on Unsplash

    Japan has a reputation for being tricky for pet travel, but that’s mostly outdated. Over the last decade, dog-friendly hotels, cafes, and even dedicated dog runs have multiplied in major cities and resort areas, and the rules—while real—are far more manageable than most first-timers expect. If you’re bringing your dog into the country, or you already live here and want to travel domestically, here’s what you actually need to know.

    Entering Japan With Your Dog: The Paperwork That Actually Matters

    Japan requires advance notification to an Animal Quarantine Service (AQS) station at least 40 days before arrival if you’re bringing a dog from a rabies-designated region (most of North America, Europe, and Australia qualify for the simplified process). You’ll need a microchip (ISO 11784/11785 compliant, 15-digit), two rabies vaccinations at least 30 days apart, a rabies antibody titer test showing at least 0.5 IU/mL, and then a waiting period of 180 days from the date the blood was drawn before you can land. Skipping any step means your dog gets held at quarantine for up to 180 days on arrival—this is the single most common and most painful mistake travelers make. Submit the advance notification online through the Ministry of Agriculture’s AQS portal; it’s free and generates the import permit you’ll need at the airport.

    If you’re arriving from a non-designated region (much of Asia, Africa, and parts of the Middle East), the process is longer and includes additional waiting periods, so check your specific country’s status well before booking flights.

    Getting Around: Trains, Taxis, and the Shinkansen

    Dogs can ride Japan Railways trains, including the shinkansen, but only inside an enclosed carrier small enough to hold on your lap or stow under a seat—typically capped around 10kg including the carrier, with combined dimensions (length + width + height) under 90cm, and no body part allowed to stick out. There’s no separate ticket required for small pets in a bag on most JR lines, though a handful of private railways charge a small pet fee (often ¥280–370). Carriers that let your dog’s head poke out, or dogs carried in slings or strollers uncovered, will get you turned away by staff, so a proper soft-sided zippered carrier is worth the investment before you travel. Taxis generally allow pet carriers without issue, and some companies (like certain Nihon Kotsu fleets in Tokyo) offer pet-friendly cars on request. If you’re combining trains with discounted intercity travel, the ticket-buying strategies in our guide to discount ticket shops still apply—carriers don’t affect fare eligibility.

    Where to Stay: Budget to Splurge

    Dog-friendly lodging in Japan splits roughly into three tiers:

    • Budget (¥6,000–12,000/night): Chain business hotels rarely allow pets, but pet-friendly “vacation rental” (minpaku) listings on Airbnb and Vrbo in resort towns like Karuizawa, Hakone, and Nasu often do, usually with a cleaning surcharge of ¥2,000–5,000.
    • Mid-range (¥15,000–30,000/night): Purpose-built pet resorts such as Karuizawa’s “Karuizawa Pet Resort” hotels and chains like “Odakyu Hotel de Yama” (Hakone) offer fenced dog runs, in-room pet amenities, and sometimes joint spa/dinner courses for owner and dog. Expect a per-dog fee of ¥3,000–6,000/night on top of the room rate.
    • Splurge (¥40,000+/night): Ryokan-style properties in Nasu and Izu with private hot-spring dog runs, dog-friendly kaiseki dinner service (served to you, not the dog), and in-room dog beds/bowls. Hoshino Resorts’ “Risonare” properties and several boutique inns in Kawaguchiko fall here.

    Always confirm size and breed restrictions directly—many properties cap dogs at 10kg or exclude certain breeds, and policies change seasonally.

    Dog Cafes and Dining Out

    Japan’s café culture extends enthusiastically to dogs. Dog cafes (inu cafe) where you can bring your own pet—distinct from the “rental dog” cafes aimed at people without pets—are common in Tokyo (Shibuya, Yoyogi-area), Osaka, and resort towns. Expect a seating charge of ¥500–1,000 per dog on top of your own order, often with a small dog menu (boiled chicken, unseasoned treats, ¥300–600). Outside dedicated dog cafes, regular restaurants are hit or miss: terrace/outdoor seating is often fine with a leashed or carried dog, but indoor seating is usually refused outside of explicitly pet-friendly establishments. Look for a paw-print sticker or “ペット可” (pet OK) signage at the entrance rather than assuming.

    Convenience stores and most food shops won’t allow dogs inside even in a carrier, so plan grab-and-go stops accordingly if you’re exploring on foot with your dog for the day.

    Dog Runs, Parks, and Seasonal Timing

    Fenced off-leash dog runs are increasingly common in both city parks and resort areas—Yoyogi Park and Komazawa Olympic Park in Tokyo both have free, unstaffed runs, while resort towns like Karuizawa and Hakone have larger, sometimes-paid runs (¥500–1,000 for a few hours) attached to hotels or rest areas. Summer (July–August) is genuinely hard on dogs in Japan: pavement heat, high humidity, and strict “no dogs on the beach in peak season” rules at many coastal spots make it the worst time to bring a dog-heavy itinerary. Spring (April) and autumn (October–November) are the sweet spot—mild temperatures, open dog runs, and resort towns at their most scenic for a walk. Winter works well too in snow regions like Nagano, where several hotels run dog-friendly snowshoe walks.

    Common Mistakes to Avoid

    • Underestimating the 40-day/180-day import timeline. This is non-negotiable; there’s no express lane, and quarantine holding fees run into the hundreds of dollars.
    • Assuming carrier rules are flexible. JR staff do check carrier dimensions and closure at busy stations, especially on the shinkansen; non-compliant carriers can mean denied boarding.
    • Not calling ahead to confirm size/breed limits. Listings and hotel websites are sometimes outdated; a phone call or message the day before saves a wasted trip.
    • Packing human snacks as dog treats. Japan’s convenience-store and import-grocery pet sections are limited compared to the US; if your dog has a specific diet, bring enough food for the trip or confirm a pet shop (like Aeon Pet or local brands) stocks your type before you fly.

    With the quarantine paperwork sorted early and a proper carrier in your bag, Japan is genuinely one of the more rewarding countries to explore with a dog—quiet rural inns, scenic dog runs, and a culture that, overall, treats well-behaved pets with real warmth.

  • Discount Ticket Shops in Japan: Where to Buy Cut-Rate Train and Bus Tickets (Kakuyasu Kippu-ya)

    Discount Ticket Shops in Japan: Where to Buy Cut-Rate Train and Bus Tickets (Kakuyasu Kippu-ya)

    Photo by Samantha Hendrata on Unsplash

    Tucked into the underground passages near Japan’s biggest train stations are small storefronts, often no bigger than a kiosk, lined with handwritten price boards and stacks of paper tickets. These are kakuyasu kippu-ya (格安きっぷ屋), literally “cut-rate ticket shops,” and they’ve been quietly saving commuters and savvy travelers money on trains, buses, and even gift cards for decades. They’re not a scam and they’re not the JR Pass counter — they’re a legitimate secondary market for tickets that other people bought and didn’t fully use. Here’s how the system works and how to use it without wasting a trip.

    What Is a Kakuyasu Kippu-ya?

    These shops buy unused or partially used tickets from the public — leftover commuter coupon books, unused return-trip Shinkansen tickets, gift certificates, and more — then resell them to anyone at a markup smaller than face value. The shop still turns a profit, the original owner recoups some cash instead of letting a ticket expire worthless, and the buyer pays less than the ticket window would charge. It’s essentially a legal pawn-shop model applied to transit tickets, and it has existed in Japan since well before reserved online booking made parts of it less necessary.

    What they are not: scalpers for concert or sports tickets. Japan’s 2019 anti-scalping law makes resale of event tickets above face value illegal, so reputable kippu-ya stick to transport tickets, retail gift cards, and similar instruments rather than touching resale-restricted event seats.

    What You Can Actually Buy There

    The inventory varies day to day since it depends on what sellers bring in, but the recurring categories are:

    • Kaisuken (回数券) fragments — Japanese commuter coupon books traditionally came in sets of 11 single-journey tickets sold for the price of 10. Shops buy up leftover books and sell the individual tickets, so you can pick up a single-fare ticket between two stations for roughly 10% less than the window price. This is the bread-and-butter item and the easiest win for a short city hop.
    • Shinkansen tickets — unused return-trip halves or regional discount tickets, usually saving anywhere from a few hundred to around ¥1,000–1,500 off a one-way fare, depending on the route and how far in advance the original ticket was bought.
    • Highway bus tickets and vouchers — less common since buses are already cheap, but occasional discount coupons turn up.
    • Seishun 18 Kippu — JR’s unlimited local-train pass, historically sold by individual day-use. Note that JR has tightened the rules on this pass in recent years to curb exactly this kind of resale, so ask the shop directly whether single-day use is still available before planning a trip around it.
    • Gift cards and vouchers — department store gift certificates, QUO cards, and sometimes amusement park or movie vouchers at a modest discount.

    What you generally will not find: the foreigner-only Japan Rail Pass (it’s registered to your passport and non-transferable), reserved seat Shinkansen tickets for a specific future date you can rely on in stock, or IC card (Suica/Pasmo) top-ups — these are physical paper or magnetic tickets, not digital balances.

    Where to Find Them: Tokyo, Osaka, and Beyond

    Tokyo’s densest cluster is around Yurakucho Station, in and around the Kotsu Kaikan building and the underground shopping passages that connect toward Shimbashi and Ginza — a handful of competing shops sit within a few minutes’ walk of each other, which makes comparison shopping easy. Shinjuku and Ueno also have scattered shops near station exits.

    In Osaka, look in the underground malls around Osaka/Umeda Station — Hankyu Sanbangai and the Diamor Osaka passage — and around Namba Station. If you’re already navigating Osaka’s downtown canals and bridges, it’s worth pairing a ticket-shop stop with a ride on the Osaka Suijo Bus water taxi, since both departure points cluster near the same central stations.

    Nagoya, Kyoto, and other major cities have smaller equivalents near their main stations, though selection thins out the further you get from Tokyo and Osaka. If your itinerary leans toward regional day trips — say, out to Tomonoura in Hiroshima Prefecture or Chiran in Kagoshima — check the ticket shop near your base city’s main station before you leave, since local trains or bus-transfer tickets to these smaller towns occasionally show up discounted.

    How to Shop: Hours, Cash, and Language

    Most shops open around 9:30–10:00am and close between 7:00 and 8:00pm, and the ones near major stations are typically open daily, including weekends, with reduced hours or closures only around New Year’s. Cash is king — many of these small operators don’t accept credit cards, so bring yen in cash, especially coins and small bills since tickets are often priced in odd amounts like ¥1,480.

    English signage is rare and staff may not speak much English, so write down your departure station, destination, and travel date on your phone or a slip of paper to show rather than relying on conversation. Prices are posted on boards inside or in the window, which makes it easy to browse without committing to anything.

    Common Mistakes That Trip Up Travelers

    • Assuming everything is discounted. Rare or hard-to-find tickets sometimes sell at or near face value — compare the posted price against what you’d pay at a station ticket machine before buying.
    • Buying a date-fixed Shinkansen ticket without checking restrictions. Discounted tickets are often non-refundable and non-changeable, unlike a ticket you buy yourself at the window.
    • Expecting IC card integration. These are paper tickets for manned gates or standard ticket-gate slots, not Suica/Pasmo top-ups.
    • Confusing kippu-ya with event ticket resale. If a shop or website is offering concert, sports, or Tokyo Disney-style tickets at a markup, that’s a different and legally murkier category — steer clear.
    • Visiting right before closing. Good kaisuken fragments and Shinkansen tickets move fast; shop early in the day if you want a specific route.

    Budget, Mid-Range, and Splurge Picks

    Budget travelers get the most reliable value from kaisuken fragments for short urban hops — a near-guaranteed 10% off single-fare city train tickets with almost no downside. Mid-range travelers doing one or two long-distance Shinkansen legs can save real money (often ¥500–1,500 per ticket) by checking the board before buying at the station, especially on popular routes like Tokyo–Osaka or Tokyo–Sendai. For a small splurge, department store gift certificates bought at a discount can offset souvenir shopping costs later in the trip — useful if your packing list includes something like Japanese laundry products or specialty snacks you plan to pick up at a department store basement food hall.

    Best Timing for Discount Tickets

    Stock isn’t seasonal in a strict sense, but two periods tend to bring in better inventory: right after New Year’s and Obon, when people who bought round-trip tickets for family visits sell back the unused return half, and around the Japanese fiscal year-end in March, when commuters switching jobs or moving sell off leftover kaisuken books. If your trip overlaps either window, it’s worth a five-minute detour to check the board even if you weren’t planning to buy a ticket that day. And if your itinerary includes long stretches of independent driving rather than rail — for example if you’re considering renting a campervan or RV for part of the trip — kippu-ya tickets are only useful for the rail and bus segments, so plan your savings around the legs you’ll actually be riding a train or bus.

  • Osaka Suijo Bus: Cruising the City’s Canals by Water Taxi

    Osaka Suijo Bus: Cruising the City’s Canals by Water Taxi

    Photo by Jeremy Santana on Unsplash

    Osaka is a city built around water. The Okawa River loops past Osaka Castle, canals thread through Dotonbori’s neon, and the bay connects the aquarium to Universal Studios Japan. The easiest way to see all of it without fighting subway crowds is the Suijo Bus — literally “water bus” — a network of sightseeing boats and short-hop water taxis that double as genuinely useful transport. Here’s how the different lines work, what they cost, and when to go.

    What Is the Osaka Suijo Bus?

    Osaka Suijo Bus Co. runs the city’s main river-cruise boats, and the brand covers a few distinct services rather than one single route. The two you’ll see most often are the Aqua Liner, a glass-roofed sightseeing boat on the Okawa River, and the Captain Line, a stripped-down shuttle boat connecting the bay-area attractions. A separate operator runs the famous Tombori River Cruise through Dotonbori — it’s not technically a Suijo Bus service, but foreign visitors lump them together since the boats look similar and the ticket windows are often side by side.

    The Aqua Liner: Osaka Castle to Nakanoshima by River

    This is the classic Osaka boat tour. The Aqua Liner departs from Osaka Castle Port, right below the castle grounds, and cruises the Okawa River to Osaka City Central Public Hall Port near Nakanoshima and Yodoyabashi, then loops back — about 40 minutes round trip. Along the way you pass the castle’s stone walls and moat, the Osaka Museum of History, and the ivy-covered brick of the Central Public Hall, with a recorded narration in Japanese and English.

    • Fare: around ¥2,000 for adults, ¥1,000 for children (roughly 6–12), with toddlers riding free on a parent’s lap
    • Frequency: departures roughly every 30–60 minutes, more frequent during cherry blossom season and autumn foliage
    • Getting there: Osaka Castle Port is a 10–15 minute walk from Osakajokoen Station (JR) or Tanimachi 4-chome Station (Osaka Metro)

    Service runs irregularly in deep winter (December–February), with some days skipped entirely, so check the current timetable before building your day around it. There’s also a smaller, roofless version called the Aqua mini, which runs a shorter stretch of the same river for a lower fare — a good option if you just want a quick look at the castle from the water without committing 40 minutes.

    Captain Line: The Harbor Shortcut to Universal Studios Japan

    The Captain Line is less about sightseeing and more about actually getting somewhere. It connects Osaka Aquarium Kaiyukan at Tempozan Harbor Village to the Universal Studios Japan Port, a crossing of about 10 minutes over Osaka Bay. If you’re splitting a day between the aquarium, the Tempozan Ferris wheel, and the park, this is a far more scenic option than backtracking through JR Loop Line transfers.

    • Fare: around ¥800 for adults, ¥400 for children
    • Frequency: roughly every 30–60 minutes; schedules tighten up around USJ opening and closing times

    Buy your ticket at the small booth right at the pier — there’s no need to book ahead, and the boat is small enough that long queues are rare outside of peak summer weekends.

    Tombori River Cruise: Dotonbori’s Neon-Lit Canal Ride

    The Tombori River Cruise runs a 20-minute loop along the Dotonbori canal, passing directly under the Glico running man sign, the giant mechanical crab, and the crowds on Ebisubashi Bridge from water level — a different angle than the one everyone photographs from the bridge itself. It’s operated by Ichibiri-ya, a separate company from Osaka Suijo Bus, but the boats board from the same general stretch of the canal near Donguri Bridge, so it’s easy to assume it’s one network.

    • Fare: around ¥1,000 for adults, ¥500 for children
    • Frequency: departures every 20–30 minutes through the day and into the evening
    • Why go at night: the illumination cruise after dark is the real draw — the canal signage is designed to be seen lit up, and daytime photos never quite match it

    After the ride, Dotonbori and nearby Nipponbashi are worth wandering on foot. If you’re headed toward Den Den Town for electronics or collectibles, Mandarake’s Osaka store is a short walk from the canal and a good way to spend the hour before or after your cruise slot.

    Tickets, Passes, and Where to Buy Them

    All three lines sell tickets at the pier on the day of travel — you generally don’t need to reserve in advance except on major holidays (New Year, Golden Week, Obon in mid-August) when boats can sell out by midday. Osaka Castle Port and the Nakanoshima pier both have ticket counters with English signage; the Tombori cruise booth is a small kiosk right on the canal path and only takes cash in smaller denominations, so carry coins or a ¥1,000 note rather than relying on a card.

    If you’re planning a full day of castle, cruise, and canal walking, it’s worth having a portable charger on hand — phone battery drains fast when you’re shooting photos and video from a moving boat. ChargeSPOT rental stations are common around Osaka Castle, Namba, and Dotonbori if you didn’t bring your own.

    Best Time to Ride and Common Mistakes to Avoid

    Late March to early April (cherry blossoms along the Okawa) and November (autumn colors near the castle) are the best windows for the Aqua Liner — book the earliest slot you can, since afternoon departures sell out fast in those seasons. For the Tombori cruise, early evening just after sunset hits the sweet spot where you get both daylight ambience and the first lit signs.

    • Mistake #1: Assuming all the Osaka boats are run by one company and one ticket covers everything. They don’t, and tickets aren’t interchangeable.
    • Mistake #2: Skipping the Aqua Liner in winter without checking the schedule first — reduced service means some days have no sailings at all.
    • Mistake #3: Treating the Captain Line as a sightseeing cruise. It’s a quick, functional crossing — fine views, but don’t expect narration or a long ride.
    • Mistake #4: Showing up to the Dotonbori kiosk expecting a card reader. Bring cash.

    Budget travelers can get a full taste of Osaka’s waterways for under ¥1,500 total by combining the Tombori cruise with the Aqua mini. For a splurge, time the Aqua Liner for cherry blossom season and follow it with the Tombori illumination cruise the same evening — two very different views of the same city, both from the water.

  • Buying Period Products in Japan: Pads, Tampons & Cups for Travelers

    Buying Period Products in Japan: Pads, Tampons & Cups for Travelers

    Photo by GeoJango Maps on Unsplash

    Japan makes it easy to find period products almost anywhere you go, but the shelf will look unfamiliar even if you’ve shopped for pads and tampons your whole life. Packaging is almost entirely in Japanese, tampon styles skew differently than in the US or Europe, and menstrual cups are far from mainstream. Here’s what to actually expect, where to shop, and what to pack ahead of time so you’re not caught off guard mid-trip.

    What’s Easy to Find vs. What’s Not

    Pads (ナプキン, napukin) are everywhere — convenience stores, drugstores, supermarkets, 100-yen shops, even station kiosks. You’ll have zero trouble restocking day or night. Tampons (タンポン) are a step down in availability: most convenience stores carry only one or two options, if any, while drugstores have a proper selection. Menstrual cups are the hardest tier — they’re a niche, mostly online purchase in Japan, not something you’ll grab on a whim between sightseeing stops. Plan your trip with that hierarchy in mind: top up pads whenever you pass a shop, but don’t assume you’ll find your specific tampon brand or any cup once you land.

    Where to Buy: Convenience Stores, Drugstores, and Donki

    For a quick, no-fuss buy, convenience stores like 7-Eleven, Lawson, and FamilyMart are open 24 hours and stock small packs of pads (roughly 8–16 pieces) for about ¥200–¥350. They’re priced a bit higher per unit than a drugstore, but unbeatable at 11pm when everything else is shut.

    Drugstores are the better value and selection option. Chains like Matsumoto Kiyoshi, Sundrug, Cocokara Fine, and Sugi Drug are in every shopping district and near most train stations, typically open from around 9:00 or 10:00am to 9:00 or 10:00pm. A 20–24 count pack of pads from Kao’s Laurier or Unicharm’s Sofy runs about ¥300–¥450, and a box of 16 o.b. tampons (Japan’s dominant tampon brand) is usually ¥500–¥650. These chains also run loyalty point programs worth signing up for if you’ll be shopping daily — see our guide to Japan’s store point card culture for how T-Point, Rakuten Point, and d-Point work for short-term visitors.

    Don Quijote (“Donki”) is a good backup — many locations are open 24 hours, carry a wide range of pad absorbencies and both tampon types, and offer a tax-free counter for tourists spending over ¥5,000 before tax with your passport in hand. Prices at Donki are comparable to drugstores, occasionally a touch cheaper on bulk packs.

    Reading the Package Without Japanese

    You don’t need to read kanji to shop confidently — the pictograms do most of the work. Look for a wing icon (羽根つき, hane-tsuki) for winged pads, a moon or “night” character (夜用, yoru-you) for overnight/longer pads, and flow-strength labels shown as drops or cc numbers (多い日用 for heavy days, 普通の日用 for normal days, 少ない日用 for light days). Length in centimeters is printed on the front, which is the fastest way to compare products at a glance — Japanese pads run noticeably longer for “night” use (up to 29–35cm) than what you may be used to.

    Tampons in Japan: The Applicator Surprise

    This is the detail that trips up the most visitors: the vast majority of tampons sold in Japan, including the market-leading o.b. brand, are non-applicator, finger-insert (“digital”) tampons. Cardboard or plastic applicator tampons — the standard in the US — are uncommon outside of imported-goods corners, select Costco Japan locations, or online orders. If you rely on an applicator, it’s worth bringing a travel supply from home rather than counting on finding your usual brand here.

    Menstrual Cups: Plan Ahead

    Cups have a small but real following in Japan, led by the domestic brand Lunacup, but they’re still mostly sold online through Amazon.co.jp and Rakuten rather than on physical shelves. Large lifestyle stores like Loft or Tokyu Hands occasionally stock one or two models, so it’s worth a quick look if you’re browsing one anyway, but don’t build your trip around finding a specific size or brand in person. If a cup is your main method, bring it from home — along with a backup pad or two, since sterilizing a cup on the road (boiling water, a clean container) is easier to manage in a hotel than mid-day while sightseeing.

    Prices and Budget Tips

    • Budget: Daiso and other 100-yen shops sell basic pad packs for ¥110–¥220 (tax included) — fine for backup supply, less so for heavy-flow days since absorbency is modest.
    • Mid-range (recommended default): Drugstore packs of Sofy or Laurier pads (¥300–¥450) or o.b. tampons (¥500–¥650) offer the best balance of quality and price, and drugstores are dense enough in any city that restocking is never a detour.
    • Splurge: Imported brands (Tampax applicators, organic cotton lines) sold at specialty import grocers or online carry a premium, often ¥800–¥1,200 for a smaller box, and are worth it only if you have a specific sensitivity or preference.

    If you’re traveling with a baby or managing other household supplies on the road, it’s worth noting Japan’s drugstores double as a one-stop shop for things like detergent for washing reusable cloth pads — our rundown of Japanese laundry detergent and fabric softener brands worth buying covers what to grab in the same aisle.

    Common Mistakes to Avoid

    • Assuming convenience stores carry tampons. Many only stock pads. If tampons are essential, check a drugstore, not just the nearest konbini.
    • Expecting applicator tampons. As above — bring your own if you need them.
    • Running out somewhere rural. Shops thin out fast outside cities. If you’re hiking somewhere remote like the three sacred peaks covered in our Dewa Sanzan guide, pack enough supply for the full day — mountain trail toilets often have no shop nearby and sometimes no disposal bin either, so carry a small bag to pack out used products.
    • Forgetting a disposal pouch. Most stalls have a small sanitary bin, but older buildings, train platform restrooms, and rural rest stops sometimes don’t — a small opaque bag solves this instantly.
    • Not budgeting for pregnancy-related shopping separately. If you’re traveling pregnant, period products aren’t your only concern — see our guide to maternity clothing shopping in Japan for where to find properly sized maternity wear.

    The short version: stock up on pads opportunistically since they’re sold everywhere, buy tampons at a real drugstore rather than hoping a convenience store has them, and if a menstrual cup is part of your routine, pack it from home. With that sorted, period logistics won’t slow down a single day of your trip.