Japan Trove

Category: Travel

Practical, up-to-date guides for traveling in Japan — itineraries, rail passes, eSIMs, where to stay, seasonal timing, etiquette, and the local know-how that makes a trip smoother. Written with real Japanese sources so you get the answer that actually works on the ground, not the recycled tourist one.

  • Kitashinchi and Ginza’s Hostess Bar Districts: What They Are and Why Tourists Should Steer Clear

    Kitashinchi and Ginza’s Hostess Bar Districts: What They Are and Why Tourists Should Steer Clear

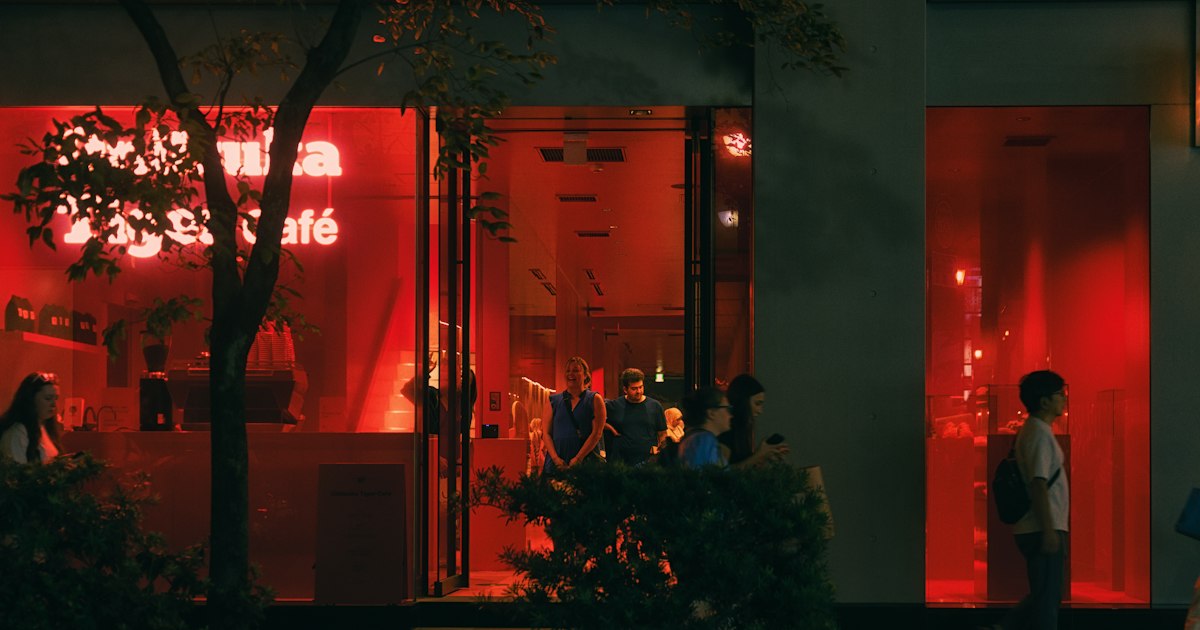
    Photo by ayumi kubo on Unsplash

    Walk through Osaka’s Kitashinchi or the backstreets of Tokyo’s Ginza after dark and you’ll notice something odd: well-dressed men standing outside unmarked doorways, quietly calling out to passersby in accented English. These are two of Japan’s most famous “mizu shobai” (water trade) nightlife districts, built around hostess clubs — and they’re also two of the easiest places in the country for a foreign tourist to lose a very large amount of money in a very short time. Here’s what’s actually going on, and how to enjoy these neighborhoods without becoming the evening’s target.

    What a “Hostess Bar District” Actually Is

    A hostess club (often called a kyabakura if it’s more casual, or a “club” if it’s high-end) is a members-oriented venue where women are paid to sit with customers, pour drinks, and make conversation. It’s legal and deeply embedded in Japanese corporate culture — a huge amount of business entertaining (“settai”) happens in these rooms. The pricing model is the key thing to understand: you pay a seating charge for a fixed time block (often 60–90 minutes), then separate charges for bottles of whisky or champagne, a per-hostess companionship fee, a service charge of 10–15%, and consumption tax on top. At a legitimate high-end club this can easily run ¥30,000–¥100,000+ per person for an evening — and that’s assuming you’re a member or arrived with one, which is how most of these clubs actually operate.

    Kitashinchi, Osaka: Where It Is and What Happens There

    Kitashinchi sits in Osaka’s Kita district, between Dojima and the Osaka/Umeda Station area — the nearest station is Kitashinchi on the Tozai Line, or it’s about a 10–15 minute walk from JR Osaka Station. By day it looks like any other block of office buildings and restaurants. After roughly 7pm, narrow side streets fill with hostess clubs, many on upper floors identified only by a small nameplate near the elevator. It’s one of Japan’s three largest hostess districts (alongside Ginza and Tokyo’s Akasaka), and the real clubs here run almost entirely on introductions — a regular customer vouching for you. That detail matters for what follows.

    Ginza, Tokyo: Luxury by Day, Hostess District by Night

    Ginza is best known to visitors as Tokyo’s flagship shopping street — flagship boutiques, department stores, and the kind of window displays that make for a nice afternoon walk. Take the Ginza or Hibiya subway lines to Ginza Station, or JR to Yurakucho, and you’re right in the middle of it. But the same streets, particularly around Ginza 6- and 7-chome and the area known as Corridor Gai, turn into one of Japan’s densest hostess club concentrations once evening falls, with clubs tucked into the upper floors of otherwise unremarkable buildings. If you’re sightseeing or shopping, daytime is genuinely the better time to be here anyway — the atmosphere, and the crowd, both shift noticeably after dark.

    The Scam Tourists Fall Into (and Why It’s Hard to Fight)

    This is the part that matters most for visitors. A friendly tout (“kyakuhiki”) approaches on the street, often in English, offering cheap drinks or a chance to meet “cute girls” at a nearby bar. Osaka and Tokyo both ban this kind of street touting under local nuisance ordinances, but enforcement at night is patchy, so it still happens constantly in and around both districts. Here’s the tell: genuine Kitashinchi and Ginza clubs almost never take walk-in foreign tourists off the street — they’re introduction-only. So if a tout is inviting you in directly, you’re not being led to an authentic club trading on the neighborhood’s reputation; you’re being led to a bar that exists specifically to overcharge tourists. The bill, when it arrives, is often ¥20,000–¥50,000+ for drinks you thought were covered by a “¥3,000 all-you-can-drink” come-on, padded with table charges and per-hostess fees never mentioned up front. Staff can be intimidating about collecting it, and once you’ve paid by card, disputing the charge from abroad is a long, often fruitless process.

    Common Mistakes to Avoid

    • Following any street tout who approaches you near Kitashinchi, Ginza Corridor Gai, or similar districts — this alone is the single biggest predictor of getting overcharged.
    • Not checking the posted price list at the entrance before sitting down; legitimate bars display pricing, and the absence of one is a red flag.
    • Assuming “snack bar” or “karaoke bar” signage means a casual, low-cost spot — many of these are hostess setups with the same opaque per-time-block billing.
    • Paying by card before getting an itemized receipt. Ask for the breakdown before you tap or hand over a card.
    • Wandering narrow backstreets alone late at night, especially after a few drinks — it noticeably increases how often you get approached.

    Safer Ways to Spend a Night in the Same Neighborhoods

    You don’t need to avoid Kitashinchi or Ginza entirely — just stick to places with transparent, posted pricing. On a budget, standing bars (tachinomi) around Yurakucho’s under-track arcades pour beer and highballs for ¥400–¥600 with prices on the wall. Mid-range, any izakaya chain or a whisky bar that shows its menu at the door is a safe bet — cover charges, if any, should be stated clearly before you sit. For a splurge with zero ambiguity, hotel bars are hard to beat: a cocktail with a view and a printed menu, no membership required. If you’d rather round out the evening with something distinctly Japanese and low-risk, a proper izakai crawl or trying something like doburoku, Japan’s rustic unfiltered sake, at a dedicated sake bar gives you an authentic drinking experience with none of the pricing games.

    If Something Goes Wrong

    If you do end up with a bill you believe is fraudulent, stay calm, ask for an itemized receipt, and state clearly that you intend to call the police if the charge isn’t explained. Many touted bars will reduce the bill on the spot rather than risk a complaint, since street touting itself is already an ordinance violation they’d rather not have on record. If staff become aggressive or won’t let you leave, call 110 for police — it’s free from any phone, no SIM required, and you don’t need fluent Japanese to get help. For the full rundown on how Japan’s emergency numbers work for visitors, see Emergency Services in Japan: Calling 110 and 119 as a Tourist. In practice, the easiest fix is the one upstream of all of this: don’t follow the tout in the first place, and both Kitashinchi and Ginza remain two of Japan’s most atmospheric neighborhoods to simply walk through.
  • Emergency Services in Japan: Calling 110 and 119 as a Tourist

    Emergency Services in Japan: Calling 110 and 119 as a Tourist

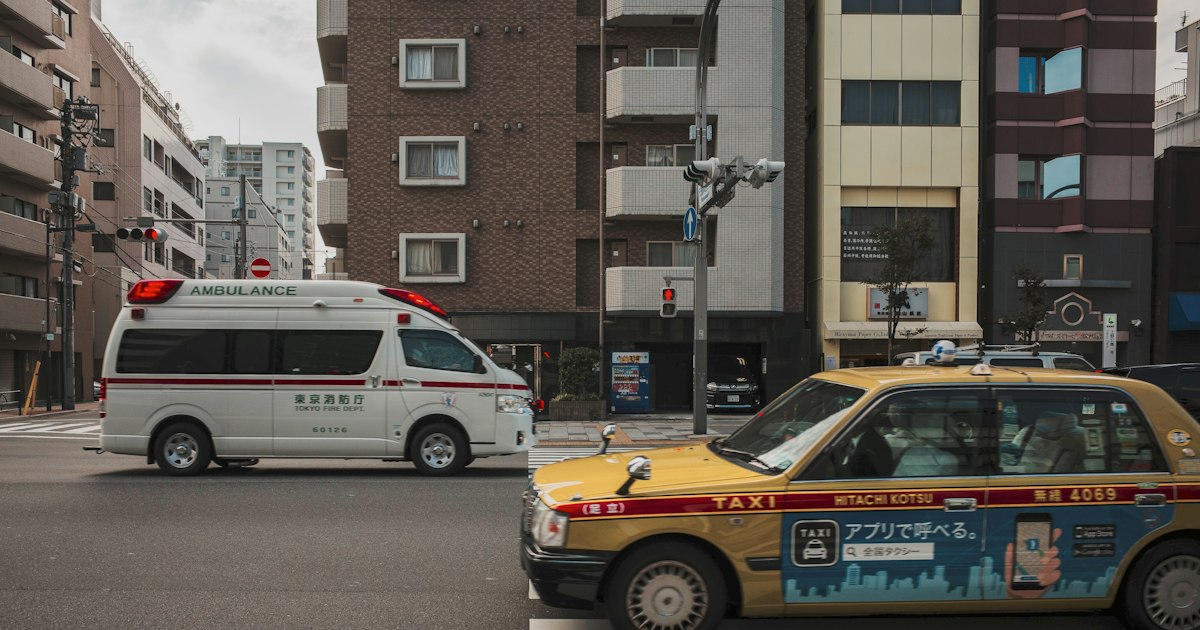
    Photo by Ivan Ermolaev on Unsplash

    Japan is one of the safest countries a traveler can visit, but accidents, sudden illness, and the occasional lost-wallet panic still happen. Knowing exactly which number to dial — and how phone and SIM setup can quietly block that call — is one of the few pieces of trip prep that actually matters. Here’s what every visitor should know before they need it.

    The Two Numbers: 110 for Police, 119 for Fire and Ambulance

    Japan splits emergency response into two separate numbers, and mixing them up wastes precious time:

    • 110 — Police. Use this for theft, assault, lost persons, traffic accidents with no injuries, or anything requiring law enforcement.
    • 119 — Fire and ambulance. Use this for medical emergencies, injuries, fires, and gas leaks.

    Both numbers are free to call, work 24 hours a day, and can be dialed without an area code from anywhere in the country. There’s no single “911” equivalent — this split system is standard across Japan, so it’s worth memorizing both before you land rather than looking it up mid-crisis.

    The SIM Card Trap Most Tourists Don’t Know About

    This is the detail that catches travelers off guard: many popular tourist SIM cards and eSIMs sold for Japan are data-only. They give you maps, translation apps, and messaging, but no voice calling — which means they physically cannot dial 110 or 119. If your plan is to rely on a cheap Amazon eSIM or an airport data SIM, check specifically whether it includes voice service before you need it in an emergency. A rental phone, a Japanese carrier SIM (Docomo, SoftBank, au, Rakuten) with voice minutes, or simply asking a nearby shop, hotel staff, or station attendant to call on your behalf are your reliable fallbacks. This is worth sorting out at the same stage you’re planning airport logistics — see our guide to Japan airport transit for related arrival-day planning.

    Language: What Happens When You Call

    Operators at 110 and 119 call centers primarily speak Japanese, but major cities (Tokyo, Osaka, Kyoto, Yokohama) have English-speaking staff or three-way interpretation available — it just takes an extra beat to connect. If you’re struggling, two phrases go a long way:

    • “Eigo o hanasemasu ka?” (英語を話せますか?) — “Can you speak English?”
    • Simply stating “Kega” (injury), “Kaji” (fire), or “Dorobo” (thief) alongside your location gets the right response dispatched even if the rest gets lost in translation.

    For non-emergency help navigating a situation in English — including how to describe a medical issue or report a problem to police — the Japan Visitor Hotline at 050-3816-2787 operates 24/7 in English, Chinese, Korean, and Japanese. It’s run by the Japan Tourism Agency specifically for foreign visitors and can also help you communicate with 110 or 119 by conference call if needed. Save this number in your phone before you travel.

    Giving Your Location (The Hardest Part)

    Japan’s address system — based on block and building numbers rather than sequential street addresses — confuses even taxi drivers, let alone emergency dispatchers working with a flustered tourist. A few tricks:

    • Open Google Maps and read out the nearest named landmark, station exit number, or shop/restaurant name rather than attempting an address.
    • If you’re near a koban (the small neighborhood police box found in nearly every district), walking there directly is often faster than describing your location over the phone.
    • Screenshot or point at your GPS pin if you’ve handed the phone to a Japanese speaker to relay details.

    This matters even more outside major cities. If you’re exploring somewhere remote — a place like Tokunoshima in Kagoshima or similar outer islands — response times are inherently longer, there may be only one small clinic on the whole island, and serious cases sometimes require a medevac flight to the mainland. Build that reality into your plans if you’re traveling with health conditions or doing anything physically demanding far from a city.

    Ambulances Are Free, But Hospitals Are Not

    Unlike in the US, calling an ambulance in Japan via 119 is free regardless of the outcome — there’s no bill for the ride itself. However, treatment at the hospital you’re transported to is not free for visitors, and without Japanese national health insurance you’ll be billed the full rate, sometimes immediately or on discharge. This is the single biggest argument for buying travel insurance before you fly, not after you’re hurt. For anyone planning higher-risk activities — climbing Mt. Fuji via the Fujikyu Railway route to the Fuji Five Lakes during the short July–September climbing season, for instance — confirm your policy covers mountain rescue specifically, since standard travel policies sometimes exclude it. If you do need emergency care on the mountain, mountain huts along the trail have radios and can relay a 119 call faster than most phones will get signal near the summit.

    Common Mistakes to Avoid

    • Dialing 119 for a police matter or 110 for a medical one. Calls do get redirected, but it costs time.
    • Assuming any phone can call out. Confirm your SIM has voice service before you need it, not during.
    • Hanging up when no English speaker answers immediately. Stay on the line — interpretation gets patched in within moments.
    • Not carrying your passport. Hospitals and police both typically ask for ID, and it speeds up registration considerably.
    • Skipping travel insurance to save money. A single ambulance-to-hospital visit for a broken bone can run into hundreds of thousands of yen without coverage.

    Save This Before You Land

    Write these down somewhere accessible without data — a notes app works, a photo of a printed card works better:

    • Police: 110
    • Fire/Ambulance: 119
    • Japan Visitor Hotline (24/7, multilingual): 050-3816-2787
    • Your hotel’s address and phone number in Japanese, written out
    • Your travel insurance policy number and emergency claims line

    None of this takes more than ten minutes to prepare, and it’s the kind of prep you’ll hopefully never use — but if you do, those ten minutes will matter more than almost anything else you packed.

  • Japan Airport Transit: Do You Need a Visa for a Layover?

    Japan Airport Transit: Do You Need a Visa for a Layover?

    Photo by Tan on Unsplash

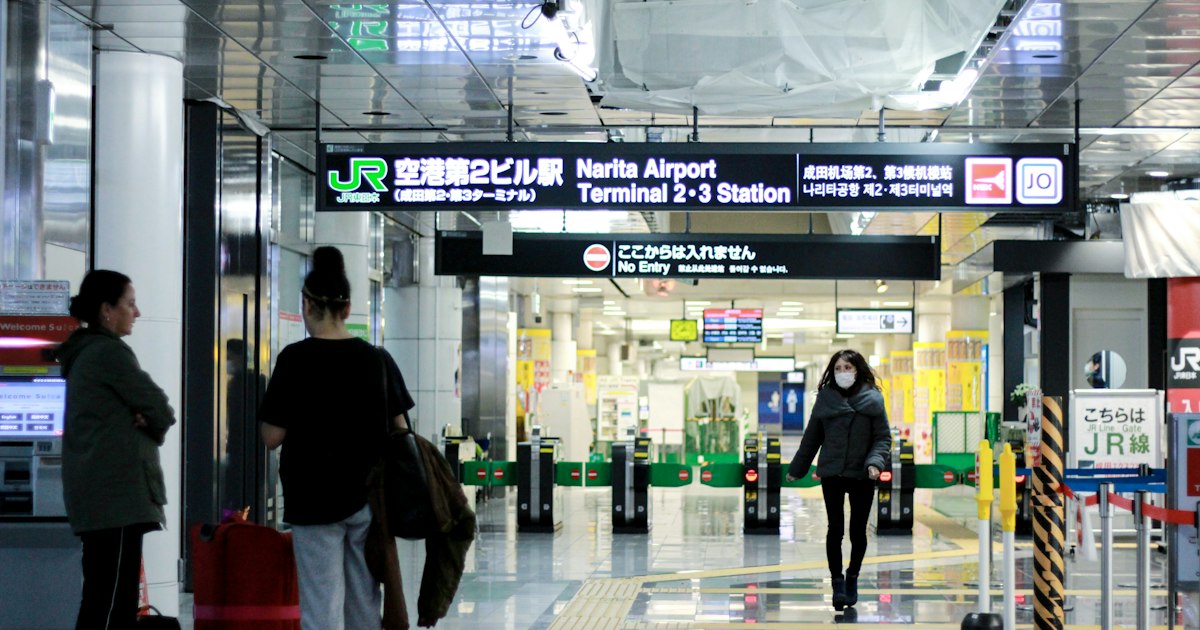
    If your flight to Bali, Manila, or Sydney happens to route through Tokyo or Osaka, you’ve probably had a small moment of panic: do I need a Japanese visa just to sit in an airport for a few hours? The short answer is that most travelers don’t — but the rules depend on your nationality, whether you leave the airport, and how long your connection is. Here’s what actually happens at Japanese immigration during a layover, broken down so you’re not guessing at the transit counter.

    The basic rule: staying inside the airport

    If you remain within the international transit area and never pass through Japanese immigration, you do not need any visa, regardless of nationality. This is true at Narita (NRT), Haneda (HND), Kansai (KIX), Chubu Centrair (NGO), and Fukuoka (FUK). You’ll stay on the “airside” of the terminal, pass through a security recheck if you’re changing airlines or terminals, and board your connecting flight without ever touching Japanese soil in the legal sense.

    This applies even to nationalities that would otherwise need a visa to enter Japan. A transit passenger from India or China connecting at Narita for 3 hours without leaving the sterile transit zone does not need a visa for that transit.

    When you DO need a visa: leaving the airport

    The moment you clear immigration and enter Japan proper — even just to grab a hotel room near the airport for an overnight layover, or to dash into Tokyo for a few hours — you are legally “entering” Japan, not transiting. At that point the normal entry rules apply:

    • Citizens of visa-exempt countries (the US, UK, Canada, Australia, most EU countries, South Korea, and around 70 others) can simply enter on their passport for short stays, usually 90 days, the same as any tourist visit.
    • Citizens of countries without visa-exemption agreements with Japan need a valid visa to leave the airport, even for a few hours. There is no special “transit visa” exception once you clear immigration — you need the same visa you’d need for a full visit.

    In practice this means: if your passport lets you visit Japan visa-free for tourism, it also lets you leave the airport during a long layover. If it doesn’t, you’re confined to the transit area unless you’ve arranged a visa in advance.

    Checking Japan’s visa-exemption list before you book

    Japan’s Ministry of Foreign Affairs maintains the official list of visa-exempt countries and territories, and it does change occasionally (it was suspended for several countries during the pandemic and has since been reinstated for most). Always verify your specific passport against the current list before counting on visa-free entry — don’t rely on secondhand information from forums or what was true a few years ago. If your country isn’t on the list, you’ll need to apply at a Japanese embassy or consulate before you travel; it cannot be arranged on arrival.

    How long is “too long” for an airport-only layover?

    There’s no hard legal cutoff on connection time for staying in the transit zone — a 16-hour overnight connection staying airside is technically fine if facilities exist to support it. But practically:

    • Under 5-6 hours: Stay in the transit area. Narita and Haneda both have adequate (if not luxurious) seating, restaurants, and in Narita’s case, day-use rest areas and capsule-style sleep pods in the terminal.
    • 6-16 hours overnight: This is the gray zone where many travelers choose to formally enter Japan (if visa-free) to use an airport hotel rather than sleep in the terminal. Narita has several hotels a free shuttle-bus ride away; Haneda has options you can walk to without even needing a train.
    • Over 16-24 hours: Almost nobody stays airside for this long voluntarily. If you’re visa-free, formally entering and spending the day in Tokyo is far more pleasant and costs nothing extra.

    Keep in mind some low-cost long layovers are actually a great way to sample Japan without a full separate trip — see our guide to Ueno Zoo’s giant pandas if you’ve got a free afternoon near Haneda or central Tokyo, since Ueno is roughly 60-75 minutes from either airport by train.

    What a same-day Tokyo excursion actually costs and takes

    If you’re visa-exempt and have 8+ hours between flights, leaving the airport is very doable. From Narita, the fastest way into central Tokyo is the Keisei Skyliner (¥2,570 one-way, about 41 minutes to Ueno/Nippori) or JR Narita Express (¥3,250, about 55-60 minutes to Tokyo Station). From Haneda, the Keikyu line or Tokyo Monorail reach central Tokyo in 15-30 minutes for ¥300-500. Budget at least 3 hours round-trip from Narita (longer with immigration queues at busy times) and build in a solid buffer before your connecting flight — Japanese airport security recommends arriving at least 2-3 hours before an international departure.

    A realistic 8-hour layover plan: clear immigration (30-45 min), train into Tokyo (45-60 min), 3-4 hours exploring or shopping, train back, and recheck-in with buffer. This isn’t enough time for a day trip to places like Nikko or the Fuji Five Lakes — those routes, covered in our guides to the Spacia Express to Nikko and the Fuji Excursion train, really need a dedicated day. Stick to central Tokyo — Ueno, Asakusa, or Ginza — for a layover excursion.

    Common mistakes travelers make

    • Assuming “transit” always means visa-free. It only means visa-free if you never clear immigration. Leaving the airport reclassifies you as an entrant.
    • Confusing connecting-flight logistics with visa rules. Changing terminals at Narita (Terminal 1 to Terminal 2, for example) still happens within the transit zone via shuttle bus and does not require immigration clearance if you’re not checking into Japan.
    • Not checking terminal separation. Some codeshare itineraries land you in one terminal and depart from another; confirm whether that requires an airside shuttle or a landside walk, since the latter means passing through immigration.
    • Booking a layover too tight to safely leave, then rushing back and missing the flight. If in doubt, stay in the terminal — missing an international connection is worse than skipping a few hours in the city.
    • Forgetting Japan’s visa-exemption status is nationality-based, not residency-based. It’s your passport that matters, not where you currently live or hold a visa for.

    Quick reference by scenario

    • Staying airside, any nationality, any layover length: No visa needed.
    • Leaving the airport, visa-exempt passport, under 90 days cumulative: No visa needed, enter like a normal short-term visitor.
    • Leaving the airport, non-exempt passport: Visa required in advance — cannot be obtained at the airport for this purpose.
    • Overnight connection, want a hotel bed: If visa-exempt, formally enter and use an airport-area hotel; if not exempt, use terminal rest facilities or a capsule pod instead.

    When in doubt, check your passport against Japan’s current visa-exemption list a few weeks before departure, not at the transit desk. It’s a five-minute check that saves you from either an unplanned confinement to the terminal or, worse, a denied entry.

  • Tobu Railway’s Spacia Express: Booking the Direct Train from Tokyo to Nikko

    Tobu Railway’s Spacia Express: Booking the Direct Train from Tokyo to Nikko

    Photo by aestelle on Unsplash

    Nikko sits just far enough from central Tokyo that most visitors assume it requires a complicated transfer — a shinkansen leg, a local train swap, maybe a bus. It doesn’t. Tobu Railway runs a direct limited express, branded Spacia (and now the newer Spacia X), straight from Asakusa to Tobu-Nikko Station in under two hours, no transfers required. It’s one of the most pleasant train rides out of Tokyo, and also one of the most commonly mis-booked, because travelers confuse it with the JR route, buy the wrong ticket type, or show up at the wrong Asakusa station entirely. Here’s how to book it correctly and get the most out of the ride.

    Why the Spacia Beats the Alternatives

    There are three ways to reach Nikko from Tokyo: the Tobu Spacia direct limited express, a JR combination (Tohoku Shinkansen to Utsunomiya, then the local JR Nikko Line), or a highway bus. The JR route is only worth it if you already hold a Japan Rail Pass, since it’s otherwise more expensive and involves a platform change. The bus is cheapest but takes close to three hours and is subject to traffic on weekends. The Spacia splits the difference nicely: one seat, one station to the next, reclining seats, and large windows for the mountain scenery once you clear the Tokyo suburbs. If you’ve ridden the Fuji Excursion Train to the Fuji Five Lakes, the experience is similar in spirit — a dedicated resort limited express that turns the journey itself into part of the trip. See our guide to riding the Fuji Excursion Train for comparison if you’re weighing both day trips.

    Spacia vs. Spacia X: Which Train to Book

    Tobu runs two fleets on this route. The original Spacia (100 series) has been in service since the 1990s and offers comfortable, all-reserved seating in a single standard class. The newer Spacia X (N100 series), launched in 2023, runs a more limited number of daily round trips and adds tiered seating: a Standard Car, a slightly upgraded Premium Seat car, six-seat private Compartments, and — at the very front and rear of the train — two glass-nosed Cockpit Suites with a forward view normally reserved for the driver. Spacia X is faster on its fastest runs (around 1 hour 48 minutes to Tobu-Nikko) and noticeably nicer, but it only departs a handful of times a day, so check the timetable before building your itinerary around it. Ordinary Spacia departures are more frequent and still comfortable, just less photogenic.

    Where to Board and How to Buy Tickets

    Trains depart from Tobu Asakusa Station, which is directly above/adjacent to Tokyo Metro Ginza Line’s Asakusa Station and a short walk from the Toei Asakusa Line exit — look for the Tobu signage near the Sumida River, not the Metro-only exits. This is the single most common mix-up: there’s no separate “Tobu” station name on most subway maps, so first-timers sometimes wander the wrong direction out of Asakusa Station.

    You can book seats three ways: online through Tobu Railway’s official reservation site (English-language booking opens roughly a month in advance and is the most reliable way to secure Spacia X during cherry blossom or autumn foliage weekends), at the ticket counters or machines inside Tobu Asakusa Station, or at the Tobu Tourist Information Center near the station, which has English-speaking staff and can also sell you combination passes. All seats on both Spacia and Spacia X are reserved — there is no unreserved car, so don’t board without a seat ticket and expect to stand.

    What It Costs

    As a rough guide for current pricing (always confirm on Tobu’s site before you travel, since fares are revised periodically): a one-way Spacia seat from Asakusa to Tobu-Nikko runs approximately ¥2,950–3,000, combining the base fare and the limited express surcharge. Spacia X Standard Car seats are similarly priced; the Premium Seat car adds a few hundred yen. The six-seat Compartments and the two-seat Cockpit Suites cost considerably more — the Cockpit Suite in particular is sold as a novelty experience and can run two to three times a Standard seat, per person. If your main goal is simply getting to Nikko efficiently, Standard Car on either train is perfectly comfortable and the better value.

    Budget travelers should also look at Tobu’s combination passes, such as the Nikko-area pass that bundles unlimited local trains and buses within the Nikko sightseeing area with a discounted limited express supplement — instead of paying full fare, you only pay a reduced surcharge on top of the pass. These passes are sold at Tobu Asakusa Station and online, and they pay for themselves quickly if you’re also riding the Toshogu shrine-area buses.

    The Ride and What You’ll See

    The route runs through Tokyo’s eastern suburbs for the first 30–40 minutes before opening into farmland and river valleys as you approach Tochigi Prefecture. Spacia X runs largely nonstop or with very few stops; the older Spacia makes a handful of station stops (Tobu-Dobutsukoen, Kasukabe, and a few others depending on the specific train) but still arrives in well under two hours. On a clear winter day, you can sometimes spot mountains to the west as the train climbs toward Nikko’s elevation — it’s noticeably cooler up there than in Tokyo, so dress in layers regardless of season.

    At the other end, Tobu-Nikko Station is about 2 km from Toshogu Shrine and the historic temple district; local buses run frequently from right outside the station, and it’s a manageable uphill walk if you’d rather stretch your legs. Note that JR Nikko Station is a separate building a few minutes’ walk away — if you booked the JR combination route by mistake, you’ll arrive there instead, not at the Tobu station.

    Best Time to Go, and Timing Your Departure

    Nikko’s two peak seasons are late April to early May, when the maples and cedars are a fresh green and the Toshogu complex is less crowded than in autumn, and mid-October through mid-November, when the surrounding mountains turn red and gold — this is by far the busiest period, and Spacia X seats sell out days in advance on weekends. If you’re traveling during foliage season, book your seat as early as the reservation window allows and aim for the earliest reasonable morning departure; Nikko’s shrine complex and Lake Chuzenji area get genuinely crowded by mid-morning on autumn weekends. Winter is quiet and crisp, with occasional snow around the shrines, and summer is the coolest escape from Tokyo’s heat thanks to Nikko’s elevation, though rain is common.

    Common Mistakes to Avoid

    • Assuming a Japan Rail Pass covers this train. It doesn’t — Tobu is a private railway, entirely separate from JR. If you’re relying on a JR Pass, take the Shinkansen-to-Utsunomiya route instead.
    • Confusing the two Asakusa stations. Tobu Asakusa Station is a distinct building from the Tokyo Metro and Toei subway exits, though they’re connected — give yourself a few extra minutes the first time.
    • Not reserving ahead during foliage season. Every seat on every Spacia and Spacia X run is reserved; there’s no standing-room fallback if you arrive without a ticket.
    • Booking Spacia X without checking the timetable. It runs far fewer times per day than the standard Spacia — don’t assume it departs hourly.
    • Getting off at the wrong Nikko station. Tobu-Nikko and JR Nikko are separate stations a short walk apart; make sure your return ticket matches the station you actually arrived at.

    If train travel in Japan has become part of the appeal of your trip rather than just a means of getting around, Nikko by Spacia pairs well with other distinctive rail journeys — and once you’re in the Nikko area, renting a bicycle around Lake Chuzenji is a popular way to extend the day; just check Japan’s bicycle helmet rules for tourists before you do. And if Nikko leaves you hungry for more offbeat day trips from Tokyo, our guide to reaching Aogashima covers the other end of the spectrum entirely.

  • Fujikyu Railway: Riding the Fuji Excursion Train from Tokyo to the Fuji Five Lakes

    Fujikyu Railway: Riding the Fuji Excursion Train from Tokyo to the Fuji Five Lakes

    Photo by Jiachen Lin on Unsplash

    If you want to see Mt. Fuji without renting a car or joining a bus tour, the easiest route from central Tokyo is a single train: the Fuji Excursion (富士回遊), a reserved-seat limited express that runs directly from Shinjuku to Kawaguchiko in the Fuji Five Lakes region. No transfers, no station-dragging luggage between platforms — you sit down in Tokyo and get off at the lake. Here’s how the train actually works, what it costs, and the booking mistakes that catch first-timers.

    What Is the Fuji Excursion Train?

    The Fuji Excursion is jointly operated by JR East and Fujikyu Railway. It starts as a normal JR limited express out of Shinjuku Station, runs down the Chuo Line to Otsuki, and then — without you having to change trains — continues onto the private Fujikyu Railway line into the mountains, terminating at Kawaguchiko Station. The whole trip takes roughly 1 hour 55 minutes to 2 hours, and there are typically only a handful of departures each way per day (around four round trips), so this isn’t a hop-on-whenever service like the Yamanote Line — check the timetable before you plan your day.

    All seats are reserved. There’s no non-reserved car, so you need a seat assignment before boarding, not just a ticket.

    Tickets, Fares, and Which Pass Actually Covers It

    This is where most visitors trip up. The train crosses two different companies’ tracks — JR East (Shinjuku to Otsuki) and Fujikyu Railway (Otsuki to Kawaguchiko) — and your fare is really two fares stitched together.

    • Standard one-way fare, Shinjuku to Kawaguchiko: around ¥4,130 for a reserved seat, covering base fare plus limited express charge for the full route.
    • Japan Rail Pass (nationwide): covers the JR East portion (Shinjuku–Otsuki) but not the Fujikyu Railway leg, so you’ll still pay a supplementary fare for the Otsuki–Kawaguchiko section plus the reserved seat charge.
    • JR East Tokyo Wide Pass (around ¥10,180 for 3 consecutive days): this is the one locals and repeat visitors actually use for this trip, because it covers the entire Fujikyu Railway line as well as JR East’s greater Tokyo network. With this pass you only pay the limited express reserved-seat surcharge (around ¥1,300) rather than the full fare — and the pass itself pays for itself quickly if you’re also using it for day trips elsewhere in the region.

    Reserve seats online through JR East’s train reservation site up to about a month in advance, or at any JR East “Midori no Madoguchi” ticket counter or ticket machine. Seats sell out on weekends and holidays, especially during cherry blossom season (early-mid April) and autumn foliage (late October to mid-November) — don’t assume you can just walk up and board.

    Riding the Route: Shinjuku to Kawaguchiko

    Board at Shinjuku Station — check the departure board for the specific limited express platform, since it’s separate from the regular Chuo Line commuter platforms. The train glides out through western Tokyo and Tachikawa before climbing into the hills past Otsuki, where the Fujikyu Railway track begins and the scenery shifts from suburban sprawl to forested mountainside. On clear days, Mt. Fuji starts appearing on the right-hand side of the train in the final 30–40 minutes, so grab a right-side window seat if the mountain is the whole point of the trip.

    The second-to-last stop, Mt. Fuji Station (formerly Fujiyoshida), is also worth knowing about: it’s the jumping-off point for the Chureito Pagoda viewpoint, a roughly 10–15 minute uphill walk and stairs climb for the classic pagoda-with-Fuji-in-the-background photo. Many visitors accidentally stay on to the final stop, Kawaguchiko, and miss this — know which station you want before you board.

    Best Time to Go for Mt. Fuji Views

    Mt. Fuji is notoriously shy in summer, when haze and clouds hide it most afternoons — if you’re visiting July through September, aim for early morning. Winter (December through February) gives the clearest, most reliable views, with crisp air and snow-capped peak, though it’s cold for lakeside walking. Spring brings the Fuji Shibazakura Festival (pink moss phlox fields near Lake Motosuko, typically mid-April to late May) with Fuji as a backdrop, and autumn (late October to mid-November) brings the Momiji Corridor near Lake Kawaguchiko, where red maple trees line the lakeside path. Both of these seasonal windows are also when trains and buses are busiest, so book your Fuji Excursion seat and any hotel well ahead.

    Getting Around the Fuji Five Lakes Once You Arrive

    Kawaguchiko Station is the regional hub, with a tourist information counter right at the exit. From there, the Fujikyu “Retro Bus” network loops around the lake and out to attractions like Oshino Hakkai (a small village built around eight spring-fed ponds, about 25 minutes by bus) and the Kachi Kachi Ropeway. A one- or two-day bus pass is usually the most economical way to see multiple spots without waiting on timed buses one by one.

    If you’d rather cycle the flat lakeside path at your own pace, rental shops (including electric bikes) cluster near Kawaguchiko Station. If you’re not used to Japan’s cycling rules, it’s worth knowing the helmet requirements that apply to rental bikes here — see our guide to Japan’s bicycle helmet law for tourists before you grab a bike.

    Common Mistakes to Avoid

    • Assuming the Japan Rail Pass covers the whole fare. It only covers the JR East section to Otsuki — you’ll still owe the Fujikyu portion at the gate or on board.
    • Confusing the Fuji Excursion with the Fujisan View Express. The latter is a separate, retro-styled sightseeing train that runs only within the Fujikyu Railway network (not from Tokyo) and charges its own extra fee — a nice add-on once you’re already in the area, but not a substitute for the Shinjuku–Kawaguchiko train.
    • Not reserving ahead on weekends. Because every seat is reserved and departures are limited, a sold-out train means waiting hours for the next one, not just standing.
    • Overshooting your stop. If Chureito Pagoda is on your list, get off at Mt. Fuji Station, one stop before the Kawaguchiko terminus.

    Budget, Mid-Range, and Splurge Options

    • Budget: The Keio/Fujikyu highway bus from Busta Shinjuku to Kawaguchiko costs around ¥1,800–2,200 one way and takes about 1 hour 45 minutes without traffic — slower and less comfortable than the train, and more exposed to weekend traffic jams, but notably cheaper if you’re not using a pass.
    • Mid-range: The standard Fuji Excursion reserved seat (around ¥4,130 one way) is the sweet spot for most travelers — direct, scenic, comfortable, and no transfers with luggage.
    • Splurge / best value for a multi-day trip: Buy the JR East Tokyo Wide Pass if you’re also planning other day trips from Tokyo during your stay (Nikko, Kamakura, or further-flung spots). It covers the Fujikyu Railway fare entirely and unlocks unlimited rides elsewhere on JR East’s greater Tokyo network for three days, dropping your Fuji Excursion cost down to just the seat reservation fee.

    However you book it, the Fuji Excursion remains the simplest way to turn “day trip to Mt. Fuji” from a logistics project into a single reserved seat and a two-hour ride with the mountain filling your window.

  • Bringing Your Own Pet to Japan: Import Quarantine Rules, Paperwork & Timelines

    Bringing Your Own Pet to Japan: Import Quarantine Rules, Paperwork & Timelines

    Photo by Dariusz Sankowski on Unsplash

    Moving to Japan with your dog or cat — or just bringing a pet along for an extended stay — is entirely doable, but it is not a last-minute errand. Japan’s Animal Quarantine Service (動物検疫所, run by the Ministry of Agriculture, Forestry and Fisheries) runs one of the stricter import regimes in Asia, built around keeping the country rabies-free. Miss a step and your pet can be held in quarantine at the airport for up to 180 days on arrival. Get the paperwork right, and the actual airport process takes well under an hour. Here is the realistic timeline, the costs, and the mistakes that trip up most first-timers.

    Where You’re Coming From Changes Everything

    The single biggest fork in the process is your country’s rabies status. If you’re flying from a “rabies-free or controlled” region recognized by Japan — Australia, New Zealand, Hawaii, Guam, Fiji, Iceland, the UK, Ireland, and most of Scandinavia, among a short list of others — the process is dramatically simpler: microchip, two rabies vaccinations (or sometimes none required if the territory has no rabies at all and the pet hasn’t left it), and a straightforward import notification. Most visitors, however, are coming from the US, Canada, continental Europe, or elsewhere in Asia — all classed as regular rabies-risk regions — and need the full process below, centered on a mandatory 180-day wait.

    Step 1: Microchip, Then Rabies Shots (Start 7–8 Months Out)

    Order of operations matters here and is a common trip-up: your pet must have an ISO 11784/11785-compliant 15-digit microchip implanted before any rabies vaccinations count toward Japan’s requirements. If your pet already has an older or non-ISO chip, a vet will need to scan and document it, or you may need a compatible scanner on hand at check-in.

    • After the microchip, your pet needs two rabies vaccinations, at least 30 days apart.
    • Many owners already have one vaccination on record; if so, you typically just need the second, properly spaced.
    • Keep every vaccination certificate — date, vaccine brand, lot number, veterinarian’s signature. Missing details are a top reason import notifications get rejected.

    Step 2: The Blood Test and the 180-Day Clock

    At least 30 days after the second rabies shot, a vet draws blood for a rabies antibody (serum neutralization, often called FAVN) test, sent to a laboratory approved by Japan’s Animal Quarantine Service — in the US this is typically Kansas State University’s Rabies Laboratory. Your pet needs an antibody titer of at least 0.5 IU/mL to pass. The lab fee runs roughly JPY 20,000–30,000 equivalent (often billed in USD, around $150–200), plus your vet’s blood-draw charge.

    Here’s the part that catches people out: the 180-day waiting period starts from the date the blood sample was drawn, not from when you get the results or book your flight. You cannot bring your pet into Japan until 180 days have passed from that sample date. Budget your whole trip around this — if you want to land in Japan on April 1, your vet needs to draw that blood sample by roughly early October the year before, assuming the titer result comes back clean on the first try. A failed test means re-vaccinating and waiting another 30+ days to redraw, so start early and build in slack.

    Step 3: Advance Notification — 40 Days Before Arrival

    Once the 180-day countdown is running, you submit an “Advance Notification of Importation of Animals” to the Animal Quarantine Service office at your planned Japanese entry airport. This must arrive at least 40 days before your pet lands — do it online or by fax/mail directly to the airport’s quarantine office (Narita, Haneda, Kansai, Chubu/Centrair, New Chitose, Fukuoka, and Naha all have quarantine counters; smaller airports generally do not). The office reviews your documents and issues confirmation, which you’ll present on arrival alongside the originals. If you’re working with a pet relocation agent, this is typically the step they handle for you.

    Step 4: Arrival and the Airport Inspection

    At the airport, go to the Animal Quarantine Service counter before passing through regular customs with your pet. Officers check the microchip reads correctly, verify your vaccination certificates and blood test results against your advance notification, and confirm the 180 days have genuinely elapsed. If everything matches, inspection typically takes well under an hour and your pet is cleared to leave with you the same day — no cage time required. If paperwork is incomplete or inconsistent, your pet can be detained at the quarantine facility for up to 12 hours while things are sorted, or in the worst case, up to 180 days if requirements genuinely weren’t met. This is the outcome the entire process is designed to help you avoid.

    Budgeting the Whole Process

    Costs vary a lot by country of origin and whether you self-manage or hire help:

    • Budget / DIY (~JPY 60,000–100,000 total): You handle your own vet visits, blood test shipping, and online advance notification. Main costs are vet fees for vaccinations and the blood draw, the lab fee, and airline pet fees (which vary widely by carrier and whether your pet flies in-cabin or as cargo).
    • Mid-range (~JPY 150,000–300,000): Same DIY paperwork, but with an international health certificate issued by a USDA/government-endorsed vet, plus airline cargo fees for a larger dog and a proper IATA-compliant crate.
    • Splurge (~JPY 300,000–600,000+): A pet relocation agency manages the entire timeline, paperwork, airport pickup, and sometimes door-to-door delivery. Worth it if you’re relocating for work and don’t have months to manage the process yourself, or if your schedule is tight on the 180-day math.

    Common Mistakes to Avoid

    • Vaccinating before microchipping. Japan only counts rabies vaccinations given after the microchip is in place.
    • Underestimating the 180-day wait. This is the step that derails travel plans booked too close to departure — there’s no way to expedite it.
    • Skipping the 40-day advance notification. Arriving without it can mean your pet is held even if every medical requirement is otherwise satisfied.
    • Assuming any airport will do. Only airports with an Animal Quarantine Service office can process live animal arrivals — check before booking your flight.
    • Forgetting the return trip. If you’re visiting rather than relocating, your home country likely has its own re-entry pet requirements — check those well before you leave.

    Once your pet has cleared quarantine, getting around Japan with them is its own project — many travelers find renting a car far easier than navigating trains with a carrier, especially for longer stays outside major cities. And if your travel dates don’t line up with the 180-day window this time around, it’s worth noting Japan has plenty of animal encounters that don’t require paperwork at all, like Ueno Zoo’s giant pandas, while you plan the real trip with your own pet for next time.

  • Ueno Zoo’s Giant Pandas: Tickets, Timed Entry & How to See Them

    Ueno Zoo’s Giant Pandas: Tickets, Timed Entry & How to See Them

    Photo by Lukas W. on Unsplash

    Ueno Zoo’s giant pandas are one of the most reliably crowded attractions in central Tokyo — and also one of the easiest to get wrong if you don’t know how the viewing system works. Unlike most zoo exhibits, seeing the pandas here can involve a second, separate queue with its own ticket, and if you show up on a weekend afternoon without a plan, you may spend 45 minutes in line for a 90-second glimpse. Here’s how to actually see them, what it costs, and when to go.

    Why Ueno Zoo’s Pandas Draw Crowds

    Ueno Zoo (Ueno Dōbutsuen) has kept giant pandas on loan from China since 1972, and they remain the single biggest draw in a zoo that’s otherwise a pleasant but fairly standard municipal collection. The pandas live in the “Panda no Mori” (Panda Forest) complex in the East Garden, a purpose-built habitat with indoor and outdoor viewing areas. Because the loan arrangements periodically bring new pandas in and send others back to China, the specific individuals on view do change over the years — check the official Ueno Zoo website shortly before your trip to confirm who’s currently there, since names and numbers shift more often than most zoo information online reflects.

    Admission Tickets and Prices

    General zoo admission (which includes panda viewing — there’s no separate “panda ticket” for entry) runs:

    • Adults (16–64): ¥600
    • Seniors (65+): ¥300
    • Junior high school students: ¥200 (Tokyo residents/students are free)
    • Elementary school age and younger: free

    Bring ID if you’re claiming a senior or student discount. Tickets are sold at machines near the entrance gates (Ueno Park main gate and Benten-mon gate); cash and IC cards both work, and you can also buy same-day tickets online in advance through the zoo’s official site, which is worth doing on weekends to skip the ticket line itself — though it does nothing for the separate panda queue.

    Hours, Closures and Getting There

    Ueno Zoo is open 9:30 AM to 5:00 PM, with last entry at 4:00 PM. It’s closed on Mondays (or the following day if Monday is a public holiday) and over the New Year holiday period, roughly December 29 to January 1. Always double-check the calendar before you go, since occasional maintenance closures happen outside this pattern.

    The zoo sits inside Ueno Park, and getting there couldn’t be simpler: it’s about a 5-minute walk from the park exit of JR Ueno Station, or a similarly short walk from Keisei Ueno Station, Ueno Station on the Tokyo Metro Ginza/Hibiya lines, or Nezu Station if you’re coming from the north side. There’s no need to rent a car or book transport in advance — this is one of the most transit-accessible attractions in the city.

    The Panda Viewing Line and Timed-Entry Tickets

    This is the part visitors are most often caught off guard by. When demand is high — weekends, holidays, cherry blossom season, school trip season, or whenever a panda cub is a current novelty — the zoo issues numbered queue tickets (seiriken) specifically for panda viewing, separate from your admission ticket. Staff hand these out near the Panda no Mori entrance once the wait builds up; the ticket gives you a return window (for example, “come back between 11:30 and 12:00”) rather than a fixed slot you book in advance. You’re free to explore the rest of the zoo while you wait for your window.

    On quieter days, there’s no queue ticket system at all and you simply walk up and view the pandas directly. The system only activates when crowds warrant it, so don’t assume you need to plan around it every single day — but don’t assume you won’t need to, either. If you arrive and see zoo staff with ticket rolls near the panda building entrance, that’s your cue to grab one immediately rather than browsing elsewhere first.

    Best Time to Visit for Short Waits

    Pandas are most active (and most visible, rather than napping out of sight) in the morning, so arriving close to the 9:30 AM opening is the single best move — both for panda activity and for beating the queue-ticket system before it kicks in. Weekday mornings, especially outside Japanese school holidays (spring break around late March, Golden Week in early May, summer break in August, and New Year), are consistently the calmest.

    Avoid: weekend afternoons, national holidays, the first good-weather Saturday after a long rainy stretch, and the period right after any newly announced panda cub becomes old enough for public viewing — local visitors treat that like an event. Rain actually helps you here; a drizzly weekday morning can mean walking straight up to the enclosure with almost no one else around.

    Common Mistakes to Avoid

    • Treating it like a one-stop attraction. Budget at least 2–3 hours for the full zoo, since the panda queue (if active) eats into your visit, and the East and West Gardens are connected by a monorail/walking path that takes time to cover.
    • Visiting right after lunch. Early afternoon is typically the peak crowd window, compounding both the general zoo crowd and the panda queue.
    • Not checking the closure calendar. Monday closures catch a surprising number of travelers who assume all Tokyo attractions run daily.
    • Assuming the pandas are guaranteed to be on exhibit. Keepers occasionally keep pandas off-view for health or behavioral reasons for a day. There’s no way to check this remotely — it’s simply a small risk inherent to zoo visits anywhere.
    • Forgetting cash for ticket machines if card readers are down. Most machines take IC cards, but having ¥1000 notes on hand avoids any hiccup.

    Budget, Mid-Range and Splurge Tips

    At ¥600 for adult admission, Ueno Zoo is already one of the cheapest things to do in central Tokyo for a half-day, so “budget vs. splurge” here is mostly about food and souvenirs rather than entry:

    • Budget: Skip the inside cafés and grab something from a convenience store near the station before you go, or bring a bento to eat at the park’s shaded benches just outside the zoo gates.
    • Mid-range: The zoo’s own cafés and kiosks sell reasonably priced snacks, and the gift shop near Panda no Mori has panda-themed cookies, keychains, and plushies in the ¥500–¥2,000 range — a solid, compact souvenir if you’re not trying to haul much home.
    • Splurge: Larger panda plush toys and limited-edition goods tied to specific cubs can run ¥3,000+ and sell out fast when a new cub debuts, so buy on the spot rather than planning to come back for it.

    If you’re visiting with young kids and traveling light on supplies, it’s worth sorting out essentials like formula or diapers before zoo day rather than mid-visit — see our guide to buying infant formula, diapers and baby food in Japan for where to stock up. And if you’re planning to explore Ueno Park and the surrounding Yanaka area by rental bike afterward, check Japan’s bicycle helmet rules for tourists first, since rental shops increasingly enforce them.

    Ueno Zoo’s pandas are worth the trip, but the real planning skill isn’t finding the zoo — it’s timing your arrival and reading the queue-ticket situation the moment you walk in. Get there early on a weekday, and you’ll likely skip the whole system entirely.

  • Japan’s Bicycle Helmet Law for Tourists: What’s Required When You Rent a Bike

    Japan’s Bicycle Helmet Law for Tourists: What’s Required When You Rent a Bike

    Photo by Aaron Hohenstein on Unsplash

    Renting a bicycle is one of the best ways to see Japan at street level — gliding along the Kamo River in Kyoto, hopping between temples in Kamakura, or covering the flat sprawl of Osaka faster than the subway allows. But since a 2023 law change, a question comes up constantly in traveler forums: do you actually have to wear a helmet? The honest answer is “it’s complicated, and it depends on who’s riding.” Here’s what the law says, what rental shops will actually hand you, and how to avoid the mistakes that trip up first-time cyclists in Japan.

    What the law actually requires

    On April 1, 2023, Japan revised its Road Traffic Act so that all cyclists — not just children — are asked to wear a helmet. Crucially, this is what’s called a doryoku gimu (努力義務), an “effort obligation.” It is not a criminal law with fines attached, and police will not stop adult tourists for riding bareheaded. This puts adult helmet use in the same soft-legal category as, say, wearing a seatbelt in the back seat of a taxi: strongly encouraged, not punishable.

    There’s one group where the rule has real teeth: children under 13. Since 2008, guardians have had a legal duty to have children in that age group wear helmets while cycling, and this is taken seriously by rental shops and schools alike. If you’re traveling with kids and plan to rent bikes as a family — something worth pairing with the practical advice in our guide to traveling with young children in Japan — expect staff to insist on a helmet for anyone who looks under 13, no exceptions.

    What rental shops provide in practice

    Most mainstream rental operations — hotel-affiliated rentals, city tourism bike schemes, and shops near train stations — now stock helmets and will offer one when you check in, even though they can’t force an adult to wear it. Budget-tier services are the exception: the ubiquitous orange-and-white Docomo Bike Share docks (common in Tokyo, Yokohama, and Osaka, roughly ¥150 for the first 30 minutes and ¥150 per additional 30 minutes) are self-service kiosks with no staff present, so no helmet is provided at all. If helmet use matters to you, a staffed rental shop is the better choice over an unmanned dock-based system.

    Typical costs at staffed shops: a standard city bike runs ¥500–¥1,500 for a full day, electric-assist bikes (handy in hilly cities like Nagasaki or Onomichi) run ¥1,500–¥3,000 per day, and helmet use is usually included free of charge or for a nominal ¥100–¥200 rental fee. Deposits are rare for short rentals but some shops will ask to photograph your passport or hotel key card. If you’re comparing this to other self-drive options for a longer trip, the logistics are similar in spirit to what we cover in renting an EV in Japan — book ahead in peak season, bring ID, and confirm return hours before you commit.

    Where and when to rent

    Popular tourist-oriented rental counters are typically open 9:00–18:00, with last rentals often cut off an hour or two before closing so bikes can be returned on time. In Kyoto, shops cluster near Nijo Castle, the Arashiyama station area, and along the Kamogawa; in Tokyo, Asakusa and the riverside near Sumida Park are common pickup points. Kamakura’s rental shops near the station are heavily booked on weekends from late March through May (cherry blossom season) and October through November (autumn foliage), so reserve a day or two ahead if you’re visiting then. Early-morning starts, before 9am, also mean lighter traffic and cooler temperatures — genuinely the best time to ride in summer, when midday heat and humidity make cycling miserable.

    Winter cycling is viable in most of Honshu and Kyushu but less pleasant in Hokkaido and the Sea of Japan side, where snow accumulates; if you’re traveling in a snow region in winter, you’re more likely to be renting skis than bikes — see our guide to renting ski and snowboard gear near Niseko, Hakuba, and Nozawa Onsen for that season instead.

    Common mistakes tourists make

    • Assuming no helmet means no rules at all. Japan still enforces plenty of cycling regulations with real penalties: riding drunk, using a phone while cycling, and riding two-abreast where prohibited can all draw fines. The relaxed helmet rule doesn’t mean relaxed traffic law generally.
    • Riding on the wrong side of the road out of habit. Traffic keeps left in Japan, and bicycles generally follow car traffic patterns on the left-hand side of the road or designated bike lane, not the right.
    • Assuming sidewalks are always fair game. Cycling on sidewalks is allowed only where signed as permitted, or for riders who are elderly, children, or using an assist bike in some areas — otherwise bikes belong on the road.
    • Forgetting cash or card readiness at self-service docks. Unmanned bike-share kiosks often want a registered IC card or app payment rather than cash. It’s worth having a no-foreign-transaction-fee credit card loaded into the relevant app before you land, since fumbling with payment at a dockless kiosk wastes your rental window.
    • Not budgeting cash for shops that are card-only or cash-only — rarely both. Smaller rental counters in rural areas sometimes take cash only; a nearby 7-Bank ATM at a 7-Eleven is usually the easiest backup if the shop won’t take your card.

    Budget, mid-range, and splurge rental options

    For a no-frills day of sightseeing, a basic single-speed city bike from a station-adjacent rental shop at ¥500–¥800 per day is perfectly fine for flat routes. Mid-range travelers who want hills handled for them should look at electric-assist rentals (¥1,500–¥3,000/day) — standard in hillier tourist towns and genuinely worth the upcharge if your itinerary includes shrines on slopes, like many in Kamakura or Nikko. At the splurge end, some cities offer guided e-bike tours bundling a helmet, GPS unit, insurance, and a local guide for ¥6,000–¥12,000 per person for a half-day — a good option if you’d rather not navigate unfamiliar traffic rules solo.

    The bottom line for tourists

    You won’t be fined for riding bareheaded as an adult in Japan, but every major rental shop will offer you a helmet anyway, and it’s worth taking — Japanese urban traffic includes narrow streets, blind corners, and a mix of pedestrians, cars, and other cyclists that catches visitors off guard. If you’re traveling with anyone under 13, treat the helmet as mandatory, because legally for them it is. Reserve ahead in cherry blossom and autumn foliage season, ride early to dodge both crowds and heat, and keep a card or cash ready so a payment hiccup doesn’t eat into your rental time.

  • Buying Infant Formula, Diapers & Baby Food in Japan: A Practical Guide for Traveling Parents

    Buying Infant Formula, Diapers & Baby Food in Japan: A Practical Guide for Traveling Parents

    Photo by Anete Lūsiņa on Unsplash

    Traveling to Japan with an infant or toddler means rethinking a few logistics, and baby supplies top the list. The good news: Japan is one of the easiest countries in the world to restock formula, diapers, and baby food on the go — drugstores are everywhere, quality is excellent, and prices are reasonable. The catch is that brands, sizing, and formula types differ from what you’re used to at home, so it helps to know where to look and what to expect before you land.

    Where to Buy: Drugstores, Baby Superstores & Supermarkets

    Your default stop should be a drugstore (doraggu sutoa) — chains like Matsumoto Kiyoshi, Sundrug, Tsuruha, and Welcia are in every neighborhood and near most train stations, typically open from around 9:00 or 10:00 a.m. until 9:00 or 10:00 p.m. They stock formula, diapers in all sizes, wipes, and baby food jars and pouches side by side, often at the lowest prices you’ll find.

    For the widest selection, go to Akachan Honpo (“Baby’s Treasure House”), a nationwide baby superstore chain owned by Aeon, with big locations in malls and standalone stores (Ikebukuro’s Sunshine City branch in Tokyo is a popular one). It carries nearly every Japanese formula and diaper brand, plus strollers and car seats if you need backup gear. Nishimatsuya is the budget equivalent — smaller selection, noticeably cheaper. Large supermarkets (AEON, Ito-Yokado, Life) also carry a solid baby aisle and are worth checking if you’re staying somewhere residential rather than touristy.

    Don’t overlook Don Quijote (Donki), the discount chain that’s open 24 hours in many locations — handy if your baby runs out of diapers at 11 p.m. Many Donki and Akachan Honpo stores also offer tax-free shopping for tourists on purchases over ¥5,000 (pre-tax) with your passport, which is worth using if you’re buying diapers in bulk before flying home. If cash comes up short, a 7-Bank ATM at 7-Eleven is the most reliable way to withdraw yen, and a no-foreign-transaction-fee credit card works at essentially all of these chains.

    Formula: Powder vs. Liquid, and What to Watch For

    The major Japanese formula brands are Meiji (Hohoemi), Morinaga (Hagukumi), Glico (Icreo), and Wakodo. All are widely available and considered high quality, but their nutritional formulations — iron content in particular — differ somewhat from U.S. and European formulas. If your baby is on a specific brand or a specialized formula (soy, hypoallergenic, anti-reflux), assume it won’t be available in Japan and pack enough from home, since pediatricians generally advise against switching formulas abruptly during travel.

    Powder is the standard format: an 800g can of Meiji Hohoemi runs roughly ¥2,000–2,500, with smaller refill packs costing less. Japan also sells ready-to-feed liquid formula in 200ml cartons (Meiji and Glico both make versions) for around ¥200 each — convenient for flights, trains, or days out since they need no mixing or hot water, though they’re pricier per feeding than powder and not stocked everywhere.

    One genuinely useful fact: Japan’s tap water is soft and safe to drink straight from the faucet, which makes it fine for mixing formula once boiled — you don’t need to hunt for special bottled water the way you might in countries with hard tap water. Most business hotels and even many Airbnbs have an electric kettle in the room, which covers your hot-water needs without relying on front desk requests.

    Diapers: Decoding Japanese Sizes and Top Brands

    The two dominant diaper brands are Merries (Kao) and Moony (Unicharm), both excellent and widely considered softer and more absorbent than many Western equivalents — it’s common for visiting parents to stock up to take home. Goo.N (Oji) is a solid third option, and imported Pampers is available too, usually at a premium.

    Japanese sizing is by weight, not age, and runs roughly: Newborn (up to ~5kg), S (4–8kg), M (6–11kg), L (9–14kg), and XL/BIG (12–22kg). These bands overlap by design — buy based on your baby’s current weight rather than translating from a home-country size number, since they don’t line up directly. Both tape-style (for newborns and before baby can stand) and pants-style (for mobile babies) are sold everywhere. Expect to pay around ¥1,500–2,200 for a pack, varying by size and count — tape diapers for newborns often come in bigger counts (80–90) at a similar price to smaller packs of pants-style diapers in larger sizes.

    Baby Food: Jars, Pouches & What’s Easy for Travelers

    Kewpie is the dominant baby food brand in Japan and makes an enormous range of pouches and small jars (rice porridge, vegetable purees, fish and meat mixes) sorted by age stage, typically ¥100–150 each. Wakodo also makes a well-regarded baby food line. These are sold at every drugstore and supermarket, and increasingly at convenience stores (7-Eleven, Lawson, FamilyMart) in limited selection — handy for a single emergency pouch, but not a reliable main source if you need a specific stage or flavor.

    Packaging is almost entirely in Japanese, but stage numbers (5–6 months, 7–8 months, 9–11 months, 12+ months) are usually printed with recognizable numerals, and jars often have a photo of the contents on the front, so you can shop reasonably confidently even without reading kanji.

    Common Mistakes to Avoid

    • Assuming any formula will do. If your baby has an allergy or is on a specialized formula, bring it — Japan doesn’t stock most specialty/hypoallergenic brands, and switching formulas suddenly isn’t recommended.
    • Buying diapers by home-country size number. Japanese sizing is weight-based (kg), not the S/M/L labels you may be used to translating 1:1 — check your baby’s current weight against the Japanese bands above.
    • Relying on convenience stores as a main source. 7-Eleven and similar chains carry a thin selection of diapers and baby food for emergencies, not full restocks — plan around drugstore hours instead.
    • Underestimating how much you’ll want to bring home. Merries and Moony diapers are popular souvenirs/stock-ups among visiting parents; if you’re buying in bulk, do it at a tax-free-eligible Akachan Honpo or Donki and keep the receipt.

    Timing and Airport Stock-Ups

    There’s no strong seasonality to baby supply shopping in Japan — stock is consistent year-round — but it’s smart to restock a day or two before flying home rather than at the airport itself, where selection is limited to kiosk convenience stores. If you’re departing through New Chitose Airport or Fukuoka Airport, do your real shopping in the city beforehand and treat the airport as a backup only. Build in a little buffer time near your hotel on your last full day for a final drugstore run — it’s the easiest way to avoid a last-minute scramble with a fussy, hungry baby and a departure gate to catch.

  • Renting an EV in Japan: Charging Stations, Apps & Road-Trip Planning

    Renting an EV in Japan: Charging Stations, Apps & Road-Trip Planning

    Photo by Alex Rerh on Unsplash

    Renting a gas car in Japan is simple enough that most visitors never think twice about it. Renting an EV is a different story—not because it’s hard, but because nobody tells you the three or four things that actually matter: which plug your car uses, which app shows real-time charger status, and how far a “full charge” really gets you once the heater or air conditioning is running. Here’s what you need to know before you book.

    Why Rent an EV in Japan (and What You’re Actually Driving)

    Almost every EV you’ll find at a mainstream rental counter is a Nissan Leaf—either the 40kWh base model (around 220km rated range) or the Leaf e+ with a 60kWh battery (around 360km rated range). Nissan Rent a Car and Times Car both carry Leafs nationwide, typically from ¥7,700–9,900/day for the standard Leaf and ¥12,000–15,000/day for the e+. Toyota Rent a Car has started adding the bZ4X in larger cities (¥14,000–18,000/day). If you want something flashier, a handful of Tokyo- and Osaka-based specialty agencies rent Tesla Model 3 or Model Y for ¥25,000–35,000/day, which also unlocks Tesla’s own Supercharger network—genuinely the most reliable charging experience in the country.

    Whatever you book, confirm the connector type before you drive off. This matters more in Japan than almost anywhere else.

    Charging Networks and Standards You’ll Encounter

    Japan standardized on CHAdeMO for DC fast charging years before the rest of the world settled on CCS, so virtually every non-Tesla EV rental uses a CHAdeMO plug. The country’s largest network is e-Mobility Power (eMP), which operates chargers at highway service areas, convenience stores, and shopping malls—look for the blue-and-white “charging station” signage. Tesla Superchargers exist in parallel and are increasingly opening slots to non-Tesla vehicles with CHAdeMO adapters, but availability for outside cars is still inconsistent.

    Charging speed varies wildly by location: highway rest-stop (SA/PA) fast chargers are usually 50–90kW and open 24 hours, while chargers at malls, hotels, and convenience stores are often older 20–50kW units tied to the business’s opening hours (typically 7am–11pm, sometimes earlier closing in rural towns). A realistic fast-charge session takes 30–40 minutes and, because charging slows dramatically past 80%, usually nets you 100–150km of range rather than a full battery—plan your stops around that math, not the advertised range.

    Apps and Cards for Finding and Paying for a Charge

    Download these before you land:

    • PlugShare – the most reliable English-language map of charger locations, with user reports on whether a unit is actually working that day.
    • Google Maps – searches “EV charging station” reasonably well in cities, less so in rural areas.
    • e-Mobility Power (eMP) app – shows live status for the largest network, though parts of the interface are Japanese-only.

    For payment, most eMP and highway-SA chargers now accept contactless credit/debit card taps directly on the unit—no account needed. This is a recent and welcome change; older chargers still require a membership card (often arranged by the rental company, who’ll hand you one at pickup). A tap-to-pay session usually runs ¥20–35 per minute, so a 30-minute fast charge costs roughly ¥600–1,050. If your card charges foreign transaction fees, that adds up over a multi-day trip—see this guide to no-foreign-transaction-fee credit cards before you go, since you’ll be tapping your card at chargers, tolls, and parking machines daily.

    Where to Rent: Budget, Mid-Range, and Splurge

    Budget (¥7,700–9,900/day): A standard 40kWh Leaf from Nissan Rent a Car or Times Car. Fine for city-to-city hops of under 150km between charges; not ideal for long highway stretches.

    Mid-range (¥12,000–18,000/day): Leaf e+ or Toyota bZ4X. The extra range buffer makes a real difference once you’re outside major cities, where chargers thin out and detours cost time.

    Splurge (¥25,000–35,000/day): Tesla via a specialty rental agency in Tokyo or Osaka. Better range, access to the Supercharger network, and (for road-trippers) built-in trip-planning software that accounts for elevation and charger occupancy—something no Leaf offers.

    Across all tiers, add an ETC card rental (¥1,000–1,500 for the trip) so you can use expressway toll lanes without stopping to pay cash, and confirm whether the daily rate includes insurance (it usually does, but check the excess/deductible, typically ¥50,000–100,000 if waived).

    Planning an EV Road Trip: Best Routes and Timing

    EVs suit Japan’s compact, well-serviced expressways better than its remote mountain backroads. Good candidates:

    • Hokkaido, picking up near New Chitose Airport—summer (June–September) is far better than winter, since cold weather and cabin heating can cut EV range by 30–40%, turning a comfortable 150km hop into a tight one.
    • Kyushu, starting from Fukuoka Airport and heading toward volcanic hot-spring country like Kirishima—charger density drops once you leave the coastal cities, so charge to full before heading into the hills, not just to 80%.

    Spring and autumn are the sweet spot nationwide: mild enough that climate control barely dents range, and before/after the summer humidity that pushes AC use (and consumption) up.

    Common Mistakes to Avoid

    • Assuming charger density matches gas stations. Rural Japan has plenty of konbini and gas stations but far fewer fast chargers—map your route’s chargers before departure, not when the battery hits 20%.
    • Trusting rated range on the highway. Sustained 100km/h expressway driving uses noticeably more energy than the JC08/WLTC test cycle suggests. Budget 20% less range than advertised.
    • Not checking opening hours. A charger at a shopping mall that closes at 9pm won’t help you at 10pm—stick to 24-hour highway SA/PA chargers for evening driving.
    • Skipping the charging card/app setup at pickup. Ask the rental staff to walk you through their specific payment method before you leave the lot; some older chargers still won’t take a simple card tap.

    Quick Checklist Before You Drive Off

    • Confirm connector type (CHAdeMO vs. Tesla) matches your planned charging stops
    • Download PlugShare and the eMP app, and have a tap-to-pay card ready
    • Rent an ETC card for toll roads
    • Plan charging stops at 24-hour highway chargers for flexibility
    • Pad your range estimate by 20%, more in winter

    Done right, an EV rental in Japan is quiet, cheap to run, and surprisingly well-suited to the country’s dense charging infrastructure in and around cities. The planning just has to happen before you’re on the road, not after.