Japan Trove

Category: Travel

Practical, up-to-date guides for traveling in Japan — itineraries, rail passes, eSIMs, where to stay, seasonal timing, etiquette, and the local know-how that makes a trip smoother. Written with real Japanese sources so you get the answer that actually works on the ground, not the recycled tourist one.

  • How Japanese Addresses Work (and Why They Confuse First-Time Visitors)

    How Japanese Addresses Work (and Why They Confuse First-Time Visitors)

    Photo by Jezael Melgoza on Unsplash

    You step out of your Tokyo hotel with an address written in your notebook — something like “1-21-2 Shibuya” — and no street name in sight. The buildings nearby aren’t numbered in order. Your map app says you’ve arrived, but you’re standing in front of a parking lot. This moment happens to almost every first-time visitor to Japan, and it’s not because you’re bad at reading maps. Japanese addresses are genuinely built on a different logic than Western ones, and once you understand that logic, navigating the country gets dramatically easier.

    Why Japan’s Address System Feels Backwards

    Most Western addresses are organized around streets: a house number tells you where a building sits along a named road, and numbers usually run in order down the block. Japan does something different. Outside of a few grid-planned cities like Kyoto and Sapporo, streets historically weren’t the organizing unit — areas were. A Japanese address identifies a progressively smaller piece of land, not a position along a road. That’s why so many streets in Tokyo and Osaka have no name at all, and why GPS pins sometimes land a block or two off from where you actually need to be.

    How the Numbers Actually Work

    A typical full address looks like this: 〒150-0043 東京都渋谷区道玄坂2-10-7, or in romanized order, “2-10-7 Dogenzaka, Shibuya-ku, Tokyo 150-0043.” Reading it from largest to smallest unit:

    • Postal code (7 digits, formatted 123-4567) — narrows things down to a small delivery zone.
    • Prefecture (都/道/府/県) — Tokyo-to, Hokkaido, Osaka-fu, or one of the other prefectures.
    • City or ward (市/区) — Shibuya-ku, for example.
    • Neighborhood name (町 or 丁目) — Dogenzaka, a named district within the ward.
    • Chome — a subdivision of that neighborhood, like “2-chome.”
    • Block and building number — the final two numbers (10-7) identify a specific plot and then a specific building on it.

    Here’s the part that trips people up most: block and building numbers are usually assigned in the order the buildings were constructed or registered, not in geographic sequence. Building 7 might sit right next to building 22 and nowhere near building 8. There’s no fix for this other than knowing it going in — don’t assume you can “count up” to find a number.

    Reading and Writing a Japanese Address Correctly

    If you need to write a return address (for a hotel reservation, a package, or a hanko registration), Japanese addresses are written largest-to-smallest when in Japanese script, but reversed to smallest-to-largest in English/romanized form — which is why the same address looks “backwards” between a Japanese envelope and an English one. When filling out English-language forms for hotels or shipping, always lead with the building/room number, then block-chome, then ward, city, prefecture, and postal code last.

    Apartment and building names matter more in Japan than in many countries. Mail and deliveries are often routed using the building name (e.g., “Sunshine Mansion 3F”) rather than relying purely on numbers, so if you’re renting an apartment or using a delivery locker, write the building name exactly as given — don’t abbreviate it.

    Getting Around Without Relying on the Address Itself

    Because the numbering system isn’t sequential, locals navigate by landmarks far more than by address. Train stations, convenience stores, and kōban (small neighborhood police boxes) function as informal waypoints — it’s completely normal, and expected, to ask someone “near the Lawson by Exit 3” rather than quoting a block number. A few practical habits help:

    • Use Google Maps or Apple Maps with the exact address pasted in rather than typed by hand — one digit off in a chome number can drop the pin streets away.
    • Save the destination’s phone number too; many Japanese map and taxi-dispatch systems can route by phone number more reliably than by address alone.
    • If you’re truly stuck, kōban police boxes exist specifically to give directions to confused pedestrians — it’s one of their most common daily tasks, and English maps are usually posted nearby in major cities.
    • A pocket Wi-Fi rental (roughly ¥700–¥1,200 per day) or a local data SIM keeps map apps working reliably, which matters more in Japan’s address system than almost anywhere else.

    Spring and autumn are the easiest seasons to be lost in — comfortable weather means you can afford to wander a few extra blocks figuring out which building is which. In August’s heat or a January cold snap, build in extra transit time precisely because address-finding can take longer than expected.

    Common Mistakes First-Time Visitors Make

    • Assuming numbers run in order along a block. They usually don’t — treat the final digits as an ID, not a position.
    • Dropping the chome or block number when asking for directions. “Dogenzaka” alone covers a wide area; the full 2-10-7 is what actually narrows it down.
    • Relying on a street name that doesn’t officially exist. Many “named” streets locals use (like Takeshita-dori) are informal nicknames, not part of the postal address — fine for asking a local, but don’t expect it in official paperwork.
    • Forgetting the postal code format. It’s always 3 digits–4 digits (e.g., 150-0043), and taxi drivers, delivery apps, and official forms often want it entered that way.

    When Addresses Matter for Shopping and Shipping

    Addresses stop being an abstract curiosity the moment you need one for a transaction. If you’re buying from Yahoo! Auctions Japan, most sellers and forwarding services will ask for a precise Japanese shipping address, so double-check every digit of the chome-block-building sequence before confirming an order. The same precision matters if you’re registering a bicycle in Japan, since the registration sticker ties the bike to your residential or hotel address on file. And if you’re mailing souvenirs home rather than carrying them, it’s worth reading up on what you can actually bring back within duty-free limits before you ship, since customs paperwork asks for both the Japanese sender address and your home delivery address in full.

    For short-term visitors, the budget option is simply writing down your hotel’s full address (including postal code) on a card to hand to taxi drivers — most hotel front desks will print this for free on request. Mid-range travelers get real mileage out of a local SIM or pocket Wi-Fi so map apps stay accurate throughout the trip. For longer stays or business travel, a splurge-tier option is a concierge or relocation service (often ¥10,000–¥30,000 for a package of services) that handles address registration, mail forwarding, and utility sign-ups entirely in Japanese on your behalf.

    Once the logic clicks — postal code, prefecture, ward, neighborhood, chome, then block and building, largest to smallest — the system that looked chaotic on day one starts to feel just as navigable as any other. You’ll just be relying on landmarks and a good map app a little more than you’re used to, and that’s completely normal here.
  • Tokyo Dome City: The Thrill-Ride Amusement Park in the Middle of the City

    Tokyo Dome City: The Thrill-Ride Amusement Park in the Middle of the City

    Photo by Nakaharu Line on Unsplash

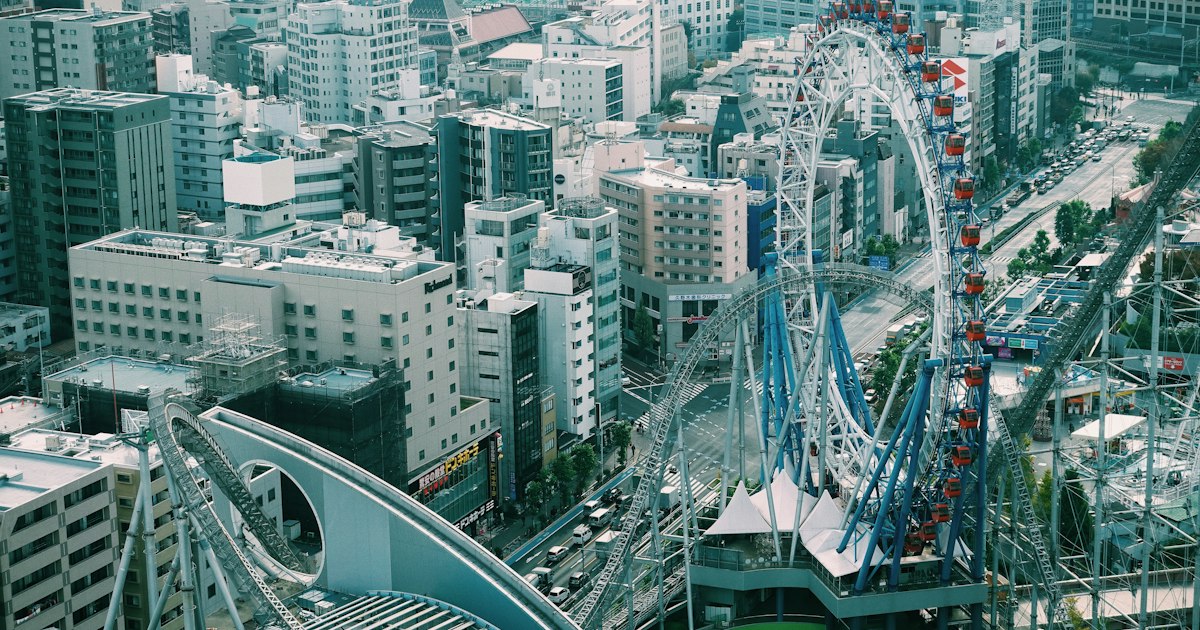
    Most amusement parks make you buy your way through a gate before you’ve ridden anything. Tokyo Dome City does the opposite: you can wander in for free, watch a roller coaster thread itself through the spokes of a wheel with no center axle, grab dinner, and only pay for the rides you actually want to go on. Tucked into Bunkyo Ward next to the stadium where the Yomiuri Giants play, it’s one of the few amusement parks in the world you can reach by subway in fifteen minutes from a major city center — no day trip required.

    What Tokyo Dome City Actually Is

    Tokyo Dome City is a entertainment complex built around Tokyo Dome, the roofed baseball stadium that gives the area its name. The amusement park section — officially Tokyo Dome City Attractions — sits on the site of the old Korakuen Yuenchi, which was redeveloped and rebranded in 2003. Unlike Tokyo Disneyland or Fuji-Q Highland, there’s no perimeter fence and no general admission ticket. The park is an open urban space threaded between shops, restaurants, a spa, and the stadium itself, so you can walk straight in, look around, and decide which rides are worth your money before committing to anything.

    The complex’s signature structure is the Big O, a Ferris wheel with no central hub — the whole ring is supported from the outside, which was a genuine engineering first when it opened. Thunder Dolphin, the park’s main roller coaster, is built to loop directly through the open center of that wheel, which is the photo everyone comes home with.

    The Rides: From Family-Friendly to Genuinely Scary

    Thunder Dolphin is the headline attraction — a steel coaster with a steep first drop and a layout that weaves between and through the surrounding buildings and the Big O’s frame. It’s intense enough that height and health restrictions apply, so it’s not for younger kids or anyone with back or heart issues. Alongside it, the park runs a mix of calmer attractions: the Big O wheel itself (a good option if coasters aren’t your thing but you still want the view over Bunkyo Ward), a smaller family coaster, spinning and swinging rides, and attractions aimed squarely at younger children. It’s a compact lineup compared to a full-day theme park like Universal Studios Japan, which makes it realistic to see and ride everything in a half-day visit.

    How the Pricing Works

    Because there’s no entry fee, you pay per ride using either individual tickets or a reloadable value, and there’s typically also an unlimited-ride pass for the day if you plan to ride more than four or five times. Individual ride tickets generally fall in the roughly ¥500–¥1,000 range, with Thunder Dolphin at the higher end; an all-day unlimited pass has historically run in the neighborhood of ¥4,000–¥4,500 for adults, with cheaper rates for children. These numbers shift with seasonal promotions and occasional price revisions, so treat them as a planning estimate and check the official Tokyo Dome City Attractions site for the current ticket chart before you go — it’s the one part of this trip worth double-checking the week of your visit.

    Budget approach: pick two or three rides you actually want and pay individually rather than buying the all-day pass. Mid-range: the unlimited pass pays for itself once you’ve ridden four or five times, which is realistic if you’re there with kids who want to repeat favorites. Splurge: combine your visit with Spa LaQua (see below) for a full day that mixes adrenaline and recovery.

    Getting There

    This is the park’s biggest practical advantage over Japan’s other big theme parks: it sits inside the city, not an hour outside it. Three stations put you within a few minutes’ walk of the entrance — Suidobashi Station on the JR Chuo-Sobu Line or the Toei Mita Line, Korakuen Station on the Tokyo Metro Marunouchi or Namboku Lines, and Kasuga Station on the Toei Mita or Oedo Lines. If you’re coming from central Tokyo, there’s a good chance you won’t need to transfer more than once. For getting between your hotel and the station, or hopping to a nearby neighborhood afterward, Tokyo’s shared e-scooters are a genuinely useful option for visitors — see LUUP: How Tourists Can Legally Ride Japan’s Shared E-Scooters for how to register and ride legally.

    Best Time to Visit

    Tokyo Dome City Attractions typically opens around 10:00 AM and closes somewhere between 6:00 PM and 9:00 PM depending on the day and season, with extended hours in summer and shorter ones in winter — always check the calendar on the official site before you plan your day, since hours can change week to week. Weekday mornings are noticeably quieter than weekends, and the park gets busy fast on days when there’s a baseball game or concert at Tokyo Dome itself, since the stadium crowd spills straight into the attractions area. If you want short lines on Thunder Dolphin, aim for a weekday right at opening. Spring and autumn are the most comfortable seasons weather-wise for an outdoor park with no real shade; summer visits are doable but hot, and a surprising number of the rides are outdoors with full sun exposure.

    Beyond the Rides

    Tokyo Dome City is bigger than just the amusement park. Spa LaQua is a proper hot-spring-style spa and sauna facility within the complex, and it’s a legitimately good way to spend an evening after a day of rides — most visitors treat it as a separate half-day rather than tacking it onto the same visit. The complex also has a shopping mall with casual dining, and if you’re hungry before or after the rides, the Suidobashi side of the station area has no shortage of ramen shops; tsukemen, Tokyo’s dipping-noodle variation, is especially popular in this part of the city if you want something more substantial than a quick snack — see Tsukemen: Japan’s Dipping Ramen and Where to Try It for how to order it properly. If you end up picking up snacks or small gifts in the shopping arcade, it’s worth knowing what you’re allowed to bring home duty-free before you buy in bulk — see Japan’s Duty-Free Allowance Coming Home.

    Right next door is Koishikawa Korakuen, a genuine Edo-period strolling garden (not to be confused with the amusement park’s old Korakuen Yuenchi name) — it’s a quiet counterpoint if you want to pair thrill rides with something more traditional on the same day.

    Common Mistakes to Avoid

    • Assuming it’s a full-fence theme park. There’s no single ticket gate — budget your money ride by ride or you’ll either overspend on an all-day pass you don’t need, or underspend and waste time buying tickets one at a time at the booth.
    • Visiting on a game day without checking the schedule. If the Giants are playing, expect heavier crowds throughout the complex, not just near the stadium.
    • Skipping the height/health check for Thunder Dolphin. Restrictions are posted at the ride and enforced — don’t assume you’ll be let on.
    • Not checking the day’s closing time. Hours vary enough by season and weekday that showing up late afternoon can mean missing rides you planned around.
    • Forgetting cash or IC card options. Ticket and pass purchasing has shifted toward electronic payment and reloadable cards in recent years; it’s worth having your transit IC card charged up before you arrive.

    Tokyo Dome City won’t out-thrill a full-day park like Fuji-Q Highland, and it won’t out-charm Disneyland’s theming. What it does uniquely well is let you squeeze a genuine amusement park, a roller coaster through a Ferris wheel, and a spa into an afternoon without leaving the city — which makes it one of the easiest “extra half-day” additions to a Tokyo itinerary that’s already packed with temples, shopping, and food.

  • Soba-Making Classes in Japan: Where Tourists Can Learn to Hand-Cut Noodles

    Soba-Making Classes in Japan: Where Tourists Can Learn to Hand-Cut Noodles

    Photo by Jorge Zapata on Unsplash

    Soba is one of the few Japanese foods you can learn to make from scratch in a single afternoon and actually eat the results. Unlike sushi, which takes years to master, hand-cut soba rewards a few hours of focused practice with noodles you cut yourself, dipped in a sauce you probably didn’t make but will appreciate a lot more once you understand how finicky the dough is. Classes run from casual one-hour sessions in central Tokyo to half-day immersions in the mountain villages where soba has been a staple for centuries. Here’s where to go, what it costs, and how to avoid showing up with a bowl of noodle fragments instead of noodles.

    What Makes Hand-Cut Soba Different

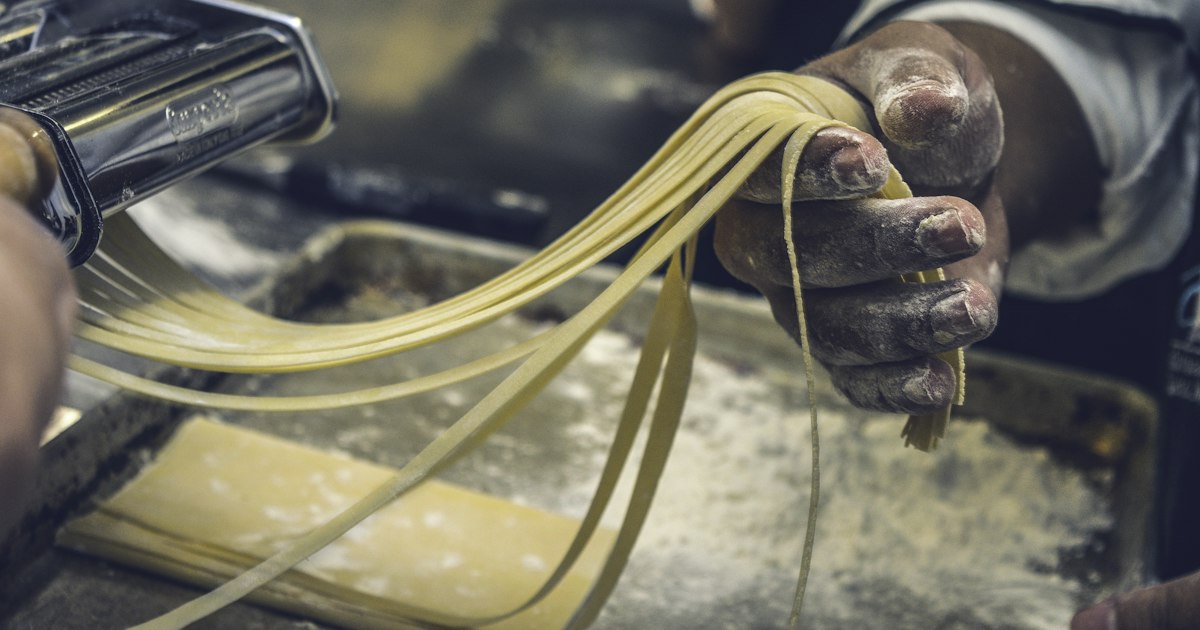
    Soba flour (buckwheat) has almost no gluten, which is what makes the noodles taste earthy and nutty but also what makes the dough maddeningly easy to crack. Traditional teuchi soba (手打ちそば, hand-struck soba) uses a ratio of buckwheat flour to wheat flour — commonly “nihachi” (80% buckwheat, 20% wheat) — kneaded into a flat disc, rolled paper-thin with a long wooden pin, folded into layers, and sliced into noodles with a straight-edged soba knife (soba-giri bōchō) and a wooden guide board (koma-ita). Every class you’ll find as a tourist teaches some version of this sequence, and the instructor’s real job is stopping you from over-kneading, under-rolling, or cutting noodles so uneven that half of them turn to mush in the boiling water.

    Tokyo: The Convenient Option for Short Trips

    If you only have one day to spare, Tokyo has several studios set up specifically for visitors, with English-speaking instructors and no Japanese required. The best known is the Tsukiji Soba Academy near the old Tsukiji outer market area, which runs beginner classes of roughly 70–90 minutes for about ¥4,000–5,500 per person, ending with a bowl of the soba you just cut. Sessions typically run two or three times a day, generally between 10:00 and 16:00, and groups are kept small (often fewer than ten people), so book at least a few days ahead — English-language slots fill first. A handful of cooking schools in Asakusa and Shinjuku offer similar one-off experiences, sometimes bundled with tempura-making, for ¥6,000–9,000. These are the easiest option logistically, but the dough is often pre-measured and pre-kneaded for you to save time, so you get the cutting and rolling experience more than the full process.

    Nagano Prefecture: Soba’s Spiritual Home

    If soba is a priority rather than a add-on, build time into your itinerary for Nagano. The prefecture’s cold climate and poor soil are ideal for buckwheat, and towns like Togakushi (near Nagano City, close to Zenko-ji Temple) have built an entire culinary identity around it — look for shops advertising “soba dojo” or “teuchi taiken” (hand-making experience). These classes run closer to ¥2,500–4,000 for 60–90 minutes, cheaper than Tokyo because they’re aimed at domestic day-trippers rather than foreign tourists, though English support is patchier, so confirm in advance if that matters to you. Matsumoto and Hakuba have similar rural soba schools, often attached to farmhouse restaurants where you eat your own noodles alongside local mountain vegetables. Getting between these small towns usually means a local bus from the nearest train station — if that’s new to you, it’s worth reading up on how flat-fare and rear-door boarding actually works before you go, since many of these routes don’t take IC cards the way city buses do.

    Other Regions Worth the Detour

    Takayama in Gifu Prefecture pairs soba-making with its well-preserved old town and sake breweries; several farmhouse-style venues offer half-day classes combining noodle-cutting with a multi-course meal, usually ¥8,000–12,000. Izumo in Shimane, home of the distinctive thick, dark “warigo soba” served in stacked lacquer bowls, has smaller-scale experiences tied to the Izumo Taisha shrine visit, though these are less set up for English speakers and benefit from a local guide or hotel concierge booking on your behalf. If you’re island-hopping in the south and wondering whether any of this applies to Okinawa — it doesn’t. Okinawa soba is wheat noodles in a completely different dish with no buckwheat at all; if you want to understand why, our guide to Okinawa soba explains the naming confusion.

    Best Season and Timing for a Class

    Soba can be made year-round, but the best time to take a class is autumn, specifically late October through November, when the year’s new buckwheat harvest (shin-soba) hits. Shops proudly label it, the flavor is noticeably more fragrant, and in Nagano this coincides with the region’s foliage season, so a soba class pairs naturally with a koyo trip — if you’re routing through the wider Chubu region for autumn leaves, the valleys around Korankei Gorge near Nagoya make a reasonable add-on before or after a Nagano detour. Summer classes are fine but the dough can get sticky and harder to handle in humidity, and instructors sometimes compensate with extra wheat flour, which changes the texture. Winter is quiet and classes run as usual, but rural venues may have reduced hours around New Year’s (late December to early January), so check ahead.

    Costs, What to Expect, and Common Mistakes

    Budget roughly three tiers: casual Tokyo studio classes at ¥4,000–6,000, rural half-day experiences with a meal at ¥8,000–12,000, and splurge options — private sessions with a soba master, sometimes paired with sake tasting or a kaiseki-style lunch — running ¥15,000–25,000 per person. Most classes supply aprons and headscarves; wear clothes you don’t mind dusting with flour. The most common beginner mistakes, consistently flagged by instructors: adding water too fast while kneading (it should be a slow, gradual mix, not poured in all at once); over-handling the dough, which breaks down what little gluten structure it has; rolling unevenly so one side of the sheet is thinner than the other; and cutting noodles too thick out of fear they’ll fall apart, which actually makes them gummy once boiled. Expect your first batch to look rustic — that’s normal, and it’s also why the noodles still taste good even when they’re a little uneven.

    Bringing the Experience Home

    Many studios sell take-home kits — a small soba knife, a cutting board, or packaged buckwheat flour — as a way to practice once you’re back. A proper soba-giri knife is a single-edged blade and counts as a legitimate souvenir rather than a novelty item, but if you’re buying one to pack in checked luggage, it’s worth a quick check of what you can actually bring back through customs, since blades sometimes raise questions that a packaged snack wouldn’t. For a smaller, lighter souvenir that still nods to the meal, a pair of hashioki chopstick rests picked up near whichever region you took your class in makes a nicer memory than a mass-produced fridge magnet, and packs flat in a suitcase.

  • Japan’s Duty-Free Allowance Coming Home: What You Can Actually Bring Back

    Japan’s Duty-Free Allowance Coming Home: What You Can Actually Bring Back

    Photo by Nick Fewings on Unsplash

    Tax-free shopping in Japan feels almost too easy — flash your passport, skip the 10% consumption tax, walk out with a bag full of ceramics, cosmetics, and snacks. But “tax-free in Japan” and “duty-free at home” are two completely different systems, and mixing them up is how travelers end up unpacking confiscated umeboshi at customs or paying unexpected duty on a suitcase of streetwear. Here’s what actually happens on both ends of the trip.

    How Japan’s Tax-Free Shopping Actually Works

    Japan’s tax-free program lets non-resident foreign visitors (anyone staying under six months on a temporary visa) skip the consumption tax at participating stores — look for “Tax-Free” signage at department stores, electronics chains, and most tourist-oriented shops. You need your passport at checkout; the store processes the exemption electronically and links it to your passport record rather than stapling a paper slip inside it, which was the old system until a few years ago.

    This only works for goods you’re taking out of the country. It is not the same as a home duty-free allowance — it just removes Japan’s tax, and only if the goods leave Japan with you, generally within 30 days of purchase.

    The ¥5,000 Minimum and the Consumables Rule

    Each store, each day, requires a combined pre-tax purchase of at least ¥5,000 to qualify, with a ¥500,000 cap on consumables per person per store per day. Goods fall into two buckets:

    • General goods — clothing, bags, electronics, ceramics, chopstick rests and the like. These can be used in Japan before you leave.
    • Consumables — food, drinks, cosmetics, and medicine. Historically these had to stay sealed in a special tamper-evident bag until you left the country, and opening one in Japan technically forfeits the exemption.

    If you’re shopping for small, easy-to-pack souvenirs, items like hashioki chopstick rests or premium washi origami paper are convenient precisely because they’re general goods you can actually use, display, or gift without worrying about the sealed-bag rule.

    A System in Transition: Japan’s Move to a Refund-Based Model

    Japan has been phasing in a reform to curb resale abuse of the tax-free program: rather than skipping the tax at the register, visitors pay full price including tax, then claim a refund at the airport or port after customs verifies the goods on the way out. The government has targeted a shift to this refund model around late 2026. If you’re traveling now or soon, don’t assume the point-of-sale exemption you remember from a past trip still works exactly the same way — check the signage and ask staff at the register, since stores are transitioning at different speeds and the rules around sealed consumable bags may already be simplified or replaced by the time you shop.

    What You’re Actually Allowed to Bring Home Duty-Free

    This is the part that has nothing to do with Japan — it’s entirely about your own country’s customs allowance for returning travelers. As a rough guide (always confirm current figures with your own customs agency before you travel, since thresholds change):

    • United States: roughly $800 per person in goods, plus separate limits on alcohol and tobacco.
    • European Union: around €430 for air and sea travelers, lower for other arrival methods.
    • United Kingdom: around £390 for most arrivals.
    • Australia: around AUD $900 for adults.
    • Canada: varies with how long you were abroad — generally nothing under 24 hours, then tiered allowances after 48 hours and 7 days.

    Anything over your personal exemption is technically dutiable, and big-ticket purchases — a full TOTO or INAX washlet seat, for instance — can easily push you over the line if you’re also carrying other shopping. For items that large and heavy, shipping separately via a forwarder is often cheaper and less stressful than trying to stuff it in luggage and hope customs doesn’t notice.

    Food, Drinks, and Other Items That Need Extra Care

    Japan’s tax-free consumables category and your home country’s biosecurity rules are unrelated, and the second one matters more. Many countries — Australia and the US in particular — restrict or outright ban fresh produce, meat products, and some seeds regardless of value. Packaged, commercially sealed snacks and condiments are usually fine to declare and bring in, but check specifics before buying in bulk. Pickled plums like umeboshi and bottled drinks are generally safe bets since they’re shelf-stable and commercially packaged, but liquids over 100ml still need to go in checked luggage, not your carry-on, unless they’re in an unopened security bag from airport duty-free.

    Alcohol and tobacco carry their own separate limits almost everywhere, on top of (not included in) the general goods allowance — so a few bottles of sake or shochu can use up your alcohol allowance even if you’re nowhere near your dollar-value limit.

    Common Mistakes That Trip Up Travelers

    • Confusing the two systems. Getting Japan’s tax removed doesn’t exempt you from declaring value at your home border.
    • Opening sealed consumables early. Cracking open that tax-free cosmetics bag in your hotel room can void the exemption if asked at departure.
    • Losing receipts. Since there’s no paper slip in your passport anymore, keep physical or digital receipts as proof of purchase in case either Japanese or home customs officers ask.
    • Ignoring the per-store, per-day threshold. Three ¥2,000 purchases at three different shops don’t combine to meet the ¥5,000 minimum — it has to hit that mark in one store, one day.
    • Assuming clothing sizes will fit without checking. Not a customs issue, but a frequent regret — use a size conversion guide before buying armfuls of clothing you can’t return once you’re home.

    Budget, Mid-Range, and Splurge Shopping Strategies

    If you’re trying to stay well under any customs threshold, budget shopping at chains like Shimamura keeps individual items cheap enough that even a full suitcase rarely approaches $800 in declared value. Mid-range shoppers mixing clothing, snacks, and a few collectibles should keep a running tally on their phone as they buy — it’s easy to underestimate how fast ¥30,000–¥50,000 purchases add up across a week. For splurge buys — electronics, washlet seats, large ceramics — separate them mentally from the rest of your shopping and decide in advance whether you’re declaring and paying duty, staying under the exemption by buying less elsewhere, or shipping the item home independently so it doesn’t ride in your luggage total at all.

    The simplest rule across both systems: Japan’s tax-free shopping saves you money leaving Japan, and your home country’s duty-free allowance decides what happens when you land. Treat them as two separate checkpoints, not one continuous discount.

  • LUUP: How Tourists Can Legally Ride Japan’s Shared E-Scooters

    LUUP: How Tourists Can Legally Ride Japan’s Shared E-Scooters

    Photo by Mylène Larnaud on Unsplash

    If you’ve walked through Tokyo, Osaka, or Kyoto recently, you’ve probably seen them: small, boxy e-scooters parked in neat rows outside train stations and convenience stores, each branded with the word LUUP. They’ve quietly become one of the most convenient ways to cover the “last mile” between a station and your actual destination — but the rules around who can ride one, and how, trip up a lot of visitors. Here’s what you actually need to know before you unlock one.

    What LUUP Actually Is

    LUUP is a Japanese shared micromobility company operating electric scooters (and electric-assist bicycles) that you unlock and pay for entirely through a smartphone app. Unlike bike-share systems with docking stations everywhere, LUUP uses a network of small “ports” — marked parking spots, often just a painted square of pavement — scattered around participating cities. You find a vehicle on the map, walk to it, scan a QR code to unlock it, ride to a port near your destination, and end the trip there. There’s no subscription required for occasional use; you pay per ride.

    As of 2026, LUUP operates in Tokyo (by far its biggest market, covering wards like Shibuya, Shinjuku, Minato, and Setagaya), as well as Osaka, Yokohama, Kyoto, and several other cities. Coverage is dense in central Tokyo but thins out fast once you’re outside the main wards, so always check the in-app map before counting on one being nearby.

    Can Tourists Actually Ride One? Yes — With Conditions

    This is the part that confuses visitors most. Japan reclassified certain small electric scooters as “specified small motorized bicycles” (特定小型原動機付自転車) in 2023, and LUUP’s scooters are built to comply with that category. The practical upshot for tourists:

    • No driver’s license is required to ride a LUUP scooter in this category — this is the single biggest misconception. You do not need an International Driving Permit for the scooters themselves.
    • You must be 16 or older.
    • Helmets are recommended but not legally mandatory for this vehicle class, though LUUP encourages wearing one and some ports have helmets attached.
    • You must register an account with a valid phone number and a credit card. The app is available in English, and registration takes about five minutes.

    Note that LUUP also rents electric-assist bicycles in some areas, and for those a license is not relevant either, but local traffic rules for regular bicycles apply instead.

    Setting Up the App and Taking Your First Ride

    Download LUUP from the App Store or Google Play, enter your phone number for SMS verification, and add a credit card (Visa, Mastercard, and JCB are all accepted; some overseas cards occasionally get declined, so having a backup card helps). The app walks new users through a short in-app road rules quiz before your first unlock — take it seriously, as it covers where you’re legally allowed to ride.

    Once registered, open the map, tap an available scooter icon, and walk to that physical spot. Scan the QR code on the scooter’s handlebar stem to unlock it. The scooter has a small digital speed display and two speed modes that switch automatically based on where you are (more on that below). To end your ride, you must park at a designated LUUP port — the app won’t let you lock the scooter anywhere else, which is a deliberate design choice to keep sidewalks clear.

    Pricing: What You’ll Actually Pay

    LUUP pricing is straightforward and shown in the app before you ride:

    • Unlock fee: ¥50
    • Per-minute fee: ¥15 per minute
    • A typical 10-minute hop — say, from Shibuya Station to a restaurant 1.5 km away — runs roughly ¥200.
    • A longer 20-minute ride comes to around ¥350.

    There’s no day pass in most areas, so LUUP works best as an occasional convenience tool rather than your main mode of transport for a whole day. For comparison, it’s usually cheaper than a short taxi ride but pricier per-minute than a subway fare if you’re going any real distance — it shines specifically for those awkward 10–20 minute walks that are too far to enjoy but too short to justify a taxi.

    Speed Zones, Where You Can Ride, and Parking Rules

    This is where LUUP differs from scooters you may have ridden elsewhere. The scooters automatically detect which type of road you’re on using GPS and switch modes:

    • Regular roads: max speed 20 km/h, and you must ride in the car lane (not the sidewalk), following normal traffic signals and keeping to the left side of the road, same as cyclists.
    • Specially marked sidewalks with a pedestrian-and-scooter sign: max speed drops automatically to 6 km/h, about walking pace, and you must yield to pedestrians.

    You cannot ride on ordinary sidewalks at full speed — doing so is illegal and is also the single biggest way tourists get flagged by police or members of the public. Red lights and one-way streets apply exactly as they would to a bicycle. Riding while intoxicated carries the same penalties as drunk driving, which matters if you’re planning an izakaya night — plan to walk or taxi home instead.

    Parking is just as strict: you can only end a ride at an official port shown in the app, and leaving a scooter elsewhere can trigger a fee or account suspension. Ports fill up during commute hours, so if your destination’s nearest port is full, the app will show you the next closest one — budget a few extra minutes of walking for that possibility.

    When LUUP Is Worth It (and When It Isn’t)

    LUUP is at its best for short, specific gaps in your day: getting from a station to a hotel with bags that aren’t too bulky, hopping between neighborhoods in Shibuya or Shimokitazawa, or reaching a restaurant that’s just outside comfortable walking distance. It’s less useful for long cross-city trips — the subway or a flat-fare local bus is almost always cheaper and faster for anything over a couple of kilometers, and bad weather (Japan’s summer heat and rainy season in particular) makes an open-air scooter miserable compared to an air-conditioned train car.

    It’s also worth noting LUUP ports cluster around busy stations and commercial districts, so it’s a poor fit for reaching quieter residential sightseeing spots — for those, walking or a taxi remains more reliable.

    Common Mistakes to Avoid

    • Assuming you need an IDP. You don’t, for this specific scooter class — don’t let a rental counter or guidebook written before 2023 convince you otherwise.
    • Riding two people on one scooter. LUUP scooters are strictly single-rider; a second person (including kids) riding along is illegal and a common fine.
    • Ignoring the speed-zone change. Riders sometimes panic when the scooter suddenly slows to 6 km/h on a sidewalk section — that’s intentional, not a malfunction.
    • Ending the ride away from a port. The app simply won’t let you, but tourists sometimes try to force it and get stuck with a running meter while they search for the real port.
    • Skipping the in-app safety quiz. It’s short, but it covers exactly the rules (lane position, no sidewalk riding at speed, no phone use) that police spot-check for near major stations.

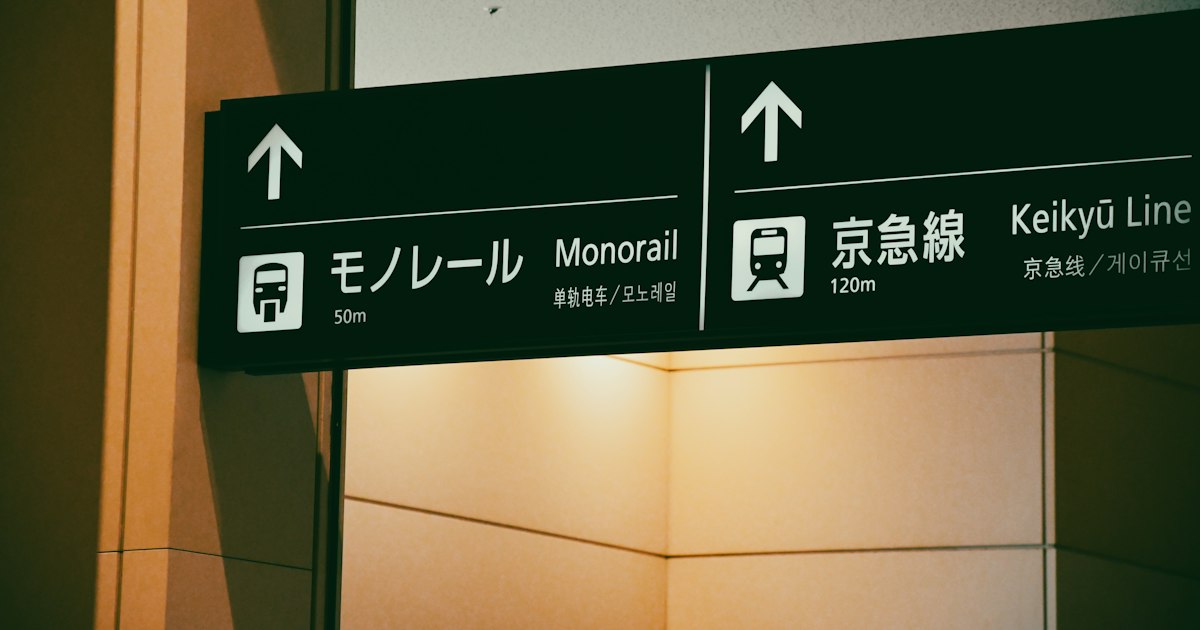
    Used thoughtfully, LUUP is a genuinely handy addition to Japan’s already excellent public transit — not a replacement for it, but a smart way to close the gap on the walk from the platform to wherever you’re actually headed. If you’re mapping out your broader transit plan, it’s worth pairing this with how you’ll handle fixed-route options like local buses or your airport transfer, such as deciding between the Tokyo Monorail and Keikyu Line from Haneda.

  • Riding Local Buses in Japan: How Flat-Fare and Rear-Door Boarding Actually Works

    Riding Local Buses in Japan: How Flat-Fare and Rear-Door Boarding Actually Works

    Photo by Crystal Fang on Unsplash

    Japan’s trains get all the attention, but local buses are often the only way to reach a quiet mountain shrine, a countryside onsen, or a bus-only neighborhood just outside a station. The problem is that bus boarding in Japan isn’t standardized — some buses want you at the front door with exact change ready, others want you at the back door with a paper ticket in hand. Get it backwards and you’ll hold up the whole bus while the driver and other passengers wait patiently (but very visibly) for you to figure it out. Here’s how both systems actually work, so you can board like you’ve done it a hundred times.

    Two Systems, One Country

    Japan runs two completely different boarding-and-payment setups, and which one you encounter depends on the city and sometimes even the specific route:

    • Flat-fare system: every ride costs the same amount regardless of distance. You board at the front, pay immediately, and exit from the rear or a middle door.
    • Distance-fare system: the fare increases the farther you ride. You board at the rear door, take a numbered ticket, and pay the correct amount at the front when you get off.

    Neither system is better — they’re just built for different route types. Flat fare suits short, dense city-center loops. Distance fare suits long rural or suburban routes where a single flat price wouldn’t be fair to someone riding one stop versus someone riding 40 minutes.

    Flat-Fare Buses: Board at the Front, Pay Immediately

    This is the simpler system, and you’ll find it on big-city municipal buses — Tokyo’s Toei buses are the classic example, with a flat adult fare in the low-200-yen range per ride (fares creep up every few years, so check the sign posted by the farebox rather than relying on an old guidebook figure). Kyoto City Bus also runs a flat fare of 230 yen for adults within its central zone, which covers most of the temples and neighborhoods tourists actually visit.

    The routine: enter through the front door next to the driver, pay or tap as you board, and exit from the rear or middle door once the bus stops. If you’re paying cash, the farebox has a built-in coin changer that will break a 1,000-yen note into coins — it generally won’t accept 5,000 or 10,000-yen bills, so carry smaller notes before you need a bus. Drop in exact change or let the machine make change, then take your receipt if the machine prints one.

    Announcements inside the bus (and an LED or LCD display at the front) show the next stop in Japanese and usually English. Press the request button mounted on the poles or ceiling well before your stop — the driver won’t stop unless someone has pressed it or someone is waiting at the stop to board.

    Distance-Fare Buses: Board at the Rear, Take a Ticket, Pay at the Front

    This is the system that trips up visitors, and you’ll meet it on most regional and rural bus companies — think buses around Nara’s outer temples, countryside routes in Kyoto Prefecture, Hiroshima-area lines, and small-city buses all over Japan.

    Here’s the sequence:

    • Board through the rear door only. Boarding at the front on these buses is reserved for the driver’s side and will confuse everyone, including you.
    • As you step on, pull a small numbered paper ticket (seiriken) from a dispenser box mounted near the door. If you’re using an IC card instead, tap it on the card reader right there — don’t skip this tap, since it’s how the system marks where your trip started.
    • Watch the electronic fare board at the front of the bus. It displays a running row of numbers, each with a yen amount underneath, and the amounts climb as the bus travels. Find the number matching your ticket to see your current fare.
    • When you reach your stop, move to the front, and either drop your ticket plus the exact cash amount into the farebox, or tap your IC card again on the front reader. The card automatically calculates and deducts the correct distance-based fare — no math required.

    If you tapped an IC card to board but forgot to tap again when leaving, drivers will usually catch it before you step off, since an unclosed trip shows up on their reader. It’s a minor hassle to fix on the spot, so get in the habit of tapping both ends.

    IC Cards Make Both Systems Foolproof

    Whether you’re dealing with flat fare or distance fare, a prepaid IC card (Suica, Pasmo, ICOCA, and similar cards are all interchangeable nationwide now) removes almost all the guesswork. On flat-fare buses you tap once, when boarding. On distance-fare buses you tap twice — once at the rear when you get on, once at the front when you get off — and the correct fare is deducted automatically, including any transfer discounts the local operator offers.

    If you’re arriving via Haneda and plan to connect onto local buses once you’re in central Tokyo, our guide to the Tokyo Monorail vs. Keikyu Line covers how to get into the city first — the same IC card you use on that train will work on every bus covered here.

    Common Mistakes Tourists Make

    • Boarding the wrong door. Always glance at the door the people ahead of you are using, or check for a small sign near the door reading “exit” or “entrance” (often in English on tourist-heavy routes).
    • Not having small change ready. Farebox coin changers are slow if you dump in a 1,000-yen note at the last second while the whole bus waits. Break larger bills at a convenience store beforehand.
    • Losing the paper ticket. On distance-fare buses, losing your numbered ticket usually means paying the maximum fare on the route when you exit, since the driver can’t verify your boarding point. Keep it somewhere you won’t fumble for it.
    • Assuming all buses in one city work the same way. Even within Kyoto, most central-zone buses are flat fare, but a handful of outer routes toward the hills switch to distance fare. The boarding door is your clue — if there’s a ticket dispenser at the rear door, it’s a distance-fare route.

    Timing, Weather, and a Few Practical Tips

    Local buses run less frequently than trains — often every 15 to 30 minutes outside big cities, and much less on weekends and holidays in rural areas. Build in buffer time, especially for the last bus of the day, which can be surprisingly early (sometimes before 9 p.m. in smaller towns). Winter mornings mean long waits at unheated stops; a hot canned coffee from a nearby vending machine (see our guide to hot vending machine drinks) makes the wait far more bearable.

    Bus terminals at major stations are also a good spot to grab a fast meal before a longer ride — many station buildings have a standing noodle counter, and our piece on eki soba standing noodle stalls explains how to order one in under two minutes. And if buses aren’t your only option for getting across a city, Tokyo’s Sumida River water bus is a scenic alternative worth comparing for certain routes.

    Once you’ve ridden a flat-fare bus and a distance-fare bus each one time, the whole system clicks into place — and you’ll have access to places the trains simply don’t reach.

  • Tokyo Monorail vs Keikyu Line: Getting from Haneda Airport to the City

    Tokyo Monorail vs Keikyu Line: Getting from Haneda Airport to the City

    Photo by Dynamic Hong Kong on Unsplash

    Landing at Haneda Airport puts you closer to central Tokyo than almost any other major international airport puts you to its city center — but that still leaves you with a choice the moment you clear customs. Do you take the Tokyo Monorail or the Keikyu Line? Both run from Haneda into the city in roughly the same amount of time, but they go to different stations, cost different amounts, and suit different travelers. Here’s how to pick the right one in about ten seconds flat.

    The Two Options at a Glance

    Both lines depart from stations directly inside the airport — Haneda Airport Terminal 1, Terminal 2, and Terminal 3 (international arrivals) — so you won’t need a shuttle bus to reach either platform. Signage in English is clear throughout both terminals, with escalators and elevators down to the ticket gates.

    • Tokyo Monorail runs to Hamamatsucho Station, where it meets the JR Yamanote Line. Fastest trains (the Haneda Express) take about 13–15 minutes from Terminal 3; fare is around ¥500 with an IC card.
    • Keikyu Line (Keikyu Airport Line) runs to Shinagawa Station, where it meets JR lines including the Tokaido Shinkansen. Fastest trains take about 13–20 minutes; fare is around ¥300 with an IC card.

    Tokyo Monorail: Scenic and Convenient for the Yamanote Loop

    The monorail glides above Tokyo Bay for part of the ride, so you get a real view — container ports, the bay, and on a clear day a glimpse of the Rainbow Bridge area — before the train dips inland toward Hamamatsucho. It’s a nice first (or last) impression of Tokyo if you’re not completely jet-lagged.

    Hamamatsucho sits directly on the JR Yamanote Line, the loop line that touches Tokyo Station, Shimbashi, Shinjuku, Ikebukuro, and Ueno. If your hotel is anywhere on that loop, the monorail gets you there with just one more hop and no need to navigate the subway. At monorail ticket machines you can also buy a combined ticket bundling the monorail fare with one onward Yamanote Line ride for the same ¥500 total — worth asking about if you’re headed somewhere like Shinjuku or Ikebukuro, since it can work out cheaper than paying the two fares separately.

    Keikyu Line: Cheaper and Better Connected South and East

    The Keikyu Line is the budget pick — about ¥200 less than the monorail for a comparable trip — and it lands you at Shinagawa, a major Shinkansen and JR hub. If you’re continuing on to Yokohama, Kamakura, or catching a bullet train onward, Shinagawa is the more useful station to arrive at.

    Keikyu’s other advantage is through-service: some trains continue past Shinagawa onto the Toei Asakusa Line without requiring a transfer, running all the way to Asakusa in around 45 minutes. That’s a genuinely handy shortcut if your first stop is Asakusa or if you’re planning a Sumida River water bus ride from there — you can go straight from the airport to the river without ever surfacing from the station network. A handful of Keikyu trains each day even continue through to Narita Airport via the Keisei line, which is occasionally useful for an airport-to-airport transfer, though it’s a long ride and most travelers are better off with the Narita Express or a bus for that specific trip.

    Which One Should You Take?

    In practice, the decision usually comes down to where you’re staying:

    • Staying near Shinjuku, Ikebukuro, Ueno, or anywhere else directly on the Yamanote loop: take the monorail to Hamamatsucho.
    • Staying near Shinagawa, Yokohama, or needing a Shinkansen connection: take Keikyu to Shinagawa.
    • Staying in Asakusa or planning to head there first: take Keikyu and look for a train continuing through to the Toei Asakusa Line — check the platform display for “Asakusa-bound via Toei Asakusa Line” to avoid an unnecessary transfer.
    • On a tight budget and not fussed about the view: Keikyu wins on price every time.

    If you’re simply trying to get to Ginza, Shibuya, or Roppongi, either line works fine since you’ll be transferring once more regardless — pick whichever arrives at a station slightly closer to your transfer line.

    Tickets, IC Cards, and Fares

    The simplest approach for almost everyone is an IC card — Suica, Pasmo, or a tourist Welcome Suica bought at the airport. Tap in at the Haneda gate and tap out at Hamamatsucho or Shinagawa; the correct fare is deducted automatically and you skip the ticket machine entirely. Both lines also sell paper tickets from machines with English-language menus if you’d rather not deal with a card, though you’ll pay a slightly higher fare than the IC rate.

    Avoid the common mistake of buying a ticket for the wrong train type: both lines run limited-stop express services and slower all-stop locals on the same tracks, and ticket machines don’t distinguish between them — the fare is the same, but local trains can take 10 minutes longer. Check the platform board for the fastest departure (Haneda Express on the monorail, Airport Limited Express on Keikyu) rather than just boarding the first train that pulls in.

    Timing and Practical Tips

    Both lines start running around 5am and the last trains leave Haneda a little after midnight, so late international arrivals are rarely stranded — but double-check the last-train time for your specific line on arrival night, since missing it means a considerably pricier taxi into the city. Morning rush hour (roughly 7:30–9am) and evening rush (5:30–7pm) make both lines crowded if you’re connecting to the Yamanote or Toei Asakusa Line at the city end, so build in a few extra minutes if you’re hauling large suitcases through those transfers.

    Both stations have elevators and luggage-friendly routes throughout, so neither line is a bad choice if you’re dragging oversized bags. If you’ve got a layover feeling before you even leave the station area, Hamamatsucho and Shinagawa both have standing eki soba counters right near the platforms — a fast, cheap way to get your first real meal in Japan before heading to the hotel. And if the weather’s cold, both stations are stocked with hot canned coffee vending machines, a small but welcome reintroduction to Japan after a long flight.

  • Sanrio Puroland & Namjatown: Tokyo’s Indoor Character Theme Parks

    Sanrio Puroland & Namjatown: Tokyo’s Indoor Character Theme Parks

    Photo by Jezael Melgoza on Unsplash

    Tokyo has two theme parks built entirely indoors, which makes them some of the best rainy-day, heatwave-day, or dead-of-winter plans in the city. Sanrio Puroland is Hello Kitty’s walk-in universe out in Tama, while Namjatown is Bandai Namco’s quirkier gyoza-and-dessert playground in Ikebukuro. They’re aimed at different crowds and sit in different parts of Tokyo, so they’re rarely visited back-to-back, but each is worth a half or full day on its own. Here’s what to actually expect, what it costs, and how to avoid the mistakes most first-time visitors make.

    Sanrio Puroland: Hello Kitty’s Indoor Kingdom

    Sanrio Puroland sits in Tama New Town, about 30–40 minutes west of central Tokyo, and has been running since 1990. It’s a fully climate-controlled, multi-floor complex built around Hello Kitty, My Melody, Kuromi, Cinnamoroll, Pompompurin and the rest of the Sanrio roster, with themed walk-through sets, a boat ride, live character stage shows (several times a day, often the real highlight of the visit), a parade, photo-op rooms like Lady Kitty House, and a large exclusive gift shop that sells merchandise found nowhere else, including Tokyo.

    Admission uses date-variable pricing rather than one flat fee—adult “passport” tickets typically run somewhere in the ¥3,300–¥4,500 range depending on the day, season, and whether it’s a weekday or weekend, with discounted rates for children. Tickets are sold in advance on the official Sanrio Puroland site with timed entry slots, and popular dates (weekends, school holidays, anything near a Sanrio character’s birthday event) sell out, so book ahead rather than planning to walk up.

    Opening hours vary by day too, generally somewhere around 10:00–17:00 on quieter days and later on weekends, with occasional full closures on weekdays for maintenance—always check the specific date you want on the official calendar before you plan around it.

    Getting to Sanrio Puroland

    The nearest station is Tama-Center, served by both the Keio Sagamihara Line and the Odakyu Tama Line, roughly 30–40 minutes from Shinjuku depending on the train. From the station it’s about a 5–8 minute walk, mostly covered or arcade-lined, following the Hello Kitty signage. There’s no need for a car or bus transfer—this is a straightforward train trip, just further out than most central Tokyo attractions, so budget the extra travel time into your day.

    Namjatown: Ikebukuro’s Gyoza-and-Dessert Playground

    Namjatown, run by Bandai Namco, is a very different kind of indoor park. It occupies a lower floor of the Sunshine City complex in Ikebukuro and leans into nostalgic, slightly retro Japanese amusement-arcade energy rather than a single IP. Its two most famous zones are Gyoza Stadium, a food court gathering well-regarded gyoza shops from around Japan under one roof, and Dessert Yokocho (“Dessert Alley”), a strip of specialty dessert stalls. Beyond the food, there are small attractions, carnival-style games, a haunted walk-through attraction for thrill-seekers, and a rotating cast of event collaborations.

    Pricing works in two layers: a relatively cheap entry fee (roughly in the ¥500–¥800 range for adults) that just gets you into the space to eat and browse, and a separate Attraction Pass for unlimited rides and games, generally priced somewhere around ¥3,000–¥3,700 for adults with lower rates for children, cheaper on weekdays than weekends. If you’re mainly there for gyoza and dessert, the basic entry ticket alone is enough—skip the attraction pass unless the kids want to play. Namjatown generally runs similar hours to the rest of Sunshine City, roughly 10:00 to late evening, with last entry an hour or so before close, but confirm the day’s hours on the official site since they do shift seasonally.

    Getting to Namjatown

    Namjatown is inside Sunshine City in Ikebukuro, about an 8–10 minute walk from Ikebukuro Station’s east exit. Ikebukuro is a major hub on the JR Yamanote Line plus several private and subway lines, so it’s an easy add-on to a day that also includes Ikebukuro’s otaku shopping streets, Sunshine Aquarium, or the Pokémon Center a few floors up in the same building.

    Best Season and Timing

    Because both parks are fully indoor, weather isn’t really a factor in choosing when to go—that’s their entire appeal. Instead, time your visit around crowds: both get noticeably busier on weekends, Japanese school holidays (late July–August, late December–early January, late March–early April), and around character-specific anniversary events, which Sanrio in particular runs throughout the year. Weekday mornings right at opening are consistently the quietest window at both parks. If your Tokyo trip includes a typhoon day, an unbearably hot August afternoon, or a cold, wet January day you don’t want to spend outside, this is exactly when an indoor character park earns its place on the itinerary.

    Tickets, Booking and Common Mistakes

    The most common mistake at Sanrio Puroland is assuming you can walk up and buy a ticket on the day—on busy dates, time slots sell out well in advance, so book online as soon as your travel dates are fixed. At Namjatown, the common mistake runs the other way: visitors buy the full Attraction Pass assuming it’s required for entry, when the cheaper basic admission is all you need if you’re there for the food courts. If you do end up needing to print a ticket confirmation or voucher and don’t have access to a printer, Japan’s convenience stores can help—see our guide to konbini multi-copy machines for how ticketing and printing works at Family Mart, 7-Eleven and Lawson terminals. And if you’re new to how Japanese ticketing platforms and resale rules generally work—useful knowledge for Sanrio’s occasional ticketed stage events as well as concerts—our guide to buying event tickets in Japan as a tourist covers the basics of Ticket Pia, e+ and official resale.

    Budget, Mid-Range and Splurge

    At Sanrio Puroland, the ticket itself is your main cost; a budget visit means skipping the character-greeting photo add-ons and sticking to the included shows, while a splurge means booking a premium seating option for a stage show and buying from the full merchandise lineup in the main store. At Namjatown, budget travelers can get a satisfying visit from the ~¥500–¥800 entry fee alone plus a few hundred yen per gyoza plate in Gyoza Stadium—it’s genuinely one of the cheaper “attractions” in Tokyo if you treat it as a themed food court. Mid-range visitors add the Attraction Pass; splurge visitors stack on dessert-alley sampling and the arcade-style prize games, which add up quickly in ¥100–¥300 coin increments.

    Which One Should You Visit?

    If you or your travel companions have a genuine attachment to Hello Kitty and the Sanrio characters, Puroland is worth the trip out to Tama on its own merits—it’s a dedicated fan experience, not a quick stop. If you’re already in Ikebukuro for the shopping, the aquarium, or the Pokémon Center and want a low-commitment, food-forward detour, Namjatown slots in easily for two or three hours. Because of the distance between Tama and Ikebukuro, don’t try to do both in one day—pick the one that matches your group, and treat the other as an option for a different day, especially a day with bad weather in the forecast.

  • Tokyo Water Bus: Cruising the Sumida River from Asakusa to Odaiba

    Tokyo Water Bus: Cruising the Sumida River from Asakusa to Odaiba

    Photo by Yu Kato on Unsplash

    Skip the subway for an afternoon and let the river do the work. The Tokyo Water Bus runs from Asakusa, past the Tokyo Skytree and a string of bridges, out to the futuristic skyline of Odaiba — and for the price of a couple of convenience-store lunches, it’s one of the best low-effort views in the city. Here’s how to actually plan the trip, not just admire it from a brochure.

    What the Tokyo Water Bus Actually Is

    The service is run by Tokyo Mizube Line (formerly known as Tokyo Cruise Ship Co.), and it’s a genuine public transit option, not a tour-bus gimmick. Regular boats are simple, Suica/Pasmo-friendly commuter ferries that locals use to skip traffic. Layered on top of that are a handful of special-design boats — most famously Himiko and Hotaluna, both designed by manga artist Leiji Matsumoto (the creator of Space Battleship Yamato) — which look like something out of an anime and run the same river for a premium fare.

    The main route for visitors links Asakusa Pier, near the Azumabashi bridge, to Hinode Pier near Tokyo’s waterfront warehouse district, and onward to Odaiba Seaside Park and Odaiba Kaihin Koen. Along the way you pass under more than a dozen bridges, each a different color and era, with the Skytree receding behind you and the Rainbow Bridge growing larger ahead.

    Getting to the Asakusa Pier

    The pier sits right beside Azumabashi Bridge, about a 5-minute walk from Asakusa Station (served by the Ginza and Asakusa subway lines, plus the Tobu Skytree Line). It’s an easy add-on to a Senso-ji temple visit — walk down through Nakamise shopping street, see the temple, then head toward the river. If you want lunch before boarding, the Asakusa area is packed with old-school rice-bowl shops; it’s a good spot to try a bowl of oyakodon or katsudon before you commit to an hour on the water with no food service.

    Routes, Prices, and How Long It Takes

    There are a few ways to make the trip, and the price difference comes down to boat type and whether you transfer:

    • Asakusa → Hinode Pier (regular boat, ~35–40 minutes): the cheapest leg, roughly ¥780–900 one-way for adults, half that for children. IC cards work on most standard-line boats.
    • Hinode Pier → Odaiba Seaside Park (regular boat, ~20 minutes): an additional ¥400–500 or so one-way.
    • Direct Asakusa → Odaiba on a standard boat when scheduled, or on Himiko/Hotaluna (~60 minutes): figure around ¥2,000 one-way for the special-design boats, since the fare covers the design premium, not just the ride.

    Fares and schedules change periodically, so treat these as planning estimates and confirm current prices and departure times on the Tokyo Mizube Line website before you go. Boats generally run every 35–60 minutes between late morning and early evening; there’s no late-night service, so plan your return before sunset unless you’ve confirmed the last departure.

    Himiko and Hotaluna: The Boats Worth Booking Ahead

    If you only ride the water bus once, the glass-domed Himiko or Hotaluna is the one to pick — curved cabins, mood lighting, and a silhouette that looks nothing like a commuter ferry. The catch is that seats are limited and these boats run fewer times per day than the standard fleet, so weekend and holiday departures can sell out. Reserve a seat online in advance through the official Tokyo Mizube Line site rather than showing up and hoping. Also note that IC cards generally aren’t accepted on these special boats — you’ll need a paper or online ticket purchased separately from the regular water bus fare system.

    Best Time to Ride

    Spring (late March to early April) is the classic pick, since the Sumida River banks near Asakusa are lined with cherry trees you’ll see from the water as you pull away from the pier. Summer afternoons are hot with little shade on deck, but a late-day or early-evening departure rewards you with the Rainbow Bridge lit up as you arrive in Odaiba, and late July brings the Sumida River Fireworks Festival, when boats and schedules get crowded and should be booked well ahead. Autumn and winter give the clearest, haze-free skyline views, and winter evenings pair nicely with Odaiba’s seasonal illuminations once you dock. Whatever the season, go on a clear day — river mist and drizzle cut visibility and make the ride feel a lot less special.

    Common Mistakes to Avoid

    • Assuming one ticket covers everything. The regular line and the Himiko/Hotaluna boats use separate ticketing. If you want the futuristic boat specifically, buy that ticket, not a standard water bus pass.
    • Not reserving ahead on weekends. The special-design boats have limited capacity and sell out faster than people expect, especially around cherry blossom season and summer weekends.
    • Forgetting it’s point-to-point river transit, not a loop. If you ride one-way to Odaiba, you’ll need to plan your return via the Yurikamome line or the boat back — don’t assume the same vessel turns around immediately.
    • Skipping weather checks. Service can be delayed or canceled in strong wind or heavy rain, which matters more here than on a train, since there’s no backup departure five minutes later.
    • Underestimating total trip time if transferring at Hinode Pier. Waiting for a connecting boat can add 20–30 minutes beyond the time printed for each individual leg.

    Budget, Mid-Range, and Splurge Options

    Budget: ride the standard boat Asakusa → Hinode Pier, pay with your IC card, and treat it as cheap transit with a bonus view — no reservation needed.

    Mid-range: take a direct standard-line sailing Asakusa → Odaiba when the schedule allows, getting the full river-to-skyline arc in one uninterrupted ride without the design-boat premium.

    Splurge: book a reserved seat on Himiko or Hotaluna for the full Asakusa–Odaiba run, ideally timed for late afternoon so you watch the light change over Tokyo Bay. Once you land in Odaiba, it’s an easy segue into a relaxed evening — Odaiba also has a cluster of head spa-style wellness spots nearby if you want to unwind after a day of sightseeing. And if the idea of a scenic boat ride from Tokyo has you hooked, the ferry crossing to climb Mount Nokogiri in Chiba makes a solid full-day follow-up trip using the same water-first mindset.

  • Tokyo Water Bus: Riding the Sumida River Cruise Between Asakusa and Odaiba

    Tokyo Water Bus: Riding the Sumida River Cruise Between Asakusa and Odaiba

    Photo by katsuma tanaka on Unsplash

    Stuck between seeing Asakusa’s temples and Odaiba’s bay-front sights, most visitors default to the subway — but there’s a far more scenic option gliding right past both neighborhoods. The Tokyo Water Bus (also called the Sumida River cruise or Tokyo Cruise) lets you swap train windows for open water, watching the city’s bridges, skyline, and harbor slide by at a relaxed pace. It’s not just a novelty ride; for a trip between Asakusa and Odaiba it’s a genuinely practical way to get around, often cheaper in time-value than it sounds and more memorable than any train transfer.

    What Is the Tokyo Water Bus?

    The Tokyo Water Bus is a public ferry service run by Tokyo Cruise (also marketed under the Tokyo Mizube Line brand) that travels the Sumida River from Asakusa down through central Tokyo to Hinode Pier near Hamamatsucho, then continues across Tokyo Bay to Odaiba. It’s a legitimate transit option, not just a sightseeing charter — locals use it, it’s covered by the same IC cards (Suica/Pasmo) you use on trains, and it runs on a fixed timetable every day of the year, weather permitting.

    There are two ways to do the Asakusa–Odaiba route: transfer once at Hinode Pier on a standard ferry, or take the direct futuristic-looking boat straight through. Both are worth knowing about because they suit different budgets and timeframes.

    Routes, Fares, and Timetables

    On the standard (non-direct) service, Asakusa to Hinode Pier runs roughly every 30–60 minutes and takes about 40 minutes, with one-way adult fares around ¥780 (child around ¥390). From Hinode Pier, a separate short hop over to Odaiba Seaside Park costs roughly ¥460 one way and takes about 20 minutes. Boats generally start around 9:30–10:00 AM and the last departures are in the late afternoon to early evening, with the exact schedule shifting by season — always check the current timetable on the Tokyo Cruise website or at the pier ticket counter before planning your day around it, since winter hours run shorter than summer.

    IC cards work for standard fares at some piers, but it’s safest to buy a paper ticket at the counter, especially for the direct Odaiba boats, which require advance reservation of a numbered seat rather than tap-and-go boarding.

    The Himiko and Hotaluna: Riding the “Anime” Boats

    If you only remember one detail about this cruise, it’s probably the boats themselves. The direct Asakusa–Odaiba service uses the Himiko and Hotaluna, two spaceship-like vessels designed by manga artist Leiji Matsumoto (creator of Galaxy Express 999 and Space Battleship Yamato). With smoked-glass domes, curved metallic hulls, and mood lighting inside, they look nothing like a typical river ferry — half the appeal is simply boarding one.

    The direct route takes about an hour and costs roughly ¥2,000 one way for adults, which is more than double the transfer route but skips the wait and walk at Hinode Pier, and gives you reserved, air-conditioned seating with big windows. Seats sell out on weekends and during cherry blossom season, so reserve online a few days ahead rather than showing up and hoping.

    Best Time to Ride and What You’ll See

    Late morning to early afternoon gives the clearest views and the most comfortable boarding experience, since piers get crowded on weekend afternoons. For photography, an hour before sunset on a clear day is hard to beat — you’ll pass under Tokyo’s low bridges just as the Tokyo Skytree and the city lights start to glow, and arrive in Odaiba in time to see the Rainbow Bridge lit up.

    Cherry blossom season (late March to early April) is the single most popular window, since the Sumida River banks near Asakusa are lined with sakura trees — book ahead if you’re riding then. Summer evenings bring fireworks-festival crowds on specific nights, which is fun if you’re in on it and frustrating if you stumble into a sold-out boat by accident. Winter rides are quieter and the air is often clearer for skyline photos, but dress warmly — the open-deck sections get cold on the water.

    How to Get to the Piers

    The Asakusa pier (Azumabashi) sits a short walk from Asakusa Station, right near the Sumida River and in clear view of the Asahi Beer headquarters’ golden flame sculpture — easy to combine with a temple visit at Senso-ji beforehand. Hinode Pier is a few minutes’ walk from Hinode Station on the Yurikamome line or a slightly longer walk from Hamamatsucho Station on the JR Yamanote/Keihin-Tohoku lines. On the Odaiba side, boats dock at Odaiba Seaside Park, a two-minute walk from Daiba Station on the Yurikamome, putting you right next to the beach, the Fuji TV building, and the shopping malls.

    If you’re the type who likes stacking unusual transit experiences into a trip, this pairs naturally with other Tokyo-area routes that trade speed for scenery — the ferry day trip out to Mount Nokogiri in Chiba is a similar idea on a bigger scale, and the Enoden seaside railway near Enoshima is the train equivalent of this boat ride’s “the journey is the point” appeal.

    Common Mistakes to Avoid

    • Assuming it’s faster than the subway. It isn’t. The Asakusa–Odaiba subway-and-train combination takes about 30–40 minutes; the water bus takes 60–90 minutes depending on which service you choose. Ride it for the experience, not to save time.
    • Not checking for operational suspensions. Service can be cancelled or shortened in strong wind, heavy rain, or unusually high tides, which affect clearance under the Sumida’s low bridges. Have a backup transit plan if you’re on a tight schedule.
    • Showing up without a reservation for the Himiko/Hotaluna. These sell out, particularly on weekends and holidays — book your seat in advance through the official site.
    • Forgetting cash or a working IC card balance. Not every pier counter takes credit cards smoothly, and ticket machines are limited; carry cash as backup.
    • Skipping the open deck. Many riders stay seated inside the whole way and miss the best photo spots — step out onto the open-air deck when passing under bridges or crossing the bay.

    Budget, Mid-Range, and Splurge Options

    For a budget trip, take the standard ferry with a transfer at Hinode Pier — total cost around ¥1,200–1,300 one way, functional and still scenic. For a mid-range experience, book the direct Himiko or Hotaluna one-way (~¥2,000) and return by subway, getting the signature boat experience without paying for it twice. For a splurge, some operators run evening dinner or illumination cruises with food service and bay views — check current offerings on the Tokyo Cruise site, since these run as special or seasonal departures rather than the standard timetable, and price well above a one-way ticket.

    However you ride it, build in a loose afternoon rather than a tight connection — the whole point of the water bus is slowing down long enough to actually look at the city instead of rushing past it underground.