Japan Trove

Category: Travel

Practical, up-to-date guides for traveling in Japan — itineraries, rail passes, eSIMs, where to stay, seasonal timing, etiquette, and the local know-how that makes a trip smoother. Written with real Japanese sources so you get the answer that actually works on the ground, not the recycled tourist one.

  • Renting Ski and Snowboard Gear in Japan: Where to Rent Near Niseko, Hakuba & Nozawa Onsen

    Renting Ski and Snowboard Gear in Japan: Where to Rent Near Niseko, Hakuba & Nozawa Onsen

    Photo by Hyungman Jeon on Unsplash

    Flying to Japan with ski boots crammed into your carry-on is one of travel’s small miseries, and for most visitors it’s unnecessary. Niseko, Hakuba, and Nozawa Onsen all have dense clusters of rental shops that can outfit a complete beginner or a backcountry powder hound within fifteen minutes of arrival. The trick is knowing which village to rent in, what things actually cost, and when to book so you’re not stuck with mismatched boots on the one powder day of your trip.

    Why Renting Beats Packing Your Own Gear

    Unless you’re attached to a specific board or custom boot fit, renting in Japan is usually cheaper than paying airline oversize baggage fees (often ¥5,000–¥15,000 each way per bag on international and domestic carriers), and it removes the hassle of hauling boards through train stations and bus transfers. Rental shops near all three resorts stock gear tuned for the conditions they see most — deep, dry Hokkaido powder in Niseko, and the steeper, more varied terrain of Hakuba and Nozawa. Many shops also offer free boot-fitting adjustments mid-week if your feet start hurting, which isn’t something you get with gear checked through an airline.

    Niseko: Rental Shops in Hirafu, Hanazono & Annupuri

    Niseko United spans four base areas — Grand Hirafu, Hanazono, Niseko Village, and Annupuri — and Hirafu’s main street is where most rental shops cluster, many open 8:00 or 8:30 until around 19:00–20:00 during the season (roughly mid-December through early April). Typical package rental of skis or a board plus boots and poles runs about ¥5,000–¥8,000 per day for standard gear, with multi-day rates dropping to ¥4,000–¥6,000/day for a 5+ day rental. Premium or latest-season demo gear runs ¥8,000–¥14,000/day. Several Niseko shops (Rhythm, Niseko Sports, and others along the Hirafu strip) also run delivery services that drop gear directly at your hotel or ski-in/ski-out condo, which is worth it if you’re staying outside central Hirafu or traveling with kids. Most visitors fly into New Chitose Airport and take a resort bus or train (about 2.5–3 hours) to Niseko — if you have a few hours before your transfer, the airport itself is worth lingering in; see our guide to New Chitose Airport’s ramen dojo, onsen, and shopping for how to spend a layover there.

    Hakuba: Renting Near Happo-One, Goryu & Hakuba 47

    Hakuba Valley’s eleven resorts (Happo-One, Hakuba 47, Goryu, Cortina, and others) are spread along a long valley, so where you rent should match where you’re skiing. Hakuba village, near Happo-One’s base, has the thickest concentration of rental shops, generally open 8:00–18:00 in season. Standard rental packages run ¥4,500–¥7,000/day, with weekly discounts common; shops near Hakuba 47 and Goryu (further south along the valley) tend to be slightly cheaper and less crowded than those directly below Happo-One. Getting here typically means a Shinkansen to Nagano Station, then roughly a 70–75 minute direct bus into the valley — book the bus seat in advance during peak weeks, as it does sell out. If you’re renting boards for a group, it’s worth comparing one shop near your lodging against the options nearer the lift you’ll use most, since hauling gear between the two can eat up a chunk of your morning.

    Nozawa Onsen: Small-Village Rentals With Onsen Convenience

    Nozawa Onsen is smaller and more old-fashioned than Niseko or Hakuba — a compact onsen town built around steaming public bathhouses, with the ski area rising directly behind it. Rental shops are concentrated near the village center and the main gondola base, typically open 8:00–18:00, and prices run a bit lower than Niseko’s, around ¥4,000–¥6,500/day for a standard ski or snowboard set. Because it’s a smaller, more local-feeling town, some of the older family-run rental shops are cash-only or have limited card terminals, so it’s worth keeping yen on hand — a 7-Eleven is on the main road through town, and 7-Bank ATMs at 7-Eleven are the easiest way to withdraw cash with a foreign card if you’re caught short. Nozawa is reached via Nagano Station followed by about a 60–75 minute bus, similar to Hakuba’s access but a separate bus line.

    Budget, Mid-Range & Splurge Options

    Across all three resorts, the pricing tiers look similar. Budget renters can expect ¥4,000–¥6,000/day for a basic beginner-to-intermediate ski or board package, often with older but perfectly serviceable gear — fine for a first trip or casual skiers. Mid-range rentals (¥6,000–¥10,000/day) get you current-season demo skis or boards and better boots, worth it if you’re an intermediate-to-advanced rider who’ll actually feel the difference. Splurge options (¥10,000–¥20,000/day) include top-tier powder skis, splitboards, custom boot fitting with heat-molding, and door-to-door delivery — useful for serious skiers chasing Niseko’s famous powder days or anyone with wide or unusually shaped feet who needs a proper fitting rather than a rack pull.

    Common Mistakes to Avoid

    The single biggest mistake is showing up without a reservation during Christmas/New Year or Chinese New Year week, when the best gear (and larger boot and board sizes) gets booked out early; reserve online at least a few weeks ahead for peak dates. Second, Japanese boot sizing runs in centimeters (mondo size) rather than US/UK/EU sizing, and shops size for narrower Japanese-average feet — if you have wide feet, ask specifically for a wider last or go to a shop known for wide-fit boots rather than squeezing into the first pair offered. Third, don’t assume every shop takes credit cards smoothly; carrying a card with no foreign transaction fees (see our rundown of no-foreign-transaction-fee credit cards for Japan trips) saves money on larger multi-day rental bills, but have cash as backup for smaller shops. Finally, don’t rent for your entire trip length if a storm is forecast mid-week — some shops let you swap or upgrade skis for deeper snow for a small fee, so ask before locking in a non-changeable package.

    Best Timing for Booking and Skiing

    The season generally runs mid-December through late March or early April, with Niseko’s Hokkaido powder most reliable from mid-January through February, while Hakuba and Nozawa tend to see their best overall snow base (and sunnier, more stable weather) from late January into March. Book rental gear online 2–4 weeks ahead for any trip that overlaps school holidays in Japan, Australia, or China; outside those windows, walking into a shop the morning you arrive is usually fine. Early mornings are also the best time to swap or upgrade gear, since shops restock and sort returns overnight.
  • Akabane: Inside Tokyo’s Retro “Adult Disneyland” Drinking Town

    Akabane: Inside Tokyo’s Retro “Adult Disneyland” Drinking Town

    Photo by Alex Knight on Unsplash

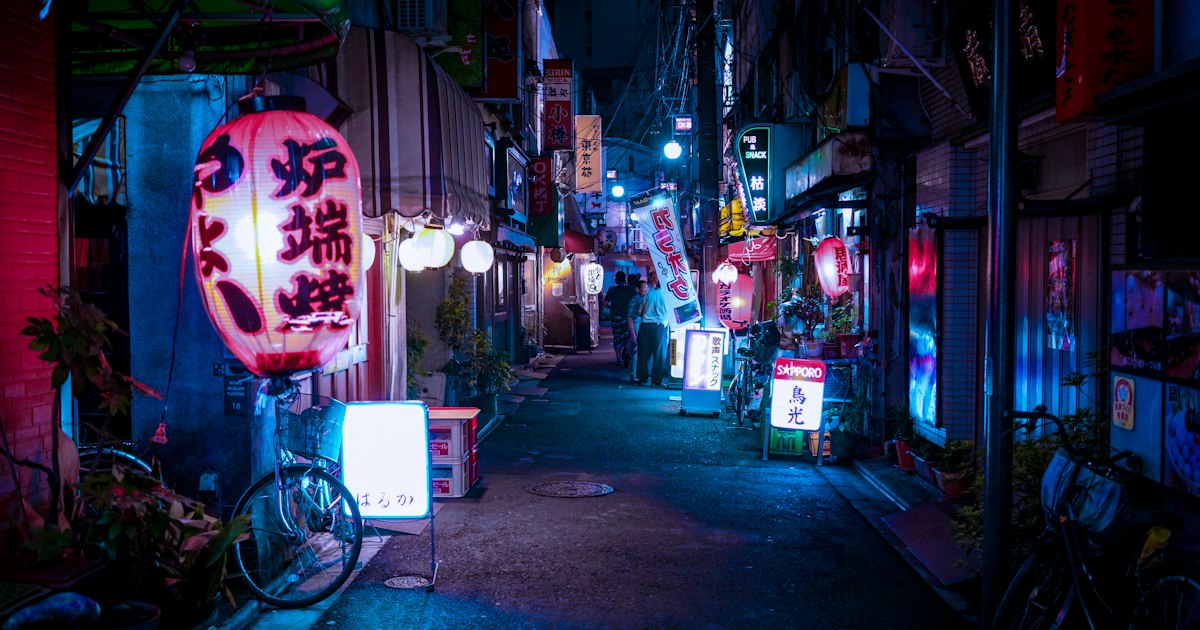
    Ask a Tokyoite where they go to drink without the Shibuya crowds or Shinjuku prices, and a surprising number will say Akabane. This unglamorous station town in the city’s north has no neon towers or viral photo spots — just dozens of standing bars, a shotengai arcade, and day-drinkers who’ve been coming since the 1970s. Locals only half-jokingly call it the “adult Disneyland” (otona no Disneyland), because once you’re inside the maze of alleys behind the station, you can hop from counter to counter for hours without ever needing to go outside. Here’s how to actually do that trip.

    What Makes Akabane the “Adult Disneyland”

    The nickname comes from the density and variety packed into a few square blocks: dozens of tiny bars, each with its own specialty, crammed close enough that bar-hopping feels like moving between rides. Unlike Shinjuku’s Golden Gai, which is largely a nighttime tourist curiosity now, Akabane’s scene is still driven by locals — retirees, office workers finishing an early shift, and regulars who’ve had the same seat for twenty years. Drinking often starts in the early afternoon rather than after dark, which is part of the appeal: you can do a full Akabane crawl and still catch the last train home at a reasonable hour.

    Getting There: Trains and Timing

    Akabane Station is served by the JR Keihin-Tohoku Line, JR Saikyo Line, JR Utsunomiya/Takasaki Lines, and the Tokyo Metro Namboku Line, which makes it easy to reach from most parts of the city without transferring. From Tokyo Station it’s roughly 20 minutes on the Keihin-Tohoku Line; from Ikebukuro it’s about 10 minutes on the Saikyo Line; from Ueno around 10 minutes. There’s no need for a taxi or a special IC card top-up strategy — just tap through with whatever Suica or Pasmo you’re already using.

    The best time to go is a weekday from mid-afternoon (around 3–4pm) through early evening. Many standing bars open as early as 11am–12pm and fill with day-drinkers by mid-afternoon, so going earlier than a typical izakaya run actually gets you the full local atmosphere rather than a late-night tourist crowd. Weekends are busier and louder but still manageable; avoid major holidays when some smaller shops close for family time.

    Where to Start: Ichiban-gai and the Yokocho Alleys

    Walk out of Akabane Station’s east exit and you’ll hit Akabane Ichiban-gai, a covered shotengai (shopping street) lined with butchers, produce stalls, and small eateries that’s been largely unchanged for decades. This is a good warm-up lap before drinking: grab a skewer or croquette from a stand-up food shop for a few hundred yen while you get oriented.

    From there, duck into the narrow lanes branching off the main street. These alleys hold the real draw: multi-tenant buildings where a single doorway opens onto six or eight tiny bars sharing a floor, each seating maybe 8–15 people at a counter. You don’t need a plan — walk until a menu board or the smell of grilled motsuyaki (grilled offal skewers, an Akabane specialty) pulls you in. Most places are standing-only or have a handful of stools, which keeps turnover fast and prices low.

    How Tachinomi (Standing Bar) Culture Works

    The backbone of Akabane’s drinking scene is the tachinomi, or standing bar. These are no-frills counters where you order, pay close to the time you order (sometimes a running tab, sometimes cash-as-you-go), and drink standing up, which keeps turnover high and prices low. Expect draft beer or a small glass of sake or shochu for roughly ¥300–500, and skewers, fried items, or small plates in the ¥100–400 range. A satisfying two-drink, three-snack stop at one bar often comes to under ¥1,500 per person.

    Etiquette is casual but has a few unwritten rules: don’t linger at the counter once you’ve finished if there’s a line waiting, don’t expect English menus (pointing at what the person next to you is eating works fine), and tip nothing — it isn’t expected anywhere in Japan. If you want a calmer, seated alternative to compare against, Tokyo’s nightlife isn’t all standing-bar chaos — see our guide to navigating Kabukicho’s nightlife district safely for a contrast in scale and energy.

    Budget, Mid-Range, and Splurge Options

    Budget (under ¥2,000 total): Stick to one or two standing bars, order the house draft and a couple of skewers, and move on. This is how most Akabane regulars drink on a weekday.

    Mid-range (¥3,000–5,000): Settle into a seated izakaya for a full meal — grilled fish, a hot pot, or a set course — plus a few rounds of drinks. Many of the sit-down spots around Ichiban-gai offer reasonably priced set menus in this range.

    Splurge (¥6,000+): Akabane isn’t really a splurge destination, which is part of its charm, but a few longer-established restaurants near the station offer proper multi-course dinners with better sake lists if you want to slow down and eat well rather than crawl bars.

    Common Mistakes First-Timers Make

    • Showing up too late. Arriving after 9pm means missing the day-drinking atmosphere that makes Akabane distinctive, and some of the oldest standing bars close relatively early since they opened at lunchtime.
    • Expecting card payment everywhere. Many standing bars and smaller stalls are cash-only. Carry enough yen before you arrive — the 7-Bank ATMs inside 7-Eleven stores near the station are the easiest way to get cash if you run short.
    • Trying to sit down everywhere. Half the appeal of a tachinomi crawl is staying mobile. Treat each stop as a 20–30 minute visit rather than settling in for the whole evening at the first bar you like.
    • Not checking where you can smoke. Street smoking is restricted across much of Tokyo, and Akabane is no exception — look for marked designated areas rather than lighting up outside a bar; our guide to designated smoking areas in Japan explains where those are and how the rules work.

    Practical Tips Before You Go

    Akabane is very walkable and low-risk compared to flashier nightlife districts — there’s little of the tout or overcharge culture found in parts of Kabukicho or Roppongi, since most bars are small, locally run, and have fixed, posted prices. Bring a basic phrase or two of Japanese (or a translation app) since English is rare here, and don’t expect a dress code; this is a jeans-and-work-clothes crowd, not a dress-to-impress one. A card with no foreign transaction fees is still worth carrying for the rare spot that takes plastic — see our roundup of no-foreign-transaction-fee credit cards for Japan trips — but plan your Akabane evening around cash. Go hungry, go early, and let the alleys decide your route; that’s the whole point of the adult Disneyland.

  • Kabukicho After Dark: Navigating Tokyo’s Neon Nightlife District Safely

    Kabukicho After Dark: Navigating Tokyo’s Neon Nightlife District Safely

    Photo by Jezael Melgoza on Unsplash

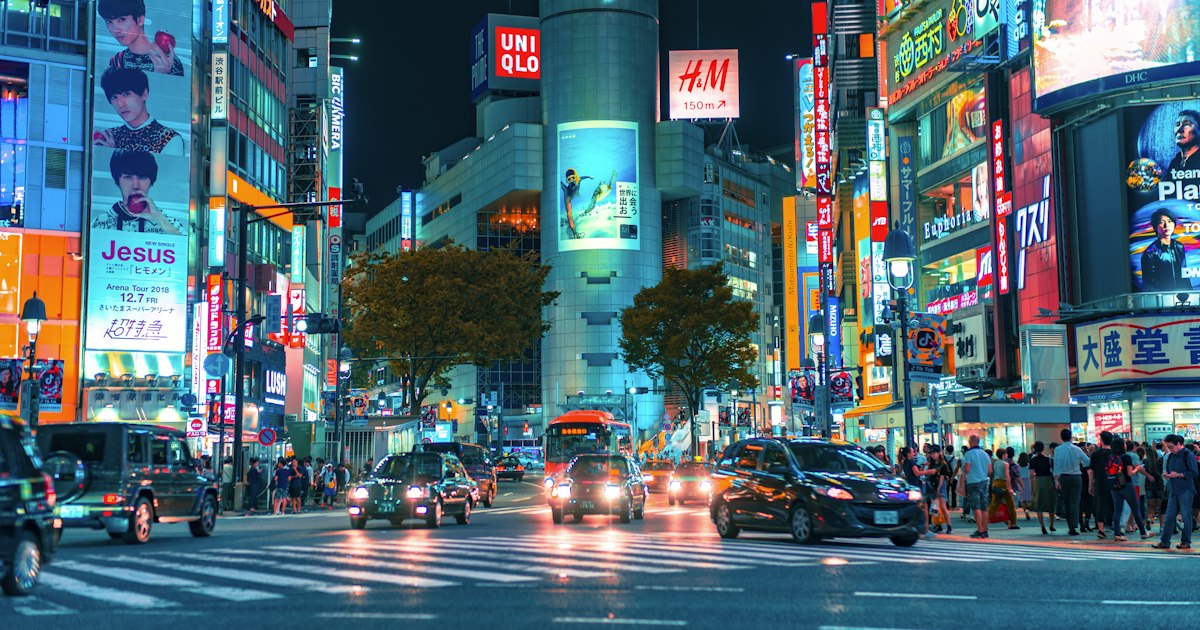
    Kabukicho is the beating, blinking heart of Shinjuku’s nightlife — a few square blocks packed with izakaya, host and hostess clubs, karaoke towers, pachinko parlors, and the giant Godzilla head glaring down from the Toho Cinemas building. It’s also Japan’s most notorious hunting ground for tourist scams, which scares some visitors off entirely. That’s a shame, because with a few basic precautions, Kabukicho is a perfectly safe, genuinely fun night out — Japan’s violent crime rate is vanishingly low even here. The danger isn’t physical; it’s financial, and it’s avoidable if you know what to watch for.

    Getting There and When to Go

    Kabukicho sits immediately north of JR Shinjuku Station’s East Exit (Higashi-guchi) — walk past the Studio Alta area and you’re there within five minutes. The nearest exits are Seibu-Shinjuku Station (right at the district’s edge) or Shinjuku Sanchome Station on the Marunouchi, Shinjuku, and Fukutoshin lines, about a 3-minute walk.

    The area is quiet-ish until around 7pm, then builds steadily until it peaks between 10pm and midnight on weekends. Last trains out of Shinjuku run until roughly 12:30-1am, after which taxis queue up but surge in price — budget around 2,000-3,000 JPY for a short ride to a nearby hotel if you miss the last train. Weeknights (Tuesday-Thursday) are noticeably calmer and easier to navigate than Friday or Saturday, which is worth considering if you want to look around without the full crowd crush.

    What’s Actually There

    Most of what you’ll want as a visitor clusters into a few categories:

    • Izakaya and standing bars — casual Japanese pubs with food and drink, typically 3,000-5,000 JPY per person for a full evening including several rounds and shared plates.
    • Golden Gai — a separate, atmospheric cluster of roughly 200 tiny bars packed into narrow alleys just south of Kabukicho proper. Many seat only 6-10 people and charge a seating fee (table charge) of 500-1,500 JPY on top of drinks; a sign reading “No Charge” or “Tourist Welcome” out front usually means they’re used to foreign visitors and English menus. Golden Gai is touristy by Tokyo standards but still one of the most atmospheric places in the city for a drink.
    • Karaoke boxes — chains like Karaoke Kan or Big Echo charge roughly 300-600 JPY per person per 30 minutes on weeknights, more on weekends, often with a one-drink minimum.
    • Robot Restaurant — the much-photographed robot cabaret show closed its original Kabukicho venue in 2023, though a touring/pop-up version has appeared elsewhere; don’t plan a trip around finding it in Kabukicho itself.
    • Host and hostess clubs — these exist primarily for a Japanese clientele and are where most tourist trouble originates (see below). They’re not illegal or inherently dangerous, but they’re not designed for casual foreign walk-ins either.

    The Scams to Actually Watch For

    Kabukicho’s reputation comes almost entirely from one pattern: a friendly tout (客引き, kyakuhiki) on the street invites you to a bar with “cheap drinks” or a “friendly” girl/host to chat with. You go in, have a drink or two, and the bill arrives for 30,000-100,000+ JPY, with the exit blocked by staff until you pay. This happens to tourists and locals alike, and it is the single most common complaint filed with Shinjuku police.

    The fix is simple: never follow anyone who approaches you on the street, no matter how friendly, fluent in English, or legitimate-looking their flyer is. Legitimate bars don’t need to recruit customers off the sidewalk. Touting was actually made illegal in Kabukicho under a 2023 ordinance, and police patrol visibly, but enforcement can’t catch everyone — the rule is on you to simply walk past and ignore the approach entirely, even if they fall into step beside you. If you want a specific bar, look it up and walk there directly, or ask staff at your hotel for a recommendation.

    A second-tier issue is non-touted bars with hidden table charges or “VIP seat” surcharges that aren’t on the menu. Always check that a printed menu shows prices before ordering, and ask “table charge arimasu ka?” (is there a seating charge?) if it’s unclear. Reputable izakaya and Golden Gai bars post prices clearly.

    Money and Payment

    Many of Kabukicho’s smaller bars, including most of Golden Gai, are cash-only, so don’t count on tapping a card at the counter. Pull out cash in advance — the 7-Bank ATMs at 7-Eleven are everywhere in Shinjuku and reliably accept foreign cards with reasonable fees. For the izakaya chains and bigger bars that do take cards, make sure you’re carrying one from the best no-foreign-transaction-fee credit cards list so you’re not losing a few percent on every round. As a rule of thumb, carry 8,000-10,000 JPY in cash for a night out covering a couple of bars and a karaoke session, more if Golden Gai is on the itinerary.

    Budget, Mid-Range, and Splurge Nights

    Budget (under 3,000 JPY): A standing bar or chain izakaya like Torikizoku, where most items and drinks run 350-500 JPY, plus one karaoke session split between friends.
    Mid-range (5,000-10,000 JPY): A proper izakaya dinner with several rounds of drinks, followed by one or two Golden Gai bars with their seating charges.
    Splurge (15,000 JPY+): A reserved table at a themed bar or a members-oriented lounge, or a full night bouncing between several Golden Gai spots with premium whisky pours.

    Common Mistakes to Avoid

    • Walking the main strip alone late at night while visibly drunk — not because of violent crime, but because it makes you the easiest target for a tout’s pitch.
    • Agreeing to “just come look” at a club menu — this is the standard opening line before the bill shock.
    • Photographing the Toho/Godzilla building and Kabukicho signage at night is fine and extremely popular, but avoid photographing individual club entrances, staff, or hostesses/hosts without permission — some venues are sensitive about this and will say so directly.
    • Assuming the whole district is seedy — most of the footprint is ordinary restaurants, karaoke, and arcades; the host/hostess club scene is a small, specific slice of it.

    If you’d rather ease into Tokyo’s after-dark scene somewhere lower-key before tackling Kabukicho’s neon chaos, a jazz kissa elsewhere in the city is the polar opposite experience — hushed, vinyl-only, and scam-free by design. And if you need a nicotine break between bars, note that Japan’s street smoking ban means you’ll want to find one of the designated smoking areas rather than lighting up on the sidewalk, which is enforced with on-the-spot fines in parts of Shinjuku.

    Handled with a bit of street sense, Kabukicho delivers exactly what its reputation promises — sensory overload, great cheap food, and some of the most photogenic streets in Tokyo — without the horror stories, as long as you keep walking when someone calls out “hey, free drink!”

  • New Chitose Airport: Hokkaido’s Ramen Dojo, Onsen & Shopping Before Your Flight

    New Chitose Airport: Hokkaido’s Ramen Dojo, Onsen & Shopping Before Your Flight

    Photo by Godspower Abdulahi on Unsplash

    Most airports are somewhere you endure. New Chitose Airport (CTS), 40 minutes south of Sapporo, is somewhere you’d almost want a longer layover for. It’s the only airport in Japan with a dedicated ramen alley, a genuine hot-spring bathhouse with an outdoor bath, and enough Hokkaido-only shopping to replace a day of sightseeing in Sapporo. If you’re flying in or out of Hokkaido, here’s how to actually use the place instead of just passing through it.

    Getting To and Around the Airport

    New Chitose has two terminal buildings — Domestic and International — connected by an above-ground walkway called Smile Road, about a 10-minute walk with moving walkways. This trips people up more than you’d expect: most of the ramen, the onsen, and the big-name shopping (Royce’, Doraemon park) are in the Domestic Terminal, while duty-free is in the International Terminal. If your flight leaves from one and you want to explore the other, budget 20–30 minutes round trip.

    From Sapporo Station, the JR Rapid Airport train takes about 37 minutes and costs roughly ¥1,150 (regular seat); it runs every 10–15 minutes during the day. Airport limousine buses connect to Otaru, Niseko (around 100 minutes), Lake Toya, and Hakodate for travelers heading straight into the mountains or ski resorts without detouring through the city. A taxi to central Sapporo runs around ¥12,000–13,000 and takes 45–60 minutes depending on traffic. If you’re withdrawing cash before a shopping run, Japanese ATMs are more foreigner-card-friendly than they used to be, but it’s still worth knowing which ones reliably work — see 7-Bank ATMs at 7-Eleven for the easiest option, and bring a card with no foreign transaction fees for the duty-free counters (our credit card guide covers which ones to pack).

    Ramen Dojo: Hokkaido’s Ramen Styles Under One Roof

    On the 3rd floor of the Domestic Terminal, Ramen Dojo (らーめん道場) is a narrow corridor lined with around eight independent ramen shops, each representing a different regional Hokkaido style — Sapporo-style miso, Asahikawa-style shoyu, Hakodate-style shio. A bowl runs roughly ¥900–1,200. It opens around 10am and most stalls stay open into the evening, but it fills up fast at lunch (11:30am–1pm) and around dinner before evening flights, with lines spilling into the hallway. If you want a shop with a short wait, go right at opening or after 2pm. Each stall has roughly 6–10 seats, so even a short line moves slowly — don’t plan this for a 40-minute connection.

    Soaking Before You Fly: New Chitose Airport Onsen

    This is the airport’s real party trick: a full hot-spring bathing facility on the 4th floor, next to the Royton Hotel wing, with indoor baths, a rotenburo (outdoor bath), and a sauna, using water trucked in from a nearby onsen source. Adult admission is roughly ¥1,200 on weekdays and ¥1,400 on weekends and holidays, with discounts for elementary-school kids. It’s open very late — into the small hours — which makes it a genuinely useful way to kill time before a dawn departure or a red-eye arrival, rather than trying to sleep upright in a terminal chair. Bring your own toiletries or buy a basic set at the front desk; towels are usually included or rentable for a small fee. As with any Japanese onsen, visible tattoos can be an issue at some facilities — it’s worth calling ahead or checking current signage if you have large tattoos, since policies vary by operator and change over time.

    Shopping for Hokkaido Souvenirs

    You can do a surprising amount of your Hokkaido souvenir shopping without ever leaving the airport:

    • Royce’ Chocolate World (Domestic Terminal) — Hokkaido’s most famous chocolate brand runs a factory-style shop here, including a chocolate curtain display and free samples of their potato-chip chocolate. Nama chocolate boxes run roughly ¥1,000–2,000.
    • Shiroi Koibito Park / Ishiya shop — the white-chocolate sandwich cookie that’s practically Hokkaido’s edible mascot, plus soft-serve using the same recipe. Boxes start around ¥800–900 for a small set.
    • Duty-free shops (International Terminal) — for liquor, including Hokkaido-distilled whisky and local sake, and cosmetics at tax-free prices if you’re on an international itinerary.

    Budget option: convenience store snacks and a Ramen Dojo bowl, both well under ¥2,000 total. Mid-range: a Royce’ box plus Shiroi Koibito for people back home, ¥3,000–5,000. Splurge: the onsen visit plus a proper sit-down meal and a case of good Hokkaido sake or whisky from duty-free.

    Killing Time: Family Attractions and Smoking Areas

    Domestic Terminal 3F also has the Doraemon Wakuwaku Sky Park (around ¥800 admission) and a Hello Kitty Happy Flight Sapporo attraction — both good for restless kids on a long layover. If you smoke, note that Japan’s indoor/outdoor smoking rules are stricter than many visitors expect; the airport has designated smoking rooms rather than open areas, and it’s worth knowing the rules before you step outside to look for one — see our guide to designated smoking areas in Japan.

    Best Season and Timing

    New Chitose is one of the busiest airports in Japan during Hokkaido’s winter season (late December through February), when the Sapporo Snow Festival (early February) draws heavy traffic and winter storms regularly cause delays or cancellations. If you’re flying in winter, build in extra buffer time on both ends of your trip, and treat a delay as an opportunity rather than a disaster — this is exactly when the onsen and Ramen Dojo earn their keep. Summer (July–August) is calmer for weather but busier with domestic tourists escaping the mainland heat, so expect fuller flights and ramen lines even outside peak meal times.

    Common Mistakes to Avoid

    • Not checking which terminal you need. Ramen Dojo, the onsen, Royce’, and the family attractions are all in the Domestic Terminal — if you’re flying internationally, confirm you have time to cross via Smile Road before security.
    • Assuming everything’s open late. Many Domestic Terminal shops close by 8–9pm even though the terminal itself stays active; the onsen and a handful of restaurants are the main late-night options.
    • Underestimating ramen queues. Each stall seats fewer than 10 people — a short-looking line can still mean a 20–30 minute wait at peak times.
    • Carrying liquids through security for international connections. If you buy sake, whisky, or liquid souvenirs before an international flight, make sure it’s after your final security checkpoint, or pack it in checked luggage.

    New Chitose is proof that an airport layover in Japan doesn’t have to be dead time. Plan even two extra hours around your flight and you can eat your way through three regional ramen styles, soak in a real onsen, and leave with a suitcase of Hokkaido treats — without ever needing to go into Sapporo at all.

  • Fukuoka Airport: Japan’s Closest Airport to a City Center and How to Get Downtown

    Fukuoka Airport: Japan’s Closest Airport to a City Center and How to Get Downtown

    Photo by PJH on Unsplash

    Most visitors to Japan budget 60-90 minutes to get from the airport into town. In Fukuoka, you can be checking into your hotel in Hakata before you’ve finished scrolling through your arrival photos. Fukuoka Airport (FUK) is widely cited as the closest major airport to a city center anywhere in Japan, and that proximity changes how you should plan your first hour on the ground. Here’s exactly how the transfer works, what it costs, and the one mistake that trips up almost every first-time arrival.

    Why Fukuoka Airport Is Different

    Fukuoka Airport sits only about 3 kilometers from Hakata Station, the city’s main transport hub, well inside the city limits rather than out on reclaimed land or a distant plain like Narita, Kansai, or even Haneda. There’s no hour-long express train or highway bus slog here. The tradeoff is that the airport is landlocked and can’t expand easily, so it handles a surprisingly high volume of domestic traffic for its size. That means efficient transfers matter, and knowing the layout before you land will save you real time.

    Domestic vs. International Terminal: The Shuttle Bus Catch

    This is the detail that catches people out. Fukuoka Airport has separate domestic and international terminal buildings, and they are not connected by the subway directly. The subway station is located at the domestic terminal. If you land internationally, you first need to take the free inter-terminal shuttle bus to the domestic terminal before you can reach the subway.

    • The shuttle bus is free and runs roughly every 10-15 minutes.
    • The ride itself takes about 10 minutes, but add time for walking to the bus stop, loading luggage, and waiting if you’ve just missed one.
    • Budget 20-25 minutes total from international arrivals to the subway platform, not the 5 minutes you might assume from looking at a map.

    If you’re short on connection time for a domestic onward flight, factor this shuttle into your schedule rather than cutting it close.

    Subway: The Fastest Way Downtown

    The Fukuoka City Subway Airport Line (Kuko Line) runs straight from the domestic terminal into the heart of the city, and it’s the best option for almost every traveler.

    • To Hakata Station: about 5 minutes, fare around ¥260.
    • To Tenjin (the city’s other major downtown hub): about 11 minutes, fare around ¥260-300.
    • Trains run roughly every 5-10 minutes during the day, with first departures around 5:30am and last trains around midnight.

    Tap on with any IC card — Suica, Pasmo, and ICOCA all work fine on Fukuoka’s subway, so there’s no need to buy a separate local card unless you want one as a souvenir. If you’re relying on cash, note that ticket machines take coins and bills but rarely large denominations, so breaking a ¥10,000 note beforehand is worth doing. Pulling cash from a convenience store ATM is often easier than hunting for a bank; see our guide on 7-Bank ATMs at 7-Eleven for the easiest way to withdraw yen on arrival.

    Bus and Taxi Options

    The subway covers most needs, but buses and taxis have their place.

    Nishitetsu airport limousine buses run from both terminals to Tenjin and other city points, with fares generally in the ¥310-¥400 range. They’re useful if your hotel is far from a subway station or you have heavy luggage and want to avoid stairs, but journey time (25-40 minutes) is longer and less predictable than the subway because it depends on road traffic.

    Taxis are the splurge option but genuinely reasonable here given the short distance. Expect roughly ¥1,500-¥2,000 to Hakata Station and ¥2,000-¥2,500 to Tenjin, with the ride taking 15-25 minutes depending on traffic. For a family of four with luggage, splitting a taxi can actually beat four subway fares once you add in convenience. Credit cards are widely accepted in Fukuoka taxis now; if you haven’t picked a travel card yet, our rundown of no-foreign-transaction-fee credit cards is worth a look before you fly.

    Timing, Rush Hour, and Seasonal Crowds

    Because the airport sits inside the city, road traffic affects buses and taxis far more than it affects the subway. Weekday mornings (roughly 7:30-9:00am) and evenings (5:30-7:00pm) can noticeably slow bus and taxi transfers into Tenjin, so the subway’s fixed schedule becomes even more valuable during those windows.

    Seasonally, watch for Golden Week (late April-early May), Obon (mid-August), and New Year, when domestic flight volume spikes and both the terminal and subway platforms get crowded with suitcases. Fukuoka Airport also runs under a curfew, with flights generally operating between about 7am and 10pm, so very early or very late international connections through here are uncommon — plan your onward transport with that window in mind rather than assuming 24-hour operations like at Kansai or Haneda.

    Common Mistakes to Avoid

    • Assuming the international terminal has its own subway access. It doesn’t — you must shuttle to the domestic terminal first.
    • Cutting a domestic connection too close after an international arrival. Immigration, customs, and the shuttle bus can easily eat 45-60 minutes before you even reach a departure gate.
    • Not having IC card balance loaded. Ticket machines at the subway station can top up cards, but lines form fast when a flight’s worth of passengers lands at once.
    • Overpaying for a hotel shuttle or private transfer booked in advance when a ¥260 subway ride does the same job in five minutes.

    One more small thing worth knowing before you step outside: Japan’s street-level smoking ban means you can’t just light up on the sidewalk once you leave the terminal. If that applies to you, it’s worth knowing where the legal spots are — see our guide to designated smoking areas in Japan before you head into the city.

    The Bottom Line

    Fukuoka Airport’s biggest advantage is also the simplest: distance. For almost every traveler, the move is subway from the domestic terminal straight to Hakata or Tenjin, with the shuttle bus as the one extra step if you’re coming through international arrivals. Budget the 20-minute shuttle buffer, load your IC card, and you’ll likely be downtown faster than it took to clear the jet bridge.

  • Best No-Foreign-Transaction-Fee Credit Cards to Bring on a Japan Trip

    Best No-Foreign-Transaction-Fee Credit Cards to Bring on a Japan Trip

    Photo by Jezael Melgoza on Unsplash

    Japan is still more cash-friendly than Seoul or Singapore, but the gap has closed fast. Most hotels, department stores, convenience stores, and even a growing number of ramen shops and shrines now take cards. The catch is that not every card is a good one to bring — many U.S. and some European cards still quietly charge 1-3% on every yen you spend abroad. Picking the right card before you leave can save a four-person family trip well over ¥20,000 in silent fees, on top of getting better exchange rates than a currency counter at the airport.

    What “no foreign transaction fee” actually means

    A foreign transaction fee (FTF) is a surcharge, typically 1-3% of the purchase amount, that your card issuer adds whenever a transaction is processed in a currency other than your home currency or through a non-domestic bank. It’s separate from the exchange rate itself — Visa and Mastercard’s underlying conversion rates are generally competitive and close to the mid-market rate on any given day. The fee is a pure markup your bank keeps. Cards marketed as “no foreign transaction fee” waive this markup entirely, so you pay the same network exchange rate with nothing added. Always check the card’s terms for the exact phrase “foreign transaction fee” or “foreign currency transaction fee” rather than trusting a travel-rewards label alone — some cards marketed for travel still charge 3%.

    Card networks and acceptance in Japan

    Visa and Mastercard are accepted almost everywhere a card is accepted at all, including most 7-Eleven, Lawson, and FamilyMart registers, JR ticket machines, and department stores. American Express is accepted at major hotels, big department stores (Isetan, Takashimaya, Mitsukoshi), and most airport/duty-free counters, but far fewer small restaurants, local izakaya, and rural shops take it — treat Amex as a secondary card, not your primary one. JCB, Japan’s domestic network, is accepted everywhere by definition, and several JCB-branded cards issued outside Japan (including some Discover-partnered cards in the U.S., since Discover and JCB are linked) waive FTFs and get a slightly warmer reception at smaller merchants. Discover itself has very limited acceptance in Japan — don’t rely on it as your only card.

    Categories of cards worth bringing

    No annual fee, no FTF: Cards like the Capital One Quicksilver, Discover it (as a backup, not primary), and most Chase cards with “no foreign transaction fee” printed in their terms fall here. These are the right pick if you don’t want to pay anything just to hold the card and don’t care about earning bonus points on travel specifically.

    Mid-range travel rewards: Cards such as the Chase Sapphire Preferred or Capital One Venture charge a modest annual fee (roughly $95-$150) but waive FTFs and earn 2-5x points on travel and dining, which adds up on a two-week trip where you’re putting ryokan stays, bullet train tickets, and restaurant meals on plastic daily.

    Splurge/premium: The Chase Sapphire Reserve or Amex Platinum carry annual fees of $400-$700+ but add airport lounge access (useful at Haneda and Narita), trip delay/cancellation insurance, and purchase protection — genuinely useful if you’re buying something expensive like a massage chair or a set of Honma or Mizuno golf clubs and want purchase protection as a backstop.

    Where cards get rejected, and common mistakes

    Chip-and-PIN is standard in Japan; make sure you know your card’s PIN before you leave, since some automated ticket machines and gas stations require it rather than accepting a signature. Many older, family-run restaurants, small guesthouses, temple shops, and street-food stalls are cash-only, especially in rural areas and smaller towns — don’t assume a card will work just because the last three stops took one. A frequent mistake is accepting “dynamic currency conversion” when a card terminal or ATM asks “pay in USD or JPY?” — always choose JPY. Paying in your home currency lets the local merchant’s bank apply its own markup on top of your card’s rate, often erasing the savings from having a no-FTF card in the first place. Another common mistake is forgetting to call or message your bank before departure; even without an FTF, some issuers still flag the first few Japan transactions as suspicious and freeze the card.

    Pairing cards with cash

    Even with a good card, carry cash for the gaps. Temple and shrine donation boxes, vending machines, small ramen shops, local festival stalls (including anywhere selling happi coats or festival goods), and countryside onsen towns often run cash-only. The easiest way to get cash without a markup is the 7-Bank ATMs inside 7-Eleven stores, which are everywhere, available 24/7, support English menus, and accept foreign cards reliably — just check whether your card issuer or the ATM charges a flat withdrawal fee (often ¥0-¥220 on the Japan side) separate from any fee your home bank adds. Withdraw in larger amounts (¥30,000-¥50,000) rather than small ones repeatedly, since flat per-transaction fees add up faster than percentage-based ones.

    Timing and practical setup before you fly

    Apply for a new travel card at least 4-6 weeks before departure if you don’t already have one — approval and card delivery can take two to three weeks, and you want time to activate it and set up the mobile app. Set up two-factor authentication and app-based transaction alerts before leaving, since Japanese mobile numbers obviously can’t receive your home-country SMS codes if your plan doesn’t support international texts. Bring at least two different card networks (e.g., one Visa and one Mastercard) plus a backup card from a different bank entirely, stored separately from your main wallet — a lost or frozen card shouldn’t end your trip’s ability to pay for anything. Note that IC cards like Suica and Pasmo, used for trains and convenience stores, can often be topped up directly from a registered no-FTF credit card via the mobile app, which is a good way to keep small daily purchases fee-free too.

    Quick picks by travel style

    Budget traveler: A no-annual-fee, no-FTF card (Capital One Quicksilver or similar) paired with cash from 7-Bank ATMs covers nearly everything, from convenience-store meals to JR tickets.

    Mid-range traveler: A mid-tier travel rewards card earning 2-3x on travel/dining pays for itself if you’re spending more than roughly $3,000-$4,000 on the trip, between hotels, train passes, and dining out.

    Splurge traveler: A premium travel card makes sense if you’re flying business class, using airport lounges, or making large purchases — a Mikimoto pearl strand at Toba’s Pearl Island, for instance — where purchase protection and insurance genuinely offset the annual fee.

  • 7-Bank ATMs at 7-Eleven: Why They’re the Easiest Cash Withdrawal for Tourists in Japan

    7-Bank ATMs at 7-Eleven: Why They’re the Easiest Cash Withdrawal for Tourists in Japan

    Photo by Julien on Unsplash

    Japan still runs on cash more than most visitors expect — tiny noodle shops, shrine donation boxes, and plenty of retro candy stalls won’t take your card. The good news is that getting yen into your wallet is no longer the ordeal it used to be, thanks to one unglamorous but hugely useful machine: the Seven Bank ATM inside almost every 7-Eleven in the country. If you’re planning a Japan trip, it’s worth knowing exactly how these work before you land, so you’re not fumbling with a rejected card at midnight.

    Why 7-Bank ATMs Are the Tourist-Friendly Default

    Seven Bank is the financial arm of Seven & I Holdings, the company behind 7-Eleven in Japan, and it was built from the start to handle foreign-issued cards reliably. That’s not true of every ATM in Japan — plenty of regular bank ATMs at Japanese megabanks still reject overseas cards outright, or only accept them during limited daytime hours. Seven Bank machines, by contrast, were designed for international withdrawals from day one, with English-language menus and recognition of the major global card networks. With roughly 21,000 7-Eleven stores nationwide, there’s almost always one within walking distance, whether you’re in central Tokyo, a small town in Nara, or a ferry terminal in Okinawa.

    Which Cards Work (and the Networks to Check)

    Seven Bank ATMs accept cards on these networks: Visa, Visa Electron, PLUS, Mastercard, Maestro, Cirrus, American Express, Diners Club, Discover, JCB, and UnionPay. In practice, this covers the vast majority of debit and credit cards issued outside Japan. Before you fly, check the back of your card for one of these logos — if it has one, it should work. It’s also worth telling your bank you’re traveling to Japan, since some card issuers flag overseas ATM activity as suspicious and freeze the card on the first withdrawal attempt.

    One quirk to know: Japanese ATMs only accept numeric PINs, typically 4 digits. If your card uses a longer or alphanumeric PIN, contact your bank before departure to get a compatible one issued.

    Step-by-Step: How to Withdraw Cash

    • Insert your card and select your preferred language (English, Chinese, Korean, Portuguese, and Spanish are commonly available) as soon as the screen prompts you.
    • Choose “Withdrawal” and enter the amount in yen.
    • Enter your PIN and confirm.
    • If a screen offers to show the transaction in your home currency (dynamic currency conversion), decline it and let your card issuer handle the conversion — their exchange rate is almost always better.
    • Take your cash, card, and the printed receipt, which shows the exchange rate used, in case your bank statement doesn’t match what you expected.

    Fees, Limits, and How to Avoid Surprises

    Seven Bank itself does not add its own ATM surcharge for most internationally issued cards, but your home bank almost certainly will — typically a foreign transaction fee of around 1–3% of the amount withdrawn, sometimes plus a flat fee per withdrawal. Because that flat fee doesn’t scale with the amount, it’s more economical to withdraw a larger sum less often than to make several small withdrawals over your trip. Most Seven Bank machines cap a single withdrawal at around ¥100,000 per transaction, dispensed in a mix of ¥10,000, ¥5,000, and ¥1,000 notes, though your own bank’s daily limit may be lower — check that figure before you go, since it’s set on your end, not Japan’s.

    Finding One and Hours of Operation

    Look for the Seven Bank ATM logo near the entrance or front window of any 7-Eleven — it’s usually a freestanding machine just inside the door, separate from the cash registers. Because most 7-Eleven stores operate 24 hours, the ATMs are generally accessible around the clock, including public holidays, which matters if you land on a late flight or need cash before an early Shinkansen. A small number of stores (especially in rural areas) have moved to reduced hours in recent years as part of a nationwide shift away from strict 24/7 operation, so if you’re in a smaller town, it’s worth having a backup machine identified rather than counting on just one location.

    Common Mistakes to Avoid

    • Accepting the on-screen currency conversion. It almost always gives a worse rate than your card network’s own conversion — choose “no conversion” or “charge in Japanese yen.”
    • Assuming any convenience store ATM works the same way. Lawson and FamilyMart also have ATMs, and many now accept foreign cards too, but Seven Bank’s foreign-card support has historically been the most consistent, so it’s the safest default if you’re unsure.
    • Forgetting Japan is still cash-heavy outside big cities. Small retro shops, local festival stalls, and traditional craft stores often don’t take cards at all — stock up on cash before you need it, not when you’re already standing at the counter.
    • Not notifying your bank. A frozen card at a 7-Eleven ATM is one of the most common and easily avoidable travel hiccups.

    Cash matters more than you’d think once you start shopping for souvenirs, too — plenty of the best finds, like the retro sweets at dagashi candy shops or a tin of gourmet canned mackerel to bring home, are sold at small, cash-preferring shops rather than big department stores.

    Backup Options If a 7-Bank ATM Won’t Work

    If a particular Seven Bank machine rejects your card (it happens occasionally, usually due to a temporary network issue rather than anything wrong with your card), don’t assume all ATMs in Japan will fail the same way — simply try another 7-Eleven down the street, or look for a Japan Post Bank ATM, which also handles foreign cards reliably and is found in post offices nationwide. Airport arrival halls also have currency exchange counters and ATMs, but their rates and fees are typically worse than withdrawing with your own card once you’re in the city. If you’re planning a longer trip with a packed itinerary — say, catching an early train to see cherry blossoms or planning around a festival — it’s worth building a quick cash withdrawal into your first day’s plan rather than leaving it for later, the same way you’d plan around opening hours for something like designated smoking areas or other practical logistics that are easy to overlook until you actually need them.

    Ultimately, the humble 7-Eleven ATM is one of the few pieces of Japan travel admin that’s genuinely gotten easier over the years. Keep your card’s network logo in mind, decline the currency conversion prompt, and withdraw in slightly larger chunks — and cash access becomes one less thing to worry about on your trip.

  • Renting Snorkel and Dive Gear in Okinawa: A Practical Guide for Non-Divers

    Renting Snorkel and Dive Gear in Okinawa: A Practical Guide for Non-Divers

    Photo by Dino Reichmuth on Unsplash

    Okinawa’s water is the main event — turquoise shallows over coral reef that rival anywhere in Asia, and you don’t need a PADI card to see it. Most visitors never touch a tank; they rent a mask, snorkel, and fins for an afternoon and get 90% of the view for a fraction of the cost and hassle. The tricky part is knowing where to rent, what things actually cost, and which rookie mistakes (sunburned backs, missed jellyfish-net hours, gear that doesn’t fit) turn a great afternoon into a mediocre one. Here’s what you actually need to know.

    Best Season for Snorkeling in Okinawa

    Okinawa’s official swimming season runs roughly from April through October, which is when public beaches put up jellyfish nets, staff lifeguard stations, and open their rental kiosks. Water temperature stays swimmable (around 23–29°C) nearly all season, but the sweet spot for most travelers is June and September–October: warm water, fewer crowds than peak Obon week (mid-August), and lower typhoon risk than late summer. July and August are busiest and hottest, with the highest chance of a typhoon closing beaches for a day or two — always have a backup indoor plan if you’re visiting then. December through March, the sea is too cold for casual snorkeling and most rental counters simply close for the winter.

    Where to Rent Gear

    You have three realistic options, roughly in order of convenience:

    • Beachside rental kiosks: Popular public beaches — Maeda Point (Cape Maeda), Busena Marine Park, Manza Beach, and most beaches in Onna Village and Chatan — have small rental huts right on the sand, open daily during the April–October season, typically 9:00 to 17:00 or 17:30. No reservation needed; just show up and pay cash.
    • Dive shops in resort towns: Onna Village, Chatan’s American Village, and Naha all have dive/marine shops that rent snorkel sets even to people not booking a dive or tour. These shops tend to have better-fitted masks (useful if you have a narrow or wide face, or wear glasses) and will often throw in a dry bag or underwater camera rental too.
    • Hotel and resort counters: Larger beachfront resorts around Onna and Nago rent gear directly to guests, sometimes with no extra fee if it’s bundled into a beach-access package. Convenient, but usually the priciest option and limited to guests.

    If you’re staying in central Naha without a car, note that the city beaches themselves are limited — most of the famous snorkeling spots are a 40–90 minute drive north or a rental car trip toward Onna and Motobu. Renting a car for the day is almost always worth it for serious snorkeling; buses to the best reef spots are infrequent.

    What It Costs: Budget, Mid-Range, and Splurge

    Prices are consistent enough across the island to budget confidently:

    • Budget (beach kiosk, self-guided): A basic set of mask, snorkel, and fins runs roughly ¥1,000–¥2,000 per day. Life jackets are usually required at supervised beaches and rent for another ¥500–¥1,000, or are sometimes included. This is the cheapest way to get in the water and perfectly fine for calm, shallow reef areas.
    • Mid-range (guided snorkel tour, gear included): Half-day boat snorkel tours out to reef spots or the Kerama Islands, with full gear, a guide, and often fruit or drinks included, typically cost ¥5,000–¥9,000 per person. This is the best value for non-swimmers or anyone who wants to see the good reef without navigating currents alone.
    • Splurge (private charter or premium tour): Smaller-group or private boat charters with a dedicated guide, underwater photography, and transfers from your hotel run ¥15,000–¥25,000+ per person. Worth it if you want fewer people in the water with you or are traveling with kids who need one-on-one attention.

    Renting for a Kerama Islands or Ishigaki Boat Tour

    The Kerama Islands, a 15–90 minute boat ride from Naha depending on departure point, have some of Okinawa’s clearest water (“Kerama blue”) and are the single most popular day-trip snorkel destination. Nearly every Kerama tour operator includes gear in the tour price, so you generally don’t need to rent separately — just confirm this when booking, since a few budget tours charge gear as an add-on (usually ¥1,000–¥2,000 extra). Book Kerama tours at least a few days ahead in peak season (July–August and Golden Week in early May); boats sell out. If you’re island-hopping further out to Ishigaki or the Yaeyama Islands, the same logic applies — reef and manta ray snorkel tours there almost always bundle gear, wetsuit, and boat transfer into one price.

    Common Mistakes First-Timers Make

    • Skipping the rash guard. Okinawa sun is intense even on cloudy days, and the back of the neck, thighs, and backs of the knees burn badly while you’re floating face-down. Rent or bring a rash guard; most kiosks rent them for a few hundred yen, and it’s cheaper than the sunburn.
    • Not checking for jellyfish season. Habu kurage (a box jellyfish species) are most common from roughly June through September. Protected beaches with nets are safe; unprotected coves are not. If a beach offers a stinger suit rental (often ¥500–�al¥1,000), take it during these months.
    • Grabbing the wrong-size fins. Rental staff will ask your shoe size, but ill-fitting fins cause cramps fast. Try them on standing up before you wade in, and ask for a swap if they’re loose.
    • Underestimating currents at famous spots. Cape Maeda (the “Blue Cave”) looks calm from the cliff path but has real current near the cave mouth. If you’re a weak swimmer, go with a guided tour rather than self-guided rental there.
    • Forgetting cash. Many beach kiosks are cash-only, especially the smaller operations outside resort areas.

    Practical Tips

    Bring a waterproof phone pouch (rental shops sell cheap ones for a few hundred yen, or bring your own), reef-safe sunscreen if you have it, and a change of clothes — most kiosks have simple rinse stations but not full showers. Smoking is banned on the sand at most managed Okinawa beaches; if you need a cigarette, check our guide to designated smoking areas in Japan for where that’s actually allowed nearby. And if the idea of people diving for a living intrigues you more than snorkeling for an afternoon does, it’s worth knowing Okinawa isn’t where to see it — that tradition is centered further north, at Toba’s Pearl Island and its Ama diver shows, a worthwhile add if your Japan itinerary also includes the Ise-Shima area.

    Snorkeling in Okinawa doesn’t require planning months ahead — gear is everywhere, prices are transparent, and the reef rewards even a casual, rented-fins afternoon. The only real homework is picking the right season and booking the boat tour a few days early if Kerama is on your list.

  • Designated Smoking Areas in Japan: Where Smokers Can Legally Light Up After the Street Ban

    Designated Smoking Areas in Japan: Where Smokers Can Legally Light Up After the Street Ban

    Photo by Emil Karlsson on Unsplash

    If you smoke and you’re heading to Japan, the rules can feel like a maze: lighting up on the sidewalk that was perfectly normal a decade ago can now get you fined, while a glass booth outside a train station might be the only legal place to smoke for blocks. Japan didn’t ban smoking outright — it relocated it. This guide explains where those designated smoking areas actually are, how to recognize one, what it costs if you get it wrong, and the quirks (heated tobacco, Shinkansen rules, convenience store corners) that trip up visitors.

    Why Japan’s Smoking Rules Changed in the First Place

    Two separate laws reshaped smoking in Japan around the same time. The national Health Promotion Act amendment, fully enforced from April 2020, banned smoking inside restaurants, bars, offices, and most other buildings where staff work, with narrow exceptions for small, existing bars under a certain floor size and for rooms built specifically for heated tobacco. Tokyo layered its own, stricter ordinance on top, extending the indoor ban to places the national law exempted.

    Separately — and this is the part that confuses tourists most — many city wards passed their own street-smoking ordinances years earlier, often around 2002–2010, banning smoking while walking on public roads and sidewalks in busy districts. These two systems overlap: even where indoor smoking in a bar might technically be allowed, walking outside with a lit cigarette in the same neighborhood can be illegal. The result is that outdoor designated smoking areas, not indoor venues, are now the main legal option for a huge number of smokers and visitors.

    How to Recognize a Legal Designated Smoking Area

    Designated areas range from fully enclosed glass or metal booths with ventilation fans to simple open-air corners marked by a standing ashtray and floor decals. Look for:

    • A sign reading “指定喫煙所” (shitei kitsuenjo, designated smoking area) or simply “喫煙所” (kitsuenjo, smoking area)
    • Yellow floor markings or a roped-off square near station exits and plazas
    • A cluster of standing ashtrays outside convenience stores (Lawson, 7-Eleven, FamilyMart often have one near the entrance, though these are shrinking in number year by year)
    • Enclosed glass cabins near major intersections — common in Shinjuku, Shibuya, and Ikebukuro — that filter smoke before venting it

    If you don’t see any of these signals, assume smoking is not allowed, including while walking. Dropping ash or a cigarette on the ground anywhere, even inside a designated area, is treated as littering on top of any smoking violation.

    Where to Actually Find Them: Stations, Streets, and Parks

    Train stations are the most reliable bet. Major JR and private railway stations in Tokyo and Osaka typically maintain at least one outdoor smoking area near an exit, often tucked beside a bus terminal or taxi stand — look near Shinjuku’s East Exit, Shibuya’s Hachiko side, or Tokyo Station’s Yaesu side. Electronics and otaku districts are another good reference point: both Tokyo’s Akihabara and Osaka’s Nipponbashi area, covered in our Den Den Town vs Akihabara guide, have multiple designated smoking corners along their main shopping streets, since both districts draw heavy foot traffic and the wards actively manage smoker flow there.

    Large parks (Ueno Park, Yoyogi Park) usually have one or two marked smoking corners near the main entrances rather than scattered throughout. Department stores and shopping malls often keep a smoking room on a mid-level floor, typically near the restrooms — ask staff for “kitsuenjo wa doko desu ka” if you can’t spot signage. Airports are well covered: both Narita and Haneda have small ventilated smoking rooms on multiple floors, both before and after security, so there’s no need to go without on a long layover.

    Street Smoking Bans and What the Fines Actually Cost

    This is the part that catches tourists off guard. In central wards like Chiyoda, Shibuya, and Shinjuku, walking while smoking (or even holding a lit cigarette while standing on a public sidewalk outside a designated area) violates a local ordinance, not the national law. Enforcement is done by ward patrol staff wearing vests, mostly stationed around major stations during the day. Penalties are administrative, on-the-spot fines rather than criminal charges, and typically run in the ¥1,000–¥2,000 range per violation in the wards that actively patrol. You pay in cash to the patroller directly, and there’s no negotiating — the safest move is simply to never walk with a lit cigarette in a station district, full stop.

    Shinjuku, Shibuya, and Chiyoda are the three wards most known for active enforcement; other municipalities around Japan have similar rules but patrol far less aggressively, so don’t assume a quiet residential street outside Tokyo’s core carries the same risk — though the ordinance may still technically apply.

    Heated Tobacco (IQOS, glo, Ploom) Plays by Different Rules

    Heated tobacco products are treated separately from combustible cigarettes under the Health Promotion Act. Restaurants and bars that aren’t allowed to permit regular smoking can legally set up a dedicated heated-tobacco-only smoking room where customers can eat, drink, and use IQOS, glo, or Ploom — something not permitted for standard cigarettes in the same seating area. If you use heated tobacco, look for signage reading “加熱式たばこ専用” (specifically for heated tobacco) — these rooms are increasingly common in izakaya chains and family restaurants, and give heated-tobacco users noticeably more options than cigarette smokers in central Tokyo and Osaka.

    Trains, Shinkansen, and Other Moving Targets

    Local and commuter trains have been fully non-smoking for decades, with no exceptions — this applies equally in the women-only cars covered in our guide to women-only train cars and every other car on the train. The Tokaido and Sanyo Shinkansen removed their last onboard smoking rooms in March 2024, so long-distance bullet trains on that route are now smoke-free from Tokyo to Hakata; if you need a cigarette on a long Shinkansen trip, your only option is to wait for a station stop with a platform smoking room, which a shrinking number of stations still offer. Check signage on the platform before you commit to lighting up during a short transfer window.

    Common Mistakes and Quick Tips

    • Mistake: assuming an open-air area without walls is automatically legal. If there’s no signage or ashtray, it’s not designated — it’s just a street.
    • Mistake: smoking right outside a convenience store door rather than at its marked ashtray corner, which annoys staff and can draw a warning even without an ordinance.
    • Tip: carry a pocket ashtray — it’s considered basic etiquette and lets you use open-air designated spots without leaving butts behind, since many no longer provide standing ashtrays at all.
    • Tip: hotel rooms are almost always non-smoking by default now; budget and mid-range chains charge a cleaning fee (often ¥20,000–¥30,000) if they detect smoke in a non-smoking room, so book a smoking-designated room in advance if you need one — they’re limited in number and sell out first.
    • Tip: apps and websites that map nearby designated smoking areas (several are run by Japan Tobacco and by independent map services) are worth installing before you land, since station smoking rooms get relocated or closed with little notice as wards tighten rules further.

    Japan hasn’t eliminated smoking areas so much as concentrated them — fewer spots, more clearly marked, and more strictly enforced in between. Once you know what signage to look for and which wards patrol hardest, it’s easy to stay both compliant and comfortable for the length of your trip.

  • Women-Only Train Cars in Japan: Hours, Rules and How to Spot the Pink Signs

    Women-Only Train Cars in Japan: Hours, Rules and How to Spot the Pink Signs

    Photo by Kanchan Raj Pandey on Unsplash

    If you’ve ridden a packed Tokyo or Osaka train during the morning commute, you’ve probably noticed a car near one end of the platform marked with pink signs and floor stickers, often with a sign reading “Women Only” in English and Japanese. These are josei senyo sharyo (女性専用車両), women-only train cars introduced on many Japanese commuter lines to cut down on groping and harassment during the worst of rush hour. They’re easy to use once you know the rules, but the hours, car numbers, and exceptions vary by line, and getting it wrong (as a man boarding by mistake, or as a woman not realizing a car has reverted to mixed use) is a common source of confusion for visitors. Here’s what you actually need to know.

    Why Women-Only Cars Exist

    Japan’s major train and subway operators introduced these cars in the early 2000s, starting with Keio and JR East, in direct response to chikan (痴漢) — groping — on crowded commuter trains. Surveys by operators and police consistently showed packed rush-hour trains, where bodies are pressed together and nobody can move, as the environment where most incidents occurred. Rather than relying solely on enforcement after the fact, operators carved out a car where women (and a few exempted groups) can ride without that risk during the two or three hours a day when trains are most crowded. The policy is voluntary and non-legally-binding — there’s no fine for a man who boards by mistake — but compliance is high, and stepping into the correct car matters socially even if it isn’t policed.

    Which Lines Have Them, and Where the Car Is

    Women-only cars run on most JR East lines serving central Tokyo (Saikyo Line, Chuo Line Rapid, Keihin-Tohoku Line, Yamanote Line on certain services, Sobu Line Rapid), on Tokyo Metro’s busier lines, and on nearly all major private railways into Tokyo — Odakyu, Keio, Tobu, Seibu, Keikyu, Tokyu. Osaka has them too, most notably on the Midosuji subway line and on JR West’s Kyoto and Kobe lines, and Nagoya’s Higashiyama subway line also runs one. The car position isn’t standardized citywide — it’s usually the car closest to one specific end of the platform (often the front car in the direction of travel, but check signage rather than assuming), and it can differ for the same line depending on direction. Platform floors are marked with pink paint or stickers at the exact spot where that car’s doors will stop, and the car itself has pink decals on the windows and doors. If you’re navigating a station for the first time, the same instinct that helps with reading station signage for ekinaka shopping malls — slow down and actually look at the floor and overhead signs rather than following the crowd — applies here too.

    Exact Hours: When the Pink Rule Applies

    This is the part that trips people up most: the women-only designation is almost always time-limited, not all-day. On most JR East lines it applies on weekday mornings only, typically from around 7:30 AM to 9:30 AM, covering inbound trains heading toward central Tokyo (Shinjuku, Tokyo, Shibuya). Outside that window, the same physical car is just a regular car — anyone can sit anywhere. A handful of lines add a second window, such as a weekday evening period (roughly 5:00 PM to 9:00 PM) on some Keio and Tobu services, and a few lines run the designation on the last train of the night regardless of day, since last trains get rowdy with late commuters. Weekends and public holidays are typically unrestricted on most lines, though a few private railways keep a limited weekend window too. Because this varies line by line, look at the sticker on the car door itself — it prints the specific days and times in both Japanese and usually English — rather than assuming the rule you saw on one line applies system-wide.

    Who’s Allowed On

    The cars are for women of all ages, plus a short list of commonly exempted riders: elementary-school-age boys and younger, passengers with disabilities, and their caregivers or assistants regardless of gender. Men accompanying a wheelchair user or a visually impaired passenger, for instance, are explicitly welcome. If you’re a man who steps into the wrong car during the restricted hours, you won’t be fined or confronted — station staff and fellow passengers in Japan are generally conflict-averse about it — but the polite move is to quietly move to the next car at the following stop rather than staying put. Conversely, if you’re traveling with a male partner or son older than elementary-school age during the restricted hours, plan to split up for that car or just ride together in an adjacent one.

    How to Spot the Signs on the Platform and Car

    Look for three things: a pink (sometimes pink-and-purple) rectangular sign hanging above the platform at the boarding point, floor decals in the same pink color scheme marking where the doors align, and a sticker on the train car’s windows or doors showing a simple pictogram of women and children with the operating hours printed underneath in small text. Announcements at major stations sometimes repeat the rule in Japanese and English just before the restricted period starts. If you can’t find a clear sign and you’re unsure, it’s completely acceptable to simply watch which car locals who look like they’re specifically waiting in a particular spot board, or to ask station staff — pointing at the platform and saying “josei senyo sharyo” (女性専用車両) usually gets you a point in the right direction.

    Practical Tips for Visitors

    • Traveling solo as a woman during rush hour: using the car costs nothing extra and is the single easiest way to avoid the worst of the 7:30–9:30 AM crush on lines like the Saikyo or Chuo Rapid, where trains can run well past 150% capacity.
    • Traveling as a mixed-gender pair or family: just board the adjacent regular car together — there’s no inconvenience to this, and it’s extremely common.
    • With a JR Pass or IC card: the women-only designation has zero effect on fares or ticketing; it’s purely about which door you stand in front of when the train arrives, so your approach to paying fares doesn’t change at all — this is strictly a big-city commuter rail and subway feature, not something you’ll encounter on rural one-man trains.
    • Common mistake: assuming the rule is all-day. Riding the “pink car” at 2 PM or on a Sunday is completely normal for everyone, since the restriction has lapsed outside the posted hours.
    • Common mistake: assuming every line has one. Not all routes do, particularly outside the three major metro areas, so don’t go hunting for pink signs on, say, a countryside JR local line.

    None of this is something you need to plan around in advance — there’s no booking, no extra cost, and no ticket to buy. It’s simply useful to recognize the signage so you’re not confused when you see it, and to know you have the option during the morning squeeze in Tokyo, Osaka, or Nagoya if you’d rather skip the densest part of the crowd.