Japan Trove

Category: Travel

Practical, up-to-date guides for traveling in Japan — itineraries, rail passes, eSIMs, where to stay, seasonal timing, etiquette, and the local know-how that makes a trip smoother. Written with real Japanese sources so you get the answer that actually works on the ground, not the recycled tourist one.

  • Ameyoko Market: Ueno’s Bargain Shopping Street Guide

    Ameyoko Market: Ueno’s Bargain Shopping Street Guide

    Photo by Luke Galloway on Unsplash

    Wedged into the elevated train tracks between Ueno and Okachimachi stations, Ameyoko is Tokyo’s loudest, cheapest, and most chaotic shopping street — and that’s exactly the point. Vendors shout out prices, dried fish and fresh tuna sit side by side with discount sneakers and knockoff sunglasses, and nobody minds if you just want to wander and snack your way through. Here’s how to actually shop it well.

    What Is Ameyoko Market?

    Ameyoko — short for Ameya-Yokocho, “candy shop alley” — grew out of the black markets that sprang up around Ueno Station after World War II. Some vendors sold homemade candy (ame) when sugar was scarce; others say the name comes from “America,” since imported American goods were a big part of the early trade. Either way, the bargain-market identity stuck. Today it’s about 500 meters of narrow street and covered arcade, packed with roughly 400 shops and stalls selling everything from fresh seafood and dried bonito flakes to cosmetics, luggage, army surplus jackets, and bags of imported snacks.

    It’s not a polished, curated experience — it’s a working market that locals still use for cheap groceries, especially around New Year’s. That’s part of the charm.

    How to Get There

    Ameyoko runs directly alongside and under the JR train tracks connecting Ueno and Okachimachi stations, so it’s easy to reach from several directions:

    • JR Ueno Station (Yamanote, Keihin-Tohoku, Utsunomiya, Takasaki, Joban lines) — use the Hirokoji exit or Shinobazu exit, about a 1-2 minute walk.
    • JR Okachimachi Station — exit and you’re at the south end of the market immediately.
    • Ueno-hirokoji Station (Ginza Line) or Naka-okachimachi Station (Oedo Line) also drop you within a couple minutes’ walk.

    If you’re coming straight from Narita or Haneda with luggage, it’s worth stashing your bags before you dive in — the alleys get narrow and crowded fast. See our guide to coin lockers in Japan for sizes and prices; Ueno Station has a large bank of lockers near most exits.

    What to Buy (and What It Costs)

    Ameyoko is really several markets stacked together:

    • Dried seafood and snacks: Bags of dried squid, small fish, and seaweed snacks typically run ¥300-800. This is one of the best places in Tokyo to buy bulk katsuobushi (dried bonito flakes) or niboshi for making dashi at home.
    • Fresh seafood: Whole tuna, uni, king crab legs, and sea urchin are sold by weight, with prices posted (and often shouted). Expect to pay a premium versus a supermarket for the best cuts, but well below department-store prices — a small tray of uni might run ¥1,000-3,000 depending on grade and season.
    • Fruit: Whole melons, strawberries, and mixed fruit cups are sold cheap by street-stall standards, often ¥300-500 for a cup.
    • Sneakers and bags: Several multi-floor stores sell brand-name sneakers and sports gear at discount prices, particularly worth checking if you wear common sizes.
    • Cosmetics and drugstore goods: A few shops specialize in discounted Japanese skincare and makeup — good for gift-buying, but compare a couple of stores since pricing isn’t always uniform.
    • Imported and ethnic foods: A legacy of the postwar import trade, several stalls sell spices, snacks, and ingredients from India, Southeast Asia, and beyond — unusual for a “Japanese souvenir” street and worth a look if you cook.

    Prices are mostly fixed and posted, but at the seafood and fruit stalls it doesn’t hurt to ask if there’s a deal on the last few pieces, especially later in the day.

    Street Food to Try Along the Way

    You don’t need a sit-down meal here — the fun is grazing. Look for grilled skewers, fried gyoza, fresh-cut fruit, and stalls doing takoyaki or okonomiyaki-style griddle snacks. If you want something sweet, keep an eye out for taiyaki and imagawayaki stands nearby; we cover both in our guide to Japan’s fish-shaped sweet snacks. Most street food here costs ¥200-600 per item, so it’s easy to sample five or six things without denting your budget.

    Best Time to Visit

    Most shops open around 10:00am and close between 7:00 and 8:00pm, though hours vary by vendor since almost every stall is independently owned — don’t expect uniform closing times, and a few shops close midweek. Weekday mornings and early afternoons are noticeably calmer than weekend afternoons, when the main strip can get shoulder-to-shoulder.

    The single busiest, most iconic time to visit is December 30-31, when Tokyo households descend on Ameyoko to buy osechi (New Year’s food) ingredients — crab, fish roe, mochi, dried goods — and vendors shout deals over a wall of noise. It’s a genuine spectacle and worth experiencing once, but go in expecting crowds, not a leisurely browse. If you want that energy without the peak crush, the last week of December generally is livelier than any other time of year.

    Common Mistakes to Avoid

    • Assuming card payment everywhere: Many stalls, especially food and small goods vendors, are cash-only. Carry yen in small bills.
    • Expecting to haggle everywhere: Some seafood and fruit vendors will deal, particularly near closing time, but most shops post fixed prices and haggling isn’t the norm — don’t push it at cosmetics or clothing stores.
    • Photographing vendors and stalls without asking: Some sellers don’t mind, others do, particularly at small family-run counters. Ask first.
    • Buying fresh seafood without a way to keep it cold: If you’re not eating it same-day, think twice before buying raw fish or uni — most hotel rooms don’t have proper refrigeration for it. Dried goods travel much better.
    • Only sticking to the main strip: The parallel side alleys (particularly toward Okachimachi) have some of the better bargains and are much less crowded than the central covered arcade.

    Budget, Mid-Range, and Splurge Picks

    Budget (under ¥1,000): A bag of dried snacks, a cup of cut fruit, and a couple of skewers or a taiyaki makes for a filling, cheap grazing session.
    Mid-range (¥1,000-5,000): A gift box of assorted dried seafood or bonito flakes, a pair of discount sneakers, or a modest tray of fresh seafood to eat that day.
    Splurge (¥5,000+): Premium uni, whole king crab legs, or a large seafood gift set for bringing home to family — just confirm it’ll survive your travel day before committing.

    Ameyoko pairs naturally with a broader Ueno day — the park, museums, and zoo are a short walk away — but if you want to compare it against Tokyo’s other great neighborhood-shopping experience, our guide to Kichijoji’s shops and Inokashira Park is a good next stop, and food lovers heading back toward the bay can follow up with Tsukishima’s monjayaki district for dinner.
  • Kichijoji: Tokyo’s Most Livable Neighborhood — Inokashira Park & Shopping

    Kichijoji: Tokyo’s Most Livable Neighborhood — Inokashira Park & Shopping

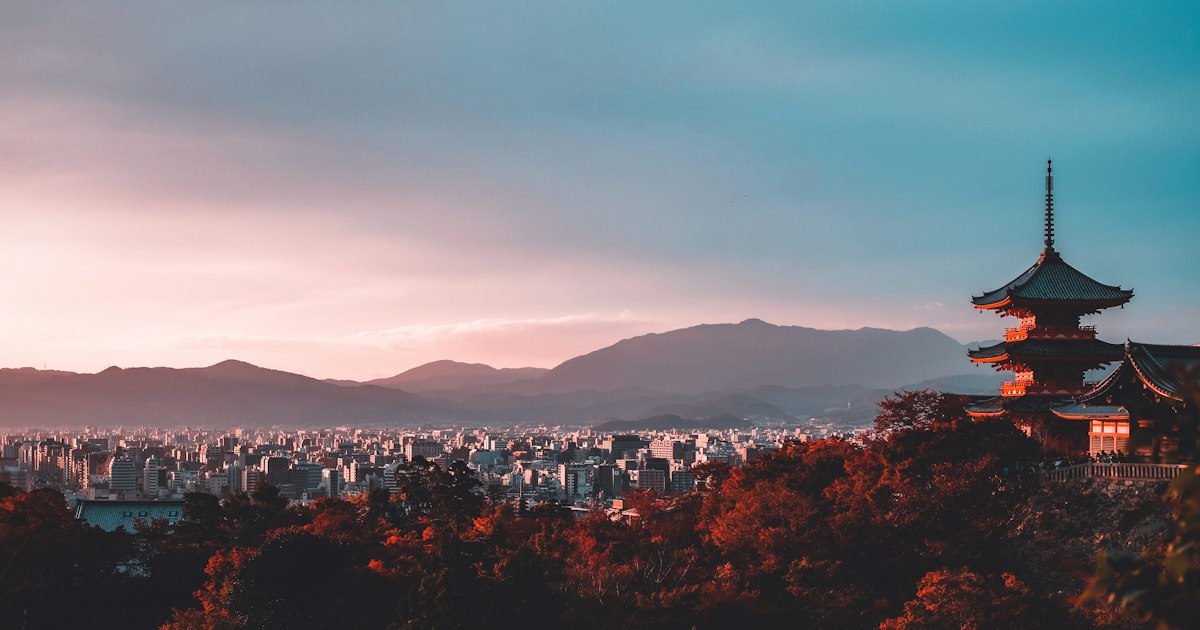
    Photo by Su San Lee on Unsplash

    Ask Tokyoites where they’d most like to live and Kichijoji comes up almost every time. This leafy, walkable neighborhood in western Tokyo has topped SUUMO’s annual “most desirable place to live” ranking for years running, and it’s easy to see why once you’re standing at the edge of Inokashira Park with a coffee in hand. For visitors, Kichijoji offers something the Shibuya-Shinjuku-Ginza circuit doesn’t: a genuine residential feel, a big green park, one of Japan’s most-loved small museums, and a shopping scene built around independent boutiques rather than flagship stores. It’s an easy half-day or full-day trip from central Tokyo, and it rewards slow wandering more than a checklist.

    Getting to Kichijoji

    Kichijoji Station is served by two lines, which makes it convenient from almost anywhere in the city. The JR Chuo Line rapid train from Shinjuku takes about 14 minutes (around ¥230). From Shibuya, hop on the Keio Inokashira Line — a semi-express (kyuko) train gets you there in roughly 16–17 minutes for about ¥200–250. There’s no need to reserve seats or use a limited express; these are regular commuter trains, so expect standing room during weekday rush hours (7:30–9:00am and 5:30–7:30pm).

    The station itself has a maze of exits, but signs for “Park Exit” (Koen-guchi) will point you toward Inokashira Park, while the “North Exit” (Kita-guchi) leads to Sun Road and Harmonica Yokocho. If you’re arriving with luggage before continuing elsewhere in Tokyo, the station and nearby Yodobashi Camera building both have coin lockers — for sizing and pricing before you go, see this guide to coin lockers in Japan.

    Inokashira Park: Boating, a Jealous Goddess, and Cherry Blossoms

    Inokashira Park (Inokashira Onshi Koen) is a five-minute walk south of the station and centers on a long, willow-lined pond. Rowboats and swan-shaped pedal boats are available for rent from a dock near the pond’s north side, typically for around ¥700–800 per 30 minutes; the rental booth generally operates from 9:30am until dusk, though hours shift seasonally, so check the signage on arrival. There’s a local legend attached to the boats worth knowing: Benzaiten, the goddess enshrined at the small shrine on the pond’s island, is said to grow jealous of couples who ride together, supposedly cursing them to break up. Most Tokyoites treat it as a fun superstition rather than a real deterrent, but you’ll hear it mentioned often.

    The park also has a modest zoo and aquarium section (adult admission around ¥400), wooded walking paths, and a wide grassy square that fills with picnickers on weekends. If you want to eat park-side, pick up onigiri from a convenience store or supermarket on your way in rather than searching for food once you’re inside — our guide to onigiri covers what to look for and how to read the fillings. Cherry blossoms typically peak in late March to early April, when the pond becomes one of Tokyo’s best hanami spots and gets genuinely crowded; November brings a quieter but equally striking wash of autumn color.

    The Ghibli Museum

    At the park’s southwestern edge (technically just over the border in Mitaka) sits the Ghibli Museum, designed by Hayao Miyazaki himself. It’s small, whimsical, and deliberately light on English signage — the idea is to explore and discover rather than read placards. Adult tickets cost around ¥1,000, but the catch is that tickets are not sold at the door. They go on sale on the 10th of each month for entry dates in the following month, through the Lawson Ticket system (either online or at a Loppi machine in any Lawson convenience store), and popular entry slots — especially weekends — often sell out within hours. If a visit here matters to you, build your Tokyo dates around ticket availability rather than the other way around. The museum is closed on Tuesdays and has fixed timed-entry slots (10am, 12pm, 2pm, and 4pm), so arrive on time. Photography is not allowed inside, which is part of what keeps the experience feeling intimate.

    Harmonica Yokocho: Retro Alleys for Eating and Drinking

    Just north of the station, Harmonica Yokocho is a tight grid of alleyways lined with tiny bars, yakitori counters, and standing-room izakaya, many seating only six to ten people. The name comes from the narrow, tightly packed stalls resembling harmonica reeds — it dates back to a black-market area that sprang up after World War II and never lost its scrappy charm. This is a good place for an early dinner or a post-park drink; most spots open around 5pm, though a handful of coffee and food stalls run in the daytime too. Expect cash-only counters in many of the smaller bars, and don’t expect English menus — pointing at what your neighbor is eating works fine. It’s atmospheric rather than polished, which is exactly the appeal.

    Shopping in Kichijoji

    Kichijoji’s shopping strength is its density of independent shops rather than any single mega-mall. Sun Road, the covered arcade running from the station’s north exit, mixes bakeries, drugstores, and casual fashion and is the easiest starting point. Just beyond it, Nakamichi-dori and the surrounding backstreets are where Kichijoji earns its reputation among Tokyo locals: secondhand clothing stores, small press bookshops, and zakka (lifestyle goods) boutiques selling ceramics, stationery, and homeware from independent Japanese makers. If you’re building a collection of everyday Japanese housewares to bring home, keep an eye out for noren doorway curtains or simple lacquer and wood pieces in these shops — browsing here is a nice complement to more specialized craft-town shopping.

    For groceries or self-catering, Kichijoji has several supermarkets within a few minutes of the station, including budget chains that are popular with residents rather than tourists — a good chance to shop the way locals actually do; see our guide to Gyomu Super and local supermarkets for what to expect and how to navigate one. On the department-store end, Kirarina Kichijoji sits directly above the station’s south side, and a Yodobashi Camera electronics store is a short walk away if you need chargers, SIM cards, or last-minute electronics.

    Best Time to Visit and Common Mistakes

    Weekday mornings and early afternoons are the calmest time to explore — Kichijoji is a residential neighborhood first, so it doesn’t have the 24-hour buzz of Shinjuku, and many smaller shops open around 11am rather than earlier. Weekends, especially with good weather, bring heavy crowds to both the park and Sun Road. The most common mistake visitors make is treating Kichijoji as a quick stopover on the way to the Ghibli Museum without checking ticket availability first — by the time many travelers think to book, their preferred dates are gone. Book Ghibli tickets as early as the sale window allows, and treat the park, alleys, and shopping streets as worth a dedicated half-day even without a museum slot. The second common mistake is rushing straight from the station to the park without wandering Harmonica Yokocho or the backstreets around Nakamichi-dori — that unplanned wandering is where Kichijoji’s actual character lives.

  • Coin Lockers in Japan: Sizes, Prices, Apps & Where to Store Your Luggage

    Coin Lockers in Japan: Sizes, Prices, Apps & Where to Store Your Luggage

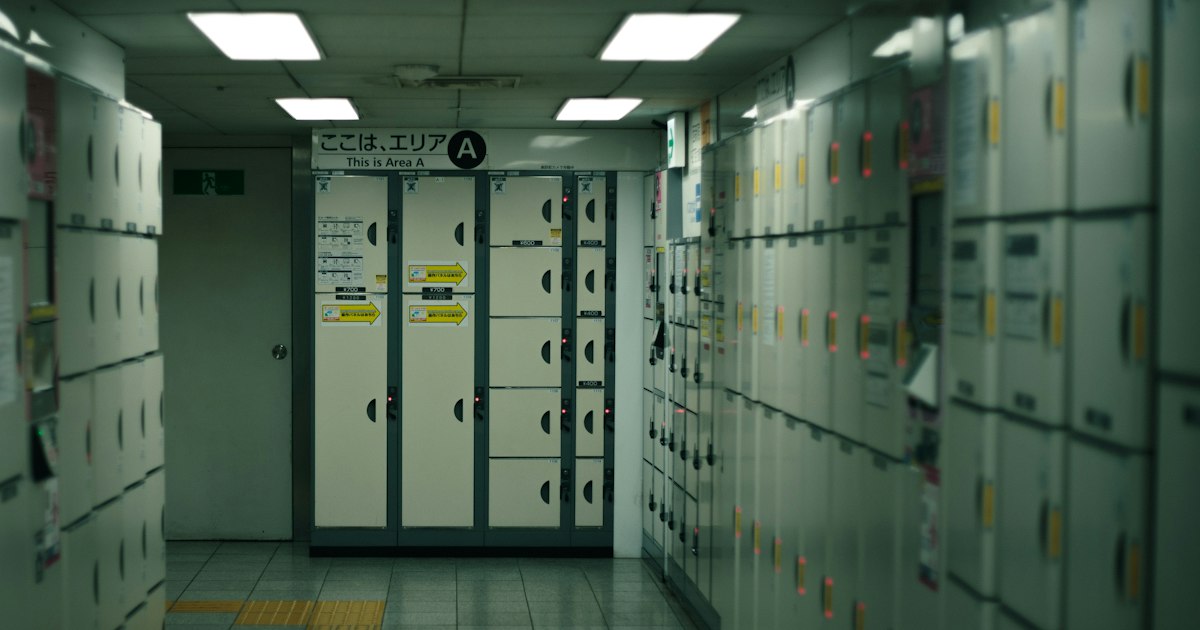
    Photo by Thiago Yonamine on Unsplash

    Nothing derails a good sightseeing day like dragging a suitcase up and down station stairs. Japan’s coin lockers solve this cheaply and reliably — but only if you know which size you need, how much cash (or IC card balance) to carry, and what to do when every locker at Kyoto or Shibuya Station is full, which happens more often than guidebooks admit. Here’s what actually works.

    How Coin Lockers Work in Japan

    Coin lockers are self-service, pay-on-entry storage units found at train and subway stations, airports, shopping malls, and tourist sites. You pick an empty locker, load your bag, pay, and take a key or a printed receipt with a QR code or PIN. Older lockers use physical keys; most stations have now switched to keyless systems where you pay by card, IC card (Suica, PASMO, ICOCA), or cash and unlock the locker later by scanning a receipt or entering a code at a touch panel.

    Almost all lockers accept 100-yen coins, and newer touch-panel units take IC cards and sometimes credit cards. Carry a stack of 100-yen coins anyway — rural stations and older locker banks are still coin-only, and change machines nearby aren’t guaranteed.

    One important rule: most coin lockers are day-use only, resetting at midnight or at the start of station operating hours (typically around 4:00-5:00 AM). If you leave a bag in overnight, you’ll usually owe an extra day’s fee, sometimes double, when you return. A few 24-hour lockers at major hubs like Tokyo, Shinjuku, and Osaka Station are built for multi-day storage and charge per calendar day instead.

    Locker Sizes and Prices

    Sizes are fairly standardized nationwide, though pricing varies slightly by operator (JR East, JR West, Kotsu Kaikan, and private mall operators all run their own networks):

    • Small (S) — roughly 34 x 34 x 57 cm, fits a backpack or small daypack. ¥300-¥500/day.
    • Medium (M) — roughly 57 x 34 x 57 cm, fits a carry-on suitcase (20-22 inch). ¥400-¥700/day.
    • Large (L) — roughly 57 x 57 x 57 cm or bigger, fits a large checked suitcase. ¥600-¥900/day.
    • Extra-large — found mainly at airports and Shinkansen hubs, big enough for oversized luggage or two suitcases. ¥800-¥1,200/day.

    Budget travelers: a small locker is enough for a day pack while you explore, freeing you from carrying souvenirs or a jacket. Mid-range: most visitors need a medium locker for one rolling suitcase. Splurge/family trips: at Tokyo, Shin-Osaka, or Kyoto Station, book the extra-large lockers early in the day — they’re the first to sell out, especially during cherry blossom season (late March-early April) and autumn foliage season (mid-November), when everyone is switching hotels mid-trip.

    Best Apps and Tools for Finding an Empty Locker

    The single biggest headache with coin lockers isn’t cost — it’s availability. Popular stations sell out of lockers by mid-morning during peak travel weeks. A few tools help:

    • Coin Locker Navi (coinlocker-navi.com) — a Japanese-run site and app showing real-time-ish locker locations and sizes at major stations in Tokyo, Osaka, Kyoto, and beyond. Not always live-updated for vacancy, but excellent for finding where locker banks physically are, since they’re often tucked behind concourses or on different floors than you’d expect.
    • Google Maps — search “coin locker” near your station; user-submitted photos often show whether a bank looked full recently.
    • Ecbo Cloak and Nimble Storage — apps that let you reserve luggage storage in advance at partner shops, cafes, and hotels rather than gambling on station lockers. Useful backup when lockers are the bottleneck, and bookable ahead of a big travel day.

    None of these apps show live vacancy for every locker bank — Japan doesn’t have a unified national system — so the real strategy is arriving early (before 9:00 AM) or having a backup plan ready.

    Where to Find Them: Stations, Airports, and Tourist Spots

    Coin lockers cluster around ticket gates, but the biggest banks are usually one level up or down from the platforms, near coin locker signage (a suitcase icon with a key). At sprawling stations — Tokyo, Shinjuku, Osaka, Kyoto — lockers are scattered across multiple exits (Yaesu vs. Marunouchi side at Tokyo Station, for example), so check a locker map before you start walking with a heavy bag.

    At airports, Narita and Haneda have locker banks in the arrival and departure lobbies, plus luggage forwarding counters (takkyubin) that can ship your suitcase ahead to your hotel or back to the airport for ¥2,000-¥3,000 — genuinely worth it if you’re doing a multi-city trip and don’t want to lug everything through every transfer.

    Tourist areas with heavy foot traffic — Kyoto Station (the gateway if you’re heading to the Arashiyama Bamboo Grove), Asakusa, Dotonbori — also have locker banks, though these fill fast on weekends. If you’re day-tripping somewhere remote, like Amanohashidate or the boathouses at Ine no Funaya, check locker availability before you go — smaller stations may have only a handful of units, or none at all, and the nearest tourist information center is often your best bet for staffed storage instead.

    Common Mistakes to Avoid

    • Losing your receipt or key. Keyless lockers print a receipt with a barcode or PIN — photograph it immediately as backup. Losing it means finding station staff, showing ID, and possibly paying a fee to prove the bag is yours.
    • Assuming 24-hour access. Many station lockers are only accessible during station operating hours, generally around 5:00 AM to midnight. If your locker is behind ticket gates, you’ll also need a valid ticket to reach it, which matters if you’re storing bags before an early Shinkansen and returning after using a different ticket.
    • Not carrying coins. Even in cashless-friendly Japan, plenty of locker banks — especially outside big cities — are coin-only. Keep a stash of 100-yen coins for this exact purpose, alongside vending machines and Setsubun-season shrine offering boxes.
    • Overpacking a locker last-minute. If you’re heading out shopping — for pottery in Mashiko or Bizen, or fountain pens in Jimbocho — remember lockers have fixed dimensions; fragile or oddly shaped purchases (a folded wagasa umbrella, boxed ceramics) may need to go in your carry bag instead, not jammed into a locker door.

    When Lockers Are Full: Backup Options

    If every locker at your station is taken, don’t panic. Larger stations often have a staffed baggage counter (temporarily storing bags for a flat daily fee, usually ¥500-¥1,000 per item, no size limit). Hotels — even before official check-in time — will almost always hold luggage for guests, and many now do so for non-guests too via the Ecbo Cloak network. Convenience stores don’t offer storage, but tourist information centers near major shrines and stations sometimes do, particularly in Kyoto and Nara.

    For longer stretches — say you want your bags gone for several days while you island-hop or take a long-distance ferry — luggage forwarding (takkyubin, run by Yamato or Sagawa) is more reliable than hoping a locker stays free. Drop your suitcase at a hotel front desk or convenience store in the morning, and it typically arrives at your next hotel by early evening the next day for ¥1,500-¥3,000 depending on size and distance.

    Plan your locker strategy the way you’d plan a train transfer: know the size you need, arrive early at busy stations, and always have a plan B. It’s a small detail, but it’s the difference between a relaxed day of sightseeing and an hour spent circling a station concourse with a suitcase.

  • Long-Distance Ferries in Japan: Osaka to Beppu and Beyond

    Long-Distance Ferries in Japan: Osaka to Beppu and Beyond

    Photo by Christian Chen on Unsplash

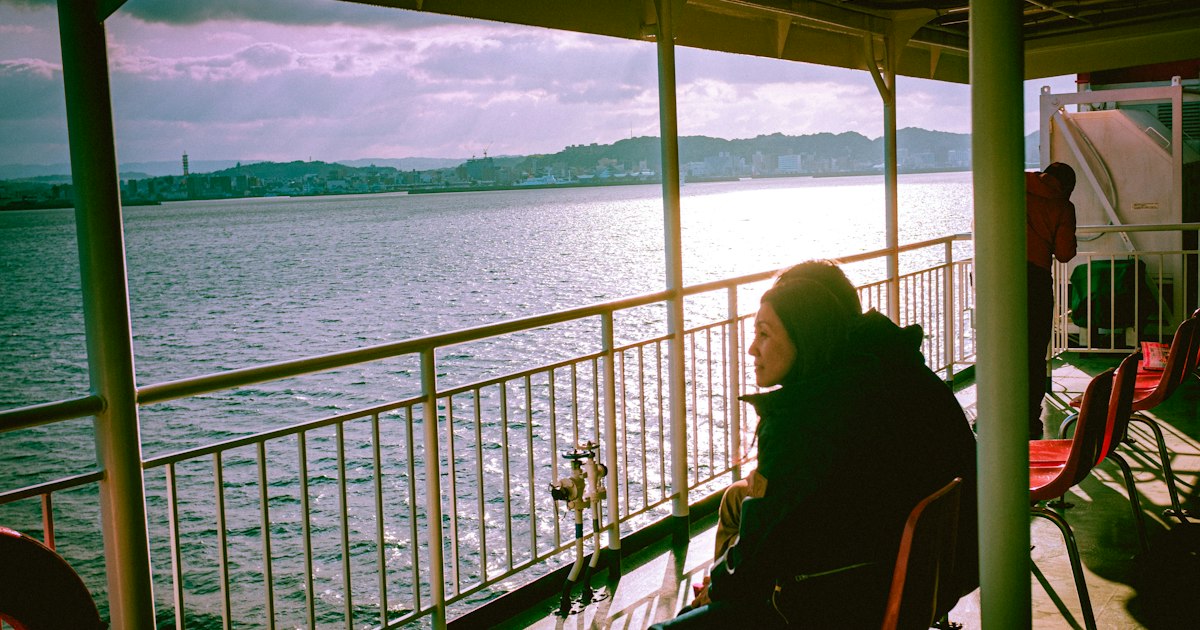
    Japan’s bullet trains get all the attention, but the country also has a genuinely great overnight ferry network — slower, cheaper than flying with a car or bike, and honestly one of the more relaxing ways to cover long distances. The flagship route for most visitors is Osaka to Beppu, an overnight sail through the Seto Inland Sea that drops you in Kyushu’s biggest onsen town by breakfast. Here’s how it works, what it costs, and where else these ferries can take you.

    The Osaka–Beppu Ferry Sunflower

    The Osaka–Beppu route is operated by Ferry Sunflower, using large car ferries that sail nightly in both directions. Ferries depart Osaka’s Nanko Ferry Terminal in the early evening (around 19:50) and arrive in Beppu the following morning (around 06:20–06:35), a crossing of roughly 11.5 hours. Going the other direction, ferries leave Beppu in the evening and reach Osaka the next morning. Either way, you sleep through most of the distance and wake up somewhere completely different — no wasted vacation day sitting on a train.

    The Osaka terminal is at Nanko, in the south of the city. Take the Osaka Metro Chuo Line to Cosmosquare, transfer to the New Tram (Nanko Port Town Line), and get off at Nanko-guchi or Ferry Terminal Station; it’s about 45 minutes from central Osaka including the walk. In Beppu, the ferry port is a short bus or taxi ride from Beppu Station, and a shuttle bus timed to arrivals and departures usually runs for a small fee.

    Cabin Classes and Prices

    Fares vary by season (peak periods like Golden Week, Obon in August, and New Year cost more) and fuel surcharges shift year to year, so treat these as ballpark figures and check the current fare table before booking:

    • Budget: Tourist/2nd class shared tatami rooms, roughly ¥9,000–11,000 one way. You get a futon mat in a large shared room — fine for one night, and how most backpackers travel this route.
    • Mid-range: 2nd-class private or semi-private cabins with bunks, roughly ¥13,000–18,000, worth it if you want a locking door and an actual night’s sleep.
    • Splurge: First-class and special (suite-style) cabins with a window, sofa, and private bathroom, roughly ¥20,000–35,000+. These book out fastest in summer.

    You can also bring a car, motorcycle, or bicycle for an additional fee based on vehicle length — a real advantage if you’re planning a Kyushu road trip and don’t want to drive the whole way down from Kansai. Onboard there’s a restaurant, a bath (often with a window over the sea), vending machines, and an observation deck; some older ships still lean on cash for onboard purchases, so carry some yen even if your cards work fine on land.

    Best Time to Sail and What You’ll See

    Summer evening departures from Osaka catch sunset light over the Akashi Kaikyo Bridge not long after leaving port, and the ship threads narrow channels between small Seto Inland Sea islands before open water — bring a layer for the deck, since it gets breezy after dark. Arriving into Beppu in the early morning, you’ll often see steam rising from the town’s onsen before you’ve even docked, which is a nice way to arrive at a hot spring destination. Typhoon season (roughly August–September) occasionally causes delays or cancellations, so build in a buffer day if you’re sailing then, and winter crossings can be rougher but are usually cheaper and easier to book.

    Common Mistakes to Avoid

    The biggest one is assuming you can book same-day during Obon, New Year, or Golden Week — cabins, especially private ones, sell out weeks ahead in these windows. Check-in also closes well before departure (usually 30–60 minutes), so don’t plan to arrive at the terminal at the last minute after a full day of Osaka sightseeing. If you’re bringing a vehicle, arrive even earlier, since loading takes longer than foot passenger boarding. Finally, don’t assume every route runs daily year-round — some long-haul ferries drop to a few sailings per week outside peak season, so always confirm the actual day and time before building your itinerary around it.

    Other Long-Distance Ferries Worth Knowing

    Osaka–Beppu is the most tourist-friendly route, but Japan’s ferry network reaches much further:

    • Osaka/Kobe – Miyazaki: Another Sunflower-brand overnight route, around 13 hours, landing you on Kyushu’s less-visited east coast.
    • Osaka/Kobe – Shin-Moji (Kitakyushu): Multiple operators run this shorter Kyushu crossing, useful for connecting toward Fukuoka or Nagasaki without flying. If you’re continuing on to the Kyushu coast, our Nagasaki travel guide covers Dejima, Chinatown, and the Peace Park once you’re on the ground.
    • Tokyo (Ariake) – Tokushima – Kitakyushu: A very long haul (around 34 hours total) that also stops in Shikoku, handy if you’re combining Tokyo with a Setouchi and Kyushu loop.
    • Maizuru/Tsuruga – Otaru: The main sea link to Hokkaido from the Japan Sea side, roughly 20 hours, popular with drivers heading north.
    • Nagoya – Sendai – Tomakomai: A multi-stop route connecting central Honshu to Tohoku and Hokkaido without touching Tokyo.
    • Kagoshima – Naha (Okinawa): A roughly 25-hour southbound route through the Amami Islands — one of the few affordable ways to reach Okinawa without flying.

    Several of these routes pass right through the Seto Inland Sea, the same scenic stretch of water that towns like Onomichi look out over — worth keeping in mind if you’re already building a Setouchi itinerary and want to see it from the water as well as the shore.

    Ferry vs. Train: Which Makes Sense?

    For pure speed, the Shinkansen wins every time — Osaka to Beppu by train and bus takes half the ferry’s crossing time. But the ferry saves you a hotel night, lets you bring a vehicle or oversized luggage cheaply, and is often less expensive than a Shinkansen fare plus accommodation, especially if you’re already comparing costs against a regional JR rail pass. If you’re coming from Kobe rather than Osaka and want an onsen experience before or after your Kyushu trip, it’s also worth weighing a stop at Arima Onsen, Kobe’s own historic hot spring town, against pushing straight on to Beppu.

    Book directly through the ferry line’s website (Ferry Sunflower’s booking system has an English interface) rather than through a general travel agent, since fares and cabin availability update in real time there. Reserve at least a few weeks out for summer sailings, and you’ll land in Beppu well rested and ready for a full day of hot springs rather than jet-lagged off a red-eye flight.

  • Jimbocho: A Book Lover’s Guide to Tokyo’s Secondhand Bookstore District

    Jimbocho: A Book Lover’s Guide to Tokyo’s Secondhand Bookstore District

    Photo by Hakan Nural on Unsplash

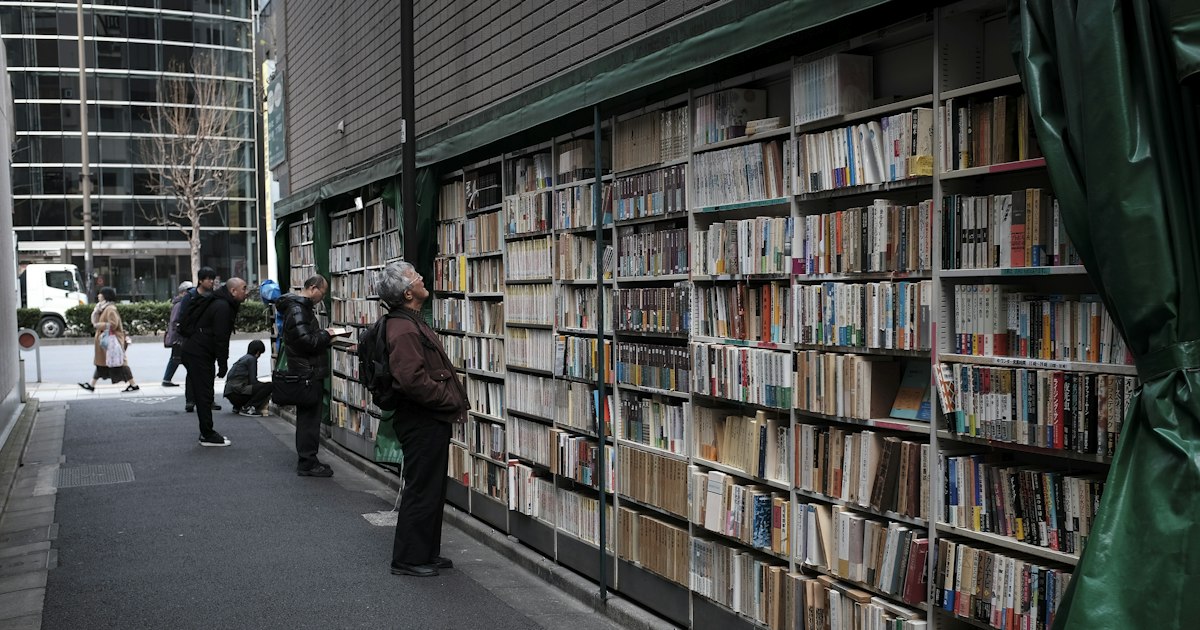
    Jimbocho (神保町) doesn’t look like much at first glance — a few blocks of low-rise buildings along a busy avenue in Chiyoda ward. But step inside any of the more than 100 secondhand bookstores packed into this small district and you’ll understand why it’s often called the largest concentration of used bookshops anywhere in the world. Some have been run by the same family for four generations, selling everything from 100-yen paperbacks to Edo-period woodblock prints locked behind glass. Even if you can’t read a word of Japanese, it’s one of the most atmospheric neighborhoods in central Tokyo to spend a slow afternoon.

    Getting There

    Jimbocho Station is served by three lines — the Toei Mita Line, Toei Shinjuku Line, and Tokyo Metro Hanzomon Line — so it’s an easy stop no matter which pass you’re using. Exit A7 puts you directly on Yasukuni-dori, the main street where most of the bookstores cluster. Ochanomizu Station (JR Chuo/Sobu Line or Tokyo Metro Marunouchi Line) is also about a 10-minute walk away and worth combining with a visit, since the route between the two stations passes musical instrument shops and a cluster of sporting goods stores that make for good browsing on the way.

    The core shopping area is compact: Yasukuni-dori (the main road, lined with the bigger antiquarian dealers) and Suzuran-dori (a narrower side street one block south, with smaller and quirkier shops) can both be walked end to end in about 15 minutes — though budget at least two to three hours if you actually want to go inside stores.

    How to Browse: Store Types and Prices

    Most shops specialize, and it helps to know roughly what you’re looking for before you start:

    • General used bookstores stock everything from manga to academic titles, with paperbacks commonly priced ¥100–¥800.
    • Kitazawa Bookstore, open since 1902, is the go-to shop for English-language books — antiquarian Western literature, art books, and academic titles, generally ¥1,000–¥10,000 depending on rarity.
    • Isseido Booksellers, one of the oldest shops in the district (since 1913), deals in fine Japanese literature, historical documents, and antiquarian material for serious collectors.
    • Ohya Shobo specializes in original ukiyo-e woodblock prints and antique maps, with prints typically running from around ¥3,000 for common designs into the tens of thousands of yen for well-preserved Hiroshige or Hokusai pieces. If prints are your main interest, it’s worth reading our guide to Japanese woodblock prints (ukiyo-e) before you go, so you know what separates an original from a modern reproduction.
    • Magnif is known for vintage magazines, fashion photography books, and old advertising ephemera — a favorite with designers.

    Most stores open around 10:00–10:30am and close between 18:30 and 19:00. A meaningful number close on Sundays, since foot traffic drops without the weekday office crowd from nearby universities and publishing houses, so a Saturday or weekday visit is more reliable than a Sunday one. Prices are fixed and clearly marked in yen — haggling isn’t part of the culture here, even at the small stalls. Bring cash; while larger shops increasingly take cards and IC cards like Suica, many of the smaller family-run stores are still cash-only.

    The Kanda Book Festival: Best Time to Visit

    If your trip lines up with it, the Kanda Used Book Festival (神田古本まつり) is the single best time to visit. Held annually for about a week in late October to early November along Yasukuni-dori, dozens of shops move discounted stock out onto outdoor tables and stalls, and the street fills with browsers even on weekdays. Exact dates shift year to year, so check closer to your travel dates, but it reliably falls in that autumn window when Tokyo’s weather is also at its most pleasant for walking around outdoors. Outside festival season, weekday afternoons are the quietest and most pleasant time to browse without crowds.

    Beyond Books: Curry and Coffee

    Jimbocho’s other claim to fame is Japanese curry rice. The neighborhood’s proximity to Meiji-era universities meant cheap, filling curry shops sprang up to feed students, and several from that era are still running — Kyoueikan, founded in 1924, is one of the oldest and most famous, serving a thick, dark roux-style curry for around ¥1,000–¥1,300 a plate. Bondy and Manten are two other long-running favorites nearby. If Japanese curry is new to you, our beginner’s guide to kare raisu explains the different regional styles and what to order.

    For a coffee break between shops, Jimbocho has several classic kissaten (retro coffee shops), including Sabouru, a cave-like basement cafe near the station that’s been serving siphon coffee since the 1950s. Our guide to kissaten and what to order is useful background if you haven’t been to one before — the ordering etiquette and menu differ from a modern chain cafe.

    Common Mistakes to Avoid

    • Expecting mostly English stock. The vast majority of inventory is in Japanese. Kitazawa Bookstore is the reliable exception for English titles; don’t assume other shops will have much for non-Japanese readers.
    • Visiting on a Sunday and finding several favorite shops shuttered — check individual store hours if a specific shop is your main target.
    • Trying to see everything in one pass. With 100+ shops, it’s more enjoyable (and less exhausting) to pick two or three streets or store types and go deep rather than trying to walk in and out of every storefront.
    • Assuming prices are negotiable. They’re not — prices are fixed and typically pencilled directly inside the book’s cover.
    • Forgetting how heavy books get. If you buy more than a few, especially large art books or print portfolios, consider shipping them home rather than carrying them for the rest of your trip. Our guide to shipping souvenirs home from Japan compares post office and courier options and pricing.

    Budget, Mid-Range, and Splurge Options

    On a tight budget, the 100-yen carts and bargain bins set up outside many general stores are genuinely worth digging through — you’ll find old photo books, manga volumes, and Japanese paperbacks for less than the price of a coffee. Mid-range shoppers should budget ¥2,000–¥8,000 for a well-preserved English-language antiquarian title from Kitazawa or a decent ukiyo-e reproduction. For a splurge, an original Edo or Meiji-period woodblock print in good condition from a specialist like Ohya Shobo can run ¥20,000–¥100,000 or more — ask the shop for a certificate or documentation of authenticity, since this matters both for insurance and for customs when you travel home.

    Jimbocho rewards unhurried visitors more than almost any other Tokyo neighborhood. There’s no single must-see landmark — the appeal is in the browsing itself, the smell of old paper, and the chance of finding something you didn’t know you were looking for.

  • Shipping Souvenirs Home from Japan: Post Office vs Courier Guide

    Shipping Souvenirs Home from Japan: Post Office vs Courier Guide

    Photo by Markus Winkler on Unsplash

    You’ve filled your suitcase with Kutani ware, a set of chopsticks, maybe a pair of Akoya pearl earrings — and now it won’t close. Shipping souvenirs home is often cheaper and safer than checking an overstuffed bag, but Japan gives you two very different systems to choose from: Japan Post’s international mail and private couriers like DHL, FedEx, and UPS. Here’s how to pick the right one, what it actually costs, and how to avoid the packing mistakes that ruin fragile gifts in transit.

    Why Ship Instead of Carry?

    Airlines charge steep excess-baggage fees (often ¥15,000–¥30,000 or more per extra bag depending on route and carrier), and fragile items like ceramics or glass wind chimes rarely survive being crammed into checked luggage. Shipping also frees up suitcase space mid-trip — useful if you’re buying bulky items early, like Kutani ware in Kanazawa (see our Kutani Ware buying guide) or a full haul of sealed Pokémon booster boxes (see our Pokémon cards in Japan guide) with weeks of travel still ahead of you.

    Japan Post: EMS, Airmail, and Surface Mail Explained

    Japan Post (Yu-Bin) is the budget-friendly default and has three international speed tiers:

    • EMS (Express Mail Service) — the fastest and most reliable option, with tracking and up to ¥6 million of automatic compensation coverage on request. Delivery typically takes 2–5 business days to the US, Europe, or Australia. As a rough guide from recent rate tables, a 5kg box runs about ¥11,000–13,000 to North America and ¥13,000–15,000 to Europe — always confirm current rates with the clerk or Japan Post’s online EMS calculator, since they’re revised periodically.
    • Airmail (small packet or parcel) — cheaper than EMS, no tracking guarantee on the cheapest tier, and delivery takes roughly 1–2 weeks. Good for lightweight, low-value items like postcards or textiles.
    • Surface mail — the cheapest option by far but painfully slow (6–12 weeks) and not offered to every country; ask the counter clerk whether it’s currently available on your route.

    Post offices sell their own EMS-branded cardboard boxes in several sizes for roughly ¥260–¥600, which is worth doing since the box dimensions are pre-approved for shipping and save you guesswork.

    International Couriers: DHL, FedEx, and UPS

    Private couriers cost more but offer real advantages: door-to-door pickup (from your hotel in some cases), better real-time tracking, English-language customer service, and stronger insurance options for high-value items. Expect a similarly sized 5kg box to run ¥15,000–¥25,000+ for express service, depending on destination and speed tier. This is the better choice for genuinely valuable purchases — a Mikimoto pearl necklace (see our Mikimoto & Akoya pearls guide) or graded trading cards — where you want full insured value and a guaranteed delivery window rather than the cheapest possible rate. Drop-off locations exist in most major cities, though pickup requests usually need to be booked a day ahead via each courier’s website or phone line.

    Packing Fragile and High-Value Souvenirs

    This is where most shipments go wrong. A few concrete rules:

    • Ceramics and glassware (Kutani ware, Arita porcelain, glass furin wind chimes) need double-boxing: wrap each piece individually in bubble wrap, nest it in a smaller box with padding on all six sides, then place that box inside a larger one with more cushioning around it. A single layer of newspaper is not enough — Japan Post and couriers both explicitly limit liability for inadequately packed fragile goods.
    • Flat items like ukiyo-e woodblock prints should go in a rigid mailer tube or flat cardboard mailer, never folded.
    • Sealed collectibles like Pokémon booster boxes should be padded on all sides to prevent corner crushing, and always declare the actual purchase value — undervaluing to dodge duty can void insurance claims if the box is damaged or lost.
    • Ask the post office or courier counter for extra packing tape and filler material on the spot; most keep some behind the counter even if it’s not openly displayed.

    Customs Forms, Duty, and Restricted Items

    Every international parcel needs a customs declaration (form CN22 for lower-value items, CN23 for higher-value or heavier ones). List contents specifically (“ceramic tableware,” “trading cards,” “pearl jewelry”) and the real purchase price — vague descriptions like “gift” or “souvenir” can trigger customs holds. Check your home country’s duty-free personal import allowance before shipping, since exceeding it means you may owe duty on arrival. Alcohol (sake, whisky) and certain foods have their own restrictions both for export from Japan and import into your home country, so verify before buying in bulk.

    Where and When to Ship

    Neighborhood post offices generally keep counter hours of 9:00–17:00 on weekdays only, but larger central post offices in big cities (Tokyo Central Post Office near Tokyo Station, for example) stay open later on weekdays and often open Saturdays too — worth seeking out if you’re shipping on a tight schedule. Avoid shipping right around New Year’s (late December–early January) and Golden Week (late April–early May), when Japan Post processing slows significantly due to national holidays. If you’re picking up regional souvenirs on a longer rail itinerary — say, ceramics in Kanazawa or lacquerware along the Nakasendo route through Tsumago and Magome — it’s often easier to ship each purchase home in stages rather than carrying everything to a single shipping point at the end of your trip.

    Post Office vs Courier: Which Should You Choose?

    Budget: Japan Post airmail or surface mail for lightweight, low-value items you’re not in a hurry to receive. Mid-range: Japan Post EMS — the sweet spot for most travelers, balancing speed, tracking, and cost for a standard box of souvenirs. Splurge: DHL, FedEx, or UPS for high-value, fragile, or time-sensitive shipments where guaranteed insurance and door-to-door pickup are worth the premium. Whichever you choose, weigh and measure your box before you go to the counter, bring your passport for the customs form, and keep the tracking receipt until the package arrives — it’s your only proof if something goes missing.

  • Renting a City Bike in Kyoto & Tokyo: Bike-Share for Sightseeing

    Renting a City Bike in Kyoto & Tokyo: Bike-Share for Sightseeing

    Photo by HANVIN CHEONG on Unsplash

    Japan’s trains are famously punctual, but they can’t take you down a quiet backstreet lined with machiya townhouses or along a river path lit up at dusk. A rental bike can. Both Kyoto and Tokyo now have dense, easy-to-use bike-share networks aimed squarely at tourists, and pairing them with a day of walking or subway-hopping is one of the best low-cost upgrades you can make to a Japan itinerary. Here’s how the systems actually work, what they cost, and where they shine.

    Two Different Systems, One App

    Kyoto and Tokyo both run on the same underlying network — Docomo Bike Share, branded locally as PiPPA in Kyoto and simply “Docomo Bike Share” in Tokyo’s central wards (Chiyoda, Chuo, Minato, Shinjuku, Shibuya, Koto, Sumida, and several others). These are dock-based systems: you unlock a bike from a docking port using a smartphone app, ride it, and return it to any port in the network — not necessarily the one you started at. This is genuinely convenient for one-way sightseeing, like riding from Kyoto Station up to Nijo Castle and returning the bike there instead of pedaling back.

    Alongside the app-based network, both cities also have old-school rental shops that hand you a bike for the day and expect it back at closing time. These tend to have better bikes (including proper e-bikes and road bikes), sometimes offer guided tours, and are worth it if you want one long ride rather than short hops between sights.

    Setting Up: The App, Registration, and Unlocking

    Download the “Docomo Bike Share” app (available in English) before you land, and register a credit card in advance — doing this on Kyoto Station wifi with a jetlagged brain is annoying. Once registered, you reserve a bike at a nearby port through the app, which sends a unique unlock code or lets you scan a QR code on the bike’s handlebar-mounted lock box. Returning is just as simple: slot the bike into any empty dock in the network and the app confirms the return and shows the final charge.

    A few practical notes: ports do run out of bikes (and out of empty slots to return to) during busy periods, so check availability in the app before you commit to a route. Baskets are standard, but bike sizes are limited — these are city bikes, not built for anyone much over 185cm or for serious hills.

    Kyoto: Where It Works Best

    Kyoto is close to ideal for cycling — mostly flat, laid out on a grid in the central city, and full of temples and gardens that sit awkwardly far from the nearest subway stop. PiPPA ports cluster around Kyoto Station, Gion-Shijo, Kawaramachi, Nijo Castle, and up toward Kinkaku-ji and Ginkaku-ji, so you can string together a route — say, Nijo Castle to the Philosopher’s Path — without backtracking to a train.

    For a full day out, the Kyoto Cycling Tour Project (KCTP), a short walk from Kyoto Station’s south (Nara-guchi) exit, rents traditional city bikes from around ¥1,000/day and e-bikes from roughly ¥1,800–2,000/day, and also runs guided cycling tours if you’d rather not navigate solo. Arashiyama, the Fushimi Inari approach, and Nishiki Market are all better done on foot once you arrive — narrow lanes, stairs, and heavy foot traffic make cycling there impractical or against local rules.

    Tokyo: Where It Works Best

    Tokyo’s network is much larger — well over 500 ports across the central wards — which makes it more useful for connecting neighborhoods than for touring any single district. A popular loop links the Imperial Palace, Ginza, and Tsukiji Outer Market; another covers Asakusa across the Sumida River to the newer riverside parks near Kiyosumi. Because coverage is ward-by-ward, double-check the app’s map before setting off — a route that drifts into a ward without ports can leave you stuck without a place to dock the bike.

    Tokyo traffic is heavier and less forgiving than Kyoto’s, so stick to wide arterial roads with painted bike lanes or genuinely quiet backstreets, and avoid rush hour (roughly 7:30–9:30am and 5:30–7:30pm) if you can.

    What It Costs: Budget to Splurge

    • Budget — bike-share pay-as-you-go: Roughly ¥165 for the first 30 minutes on Docomo Bike Share/PiPPA, with the same rate charged per additional 30-minute block. Fine for short hops between sights.
    • Mid-range — bike-share day pass or shop rental: A 1-day pass on the bike-share app runs around ¥1,600–1,700 (each individual ride is capped at 30 minutes before extra charges kick in, so you re-dock and re-unlock for longer outings). A standard mama-chari from a rental shop like KCTP costs about ¥1,000–1,300/day with no time-block restrictions.
    • Splurge — e-bikes and guided tours: E-bike rental runs roughly ¥2,000–3,500/day, well worth it for Kyoto’s temple hills or a longer Tokyo river route. Guided half-day or full-day cycling tours (English-speaking) typically start around ¥8,000–12,000 per person and include route planning, a knowledgeable guide, and often a rest stop or two.

    If you’re already planning long-distance cycling rather than city sightseeing, the dedicated route on the Shimanami Kaido is a completely different — and spectacular — kind of ride, worth building a separate day or two around.

    Rules, Etiquette, and Common Mistakes

    • Ride on the road, keep left. Japan drives on the left, and bicycles are legally vehicles that belong on the road unless a sidewalk is specifically marked for shared use.
    • Helmets are recommended, not required. Since a 2023 law change, wearing a helmet is an “effort obligation” for all cyclists in Japan — encouraged but not enforced for adults. Rental shops rarely provide them by default; ask if you want one.
    • No phone use, no umbrella-holding, no riding while intoxicated. These are actively enforced and carry real fines.
    • Don’t assume free-floating return. Bike-share bikes must go back into a designated dock, not just be left on a street corner — leaving one outside a port can trigger a fee or a lockout on your account.
    • Check port availability before you ride, not after. Arriving at a temple to find every dock full (or arriving to rent and finding no bikes) is the single most common frustration; the app shows live counts.

    Best Season and Timing

    Spring (late March–May) and autumn (October–November) are the sweet spot — mild temperatures and, in Kyoto especially, cherry blossoms or fall foliage along canal and river paths that are genuinely better seen by bike than by bus. Summer (July–August) means high heat and humidity that make cycling uncomfortable by midday; if you ride then, go early morning or after 4pm. The rainy season (tsuyu), roughly mid-June to mid-July, makes bike-share far less appealing — Japan’s convenience stores sell cheap umbrellas, but riding in rain on an unfamiliar city bike isn’t worth the hassle. Whatever the season, aim to start by mid-morning; both networks get heavily used by commuters before 9am, which can mean empty docks right when you’re hoping to start your day.

  • Omoide Yokocho: How to Crawl Shinjuku’s “Piss Alley” for Yakitori and Beer

    Omoide Yokocho: How to Crawl Shinjuku’s “Piss Alley” for Yakitori and Beer

    Photo by Pema G. Lama on Unsplash

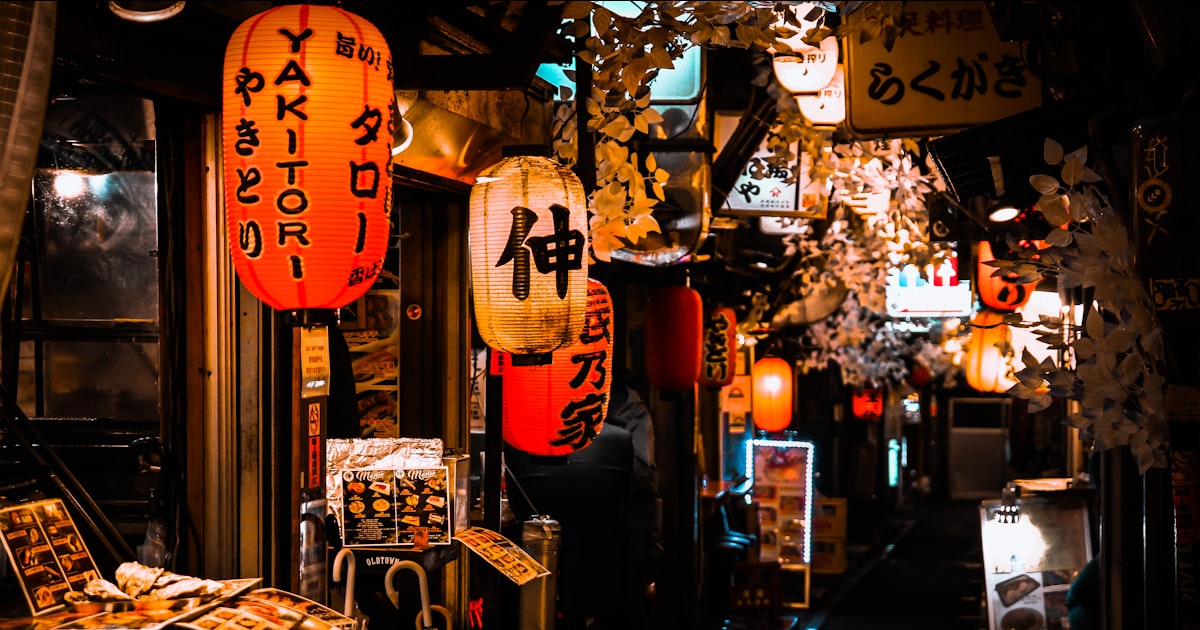
    Wedged between the JR tracks and Yodobashi Camera’s flagship store, Omoide Yokocho is two narrow lanes of yakitori stalls so small that half the seats are just stools facing a grill. Its nickname, Shonben Yokocho (“Piss Alley”), dates back to the postwar black-market years when the area had no public toilets — the name stuck even after the alley cleaned up. It’s touristy now, smoky, and a little cramped, and it’s still one of the best places in Tokyo to eat grilled chicken parts off a stick while a cook two feet away fans the coals. Here’s how to actually do it well.

    What Omoide Yokocho Actually Is

    This is a cluster of roughly 60 tiny stalls (yatai) spread across two covered alleys just northwest of Shinjuku Station’s West Exit, most seating between 4 and 15 people. Almost every stall specializes in some version of yakitori or motsuyaki (grilled offal) — chicken thigh, skin, cartilage, liver, heart, and the beef and pork intestine dishes that give the alley its slightly funky smell. A handful of stalls do ramen, oden, or unagi instead, so it’s not exclusively a chicken-skewer crawl. The area burned down in 1999 and again partially in 2014, and was rebuilt with modern wiring and fire suppression, so despite the retro Showa-era look, the structure itself is new.

    Getting There and Best Timing

    From JR Shinjuku Station, take the West Exit (Nishiguchi) and walk about 2–3 minutes north along the tracks; you’ll see the low wooden entrance signs before you reach Yodobashi Camera’s main building. It’s also a 3-minute walk from Seibu-Shinjuku Station. There’s no gate and no admission — you just duck into whichever stall has an open seat.

    Most stalls open around 3–5pm and run until midnight or later; a few open for a lunch service around 11am–2pm with cheaper donburi or yakitori sets (around ¥800–1,200), which is a good option if you want the atmosphere without the crowds. The alley is loudest and most packed from 7pm to 10pm, especially Friday and Saturday. If you want elbow room to actually enjoy your beer, aim for a weekday between 5pm and 6:30pm, or go for the quieter lunch window. After 10pm on weekends it can be standing-room only in the narrower lane.

    How to Order Like You’ve Done This Before

    Walk the alley once before committing — most stalls post a menu outside, often with photos or English/Chinese translations, and you can see how full each one is. Once you sit, a few things are near-universal: many stalls charge a small seating/table charge (otoshi), typically ¥300–500, sometimes in the form of a small starter dish you didn’t order but do pay for. This isn’t a scam, it’s standard izakaya practice across Japan — just budget for it.

    Skewers (yakitori/motsuyaki) usually run ¥150–450 each depending on the cut, and most people order 2–3 different skewers at a time rather than a big batch all at once, so you can keep pace with your beer. A mug of draft beer (nama biru) is around ¥500–700; highballs and shochu are similar. Cash is still king in the alley — plenty of stalls, especially the smallest ones, don’t take cards or IC cards (Suica/Pasmo), so carry at least ¥5,000–8,000 in cash for a night out. Seats are limited and shared with strangers, so if a stall is full, it’s completely normal to stall-hop rather than wait.

    What to Eat (and What to Skip if You’re Squeamish)

    The classics worth ordering: negima (chicken thigh and leeks), tsukune (chicken meatballs, often with a raw egg dip), kawa (crispy grilled skin), and tebasaki (wings). If you’re feeling adventurous, nankotsu (chicken cartilage) and reba (liver) are good gateway items into the offal side of the menu, before you graduate to motsu (intestines) or hatsu (heart). A few stalls do exotic items like grilled frog or horse — these are the exception, not the rule, and are usually clearly marked.

    If yakitori isn’t your thing, some stalls in the alley grill unagi or serve oden, and it’s worth knowing more broadly what you’re looking at if eel interests you — see our guide to unagi and where to eat it for context on grades and pricing elsewhere in Tokyo. And if the smoke and offal genuinely aren’t for you, Yodobashi Camera’s building and the station concourse have several conveyor-belt sushi options nearby — our kaiten-zushi chain comparison covers what to expect if you’d rather eat sushi than skewers.

    Budget, Mid-Range, and Splurge Nights

    Budget (¥1,500–2,500): One drink, 4–5 skewers, and the seating charge at a standing-only stall. This is enough to get the experience without committing to a full meal.

    Mid-range (¥3,000–5,000): Two rounds of drinks, 8–10 skewers, maybe a bowl of ramen or oden to finish, split across one or two stalls. This is the sweet spot most visitors land on for a proper dinner-and-drinks night.

    Splurge (¥6,000–9,000): A few of the newer, slightly more polished stalls run sake-pairing courses or offer rarer cuts (wagyu skewers, uni add-ons) at proportionally higher prices. Worth it once if you want a step up from the plastic-stool standard.

    Common Mistakes to Avoid

    • Assuming every stall is tourist-friendly. A few smaller counters are effectively regulars-only in practice — if the staff seem hesitant or the menu is handwritten Japanese with no photos, it’s fine to just move to the next stall rather than force it.
    • Not carrying cash. Card and contactless acceptance has improved but is still inconsistent stall to stall; don’t rely on it.
    • Confusing this with Golden Gai. They’re both historic Shinjuku alleys but serve different purposes — Omoide Yokocho is about food and standing-bar yakitori, while Golden Gai across town near Kabukicho is almost entirely tiny themed bars with cover charges and little to no food. If you want both in one night, see our guide to Golden Gai and how to drink there — it’s a 10–15 minute walk from Omoide Yokocho and makes a natural second stop.
    • Expecting to linger for hours at one stall. Seats are scarce and turnover is part of the culture; if there’s a line forming behind you, it’s polite to wrap up after a round or two rather than camp out.
    • Skipping breakfast the next morning. If you overdo the shochu, Shinjuku has several old-school kissaten serving thick coffee and pilaf-style breakfasts that are a good antidote — our guide to kissaten and what to order covers what to look for.

    Omoide Yokocho rewards showing up hungry, curious, and with small bills in your pocket. Go early for a calmer meal, go late for the full smoky, shoulder-to-shoulder atmosphere — either way, it’s one of the few spots in central Tokyo where a five-minute walk from a major train station still feels like stepping into 1955.

  • Regional JR Rail Passes: JR East, JR West & Kansai Explained

    Regional JR Rail Passes: JR East, JR West & Kansai Explained

    Photo by Jiachen Lin on Unsplash

    The national Japan Rail Pass gets all the attention, but for most trips it’s actually the wrong tool. If you’re staying in one region—Tokyo and its day-trip radius, or Kansai and its neighbors—a regional JR pass is usually cheaper and covers exactly the trains you’ll actually ride. The catch is that JR East, JR West, and JR Central each sell their own overlapping lineup of area passes, with different coverage maps, validity windows, and rules about which seats you can reserve. Here’s how to tell them apart and pick the right one.

    Why a Regional Pass Instead of the National JR Pass

    The nationwide JR Pass (7/14/21 days, ¥50,000/¥80,000/¥100,000 for the ordinary 7-day tier as of recent pricing) only pays off if you’re covering long distances across multiple regions—say, Tokyo to Hiroshima and back. If your itinerary is Tokyo plus Nikko, Kawaguchiko, and Karuizawa, or Osaka plus Kyoto, Kobe, and Himeji, a regional pass covering just that zone almost always costs less than half as much and includes local lines the national pass doesn’t bother optimizing for. Regional passes also tend to be usable the same day you buy them, without the advance exchange-voucher hassle some travelers still associate with the national pass.

    JR East Regional Passes: Tokyo and Beyond

    JR East’s most useful pass for short trips is the JR Tokyo Wide Pass: ¥15,000 for adults, ¥7,500 for children, valid 3 consecutive days. It covers unlimited rides on JR East lines within the greater Tokyo area plus reserved seats on the Narita Express, the Joetsu Shinkansen out to GALA Yuzawa, and the Nagano/Hokuriku Shinkansen as far as Karuizawa and Nagano. It also includes the Fujikyu Railway line, making it one of the few passes that gets you to the Kawaguchiko/Mt. Fuji area on rails without paying separately. Buy it at JR East Travel Service Centers at Narita or Haneda airports, or major stations like Shinjuku and Tokyo.

    If you’re going further north, the JR East Pass (Nagano, Niigata area) and the JR East Pass (Tohoku area) are 5-day flexible passes (you pick 5 non-consecutive days within a 14-day window) priced around ¥18,000–¥20,000 for adults. These make sense if you’re chasing snow country onsen towns or the Tohoku coast rather than staying Tokyo-centric.

    JR West Regional Passes: Kyoto, Osaka, and the San’in Coast

    JR West sells a tiered set of passes depending on how far you’re ranging. The Kansai Area Pass is the simplest: unlimited JR West trains (not the Shinkansen) between Kyoto, Osaka, Kobe, Nara, and Kansai Airport. Pricing runs roughly ¥2,800 for 1 day up to ¥6,800 for 4 days for adults—buy it if you’re doing day trips between those cities and want to skip juggling individual tickets.

    Step up to the Kansai WIDE Area Pass (around ¥5,000–¥6,000, 4 consecutive days) and you get the San’in Kaigan coast, Himeji, Okayama, and reserved seats on limited express trains and select Shinkansen segments within the zone. This is the one that makes sense if Kinosaki Onsen is on your list—the pass covers the JR limited express that runs straight there from Kyoto or Osaka, which otherwise costs around ¥5,000–¥6,000 each way. For trips extending toward Hiroshima and the Seto Inland Sea, the Sanyo-San’in Area Pass (7 consecutive days, roughly ¥19,000–¥20,000) adds Shinkansen coverage down to Shimonoseki, useful if you’re also detouring to Onomichi to ride the Shimanami Kaido.

    Where “Kansai Passes” Get Confusing

    Here’s the trap: not every pass with “Kansai” in the name is a JR pass. The Kansai Thru Pass is sold by a consortium of private railways and subway operators (Osaka Metro, Hankyu, Hanshin, Kintetsu, Keihan) and deliberately excludes JR lines entirely. It’s the better choice if your days are heavy on Kyoto’s Keihan/Hankyu lines, Nara via Kintetsu, or Osaka’s subway—but it will not get you on a JR train, full stop. Mixing this up is the single most common mistake visitors make: they buy the Thru Pass expecting it to cover a JR ride to Kansai Airport, tap in, and get charged in full. If your plan genuinely mixes JR and private lines evenly, it’s often cheaper to just use an IC card (Suica/ICOCA) and pay as you go rather than buying two overlapping passes. For a fuller comparison of area passes including Hokuriku, see our JR Regional Rail Passes guide to Kansai, Hokuriku & other area passes.

    How to Buy and Activate Your Pass

    Most JR East and JR West regional passes can be purchased in person on the day of travel at designated ticket offices (marked “JR Travel Service Center” or “Midori no Madoguchi”) without advance booking, which is a real advantage over the national pass’s exchange-order system. Some, like the Tokyo Wide Pass, can also be reserved online in advance for slightly faster pickup. You’ll need your passport for foreign-tourist-only passes—these are not available to Japanese residents. Once issued, write your travel dates on the pass if it’s a paper ticket, and keep it until you exit the gate on your last day; station staff do random checks at manned gates.

    Common Mistakes to Avoid

    Beyond the JR-vs-private-line mix-up, the other frequent error is buying a multi-day pass for a trip that doesn’t need it. If you’re only making one round trip—say, Osaka to Himeji and back—check the individual fare first; a single round-trip ticket is often cheaper than even the 1-day Kansai Area Pass. Also double-check whether your pass includes Shinkansen reserved seats or only local/rapid trains; the cheaper area passes generally exclude the Shinkansen entirely, and trying to board one without the right coverage means paying the fare difference on the spot. Finally, remember these passes don’t cover the Tokaido Shinkansen (Tokyo–Osaka), which is JR Central territory and needs its own ticket or the national JR Pass.

    Budget, Mid-Range, and Splurge Picks

    On a tight budget, skip passes altogether for short stays and load a Suica or ICOCA IC card instead—no expiration pressure, works everywhere, and refunds unused balance at the end (minus a small fee). Mid-range travelers doing a Kyoto-Osaka-Kobe-Nara loop over 3–4 days get the clearest value from the Kansai Area Pass. If you’re stretching out to Kinosaki Onsen, Himeji, and Okayama in one trip, the Kansai WIDE Area Pass earns its price back in a single limited-express ride. For a genuine splurge itinerary covering Tokyo, Karuizawa, and a Fuji day trip, the Tokyo Wide Pass is worth it even for two rides, since a round trip to Karuizawa alone runs close to the pass price. Whichever route you take, it pairs well with overnight buses for the longer legs outside your pass zone, or with a rental car if you want to reach spots the rail network simply doesn’t touch.

  • Michi-no-Eki: Japan’s Roadside Stations for Road Trippers

    Michi-no-Eki: Japan’s Roadside Stations for Road Trippers

    Photo by Zion C on Unsplash

    If you’re renting a car in Japan, you’ll pass a brown-and-white sign reading 道の駅 (michi-no-eki) roughly every 15-20 minutes on rural highways. These “roadside stations” are one of Japan’s most useful and least-discussed travel resources: free parking, clean toilets, local produce, regional food, and a genuine window into small-town Japan that most tourists never see. There are now over 1,200 of them nationwide, and for anyone doing a self-drive trip, they’re worth planning around rather than stumbling into.

    What Exactly Is a Michi-no-Eki?

    Michi-no-eki are government-registered rest stops, certified by the Ministry of Land, Infrastructure, Transport and Tourism since 1993. Unlike a generic highway service area, each one is run in partnership with the local municipality, so the mix of shops always reflects the surrounding region. A typical station has three fixed elements: a free 24-hour parking lot and restroom, a farmers’-market-style shop selling produce and goods from within that town or prefecture, and at least one food counter or restaurant. Beyond that, facilities vary wildly — some have onsen baths, campgrounds, playgrounds, EV chargers, or small museums attached. Entry and parking are always free, and the toilets and parking stay open even after the shops close for the night.

    The key distinction from a standard highway SA (service area) is that michi-no-eki sit on regular national and prefectural roads, not the tolled expressway network, so you don’t need to exit and re-enter the toll system to use one — useful if you’re avoiding expressway fees, which typically run ¥24-27 per km.

    What You Can Actually Buy There

    The produce section is the main draw for most visitors: bags of just-picked vegetables, fruit, rice, and pickles priced well below city supermarkets, often ¥100-500 per item, sold by the farmers themselves and restocked through the day. Many stations also carry regional specialty goods you won’t find elsewhere — local sake, miso, dried fish, or craft items tied to that prefecture’s traditions. If you’re already hunting for ceramics on a Kansai or Kyushu itinerary, it’s worth noting that michi-no-eki near production areas sometimes stock seconds-quality pieces from nearby kilns at a discount; travelers heading toward the Kutani or Arita/Imari regions should keep an eye out. Food-wise, expect a soft-serve ice cream stand (often a local fruit or vegetable flavor, ¥300-400), a food court serving a regional take on standards like katsu curry (a cousin of the curry rice you’ll find all over Japan) for around ¥800-1,200, and vending machines selling everything from hot corn soup to local craft beer.

    Opening Hours and When to Time Your Stops

    Parking and restrooms are open 24/7/365 at essentially every michi-no-eki, which is the whole point — they’re designed as safe overnight rest points for long-haul drivers. The shops and restaurants, however, keep normal retail hours: typically 9:00 a.m. to 6:00 p.m., with restaurants often closing their kitchen by 4:00 or 5:00 p.m. even if the building stays open later. This matters more than it sounds: arrive at 6:30 p.m. hoping for dinner and you may find only vending machines working. Plan your driving day so you hit the station you actually want to shop or eat at before mid-afternoon, and treat any stop after 5 p.m. as a bathroom-and-stretch break only. Produce sections sell out fastest on weekend mornings, so if you want the best selection of local vegetables, arrive before 10 a.m.

    Seasonally, spring (cherry and strawberry season) and autumn (harvest, persimmons, chestnuts) bring the best produce and the most crowded parking lots, especially near popular scenic routes. Winter stations in snow regions are genuinely useful for checking road conditions and warming up, but some smaller ones reduce hours or close entirely between December and March.

    How to Find and Use Them on a Road Trip

    Every rental car’s built-in navigation system (and Google Maps) marks michi-no-eki with their own icon, so you don’t need to plan routes around them in advance — just glance at the map as you drive and detour to whichever one is coming up. The official michi-no-eki association also publishes a nationwide list by prefecture if you want to research stops before a trip, particularly useful if you’re building an itinerary around a specific route like the coastal roads near Kinosaki Onsen or the approach to Ise Jingu. For the specifics of renting the car itself — international driving permit rules, typical rental costs (budget around ¥6,000-9,000/day for a compact car), and suggested routes — see our full guide to renting a car in Japan.

    If you’re not driving a car but still want the michi-no-eki experience, a few are accessible by local bus or bicycle — most notably along the Shimanami Kaido, where roadside stations double as cyclist rest points with air pumps, water, and repair stands built in alongside the usual produce shop.

    Common Mistakes to Avoid

    The single biggest mistake is treating every michi-no-eki as interchangeable and stopping at random without checking what’s actually there — some are little more than a parking lot and vending machines, while others a few kilometers away have full restaurants and onsen baths. A quick look at the map listing (most show a photo and facility icons) before detouring saves wasted time. Second, don’t assume credit cards work everywhere: smaller produce stalls and food counters, especially in rural Tohoku, Shikoku, and parts of Kyushu, are still cash-only, so keep ¥1,000-¥5,000 in small bills on hand. Third, remember these are not 24-hour convenience stores — if you’re driving late at night expecting a hot meal, you’ll likely find only vending machines and toilets. Finally, resist the urge to buy too much produce too early in a multi-day trip; fresh vegetables and fruit don’t hold up well in a hot rental car, so it’s better to buy near the end of your route or somewhere you can refrigerate that night.

    Budget, Mid-Range, and Splurge Stops

    At the budget end, most stations cost nothing beyond whatever snacks you buy — a rice ball or bag of fruit runs ¥150-300. Mid-range stops are the ones with a proper restaurant serving a regional set meal, typically ¥1,000-2,000, worth timing your lunch around. At the splurge end, a growing number of “super” michi-no-eki have added day-use onsen baths (¥500-800 entry) or attached hotels, turning a rest stop into a genuine overnight destination — a good option if you’re stringing together a multi-day loop and want to break up long drives without booking a formal ryokan every night.