Japan Trove

Category: Travel

Practical, up-to-date guides for traveling in Japan — itineraries, rail passes, eSIMs, where to stay, seasonal timing, etiquette, and the local know-how that makes a trip smoother. Written with real Japanese sources so you get the answer that actually works on the ground, not the recycled tourist one.

  • Golden Gai: Shinjuku’s Tiny Bar Alleys and How to Drink There

    Golden Gai: Shinjuku’s Tiny Bar Alleys and How to Drink There

    Photo by Mateo Krossler on Unsplash

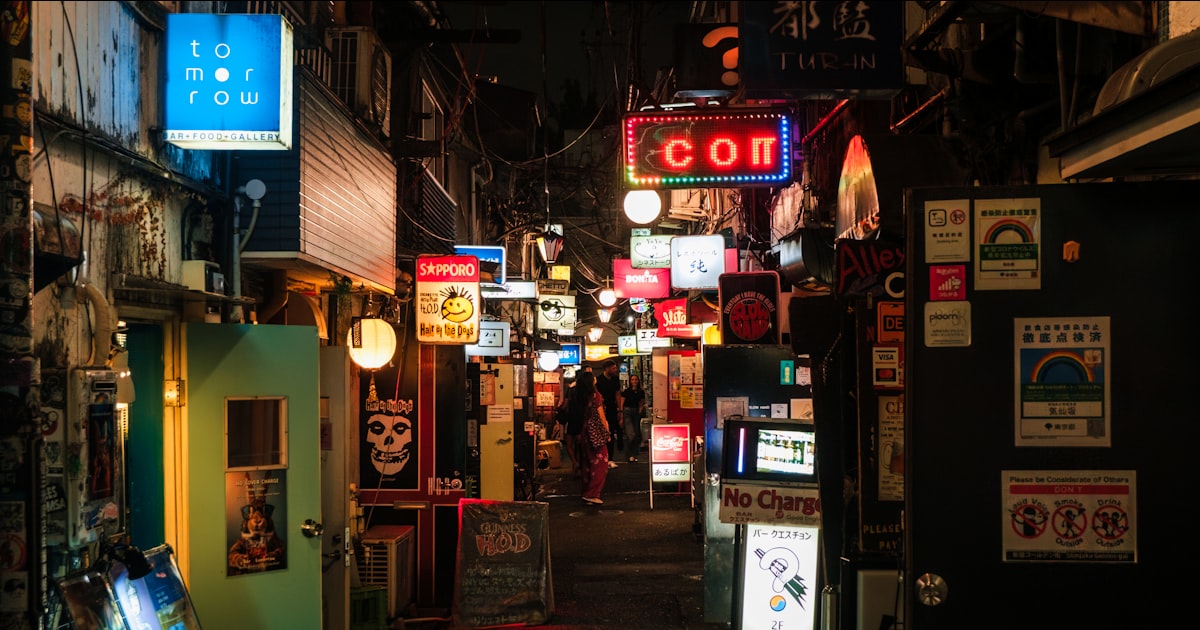
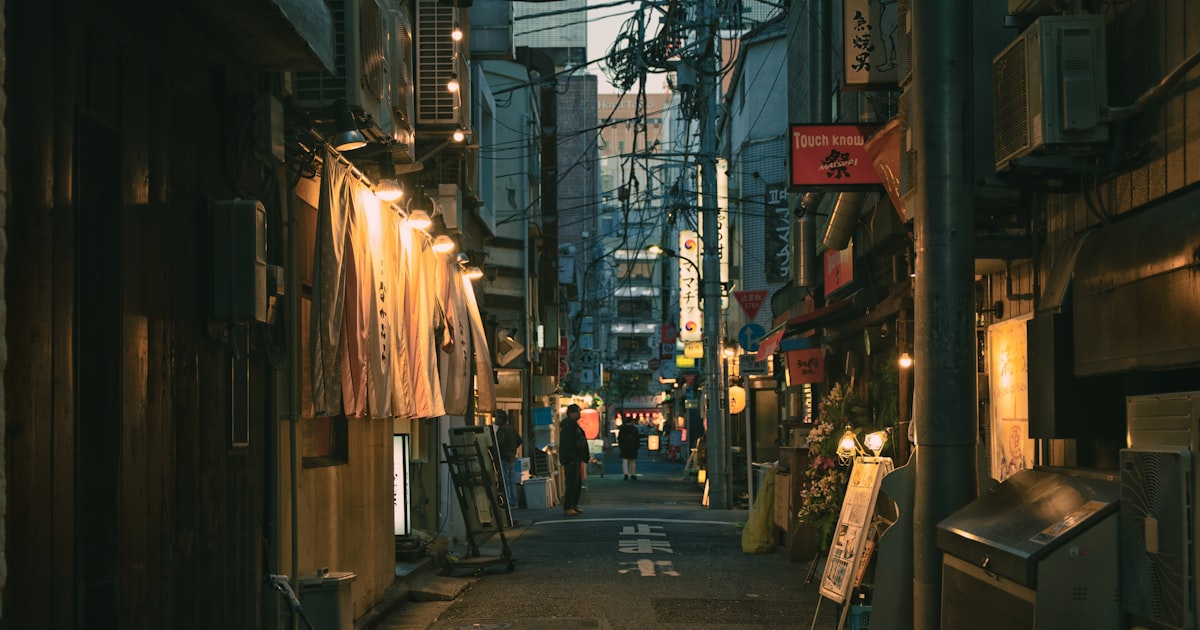
    Golden Gai is six narrow alleys packed with roughly 200 bars, most no bigger than a closet, tucked into a single block of Shinjuku between the neon chaos of Kabukicho and the quiet grounds of Hanazono Shrine. It survived post-war black-market roots and decades of redevelopment pressure, and today it’s one of the last places in Tokyo where you can still drink shoulder-to-shoulder with a bar owner who’s been pouring the same five seats for thirty years. It’s touristy in places now, but it’s not a theme park — these are real, working bars, and knowing the unwritten rules before you go makes the difference between a great night and an awkward five minutes on the doorstep.

    What Golden Gai Actually Is

    Each “bar” here is typically one room: a counter, five to fifteen stools, and a theme or obsession that the owner (called the mama or master) has built the whole place around — old French New Wave films, punk records, horror movies, Okinawan music, shogi. There’s no single unifying style; the fun is in the variety packed into an area you can walk end-to-end in about five minutes. Most buildings are two storeys, with a second tiny bar stacked directly above the first, reached by a steep, narrow staircase.

    Getting There and Timing Your Visit

    The closest station is Shinjuku Sanchome (Marunouchi, Fukutoshin, or Toei Shinjuku lines) — take exit B2 or B3 and it’s a 3–5 minute walk. From the sprawling JR Shinjuku Station, it’s about a 10–12 minute walk northeast, or you can walk through Kabukicho, which is part of the experience if you don’t mind the touting.

    Most bars open somewhere between 7–8pm and run until 3–5am; a handful open earlier, around 6pm. Golden Gai has almost no daytime life — there’s nothing to see before dark. Go on a weeknight (Tuesday to Thursday) if you want an easier time getting a seat; Friday and Saturday nights get crowded fast, and with only five or six stools per bar, a couple of large groups can fill a place in minutes. Arriving by 8–9pm gives you the best odds before the after-work crowd settles in. There’s no real seasonal angle since everything happens indoors, but summer alleys get uncomfortably humid and packed with smoke, so an air-conditioned bar with the door shut is genuinely a relief in July and August.

    How the Bars Actually Work

    This is the part that trips up first-timers. Almost every bar charges a seat charge (seki-ryo or chaji), typically ¥500–¥2,000 per person, on top of your drinks — this is standard practice, not a scam, and it’s how tiny bars with only a few seats stay in business. It should be posted somewhere near the entrance or on a card at the counter; if you don’t see it, ask “Seki-ryo wa arimasu ka?” before sitting down. Drinks themselves usually run ¥600–¥1,200 for a highball, beer, or simple cocktail.

    Cash is still king. Many bars are cash-only, and Golden Gai is one of the few areas in Tokyo where you shouldn’t assume a card machine exists. Carry at least ¥5,000–¥6,000 for an evening covering two or three bars. Bar-hopping is normal and expected here — nobody stays in one place all night — but each new bar means a new seat charge.

    Some doors have signs reading “jimoto no kata nomi” (local regulars only) or simply look closed even when they’re not. Respect those and move on rather than pushing the door open to check. A good number of bars, especially the more famous ones, are used to foreign visitors and will have English menus or an English-speaking owner — look for small English signage near the entrance as a signal.

    Where to Drink: Budget to Splurge

    • Budget: Look for bars advertising no cover charge or a low flat fee (around ¥500) plus a one-drink minimum. Highball- and beer-focused counters in the Nichome-dori alley tend to be the most casual and welcoming to walk-ins.
    • Mid-range: Themed bars like Albatross (multiple floors, chandeliers, eclectic decor) or the cinema-themed La Jetée run a ¥1,000–¥1,500 seat charge and are well used to tourists, with staff who can chat in basic English.
    • Splurge: A few counters specialize in aged whisky or rare shochu, where a proper pour can run ¥2,000–¥4,000 and the seat charge is higher. If you’re building a serious drinks itinerary in Tokyo, it’s also worth reading our guide to craft beer in Japan for taprooms with a more conventional pricing structure, and our primer on umeshu if you want to order Japan’s plum wine instead of another highball once you’re seated.

    Etiquette and Common Mistakes

    • Don’t walk in with a large group. Five people trying to enter a five-seat bar is a non-starter; split up or find a bigger space. Two or three people is the sweet spot.
    • Ask before sitting, and ask about the charge. A quick “Ii desu ka?” (is it okay?) at the door and a nod from the owner is the norm before you take a stool.
    • Don’t photograph the interior or other patrons without asking. Exterior alley shots are fine and everyone takes them; pointing a phone at the counter is not.
    • Don’t expect food. A few bars serve light snacks, but Golden Gai isn’t for dinner — eat in Kabukicho or Shinjuku first.
    • Check the last train. Shinjuku Sanchome’s last trains run around 12:20–12:40am depending on the line; after that you’re looking at a taxi or an all-nighter until the first trains resume around 5am.

    Beyond the Bars

    If you want a quieter, daytime contrast to Golden Gai’s late-night intensity, Shinjuku’s older, low-rise neighbor Yanaka offers the same sense of old, human-scale Tokyo backstreets but by daylight, with none of the drinking. Hanazono Shrine, right next to Golden Gai, is also worth a quick daytime walk-through before you come back after dark for the bars — it’s a strange, pleasant contrast to duck through torii gates a few steps from where you’ll be squeezing onto a barstool that night.

    Golden Gai rewards curiosity more than planning. Pick an alley, peek through a few doors, and follow whatever theme catches your eye — that’s really the whole method.
  • Shimokitazawa: Tokyo’s Thrift, Vintage & Indie Music Neighborhood

    Shimokitazawa: Tokyo’s Thrift, Vintage & Indie Music Neighborhood

    Photo by ayumi kubo on Unsplash

    Shimokitazawa (locals just say “Shimokita”) is the neighborhood Tokyo sends its art students, musicians, and secondhand-clothing obsessives to live in. Unlike the glossy vintage boutiques of Harajuku’s Cat Street, Shimokita’s shops are packed into a tangle of narrow, low-rise backstreets that feel more like a college town than a capital city. It’s small enough to cover on foot in an afternoon, but dense enough with shops, record stores, and live houses that most visitors end up staying much longer than planned.

    Why Shimokitazawa Is Different

    Shimokitazawa has been Tokyo’s countercultural neighborhood since the 1960s theater and folk-music scene took root here, and that identity has never really faded. What makes it distinct from other shopping districts is the sheer density of independently owned shops rather than chains — vintage clothing, used records, handmade jewelry, and small theaters sit shoulder to shoulder along streets barely wide enough for two people to pass. It rewards wandering more than any single “must-see” address, though the area does have well-known anchor shops that longtime fans return to on every visit.

    Getting There and Timing Your Visit

    Shimokitazawa Station is served by two lines: the Odakyu Odawara Line (about 4 minutes from Shinjuku on an express train, roughly ¥160) and the Keio Inokashira Line (about 5 minutes from Shibuya, roughly ¥140). Both lines take a standard IC card (Suica/Pasmo), so there’s nothing special to plan for on the transit side. Weekday mornings and early afternoons (opening time to around 2pm) are noticeably calmer for browsing vintage racks without a crowd; by Saturday evening the main lanes near the station get genuinely packed. Most shops don’t open until 11:00 or noon and close by 20:00–21:00, so this isn’t a neighborhood for an early-morning visit — treat it as a late-morning-through-evening stop, and pair it with dinner or a live show so you’re not rushing. Spring and autumn are the most comfortable seasons for the outdoor alleys; summer humidity makes the covered arcades near the station a welcome relief.

    Thrift and Vintage Shopping: What to Expect

    Shimokita is Tokyo’s best-known secondhand clothing district, with dozens of shops clustered south and north of the station. Long-running names to look for include Chicago (a multi-floor shop with a strong selection of vintage kimono alongside Americana clothing), Flamingo, New York Joe Exchange (which also buys and sells on the spot), Haight & Ashbury, and several Big Time and Used Mix branches scattered through the side streets. Expect band and graphic T-shirts from roughly ¥1,500–4,000, vintage denim from ¥6,000–25,000 depending on brand and condition, and flight jackets or heavy outerwear often ¥10,000 and up. A common misconception is that Japanese vintage is cheap — it isn’t. Shops here curate and grade condition carefully, and rare or Americana pieces are priced closer to (sometimes above) what you’d pay in the US or Europe. The value is in the selection and condition, not bargain pricing. If you’re also curious about Tokyo’s other major secondhand and collector shopping district, Nakano Broadway covers vintage toys, idol goods, and manga rather than clothing, and makes a good complementary half-day trip.

    Record Shops and Live Music Venues

    Shimokitazawa’s record shops are a big part of its identity. Jet Set and Disk Union both have strong secondhand vinyl and CD selections spanning rock, jazz, and city pop, with used records commonly running ¥500–3,000 and rarer original pressings well beyond that. Flash Disc Ranch is a smaller, denser shop worth digging through if you’re after used vinyl bargains. The neighborhood is equally known for its live houses (small music venues) — Shimokitazawa Club Que and Basement Bar are long-standing spots for indie rock and punk, while Mona Records leans toward folk and singer-songwriter acts. Cover charges (often called a “door charge” or *charge*) typically run ¥2,000–3,500 and frequently include one drink ticket; most venues are cash-only at the door, so carry yen rather than assuming card payment. Shows are usually listed on venue websites or Twitter/X a few weeks ahead — walk-ins are common for smaller weekday shows but riskier for weekend headline acts.

    Bonus Track, Reload, and the New Indie Scene

    Between roughly 2019 and 2022, the Odakyu Line here was moved underground, freeing up a long strip of surface land beside the station. That space became two redevelopment projects, Bonus Track and Reload, filled with small independent shops, bakeries, breweries, and cafes built in a low, open-air style that echoes the neighborhood’s older backstreets rather than replacing them. It’s a good stop if you want a calmer, more curated contrast to the denser vintage lanes, and it’s where several newer craft beer taprooms and natural wine bars have opened. If beer is part of your Japan itinerary, our guide to craft beer in Japan covers taprooms in Tokyo and beyond worth building into a longer crawl.

    Cafes, Bars, and Fueling Up

    Shimokita has a dense concentration of small cafes and standing bars rather than large restaurants, which suits its walk-and-graze rhythm. Budget travelers can eat well here: curry shops and ramen counters serve full meals for ¥800–1,200, and the neighborhood’s many small izakaya (some seating under ten people) are ideal for an early evening drink and small plates before a live show. For a splurge, look toward the sit-down restaurants around Reload, where dinner with drinks runs ¥4,000–6,000 per person. If you’re coming from another older Tokyo neighborhood on your itinerary, Shimokita’s energy is a useful contrast to somewhere like Yanaka, Tokyo’s quieter old shitamachi district — pairing the two on different days gives a good sense of how differently Tokyo’s neighborhoods have aged.

    Common Mistakes to Avoid

    • Arriving too early. Most shops open at 11:00–12:00; showing up at 9am means empty streets and shuttered storefronts.
    • Expecting steep discounts. Curated vintage is priced for its condition and rarity, not as a bargain bin — bring realistic expectations, especially for Americana and denim.
    • Not carrying cash. Many smaller vintage shops, record stores, and live house doors are cash-only; ATMs at the station’s convenience stores are the easiest backup.
    • Skipping the side streets. The most interesting small shops are often one block off the main pedestrian lanes near the station, not directly on them.
    • Treating it as a quick stop. Shimokita rewards slow, unplanned wandering far more than a checklist of specific addresses — budget at least three to four hours.

    Shimokitazawa doesn’t have a single landmark that defines a visit the way a temple or tower might elsewhere in Tokyo — its appeal is cumulative, built from an afternoon of digging through record bins, trying on secondhand jackets, and ending the night at a small live house. Come with an open afternoon, cash in your wallet, and no fixed shopping list, and it tends to deliver more than neighborhoods with a bigger reputation.

  • JR Regional Rail Passes: Kansai, Hokuriku & Other Area Passes Explained

    JR Regional Rail Passes: Kansai, Hokuriku & Other Area Passes Explained

    Photo by Spenser Sembrat on Unsplash

    The nationwide Japan Rail Pass gets all the attention, but if your trip is staying inside one region — say, Kansai, the Hokuriku coast, or Hokkaido — a regional JR pass is very often cheaper and better matched to what you’re actually doing. These passes are sold by the individual JR companies (JR West, JR Hokkaido, JR Central) rather than the Japan Rail group as a whole, they’re restricted to specific lines and prefectures, and most are only available to travelers on a temporary visitor visa. Here’s how the main ones stack up and how to avoid wasting money on the wrong one.

    Why go regional instead of nationwide

    Since the nationwide 7-day Ordinary Japan Rail Pass now costs around ¥50,000 for adults, it only pays for itself if you’re covering serious distance — Tokyo to Kyoto to Hiroshima to Kanazawa in a single loop, for example. If your plan is more like “base myself in Osaka or Kyoto and make day trips,” or “spend a week exploring one coastline,” a regional pass targeted at that footprint usually costs a third to half as much and covers everything you’ll actually ride. The tradeoff is that regional passes won’t get you back to Tokyo or Narita/Haneda — you’ll need a separate ticket, an overnight bus (see our guide to overnight buses as a Shinkansen alternative), or a one-way Shinkansen fare for the legs outside the pass area.

    Kansai Area Pass vs. Kansai Wide Area Pass

    JR West sells two passes that get confused constantly, and picking the wrong one is the single most common mistake travelers make here.

    The Kansai Area Pass is the city-hopping option: it covers local and rapid JR trains between Osaka, Kyoto, Kobe, Nara, and Himeji, plus the Haruka airport express (non-reserved seats) to and from Kansai Airport. As of 2025, adult prices run roughly ¥2,800 for 1 day, ¥4,600 for 2 days, ¥5,600 for 3 days, and ¥7,000 for 4 days. It does not cover the subway, Hankyu, Keihan, or Kintetsu lines — a real trap, since the fastest way to Nara or Fushimi Inari is often a private railway, not JR. Check current fares on JR West’s official site before buying, as these are revised periodically.

    The Kansai Wide Area Pass is a different animal: 5 consecutive days for about ¥12,000 (adult), and it includes reserved seats on limited expresses, not just local trains. That opens up day trips that the basic pass can’t touch — Himeji Castle, the San’in coast, Kii-Tanabe near the Kumano Kodo, and crucially, the Kinosaki Onsen hot spring town via the limited express Kounotori, which would otherwise cost close to ¥6,000 round trip on its own. If an onsen weekend is on your itinerary, this pass alone can justify itself.

    If you’re only moving around within Osaka or Kyoto proper on any given day, it’s worth comparing against just tapping an ICOCA IC card — for light travel days, pay-as-you-go can beat the pass price outright.

    Hokuriku Arch Pass: Tokyo, Nagoya, Osaka to Kanazawa

    Since the Hokuriku Shinkansen extended to Kanazawa and beyond, this region has become one of the easiest add-ons to a Kansai or Tokyo trip. The Hokuriku Arch Pass is a 7-day pass, priced around ¥24,500 for adults, and it’s genuinely built for tourists: it covers a round-trip Shinkansen journey from Tokyo, Nagoya, or Osaka into the Hokuriku region, plus unlimited non-reserved travel on the Hokuriku Shinkansen, the Shirasagi limited express (Nagoya–Kanazawa), and local JR lines around Toyama, Kanazawa, and Fukui for the full week. A handful of reserved-seat uses are included too. For a trip built around lacquerware, gold leaf, and porcelain shopping in Kanazawa — including Kutani ware — this is close to unbeatable value, since a single one-way Shinkansen fare from Tokyo to Kanazawa alone runs over ¥14,000.

    San’yo-San’in and Setouchi Passes for Western Honshu

    Two lesser-known JR West passes cover the stretch west of Osaka that most first-time visitors skip and most repeat visitors love.

    The San’yo-San’in Area Pass (7 consecutive days, around ¥19,000 adult) rides the San’yo Shinkansen down to Shimonoseki and loops back along the San’in coastal line through Tottori, Matsue, and Izumo — useful if sand dunes, Izumo Taisha, or the quieter, less-touristed coast appeal more than another temple crawl.

    The Setouchi Area Pass (4 consecutive days, roughly ¥10,000) is built around the Seto Inland Sea, linking Okayama, Hiroshima, Takamatsu, and Matsuyama, with some included ferry crossings. It’s a natural match if you’re extending into Shikoku for the Iya Valley or the 88 Temple Pilgrimage rather than doubling back through Kansai.

    JR Hokkaido Rail Pass

    Hokkaido’s distances are deceptive on a map — Sapporo to Kushiro or Wakkanai is a genuine half-day journey — and point-to-point limited express fares add up fast. The JR Hokkaido Rail Pass comes in several formats: a 3-day consecutive pass (around ¥24,000), a 4-day flexible pass usable on any 4 days within a 10-day window (around ¥26,000), a 5-day consecutive pass (around ¥28,000), and a 7-day consecutive pass (around ¥32,000), all adult ordinary-car prices. The flexible option is worth the small premium if your plan mixes train days with days spent hiking or soaking in onsen where you won’t touch a train at all. For genuinely remote corners like Shiretoko, pairing a shorter rail pass with a few days of rental car driving is usually more practical than trying to rail-pass the whole trip.

    Buying, activating, and common mistakes

    Most regional passes can be bought either as an exchange voucher before departure or directly at JR ticket offices and vending machines inside Japan — you’ll need your passport and a temporary visitor entry stamp either way, since these passes aren’t sold to residents. A few things trip people up repeatedly:

    • Assuming “JR” means “all trains.” Regional passes exclude subways and private railways (Hankyu, Keihan, Kintetsu, Nankai, Meitetsu). Budget separate fare or an IC card top-up for those legs.
    • Not checking the reserved-seat allowance. Some passes cap the number of reserved-seat bookings; once you hit the limit you’re back to non-reserved cars, which can mean standing during peak periods like Golden Week or Obon.
    • Buying a wide-area pass for a city-only trip. If you’re not leaving Osaka or Kyoto on most days, the cheaper area pass — or no pass at all — beats a wide-area pass every time.
    • Ignoring the calendar. Consecutive-day passes start counting the moment you activate them, so activate on the morning of your first travel day, not the day you land.

    As a rough budget guide: an ICOCA card alone is the budget option for single-city stays, an Area or Setouchi-style pass is solid mid-range value for a regional loop of 3–5 days, and the Kansai Wide Area or Hokuriku Arch passes are the splurge-worthy picks when they unlock an otherwise-expensive limited express or Shinkansen leg you were going to take anyway.

  • Doing Laundry in Japan: Coin Laundries, Hotels & What You’ll Need

    Doing Laundry in Japan: Coin Laundries, Hotels & What You’ll Need

    Photo by Jakub Stekla on Unsplash

    Pack light, wash as you go — it’s the single best strategy for a trip longer than a week in Japan, and the country makes it easy once you know the system. Coin laundries are everywhere, hotel options range from free washer-dryers to full valet service, and everything you need to do a load is sold at the nearest drugstore. Here’s exactly how it works, what it costs, and the mistakes that trip up first-timers.

    Coin Laundries (Koin Randorī): How They Work

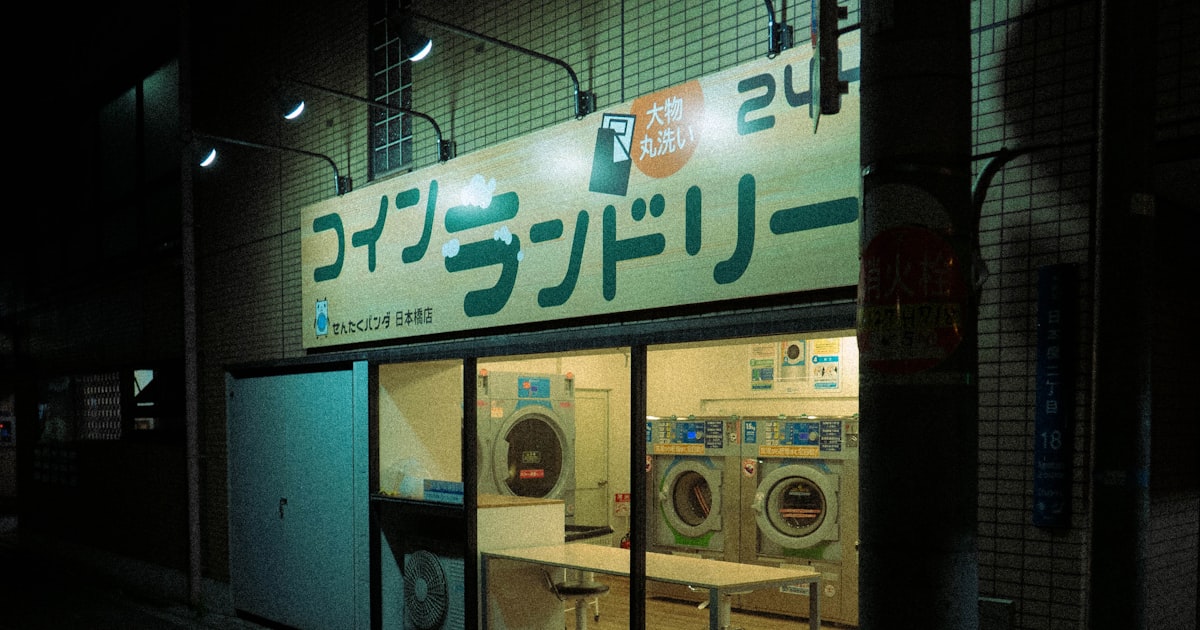
    A コインランドリー (koin randorī) is a self-service laundromat, and you’ll find one within a few blocks of almost any train station or residential neighborhood, even in small towns. They’re unstaffed, open 24 hours in most cases, and machines take coins (¥100 pieces are essential) or, increasingly, IC transit cards and PayPay.

    Typical pricing: a standard washer (7–8 kg) runs ¥300–500 per load, and larger washers (10–12 kg, useful for futon or several days’ worth of clothes) run ¥600–800. Dryers are coin-fed in blocks of time rather than one flat fee — expect ¥100 per 10–12 minutes, and Japanese dryers run cooler than American ones, so a full load of cotton clothing often needs 40–60 minutes (¥400–600) to get properly dry. Bring a stack of ¥100 coins; break larger bills at a convenience store first, since most machines don’t give change for anything bigger.

    Some coin laundries are stand-alone buildings; others are attached to a super sento bathhouse, so you can toss in a load, soak for 45 minutes, and come back to dry clothes — a genuinely efficient combo if you’re near one of the facilities in our guide to super sento. To find one, search “コインランドリー” or “laundromat” on Google Maps near your accommodation; the app’s Japanese-language listings are far more complete than English ones.

    Hotel and Ryokan Laundry Options

    Business hotel chains (Toyoko Inn, APA, Super Hotel, Route Inn) are the most laundry-friendly accommodation in Japan. Most have a small coin laundry room on one of the upper floors, priced the same as a standalone laundromat (¥200–300 wash, ¥100/10 min dry) and reserved for guests only, which means no wait and no lugging a bag down the street. It’s worth checking this when booking if laundry is a priority — it’s usually listed under hotel facilities.

    Mid-range and upscale hotels typically don’t have self-service machines but offer a send-out laundry service instead: you fill out a slip, bag your clothes, and get them back same-day or next-day, professionally washed and folded. This is priced per item, not per load — a T-shirt might be ¥300–500, a pair of trousers ¥500–800, and a jacket considerably more — so a full bag can easily run ¥3,000–5,000. It’s convenient but not a budget option; use it for a few key items rather than your whole wardrobe.

    Ryokan, including those in onsen towns like the ones covered in our Kinosaki Onsen guide, almost never have guest laundry machines, since stays are typically one or two nights and the whole point is not doing chores. If you’re settling into a ryokan town for several nights of onsen-hopping, do a load at a coin laundry before you arrive rather than trying to find one there.

    What to Buy (and What to Pack)

    Don’t bother bringing large bottles of detergent — it adds weight and you can buy everything you need cheaply once you land. Drugstores like Matsumoto Kiyoshi, Sundrug, and Daikoku, plus most supermarkets, sell single-use detergent pods (a box of 10–20 runs ¥300–500), travel-size bottles of liquid detergent, and mesh laundry bags (¥100–300) for delicates. Convenience stores (7-Eleven, Lawson, FamilyMart) carry a more limited selection but usually stock at least one small detergent option in a pinch.

    Two things worth packing from home: a small tube or capsule-style stain remover pen, since Japanese drugstores mostly stock spray-on stain treatments in Japanese-only packaging that’s hard to read on the fly, and a couple of flat rubber sink stoppers if you plan to hand-wash in your hotel sink — Japanese sinks don’t always have stoppers built in. A collapsible travel clothesline with suction hooks is genuinely useful, since drying space in hotel rooms is limited.

    Drying: The Part That Actually Trips People Up

    The biggest laundry mistake in Japan isn’t washing — it’s underestimating drying time. Japanese home and coin-laundry dryers are gentler and cooler than what many visitors are used to, so a load that would take 30 minutes elsewhere can take an hour. Budget the coins accordingly, or plan to dry heavier items (jeans, hoodies) overnight on a hotel towel rack or clothesline instead of paying for extra dryer cycles.

    Season matters a lot here. During Japan’s rainy season (tsuyu, roughly early June to mid-July) and the humid peak of summer — see our guide to Japan in summer — air-drying indoors barely works at all; humidity sits above 70% for weeks, and clothes hung in a room can take two days to dry and start to smell musty. In this window, pay for the full dryer cycle rather than trying to save a few hundred yen air-drying. In autumn and winter, indoor air is dry enough that hang-drying overnight works fine, and it’s the cheaper choice.

    Common Mistakes to Avoid

    Skipping detergent measurements: Japanese washers are usually smaller-capacity than what you’re used to, so a home-country “one scoop” habit can oversud a small drum. Follow the line markings on the machine or the pod instructions.

    Not carrying coins: many laundromats, especially older ones, only take ¥100 coins and don’t make change. Get a stack of ten to twenty coins in cash before you go, ideally from a convenience store register when you buy something small.

    Assuming ryokan or capsule hotels have machines: they usually don’t. If you’re island-hopping or doing a multi-day itinerary through somewhere remote like Yakushima or the Shikoku pilgrimage route, plan your laundry stop for the last city hotel before you head somewhere rural, not after.

    Budget vs. Splurge Summary

    Budget: self-service coin laundry, wash and dry yourself, roughly ¥700–1,200 total per load including coins and a pod of detergent. Mid-range: business hotel coin laundry room, similar pricing but with the convenience of doing it in-house overnight, useful if you’re arriving late after an overnight bus and want clean clothes waiting the next morning. Splurge: hotel valet service for a handful of items you want professionally pressed, at ¥300–800 per piece — reasonable for a business shirt before a meeting, expensive if you try to do your whole suitcase that way.

  • Overnight Buses in Japan: The Budget Alternative to the Shinkansen

    Overnight Buses in Japan: The Budget Alternative to the Shinkansen

    Photo by Shigeki Wakabayashi on Unsplash

    The Shinkansen gets all the glory, but it isn’t the only way to cross Japan while you sleep. Overnight highway buses (yakou bus) quietly move thousands of budget travelers, students, and commuting workers between cities every night, often for a third of the bullet train fare. If you’re trying to stretch a Japan budget without losing a full day to travel, the overnight bus deserves a serious look — with a few tradeoffs you should know about before you book.

    Why Take an Overnight Bus?

    The math is simple: an overnight bus does double duty as transport and accommodation. Instead of paying for a Shinkansen ticket during the day and a hotel room at night, you pay once for a seat that gets you to your destination early the next morning, ready to start sightseeing. On routes like Tokyo–Osaka or Tokyo–Kyoto, that can mean saving 10,000–15,000 yen per person compared to a bullet train ticket plus a night’s lodging. It’s especially useful for travelers doing a loop through the Kansai region, heading to onsen towns like Kinosaki Onsen, or connecting to gateway cities like Matsumoto before continuing into the Japan Alps.

    How Much Do Overnight Buses Really Cost?

    Prices swing widely based on seat type, how far ahead you book, and the season. On the busiest corridor, Tokyo–Osaka, expect roughly:

    • Budget 4-across seats: 3,000–6,000 yen one way
    • 3-across or reclining seats: 6,000–9,000 yen
    • Premium seats (privacy curtains, deep recline, footrests — Willer Express’s “Cocoon” or similar):
    • 10,000–15,000 yen

    Compare that to a reserved-seat Nozomi Shinkansen on the same route, which runs around 14,000–15,000 yen one way and takes about 2.5 hours. The bus takes 8–9 hours, but you’re asleep for most of it, and you arrive with a full day ahead of you rather than a half-day already spent on lodging costs. Longer routes scale accordingly — Tokyo to Hiroshima, for instance, runs roughly 6,000–14,000 yen and takes about 11–12 hours. As with air travel, prices rise the closer you book to departure, and they spike hard around Golden Week (late April–early May), Obon (mid-August), and New Year, when seats can sell out weeks in advance and prices can more than double.

    The Main Operators and How to Book

    Willer Express is the most foreign-visitor-friendly operator, with an English-language booking site, clear seat diagrams, and its distinctive curtained “Cocoon” seats. JR Bus (operating as JR Bus Kanto, JR Tokai Bus, and regional JR affiliates) runs reliable “Dream” sleeper coach routes, particularly Tokyo–Osaka and Tokyo–Kyoto, often departing from Tokyo Station or Shinjuku. Regional players like Kansai Bus, Orion Tour, and Seibu Bus fill in specific routes at lower prices but with less English support. Comparison sites such as Kosoku Bus and Bus Hikaku let you filter by price, seat type, and departure time across multiple operators at once — useful since the same route can vary by several thousand yen between companies on the same night. Payment is usually by credit card online, though some sites also allow konbini (convenience store) payment.

    What to Expect Onboard

    Most Tokyo departures leave from Busta Shinjuku, the large bus terminal built directly above Shinjuku Station’s south exit — it’s well signed but can be confusing on a first visit, so arrive at least 20–30 minutes early to find your gate. Buses typically depart between 22:00 and 23:30 and arrive at their destination between 5:00 and 7:00 the next morning, which means you’ll often be standing outside a train station before anything is open. It’s worth planning your first stop accordingly — many travelers head straight to a 24-hour manga café, an early-opening bathhouse, or a station coin locker to store luggage until sights open.

    Seats range from cramped 4-across rows (fine for short hops, tough for a full night if you’re tall) to individual reclining seats with curtains, USB ports, and blankets. Not every bus has an onboard toilet — check before booking if that matters to you, since rest stops at highway service areas (SA/PA) happen roughly every 2–3 hours and are your main chance to use a real restroom, buy a snack, or stretch. Under-bus luggage storage is standard and included in the fare, typically one or two bags per person with generous size limits, unlike some overseas budget carriers that charge for hold luggage. Many operators also offer women-only sections or entire women-only buses, which is worth requesting if it makes you more comfortable.

    Best Routes and Timing

    Overnight buses make the most sense on routes of roughly 6–12 hours by road — long enough that you’d otherwise burn a travel day, short enough that you actually get decent sleep. Tokyo–Osaka/Kyoto, Tokyo–Hiroshima, Tokyo–Sendai, and Tokyo–Kanazawa are the classic corridors, along with connections into Shikoku for travelers combining the Iya Valley and the 88 Temple Pilgrimage with a Tokyo start or end point. Summer and early autumn tend to run smoothly, but winter buses on mountain routes can face delays for snow chains, particularly anything crossing the Japan Alps or heading into Tohoku — build in a buffer day if your onward plans are tight. Once you arrive, remember that IC cards work seamlessly for local transit at your destination; see our guide to IC cards beyond Tokyo for which card to load up before you hop off the bus.

    Common Mistakes to Avoid

    The most common regret isn’t the price — it’s comfort. Skipping earplugs, an eye mask, and a neck pillow makes a real difference on a bus with dozens of strangers, ceiling lights, and highway noise. Booking the cheapest 4-across seat for a route over 8 hours is a mistake if you’re over about 175cm tall; pay the extra 2,000–4,000 yen for a 3-across or independent seat. Don’t assume you can eat a proper meal at rest stops — they’re geared toward quick snacks and drinks, not sit-down food, so grab a bento or onigiri from a convenience store before boarding. Finally, don’t underestimate how early and disorienting a 5:30am arrival can be; check that your first destination — a hotel, sento, or attraction — is actually open before you plan your morning around it.

    Budget, Mid-Range, and Splurge Picks

    For pure budget travel, a standard 4-across seat booked a few weeks ahead is hard to beat at 3,000–5,000 yen. For most travelers, a 3-across reclining seat in the 6,000–9,000 yen range hits the sweet spot of comfort and price. If you want the closest thing to actual sleep, splurge on a curtained Cocoon-style or independent seat at 10,000–15,000 yen — still cheaper than a Shinkansen ticket, with a proper night’s rest thrown in. And if your itinerary calls for real flexibility — multiple stops, rural areas, or odd-hour departures — it may be worth comparing against renting a car in Japan instead, particularly for road-trip-style routes where a bus schedule would box you in.

  • Renting a Car in Japan: License Rules, Costs & Best Road Trips

    Renting a Car in Japan: License Rules, Costs & Best Road Trips

    Photo by Kishor on Unsplash

    Japan’s trains are famously good, which is exactly why most visitors never consider a rental car — and exactly why they miss the parts of Japan that trains don’t reach. The Iya Valley’s vine bridges, Noto Peninsula’s coastline, and back roads through the Japan Alps open up dramatically once you’re driving. But renting a car in Japan has a few rules that trip up first-timers, starting with the one document almost everyone forgets.

    Do You Need an International Driving Permit?

    Yes — and you must get it before you land. Japan recognizes the 1949 Geneva Convention International Driving Permit (IDP), which you apply for through your home country’s motoring authority (AAA in the US, CAA in Canada, the AA or RAC in the UK, and so on). It typically costs $20–35 USD equivalent and is issued same-day, valid for one year. Japan cannot issue one to you on arrival, and airport rental counters will turn you away without it.

    There’s one major exception: drivers licensed in France, Germany, Switzerland, Belgium, Monaco, and Taiwan aren’t part of the Geneva Convention system. Instead, you need an official Japanese translation of your home license, obtainable from the Japan Automobile Federation (JAF) or your country’s consulate in Japan. Everyone else — US, UK, Canada, Australia, most of Europe, Southeast Asia — needs the IDP. Bring your physical home license too; the IDP alone isn’t valid without it.

    Most companies require drivers to be at least 18, and some (particularly for larger vehicles or campervans) want at least one year of driving history on your home license.

    Choosing a Rental Company and What It Costs

    The big national chains — Toyota Rent a Car, Nippon Rent-A-Car, Times Car Rental, Orix Rent-A-Car, and Nissan Rent-A-Car — all have English-language websites and counters at major airports and train stations, which makes them the easiest starting point. Prices for a 24-hour rental typically run:

    • Budget: Kei car (yellow-plate minicar, seats 4) — around ¥5,000–6,500/day. Cheap and easy to park, but underpowered for mountain passes or highway merges with luggage aboard.
    • Mid-range: Compact sedan or hatchback (Toyota Yaris, Honda Fit class) — ¥6,500–9,500/day.
    • Splurge: SUV or minivan for groups, or a premium model — ¥12,000–20,000+/day.

    On top of the base rate, budget for Collision Damage Waiver insurance (¥1,000–2,000/day, often bundled in but confirm) and the Non-Operation Charge waiver (NOC, roughly ¥1,000–1,500/day) — without the NOC waiver, you’re liable for the company’s lost rental income if the car is damaged, even with CDW covering repairs. Renting an ETC toll card costs a flat ¥300–330. If you’re picking up in one city and dropping off in another, expect a one-way fee of ¥10,000–30,000+ depending on distance.

    Tolls, Gas, and Parking: The Hidden Costs

    Japan’s expressways are toll roads, and the tolls add up fast — Tokyo to Nagano runs roughly ¥5,000 one-way, for example. Get the ETC card and use the dedicated ETC lanes at tollgates; it deducts automatically and saves you from fumbling for cash at 80 km/h. Regular gasoline (レギュラー) runs around ¥170–185 per liter as of 2026; rental cars are returned with a full tank, so budget the equivalent of a top-up right before drop-off, or you’ll be charged a premium rate for the difference.

    Parking is the cost visitors underestimate most. Central Tokyo, Kyoto, and Osaka charge ¥300–500 per 30 minutes at coin parking lots (coordinated by locking wheel-lock systems), and can hit ¥2,000–3,000 for a full day even outside the very center. If your itinerary is mostly cities like Kyoto or Osaka, a car is often more hassle than help — save it for the legs where public transit thins out, and lean on regional IC cards for the city portions.

    Rules of the Road

    Japan drives on the left, with the steering wheel on the right side of the car. Expressway speed limits are generally 80–100 km/h, and city/rural roads 30–60 km/h — enforced strictly, with speed cameras common. Drink driving has a zero-tolerance policy with serious penalties even at low blood alcohol levels; if you’re planning an onsen town stop with dinner and drinks, don’t plan to drive afterward.

    Rental car navigation systems are usually in Japanese by default; ask staff to switch the language, or simply enter your destination’s phone number or a MAPCODE, which the nav systems handle more reliably than romanized addresses. Many rentals now include CarPlay/Android Auto, letting you run Google Maps from your phone instead. If you’re heading into snow country (Tohoku, Hokkaido, the Japan Alps) between December and March, confirm the car comes with studless winter tires — reputable agencies swap them automatically in season, but it’s worth asking outright.

    Common Mistakes to Avoid

    • Arriving without the IDP. This is the single most common reason travelers get turned away — and it can’t be fixed once you’re in Japan.
    • Renting a car for a city-heavy itinerary. If you’re mostly hopping between Tokyo, Kyoto, and Osaka, trains and buses (see our guide to overnight buses in Japan) are cheaper and less stressful than parking fees and tolls.
    • Skipping the pre-rental damage walkaround. Photograph every scratch with the staff present before driving off.
    • Ignoring narrow rural roads. Many countryside roads are one-lane with passing bays; go slowly and be ready to reverse.
    • Not checking earthquake and typhoon contingencies. If you’re driving through rural or coastal areas, it’s worth a quick read of our earthquake and disaster prep guide before you set off.

    Best Road Trips by Rental Car

    A few regions genuinely reward having your own wheels:

    • Shikoku: The smallest of Japan’s main islands has patchy rail coverage but spectacular driving — the vine bridges and gorges of the Iya Valley, the Naruto whirlpools, and stretches of the 88 Temple Pilgrimage route are all far easier by car. See our full Shikoku travel guide.
    • The Japan Alps: Base yourself in Matsumoto and drive into the mountains for alpine scenery that’s a real slog by bus, especially outside peak season.
    • Yakushima and Sado Island: Both islands are compact enough to circle in a day or two by car, and both have limited public transit once you’re off the main port town — see our guides to Yakushima’s ancient forests and Sado Island.

    Best timing for road trips is spring (April–May) and autumn (October–November), when mountain passes are clear and scenery is at its best; midsummer is fine but hot and humid for stops outside the AC, and winter driving in the Alps or Tohoku requires real snow-driving confidence even with the right tires. Whatever the season, book your car at least a few weeks ahead for the busiest windows — Golden Week (late April–early May), Obon (mid-August), and New Year — when fleets sell out at popular pickup points.

  • Kappabashi Kitchen Town: Tokyo’s Restaurant Supply Street and What to Buy

    Kappabashi Kitchen Town: Tokyo’s Restaurant Supply Street and What to Buy

    Photo by Louie Martinez on Unsplash

    Between Asakusa and Ueno sits a street most tourists walk past without noticing it’s there — until they spot a giant golden chef’s head grinning down from a rooftop. That’s Kappabashi Dogu Suji, better known as Kappabashi Kitchen Town, a roughly 800-meter strip of shops that has supplied Tokyo’s restaurants, hotels, and food stalls with everything from sushi knives to plastic tempura since the early 20th century. It’s not a tourist market dressed up for visitors — it’s a working trade street where chefs still stock their kitchens — which is exactly why it’s worth a couple of hours if you care about Japanese cooking, design, or just want souvenirs that aren’t keychains.

    What Kappabashi actually is

    Kappabashi runs along Kappabashi Dogu Suji between Asakusa-dori and Kototoi-dori, lined with roughly 150 specialist shops. Each one tends to sell exactly one category of thing: a knife shop sells only knives, a ceramics shop only tableware, a signage shop only noren curtains and lanterns. This specialization is the whole appeal — instead of a general souvenir shop with a shelf of “Japanese knives,” you get a shop where the owner has sharpened knives for 40 years and will talk you through blade steel for ten minutes if you let them.

    The street’s unofficial mascot is the enormous white chef’s head statue on top of the Niimi Corporation building near the Kototoi-dori end — it’s the easiest landmark to navigate by and a popular photo stop.

    How to get there

    The closest station is Tawaramachi on the Ginza Line, about a 5-7 minute walk to the start of the shopping street. It’s also an easy 15-20 minute walk from Asakusa Station (handy to combine with a visit to Senso-ji) or from Ueno Station. If you’re staying near Ueno or Asakusa, there’s no need to bother with buses or taxis — walking is simplest, and it’s a good way to pass through quieter backstreets on the way. If you’re basing yourself further out and traveling around Japan by long-distance bus rather than the Shinkansen, see our guide to overnight buses in Japan for budget options into Tokyo.

    Opening hours and best timing

    Most shops open around 9:00-10:00am and close between 5:00 and 6:00pm. A meaningful number of shops close on Sundays, since this is a trade street built around restaurant supply chains rather than weekend shopping — Tuesday through Saturday mornings are the most reliable time to find everything open. Arrive by early afternoon to have real browsing time before shutters start coming down.

    If you can time your visit for early-to-mid October, look out for the annual Kappabashi Dogu Matsuri (tool festival), when the street strings up decorations, some shops run discounts, and the atmosphere is livelier than usual. Outside of that, any season works — this is an indoor, shop-to-shop street, so it’s a good rainy-day or extreme-heat option compared to an outdoor market. If you’re visiting in the muggier months, our guide to Japan in summer has tips on managing the heat between stops.

    What to buy

    Knives. This is Kappabashi’s headline category. Kama-asa Shoten is one of the best-known shops on the street, with cutlery running from workaday kitchen knives to serious hand-forged pieces, plus engraving service for gifts. Expect roughly ¥3,000-8,000 for a solid entry-level Japanese kitchen knife (a santoku or nakiri is a good all-rounder for home cooks), ¥15,000-50,000 for professional-grade steel, and beyond ¥50,000 for damascus or custom-forged blades. Bring your passport — many shops offer tax-free purchases on top of ¥5,000, and reputable shops will wrap blades for flight travel, but always pack knives in checked luggage, never carry-on.

    Plastic food samples (sampuru). Kappabashi is the historic center of Japan’s fake-food industry, the hyper-realistic plastic dishes displayed in restaurant windows nationwide. Shops like Maizuru sell everything from a single ¥500-1,500 sushi-piece keychain or magnet to full plates of “tempura” or “ramen” for ¥3,000-15,000, and some stores let you try a hands-on workshop to make your own tempura or lettuce piece for around ¥2,000-4,000 — a genuinely fun, kid-friendly activity.

    Ceramics and tableware. Donburi bowls, sake cups, plates, and serving dishes in both mass-produced and handmade styles, often cheaper than equivalent pieces sold as souvenirs elsewhere in Tokyo. If you want to go deeper into Japanese ceramics at the source rather than buying retail, our guide to Arita and Imari’s porcelain towns covers the production regions themselves.

    Bento boxes, tools, and small kitchen gear. Lacquered and plastic bento boxes, rice paddles, graters, molds, and copper tamagoyaki pans are all here at trade prices — a nice pairing if you’ve gotten interested in Japan’s bento culture after reading about station bento (ekiben) on the rails.

    Noren, lanterns, and shop signage. Fabric curtains and paper lanterns in traditional patterns, sold both as functional shop items and as decor souvenirs, typically ¥2,000-8,000 for a noren depending on size and fabric.

    Budget, mid-range, and splurge picks

    • Budget: a food-sample keychain or magnet (¥500-1,500), a basic paring or utility knife (¥2,000-4,000), or a single ceramic rice bowl (¥800-2,000).
    • Mid-range: a quality santoku knife (¥8,000-20,000), a copper tamagoyaki pan (¥5,000-10,000), or a full plastic food display piece (¥5,000-10,000).
    • Splurge: a hand-forged, custom-engraved chef’s knife from a specialist shop (¥30,000-80,000+), built to last decades with proper care.

    Common mistakes to avoid

    Don’t visit on a Sunday expecting everything open — you’ll find some shops shuttered and miss the specialists you came for. Don’t assume every knife shop offers tax-free processing or sharpening on the spot; ask before you commit, since policies vary shop to shop. Don’t pack a purchased knife in carry-on luggage — it will be confiscated at security, so plan to check your bag or ship the knife home separately if you’re traveling on to another city by air. And don’t rush through in twenty minutes — the value here is in the specialist shops, and a fast walk-through will just look like a slightly odd hardware street.

    Kappabashi pairs naturally with a wider wander through old-town Tokyo: it sits close to the low-rise, backstreet character of Yanaka’s shitamachi neighborhood, and if you’ve shopped a kitchen street like this before, it’s a fun comparison to Kyoto’s food-focused Nishiki Market — one sells the tools, the other sells what you’d cook with them.

  • Overnight Buses in Japan: The Budget Alternative to the Shinkansen

    Overnight Buses in Japan: The Budget Alternative to the Shinkansen

    Photo by Shigeki Wakabayashi on Unsplash

    The Shinkansen gets all the attention, but Japan’s overnight highway buses (夜行バス, yakō basu) are how a huge number of students, backpackers, and budget-minded locals actually get around the country. For a fraction of the bullet train fare, you can cover 500-1,000 km while you sleep, waking up in a new city with a full day ahead of you and a hotel night saved. They’re not for everyone, but for the right traveler and the right route, they’re one of the best value moves in Japan.

    Why Take a Bus Instead of the Shinkansen

    The math is simple: a Tokyo-Osaka overnight bus runs roughly ¥3,500-¥9,000 depending on the operator, season, and seat type, versus about ¥14,000-14,720 for an unreserved Nozomi seat one way. On longer routes the gap widens further — Tokyo to Hiroshima by bus is typically ¥8,000-¥13,000 against a Shinkansen fare north of ¥19,000. Because the bus departs late evening and arrives early morning, you also skip a night of hotel costs, which is often the bigger saving. The trade-off is time and comfort: a Tokyo-Osaka bus takes 7-9 hours versus 2.5 by rail, and you’re sitting (or semi-reclining) the whole way rather than lying flat.

    How Much You’ll Actually Save

    Pricing on Japanese overnight buses moves with demand, much like airline tickets, so booking early matters. As a rough guide: standard 4-row seating (yonretsu) on routes like Tokyo-Kyoto or Tokyo-Osaka starts around ¥3,000-¥5,000 on off-peak weeknights and climbs to ¥8,000-¥10,000 on Friday and Saturday departures. Premium 3-row or independent-seat buses run ¥8,000-¥15,000. On the busiest travel weeks — Golden Week (April 29-May 5), Obon (August 13-16), and New Year (December 28-January 3) — prices spike sharply and popular departures sell out weeks in advance, so the discount over the Shinkansen shrinks or disappears entirely. Outside those windows, a bus booked 2-3 weeks ahead is almost always your cheapest way to cover long distances.

    Choosing Your Seat: Bus Classes Explained

    Not all overnight buses are equal, and the seat type matters more than the operator name on most routes.

    • 4-row (yonretsu): The cheapest option, four seats across with a center aisle, similar to a standard coach seat with a bit more recline. Fine for shorter overnight hops (5-6 hours) but tiring on longer ones.
    • 3-row (sanretsu): Three seats across, meaningfully wider with deeper recline and usually a curtain or partition for privacy. This is the sweet spot for most travelers — a noticeable comfort jump for maybe ¥2,000-¥4,000 more.
    • Independent/pod seats: High-end buses (Willer Express’s Cocoon and Relax seats, JR Bus’s Dream Sleeper) offer individual shell-like seats or even flat-ish sleeping pods with privacy curtains, USB ports, and reading lights. Expect ¥12,000-¥20,000+, which starts to approach Shinkansen pricing but still beats it on very long routes while saving a hotel night.

    Booking an Overnight Bus

    The two biggest platforms for foreign travelers are Willer Express (willerexpress.com), which has a full English booking site and issues an e-ticket you show as a QR code, and Kosoku Bus / Bus Hikaku (aggregator sites comparing multiple operators, though largely Japanese-language). JR Bus (JR each region’s bus subsidiary) also runs reliable overnight routes bookable via their Japanese sites or at any JR ticket counter. For English-speakers, Willer is the easiest starting point — search your route and date, filter by seat class, and pay by credit card. Buses depart from major terminals: in Tokyo, that’s mostly the Shinjuku Expressway Bus Terminal (Busta Shinjuku), directly above Shinjuku Station’s south exit; in Osaka, it’s the Osaka Umeda Bus Terminal or Namba OCAT. Counters at these terminals are typically staffed from early morning until the last departure, often past midnight, and have coin lockers if you need to store bags beforehand.

    What to Expect on Board

    Boarding usually happens 15-20 minutes before departure, and drivers are strict about on-time boarding — arrive at your gate number with margin. Most buses have onboard toilets, though budget services on shorter routes sometimes don’t, relying instead on one or two rest-area stops (called SA or PA) roughly every 2-3 hours, where you can use the bathroom, buy a drink, or grab a snack from vending machines. Lights go off and the driver announces quiet hours shortly after departure — talking, phone calls, and even phone screen brightness are expected to be kept to a minimum out of consideration for sleeping passengers. Bring an eye mask, a neck pillow, and a light layer, since air conditioning can run cold. Buses typically arrive at their destination terminal between 5:30 and 7:30 AM, which is earlier than most hotel check-in times — plan to store luggage in a station locker and start your day with breakfast or a visit to a public bath before checking in.

    Best Routes and When to Use Them

    Overnight buses shine most on routes where the Shinkansen either doesn’t reach directly or costs disproportionately more for the distance. Heading to the Japan Alps, an overnight bus from Shinjuku to Matsumoto lets hikers arrive early enough to head straight into the mountains — worth pairing with our guide to Matsumoto, Castle, Soba & Gateway to the Japan Alps. For Shikoku, where Shinkansen coverage is limited, overnight buses from Tokyo to Takamatsu or Tokushima are a genuinely practical way in — see our Shikoku Travel Guide for what to do once you arrive. Kansai-to-Kyushu overnight buses, such as Osaka to Beppu, are another strong value route for onsen-bound travelers — pair it with our Beppu & Yufuin guide. Once you land at your destination, remember that regional IC cards work differently from Tokyo’s Suica/Pasmo network for local transit — our guide to IC cards beyond Tokyo covers ICOCA, SUGOCA, and the rest.

    Common Mistakes to Avoid

    The most frequent regret travelers report is booking the cheapest 4-row seat for a route over 7-8 hours and arriving too exhausted to enjoy the first day — pay the extra ¥2,000-¥3,000 for a 3-row seat on longer hauls. Second, don’t assume every bus has a toilet; check the listing before booking if that matters to you. Third, avoid booking overnight buses during Obon, New Year, or Golden Week unless you’ve reserved weeks ahead, since both prices and availability move fast. Finally, note that most overnight bus tickets are non-refundable or carry steep cancellation fees close to departure, unlike a flexible Shinkansen reserved ticket, so only book once your plans are firm.

    Used strategically — on the routes where the price and time savings are real, and with a seat class that matches how many hours you’ll actually be on board — overnight buses are one of the best budget tools for covering ground in Japan without burning through your travel fund on rail passes alone.

  • Yanaka: Tokyo’s Old Shitamachi Neighborhood — Cats, Senbei & Backstreets

    Yanaka: Tokyo’s Old Shitamachi Neighborhood — Cats, Senbei & Backstreets

    Photo by Y Y on Unsplash

    Why Yanaka Feels Different From the Rest of Tokyo

    Most of central Tokyo was flattened twice in the 20th century — first by the 1923 Great Kanto Earthquake, then by the firebombing raids of 1945. Yanaka, along with its neighbors Nezu and Sendagi (together nicknamed “Yanesen”), largely escaped both. The result is a district of narrow lanes, wooden houses, small temples, and family-run shops that still operate the way they did a century ago. There’s no single blockbuster attraction here — no castle, no five-story pagoda dominating the skyline — which is exactly why it rewards slow walking. You come to Yanaka to wander, not to check off a landmark.

    It’s also become known, somewhat unofficially, as Tokyo’s cat neighborhood. Between the old cemetery, the low rooftops, and a population of residents who feed and tolerate them, stray and semi-stray cats have become a genuine local identity, showing up on shop signs, snacks, and souvenirs throughout the area.

    Getting There and When to Go

    The easiest approach is Nippori Station (西日暮里/日暮里), reachable directly on the JR Yamanote Line and JR Keihin-Tohoku Line, about 20 minutes from Tokyo Station and 5 minutes from Ueno. Nippori is also a stop on the Keisei Line, so travelers arriving via the Keisei Skyliner from Narita Airport can detour into Yanaka with luggage in tow before checking into a hotel, though coin lockers at the station make that easier. From Nippori’s north exit, it’s about a 5-minute walk to the start of the main shopping street. Sendagi Station on the Chiyoda Line is a second option if you’re coming from Omotesando or Otemachi. If you haven’t used Tokyo’s rail system before, it’s worth reading up on how to get around Tokyo before you go, since Yanaka involves a mix of JR and subway lines depending on where you’re staying.

    Go on a weekday morning if you can — Yanaka Ginza gets genuinely crowded on weekend afternoons, with tour groups filling the narrow street. Weekday visits between 10:00 and noon are far more pleasant. Late afternoon, around 16:00–17:00, is the other sweet spot: this is when the neighborhood’s famous sunset staircase earns its name. Cherry blossom season (typically late March to early April) is the single busiest period, since Yanaka Cemetery is one of Tokyo’s best low-key hanami spots — see our guide to Japan in spring for bloom timing if you’re planning around it.

    Yanaka Ginza: The Sunset Stairs to Senbei and Cat Everything

    The heart of the district is Yanaka Ginza, a roughly 170-meter pedestrian shopping street lined with about 70 small shops. You reach it by descending Yuyake Dandan (“Sunset Steps”), a short staircase that frames a postcard view down into the street, especially striking around golden hour. Most shops here open around 10:00 and close by 19:00, though hours vary by owner and a fair number close one day a week (often Wednesday), so don’t build your whole visit around one specific store.

    Senbei (rice crackers) are the street’s signature snack. Several old-fashioned senbei shops grill crackers to order right in the doorway, filling the street with the smell of soy sauce and toasted rice; expect to pay roughly ¥150–400 depending on size and flavor, sold loose by the piece or in small gift bags. For something sweeter, look for Yanaka Shippoya, known for cat-tail-shaped imagawayaki (a thick, pan-fried cake similar to dorayaki) for around ¥250–300 each — it’s one of the more photographed food stalls on the street, but the queue rarely takes more than a few minutes on weekdays. If you want a broader primer on Japanese snack culture before you go, our street food guide covers what else to look for on streets like this one.

    Yanaka Cemetery: Cherry Blossoms and Quiet Backstreets

    A five-minute walk from Yanaka Ginza brings you to Yanaka Reien, a sprawling public cemetery that doubles as one of the area’s most atmospheric public spaces. It’s free to enter and open all day, though it’s a working cemetery, so keep voices down and don’t treat gravesites as photo props. The central cherry-tree-lined avenue is a popular but far less crowded alternative to Ueno Park during hanami season, and the grounds are pleasant to walk through even outside bloom, since the old stone lanterns, moss-covered graves, and resident cats give it a genuinely calm, almost rural feel in the middle of the city. The last Tokugawa shogun, Yoshinobu, is buried here, along with several other notable historical figures. Tennoji Temple, at the edge of the cemetery, has a large seated bronze Buddha dating to the early 1700s that survived the era’s disasters largely intact.

    Beyond the Main Street: Temples, Galleries and Old Kissaten

    Yanaka rewards ducking off the main street more than almost anywhere else in Tokyo. Within a 10–15 minute walk of Yanaka Ginza you’ll find dozens of small temples (the area has over 70), quiet residential lanes, and a handful of small museums and galleries worth the detour:

    Asakura Museum of Sculpture, the former home and studio of sculptor Fumio Asakura, is built around a striking interior garden courtyard and costs around ¥500 to enter; it’s typically closed Mondays and Thursdays, so check before you walk over. SCAI The Bathhouse is a contemporary art gallery installed in a converted 200-year-old sento (public bathhouse) — entry is usually free, and it’s a good stop if you’re already interested in bathhouse culture; for context on how sento differ from onsen, see our guide to super sento. For a coffee break, Kayaba Coffee occupies a beautifully preserved early-1900s wooden building and serves coffee for around ¥600–700; it gets busy on weekends, so aim for a weekday visit.

    What to Buy: Senbei, Cat Goods and Paper Crafts

    Beyond senbei, Yanaka’s other classic purchase is washi (traditional paper) goods from Isetatsu, a chiyogami paper shop founded in 1864 that’s still making and selling block-printed paper crafts — small items like paper boxes, fans, and origami sheets start around ¥300–500, with larger boxed sets running into the thousands of yen. If you’re building out a broader interest in traditional Japanese sweets while you’re in the area, the shops along Yanaka Ginza and Nezu sell wagashi alongside the senbei; our beginner’s guide to wagashi is useful background if you want to know what you’re looking at before buying. Cat-themed goods — magnets, tote bags, small ceramic figures — are sold from souvenir stalls throughout the street, generally in the ¥300–1,500 range depending on the item; quality varies a lot stall to stall, so it’s worth browsing two or three before buying rather than grabbing the first cute thing you see.

    Common Mistakes and Practical Tips

    The most common mistake is treating Yanaka as a 30-minute stop between other Tokyo sights. The neighborhood is small on a map but slow in practice — the backstreets, not the main shopping street, are the actual point, and rushing through Yanaka Ginza alone will make it feel like a slightly quainter version of any other Tokyo shopping street. Budget at least two hours, and ideally a half day if you want to include the cemetery and a museum.

    Second, don’t assume every shop takes cards — many of the older senbei and craft shops in Yanaka are cash-only or IC-card-only (Suica/Pasmo), so carry some cash. Third, if you’re visiting specifically for cats, know that they’re wild or semi-feral animals living around a cemetery and temple grounds, not a curated attraction — feeding them, especially without knowing local rules, is discouraged, and sightings can’t be guaranteed on any given day. Finally, avoid weekend early afternoons if you can; the single narrow street of Yanaka Ginza becomes a slow shuffle of tour groups from around midday Saturday and Sunday, which undercuts exactly the unhurried atmosphere that makes the area worth visiting in the first place.

  • IC Cards Beyond Tokyo: ICOCA, Manaca, SUGOCA & Regional Transit Explained

    IC Cards Beyond Tokyo: ICOCA, Manaca, SUGOCA & Regional Transit Explained

    If you’ve read our Suica vs Pasmo guide, you already know Tokyo’s two IC cards work almost identically and are basically interchangeable for tourists. What that guide doesn’t cover is what happens once you leave the Kanto region — because Japan’s IC card system is actually a patchwork of roughly ten regional cards, and knowing how they interact saves real confusion once you’re traveling beyond Tokyo.

    The good news: national interoperability

    Since 2013, the ten major IC cards — Suica and Pasmo (Kanto), ICOCA (Kansai/JR West), TOICA (Chubu/JR Central), Manaca (Nagoya area), PiTaPa (Kansai private railways), Kitaca (Hokkaido/JR Hokkaido), SUGOCA (Kyushu/JR Kyushu), nimoca and Hayakaken (Fukuoka) — can all be used interchangeably on trains and buses across almost the entire country. In practice, this means a Suica card bought at Narita Airport works fine on the subway in Osaka, Fukuoka, or Sapporo. For a tourist, this is the single most important fact: you generally only need to buy one card, ever.

    Where it gets complicated

    • A small number of local/rural lines opt out of the national system, particularly some regional third-sector railways and small city bus networks in less-touristed areas — always check signage or ask if you’re heading somewhere remote.
    • PiTaPa is a postpaid card tied to a Japanese bank account, so tourists can’t get one directly, but PiTaPa readers still accept Suica, ICOCA, and the other prepaid cards without issue.
    • Vending machines and konbini payments using an IC card work nationwide the same way regardless of which regional card you’re holding — this part is fully seamless.
    • Card issuance has occasionally been limited due to chip shortages (Suica notably suspended sales of new physical cards for a period), so check current availability before you fly, or plan to use a mobile IC card via Apple Pay/Google Pay instead, which sidesteps physical stock issues entirely.

    Should you buy a card in Tokyo, or wait?

    Buy it wherever you land first — there’s no advantage to waiting. A Suica or Pasmo bought at Narita or Haneda on arrival, per our Narita and Haneda guide, works the rest of your trip regardless of which regions you visit afterward. If your trip starts in Osaka or Fukuoka instead, an ICOCA or SUGOCA bought there works just as well everywhere else, Tokyo included. The names differ by region mostly for historical and corporate reasons (each card is issued by a different regional JR company or transit operator), not because of any functional difference that matters to a visitor.

    Mobile IC cards

    If your phone supports it, adding a Suica (or, in some cases, another regional card) to Apple Pay or Google Pay lets you top up with a credit card instantly, skip physical card queues, and avoid the risk of losing a physical card with your balance on it. This has become the recommended option for many travelers with a compatible iPhone or Android device, especially given past physical card shortages — though Apple Pay’s Suica implementation currently works more reliably for foreign-issued credit cards than some Android equivalents, so test it before you fly if you’re relying on it.

    Refunds and leftover balance

    • Physical cards can be refunded at major stations before you leave the region that issued them — an ICOCA is refunded at a JR West window, a Suica at a JR East window, and so on; a small non-refundable service fee is usually deducted.
    • Simpler option: spend down the balance on your last day using konbini purchases or vending machines rather than dealing with a refund queue, since the amounts left over are typically small.
    • Mobile IC cards tied to Apple Pay or Google Pay don’t need a physical refund — just stop topping up, and the balance simply sits unused on your phone for a future trip.

    Quick reference by region

    • Tokyo/Kanto — Suica or Pasmo
    • Kansai (Osaka, Kyoto, Kobe) — ICOCA
    • Nagoya/Chubu — TOICA or Manaca
    • Fukuoka/Kyushu — SUGOCA, nimoca, or Hayakaken
    • Hokkaido — Kitaca
    • All of the above work on trains, subways, and most buses in every region listed — pick whichever is easiest to buy where your trip starts.

    What IC cards don’t cover

    • Shinkansen reserved seats — IC cards work for unreserved shinkansen seating on some routes when linked to an online booking system (like JR East’s Suica-linked Shinkansen e-ticket service), but many long-distance and reserved bookings still require a separate paper or app-based ticket; don’t assume tapping your card works everywhere.
    • Overnight and sleeper trains, most long-distance highway buses, and domestic flights all require separate booking regardless of which IC card you’re carrying.
    • Some rural single-car “one-man” trains use a boarding-ticket system even where IC readers exist, requiring you to take a numbered ticket and pay the driver on exit — pay attention to boarding instructions in unfamiliar rural areas rather than assuming a simple tap-in, tap-out process.

    Bottom line

    Don’t overthink regional IC cards. Buy one card at your first airport or major station, use it everywhere from Tokyo’s trains to a Sapporo subway to a Kagoshima bus, and only worry about a refund if the leftover balance is more than pocket change. The regional names are a historical artifact of Japan’s privatized rail system, not a puzzle you need to solve before you travel.