Japan Trove

Category: Travel

Practical, up-to-date guides for traveling in Japan — itineraries, rail passes, eSIMs, where to stay, seasonal timing, etiquette, and the local know-how that makes a trip smoother. Written with real Japanese sources so you get the answer that actually works on the ground, not the recycled tourist one.

  • Gion & Geisha in Kyoto: How to Visit Respectfully

    Gion & Geisha in Kyoto: How to Visit Respectfully

    Kyoto’s Gion district is the heart of geisha culture — lantern-lit lanes, wooden teahouses, and, if you’re lucky, a glimpse of a geiko or maiko. Here’s how to experience it respectfully.

    Geiko & maiko (not “geisha girls”)

    In Kyoto, geisha are called geiko, and their apprentices maiko. They are highly trained artists of dance, music, and conversation — not tourist attractions. Seeing one hurrying to an appointment is a privilege, not a photo op.

    What to do in Gion

    • Stroll Hanamikoji & Shirakawa — the most atmospheric streets, best in early evening.
    • Watch a public performance — seasonal dances (like Miyako Odori) and cultural shows let you see maiko perform, ethically.
    • Tea & sweets in a traditional setting; explore nearby temples in our Kyoto guide.

    Etiquette (please read)

    • Do not chase, touch, or block geiko/maiko for photos — it’s harassment, and some lanes ban photography.
    • Respect private streets — some are off-limits or fine visitors for bad behavior.
    • Keep your voice down; the district is residents’ and workers’ space. See our etiquette guide.

    Do it the right way

    • Book a proper experience — a maiko dinner, tea ceremony, or performance supports the culture and guarantees a real encounter.
    • Rent a kimono for a lovely stroll and photos of yourself.
    • Go at dusk for the magic; see where to stay in Kyoto.

    What a proper Gion experience costs

    • A public seasonal dance performance (like Miyako Odori in spring) runs JPY 4,000-6,000 and is the most accessible, ethical way to see maiko perform up close.
    • A private ozashiki tea house experience with a maiko, arranged through a hotel concierge or specialist booking service, typically costs JPY 30,000-60,000+ per person and usually requires advance arrangement rather than a walk-in.
    • A kimono rental for exploring Gion runs JPY 4,000-8,000 for a half or full day, plus optional hair styling.

    Common mistakes to avoid

    • Chasing anyone who looks like a maiko for a photo — many are tourists in rental kimono, not real geiko or maiko, and even when it is a real maiko, blocking her path is considered harassment and can result in a fine in parts of Gion.
    • Wandering into private lanes marked as off-limits — some streets are residential or restricted specifically due to past tourist behavior; respect the signage.
    • Assuming you’ll spot a maiko on a quick daytime walk — they mostly move between appointments in the early evening, so dusk is a far better time to be in the district if a sighting matters to you.

    Best time of day to visit

    Late afternoon into early evening, roughly 5-6:30pm, is when geiko and maiko are most likely to be moving between teahouses for evening appointments — it’s also when Gion’s lantern-lit streets look their best for photos, making it the natural time to plan a visit regardless of whether you see anyone.

    If you don’t see a maiko

    Many visitors leave Gion without a sighting, which is completely normal — geiko and maiko keep a limited public schedule by design. A booked dance performance or tea house experience removes the guesswork entirely and is a more respectful way to guarantee an encounter than wandering the lanes hoping for a glimpse.
  • Studio Ghibli in Japan: Museum & Park Guide

    Studio Ghibli in Japan: Museum & Park Guide

    Some links below are affiliate links. If you book through them, Japan Trove may earn a small commission at no extra cost to you.

    For Studio Ghibli fans, Japan has two magical destinations: the whimsical Ghibli Museum in Tokyo and the sprawling Ghibli Park near Nagoya. Here’s how to visit both — and why booking ahead is essential.

    Ghibli Museum (Mitaka, Tokyo)

    • An intimate, enchanting museum full of Ghibli art, a rooftop robot, a mini cinema, and playful details.
    • Tickets are date- and time-specific and must be bought in advance — they sell out fast and are not sold at the door.
    • In Mitaka, a short trip from central Tokyo; see our Tokyo guide.

    Ghibli Park (near Nagoya)

    • A larger park with beautifully recreated film settings (no big thrill rides — it’s about atmosphere and detail).
    • Timed tickets in advance only; different areas may need separate tickets.
    • Near Nagoya, easy from Tokyo or Kyoto on the shinkansen.

    Booking tips (read this!)

    • Both require advance, dated tickets — plan around availability before fixing your dates.
    • Tickets are released on a schedule (often monthly) and go quickly — set a reminder.
    • Compare tour/ticket options on Klook .

    For fans

    Grab Ghibli goods at official shops and Don Quijote; more character shopping in our gifts guide. Traveling with kids? See Japan with kids.

    What tickets cost & when they’re released

    • Ghibli Museum tickets cost a flat JPY 1,000 for adults (less for children) and are released on the 10th of each month at 10am Japan time for the following month — they can sell out within hours for popular dates.
    • Ghibli Park tickets range roughly JPY 1,000-3,500 depending on which areas you enter, sold in timed slots and released about a month ahead through the official ticketing site.
    • Neither venue sells same-day tickets at the gate, so budget-wise the main “cost” to plan around is the advance booking window, not the ticket price itself.

    Common mistakes to avoid

    • Fixing your Tokyo dates before checking Ghibli Museum availability — popular dates (weekends, holidays) can be gone within the first hour of release; if this is a trip priority, check availability before locking flights.
    • Assuming Ghibli Park has rides like a typical theme park — it’s built around walking through detailed film-set recreations, so pace expectations accordingly and don’t expect a full day of attractions in the theme-park sense.
    • Booking third-party resale tickets at a markup instead of trying the official release windows first.

    Making a full day of Ghibli Park

    Ghibli Park sits inside a large public park near Nagoya, so budget transit time getting out from central Nagoya, then plan on 4-6 hours to see the main areas without rushing. Combine it with a stop at Nagoya Castle or the city’s famous miso-based food scene if you’re making the trip from Tokyo or Kyoto worthwhile beyond the park itself.

    Visiting with kids

    Both venues work well for families — the Ghibli Museum’s playful, hands-on exhibits suit younger children especially well, while Ghibli Park’s spread-out walking paths give kids room to explore. See our Japan with kids guide for more on pacing a family itinerary around timed-ticket attractions like these.

  • Japanese Castles: The Best to Visit (and the Original 12)

    Japanese Castles: The Best to Visit (and the Original 12)

    Japan’s castles are striking reminders of the samurai era — soaring white keeps, stone walls, and moats. Here’s a guide to the best to visit and how to tell an original from a reconstruction.

    The “original twelve”

    Only twelve castles keep their original wooden keeps (donjon); the rest are post-war concrete reconstructions (still worth visiting for the grounds and views). The originals feel authentically old — steep stairs, dark timber, and history.

    The best castles to visit

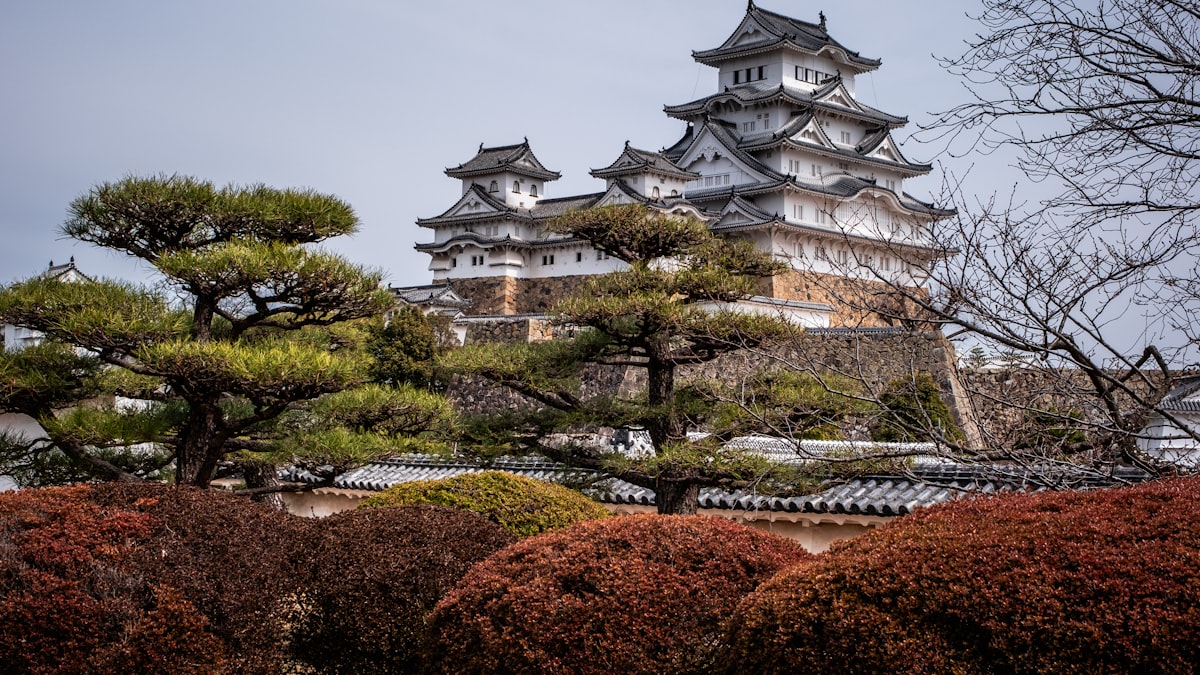
    • Himeji Castle — the magnificent “White Heron,” Japan’s finest surviving castle (near Kobe/Osaka).
    • Matsumoto Castle — a striking black-and-white original in the Nagano Alps.
    • Hikone & Inuyama — beautiful original keeps.
    • Nijo Castle (Kyoto) — famous “nightingale” floors; see our Kyoto guide.
    • Osaka & Nagoya Castles — grand reconstructions with great museums; see our Nagoya guide.

    What to look for

    • Defensive design — narrow windows, drop chutes, maze-like approaches.
    • Stone walls & moats — often the most impressive original parts.
    • Cherry blossoms — castles are prime hanami spots; see our cherry blossom guide.

    Tips

    • Original keeps have steep, ladder-like stairs — wear easy-off shoes (you go barefoot inside).
    • Go early at Himeji to beat crowds.
    • Pair castles with nearby shrines and temples and gardens.

    Typical costs & hours

    • Himeji Castle entry is JPY 1,000; most other major castles run JPY 500-1,000, with combined tickets sometimes available for the castle plus an adjoining garden (Himeji’s Koko-en garden adds JPY 300 as a combo).
    • Standard hours run roughly 9am to 5pm (last entry around 4:30pm), with reduced winter hours at some sites — check specific dates around New Year, when several castles close briefly.
    • Original keeps like Himeji and Matsumoto take 1-1.5 hours to fully climb and explore due to narrow original staircases that create bottlenecks; reconstructed castles with elevators (Osaka, Nagoya) move faster.

    Common mistakes to avoid

    • Wearing boots or shoes with buckles to an original keep — you’ll remove them at the entrance and carry them in a provided bag up steep stairs, so slip-on shoes save real hassle.
    • Assuming every castle you see is original — most of Japan’s famous castle skylines (Osaka, Nagoya, Wakayama) are 20th-century concrete reconstructions with modern elevators and museum interiors, which is worth knowing before setting an expectation of centuries-old timber.
    • Visiting Himeji at midday in cherry blossom season without a plan — it’s one of the most popular hanami spots in the Kansai region and gets very crowded.

    Combining castles with a wider day

    Himeji works well as a stop between Kyoto/Osaka and Hiroshima if you’re taking the shinkansen that direction anyway, since the castle sits a short walk from Himeji Station. Matsumoto pairs naturally with a Japan Alps route through Kamikochi and Takayama.

    A castle-and-garden combo day

    Many castle grounds double as some of Japan’s best cherry blossom and autumn leaf viewing spots, since moats and stone walls photograph beautifully against seasonal color — pairing a morning castle visit with an afternoon at a nearby traditional garden makes efficient use of a single day without feeling repetitive.

  • How to Watch Sumo in Japan: Tickets, Tournaments & Etiquette

    How to Watch Sumo in Japan: Tickets, Tournaments & Etiquette

    Some links below are affiliate links. If you book through them, Japan Trove may earn a small commission at no extra cost to you.

    Watching sumo live is one of Japan’s most thrilling cultural experiences — ancient ritual, explosive bouts, and roaring crowds. Here’s how to see it, whether at a tournament or a morning practice.

    Grand tournaments (honbasho)

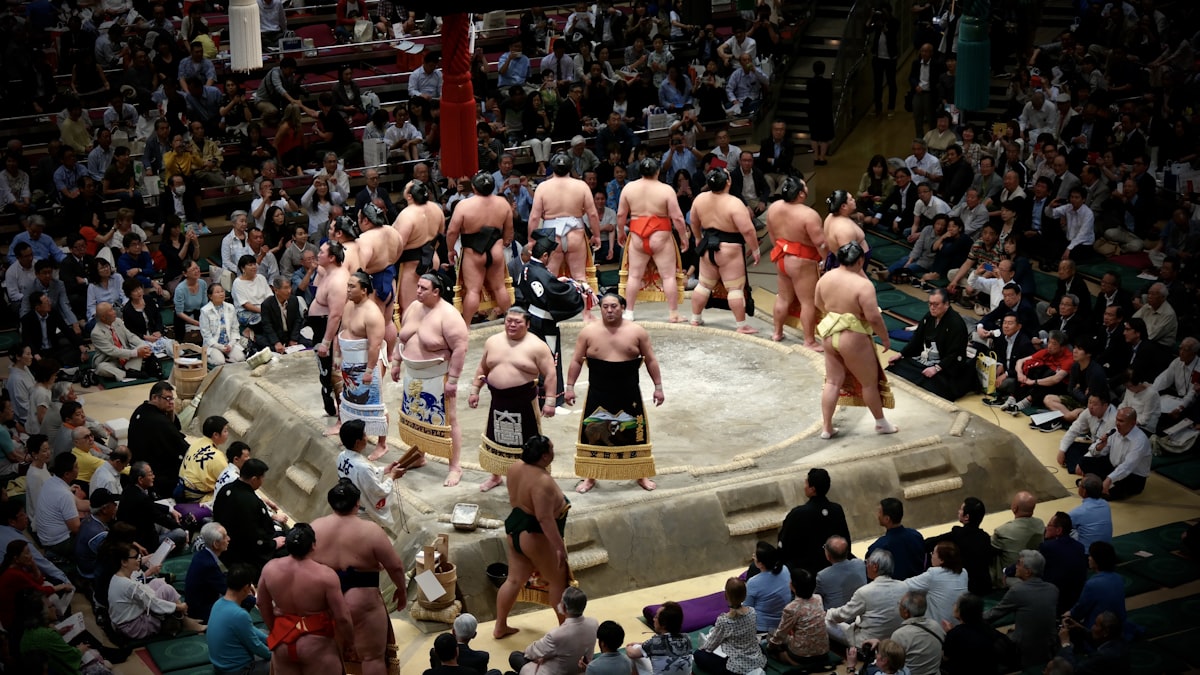
    Six 15-day tournaments run each year: Tokyo (Jan, May, Sep), Osaka (Mar), Nagoya (Jul), and Fukuoka (Nov). The top-division bouts run late afternoon and build to the finale.

    Getting tickets

    • Buy as early as possible — popular tournaments sell out. Tickets go on sale about a month ahead.
    • Ringside (expensive, cushions on the floor), box seats (tatami, sold as a set), and arena seats (cheapest, upstairs).
    • Compare official and resale options; some tours include tickets on Klook .

    No tournament on? See morning practice

    Outside tournament days you can watch a morning practice (asageiko) at a sumo stable — usually via a guided tour, with strict etiquette (stay quiet, no eating). A memorable up-close alternative.

    What to expect & etiquette

    • Arrive later for the top division if you can’t stay all day; the atmosphere peaks near the end.
    • Try chanko nabe — the hearty hot pot wrestlers eat.
    • Cushion-throwing after an upset is traditional but officially discouraged — follow the crowd’s lead. See our etiquette guide.

    Getting there

    Tokyo bouts are at Ryogoku Kokugikan — grab an IC card and see our Tokyo guide. Fold it into your itinerary if dates line up.

    What sumo tickets cost

    • Arena seats (2F): roughly JPY 2,100-3,800 — the cheapest way in and a fine view of the whole ring.
    • Box seats (masu-seki): sold as a set of 2-4 people sitting on tatami, roughly JPY 9,000-18,000 for the box depending on proximity to the ring.
    • Ringside cushion seats: the most expensive and hardest to get, often JPY 45,000+ and sometimes only available through connections or resale.
    • Morning stable practice tours through a licensed operator typically run JPY 8,000-15,000 per person, including guide commentary.

    Common mistakes to avoid

    • Arriving right at doors-open time expecting top-division action — the marquee wrestlers (makuuchi) fight late afternoon; lower-ranked bouts fill the earlier hours and are far less crowded to watch if you want a quieter warm-up.
    • Booking box seats without realizing there are no chairs — you sit on cushions on the tatami floor, which some visitors find uncomfortable for a full multi-hour session; arena seats have normal chairs.
    • Skipping tournament months entirely because you assumed sumo isn’t happening — outside the six annual honbasho, stable visits and sumo-themed restaurants (serving chanko nabe) keep the culture accessible year-round.

    A typical tournament day

    Doors open around 8am, but most visitors arrive by early-to-mid afternoon to catch the ranked divisions build toward the final bouts around 6pm. Wrestlers’ pre-bout rituals — the salt throwing, leg stomping, and staring contests — take up more time than the bouts themselves, which often last only a few seconds; this rhythm is part of what makes a first visit surprising and worth staying for the full session rather than dipping in briefly.

  • Kawaguchiko & the Fuji Five Lakes: Best Mt. Fuji Views

    Kawaguchiko & the Fuji Five Lakes: Best Mt. Fuji Views

    Some links below are affiliate links. If you book through them, Japan Trove may earn a small commission at no extra cost to you.

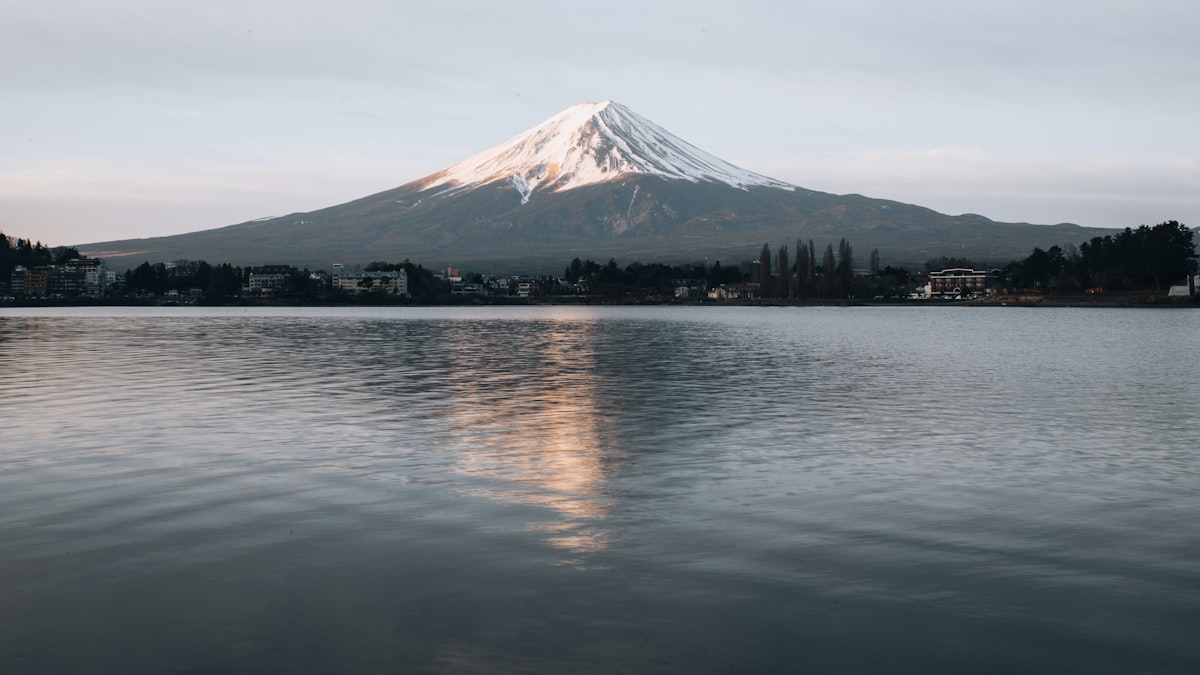
    For the classic Mt. Fuji view — the mountain mirrored in a lake — head to Kawaguchiko and the Fuji Five Lakes. It’s the best base for seeing and photographing Fuji. Here’s how to visit.

    Why Kawaguchiko

    Lake Kawaguchiko is the most accessible of the Fuji Five Lakes, with postcard reflections of Mt. Fuji, hot springs, and easy transport. It’s the go-to spot for that iconic shot — see our wider how to see Mt. Fuji guide.

    Best things to do

    • Lakeside Fuji views & reflections — best on calm, clear mornings.
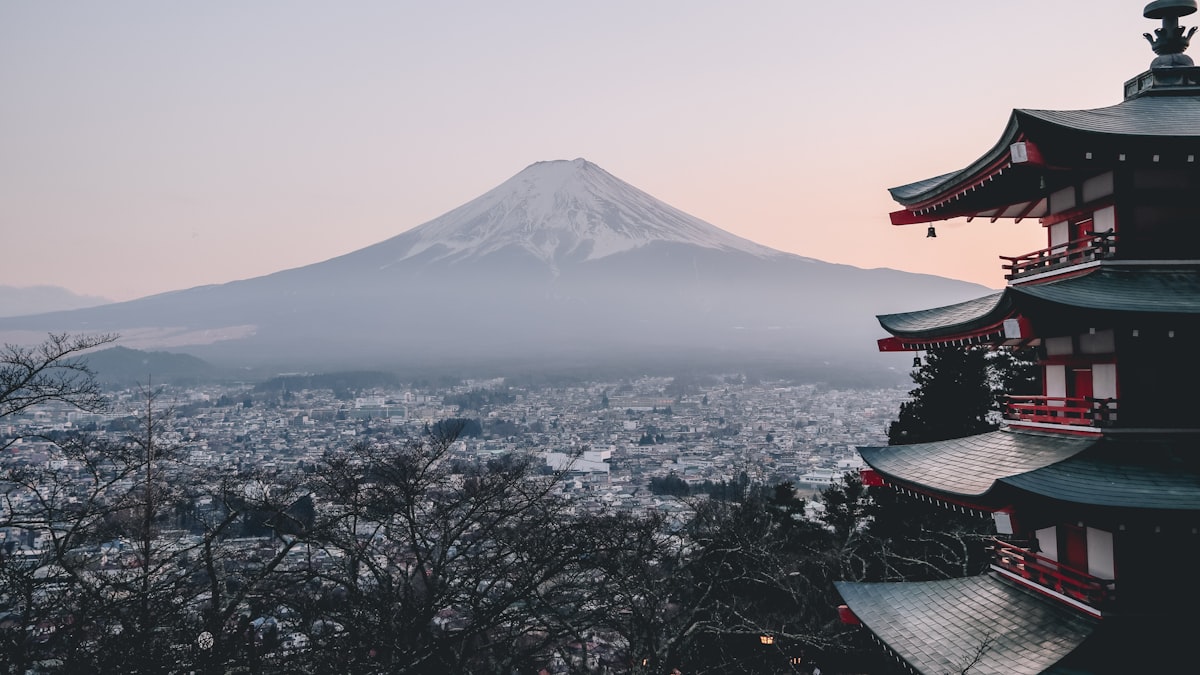
    • Chureito Pagoda — the famous five-storied pagoda with Fuji behind (nearby Fujiyoshida).
    • Mt. Kachi Kachi Ropeway — quick panoramic views over the lake and mountain.
    • Oishi Park — seasonal flowers framing Fuji.
    • Onsen ryokan with Fuji-facing baths — see our ryokan guide.

    When to go for clear views

    • Autumn and winter mornings offer the clearest skies; Fuji often hides behind cloud midday and in summer haze.
    • Build in a flexible day or two to chase a clear window. See best time to visit.

    Getting there

    • Direct buses from Tokyo (Shinjuku) to Kawaguchiko (~2 hours), or train via Otsuki.
    • It pairs well with Hakone for a Fuji-and-onsen loop. See day trips from Tokyo.
    • Book Fuji-view stays early — compare on Booking.com .

    Tips

    • Stay overnight for the best odds of a clear morning Fuji.
    • Bring layers — it’s cooler by the lakes. See our packing list.

    Costs & how long to stay

    • Direct highway buses from Shinjuku to Kawaguchiko run about JPY 2,000-2,200 one-way and take roughly 2 hours; reserve ahead on weekends and holidays when buses sell out.
    • The Kachi Kachi Ropeway round-trip costs about JPY 900-1,000 and takes only a few minutes each way, making it an easy add-on rather than a half-day commitment.
    • One night is enough to try for a clear-morning view, but two nights meaningfully improves your odds if weather is uncertain — Fuji hides behind cloud more often than postcards suggest, especially outside the clearest autumn and winter windows.

    Common mistakes to avoid

    • Visiting on a single summer day and expecting a clear view — summer haze obscures Fuji far more often than autumn or winter mornings; if summer is your only option, keep expectations modest and treat any sighting as a bonus.
    • Booking a Fuji-view room without confirming which direction it actually faces — some “Fuji view” listings mean a distant partial view; check recent reviews or photos before paying a premium.
    • Skipping Chureito Pagoda because of the stair climb — it’s a genuine uphill walk (roughly 15-20 minutes), but the reward is one of the most photographed views in Japan and worth the effort for most visitors.

    Best time of day & season

    Fuji is most often visible in the first couple of hours after sunrise, before daytime heating builds cloud cover around the peak — an early start dramatically improves your odds regardless of season. Combine with our Mt. Fuji guide for a wider comparison of viewing spots beyond the Kawaguchiko area.

    Pairing with Hakone

    Kawaguchiko and Hakone both offer Fuji views and onsen culture but with a different feel — Kawaguchiko is quieter and more nature-focused, while Hakone has more museums, the Owakudani volcanic valley, and better transit connections back to Tokyo, making a combined 3-4 day loop a popular way to see both sides of the mountain.

  • Onsen Etiquette: How to Use a Japanese Hot Spring

    Onsen Etiquette: How to Use a Japanese Hot Spring

    Soaking in an onsen (hot spring) is a quintessential Japanese experience — but the etiquette can feel daunting the first time. Here’s a simple, step-by-step guide so you can relax with confidence.

    The golden rule: wash before you soak

    The bath is for soaking, not washing. You clean yourself thoroughly at the shower stations before entering the communal bath. The bath water stays clean for everyone.

    Step by step

    1. Undress fully in the changing room — no swimsuits. Put clothes in a basket or locker.
    2. Bring the small towel to the bathing area (a modesty towel).
    3. Wash and rinse completely at a shower station — sit on the stool, rinse off all soap.
    4. Enter the bath slowly — it’s hot. Keep the small towel out of the water (rest it on your head or the side).
    5. Soak and relax. Rinse off after if you like, then dry with the small towel before returning to the changing room.

    Do’s and don’ts

    • Do tie up long hair so it doesn’t touch the water.
    • Don’t put your towel or head under the water, swim, or splash.
    • Don’t take photos — privacy is essential.
    • Keep voices low — it’s a place to unwind. More in our etiquette guide.

    Tattoos?

    Many onsen still restrict tattoos, but there are workarounds (cover patches, private baths, tattoo-friendly spots) — see our tattoo & onsen guide.

    Where to soak

    Try an onsen town for the full experience — see our best onsen towns and Hakone guide. A ryokan with a private open-air bath is the stress-free way to start.

    What onsen bathing typically costs

    • Public bathhouses (sento, not fed by natural hot spring but similar etiquette) cost as little as JPY 400-600; standalone onsen day-use facilities usually run JPY 700-2,000 depending on the region and facilities.
    • A ryokan stay with a private in-room open-air bath (kashikiri or private bath rooms) typically adds JPY 5,000-20,000 per couple over a standard room, but removes any tattoo or etiquette concerns entirely since you’re bathing alone.
    • Rental towels and yukata are usually included at ryokan; day-use facilities sometimes charge JPY 200-500 extra if you don’t bring your own small towel.

    Common first-timer mistakes

    • Rinsing only briefly before entering the bath — a thorough wash (shampoo, soap, full rinse) is expected, not optional; locals notice and it affects water cleanliness for everyone.
    • Wearing a swimsuit into a mixed public bath thinking it’s more modest — most onsen explicitly prohibit swimwear in the communal bath itself, though some newer mixed-gender or family facilities do allow suits, so check specific rules.
    • Rushing the soak — most visitors find 10-15 minutes at a time comfortable before needing to cool off outside the water, then returning for a second soak; treat it as a slow, repeated ritual rather than one long sit.

    Choosing your first onsen experience

    A private-bath ryokan room removes nearly every source of first-timer anxiety (nudity, tattoos, unfamiliar etiquette in front of strangers) and is worth the extra cost for a first try if budget allows. If you’d rather dive into the full communal experience, a well-reviewed onsen town like those in our best onsen towns guide will have staff used to first-time foreign visitors and often posted English instructions.

    Onsen for families and groups

    Traveling with kids or a mixed group of friends who’d rather not split up? Family baths (kazoku-buro) at many onsen towns can be reserved by the hour for private, mixed-gender bathing — a practical option that sidesteps the gender-separated communal baths without requiring a full private-bath ryokan stay. Ask at check-in or the local tourist office, since availability and pricing vary widely by town.

  • Japanese Gardens: The Most Beautiful to Visit & How to Enjoy Them

    Japanese Gardens: The Most Beautiful to Visit & How to Enjoy Them

    Japanese gardens are among the country’s most serene pleasures — carefully composed landscapes of moss, stone, water, and seasonal color. Here’s how to enjoy them and which are the most beautiful to visit.

    Types of Japanese garden

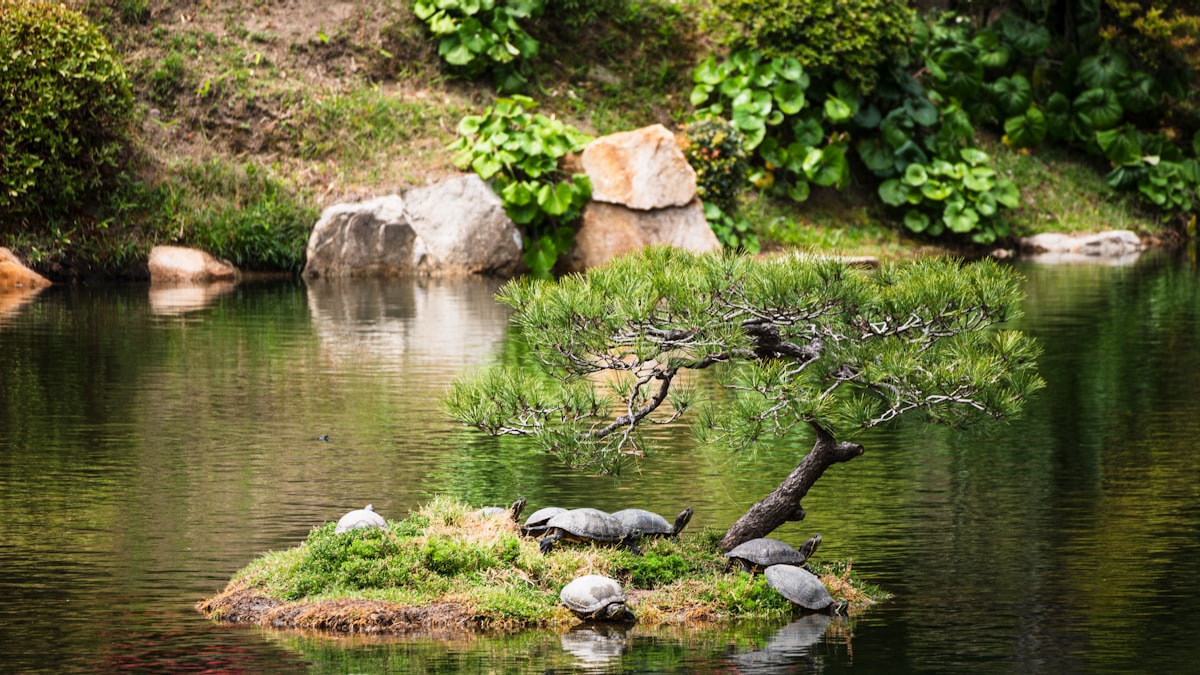
    • Strolling gardens (kaiyu-shiki) — large gardens designed to be walked, with a central pond.
    • Zen rock gardens (karesansui) — raked gravel and stone, meant for quiet contemplation.
    • Tea gardens (roji) — the mossy path leading to a tea house.

    The most beautiful to visit

    • Kenrokuen (Kanazawa) — one of Japan’s “three great gardens”; see our Kanazawa guide.
    • Ryoan-ji & Saiho-ji (Kyoto) — the famous Zen rock garden and moss temple; more in our Kyoto guide.
    • Korakuen (Okayama) and Kairakuen (Mito) — the other two great gardens.
    • Adachi Museum & Ritsurin (Takamatsu) — stunning, less-crowded masterpieces.
    • Shinjuku Gyoen (Tokyo) — a gorgeous city escape; see our Shinjuku guide.

    How to enjoy them

    • Go early for stillness and soft light; gardens reward a slow pace.
    • Every season shines — cherry blossoms, summer green, autumn maples, and snow.
    • Sit and take it in — many gardens have a tea house for matcha (see our green tea guide).
    • Stay on paths and keep quiet — see our etiquette guide.

    Tips

    • Some famous gardens require timed entry or advance reservation (e.g. Saiho-ji).
    • Combine garden visits with nearby temples and shrines.

    Typical costs & hours

    • Most famous gardens charge JPY 300-700 entry; Kenrokuen is JPY 320, the Adachi Museum garden (paired with its art collection) is JPY 2,500, and many smaller temple gardens are free or included in temple admission.
    • Saiho-ji (the famous moss garden) requires advance postal or online reservation and a suggested donation of around JPY 4,000, which includes a short sutra-copying session before you’re allowed into the garden — budget extra planning time for this one specifically.
    • Standard hours run 8:30am/9am to 5pm-ish, with seasonal night illuminations (often an extra ticket) during cherry blossom and autumn leaf season at gardens like Kenrokuen and some Kyoto temples.

    Common mistakes to avoid

    • Rushing through in 15-20 minutes — Japanese gardens are designed to be walked slowly, with views composed to unfold as you move; treat 45-90 minutes as a realistic minimum for a proper visit to a major garden.
    • Visiting Ryoan-ji’s rock garden at midday in peak season — the small viewing platform gets crowded fast; early morning gives a genuinely different, quiet experience of the same 15 stones.
    • Skipping the tea house — many gardens have a seated matcha service for a small additional fee, and pausing there is often the most memorable part of the visit, not an afterthought.

    Best season for each garden

    Kenrokuen is famous for its yukizuri (rope supports protecting pine branches from snow) in winter, a sight unique to that season; Ritsurin in Takamatsu peaks with autumn maples reflected in its ponds; and Shinjuku Gyoen offers a rare mix of Japanese, French, and English garden styles that make it worth a return visit across different seasons if you’re staying in Tokyo a while.

    Combining gardens with a wider day

    Many great gardens sit right beside temples or castles, so pairing them costs little extra planning — Kenrokuen sits next to Kanazawa Castle, and several Kyoto temple gardens are part of the same admission as the main hall. Building a garden into an existing temple or castle stop, rather than treating it as a separate destination, is usually the most efficient way to fit several into one trip.

  • Accessible Japan: Tips for Wheelchair Users & Limited Mobility

    Accessible Japan: Tips for Wheelchair Users & Limited Mobility

    Japan is more accessible than many travelers expect — but it has quirks worth planning around. Here’s a practical guide for wheelchair users and anyone with limited mobility.

    The good news

    • Trains & stations are largely step-free, with elevators, tactile paving, and staff who will set up ramps for boarding (ask at the gate — they’ll radio ahead).
    • The shinkansen has wheelchair-accessible seating — reserve it in advance.
    • Modern buildings, malls, and attractions generally have elevators and accessible toilets (look for the “multipurpose” restroom).

    Things to plan around

    • Older temples & shrines can have steps, gravel, and slopes — check ahead.
    • Some small stations and older streets are less step-free; big hubs are best.
    • Ryokan & onsen vary — ask about accessible rooms and private baths (see our ryokan guide).

    Practical tips

    • Ask station staff for help boarding — it’s a smooth, well-practiced system; allow a few extra minutes.
    • Reserve accessible shinkansen seats and hotel rooms early.
    • Rent equipment — wheelchair and mobility rentals are available in major cities.
    • Use an eSIM and maps to check step-free routes and elevator exits.

    Where to stay

    Choose accessible rooms in newer hotels near major stations for the easiest logistics — see where to stay in Tokyo. Plan gentle days and build in rest.

    Bottom line

    With some advance planning, Japan is a rewarding, largely barrier-free destination. Pair this with our first-timer tips and a realistic itinerary.

    Typical costs for accessible travel

    • Wheelchair and mobility scooter rentals in major cities run roughly JPY 1,000-3,000/day through specialist rental services, often with delivery to your hotel — worth arranging before arrival rather than trying to source one last-minute.
    • Accessible taxi services (with wheelchair-accessible vans) exist in major cities but are limited in number and should be booked in advance, typically at standard taxi rates plus a modest dispatch fee.
    • Most major museums and attractions don’t charge extra for accessible facilities, though a companion/carer ticket discount is common at larger sights — ask at the ticket counter, since it’s not always advertised in English.

    Common mistakes to avoid

    • Assuming all train stations are equally accessible — large hub stations are excellent, but some smaller rural or older stations still require stairs; check a station’s accessibility on Japan’s rail operator apps before building it into a tight itinerary.
    • Not calling ahead for ryokan with tatami rooms — traditional low furniture and steps between rooms can be a real obstacle even at otherwise well-reviewed properties; ask specifically about barrier-free rooms.
    • Underestimating walking distances between train exits and attractions — Japanese stations and city blocks can involve longer covered walks than expected; build extra time into each day’s plan.

    Requesting station assistance in practice

    Station staff assistance is a well-practiced, genuinely reliable system — tell any staff member your destination station and roughly when you’d like to travel, and they’ll radio ahead so a colleague meets you with a ramp at your arrival platform. Arriving 10-15 minutes before your planned departure gives staff enough time to set this up smoothly, especially at busy hub stations during peak hours.

    Onsen and ryokan accessibility notes

    Larger modern ryokan chains and hotel-style onsen resorts increasingly offer barrier-free rooms and step-free bath access, while small family-run traditional ryokan often cannot accommodate wheelchairs due to their historic layout — always call or email ahead rather than relying on a booking site’s general description, since accessibility details are frequently missing from listings entirely.

  • Japan Itinerary: 10 Days for First-Timers

    Japan Itinerary: 10 Days for First-Timers

    Some links below are affiliate links. If you book through them, Japan Trove may earn a small commission at no extra cost to you.

    Ten days is a fantastic length for a first trip to Japan — enough to pair the classic cities with a couple of deeper stops without rushing. Here’s a balanced 10-day itinerary.

    At a glance

    • Days 1–3: Tokyo
    • Day 4: Hakone or Nikko (nature/onsen)
    • Days 5–7: Kyoto (+ Nara)
    • Day 8: Osaka
    • Day 9: Hiroshima & Miyajima
    • Day 10: Back to Tokyo / departure

    Tokyo (Days 1–3)

    Ease in with Asakusa, Shibuya, Shinjuku, and a day trip. See our Tokyo guide; grab a Suica/Pasmo and an eSIM.

    Nature break (Day 4)

    Add hot springs and Mt. Fuji views in Hakone, or shrines and waterfalls in Nikko.

    Kyoto, Nara & Osaka (Days 5–8)

    Ride the shinkansen to Kyoto for temples and geisha districts, day-trip to Nara, then eat your way through Osaka.

    Hiroshima & Miyajima (Day 9)

    The Peace Park and the floating torii — see our Hiroshima & Miyajima guide.

    Tips

    Budgeting for 10 days

    • A mid-range 10-day trip covering Tokyo, Hakone/Nikko, Kyoto, Nara, Osaka, and Hiroshima typically runs JPY 250,000-400,000 per person excluding flights, factoring hotels, food, local transport, and a few paid attractions.
    • Long-distance transport is the biggest lever here — with a Hiroshima leg added, price out the 7 or 14-day JR Pass carefully, since this itinerary’s distance profile is exactly the kind that can make the nationwide pass worthwhile.
    • Luggage forwarding between each multi-night base runs roughly JPY 2,000-3,000 per bag per hop and is worth the cost on a trip with this many city changes.

    Common mistakes on a 10-day itinerary

    • Under-allocating time to Hiroshima and Miyajima — treating it as a single rushed day from Kyoto often means missing the low-tide floating torii walk or the Peace Museum’s full impact; if possible, an overnight makes this leg far less rushed.
    • Packing Days 5-7 in Kyoto too tightly around Nara — Kyoto alone has enough for 2-3 full days; treat the Nara add-on as a half-day, not a full day carved from Kyoto time.
    • Not confirming the JR Pass exchange process before travel — passes now require online purchase and a specific pickup process at designated stations; leave time on Day 1 to sort this out if you’re using one.

    Adjusting the pace to your travel style

    This 10-day structure assumes a first-timer wanting breadth across regions; if you’d rather go deeper into fewer places, swap the Hiroshima day for an extra Kyoto day or a detour to Kanazawa, which is closer to the standard Tokyo-Kyoto corridor and easier to fit without adding a long return leg.

    What to eat along the way

    A 10-day route touching this many regions is also a great food tour if you eat locally at each stop: Tokyo’s sushi and ramen, a kaiseki dinner at your Hakone or Nikko ryokan, Kyoto’s tofu and kaiseki cuisine, Osaka’s street food, and Hiroshima’s distinct layered okonomiyaki style each give a genuinely different regional flavor rather than repeating the same dishes city to city.

  • Sapporo Guide: Snow Festival, Ramen & Beer

    Sapporo Guide: Snow Festival, Ramen & Beer

    Sapporo, the capital of Hokkaido, is a spacious, easygoing city famous for snow, beer, ramen, and incredible seafood. It’s the perfect gateway to Japan’s northern island. Here’s what to do.

    Top things to do

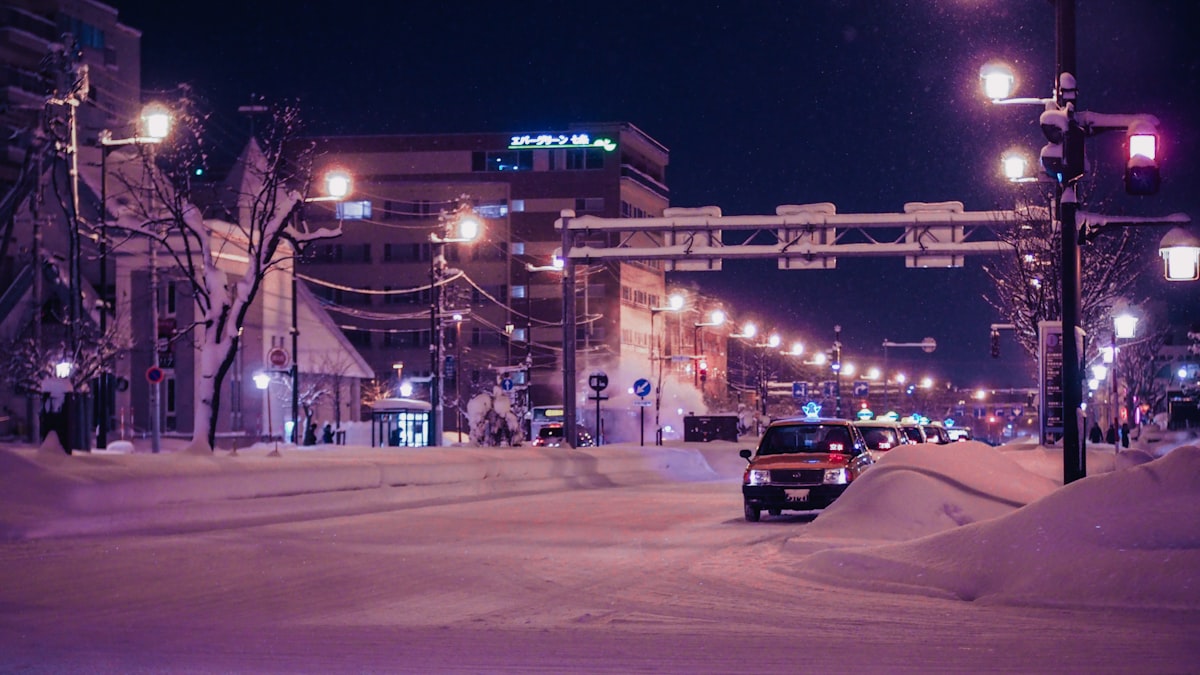
    • Sapporo Snow Festival — the spectacular February event with giant snow and ice sculptures.
    • Odori Park & Sapporo TV Tower — the green spine of the city, lit up in winter.
    • Sapporo Beer Museum — Japan’s only beer museum, with tastings.
    • Nijo Market — fresh Hokkaido seafood: crab, uni, salmon roe.
    • Mt. Moiwa ropeway — a gorgeous night view over the city.

    Sapporo food

    • Miso ramen — Sapporo’s signature, rich and warming.
    • Soup curry — a local specialty.
    • Seafood and dairy — Hokkaido’s are Japan’s best; don’t skip the soft-serve. More in must-try food.

    Base for Hokkaido

    Use Sapporo to reach Otaru, Furano’s flower fields, and Niseko’s powder skiing. See our wider Hokkaido guide.

    Getting there & around

    • Fly into New Chitose Airport — much faster than the train from Honshu.
    • The city has an easy subway; grab an IC card. For rural Hokkaido, consider renting a car.

    When to go

    Winter for snow and the festival; summer for cool escapes and flowers. Check best time to visit and pack for the cold in winter (winter guide).

    Typical costs

    • The Sapporo Beer Museum’s basic exhibit is free; a tasting flight of three beers runs about JPY 400-600, one of the better-value activities in the city.
    • Nijo Market seafood breakfast bowls (kaisendon) run JPY 2,000-4,000 depending on how much crab and uni you pile on — a splurge-worthy way to start a Sapporo day.
    • Flights from Tokyo (Haneda) to New Chitose run about 1.5 hours and, booked with some notice, can cost similar to or less than the 8-hour shinkansen-plus-transfer alternative, making air travel the practical default for most itineraries.

    Common mistakes to avoid

    • Underestimating winter cold — Sapporo winters are genuinely cold (often well below freezing), colder than most first-time visitors expect from mainland Japan; proper insulated boots matter as much as a warm coat given icy sidewalks.
    • Visiting during Snow Festival week without booking months ahead — hotel rates spike and rooms sell out across the whole city, not just near the festival site.
    • Skipping a rental car for rural Hokkaido plans — public transport thins out fast outside Sapporo, and destinations like Furano’s flower fields or Niseko are far easier and often cheaper to reach by car if you’re comfortable driving on snow or in a group splitting the cost.

    Sapporo as a Hokkaido base

    Most first-time visitors use Sapporo for 2-3 nights before branching out — Otaru’s canal and glassware shops are a 30-40 minute train ride, Niseko’s ski resorts about 2-2.5 hours by bus or car, and Furano’s summer lavender fields around 2 hours by train. See our Hokkaido guide for how to sequence a longer regional trip.

    Best time to visit for different interests

    February is the obvious pick for the Snow Festival, but it’s also the coldest and busiest window; June through August offers a genuinely pleasant, cool-summer alternative to Japan’s mainland heat, with fresh seafood and lavender season overlapping nicely for a warm-weather Hokkaido trip that feels completely different from the winter version.