Japan Trove

Category: Travel

Practical, up-to-date guides for traveling in Japan — itineraries, rail passes, eSIMs, where to stay, seasonal timing, etiquette, and the local know-how that makes a trip smoother. Written with real Japanese sources so you get the answer that actually works on the ground, not the recycled tourist one.

  • Nagoya Guide: Castle, Food & Things to Do

    Nagoya Guide: Castle, Food & Things to Do

    Nagoya, Japan’s fourth-biggest city, is an underrated stop between Tokyo and Kyoto — home to a famous castle, distinctive local food, and great museums. Here’s what to do.

    Top things to do

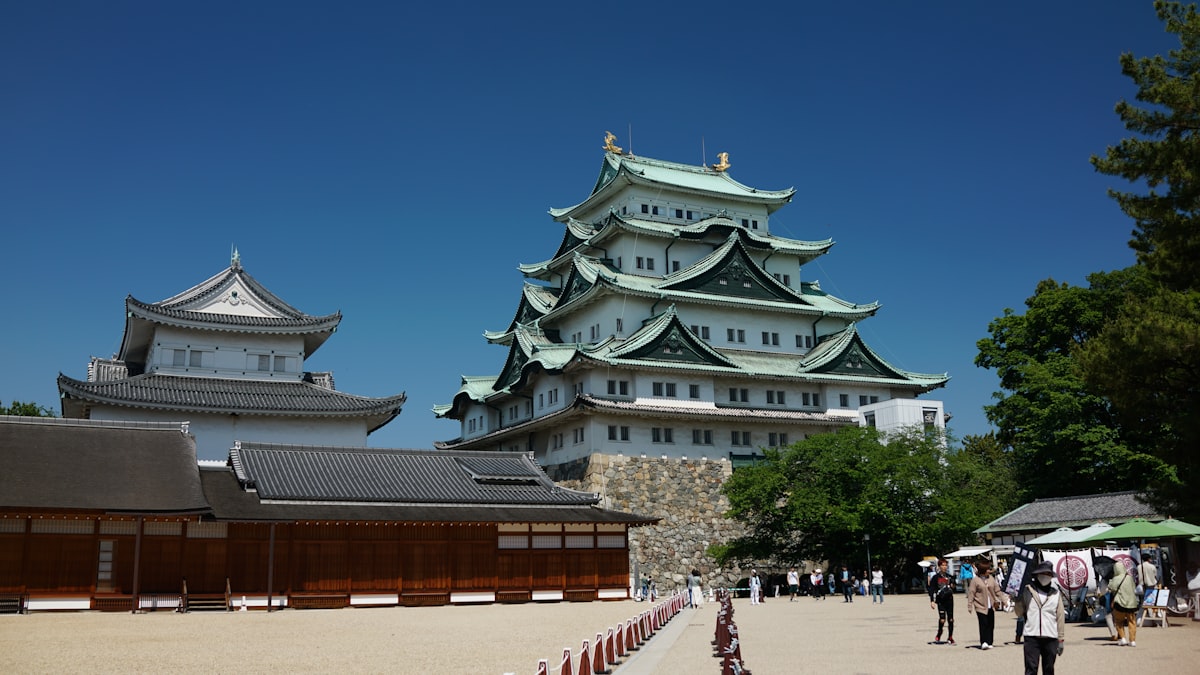
    • Nagoya Castle — a landmark castle with golden shachihoko (tiger-fish) roof ornaments and a beautifully reconstructed palace.
    • Toyota Commemorative Museum & SCMaglev and Railway Park — excellent for industry and train fans.
    • Atsuta Shrine — one of Japan’s most important shrines, set in a peaceful forest.
    • Osu Shopping District — a lively arcade of vintage, street food, and quirky shops.
    • Ghibli Park — the Studio Ghibli theme park is nearby (book well ahead).

    Nagoya food (Nagoya meshi)

    • Hitsumabushi — grilled eel over rice, eaten three ways.
    • Miso katsu — pork cutlet with rich red-miso sauce.
    • Tebasaki — sweet-spicy chicken wings. More in must-try food.

    Getting there

    Tips

    • Easy to slot in as a half-day or overnight between Tokyo and Kyoto — see our 14-day itinerary.
    • Ghibli Park tickets sell out — plan far ahead.

    Typical costs

    • Nagoya Castle entry runs JPY 500; the SCMaglev and Railway Park is JPY 1,000 and genuinely excellent for train enthusiasts of any age, with real retired shinkansen and maglev units on display.
    • A hitsumabushi lunch (eel over rice, eaten three ways) runs JPY 2,500-4,000 depending on the restaurant — it’s pricier than most rice-bowl meals in Japan since eel prices have climbed, but it’s a genuine Nagoya specialty worth the splurge.
    • Ghibli Park tickets, sold separately from general park entry, range JPY 1,000-3,500 per area and must be booked online in advance — factor this into your Nagoya budget if it’s a trip priority.

    Common mistakes to avoid

    • Treating Nagoya as only a transfer point — it’s an easy skip on a first Tokyo-Kyoto trip, but even a half-day stopover using a shinkansen ticket break gives you time for the castle or Atsuta Shrine without adding a full extra hotel night.
    • Not booking Ghibli Park tickets before arriving in the region — unlike the castle or shrine, this genuinely requires advance planning and can’t be done as a spontaneous add-on.
    • Skipping Osu’s covered arcade because it looks like an ordinary shopping street from the entrance — it opens into a dense, quirky mix of vintage clothing, street food, temples, and electronics that rewards a slow wander.

    A practical stopover plan

    If you’re riding the Tokaido Shinkansen between Tokyo and Kyoto anyway, break the journey in Nagoya for a half-day: Nagoya Castle in the morning, lunch at a hitsumabushi restaurant near the castle, then Osu Shopping District in the afternoon before continuing to Kyoto or back to Tokyo by evening.

    If you’re combining with Ghibli Park

    Ghibli Park sits outside central Nagoya in a large public park, so plan a separate half-day for it rather than squeezing it into the same day as the castle and Osu — between train transfers and the park’s spread-out layout, trying to do both properly in one day usually means rushing at least one of them.
  • Capsule Hotels in Japan: What to Expect & How to Book

    Capsule Hotels in Japan: What to Expect & How to Book

    Some links below are affiliate links. If you book through them, Japan Trove may earn a small commission at no extra cost to you.

    Staying in a capsule hotel is a fun, only-in-Japan experience — and a great budget option. If you’ve never slept in a pod, here’s exactly what to expect and how to do it right.

    What is a capsule hotel?

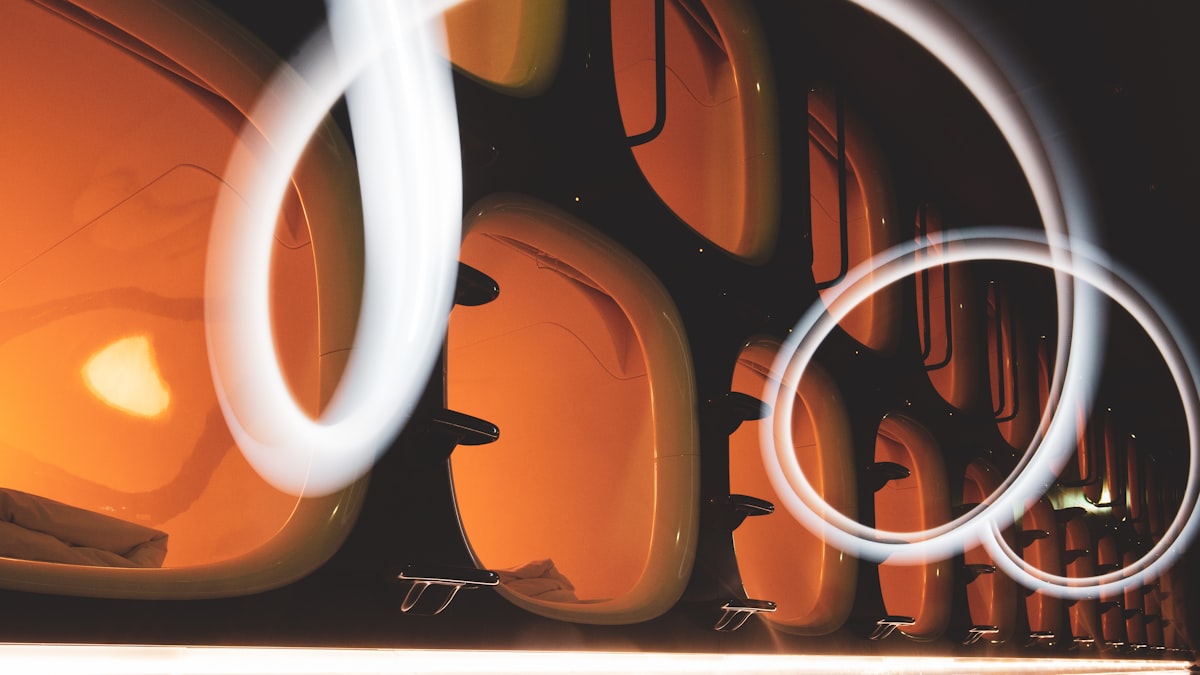
    A capsule hotel gives you a compact sleeping pod (bed, light, outlet, often a small screen) stacked in rows, with shared bathrooms, lockers, and lounges. Modern ones are clean, secure, and surprisingly comfortable — a world away from the old image.

    What to expect

    • Your pod: enough room to sit up and sleep; a curtain or blind for privacy (not a locking door).
    • Shared facilities: lockers for luggage, communal baths/showers, and a lounge. Many have a large public bath (sento-style).
    • Amenities: pajamas, towels, and toiletries are often provided.
    • Often gender-separated floors.

    Etiquette & tips

    • Keep quiet — noise carries between pods. No phone calls in the pod area.
    • Store bags in your locker; pods are for sleeping, not luggage.
    • Follow bath rules if there’s a communal bath — see our onsen etiquette guide.
    • Great for solo travelers — see solo travel in Japan.

    When they’re perfect

    • Budget nights, solo trips, or an early flight (many are near stations/airports).
    • A fun experience to try once even if you usually book hotels.
    • Traveling light helps — use luggage forwarding for big bags.

    How to book

    Reserve ahead in busy seasons; compare capsule and business hotels on Booking.com . For more options, see where to stay in Tokyo and our budget guide.

    What a capsule hotel typically costs

    • Budget capsule hotels run JPY 2,500-4,500/night, often cheaper than a hostel dorm bed in the same neighborhood while offering more privacy.
    • Upscale “designer” capsule hotels (with saunas, quality bedding, and stylish lounges) run JPY 5,000-9,000/night and have become genuinely popular with design-conscious travelers, not just budget backpackers.
    • Most include access to a public bath or sauna at no extra charge, which is worth factoring in as part of the value compared to a plain business hotel room.

    Common mistakes to avoid

    • Booking without checking gender policy — most capsule hotels are single-gender per floor or fully single-gender properties; a small but growing number accept mixed groups, so confirm before assuming your travel companions can stay in adjacent pods.
    • Bringing a large suitcase expecting in-pod storage — luggage goes in a separate locker, not the sleeping pod itself; oversized bags sometimes need to be checked at the front desk if lockers are too small.
    • Expecting a locking door — pods use a curtain or roll-down screen for privacy, not a lock; valuables should stay in your locker, not the pod.

    Who capsule hotels suit best

    They’re an excellent fit for a single night near an airport before an early flight, a solo traveler on a budget, or anyone curious to try the experience once — less ideal for a multi-night stay with heavy luggage or anyone who values a private bathroom, in which case a compact business hotel room is a closer, only slightly pricier alternative.

    A first-timer’s checklist

    Bring earplugs (noise carries between pods more than you’d expect), a phone charger since outlets are sometimes positioned awkwardly inside the pod, and flip-flops or the provided sandals for moving between your pod and the shared bath — most of the mild culture shock first-timers report comes from not knowing these small details in advance, not from the pod itself.

  • What to Wear in Japan: A Season-by-Season Packing Guide

    What to Wear in Japan: A Season-by-Season Packing Guide

    Wondering what to pack and wear in Japan? The country spans seasons and situations — from temple visits to fancy dinners to lots of walking. Here’s a practical, season-by-season guide.

    By season

    • Spring (Mar–May): layers — mild days, cool mornings. A light jacket and a compact umbrella. Perfect for cherry blossom season.
    • Summer (Jun–Aug): hot and very humid. Breathable clothes, a hat, and a hand towel; a light layer for strong air-con.
    • Autumn (Sep–Nov): gorgeous and mild — layers again, great for fall foliage.
    • Winter (Dec–Feb): cold, especially up north — a warm coat, gloves, and heat packs; see Japan in winter.

    Comfortable, respectful, practical

    • Shoes you can slip off easily — you’ll remove them at temples, ryokan, and some restaurants. Nice socks help!
    • Walk-friendly footwear — you’ll walk a lot; broken-in sneakers win.
    • Modest options for temples and shrines; shoulders/knees covered is polite. See our etiquette guide.

    Dressing up (and down)

    • Japan skews neat and put-together; smart-casual covers most situations.
    • High-end restaurants may expect tidy attire (no gym wear/flip-flops).
    • Renting a kimono or yukata for a day is a fun experience.

    Handy extras

    • A compact umbrella, a foldable bag, and layers you can peel off.
    • Tattoos? Some onsen have rules — see our tattoo & onsen guide.
    • Full checklist in our packing list.

    What clothing actually costs to buy locally

    • Uniqlo’s AIRism and Heattech lines (JPY 990-2,990 per piece) are widely available and a smart way to pack light — many travelers buy a few pieces on arrival rather than checking a full seasonal wardrobe from home.
    • A basic folding umbrella from a konbini runs JPY 500-700; a compact travel umbrella from a department store runs JPY 2,000-3,500 and holds up better to wind.
    • Heat packs (kairo) for winter cost about JPY 500-800 for a pack of 10 and are sold at every drugstore and convenience store from October through March.

    Common packing mistakes

    • Packing only for the season you’re used to at home — Japan’s humidity in summer and damp cold in winter both feel more intense than similar temperatures elsewhere; err toward more breathable fabric in summer and warmer layers in winter than your home climate would suggest.
    • Forgetting temple-appropriate footwear — shoes that are quick to remove and put back on save real time and hassle across a day with multiple temple or restaurant stops requiring shoes off.
    • Overpacking formal wear — smart-casual covers the overwhelming majority of restaurants and situations; very few places outside high-end kaiseki restaurants enforce a strict dress code.

    Shopping for weather gear once you arrive

    Rather than over-packing for uncertain weather, most travelers find it easier to buy what they need once in Japan — Uniqlo, drugstores, and 100-yen shops are everywhere and inexpensive, and this approach also frees up luggage space for souvenirs on the way home. See our full packing list for exactly what’s worth bringing versus buying locally.

    Dressing for specific situations

    A kaiseki dinner at a nice ryokan, a rooftop bar in Ginza, or a temple visit in the rain each call for slightly different choices — a versatile smart-casual outfit with layering options handles all three, while a single pair of easy slip-on shoes covers everything from a shrine visit to a fine-dining reservation without needing a separate formal shoe.

  • Japan Itinerary: 5 Days for First-Timers (Tokyo & Kyoto)

    Japan Itinerary: 5 Days for First-Timers (Tokyo & Kyoto)

    Some links below are affiliate links. If you book through them, Japan Trove may earn a small commission at no extra cost to you.

    Only have five days in Japan? You can still see the highlights of Tokyo and Kyoto without rushing. Here’s a tight but comfortable 5-day first-timer itinerary.

    At a glance

    • Days 1–2: Tokyo
    • Day 3: Day trip (Hakone or Nikko) or more Tokyo
    • Days 4–5: Kyoto (with a Nara or Osaka half-day)

    Days 1–2: Tokyo

    Asakusa, Shibuya, Shinjuku, and a neighborhood or two — see our Tokyo guide. Get a Suica/Pasmo and an eSIM on arrival.

    Day 3: A taste of nature

    Add an onsen-and-Fuji day in Hakone or shrines and waterfalls in Nikko — or simply go deeper into Tokyo.

    Days 4–5: Kyoto (+ Nara/Osaka)

    Take the shinkansen to Kyoto for temples, bamboo groves, and geisha districts (Kyoto guide), with an easy half-day to Nara or Osaka.

    Tips to make 5 days work

    • Base in just two cities to minimize transit; a 7-day pass usually isn’t worth it — see JR Pass.
    • Use luggage forwarding between Tokyo and Kyoto to travel light.
    • Book hotels early — compare on Booking.com .
    • Have more time? See our 7-day and 14-day itineraries.

    Budgeting for 5 days

    • A mid-range 5-day Tokyo-Kyoto trip typically runs JPY 150,000-230,000 per person excluding flights, covering hotels, food, local transport, and a handful of paid attractions.
    • The one-way Tokyo-Kyoto shinkansen fare runs about JPY 14,000 in an unreserved seat — with only one long-distance leg each way, single tickets almost always beat any rail pass on a trip this short.
    • Luggage forwarding between Tokyo and Kyoto (JPY 2,000-3,000 per bag) is worth it on a tight 5-day trip since it removes a full transfer day’s worth of hassle.

    Common mistakes on a 5-day trip

    • Trying to add a third base city — 5 days is genuinely tight for even two cities; adding Osaka as a full third base (rather than a Kyoto day trip) usually means arriving exhausted rather than well-traveled.
    • Scheduling the Hakone or Nikko day trip on your last full day — if it runs long or the weather turns, you have no buffer before departure; slot nature days in the middle of the trip instead.
    • Skipping jet lag adjustment time — most travelers land in Tokyo groggy; treating Day 1 as a lighter orientation day (rather than a packed sightseeing day) usually pays off across the rest of the trip.

    Making 5 days feel unrushed

    The trick with a short trip is choosing depth over breadth — rather than trying to see everything in our Tokyo and Kyoto guides, pick 2-3 priority sights per city and leave real gaps for food, wandering, and rest. A 5-day trip that covers less but moves at a comfortable pace consistently gets better reviews from first-timers than one that tries to match a 10-day itinerary’s checklist.

    If you land with jet lag

    Most international flights arrive in the afternoon or evening local time, which is a natural moment to keep Day 1 light — a nearby neighborhood walk and an early dinner beat forcing yourself through a packed sightseeing schedule on almost no sleep. The extra rest usually pays for itself in how much more you enjoy Days 2 through 5.

  • Shrines vs Temples in Japan: The Difference & Etiquette

    Shrines vs Temples in Japan: The Difference & Etiquette

    You’ll visit a lot of shrines and temples in Japan — but what’s the difference? Knowing helps you appreciate them and behave respectfully. Here’s a simple guide.

    The basic difference

    • Shrines (jinja) are Shinto — Japan’s indigenous religion of kami (spirits/gods). Look for a torii gate at the entrance.
    • Temples (o-tera) are Buddhist. Look for a large gate with guardian statues, an incense burner, and often a pagoda.

    Many sites blend both, and most Japanese people take part in each — Shinto for life events and New Year, Buddhism for funerals.

    How to visit a shrine

    1. Bow slightly at the torii; walk to the side, not the center (reserved for the kami).
    2. Purify at the water basin (temizuya): rinse left hand, right hand, then mouth.
    3. At the hall: toss a coin, bow twice, clap twice, pray, bow once.

    How to visit a temple

    1. Bow at the gate.
    2. Optionally waft incense smoke over yourself for good health.
    3. At the hall: toss a coin, bow, pray quietly (no clapping), bow.

    Good to know

    • Omamori (charms) and goshuin (stamp-book seals) make meaningful souvenirs.
    • Photography is often fine outside but restricted inside halls — check signs.
    • Dress and behave modestly. More in our etiquette guide.

    See famous examples in Kyoto, Asakusa, and Nikko.

    Costs & practical details

    • Most shrines are free to enter; the majority of Buddhist temples charge a modest JPY 300-600 entry fee for the main garden or hall, though the grounds themselves are often free to walk.
    • A goshuin stamp costs JPY 300-500 at either type of site and is collected in a dedicated book (goshuincho, JPY 1,500-3,000) rather than a passport or notebook — buy the book at your first stop.
    • Omamori charms run JPY 500-1,500 depending on their purpose (health, travel safety, love, exam success) and are meant to be renewed yearly rather than kept forever, traditionally returned to any shrine or temple for a ritual burning.

    Common mistakes to avoid

    • Clapping at a Buddhist temple — the clap-twice ritual belongs to Shinto shrines only; at a temple, pray silently with palms together after your coin offering, no clapping.
    • Walking straight up the center of a shrine’s approach path — the center is traditionally reserved for the resident kami, not visitors, so walk slightly to one side as a small but appreciated courtesy.
    • Skipping the purification basin because the process seems unclear — rinse your left hand, then right hand, then cup a little water in your left hand to rinse your mouth (don’t drink from the ladle directly), then rinse the ladle handle itself before setting it down.

    Sites that combine both in one visit

    Several famous complexes blend Shinto and Buddhist elements on the same grounds, a good way to see both traditions side by side in a single stop — Nikko’s Toshogu area mixes shrines and temples across one hillside complex, and many Kyoto neighborhoods have a shrine and temple within a few minutes’ walk of each other, making it easy to compare the etiquette in practice rather than just in theory.

  • Japanese Festivals (Matsuri): A Season-by-Season Guide

    Japanese Festivals (Matsuri): A Season-by-Season Guide

    Japan’s festivals (matsuri) are among the best reasons to time a trip — fireworks, portable shrines, lantern-lit nights, and food stalls galore. Here’s a guide to the big ones and how to enjoy them.

    Famous festivals by season

    • Spring: cherry-blossom hanami parties everywhere — see our cherry blossom guide; Takayama Spring Festival.
    • Summer: the big season — Gion Matsuri (Kyoto), Tenjin Matsuri (Osaka), Nebuta (Aomori), and countless fireworks (hanabi) festivals.
    • Autumn: Takayama Autumn Festival and harvest matsuri amid the fall foliage.
    • Winter: the Sapporo Snow Festival and atmospheric New Year shrine visits (hatsumode).

    What to expect

    • Mikoshi — portable shrines carried through the streets by chanting crowds.
    • Yatai food stalls — takoyaki, yakisoba, candied apples, shaved ice.
    • Yukata — locals dress up; you can too (see our yukata guide).

    Tips for enjoying matsuri

    • Arrive early for fireworks — the best spots and trains fill fast.
    • Carry cash for stalls; expect big crowds and limited transport after.
    • Check exact dates each year — many are fixed to specific days, not weekends.
    • Mind your manners in the crush — see our etiquette guide.

    Time a festival into your itinerary and check the best time to visit.

    Costs & how festivals actually work

    • Most matsuri are free to attend — you’re paying only for food stalls (JPY 300-700 per item) and, for major hanabi festivals, sometimes a reserved seating area (JPY 2,000-5,000) if you want to skip the free general viewing spots.
    • Big-name festivals like Gion Matsuri and Nebuta draw huge crowds and can fully book nearby hotels months ahead — if a specific festival is your trip’s anchor, book lodging before anything else.
    • Fireworks festivals in particular can pack local trains afterward for over an hour; budget extra time or plan to linger for food after the show ends rather than rushing for the last train with everyone else.

    Common mistakes to avoid

    • Assuming a festival happens on a fixed weekend — many matsuri are pinned to specific calendar dates regardless of weekday, so always check the current year’s exact schedule rather than relying on “usually happens in July.”
    • Skipping the daytime portion of a festival to save for the evening highlights — daytime processions, mikoshi parades, and smaller stalls are often just as memorable and much less crowded.
    • Wearing a rented yukata with sandals unsuited to a long day of standing and walking — comfortable footwear matters more than perfect styling for an all-day festival visit.

    Building a festival around your trip dates

    Rather than picking a destination first, some of the best matsuri trips work backward from the calendar — check which festivals overlap with your travel window using an updated yearly matsuri calendar, then route your itinerary to catch one or two rather than trying to force a fit. See our best time to visit guide for how festival season interacts with weather and crowds more broadly.

    Festival food worth trying beyond the basics

    Beyond takoyaki and yakisoba, look for festival-specific treats like ringo-ame (candied apples in a hard red shell), choco-banana on a stick, and regional specialties tied to that particular matsuri — Gion Matsuri stalls in Kyoto, for instance, sell items you won’t find at a typical Tokyo summer festival, so treat the food as part of the region’s character, not a generic festival menu.

  • Koyasan (Mount Koya): Temple Stays & Okunoin

    Koyasan (Mount Koya): Temple Stays & Okunoin

    Koyasan (Mount Koya) is one of Japan’s most spiritual places — a mountaintop temple town where you can sleep in a Buddhist temple, eat monk’s cuisine, and walk a lantern-lit cemetery at dawn. Here’s how to visit.

    What makes Koyasan special

    • Okunoin — a mesmerizing forest cemetery of 200,000 tombs and lanterns leading to the mausoleum of Kobo Daishi. Magical at night on a guided walk.
    • Danjo Garan & Kongobuji — the striking central temple complex and head temple.
    • Temple lodging (shukubo) — stay overnight in a working temple.

    Staying in a temple

    A shukubo stay is the highlight: simple tatami rooms, shojin ryori (Buddhist vegetarian cuisine), and optional morning prayers/meditation. It’s a peaceful contrast to the cities — book ahead, especially in autumn. See our traditional-stay guide for what to expect.

    Getting there

    • From Osaka: train to Gokurakubashi, then a cablecar up the mountain, then a short bus (a scenic half-day journey).
    • Consider the Koyasan-World Heritage ticket for transport savings; the JR Pass doesn’t cover the private line up.

    Tips

    • Do the Okunoin night walk — it’s the unforgettable part.
    • It’s cool and quiet up the mountain; bring layers even in summer. See our packing list.
    • Pairs well with Osaka and Kyoto.

    What a Koyasan visit costs

    • A shukubo temple stay with two meals typically runs JPY 12,000-25,000 per person, noticeably more affordable than a comparable ryokan experience elsewhere in Japan given the cultural depth included.
    • The Koyasan World Heritage Ticket bundles the cablecar, local bus, and several temple discounts for around JPY 3,000, usually cheaper than buying each separately if you plan to see more than one temple.
    • A guided night walk through Okunoin costs roughly JPY 2,000-3,000 per person and is worth it for the history and folklore context that’s easy to miss walking alone in the dark.

    Common mistakes to avoid

    • Treating it as a rushed day trip — the round trip from Osaka alone takes half a day; without an overnight stay, you’ll miss both the night walk and the morning prayer service that make Koyasan distinctive rather than just another temple stop.
    • Skipping dinner at your shukubo to eat elsewhere — the shojin ryori vegetarian meal is a core part of the experience and usually excellent; passing on it defeats much of the point of staying at a temple.
    • Underestimating the cold — Koyasan sits at higher elevation than surrounding cities and can be genuinely chilly even in summer evenings.

    What to expect from morning prayers

    Most shukubo offer an optional early-morning fire ritual (goma) or sutra chanting session, usually around 6am, open to guests regardless of religious background — it’s quiet, meditative, and one of the more memorable parts of a temple stay precisely because it isn’t staged for tourists.

    Getting the cablecar timing right

    The Nankai cablecar up the mountain runs on a set schedule with gaps of 15-20 minutes between departures — check the timetable before you arrive at Gokurakubashi Station rather than assuming a train-like frequency, since missing one by a few minutes means a genuine wait at a fairly quiet station with limited facilities.

  • Fukuoka Guide: Ramen, Food Stalls & Kyushu

    Fukuoka Guide: Ramen, Food Stalls & Kyushu

    Fukuoka, the gateway to Kyushu, is a laid-back food city loved for its ramen, open-air food stalls, and easy pace. It’s underrated by first-timers and perfect for a relaxed few days. Here’s what to do.

    Top experiences

    • Yatai food stalls — Fukuoka’s famous open-air street stalls, buzzing at night along the river and in Nakasu.
    • Hakata ramen — the rich tonkotsu (pork bone) ramen that made the city famous.
    • Ohori Park & Fukuoka Castle ruins — a relaxing central green space.
    • Canal City & Tenjin — shopping and entertainment districts.
    • Dazaifu Tenmangu — a beautiful shrine a short trip away.

    A springboard for Kyushu

    Use Fukuoka as a base to explore Kyushu — hot-spring towns like Beppu and Yufuin, and Nagasaki are within reach. Great for a longer itinerary.

    Getting there

    • The Sanyo Shinkansen reaches Hakata Station from Osaka (~2.5 hrs) and Hiroshima; see our bullet train guide.
    • Fukuoka Airport is unusually close to the city — minutes by subway. Grab an IC card.

    Tips

    • Go to a yatai at night for the full experience — cash only, small and social.
    • Try both tonkotsu ramen and mentaiko (spicy cod roe), a local specialty. See must-try food.

    What things cost in Fukuoka

    • A bowl of Hakata tonkotsu ramen at a yatai stall runs JPY 700-900, and it’s normal to order a small extra portion of noodles (kaedama) for JPY 100-150 once you finish the broth.
    • A full yatai evening — moving between two or three stalls for different dishes and drinks — typically runs JPY 3,000-5,000 per person, cash only at nearly every stall.
    • The Sanyo Shinkansen from Osaka (Shin-Osaka) to Hakata runs about JPY 15,000-16,000 one-way and takes roughly 2.5 hours; flying can be cheaper and faster from Tokyo if booked with notice.

    Common mistakes to avoid

    • Showing up to a yatai stall right at opening expecting full atmosphere — most get going after 7-8pm and reach peak energy later; an early visit means a quieter, half-empty stall.
    • Lingering too long at a popular stall during peak hours — yatai have limited seats (often under 10), and while there’s no strict time limit, moving on after finishing lets others in during a busy night.
    • Skipping Dazaifu because it feels like an afterthought — it’s a genuinely beautiful shrine complex and less than 30 minutes from central Fukuoka, easily worth a half-day.

    Using Fukuoka as a Kyushu base

    Fukuoka’s central position and excellent transport links make it a smarter Kyushu base than trying to move hotels every night — Beppu and Yufuin are about 2 hours by train, Nagasaki around 2 hours, and Kumamoto under an hour, all doable as day trips or short overnight hops from a single Fukuoka hotel.

    The mentaiko souvenir detour

    Fukuoka’s spicy cod roe (mentaiko) is sold vacuum-packed at the airport and department stores specifically for travel, and it’s one of the few fresh regional foods that survives a flight home well when kept cold — a genuinely distinctive souvenir compared to the packaged snacks available almost everywhere else in Japan.

  • Yokohama Guide: Chinatown, Bay Views & Day Trips

    Yokohama Guide: Chinatown, Bay Views & Day Trips

    Yokohama, just south of Tokyo, is a breezy bayside city with Japan’s biggest Chinatown, a romantic waterfront, and great museums. It’s one of the easiest and most rewarding day trips from the capital. Here’s the guide.

    What to see & do

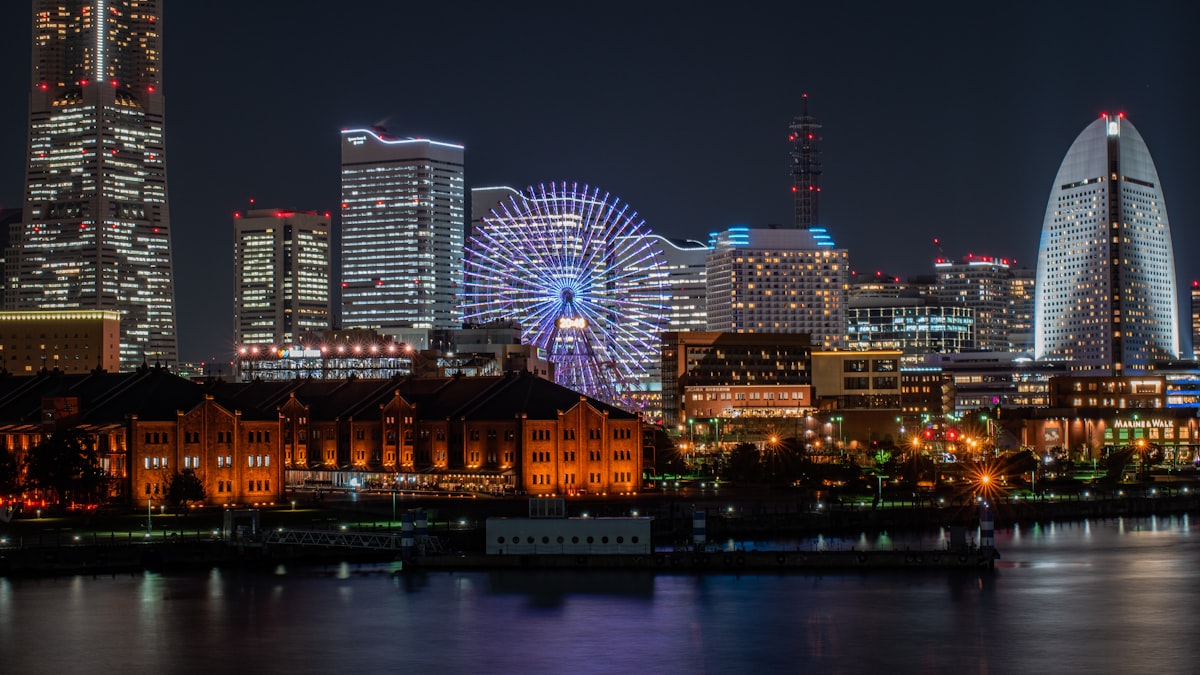
    • Minato Mirai — the futuristic harbor district with the Landmark Tower, a Ferris wheel, and Cup Noodles Museum.
    • Yokohama Chinatown — Japan’s largest, packed with street food and restaurants.
    • Red Brick Warehouse & Osanbashi Pier — waterfront shopping, events, and skyline views.
    • Sankeien Garden — a beautiful traditional garden with historic buildings.
    • Ramen Museum — regional ramen in a retro-themed hall.

    Why it’s a great day trip

    Only about 30 minutes from central Tokyo, Yokohama makes an easy half- or full-day escape with a completely different, seaside feel. See more day trips from Tokyo.

    Getting there

    • ~30 min from Tokyo/Shibuya by train; grab an IC card.
    • The waterfront is walkable; the Minato Mirai area is compact.

    Tips

    • Come hungry — Chinatown is best for grazing on street snacks.
    • The harbor is gorgeous at night when Minato Mirai lights up.
    • Pair with the rest of our Tokyo guide.

    What things cost

    • The train from Shibuya to Yokohama runs about JPY 280-540 depending on the line and express type, taking 25-40 minutes.
    • Minato Mirai’s Cup Noodles Museum costs JPY 500 for the exhibits, with a separate JPY 500 fee if you want to make your own custom cup noodle — a fun, hands-on stop for families.
    • Chinatown meals run the full range, from JPY 500 steamed buns bought street-side to JPY 3,000-5,000 sit-down banquets — grazing on street food is both cheaper and arguably more fun than one big meal.

    Common mistakes to avoid

    • Treating Yokohama as only an evening trip — Sankeien Garden and the Ramen Museum are better suited to daytime visits, so a well-planned day trip should start earlier than the harbor’s evening light show.
    • Arriving at Chinatown hungry with no plan — with over 500 restaurants and stalls packed into a small area, deciding on 2-3 must-try dishes in advance saves a lot of aimless wandering.
    • Missing the last direct train back to central Tokyo late at night — Yokohama’s late-night connections are good but not infinite; check return times if you’re staying for the night skyline view.

    A simple day-trip structure

    Start at Sankeien Garden in the morning when it’s quiet, move to Minato Mirai for lunch and the Cup Noodles Museum in the early afternoon, then finish in Chinatown for dinner and a stroll along the Red Brick Warehouse waterfront as the harbor lights come on at dusk.

    Combining with a wider Kanto trip

    Yokohama’s proximity to Tokyo makes it easy to fold into an existing itinerary without dedicating a full separate hotel night — many visitors base in Tokyo and treat Yokohama purely as a day trip, saving the hassle of packing and moving hotels for a destination that’s only 30 minutes away.

  • Kobe Travel Guide: Beef, Sake & Harbor Views

    Kobe Travel Guide: Beef, Sake & Harbor Views

    Kobe is one of Japan’s most stylish port cities — famous worldwide for its beef, framed by mountains and sea, and packed with charm. It’s an easy add to any Kansai trip. Here’s what to do.

    Top things to do

    • Kobe beef — the legendary wagyu; splurge on a teppanyaki lunch to save over dinner.
    • Kitano-cho — a hillside district of preserved Western-style merchant houses (ijinkan).
    • Mount Rokko & Nunobiki Herb Gardens — ropeway views over the bay, spectacular at night.
    • Nada sake district — Japan’s top sake-brewing area with tasting breweries; see our sake guide.
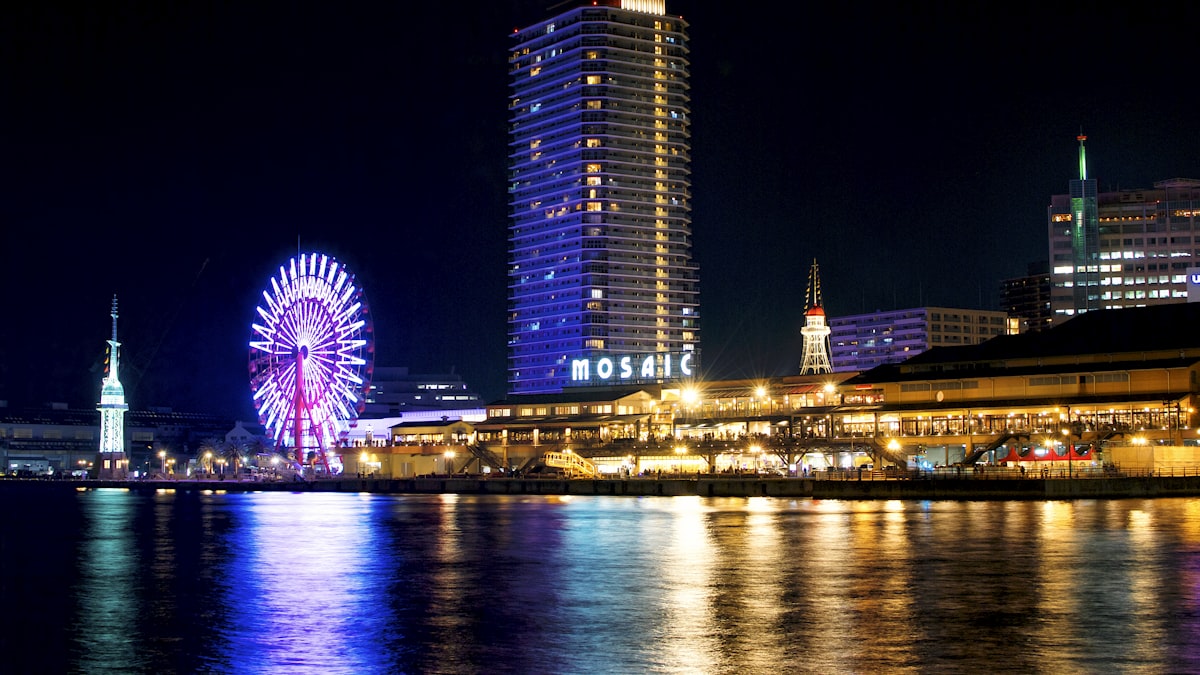
    • Harborland & Meriken Park — a relaxed waterfront with the Kobe Port Tower.

    Day trips & nearby

    Kobe pairs perfectly with Osaka and Kyoto, and Himeji Castle is a short hop west. Add it to a longer itinerary.

    Getting there

    • ~30 min from Osaka, ~30 min from Kyoto by train (covered by the JR Pass).
    • Compact and walkable; grab an IC card.

    Tips

    • Book a well-known Kobe beef restaurant ahead, or go at lunch for better value.
    • The Mt. Rokko night view is worth timing for sunset.
    • It works as a day trip, but an overnight lets you enjoy the night views. See day-trip planning tips.

    What things cost in Kobe

    • A Kobe beef teppanyaki lunch set runs JPY 6,000-12,000, roughly half the price of an equivalent dinner course at the same restaurant — lunch is genuinely the smart way to try it without the full splurge price.
    • The Nunobiki Herb Garden ropeway round-trip costs about JPY 2,000 and includes garden admission; going right before sunset lets you see the gardens in daylight and the night view without paying for two separate tickets.
    • Sake brewery tours and tastings in the Nada district are often free or under JPY 1,000 for a full tasting flight, making it one of the better-value activities in the city.

    Common mistakes to avoid

    • Booking a famous Kobe beef restaurant without checking if lunch sets are offered — not every restaurant runs a lunch service, and calling ahead saves a wasted trip if dinner-only.
    • Treating Kobe as a same-day round trip without checking the Mt. Rokko ropeway’s last departure — the night view is the highlight, but the ropeway stops running earlier than most city attractions.
    • Skipping Kitano-cho because “old Western houses” sounds unremarkable on paper — the hillside district’s mix of architecture and cafes is genuinely distinct from anywhere else in the Kansai region.

    Kobe beef grades and what you’re actually paying for

    Kobe beef is graded on marbling, color, and texture, and menus often list the specific cut and grade — higher grades (A4, A5) command a real price premium and are meant to be eaten in smaller portions given the richness. If budget matters more than the Kobe name specifically, a slightly less famous wagyu region can deliver a similar experience for less.

    Kobe as a stopover, not just a day trip

    Because it sits directly between Osaka and Himeji on the same rail line, Kobe works especially well as a half-day stopover on the way to or from Himeji Castle rather than requiring a separate dedicated trip from your Kansai base.