Japan Trove

Category: Travel

Practical, up-to-date guides for traveling in Japan — itineraries, rail passes, eSIMs, where to stay, seasonal timing, etiquette, and the local know-how that makes a trip smoother. Written with real Japanese sources so you get the answer that actually works on the ground, not the recycled tourist one.

  • Solo Female Travel in Japan: Safety Tips & Guide

    Solo Female Travel in Japan: Safety Tips & Guide

    Japan is widely considered one of the best and safest countries in the world for solo female travelers. Here’s an honest, practical guide to making the most of it — with sensible precautions.

    Why Japan is great for solo women

    • Very low crime and a strong culture of respect; walking alone, even at night in busy areas, generally feels safe.
    • Easy to navigate — clear signage, reliable trains, and helpful people.
    • Solo-friendly by design — counter seats, single hotel rooms, and lots to do alone. See our solo travel guide.

    Smart, simple precautions

    • Women-only train cars exist during rush hour (look for pink signs) to avoid crowded-train harassment (chikan), which does happen.
    • Women-only floors or hotels and female dorms at hostels are common — a comfortable option.
    • Trust your instincts in nightlife districts; avoid overly pushy touts.
    • Share your itinerary with someone at home and keep an eSIM for maps and contact.

    Experiences that shine solo

    Accommodation tips

    • Business hotels and female-friendly capsule hotels are safe, clean, and budget-friendly; see where to stay and our capsule hotel guide.
    • Book near major stations for easy, well-lit access.

    Bottom line

    With basic street smarts, Japan is an exceptionally rewarding solo trip for women. Start with our first-timer tips and a relaxed itinerary.

    What it actually costs to travel solo

    • Solo travelers avoid the “single supplement” that plagues package tours in many countries — Japanese business hotels price by room, not per person, so a single room typically runs JPY 6,000-12,000/night in a mid-size city, not much more than a shared twin split two ways once you count the space.
    • Counter dining, ramen shops, and konbini meals are all designed around single diners, so solo travelers rarely pay a premium to eat well — unlike many countries where solo restaurant dining feels awkward or costs more per head.
    • Budget roughly JPY 12,000-18,000/day all-in (lodging, food, local transport) for a comfortable solo mid-range trip outside peak season.

    Common solo travel mistakes

    • Over-scheduling every hour — solo trips are the easiest to burn out on since there’s no one to suggest a slower pace; build in at least one unplanned afternoon per week.
    • Skipping the women-only train car out of uncertainty about the rules — they’re simply marked with pink signage near specific doors during designated hours, and any woman can use them, no ticket or registration required.
    • Avoiding solo dining out of habit — ramen counters, kaiten-zushi, and standing bars are built for it, and hesitating means missing some of the best, most casual food in the country.

    Solo-friendly cities beyond Tokyo and Kyoto

    Smaller cities like Kanazawa, Takayama, and Nara are especially easy solo destinations — compact enough to navigate without much planning, safe to walk at night, and set up with good single-traveler accommodation. If you want a quieter solo pace after a few busy days in the capital, see our Kanazawa guide or Takayama guide for a change of tempo.

    Nighttime safety in practice

    Areas like Kabukicho in Shinjuku have more aggressive touting than most of Japan, and it’s worth walking past rather than engaging with anyone offering a “cheap” bar — these scams target tourists of any gender. Outside nightlife zones, walking alone late at night on ordinary streets is genuinely normal in Japan and something many local women do without a second thought, which is a real cultural difference worth knowing before you arrive nervous about it.
  • Best Day Trips from Kyoto: Nara, Osaka, Uji & More

    Best Day Trips from Kyoto: Nara, Osaka, Uji & More

    Kyoto is perfectly placed for day trips — ancient towns, a giant Buddha, and even Osaka’s food scene are all a short train ride away. Here are the best day trips from Kyoto.

    Top day trips

    • Nara (~45 min) — the giant Buddha of Todai-ji and free-roaming deer; see our Nara guide.
    • Osaka (~15–30 min) — food heaven and Dotonbori; see our Osaka guide.
    • Uji (~20 min) — famous for green tea and the Byodo-in Phoenix Hall; pair with our green tea guide.
    • Fushimi — the torii-gate shrine and sake district; see our Fushimi Inari guide.
    • Himeji (~1 hr) — Japan’s finest castle; see our castles guide.

    A little further

    • Kobe (~30 min) — beef, harbor, and hillside views; see our Kobe guide.
    • Koyasan — a mountaintop temple town (a longer trip but unforgettable); see our Koyasan guide.
    • Amanohashidate — one of Japan’s “three great views” on the coast.

    Tips

    • Kyoto’s central location makes the Kansai region incredibly easy — grab an IC card.
    • Consider a regional pass if you’ll do several trips; compare with the JR Pass.
    • Start early to beat crowds at the big sights. Plan it into a 7-day itinerary.

    Typical costs & travel times

    • Nara: about JPY 720 round-trip on the Kintetsu line (45 min each way); Todai-ji entry is JPY 600.
    • Osaka: about JPY 900-1,000 round-trip (15-30 min); mostly free to explore, budget JPY 2,000-3,000 for street food.
    • Uji: about JPY 540 round-trip (20 min); Byodo-in entry is JPY 700.
    • Himeji: about JPY 5,000-6,000 round-trip by shinkansen or JPY 2,400 by local/rapid train (roughly 1-1.5 hours); castle entry is JPY 1,000.

    Common mistakes when day-tripping from Kyoto

    • Trying to combine Nara and Osaka in one day — both deserve a half to full day on their own; stacking them leaves you rushing both.
    • Underestimating Himeji’s distance — it’s the furthest common day trip and eats a good chunk of the day once you add the walk from the station to the castle and back.
    • Not checking the last return train time from smaller towns like Amanohashidate, where service thins out earlier than in the city.

    Which day trip suits which traveler

    First-timers with only one extra day should choose Nara for the deer and the giant Buddha, or Osaka for food — both are close, easy, and hard to get wrong. Repeat visitors or those with a car-free rural itch should prioritize Uji’s tea culture or a full day at Himeji, Japan’s best-preserved original castle. If you’re building a longer stay, see our best day trips from Tokyo guide for how the two regions compare.

    Building a two-destination day

    Uji and Fushimi pair well together since both sit on the same side of Kyoto and involve short train hops — a morning at Byodo-in and a tea house in Uji, then Fushimi Inari’s lower gates in the late afternoon before the crowds thin out further, makes for one well-paced day rather than two rushed half-days.

    Packing light for a day trip

    Leave the big suitcase at your Kyoto hotel and travel with just a small day bag — lockers at Kyoto Station are plentiful but fill up on busy mornings, so it’s simpler to check out of the habit of carrying much at all. A portable charger and a paper or offline map backup are worth having for smaller towns like Uji or Amanohashidate, where signal and English signage thin out compared to central Kyoto.

  • Best Temples in Japan: The Most Beautiful to Visit

    Best Temples in Japan: The Most Beautiful to Visit

    Japan’s temples range from golden pavilions to moss gardens to mountaintop retreats. If you only visit a few, make them count. Here’s a guide to the most beautiful and meaningful temples to see.

    Kyoto’s greatest hits

    • Kinkaku-ji — the shimmering Golden Pavilion.
    • Kiyomizu-dera — the grand hillside temple with city views.
    • Ryoan-ji — the world’s most famous Zen rock garden; see our gardens guide.
    • More in our Kyoto guide.

    Beyond Kyoto

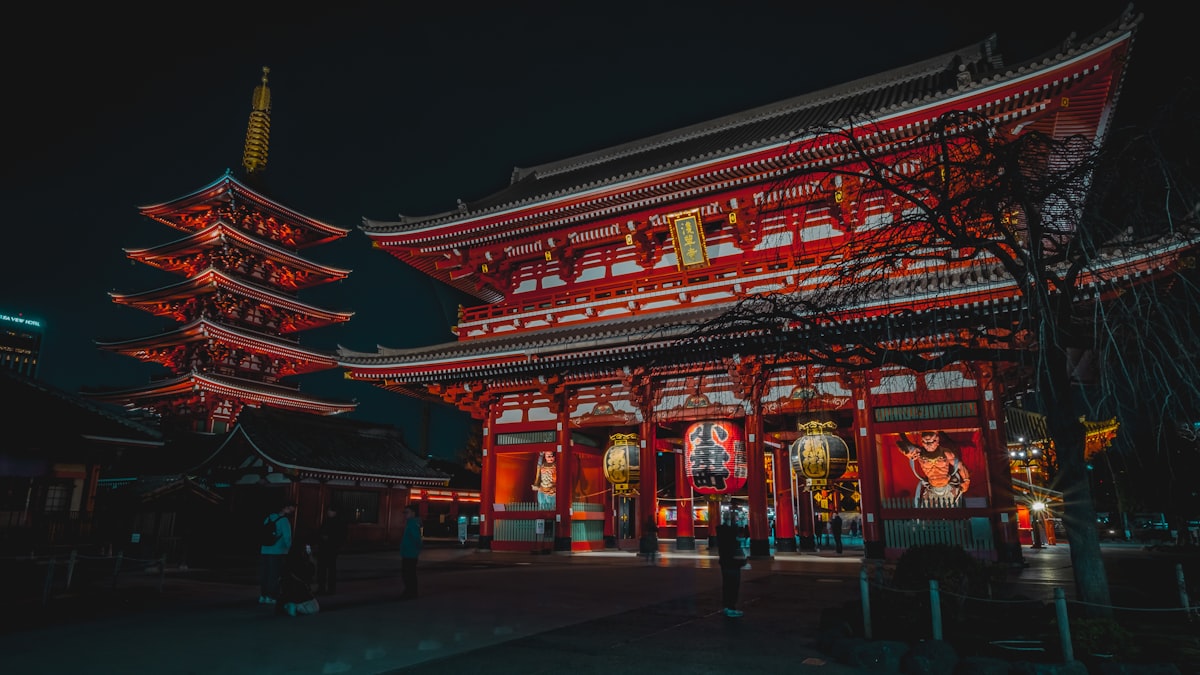
    • Senso-ji (Tokyo) — the capital’s oldest temple; see our Asakusa guide.
    • Todai-ji (Nara) — home to a giant bronze Buddha; see our Nara guide.
    • Koyasan’s Okunoin — a mystical mountaintop temple town; see our Koyasan guide.
    • Byodo-in (Uji) — the Phoenix Hall pictured on the 10-yen coin.

    Temple vs shrine?

    Temples are Buddhist; shrines are Shinto — and they’re visited differently. Read our shrines vs temples guide so you know the etiquette.

    How to enjoy temples

    • Go early for calm and soft light; the famous ones fill up fast.
    • Collect goshuin (calligraphy stamps) in a special book — a lovely keepsake.
    • Dress modestly and keep quiet; remove shoes where indicated. See our etiquette guide.
    • Consider a temple stay (shukubo) for the full experience.

    Fit temple-hopping into a 7-day itinerary.

    Typical costs & opening hours

    • Most major temples charge JPY 400-600 entry; Kinkaku-ji is JPY 500, Kiyomizu-dera is JPY 400, and Todai-ji in Nara is JPY 600. Ryoan-ji’s rock garden is included in a combined JPY 500 ticket with its grounds.
    • Standard hours run roughly 8:30am/9am to 5pm, though some extend for seasonal evening illuminations during cherry blossom and autumn leaf season — check ahead, since these are genuinely different (and often better) than a daytime visit.
    • A goshuin calligraphy stamp costs JPY 300-500 per temple, collected in a special book (goshuincho) that itself runs JPY 1,500-3,000 at the first temple you visit.

    Common mistakes to avoid

    • Visiting Kinkaku-ji or Kiyomizu-dera at midday — both are among the most crowded sights in Japan by 10am; arriving at opening is the single biggest quality-of-visit improvement available.
    • Wearing shoes that are hard to remove — many temple interiors require shoes off, and slip-on footwear saves real time and hassle over a day of temple-hopping.
    • Trying to see too many major temples in one day — three well-chosen temples with time to actually sit and look beat six rushed stops.

    Photography & quiet moments

    Many temples restrict photography inside main halls even where it’s allowed in the gardens — look for posted signs rather than assuming. If a contemplative visit matters more to you than checking off famous names, quieter options like Kyoto’s Shisen-do or Nara’s smaller temple gardens deliver a similar atmosphere to the headline sights with a fraction of the visitors.

    Temple stays and deeper experiences

    Beyond a quick visit, several temples offer sitting meditation (zazen) sessions open to visitors, usually for a small fee and often in English at temples used to tourists, like some in the Kyoto’s Shokoku-ji complex. A shukubo temple stay at Koyasan takes this further, letting you eat the monks’ vegetarian shojin ryori cuisine and join a morning fire ritual — a very different experience from a daytime sightseeing stop.

  • Dotonbori (Osaka): Neon, Street Food & What to Do

    Dotonbori (Osaka): Neon, Street Food & What to Do

    Dotonbori is Osaka at full volume — neon signs, canal reflections, the iconic Glico running man, and street food everywhere. It’s the city’s must-see nightlife and eating district. Here’s how to enjoy it.

    What to see

    • The Glico running man sign — Osaka’s most famous photo spot, on the canal.
    • Neon-lit canal — dazzling at night; take a short canal cruise for a different angle.
    • Giant food signs — the moving crab (Kani Doraku), giant octopus, and more.
    • Hozenji Yokocho — a tiny atmospheric alley just off the main drag.

    Eat your way through (kuidaore)

    Osaka’s motto is “eat until you drop.” Don’t miss:

    • Takoyaki — octopus balls, the city’s signature snack.
    • Okonomiyaki — savory pancakes.
    • Kushikatsu — deep-fried skewers (no double-dipping the sauce!).
    • More in our must-try food guide.

    Nearby

    • Shinsaibashi — a long covered shopping arcade next door.
    • Namba & Amerimura — nightlife and youth fashion.
    • See more in our Osaka guide.

    Getting there & tips

    • Namba Station is the closest hub; grab an IC card.
    • Go at night for the full neon effect; it’s busiest (and best) after dark.
    • Carry cash for street stalls (see money in Japan). Day-trip from Kyoto easily.

    Typical costs

    • A canal cruise (Tombori River Cruise) runs about JPY 1,200-1,500 for a 20-minute ride and is a nice change of pace from walking the same street twice.
    • Street food snacking through the district (takoyaki, kushikatsu, a drink) runs JPY 1,500-2,500 per person for a satisfying grazing dinner.
    • Dotonbori itself is free to walk — the giant signs and canal views cost nothing, which is part of why it’s such an easy stop to add to any Osaka day.

    Common mistakes to avoid

    • Double-dipping kushikatsu skewers in the shared sauce — this is a genuine faux pas at kushikatsu counters; use the provided cabbage to scoop extra sauce instead.
    • Visiting only in daylight — Dotonbori’s neon signage is its main draw and looks flat and ordinary before dusk; plan to be there after sunset at least once.
    • Eating at the first crowded restaurant you see on the main strip — some of the better food is one street back in Hozenji Yokocho or the surrounding arcades, away from the highest-rent storefronts.

    A simple half-day plan

    Arrive in the late afternoon, walk Shinsaibashi’s covered arcade for shopping, reach Dotonbori by early evening for photos while there’s still some daylight, eat your way along the canal as it gets dark, and finish with a stroll down the quiet lantern-lit lane of Hozenji Yokocho before heading back. Pair it with our Osaka guide for what to do earlier in the day.

    Combining with a wider Osaka night out

    Dotonbori naturally spills into Amerikamura for younger, thrift-and-streetwear fashion, and into Namba’s covered arcades for more shopping if the crowds start to feel like too much. If karaoke or a themed bar sounds fun after dinner, the surrounding blocks have some of Osaka’s densest concentration of both, open late into the night.

  • Fushimi Inari Shrine: Torii Gates Guide & How to Beat Crowds

    Fushimi Inari Shrine: Torii Gates Guide & How to Beat Crowds

    Fushimi Inari Shrine — the mountain of thousands of vermilion torii gates — is one of Japan’s most unforgettable and photographed sights. Here’s how to visit, and how to escape the crowds.

    What it is

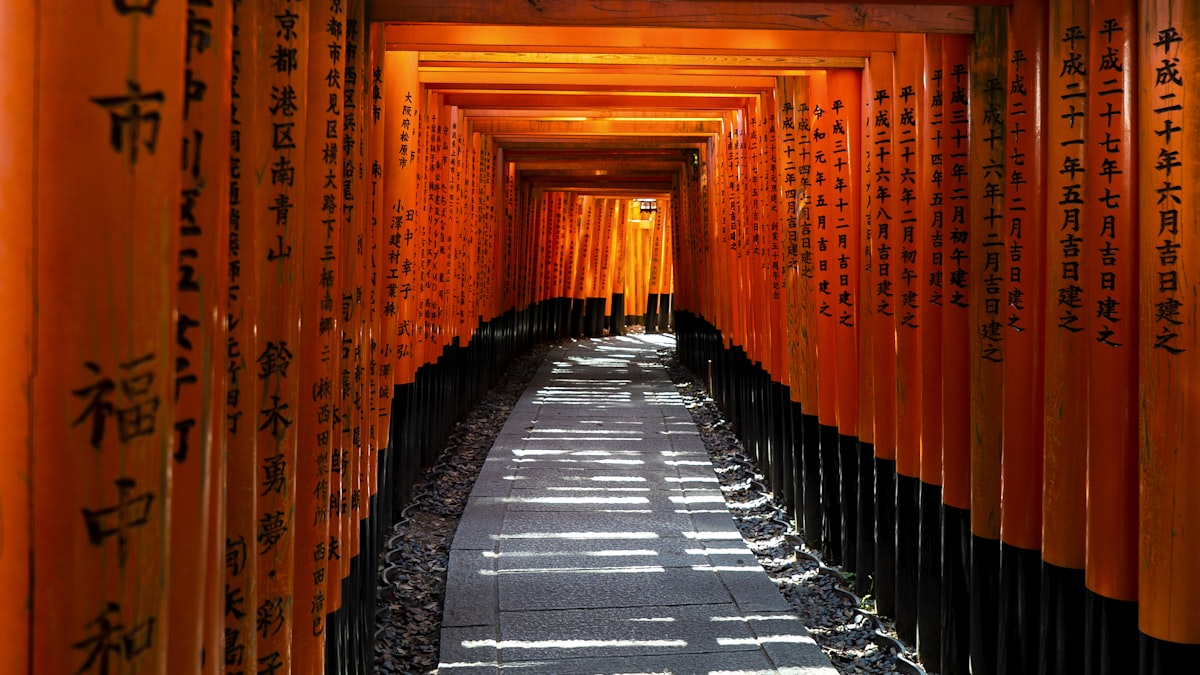
    Fushimi Inari Taisha, in southern Kyoto, is dedicated to Inari, the Shinto god of rice and prosperity. Its famous Senbon Torii — endless tunnels of orange gates donated by businesses — wind up the sacred Mt. Inari. It’s free and open 24 hours.

    The hike

    • The full loop to the summit and back takes about 2–3 hours, but you can turn back anytime.
    • The gates are densest near the bottom; the Yotsutsuji intersection (about 30–45 min up) has a great city view and is a good turnaround point.
    • Look for the pairs of fox statues (kitsune) — Inari’s messengers.

    Beat the crowds

    • Go very early (before 8am) or in the evening — the lower gates are packed midday. Early morning is magical and quiet.
    • Walk past the first tunnels — crowds thin dramatically higher up.
    • It’s stunning lit up at night, and safe (bring a light for the upper trail).

    Getting there

    Tips

    • Wear comfortable shoes — it’s a real uphill hike, not just a photo stop.
    • Try street food (grilled quail, inari-zushi) at the base stalls.
    • Rent a kimono for memorable photos among the gates.

    Costs, hours & how long to allow

    • Fushimi Inari is free and open 24 hours, with no ticket booth or gate — a rarity among Japan’s major sights and part of why it draws crowds at every hour of the day.
    • Budget 45-60 minutes for a quick visit to the dense lower gates and Yotsutsuji viewpoint, or 2-3 hours for the full summit loop; there is no rush and no closing time forcing your pace.
    • Food stalls near the entrance sell grilled quail and inari-zushi for roughly JPY 300-600 each — a good pre- or post-hike snack, since options thin out higher up the mountain.

    Common mistakes to avoid

    • Turning back at the first photogenic tunnel — this is the single most crowded 100 meters of the entire mountain; even 10 more minutes of walking thins the crowd dramatically.
    • Visiting only during the day — the gates are lit at night and genuinely feel different, quieter and more atmospheric, and the mountain is safe to walk after dark with a phone flashlight.
    • Wearing sandals or dress shoes — despite looking like a short photo stop, this is a real hillside hike with uneven stone steps.

    What’s actually at the summit

    Beyond the famous lower gates, the upper mountain has smaller shrines, teahouses with mountain views, and a genuinely different, quieter atmosphere from the crowded base — many visitors are surprised the summit itself is a modest shrine rather than a dramatic finale, so treat the walk itself, not a single endpoint, as the main reward. Combine the visit with nearby Fushimi’s sake district for an easy full-morning plan.

  • Japan’s Rainy Season (Tsuyu): What to Know

    Japan’s Rainy Season (Tsuyu): What to Know

    Japan’s rainy season (tsuyu) puts many travelers off — but it has real upsides and is very manageable with a little planning. Here’s what to expect and how to make the most of it.

    When is the rainy season?

    Tsuyu typically runs from early June to mid/late July across most of Japan (Okinawa earlier; Hokkaido largely skips it). Expect humid days with periods of rain rather than constant downpours.

    The upsides

    • Fewer crowds and lower prices at big sights and hotels.
    • Lush greenery — gardens and moss temples look their best; see our gardens guide.
    • Hydrangeas (ajisai) bloom beautifully at temples and parks.

    How to plan around the rain

    • Mix indoor and outdoor plans — museums, aquariums, teamLab, shopping, and food halls are perfect rain backups.
    • Carry a compact umbrella (cheap at any konbini) and quick-dry clothes; see what to wear.
    • Check forecasts daily and stay flexible — with an eSIM you can adjust on the go.

    What to know

    • It’s humid — pack breathable clothing and a hand towel.
    • Rain rarely ruins a trip here; trains and indoor life carry on as normal.
    • Onsen towns are lovely in the rain — see our onsen towns guide.

    Bottom line

    If you don’t mind some rain, tsuyu offers value and beauty with fewer crowds. Compare with our best time to visit guide, and plan with a flexible itinerary.

    What tsuyu means for your budget

    • Hotel rates in June and early July often sit 15-25% below the cherry blossom and summer peaks, and popular ryokan that book out months ahead in April are frequently available with a week or two of notice.
    • Flights into Japan during this window are also typically cheaper than the surrounding shoulder seasons, since it falls between the two big domestic travel peaks of Golden Week and Obon.
    • An umbrella from a konbini costs about JPY 500-700 and is disposable enough that buying one on arrival, rather than packing one, is a normal local habit during this season.

    Common mistakes during rainy season

    • Cancelling outdoor plans entirely — most days bring a few hours of rain, not a full washout; checking an hourly forecast rather than the daily one often reveals a dry window to work with.
    • Packing only cotton clothing — it stays damp in the humidity; the same quick-dry fabrics recommended for summer help here too.
    • Skipping Hokkaido on the assumption all of Japan is rainy in June — Hokkaido largely misses tsuyu and can be a smart regional pivot if the forecast further south looks grim.

    Regional timing differences

    Okinawa’s rainy season starts and ends earlier (roughly May to mid-June), so a trip timed for late June often finds Okinawa already clear while the mainland is still damp. If flexibility allows, watch the Japan Meteorological Agency’s tsuyu-akemi (rainy season end) announcements, since the season can run shorter or longer than the average by two or three weeks in either direction.

    What to pack for rainy season

    A packable rain shell beats an umbrella on breezy days, and quick-dry socks and shoes make a real difference if you’re walking outdoor sights in steady rain. See our packing list for a full season-by-season rundown, and pair a rainy-season trip with a flexible itinerary that can shuffle outdoor and indoor days as the forecast changes.

  • Watching Baseball in Japan: A Fan’s Guide

    Watching Baseball in Japan: A Fan’s Guide

    Catching a baseball game in Japan is one of the most fun (and surprisingly different) things you can do — nonstop cheering, brass bands, and a party atmosphere. Here’s how to experience it.

    Why it’s a must-do

    Japanese baseball (NPB) turns the crowd into the show: each team has organized cheering sections (oendan) with chants, trumpets, and songs for every player. It’s loud, joyful, and welcoming to newcomers — even if you don’t follow the sport.

    The basics

    • Season: roughly late March to October, with playoffs and the Japan Series after.
    • Teams to catch: the Tokyo Giants and Swallows, Hanshin Tigers (Osaka — famously passionate fans), SoftBank Hawks (Fukuoka), and more.
    • Tickets are affordable and easy to buy online or at convenience stores; big games sell out.

    What to expect at the stadium

    • Cheer with the home section — follow along; fans will happily show you.
    • Beer “girls” with kegs on their backs, and great stadium food (try a bento).
    • Seventh-inning balloon launch at some stadiums — an iconic moment.

    Tips

    • Sit in the outfield/cheering section for the full atmosphere, or infield for a calmer view.
    • Bring some cash for food and merch (see money in Japan).
    • Games are in Tokyo, Osaka, Fukuoka and more — easy to fit into any itinerary.

    What a game day costs

    • Outfield cheering-section seats run roughly JPY 2,000-3,500; infield seats climb to JPY 4,000-8,000, and premium box seats can reach JPY 10,000+ at popular Tokyo and Osaka matchups.
    • Stadium food and a beer typically run JPY 1,500-2,500 per person — yakisoba, karaage, and a bento are all normal ballpark fare alongside beer sold from tap backpacks that circulate the stands.
    • Team merchandise (a happi coat, towel, or noisemaker) runs JPY 1,500-4,000 and doubles as a fun, functional souvenir since you’ll actually use it in the stands.

    Common mistakes to avoid

    • Sitting in the quiet infield expecting the famous chanting atmosphere — the organized cheering happens in the outfield sections; that’s where to sit if the crowd energy is the main draw.
    • Buying tickets at the gate for a marquee matchup (like a Giants-Tigers game) — these sell out online days or weeks ahead.
    • Leaving before the seventh-inning stretch at stadiums that do the balloon release — it’s a genuinely fun, photogenic tradition worth staying for even if you plan to beat the post-game crowd out.

    Which team to see for a first game

    The Hanshin Tigers in Osaka have the most famously passionate, chant-heavy fanbase in NPB and are a great first choice if raw atmosphere matters most; the Yomiuri Giants at Tokyo Dome are the easiest to reach from most Tokyo hotels and have solid English signage for first-time visitors.

    Weather & seasonal notes

    Most NPB stadiums are open-air, so a July or August game means real heat and humidity in the stands — bring a hand fan and expect to buy several drinks over a three-hour game. A handful of stadiums, including Tokyo Dome, are fully covered, which is worth choosing deliberately if you’re visiting during peak summer and want the atmosphere without the heat.

  • Karaoke in Japan: A First-Timer’s Guide

    Karaoke in Japan: A First-Timer’s Guide

    Karaoke is a beloved Japanese pastime and a must-try night out — and it works very differently from karaoke bars back home. Here’s how to do it, even if you don’t speak Japanese.

    How Japanese karaoke works

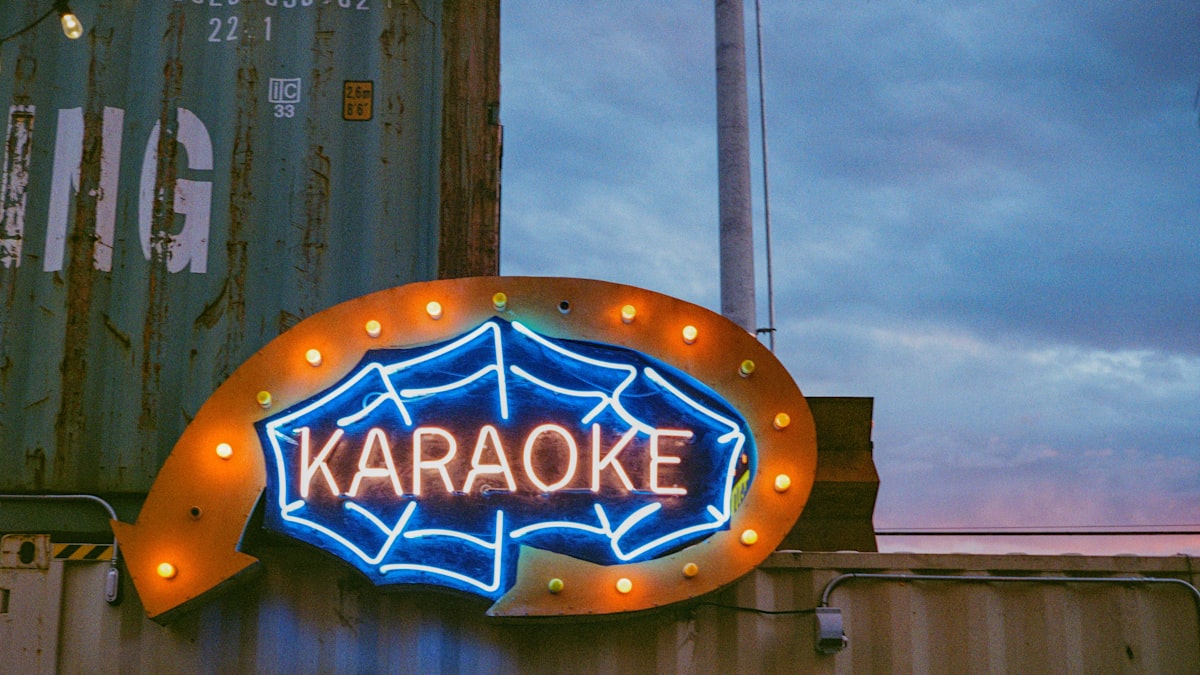
    You rent a private room (karaoke box) by the hour for your group — no singing in front of strangers. You order drinks and food to the room, pick songs on a tablet, and belt out as many as you like.

    Step by step

    1. Check in at the front desk — say your group size and how long (e.g. “two hours”).
    2. Options like nomihodai (all-you-can-drink) are common and good value.
    3. Find your room; use the tablet remote (switch to English) to search songs.
    4. Call the front desk to extend time or order food/drinks.

    Good to know

    • Big chains (like Big Echo, Karaoke Kan, Joysound) have huge English and international song lists.
    • Cheaper by day, pricier at night and weekends; free time (freetime) deals exist.
    • Great for groups, families, and solo travelers (yes, solo karaoke — hitokara — is a thing).

    Tips

    • Tambourines and mics are provided — go all in.
    • Pay at the end at the front desk; carry some cash (see money in Japan).
    • Pair it with a night out in Shinjuku or Shibuya. More only-in-Japan fun in our Tokyo guide.

    What karaoke actually costs

    • Daytime rates run as low as JPY 200-400 per person per 30 minutes at budget chains; evening and weekend rates climb to JPY 500-900 per 30 minutes, often with a required one-drink minimum.
    • Nomihodai (all-you-can-drink) packages add roughly JPY 1,000-1,800 per person for a set time block and are usually worth it for a group planning to stay two hours or more.
    • A typical two-hour session with one drink each for a group of four runs about JPY 2,500-4,000 per person all-in, depending on the chain and time of day.

    Common mistakes to avoid

    • Not switching the tablet to English before searching — the menu language toggle is usually a small flag icon in a corner, easy to miss on a first visit.
    • Forgetting to call the front desk to extend time — rooms don’t auto-extend, and walking to the desk mid-song is a rite of passage every karaoke-goer eventually experiences.
    • Assuming karaoke is only a late-night activity — daytime and early-evening sessions are cheaper, quieter, and a great way to kill a rainy afternoon.

    Song-picking tips for non-Japanese speakers

    Most tablets let you search by artist or song title in roman letters, and international pop, rock, and hip-hop catalogs are usually extensive even at smaller chains. If you want to try a Japanese song, karaoke machines display furigana (phonetic readings) over the lyrics, which makes singing along phonetically possible even without reading kanji.

    Karaoke with kids or larger groups

    Family-friendly chains welcome children, and rooms scale up to 10+ people for larger parties — book ahead for weekend evenings, since popular branches near stations fill up fast. Some chains also offer solo booths (hitokara) sized for one person, a surprisingly relaxing way to spend an hour if you want to sing without an audience at all.

  • Kyoto Itinerary: 2 Days of Temples & Old Streets

    Kyoto Itinerary: 2 Days of Temples & Old Streets

    Two days in Kyoto lets you see the essential temples, shrines, and old streets without rushing. Here’s a well-planned 2-day Kyoto itinerary that groups sights by area to save time.

    Day 1: East Kyoto (Higashiyama)

    • Kiyomizu-dera — the famous hillside temple; go early.
    • Sannenzaka & Ninenzaka — preserved sloping lanes of shops and tea houses.
    • Yasaka Shrine & Gion — end in the geisha district at dusk; see our Gion & geisha guide.
    • Optional: Fushimi Inari (the red torii gates) — magical early morning or evening.

    Day 2: Arashiyama & the north/west

    • Arashiyama Bamboo Grove and Tenryu-ji temple; go at opening for calm.
    • Kinkaku-ji (the Golden Pavilion) — dazzling on a clear day.
    • Ryoan-ji — the famous Zen rock garden; see our gardens guide.

    Make it smooth

    • Group by area — Kyoto’s sights are spread out; buses and trains fill the gaps. Grab an IC card.
    • Start early — the top temples get crowded by mid-morning.
    • Rent a kimono for Higashiyama photos.

    Nearby & next

    Add a half-day to Nara or Osaka. See our full Kyoto guide, where to stay, and fit it into a 7-day itinerary.

    Budgeting for two days in Kyoto

    • Temple entry fees across both days typically total JPY 2,000-3,000 per person if you visit 4-5 paid sites; Fushimi Inari and much of Arashiyama’s grounds are free.
    • A kimono rental for a Higashiyama photo walk runs JPY 4,000-8,000 for a basic set, more for higher-end fabrics or hair styling add-ons.
    • Bus and train fares across two days of area-hopping run about JPY 1,000-1,500 per person on an IC card; a one-day bus pass (around JPY 700) can pay off if you’re doing several short hops rather than a few longer train rides.

    Common mistakes on a 2-day Kyoto trip

    • Underestimating Higashiyama’s crowds by mid-morning — Kiyomizu-dera and the lanes below it are genuinely packed by 10am; starting at opening is the difference between a calm and a crowded visit.
    • Trying to fit Fushimi Inari into Day 1 on top of a full Higashiyama itinerary — it deserves its own slot, ideally early morning or evening on either day.
    • Skipping lunch planning — Nishiki Market and the streets around Gion have good options, but the most famous spots near Kiyomizu-dera can have long waits at peak lunch hours.

    Where to eat each day

    Day 1 in Higashiyama pairs naturally with a stop at Nishiki Market for a grazing lunch on the way to or from the eastern temples. Day 2 in Arashiyama has good tofu-focused restaurants near Tenryu-ji — a fitting, quiet lunch after the bamboo grove, before the afternoon crowds arrive from tour buses.

    Extending to three days

    If you can stretch to a third day, Uji’s tea houses and the Byodo-in Phoenix Hall make an easy, low-key add-on that doesn’t require re-planning the rest of the trip — it’s a short hop from central Kyoto and pairs naturally with the green tea theme already present in the city’s cafes.

  • Tokyo Itinerary: 3 Days for First-Timers

    Tokyo Itinerary: 3 Days for First-Timers

    Three days in Tokyo is enough to hit the highlights and get a real feel for the city. Here’s a well-paced 3-day Tokyo itinerary that balances old and new, plus food and downtime.

    Day 1: Old Tokyo & the east

    • Asakusa — Senso-ji temple and Nakamise street; see our Asakusa guide.
    • Tokyo Skytree or a Sumida River cruise.
    • Evening in Akihabara for neon and geek culture — see our Akihabara guide.

    Day 2: West-side energy

    • Meiji Shrine & Harajuku — calm forest then youth fashion (Harajuku guide).
    • Shibuya — the scramble crossing and Shibuya Sky (Shibuya guide).
    • Evening in Shinjuku — Omoide Yokocho and city views (Shinjuku guide).

    Day 3: Your pick

    Practical tips

    Budgeting for three days in Tokyo

    • Entry fees for the optional attractions vary widely — Tokyo Skytree runs JPY 2,100-3,500 depending on the deck, teamLab is JPY 3,800-4,800, and the Ghibli Museum is a flat JPY 1,000 but needs advance booking.
    • Food across three days for a mid-range traveler runs roughly JPY 3,000-5,000/day if you mix konbini breakfasts, ramen or teishoku lunches, and one nicer dinner.
    • Local transport across three days on an IC card typically totals JPY 2,500-3,500 per person, assuming a few train hops each day rather than a day pass.

    Common mistakes on a 3-day Tokyo trip

    • Booking Ghibli Museum or teamLab tickets too late — both release timed tickets in advance and sell out, especially around weekends and holidays; lock these in before finalizing the rest of the itinerary.
    • Spreading day trips too thin — Kamakura, Nikko, and Yokohama are each worth a dedicated half-to-full day; squeezing more than one into Day 3 usually means rushing all of them.
    • Not grouping Asakusa and Akihabara together despite being on the same day — they’re a short ride apart and pair naturally into one east-Tokyo day.

    Where to eat on each day

    Day 1 in Asakusa has excellent tempura and unagi (eel) restaurants near Nakamise; Day 2 in Harajuku and Shibuya is best for casual crepe stands and trendy cafes between sights; Day 3, if you choose the Tsukiji morning option, is the day to have a proper sushi breakfast before your afternoon activity.

    If it rains

    Tokyo has enough indoor backup options that rain rarely derails a day: teamLab’s digital art is arguably better experienced on a rainy afternoon, and the underground shopping arcades beneath Tokyo, Shinjuku, and Ginza stations let you cover real ground between sights without stepping outside.