Japan Trove

Category: Travel

Practical, up-to-date guides for traveling in Japan — itineraries, rail passes, eSIMs, where to stay, seasonal timing, etiquette, and the local know-how that makes a trip smoother. Written with real Japanese sources so you get the answer that actually works on the ground, not the recycled tourist one.

  • Naoshima: Japan’s Art Island Guide

    Naoshima: Japan’s Art Island Guide

    Naoshima is Japan’s famous “art island” — a serene Seto Inland Sea escape where world-class museums, outdoor sculptures, and a giant polka-dot pumpkin meet fishing-village calm. Here’s how to visit.

    What to see

    • Yayoi Kusama’s pumpkins — the iconic yellow and red polka-dot sculptures by the sea.
    • Chichu Art Museum — a Tadao Ando concrete masterpiece built into the hillside, with Monet and light installations.
    • Benesse House & Lee Ufan Museum — striking art-and-architecture blends.
    • Art House Project (Honmura) — old village houses transformed into art.

    Nearby art islands

    • Teshima — home to the ethereal Teshima Art Museum.
    • Inujima — industrial ruins reborn as art.
    • The Setouchi Triennale art festival brings extra installations in its years.

    Getting there

    • Ferries run from Uno Port (near Okayama) or Takamatsu. Reach Okayama on the shinkansen.
    • Rent a bike or use the island bus to get around.

    Plan carefully (important)

    • Check museum opening days — many close Mondays, and some require advance reservations (Chichu especially).
    • Stay overnight to enjoy the island after day-trippers leave; accommodation is limited, so book early.
    • Bring cash and an eSIM; it’s rural.

    Tips

    Naoshima is a slow, contemplative highlight — build in a full day or two. Pair it with a wider western-Japan route in our 14-day itinerary.

    Costs & timing

    • Ferry fares from Uno Port run about JPY 300-800 one-way depending on the boat; the faster route from Takamatsu costs a bit more but saves time if you are coming from the Shikoku side.
    • Museum admission runs roughly JPY 1,000-2,300 per site (Chichu Art Museum is the priciest); budget JPY 5,000-8,000 total for a full day covering 2-3 museums plus a bike rental.
    • Weekdays are noticeably quieter than weekends, and the gap widens further outside the Setouchi Triennale years — check the festival calendar, since triennale years bring extra crowds along with extra art.

    Common mistakes to avoid

    • Turning up without a Chichu Art Museum reservation — it caps visitor numbers per time slot and can sell out days ahead in peak season; book online before you travel.
    • Trying to do Naoshima as a rushed day trip from Okayama — the ferry schedule and spread-out sights make this tight; even a one-night stay dramatically improves the pace.
    • Skipping bike rental — the island’s sights are spread along the coast, and walking between them eats into museum time. E-bikes handle the hills easily.

    Where to eat

    Options are limited compared to a big city, so plan around them rather than assuming you will find something. Honmura village has a handful of small cafes and set-lunch spots near the Art House Project; the port areas have simple noodle and curry shops. Many close by early evening, so a packed snack is a good backup if you are staying to watch the sunset over the Seto Inland Sea.

    Budget, mid-range & splurge for Naoshima

    • Budget: a day trip from Okayama, free outdoor sculptures, and a bento lunch from the ferry terminal instead of a sit-down restaurant.
    • Mid-range: one overnight at a simple guesthouse plus tickets to two or three museums, spread across a relaxed day and a half.
    • Splurge: a stay at Benesse House itself, which doubles as a hotel and lets guests view parts of the museum after public hours close.

    A sample one-day itinerary

    Arrive on the morning ferry, head straight to the Chichu Art Museum for your reserved slot, walk or bike to the Art House Project in Honmura for lunch and a few hours exploring the village galleries, then finish at the Benesse House Museum and the pumpkin sculptures by the water in time for sunset over the Seto Inland Sea before catching a late-afternoon or evening ferry back.
  • Beppu & Yufuin: Kyushu’s Best Hot Spring Towns

    Beppu & Yufuin: Kyushu’s Best Hot Spring Towns

    Some links below are affiliate links. If you book through them, Japan Trove may earn a small commission at no extra cost to you.

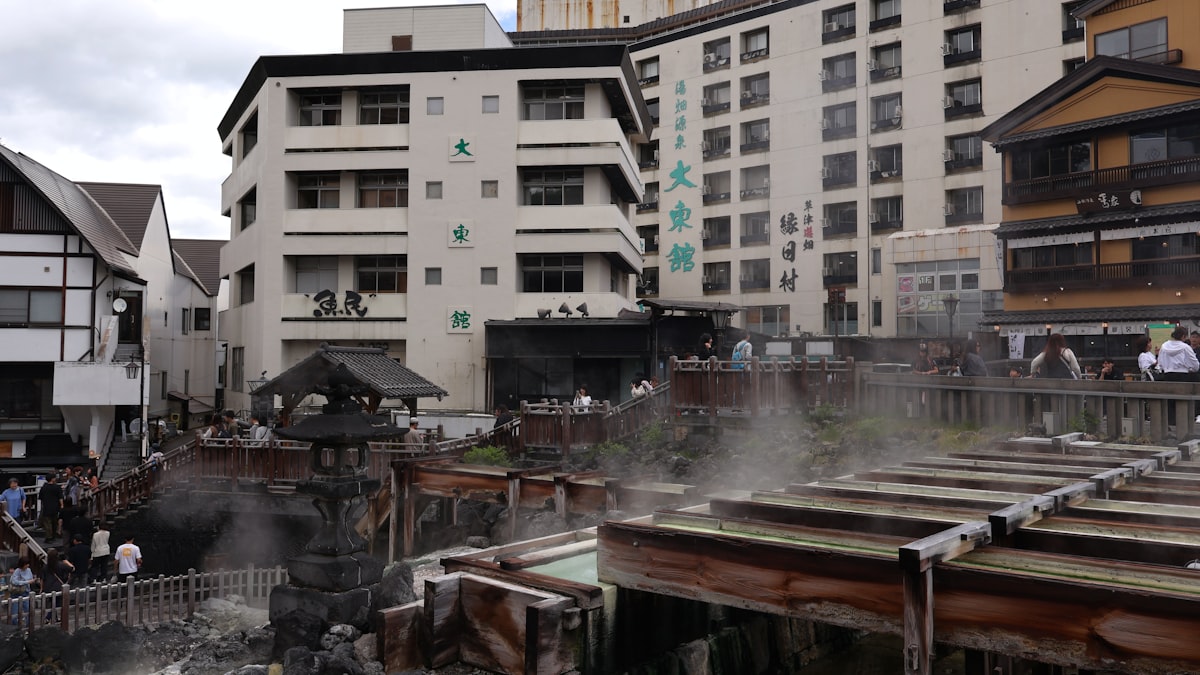
    Beppu and Yufuin, in Kyushu, are two of Japan’s most famous hot-spring destinations — one dramatic and steamy, the other chic and tranquil. Here’s how to enjoy them.

    Beppu: steam and spectacle

    • The “Hells” (jigoku) — vividly colored hot-spring ponds to look at (not bathe in), from cobalt blue to blood red.
    • Sand baths — get buried in naturally heated sand, a unique experience.
    • Endless onsen — Beppu produces more hot-spring water than almost anywhere on earth. Read our onsen etiquette guide first.

    Yufuin: chic and calm

    • A stylish, artsy hot-spring town with boutiques, cafes, and galleries.
    • Lake Kinrin — misty and beautiful at dawn.
    • Upscale ryokan with private baths and Mt. Yufu views; see our ryokan guide.

    Getting there

    • Both are near Fukuoka — reachable by train or bus (Yufuin has a scenic limited express).
    • They pair well together and with a wider Kyushu trip.
    • Book onsen ryokan early — compare on Booking.com .

    Tips

    • Tattooed? Choose private baths or check policies; see our tattoo & onsen guide.
    • Beppu for spectacle and variety; Yufuin for a relaxed, refined stay — do both if you can.
    • Compare with other soak spots in our best onsen towns guide.

    What it costs & how long to stay

    • Beppu’s “Hells” circuit costs around JPY 2,000-2,500 for a combined ticket to the main viewing sites, or JPY 400-500 per site individually; most visitors comfortably see the highlights in half a day.
    • A sand bath session runs roughly JPY 1,500-1,600 including a yukata rental, and lasts about 10-15 minutes buried, which is plenty for most people.
    • One night is enough to sample Beppu’s variety, but Yufuin rewards a slower pace — a two-night combo (one per town) is the most common and satisfying split.

    Best time to visit & avoiding crowds

    • Yufuin’s Lake Kinrin is famous for autumn and winter mornings when mist rises off the warm water into cold air — arrive right at sunrise for the classic photo, before day-tripper buses arrive from Beppu and Fukuoka.
    • Weekday visits make a noticeable difference in Yufuin, which is a popular domestic weekend getaway; the main shopping street can feel genuinely crowded on Saturday afternoons.
    • Winter is a great time to visit both towns — cold air makes the hot springs more rewarding, and the Hells’ colors read even more vividly against grey winter skies.

    Getting between the two towns

    The JR Yufuin no Mori limited express connects Beppu and Yufuin directly in about 15 minutes and is scenic enough to be worth taking even without a fixed schedule need — reserve a seat in advance in peak season, since it is popular in its own right. Local buses also run the route roughly every 30-40 minutes and are cheaper if you do not need the scenic train.

    Budget, mid-range & splurge options

    • Budget: public bathhouses (sento-style onsen) in Beppu cost as little as JPY 100-300 entry, some of the cheapest hot-spring bathing anywhere in Japan.
    • Mid-range: a standard ryokan with a shared or semi-private bath in Yufuin, JPY 15,000-25,000 per person with dinner and breakfast.
    • Splurge: a Yufuin ryokan with a private open-air bath and Mt. Yufu view, often JPY 40,000-80,000+ per person for a full kaiseki-dinner stay.

    A one-day Beppu walking route

    Start at Umi Jigoku for the cobalt-blue pond, walk or shuttle to Chinoike Jigoku (blood-red pond) and Tatsumaki Jigoku (a real geyser that erupts roughly every 30 minutes), then finish the afternoon at a sand bath before dinner. Most of the Hells cluster in two groups a short bus ride apart, so a single combined ticket and a loop bus ticket cover the whole circuit without much backtracking.

  • Ekiben: Japan’s Station Bento & the Shinkansen Ritual

    Ekiben: Japan’s Station Bento & the Shinkansen Ritual

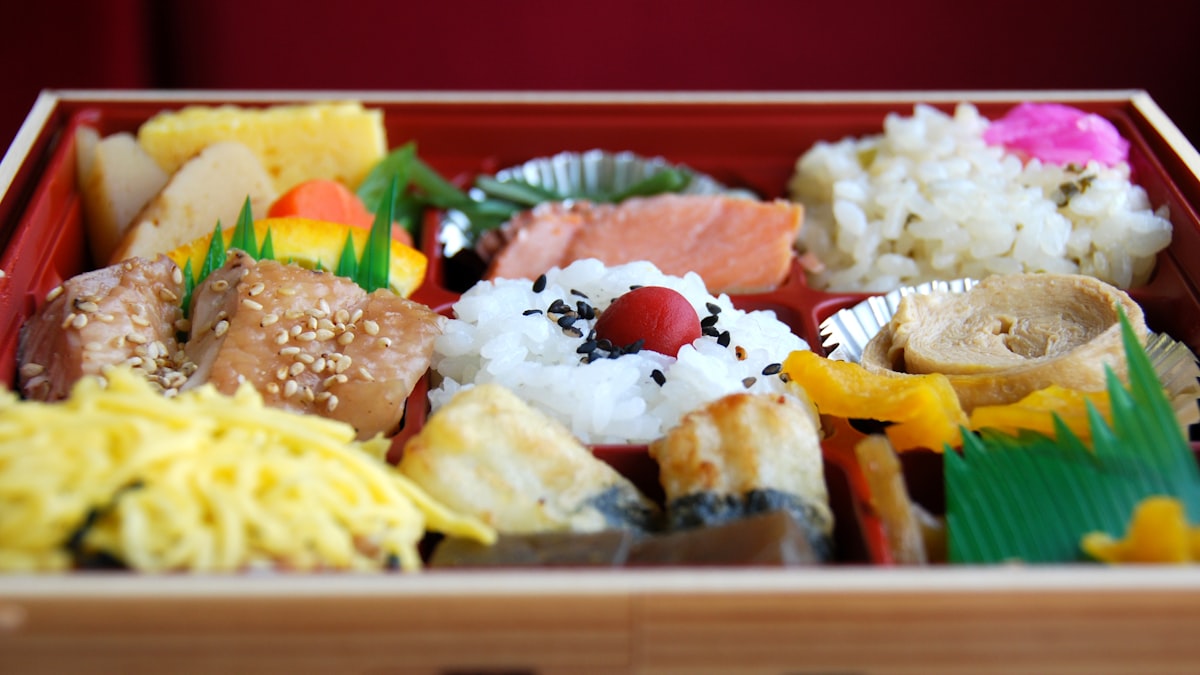
    One of the great joys of Japanese train travel is the ekiben — a beautifully packed station bento eaten on the shinkansen. Here’s what they are and how to enjoy this delicious ritual.

    What is ekiben?

    Ekiben (eki = station, bento = boxed meal) are ready-to-eat lunch boxes sold at train stations and on platforms. They range from simple rice-and-fish boxes to elaborate regional specialties in gorgeous packaging — a meal and a souvenir in one.

    Why they’re special

    • Regional pride — each area has signature ekiben using local ingredients (crab in Hokkaido, beef in Kobe, eel in Nagoya).
    • Designed to travel — tasty at room temperature, tidy to eat on a train.
    • Fun packaging — some come in shapes like bullet trains or ceramic pots you keep.

    How to enjoy the ritual

    • Buy before boarding the shinkansen — big stations have huge ekiben selections.
    • Pair with a drink and a green tea; eating on the shinkansen is normal and expected.
    • Eating on local commuter trains is less common — save it for long-distance rides.

    Where to find the best

    • Tokyo Station’s Ekibenya Matsuri — hundreds of ekiben from across Japan under one roof.
    • Major shinkansen stations and department-store depachika (see our department store guide).
    • Look for “sold today only” and seasonal specials.

    Tips

    • Carry small change/cash and tidy up your box afterward (see our etiquette guide).
    • It’s a highlight of any itinerary with train travel — don’t skip it.

    What ekiben typically cost

    • Most ekiben run JPY 900-1,800, with elaborate regional specialties (whole crab, wagyu beef, elaborate multi-compartment boxes) reaching JPY 2,500-3,500.
    • Budget-friendly options (simple rice-and-fish or curry boxes) start around JPY 700-900 and are widely available even at smaller stations.
    • Limited-edition and seasonal boxes sell out fast on weekend mornings — if you have your heart set on a specific famous one, buy it as soon as you reach the station rather than saving it for the platform.

    Common mistakes to avoid

    • Assuming you can buy one at the last minute — the best-known counters (like Tokyo Station’s Ekibenya Matsuri) can have queues, especially before long weekends; give yourself 15-20 extra minutes.
    • Opening a hot ekiben (like a heated beef or pork box) too early — some have a pull-tab self-heating mechanism; read the instructions so it is still hot when you eat it on board.
    • Forgetting chopsticks — they usually come with the box, but grab an extra set at the konbini if you are buying from a station stall that does not include them.

    Pairing it with the ride

    Green tea and canned coffee are the classic ekiben companions and are sold from the same kiosks or a cart that sometimes still passes through the car. If you are on a long Tohoku or Kyushu shinkansen leg, an ekiben roughly an hour into the journey — once the initial city views give way to countryside — is the traditional moment to eat, giving you something to look forward to mid-ride.

    Vegetarian, vegan & allergy notes

    Most ekiben are built around fish, meat, or both, which makes them a tricky option for vegetarian and vegan travelers. A small number of stations sell vegetable-forward boxes (inari sushi, vegetable curry, or onigiri sets), but they are far less common than meat and seafood versions — check our vegetarian and vegan in Japan guide for backup options if ekiben do not fit your diet, including building your own box from a station’s onigiri and side-dish counters.

    Regional ekiben worth seeking out

    A few boxes are worth planning around: the Toge no Kamameshi (a kettle-shaped clay pot rice dish from Yokokawa Station you can keep as a souvenir), Kobe’s beef-topped rice boxes, Hokkaido’s crab and salmon roe boxes, and Yokohama’s shumai bento sold at Yokohama Station and on the Tokaido Shinkansen. Many now sell out at their home station well before evening, so shop early if a specific box is the goal.

  • Japanese Street Food: What to Try & Where to Find It

    Japanese Street Food: What to Try & Where to Find It

    From festival stalls to market lanes, Japanese street food is delicious, cheap, and everywhere. Here’s what to try and where to find the best bites.

    Must-try street foods

    • Takoyaki — octopus-filled batter balls, Osaka’s icon; see our Dotonbori guide.
    • Okonomiyaki — savory griddle pancakes.
    • Yakitori — grilled chicken skewers.
    • Taiyaki — fish-shaped cakes with sweet filling.
    • Dango & taiyaki, candied fruit (ringo-ame), and kakigori (shaved ice) in summer.

    Where to find it

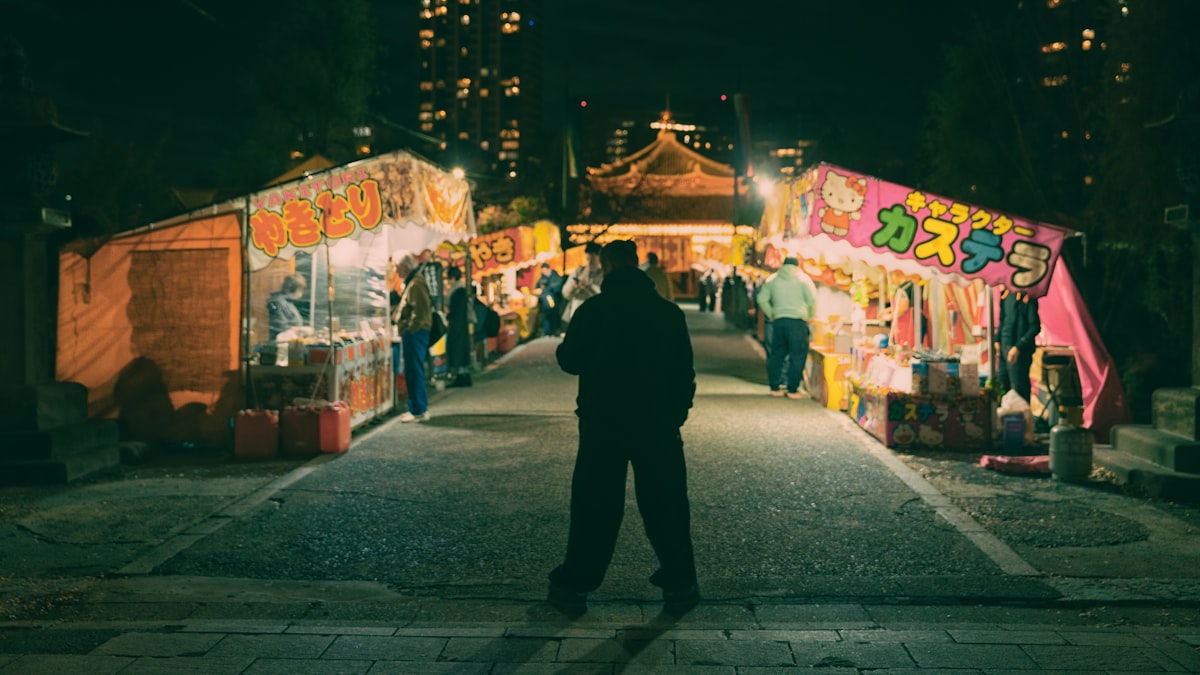
    • Festival stalls (yatai) — the best street-food scene; see our festivals guide.
    • Market streets — Nishiki Market (Kyoto), Kuromon (Osaka), and Tsukiji.
    • Fukuoka’s yatai — riverside food stalls; see our Fukuoka guide.
    • Temple approaches like Nakamise in Asakusa.

    How to enjoy it

    • Carry cash — stalls are cash-only (see money in Japan).
    • Eat near the stall — eating while walking is frowned upon; there are often standing areas.
    • Bin your trash properly (or carry it) — public bins are scarce. See our etiquette guide.

    Konbini counts too

    Don’t overlook convenience-store hot snacks (fried chicken, oden, nikuman) — cheap and genuinely good. More in our must-try food guide.

    What street food typically costs

    • Most stall items run JPY 300-700 per portion — takoyaki (6-8 pieces) is usually JPY 500-600, a yakitori skewer JPY 150-300, and taiyaki JPY 200-300 each.
    • Festival stalls (yatai) sometimes price slightly higher than everyday market stalls, since you are also paying for the atmosphere and limited-time setup.
    • A reasonable budget for grazing your way through a market or festival lunch is around JPY 1,500-2,500 for two or three different items plus a drink.

    Common mistakes to avoid

    • Eating while walking through a market — most Japanese food markets expect you to eat near the stall or in a designated standing area, not stroll and eat; look for a small counter or step to the side.
    • Assuming every stall takes cards — most street food is strictly cash, and small-denomination coins move things along faster during a rush.
    • Skipping the queue-watching trick — a short line at a stall in a busy festival or market is a good, low-risk way to find the best vendor without research.

    Seasonal street food to watch for

    Street food shifts with the seasons: kakigori (shaved ice) and cold noodles dominate summer festival stalls, roasted sweet potato (yaki-imo) carts appear on autumn and winter streets, and New Year shrine visits (hatsumode) bring their own stall lineup of amazake (sweet rice drink) and grilled mochi. If you are visiting for a specific matsuri, check our festivals guide for what is in season.

    Street food for different diets

    Vegetarians will find dango, taiyaki, and most candied fruit safe bets, but should ask before ordering takoyaki or okonomiyaki, which often contain fish flakes (katsuobushi) or a fish-based sauce even in an otherwise vegetable-heavy dish — see our vegetarian and vegan in Japan guide for phrases that help. Travelers with shellfish allergies should be cautious with takoyaki (octopus) and any stall selling grilled seafood skewers at festivals.

    Regional street food specialties

    Beyond the nationwide favorites, look for regional specialties tied to where you are: Hiroshima-style okonomiyaki layered with noodles, Osaka’s negiyaki (a lighter, green-onion version of okonomiyaki), Sendai’s grilled beef tongue skewers, and Okinawa’s sata andagi (fried sugar doughnuts). Seeking out the local variation rather than the generic version is one of the easiest ways to eat well while traveling between cities.

  • Sushi in Japan: How to Order & Eat It Like a Local

    Sushi in Japan: How to Order & Eat It Like a Local

    Sushi in Japan is a revelation — fresher, more varied, and often cheaper than back home. But the etiquette and ordering can feel mysterious. Here’s a friendly guide to eating sushi in Japan.

    Types of sushi spot

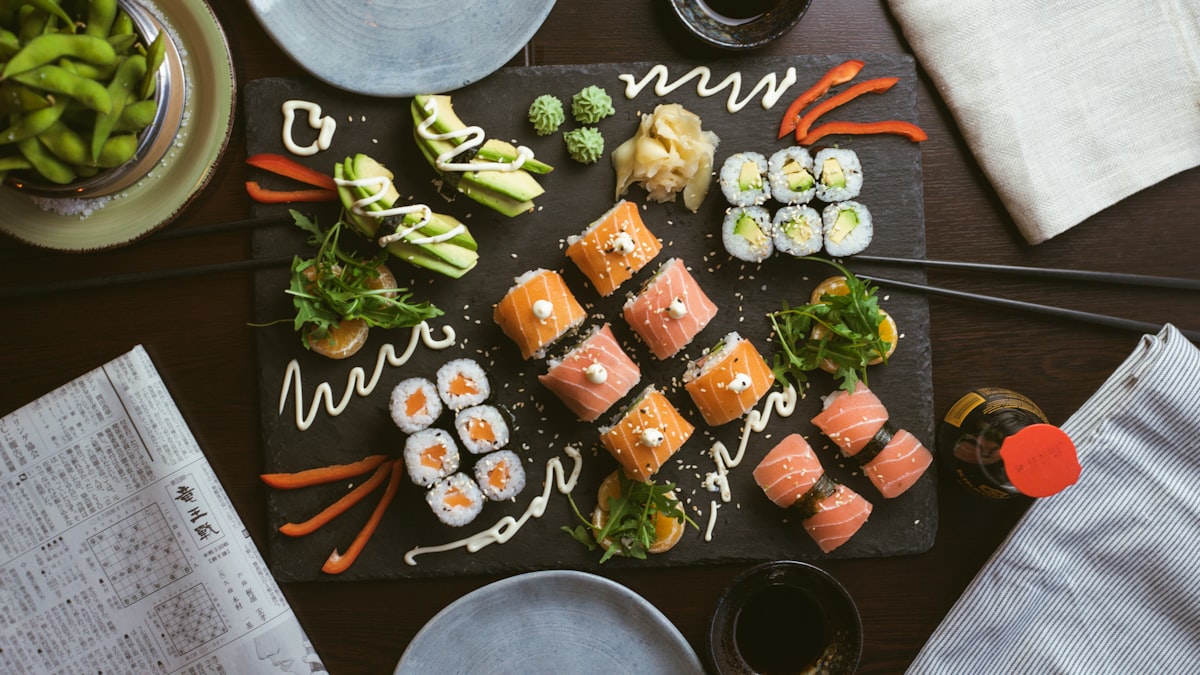
    • Kaiten-zushi (conveyor belt) — fun, cheap, and beginner-friendly; grab plates or order on a screen.
    • Standing sushi bars — quick and affordable.
    • Counter sushi / omakase — the chef serves their choice, piece by piece; a special-occasion experience.

    How to eat sushi properly

    • Nigiri can be eaten with your hands or chopsticks.
    • Dip fish-side (not rice) lightly in soy sauce — too much rice soaks up too much soy.
    • Eat in one bite where you can; don’t drown it in soy or wasabi (often already added).
    • Ginger (gari) is a palate cleanser between pieces, not a topping.

    What to try

    • Maguro (tuna), salmon, ebi (shrimp), uni (sea urchin), ikura (salmon roe), tamago (egg).
    • Ask for seasonal recommendations at counter spots.
    • Fresh market sushi is unbeatable — see our Tsukiji & Toyosu guide.

    Etiquette & tips

    • At omakase, eat each piece promptly (the chef timed it) and follow their lead.
    • There’s no tipping — see our tipping guide.
    • Conveyor spots are great with kids and for budgets; see our must-try food guide.

    What sushi actually costs

    • Kaiten-zushi (conveyor belt) chains price plates by color, typically JPY 110-500 per plate (2 pieces); a filling meal for one runs roughly JPY 1,500-2,500.
    • Counter sushi with a set lunch menu can be surprisingly affordable, often JPY 2,000-4,000 for a quality lunch omakase — lunch is consistently the best value time to try a good counter.
    • Dinner omakase at a well-regarded shop typically runs JPY 8,000-25,000+ per person; the very top-tier, reservation-only counters can run well beyond that.

    Common mistakes to avoid

    • Mixing wasabi into your soy sauce dish — at a proper counter, the chef has already added the right amount of wasabi between fish and rice; doing it yourself can be seen as an insult to the balance they intended.
    • Letting nigiri sit too long before eating — the rice temperature and texture are part of the point, so eat each piece shortly after it is placed in front of you.
    • Booking omakase without checking allergy or seafood-aversion policies in advance — many set menus cannot be modified once the chef has bought the day’s fish.

    Budget vs. splurge picks

    If you are traveling on a budget, kaiten-zushi chains (Sushiro, Kura Sushi, Hama-zushi) deliver genuinely good fish at fast-food prices and are an easy first sushi meal with kids. For a splurge night, a mid-tier counter omakase booked a few days ahead gives most travelers 90% of the high-end experience for a fraction of the cost of Tokyo’s most famous reservation-only spots.

    Sushi for different diets

    Vegetarian options exist but are limited — kappa-maki (cucumber roll), natto rolls, and tamago (egg) nigiri are the main choices at most kaiten-zushi chains, and a few upscale spots now offer vegetable-focused omakase with advance notice. Shellfish and fish-roe allergies are worth flagging clearly before an omakase booking, since substitutions mid-course are harder at counter-style restaurants than at a conveyor-belt chain where you simply skip a plate.

    A sample first sushi day

    Start with a market breakfast at Tsukiji’s outer market, try a mid-tier counter set lunch omakase in the early afternoon when it is quieter and cheaper than dinner service, then round out the trip with a casual, fun kaiten-zushi dinner later in the week — the contrast between the three settings shows off how differently sushi can be served and enjoyed in Japan.

  • Best Ramen in Japan: Types, How to Order & Where to Eat

    Best Ramen in Japan: Types, How to Order & Where to Eat

    Ramen is Japan’s ultimate comfort food — and every region has its own style. Knowing the main types helps you order like a pro. Here’s a guide to Japanese ramen and how to eat it.

    The main ramen styles

    • Tonkotsu — rich, creamy pork-bone broth; the Kyushu classic (see our Fukuoka guide).
    • Shoyu — soy-sauce based, clear and savory; the Tokyo standard.
    • Miso — hearty and warming; born in Sapporo (see our Sapporo guide).
    • Shio — light, salt-based broth, delicate and clean.
    • Tsukemen — noodles served separately for dipping in concentrated broth.

    How to order & eat

    • Many shops use a ticket machine — buy a meal ticket and hand it over.
    • Customize richness, noodle firmness (katame = firm), and toppings where offered.
    • Slurping is encouraged — it cools the noodles and shows you’re enjoying it.
    • Eat quickly while hot; it’s fast food, not a lingering meal.

    Toppings to know

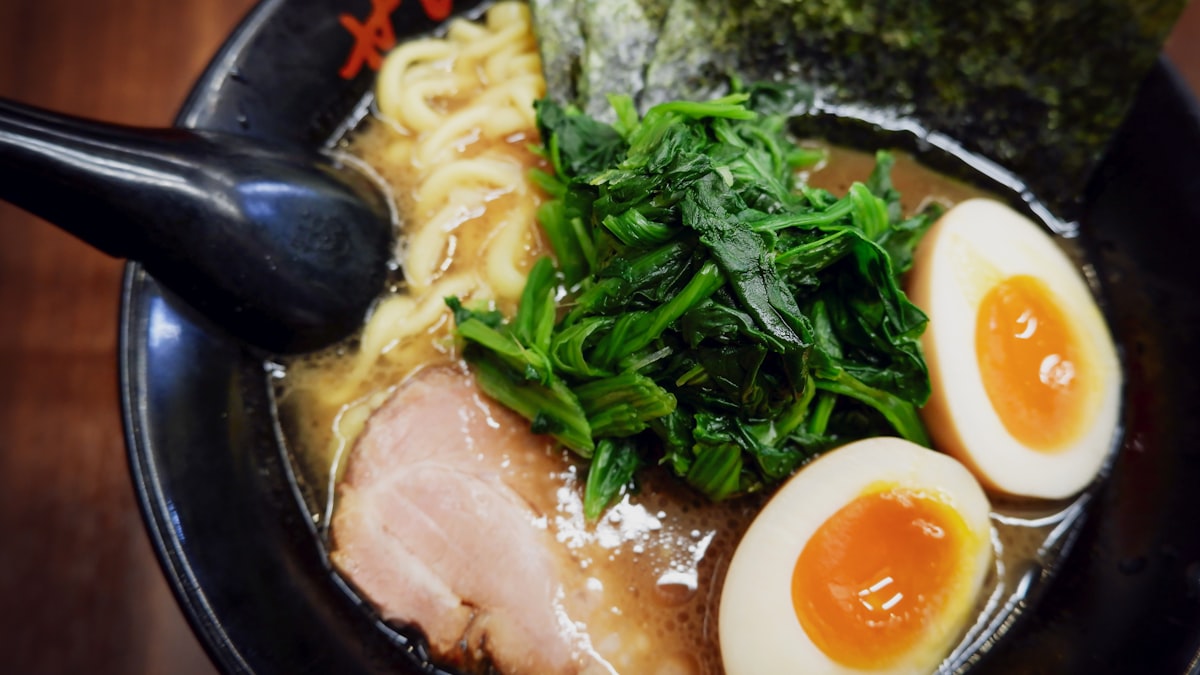
    Chashu (braised pork), ajitama (seasoned egg), menma (bamboo), nori, and negi (green onion). Add extra noodles (kaedama) at tonkotsu shops.

    Where to find great ramen

    • Follow the queues — a line usually means it’s good.
    • Regional specialties are best in their home cities.
    • Even konbini and instant versions are excellent; see our instant ramen guide.
    • More dishes in our must-try food guide.

    What a bowl typically costs

    • Standard ramen runs JPY 700-1,100 at most shops; adding toppings (extra chashu, ajitama egg, extra noodles) brings a loaded bowl to around JPY 1,200-1,500.
    • Tsukemen (dipping noodles) is usually priced similarly to regular ramen, sometimes slightly higher because portions tend to be larger.
    • Ramen is one of the best-value hot meals in Japan — even in expensive tourist areas, a bowl rarely crosses JPY 1,500 unless it is a specialty or premium ingredient shop.

    Common ordering mistakes

    • Freezing at the ticket machine — most machines have an English button or picture menu; if not, the base ramen button is usually the largest, top-left button, with topping buttons below.
    • Asking to modify a bowl at a specialist shop — many small ramen-ya are built around one exact recipe and do not take substitutions; save customization requests for shops that clearly offer them (richness/firmness dials on the ticket machine).
    • Lingering too long at the counter during a lunch rush — ramen shops turn tables fast, and it is normal (not rude) to eat efficiently and leave your seat for the next customer.

    Regional detours worth making

    If ramen is a trip priority, it is worth routing travel around it: Hakata tonkotsu in Fukuoka, miso ramen in Sapporo, and Kitakata’s soy-based style in Tohoku are each distinct enough from the Tokyo standard to justify trying the original in its hometown rather than a transplant shop elsewhere.

    Ramen for different diets

    Classic ramen broth is almost always built on pork, chicken, or fish stock, which makes vegetarian and vegan ramen genuinely hard to find outside of a growing number of specialist shops in Tokyo, Kyoto, and Osaka that make dedicated vegetable or soy-based broths — see our vegetarian and vegan in Japan guide for how to spot them. Halal-certified ramen shops also exist in a handful of major cities, mostly using chicken broth instead of pork.

    A short ramen crawl idea

    If you have a free evening, try comparing two styles back to back: a tonkotsu shop for a rich, filling first bowl, followed an hour or two later by a lighter shio or shoyu bowl elsewhere — portions are generally small enough that this is realistic, and it makes the differences between broths far clearer than reading about them. Many ramen districts in Tokyo (like parts of Shinjuku and Ikebukuro) cluster several well-regarded shops within a five-minute walk of each other.

  • Kamikochi & the Japan Alps: Mountain Scenery Guide

    Kamikochi & the Japan Alps: Mountain Scenery Guide

    For dramatic mountain scenery, head to Kamikochi — a pristine highland valley in the Japan Alps of crystal rivers, wooden bridges, and towering peaks. It’s one of Japan’s most beautiful nature escapes. Here’s how to visit.

    What to see & do

    • Kappabashi Bridge — the iconic wooden bridge over the clear Azusa River, framed by peaks.
    • Taisho Pond & Myojin Pond — mirror-still waters reflecting the mountains.
    • Easy riverside walks — mostly flat, well-marked trails suit all levels; serious hikers use it as a base for the high Alps.
    • Wildlife — monkeys and birds; the air is famously fresh.

    When to go

    • Open roughly mid-April to mid-November — it closes in winter.
    • Fresh green early summer and spectacular autumn foliage are the highlights.
    • Even summer is cool up here — a great heat escape. See best time to visit.

    Getting there

    • Private cars are banned — you transfer to a bus/taxi at Sawando (from Matsumoto) or Hirayu (from Takayama).
    • Pairs beautifully with Takayama and Matsumoto Castle (see our castles guide).

    Tips

    • Bring layers and rain gear — mountain weather changes fast; see our packing list.
    • Stay overnight at a lodge to enjoy the valley after day-trippers leave.
    • Carry water and snacks — options inside are limited. It’s a nature spot, so pack out your trash.

    Costs & how much time to budget

    • Round-trip bus fare from Sawando or Hirayu into Kamikochi runs roughly JPY 2,000-2,500; there’s also a separate toll/entry fee bundled into most bus tickets.
    • The flat riverside loop past Kappabashi, Myojin Pond, and back takes about 3-4 hours at an easy pace — budget a full day once you add transfer time from Matsumoto or Takayama.
    • Lodge accommodation inside the valley (there are a handful of mountain hotels) runs JPY 15,000-30,000+ per person with meals, and is worth it if you want the valley without day-tripper crowds, both early morning and after 4pm.

    Common mistakes to avoid

    • Underestimating how cold it gets — even in August, mornings can dip into single digits Celsius at this elevation; a packable fleece matters more here than almost anywhere else in a typical Japan itinerary.
    • Trying to drive in — there is no way around the private-vehicle ban; rental cars must be parked at Sawando or Hirayu, so build the bus transfer into your timing rather than discovering it at the gate.
    • Visiting on a weekend in peak foliage season without an early start — the shuttle buses and parking areas at the gateway towns back up badly on autumn weekends.

    Pairing Kamikochi with a wider Alps route

    Kamikochi works best as one stop on a Japan Alps loop rather than a standalone trip: Matsumoto (with its original-construction castle, see our castles guide), Kamikochi itself, and Takayama connect naturally by bus and rail over 3-4 days.

    Budget, mid-range & splurge options

    • Budget: a day trip by bus from Matsumoto, packed lunch, and the free riverside walking loop — no entry fee to the valley itself beyond transport.
    • Mid-range: a night at a mountain lodge inside the valley with simple Japanese-style rooms and shared baths.
    • Splurge: a suite-style room at one of the historic mountain hotels with mountain views and full-course dinners, popular with hikers finishing a multi-day Alps route.

    What’s within easy reach

    Serious hikers use Kamikochi as a trailhead for multi-day routes into the Hotaka mountain range, but you do not need to be a climber to enjoy it — the valley floor paths are accessible to most fitness levels and still deliver the same views the mountaineers see from below. If you have extra time, the short hike up to Tokusawa (about 2 hours one-way from Kappabashi) extends the flat riverside walk into quieter forest with far fewer day-trippers.

  • Japan Honeymoon: Romantic Ryokan, Onsen & Itinerary

    Japan Honeymoon: Romantic Ryokan, Onsen & Itinerary

    Some links below are affiliate links. If you book through them, Japan Trove may earn a small commission at no extra cost to you.

    Japan is a dream honeymoon destination — romantic ryokan, private onsen, incredible food, and a beautiful mix of city and nature. Here’s how to plan a memorable, romantic trip.

    Romantic experiences

    • A luxury ryokan with a private open-air bath — the ultimate couple’s experience; see our ryokan guide.
    • Onsen towns for a relaxing soak together; see best onsen towns.
    • Mt. Fuji views from a lakeside stay; see our Kawaguchiko guide.
    • Kyoto’s temples and gardens at golden hour, plus a kimono stroll.

    A sample romantic route

    • Tokyo for city buzz and fine dining.
    • Hakone or Kawaguchiko for an onsen ryokan and Fuji views (Hakone guide).
    • Kyoto for timeless romance and day trips.
    • See our 7-day or 10-day itineraries for a framework.

    Where to stay

    • Splurge on one or two special ryokan or view rooms — compare on Booking.com and Agoda .
    • Private-bath rooms are ideal if either of you has tattoos.

    Tips

    • Book standout dinners and ryokan early — the best fill up.
    • Best seasons: cherry blossoms and autumn leaves (also the busiest).
    • Balance city and nature, and leave downtime to simply enjoy each other. Start with our first-timer tips.

    Budgeting for a honeymoon trip

    • Mid-range: a comfortable 7-10 night honeymoon (nice hotels, one splurge ryokan night, good dinners) typically runs JPY 350,000-550,000 per person excluding flights.
    • Splurge: adding 2-3 nights at top-tier ryokan with private open-air baths and kaiseki dinners can add JPY 80,000-150,000 per night per couple on top of a mid-range base.
    • Budget-conscious couples can still get the romantic highlights by choosing one splurge night (rather than a whole trip of them) and staying at well-reviewed business hotels or standard ryokan the rest of the time.

    Common planning mistakes

    • Booking the whole trip around cherry blossoms or autumn leaves without a flexible date — both seasons shift year to year by 1-2 weeks; if your dates are fixed for a honeymoon, treat foliage as a bonus, not the plan’s foundation.
    • Packing the itinerary too tightly — honeymoons are one of the few trip types where we would recommend fewer cities and more unstructured time, especially around a ryokan stay meant for slowing down.
    • Not confirming twin vs. double bedding when booking — some traditional ryokan rooms are set up with two futons by default; specify a double/Western bed request if that matters to you.

    A few special-occasion touches

    Many ryokan and hotels will arrange a small in-room celebration (flowers, cake, or a sake set) for honeymooners if you mention the occasion when booking — it rarely costs extra and is a nice way to mark the trip. A sunset dinner cruise in Tokyo Bay or a private tea ceremony in Kyoto are also easy ways to add one memorable, low-effort splurge to an otherwise budget-conscious trip.

    Sample honeymoon budget breakdown (7 nights, per couple)

    • Budget-conscious: roughly JPY 400,000-550,000 total — comfortable hotels, one splurge ryokan night, mostly mid-range dining.
    • Mid-range: roughly JPY 700,000-1,000,000 — better rooms throughout, two ryokan nights with kaiseki dinners, a couple of special experiences.
    • Full splurge: JPY 1,500,000+ — top-tier ryokan for most of the trip, private guided days, and fine-dining reservations.

    Choosing between city and countryside nights

    A good honeymoon rhythm alternates energy levels: a couple of nights in Tokyo for restaurants and nightlife, a slower two or three nights in an onsen town or Kyoto for quiet mornings and long baths, then a final city night before flying home. Trying to do all of Japan’s regions in one honeymoon usually backfires — fewer stops with more time in each tends to feel far more romantic than a rushed multi-city sprint.

  • Kansai Airport (KIX) to Osaka, Kyoto & Nara

    Kansai Airport (KIX) to Osaka, Kyoto & Nara

    Landing at Kansai International Airport (KIX) for Kyoto, Osaka, or Nara? Getting from the airport into the city is easy once you know your options. Here’s the practical guide.

    KIX to Osaka

    • Nankai Rapi:t — a sleek limited express to Namba (~40 min).
    • JR Haruka / Kansai Airport Rapid — to Tennoji and Osaka Station.
    • Airport buses reach major hotels and areas directly.

    KIX to Kyoto

    • JR Haruka Express — the direct train to Kyoto Station (~75–80 min).
    • Look at the ICOCA & Haruka combo (discounted express + IC card) if it fits your plans.

    KIX to Nara

    Take the JR line via Tennoji, or an airport bus. Allow around 1.5 hours. See our Nara guide.

    Tickets & tips

    • Grab an IC card (ICOCA in Kansai) — it works on almost everything.
    • Reserve express seats at busy times; luggage space can be limited.
    • Consider luggage forwarding from the airport to your hotel to travel hands-free.
    • Set up an eSIM before you land so maps work immediately.

    Good to know

    • KIX is built on an artificial island — allow buffer time in bad weather.
    • Arriving at Osaka’s other airport (Itami/ITM)? It’s closer to the city, mainly domestic.
    • Plan the rest with our Osaka and Kyoto guides.

    Typical costs

    • Nankai Rapi:t to Namba costs around JPY 1,450 one-way (reserved seat); the regular Nankai limited express is cheaper at roughly JPY 970 but takes a bit longer.
    • JR Haruka to Kyoto runs about JPY 3,600 one-way in an unreserved seat, or less with the ICOCA & Haruka discount ticket aimed at overseas visitors.
    • Airport limousine buses run JPY 2,000-2,800 depending on destination and are a good option with heavy luggage or a hotel far from a train line.

    Common mistakes to avoid

    • Missing the last train — KIX train services thin out late at night; check the last Haruka/Rapi:t departure time if your flight lands after 9-10pm, or budget for a taxi or airport hotel.
    • Not checking which Osaka station you actually need — Namba, Shin-Osaka, and Osaka/Umeda are all separate hubs on different lines; confirm which one is closest to your hotel before choosing a route.
    • Assuming KIX and Itami (Osaka’s domestic airport) are interchangeable when booking connecting flights — they are a significant distance apart with no direct rail link between them.

    If you’re continuing onward

    Travelers heading straight to Kyoto or Nara without stopping in Osaka can go directly via JR without changing at Osaka Station, which saves both time and a transfer with luggage. If Kyoto is your first stop, see our 2-day Kyoto itinerary for how to spend the rest of arrival day.

    Late-night and early-morning arrivals

    If your flight lands very late or you have an early departure, staying at an airport-area hotel near KIX for one night is often cheaper and less stressful than rushing for the last train with jet lag and luggage. Several hotels run shuttle buses to the terminal, and this small buffer can save a rough, expensive taxi ride into Osaka or Kyoto after midnight.

    Traveling with young kids or heavy luggage

    Families and anyone with multiple large suitcases should lean toward the airport limousine bus or a taxi/private transfer over the train options, since KIX’s rail platforms involve stairs and walking that get harder with a stroller or several bags. If you are heading onward to Kyoto or Nara rather than stopping in Osaka, consider shipping bulky luggage ahead via takkyubin luggage forwarding from the airport counter so you travel light for the rest of arrival day.

  • How to Get Around Tokyo: Trains, Subway & IC Cards

    How to Get Around Tokyo: Trains, Subway & IC Cards

    Tokyo’s transport looks intimidating but is actually one of the easiest and most reliable systems in the world once you know the basics. Here’s how to get around the city with confidence.

    Start with an IC card

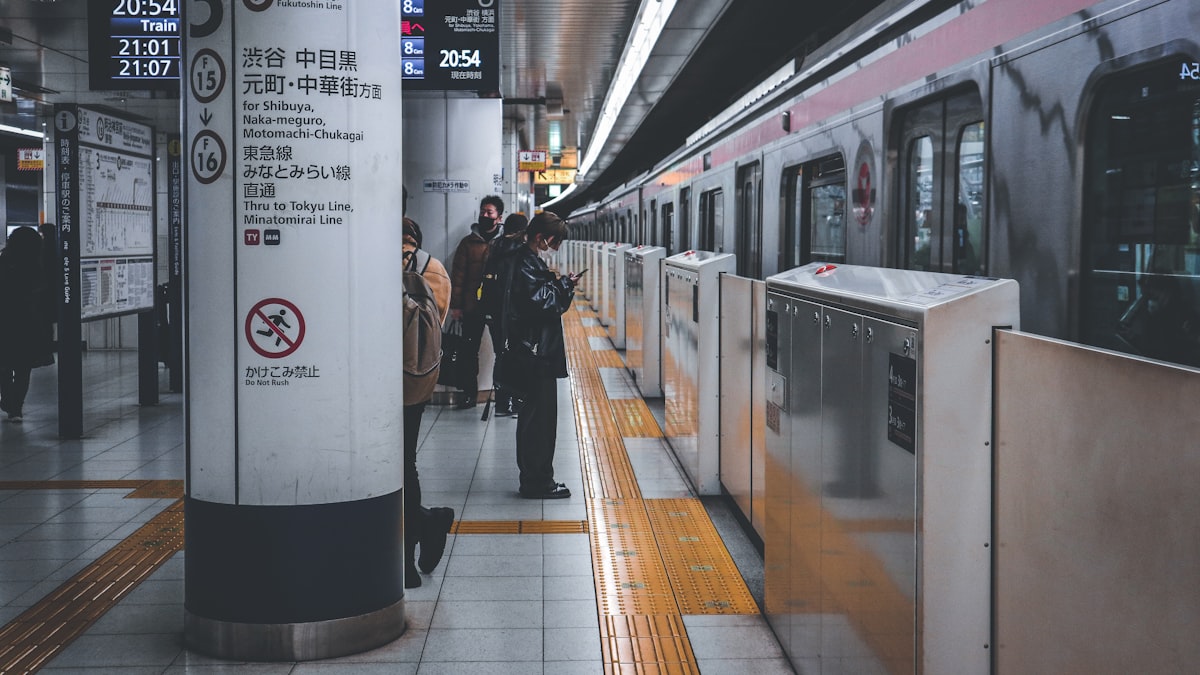
    Get a Suica or Pasmo (or use a mobile version) — tap in and out of any train, subway, or bus, and pay at konbini too. It removes all the ticket-buying hassle. See our IC card guide.

    Trains & subways

    • JR Yamanote Line — the green loop connecting major hubs (Tokyo, Shinjuku, Shibuya, Ueno). Your backbone.
    • Tokyo Metro & Toei subways — dense coverage for everywhere in between.
    • Use a maps app for the fastest route and platform/exit info — see our trains guide.

    Key survival tips

    • Note your exit name/number, not just the station — big stations have dozens of exits.
    • Avoid rush hour (roughly 7:30–9:30am, 5:30–7:30pm) if you can — trains get packed.
    • Stand on the correct side of escalators (left in Tokyo) and let passengers off first.
    • Keep quiet on trains and avoid phone calls.

    Other options

    • Taxis — clean and reliable but pricey; doors open automatically (no tipping — see tipping).
    • Walking — neighborhoods are dense and rewarding on foot.
    • Buses — useful in some areas; tap your IC card.

    Do you need the JR Pass in Tokyo?

    Usually no — a nationwide JR Pass rarely pays off for city-only travel; just use your IC card. Pair this with our Tokyo guide and 3-day itinerary.

    What a day of Tokyo transport costs

    • Most single subway/train rides within central Tokyo run JPY 170-320 depending on distance; a full day of sightseeing with several transfers typically totals JPY 1,000-1,500 on your IC card.
    • Tokyo Metro and Toei day passes (around JPY 800-900 combined) can pay off on a day with 5+ rides, but for most first-timers tapping an IC card per ride ends up simpler and similarly priced.
    • Taxis start around JPY 500-700 for the first kilometer or so and climb quickly — fine for a short late-night hop with luggage, expensive for anything cross-town.

    Common mistakes to avoid

    • Confusing similarly named stations — Tokyo has several stations with near-identical names in different areas; always check the line name and a couple of stops in each direction on your map app, not just the station name.
    • Standing on the wrong side of the platform — some lines share platforms for both directions; check the electronic board or ask, since boarding the wrong direction is an easy early mistake.
    • Trying to time a rush-hour ride with heavy luggage from the airport — route large-suitcase travel around 7:30-9:30am and 5:30-7:30pm if you can, or use the Narita Express/Skyliner and its luggage racks instead of a packed commuter line.

    Getting oriented fast

    If you only remember one thing, remember the Yamanote Line loop — nearly every major area worth visiting on a first trip (Tokyo, Ueno, Ikebukuro, Shinjuku, Shibuya) sits directly on it or a short transfer away. Pair this guide with our 3-day Tokyo itinerary to see how the areas connect in practice.

    Accessibility & traveling with luggage or a stroller

    Most central Tokyo stations have step-free elevator routes, though they are not always the most obvious path from the ticket gate — station staff will point you to the right elevator if you ask. Rush hour with a stroller or large suitcase is genuinely difficult; if you must travel with bulky luggage during the day, the Narita Express, Skyliner, or a taxi are more comfortable choices than a packed Yamanote Line car. See our accessible Japan guide for more on navigating with mobility needs.

    Apps and tools that actually help

    Google Maps handles Tokyo train routing well, including live platform and exit numbers, and works offline once cached if your eSIM connection drops underground. The Japan Official Travel App and each subway operator’s own app add fare and first/last train details that Google Maps sometimes lacks. Set your home country’s transit card off before you land so your phone doesn’t try to use it by mistake at the ticket gates.