Japan Trove

Author: JapanTrove Editorial

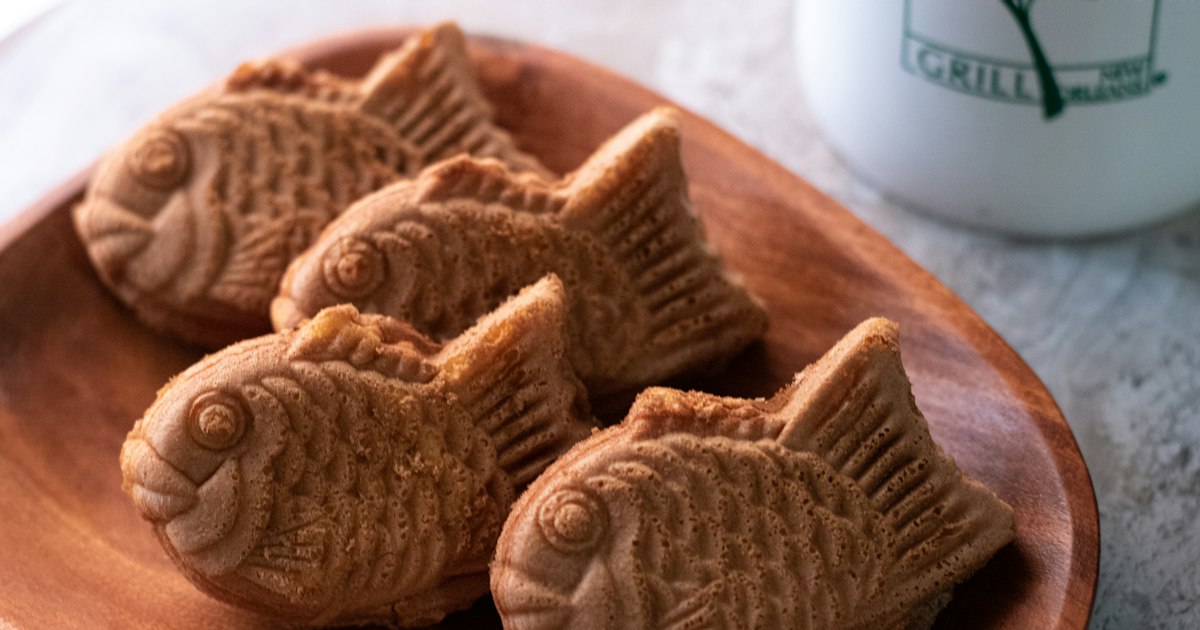
  • Kamaboko: Japan’s Fish Cake Craft and Where to Buy Artisan Varieties

    Kamaboko: Japan’s Fish Cake Craft and Where to Buy Artisan Varieties

    Photo by Kelly Visel on Unsplash

    Walk past any Japanese supermarket’s refrigerated section and you’ll spot it: a smooth pink-and-white loaf, sometimes mounted on a thin wooden board, sometimes swirled into a pink pinwheel floating in a bowl of ramen. That’s kamaboko, Japan’s steamed fish cake, and while it often gets dismissed as a throwaway ramen topping, the artisan versions made in a handful of towns are genuinely crafted goods worth seeking out — some cut and shaped like origami, others aged in techniques that go back centuries. Here’s how to find the good stuff.

    What Is Kamaboko, Exactly?

    Kamaboko starts as surimi — white fish (traditionally shiro-guchi croaker, now often Alaska pollock or shark) pounded into a fine paste with salt, sugar, and starch, then steamed until it sets into a firm, springy cake. The classic shape is a half-cylinder loaf mounted on a small wooden board (ita), which is why old-school kamaboko is sometimes called ita-kamaboko. The pink skin you see on top isn’t rubber dye for fun — kōhaku (red-and-white) kamaboko is specifically made for New Year’s osechi trays and celebrations, since red and white together symbolize good fortune in Japan.

    Two relatives worth knowing so you don’t mix them up in a shop: chikuwa is the hollow, tube-shaped version grilled on a stick (not board-mounted), and narutomaki is the pink spiral swirl you find in ramen and oden, named after the whirlpools off Naruto in Tokushima. Both are technically kamaboko-family products but sold and eaten differently.

    Regional Styles Worth Seeking Out

    Kamaboko is a regional craft as much as a food category, and the differences are real:

    • Odawara (Kanagawa): Often considered the heartland of refined kamaboko, thanks to clean coastal water and a port that historically shipped premium white fish. Odawara kamaboko is prized for its tight, bouncy texture (the Japanese word is “ashi,” or springiness) and is sold in long-running shops dating back to the Edo period.
    • Sendai (Miyagi): Home to sasa-kamaboko, flat fan-shaped cakes grilled (not just steamed) so the surface browns slightly, resembling bamboo leaves. It’s a grab-and-eat snack as much as a formal gift, and stalls near Sendai Station sell it warm.
    • Kanazawa (Ishikawa): Known for kazari-kamaboko — decorative kamaboko sculpted into cranes, flowers, or crab shapes, traditionally made for weddings and celebrations. These are display pieces as much as food.
    • Shimonoseki and the Seto Inland Sea area: Leans on local fish varieties for a denser, more savory style, often sold in smaller artisan shops rather than department stores.

    Where to Buy Artisan Kamaboko

    If you’re in Tokyo, the easiest reliable source is a department store basement food hall (depachika), which routinely stocks regional kamaboko brands flown in from Odawara, Sendai, and Kanazawa. The food halls around Nihonbashi’s flagship department stores are a good bet precisely because this neighborhood has centuries of history as a merchant and provisions district — look for the gift-boxed sets, usually 1,000–3,000 yen for an assortment of 4–6 small cakes, which travel well if you’re bringing souvenirs home.

    In Osaka, the stalls of Kuromon Ichiba Market sell fresh kamaboko and chikuwa alongside the market’s famous seafood skewers — it’s a good spot to buy a small loaf (often 300–800 yen) to eat that day rather than a shelf-stable gift box.

    For the real pilgrimage, Odawara is an easy day trip from Tokyo — about 35 minutes by Tokaido Shinkansen from Tokyo Station, or roughly 70–80 minutes on the Odakyu Line from Shinjuku. Several historic kamaboko houses operate shops near Odawara Station and along the old Tokaido road, selling everything from everyday boards (around 500–900 yen) to elaborately shaped gift sets well over 3,000 yen.

    Watching (and Trying) the Craft Yourself

    The best-known hands-on stop is Suzuhiro Kamaboko no Sato, a combined shop, small museum, and workshop space a short walk or bus ride from Odawara Station. It’s generally open daily from around 9:00 to 18:00 (hours can shift seasonally, so confirm before you go), and offers a chikuwa- or kamaboko-making experience where you shape surimi paste by hand and grill or steam it yourself, typically for a fee in the 1,000–2,000 yen range per person. It’s a genuinely fun 20–30 minute activity for families or anyone curious how a flat fish paste becomes a springy, structured cake — and you eat what you make.

    Budget, Mid-Range, and Splurge Picks

    Thinking about what to buy at different price points:

    • Budget (300–800 yen): A single loaf or a few pieces of narutomaki or chikuwa from a market stall or supermarket — fine for snacking, not really gift material.
    • Mid-range (1,000–3,000 yen): Boxed assortments from an established house like those in Odawara or Sendai, usually vacuum-sealed or chilled, suitable as omiyage for colleagues or family. If you’re already building a shopping list of Japanese gift sweets and snacks, it’s worth comparing against the standards covered in our omiyage buyer’s guide — kamaboko makes a nice savory counterpoint to an all-sweets gift box.
    • Splurge (3,000–8,000+ yen): Hand-shaped kazari-kamaboko from Kanazawa artisans, often made to order for weddings or New Year, sculpted into cranes or flowers. These are closer to edible art and usually need advance ordering through specialty shops rather than walk-in purchase.

    Common Mistakes to Avoid

    The biggest one is buying kamaboko as a take-home souvenir without checking that it needs refrigeration — most artisan kamaboko is chilled, not shelf-stable, and will spoil within days, so it’s a poor choice if you have a long flight home with no cooler bag. Ask specifically for a vacuum-sealed or shelf-stable gift set if you need something to survive the trip; shops that cater to tourists usually have one. Another mistake is confusing cheap, highly processed kamaboko (often made mostly from starch and flavoring, sold cold-cut style for bento boxes) with the artisan product — texture and fish content vary enormously by price, and a 150-yen convenience store pack tells you nothing about what real ita-kamaboko tastes like.

    Best Time to Buy

    Kamaboko is sold year-round, but late December is peak season, since kōhaku (red-and-white) kamaboko is a required component of osechi ryori, the New Year’s meal, and shops sell out of their nicest shaped and gift-boxed versions in the final weeks of the year. If you want the full range of celebratory and decorative styles — including the elaborate Kanazawa shapes — visiting in mid-to-late December gives you the widest selection, though you’ll be competing with locals doing their own New Year shopping. Outside that window, kamaboko culture pairs naturally with other traditional Japanese food crafts worth building a trip around, like the fermented and pickled vegetables covered in our guide to tsukemono — both are everyday staples that have a surprisingly deep artisan tier once you know where to look.
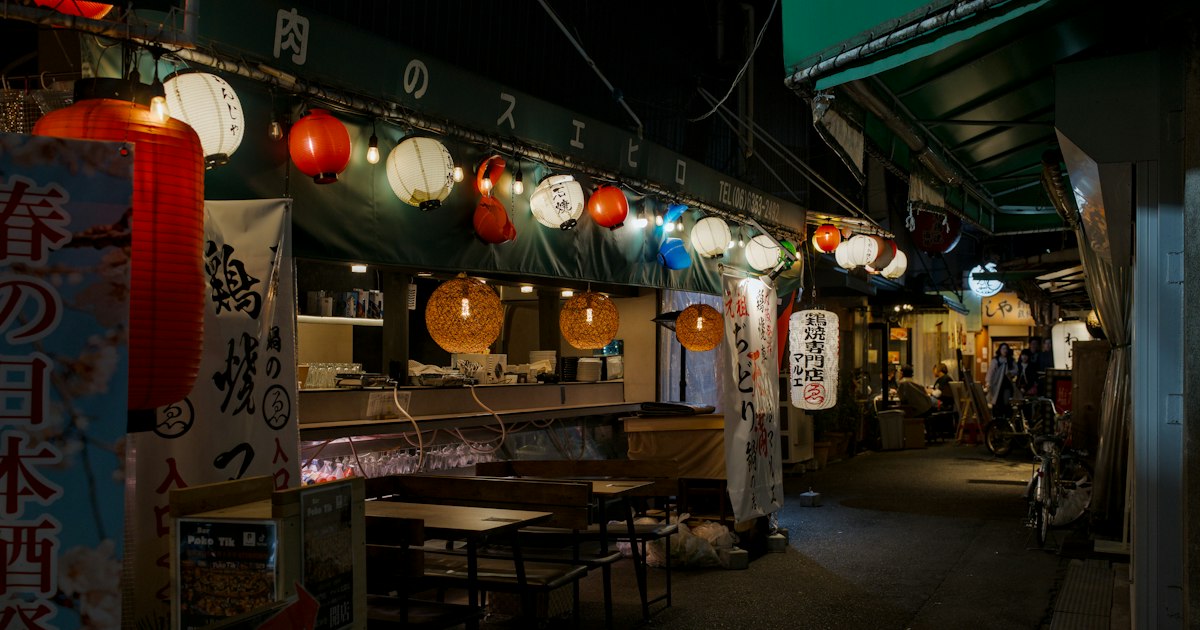
  • Kuromon Ichiba Market: Osaka’s Kitchen Street Food Crawl

    Kuromon Ichiba Market: Osaka’s Kitchen Street Food Crawl

    Photo by Julien on Unsplash

    Known locally as “Osaka’s Kitchen,” Kuromon Ichiba Market is a 580-meter covered arcade in Nipponbashi packed with roughly 150 stalls selling everything from live seafood to wagyu skewers to seasonal fruit. Unlike many food markets in Japan where eating on the spot is frowned upon, Kuromon actively encourages it—most stalls grill, shuck, or torch their food right at the counter and hand it to you to eat standing a few feet away. Here’s how to plan a food crawl that actually works, with real prices and the mistakes that trip up first-time visitors.

    What Is Kuromon Ichiba Market?

    Kuromon Ichiba has operated as a wholesale-turned-retail food market since the late Edo period, originally supplying restaurants and sushi chefs across Osaka. Today it’s split roughly between old-school vendors selling raw fish, pickles, and produce to locals, and newer stalls built for tourists who want a quick skewer or a grilled scallop to eat on the move. Both halves are worth your time—the produce and dry-goods shops give you a sense of what Osaka actually cooks with, while the grab-and-go counters are where most visitors spend their money.

    The arcade is fully covered, so it’s a good rainy-day option, and it stays open regardless of weather or season. Pickle specialists here are a good stop if you want to understand Japan’s tsukemono tradition beyond the small packets sold at convenience stores—several stalls let you sample before buying.

    Getting There: Trains, Walking, and Taxis

    The market sits between Namba and Nipponbashi, making it an easy add-on to a Dotonbori or Shinsekai day.

    • Osaka Metro: Nippombashi Station (Sakaisuji Line or Sennichimae Line), Exit 10, is about a 1-minute walk directly into the market’s southern end.
    • Kintetsu/Hanshin Namba Line: Nihonbashi Station is similarly close, roughly 2 minutes on foot.
    • From Namba Station: It’s a 10–12 minute walk north through the Nipponbashi Den Den Town electronics district.
    • From Shin-Osaka Station: Take the subway (Midosuji Line to Namba, then transfer) for about 25 minutes total.

    If you’re coming from a hotel in a less subway-friendly area, or you’re loaded down with shopping bags afterward, a taxi is a reasonable option for this short a hop—see our guide to hailing a taxi in Japan for app-based ordering and fare etiquette.

    When to Go: Best Time to Beat the Crowds

    There’s no single posted opening hour for the market as a whole—it’s a public shopping street, not a gated facility—but individual stalls set their own schedules. Most open between 8:00 and 10:00 and pull their shutters by 18:00, though a handful of sushi and seafood counters stay open until 20:00 to catch dinner traffic. A few produce and dry-goods shops close entirely on no fixed day, so if there’s one specific stall you want, it’s worth checking it’s open before you go.

    Arrive before 10:00am for the best combination of fresh stock and thin crowds. Tour groups and cruise-ship day-trippers tend to flood the arcade between 11:00am and 3:00pm, especially on weekends, when the narrow lanes can get genuinely congested. Winter (November through February) is prime season for crab and oysters, while summer brings cheaper, plumper uni and the market’s famous grilled scallops at their sweetest. The market is covered, so humidity aside, there’s no bad season to visit.

    What to Eat: A Stall-by-Stall Crawl

    Budget street food runs 300–1,500 yen per item, which is the sweet spot for grazing your way down the arcade:

    • Grilled scallop on the half-shell — 500–800 yen, torched or grilled to order
    • Fresh oysters — 300–500 yen each, raw or lightly grilled
    • Tamagoyaki (rolled omelet) skewer — 300–500 yen, a good palate reset between seafood
    • Wagyu beef skewer — 800–1,500 yen, seared tableside
    • Takoyaki (6 pieces) — around 500–700 yen

    Mid-range options (1,500–3,000 yen) include small sushi sets, seafood rice bowls, and grilled fish plates meant to be eaten at a counter rather than walking. For a splurge, king crab legs run anywhere from 1,500 to 4,000+ yen depending on size and preparation, and premium uni bowls or whole grilled fugu courses can run 3,000–8,000 yen. These higher-end items are usually priced per gram or per piece and displayed clearly—always confirm the total before the vendor starts cutting, since a “per 100g” price can add up fast on a king crab leg.

    If you want to compare notes on grilled skewers more broadly—seasonings, cuts, and how to order like a regular—our guide to yakitori in Japan covers the etiquette that carries over to Kuromon’s beef and seafood skewer stalls too.

    Market Etiquette and Common Mistakes

    Eating while walking is one of the few places in Japan where this is normal, since Kuromon is built around it—but there are still unwritten rules. Eat your food near the stall you bought it from, not three shops down, and use the small trash bins each vendor provides rather than carrying wrappers out of the market. Don’t photograph vendors or their product up close without asking, and don’t pick up or touch seafood on display.

    The biggest mistake visitors make is assuming every stall takes cards. Many of the larger seafood and skewer counters now accept IC cards (Suica/Icoca) and credit cards, but plenty of the smaller, older stalls remain cash-only, and you’ll want small bills and coins rather than a 10,000 yen note for a 500 yen scallop. If a vendor hands you a receipt for a pricier item like crab or wagyu, hold onto it—it’s useful if you have any dispute about what you were charged, and our guide to receipts and returns in Japan explains what tourists should know before handing over cash at a market stall versus a retail shop.

    A second common mistake: buying the first grilled scallop or crab leg you see at the market’s entrance. Prices for the same item can vary by a few hundred yen between stalls, and the entrance-facing shops often charge a premium knowing it’s the first thing visitors encounter. Walk at least a third of the way down the arcade before committing to your first purchase.

    Budget Planning: What a Food Crawl Actually Costs

    For a satisfying grazing lunch of four or five small items—a scallop, an oyster, a skewer, a tamagoyaki, and a drink—budget 2,500–3,500 yen per person. Add a crab leg or premium uni bowl and you’re looking at 5,000–8,000 yen for a genuinely indulgent meal. Most people spend 45 minutes to 90 minutes working through the market at a grazing pace; if you want to sit down for a proper sushi set at one of the counter restaurants mid-arcade, add another 20–30 minutes and 2,000–3,000 yen to that.

    Nearby: Where to Go After Kuromon

    Dotonbori’s canal-side neon and restaurants are a 10-minute walk north, making it natural to pair a Kuromon lunch with an evening in Dotonbori. Shinsekai and the Tsutenkaku Tower area, known for kushikatsu, are about 20 minutes south on foot or a short subway ride. If you’re stocking up on souvenirs for home after your food crawl, it’s worth comparing what you find at Kuromon’s dry-goods stalls against the packaged sweets at department stores—see our buyer’s guide to Tokyo Banana and Japan’s iconic omiyage sweets for what travels well and what doesn’t.

  • Hailing a Taxi in Japan: Apps, Fares & Etiquette (GO, S.Ride)

    Hailing a Taxi in Japan: Apps, Fares & Etiquette (GO, S.Ride)

    Photo by Matthieu Bühler on Unsplash

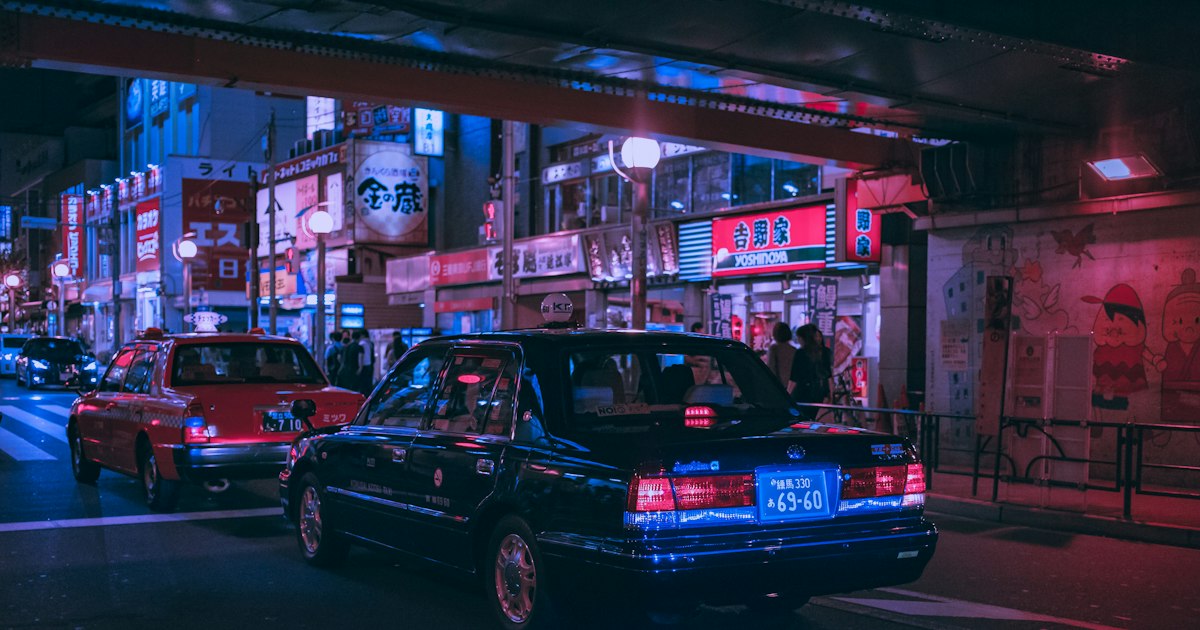
    Japan’s taxis are clean, famously punctual, and driven by people who will not slam a door, demand a tip, or take a roundabout route to pad the fare. They’re also one of the easiest things for a visitor to get wrong — not because the system is confusing, but because it runs on conventions nobody explains to you until you’re standing on a curb with a suitcase, wondering why the car with its light on just drove past. Here’s how to actually use a Japanese taxi, from booking it on your phone to paying without fumbling for cash.

    When a Taxi Actually Makes Sense

    Japan’s trains and subways are so good that taxis are usually the backup plan, not the default. But there are real situations where a taxi is worth the extra cost: last trains stop running around midnight to 1am in most cities, and after that a taxi is often your only option besides walking. Taxis also make sense when you’re hauling luggage to or from a hotel, traveling as a group of three or four where the per-person cost splits down to train-ticket territory, or visiting a rural area — like a hot spring town — where buses run twice a day and the nearest station is a 20-minute walk from anywhere useful. If you’re staying somewhere like Kurokawa Onsen, a taxi from the nearest train or bus station is often the only practical way in, especially with bags.

    The Two Big Apps: GO and S.Ride

    GO is Japan’s largest taxi-hailing app, formed from a merger of JapanTaxi and DeNA’s MOV, and it has by far the widest coverage — it works in Tokyo, Osaka, Kyoto, Sapporo, Fukuoka, and dozens of smaller cities. You enter your pickup pin and destination, see an estimated fare range before you confirm, and watch the car approach on the map in real time. Payment can be registered in-app (credit card or GO Pay) so you can skip handling cash or a card reader entirely, or you can simply pay in the car as normal.

    S.Ride is the other major player, backed by Sony along with Daiwa Motor Transportation, Kyocera, and Toyota-affiliated taxi groups, and it’s strongest in Tokyo specifically. Functionally it’s very similar to GO: live map, fare estimate, in-app payment. In practice, many frequent visitors install both, since availability can vary by neighborhood and time of day — if GO shows a 10-minute wait, S.Ride might have a car two minutes away.

    One practical snag: both apps generally want to verify your account via SMS to a phone number, which can be awkward if you’re on an eSIM or haven’t activated a Japanese number yet. Download and set up whichever app you plan to use before your trip, or as soon as you land, rather than discovering the hurdle at 11pm when you actually need a ride.

    Other Ways to Get a Taxi

    You don’t need an app at all. Taxi stands (タクシー乗り場) are standard outside every major train station, airport terminal, and large hotel — just join the queue. You can also hail one on the street by raising a hand; look at the small lit sign on the dashboard: red characters (空車, “vacant”) mean it’s free to stop, while green characters (賃走) mean it’s occupied. DiDi also operates in several Japanese cities including Osaka, Kyoto, and Sapporo, with an interface similar to GO. Uber exists in Japan too, but in most cities it dispatches the same licensed taxis as GO rather than private drivers — it’s a familiar app, not a cheaper option.

    How Much a Taxi Actually Costs

    In Tokyo, the flag-drop fare is ¥500 for the first 1.096 km, then ¥100 for every additional 255 meters — so a short 2 km hop might run ¥900–1,100 before traffic. A 10-minute ride across a neighborhood often lands around ¥1,500–2,000. Fares rise 20% between 10pm and 5am, and metered time is added when the car is stuck below a certain speed in traffic, so a jam during rush hour will cost more than the distance alone suggests. Osaka and Kyoto use a similar flag-drop-plus-distance structure with slightly different numbers — the app will always show you an estimate before you confirm, so there’s no need to memorize exact rates city by city.

    Airport runs are where taxis get expensive: Narita to central Tokyo by taxi typically costs ¥20,000–23,000 and takes 60–90 minutes depending on traffic, while Haneda to central Tokyo runs roughly ¥6,000–8,000 for 30–45 minutes. For Narita in particular, the train is almost always the better value — see our comparison of the Narita Express vs. Keisei Skyliner if you’re deciding how to get into the city. A taxi from the airport is worth it mainly late at night after trains stop, or if you’re traveling with a group where the per-person cost competes with train tickets anyway.

    Taxi Etiquette: Doors, Seats, and Payment

    The back doors are automatic — the driver opens and closes them from a control near the steering wheel, so don’t pull the handle or try to close it yourself. Get in the back seat; the front passenger seat is generally left empty unless the car is full. Tipping is not expected and can actually cause an awkward moment as the driver tries to give your money back — the fare on the meter is the fare. Most taxis in major cities now accept IC cards (Suica, Pasmo), credit cards, and QR payment apps, but smaller cities and older cars are more likely to be cash-only, so carry some yen as a backup. Always ask for a receipt (レシート, “reshiito”) if you’ll need to track the expense later — drivers hand them over automatically in most cases, and it’s useful to know what’s expected if you’re ever navigating receipts and paperwork in Japan more broadly.

    Common Mistakes to Avoid

    Don’t assume every taxi app works everywhere — GO has the broadest coverage, but a car that’s five minutes away in central Tokyo might not exist at all in a small town; in rural areas, a taxi stand or a phone call to a local taxi company (ask your ryokan or hotel to call for you) is often more reliable than an app. Don’t try to flag a taxi that already has its green “occupied” light on — drivers won’t stop, and waving harder doesn’t help. Don’t expect drivers to speak much English; typing your destination into the app, or showing a pinned location or hotel business card, works far better than trying to pronounce an address. And don’t overload a standard taxi with luggage for four people — Japanese taxis are often smaller than they look from outside; if you’re a group with suitcases, look for a “jumbo taxi” (a larger van-style vehicle bookable through GO) or split into two cars.

    A Few Situational Tips

    Heading somewhere with specific opening hours — a boutique strip like Daikanyama or a department-store district like Nihonbashi — a taxi is often faster than the train for that last stretch from the station, especially if you’re carrying shopping bags on the way back. In heavy rain, taxi demand spikes and wait times on apps can jump sharply, so budget extra time or just join a station queue instead of watching the app countdown climb. And if you’re island- or countryside-bound, confirm with your accommodation in advance whether taxis are even available on demand — some areas have only one or two taxi companies with limited cars, and a reservation ahead of time beats hoping one appears.

  • Sonny Angel, Smiski & Blind Box Toys: Japan’s Designer Collectible Craze

    Sonny Angel, Smiski & Blind Box Toys: Japan’s Designer Collectible Craze

    Photo by Benson John on Unsplash

    If you’ve scrolled past rows of tiny naked cherubs wearing fruit hats or glow-in-the-dark creatures hiding on a shelf, you’ve met Japan’s blind box toy world. Sonny Angel, Smiski, and the dozens of “nyagacha” and character blind boxes that followed have turned into one of the most approachable, suitcase-friendly souvenirs a visitor can bring home. Here’s how the craze actually works, what you’ll pay, and where to shop without wasting a trip to a store that sold out weeks ago.

    What Are Sonny Angel, Smiski, and Blind Box Toys?

    Sonny Angel is a line of palm-sized baby figures, each topped with a removable hat (a strawberry, a panda, a cactus, a Shiba Inu—hundreds of designs exist across themed series). It was created by the Japanese company Dreams Inc. in 2005 and has since become a genuine collecting subculture, with secondary-market trading, series checklists, and online “box opening” videos. Smiski, from the same company, is a related but distinct line: glow-in-the-dark figures designed to be tucked into corners of a room, on a shelf edge, or behind a lamp, so they “appear” to be hiding when the lights go off.

    Both are sold as blind boxes (japan calls this “box gacha” or simply “box”): the outer packaging shows the full series lineup on the back, but you don’t know which exact figure is inside until you open it. That’s the appeal—and the trap—of the format, and it’s spawned a wider ecosystem of blind box toys covering anime characters, food-themed figures, and collaborations with brands like Studio Ghibli or Sanrio.

    Where to Buy Them in Japan

    You don’t need to hunt down a specialty import shop; these are mainstream products in Japan, sold at:

    • Kiddy Land Harajuku – the most famous multi-floor toy and character-goods store in Tokyo, with a consistently deep Sonny Angel and Smiski selection. Open roughly 11:00–20:00 daily; nearest station is Meiji-Jingumae or Harajuku.
    • Loft and Hands (formerly Tokyu Hands) – lifestyle department stores found in nearly every major city, usually with a dedicated blind box toy corner near stationery or gifts.
    • Village Vanguard – a quirky variety store chain that stocks newer and collaboration series, often before other retailers.
    • Don Quijote (Donki) – the discount chain, useful for late-night or budget browsing, though selection rotates unpredictably.
    • Sonny Angel official stores – standalone shops exist in spots like Tokyo Solamachi (Tokyo Skytree Town) and Odaiba, carrying the full current catalog plus store-exclusive releases not sold elsewhere.

    Department store pop-up events are also common. Flagship stores in historic shopping districts like Nihonbashi periodically host limited-run character goods fairs on their upper floors—worth checking the store’s event calendar if you’re visiting during a specific series launch.

    How Much Do They Cost?

    Pricing is refreshingly transparent since it’s fixed by the manufacturer, not scalped at the register:

    • Budget: A single Sonny Angel or Smiski blind box runs roughly ¥800–¥990 including tax. This is the standard mini-figure price across nearly every retailer.
    • Mid-range: Themed sets, holiday editions, or specialty collaborations (Disney, Ghibli, Sanrio crossovers) typically land between ¥1,500 and ¥3,500 for a single figure or small set.
    • Splurge: Limited-run full-size figures, plush versions, or sealed full-case sets (usually 12 boxes per case, guaranteeing one of each design) can run ¥9,000–¥12,000 for a full case—useful if you want a complete series without duplicates, since opening individual boxes is pure chance.

    Buying a full case is the single best way to avoid the most common rookie mistake: buying ten individual boxes hoping for variety and ending up with five duplicates of the same hat.

    Timing Your Trip Around New Releases

    New Sonny Angel series typically drop several times a year, often tied to seasons: spring (cherry blossom/animal themes), summer, Halloween, and a heavily anticipated Christmas/winter series that regularly sells out in Japan within days. If you’re visiting in October or November, expect to see holiday-series restocks happening in real time—check a store’s social media the morning of a release if you want a specific design, as popular ones vanish fast. Conversely, late summer tends to have the calmest shelves and best chance of finding older, overlooked series at full stock.

    Common Mistakes to Avoid

    • Assuming you can return an unwanted figure. Blind boxes are final sale almost everywhere in Japan once opened, and even unopened boxes face the same general return restrictions as other goods—see this site’s guide to returns, exchanges, and receipts in Japan before assuming a store will swap a duplicate.
    • Buying resold “rare” figures at inflated prices online before your trip. Nearly every design is restocked eventually in Japan at retail price; patience at a physical store usually beats paying a markup.
    • Overpacking fragile pieces. The hats detach easily and the figures are solid vinyl but can chip—wrap each one individually rather than tossing a handful loose into a suitcase pocket.
    • Skipping smaller character-goods districts. Everyone heads to Harajuku, but Tokyo Character Street inside Tokyo Station is an easy add-on if you’re already passing through on a Shinkansen connection, and it regularly carries blind box toys alongside anime merchandise.

    Beyond Sonny Angel: Exploring the Wider Blind Box Scene

    Once you start looking, blind box toys show up everywhere—convenience store gacha corners, airport gift shops, and boutique concept stores. Design-forward neighborhoods like Daikanyama are good for stumbling onto small shops carrying independent Japanese designer toy lines you won’t find in mainstream chains, often in limited runs with no English signage or online presence—part of the fun is simply browsing without an itinerary.

    Whether you leave Japan with a single mystery box or a full case lined up on a shelf at home, the format rewards a bit of strategy: know the price point going in, check for current series before you shop, and accept that part of the charm is genuinely not knowing which tiny hat you’ll get.

  • Anmitsu & Mitsumame: Japan’s Retro Jelly Dessert and Where to Try It

    Anmitsu & Mitsumame: Japan’s Retro Jelly Dessert and Where to Try It

    Photo by Tracey Parish on Unsplash

    Long before soft-serve and fruit sandos took over Japanese dessert menus, there was anmitsu — a bowl of cubed agar jelly, sweet red bean paste, fruit, and a pour of dark syrup that’s been a fixture of Japanese sweets shops since the Meiji era. It’s not flashy, it’s not Instagram-engineered, and that’s exactly the appeal. If you want to taste a dessert that Japanese grandparents actually grew up eating, anmitsu and its simpler cousin mitsumame are worth seeking out, and they’re cheap enough to try more than once.

    What’s Actually in the Bowl

    Anmitsu starts with kanten — agar jelly made from seaweed, not gelatin, so it’s firm, barely sweet, and faintly grassy rather than bouncy like Western jello. The cubes sit in a bowl with:

    • Anko (sweet red bean paste) — usually a small scoop of smooth (koshian) or chunky (tsubuan) paste
    • Mitsu — a dark, molasses-like syrup called kuromitsu (black sugar syrup) poured over everything just before eating
    • Fruit — commonly mikan segments, cherries, and sometimes seasonal fruit like strawberries or persimmon
    • Shiratama dango — small chewy rice flour balls, in fancier versions
    • Ice cream or whipped cream — in modern variations, though traditional shops often skip this

    Mitsumame is the stripped-down version: just kanten cubes, a few beans (often sweetened red peas, not red bean paste), fruit, and kuromitsu — no anko. If a menu lists both, mitsumame is almost always the cheaper, lighter option and a good entry point if you’re not sure you like anko yet.

    How to Order and Eat It

    You’ll typically get kuromitsu served separately in a small pitcher or container — pour it yourself rather than having it pre-mixed, since the kanten can turn mushy if it sits in syrup too long. Mix everything together with your spoon before eating; it’s meant to be eaten as one bowl, not picked apart component by component. If you’re ordering in Japanese, “anmitsu” and “mitsumame” are both written clearly on menus in hiragana/kanji (あんみつ / みつまめ), and most shops that serve them will have a picture menu or plastic food models in the window, so pointing works fine.

    A common mistake first-timers make is assuming it’s a cold soup you drink — it’s eaten with a spoon, and the kanten cubes should be bitten through, not slurped. Another is skipping the matcha or hojicha tea that often comes alongside; the bitterness is there specifically to cut the sweetness of the kuromitsu, and the dessert tastes unbalanced without it.

    Where to Try It in Tokyo

    The best anmitsu comes from kanmidokoro (甘味処) — traditional sweets cafés — rather than general cafés or convenience stores, though you can find packaged versions in any supermarket for around 150–300 yen if you just want a quick taste.

    • Budget (300–600 yen): Convenience store and supermarket anmitsu cups are everywhere and surprisingly decent for the price — a good way to confirm you like the flavor before seeking out a sit-down shop.
    • Mid-range (700–1,200 yen): Kanmidokoro in old shopping districts like Asakusa, Yanaka, and Ningyocho serve made-to-order anmitsu in this range. Many of these neighborhoods are near other retro shopping areas — if you’re already exploring Nihonbashi’s historic merchant district, several long-running sweets shops are a short walk from the main department stores, making it an easy add-on to a shopping day.
    • Splurge (1,500–2,500 yen): Department store basement food halls and hotel tea lounges serve elevated versions with seasonal fruit, premium anko, and sometimes matcha ice cream added — common in Ginza and Nihonbashi department stores where high-end wagashi (traditional sweets) counters operate.

    Most kanmidokoro keep daytime hours, roughly 10:00 or 11:00 to 18:00 or 19:00, and close one day a week (often Monday or Wednesday) — it’s worth checking a shop’s hours before making a special trip, since these are small, independently run spots rather than chains with standardized schedules.

    Best Season and Timing

    Anmitsu is sold year-round, but it’s marketed and eaten primarily as a summer dessert — it’s cold, light, and common on menus from May through September when shops add seasonal fresh fruit versions. In winter, some kanmidokoro pivot their counter space toward hot dessert options like zenzai (sweet red bean soup) instead, so anmitsu availability can shrink in colder months, especially at smaller shops with limited seating. If you’re visiting in summer and want to beat the heat the way locals do, an afternoon anmitsu break between 14:00 and 16:00 — after lunch service ends and before dinner crowds — is when kanmidokoro tend to be least crowded and most relaxed.

    How to Get There

    Kanmidokoro cluster in Tokyo’s older downtown (shitamachi) neighborhoods — Asakusa, Yanaka, Ningyocho, and Nihonbashi — all reachable via the Tokyo Metro or Toei subway lines without needing a special transit pass. If you’re arriving from Narita Airport and heading straight into the city, deciding between the Narita Express and Keisei Skyliner is the first logistics question to sort out, since both connect to central Tokyo stations within a short transfer of these sweets districts.

    Buying Anmitsu-Style Treats as Souvenirs

    Fresh anmitsu doesn’t travel, but packaged kanten and mitsumame kits are sold in department store food halls and are easy to pack since kanten jelly is shelf-stable for weeks at room temperature. If you’re already building an omiyage shopping list alongside something like Tokyo Banana and other iconic Japanese sweets, a box of kuromitsu syrup or kanten jelly mix makes a good lightweight addition — just confirm the shop can give you a proper receipt if you’re using a tax-free purchase, something covered in our guide to returns, exchanges, and receipts in Japan.

    A Few Shops Worth Seeking Out

    While exact shop recommendations shift over time, look for kanmidokoro with a visible wagashi counter and a queue of local regulars rather than tourists — that’s usually the best sign of quality. Shops that have been operating for 50+ years (common in Yanaka and Asakusa) tend to make their own kanten and anko in-house daily, which means the jelly has better texture and the bean paste is less cloying than mass-produced versions. Expect simple, no-frills interiors — low tables, paper menus, maybe a single ceiling fan — this is a dessert built around consistency and tradition, not atmosphere.

    Anmitsu won’t win any dessert trend awards, but that’s precisely why it’s worth trying: it’s a direct line to how Japanese sweets shops operated a century ago, served in the same unfussy way, for a few hundred yen a bowl. Pair it with a slow afternoon in one of Tokyo’s old merchant districts and you’ll understand why it’s stuck around this long.

  • Nihonbashi: Tokyo’s Historic Merchant District & Flagship Department Stores

    Nihonbashi: Tokyo’s Historic Merchant District & Flagship Department Stores

    Photo by Cem Ersozlu on Unsplash

    Long before Shibuya or Ginza existed as shopping names, Nihonbashi was already Tokyo’s commercial heart. This is where the Edo-period merchant class built fortunes, where Japan’s oldest department store still rings a brass bell at opening time, and where the official “kilometer zero” marker for Japan’s entire road network sits quietly under a bridge most tourists walk past without noticing. It’s one of the few places in central Tokyo where you can trace four centuries of commerce in a single afternoon.

    A Brief History of Japan’s Merchant Capital

    Nihonbashi (“Japan Bridge”) takes its name from the wooden bridge first built here in 1603, the same year Tokugawa Ieyasu made Edo his capital. The bridge marked the starting point of the Five Routes, the highway system connecting Edo to the rest of Japan, and the district around it filled with wholesalers, moneylenders, and fish markets (the original Tsukiji market started life here before relocating). The current stone bridge dates to 1911 and still carries a small bronze “Nihon no Michi no Genten” (Center of Japan) marker at its midpoint — easy to miss, but a nice two-minute detour if you’re walking between the department stores.

    Nihonbashi Mitsukoshi: Japan’s Oldest Department Store

    Mitsukoshi traces its roots to a kimono shop called Echigoya, opened in 1673 on this exact spot. The current main building (completed in stages between 1914 and 1935) is a designated Important Cultural Property, and it still has the theatrical flourishes that made department stores a spectacle a century ago: bronze lion statues modeled on the ones in London’s Trafalgar Square guard the main entrance, a carved wooden “Tenjin” staircase rises through the center hall, and a pipe organ on the upper floors is played live several times a day (schedules are posted near the atrium).

    Store hours run 10:30 to 19:00 (some restaurant floors stay open later). The basement food hall — a depachika in Japanese — is the easiest entry point for souvenir shopping: individually wrapped sweets and tea generally run ¥500–¥2,000, and most stalls have English-speaking staff used to tourists. Tax-free counters exist but are usually on a separate floor from the registers, so keep your passport and receipts handy and ask staff where the “tax-free counter” is before you start piling up bags. For a refresher on how Japanese retail refund and receipt rules actually work, see Returns, Exchanges & Receipts in Japan.

    Takashimaya Nihonbashi: A National Important Cultural Property

    A five-minute walk away, Takashimaya’s Nihonbashi flagship (opened 1933, expanded over the decades) is the first department store building in Japan to receive Important Cultural Property status, awarded in 2009. The exterior blends Japanese and Western Art Deco motifs, and the store has since grown into a small complex with a connected “Watch Maison” annex for luxury timepieces and a rooftop garden that’s a quiet rest stop on a hot day. Hours are 10:30 to 19:30, slightly later than Mitsukoshi, which makes it a good last stop if you’re doing both in one day. Its depachika is smaller than Mitsukoshi’s but strong on regional Japanese sweets and bento boxes if you want a picnic-quality lunch for under ¥1,500.

    COREDO Muromachi and the Modern Mix

    Facing Mitsukoshi across the street, the COREDO Muromachi 1, 2, and 3 complex (opened between 2010 and 2014) shows how Nihonbashi has modernized without bulldozing its identity. Long-running merchant shops that have operated here since the Edo period — including Ninben, a bonito-flake and dashi specialist founded in 1699 — now share floors with contemporary cafés and a cinema. Ninben’s “Nihonbashi Dashi Bar” sells a cup of fresh dashi broth for around ¥100, a cheap and genuinely interesting way to taste what Japanese cooking is actually built on. If you’re assembling a pantry of condiments and seasonings to bring home, this area pairs well with what you’d find in a guide like Yuzu Kosho and Beyond: A Japanese Condiment Pantry Souvenir Guide, and pickle shops in the COREDO basements make good use of the ideas in Tsukemono: Japan’s Pickled Vegetable Tradition and Where to Buy.

    Getting There and the Best Time to Visit

    Nihonbashi is genuinely central: it’s about a 10-minute walk from Tokyo Station’s Yaesu side, or one stop on the Tokyo Metro Ginza or Tozai Line to Nihonbashi Station, which connects directly underground to both Mitsukoshi (via Mitsukoshimae Station) and Takashimaya. If you’re coming straight from the airport, decide your route in first — our comparison of Narita Express vs Keisei Skyliner covers which train gets you into central Tokyo fastest depending on which airport you land at.

    Weekday mornings right after opening (10:30–11:30) are the quietest time to browse the historic buildings and take photos without crowds. Depachika basements get busiest in the late afternoon, especially after 17:00, when staff start marking down prepared foods and bento — good for bargain hunting, less good for a leisurely look around. Early January is uniquely chaotic: Japanese department stores sell “fukubukuro” lucky grab bags starting January 1–2, and lines can form before opening. If you want to see the stores at their calmest and still photograph the New Year decorations, aim for the first week of January but arrive well before 10:30, or wait until mid-January when the rush has passed.

    Common Mistakes to Avoid

    The biggest one is treating Nihonbashi as a single store rather than a district — Mitsukoshi, Takashimaya, and COREDO Muromachi are a 10-minute walking loop, and most visitors only budget time for one. Another is assuming every item in the depachika can leave the country: fresh prepared foods, fish, and some produce are not airport-friendly, so if you’re shopping for omiyage to carry home, look for shelf-stable sweets instead. The classic choice is covered well in Tokyo Banana and Japan’s Iconic Omiyage Sweets: A Buyer’s Guide. Finally, don’t assume tax-free shopping is automatic — you need to spend a minimum (typically ¥5,000 before tax at a single store in one day) and present your passport at the designated counter, not the regular register.

    Budget, Mid-Range, and Splurge Options

    On a tight budget, the Ninben dashi bar and depachika sample counters let you taste Nihonbashi’s food culture for a few hundred yen. Mid-range shoppers will find plenty in the ¥2,000–¥8,000 range among tea sets, lacquerware, and seasonal sweets across both department stores’ basement and first floors. For a splurge, Takashimaya’s upper floors and Watch Maison annex carry Japanese and European luxury goods, while Mitsukoshi’s kimono and tableware departments stock pieces that run well into six figures — browsing them is free, and the sales staff are generally happy to explain what makes a piece valuable even if you’re not buying.

  • Mailing Postcards & Stamps from Japan: A Traveler’s Guide

    Mailing Postcards & Stamps from Japan: A Traveler’s Guide

    Photo by Magic Mary on Unsplash

    Sending a postcard home is one of the cheapest, most satisfying souvenirs you can bring back from Japan — except you don’t keep it, someone else gets the joy of finding it in their mailbox weeks later. The process is simple once you know where to buy stamps, where the mailboxes are, and how long it actually takes. Here’s everything you need to pull it off without a wasted trip to the post office.

    Where to Buy Stamps (Kitte)

    Japanese postage stamps (切手, kitte) are sold at every post office counter, but you don’t need to track one down specifically for this — stamps are also sold at convenience stores (Lawson, FamilyMart, 7-Eleven) if you ask at the register, though stock is often limited to the most common denominations. Post offices themselves are the most reliable source and often sell postcard-friendly novelty stamp sheets featuring seasonal designs, anime characters, or regional motifs, which make nice souvenirs even unused.

    As of 2024, a standard postcard mailed internationally from Japan costs 85 yen. Domestic postcards cost 63 yen. Always confirm current rates at the counter, since postal rates do shift periodically — the clerk will weigh and check your postcard if you’re unsure which stamp denomination to use, which is the safest way to avoid an underpaid card getting held up overseas.

    Finding a Mailbox

    Japan’s post boxes are bright red, cylindrical or box-shaped, and genuinely everywhere — outside post offices, near train stations, by convenience stores, and along shopping streets. Each box has two slots: one for regular mail (普通) and one for larger or non-standard items (大型・その他). Postcards always go in the regular slot. If a box looks locked or unusually quiet, don’t worry — these are just emptied on a set schedule printed on a small sign on the box itself, often once or twice daily.

    If you’d rather hand your postcard directly to a person, any post office counter will take it, stamp it, and send it off the same day, which is reassuring if you’re nervous about a card sitting in a random street box.

    Post Office Hours and Logistics

    Regular post offices (郵便局) are typically open 9:00 AM–5:00 PM on weekdays and closed on weekends and public holidays — a schedule that catches a lot of travelers off guard since so much else in Japan runs late and seven days a week. Larger central post offices in big cities, however, often have extended hours, and some — like Tokyo Central Post Office near Tokyo Station — stay open into the evening or even operate a 24-hour counter for mail and parcels. If you’re arriving via Narita, note that post office hours are a different beast entirely from the efficient airport transfers covered in our Narita Express vs. Keisei Skyliner guide — don’t assume postal services will be as convenient as the trains.

    Budget tip: if you’re buying stamps for a handful of postcards, convenience stores are fastest and open 24 hours, but for anything requiring weighing, customs forms, or unusual destinations, go to a proper post office.

    Best Time to Mail Postcards

    There’s no bad season to send a postcard, but timing matters if you want it to arrive before you’re home. International postcards from Japan typically take 1–2 weeks to North America, Europe, and Australia via standard airmail — occasionally longer during the New Year period (late December–early January) when Japan’s domestic mail volume spikes with nengajo (New Year’s cards) and processing slows everywhere. If you’re traveling during Golden Week (late April–early May) or Obon (mid-August), post offices will have reduced hours or closures, so mail postcards before or after those windows if timing matters to you.

    A nice trick: buy and write your postcards early in the trip, while you’re still near post offices in Tokyo or Kyoto, rather than scrambling on your last day when you might be somewhere rural with no post office in sight.

    Common Mistakes to Avoid

    • Underpaying postage. Oversized or thick novelty postcards sometimes exceed standard postcard weight/size limits and need extra postage — have the counter clerk check if your card feels unusually heavy or textured.
    • Assuming weekend post office access. Regular post offices are closed Saturday and Sunday; plan around this rather than discovering it on a Sunday afternoon.
    • Writing the address in the wrong format. For international mail, write the destination country name clearly in English/Roman letters, and write the address in the normal format for that country (not Japanese order) so it’s legible to the receiving postal service.
    • Forgetting customs forms for anything beyond a postcard. If you’re mailing a small gift alongside your postcard — say, a little omiyage sweet from our Tokyo Banana and Japan’s Iconic Omiyage Sweets guide — that becomes a parcel, not a postcard, and needs a customs declaration at the counter.

    Where to Find Beautiful Postcards to Send

    Souvenir shops near major shrines and stations sell standard tourist postcards, but for something more distinctive, look in neighborhoods known for craft and design. Daikanyama’s boutique shops often stock beautifully designed stationery and postcard sets from independent Japanese illustrators, a step up from generic rack postcards. If you’re drawn to traditional crafts, postcards featuring textile and washi paper motifs pair nicely with a stop at Nishijin-ori in Kyoto, where you can see the silk-weaving tradition that inspires a lot of that imagery firsthand.

    Budget option: 100-yen shops and train station kiosks sell perfectly decent postcards for 100–200 yen each. Mid-range: boutique stationery shops run 300–600 yen for higher-quality card stock and original art. Splurge: limited-edition museum or temple postcard sets, sometimes boxed, can run 1,000–2,000 yen but make excellent gifts in their own right.

    Final Tip: Send One to Yourself

    A postcard mailed to your own address is a small, inexpensive time capsule — it’ll arrive after you’re home, stamped and dated, as a tangible memory of the trip. Combine it with a quick post office stop near your hotel on day one or two, before the itinerary gets busy, and you’ll have one less thing to worry about later.

  • Zojirushi & Thermos Mugs: Japan’s Vacuum Bottle Buying Guide

    Zojirushi & Thermos Mugs: Japan’s Vacuum Bottle Buying Guide

    Photo by Battlecreek Coffee Roasters on Unsplash

    If you’ve ever wondered why your coffee stays scalding hot for ten hours or why Japanese commuters never seem to carry a cold drink gone warm, the answer is usually sitting in their bag: a Zojirushi or Thermos vacuum bottle. These two brands dominate Japan’s drinkware shelves so completely that “mahobin” (魔法瓶, literally “magic bottle”) has become shorthand for the whole category. They make genuinely excellent souvenirs — compact, useful every single day, and nowhere near as expensive as visitors expect. Here’s how to buy one without wasting time or money.

    Zojirushi vs. Thermos: What’s the Difference

    Zojirushi (象印) is an Osaka-founded company that’s been making vacuum flasks and rice cookers since 1918; its logo is a stylized elephant. Thermos in Japan is operated by Thermos K.K., a company that has run independently of the American Thermos L.L.C. for decades — so the lineup you’ll find in a Tokyo department store is different from what’s sold under the same name back home, with its own sizing, colorways, and seasonal collaborations (Snoopy, Studio Ghibli, and Disney tie-ins show up regularly).

    In practice, the two brands compete head-to-head on tumblers, water bottles, and soup/lunch jars, and quality is comparable. Zojirushi tends to lean slightly more “office and kitchen,” while Thermos has a stronger outdoor and sports-bottle line. Neither is objectively better — pick based on the specific product, not brand loyalty.

    Where to Buy Them

    You don’t need to hunt down a flagship store — both brands are sold everywhere, which is part of the appeal.

    • Loft and Tokyu Hands (now branded “Hands”) — the best selection of colors and limited editions, typically open 10:00–21:00. Shibuya and Shinjuku locations carry entire shelves of both brands side by side, which makes comparing lid types easy.
    • Bic Camera and Yodobashi Camera — technically electronics stores, but their home-goods floors stock the full Zojirushi and Thermos ranges, often at a few hundred yen cheaper than department stores, and they process tax-free purchases on the spot with your passport.
    • Department store kitchenware floors (Takashimaya, Isetan, Daimaru) — pricier but carry the premium and largest-capacity lines, plus gift-wrapping if you need one for omiyage.
    • Don Quijote — hit or miss on selection, but worth checking if you’re already there late at night; some locations stay open past midnight.

    If you’re also shopping for other home goods, pair the trip with a stop at Francfranc, which sells its own stylish (if less technically serious) insulated tumblers and is worth comparing on design. Lifestyle-heavy neighborhoods like Daikanyama are good for browsing boutique kitchen shops in the same afternoon.

    Choosing the Right Model

    This is where most first-time buyers get it wrong, because the Japanese retail wall is a genuine wall of nearly identical bottles.

    • Capacity — sizes run from compact 300ml tumblers up to 2-liter soup jars. For daily commuting, 350–480ml is the sweet spot; anything under 300ml won’t hold a full coffee-shop drink.
    • Lid type — screw-top lids insulate best and are leak-proof in a bag, one-touch flip lids are faster for one-handed use but slightly less airtight, and straw lids are popular with kids but harder to hand-wash thoroughly. If you want to carry it in a backpack on trains, go screw-top.
    • Coating — look for “mug” or “tumbler” models with a slick interior coating (Zojirushi calls its clean-release coating “stainless clean” in Japanese marketing) if you plan to carry coffee or tea daily; it prevents staining and makes rinsing easier.
    • Carbonated drinks — standard vacuum bottles are not rated for carbonated beverages. Pressure builds inside a sealed vacuum flask and can make the lid pop or even crack the bottle. Only buy a carbonation-rated model if that’s specifically what you want.

    Budget, Mid-Range, and Splurge Picks

    Budget (¥1,500–¥2,500): compact 300–350ml tumblers, often in simpler single colors. Good as a light, cheap souvenir that still performs well.

    Mid-range (¥2,500–¥4,000): the 400–500ml standard bottles most Japanese commuters actually use — this is where the bulk of the shelf space goes, and where you’ll find seasonal character collaborations.

    Splurge (¥4,500–¥8,000): large-capacity soup jars and lunch jar sets (useful for anyone who wants to pack a hot soup alongside rice, similar to how tsukemono or other pantry souvenirs get packed into a bento), and premium double-wall tumblers with extra-long heat retention, sometimes 12+ hours. Limited-edition character or designer collaborations also land in this range.

    Best Time to Buy and Common Mistakes

    New product lines roll out in spring (March–April), tied to Japan’s fiscal and school year, so that’s when you’ll see the newest colors before they sell out. Early January brings fukubukuro “lucky bags” at department stores, which occasionally bundle discounted drinkware — worth checking if you happen to be in Japan then, though contents aren’t guaranteed. Summer is peak buying season for cold-retention bottles generally, so popular colors can sell out faster June through August.

    Common mistakes to avoid:

    • Assuming the bottle is dishwasher-safe — many printed or lacquered exteriors are hand-wash only; check the box.
    • Buying at the airport without comparing prices first — Narita and Haneda shops carry a narrower selection at similar or higher prices than Loft or Bic Camera in the city.
    • Confusing ml and oz capacity labels, especially when comparing Japanese packaging to what you’re used to at home.
    • Forgetting that a vacuum bottle keeps cold drinks cold just as well as hot ones hot — many visitors buy only for coffee and don’t realize how well the same bottle handles iced drinks in summer.

    Tax-Free Shopping and Getting It Home

    Drinkware counts as a general good, not a consumable, for Japan’s tax-free system, so you can use it in Japan before you leave — unlike food items. You’ll need to spend over ¥5,000 (before tax) at a single store on the same day and show your passport at checkout; most major retailers listed above have a dedicated tax-free counter or process it directly at the register. Keep the receipt accessible, since customs may ask to see it at departure. For the fine print on what’s refundable and how exchanges work if a mug arrives damaged, see our guide to returns, exchanges, and receipts in Japan before you buy.

    Once you’ve found your store, getting there is simple with an IC card — if you haven’t set one up yet, our guide to adding Suica or Pasmo to Apple Wallet will save you fumbling with ticket machines on the way to Shibuya or Shinjuku. Pack the bottle in your checked luggage or wrap it well in carry-on — stainless steel survives baggage handling far better than ceramic, which is one more reason it travels so well as a gift.

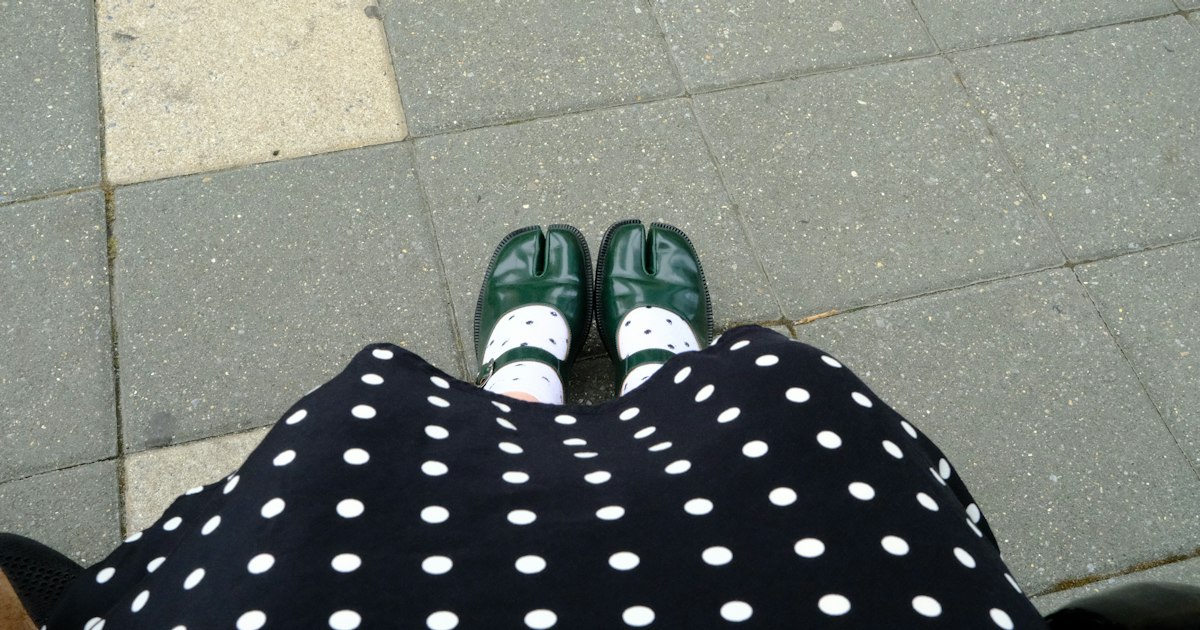
  • Tabi Boots & Socks: Japan’s Split-Toe Footwear Buying Guide

    Tabi Boots & Socks: Japan’s Split-Toe Footwear Buying Guide

    Photo by Ana Soares on Unsplash

    Long before European designers turned the split-toe silhouette into a runway statement, Japanese farmers, carpenters, and festival crews were wearing it to work. Tabi — the two-toed sock — and its rubber-soled cousin jika-tabi are some of the most functional, least understood pieces of Japanese clothing you can bring home. This guide breaks down what they actually are, where to buy real ones, and how to avoid the sizing mistakes that trip up almost every first-time buyer.

    What Exactly Are Tabi?

    Tabi are ankle-high socks with a separated big toe, designed to be worn with thonged footwear like zori and geta sandals, or under kimono. Traditional tabi fasten up the back with small metal hook-and-loop clasps called kohaze — usually four or five of them, with more clasps generally meaning a more formal, tighter-fitting sock. White cotton tabi are the standard for formal kimono wear; patterned or colored tabi (often indigo-dyed or printed with traditional motifs) are everyday or festival versions.

    Jika-tabi are a different animal entirely: heavier-duty boots with a rubber sole built directly onto a tabi-shaped upper, worn by construction workers, rice farmers, roofers, and the teams who carry mikoshi shrines during summer festivals. The split toe gives better grip and balance on uneven ground, ladders, and scaffolding — which is also why skateboarders and some outdoor brands have borrowed the shape in recent years.

    Jika-Tabi Work Boots: Function First

    If you want the real workwear item rather than a fashion reinterpretation, look at Japanese workwear chains rather than boutiques. Workman — a nationwide workwear retailer with stores near stations, highways, and suburban shopping centers — stocks jika-tabi from around ¥2,000 to ¥5,000, in both ankle-high and tall “tobi”-style versions popular with construction crews. Stores typically open 9:00am–8:00pm daily. Sizes are listed in centimeters and run true to Japanese foot measurements, which tend to be slightly narrower in the heel than Western lasts.

    Fun fact worth knowing before you shop: Bridgestone, now a global tire giant, began in Kurume, Fukuoka in the early 20th century as a rubber-soled jika-tabi manufacturer before pivoting to tires in 1931. The split-toe boot and the modern Japanese rubber industry share the same roots.

    Where to Find Fashion-Forward Tabi Footwear

    For a more wearable, street-ready take on the shape, Kyoto’s Sou-Sou is the name to know. Clustered around Nishiki-koji and the Teramachi covered arcade in central Kyoto — an easy walk from Kawaramachi or Shijo Station — Sou-Sou’s shops sell tabi-shaped sneakers with a thin rubber sole alongside patterned cotton tabi socks in collaboration prints. Expect ¥3,000–¥8,000 for sock-weight tabi items and ¥8,000–¥16,000 for the sneaker-soled versions. It’s a good contrast stop after browsing Kyoto’s weaving district — if you’re already visiting [[Nishijin-ori: Kyoto’s 1,200-Year-Old Silk Weaving District]](https://japantrove.com/nishijin-ori-kyotos-1200-year-old-silk-weaving-district/) wait, skip — see link list below.

    In Tokyo, Asakusa remains the best neighborhood for traditional tabi: the area’s kimono and festival-supply shops cater to locals who need tabi for shrine events and obon matsuri, so you’ll find a wider range of kohaze counts and seasonal patterns than in a general department store. For the designer-adjacent, streetwear side of the split-toe trend — including Japanese and international labels playing with the shape — boutique neighborhoods like Daikanyama are worth a browse, though stock of true tabi-last shoes rotates with the season.

    Tabi Socks for Everyday Wear

    If you’re not buying a full kimono outfit, plain cotton tabi socks are a cheap, genuinely useful souvenir — they’re comfortable in regular sneakers too, once you get used to the toe split. Basic white or navy cotton tabi run ¥600–¥1,500 a pair at department store kimono floors (Isetan, Takashimaya, and Mitsukoshi all carry them) or specialty tabi shops. Tabi socks for everyday use, as opposed to formal kimono tabi, usually have a stretch panel and fewer or no kohaze clasps, closer to a two-toe sock than a traditional garment.

    Fabric matters more than it looks: cotton tabi shrink noticeably after a hot wash, so size up slightly or wash in cold water if you plan to wear them long-term. Tabi made with a tabi-specific knit (common in brands sold at specialty shops rather than souvenir stores) hold shape better over repeated washes.

    Budget, Mid-Range, and Splurge Picks

    • Budget (¥600–¥2,000): Plain cotton tabi socks from a department store kimono floor, or basic jika-tabi from Workman.
    • Mid-range (¥3,000–¥8,000): Patterned Sou-Sou tabi socks, mikoshi-festival jika-tabi with reinforced soles, or locally made tabi from a dedicated Asakusa shop.
    • Splurge (¥8,000–¥20,000+): Sneaker-soled tabi shoes from Sou-Sou or similar specialty brands, and custom-fitted tabi made to your exact foot measurements by an artisan tabi maker — a service still offered by a handful of long-running shops in Tokyo and Kyoto, usually requiring an in-person fitting and a wait of one to several weeks.

    Common Mistakes to Avoid

    The single biggest error visitors make is sizing tabi like a regular sock — they should fit snugly, almost tight, since cotton tabi stretch slightly with wear and loosen over the day. Buying a size too large results in bunching at the toe seam, which is both uncomfortable and visibly wrong with kimono.

    Second: don’t confuse soft cotton tabi (for sandals and kimono) with jika-tabi (rubber-soled work boots) when shopping — staff at workwear stores may not carry the formal kimono version, and kimono shops rarely stock heavy-duty jika-tabi. Know which one you want before you go.

    Third, check return policy before buying, especially for sized items purchased in a hurry. Japanese retailers are generally stricter about returns than many Western shoppers expect, and worn footwear is almost never returnable for hygiene reasons — it’s worth reading Returns, Exchanges & Receipts in Japan before you commit to a pair, and keep your receipt until you’ve confirmed the fit at home.

    Best Time to Shop

    Tabi and jika-tabi are sold year-round, but stock and selection peak around two windows: early summer through August, when matsuri season drives demand for festival-grade jika-tabi and specialty shops restock patterned designs, and late December into early January, when kimono shops refresh their formal tabi ahead of New Year visits to shrines. If you want the widest selection of patterns and sizes, shop in those windows rather than the quieter off-season months of late autumn.

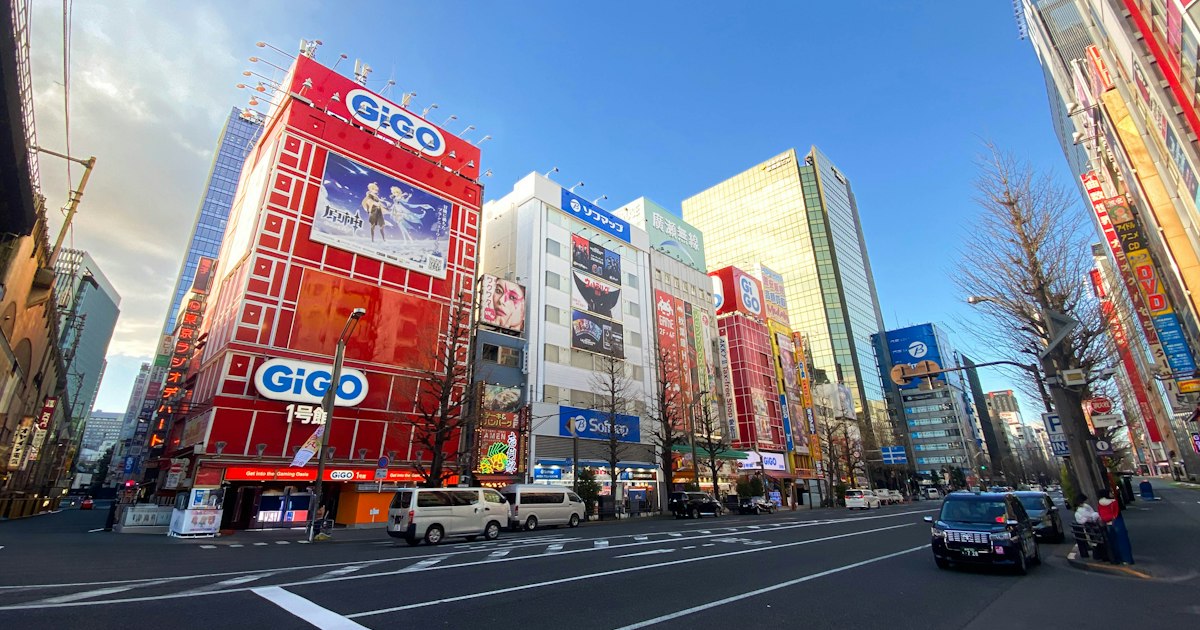
  • Super Potato: Japan’s Retro Video Game Treasure Hunt

    Super Potato: Japan’s Retro Video Game Treasure Hunt

    Photo by hiding ninja on Unsplash

    If you grew up blowing dust out of Famicom cartridges or feeding coins into an arcade cabinet, Super Potato is the closest thing Japan has to a video game museum you’re allowed to buy from. The neon-pink signage and towering piles of secondhand consoles have made it a pilgrimage site for collectors, but it’s just as fun for anyone who’s merely curious about the hardware that built Japan’s gaming culture. Here’s how to shop it properly — what’s worth your yen, what isn’t, and how to avoid the mistakes first-timers make.

    What Is Super Potato?

    Super Potato is a Japanese retro game store chain specializing in secondhand consoles, cartridges, discs, controllers, and gaming memorabilia spanning from the 1970s Famicom era through the PlayStation 2 and early Xbox generation. It isn’t a museum — everything is for sale — but the sheer density of hardware, from Super Famicom units still in their original boxes to obscure peripherals like the Famicom Disk System, gives it a museum-like browsing experience. The flagship store is in Tokyo’s Akihabara district, with sister branches in Osaka’s Den Den Town (Nipponbashi) and Nagoya.

    Inside the Akihabara Flagship

    The main Akihabara store occupies several narrow floors of a building just off the main electronics strip, and the vertical layout is part of the charm — you take a cramped staircase up past walls of cartridges organized by console, with hand-written price tags in Japanese and English. Lower floors tend to hold more recent retro stock (PS1/PS2, Dreamcast, GameCube) and import Western titles, while upper floors lean into pure nostalgia: Famicom, Super Famicom, PC Engine, and arcade-specific merchandise. The top floor houses a small retro arcade with a handful of original cabinets running classic titles for coins — often just 50-100 yen per credit — which is worth the climb even if you buy nothing. Expect the space to be tight and a little dim; it’s a browsing experience built for patience, not speed-shopping.

    Getting There and Best Time to Visit

    Akihabara Station is served by the JR Yamanote and Chuo-Sobu lines, the Hibiya subway line, and the Tsukuba Express, so access from almost anywhere in Tokyo is straightforward and doesn’t require a taxi or special ticket. If you’re coming straight from Narita or Haneda, sort out your airport transfer first — our comparison of the Narita Express vs. Keisei Skyliner covers which gets you into central Tokyo faster and cheaper. Once you’re commuting around the city day to day, having Suica or Pasmo loaded onto your phone saves you fumbling for cash at ticket gates between shopping stops.

    Weekday mornings right after opening are the calmest time to browse — Akihabara gets genuinely crowded by early afternoon, especially on weekends, and the store’s narrow aisles don’t handle crowds gracefully. There’s no strong seasonal angle here (it’s an indoor shop), but avoiding Golden Week (late April–early May) and New Year’s is wise, since both the store and the surrounding district get packed with domestic tourists. Hours generally run late morning to early evening, roughly 11:00–20:00, but retro shops in this district occasionally adjust hours around holidays, so it’s worth a quick check the morning of your visit rather than assuming.

    What to Buy — and What It Actually Costs

    Pricing swings wildly based on condition, rarity, and whether a title is boxed with its original manual (“box and manual,” often abbreviated as hako-tsuki in listings).

    • Budget (¥300–¥1,500): Loose, common Famicom or Super Famicom cartridges — think mainstream sports titles or lesser-known platformers — fall in this range. It’s an easy, low-risk way to walk away with an authentic piece of Japanese gaming history.
    • Mid-range (¥2,000–¥10,000): Popular series entries in decent condition, working handheld consoles like a Game Boy or Game Gear with cosmetic wear, or boxed titles without the manual usually land here. This is the sweet spot for most visiting collectors.
    • Splurge (¥15,000 and up): Complete-in-box rarities, limited-print titles, or working vintage hardware like an original Famicom Disk System or a pristine PC Engine setup can run into five figures. Serious rarities — sealed stock or famously scarce titles — can exceed ¥50,000.

    Controllers, strategy guides, promotional posters, and arcade-adjacent merchandise are usually cheaper impulse buys in the ¥500–¥3,000 range and make for lighter, more packable souvenirs than a boxed console.

    Shopping Smart: Voltage, Region, and Tax-Free Rules

    Before you buy a console, confirm it’ll actually work at home. Older Japanese hardware runs on Japan’s 100V electricity and many systems are region-locked to Japanese cartridges or NTSC-J discs, so a Super Famicom won’t necessarily run games you already own, and you may need a step-down converter or region adapter depending on your destination country. Staff at Super Potato are used to this question from overseas buyers and can usually tell you whether a given unit is modified or region-free.

    Tax-free shopping is available at some electronics and retro shops for visitors spending above the eligible threshold on a single visit, but policies and minimums vary by store and have changed in recent years, so ask at the register rather than assuming eligibility. Always keep your receipt — if a cartridge turns out to be faulty or a console doesn’t power on back home, Japanese retailers are not obligated to offer the easy returns you might expect elsewhere. Our guide to returns, exchanges, and receipts in Japan explains what you can realistically expect if something goes wrong after you’ve left the store.

    Beyond Akihabara: Other Super Potato Locations

    If Tokyo isn’t on your route, or you simply want a second pass through different stock, Super Potato also operates in Osaka’s Den Den Town (Nipponbashi) — Osaka’s answer to Akihabara for electronics and otaku culture — and in Nagoya. Inventory differs store to store since stock is sourced locally, so collectors hunting a specific title sometimes check more than one branch rather than assuming Akihabara will have everything. If you’re based in Akihabara for the day, it’s also worth pairing your visit with nearby anime and character-goods shopping; Tokyo Character Street at Tokyo Station is a short train ride away and scratches a related but distinct collecting itch.

    Common Mistakes First-Timers Make

    • Assuming everything is cheap because it’s secondhand. Rare titles are priced to market, not to nostalgia — do a quick price check on your phone before assuming you’ve found a bargain.
    • Skipping the authenticity check. Bootleg or repro cartridges exist in the secondhand market; Super Potato has a solid reputation for authenticity, but it’s still worth inspecting labels and asking if you’re spending serious money on something rare.
    • Buying hardware without checking voltage and region compatibility. A beautiful boxed console is a bad souvenir if it can’t actually play anything once you’re home.
    • Treating it as a quick stop. The best finds are often buried in bins or on a floor you almost skipped — budget at least 45–60 minutes if you want to actually dig.
    • Paying by card without checking first. Smaller retro shops in Japan sometimes remain cash-preferred or cash-only for lower-value items, so carry yen rather than assume every register takes IC cards or credit.

    Super Potato rewards patience over speed. Go in with a loose budget, a little knowledge of what you’re looking for, and enough time to actually dig through the shelves — that’s when the treasure-hunt part of the name starts to make sense.