Japan Trove

Author: JapanTrove Editorial

  • Tokyo Character Street: A Shopper’s Guide to Tokyo Station’s Anime Arcade

    Tokyo Character Street: A Shopper’s Guide to Tokyo Station’s Anime Arcade

    Photo by Kanchan Raj Pandey on Unsplash

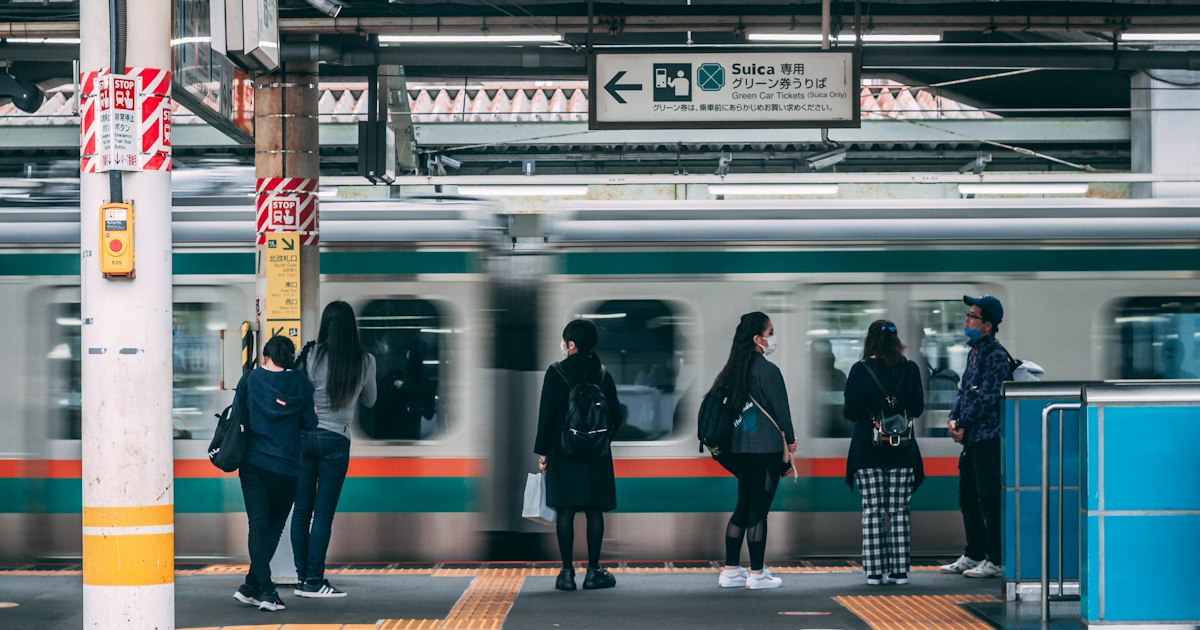
    Tucked into the basement of Tokyo Station, between bullet train platforms and ramen stalls, is one of the most efficient souvenir stops in the entire city: Tokyo Character Street. In roughly 100 meters of corridor, you’ll find more than 20 officially licensed shops covering Pokémon, Studio Ghibli, Sanrio, Jump manga titles, NHK characters, and more — all walkable in under an hour, and conveniently positioned for anyone already passing through on a train connection. If you’re heading to or from the Shinkansen and want to squeeze in meaningful shopping without a dedicated detour, this is the place.

    What Tokyo Character Street Actually Is

    Tokyo Character Street (東京キャラクターストリート) is a themed retail corridor on the first basement level (B1) of Tokyo Station, inside the Yaesu-side underground shopping zone known as “Tokyo Station Ichibangai.” It’s not a single store but a collection of brand-specific shops lined up side by side, each one a compact, dedicated outpost for a particular franchise or character line. Expect shops for Pokémon Center TOKYO-DX (the biggest and busiest), Studio Ghibli’s Donguri Kyowakoku, Sanrio Character Shop (Hello Kitty and friends), Jump Shop (One Piece, Naruto, Dragon Ball, and other Shonen Jump titles), Ultraman World M78, NHK Character Street (Domo-kun and NHK educational mascots), Kirby’s Pupupu Market, Chiikawa, Rilakkuma Store, and several rotating seasonal or collaboration pop-ups. The lineup shifts occasionally as leases turn over, but the core anchors — Pokémon, Ghibli, Sanrio, and Jump — have been fixtures for years.

    Hours, Access, and Finding It Inside Tokyo Station

    Most shops on Tokyo Character Street are open daily from 10:00 to 20:30 or 21:00, though a few individual shops close slightly earlier (Pokémon Center TOKYO-DX, for example, typically runs 10:00–20:30). There’s no single closing time for the whole street, so check the hours posted at each shop’s entrance if you’re cutting it close.

    To find it, head to the B1 level and follow signage for “Tokyo Station Ichibangai” or “Character Street” — it’s on the Yaesu side of the station (opposite the Marunouchi/Imperial Palace side), near the Yaesu North Exit basement concourse. If you arrive by Shinkansen, follow signs toward the Yaesu side exits and look for basement-level directories; station staff at the ticket gates can point you toward “Character Street” by name, since it’s a well-known local landmark, not an obscure shop. If you’re arriving from Narita or Haneda airport, our guide to Narita Express vs Keisei Skyliner can help you plan a route that lands you directly at Tokyo Station rather than Ueno or Shinjuku, saving a transfer.

    What to Buy and Realistic Prices

    Pricing varies widely by franchise and item type, but here’s a realistic budget breakdown based on what’s typically stocked:

    • Budget (¥500–¥1,500): Rubber straps, acrylic keychains, single stickers, small plushie charms, postcards, and gacha capsule toys (most gacha machines run ¥300–¥500 per pull). Jump Shop and Sanrio both stock a deep range of sub-¥1,000 items.
    • Mid-range (¥1,500–¥5,000): Standard plush toys, mugs, T-shirts, tote bags, and character-branded stationery sets. Pokémon Center exclusive plush (Pikachu in regional costumes, for instance) often lands in the ¥2,000–¥3,500 range.
    • Splurge (¥6,000 and up): Limited-edition figures, large plush, Ghibli art reproductions or ceramics from Donguri Kyowakoku, and region- or store-exclusive collaboration items. Pokémon Center TOKYO-DX exclusives and Ghibli porcelain pieces are the most likely to hit this bracket.

    Store-exclusive items are the real draw here — many shops stock Tokyo Station-only or Tokyo-limited variants you won’t find at other branches, which is worth knowing if you’re comparing against Pokémon Center or Jump Shop locations elsewhere in the city.

    Best Time to Visit

    Because it sits inside a major transit hub, Character Street gets crowded during commuter rush hours (roughly 8:00–9:30 and 17:30–19:00 on weekdays) simply from foot traffic passing through the concourse, even though the shops themselves are leisure destinations. For calmer browsing, aim for weekday mid-mornings (10:00–11:30) right after opening. Weekends, especially Saturday afternoons, bring in families and tend to be the busiest shopping periods, with lines forming outside Pokémon Center TOKYO-DX and Jump Shop at peak times. If your itinerary is flexible, visiting on a weekday just after the shops open gives you the best shot at browsing without queuing, and checkout lines are noticeably shorter.

    Common Mistakes to Avoid

    • Treating it as a quick five-minute stop. With 20+ shops, even a light browse takes 45–60 minutes. Budget more if you plan to actually buy things, since checkout lines at Pokémon Center and Jump Shop can take 10–15 minutes during busy periods.
    • Forgetting it’s inside the paid ticket area in parts. Tokyo Station Ichibangai, including Character Street, is accessible without a Shinkansen ticket — it’s in the general station concourse — but double-check your route if you’re navigating from a platform, since some basement corridors do require passing through ticket gates. If you’re unsure, ask station staff before tapping through.
    • Not keeping receipts for tax-free purchases. Most shops here are not set up for on-the-spot tax exemption the way large department stores are, so don’t count on duty-free pricing. Keep every receipt regardless — see our guide on returns, exchanges, and receipts in Japan for what to do if an item is damaged or you need to swap a size.
    • Assuming all shops take the same payment method. Most now accept IC cards and major credit cards, but a few smaller specialty shops are cash-preferred for low-value items. If you’ve already set up Suica or Pasmo on your phone, it’s worth testing at checkout before assuming it’ll work everywhere.
    • Skipping it because you’re “just passing through.” Because it’s inside the station, it’s one of the few souvenir stops in Tokyo genuinely compatible with a tight transit schedule — you don’t need a separate subway trip.

    Pairing It With the Rest of Tokyo Station

    Character Street is just one wing of Tokyo Station Ichibangai, which also includes the famous “Okashi Land” sweets corridor and a ramen alley. If you still need standard omiyage (gift-boxed snacks for coworkers or family back home) after character shopping, the nearby confectionery shops are a convenient next stop — our guide to Tokyo Banana and Japan’s iconic omiyage sweets covers what to grab and how to choose between the dozens of similar-looking boxed gift sets sold throughout the station. Between the two, you can realistically cover character goods and food gifts in a single basement-level loop without ever leaving the station building — ideal if you’re catching a train within the next hour or two.
  • Shirakami-Sanchi: Hiking Japan’s Ancient Beech Forest UNESCO Site

    Shirakami-Sanchi: Hiking Japan’s Ancient Beech Forest UNESCO Site

    Photo by Robin Noguier on Unsplash

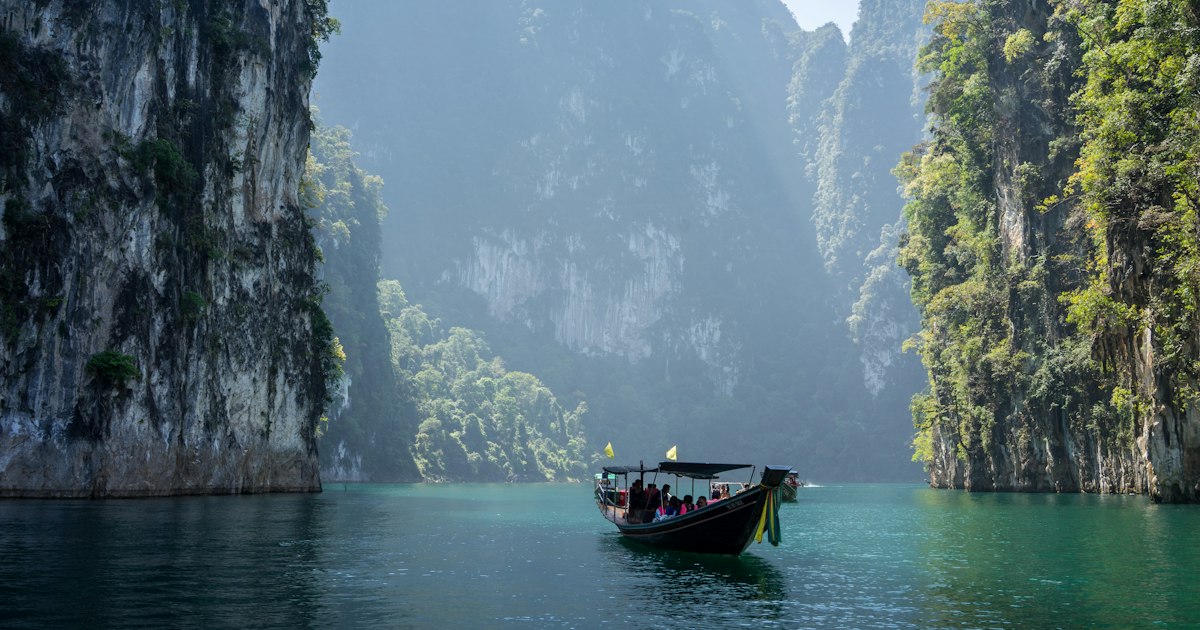
    Straddling the border of Aomori and Akita prefectures in northern Tohoku, Shirakami-Sanchi is the largest remaining virgin beech (buna) forest in East Asia and one of Japan’s first UNESCO World Heritage Sites, listed in 1993. Most visitors never make it this far north, which is exactly the appeal: you get ancient forest, a cobalt-blue pond that looks digitally altered, and almost none of the crowds you’d fight through in Nikko or Hakone. Here’s what you actually need to know before you go.

    What Makes Shirakami-Sanchi Special

    Shirakami-Sanchi isn’t a single trail or park — it’s a mountainous region roughly 1,300 square kilometers in size, with a strictly protected “core zone” at its heart where logging has never occurred and human access is tightly controlled. Almost everything tourists actually visit sits in the surrounding “buffer zone,” which is open and well-marked. The two famous entry points are Juniko (the “Twelve Lakes,” on the Aomori side) and Anmon Falls, also in Aomori near Tsugaru. The Akita side has fewer facilities but is where you’ll find the main visitor center for arranging deeper access.

    Getting There: Trains, Buses, and the Scenic Resort Shirakami

    The region is remote, so plan a full day. From Tokyo, take the Tohoku Shinkansen to Shin-Aomori or Hachinohe (around 3 hours), then transfer to local lines. The most enjoyable approach is the Resort Shirakami, a sightseeing train that runs along the Sea of Japan coast between Akita and Aomori/Hirosaki on the JR Gono Line, taking roughly 4 hours end to end. Seats are reserved-only, with a surcharge of around ¥520 on top of the base fare — book this well in advance if you’re traveling during autumn foliage season, since window seats facing the coast and Juniko sell out fast. Regular IC cards like Suica won’t cover the reserved-seat fee or work for through-ticketing on this route, so if you’re new to using one, it’s worth reading up on adding Suica or Pasmo to Apple Wallet before you leave Tokyo, and buy the Resort Shirakami ticket separately at a JR counter.

    From Hirosaki, it’s about 1.5–2 hours by train to Juniko Station. From there, a Konan Bus connects to the Oku-Juniko lake area in about 15 minutes, with a one-way fare in the ¥300–400 range. If you’re driving, rental cars from Aomori Airport give you the most flexibility and shave off waiting time for infrequent buses — figure 1.5–2 hours of driving to reach Juniko.

    The Blue Pond and Juniko: The Easiest Way to See Shirakami-Sanchi

    Juniko means “twelve lakes,” though there are actually around 33 ponds and lakes scattered through the beech forest — the name comes from how many are visible from a particular viewpoint. The star attraction is Aoike (Blue Pond), a small, perfectly clear pond with an intense cobalt color caused by light refraction through mineral-rich water. It’s an easy 10–15 minute walk from the Oku-Juniko parking area, so you don’t need serious hiking gear to see it.

    If you want more than a photo stop, the full walking course linking several of the ponds is about 2–3 hours round trip on flat, well-maintained paths — genuinely pleasant walking rather than hiking. Parking at Oku-Juniko costs around ¥500 per car. There are a few small food stalls and a rest house near the entrance, but nothing resembling a convenience store, so bring cash and snacks.

    Anmon Falls: A Quieter Alternative

    If Juniko sounds too popular for your taste, Anmon Falls (Anmon no Taki) is a three-tiered waterfall deeper in the forest, reached via a dedicated forest road from the Tsugaru area. The walk from the parking area to the falls takes 20–40 minutes each way depending on how many of the three tiers you want to see, with a full loop taking around 2 hours. The access road is only open roughly April through November — it’s gated and impassable once snow sets in, so check current conditions before planning a visit outside summer or early autumn.

    Best Time to Visit

    Late April through May brings shinryoku — the vivid fresh green of newly unfurled beech leaves — and is arguably the most beautiful and least crowded window. Summer (July–August) gives you full canopy shade and cooler temperatures than Tokyo, good for longer walks. Autumn, typically mid-October to early November, is peak season for foliage and the single busiest time to visit, which is also when Resort Shirakami seats and Juniko-area accommodation book out fastest. Winter brings heavy snow that closes most trails and the Anmon access road entirely; this is not the season for independent hiking here. For a sense of comparable Tohoku forest scenery if you have extra time in the region, Oirase Gorge is a streamside walk elsewhere in Aomori worth pairing with a Shirakami-Sanchi trip.

    Core Zone Hiking: Permits, Guides, and What to Know

    The strictly protected core zone, including the trek to the summit of Mt. Shirakami, is not something you can casually wander into. Access requires advance registration, and for most routes a licensed local guide is strongly recommended or required, both to protect the forest ecosystem and because the terrain is genuinely remote multi-day mountain hiking, not a day walk. The Shirakami-Sanchi Visitor Center in Fujisato on the Akita side (free admission, roughly 9:00–17:00, though hours and closures shift seasonally so confirm ahead) is the best place to arrange guided access and get current trail conditions. Asian black bears live throughout the forest, so even on the open buffer-zone trails, carrying a bear bell and making noise on quieter paths is standard practice, not paranoia.

    Common Mistakes and Budget Tips

    • Treating it as one attraction: Juniko’s Blue Pond is a tiny, easily accessible sliver of a vast mountain region — don’t expect a short walk there to count as “hiking Shirakami-Sanchi” in any deeper sense, and don’t expect to casually summit anything.
    • Skipping the reserved-seat booking: Resort Shirakami seats vanish weeks ahead during autumn foliage; book as soon as your dates are fixed.
    • Underestimating remoteness: cell signal is patchy in the forest, services are sparse, and the last buses back from Juniko run early evening — check return times before you start walking.
    • Budget option: self-guided day trip by train and bus from Hirosaki or Akita, roughly ¥3,000–5,000 round trip in transport, packing your own lunch.
    • Mid-range option: rental car (around ¥6,000–9,000/day) for flexibility, or a guided half-day nature walk around ¥5,000–8,000 per person.
    • Splurge option: a multi-day licensed-guide trek into the core zone with mountain lodge stays, which can run ¥20,000–40,000+ per day including guiding fees and lodging.

    Before heading home, the small shops near the visitor centers sell regional specialties worth a look — Aomori’s apple products and Akita’s mountain-vegetable pickles make good edible souvenirs, in the same spirit as Japan’s broader tsukemono pickling tradition. Shirakami-Sanchi rewards a bit of planning far more than it rewards spontaneity — get the logistics right and you’ll have one of the quietest, most striking natural sites in the country largely to yourself.

  • Kurokawa Onsen: Kumamoto’s Rotenburo-Hopping Hot Spring Village

    Kurokawa Onsen: Kumamoto’s Rotenburo-Hopping Hot Spring Village

    Photo by Tayawee Supan on Unsplash

    Tucked into a forested valley in the mountains of Aso-gun, Kurokawa Onsen is the hot spring town Japanese travelers quietly rank above the famous names. There’s no garish neon, no pachinko parlor, no vending machine on every corner — just steam rising over a cluster of wooden ryokan along a narrow river, and a simple wooden pass that lets you hop between their outdoor baths for the afternoon. If you’ve already done Hakone or Atami and want something that feels less like a resort town and more like a village that happens to sit on hot water, this is the trip to plan.

    What Makes Kurokawa Onsen Different

    Kurokawa is small by design. In the 1980s and 90s, local innkeepers — led by the owner of the Shinmeikan ryokan — agreed to a set of unwritten rules: no bright signage, no love hotels, no amusement arcades, and every ryokan should keep at least one rotenburo (open-air bath) that feels built into the landscape rather than bolted onto a building. That agreement is why the town today looks the way it does: about 30 ryokan connected by stone paths and little footbridges, cedar and bamboo screening the baths from the road, and a soundtrack of running water instead of traffic. It’s the kind of place where you walk the main lane in a rented yukata between baths and nobody looks twice.

    The Nyuto Tegata: How Rotenburo-Hopping Works

    The signature Kurokawa experience is the nyuto tegata (入湯手形), a small round wooden pass sold at the Kurokawa Onsen Tourist Information Center in the middle of the village. It costs around 1,300 yen for adults and about 700 yen for children, and it entitles you to enter three different ryokan baths of your choosing among roughly 20+ participating inns. Each time you use one, staff stamp or burn a mark onto the tag; once you’ve used all three you get to keep the pass as a souvenir. It’s valid for six months from purchase, so if you only manage two baths before dinner, you can finish the set the next morning before checking out.

    A few practical notes: not every ryokan’s bath is open to outside day-visitors at every hour, mixed-gender rotenburo exist at some inns (always marked clearly, and towels are provided for coverage), and a handful of the most photogenic baths — particularly ones with cave pools or river views — can have a line on weekends. If you don’t want to commit to the pass, most ryokan also sell single-visit day-bathing (higaeri onsen) directly for roughly 500–700 yen per bath, no tag required.

    Getting to Kurokawa Onsen

    This is the one part of the trip that takes real planning, since Kurokawa isn’t on a train line.

    • From Kumamoto: A direct highway bus (Kumamoto Kotsu) runs from Kumamoto Station/Kumamoto Airport to Kurokawa Onsen in roughly 70–90 minutes. Seats on the limited daily departures should be reserved in advance.
    • From Fukuoka/Hakata: A direct highway bus takes about 2.5–3 hours; reservations are required and schedules run only a few times a day, so book this before you build the rest of your itinerary around it.
    • From Beppu/Yufuin: The Kyushu Odan (“Kyushu Crossing”) highway bus connects Yufuin and Kurokawa Onsen in around 2 hours, continuing on to Kumamoto — a convenient way to combine Kyushu’s two biggest onsen regions in one loop, though it typically only operates seasonally, so check current schedules before relying on it.
    • By car: The easiest option if your Japan itinerary includes a rental car. It’s about an hour from Kumamoto Airport and roughly 2.5–3 hours from Fukuoka via expressway. Cars are left in a paid village lot (a few hundred yen) since the inn lanes themselves are pedestrian-scale.

    However you arrive, build in a full afternoon — the appeal of Kurokawa is slowing down, not rushing between buses.

    Best Time to Visit

    Kurokawa is genuinely a four-season destination, but two windows stand out. Late October through November brings fall foliage down the valley walls above the baths — one of the most photographed combinations in Kyushu. December through February is the other peak: snow on the cedar roofs and steam rising off the rotenburo makes for the classic “onsen in winter” scene, and several ryokan light up outdoor baths for evening snow-viewing. Summer is cooler here than in the cities below thanks to the elevation, which makes it a decent escape from Kumamoto or Fukuoka heat, though the baths themselves feel less dramatic without steam in the air. Whatever season, avoid Japanese holiday weekends (Golden Week in early May, Obon in mid-August, New Year) if you can — the village is small enough that even moderate crowds change the feel of the place.

    Where to Stay: Budget to Splurge

    Staying overnight — rather than visiting as a day trip — is worth prioritizing, since many of the best baths are reserved for guests after the day-bathing hours end (typically mid-afternoon).

    • Budget: Smaller family-run ryokan with shared bath access run roughly 15,000–20,000 yen per person with two meals included.
    • Mid-range: Inns with a private or semi-private rotenburo and a proper kaiseki dinner generally land around 25,000–35,000 yen per person.
    • Splurge: Well-known names like Yamamizuki or Shinmeikan — the latter famous for a bath set inside a natural cave — can run 40,000 yen and well beyond per person for a room with its own open-air bath and a multi-course dinner. These book out months ahead for foliage and snow season.

    If you’ve stayed somewhere like Noboribetsu Onsen in Hokkaido or made a quick trip to Atami from Tokyo, Kurokawa is a useful point of comparison — it trades Noboribetsu’s volcanic drama and Atami’s retro seaside-resort energy for something quieter and more rustic, closer in spirit to a mountain village than a hot spring resort.

    Common Mistakes to Avoid

    • Not reserving the long-distance bus. These routes run only a handful of times a day and fill up, especially around foliage season — book as soon as your dates are set.
    • Trying to pack in too many baths. Walking between ryokan, changing, and soaking properly takes longer than it sounds; three baths in an afternoon is a full, satisfying day, not a warm-up.
    • Forgetting tattoo policies vary by ryokan. Some baths welcome visitors with tattoos, others don’t, and a few offer cover-up stickers. If you have visible tattoos, it’s worth asking at the tourist information center which baths on your tegata are tattoo-friendly before you set out.
    • Assuming day-bathing is available any time. Many ryokan close their baths to outside visitors from mid-afternoon through the evening to prioritize overnight guests. Start your rotenburo-hopping by midday if you’re not staying the night.
    • Expecting convenience stores. Part of what preserves the atmosphere here is the deliberate absence of them — bring cash (many small ryokan don’t take cards) and don’t count on finding a conbini for forgotten toiletries.

    If a slow, forested soak isn’t quite enough on its own, the drop into the Aso caldera is less than an hour away by car, and travelers who enjoy a scenic streamside walk — in the way Oirase Gorge draws hikers up in Aomori — will find the short riverside path connecting Kurokawa’s ryokan has a similar, unhurried appeal, just on a much smaller scale. Either way, come with low expectations of “seeing” much and high expectations of actually relaxing — that’s the entire point of the place.

  • Tsukemono: Japan’s Pickled Vegetable Tradition and Where to Buy

    Tsukemono: Japan’s Pickled Vegetable Tradition and Where to Buy

    Photo by 5010 on Unsplash

    Walk through any Japanese supermarket basement, department store food hall, or morning market, and you’ll hit a wall of color before you hit the fish counter: crimson umeboshi, golden takuan, deep purple shibazuke, pale green cucumber in miso. This is tsukemono, Japan’s centuries-old tradition of pickled vegetables, and it’s one of the most overlooked souvenir and tasting categories for visitors. It’s cheap, it’s distinctly regional, and almost none of it is sold outside Japan in the form you’ll find it here. This guide covers what tsukemono actually is, the regional styles worth seeking out, where to buy it at every budget, and the mistakes that trip up first-time buyers.

    What Is Tsukemono, Exactly?

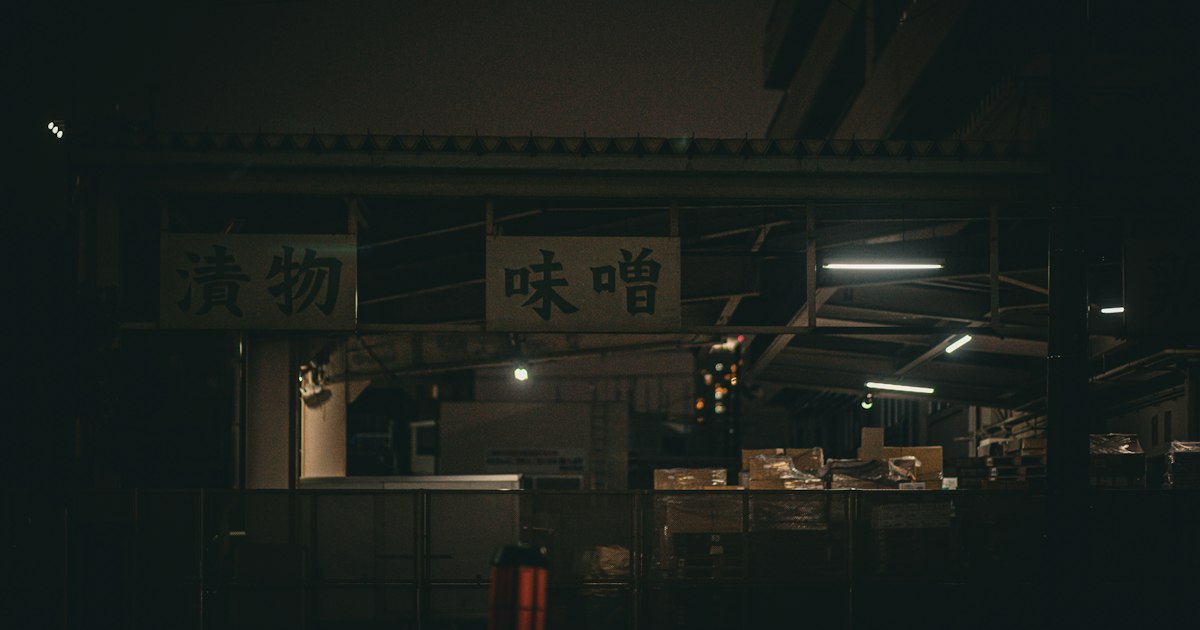
    Tsukemono (漬物, literally “pickled things”) is an umbrella term covering vegetables preserved in salt, rice bran, miso, soy sauce, vinegar, or fermented rice lees. Unlike Western pickles, which are almost always vinegar-based, Japanese pickling techniques developed to extend the storage life of vegetables through winter and to balance rich, starchy meals like rice and grilled fish. The result is a category with far more range than “pickle” implies — some tsukemono are crunchy and salty, some are funky and fermented, some are sweet and mellow. They function as a palate cleanser, a side dish, and in many cases a pantry souvenir that survives the flight home far better than fresh food, much like the fermented condiments covered in our Japanese condiment pantry guide.

    The Regional Styles Worth Knowing

    Tsukemono varies dramatically by region, and knowing a few names will help you shop with purpose rather than guessing from the label art.

    • Takuan — bright yellow daikon radish pickled in rice bran and salt, found nationwide. Crunchy and slightly sweet-salty; the everyday tsukemono most visitors encounter first, usually served alongside rice at breakfast.
    • Umeboshi — intensely sour, salty pickled ume plums, Wakayama Prefecture’s signature product (Nanko-ume is the premium cultivar). A small jar packs a serious punch; locals eat one with rice or tea to settle the stomach.
    • Shibazuke — Kyoto’s purple eggplant and cucumber pickle, colored and flavored with red shiso leaves. Tangy and slightly tart, sold all over Nishiki Market.
    • Nozawana-zuke — pickled leafy greens from Nagano, mild and slightly bitter, often fried with rice or chopped into onigiri.
    • Narazuke — vegetables (often cucumber or melon) pickled in sake lees for months or years in Nara; the flavor is deep, boozy, and an acquired taste worth trying at least once.
    • Misozuke — vegetables pickled in miso paste, common throughout the country, with a savory, almost caramelized depth.

    Where to Buy: Budget, Mid-Range, and Splurge

    Budget (¥150–¥500): Supermarket chains like Life, Seijo Ishii, and Ito-Yokado sell vacuum-packed takuan, shibazuke, and umeboshi in the refrigerated section near the tofu and natto. A standard 150–200g pack runs ¥150–¥350. Convenience stores also stock single-serving umeboshi onigiri for under ¥200 if you just want a taste.

    Mid-range (¥500–¥1,500): Department store basement food halls (depachika) — Isetan Shinjuku, Daimaru, Takashimaya — have dedicated tsukemono counters with staff who’ll let you sample before buying. Expect ¥600–¥1,200 for a well-packaged assortment box, which also makes a better gift than a supermarket bag. Nishiki Market in Kyoto is the classic tourist stop for shibazuke and pickled Kyoto vegetables (kyo-yasai), with shops offering small taster cups for free or a token ¥100.

    Splurge (¥2,000–¥6,000+): Specialty makers sell aged narazuke and premium umeboshi in gift boxes. In Nara, shops near Kintetsu Nara Station specializing in sake-lees pickles sell gift sets from ¥2,500 up to ¥6,000 for long-aged, dark narazuke. Wakayama’s top umeboshi producers sell large, flesh-heavy Nanko-ume in lacquered boxes for ¥3,000–¥8,000 — these are genuinely different from the cheap, bullet-sized variety and make a memorable high-end omiyage, comparable in gifting weight to the sweets covered in our omiyage sweets buyer’s guide.

    Best Places to Shop in Person

    Nishiki Market (Kyoto) remains the single best place to sample a wide range of regional tsukemono side by side; it’s open roughly 9:00 AM–6:00 PM, though individual shop hours vary, and most stalls close by early evening — go in the morning for the freshest selection before tour groups arrive. Kyoto has multiple dedicated chains here, including Nishiri and Murakamiya, both with English-friendly staff used to tourists.

    In Tokyo, Ameyoko Market in Ueno has several old-school tsukemono stalls with bulk bins and lower prices than department stores, while Tsukiji Outer Market has smaller stalls selling pickled vegetables alongside seafood snacks — good for grazing rather than gift shopping. If you’re staying near Shibuya or want a more curated, design-forward shopping stop afterward, Daikanyama’s boutiques (see our Daikanyama neighborhood guide) are a short train ride away, though tsukemono itself is better sourced at markets or depachika than boutique districts.

    Best Season and Timing to Buy

    Tsukemono is sold year-round, but timing affects both quality and price. Fresh-pickled vegetables (asazuke, “quick pickles”) are best in their harvest season — nozawana in late autumn/winter in Nagano, cucumber and eggplant shibazuke in summer in Kyoto. Winter (December–February) is traditionally when households make large batches of takuan and umeboshi for the year, so markets often have the widest fresh selection and seasonal gift sets in the lead-up to New Year, when pickles are part of osechi ryori (New Year’s food). If you’re traveling in early summer, that’s also when fresh ume plums appear before being salted, so some shops sell “this year’s” umeboshi batches as a selling point.

    Common Mistakes to Avoid

    • Buying refrigerated items without a cooler bag. Many fresh (non-vacuum-sealed) tsukemono need refrigeration and won’t survive a multi-day trip or flight. Stick to vacuum-packed, shelf-stable products if you’re buying for the flight home — ask the shop clearly, “Can this stay at room temperature?” (常温で大丈夫ですか, joon de daijoubu desu ka).
    • Assuming it’s low-sodium. Tsukemono is often very high in salt; it’s a condiment portion, not a vegetable serving, despite looking healthy.
    • Skipping the sample. Flavor intensity varies wildly between shops even for the same style (shibazuke can range from mild to aggressively sour). Always taste before buying a gift box — most market stalls expect this.
    • Not checking customs rules. Most commercially packaged, shelf-stable tsukemono is fine to bring into the US, EU, and most countries in personal luggage, but fresh/refrigerated items packed in liquid brine can raise questions at customs. When in doubt, buy the vacuum-sealed version.
    • Packing glass jars in checked luggage without padding. Narazuke and premium umeboshi are often sold in glass; wrap them in clothing or ask the shop for extra bubble wrap, which most will provide on request.

    Bringing It Home

    Vacuum-sealed tsukemono typically keeps for weeks to a few months unopened, making it one of the more forgiving pantry souvenirs — far less fragile than fresh produce and lighter than ceramics. If you’re flying out through Narita, note that depachika and airport shops sell similar gift-boxed sets, though selection is smaller and pricier than in-city shops, so buy en route if you’re taking the Narita Express or Skyliner rather than waiting until the terminal. Keep receipts in case you want to query a product at customs, and remember that tax-free shopping rules for food items require unopened packaging and your passport at checkout — the same rules covered in our general guide to returns, exchanges, and receipts in Japan.

  • Royce’ Chocolate and Hokkaido’s Nama Chocolate Craze

    Royce’ Chocolate and Hokkaido’s Nama Chocolate Craze

    Photo by Denny Ryanto on Unsplash

    If you ask a Japanese traveler what to bring back from Hokkaido, odds are good they’ll say “Royce’.” The Sapporo-based chocolate maker has turned a simple idea — ganache-like truffles dusted in cocoa powder, too soft to survive a hot pocket — into one of the most sought-after omiyage (souvenir gifts) in the country. Understanding what makes Nama Chocolate different, where to actually buy it, and how to transport it without ending up with a melted bag of regret will save you both money and disappointment.

    What Is Nama Chocolate, Exactly?

    “Nama” (生) means raw or fresh, and Nama Chocolate is essentially chocolate ganache cut into bite-sized cubes and coated in cocoa powder — closer to a soft truffle than a bar of chocolate. It has a much higher cream content than standard chocolate, which gives it that melt-in-your-mouth texture, but also means it’s genuinely perishable. Royce’ didn’t invent the category, but its version, launched in the 1980s, became the benchmark, and Royce’ is still the name most associated with it both inside Japan and among the inbound tourists who’ve caught on via social media.

    The original “Nama Chocolate Au Lait” comes in a signature insulated box with a small ice pack built into the packaging — a detail that matters more than it sounds, because it’s the reason this souvenir has strict handling rules most first-time buyers don’t anticipate.

    Where to Buy It in Hokkaido

    You don’t need to hunt for a hidden shop — Royce’ is sold almost everywhere in Hokkaido, but the experience and selection vary a lot by location:

    • New Chitose Airport: The Royce’ Chocolate World shop (near the domestic terminal, 2nd floor) is the single best stop for most travelers, open roughly 8:30am–8:00pm daily. It has a small factory viewing window and the widest seasonal selection, plus a dedicated duty-free counter for international departures.
    • Sapporo Factory outlet (Higashi-ku): Royce’s actual production facility has a shop and a free viewing corridor showing the chocolate-making line, open daily 9:00am–6:00pm. It’s about a 15-minute taxi ride from Sapporo Station, or reachable by local bus — worth it if you want the full “chocolate factory” experience rather than just a retail counter.
    • Department stores and Sapporo Station: Daimaru Sapporo (directly connected to JR Sapporo Station) and Odori underground shopping areas both carry the full lineup, useful if you’re buying on your way out of the city rather than at the airport.
    • Convenience stores and supermarkets: Some individually wrapped Royce’ items (not the delicate Nama line) turn up in Hokkaido supermarkets and are fine for casual snacking, though selection is limited.

    Outside Hokkaido, Royce’ has a handful of shops in Tokyo (Tokyo Station, Haneda Airport) and a few other major cities, but prices and selection are best on home turf, and part of the appeal for gift-giving is that it reads as an authentic Hokkaido souvenir rather than something picked up at a Tokyo airport on the way out.

    Prices and What to Buy

    Royce’ is mid-range as Japanese confectionery gifts go — not cheap, but far from a splurge item:

    • Nama Chocolate (Au Lait, Bitter, Champagne, Matcha and seasonal flavors): roughly ¥850–¥1,100 for a standard box of about 16–20 pieces.
    • Potechi (chocolate-coated potato chips): around ¥650–¥750 per bag — a genuinely addictive, less fragile alternative if you’re worried about melting.
    • Pierre de Royce / baked chocolate cookies: about ¥800–¥1,200, and far more travel-friendly since they’re shelf-stable.
    • Gift sets and larger boxes: can run ¥2,000–¥4,000+, often packaged specifically for omiyage-giving with individually wrapped pieces, which matters in Japan’s office gift-giving culture where recipients expect to take one piece each.

    Budget tip: a single ¥850 Nama Chocolate box split and shared is plenty for a small office; mid-range shoppers often grab 2–3 boxes in different flavors (matcha and champagne are popular picks that aren’t sold everywhere outside Hokkaido); splurge shoppers go for the large mixed gift sets or the seasonal strawberry/winter-limited editions that only appear roughly November through February.

    Best Season for Buying Nama Chocolate

    Timing matters more than with most souvenirs. Royce’ Nama Chocolate needs to stay cool, so the company itself recommends it mainly as a cold-weather purchase — think late autumn through early spring (roughly October to April). In peak summer, many shops reduce Nama Chocolate stock or push you toward the more heat-stable Potechi and cookie lines instead, precisely because the texture that makes it special also makes it collapse in a hot bag. If you’re visiting Hokkaido in July or August specifically to chase the cooler climate — similar in spirit to travelers escaping to Amami Oshima for a subtropical island break — plan to buy Nama Chocolate on your very last day, and ask the shop for a cold pack.

    Common Mistakes Tourists Make

    • Buying too early in the trip. The ice pack inside the box is rated for several hours, not several days. If you buy Nama Chocolate on day one of a two-week trip, it will likely be a soft, melted mess by the time you fly home — buy it at the airport right before departure, or on your last day in Hokkaido.
    • Checking it in baggage. Always carry it in your cabin bag. Hold luggage sits in non-climate-controlled parts of the aircraft and can get warm on the tarmac, and boxes have been known to arrive crushed as well as melted.
    • Forgetting it’s not shelf-stable at room temperature for long. Once opened, most Nama Chocolate should be eaten within a few days and kept refrigerated — it is not a “leave it in a drawer for a month” gift like rice crackers.
    • Assuming all Royce’ products need cold storage. Potechi and the baked cookie lines travel fine at room temperature, so if your itinerary has several more days of travel after Hokkaido, buy those instead and save the Nama line for last.
    • Not checking the receipt before leaving the shop. If you’re buying at the duty-free counter at New Chitose Airport, make sure your passport is scanned and the paperwork is correct on the spot — Japan’s rules around tax-free purchases and returns are stricter than many tourists expect, and sorting it out after you’ve left is difficult. The general guide on returns, exchanges and receipts in Japan is worth a skim before any big souvenir shopping day.

    Royce’ vs. Other Hokkaido Omiyage

    Royce’ isn’t the only sweet competing for suitcase space. Shiroi Koibito (white chocolate-filled langue de chat cookies) is Hokkaido’s other mega-famous confection, and it has the advantage of being completely shelf-stable — a safer bet if cold-chain logistics make you nervous. If you’re trying to decide what to bring home at all, it helps to think about Royce’ as part of the broader Japanese gift-giving landscape covered in our guide to Tokyo Banana and Japan’s iconic omiyage sweets: regional specialty, individually wrapped, modestly priced per piece, and instantly recognizable to anyone back home who knows Japanese sweets even a little.

    Many travelers combine a Hokkaido souvenir run with a soak at one of the region’s hot spring towns — if Nama Chocolate is on your list, consider pairing the shopping trip with a stop at Noboribetsu Onsen, about 90 minutes from Sapporo by train and bus, for a classic cold-weather Hokkaido itinerary that also happens to be the best season for buying chocolate that won’t melt in your bag.

    Quick Reference

    • Best buy location: New Chitose Airport Royce’ Chocolate World, 2nd floor domestic terminal
    • Typical price: ¥850–¥1,100 per box of Nama Chocolate
    • Best season: October–April
    • Golden rule: buy it last, carry it on, eat it within days
  • Amami Oshima: Japan’s Subtropical Island Escape

    Amami Oshima: Japan’s Subtropical Island Escape

    Photo by Phurichaya Kitticharin on Unsplash

    Most visitors picture Japan as temples and neon, not turquoise water and mangrove swamps — which is exactly why Amami Oshima surprises people. Tucked in the Satsunan Islands between Kyushu and Okinawa but administratively part of Kagoshima Prefecture, this subtropical island has coral reefs, an endemic rabbit found nowhere else on Earth, and a UNESCO World Natural Heritage designation (shared with Tokunoshima, northern Okinawa Island, and Iriomote, listed in 2021). It’s also almost entirely untouched by mass tourism, which means fewer crowds but also fewer English signs and far less public transport than you’re used to on the mainland. Here’s how to actually plan the trip.

    Getting to Amami Oshima

    The fastest route is flying into Amami Airport (ASJ) in Tatsugo, on the island’s north side. JAL and ANA run direct flights from Tokyo Haneda (about 2 hours 40 minutes), with additional connections from Osaka, Fukuoka, and Kagoshima. Advance-purchase fares from Haneda can run as low as ¥15,000–25,000 one way if booked a month or more out; walk-up fares climb well past ¥35,000. If you’re coming from Kyushu, budget carriers and smaller regional flights from Kagoshima are often cheaper and take under an hour.

    The slower, cheaper option is the overnight ferry from Kagoshima’s New Port, operated on alternating days by A-Line Ferry and Marix Line on their Kagoshima–Amami–Okinawa route. It takes roughly 11 hours and costs around ¥9,000–13,000 one way in second class (shared tatami rooms); private cabins cost more. It’s a genuinely scenic way to arrive, but check the schedule carefully since sailings aren’t daily on every route.

    Once on the island, rent a car. Bus service exists but is infrequent and mainly useful near Naze (the main town); most beaches, trailheads, and craft studios are a 20–40 minute drive apart. Rental cars run about ¥5,000–8,000 per day, and an international driving permit is required for most foreign visitors.

    When to Go: Best Season and Timing

    Amami’s subtropical climate means it’s warm nearly year-round, but timing still matters. The rainy season (tsuyu) runs roughly mid-May through early June, and typhoon risk peaks from August through September — storms can cancel ferries and flights with little warning. The sweet spot is late April to early June or October to early November, when the heat is manageable, humidity is lower, and typhoons are less likely. Swimming season runs roughly June through September, but if you’re prioritizing comfortable hiking and sightseeing over beach time, shoulder-season visits are more pleasant. Humpback whales pass through the waters around Koniya from January to April, and whale-watching boat tours (around ¥5,000–6,000 per person) depart during that window.

    Must-See Natural Sights

    The Amami Mangrove Primeval Forest, near Sumiyo, is Japan’s second-largest mangrove forest and the easiest way to see it is by canoe or kayak. Local operators run 90-minute guided tours for roughly ¥3,000–4,000 per person, gliding between the roots of mangrove trees with egrets and fiddler crabs for company; tours typically run several times daily between 9:00 and 17:00, and booking a day ahead in peak season is wise.

    Tomori Beach, on the island’s southwest coast, hides a heart-shaped coral reef formation nicknamed “Heart Rock,” visible from an observation point in Ohama Kaihin Park. It only appears clearly during low tide, so check tide tables before you go — showing up at high tide means staring at open water with nothing to see. Nearby beaches around Kuninao and the smaller offshore island of Kakeroma (reachable by ferry from Koniya port) have some of the clearest snorkeling water on the island, with minimal development.

    If you’re interested in the island’s famously endangered wildlife, several operators run night tours to spot the Amami rabbit (Amami no kurousagi), a primitive, dark-furred species found only here and on Tokunoshima. These run after dark since the rabbits are nocturnal, and sightings aren’t guaranteed, but local guides know the forest roads where they tend to appear.

    Oshima Tsumugi: The Island’s Legendary Silk

    Amami Oshima’s signature craft is Oshima Tsumugi, a hand-woven silk textile dyed using local mud and tannin-rich sharinbai wood — a process unique to the island that produces a deep, almost iridescent black-brown pattern. It’s considered one of Japan’s three great kasuri weaving traditions, and a full kimono bolt can take months to weave, with prices for finished kimono running into the hundreds of thousands of yen. For visitors, Oshima Tsumugi villages and workshops around Naze offer mud-dyeing demonstrations and kimono rental for photos, plus smaller, more affordable souvenirs — ties, pouches, and accessories — usually in the ¥3,000–15,000 range. If you’re drawn to Japan’s regional textile traditions generally, it’s worth comparing notes with Kyoto’s equally storied silk district, covered in our guide to Nishijin-ori: Kyoto’s 1,200-Year-Old Silk Weaving District.

    Whatever you buy, keep the receipt. Shops outside major tourist circuits sometimes don’t issue English paperwork by default, and return policies on handmade textiles can be stricter than at mainland department stores — our guide to returns, exchanges, and receipts in Japan covers what to ask for before you pay.

    Where to Stay and What to Eat

    Budget travelers will find simple minshuku (family-run guesthouses) and business hotels around Naze for roughly ¥4,000–7,000 per night. Mid-range options include small oceanfront hotels and resort-style lodges near the beaches on the island’s west side, generally ¥10,000–18,000 per night. For a splurge, a handful of upscale resort properties on the island offer private villas and ocean-view rooms well above ¥25,000 per night — book these early, since inventory is limited. If you’re staying at a minshuku or traditional inn, the same shoes-off customs apply as on the mainland; see our primer on indoor etiquette for homes, ryokan, and temples if it’s your first stay in a Japanese-style inn.

    For food, don’t skip keihan — the island’s signature dish, a bowl of rice topped with shredded chicken, shiitake, egg, and citrus peel, then doused with hot chicken broth at the table. It’s served at casual restaurants across Naze for roughly ¥1,000–1,500. Amami is also one of Japan’s main producers of kurozu (black vinegar), aged outdoors in clay jars for months; small bottles make a distinctive, lightweight omiyage that’s hard to find elsewhere in Japan.

    Common Mistakes to Avoid

    • Skipping the car rental. Relying on buses will strand you — most of the island’s best spots have no public transport nearby.
    • Ignoring tide and weather timing. The Heart Rock at Tomori Beach is invisible at high tide, and typhoon season can cancel your flight or ferry home with only a day or two of warning in August and September.
    • Assuming it’s a budget version of Okinawa. Fewer tourists means fewer facilities — convenience stores, ATMs, and English-speaking staff are concentrated in Naze, not spread evenly across the island.
    • Underestimating sun exposure. This is subtropical Japan; pack reef-safe sunscreen and rehydration salts, and consider grabbing basic cold or allergy relief before you go if you’re prone to summer colds — our Japanese drugstore medicine guide is useful prep since pharmacy options on the island itself are limited.

    Amami Oshima rewards travelers willing to rent a car, check a tide chart, and slow down for a few days. It’s one of the few places in Japan where you can snorkel a coral reef in the morning and watch silk thread being dipped in mud dye by afternoon — a genuinely different side of the country from the shrine-and-ramen circuit most first-time visitors stick to.

  • Hina Matsuri: Japan’s Girls’ Day Doll Festival Explained

    Hina Matsuri: Japan’s Girls’ Day Doll Festival Explained

    Photo by 萬 北村 on Unsplash

    Every February, department stores, hotel lobbies, and private homes across Japan fill with tiered platforms of small ceremonial dolls dressed in Heian-period court robes. This is the lead-up to Hina Matsuri, the Doll Festival held on March 3rd, and if you’re traveling in Japan during late winter, it’s one of the most visually striking seasonal traditions you can stumble into — no ticket or reservation required, just the right timing and a few good locations.

    What Hina Matsuri Actually Celebrates

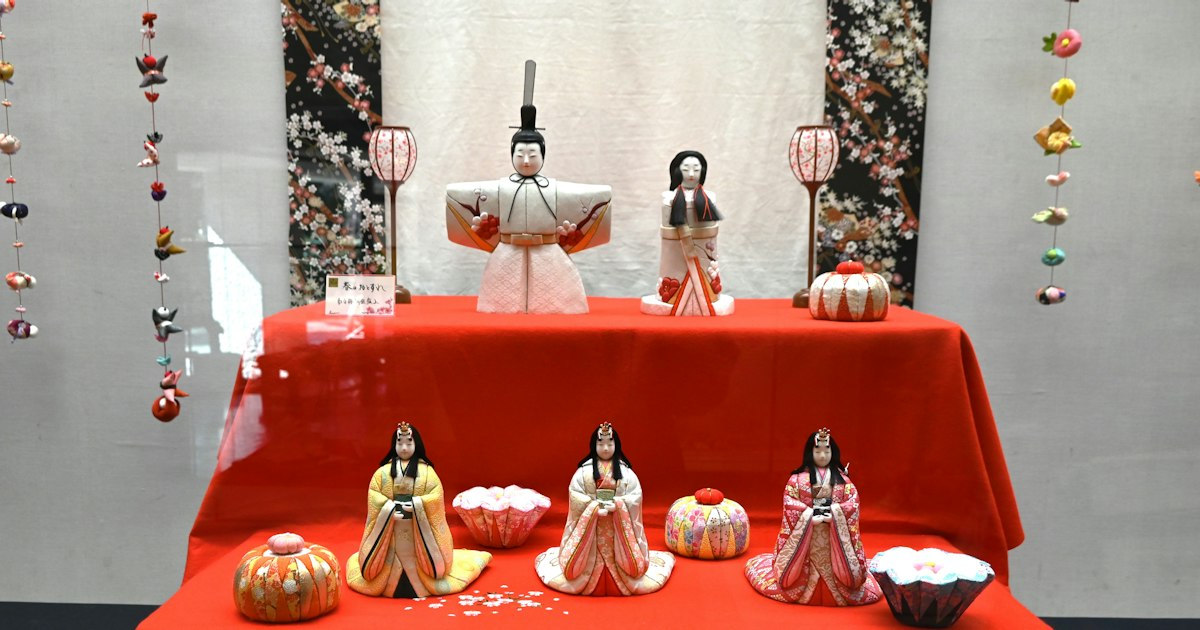
    Hina Matsuri (雛祭り), also called Girls’ Day or the Doll Festival, is a wish for the health, happiness, and good marriage prospects of young girls. Families with daughters display a set of hina ningyo (雛人形) — ornamental dolls representing the Emperor, Empress, court ladies, musicians, and ministers — arranged on a tiered stand covered in red cloth. A full display can have seven tiers and fifteen or more dolls, though most modern homes use a compact two- or three-doll set due to apartment space constraints.

    The custom traces back to the Heian period (794–1185) and the practice of nagashi-bina, floating paper dolls down a river to carry away bad luck. Over centuries this merged with doll-display culture into the festival seen today. One point of etiquette worth knowing: tradition holds that dolls should be put away promptly after March 3rd, since leaving them out too long is said to delay a daughter’s marriage. It’s a superstition, but it’s taken seriously enough that you’ll notice displays disappear from shop windows almost overnight on March 4th.

    When and Where to See Displays

    The display season runs roughly from early February through March 3rd — some towns start as early as late January. The festival date itself, March 3rd, is not a national holiday, so stores stay open and daily life continues as normal; this makes it an easy add-on to a late-winter or early-spring itinerary rather than something you need to build a trip around.

    • Department stores: Major stores like Takashimaya, Mitsukoshi, and Isetan set up elaborate hina displays in their entrance halls and home goods floors throughout February, free to view during normal store hours (typically 10:00–20:00).
    • Katsuura Hina Matsuri (Chiba Prefecture): The largest public display in Japan, with around 1,800 dolls arranged on stone steps at Tomisaki Shrine and scattered across the town, including a stairway display of roughly 60 tiers. Held through most of February into early March; free to view, reachable in about 2 hours from Tokyo by train via the JR Sotobo Line to Katsuura Station.
    • Kawagoe and other “Little Edo” towns: Smaller hina displays appear in merchant shopfronts, a nice stop if you’re already visiting Kawagoe’s old town.
    • Hotel lobbies and ryokan: Many traditional inns put out a hina display for guests in February and March — if you’re staying at an onsen town like Atami, check the lobby.
    • Museums: Some folk-craft and doll museums run dedicated exhibitions; check locally, as these are seasonal and vary year to year.

    Most displays are free and viewable without appointment. The main “mistake” visitors make is arriving after March 3rd expecting to still see them — once the festival passes, displays come down quickly, so if seeing hina ningyo is a priority, plan your visit for mid-to-late February rather than cutting it close to the date itself.

    What to Eat During Hina Matsuri

    Food is a smaller but genuine part of the celebration, and it’s easy to try even as a visitor:

    • Hina arare: Small, colorful rice crackers (pink, white, green, and sometimes yellow) sold in convenience stores and supermarkets from mid-February — a cheap, easy souvenir snack at around 150–300 yen per bag.
    • Chirashizushi: Scattered sushi topped with colorful ingredients, served at home or in restaurants during the season.
    • Hishi mochi: Diamond-shaped layered mochi in pink, white, and green, symbolizing snow melting into new plant growth.
    • Shirozake: A sweet, low-alcohol white sake traditionally drunk during the festival (an amazake version without alcohol is also common).

    Department store basement food halls (depachika) are the easiest place for a visitor to find all of these pre-packaged and ready to eat without needing reservations or Japanese menu skills.

    Buying Your Own Hina Dolls

    If the displays catch your interest enough to want a souvenir version, pricing varies enormously by size and craftsmanship:

    • Budget: Small decorative pairs (just the Emperor and Empress) made for the souvenir market run roughly 3,000–8,000 yen at craft shops, department stores, or airport souvenir corners.
    • Mid-range: A proper two-doll set with silk-brocade robes and a lacquered base, the kind actually sold to Japanese families for a new granddaughter, typically runs 30,000–100,000 yen.
    • Splurge: Full multi-tier sets with 15 dolls and accessories, handmade by established doll ateliers (notably around Saitama’s Iwatsuki district, a historic doll-making area), can run from several hundred thousand yen into the millions for the most prestigious craftsmanship.

    Specialty doll shops and traditional craft stores are the best source for anything beyond souvenir-grade pieces; department stores stock a curated but limited range during the February–March season specifically. If you’re drawn to traditional Japanese textile and craft work generally, it’s worth knowing the robes on higher-end hina dolls are often woven using techniques related to those seen at Kyoto’s Nishijin-ori silk district, and the decorative cords tying some display accessories together are a form of mizuhiki cord art — both worth a look if you want to go deeper on the craft side of this tradition.

    A practical note for anyone buying a doll set to take home: these are delicate, boxed items, and if something turns out damaged or not as described, it helps to know the store’s policy before you leave — our guide to returns, exchanges, and receipts in Japan covers what to expect and what documentation to keep.

    Planning Around the Festival

    Early March in most of Japan is still cool — expect daytime temperatures in Tokyo around 10–13°C, with Tohoku and Hokkaido still firmly in winter. Pack accordingly if you’re combining Hina Matsuri viewing with other late-winter plans. For travelers flying into Tokyo specifically for this window, getting from Narita into the city efficiently matters more in the shoulder season when trains can be less frequent; see our comparison of the Narita Express vs. Keisei Skyliner to pick the right option for your route and luggage.

    Hina Matsuri won’t anchor an entire itinerary the way cherry blossoms or a summer festival might, but it rewards travelers who happen to be in Japan during February and early March with genuinely beautiful, low-effort sightseeing — a department store atrium, a shrine staircase in Chiba, or a ryokan lobby can all turn into an unplanned highlight of the trip.

  • Tanabata: Japan’s Star Festival and Where to Celebrate It

    Tanabata: Japan’s Star Festival and Where to Celebrate It

    Photo by Tsuyoshi Kozu on Unsplash

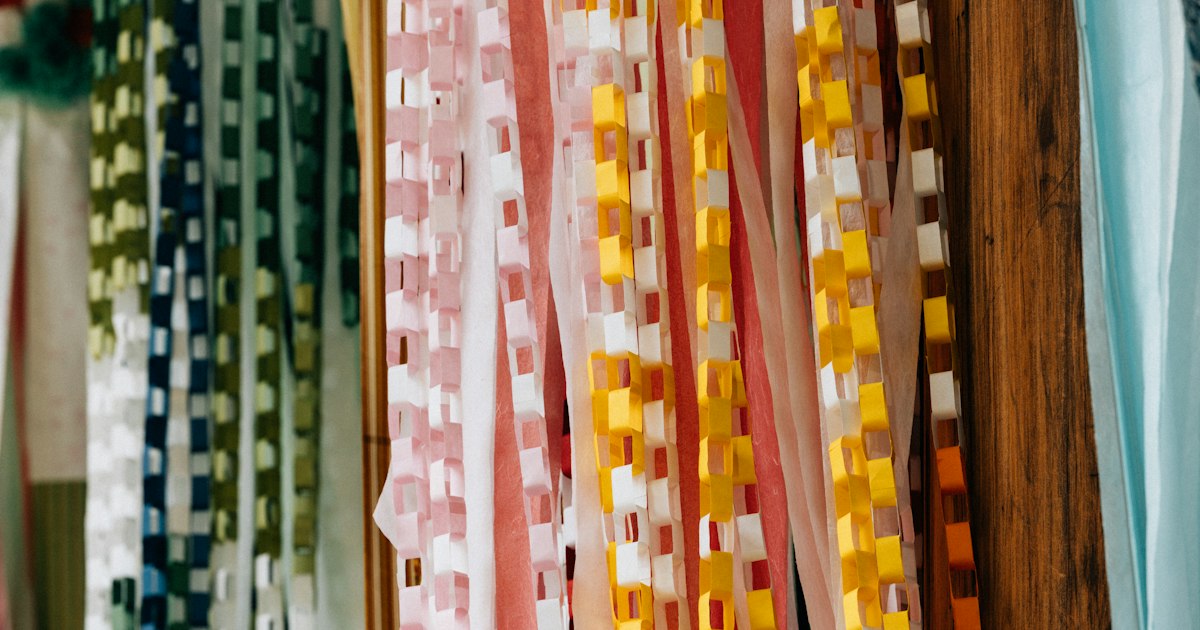
    Walk through almost any Japanese shopping arcade in July and you’ll see bamboo branches sprouting indoors, hung with strips of colored paper fluttering under the air conditioning. That’s Tanabata, Japan’s Star Festival, and it’s one of the easiest traditional events for a visitor to stumble into — and one of the most rewarding to plan around, if you know where the real celebrations happen.

    What Is Tanabata? The Legend Behind the Festival

    Tanabata (“Evening of the Seventh”) celebrates the once-a-year reunion of two star-crossed lovers: Orihime (the weaver star, Vega) and Hikoboshi (the cowherd star, Altair). According to the legend, the two were separated by the Milky Way as punishment for neglecting their work after marrying, and are allowed to meet just one night a year — provided the sky is clear enough for them to cross the river of stars.

    The custom of writing wishes on tanzaku, small strips of colored paper, and tying them to bamboo branches (sasa) comes from this legend — people ask for good harvests, skill in crafts, or simply good luck, then hang the paper alongside origami cranes, streamers, and nets. You’ll see these small bamboo displays for free outside train stations, in shopping malls, and at hotel lobbies throughout early summer, no ticket or plan required.

    When to Go: July 7 vs. the August Festivals

    This trips up a lot of first-time visitors. The “official” date is July 7, and in Tokyo and most of the country, small-scale Tanabata decorations appear in late June and come down by July 7. But because the date was originally set by the old lunar calendar, several of the biggest, most spectacular festivals are held a month later, in early August, when the weather (and the stars) cooperate better. If you’re specifically traveling to see a major Tanabata festival rather than just casual decorations, check the exact dates for that year before booking — they don’t always fall on the same days annually.

    Sendai Tanabata Matsuri: Japan’s Biggest Celebration

    Sendai, the largest city in the Tohoku region, hosts Japan’s most famous Tanabata festival, held every year from August 6 to 8. The covered shopping arcades of Ichibancho and the Chuo-dori street near Sendai Station fill with roughly 3,000 enormous paper streamers (fukinagashi), some reaching several meters long, handmade by local shops, schools, and families — it’s genuinely one of the most photogenic displays of folk craft in the country.

    • Getting there: Sendai is about 90 minutes from Tokyo on the Tohoku Shinkansen (Hayabusa or Yamabiko trains); a one-way unreserved seat runs around ¥11,410. The decorated arcades are a 5-10 minute walk from Sendai Station’s west exit.
    • Timing: The streamers are up all day, but they’re lit and most atmospheric from early evening onward, roughly 18:00-21:00. The night before the main festival (August 5) features a separate fireworks display with around 16,000 fireworks over the Nishi Park area — worth building into your itinerary if dates allow.
    • Cost: Viewing the decorations is completely free. Budget ¥500-1,500 per item for festival food stalls (yakisoba, grilled corn, shaved ice).

    Since you’ll be in Sendai anyway, it’s worth timing a meal around the city’s signature dish — see our guide to gyutan, Sendai’s grilled beef tongue, for where locals actually eat it near the station.

    Other Tanabata Festivals Worth Knowing

    Sendai isn’t the only option, and some are far more convenient if you’re staying in Tokyo:

    • Hiratsuka Tanabata Matsuri (Kanagawa): Held in early July, this is one of the largest Tanabata festivals near Tokyo, with colorful streamers lining the shopping streets around Hiratsuka Station on the JR Tokaido Line, about an hour from Tokyo Station. It’s a good day-trip alternative if you can’t make it up to Sendai.
    • Asagaya Tanabata Matsuri (Tokyo): Held in early August in Suginami Ward, this neighborhood festival is known for giant papier-mâché character floats rather than traditional streamers — quirky, local, and a short walk from Asagaya Station on the JR Chuo Line, about 20 minutes from Shinjuku.
    • Kyoto’s Kitano Tenmangu and Kamo River events: Kyoto marks Tanabata with smaller-scale bamboo displays and evening events along the river in early July — less of a dedicated “festival” and more of a seasonal atmosphere, but worth seeking out if you’re already in the city.

    What to Buy and Do While You’re There

    Tanabata festivals are casual, street-level events rather than ticketed attractions, so most of the spending happens at food stalls and small craft vendors:

    • Budget: Write your own wish on a tanzaku strip at a shrine or shopping arcade display — this is usually free or by small donation, and it’s the most authentic way to participate.
    • Mid-range: Festival food stalls (yatai) selling takoyaki, yakitori, and shaved ice typically run ¥400-1,200 per item. If you’re near a yakitori stall, our guide to ordering yakitori is useful for navigating the menu quickly in a crowd.
    • Splurge: Some ryokan and hotels in festival cities run Tanabata-season kaiseki dinners or offer rooms overlooking the decorated streets during the festival dates — book these well ahead, as Sendai in particular sells out during its festival week.

    Tanabata falls squarely in Japan’s summer fireworks and sparkler season, so it pairs naturally with a stop for traditional sparklers — see our piece on senko hanabi and summer firework souvenirs if you want to bring a bit of that atmosphere home. If you’re also picking up gifts before heading back, our guide to Tokyo Banana and omiyage sweets covers what travels well.

    Common Mistakes to Avoid

    • Assuming every Tanabata event is on July 7. The biggest festivals (Sendai, Asagaya) are in early August — check the specific year’s dates before building a trip around them.
    • Visiting Sendai’s arcades at midday expecting festival energy. The streamers are impressive any time, but the crowds, food stalls, and lit-up evening atmosphere build from late afternoon onward.
    • Not planning transit in advance. Festival nights in Sendai and Hiratsuka draw heavy local crowds and the trains back can be packed; having your IC card ready saves time at the gates — see our guide to adding Suica or Pasmo to Apple Wallet before you go.
    • Expecting indoor-mall bamboo displays to be “the festival.” Those small lobby decorations are charming but are not the same as the dedicated street festivals — if you’ve traveled specifically for Tanabata, make sure you’re headed to Sendai, Hiratsuka, or Asagaya on the right dates.

    Tanabata rewards visitors who do a little homework on dates and location — get that right, and you’ll see one of Japan’s most visually striking folk traditions rather than just a bamboo branch in a shopping mall.

  • Mizuhiki: Japan’s Decorative Cord Art and Where to Buy

    Mizuhiki: Japan’s Decorative Cord Art and Where to Buy

    Photo by Dan Dennis on Unsplash

    If you’ve ever received a Japanese gift and noticed a stiff, glossy, paper-based cord tied into an intricate knot around the wrapping, you’ve already met mizuhiki. It looks almost too elegant to be craft-store material, yet it’s sold by the bundle in stationery shops across the country and makes one of the most compact, culturally rich souvenirs you can bring home. Here’s what it actually is, where it’s made, and where to buy good pieces without overpaying for a tourist-shelf version.

    What Is Mizuhiki, and Why Does It Matter in Japan?

    Mizuhiki is cord made from twisted washi paper, coated with starch or a light lacquer to give it stiffness, then dyed in bright, often metallic colors. Unlike fabric ribbon, it holds a shape once tied — which is the whole point. For centuries it’s been used to tie noshi (the formal paper gift wrappers) on celebratory envelopes, wedding gifts, and New Year presents. The specific knot used isn’t decorative flourish; it’s a coded message about the occasion, and getting it wrong is a real faux pas, similar to the gift-wrapping etiquette covered in our guide to omiyage etiquette. Today mizuhiki has expanded well beyond envelopes into earrings, hair accessories, keychains, and framed art, which is why it’s become a popular collectible for visitors who want something distinctly Japanese that fits in a suitcase.

    The Meaning Behind the Knots and Colors

    Two knot families matter most. Musubiri (a bow-style knot, easy to retie) is used for occasions you’d want to repeat — births, promotions, general celebrations. Awaji-musubi (a tighter, interlocking knot that’s hard to undo) is used for once-in-a-lifetime events: weddings and, in a different color scheme, funerals. Color follows the same logic: red-and-white or gold-and-silver combinations signal celebration; black-and-white or yellow-and-silver signal condolence. If you’re buying mizuhiki items as gifts for Japanese friends or colleagues, this is the detail to get right — a gift wrapped in the wrong color combination can read as either confusing or, worse, oddly funereal. For everyday souvenirs (brooches, bookmarks, keychains), this etiquette matters less, but it’s worth knowing before you buy anything meant for a specific occasion.

    Iida, Nagano: The Mizuhiki Capital Worth a Detour

    Around 70% of Japan’s mizuhiki is produced in Iida City, Nagano Prefecture, where the craft took off in the Edo period thanks to the local paper industry. If you’re already routing through central Japan, Iida is reachable by the JR Iida Line or by highway bus (roughly 3.5–4 hours from Shinjuku, or about 1.5–2 hours from Nagoya), and the town leans into its identity with mizuhiki shopfronts, workshops, and seasonal displays, especially lively from late autumn through New Year when demand for celebratory cords peaks. This is the best season to visit if you want to see the full range of colors and styles in production rather than just the tourist-friendly basics. It’s a niche detour, not a headline destination, so pair it with another Nagano-area stop rather than building a whole day around it.

    Where to Buy Mizuhiki in Tokyo and Kyoto

    You don’t need to go to Nagano to buy well-made mizuhiki. In Tokyo, large stationery and craft stores — Tokyu Hands and Loft branches in Shibuya and Shinjuku both stock mizuhiki cord bundles and finished accessories — are reliable starting points, as are the stationery floors of old-line shops like Itoya in Ginza, which carries higher-end envelope and gift-wrap mizuhiki alongside washi paper goods. Department store New Year gift sections (roughly early December through early January) are the single best time to find the widest variety, since noshi-wrapped gifts are a seasonal staple. In Kyoto, mizuhiki-trimmed accessories show up in craft boutiques around the Nishijin textile district — a natural add-on if you’re already visiting the weaving workshops covered in our guide to Nishijin-ori — and in shops near Kiyomizu-dera and the Gion area that cater to traditional crafts generally. Most shops open around 10:00 or 11:00 and close by 19:00–20:00; expect them to be busiest on weekends and in the run-up to New Year.

    Budget, Mid-Range, and Splurge Picks

    At the budget end, a pack of loose mizuhiki cords for DIY projects runs roughly ¥300–800, and simple finished items like hair ties or bookmarks are typically ¥500–1,500. Mid-range buyers should look at brooches, earrings, and small framed knot art, generally ¥2,000–5,000, which is where craftsmanship starts to show in knot precision and color layering. For a splurge, artisan-made pieces — large ceremonial knots, combination mizuhiki-and-kumihimo braided accessories, or custom-ordered gift sets from Iida workshops — can run ¥10,000 and well beyond. As with most traditional crafts in Japan, price tracks the number of individual knots and the quality of the paper cord, not just the design complexity, so don’t assume a simple-looking knot is cheap — some of the tightest, most symmetrical awaji knots take real skill to tie cleanly.

    Try It Yourself: Mizuhiki Workshops

    Several craft studios in Tokyo and Kyoto run short mizuhiki-tying workshops, usually 60–90 minutes, priced around ¥3,000–6,000, where you learn one or two knot styles and leave with a finished accessory. These sessions are typically run in Japanese with simple English handouts rather than full English instruction, so they suit visitors who enjoy hands-on craft experiences in the vein of the build-your-own sessions at Kakimori’s notebook atelier — good if you want a souvenir you made yourself rather than bought off a shelf. Book ahead where possible; class sizes are small and English-language slots fill first.

    Common Mistakes to Avoid

    The most common error is buying mizuhiki items purely for their color without checking the occasion match — gifting a black-and-white knotted piece as a casual souvenir can land oddly with a Japanese recipient who reads it as condolence-coded. Second, cheap mass-produced mizuhiki (often sold in generic souvenir shops) uses thinner, less-stiff paper that frays and loses its shape within weeks; if a cord feels soft or bends without holding a crease, it’s low quality. Third, if you buy a boxed gift set, keep the receipt — Japanese retailers generally only accept returns or exchanges with proof of purchase and within a short window, a point covered in more detail in our guide to returns and receipts in Japan. Finally, don’t pack delicate mizuhiki pieces loose in a suitcase; the paper cords crush easily, so ask for a small gift box, which most shops provide free or for a nominal fee.

  • Teppanyaki in Japan: Where to Watch Chefs Grill Tableside

    Teppanyaki in Japan: Where to Watch Chefs Grill Tableside

    Photo by Laszlo Oveges on Unsplash

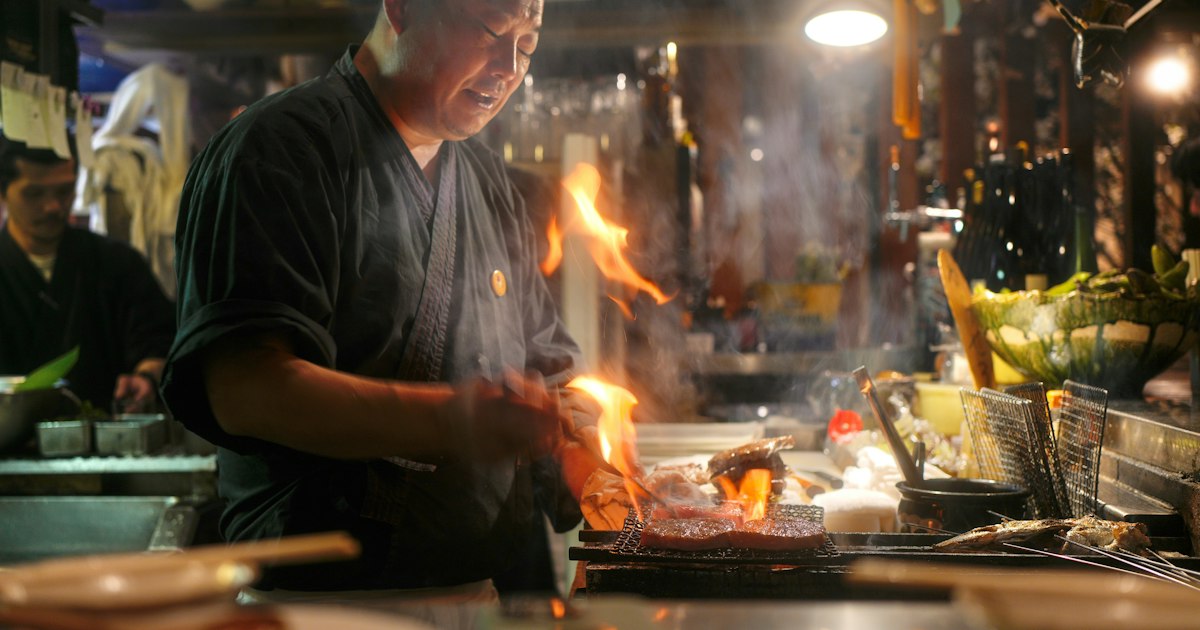
    Teppanyaki looks simple from the outside — a chef, a hot steel plate, some butter, and a lot of sizzle — but getting a good seat in front of a skilled itamae (chef) takes a bit of planning. This guide covers what teppanyaki actually is, how it differs from the “hibachi” most foreign visitors know, what it costs at every budget level, and how to book a counter seat without wasting an evening standing outside a full restaurant.

    What Teppanyaki Actually Is (and Isn’t)

    Teppanyaki means “grilled on an iron plate” (teppan = iron plate, yaki = grilled). In Japan, it refers to a style of cooking on a flat steel griddle, usually built into the counter so diners sit around it and watch the chef work a few feet away. It developed in Japan in the postwar years, with steakhouses like Misono in Kobe (opened 1945) and Ustuwa-no-Yakatabune credited as early pioneers of the format now associated with premium wagyu.

    What Americans call “hibachi” — the theatrical onion-volcano, shrimp-flipped-into-hats routine — is actually teppanyaki as adapted for restaurant chains in the US (Benihana being the most famous). You won’t find onion volcanoes in Japan. Real teppanyaki is quieter and more focused: the chef narrates little, concentrates on searing technique, and the showmanship comes from precision — perfectly timed turns, a clean sear, minimal seasoning (usually just salt, pepper, and a squeeze of yuzu or a pat of garlic butter) that lets good beef speak for itself.

    Budget: Casual Teppanyaki and Okonomiyaki-Style Grills

    At the low end, teppan dining means okonomiyaki and monjayaki restaurants, where the “chef” is often you — batter, cabbage, and toppings are cooked on a shared table-top teppan grill. Tokyo’s Tsukishima monja street has dozens of these shops, and a full meal runs ¥1,500–¥2,500 per person. In Osaka, Dotonbori okonomiyaki spots like Mizuno charge roughly ¥1,200–‘2,000 for a plate. This isn’t the tableside-chef experience but it’s the same cooking surface and a good way to understand teppan cuisine before paying steakhouse prices.

    For an actual chef-at-the-counter experience on a budget, look for casual teppan steak chains such as Ikinari Steak (stand-and-eat, pay by weight, roughly ¥1,500–¥3,000 for a reasonably sized cut) or hotel-basement teppan lunch sets, which often run ¥2,500–¥4,000 for a lunch course that would cost double at dinner.

    Mid-Range: Dedicated Teppanyaki Steakhouses

    This is the sweet spot for most visitors. A proper teppanyaki restaurant with a 6–10 seat counter, a dedicated chef per counter, and a set course (soup, salad, vegetables, rice or garlic fried rice, and a beef course) typically costs ¥6,000–¥15,000 per person for dinner, less for lunch courses (often ¥3,000–¥6,000 at the same restaurants). Kobe and Osaka have the highest concentration of classic teppanyaki houses given the region’s association with Kobe beef, but every major city has reputable options — Ginza and Roppongi in Tokyo, Gion and Kawaramachi in Kyoto.

    Book ahead where possible, especially for dinner and especially for counter seats, which are limited by design — a single chef can usually only serve 6–8 people at once. Many teppanyaki restaurants take reservations by phone only, so if you don’t speak Japanese, ask your hotel concierge to call, or use a restaurant booking app. Walk-ins are possible at lunch but risky at dinner in tourist-heavy areas.

    Splurge: Wagyu-Grade Teppanyaki

    At the top end, teppanyaki is where you eat A4 or A5 Kobe, Matsusaka, or Omi beef cooked a few inches from your hands. Courses at well-regarded Kobe or Tokyo wagyu teppanyaki restaurants run ¥20,000–¥40,000+ per person, and flagship omakase-style counters can exceed ¥60,000. What you’re paying for isn’t just the beef grade — it’s the chef’s control of heat and timing, which is the entire point of teppanyaki as a format. A5 wagyu has so much intramuscular fat that a chef has to manage rendering carefully; overcooked, it turns greasy rather than silky.

    At this level, it’s worth asking in advance whether the course includes a specific cut (sirloin vs. fillet) and whether the beef’s grade and origin will be shown or certified tableside — reputable restaurants are happy to show the certificate of origin for Kobe beef specifically, since the name is a protected regional brand with strict certification requirements.

    Best Season and Timing

    Teppanyaki isn’t seasonal the way some Japanese cuisine is, but a few timing notes help: lunch courses are consistently 40–60% cheaper than dinner for the same restaurant and often the same cut of beef, just a smaller portion — a good way to try a splurge-tier restaurant on a mid-range budget. Winter (December–February) is considered prime wagyu season because cattle are typically finished for slaughter in the cooler months, giving slightly better marbling, though this varies by producer. Avoid peak dinner hours (7–8:30pm) if you want a same-day walk-in chance; early dinner (5:30–6pm) or late lunch (1:30–2pm) seatings are easier to get without a reservation.

    Common Mistakes to Avoid

    • Confusing teppanyaki with okonomiyaki or yakiniku. Yakiniku is diner-grilled meat on a grated or perforated grill at your table — no chef involved. If you want to watch a chef cook for you, you specifically want a restaurant advertising “teppanyaki,” not “yakiniku” or “okonomiyaki,” though all three use variations of a flat or grated iron cooking surface.
    • Expecting Benihana-style theatrics. If you want the flipping and flaming show, that’s an overseas interpretation; Japanese teppanyaki chefs are typically reserved and technical, not comedic performers.
    • Not asking about seating before booking. Some restaurants have both counter (teppan) seats and regular table seats where food is cooked in the kitchen and plated — if watching the chef matters to you, confirm counter seating specifically when you book.
    • Overdressing the beef with sauce. Good teppanyaki chefs season minimally. If you douse a ¥30,000 cut of A5 wagyu in steak sauce, you’re paying premium prices to taste the sauce, not the beef — ask for just salt, or the ponzu/garlic options on the side, and taste a bite plain first.
    • Skipping the garlic fried rice finale. Many courses end with rice fried in the beef fat and drippings on the same teppan — don’t fill up on the preceding courses and miss it; it’s often the most memorable bite of the meal.

    Practical Booking Notes

    Most teppanyaki restaurants above the casual tier require reservations, accept credit cards, and expect you to arrive on time (seating is often choreographed around when the chef starts). Smart casual dress is appropriate — no beachwear or flip-flops at mid-range and above. If you’re combining a wagyu teppanyaki dinner with a broader food-focused itinerary, it pairs naturally with other tableside or counter dining experiences like yakitori for a contrasting casual counter meal, or gyutan if you’re building a beef-focused food trip around Japan. If you’re coming straight from Narita on your first day and want to get settled before a dinner reservation, see our comparison of the Narita Express vs. Keisei Skyliner to plan arrival timing. And if you’re carrying cash for a cash-only izakaya-style teppan spot, it’s worth knowing how receipts and payment norms work in Japan before you sit down, since some smaller teppanyaki counters still don’t take cards.