Japan Trove

Category: Shopping

Honest guides to shopping in and buying from Japan — skincare and cosmetics, snacks and sweets, whisky and sake, hobby and character goods, kitchenware and homeware, and exactly how to ship it all home. We recommend what is genuinely worth it and flag the catches, from voltage and region locks to tax-free rules.

  • Gotemba Premium Outlets: Tokyo’s Designer Outlet Day Trip with Mt. Fuji Views

    Gotemba Premium Outlets sits at the base of Mt. Fuji in Shizuoka Prefecture, and on a clear day you can browse Coach bags and Patagonia fleeces with the mountain looming right behind the rooftops. It’s one of the few shopping trips in Japan where the view is as much the draw as the discounts. Here’s how to time it, get there, and avoid wasting half the day.

    What’s actually there

    Gotemba Premium Outlets is one of the largest outlet malls in Japan, with roughly 290 stores split across an East Zone, West Zone, and a newer “Forest” area added in 2020 that leans toward outdoor and lifestyle brands. The mix is heavily Western fashion and sportswear: Coach, Kate Spade, Michael Kors, Polo Ralph Lauren, Tommy Hilfiger, Burberry, and a strong outdoor/sports lineup (Patagonia, The North Face, Nike, Adidas, Asics, Mont-bell) that makes sense given the mountain setting. There’s also a food court, several standalone restaurants, and a scenic deck area where people stop just to photograph Fuji.

    Admission is free — it’s an open-air mall, not a ticketed attraction. Budget 3–5 hours if you want to actually cover both zones rather than skim one.

    Getting there from Tokyo

    The easiest option is the direct highway bus from Shinjuku (Busta Shinjuku terminal), which takes about 2 hours 15 minutes and costs roughly ¥1,900–2,500 one-way; round-trip tickets are usually discounted to around ¥3,000–3,600. Buses also run directly from Tokyo Station (Yaesu side) and from Yokohama, so check which is closer to your lodging before defaulting to Shinjuku. If you’re navigating Tokyo’s rail network to reach the bus terminal, it’s worth understanding how the city’s two subway operators connect — see Tokyo Metro vs Toei Subway if you’re transferring through Shinjuku Station itself, which is a maze.

    The alternative is train plus shuttle: take a train to Gotemba Station (via the JR Gotemba Line or an Odakyu Romancecar connection), then transfer to the outlet’s free shuttle bus, which runs every 20–30 minutes and takes about 20 minutes. This costs more in train fare but gives you flexibility if the direct buses are full or sold out, which happens on weekends.

    A popular variation is combining Gotemba with Hakone — buses connect the outlet to the Hakone area, so you can do a loop of hot springs and shopping in one long day rather than two separate trips from Tokyo. If you’re flying in or out and need to plan the Tokyo end of the journey, Narita to Haneda (and Back) covers how the two airports connect, which matters if your Gotemba day falls right before or after a flight.

    Best season and time of day for Mt. Fuji views

    Fuji is most reliably visible in winter — roughly November through February — when the air is drier and skies stay clearer longer into the day. In summer and early autumn, humidity builds clouds around the mountain by late morning, so you might see nothing by 1pm even on a day that started clear.

    Regardless of season, mornings are your best bet. Arrive at or soon after opening and head to the viewing areas first before you get absorbed in shopping — the mountain tends to cloud over as the day warms up. If you’re visiting in winter specifically for snow-capped Fuji photos, check the forecast the night before; it’s not worth the 2-hour bus ride on a day when Fuji is forecast to be socked in.

    Hours and crowds

    Gotemba Premium Outlets generally opens at 10:00 AM and closes around 8:00 PM from March through November, shifting to a 7:00 PM close in the winter months (December–February). The mall closes a handful of days a year for maintenance, usually announced on its official calendar, so it’s worth a quick check before you commit a whole day to the trip.

    Weekends, Japanese public holidays, and periods like Golden Week or Obon bring heavy crowds and packed buses — if you have flexibility, go on a weekday. Tour buses also arrive in waves mid-morning, so an early arrival beats both the crowds and the clouds.

    Budget, mid-range, and splurge shopping

    • Budget: The food court runs about ¥800–1,200 per meal, and outlet pricing on Nike or Adidas sneakers often lands in the ¥3,000–6,000 range — noticeably below standard Japanese retail.
    • Mid-range: Bags and apparel from Coach, Kate Spade, or Polo Ralph Lauren typically run 30–50% off, so a Coach bag that’s ¥50,000+ at full retail might be ¥25,000–40,000 here.
    • Splurge: Burberry and premium outdoor gear (Patagonia, Arc’teryx-adjacent brands) stock higher-end pieces at outlet prices that are still a real discount versus buying at home, especially useful if you’re already stocking up on technical gear for a Fuji-area hike.

    Don’t expect American-style 70% outlet blowouts — Japanese outlet discounts tend to be more modest, generally 20–50% off, and some imported luxury brands are priced higher in Japan to begin with. Treat it as a good day of shopping with a view, not a bargain-hunting mecca.

    Common mistakes to avoid

    The biggest one is timing the trip around the mall’s hours rather than the mountain’s. People show up at 1pm expecting the postcard view and find Fuji buried in haze. Second: if you’re claiming the consumption tax exemption on purchases, you need your passport with you — the tax-free counter requires combining receipts from the same store chain to hit the roughly ¥5,000 pre-tax minimum, so keep receipts if you’re buying from the same brand in multiple stops. Third: check the last return bus time before you get absorbed in shopping; missing the last direct bus back to Shinjuku means a slower, more expensive train transfer home. Finally, don’t underestimate the size — with the East, West, and Forest zones combined, it’s easy to burn half a day just walking between areas, so plan rest stops and don’t try to “do it all” in under three hours.

    If you’re traveling with young kids, note that outlet malls like this generally have decent baby-care facilities built in alongside the bigger stores — worth checking before you go if that’s a factor; see Nursing Rooms, Stroller Access & Diaper Changing for what to expect at Japanese commercial facilities generally. And if Gotemba’s brand mix doesn’t match what you’re after, Tokyo itself has mall-based alternatives — Odaiba’s malls are a far shorter trip if you want shopping without the Mt. Fuji bus ride.
  • Buying Contact Lenses in Japan: Prescriptions, Brands & Where Tourists Can Restock

    Buying Contact Lenses in Japan: Prescriptions, Brands & Where Tourists Can Restock

    Photo by Perry Merrity II on Unsplash

    Running low on contact lenses mid-trip is one of those small travel problems that can derail a day fast — and Japan’s rules around buying them are different enough from the US, UK, or Australia that it’s worth understanding before you’re standing in a drugstore aisle squinting at kanji. The short version: lenses are treated as medical devices here, but there are several realistic paths to restocking even without a Japanese prescription in hand. Here’s how it actually works.

    Do You Actually Need a Prescription?

    Legally, yes — in Japan, corrective contact lenses (daily, 2-week, and monthly disposables) are classified as “kokansei iryo kizai” (管理医療機器), a controlled medical device category, which means retailers are supposed to confirm you have a valid prescription or have had an in-store eye check before selling them to you. This is different from eyeglasses, which anyone can buy off the shelf.

    In practice, this plays out in two very different retail environments:

    • Optical chains and contact lens specialty shops will do a quick in-store vision check (often free or a few hundred yen) and issue lenses the same day, even to first-time customers and tourists.
    • Drugstores and variety stores (Don Quijote, Loft, Matsumoto Kiyoshi) mostly stock zero-power “cosmetic” circle lenses that don’t correct vision, plus solution and lens cases — they generally won’t sell you prescription corrective lenses without proof of a check.

    Cosmetic (plano) circle lenses marketed for Halloween, cosplay, or everyday eye-enlarging looks are sold more freely, but even these technically fall under the same medical device rules since a 2009 regulation change, so enforcement varies by store and staff.

    Where Tourists Can Actually Restock

    The most reliable route for a traveler is a contact lens specialty chain or an optical chain with an in-house eye-check counter. These exist in basically every major shopping area and department store basement:

    • Eyecity (アイシティ) — Japan’s largest contact lens specialty chain, with large-format stores in Shinjuku, Shibuya, Ikebukuro, and other big stations. Staff are used to walk-in customers and the eye check is fast.
    • JINS and Zoff — primarily eyewear chains, but most locations have a contact lens corner with the same in-store check. Reliable in shopping malls, including the ones on Odaiba, where Aqua City and DiverCity both have optical shops.
    • Alpha Village and Menicon’s own retail counters — Menicon is one of Japan’s biggest contact lens manufacturers and runs direct-to-consumer counters in many cities.
    • Drugstores like Matsumoto Kiyoshi and Don Quijote — worth checking for solution, cases, and eye drops even if they can’t sell you corrective lenses outright. Don Quijote locations, which also turn up in our guide to buying a suitcase in Japan, often keep late or 24-hour opening hours, which is handy if your lenses dry out at 11pm.

    Typical opening hours for optical shops in malls and near stations run 10:00–20:00 or 21:00, closed occasionally for New Year’s (Jan 1–3). Drugstores in tourist districts (Shibuya, Shinjuku, Dotonbori) frequently stay open until midnight or around the clock.

    What It Costs

    Lens prices in Japan are generally on par with or cheaper than the US and UK, especially for domestic and Asian brands:

    • Daily disposables (30-pair box) — roughly ¥2,000–3,500 for brands like Seed 1dayPure, Menicon Melsheen, or Acuvue Moist; premium options like Acuvue Oasys or Alcon Dailies Total1 run ¥3,500–4,800.
    • 2-week disposables (6-lens box) — around ¥2,500–3,500.
    • In-store eye check fee — free to about ¥3,000, depending on the chain; some waive it entirely for simple repeat purchases if you can show your existing lens box or packaging.
    • Lens solution (355–500ml bottles of OPTI-FREE, ReNu, or AOSept) — ¥800–1,500 at any drugstore, no prescription needed.

    Bring a credit card or cash — most optical chains take both, but smaller specialty shops can be cash-preferred, so it’s worth knowing how to pull yen from an ATM; our guide to Japan Post Bank ATMs and foreign cards covers the most reliable option if your hotel area is light on international-friendly machines.

    The Fastest Way: Bring Your Own Prescription

    The single biggest time-saver is arriving with your actual contact lens prescription — not just a glasses prescription, since contacts need extra numbers that glasses don’t: base curve (BC), diameter (DIA), and the specific brand/power you wear, in addition to sphere, cylinder, and axis. A glasses-only prescription will not let a Japanese optician dispense the right lens.

    If you don’t have the paperwork, the next-best option is to bring an empty lens box or blister pack — the brand name and power printed on it is often enough for staff at a specialty shop to cross-reference and either sell you the exact same product or recommend the closest local equivalent.

    If You Need a Fresh Eye Exam

    If you’ve lost your prescription entirely or your eyes have changed, a Japanese ophthalmology clinic (眼科, ganka) can do a full exam and issue a Japanese prescription, usually same-day with a short wait. Expect to pay out of pocket as a visitor — roughly ¥3,000–6,000 for the exam without Japanese national insurance coverage. Many optical chains work directly with a nearby clinic or have an in-house optometrist for straightforward cases, which is usually faster than a standalone clinic visit.

    Common Mistakes to Avoid

    • Assuming your glasses prescription is enough. It isn’t — contacts need BC/DIA info your eyeglass prescription won’t have.
    • Expecting drugstores to sell corrective lenses on the spot. They’re better for solution, cases, and cosmetic plano lenses, not your actual prescription.
    • Waiting until you’re down to your last pair. Pack at least one spare week’s worth, especially if your trip includes rural areas like Noto Peninsula or the Oki Islands, where the nearest optical shop may be a ferry or long drive away.
    • Forgetting humidity affects lens comfort. Japan’s summer humidity (June–September) can make daily disposables feel different than at home — rewetting drops from any drugstore help.
    • Leaving restocking for your last day. If you’re flying out of a major airport, build in buffer time — the same way you’d plan around a deadline for returning a rental pocket Wi-Fi or SIM at the airport, don’t assume you can dash into an optical shop between check-in and boarding.

    Bottom Line

    Japan makes it genuinely easy to restock contact lenses as a tourist — the catch is knowing which kind of store to walk into. Head to a specialty chain like Eyecity, JINS, or Zoff for an in-store eye check and same-day corrective lenses, keep drugstores in mind for solution and cosmetic lenses, and always travel with your full prescription details (or at least an empty box) so staff can match you to the right product without guesswork.

  • Ochanomizu: Tokyo’s Guitar and Musical Instrument Shopping Street

    Tucked between Akihabara and Jimbocho, the slope running up from Ochanomizu Station to Nikolai Cathedral is one of Tokyo’s most specific shopping streets: for roughly 800 meters, almost every storefront sells guitars, basses, amps, or drums. Musicians call it “Gakki no Machi” — Instrument Town — and it’s been that way since the 1950s, when shops selling sheet music and school instruments to students at nearby Meiji and Nihon universities gradually shifted into guitars as rock and jazz took off. Today it’s a legitimate destination whether you’re hunting for a rare Japan-made vintage electric or just want to see how deep Tokyo’s niche shopping streets go.

    Where It Is and How to Get There

    Ochanomizu sits in Chiyoda City, and the shopping street itself is the stretch of Meidai-dori running between JR Ochanomizu Station and Suidobashi, with a second cluster near Jimbocho to the south. You have several station options:

    • JR Ochanomizu Station (Chuo-Sobu Line) — exits directly onto the slope where most shops are. This is the most convenient option if you’re coming from Tokyo, Shinjuku, or Akihabara.
    • Shin-Ochanomizu Station (Tokyo Metro Chiyoda Line) — a few minutes’ walk, useful if you’re coming from Omotesando or Yoyogi.
    • Suidobashi Station (Toei Mita Line or JR) — marks the northern end of the street, near Tokyo Dome.

    Everything described here is walkable in under 20 minutes end to end, so you don’t need to plan a complicated route — just pick whichever station is closest to where you’re coming from.

    What’s Actually on the Street

    The shops are mostly multi-floor buildings, not single storefronts, and many brands run several specialized locations within a few blocks of each other — one floor for new electrics, another for acoustics, another just for effects pedals or vintage basses. The names worth knowing:

    • Kurosawa Gakki — one of the oldest names on the street, with separate buildings for new instruments and a well-regarded used/vintage section.
    • Ishibashi Music / Ishibashi Rock Inn — a large chain with Ochanomizu branches split by instrument type, generally reliable for new gear and warranty service.
    • Yamashiro Gakki — long-running, strong on classical and acoustic guitars.
    • Five’s, Chuya Music, and smaller independent shops — this is where the vintage hunting happens: Japan-made guitars from the 1970s and ’80s (Tokai, Greco, Yamaha SG and FG series) that are harder to find at these prices outside Japan.

    Prices give you a sense of scale: a decent beginner acoustic runs roughly ¥15,000–30,000, mainstream new electrics (Fender Japan, Ibanez, Yamaha Pacifica) sit around ¥50,000–150,000, and genuine vintage Japanese-made instruments can range from ¥80,000 into the millions of yen depending on rarity and condition. Boss and Ibanez effects pedals, which are made in Japan and sometimes cheaper here than abroad, typically run ¥8,000–20,000 new.

    Budget, Mid-Range, and Splurge Strategies

    Budget: Used-gear floors (look for signs saying 中古 — chuko, meaning secondhand) at Kurosawa or Chuya Music often have well-maintained Japanese-brand guitars for less than you’d pay for an equivalent new import back home. Check the setup and intonation in-store before buying — most shops let you plug in and play.

    Mid-range: New Japan-market exclusive models — guitars and basses sold only domestically, never exported — are the smart buy here. Ishibashi and Yamashiro both carry Fender Japan and Yamaha lines not sold overseas.

    Splurge: Serious vintage collectors come to Ochanomizu specifically for 1970s Japanese “lawsuit era” guitars (close copies of American classics, built to a standard that’s since become collectible in its own right). These live in glass cases on upper floors and staff will usually bring one down for you to try with advance notice or a polite ask.

    What to Know Before You Buy

    A few practical details that aren’t obvious to first-time visitors:

    • Tax-free shopping is available at the larger chains (Ishibashi, Kurosawa) for purchases over ¥5,000, provided you show your passport at the register and the item leaves the country within 30 days — standard rules apply, but smaller independent vintage shops often don’t offer it, so ask before you commit.
    • Cash still matters. Many of the smaller used-instrument shops are card-reluctant or have a minimum for card payments. If you’re planning to buy something substantial, it’s worth knowing how Japan Post Bank ATMs work for foreign cards before you arrive with an empty wallet.
    • CITES and wood restrictions. Vintage guitars sometimes use Brazilian rosewood or other restricted tonewoods on the fretboard or body. This rarely causes problems for personal, non-commercial travel with an older instrument, but if a shop mentions CITES documentation, take it with you and keep it with the guitar — don’t leave it behind.
    • Shipping vs. carry-on. Most shops can arrange international shipping, but it’s expensive and slow. If you can fly with the guitar as a gate-checked item or in an overhead bin (most airlines allow a guitar in place of one carry-on if the case fits), that’s almost always cheaper and safer. Ask the shop for a sturdy gig bag or hard case if you didn’t bring one — expect to pay an extra ¥5,000–15,000 for a decent case.

    Opening Hours and Best Time to Visit

    Most shops open around 11:00–11:30 AM and close between 7:00 and 8:00 PM; a handful close one weekday, often Wednesday, so if you have one specific shop in mind, check their hours before making a special trip. Weekday mornings right after opening are noticeably quieter than weekend afternoons, when local musicians come to browse and try out gear — useful to know if you want unhurried time with staff or a chance to actually plug in and play without an audience. There’s no strong seasonal angle here (this isn’t a cherry-blossom street), so it’s a good rainy-day or non-peak-season activity to pair with sightseeing in nearby Akihabara or the secondhand bookshops of Jimbocho.

    Common Mistakes to Avoid

    • Assuming it’s one street with one layout. The shops are spread across several buildings and side streets, and a single brand might have three separate locations for different instrument categories. Budget extra time to walk the full stretch rather than assuming you’ve seen everything after one shop.
    • Skipping the test-play. Japanese shop etiquette is relaxed about this — staff expect you to plug in and try an instrument before buying, and not doing so means you miss obvious setup issues.
    • Not asking about export paperwork for vintage pieces. It’s a quick question at checkout, and skipping it can mean customs headaches later.
    • Forgetting humidity differences. An acoustic guitar bought in Tokyo’s humidity may need a truss rod adjustment once it settles into a drier climate back home — budget for a setup at a local shop a few weeks after you return.

    Ochanomizu won’t be on most first-time Tokyo itineraries, but if you play — or you’re shopping for someone who does — it’s one of the city’s most rewarding specialty shopping streets, in the same spirit as niche destinations like Ikebukuro’s Otome Road or the craft-focused shops of Seki’s Blade City in Gifu. Give yourself at least two hours, bring cash, and don’t be afraid to ask staff to bring something down from the glass case.

  • Japan’s Mosquito Repellent Aisle: Vape Mats, Earth No Mat & What Actually Works

    Japan’s Mosquito Repellent Aisle: Vape Mats, Earth No Mat & What Actually Works

    Photo by Ronald Langeveld on Unsplash

    If you’ve ever stood in a Japanese drugstore aisle staring at a wall of unfamiliar boxes with cartoon mosquitoes on them, you’re not alone. Japan takes bug repellent seriously — summers are hot, humid, and buggy from the Pacific coast to the mountains — and the result is a genuinely excellent lineup of products that most visitors never learn to use properly. This guide covers what’s actually in that aisle, what it costs, and how to pick the right thing for your trip, whether you’re staying in a Tokyo apartment, camping near a lake, or heading out for a day of fishing.

    Why Japan’s Bug Repellent Aisle Looks Different From Home

    Japanese mosquitoes are mostly the Asian tiger mosquito (yabu ka), which bites during the day and at dusk rather than only at night, and they’re persistent around standing water, rice paddies, parks, and shaded garden paths. Because of this, Japanese households rely on a layered system rather than a single spray: a plug-in or mat device for the room, a coil for outdoor spaces like balconies and genkan entryways, a personal spray or patch for when you’re out walking, and a dedicated itch-relief cream for after you’ve already been bitten. Most of these products use pyrethroid compounds (synthetic versions of a chrysanthemum-derived insecticide), which is a different base than the citronella or DEET-heavy formulas many visitors are used to, so don’t expect identical ingredient labels.

    Earth No Mat and Plug-In Vape Units: How They Work

    “Earth No Mat” (by Earth brand) and its main rival, Fumakilla’s “Vape,” are the two household names for electric mosquito repellent. There are two formats: the classic heated mat version, where a small electric unit heats a medicated paper mat that slowly releases repellent into a room, and the newer liquid version, where a plastic bottle of liquid repellent screws into a plug-in unit and evaporates continuously for 30, 60, or sometimes 180 days per bottle. A starter set with the device and one mat or bottle runs about 700–1,500 JPY at a drugstore; refill mats (usually 30 or 60 per box) cost around 400–600 JPY, and refill liquid bottles run 600–900 JPY depending on how many days they last. These units need a Japanese 100V outlet, so if you’re staying in self-catering accommodation for more than a few nights in summer, buying one is genuinely worth it — just leave it behind when you check out, since the voltage and plug shape won’t work back home.

    A cordless, battery-powered version also exists for tents or balconies without outlets, usually a bit pricier at 1,500–2,500 JPY for the unit.

    Mosquito Coils (Katori Senko) for Camping and Balconies

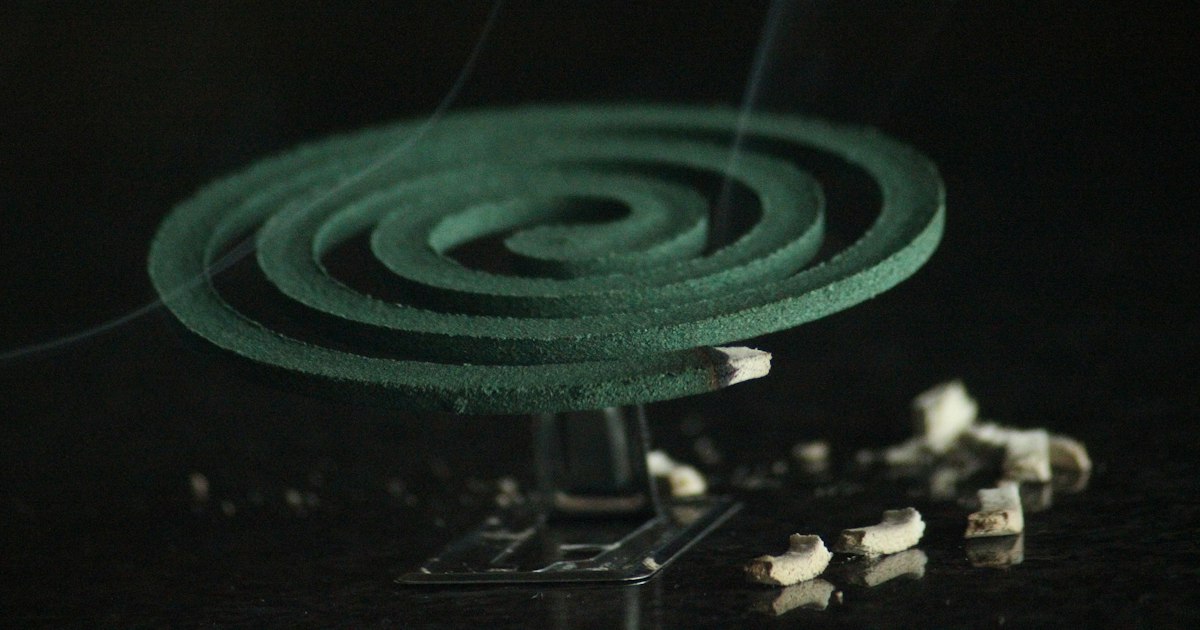
    The spiral green coil you’ve probably seen in period dramas is still sold everywhere and still works well outdoors, where plug-in units aren’t practical. A box of 30 coils from Kincho or Earth costs roughly 400–550 JPY, plus you’ll want a simple ceramic or tin coil stand (300–600 JPY) to hold it safely above a flammable surface. These are ideal for camping trips, riverside fishing spots, or barbecues — if you’re planning time outdoors, they pair well with gear covered in our guide to fishing in Japan, where sitting still near water for hours makes you a prime mosquito target. One coil burns for about 6–7 hours, so budget two per full evening session.

    Spray and Patch Repellents for On-the-Go Protection

    For walking around temples, gardens, or golf courses, skip the room devices and grab a personal spray. The two biggest brands are Kincho’s “Mushi Pro” line and Fumakilla’s “Skin Vape,” sold as aerosol sprays (200ml, about 700–950 JPY), pump sprays, or wipe-on gels. Japanese formulas often use icaridin (picaridin) rather than high-concentration DEET, which is gentler on skin and fine for kids in the lower-strength versions — look for “こども用” (for children) on the label if traveling with a family. Adhesive repellent patches (stick them on clothing, strollers, or bag straps) are another uniquely convenient option: a pack of 24–60 patches costs around 400–600 JPY and lasts roughly 12 hours per patch with no spraying required, which is handy if you’re outdoors all day at a golf course — see our golfing in Japan guide for other things worth packing for a round.

    If you’re flying home with sprays, remember standard aerosol restrictions apply in checked and carry-on luggage, so buy travel-size cans (around 50–100ml) if you intend to pack them rather than use them up locally.

    After the Bite: Muhi and Itch Relief

    No repellent system is perfect, so Japanese pharmacies sell dedicated anti-itch creams rather than expecting you to use general antihistamine cream. The classic is Ikeda Mohando’s “Muhi S” (orange box, roughly 600–900 JPY for a small tube), which combines a local anesthetic with an anti-inflammatory and works faster than most imported alternatives. There’s a kids’ version with a gentler formula and a cooling roll-on version for adults. Keep a small tube in your day bag during the warmer months — it’s one of the most useful 700-yen purchases you’ll make on a summer trip.

    Where to Buy and What to Expect to Pay

    You don’t need to hunt for a specialty shop — this is one of the easiest souvenir and necessity categories in Japan. Drugstores like Matsumoto Kiyoshi, Sundrug, and Tsuruha carry the full range and are typically open from around 10:00 to 21:00. Convenience stores (7-Eleven, FamilyMart, Lawson) stock a smaller selection — usually just patches and small sprays — but are open 24 hours, useful if you get bitten at 2am. For the best prices and widest selection in one stop, Don Quijote is hard to beat, often staying open very late or 24 hours in city locations; it’s the same chain worth checking for luggage needs, as covered in our guide to buying a suitcase in Japan. Almost everywhere now accepts PayPay or other QR code payments, so you don’t need to worry about having exact cash for a 500-yen coil box.

    Best Season and Common Mistakes

    Mosquito activity ramps up with the rainy season (tsuyu), roughly early June through mid-July depending on region, and stays high through the humid months until late September. If your trip overlaps with this window — which also overlaps with typhoon season in Japan — pack or buy repellent before you need it rather than after the first bite. The most common visitor mistakes: buying a mat-style Earth No Mat device assuming it works like a plug-in air freshener (it needs its specific mat refills, not any brand’s), forgetting that electric units require a working 100V outlet and won’t run on batteries, and relying only on room devices while ignoring that most bites happen outdoors at dawn, dusk, or near water — that’s when a spray or patch earns its keep. Buy a small starter kit (one spray, one patch pack, one tube of Muhi) for under 2,000 JPY total, and you’ll be far better equipped than most tourists who tough it out with nothing.

  • Buying Fireworks (Hanabi Sets) in Japan to Take Home: Rules and Where to Shop

    Every summer, convenience stores and discount shops across Japan roll out baskets of colorful hanabi (花火) sets — bundles of sparklers, smoke fountains, and mini roman candles wrapped in cheerful packaging that practically begs to be bought as a souvenir. Before you load up your suitcase with them, there’s one rule you need to know: you almost certainly cannot take them home with you on a plane. This guide explains why, where the exceptions (don’t) lie, and how to enjoy hanabi shopping in a way that actually works.

    The Rule: Fireworks Can’t Fly, Full Stop

    Fireworks of any kind — including small senko-hanabi sparklers — are classified as explosives/dangerous goods under the international aviation rules (IATA/ICAO dangerous goods regulations) that every commercial airline follows. This applies to checked luggage and carry-on bags equally, and it applies regardless of size, so a ¥300 pack of sparklers is treated the same as a box of large fountains. There is no “small enough to be fine” loophole, and no major airline — Japanese or foreign — grants exceptions for personal-use consumer fireworks. If airport security finds them, the hanabi set gets confiscated on the spot, and in some cases it can trigger a longer security interview that eats into your time before boarding.

    This surprises a lot of visitors because hanabi sets are marketed and displayed exactly like candy or snacks, sitting right next to the omiyage (gift) shelves. The packaging gives no hint that it’s a restricted item for travel.

    What About Shipping Them Home Instead?

    Mailing them isn’t a workaround either. Japan Post lists fireworks among the explosive and flammable items that cannot be sent through international mail or EMS, and private couriers (Yamato, Sagawa) follow similar restrictions for cross-border shipments. Domestic shipping within Japan — say, from a shop to your hotel — is sometimes possible through specific arrangements, but getting a hanabi set out of the country by post is not realistic for a typical traveler.

    So the honest takeaway is this: buy hanabi in Japan to use in Japan, not to pack for the trip home.

    Best Season and Timing

    Hanabi sets appear on shelves from roughly early June and stay in stock through late August, tapering off into September as summer festival season winds down. This window overlaps with Japan’s rainy season and the start of typhoon season, so if you’re planning a trip specifically to buy and set off hanabi outdoors, it’s worth checking our guide to typhoon season timing before locking in dates — a washed-out evening is a common disappointment for summer visitors.

    Where to Buy Hanabi Sets

    Budget (¥300–¥800): Convenience stores (7-Eleven, Lawson, FamilyMart) stock small seasonal packs of 10–15 sparklers for around ¥300–500 during peak summer. These are the easiest to grab on impulse but have the thinnest selection.

    Mid-range (¥800–¥2,500): Don Quijote is the go-to for variety — most locations carry entire aisles of assorted hanabi sets from June through August, with mixed bags of sparklers, hand-held fountains, and smoke items running roughly ¥800–¥2,000. Don Quijote stores are numerous in every major city, many open very late or 24 hours, and checkout is quick with cash, card, or QR payment apps — if you haven’t used PayPay or Rakuten Pay yet, our guide to QR code payments covers how tourists can set them up. AEON supermarkets and Loft also carry comparable mid-range sets, usually with nicer box presentation.

    Splurge (¥2,000–¥5,000+): Japan has regional traditions of premium senko-hanabi (thin, slow-burning sparklers that produce a distinctive chrysanthemum-shaped ember), with Yanagawa in Fukuoka and parts of Nagano known for higher-grade production. Boxed gift sets of these show up in department store basement floors (depachika) and specialty shops in summer, priced from around ¥1,500 up to ¥5,000 for elaborate presentation boxes. These burn more slowly and consistently than the mass-market versions and are genuinely a step up if you’re using them during your stay — though remember the same travel restriction applies no matter how nice the box looks.

    Where You’re Actually Allowed to Light Them

    Buying hanabi doesn’t automatically mean you can set them off anywhere. Most city parks and streets ban open flame and fireworks outright, and apartment buildings, riverside promenades, and beaches often post signs (“花火禁止” / hanabi kinshi) where they’re prohibited due to noise, litter, or fire risk. The reliable options are:

    • A ryokan or guesthouse with a private garden or courtyard — many rural inns explicitly welcome guests doing hanabi in summer and will point you to a safe spot
    • A rental cottage, campsite, or private beach area that permits it (check with the operator first)
    • Designated fireworks-permitted sections of certain riverbanks and beaches, usually marked with signage — ask locally or at your accommodation if unsure

    If you’re staying somewhere rural rather than central Tokyo or Osaka, your odds of finding a legitimate spot go up considerably.

    Common Mistakes to Avoid

    • Packing them “just in case” and hoping security misses it — security staff recognize hanabi packaging immediately; it’s a routine item on their list, not an edge case.
    • Lighting fireworks without water on hand — a bucket or bottle of water nearby is standard practice in Japan (and sometimes legally required locally) for dousing spent sparklers, which stay hot.
    • Buying sets without checking for a usage season — some packaging notes a recommended-use timeframe since the pyrotechnic composition can degrade; stick to sets purchased and used within the same summer.
    • Assuming any outdoor space is fair game — always look for kinshi (prohibition) signage or ask before lighting anything in a shared or public space.

    If You Still Want a Takeable Souvenir

    Since the hanabi themselves have to stay behind, many travelers redirect that souvenir budget toward something that actually survives the flight. Edible omiyage is the easiest swap — if you’re flying out of Fukuoka, our guide to Hakata Station’s basement food floor covers how to shop efficiently in your last hour. For something with more visual flair that nods to the same festival aesthetic, Kanazawa’s gold leaf goods make striking, fully packable gifts. Either way, enjoy the hanabi while you’re here — just plan to leave the box behind.

  • Kanazawa Gold Leaf Shopping: Foil-Wrapped Sweets, Cosmetics & Souvenirs Beyond Ice Cream

    Kanazawa Gold Leaf Shopping: Foil-Wrapped Sweets, Cosmetics & Souvenirs Beyond Ice Cream

    Photo by Tunafish on Unsplash

    Kanazawa produces roughly 99% of Japan’s gold leaf, a craft perfected here since the Edo period when the Maeda clan, barred from minting their own coins, channeled their wealth into hammering gold into sheets thinner than a human hair. Every tourist photo of the city’s famous gold-flecked soft-serve cone is real, but the ice cream is a gateway drug — the actual shopping, from skincare to sake cups to lacquered chopsticks, is better value and more interesting once you know where to look.

    Why Kanazawa Owns Gold Leaf

    Kanazawa’s humidity and water quality turned out to be ideal for the final hammering stage, where artisans pound gold between layers of handmade paper until it’s about 1/10,000th of a millimeter thick — thin enough to be translucent. That local monopoly means the city has an entire retail ecosystem built around leaf: dedicated craft shops, a public museum, and two dominant brands, Hakuza (箔座) and Hakuichi (箔一), that compete for your yen with flagship stores a few minutes apart.

    Higashi Chaya District: The Main Shopping Street

    Higashi Chaya-gai, the preserved teahouse district, is the center of gold leaf retail. It’s about a 20-25 minute walk from Kanazawa Station, or a short ride on the Kanazawa Loop Bus to the Hashiba-cho stop (roughly ¥200 per ride, or covered by a day pass). Most shops along the lattice-fronted main street open around 9:30-10:00am and close by 17:30-18:00; a few close on Tuesdays or Wednesdays without much warning, so don’t plan your only visit around one specific store.

    Hakuza’s flagship here, Hikari Gura, is a small storehouse entirely clad in platinum and gold leaf — free to walk into and photograph, and a good orientation stop before you buy anything. Hakuichi’s nearby shop sells the famous ice cream (around ¥900-1,100 for a cone wrapped in a full sheet of edible gold) alongside a much deeper product range inside, including sake, cosmetics, and tableware that most visitors never make it past the ice cream counter to see.

    If you want context on how the leaf is actually made, the Kanazawa Yasue Gold Leaf Museum is a five-minute walk away, with hand-beating demonstrations and an entry fee around ¥300. It’s small — budget 30-40 minutes — but it makes the markup on finished goods make a lot more sense.

    Beyond the Ice Cream: Sweets and Drinks

    Once you’ve had the cone, look for gold leaf castella (sponge cake) and gold leaf chocolate bars, both sold in gift-box sets from ¥800-2,000, which travel far better than ice cream and make reasonable omiyage for coworkers. Sake is the other classic carrier: small bottles or single-serve cups with gold flakes suspended inside run roughly ¥1,000-3,000, and several Kanazawa breweries sell locally alongside the leaf shops. You’ll also find gold-flecked amazake in the same stores — if you haven’t tried the drink itself, our amazake guide explains what it actually tastes like before you commit to a bottle with gold in it.

    Gold Leaf Cosmetics and Skincare

    This is the category most visitors miss entirely. Kanazawa’s leaf brands sell facial sheet masks infused with gold leaf flakes (boxes of 3-5 sheets, roughly ¥1,500-3,000), gold leaf-infused creams and serums marketed on collagen and anti-oxidant claims, and even gold leaf bath salts. These are genuinely popular with Japanese shoppers, not just a tourist gimmick, and they pack flat — a better suitcase use of space than a boxed sweet that needs to be eaten within a week.

    Souvenirs and Homeware

    For something that lasts, look at lacquerware: chopsticks with gold leaf inlay start around ¥2,000-3,000 a pair, and small lacquered dishes or sake sets with gold accents run ¥3,000-8,000. Folding fans, phone cases, and bookmarks finished in gold leaf sit in the ¥500-1,500 range and make easy gifts. At the top end, decorative folding screens, gold leaf-wrapped tea caddies, and large commissioned pieces move into the tens of thousands of yen — these are the kind of items shops will arrange international shipping for, since they’re too fragile and bulky to carry home in a suitcase.

    Getting There and Timing Your Visit

    From Tokyo, the Hokuriku Shinkansen runs direct to Kanazawa in about 2.5 hours. From Kyoto or Osaka, take the Thunderbird limited express to Tsuruga and transfer to the Hokuriku Shinkansen for the final leg — the whole trip takes roughly 2.5-3 hours since the shinkansen extension opened in 2024. Gold leaf shopping works in any season since it’s almost entirely indoors, which makes it a good anchor activity during Hokuriku’s grayer winter months. If you want to pair it with scenery, spring (early-mid April) and November foliage make Kenrokuen Garden, a 10-minute taxi ride away, worth combining with the same day. Travelers extending further into Ishikawa often continue on to the Noto Peninsula, though check current access conditions before planning that leg.

    Common Mistakes and Budgeting

    The biggest mistake is assuming anything gold-colored is actual gold leaf. Cheaper souvenirs — stickers, cheap postcards, trinkets sold near the station — are often brass-based imitation foil, not real kinpaku. Genuine products are usually labeled with the gold content or marked “純金箔” (pure gold leaf); if a shop assistant can’t tell you the gold percentage, assume it’s decorative foil, not the real thing, and price it accordingly. Second, don’t buy perishable gold leaf sweets too early in your trip — castella and chocolate have short shelf lives and gold flake sake should be drunk within a reasonable window, not saved for a flight home weeks later. Third, carry some cash: several of the smaller family-run craft shops in Higashi Chaya still prefer it, even though QR code payments are spreading fast elsewhere in the city, and a Japan Post Bank ATM at the station is a reliable backup if you run short.

    For budgeting: treat ¥500-1,500 items (fans, bookmarks, small sweets) as the easy, risk-free buy; ¥2,000-5,000 as the mid-range sweet spot for cosmetics boxes and lacquerware you’ll actually use; and anything above ¥10,000 as a considered purchase you should see in person and ask about shipping before committing to. If your gift list is bigger than expected and your suitcase isn’t, it’s worth knowing Kanazawa itself doesn’t have the bag selection that Kyoto or Osaka do — our guide to buying a suitcase in Japan covers where to pick up an extra bag if the gold leaf haul gets out of hand.

  • Buying a Suitcase in Japan: Samsonite Outlets, Don Quijote Deals & Repair Shops

    Buying a Suitcase in Japan: Samsonite Outlets, Don Quijote Deals & Repair Shops

    Photo by Tan on Unsplash

    It happens to almost every visitor to Japan eventually: the airline cracks a wheel off your suitcase, the zipper gives out on day three, or you simply bought more than you packed for. Fortunately, Japan is one of the easiest places in the world to solve a luggage emergency — you can find anything from a ¥2,980 throwaway case to a half-price Samsonite, often within walking distance of your hotel. Here’s where to go, what to expect to pay, and how to avoid the mistakes that trip up most tourists.

    Why Visitors End Up Suitcase Shopping Mid-Trip

    The most common scenario isn’t a broken suitcase — it’s an overflowing one. Travelers who stock up on kitchen knives in Seki, pottery in Mino, or a shelf’s worth of character goods from a Sanrio store regularly find their original suitcase won’t close by the end of the trip. The second most common cause is airline baggage handling — hard-shell cases, especially cheap ones, crack corners and lose wheels on domestic transfers. Either way, you have three realistic options: buy cheap and disposable, buy a proper replacement at a discount, or get the old one repaired. All three are covered below.

    Don Quijote: The Budget Fix

    Don Quijote (ドン・キホーテ, nicknamed “Donki”) is the default answer for most tourists because it’s everywhere, often open 24 hours, and carries a genuinely useful range of hard-shell carry-ons. Expect small 2-wheel or 4-wheel carry-on cases from around ¥2,980–¥5,980, and larger checked-size (24–28 inch) cases from roughly ¥5,980–¥9,980. These are generic, unbranded ABS or polycarbonate shells — fine for one flight home, not built for years of travel.

    Flagship stores with the biggest luggage sections include the MEGA Don Quijote branches in Shibuya, Shinjuku Kabukicho, and Namba/Dotonbori in Osaka. Most locations open around 10am and many run until 3am or 24 hours; check the specific branch, as hours vary by location. As a tourist, bring your passport — Don Quijote still processes consumption-tax discounts for qualifying purchases over ¥5,000, though it’s worth confirming the current refund mechanism at the register, since Japan’s tax-free system has been undergoing changes. You can pay with PayPay or another QR code wallet at checkout, which is often faster than fumbling with cash at a crowded Donki register.

    Samsonite Outlets: Real Quality at a Discount

    If you want something that will actually survive the flight home and several trips after, Japan’s outlet malls are the best value play. Two are especially useful for travelers:

    • Gotemba Premium Outlets (Shizuoka, near Mt Fuji) — about 90 minutes to 2 hours by direct highway bus from Shinjuku or Tokyo Station. Open roughly 10am–7pm (shorter in winter). Its Samsonite outlet store regularly discounts hardside carry-ons and checked cases 30–50% off department-store prices, and American Tourister (Samsonite’s budget sister brand) runs even cheaper.
    • Rinku Premium Outlets (near Kansai International Airport, Osaka) — connected by a free shuttle bus from Rinku Town Station, one stop from Kansai Airport. Open roughly 10am–8pm. This is the single most convenient outlet for anyone flying out of KIX, since you can buy a case the same day you depart.

    At either location, a mid-tier Samsonite hardside carry-on that retails for ¥50,000–70,000 often sells for ¥25,000–40,000, and clearance racks occasionally drop further. Try the telescoping handle and spin the wheels on the shop floor before buying — outlet stock includes discontinued colors and the occasional cosmetic second.

    Department Stores, Loft, and Tokyu Hands (Mid-Range)

    If an outlet trip doesn’t fit your itinerary, the luggage floor of any major department store (Isetan, Takashimaya, Daimaru) carries Samsonite, Proteca (the Japanese-made premium line from luggage maker Ace), and Rimowa at full price, with English-speaking staff in central Tokyo and Osaka branches. Loft and Tokyu Hands, the lifestyle chains found in almost every major shopping district, stock a smaller but decent range of mid-range suitcases and packing accessories if you want to browse travel gear and souvenirs in one stop. Expect ¥15,000–¥40,000 for a reliable mid-range case at these stores, and ¥60,000+ if you splurge on a Rimowa boutique in Ginza or Omotesando.

    Airport Shops: The Last-Resort Option

    Narita, Haneda, and Kansai airports all have luggage shops in the departures area, aimed squarely at travelers who’ve overbought souvenirs and need an extra bag before check-in. Selection is limited and prices run higher than anywhere else on this list — treat it as a safety net, not a destination. If you know you’re tight on space, it’s cheaper to solve the problem the day before at a Don Quijote or outlet mall than at the airport counter an hour before your flight.

    Getting a Suitcase Repaired Instead

    A broken wheel or zipper doesn’t always mean buying new. Mister Minit, a repair chain with counters inside train stations and department stores across Japan, handles luggage wheel and handle repairs, usually within a few days. Samsonite and Ace (maker of Proteca and Ace-branded luggage) both run their own repair services for their products — Samsonite Japan accepts cases by mail or at authorized service points, and Ace has repair counters in its directly operated stores. If your case is under warranty or was expensive enough to be worth saving, ask staff at any Samsonite or Ace retail store where to send it; repair costs for a wheel or zipper typically run a fraction of a new case’s price, though turnaround can take one to two weeks, so it’s not a same-trip fix unless you’re based in one city for a while.

    Timing, Common Mistakes, and Quick Tips

    • Shop early in the trip, not the last day. Outlet malls require a half-day round trip; don’t plan one for your departure morning.
    • Weigh your case before you buy. A cheap Don Quijote shell can add 3–4kg of dead weight versus a polycarbonate case, which matters if you’re already near your airline’s limit.
    • Check the season. Outlet malls get very crowded on weekends and during Golden Week or New Year sales — weekday mornings are calmer. If your trip overlaps typhoon season (roughly August–October), build in a buffer day, since bus and train schedules to Gotemba or Rinku can be disrupted.
    • Keep the receipt and tax paperwork if you used the tourist tax exemption — you may need to show it again at airport customs.
    • Don’t assume all outlet stock is current-season. Outlet pricing is low partly because the color or size you want may be sold out; call ahead or check the store’s site if you need a specific model.

    Whether you need a ¥3,000 stopgap or a proper Samsonite that’ll outlast the trip, Japan makes it easy to solve a suitcase problem fast — the only real decision is how much quality you want to pay for.

  • QR Code Payments in Japan: Using PayPay & Rakuten Pay as a Tourist

    QR Code Payments in Japan: Using PayPay & Rakuten Pay as a Tourist

    Photo by Juan Montano on Unsplash

    Japan’s reputation as a cash-only country is outdated. In most cities, you’ll see small shops, ramen counters, and even shrine omikuji stands with laminated QR codes taped to the register — and increasingly, those are PayPay or Rakuten Pay logos, not just credit card terminals. For tourists, these QR-based payment apps can save you from constant ATM runs and awkward coin-counting, but they come with real limitations: foreign card compatibility varies, top-up rules are confusing, and not every shop that displays a QR sticker actually takes foreign-issued accounts. Here’s how to actually use them.

    What PayPay and Rakuten Pay actually are

    Both are smartphone wallet apps that generate a QR code (or scan the merchant’s) to move money at checkout — no physical card, no tapping required, just your phone. PayPay is by far the more widely accepted of the two, used by an estimated 6+ million merchants across Japan, from major convenience store chains down to one-man yakitori stalls and farmers’ markets. Rakuten Pay has a smaller but still substantial footprint, strong in drugstores, Rakuten-affiliated retailers, and chain restaurants.

    The payment flow is simple once set up: at checkout you either show your app’s QR code for the cashier to scan (“user-presented”), or you scan a static QR code posted at the register and enter the amount yourself (“store-presented”). Small independent shops almost always use the static sticker method, which is slower and easier to fumble as a first-timer — practice at a convenience store before trying it at a crowded lunch spot.

    Can tourists actually sign up?

    This is the part most guides gloss over. PayPay launched an international version in 2023 called “PayPay for Travelers,” aimed specifically at short-term visitors, which lets you load money using an overseas-issued credit card (Visa or Mastercard) through the app without a Japanese bank account or phone number tied to a Japanese carrier. You download it from your home App Store/Google Play account before or after arrival, verify with your passport photo in-app, and top up directly in yen.

    Regular PayPay (the domestic version most residents use) is harder for tourists — it generally wants a Japanese phone number for SMS verification, and linking a foreign credit card for top-ups is inconsistent. Rakuten Pay is similarly resident-oriented: it’s easiest to use if you already have a Rakuten account, and foreign card support for top-ups has been limited historically, though this changes periodically, so check current app store reviews before counting on it. The practical takeaway: look specifically for “PayPay for Travelers” rather than the standard app if you want the smoothest tourist experience.

    Where it works — and where it doesn’t

    PayPay is genuinely everywhere once you start looking: Lawson and FamilyMart convenience stores, Don Quijote, many drugstores (Matsumoto Kiyoshi, Sundrug), izakaya chains, taxi apps like GO, and a huge number of independent restaurants and craft shops in neighborhoods like Jiyugaoka, where small boutique owners often prefer QR payments over the fees charged by card networks. In Kyoto’s narrow dining lanes like Pontocho Alley, you’ll still find a mix — some tiny counter restaurants are cash-only, others have a PayPay sticker right by the register.

    Rakuten Pay shows up most reliably at Rakuten-affiliated stores, Lotteria, some Mos Burger locations, and drugstore chains. Neither app is reliably accepted at shrines, temples, rural guesthouses, small-town markets, or vending machines (vending machines are almost entirely Suica/IC-card or coin only). If you’re heading somewhere remote — the Goto Islands, the Shiretoko Peninsula, or deep into the Mount Aso grasslands — assume cash is king and plan accordingly.

    Setting up before you land

    • Budget approach: Just bring cash and a Suica/Pasmo IC card for trains and convenience stores — skip QR apps entirely. This is still completely viable for a one- or two-week trip.
    • Mid-range approach: Download PayPay for Travelers a few days before departure, verify your passport, and link one overseas Visa or Mastercard. Top up ¥5,000–¥10,000 once you land and treat it as a convenience store and casual-dining tool.
    • Power-user approach: Combine PayPay for Travelers with a Suica set up in Apple Pay/Google Wallet on your phone. Use Suica for trains, vending machines, and kiosks; use PayPay for restaurants, shops, and taxis. This covers probably 90% of daily transactions without touching cash.

    Make sure your phone has a working data connection before you try to set anything up — see the guide to reliable wifi and SIM options in Japan if you haven’t sorted a local eSIM yet, since app verification and QR scanning both need live internet, not just offline maps.

    Common mistakes to avoid

    The single biggest error is confusing the two scan directions. If the cashier says “scan this” and points at a printed code on the counter, you open your app’s scanner and photograph their code, then type in the total yourself — getting this backward (showing them your personal QR when they expect to show you theirs) causes the most checkout-line confusion. Say “QR code, ii desu ka?” (is QR code okay?) before you start digging through your phone, since not every register that takes Suica also takes PayPay.

    Second mistake: assuming your home top-up card works instantly. Foreign cards sometimes get declined on first attempt due to how the bank flags the transaction — have a backup card or cash ready rather than holding up the line while you retry.

    Third: forgetting that neither app works well for anything you’d buy from a vending machine, a temple omamori stand, or a market stall at an outdoor festival — these remain overwhelmingly cash or IC-card territory, which matters if you’re timing a trip around festival season or Japanese public holidays when street-stall shopping spikes.

    A quick note on timing and connectivity

    There’s no strong seasonal angle to QR payments themselves, but connectivity and crowding do matter indirectly. During typhoon season, mobile networks can get congested or spotty in affected regions, which is exactly when QR app verification or top-ups might fail at the worst possible moment — carry extra cash as backup during typhoon-prone months (roughly June through October). Outside of that, QR payments work identically year-round; there’s no “better season” for using the apps themselves.

    Bottom line: PayPay for Travelers is worth setting up for a trip longer than a few days, especially if you’re shopping around boutique neighborhoods or eating your way through small restaurants where card fees push owners toward QR codes. Rakuten Pay is a nice-to-have if you stumble into compatible stores, but don’t build your payment strategy around it. Either way, keep physical yen on hand — no app, however convenient, has fully replaced cash in Japan yet.

  • Sanrio Shopping Guide: Hello Kitty, My Melody & Where to Buy Character Goods

    Hello Kitty turns 50 this decade, and she’s still outselling half the toy aisle in Japan. If you’re hunting for genuine Sanrio merchandise — Hello Kitty, My Melody, Cinnamoroll, Kuromi, Pompompurin — the good news is that Japan makes it easy, as long as you know which stores stock the exclusives and which ones just sell the same airport-gift-shop lineup you could find at home. Here’s where locals and serious collectors actually go.

    Sanrio Puroland: the theme park for superfans

    Sanrio Puroland in Tama City, western Tokyo, is the mothership. It’s an indoor theme park, so it runs rain or shine, and the gift shop inventory rotates with seasonal campaigns, anniversary lines, and park-exclusive plushies you genuinely cannot buy anywhere else — including online.

    • Getting there: Take the Keio Line or Odakyu Line to Tama-Center Station, then walk about 7 minutes. From central Tokyo it’s roughly 40–50 minutes door to door.
    • Hours: Typically 10:00–17:00 on weekdays and extended on weekends/holidays, but Puroland closes on irregular weekdays for maintenance — always check the official calendar before you go, since showing up on a closed day is the single most common mistake visitors make.
    • Admission: Entry tickets generally run ¥3,600–¥4,500 for adults depending on the date (weekday/weekend/peak pricing), on top of whatever you spend on merchandise.
    • Budget tip: If you only want to shop, not ride attractions, check whether a “shopping only” or evening discount ticket is being offered that day — Puroland periodically runs cheaper late-entry passes.

    Prices inside run from ¥500–¥1,000 for keychains and small snacks up to ¥4,000–¥8,000+ for large plush or limited-edition collaboration items. Lines for the most popular new releases (especially around character birthdays or Christmas) can form before opening, so arrive 20–30 minutes early if a specific item is your target.

    Sanrio World / Gift Gate flagship stores in central Tokyo

    If a trip out to Tama City doesn’t fit your itinerary, Sanrio’s official retail stores in central Tokyo carry most of the same seasonal lines.

    • Harajuku: The Sanrio flagship near Takeshita Street is the most convenient stop for most travelers — easy walking distance from Harajuku Station, open roughly 10:00–20:00, and stocked with Harajuku-exclusive designs you won’t find in suburban branches.
    • Ikebukuro: Sunshine City’s Sanrio outlet draws a slightly more local, collector-heavy crowd and often gets regional exclusives tied to Ikebukuro’s broader otaku/character-goods scene.

    Expect similar pricing to Puroland for small goods, with plush and apparel often cheaper here than at resale shops or overseas import stores. Stock moves fast on new character debuts — if you see a design you like, buy it on sight rather than planning to “come back later,” since Sanrio restocks are unpredictable and sell-through on limited runs can happen within days.

    Tokyo Character Street and department store character floors

    Tokyo Character Street, inside Tokyo Station’s Yaesu underground mall (near the Yaesu North exit, open daily roughly 10:00–20:30), has a dedicated Sanrio corner alongside Studio Ghibli, Pokémon, and other character shops — handy if you’re killing time before a Shinkansen and want one-stop shopping across multiple franchises rather than a Sanrio-only trip.

    Department stores like Isetan Shinjuku, Takashimaya, and Seibu Ikebukuro also run seasonal Sanrio pop-up corners, especially around Christmas and spring. These pop-ups are worth checking if you’re already browsing a department store’s stationery or gift floor — Japanese department stores stock a huge range of character stationery generally, which pairs naturally with a broader look at washi tape and planner goods if you’re building a stationery haul rather than a pure Sanrio one. Fans of Japan’s Hobonichi Techo planner culture will also recognize plenty of crossover — Sanrio runs its own techo and sticker lines every autumn for the following year.

    Discount and secondhand options

    For budget shopping, 100-yen shops (Daiso, Seria) carry simple Sanrio-licensed items — stickers, small pouches, chopstick sets — usually ¥100–¥330, official but far simpler than the flagship-store lines. Don’t expect plush or premium goods here.

    For rare or discontinued items, secondhand/resale shops like Book Off’s “Hobby Off” branches and the Mandarake chain (Nakano Broadway, Shibuya) stock vintage Sanrio — including decades-old Hello Kitty items that collectors specifically seek out. Prices vary wildly by rarity, from a few hundred yen to tens of thousands for discontinued 1970s–90s pieces.

    Best timing and seasonal releases

    Sanrio refreshes merchandise around several fixed points in the year: cherry-blossom designs in March–April, summer/Puroland anniversary items around July–August, Halloween lines in October, and Christmas collections from November. Hello Kitty’s own birthday (November 1) often triggers a dedicated capsule collection. If your trip lines up with a Japanese public holiday week, note that Puroland and Harajuku get noticeably more crowded — it’s worth cross-checking which 2026 holiday dates to avoid or plan around before booking Puroland tickets, since Golden Week and school holiday periods can mean long queues for both entry and popular merchandise.

    Common mistakes to avoid

    • Buying everything at the airport: Narita and Haneda gift shops carry a limited, generic Sanrio selection at a markup. Save your real shopping for Harajuku, Puroland, or Tokyo Character Street, and only treat the airport as a last-minute top-up.
    • Assuming item availability carries over: A design sold at Puroland may not exist at the Harajuku store, and vice versa. If you have a specific character or collaboration in mind, check Sanrio’s official site or social accounts for which location stocks it before traveling across town.
    • Underestimating luggage space: Plush and boxed gift sets are bulky. If you’re flying out through Narita or Haneda and taking the airport limousine bus back to your hotel, factor in that you’ll be hauling shopping bags on and off — a foldable tote packed in your day bag in advance saves a lot of hassle.
    • Losing small items: Pins, charms, and keychains fall off bags easily. If something goes missing in a station or shop, Japan’s koban lost-and-found system is worth knowing about — items turned in to station staff are often recoverable within a day or two.

    Whether you’re after a single Hello Kitty keychain or chasing a Puroland-exclusive plush, spreading your shopping across a flagship store visit and one theme-park trip — timed outside peak holiday weeks — will get you the widest selection without the worst crowds.

  • Washi Tape: Japan’s Decorative Masking Tape and the Brands Worth Buying

    Washi Tape: Japan’s Decorative Masking Tape and the Brands Worth Buying

    Photo by Madeline Liu on Unsplash

    If you’ve ever seen rolls of patterned paper tape stacked like candy in a Tokyo stationery shop, you’ve found washi tape — one of Japan’s most addictive, lightweight souvenirs. It’s cheap, it packs flat, and it comes in thousands of designs, from indigo dye patterns to tiny Shiba Inu dogs. But not all washi tape is equal, and knowing which brands started the craze (and which are just imitating it) will save you money and disappointment.

    What Makes Washi Tape Different From Regular Tape

    Washi tape is made from washi — traditional Japanese paper, often derived from mulberry or similar plant fibers — coated with a low-tack adhesive. That weak adhesive is the whole point: it’s designed to be torn by hand (no scissors needed), repositioned, and peeled off cleanly from most surfaces without leaving residue. It’s not a strong packing or mounting tape, and treating it like one is the single most common disappointment first-time buyers run into.

    Standard rolls are usually 15mm wide, though you’ll find skinny 7mm rolls and wide “deco” rolls up to 50mm or more. A typical roll holds 5–10 meters of tape.

    mt: The Brand That Started It All

    The modern washi tape boom traces back to one company: Kamoi Kakoshi, an industrial masking tape manufacturer based in Kurashiki, Okayama Prefecture, that has been making adhesive tape since the 1920s. In 2008, the company repackaged its factory know-how into a consumer product called “mt” (short for masking tape), aimed at designers and crafters rather than construction sites. It’s widely credited with turning masking tape into a design object, and the brand remains the benchmark everyone else is compared to.

    mt rolls typically run about ¥200–250 for a single 15mm x 10m roll, with boxed sets of 2–3 rolls around ¥450–700. Wider deco rolls and special textured or foil finishes run ¥450–700 each. Kurashiki itself is worth the detour if you’re already routing through Okayama — the city’s Bikan Historical Quarter of canal-side warehouses is a pleasant half-day stop, and local stationery and souvenir shops there stock mt tape alongside Kurashiki-specific designs you won’t find in Tokyo. Okayama Station is a shinkansen stop on the Sanyo line, so if you’re coming from Osaka or Hiroshima, check how to book Shinkansen tickets online before you go, and keep in mind that Japan’s transfer rules are more forgiving than you’d expect if your connecting train runs late.

    Other Brands Worth Seeking Out

    Once you start looking, the shelf gets crowded fast. A few names are worth knowing:

    • Classiky — a Himeji-based brand known for muted, vintage-feeling colorways and retro European-inspired patterns. Pricier than most, but the color palettes are genuinely distinct.
    • BGM — known for foil-accented and glitter tapes, popular for scrapbooking and gift wrapping; usually ¥300–450 per roll.
    • Shinzi Katoh Design — illustrated, character-driven designs aimed at a younger or gift-buying crowd.
    • Craft Design Technology — minimalist, monochrome and single-color tapes for people who want function over cuteness, sold at design-focused shops like Loft.
    • Daiso’s house brand — not a design label so much as the budget option, but genuinely usable for everyday wrapping and labeling.

    A quick way to spot a “real” washi tape versus a cheap plastic-film imitation sold in some airport gift shops: genuine paper tape tears cleanly by hand with a slightly fibrous edge and has a matte, slightly textured surface. Shiny, stretchy tape that resists tearing is usually a PVC tape dressed up with a washi-style print.

    Where to Buy It

    You don’t need to hunt — washi tape is sold everywhere stationery is sold in Japan.

    • Itoya (Ginza, Tokyo) — the 12-floor flagship “G. Itoya” near Ginza Station has a dedicated stationery floor with one of the city’s deepest washi tape selections, including limited designs. Open daily, roughly 10:00–20:00.
    • Tokyu Hands and Loft — nationwide chains (branches in Shibuya, Shinjuku, Umeda, and most major cities) with large tape walls covering mt, BGM, and in-house lines. Typically open 10:00–21:00.
    • Sekaido (Shinjuku, Tokyo) — an art-and-stationery megastore near Shinjuku Station with competitive prices and a huge selection; open daily, roughly 10:00–20:00.
    • Daiso — for the budget end, any branch will have a basic rack, usually ¥110–220 per roll including tax.

    Department store stationery floors (Tokyu, Isetan, Loft outposts inside them) are also reliable, especially if you’re already shopping for other Japanese souvenirs — it’s easy to combine a stationery stop with a browse through gift-worthy skincare, like our guide to Japanese hand cream and lip balm brands, or edible souvenirs such as our furikake buyer’s guide.

    Budget, Mid-Range, and Splurge Picks

    • Budget (¥110–220/roll): Daiso’s house-brand tape. Fine for everyday wrapping, journaling, and labeling; designs are simpler and the paper is slightly thinner than name brands.
    • Mid-range (¥200–350/roll): Standard mt rolls and Craft Design Technology. This is the sweet spot for most souvenir shopping — good paper quality, huge design range, widely available.
    • Splurge (¥450–1,000+): Limited-edition collaborations (mt has done collabs with artists and museums over the years), Classiky’s vintage sets, foil and glitter BGM rolls, and boxed gift sets. These make better gifts than personal craft supplies, since you’re partly paying for packaging and novelty.

    Common Mistakes to Avoid

    Don’t buy washi tape expecting it to hold heavy objects or survive outdoor weather — it’s a decorative, repositionable tape, not a structural one. Don’t assume every “washi-style” tape sold in tourist-heavy areas (airports, train station kiosks) is the real paper product; check that it tears cleanly by hand rather than stretching. And don’t overbuy single rolls at souvenir-shop markups when the same mt or Classiky designs are usually cheaper at Loft, Tokyu Hands, or Itoya — tourist gift shops near major temples sometimes charge ¥100–200 more per roll for identical stock.

    Best Time to Shop

    Washi tape isn’t seasonal the way food or clothing is, but brands do release seasonal print runs — sakura pastels in spring, autumn-leaf colorways around November, and Christmas or New Year designs from late November through December. These limited runs sell out at flagship stores first, so if a specific seasonal pattern catches your eye, buy it on sight rather than planning to come back later in the trip.