Japan Trove

Category: Shopping

Honest guides to shopping in and buying from Japan — skincare and cosmetics, snacks and sweets, whisky and sake, hobby and character goods, kitchenware and homeware, and exactly how to ship it all home. We recommend what is genuinely worth it and flag the catches, from voltage and region locks to tax-free rules.

  • Kojima Jeans Street: Okayama’s Denim Shopping Pilgrimage

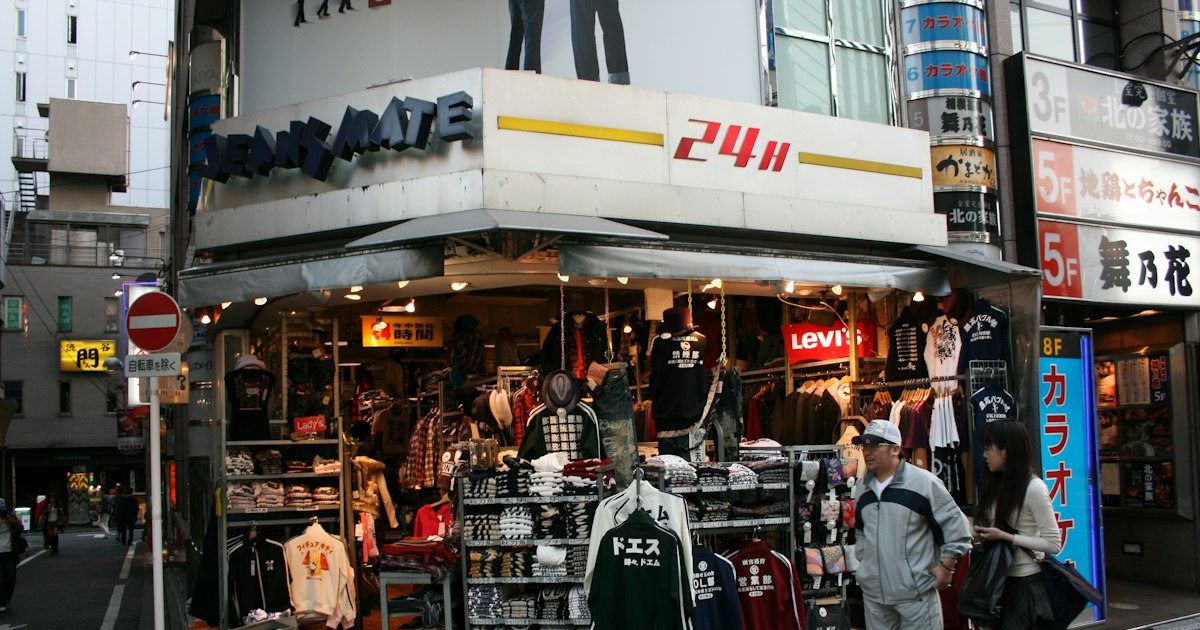
    Tucked into a quiet corner of Kurashiki City, a 400-meter stretch of shopfronts called Ebisu-dori has a disproportionate claim to fame: it’s where Japan’s domestic denim industry was born, and today it’s the closest thing the country has to a pilgrimage site for jeans obsessives. Kojima Jeans Street is lined with roughly 40 shops selling raw selvedge denim, indigo-dyed everything, and the occasional jeans-shaped phone booth. If you care about where your clothes come from — or you just want a genuinely well-made souvenir — this is a worthwhile detour from the usual Okayama/Kurashiki sightseeing loop.

    Why Kojima Is Japan’s Denim Capital

    Kojima’s denim story starts with school uniforms, not jeans. The area had a long tradition of cotton weaving and tabi (traditional sock) manufacturing, which gave it the textile infrastructure and skilled labor to pivot into jeans production in the 1960s. Big John, founded here, produced Japan’s first domestically made jeans in 1965, and other brands followed — Betty Smith, Japan Blue (maker of the well-regarded Momotaro Jeans line), Studio D’Artisan, and smaller workshops like Collect and Denim Sabbath. Many still weave, dye, and sew within a short drive of the street, which is part of why the quality-to-price ratio here is hard to beat elsewhere in Japan.

    Getting to Kojima Jeans Street

    From Okayama Station, take the JR Uno Line to Kojima Station — it’s about 30-40 minutes depending on the train, with no transfer needed on most services. From Kojima Station, Jeans Street is roughly 1.5km away, about a 20-25 minute walk. On weekends and holidays, a community shuttle (the “Jeans Bus”) runs between the station and the street for a small flat fare, usually around 100 yen — check current schedules locally, as it doesn’t run daily. A taxi from the station takes about 5 minutes and costs roughly 1,000 yen. If you’re road-tripping through the Chugoku region, Kojima is an easy stop with parking available near the street; for longer self-drive itineraries, see our guide on renting a campervan or RV in Japan.

    What to Buy: Brands and Price Ranges

    Prices vary a lot by brand and construction method, so it helps to know roughly what tier you’re shopping in before you walk in.

    • Budget (around 8,000-14,000 yen): Entry-level stretch or lighter-weight denim from brands aimed at everyday wear. Betty Smith and some of the smaller general stores on the street carry these.
    • Mid-range (around 18,000-28,000 yen): Classic 100% cotton selvedge denim, often rope-dyed and sewn on vintage shuttle looms. This is where most serious denim shoppers end up — brands like Momotaro Jeans and Japan Blue sit in this bracket, and it’s genuinely comparable in quality to premium denim brands that charge far more overseas.
    • Splurge (35,000 yen and up): Limited runs, hand-finished details, natural indigo dyeing, or collaborations. Studio D’Artisan and some Momotaro special editions fall here, and a few shops sell museum-quality pieces well past 60,000 yen.

    Beyond jeans themselves, the street is also good for indigo-dyed accessories — wallets, tote bags, caps, and even denim-wrapped snacks and drinks sold as novelty souvenirs. These make easier gifts than a pair of jeans you can’t try on for someone back home.

    Custom Jeans and Factory Experiences

    Several shops offer hands-on experiences beyond regular retail. Betty Smith runs a jeans-making workshop where you sew your own pair from a pre-cut kit, typically taking around 1.5-2 hours; reservations are recommended, especially on weekends, and the experience fee is usually in the 15,000-20,000 yen range (on top of material costs in some packages). A few shops also offer custom embroidery or patch personalization for a few hundred to a couple thousand yen, which is a nice way to make an off-the-rack pair feel one-of-a-kind without committing to a full bespoke order.

    Best Time to Visit and Shop Hours

    Most shops open around 10:00 and close between 18:00 and 19:00. Individual stores — especially the smaller, specialist ones — often take an irregular weekday off, commonly midweek, so it’s worth confirming a specific shop’s hours if you’re making a special trip to see it. The street itself is pleasant to walk in spring (March-May) and autumn (October-November); Okayama’s summers are hot and humid enough to make browsing indoor racks far more appealing than lingering outside, and winter is quieter but still fully operational. Weekends bring slightly more foot traffic and the Jeans Bus shuttle, but Kojima never feels crowded the way central Kyoto or Tokyo shopping streets do — this is a low-stress shopping day even during Japanese holiday periods, though a handful of shops do close around New Year’s.

    Common Mistakes to Avoid

    • Expecting outlet prices. This is a destination for quality denim, not discount shopping — most visitors budget at least 20,000 yen if they want a pair that reflects what the street is known for.
    • Not bringing cash. While larger shops take credit cards, some of the smaller, family-run boutiques are cash-only or have card minimums. An IC card won’t help you here the way it does on point-card-friendly convenience store and supermarket chains — bring yen.
    • Underestimating the walk from the station. Twenty-five minutes doesn’t sound like much until you’re doing it in August heat; check the shuttle bus schedule first if you’re visiting in summer.
    • Buying raw denim without asking about sizing. Unwashed selvedge denim shrinks after its first few washes — staff are generally happy to explain how much room to size up, so ask before you buy rather than guessing.
    • Treating it as a quick 20-minute stop. Between browsing multiple shops, a workshop, and lunch, most visitors find a half-day is the realistic minimum to actually enjoy it rather than rush it.

    Caring for Your New Raw Denim

    If you buy unwashed selvedge denim, resist washing it for the first several months of wear — that’s how denim fans build up the fading patterns the fabric is known for. When you do eventually wash it, turn the jeans inside out, use cold water, and skip fabric softener, which can mute the indigo over time. If you want to know which detergents sold in Japanese supermarkets are worth bringing home or using while you’re here, our guide to Japanese laundry detergent and fabric softener brands worth buying covers the options that are gentlest on dark, dyed fabric.
  • BookOff: Japan’s Secondhand Media Chain and the Deals Worth Hunting

    BookOff: Japan’s Secondhand Media Chain and the Deals Worth Hunting

    Photo by amandazi photography on Unsplash

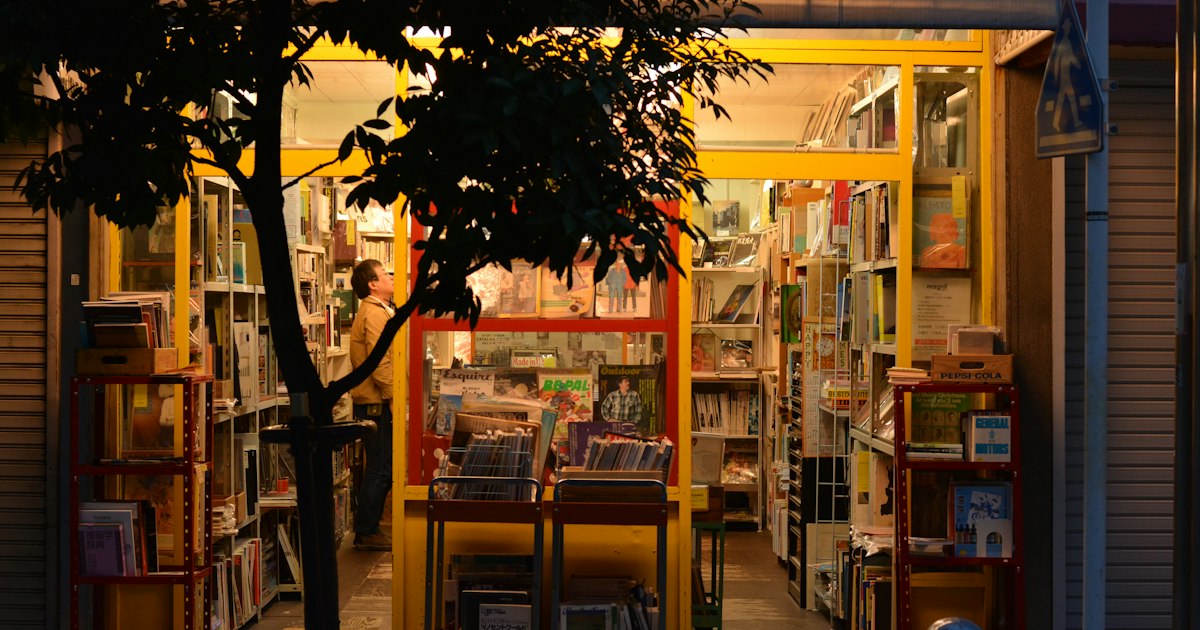
    If you’ve wandered past a store with a yellow-and-black sign stacked floor to ceiling with manga, CDs, and old video game cartridges, you’ve found BookOff — Japan’s biggest secondhand media chain and one of the best low-stakes shopping stops for any visitor. It’s not glamorous, but for travelers willing to dig, it’s one of the few places in Japan where you can walk out with an armful of goods for less than the price of a convenience store lunch.

    What Exactly Is BookOff?

    BookOff (ブックオフ) started in 1990 as a secondhand bookstore and has grown into a nationwide chain of well over 700 branches, plus sister brands under the same corporate umbrella: Hard Off (used electronics, instruments, cameras), Off House and Mode Off (secondhand clothing), and Garage Off (sporting goods and outdoor gear). You’ll see the main BookOff format in nearly every city center and train station shopping street, while the larger “BookOff Super Bazaar” stores — usually in suburban roadside locations with parking — stock everything from furniture to clothing alongside the usual media.

    The core inventory at a standard store is books, manga (comics), CDs, DVDs, Blu-rays, video games and consoles, and trading cards. Larger branches add toys, idol goods, cameras, and occasionally vintage electronics.

    What’s Worth Buying (and What Isn’t)

    For foreign visitors, the best finds tend to be things that are either expensive or hard to find back home:

    • Manga sets — complete runs of older series often sell for a fraction of new retail, especially once a series has been out for a few years.
    • Japanese photography and art books — these can be pricey new but show up secondhand in excellent condition.
    • Retro and used video games/consoles — Japanese releases, regional variants, and older handhelds are common.
    • J-pop, city pop, and soundtrack CDs — a genuinely good hunting ground if you’re into Japanese music, including obi-strip first pressings.
    • Used cameras at Hard Off locations — point-and-shoots and film cameras in working condition, often cheaper than at a dedicated camera shop.

    What’s usually not worth your suitcase space: English-language books (rare and not particularly cheap), bulky DVDs/Blu-rays if your home region uses a different disc format, and anything you could get just as easily at a 100-yen shop. If you’re specifically after anime figures, cel art, doujinshi, or rarer otaku collectibles, Mandarake is the stronger specialist — see our guide on Mandarake: Japan’s Secondhand Otaku Treasure Trove and How to Shop It for how that chain differs and how to navigate its pricing tiers.

    Pricing: How Cheap Is “Cheap”?

    Prices are marked directly on a small sticker on each item, tax not included until checkout (8% for books/food, 10% for most other goods). Rough real-world ranges:

    • Manga volumes: ¥100–¥400 for common back-catalog titles, up to ¥1,000+ for recent or in-demand releases.
    • Paperback novels and art books: ¥100–¥600, though large-format photo books can run ¥1,500–¥3,000.
    • CDs: ¥100–¥500 for older or mainstream releases, more for rare pressings.
    • DVDs/Blu-rays: ¥300–¥1,500 depending on title and condition.
    • Video games: ¥500–¥3,000; retro cartridges vary wildly based on rarity.

    The ¥100 shelf (sometimes a dedicated bin near the entrance) is where the real bargain-hunting happens — rummage through it and you’ll usually find something worth taking home even if it wasn’t on your list.

    Where to Find the Best Branches

    BookOff is genuinely everywhere, but a few areas reward a dedicated visit. Akihabara and Nakano (near Nakano Broadway) have several branches close together with deep manga and game selections. Shibuya and Shinjuku locations tend to have strong CD/DVD sections given the foot traffic of music fans. If you want the full department-store experience — clothing, furniture, and media all in one warehouse-sized store — look for a “Super Bazaar” branch on the edge of a city, which usually requires a short taxi or bus ride from the nearest station but rewards you with far more stock to sort through.

    Typical opening hours run from around 10:00 to 21:00 or 22:00, seven days a week, though smaller urban branches may close earlier. Hours vary store to store, so it’s worth a quick map check before you go, especially if you’re planning a stop late in the evening.

    Tax-Free Shopping and Payment

    Some larger BookOff and BookOff Super Bazaar locations are registered tax-free shops for overseas visitors, meaning you can get the consumption tax refunded on a same-day purchase total over ¥5,000 (before tax) when you show your passport at a dedicated tax-free counter. Not every branch offers this — look for a tax-free sign near the entrance or ask staff (“tax-free, arimasu ka?”). Before your trip, it’s worth registering your passport details through Visit Japan Web: How to Pre-Register Customs, Immigration & Tax-Free Shopping Before You Land, which speeds up the paperwork at checkout considerably.

    Most branches accept cash and major IC cards (Suica/Pasmo), and larger stores take credit cards, but don’t assume every small branch does — carrying some cash is the safer bet. If you’re a frequent shopper, BookOff also has its own point card system, which sits alongside the broader landscape of Japanese loyalty programs explained in our guide to Japan’s Store Point Card Culture — generally not worth signing up for on a short trip, but handy to know about if you’re staying long-term.

    Timing Your Visit and Common Mistakes

    There’s no strict “season” for BookOff shopping, but stock tends to refresh most heavily after Japan’s graduation and moving season in March and April, when people clear out apartments, and again after New Year’s as households declutter. Visiting a Super Bazaar branch on a weekday morning also means first pick of whatever just came in, before weekend crowds thin it out.

    The most common mistake visitors make is assuming BookOff will have English-language stock or English-speaking staff — it won’t, beyond basic phrases. Bring a translation app for checking condition notes or searching titles. The second mistake is skipping the Off House and Mode Off clothing branches entirely; these secondhand clothing arms occasionally turn up excellent vintage Americana and old denim, in the same spirit covered in our piece on Vintage Levi’s & Americana: Why Japan Is a Treasure Hunt for Old American Clothing. Finally, don’t expect to haggle — prices are fixed, and the only real strategy is checking multiple branches, since stock and pricing differ store to store even within the same city.

    BookOff won’t give you the curated thrill of a specialist vintage shop, but as a low-cost, low-effort way to bring home a genuine slice of Japanese pop culture, it’s hard to beat.

  • Japan’s Store Point Card Culture: T-Point, Rakuten Point & d-Point Explained for Tourists

    Japan’s Store Point Card Culture: T-Point, Rakuten Point & d-Point Explained for Tourists

    Photo by Olegs Jonins on Unsplash

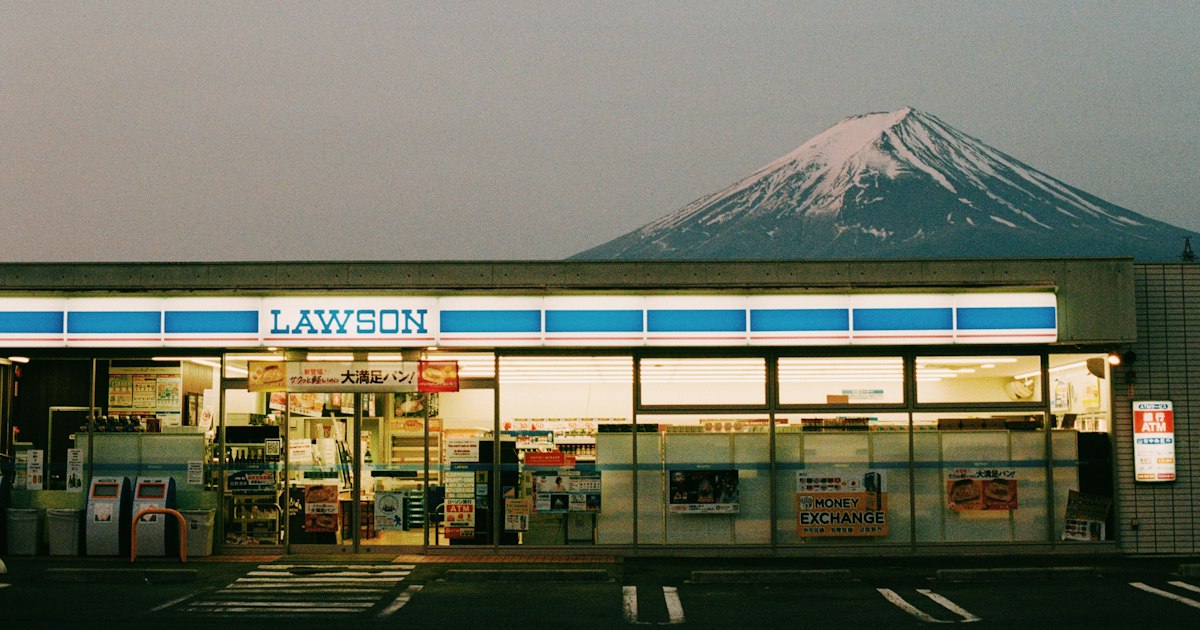
    Stand at a Japanese convenience store register for more than a few seconds and the cashier will ask you something fast and slightly rhetorical-sounding: “Point card wa o-mochi desu ka?” (“Do you have a point card?”). If you don’t speak Japanese, it’s easy to just nod along and miss out on a small but real discount — or worse, hand over a card you didn’t realize had a bunch of unrelated rules attached. Japan runs on a handful of competing “kyoutsuu point” (common point) ecosystems, and three names come up constantly: T-Point (now folded into V Point), Rakuten Point, and d-Point. Here’s what each one actually is, where it works, and whether it’s worth the hassle for a two-week visitor.

    Why Japan’s Point Card System Confuses Tourists

    Unlike a single national loyalty program, Japan has several overlapping networks, each backed by a different corporate alliance — a convenience store chain, a mobile carrier, an e-commerce giant, a credit card issuer. A single store often accepts two or three different point systems simultaneously, and which one benefits you depends on which app or card you’re already carrying. For tourists with no Japanese phone number, no residence card, and a short stay, the calculus is simpler than it looks: usually not worth the signup friction, except in a couple of specific situations covered below.

    T-Point’s 2024 Rebrand to V Point: What Changed

    T-Point was Japan’s original mass-market point system, launched in 2003 by Culture Convenience Club (the company behind Tsutaya video/book rental shops) and historically tied to Family Mart convenience stores, ENEOS gas stations, and drugstore chains like Welcia and Sundrug. If you see an old “T” logo sticker at a shop counter, that history is why.

    In April 2024, T-Point merged with SMBC’s existing Vポイント (V Point) program to create a single, unified V Point. The standalone T-Point card and app stopped working around April 22, 2024 — existing T-Point balances were converted into V Points, and the old T-Point branding is being phased out store by store. Practically, this means: if a clerk still says “T-point,” they likely mean the new V Point system, and a card or QR code in the V Point app is what you’d actually use now. For a short trip, there’s little reason to set this one up — Family Mart’s own app-based rewards and standard tax-free purchases (see our guide to registering with Visit Japan Web before you land) will matter far more to your budget than V Point accumulation.

    Rakuten Point: The Easiest One for Visitors

    Rakuten Point is the most tourist-friendly of the three, mainly because it’s tied to an account system (not a Japanese phone number requirement in the same strict way) and because Rakuten Pay, the QR-code payment app under the same ecosystem, is accepted at an increasing number of independent shops, drugstores, and chains like McDonald’s Japan. Rakuten’s core businesses — Rakuten Ichiba (online mall), Rakuten Travel, Rakuten Books — all earn and spend the same points, at a standard rate of 1 point per 100 yen spent (roughly 1%), and points are worth a flat 1 yen each with no redemption minimum.

    Rakuten also runs periodic bonus campaigns, most notably the “Rakuten Super Sale,” which lands roughly quarterly (around March, June, September, and December) and can multiply point-back rates significantly for online purchases. If you’re already buying Japanese goods online before or after your trip — camera gear, skincare, anime merchandise — creating a free Rakuten account and routing purchases through Rakuten Ichiba or Rakuten Pay is one of the few point-card moves that genuinely pays off for a visitor, since it doesn’t require an in-person store visit or a Japanese SIM to set up.

    d-Point: NTT Docomo’s Everyday Discount Network

    d-Point belongs to NTT Docomo, Japan’s largest mobile carrier, but you don’t need a Docomo phone plan to use it. The d-Point app and physical d-card work at a wide partner network that includes Docomo’s own shops, Mister Donut, Matsumoto Kiyoshi drugstores (a favorite tourist stop for cosmetics and over-the-counter medicine), ENEOS gas stations, Kappa Sushi conveyor-belt restaurants, and Big Echo karaoke chains. Many Lawson convenience stores also let customers link d-Point as their chosen common-point program at checkout. The earn rate mirrors the others: typically 1 point per 100 yen, 1 point = 1 yen on redemption.

    d-Point’s app signup generally wants a Japanese phone number for SMS verification, which is the real sticking point for short-term visitors. The workaround that actually matters: you can usually request a free physical d-Point card at a partner store counter (no phone number needed) and just scan it at checkout — you lose the app’s purchase history and bonus notifications, but you still accumulate and redeem points on the card itself.

    Should Tourists Bother Signing Up?

    For most trips under two weeks, the honest answer is: skip it. The points you’d accumulate on typical tourist spending — a few convenience store snacks, a drugstore run, a donut — amount to maybe 50-150 yen total by the time you fly home, and you can’t easily use leftover points once you’re back in your home country since redemption usually happens at the same Japanese storefronts. It’s one more card or app to manage for a marginal return.

    The exceptions: if you’re staying a month or longer, doing repeat drugstore runs at Matsumoto Kiyoshi, or buying Japanese goods online before/after your trip through Rakuten, signing up is quick, free, and the savings compound. If you’re already struggling to keep track of your purchases at self-checkout machines, adding a point card to the mix is worth doing only after you’re comfortable with the basic transaction flow — our guide on self-checkout and bagging your own groceries in Japan covers that learning curve in detail.

    Common Mistakes with Store Point Cards

    • Assuming one card works everywhere. A V Point card won’t earn anything at a d-Point partner store, and vice versa — these are separate, competing ecosystems, not a single national system.
    • Trying to register via app without a Japanese number. Most apps gate full registration behind SMS verification. A physical card picked up at the counter sidesteps this for basic point accumulation.
    • Forgetting to present the card before payment. Points are almost always logged before the transaction is finalized, not after. If you pay first and then ask, most registers can’t retroactively add points.
    • Confusing point cards with tax-free paperwork. A point card discount and consumption-tax exemption are unrelated systems — the latter requires your passport and a minimum 5,000 yen purchase at a tax-free counter, not a point scan.
    • Letting a card expire unused. Some systems (notably the old T-Point, now V Point) deactivate accounts after a period of inactivity, wiping accumulated points.

    Quick Reference: Where Each Point System Works

    • V Point (formerly T-Point): Family Mart, Tsutaya, ENEOS, Welcia/Sundrug drugstores.
    • Rakuten Point: Rakuten Ichiba, Rakuten Travel, Rakuten Books, plus any shop accepting Rakuten Pay (expanding list including McDonald’s Japan).
    • d-Point: Docomo shops, Mister Donut, Matsumoto Kiyoshi, ENEOS, Kappa Sushi, Big Echo, select Lawson stores.

    None of these require luggage space or a special trip to collect — the cards are free and handed over at the register on request. If your trip includes a serious shopping list, Japan’s point culture is a minor curiosity rather than a strategy; your bigger wins will come from timing purchases around tax-free thresholds and seasonal sales rather than chasing 1% back on a donut.

  • Self-Checkout & Bagging Your Own Groceries in Japan: What First-Timers Get Wrong

    Self-Checkout & Bagging Your Own Groceries in Japan: What First-Timers Get Wrong

    Photo by Beth Macdonald on Unsplash

    Japanese supermarkets and convenience stores have quietly shifted most of their checkout lanes to self-service over the past few years, and almost nobody explains the system to tourists. The machines are efficient once you know the sequence, but the unwritten rules — where to bag, which basket goes where, whether to tap or insert your card — trip up first-timers constantly. Here’s what actually happens at the register, and the mistakes to avoid.

    The Two-Step System: Pay First, Then Bag

    Almost every Japanese supermarket (Life, Seijo Ishii, Maruetsu, Ito-Yokado) and convenience store (7-Eleven, Lawson, FamilyMart) splits checkout into two physically separate stations. Station one is the register, where you scan and pay. Station two is a long counter nearby, usually against a wall or window, with empty baskets stacked underneath and a roll of plastic bags or a box of paper ones.

    The mistake visitors make: standing at the register trying to bag their items while the next customer waits behind them. This blocks the line and is the single biggest self-checkout faux pas in Japan. The correct move is to transfer your scanned items from the checkout basket into a fresh basket (or carry them in the original one), walk to the bagging counter, and pack there at your own pace. Nobody will rush you at the bagging counter — that’s its entire purpose.

    How the Scan-and-Pay Machines Actually Work

    Most self-checkout machines fall into one of two types:

    • Full self-scan: You scan every barcode yourself, then pay at the same machine. Common at Life, Daiei, and most convenience stores. Look for a green “開始” (start) or “はじめる” button on the touchscreen to begin.
    • Semi-self-checkout: A staff member scans your items for you at a regular-looking counter, then slides the basket over and you move to a separate payment kiosk to tap your card or insert cash. This is extremely common at supermarkets like Seijo Ishii and Peacock. Watch for the staff member gesturing toward the kiosk — that’s your cue to walk over, not keep standing at their counter.

    Payment kiosks almost always accept IC transit cards (Suica, PASMO, ICOCA), major credit cards via tap, and cash. Cash machines in Japan are nearly always bill-and-coin trays rather than slots — you pour coins into a tray and feed bills individually into a slot above it; the machine counts and dispenses change automatically. Don’t hand cash to a machine the way you’d hand it to a cashier — there’s no human on the other side to catch an underpayment, so take a second to confirm the total on screen before inserting money.

    Bring Your Own Bag, or Pay for One

    Since a nationwide plastic bag law took effect in July 2020, retailers must charge for plastic bags — typically ¥3 to ¥10 depending on size and store. Convenience stores will ask “レジ袋はご利用ですか?” (would you like a shopping bag?) at the register; a simple “daijoubu desu” (no, I’m fine) or a hand-wave declines it. Supermarkets assume you’re bagging yourself and won’t ask at all — you either bring your own reusable bag (eco-bag, or “マイバッグ”) or buy one at the bagging counter.

    Budget travelers: a ¥100 foldable eco-bag from Daiso or a convenience store pays for itself after two or three grocery runs. If you’re staying in an Airbnb or hotel room with a kitchenette and plan to cook even a little, it’s worth buying one on day one rather than accumulating a pile of paid plastic bags. Mid-range option: most supermarkets sell sturdier insulated bags (¥300–¥800) with a cold-pack lining, genuinely useful in Japan’s humid summers if you’re carrying ice cream or raw fish back to a hotel.

    Tape, Not Tying: How Bagging Actually Works

    At the bagging counter you’ll usually find small rolls of clear tape mounted on the wall or counter edge. These are for sealing your own bag shut — pull off a strip, press it over the top where the handles meet, and it keeps the bag closed without a knot. There’s no need to ask permission to use it; it’s there for exactly this. You’ll also typically find a small trash bin for discarding the plastic sleeves that wrapped your basket-scanned items, and sometimes a wet cloth for wiping up spills from leaking packages — use it if something leaks, since the next customer needs a clean counter too.

    A second common mistake: trying to bag fragile items (eggs, tofu, bottled drinks) together with heavy items like rice or detergent. Most bagging counters have small plastic trays specifically for eggs and tofu — look for a short stack of rectangular trays near the tape. Japanese shoppers habitually bag cold items together, separate raw meat/fish into the thin plastic sleeves provided near the meat section, and put heavy items at the bottom. Staff won’t correct you if you skip this, but your groceries will survive the walk home better if you follow it.

    Convenience Store Self-Checkout Is a Different Animal

    7-Eleven, Lawson, and FamilyMart have rolled out self-checkout widely in Tokyo, Osaka, and other major cities, though plenty of smaller or rural branches still staff every register by hand. At these machines, hot food (oden, fried items from the hot case) and tobacco/alcohol still usually require a staff tap to confirm age or handling, so don’t be surprised if a clerk steps in mid-transaction — this is normal, not an error. For anyone restocking a hotel room fridge or grabbing snacks before a long train ride, this is worth knowing before you’re standing there wondering why the machine froze on a can of beer.

    If you’re traveling with a baby and stocking up on formula, diapers, or bottled water in bulk, note that most convenience stores sell these in small sizes only — supermarkets and drugstores (Matsumoto Kiyoshi, Sundrug) are far better value for baby supplies. If you haven’t sorted out a stroller or car seat yet, see our guide on renting baby gear in Japan before you’re juggling grocery bags and a car seat at once.

    Timing and Where This Matters Most

    Self-checkout lines move fast outside peak hours but back up badly between 6 PM and 8 PM on weekdays, when commuters stop in on their way home — if you’re near a station on the Yamanote Line or any major commuter route, expect a wait at that hour regardless of which lane you pick. Early morning (store opening, usually 8–10 AM) and mid-afternoon are the quietest windows if you want to take your time figuring out a machine you haven’t used before.

    Before you fly, it’s worth registering your customs and tax-free shopping details through Visit Japan Web — it won’t speed up a supermarket checkout, but it saves real time at the actual airport, which is the checkout line that matters most on your way home.

    One Splurge Worth Knowing About

    If you want a souvenir-grade grocery experience rather than a purely functional one, department store basement food halls (depachika) — like those under Isetan Shinjuku or Daimaru Tokyo — use fully staffed checkout with elaborate gift-wrapping, no self-service involved, and it’s a genuinely different, more leisurely way to shop for high-end items like a fresh-fried korokke or boxed sweets to take home. It costs more than a supermarket run but it’s worth doing once for the experience, not just the food.

  • Handy Fans: Japan’s Pocket-Sized Electric Fan and the Summer Gadget Everyone Carries

    Handy Fans: Japan’s Pocket-Sized Electric Fan and the Summer Gadget Everyone Carries

    Photo by PJH on Unsplash

    Walk through any Japanese city between June and September and you’ll notice it immediately: nearly everyone, from schoolkids to salarymen, has a small fan either whirring in their hand or clipped to their collar. These are “handy fans” (ハンディファン, handī fan), and they are not a novelty item — they’re a genuine coping mechanism for a climate that regularly pushes 35°C with suffocating humidity. If you’re visiting in summer, buying one in your first 48 hours will probably do more for your trip than any other single purchase.

    Why Japan is obsessed with handy fans

    Japanese summers are brutal in a way that surprises a lot of first-time visitors — it’s not just heat, it’s humidity that makes 32°C feel like a sauna, especially in cities like Tokyo and Osaka where asphalt and building exhaust trap warmth. Public buildings are air-conditioned, but the walk between the train station and your destination, or standing on an open-air platform waiting for the Yamanote Line, can leave you drenched. Handy fans became ubiquitous roughly a decade ago as battery technology improved, and now they’re sold everywhere from ¥100 shops to department stores, with convenience stores stocking basic models at checkout counters during peak season.

    What they actually cost

    There are three real tiers:

    • Budget (¥500–1,500): Daiso, Seria, and other ¥100-yen shops (really ¥100–300-yen shops) sell simple handheld or neck fans. They work, but battery life is often 2–4 hours on a charge and the plastic feels cheap. Fine for a one-week trip if you don’t mind recharging daily.
    • Mid-range (¥1,500–4,000): Brands like Francfranc, Cepia (the “Jiang Fan” and similar), and convenience-store-exclusive collaborations fall here. Expect 6–10 hours of runtime, quieter motors, and USB-C charging. This is the sweet spot most visitors should aim for — look for models at Don Quijote, Loft, or Tokyu Hands.
    • Splurge (¥4,000–8,000+): Francfranc’s higher-end “Toffy” line and some Cepia premium models add retractable designs, mist/cooling-pad attachments, or app-free adjustable airflow with 3–5 speed settings and 15+ hour battery life. Worth it if you’ll use it every summer, not just this trip.

    Where to buy one

    You don’t need to hunt — the challenge is usually which store to pick, not finding one at all:

    • Don Quijote (Donki): Open late (often until 2am–5am depending on location), huge selection across all price tiers, and a dedicated summer-goods section from roughly May through September. Good for last-minute buys after a long dinner.
    • Loft and Tokyu Hands: Department-store lifestyle shops with the best mid-range and design-forward options (pastel colors, folding designs, character collaborations). Typically open 10am–8pm or 9pm. Tokyu Hands has large branches in Shibuya and Shinjuku.
    • Daiso / Seria / Can Do: For the cheapest functional option, usually open 10am–9pm. Good as a backup or for kids who might lose or break it.
    • Convenience stores (7-Eleven, Lawson, FamilyMart): Carry one or two basic models at inflated prices (¥700–1,200) during heat waves — a reasonable emergency buy, not a planned shopping stop.
    • Electronics chains (Bic Camera, Yodobashi Camera): Best for the premium end and for comparing battery specs side by side, plus tax-free purchase counters for visitors spending over ¥5,000 before tax.

    Best timing to buy

    Stock and selection peak from late May through August. If you’re visiting in early spring or autumn and don’t expect extreme heat, you probably don’t need one — but shoulder-season heat waves (increasingly common in September) do happen, and stores keep at least basic stock year-round. If your trip overlaps with Obon (mid-August) or Golden Week, buy early in your trip rather than waiting, since popular character-collab designs sell out at tourist-heavy Donki branches.

    Common mistakes tourists make

    • Buying the cheapest one and regretting it within three days. Sub-¥500 fans often die after a week of travel-level daily use. If you’re traveling for 10+ days, spend the extra ¥1,000 for a mid-range model.
    • Not checking the charging cable. Many budget models use micro-USB rather than USB-C, meaning you may need an extra cable if you’ve gone all-USB-C with your phone.
    • Forgetting it’s a lithium battery. Pack it in checked luggage carefully or keep it in carry-on — airline rules on spare lithium batteries apply, so don’t buy a model with a swappable battery pack unless you’ll check the airline’s limits.
    • Assuming it replaces sun protection. A handy fan cools you but doesn’t block UV. Pair it with a UV-cut parasol if you’re out for hours — locals often carry both.
    • Running it constantly at full speed. This drains the battery in 1–2 hours on weaker models. Most have a low setting that’s barely audible and still makes a real difference — use that as your default and save high speed for actual emergencies.

    Bringing one home

    Handy fans are compact, light, and genuinely useful back home too, so they’re an easy souvenir that doesn’t feel like a tourist trinket. They’re not restricted items, but if you’re buying several as gifts, check Japan’s duty-free allowance guidance for your home country’s customs rules on electronics, and remember that voltage isn’t an issue since these run on internal rechargeable batteries rather than being wired for Japan’s 100V outlets — they’ll charge fine anywhere with a standard USB adapter.

    Which one should you actually get

    For most visitors: skip the ¥100-shop option unless you’re on a very tight budget or just want a backup, and go mid-range at Loft, Tokyu Hands, or Don Quijote. Look for a stated battery life of at least 6 hours, USB-C charging, and a folding or retractable neck strap if you plan to wear it hands-free while sightseeing. It’ll end up being one of the most-used things you packed — and possibly the thing you miss most once you’re back in air-conditioned normalcy.

  • Buying a Bicycle in Japan: Mamachari Shops, Registration Stickers & Shipping One Home

    Buying a Bicycle in Japan: Mamachari Shops, Registration Stickers & Shipping One Home

    Photo by Rob Maxwell on Unsplash

    Japan runs on bicycles. In almost any city or town, you’ll see commuters, students, and parents with kids strapped into front and back seats pedaling sturdy, basket-equipped bikes called “mamachari” — literally “mom’s bicycle.” If you’re staying long enough to want one of your own, or you’ve fallen for the look of a Japanese city bike and want to ship one home, here’s what actually happens at the shop, what the registration sticker on the frame means, and what it costs to get a bike out of the country.

    What a Mamachari Actually Is

    A mamachari is a single- or three-speed upright bicycle with a front basket, a kickstand, a wheel lock built into the frame, and usually a dynamo or battery light. They’re built for short errands at low speed, not for serious cycling, and that’s the point — they’re cheap, low-maintenance, and everywhere. If you only need wheels for a day or two of sightseeing rather than a bike to own, renting a LUUP shared e-scooter is far less hassle than buying and registering an actual bicycle — no paperwork, no resale to worry about, just an app and a QR code.

    Where to Buy a New One

    The easiest option is a nationwide chain store, where staff are used to handling registration on the spot. Asahi Cycle (サイクルベースあさひ), with around 400+ stores across Japan, is the default choice — most branches open around 10:00 and close at 20:00, and you can search for a location on their site before you go. Aeon Bike (inside Aeon Mall shopping centers) and Don Quijote’s in-house bike line are also common for basic models. Expect a plain steel mamachari with a basket and lock to run ¥9,800–¥15,000. Electric-assist models (denkō assist jitensha) from Panasonic, Bridgestone, or Yamaha, which flatten hills and make hauling kids or groceries painless, run ¥90,000–¥160,000. Shops will usually include basic assembly and a test of the brakes and gears before you wheel it out.

    Buying Secondhand

    If you don’t need a brand-new bike, secondhand is where the real savings are. Recycle shops (chain names like Hard Off, or local “jitensha recycle” shops) sell inspected used mamachari for roughly ¥3,000–¥8,000. The best timing is late March into early April, when the Japanese academic and fiscal year turns over — graduating students sell or abandon bikes en masse near universities, and some schools or shops run organized used-bike sales with prices as low as ¥2,000–¥5,000. For something more specific — a vintage road bike, discontinued Shimano components, or a particular brand you can’t find locally — the Yahoo Auctions Japan guide covers how overseas buyers can bid on and import items like these through a proxy service.

    The Bōhan Tōroku: Japan’s Registration Sticker

    This is the part visitors most often miss. Nearly every prefecture in Japan legally requires a bicycle anti-theft registration, called bōhan tōroku (防犯登録), for any bike actually ridden on public roads. A small sticker on the frame, tied to your name and address, lets police confirm the bike isn’t stolen — and they do spot-check cyclists, especially at night. When you buy new from a shop, staff register it for you on the spot for a fee of roughly ¥500–¥700, using an ID that shows your name and address. This is the real catch for tourists: registration is built around having a Japanese address, so it works smoothly for residents, students, and long-stay visa holders, but a short-term hotel guest may find shops reluctant to register a bike to a hotel address. If that’s your situation, ask the shop directly before buying — policies vary by store.

    Buying secondhand adds another wrinkle: the registration needs to be formally transferred to your name (meigi henkō), which requires the previous owner’s registration card. Private sales — a bike left behind by a departing expat, something bought on a local marketplace app — often skip this step, leaving you riding a bike registered to someone else. It’s a common reason foreign residents get stopped and questioned by police, so if you’re buying secondhand from an individual rather than a shop, ask for proof of the original registration and get it transferred.

    Budget, Mid-Range, and Splurge

    • Budget (¥2,000–¥15,000): secondhand recycle-shop mamachari, or a basic new one from Asahi Cycle or Aeon Bike.
    • Mid-range (¥20,000–ª60,000): a new multi-speed city bike or a folding bike (useful if you’re planning to ship it home, since folders break down smaller for boxing).
    • Splurge (¥90,000–¥160,000+): an electric-assist mamachari from Panasonic or Bridgestone, or a Japanese-made road/touring bike with higher-end components.

    Shipping One Home

    Getting a bicycle out of Japan takes the same basic logistics as shipping any oversized item — it’s worth comparing notes with how visitors handle shipping a Japanese toilet seat home, since both involve bulky items, courier pickup, and international customs declarations. First, the bike needs to be partially disassembled — front wheel off, pedals removed, handlebars turned sideways — and boxed. Bike shops often have free used cardboard boxes on hand, or will sell a proper travel box for roughly ¥1,000–¥3,000.

    From there you have two realistic routes. If you’re flying home, check your airline’s sports-equipment or oversized-baggage policy well in advance; fees for a boxed bike typically run ¥5,000–¥30,000 depending on the carrier and route, and some airlines count it against checked-baggage weight rather than charging separately. Alternatively, a domestic courier like Yamato or Sagawa can take the boxed bike to an international freight forwarder, which then ships it by air or sea — budget roughly ¥20,000–¥50,000+ for a full international door-to-door shipment, with sea freight much cheaper but taking weeks rather than days. Before you commit to either, check your home country’s import rules for used goods; the kind of personal-allowance thinking covered in Japan’s duty-free allowance guide is about what you carry back yourself, but it’s a useful reminder to also check your destination country’s duty rules for anything shipped separately, since a bicycle usually isn’t covered by standard traveler exemptions.

    Common Mistakes

    • Riding unregistered. Even a short-term use case can get you stopped by police if the frame has no registration sticker at all.
    • Skipping the registration transfer on a secondhand buy. Always ask for the previous owner’s registration card.
    • Not measuring the shipping box. International courier services often cap total dimensions (length + girth), and a fully assembled frame won’t fit — confirm sizing before you box it.
    • Forgetting to sell or dispose of the bike properly if you don’t ship it. Abandoning a registered bike on the street can trace back to your name; return it to a shop or hand it off to another resident instead.
  • Satsuma Kiriko: Kagoshima’s Colorful Cut-Glass Tradition and Where to Buy It

    Satsuma Kiriko: Kagoshima’s Colorful Cut-Glass Tradition and Where to Buy It

    Photo by Tim Mossholder on Unsplash

    If you associate Japanese cut glass with the clear, precise patterns of Tokyo’s Edo Kiriko, Satsuma Kiriko will surprise you. Made in Kagoshima at the southern tip of Kyushu, it’s thicker, bolder, and defined by a soft gradient of color that fades into clear glass as the cutter goes deeper — a technique that almost died out completely and was only revived in the 1980s. It’s one of the more distinctive souvenirs you can bring home from Japan, and also one of the easiest to buy wrong if you don’t know what you’re looking at. Here’s what it is, where to see it made, and how to shop for it without overpaying or ending up with a mass-produced imitation.

    A Craft That Almost Disappeared

    Satsuma Kiriko traces back to the 1840s–50s, when Shimazu Nariakira, the lord of the Satsuma domain, set up a glassworks as part of his broader push to industrialize the region at Shuseikan in the Iso district of Kagoshima city. Craftsmen there developed a style of cut glass using a thick layer of colored glass — most famously indigo blue and deep red — fused over a clear glass body. Rather than cutting all the way through to a crisp color line the way Edo Kiriko does, Satsuma artisans cut at an angle that leaves a soft, smoky gradation between the color and the clear glass underneath. That blurred edge, called “bokashi,” is the single clearest way to tell genuine Satsuma Kiriko from other cut glass at a glance.

    Production collapsed after Satsuma’s defeat in the 1877 Satsuma Rebellion, and the technique was essentially lost for over a century. It wasn’t revived until 1985, when a local company reconstructed the process through research and trial and error. That history matters for buyers: because the craft only came back a few decades ago, there’s no flood of cheap antique supply, and every piece on sale today is, in effect, a modern reproduction of a short-lived 19th-century art form — which is part of why prices run high.

    Where to See It Made and Buy It in Kagoshima

    The best place to shop is also the best place to understand what you’re buying: the workshop and showroom near Sengan-en, the Shimazu family’s former garden villa in the Iso area of Kagoshima city, close to where the original glassworks stood. The attached shop sells direct-from-workshop pieces, and you can usually watch cutters at work through a viewing window. Entry to the shop itself is free; Sengan-en’s garden and the Shoko Shuseikan history museum next door charge separate admission, roughly ¥1,000–¥1,700 depending on the combination ticket, and are worth the extra hour if you want the historical context behind the glass.

    If your schedule doesn’t stretch to Iso, there are smaller selections at Kagoshima-Chuo Station’s gift shop area and at Kagoshima Airport, though the range is narrower and skewed toward smaller, giftable pieces (sake cups, small plates) rather than the larger vases and bowls you’ll find at the workshop. Prices at the station and airport run slightly higher than at the source for comparable pieces, so if you have time, buy at Iso and treat the station/airport shops as a backup for last-day purchases.

    Getting There and Timing Your Visit

    Kagoshima-Chuo Station is the hub: it’s about 1 hour 20 minutes from Hakata (Fukuoka) on the Kyushu Shinkansen, or a short domestic flight into Kagoshima Airport with a bus transfer into the city. From Kagoshima-Chuo Station, Sengan-en and the glass workshop are about 25–30 minutes by local bus (the Kagoshima City View sightseeing bus covers this route) or a similar taxi ride.

    Shopping for Satsuma Kiriko isn’t seasonal — the shop operates year-round — but pairing it with a Sengan-en visit is nicest in early-to-mid April for cherry blossoms or in November for autumn foliage, when the garden itself (with Sakurajima volcano as a backdrop) is at its best. Weekday mornings are quieter for watching the cutters work without a crowd at the viewing window. If you’re building a longer Kyushu itinerary, Kagoshima pairs well with a side trip to Amakusa in neighboring Kumamoto for dolphin-watching and a slower island pace.

    What to Buy, and What It Actually Costs

    Satsuma Kiriko is not a cheap souvenir, and that’s by design — each piece is cut and polished by hand, and the thick colored glass layer takes longer to work than thinner Edo-style glass. Rough price bands you’ll actually encounter:

    • Budget (¥8,000–¥18,000): small sake cups, shot glasses, or a single rock glass. This is the realistic entry point for most visitors and the most common size sold at the station and airport.
    • Mid-range (¥25,000–¥60,000): a paired set of glasses in a presentation box, a small bowl, or a single larger rock glass with a more elaborate cut pattern.
    • Splurge (¥80,000–¥200,000+): vases, large bowls, and signature pieces with multi-color layering or especially intricate cutting, sold as display or gift pieces rather than everyday glassware.

    Deep indigo blue and crimson red are the signature colors and generally the easiest to source across sizes; purple and green pieces exist but are less common and tend to cost a bit more simply because fewer are made. If budget is the priority, a single small cup in the ¥10,000 range still shows the bokashi gradient clearly and is a far more honest souvenir than a cheaper imitation at full size.

    Mistakes to Avoid

    • Confusing it with Edo Kiriko. Tokyo’s Edo Kiriko is cut with sharp, clean color lines and is generally less expensive. If a “Satsuma Kiriko” piece has crisp edges and no color gradation, it’s either mislabeled or a different style — ask directly before buying.
    • Mistaking tiny air bubbles for defects. Hand-blown colored glass often contains very small bubbles in the body of the glass. This is normal and part of the handmade process, not a flaw — don’t talk yourself out of a good piece over it. Do check instead for rough, unpolished cut edges or chips at the rim, which are genuine quality issues.
    • Buying the first thing you see at the airport. Selection is thinner and prices are a touch higher there. If you’re flying out of Kagoshima, it’s a fine backup, but the Iso workshop has the deepest range.
    • Packing it loose in a suitcase. Ask the shop to box and wrap the piece — most will do this well — and carry fragile glass in your carry-on if the piece is valuable enough to matter. Checked-bag handling is rough on cut glass.
    • Forgetting your duty-free limits. If you’re buying more than one piece, or combining Satsuma Kiriko with other Japanese purchases on the trip, check what you can actually bring home duty-free before you get to the airport.

    If You Can’t Make It to Kagoshima

    Satsuma Kiriko occasionally turns up in department store craft sections in Fukuoka, Osaka, and Tokyo, and secondhand or vintage pieces sometimes surface through resale channels — if you’re comfortable navigating a Japanese-only marketplace, Yahoo Auctions Japan is one way overseas buyers track these down after their trip. It’s a slower, less certain route than buying in Kagoshima, though, and you lose the ability to inspect the cutting and color quality in person before paying.

    For shoppers who like regional Japanese craft hunting in general, Satsuma Kiriko pairs conceptually with other hands-on craft-town visits like Aizu-Wakamatsu’s lacquerware shopping in Fukushima — both are places where buying at the source, from the people who actually make the thing, gets you better quality and a better price than buying it secondhand in a souvenir shop elsewhere in Japan.

  • Shiroi Koibito: Hokkaido’s Famous White Chocolate Cookie and the Factory You Can Tour

    If you’ve flown through New Chitose Airport or wandered a department store food hall in Sapporo, you’ve seen the pale blue tins stacked by the hundreds: Shiroi Koibito, Hokkaido’s signature white chocolate cookie. The name means “white lovers,” and the snack itself is simple — two thin, crisp langue de chat cookies sandwiching a layer of white chocolate — but it’s become one of Japan’s most recognizable regional souvenirs. What many visitors don’t realize is that you can also tour the factory where it’s made, just outside central Sapporo, for the price of a bus fare and a small admission fee.

    What Shiroi Koibito Actually Is

    Shiroi Koibito is made by Ishiya, a Sapporo confectionery company that’s been producing the cookie since 1976. The core product hasn’t changed much: buttery, delicate langue de chat biscuits pressed around a slab of white chocolate, individually wrapped in foil to keep it from melting or going soft. It’s sold in boxes of 5, 9, 12, 18, 24, and up, which makes it easy to scale your purchase to who you’re buying for — a box of 9 runs roughly 800–900 JPY, while a 24-piece box is closer to 2,500–2,800 JPY. There’s also a dark chocolate “Kuroi Koibito” version and seasonal flavors sold mainly in Hokkaido.

    Because it travels well and doesn’t need refrigeration for short trips, it’s a reliable choice if you’re building an omiyage (souvenir) run for coworkers or relatives back home — similar in spirit to how travelers stock up on Pocky and Pretz for easy, individually wrapped gifting, except Shiroi Koibito reads as more of a “proper” gift box rather than a convenience-store grab.

    Shiroi Koibito Park: The Factory You Can Visit

    Ishiya operates Shiroi Koibito Park in Sapporo’s Nishi-ku district, a factory-and-theme-park hybrid built around the cookie. The complex includes a glassed-in viewing corridor where you can watch the actual production line wrap and pack cookies, a small chocolate museum with historical cocoa and confectionery displays, a European-style clock tower and rose garden for photos, a gift shop selling park-exclusive items, and a café.

    Admission to the factory and museum area is a modest fee — budget around 600 JPY for adults and roughly 200 JPY for elementary and junior high students, with younger children typically free. That’s separate from the hands-on cookie-decorating workshop, where you can paint a blank Shiroi Koibito cookie with white and dark chocolate and take it home in a small box; this costs extra (budget around 1,000–1,300 JPY per cookie kit) and is worth booking ahead during busy periods, since slots can fill up on weekends and school holidays.

    The park is open daily, typically 9:00 AM to 6:00 PM with last entry around an hour before close, year-round. It’s rarely fully closed, but it’s worth double-checking the official Ishiya website before you go, since hours can shift around New Year’s and for maintenance days.

    How to Get There

    From Sapporo Station, the easiest route is the Sapporo Municipal Subway Tozai Line to Miyanosawa Station — about a 15-minute ride — followed by a 10-minute walk to the park. There’s also a free shuttle bus that runs on a set schedule from near Sapporo Station on some days; check current timetables locally since these schedules change seasonally and aren’t always running. Taxis from central Sapporo take about 20–25 minutes depending on traffic. If you’re combining this with other Sapporo sightseeing, it pairs easily with a half-day plan since it’s a relatively short detour from the city center rather than a full day trip.

    Best Time to Visit

    The park is pleasant in any season, but Hokkaido’s winter (December–February) adds a layer of appeal: the surrounding area gets genuinely snowy, and the clock tower and garden look distinctly European-Christmas in a way that photographs well. Summer (July–August) is Hokkaido’s most comfortable season weather-wise and the busiest for domestic tourism, so expect more crowds at the workshop counter. Weekday mornings right after opening are consistently the quietest time to walk through the factory viewing corridor without queuing.

    Where Else to Buy It (If You Skip the Park)

    You don’t need to visit the factory to buy Shiroi Koibito — it’s sold at New Chitose Airport, Sapporo Station’s Daimaru department store, Odori-area souvenir shops, and increasingly at select stores outside Hokkaido, including some duty-free counters in Tokyo and Osaka airports. Prices are generally consistent across these outlets, though airport shops occasionally mark up slightly for convenience. If you’re shopping late in your trip and can’t make it to Hokkaido at all, the airport is a perfectly reasonable fallback — just confirm the box hasn’t been sitting in direct sun, since the chocolate layer is genuinely prone to melting and re-setting with a chalky texture.

    If you’re stacking up boxes of Shiroi Koibito alongside other snack souvenirs for the flight home, it’s worth a quick check of Japan’s duty-free allowance rules so you know what you can bring back without issues, especially if chocolate is just one item in a larger haul of Japanese food gifts.

    Common Mistakes to Avoid

    • Buying it in summer and leaving it in a hot bag or car. White chocolate melts at a lower temperature than dark chocolate, and Shiroi Koibito’s thin wafer structure means a melted-then-reset cookie loses its snap.
    • Assuming the factory tour is free. The viewing corridor and museum require a ticket; only the shop and café areas are accessible without paying admission.
    • Skipping reservations for the cookie-decorating workshop during peak season. Walk-up spots aren’t guaranteed on busy weekends or during Japanese school holidays (late July–August, late December–early January).
    • Overbuying before a long multi-city trip. If Sapporo is early in your itinerary, the cookies can get crushed in a backpack over several weeks of travel — buy closer to your departure date, or ship a box home if your itinerary is long.

    Budget, Mid-Range, and Splurge Options

    For a light, budget-friendly souvenir, a 5- or 9-piece box (roughly 500–900 JPY) is easy to carry and gift individually. For a mid-range option that covers an office or extended family, the 18- or 24-piece boxes (around 2,000–2,800 JPY) offer better per-cookie value. If you want something more memorable than a supermarket purchase, the splurge is really the experience itself: the park admission plus the hands-on decorating workshop, which turns a cookie you’d otherwise just unwrap into something you made yourself — a nice complement to other hands-on food experiences in Japan, like soba-making classes, if you enjoy pairing souvenir shopping with a bit of craft.

    Shiroi Koibito won’t surprise anyone who’s already deep into Japanese confectionery, but it earns its reputation honestly: it’s consistent, well-packaged for travel, and backed by a factory experience that’s genuinely worth an afternoon if you’re already in Sapporo. For travelers curious about Japan’s long-running sweets makers more broadly, it’s a useful contrast to older, traditionally rooted shops like Toraya — one built on centuries of wagashi tradition, the other on a single, very modern cookie that became a regional icon in under fifty years.

  • Pocky & Pretz: Japan’s Iconic Snack Sticks and the Rare Flavors Worth Hunting Down

    Pocky & Pretz: Japan’s Iconic Snack Sticks and the Rare Flavors Worth Hunting Down

    Photo by Josh Marty on Unsplash

    Every konbini checkout counter in Japan has them stacked near the register, but Pocky and Pretz are far more interesting than their export versions suggest. Beyond the familiar chocolate box sold worldwide, Japan’s domestic market is flooded with regional exclusives, seasonal limited runs, and adult-targeted flavors that rarely make it onto a plane — let alone a shelf outside the country. Here’s how to shop for them properly, which flavors are actually worth the detour, and what to avoid when you’re packing a suitcase full of them.

    Pocky vs. Pretz: Know the Difference

    Both are made by Ezaki Glico, an Osaka company whose illuminated “Running Man” sign over the Ebisubashi Bridge in Dotonbori is one of the most photographed landmarks in the city — it’s free to view, lit 24 hours a day, and worth a short detour if you’re in the area at night. Pretz came first, launched in 1964 as a plain, savory biscuit stick. Pocky followed in 1966, taking the same stick and coating it in chocolate. The distinction still matters when you’re shopping: Pretz flavors tend to be savory (Roast, Salad, Tomato, regional ones like cod-roe mentaiko in Kyushu), while Pocky flavors are sweet or chocolate-based. If you only know the strawberry Pocky sold abroad, you’re seeing a small fraction of what’s actually on shelves here.

    Where to Buy: Convenience Store, Don Quijote, or Airport

    For everyday flavors, any 7-Eleven, Lawson, or FamilyMart will do — they’re open 24 hours, and a standard box runs ¥120–¥160. For volume or novelty sizes (giant single-stick boxes, family packs, discount multi-packs), Don Quijote is the better stop; most urban locations stay open very late or 24 hours, and prices on bulk boxes often beat convenience stores by 20–30%. For regional and prefecture-exclusive flavors, check station omiyage (souvenir) shops and department store basement food halls (depachika) in the city or region the flavor is tied to — these are usually sold in individually wrapped mini-bags inside a gift box, priced ¥500–�¥1,500 depending on box size. Airport shops at Narita, Haneda, and Kansai also stock last-chance exclusive flavors and Pocky Day leftovers, though selection is smaller and prices run slightly higher than in the city.

    Regional and Seasonal Flavors Worth Hunting Down

    These are the ones that make the hunt worthwhile, since most never get sold outside their home region:

    • Kyoto Uji Matcha Pocky — a genuinely bitter, high-quality matcha coating, sold around Kyoto Station and Uji.
    • Hokkaido Melon Pocky — white chocolate infused with Yubari melon flavor, found in Sapporo and New Chitose Airport.
    • Tokyo Banana Pocky — a collaboration between two of Japan’s biggest omiyage brands, sold mainly in Tokyo station shops.
    • Men’s Pocky — a less-sweet, higher-cocoa line aimed at adults, including a Bitter and a seasonal Roasted varieties; a good pick if you find standard Pocky too sugary.
    • Mentaiko Pretz — savory cod roe flavor, a Kyushu/Fukuoka specialty and one of the better savory options for travelers who don’t want more chocolate.

    Availability shifts constantly — Glico rotates regional and seasonal flavors without much notice, so don’t assume a flavor you read about online is still on shelves. If you spot something unfamiliar in a souvenir aisle, buy it there; you likely won’t see it again once you leave the region.

    Pocky Day and Other Timed Releases

    November 11th is “Pocky Day” in Japan — the date mimics the look of four Pocky sticks (11/11) — and Glico treats it like a mini-holiday, releasing limited edition boxes and running in-store promotions in the weeks leading up to it. If your trip lands in late October through mid-November, check convenience stores and Don Quijote for Pocky Day exclusives, which usually sell out faster than the regular rotation. Spring brings sakura-themed pink boxes (typically March–April), and winter brings “Melty” formulations in colder regions, where the chocolate is blended to resist melting in cold shipping and storage conditions — the inverse problem of what you’ll deal with bringing them home in summer.

    Common Mistakes to Avoid

    The biggest mistake is buying only the familiar chocolate box and skipping the savory Pretz aisle entirely — it’s a completely different, less sugary snack worth trying. The second is traveling in Japan’s hot months (June–September) and packing chocolate-coated Pocky loose in a checked bag; it melts, resets, and arrives as a solid clump. If you’re buying in summer, favor Pretz varieties (no chocolate, far more heat-stable) or pack chocolate Pocky in carry-on with some insulation rather than a hot cargo hold. Third, don’t assume regional flavors are restocked constantly — shops sell through limited lots and may not reorder for weeks, so buy on sight rather than planning to “come back later.”

    Budget, Mid-Range, and Splurge Picks

    On a tight budget, a standard convenience store box (¥120–¥160) or a Don Quijote giant pack (around ¥300–¥500 for a large multi-stick box) covers the classic experience cheaply. Mid-range shoppers should go for a regional gift box from a depachika or station shop (¥700–¥1,200), which usually includes several individually wrapped flavors and is already sized for giving away. For a splurge, look for a seasonal collaboration box — Tokyo Banana Pocky or a department-store exclusive collaboration set — which can run ¥1,500–¥2,500 but functions as both a novelty souvenir and a genuinely good gift for someone back home who’s hard to shop for.

    Bringing Them Home

    Snack boxes are low-risk items for customs almost everywhere, but if you’re loading up on a large haul alongside other Japanese purchases, it’s worth checking your country’s duty-free limits before you’re at the airport counter — our guide to Japan’s duty-free allowance coming home breaks down what actually counts against your limit. If you get home and realize you missed a discontinued or ultra-limited flavor, Japanese resellers often list unopened boxes on Yahoo Auctions — our Yahoo Auctions buyer’s guide for overseas shoppers walks through how to bid and ship from outside Japan. And if Pocky and Pretz get you curious about Japan’s wider snack culture, pairing a haul with something like warabimochi rounds out a far more interesting souvenir box than chocolate sticks alone.

  • Japanese Clothing & Shoe Size Conversion: A Shopper’s Guide for Foreign Visitors

    Japanese Clothing & Shoe Size Conversion: A Shopper’s Guide for Foreign Visitors

    Photo by Matthieu Collin on Unsplash

    You found the perfect jacket in a Harajuku boutique, grabbed what looked like your size, and it doesn’t close. Welcome to the most common frustration in Japanese shopping: the numbers on the tag don’t mean what you think they mean. Japanese clothing and shoe sizing uses different scales, different assumptions about body shape, and — crucially — different units than the US, UK, or EU systems. This guide breaks down exactly how to convert, where the conversion tables lie to you, and how to shop smart whether you’re hunting basics at a fast-fashion chain or splurging on streetwear.

    Why Japanese Sizing Doesn’t Match Western Labels

    Japanese apparel sizing is built around a smaller average frame and a narrower range of cuts than US or European sizing. A “Free Size” (フリーサイズ) label — common on blouses, accessories, and many Uniqlo/GU items — is really cut for a Japanese small-to-medium body, roughly US 2–6 or UK 6–10. If you’re outside that range, Free Size will not be free. Letter sizes (S/M/L/XL) also run noticeably smaller than their US equivalents: a Japanese L is closer to a US M in most brands. There’s no universal offset, though — it varies by brand and even by garment type within the same brand, so treat every chart below as a starting point, not gospel.

    Women’s Clothing: The Numbers Game

    Japanese women’s sizing shows up two ways: letters (S/M/L) and odd numbers (5/7/9/11/13), the latter common in department stores and office wear. Rough conversions:

    • Japan 5 / S ≈ US 2–4, UK 6–8, EU 34–36 (bust ~80–83cm)
    • Japan 7 / M ≈ US 4–6, UK 8–10, EU 36–38 (bust ~83–86cm)
    • Japan 9 / L ≈ US 8–10, UK 12–14, EU 40–42 (bust ~86–90cm)
    • Japan 11–13 / LL ≈ US 12–14, UK 16, EU 44

    Bra sizing adds another wrinkle: Japanese band sizes are measured in 2.5cm increments differently from US/UK, so a Japanese 70 band is roughly a US 32. Cup letters (A, B, C) are close enough to US cups but run about one letter smaller — a Japanese C is closer to a US B. If lingerie shopping is on your list, department stores like Isetan Shinjuku offer free fitting consultations (English-speaking staff available at the main store, 10am–8pm) that are worth the ten minutes.

    Men’s Clothing: Where “Large” Gets Small

    Men’s tops and outerwear follow a similar downward shift:

    • Japan S ≈ US XS–S, chest ~86–89cm
    • Japan M ≈ US S–M, chest ~89–94cm
    • Japan L ≈ US M, chest ~94–99cm
    • Japan XL ≈ US L, chest ~99–104cm

    Sleeve length is where travelers get caught out most — Japanese cuts tend to run shorter in the arm and torso even when the chest measurement matches. If you’re tall or broad-shouldered, check the actual cm measurements printed on the tag (usually chest 身幅 and length 着丈) rather than trusting the letter. This matters especially for streetwear, where boxy, oversized cuts are the house style — brands like those covered in our guide to Harajuku’s streetwear boutiques (BAPE, Neighborhood, Human Made) often size generously on purpose, so a Japanese M can fit like a Western L — always try before buying, since resale prices on these labels make returns painful.

    Shoes: Centimeters Are Your Friend

    Shoe sizing is actually the easiest category to convert, because Japan uses straight centimeter measurements (foot length) instead of an arbitrary numbering system. If you know your foot length in cm, you’re set. Rough equivalents:

    • 22cm ≈ US women’s 5 / UK 2.5 / EU 35
    • 23cm ≈ US women’s 6 / UK 3.5 / EU 36
    • 24cm ≈ US women’s 7 / men’s 6 / UK 5.5 / EU 38
    • 25cm ≈ US men’s 7 / UK 6.5 / EU 40
    • 26cm ≈ US men’s 8 / UK 7.5 / EU 41
    • 27cm ≈ US men’s 9 / UK 8.5 / EU 42
    • 28cm ≈ US men’s 10 / UK 9.5 / EU 43

    Two catches: Japanese lasts tend to be cut narrower through the heel and midfoot even when the length matches, so a snug 26cm doesn’t necessarily mean you need 26.5cm — it might mean you need a wider brand. Also, width is rarely labeled on Western sneakers sold in Japan, so always ask to try the display shoe. Our guide to ABC Mart covers how to navigate Japan’s biggest shoe chain, where staff keep a cm-measuring foot gauge (フットメジャー) at the counter — use it rather than guessing, since it takes 30 seconds and removes all doubt.

    Where to Shop by Budget

    Budget: GU and Uniqlo basics run ¥990–¥3,990 for tops and ¥2,990–¥4,990 for bottoms, with generous size runs (XS–3XL in many styles) and clear size charts posted in-store. Our breakdown of GU, Uniqlo’s trendier sister brand, is a good primer if you haven’t shopped there before. Mid-range: Department store floors (Isetan, Takashimaya, Hankyu) carry domestic brands from ¥8,000–¥25,000 with tailoring services on-site — hemming typically costs ¥1,000–¥2,000 and takes same-day to a few days. Splurge: Flagship streetwear stores in Harajuku and Shibuya sell limited hoodies and jackets from ¥15,000–¥40,000; because these run in small batches and rarely restock, nail your size conversion before you go rather than hoping for an exchange later.

    Common Mistakes to Avoid

    • Assuming your home size number applies. A US size 8 and a Japanese size 8 are not remotely the same garment — Japan’s numbered system (5/7/9/11) is its own scale, not a direct match to US numbered sizing.
    • Trusting “Free Size” outside the narrow range it’s cut for. If you’re above roughly a US 8/UK 12 or below a US 2/UK 6, try it on before committing.
    • Ignoring shoe width. Length in cm will usually be right; fit through the forefoot and heel is the variable that trips people up.
    • Shopping during Golden Week (late April–early May) or New Year’s expecting calm fitting rooms — both are peak domestic travel periods and stores get crowded fast. January and July bring the best seiru (セール) end-of-season sales, with markdowns of 30–50% at both fast-fashion and department stores.
    • Not carrying your own measurements. Write your chest/bust, waist, and foot length in cm on your phone before the trip — it’s faster than converting on the spot and far more reliable than size letters alone.

    Getting There and Timing Your Trip

    Harajuku’s Takeshita Street and Cat Street shops generally open 11am–8pm; department stores like Isetan Shinjuku and Takashimaya run 10am–8pm. Weekday mornings right after opening are the quietest time to get unhurried fitting-room access and attentive staff. If you’re coming in from Haneda, see our guide on getting from Haneda Airport to the city to plan the fastest route into Shibuya or Shinjuku before the shops get busy.