Japan Trove

Category: Shopping

Honest guides to shopping in and buying from Japan — skincare and cosmetics, snacks and sweets, whisky and sake, hobby and character goods, kitchenware and homeware, and exactly how to ship it all home. We recommend what is genuinely worth it and flag the catches, from voltage and region locks to tax-free rules.

  • Furin: Japan’s Summer Wind Chimes and Where to Buy Them

    Furin: Japan’s Summer Wind Chimes and Where to Buy Them

    Photo by Geoff Oliver on Unsplash

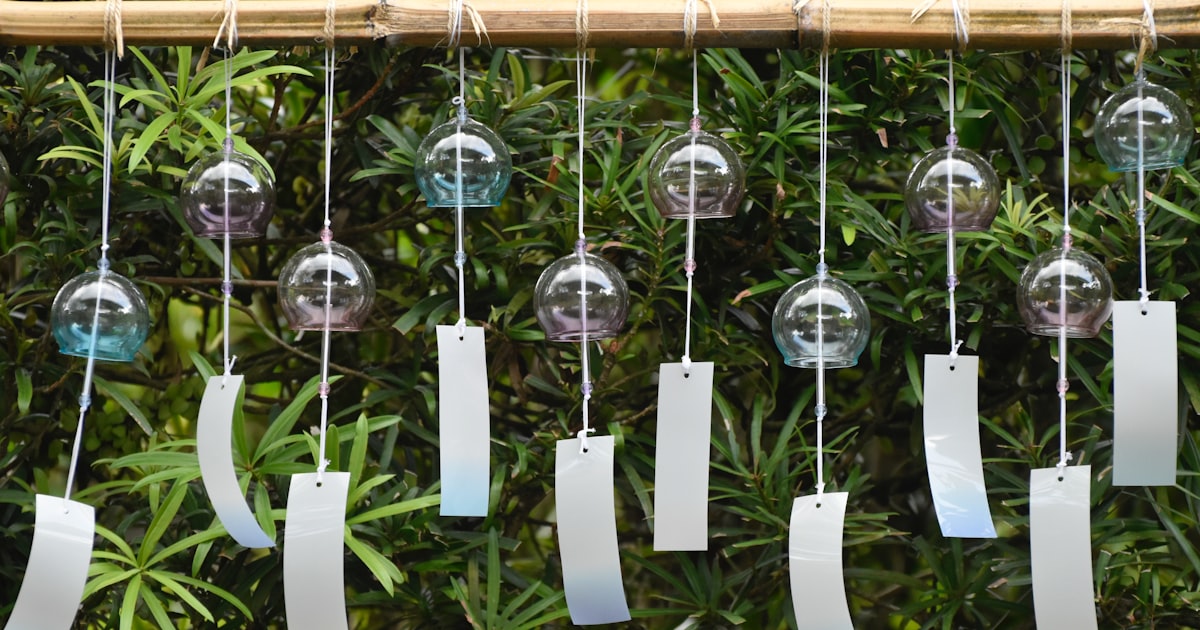
    Walk through almost any Japanese neighborhood in July or August and you’ll hear it before you see it: a thin, glassy chirin-chirin drifting from a shop awning or an apartment balcony. That’s furin, Japan’s traditional wind chime, and it’s one of the most authentic, packable souvenirs you can bring home from a summer trip. Here’s how to buy one that’s actually worth carrying home, where to see the best displays, and the mistakes first-time buyers make.

    What Is Furin, and Why Do You Hear Them in Summer?

    A furin is a small bell, traditionally glass, iron, or ceramic, hung with a clapper and a dangling paper strip called a tanzaku that catches the wind and swings the clapper against the bell. In Japan, the sound is culturally coded as “cooling” — long before air conditioning, the high, thin ring was a psychological trick to make sweltering afternoons feel a few degrees lighter. That’s why furin appear everywhere from late June through late August and then quietly disappear once autumn starts: they’re a seasonal object (a kigo, in poetry terms), not a year-round decoration, and most Japanese people take theirs down once summer ends.

    The Main Types You’ll Find

    Not all furin sound or look the same, and knowing the differences helps you pick the right one:

    • Edo furin (江戸風鈴) — Hand-blown glass, made in Tokyo, with a deliberately rough, unground rim so the clapper produces a slightly irregular, higher-pitched ring. The inside is hand-painted with goldfish, morning glories, or fireworks motifs, applied from the inside of the glass so the color never rubs off. Expect ¥2,500–¥5,000 for a genuine hand-painted piece.
    • Nanbu tekki furin (南部鉄器風鈴) — Cast iron, made around Morioka and Oshu in Iwate Prefecture using the same technique as Nanbu ironware teapots. These have a deep, clear, bell-like tone that carries much further than glass, and they’re virtually indestructible. Prices run ¥3,000–¥8,000 depending on size.
    • Ceramic and Ryukyu glass furin — Ceramic ones (often from craft towns) have a duller, softer knock; Ryukyu glass furin from Okinawa are thicker, bubble-flecked, and colorful, with a lower tone than Edo glass. Both are typically ¥1,500–¥3,500.
    • Souvenir-grade furin — Mass-produced, machine-painted, sold for ¥500–¥1,500 in tourist shopping streets. Fine as a cheap gift, but the sound is thinner and the paint often sits on the outside, where it can wear off.

    Where to Buy Furin in Tokyo

    For the real thing, skip the airport gift shop and go to a specialist:

    • Shinohara Furin Honpo — A family workshop in Edogawa Ward (near Funabori Station on the Toei Shinjuku Line) that has hand-blown Edo furin since 1915. You can watch the glass-blowing and painting process, and during summer they often let visitors pick a blank bulb and watch it get painted to order. It’s a working workshop, not a polished retail store, so hours can be irregular — call ahead or check with your hotel concierge before making the trip.
    • Asakusa’s Nakamise-dori and side streets — The easiest option if you’re already sightseeing near Sensoji Temple. Quality varies from genuine Edo furin to cheap imports, so look for the painted-from-inside detail and ask if it’s hand-painted before paying mid-range prices.
    • Department store “furin ichi” fairs — Stores like Isetan Shinjuku, Nihombashi Takashimaya, and Mitsukoshi run temporary wind-chime fairs (usually on a rooftop or event floor) each June, gathering Edo, Nanbu, and Ryukyu furin from different regions in one place. It’s a good way to compare styles side by side before committing. Exact dates shift year to year, so check the store’s event calendar for the current summer.

    Kawagoe’s Wind Chime Festival: See Thousands in One Place

    If you want the full sensory experience rather than just a single chime, visit Hikawa Shrine in Kawagoe, a small city about 30–50 minutes from central Tokyo (Tobu Tojo Line from Ikebukuro, or Seibu Shinjuku Line from Seibu-Shinjuku Station). Each summer, roughly mid-July through mid-September, the shrine hangs around 1,700 to 2,000 furin from its walkways for the “Enmusubi Furin” display — a tunnel of chimes that ring in unison whenever the wind picks up. On weekend evenings the shrine strings paper lanterns among the chimes for an illuminated night version. Entry is free, and Kawagoe itself (nicknamed “Little Edo” for its preserved warehouse district) makes a pleasant half-day trip on its own, easily combined with a stroll through its old merchant street. Neither Kawagoe nor Morioka requires a rail pass for a single day trip, but if you’re planning a broader Kanto or Tohoku itinerary, it’s worth checking the Regional JR Rail Passes: JR East, JR West & Kansai Explained guide to see if a pass pencils out.

    Buying Nanbu Ironware Furin at the Source

    If cast iron is more your style, Morioka in Iwate is the source. Foundries there sell direct at their workshop shops, and the local craft center in central Morioka stocks pieces from multiple makers so you can compare tones before buying — the pitch varies noticeably between foundries and sizes. It’s a full-day trip from Tokyo via Tohoku Shinkansen, so it only makes sense if you’re already heading north; otherwise, look for Nanbu tekki furin at traditional craft shops in Tokyo or at the department store fairs mentioned above.

    Prices, Shipping, and Common Mistakes

    Budget: ¥500–¥1,500 for souvenir-grade glass, fine for gifts but skip if you want the authentic sound. Mid-range: ¥2,500–�¥5,000 for a genuine hand-painted Edo furin or a mid-size ceramic piece — this is the sweet spot for most travelers. Splurge: ¥6,000–¥10,000+ for a large Nanbu ironware furin or a named-artist Edo furin with detailed reverse-glass painting.

    The most common mistake is treating furin like a normal souvenir when packing. Glass ones are genuinely fragile — ask the shop to wrap it in bubble wrap and box it (most will, especially at specialist shops), and carry it in your hand luggage rather than checked baggage. Cast iron furin are heavy; factor that into your luggage weight if you’re checking bags for a flight home. The other mistake is losing or discarding the tanzaku paper strip: it’s not just decorative, it’s what catches the wind and makes the clapper move, so a furin without it will barely ring at all. If you’re already thinking about how to wrap and carry delicate purchases home, the same principles that apply to a traditional furoshiki wrapping cloth — snug wrapping, no loose rattling — work well for glass furin too.

    Finally, timing matters: shops sell down their furin stock through August and many stop restocking by early September since the item is explicitly seasonal, so if you’re traveling in autumn or winter, expect to find much thinner selection outside of a few year-round craft specialists. Furin pair naturally with other small, quintessentially Japanese purchases — if you’re already building a shopping list, guides on Japanese incense and Kutani ware porcelain cover two other traditional crafts that travel just as well.

  • Kutani Ware: Kanazawa’s Colorful Porcelain and Where to Buy

    Kutani Ware: Kanazawa’s Colorful Porcelain and Where to Buy

    Photo by Kazuo ota on Unsplash

    A Porcelain Style Born From Failure

    Kutani ware (九谷焼, Kutani-yaki) gets its name from Kutani, a small village in what is now the Kaga area of Ishikawa Prefecture, where kilns began firing porcelain around 1655. Production stopped abruptly roughly 70 years later — historians still argue over whether it was exhausted clay resources, financial collapse, or something else — and the kilns sat dormant for nearly 80 years. When production revived in the early 1800s under new kilns like Kasugayama and Yoshidaya, it kept the old name and the bold aesthetic that made the original ware famous. Today "Kutani-yaki" is produced across the wider Kaga region — Kanazawa, Kaga City, Komatsu, and Nomi — but Kanazawa, with its dense concentration of craft shops and easy access from Tokyo and Kyoto, is where most visitors will actually see and buy it.

    What to Look For: Five Colors and a Few Key Styles

    Kutani ware is instantly recognizable once you know the palette: gosai, the five colors of green, yellow, red, purple, and deep blue, applied in thick, glossy overglaze enamels that often cover almost the entire surface of a piece. This is a very different look from the airy blue-and-white porcelain of Arita — if you want a point of comparison, our guide to Arita & Imari covers Japan’s other major porcelain region, and seeing both styles side by side makes the difference click immediately. Within Kutani ware itself, dealers and collectors distinguish several sub-styles: Ao-Kutani (heavy on green and yellow, little to no red, from the original 17th-century kilns), the Yoshidaya revival style that echoes it, Iidaya (red-dominant with fine gold linework), and Shoza style, a Meiji-era export favorite dense with red and gold. None of this is essential to enjoy the ware, but knowing the terms helps you ask better questions in shops and understand why a similar-looking bowl can cost ¥3,000 in one store and ¥80,000 in another.

    Where to Buy in Kanazawa City

    You don’t need to leave central Kanazawa to find genuine, well-made pieces. A few reliable stops:

    • Ishikawa-ken Kanko Bussankan (Ishikawa Prefectural Products Center), right by the Ishikawa Gate entrance to Kenrokuen Garden. It’s a multi-floor showcase of regional crafts — Kutani ware, Wajima lacquerware, gold leaf — with clearly labeled kiln and artist names, generally open around 9:00–18:00 with no fixed closed day. It’s the easiest place to compare price points in one visit.
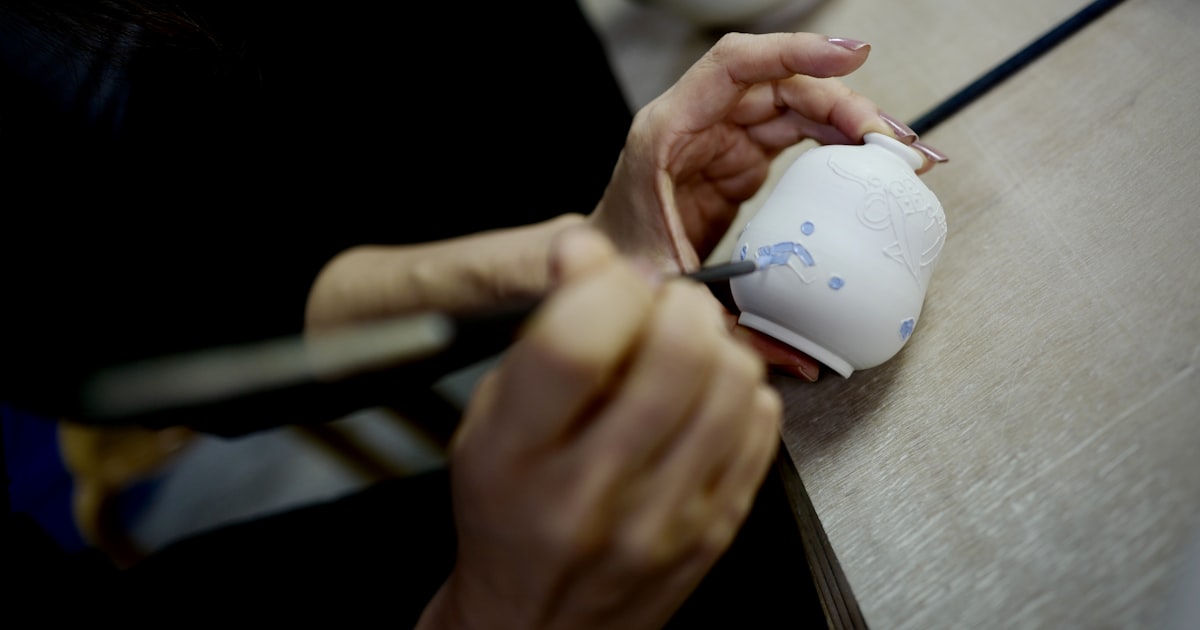
    • Kutani Kosen-gama, a working kiln and shop near Nomachi in central Kanazawa, where you can see pieces being painted and sometimes try hand-painting a small item yourself. Good for understanding how much labor goes into a single plate.
    • Higashi Chaya District, the old geisha quarter, has several craft boutiques mixing Kutani ware with gold-leaf goods; quality varies more here, so check for a maker’s mark before buying anything priced like a serious piece.
    • Kanazawa Station’s Rinto/Anto shopping arcades, useful for a last-minute purchase before your train — open into the evening, though selection leans toward smaller, giftable items.

    Day Trip to the Source: Kaga and Nomi

    If you have half a day to spare, the actual kiln towns are worth the trip. Nomi City has a cluster of studios collectively promoted as the Kutani Ceramic Art Village, plus a dedicated Kutani ware museum, while Kaga City (which includes the original Kutani village site) has working kilns that sell seconds and overstock at noticeably lower prices than city boutiques. Both are reachable by local train and a short bus or taxi ride from Kanazawa Station, but if you’re also planning to explore the wider Kaga countryside — hot spring towns, rural back roads — it may be worth reading our guide to renting a car in Japan and combining the pottery towns with a small road trip. Time it right and you can catch the Kutani Chawan Matsuri (Kutani Bowl Festival), an annual outdoor market held in early May in the Kutani area where kilns clear out inventory at a fraction of retail price — it’s popular with Japanese collectors, so go early in the day for the best selection.

    What to Expect to Pay

    Budget (under ¥3,000): chopstick rests (¥800–1,500), a single sake cup or guinomi (¥1,500–3,000), and small dishes make easy, packable souvenirs.

    Mid-range (¥3,000–15,000): a rice bowl, teacup, or small decorative plate typically runs ¥4,000–9,000; matched pairs or small sets push toward ¥15,000.

    Splurge (¥30,000+): artist-signed vases and large decorative plates from named kilns commonly sell for ¥30,000–150,000, and genuine antique Ko-Kutani or Yoshidaya pieces at specialist dealers can run well into six figures. Larger stores offer tax-free shopping on purchases over ¥5,000 (pre-tax) with your passport, which is worth asking about before you pay.

    Common Mistakes to Avoid

    Not everything colorful and floral in a Kanazawa souvenir shop is genuine hand-painted Kutani ware — cheaper transferware imitations exist, so flip a piece over and look for a kiln seal or maker’s mark, and don’t hesitate to ask staff whether a piece is tegaki (hand-painted) or printed. Second, porcelain is heavy and breakable: ask the shop for proper packing, or if you’re buying several pieces, ask about domestic courier (takkyubin) shipping to your next hotel or straight to the airport so you’re not carrying fragile boxes on trains. Third, heavily gold-decorated pieces are typically decorative only and shouldn’t go in a microwave or dishwasher, whatever the shop clerk may or may not mention. And finally, don’t leave your shopping until the last twenty minutes before a Shinkansen departure — station shops get crowded right before peak departure times, and careful gift-wrapping takes longer than you’d expect.

    Getting There and Practical Tips

    Kanazawa is about 2.5 hours from Tokyo on the Hokuriku Shinkansen, or roughly 2.5–3 hours from Osaka, Kyoto, or Nagoya via limited express trains. Local buses around the city accept regional IC cards — see our guide to IC cards beyond Tokyo if you’re not sure which one works where. There’s no strict best season for shopping itself, but pairing your visit with cherry blossoms at Kenrokuen in early April or autumn foliage in November makes for a prettier trip overall. If you’d rather wrap a delicate piece the traditional way instead of asking for plastic packaging, it’s worth picking up a furoshiki cloth beforehand — our guide to furoshiki wrapping covers a few knots sturdy enough for a boxed teacup.

  • Furoshiki: Japan’s Reusable Wrapping Cloth and How to Use One

    Furoshiki: Japan’s Reusable Wrapping Cloth and How to Use One

    Photo by freestocks on Unsplash

    Long before reusable tote bags became a global talking point, Japan already had one: the furoshiki. This square piece of cloth has been used for centuries to wrap, carry, and gift almost anything—bento boxes, sake bottles, gifts, even furniture. It folds flat into a pocket, costs less than a souvenir T-shirt, and doubles as a genuinely useful travel accessory. Here’s how to choose one, where to buy it, and how to actually use it once you’re home.

    What Is Furoshiki, and Why Should You Care?

    The word combines furo (bath) and shiki (to spread), a nod to its Edo-period use for bundling clothes at public bathhouses. Over time it became an all-purpose wrapping tool for merchants, gift-givers, and travelers, largely replaced by paper and plastic bags in the 20th century. In the last decade or two it’s had a genuine revival, partly on environmental grounds and partly because it’s simply elegant: one square of cloth, tied a few different ways, replaces gift wrap, a lunch bag, a wine carrier, and an emergency tote.

    For visitors, furoshiki make excellent souvenirs precisely because they’re light, flat, and useful the day you buy them—wrap your onsen toiletries in one, or use it to bundle up breakable souvenirs like Arita or Imari porcelain for the flight home.

    Choosing the Right Furoshiki: Sizes, Fabrics, and Prices

    Furoshiki are sold by size, measured in centimeters per side:

    • 45cm – the most common size, good for wrapping a small gift box, a bento, or a bottle of wine. Roughly ¥800–2,500 in cotton.
    • 68–70cm – wraps two bottles, a stack of books, or works as a small bag. Typically ¥1,500–4,000.
    • 90cm and up – large enough to use as an actual carry bag or to wrap bulky items. Often ¥3,000–8,000, more in silk.

    On fabric: cotton is the everyday choice—easy to wash, inexpensive, and fine for gifts or grocery-carrying. Rayon and chirimen (a crepe-textured synthetic or silk blend) have more drape, which matters for tying knots that need to hang nicely, like a bag handle. Pure silk furoshiki, often hand-dyed with traditional patterns, are the splurge option—expect ¥8,000–20,000 or more at specialty shops, and treat them as gift items or display pieces rather than daily carry cloths.

    Budget tip: 100-yen shops (Daiso, Seria) and Muji both stock simple cotton furoshiki for ¥300–1,500, which is plenty for practice and casual use. Save the specialty shops for a nicer pattern you’ll actually want to keep.

    Where to Buy Furoshiki in Japan

    Every department store in Japan (Takashimaya, Isetan, Daimaru) has a furoshiki section, usually near the gift-wrapping or tableware floor, with a wide range from ¥1,000 basics to museum-quality silk pieces. Kyoto is the spiritual home of the craft, thanks to the city’s textile history in the Nishijin district—look for small specialty shops selling hand-dyed cotton and chirimen furoshiki in traditional motifs like waves, cranes, and seasonal flowers.

    In Tokyo, old shitamachi neighborhoods are a good bet for traditional textile shops tucked between temples and old shopfronts—Yanaka in particular has small craft and textile stores worth a browse if you’re already there for the cats and senbei. If you’re shopping for kitchen-oriented cloths—large ones for wrapping food storage containers or bento—Kappabashi Kitchen Town carries practical cotton furoshiki alongside its restaurant-supply stock, generally cheaper than department store prices. Most independent shops open around 10:00 and close by 18:00–19:00; department store hours run later, typically to 20:00.

    Five Essential Furoshiki Wrapping Techniques

    You don’t need to learn dozens of knots—five will cover almost everything:

    • Otsukai-zutsumi (basic parcel wrap): Place the box diagonally in the center of the cloth, fold the near and far corners over the top, then tie the two side corners in a simple double knot on top. This is the default way to wrap a gift box or bento.
    • Bin-zutsumi (bottle wrap): Roll a bottle diagonally from one corner, then tie the two long ends around the neck with a bow. Makes a wine bottle look like an actual gift rather than something grabbed at the last minute.
    • Suika-zutsumi (round object wrap): Named for wrapping watermelons—gather the cloth around a round or irregular object and tie the four corners at the top, twisting the fabric taut as you go.
    • Kaban-zutsumi (bag knot): Tie two opposite corners together, then the other two, leaving one pair of knots longer to form a handle. With a 90cm cloth this becomes a genuinely usable tote.
    • Ichimai-zutsumi (flat wrap for books/laptops): Fold the cloth around a flat item like a book or tablet, tucking and tying at the ends—handy as an improvised padded sleeve.

    None of these require special skill; the whole point of furoshiki is that a few folds and one knot solve most wrapping problems.

    Common Mistakes First-Timers Make

    The most common issue is buying a cloth too small for the job—a 45cm furoshiki won’t wrap a bottle of sake comfortably, so size up if you’re unsure. The second is using slippery synthetic fabric for knots that need friction, like the bag handle knot; cotton or chirimen grips itself far better than smooth polyester. Finally, don’t over-tighten decorative bow knots meant to be untied by the recipient—Japanese gift-giving etiquette generally expects the cloth to be returned or reused, not kept wrapped around the item permanently.

    Best Season and Occasions to Use One

    Furoshiki have a natural place in Japan’s mid-year and year-end gift-giving seasons, ochugen (early-to-mid July) and oseibo (December), when boxed gifts of food or household goods change hands constantly—shops get noticeably busier with furoshiki and gift-wrap displays during these windows. Cherry blossom season is another good excuse: pack a bento in a furoshiki for a hanami picnic instead of disposable containers, a habit that pairs naturally with the general spirit of springtime outings described in our guide to Japan in spring. If you’re picking up sweets from a wagashi shop as a gift, ask to have the box wrapped in furoshiki rather than paper—it’s a small touch that locals notice, and pairs well with what you’ll learn in our beginner’s guide to wagashi.

    Bringing Furoshiki Home

    Pack a couple of cotton furoshiki in your suitcase before you fly home—they weigh almost nothing and can wrap fragile souvenirs, double as a laundry bag, or bundle up food picked up on a crawl through somewhere like Nishiki Market. Once home, a furoshiki makes a genuinely reusable gift wrap for birthdays and holidays, and it’s one of the few souvenirs from a Japan trip that gets more useful with time rather than sitting on a shelf.

  • Arita & Imari: Japan’s Historic Porcelain Towns and Where to Buy

    Arita & Imari: Japan’s Historic Porcelain Towns and Where to Buy

    Photo by Rob Maxwell on Unsplash

    Long before “Made in Japan” meant electronics, it meant porcelain. In the hills of Saga Prefecture on the island of Kyushu, the twin towns of Arita and Imari have been firing kilns since 1616, and the wares that came out of them once furnished the palaces of Europe. If you care about Japanese craft — the same instinct that draws people to wagashi or a well-poured hi-fi setup — this is one of the few places in Japan where you can watch a centuries-old industry still working at full speed, and buy directly from the kilns that make it.

    Why Arita and Imari Matter

    In 1616, a Korean potter working under the name Kanagae Sanbei (also known as Yi Sam-pyeong) discovered kaolin clay at Izumiyama, on the edge of what’s now Arita town. It was the first source of true porcelain-grade clay found in Japan, and it kicked off an industry that would dominate Japanese ceramics for the next four centuries. Arita became the production center; Imari, a port town a short distance away, became the shipping point. Dutch East India Company ships loaded Arita-made porcelain at Imari’s harbor and carried it to Europe, which is why the ware is still known internationally as “Imari ware” even though almost none of it was actually made in Imari itself.

    The most exclusive production happened at Okawachiyama, a small valley near Imari where the Nabeshima domain set up kilns making porcelain exclusively for the shogun and other daimyo. The valley was sealed off from outsiders, with guard posts at its entrance, to protect trade secrets — hence its nickname, the “secret kiln village.” That history is still visible today in the quality and formality of Nabeshima-style ware, which favors restrained, precisely painted designs compared to the more decorative Kakiemon and Imari-Nabeshima export styles.

    Getting There and When to Go

    Arita and Imari sit close together in Saga Prefecture, roughly 90 minutes from Fukuoka and about an hour from Nagasaki. From Hakata Station in Fukuoka, take a JR limited express (Kamome or similar) toward Sasebo/Nagasaki, then transfer to a JR Sasebo Line local train to Arita Station — the whole trip runs around 1.5–2 hours depending on connections. From Nagasaki, the trip is similar in length via the Sasebo Line. Imari is reachable from Arita by a short ride on the JR Sasebo Line or the private Matsuura Railway. If you’re travelling around Kyushu, a SUGOCA card covers all of these local trains — worth reading up on if you’re used to Tokyo’s Suica, since regional IC cards work a little differently; see IC Cards Beyond Tokyo for how they interoperate.

    Both towns are walkable once you arrive, but distances between kilns can be a few kilometers, so a rental bicycle (available near Arita Station for roughly ¥500–1,000 a day) or a short taxi hop is useful. Most kiln shops and galleries keep hours of around 9:00–17:00, and quite a few close one day a week (often Tuesday or Wednesday) — it’s worth checking a specific shop’s hours before making a special trip, since Arita is not a place where everything is open all the time. The single busiest week of the year is Golden Week (April 29–May 5), when the Arita Ceramics Fair takes over the town; if you want quiet browsing rather than crowds, aim for late spring or autumn outside that window. If your trip already lines up with cherry blossom season, our Japan in Spring guide has the broader timing context for late April travel.

    Arita: Shop Streets, Kilns and the Ceramic Museum

    Arita’s old shopping street, Uchiyama, runs along the former Nagasaki Kaido road and is lined with kiln shops, some in buildings over a hundred years old. Look for the tonbai walls tucked into side alleys — fences built from broken kiln bricks and discarded pottery shards, a distinctive bit of recycled architecture unique to this district.

    A few kilns worth prioritizing if you’re short on time:

    • Fukagawa Seiji — founded in 1894 and a longtime supplier to the Imperial Household; clean, formal designs, with a retail shop and small gallery.
    • Gen-emon Kiln — one of the oldest continuously operating kilns in Arita, known for indigo-and-white sometsuke patterns at relatively accessible prices.
    • Kakiemon Kiln — the home of the Kakiemon family’s signature milky-white nigoshide porcelain and overglaze enamel work; pieces here run from mid-range to serious splurge territory.

    For context before you shop, the Kyushu Ceramic Museum (Kyushu Toji Bunkakan), a short walk from Arita Station, has free admission and a strong permanent collection tracing the region’s ceramic history — closed Mondays. The Arita Ceramic Museum in the town center is smaller and charges a modest entry fee, but has good historical pieces if you want more depth. If you want a single, all-in-one stop, Arita Porcelain Park — a themed complex including a full-scale replica of Dresden’s Zwinger Palace — sells work from dozens of kilns under one roof, though prices there trend a bit higher than buying direct from individual kiln shops.

    Imari and Okawachiyama: The Secret Kiln Village

    Imari town itself is a working port with a pleasant riverside shopping arcade (Imari Otemon), but the real destination is Okawachiyama, about 15–20 minutes by taxi or local bus from Imari Station. This tiny valley of roughly thirty kilns still produces Nabeshima- and Imari-style ware, and it’s dense enough to explore entirely on foot in half a day. The valley is dotted with decorative ceramic-tiled lamp posts and gateposts made by local kilns — a nice reminder that this whole village is essentially a living showroom. An Okawachiyama Ceramic Museum near the entrance gives useful background on the domain-kiln system before you start browsing shops.

    Because Okawachiyama pieces historically served the shogunate, quality here tends to be high and prices reflect it — expect this to be your splurge stop rather than your bargain stop.

    The Arita Ceramics Fair: Japan’s Biggest Pottery Market

    Every year from April 29 to May 5, Arita hosts the Arita Ceramics Fair (Arita Tōki Ichi), a market that’s been running for well over a century. Roughly 4 kilometers of the main street fill with several hundred stalls from kilns and wholesalers across the region, and the crowds are enormous — this is one of Kyushu’s biggest annual events. The upside is pricing: because much of what’s sold is factory-direct or slightly imperfect stock (wake ari), you’ll find everyday tableware discounted well below gallery prices, sometimes to a few hundred yen per piece for seconds and overstock. The downside is that it’s crowded, hot, and not the setting for leisurely browsing of high-end pieces — if you want a calm, considered shopping experience with a kiln’s full range on display, visit outside the fair dates instead.

    What to Buy, What It Costs, and How to Ship It Home

    Budget (¥1,000–3,000): A single sake cup, small sometsuke (blue-and-white) dish, or chopstick rest from a mid-tier kiln shop. This is also the sweet spot for fair-week seconds.

    Mid-range (¥5,000–20,000): A rice bowl and matching dish set, a mid-size Gen-emon or Fukagawa Seiji piece, or a decorative sometsuke vase.

    Splurge (¥30,000 and well beyond): Kakiemon nigoshide ware, Nabeshima-style pieces from Okawachiyama, or signed work from a recognized kiln master — these can run into the hundreds of thousands of yen for museum-quality pieces, and some shops will happily show you what that tier looks like even if you’re not buying.

    Most established kiln shops in both towns are used to foreign visitors and can arrange international shipping for fragile purchases — ask before you buy, since packing porcelain safely in your own luggage is a real risk, not just a formality. Cash is still preferred at smaller family-run shops, though the bigger names accept cards. If you’re stacking a Kyushu itinerary, Arita and Imari pair naturally with a swing further south to the hot spring towns of Beppu and Yufuin.

    Common Mistakes to Avoid

    Don’t assume every shop is open every day — the smaller kiln-run shops especially keep irregular hours, and a wasted trip to a closed storefront is a common complaint from visitors who didn’t check ahead. Don’t try to see both Arita and Imari’s Okawachiyama district in a single rushed afternoon; budget a full day if you want to do both properly, since transfers between them eat more time than the map suggests. Don’t buy your only pieces during the Golden Week fair if you actually want to see a kiln’s full catalog — the fair is about volume and bargains, not curated selection. And don’t skip asking about shipping: porcelain is heavy and breakable, and a shop that ships regularly to the US or Europe will pack it far better than you can in a suitcase.

  • Wagashi: Japan’s Traditional Sweets — A Beginner’s Guide

    Wagashi: Japan’s Traditional Sweets — A Beginner’s Guide

    Long before Western-style chocolate arrived in Japan, there was wagashi — traditional confections built around red bean paste, mochi, and seasonal motifs rather than butter and sugar. If you’ve only tried the Kit Kats and Royce’ chocolate that fill souvenir shelves (our chocolate and sweets guide covers those), wagashi is the older, quieter tradition worth seeking out — and it pairs perfectly with a bowl of matcha.

    What makes wagashi different

    Wagashi is built around a small set of core ingredients: anko (sweetened red bean paste, either smooth “koshian” or chunky “tsubuan”), mochi (pounded glutinous rice), agar-based jellies, and seasonal fruit or floral flavoring. It’s typically far less sweet than Western confectionery and designed to be eaten in small portions alongside tea — the bitterness of matcha and the sweetness of wagashi are meant to balance each other, which is why the two are almost always served together.

    Types worth knowing

    • Namagashi — “fresh” wagashi, delicate and highly seasonal, often shaped to resemble cherry blossoms, autumn leaves, or seasonal flowers. These are the most artistic and the most perishable, usually eaten within a day or two.
    • Daifuku — soft mochi stuffed with sweet red bean paste; strawberry daifuku (ichigo daifuku), with a whole strawberry inside, is a beloved seasonal spring version.
    • Dorayaki — two small pancake-like discs sandwiching red bean paste, famous as the favorite food of the character Doraemon.
    • Yokan — a firm, sliceable jellied bar made from red bean paste and agar, dense and not overly sweet; it travels well and keeps for weeks, making it one of the best wagashi to bring home.
    • Monaka — thin, crisp wafer shells filled with red bean paste, assembled fresh so the wafer stays crunchy.
    • Taiyaki — a fish-shaped waffle cake, usually filled with red bean paste (though custard and chocolate versions are common street-food variants), sold hot from street stalls.
    • Higashi — dry, pressed sugar sweets used in formal tea ceremony, delicate and often shaped into small seasonal molds.

    Where to find good wagashi

    • Kyoto is the spiritual home of wagashi, thanks to its centuries of tea-ceremony culture; long-established shops near temples and in the Nishiki Market area specialize in namagashi made fresh daily. Pair a visit with our green tea guide to shop for matcha at the same time.
    • Depachika food halls in any major department store carry a rotating, beautifully packaged selection — a good one-stop option if you’re short on time or want gift boxes.
    • Specialty wagashi shops with generations of history exist in most historic cities; look for shopfronts with simple wooden signage and a small glass case rather than flashy displays.
    • Convenience stores and supermarkets carry mass-produced daifuku and dorayaki that are perfectly good everyday versions, at a fraction of the price of artisan shops.

    Prices and what to expect

    • Individual pieces of namagashi from a quality shop typically run 300–600 yen each, reflecting the handwork involved.
    • Daifuku, dorayaki, and taiyaki from a casual shop or street stall are much cheaper — often 150–300 yen.
    • Gift boxes of yokan or assorted wagashi make excellent packable souvenirs, generally 1,000–3,000 yen depending on the shop’s reputation and packaging.
    • A proper tea-ceremony experience that includes wagashi and matcha typically costs 1,500–3,000 yen at casual tea houses in Kyoto, less formal than a full ceremony but a good introduction.

    Seasonal wagashi to look for

    • Spring — sakura mochi (pink mochi wrapped in a pickled cherry leaf) and ichigo daifuku.
    • Summer — mizu yokan (a lighter, more chilled version of standard yokan) and kingyokukan, a translucent jelly meant to look cooling.
    • Autumn — chestnut-based sweets (kuri) and namagashi shaped like maple leaves.
    • Winter — yuzu-flavored confections and New Year’s wagashi shaped like pine, bamboo, and plum, Japan’s traditional lucky symbols.

    Bringing wagashi home

    This is the catch: fresh namagashi doesn’t travel well and is meant to be eaten within a day or two, so it’s not a realistic souvenir for anyone flying home. For gifts, stick to shelf-stable options — yokan, dried higashi, and vacuum-packed monaka all survive a long flight fine. If you want the fresh experience, treat it the way locals do: buy it the same day you plan to eat it, ideally alongside a hot cup of matcha or sencha, and think of it as something to enjoy in Japan rather than to pack in your suitcase.

    Trying a wagashi-making class

    Several cities, especially Kyoto and Tokyo, offer short hands-on wagashi-making workshops for visitors, usually lasting 60–90 minutes and running 3,000–6,000 yen per person. An instructor guides you through shaping namagashi with small wooden and metal tools, and you get to eat what you make alongside a proper cup of matcha at the end. It’s a good rainy-day activity or a calmer alternative to a full tea ceremony, and unlike most souvenirs, the skill (if not the sweet itself) travels home with you. Many classes are run in English or with an interpreter on hand specifically for tourists, so no Japanese is required to join.

  • Shochu: Japan’s Other Spirit — A Beginner’s Guide

    Shochu: Japan’s Other Spirit — A Beginner’s Guide

    Some links below are affiliate links. If you buy through them, Japan Trove may earn a small commission at no extra cost to you.

    Sake gets most of the attention, but shochu is what a lot of Japanese people actually drink on a regular Tuesday night. It’s a distilled spirit, usually lower in alcohol than whisky or vodka, made from a surprising range of ingredients, and it’s central to izakaya culture across the country — especially in Kyushu, where it outsells sake by a wide margin. If you’ve only tried sake or Japanese whisky, shochu is worth a detour.

    What shochu actually is

    Shochu is a distilled spirit, typically 25% ABV (compared to sake’s roughly 15–16%, which isn’t distilled at all — see our sake guide for that side of things). Traditional “honkaku” (authentic) shochu is single-distilled, which preserves more flavor from its base ingredient, while cheaper blended shochu is column-distilled for a lighter, more neutral taste closer to vodka.

    The main types, by base ingredient

    • Imo-jochu (sweet potato) — the most distinctive style, earthy and full-bodied, sometimes with a funky, almost savory edge. Kagoshima Prefecture in Kyushu is the heartland; look for the label “芋” (imo).
    • Mugi-jochu (barley) — lighter and smoother, closer to a mild whisky in character, often the easiest entry point for newcomers. Oita Prefecture is well known for this style.
    • Kome-jochu (rice) — clean and mild, sometimes similar in aroma to sake but with a spirit’s kick. Kumamoto is a key production area.
    • Kokuto-jochu (brown sugar) — made only in the Amami Islands (south of Kyushu, administratively part of Kagoshima), with a rounder, slightly sweet character.
    • Soba-jochu (buckwheat) — nutty and delicate, a niche but well-loved style, particularly from Miyazaki.

    How to drink it

    Unlike sake, shochu is rarely drunk straight and small. The classic serving styles are:

    • On the rocks (rokku) — over ice, letting it open up slowly as it dilutes.
    • Mizuwari — mixed with water, often pre-mixed and rested overnight at good izakaya to mellow the spirit before serving.
    • Oyuwari — mixed with hot water, a popular winter style that brings out aroma more than ice ever could.
    • Chuhai — mixed with soda and flavored syrup or fruit juice, the base of Japan’s ubiquitous canned “chu-hi” drinks sold at every konbini.

    Ask any izakaya staff for a recommendation on ratio — it’s a completely normal question, and shochu is meant to be adjusted to taste rather than drunk at a fixed strength.

    Where to try it

    • Izakaya menus almost always have a shochu section, often organized by base ingredient with several bottles available by the glass.
    • Kyushu is the best region to explore shochu seriously — bars in Fukuoka and across Kagoshima and Kumamoto often stock dozens of regional labels you won’t find elsewhere in Japan.
    • Depachika and liquor shops sell bottles for travel, and duty-free shops at major airports carry well-known brands.

    Bottles worth buying

    • Iichiko — a widely available, smooth barley shochu that’s a safe, well-made starting point.
    • Kuro Kirishima — a black-koji sweet potato shochu with more depth, a reasonable step up once you know you like the imo style.
    • Mao (魔王) and Mori Izo — sought-after, harder-to-find premium sweet potato shochu that serious enthusiasts chase down; don’t expect to find these on a regular shelf.
    • Most standard bottles run 1,500–3,000 yen for 720ml–1.8L, making shochu one of the better value spirits to bring home; check Amazon if you want to sample styles before you travel.

    Bringing it home

    • Duty-free allowances vary by country — typically one to three liters of spirits per adult, so check your destination’s customs rules before buying multiple bottles.
    • Glass bottles should go in checked luggage, well wrapped; duty-free liquor bought after security can usually be carried on if it stays sealed in its tamper-evident bag for connecting flights.
    • Shochu doesn’t need refrigeration and keeps well for years unopened, unlike some sake styles.

    Shochu vs. whisky vs. sake at a glance

    • Sake — brewed, not distilled, around 15–16% ABV, made only from rice; best served slightly chilled or warm depending on grade.
    • Shochu — distilled, typically 25% ABV, made from sweet potato, barley, rice, or buckwheat; almost always diluted with ice, water, or soda before drinking.
    • Japanese whisky — distilled from malted grain and aged in wood casks, generally 40%+ ABV, and priced much higher than shochu at the premium end.

    Because it’s usually diluted, a glass of shochu often ends up with less alcohol per serving than a glass of wine, which is part of why it works as an everyday drink rather than an occasional splurge the way premium sake or whisky can be.

    A quick tasting note for beginners

    If you want one bottle to understand what the fuss is about, start with a mugi (barley) shochu on the rocks — it’s the style closest to whisky in profile, so it won’t feel like a completely foreign flavor. Once you’re comfortable, move to imo (sweet potato) to experience the more distinctive, uniquely Japanese side of the category. Pair either with grilled skewers (yakitori) or a Kyushu-style tonkotsu ramen night, and you’ll understand why it’s the house spirit in so many izakaya. Most izakaya offer a “bottle keep” system for regulars — buy a full bottle, and the shop stores it with your name on it for your next visit — a sign of how central shochu is to repeat, everyday drinking rather than one-off tourist novelty.

  • Buying Audio Gear in Japan: Headphones & Hi-Fi

    Buying Audio Gear in Japan: Headphones & Hi-Fi

    Some links below are affiliate links. If you buy through them, Japan Trove may earn a small commission at no extra cost to you.

    Japan is an audiophile’s paradise — home to legendary audio brands, specialist shops, and gear you can’t easily find elsewhere. If you love headphones and hi-fi, here’s what to know and where to buy.

    Why buy audio in Japan

    • Japan-exclusive models and colorways from major brands.
    • Deep specialist stores where you can audition dozens of headphones and IEMs.
    • Tax-free savings for tourists, plus a strong used market.

    Brands & gear to explore

    • Headphones & IEMs — famous Japanese audio houses and boutique in-ear brands.
    • Portable players & DACs — high-res audio players and amps.
    • Vinyl & hi-fi — turntables and components; pair with our vinyl records guide.

    Where to shop

    • e-earphones (Akihabara/Osaka) — a legendary headphone/IEM store with huge audition walls; see our Akihabara guide.
    • Yodobashi & Bic Camera — big tax-free selections; see our electronics guide.
    • Fujiya Avic and used shops for pre-owned bargains; see secondhand shopping.

    Before you buy

    • Audition first — bring your own music; staff are used to careful listeners.
    • Warranty may be domestic-only — ask for international if it matters.
    • Bring your passport for tax-free; some gear is on Amazon or via a proxy service for Japan-only items.

    Typical prices & what counts as a deal

    • Flagship over-ear headphones from Japanese brands often launch JPY 5,000-15,000 cheaper in Japan than their US/EU retail price, before tax-free savings are even applied.
    • Entry-level IEMs (in-ear monitors) from boutique Japanese and Chinese-import brands start around JPY 3,000-8,000 at specialist shops like e-earphones — a good way to try the hobby without committing to a flagship price.
    • Used and demo-unit gear at shops like Fujiya Avic can run 20-40% below new retail, and is a normal, well-regarded way to buy hi-fi in Japan, not a last resort.

    Common mistakes to avoid

    • Buying sealed without auditioning — nearly every specialist shop has open demo units on the audition wall; use them, since Japanese tuning preferences (often brighter or more detailed) can surprise buyers used to warmer Western tunings.
    • Assuming tax-free pricing applies everywhere — smaller specialist shops sometimes require a minimum purchase amount to process the tax refund; ask before you commit to multiple smaller items across different visits.
    • Forgetting voltage/plug compatibility for desktop amps and DACs — Japan runs 100V, which most modern chargers and small amps handle fine, but check the label on anything with a larger power brick.

    Best time and place to shop

    Weekday afternoons at e-earphones and similar shops are far quieter than weekends, giving you real time on the audition wall without feeling rushed. If you’re combining audio shopping with a wider electronics run, pair it with a stop at Yodobashi or Bic Camera for mainstream gear and save the specialist shops for anything niche or Japan-exclusive.

    Budget, mid-range & splurge shopping tiers

    • Budget: entry IEMs and used cables/accessories at specialist secondhand counters, JPY 2,000-8,000.
    • Mid-range: a well-regarded over-ear headphone or portable DAC/amp combo, JPY 20,000-60,000, often with meaningful tax-free savings.
    • Splurge: flagship reference headphones or a desktop tube amp setup, JPY 100,000+, best bought after auditioning several competitors on the same demo wall.

    Shipping gear home

    Larger or fragile purchases (turntables, floor-standing speakers, boxed amps) can usually be shipped internationally from the shop itself or via a forwarding service for a reasonable fee, which is worth asking about before you decide to check a bulky item as luggage. Keep your tax-free receipt and passport-linked purchase record until you clear customs at departure, since Japan’s tax-free system requires the paperwork to match the item leaving the country with you.

  • Buying a Camera in Japan: Tax-Free & Used Gear

    Buying a Camera in Japan: Tax-Free & Used Gear

    Some links below are affiliate links. If you buy through them, Japan Trove may earn a small commission at no extra cost to you.

    Japan is a dream destination for camera shopping — huge selection, tax-free savings, and a legendary used-gear scene. Here’s how to buy a camera or lens without the pitfalls.

    Why buy a camera in Japan

    • Selection — enormous stock of bodies, lenses, and accessories under one roof.
    • Tax-free savings for tourists on top of competitive prices.
    • World-class used market — honestly graded, often near-mint gear at great prices.

    Where to shop

    • Yodobashi Camera & Bic Camera — giant tax-free electronics stores with English support; see our electronics guide.
    • Map Camera, Fujiya Camera, and Kitamura — famous for used gear (Shinjuku/Nakano).
    • Nakano Broadway & secondhand shops for vintage finds; see secondhand shopping.

    Before you buy

    • Warranty: many Japanese warranties are domestic-only — ask about international warranty for new gear.
    • Menus & markings are usually switchable to English, but confirm.
    • Voltage: chargers are typically universal, but check.
    • Bring your passport for tax-free.

    Used-gear tips

    • Learn the shop’s grading system (e.g. AB, B) — conditions are reliable.
    • Inspect the sensor and test the shutter where possible.
    • Can’t visit? A proxy service can bid on Japanese used-camera sites; some gear is on Amazon .

    What cameras and lenses typically cost

    • New mirrorless bodies often price JPY 20,000-50,000 below US/EU retail before tax-free savings, especially for Japan-market color variants and kit lens bundles not sold abroad.
    • Well-graded used lenses at Map Camera or Kitamura commonly run 20-40% below new price, with condition grading reliable enough that many professional photographers buy used gear exclusively in Japan.
    • Budget an extra 30-60 minutes at the register for tax-free processing during busy periods — Yodobashi and Bic Camera have dedicated tax-free counters, but they queue up on weekends.

    Common mistakes to avoid

    • Assuming all accessories are tax-free — consumables like batteries and cleaning supplies are sometimes excluded from the tax refund even when bought alongside a camera body.
    • Not testing the specific unit before leaving the store — reputable used shops allow this, and it takes only a few minutes to check the shutter count display and sensor for dust.
    • Buying a camera with a region-locked firmware feature (rare but possible on some accessories) without checking compatibility with software back home.

    Which shop for which need

    New, tax-free, English-speaking-staff purchases point toward Yodobashi or Bic Camera; if you want the widest possible used selection and don’t mind browsing without much English support, Map Camera and Fujiya Camera in Shinjuku have the deepest inventories. Nakano Broadway rewards patient browsers hunting for vintage film cameras and unusual lenses rather than a specific model on a list.

    International shipping for camera gear

    If you buy more than you want to carry, most large electronics stores can arrange international shipping for an added fee, and specialist used-camera shops are used to overseas buyers who return home and later regret not picking up one more lens — ask about their mail-order service for future purchases even after you’ve left Japan.

  • Buying Vinyl Records in Japan: A Collector’s Guide

    Buying Vinyl Records in Japan: A Collector’s Guide

    Japan is a paradise for record collectors — pristine pressings, deep back catalogs, legendary city pop, and some of the best-stocked shops on earth. Here’s a collector’s guide to buying vinyl in Japan.

    Why Japan is a vinyl mecca

    Japanese pressings are famous for their quality and careful handling, and the country’s used-record scene is unrivaled — meticulously graded, often near-mint, and organized to a fault. From jazz to city pop to Western rock, the digging is world-class.

    What to hunt for

    • City pop & Japanese jazz — the sought-after genres that draw collectors worldwide.
    • Japanese pressings (OBI strips) — the paper “obi” band adds value; keep it intact.
    • Audiophile pressings and rare Western imports in mint condition.

    Where to shop

    • Disk Union — the legendary chain with genre-specific stores (Tokyo especially).
    • Shimokitazawa & Koenji — Tokyo neighborhoods packed with independent record shops.
    • HMV record shops, Face Records, and countless indies.
    • Akihabara & Nakano for collectibles; see our Akihabara guide.

    Buying tips

    • Learn the grading — shops grade sleeve and vinyl separately; conditions are honest.
    • Keep the OBI — it matters for value.
    • Bring your passport for tax-free on bigger hauls.
    • Pack carefully — records are heavy and warp in heat; consider forwarding or a proxy service to ship home.

    Tip

    Give yourself time — the best finds come from patient digging in the indies. A rare record makes a unique souvenir.

    What records typically cost

    • Common used Western rock and pop pressings run JPY 500-2,000 in good condition, genuinely cheap by international collector standards, especially at large chains like Disk Union that turn over huge volumes.
    • Sought-after city pop and Japanese jazz pressings, especially with an intact OBI strip, can run JPY 5,000-30,000+ depending on rarity — prices have risen sharply over the past decade as international collector interest grew.
    • New reissue vinyl from Japanese pressing plants typically runs JPY 3,000-4,500, often praised for pressing quality even when the underlying release is a foreign artist.

    Common mistakes to avoid

    • Buying a record with a damaged OBI expecting full value — collectors pay a real premium for an intact strip, so a torn or missing OBI should be reflected in a lower price; ask if it’s unclear.
    • Skipping the genre-specific Disk Union branches — the chain splits stock across specialized stores (jazz, rock, club music, etc.) in the same neighborhood, and browsing the wrong branch means missing most of the relevant stock.
    • Not asking to hear a needle-drop on an expensive used record — most shops will play a portion on request, which is standard practice, not an imposition.

    Shipping records home safely

    Vinyl warps in heat and can crack if bent, so pack purchases flat, never at an angle, and avoid leaving a bag of records in a hot car or direct sun while sightseeing. For a large haul, a specialist shipping service or your hotel’s front desk can often arrange a properly padded box home cheaper than checking them as fragile airline luggage.

    Where digging pays off most

    Shimokitazawa’s dense cluster of independent shops rewards slow, unhurried browsing over a single big-name store, since small owner-run shops often price stock more idiosyncratically than the chains — genuine bargains and mispriced rarities still turn up. Set aside at least half a day if crate-digging is a trip priority rather than treating it as a quick errand between other stops.

  • Japanese Denim: The World’s Best Jeans & Where to Buy

    Japanese Denim: The World’s Best Jeans & Where to Buy

    Some links below are affiliate links. If you buy through them, Japan Trove may earn a small commission at no extra cost to you.

    Japan is the global capital of premium selvedge denim — prized worldwide for its craftsmanship, vintage looms, and deep indigo. If you love jeans, here’s what to know and where to buy.

    Why Japanese denim is special

    Japanese mills (many in Okayama) weave denim on old shuttle looms, creating dense, characterful selvedge fabric that ages beautifully. Natural indigo dyeing and obsessive attention to detail make these some of the best jeans in the world.

    Brands to know

    • Momotaro, Iron Heart, Studio D’Artisan, Full Count — cult heavyweight labels.
    • The Flat Head, Samurai, Oni, Sugar Cane — beloved by denim enthusiasts.
    • Kojima (Okayama) — the denim heartland, with a famous “Jeans Street.” More Japanese labels in our fashion brands guide.

    What to look for

    • Selvedge edge and heavyweight (14oz+) fabric for character and fades.
    • Raw (unwashed) denim if you want to create your own fades over time.
    • Fit and inseam — try in person; many offer chain-stitch hemming.

    Where to buy

    • In Japan: specialty denim shops in Tokyo (Ura-Harajuku), Osaka, and Kojima’s Jeans Street; bring your passport for tax-free.
    • Vintage & secondhand — great deals; see our secondhand shopping guide.
    • From abroad: many brands ship worldwide, or use a proxy service for Japan-only releases; some on Amazon .

    Tips

    • Raw denim guidance: wear before first wash for sharper fades (follow the maker’s advice).
    • A great pair is a lasting souvenir — for yourself.

    What Japanese denim typically costs

    • Entry-level raw selvedge jeans from respected brands start around JPY 15,000-25,000; heavyweight cult labels like Studio D’Artisan or The Flat Head often run JPY 30,000-50,000.
    • Limited or collaboration releases from brands like Momotaro or Iron Heart can sell out fast and command resale premiums well above retail, so buying in-store at release is worth planning around if a specific model matters to you.
    • Vintage and secondhand Japanese denim shops sometimes carry older runs at 20-40% below current retail, a good way to try a cult brand before committing to full price.

    Common mistakes to avoid

    • Sizing raw denim like pre-shrunk jeans — unwashed selvedge typically shrinks noticeably after the first wash; ask staff for size guidance specific to the brand rather than relying on your usual size.
    • Machine-hemming a pair meant to keep its original chain-stitch roping — ask the shop to hem in-house if you want the fade pattern to look authentic over time.
    • Washing raw denim too early — most enthusiasts recommend 3-6 months of wear before a first wash to develop personal fade lines; washing on day one erases that potential.

    Visiting Kojima’s Jeans Street

    If denim is a genuine trip priority, Kojima in Okayama Prefecture is worth the detour — an entire street of denim shops, a denim-themed bridge, and even indigo-dyed vending machines celebrating the town’s manufacturing history. It pairs naturally with a wider Okayama stop en route to Naoshima or western Japan.

    Caring for raw denim while traveling

    If you plan to wear a new pair through the rest of your trip, avoid getting them soaked in rain or onsen steam before they’ve had a chance to mold to your body — a light misting to remove odor is fine, but a full wash resets the fading process you’re trying to build. Spot-cleaning with a damp cloth is the safest option while traveling.