Japan Trove

Category: Travel

Practical, up-to-date guides for traveling in Japan — itineraries, rail passes, eSIMs, where to stay, seasonal timing, etiquette, and the local know-how that makes a trip smoother. Written with real Japanese sources so you get the answer that actually works on the ground, not the recycled tourist one.

  • How to See Mt. Fuji: Best Views, Times & Climbing

    How to See Mt. Fuji: Best Views, Times & Climbing

    Some links below are affiliate links. If you book through them, Japan Trove may earn a small commission at no extra cost to you.

    Mt. Fuji is Japan’s most iconic sight — but it’s famously shy, often hidden by cloud. Here’s how and where to actually see it (and whether to climb it).

    Best time to see Fuji

    • Clearest views: autumn and winter (roughly Nov–Feb), especially crisp mornings.
    • Time of day: early morning and late afternoon beat hazy midday.
    • Summer is climbing season but often too hazy for good distant views.

    Best places to view it

    • Hakone — hot springs with Fuji views; an easy day trip or overnight from Tokyo. See day trips from Tokyo.
    • Kawaguchiko (Fuji Five Lakes) — postcard reflections of Fuji over the lake.
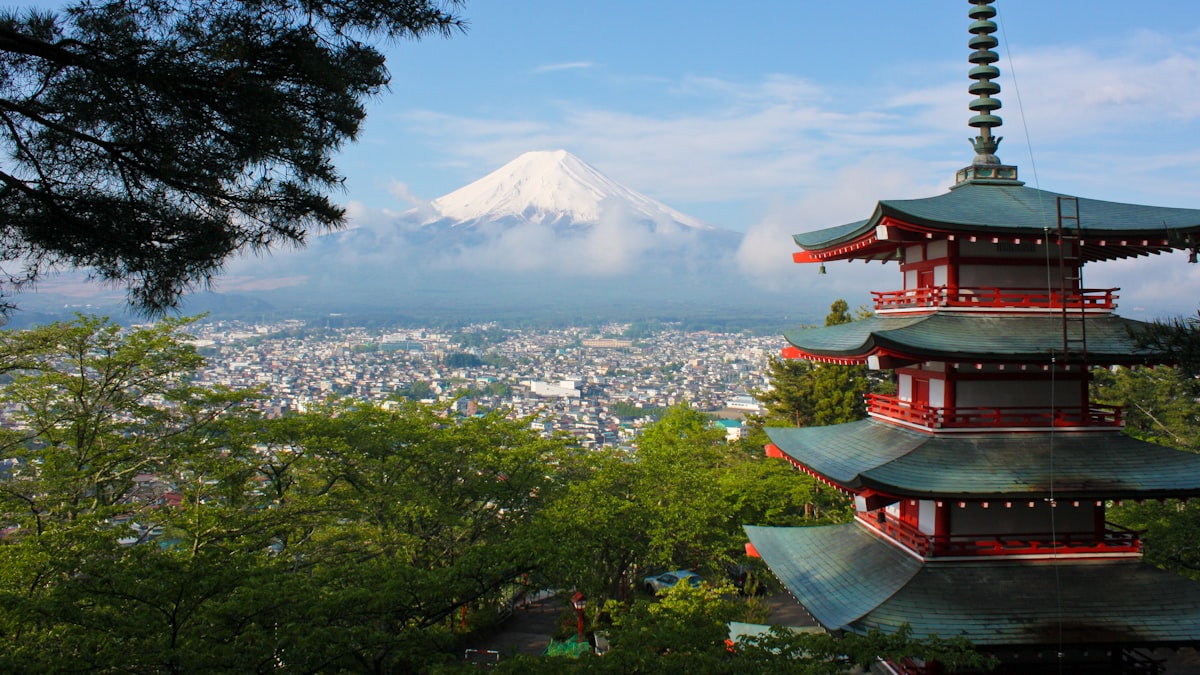
    • Chureito Pagoda — the famous pagoda-with-Fuji shot near Fujiyoshida.
    • From the shinkansen — sit on the right side Tokyo→Kyoto; see our bullet train guide.
    • Gotemba / Oshino Hakkai — outlet shopping and spring-water village with mountain views.

    Should you climb it?

    • Season: official climbing is only early July to early September.
    • Difficulty: no technical skill needed, but it’s a long, steep, cold slog — altitude and weather are the real challenges.
    • Classic plan: climb in the afternoon, sleep in a mountain hut, summit for sunrise (goraiko).
    • Rules: trails now have entry fees and daily limits — check the current-year rules before booking.

    Getting there

    Buses run from Tokyo (Shinjuku) to Kawaguchiko and the Fuji trailheads; trains reach Fujiyoshida/Kawaguchiko. Guided day tours bundle transport and the best viewpoints — browse Fuji day tours on Klook . Bring layers, and don’t forget an eSIM to check the forecast.

    Reality check

    Fuji hides behind clouds often — build in a flexible day or two, chase a clear morning, and you’ll get your shot. Fold it into our 7-day itinerary.

    What a Fuji trip costs

    • Buses from Shinjuku to Kawaguchiko run about JPY 2,000-2,200 one-way; a guided day tour bundling transport and 2-3 viewpoints typically runs JPY 8,000-15,000 per person.
    • Climbing season trail fees now run around JPY 2,000-4,000 per climber (subject to change year to year), plus mountain hut costs of JPY 8,000-15,000 per person for the overnight stop most climbers use before a sunrise summit push.
    • The Fuji Five Lakes ropeway and smaller viewpoint attractions each run JPY 500-1,000, modest costs that add up if you’re chasing several different viewing angles across a single trip.

    Common mistakes to avoid

    • Booking a single-day trip with no weather flexibility — Fuji’s visibility is genuinely unpredictable; a rigid one-day plan has a real chance of a completely obscured mountain, while a 2-3 day window in the area meaningfully improves your odds of at least one clear sighting.
    • Attempting to climb without acclimatization or proper gear — altitude sickness is a real risk on a fast ascent, and temperatures near the summit can drop below freezing even in August; layers and a slower pace matter more than fitness alone.
    • Assuming outside climbing season (September-June) means no options — the mountain itself remains visible and photogenic year-round; only the summit trails close, so viewing trips work in any season, just not the climb itself.

    Choosing your Fuji base

    Hakone suits travelers who want onsen and art alongside their Fuji views, Kawaguchiko suits those chasing the classic lake-reflection photo and a quieter, more nature-focused stay, and a shinkansen-window sighting suits anyone with very limited time who still wants a chance at seeing the mountain without dedicating a full extra day to the area.

    What sunrise from the summit is actually like

    Goraiko (the sunrise seen from Fuji’s summit) is the traditional reward for an overnight climb, but reaching the top in time requires a genuinely early pre-dawn push from the mountain hut in cold, dark conditions — climbers who’ve done it consistently describe it as exhausting but worth it, and recommend against underestimating how physically demanding the final stretch feels after a short, broken night’s sleep at altitude.
  • Tokyo to Kyoto by Bullet Train: The Complete Guide

    Tokyo to Kyoto by Bullet Train: The Complete Guide

    Some links below are affiliate links. If you book through them, Japan Trove may earn a small commission at no extra cost to you.

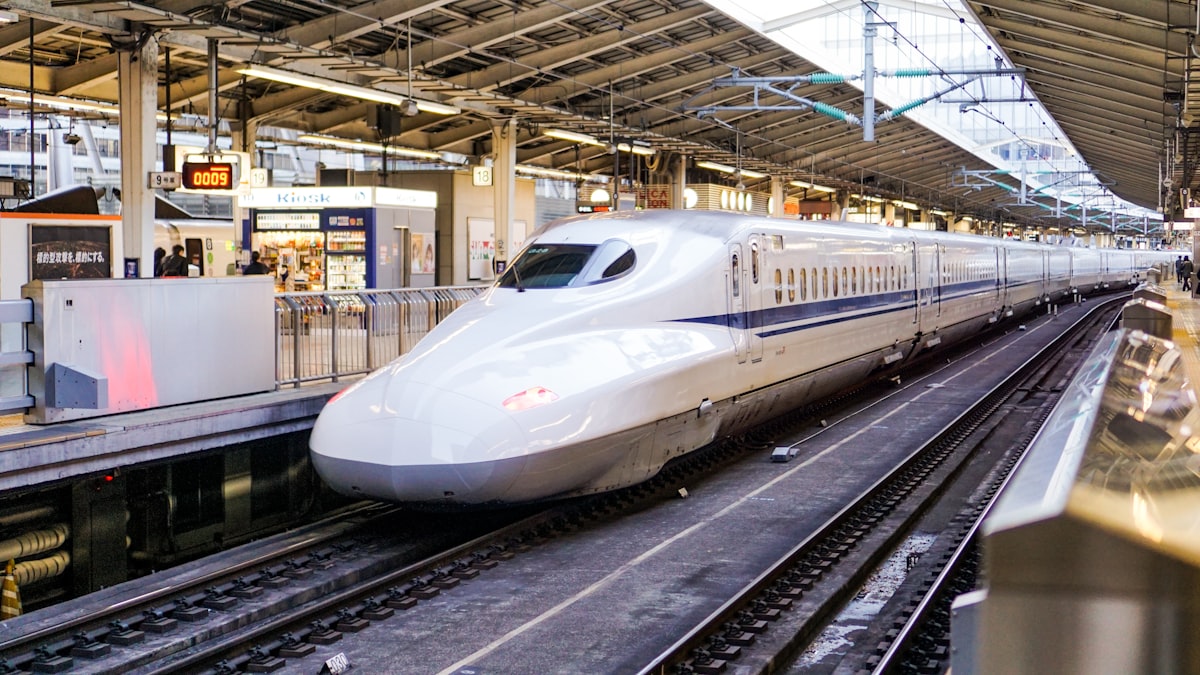
    The bullet train from Tokyo to Kyoto is a rite of passage — fast, smooth, and with a chance to spot Mt. Fuji from your seat. Here’s exactly how to do it.

    The basics

    • Time: about 2 hours 15 minutes on the fastest trains.
    • Line: the Tokaido Shinkansen, from Tokyo Station (or Shinagawa) to Kyoto Station.
    • Trains: Nozomi (fastest), Hikari (slightly slower, covered by the JR Pass), and Kodama (all-stops).

    Nozomi vs Hikari — which to take

    Nozomi is fastest but not covered by the standard Japan Rail Pass. If you have the pass, take a Hikari (only ~15 minutes slower). Paying cash? Nozomi is fine and runs most frequently.

    Reserved vs non-reserved seats

    • Non-reserved cars are cheaper and fine off-peak — just queue on the platform.
    • Reserved is worth it during holidays and busy seasons like cherry blossom time.
    • Green Car (first class) has roomier seats for a premium.

    Get the Fuji view

    Sit on the right-hand (D/E) side heading from Tokyo to Kyoto for the best Mt. Fuji view, roughly 40–45 minutes in. On clear days it’s spectacular.

    How to buy tickets

    • Ticket machines and JR ticket offices at the station (English available).
    • Reserve online in advance for peace of mind — handy at peak times. Compare rail options and passes on Klook .
    • Have an IC card for the local trains at each end.

    Pro tips

    • Grab an ekiben (station bento) before boarding — a classic shinkansen ritual.
    • Oversized luggage needs a reserved spot; otherwise use luggage forwarding to travel light.
    • Stay connected with an eSIM.

    Arriving in Kyoto? Jump to our Kyoto guide and where to stay.

    What the ride typically costs

    • An unreserved Nozomi seat Tokyo-Kyoto runs about JPY 13,320 one-way; a reserved seat adds a few hundred yen more, and Green Car (first class) runs roughly JPY 18,000-19,000.
    • Booking through official channels or reliable ticket machines avoids markup — there’s no meaningful discount for advance purchase on standard fares the way there might be for flights, so timing your purchase doesn’t change the price much.
    • An ekiben lunch (JPY 900-1,800) and a canned coffee or tea (JPY 130-160) round out a comfortable one-way trip budget without needing to plan a separate meal stop.

    Common mistakes to avoid

    • Boarding a Nozomi with a nationwide JR Pass — this is one of the most common and costly mistakes pass holders make; the standard Japan Rail Pass explicitly excludes Nozomi and Mizuho trains, and staff will require an upgrade payment or redirect you to a Hikari if you board by mistake.
    • Standing in line for a popular non-reserved car during a holiday weekend — non-reserved cars can fill to standing room during Golden Week, Obon, or New Year; reserving a seat in advance for these dates is worth the small extra step.
    • Missing the Fuji viewing window because you’re absorbed in a phone or laptop — the mountain is visible for only a few minutes around the 40-45 minute mark from Tokyo; a phone reminder timed to departure helps you look up at the right moment.

    What to do if it’s cloudy

    Since Fuji is often obscured, don’t build your whole trip’s excitement around the shinkansen sighting alone — treat it as a nice bonus on top of a dedicated Fuji-area stop like Kawaguchiko or Hakone, where you have more time and multiple chances across a stay to catch a clear view.

    Making a short stopover along the way

    The Tokaido Shinkansen passes through Nagoya, making it easy to break the Tokyo-Kyoto journey with a half-day stop if you have the time and a flexible ticket — see our Nagoya guide for what a quick stopover there can add to an otherwise point-to-point train ride.

  • Tattoos and Onsen: How to Enjoy Japan’s Hot Springs

    Tattoos and Onsen: How to Enjoy Japan’s Hot Springs

    Onsen (hot springs) are one of Japan’s great pleasures — but if you have tattoos, you’ve probably heard they can be a problem. Here’s the honest, up-to-date guide to soaking with ink.

    Why tattoos and onsen clash

    Historically, tattoos in Japan were associated with the yakuza (organized crime), so many bathhouses banned them to keep a family-friendly atmosphere. The rule is about appearances, not you personally — but it’s still widely enforced, especially at traditional public baths.

    Your options with tattoos

    • Tattoo-friendly onsen. A growing number welcome ink, especially in tourist areas. Look for “tattoo OK” / “tattoo friendly” listings before you go.
    • Cover-up patches. Small tattoos can be hidden with waterproof skin-tone stickers (sold online and at some pharmacies). Many baths allow entry if the tattoo is fully covered.
    • Private baths (kashikiri / family bath). The stress-free choice — rent a private bath by the hour, common at ryokan and onsen towns.
    • In-room onsen. Some ryokan rooms have a private open-air bath (rotenburo) — no rules, total privacy.

    Where it’s easiest

    Big resort areas like Hakone, Kinosaki, and Beppu have more tattoo-friendly and private options. See our guide to the best onsen towns in Japan to plan around private baths.

    Onsen etiquette (for everyone)

    • Wash and rinse thoroughly at the shower stations before entering the bath.
    • No swimsuits — you bathe nude. The small towel doesn’t go in the water.
    • Tie up long hair; keep voices low; no photos.

    New to Japanese customs? Pair this with our etiquette guide.

    Bottom line

    Tattoos don’t have to mean no onsen. Book a ryokan with a private bath, use a cover patch for small designs, or seek out tattoo-friendly spots — and you’ll still get that unforgettable soak. Make it part of a wider trip with our 7-day itinerary.

    What tattoo-friendly options cost

    • Cover-up patches run JPY 500-1,500 for a pack, sized to cover small-to-medium tattoos — worth buying a couple of sizes before your trip since availability in Japanese pharmacies can be inconsistent outside major cities.
    • Private family baths (kashikiri) at onsen towns run JPY 2,000-5,000 for a 45-60 minute rental, separate from the main communal bath admission, and typically need to be booked at the front desk on arrival since slots are limited.
    • A ryokan room with a private in-room open-air bath adds JPY 5,000-20,000 over a standard room, but completely removes any tattoo policy question for the length of your stay.

    Common mistakes to avoid

    • Assuming a “tattoo-friendly” label means a large tattoo is fine everywhere — some tattoo-friendly onsen still have size or placement limits (no face/neck ink, for example); check the specific policy for your tattoo’s size rather than assuming a blanket welcome.
    • Not calling ahead to confirm a private bath is available — especially at smaller, popular onsen towns, private baths can be fully booked on weekends; a quick call or online booking before you arrive avoids disappointment.
    • Using a cover patch that isn’t genuinely waterproof for extended soaking — test any patch at home in a bath first, since some cheaper covers lift after 10-15 minutes in hot water.

    Researching before you travel

    Several English-language apps and websites specifically list tattoo-friendly onsen and ryokan across Japan, updated by other tattooed travelers — checking one of these before finalizing your itinerary saves the stress of discovering a policy problem after you’ve already booked a non-tattoo-friendly property.

    Traveling as a group with mixed tattoo status

    If your travel group includes both tattooed and non-tattooed members, a private family bath or a ryokan with in-room bathing lets everyone soak together without singling anyone out or splitting up the group — often a smoother solution than each person separately navigating different individual policies at a shared communal bath.

  • Solo Travel in Japan: Why It’s So Good & How to Do It

    Solo Travel in Japan: Why It’s So Good & How to Do It

    Some links below are affiliate links. If you book through them, Japan Trove may earn a small commission at no extra cost to you.

    Japan might be the best country in the world for solo travel: extremely safe, easy to navigate, and full of experiences that are just as good — sometimes better — on your own. Here’s how to make the most of a solo trip.

    Why Japan is perfect for solo travelers

    • Safety. Low crime and easy to walk around late; solo travelers, including women, generally feel very comfortable.
    • Solo-friendly by design. Counter seats at ramen and sushi bars, single hotel rooms, and vending machines everywhere.
    • Easy logistics. Great signage, reliable trains, and translation apps mean you rarely feel stuck.

    Where to stay solo

    • Business hotels — cheap, clean single rooms; ideal bases. Book via Booking.com .
    • Capsule hotels — a fun, budget-friendly only-in-Japan experience.
    • Hostels — great for meeting people if you want company.

    Eating alone (no problem here)

    Solo dining is completely normal. Look for counter seats, ticket-machine restaurants (buy a meal ticket, hand it over — no awkward ordering), ramen shops, and standing bars. Konbini and depachika food halls are your friends too.

    Things that shine solo

    • Quiet temple mornings in Kyoto.
    • Wandering neighborhoods at your own pace in Tokyo.
    • A reflective soak at an onsen town.

    Practical solo tips

    • Get an eSIM and an IC card so you’re self-sufficient.
    • Share your itinerary with someone at home and keep some cash on hand.
    • Learn a few Japanese phrases — locals appreciate the effort.

    New to the country? Combine this with our first-timer tips and 7-day itinerary.

    What solo travel typically costs

    • Single business hotel rooms run JPY 6,000-12,000/night in most mid-size cities, not much more than a shared twin room split two ways once you account for the space and privacy difference.
    • Solo dining rarely carries a premium in Japan — ramen counters, kaiten-zushi, and set-meal shops are priced per person regardless of party size, unlike some countries where solo diners face minimum spend requirements or awkward seating.
    • A realistic solo daily budget for a comfortable mid-range trip runs JPY 12,000-18,000 including lodging, food, and local transport, similar to per-person costs for a couple since Japan doesn’t heavily incentivize group travel the way some destinations do.

    Common mistakes to avoid

    • Over-scheduling every single day — solo trips are the easiest to burn out on since there’s no travel companion suggesting a slower pace; building in at least one unplanned afternoon per week noticeably improves overall trip satisfaction.
    • Avoiding counter dining out of unfamiliarity — ramen shops, sushi counters, and standing bars are specifically designed around solo and quick dining; hesitating to sit alone at a counter means missing some of the best, most efficient food in the country.
    • Not researching capsule hotel gender policies before booking — most are single-gender by floor or property; check before assuming any capsule hotel works for solo bookings of any gender.

    Meeting other travelers if you want company

    Hostels with common areas, guided food or walking tours, and izakaya with shared counter seating are all easy, low-pressure ways to have social moments during an otherwise independent trip — solo travel in Japan doesn’t have to mean total isolation unless that’s specifically what you’re looking for.

    Solo-friendly cities beyond the capital

    Compact regional cities like Kanazawa, Takayama, and Nara are especially rewarding for solo travelers — easy to navigate without much planning, safe to explore after dark, and set up with good single-traveler accommodation options away from Tokyo’s larger scale and pace.

  • Best Onsen Towns in Japan (and Onsen Etiquette)

    Best Onsen Towns in Japan (and Onsen Etiquette)

    Some links below are affiliate links. If you book through them, Japan Trove may earn a small commission at no extra cost to you.

    Soaking in an onsen (hot spring) is one of Japan’s great pleasures — and staying overnight in an onsen town, with a ryokan dinner and a soak under the stars, is unforgettable. Here are the best onsen towns and how to enjoy them.

    Top onsen towns

    • Hakone — easiest from Tokyo, with Mt. Fuji views; see our day trips guide (great overnight too).
    • Kinosaki — a storybook town where you stroll between seven public baths in a yukata.
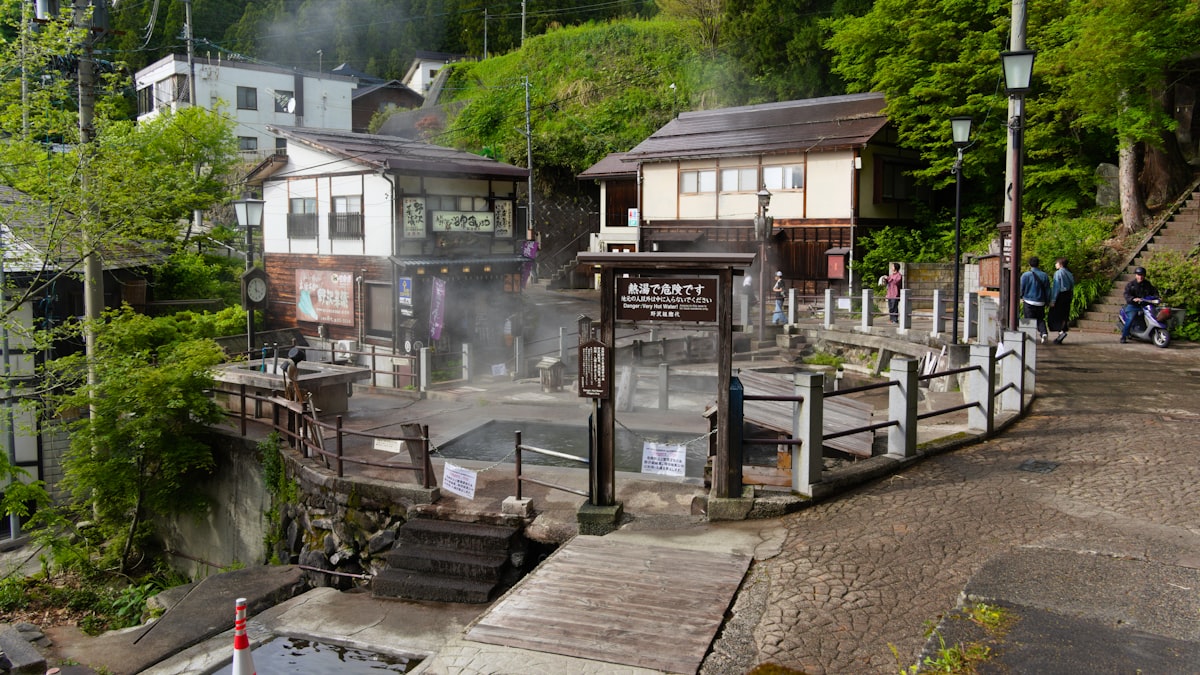
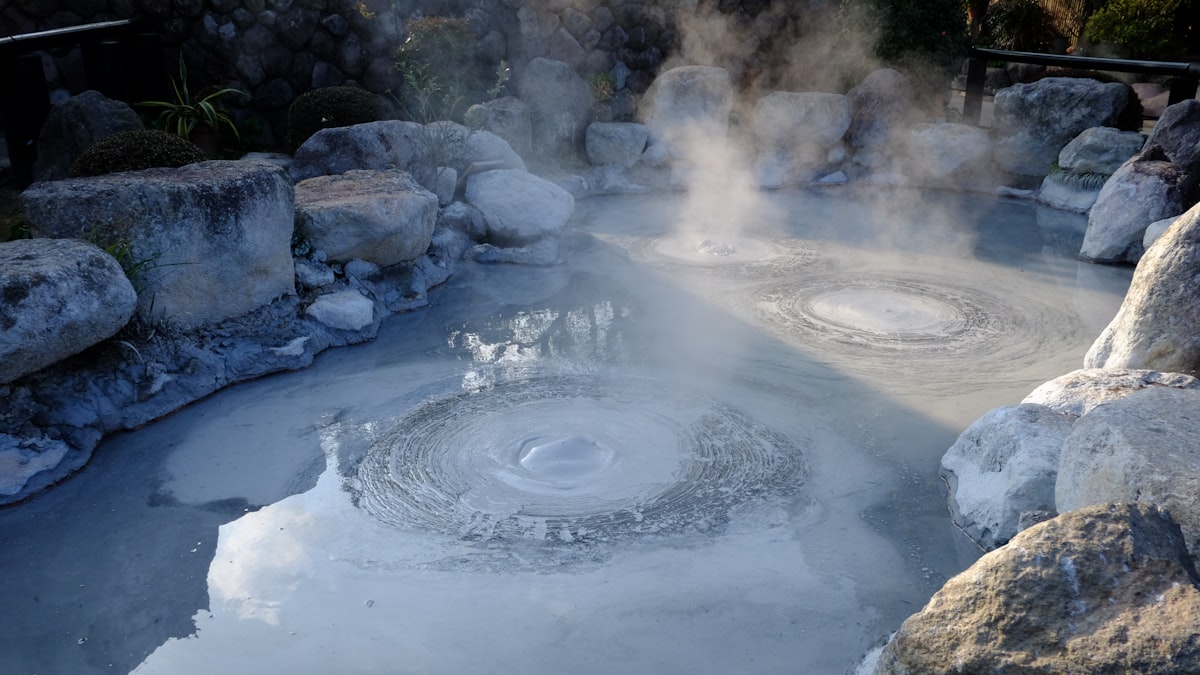
    • Kusatsu — one of Japan’s most famous hot-spring resorts, with a dramatic steaming water field.
    • Beppu & Yufuin (Kyushu) — a hot-spring wonderland and a chic, arty retreat side by side.
    • Nyuto Onsen (Tohoku) — remote, rustic milky baths deep in the mountains.

    Onsen etiquette (important)

    • Wash thoroughly at the shower stations before entering the bath.
    • No swimsuits — you bathe undressed; baths are usually gender-separated.
    • Keep the small towel out of the water (rest it on your head or the side).
    • Tie up long hair and don’t put it in the water.
    • Tattoos can be restricted at some baths — look for tattoo-friendly onsen or private (kashikiri) baths; a ryokan room with a private bath sidesteps the issue.

    Staying overnight

    The magic is a ryokan with a kaiseki dinner and your own or a shared onsen. Book early, especially in autumn and winter — filter for onsen ryokan on Booking.com and Agoda .

    When to go

    Onsen are wonderful year-round, but a snowy outdoor bath in winter is peak Japan. See our best time to visit guide, and slot an onsen night into your itinerary.

    What an onsen town stay costs

    • A ryokan stay with kaiseki dinner and breakfast runs JPY 20,000-45,000 per person depending on the town and season, with remote spots like Nyuto Onsen often pricing lower than easily accessible ones like Hakone despite the more memorable setting.
    • Day-use onsen access (without an overnight stay) runs JPY 700-2,000 at most towns, a good budget option if you’re passing through without time for a full stay.
    • Kinosaki’s seven-bath yukata-hopping system is included with many ryokan stays via a discount pass, letting you try multiple baths across the town for one modest add-on fee rather than paying full price at each.

    Common mistakes to avoid

    • Choosing a destination based on fame alone — Hakone’s convenience from Tokyo comes with bigger crowds than Kinosaki or Nyuto Onsen; if a quiet, immersive soak matters more than easy access, the less famous towns often deliver a better experience.
    • Booking a single-night stay when a town rewards two — Kinosaki specifically is built around strolling between baths over an unhurried one or two nights, and a rushed single night undercuts the whole point of the town’s design.
    • Forgetting winter road and train delays in remote areas like Nyuto Onsen — build extra travel time buffer into winter visits to the more rural onsen towns.

    Choosing a town to match your trip style

    Hakone suits a quick, well-connected escape from Tokyo with Fuji views bundled in; Kinosaki suits travelers who want a walkable, storybook town experience; and Nyuto Onsen or similar remote spots suit those chasing a genuinely rustic, off-the-beaten-path soak away from any crowd at all.

    Onsen towns for a winter escape

    Winter genuinely transforms an onsen town visit — soaking in a steaming outdoor bath while snow falls around you is one of the most consistently cited highlights by first-time visitors, and towns like Kusatsu and Nyuto Onsen lean into this with dramatic seasonal scenery that summer visits simply can’t match.

  • How to Use Japanese Trains: A Simple Guide for Tourists

    How to Use Japanese Trains: A Simple Guide for Tourists

    Some links below are affiliate links. If you buy through them, Japan Trove may earn a small commission at no extra cost to you.

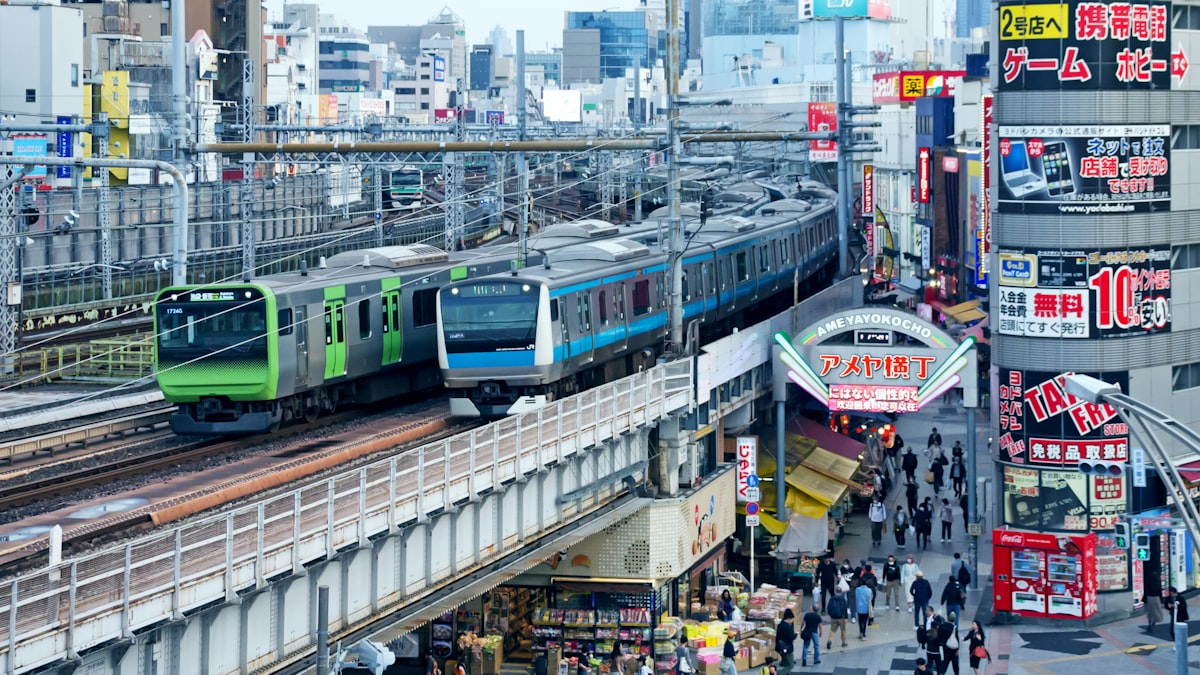
    Japan’s trains are fast, punctual, and cover almost everywhere — and once you know the basics, they’re the best way to get around. Here’s a simple guide to riding them with confidence.

    The types of train

    • Local & rapid — city and suburban trains; tap in with an IC card.
    • Limited express — faster regional trains, sometimes needing a reserved seat.
    • Shinkansen (bullet train) — long-distance; buy a ticket (and optionally reserve a seat).
    • Subways & private railways — run by different companies but the same IC card works.

    The easiest way to pay: an IC card

    Get a Suica or Pasmo (or add one to your phone). Tap in at the gate, tap out at your destination, and the fare is calculated automatically. It also works on buses and at konbini.

    Finding your train

    • Use Google Maps — it shows the exact line, platform, departure time, and even which car to board.
    • Follow the colored line signs; stations are well-marked in English.
    • Check the train type on the platform board — a “rapid” or “express” may skip your stop.

    Shinkansen basics

    • Buy at a ticket machine or counter; you can also reserve online.
    • Non-reserved cars are cheaper and fine off-peak; reserve seats for busy times and with luggage.
    • Note the fastest Nozomi/Mizuho trains aren’t covered by the nationwide pass — check the JR Pass guide.

    Etiquette

    Keep quiet, set your phone to silent, queue on the platform markings, let people off first, and keep backpacks off your back in crowds. More in our etiquette guide.

    Handy tips

    • Luggage forwarding (takkyubin) saves hauling big bags on transfer days.
    • Rush hours (roughly 7–9am, 5–7pm) are packed — avoid if you can.
    • Get an eSIM so maps and times are always to hand.

    Ready to plan the route? Start with the 7-day itinerary.

    What train travel typically costs

    • Local and rapid train fares within a city run JPY 150-400 per ride, while limited express reserved seats add a modest surcharge (JPY 500-1,500) on top of the base fare for regional trips.
    • A shinkansen reserved seat typically costs a few hundred yen more than non-reserved, a small price for guaranteed seating during busy travel periods.
    • An IC card requires a refundable deposit (usually JPY 500 for a physical card) that’s returned when you cancel the card before leaving Japan — mobile IC cards on a compatible phone skip this deposit entirely.

    Common mistakes to avoid

    • Boarding a rapid or express train without checking if it skips your stop — these skip smaller stations to save time; the platform board and train livery usually indicate the service type, but double-checking with a maps app before boarding prevents an accidental overshoot.
    • Assuming every station is equally simple — large interchange stations (Shinjuku, Tokyo, Osaka) can require a genuine 10-15 minute walk between platforms on different lines; build transfer buffer time into any tight connection.
    • Standing near the doors during boarding without letting passengers off first — this is one of the most visible etiquette breaches for first-time visitors and slows down the whole platform.

    Reading a Japanese train platform board

    Most boards display the train type (local, rapid, express), departure time, and final destination, usually with an English toggle at major stations — learning to read just these three fields, even without full station name recognition, is often enough to confidently confirm you’re boarding the right train.

    Traveling with large luggage

    Rush-hour commuter trains and large suitcases are a genuinely difficult combination — if you must travel during peak hours with heavy bags, consider a limited express or shinkansen with dedicated luggage space instead of a standard commuter line, or shift your travel time by even 30-60 minutes to avoid the worst of the crowd.

  • Nara Day Trip: Deer, the Great Buddha & How to Visit

    Nara Day Trip: Deer, the Great Buddha & How to Visit

    Some links below are affiliate links. If you book through them, Japan Trove may earn a small commission at no extra cost to you.

    Nara was Japan’s first permanent capital, and it packs a giant bronze Buddha, ancient temples, and a park full of famously polite (and cheeky) deer into an easy day trip from Kyoto or Osaka. Here’s how to do it.

    Getting there

    Nara is about 45 minutes from Kyoto or Osaka by train. The Kintetsu line drops you closest to the park; JR works too and may be covered by a regional pass. It’s an easy half- or full-day.

    The deer of Nara Park

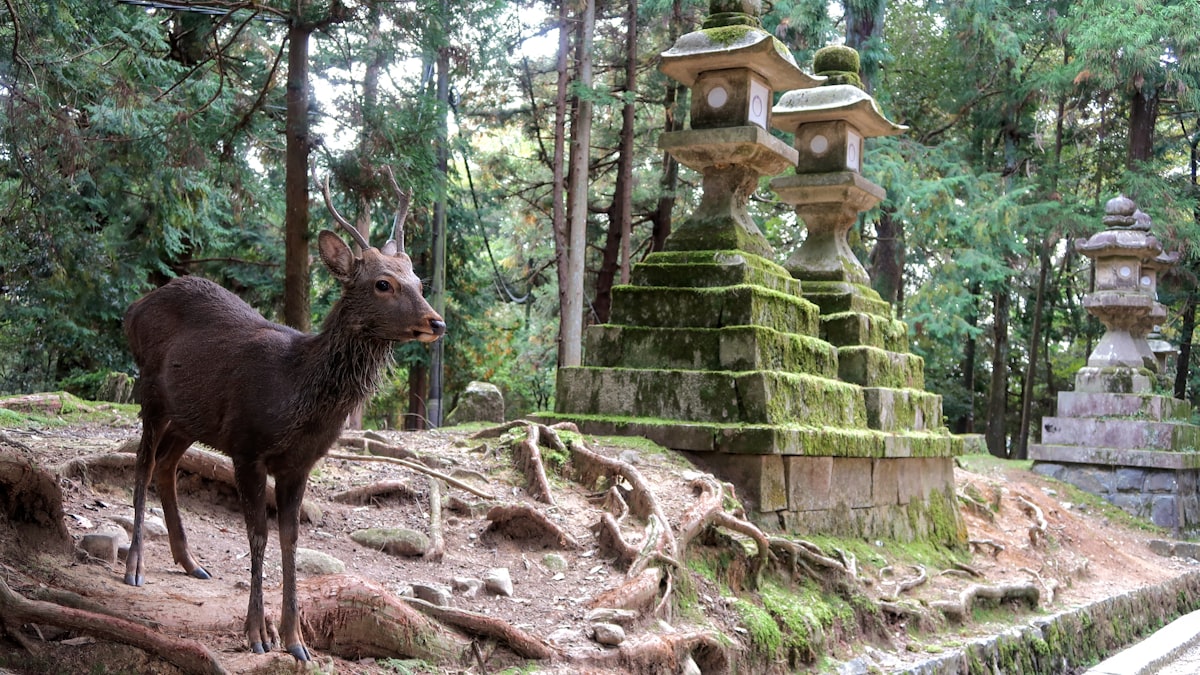
    Hundreds of free-roaming deer are the star attraction. You can buy shika senbei (deer crackers) to feed them — and yes, many will bow for a cracker. Tips:

    • Keep crackers hidden until you’re ready; the deer are bold and will nudge you.
    • They’re wild animals — gentle is best, and watch small children.
    • Feed and move on; don’t tease them with food you won’t give.

    Don’t miss

    • Todai-ji — a colossal wooden temple housing the Great Buddha (Daibutsu). Genuinely awe-inspiring.
    • Kasuga Taisha — a shrine famous for thousands of bronze and stone lanterns.
    • Isuien Garden — a serene stroll garden if you want a quiet break.

    How much time?

    Half a day covers the deer and Todai-ji; a full day lets you add the shrine and gardens at a relaxed pace. Most sights are walkable from the park.

    Fit it into your trip

    Nara pairs perfectly with a Kansai base — see where to stay in Kyoto or our Osaka guide. Great with kids, too — see Japan with kids. Book a guided Nara tour in English on Klook if you’d rather not plan the logistics.

    Slot it into the wider 7-day itinerary.

    What things cost

    • Todai-ji entry runs JPY 600, and Kasuga Taisha’s main shrine grounds are free (the inner sanctuary and lantern-lit hall of the Mantoro festival cost extra on special occasions).
    • Deer crackers (shika senbei) cost about JPY 200 per bundle from the many stalls around the park — a small, worthwhile cost most visitors budget for multiple times over a visit.
    • Isuien Garden’s modest entry fee (around JPY 900) buys a genuinely quiet contrast to the busier deer park and temple areas nearby.

    Common mistakes to avoid

    • Waving a cracker at a deer without intending to give it — this is one of the most common ways visitors get head-butted or nudged; once a deer sees the cracker, commit to feeding it or hide it away completely.
    • Visiting Todai-ji at midday on a weekend — like most famous single sights, an early arrival avoids both the worst crowds and the peak heat if visiting in summer.
    • Assuming all the deer are equally docile — most are gentle, but mating season (autumn) and areas with newborn fawns (spring) can see more defensive behavior; keep a respectful distance regardless of season.

    Nara as more than a quick stop

    While many visitors treat Nara as a rushed half-day squeeze between Kyoto and Osaka, a full day lets you add Kasuga Taisha’s forest approach and Isuien Garden’s quiet paths to the more famous deer-and-Buddha combination, giving a genuinely fuller sense of the city beyond its most photographed moment.

    A rainy-day version of Nara

    Nara’s deer park and temple approaches are pleasant even in light rain, and Todai-ji’s main hall itself offers substantial covered space to shelter and take in the Great Buddha without rushing — a genuinely workable rainy-day plan rather than one that needs a full reschedule.

  • Japan with Kids: A Family Travel Guide

    Japan with Kids: A Family Travel Guide

    Some links below are affiliate links. If you book through them, Japan Trove may earn a small commission at no extra cost to you.

    Japan is one of the easiest and most rewarding countries to visit with kids: safe, clean, endlessly novel, and full of things children love. Here’s how to plan a family trip that works for everyone.

    Why Japan is great for families

    • Safety and cleanliness are exceptional; kids can have a lot of freedom.
    • Trains are a highlight in themselves — the Shinkansen thrills most kids.
    • Convenience stores and vending machines mean snacks and drinks are always close.
    • Novelty everywhere — from robot cafés to character shops.

    Kid-friendly highlights

    • Tokyo: teamLab digital art, Ueno Zoo, character stores in Harajuku, and the Ghibli Museum (book far ahead).
    • Osaka: Universal Studios Japan, the Aquarium (Kaiyukan), and easygoing street food in Dotonbori.
    • Nara: the friendly bowing deer are a guaranteed hit — see our Nara day trip.
    • Anywhere: Pokémon Centers and Nintendo/character shops — see where to buy Pokémon merch.

    Practical tips

    • Pack light and use luggage forwarding (takkyubin) between hotels — much easier with kids.
    • Family rooms and rooms for 3–4 fill up fast; book early via Booking.com .
    • Strollers: stations have elevators but they can be a hunt; a compact stroller or carrier helps.
    • Baby supplies — diapers, formula, and food are easy to buy at drugstores and konbini.
    • Slow down. Fewer stops, more time; build in park and playground breaks.

    Getting around

    Kids often ride trains cheaply or free depending on age. Grab an IC card each for easy tapping, and check the JR Pass math for your route. Then build your days with the 7-day itinerary.

    What a family trip costs

    • Kids under a certain age (typically 6 and under) ride most trains free, and elementary-age children usually pay half fare — a genuine cost saving that adds up on a multi-city itinerary with several long train legs.
    • Family-sized hotel rooms run JPY 15,000-30,000/night in mid-range hotels, though many standard Japanese hotel rooms are compact enough that families of 4+ need to specifically confirm room capacity rather than assume a “family room” fits everyone comfortably.
    • Kid-focused attractions (teamLab, aquariums, Pokemon Centers) run JPY 1,500-4,000 per child, generally reasonable compared to similar attractions in other major tourist destinations.

    Common mistakes to avoid

    • Overpacking the daily schedule — this is the single most common family-trip mistake; children tire faster than adults expect, and building in park time, hotel downtime, or an early dinner prevents meltdowns that derail an otherwise good day.
    • Not researching stroller-friendly routes in advance — while most major stations have elevators, they’re not always the most obvious route from the ticket gate; asking station staff for the accessible route saves real frustration with a stroller in tow.
    • Assuming all restaurants welcome young children — some smaller counter-style restaurants (particularly high-end sushi or ramen counters) aren’t well suited to kids; family restaurants (like Gusto or Saizeriya) and casual chain restaurants are safer, kid-friendly defaults.

    Building in downtime kids actually need

    Japan has excellent, well-maintained playgrounds and parks in nearly every neighborhood, and building in even 30-45 minutes of unstructured park time between sightseeing stops does more for a family trip’s overall mood than any single attraction — a detail easy to overlook when planning around famous sights alone.

    Handling picky eaters

    Konbini and depachika food halls are a genuine lifesaver for families with picky eaters, offering familiar-looking options (plain rice balls, simple noodle dishes, fruit) alongside more adventurous choices — a practical backup that removes the pressure of every meal being a new food experience for a reluctant child.

  • Japanese Phrases for Travelers: The Ones Worth Knowing

    Japanese Phrases for Travelers: The Ones Worth Knowing

    You don’t need to speak Japanese to travel Japan — English signage and translation apps cover a lot. But a handful of phrases go a long way and are genuinely appreciated. Here are the ones actually worth memorizing.

    The essentials

    • Arigatou gozaimasu — thank you (polite). The single most useful phrase.
    • Sumimasen — excuse me / sorry / thank you (to get attention or apologize). Incredibly versatile.
    • Konnichiwa — hello (daytime).
    • Onegaishimasu — please (when requesting something).
    • Hai / Iie — yes / no.

    Eating out

    • Kore o kudasai — “this one, please” (point at the menu).
    • Oishii! — delicious!
    • Okaikei onegaishimasu — the bill, please.
    • Gochisousama deshita — “thank you for the meal” (as you leave).
    • Vegetarian desu / ___ arerugī desu — “I’m vegetarian” / “I’m allergic to ___”.

    Getting around & shopping

    • ___ wa doko desu ka? — “where is ___?”
    • Ikura desu ka? — “how much is it?”
    • Eigo o hanasemasu ka? — “do you speak English?”
    • Daijoubu desu — “it’s fine / no thanks / I’m okay.” Very handy.

    Pronunciation tips

    Japanese is pronounced consistently: vowels are a (ah), i (ee), u (oo), e (eh), o (oh). Keep it flat and even — no strong stress. Even a rough attempt is warmly received.

    Tech that helps

    Download a translation app with camera mode for menus and signs, and set up an eSIM so it works everywhere. For the cultural side of communicating politely, see our etiquette guide.

    Ready to plan? Start with our first-timer tips and 7-day itinerary.

    Phrases for specific situations

    • At a ryokan or onsen: “Sumimasen, taoru wa arimasu ka?” — “Excuse me, do you have a towel?” — useful shorthand for asking staff about any missing item using the same simple pattern.
    • At a train station: “Kono densha wa ___ ni ikimasu ka?” — “Does this train go to ___?” — a quick way to confirm you’re boarding correctly before the doors close.
    • Shopping: “Kore, chiisai/ookii saizu arimasu ka?” — “Do you have this in a smaller/bigger size?” — handy for clothing shops where sizing runs differently than expected.

    Common mistakes to avoid

    • Over-relying on formal textbook phrasing — real interactions move faster than a phrasebook; single words like “sumimasen” plus pointing usually communicate intent just as well as a full grammatically perfect sentence.
    • Assuming louder or slower English helps — speaking clearly at normal volume, paired with a translation app for anything complex, generally works better than repeating English more forcefully.
    • Skipping numbers — learning to count to 10 in Japanese (ichi, ni, san…) helps with everything from ordering quantities to understanding prices read aloud, and is a quick, useful addition to a basic phrase list.

    Using translation apps effectively

    Camera-mode translation (pointing your phone at a menu or sign) works remarkably well for printed Japanese text, but voice translation for live conversation can struggle with fast or accented speech — typing into a translation app rather than relying on voice recognition often produces a cleaner, more accurate result in a noisy restaurant or station.

    Phrases that build goodwill, not just function

    Beyond purely functional phrases, small courtesy expressions — “osaki ni shitsurei shimasu” when leaving a room before others, or a simple “otsukaresama desu” to acknowledge someone’s effort — aren’t strictly necessary for a tourist to know, but locals notice and appreciate them enough that even one used correctly can visibly improve an interaction.

  • Money in Japan: Cash, Cards, ATMs & Budgeting for Tourists

    Money in Japan: Cash, Cards, ATMs & Budgeting for Tourists

    Some links below are affiliate links. If you buy through them, Japan Trove may earn a small commission at no extra cost to you.

    Japan used to be famously cash-only. It’s modernized fast, but there are still quirks worth knowing so you’re never caught out. Here’s how money works for visitors — cash, cards, IC cards, and budgeting.

    Cash vs cards in 2026

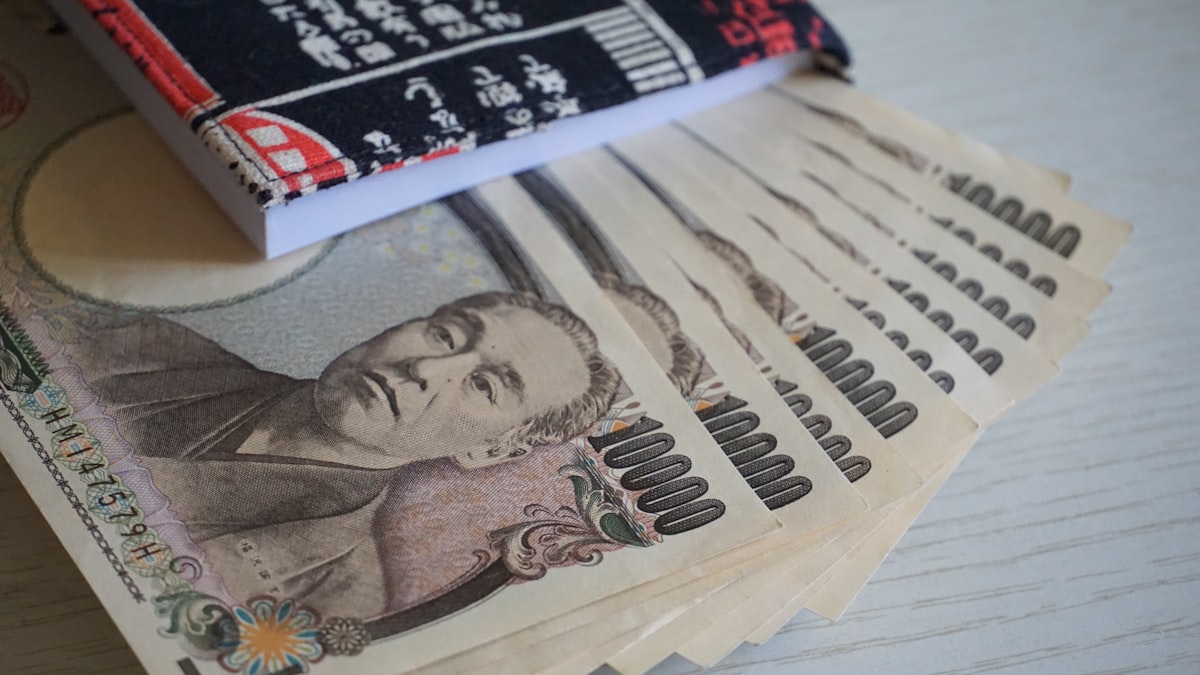
    Cards and mobile payments now work at most hotels, chains, department stores, and convenience stores. But you’ll still hit cash-only spots: small restaurants, older shops, shrines and temples, some markets, and rural areas. Always carry some yen.

    Getting cash

    • 7-Eleven and Japan Post ATMs reliably accept foreign cards, 24/7, with English menus. They’re everywhere.
    • Bank ATMs can be pickier and keep limited hours; stick with konbini ATMs.
    • Withdraw as you go rather than carrying lots of cash from home.

    IC cards & mobile payments

    Load a Suica or Pasmo for trains and quick konbini purchases — you can even add one to your phone. Apple Pay and Google Pay work in many places, but don’t rely on them alone.

    Tax-free shopping

    Tourists can shop tax-free above a spend threshold at participating stores — bring your passport. It’s a real saving on electronics, cosmetics, and gifts. See our drugstore and gift guides for what to buy.

    Tipping & etiquette

    No tipping — service is included and tips can cause confusion. Hand money over on the small tray at the register rather than into the cashier’s hand.

    Rough daily budget

    • Budget: hostels, konbini and cheap eats, lots of walking — very doable.
    • Mid-range: business hotels, restaurant meals, the odd taxi and paid attraction.
    • Splurge: ryokan with kaiseki, fine dining, private tours.

    Trains are often the biggest single cost — run the numbers in our JR Pass guide, and don’t forget an eSIM. New here? Start with first-timer tips.

    Realistic daily cash needs

    • Carrying JPY 5,000-10,000 in cash covers most cash-only situations (small restaurants, temple entry fees, rural shops) for a typical day without needing a mid-day ATM run.
    • Konbini ATMs (7-Eleven especially) reliably accept foreign cards with a modest flat withdrawal fee, usually cheaper overall than exchanging large sums of cash at an airport counter before you leave home.
    • IC cards typically require a minimum top-up of JPY 1,000-3,000 at a time via station machines, so topping up periodically as you go is simpler than trying to load a large amount upfront.

    Common mistakes to avoid

    • Relying only on mobile payment apps — while increasingly common in cities, many smaller shops, temples, and rural spots still don’t accept Apple Pay or Google Pay; cash remains the reliable fallback everywhere.
    • Trying a random bank ATM assuming it accepts foreign cards — many Japanese bank-branded ATMs restrict foreign card use or keep limited hours; sticking to konbini and post office ATMs avoids this entirely.
    • Handing cash directly into a cashier’s hand — most registers have a small tray specifically for this; placing money there rather than hand-to-hand is the expected, polite norm.

    Currency exchange strategy

    Exchanging a small amount of cash before departure (enough for the first day or two) and then relying on konbini ATM withdrawals for the rest of the trip generally beats either extreme — exchanging a huge sum upfront at a poor rate, or arriving with no cash at all and hoping every stop takes cards.

    Setting a daily cash routine

    A simple habit — checking your cash total each morning before heading out and topping up at a konbini ATM if you’re running low — avoids the awkward situation of reaching a cash-only restaurant or shrine with an empty wallet late in the day, which is a genuinely common first-timer experience.