Japan Trove

Author: JapanTrove Editorial

  • Overnight Buses in Japan: The Budget Alternative to the Shinkansen

    Overnight Buses in Japan: The Budget Alternative to the Shinkansen

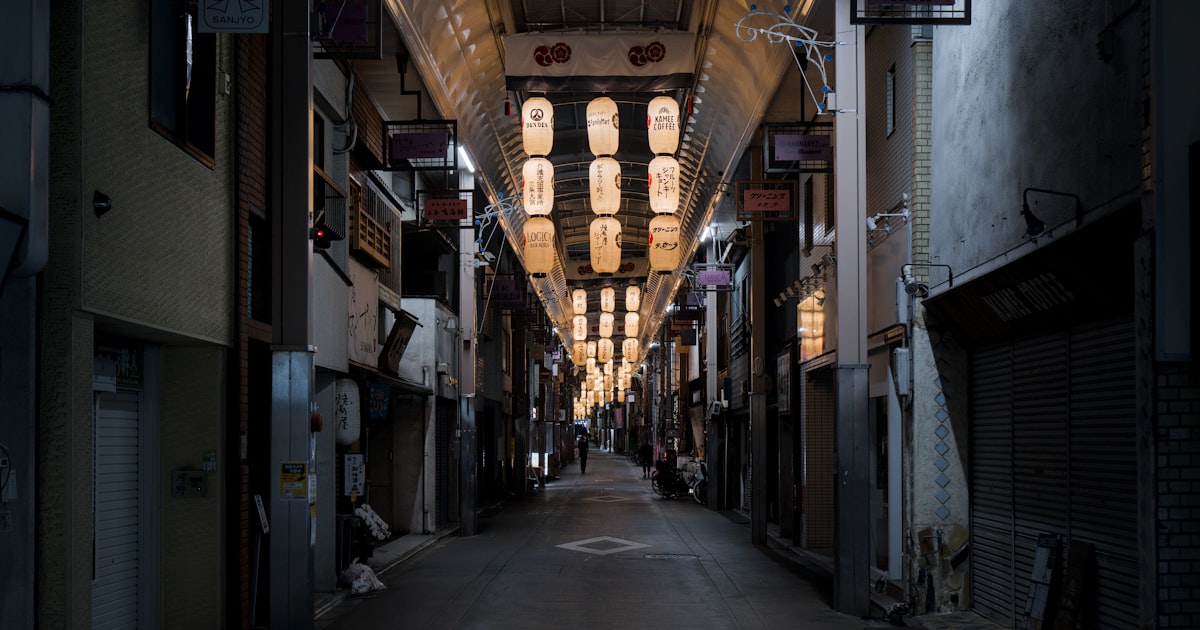
    Photo by Shigeki Wakabayashi on Unsplash

    The Shinkansen gets all the glory, but it isn’t the only way to cross Japan while you sleep. Overnight highway buses (yakou bus) quietly move thousands of budget travelers, students, and commuting workers between cities every night, often for a third of the bullet train fare. If you’re trying to stretch a Japan budget without losing a full day to travel, the overnight bus deserves a serious look — with a few tradeoffs you should know about before you book.

    Why Take an Overnight Bus?

    The math is simple: an overnight bus does double duty as transport and accommodation. Instead of paying for a Shinkansen ticket during the day and a hotel room at night, you pay once for a seat that gets you to your destination early the next morning, ready to start sightseeing. On routes like Tokyo–Osaka or Tokyo–Kyoto, that can mean saving 10,000–15,000 yen per person compared to a bullet train ticket plus a night’s lodging. It’s especially useful for travelers doing a loop through the Kansai region, heading to onsen towns like Kinosaki Onsen, or connecting to gateway cities like Matsumoto before continuing into the Japan Alps.

    How Much Do Overnight Buses Really Cost?

    Prices swing widely based on seat type, how far ahead you book, and the season. On the busiest corridor, Tokyo–Osaka, expect roughly:

    • Budget 4-across seats: 3,000–6,000 yen one way
    • 3-across or reclining seats: 6,000–9,000 yen
    • Premium seats (privacy curtains, deep recline, footrests — Willer Express’s “Cocoon” or similar):
    • 10,000–15,000 yen

    Compare that to a reserved-seat Nozomi Shinkansen on the same route, which runs around 14,000–15,000 yen one way and takes about 2.5 hours. The bus takes 8–9 hours, but you’re asleep for most of it, and you arrive with a full day ahead of you rather than a half-day already spent on lodging costs. Longer routes scale accordingly — Tokyo to Hiroshima, for instance, runs roughly 6,000–14,000 yen and takes about 11–12 hours. As with air travel, prices rise the closer you book to departure, and they spike hard around Golden Week (late April–early May), Obon (mid-August), and New Year, when seats can sell out weeks in advance and prices can more than double.

    The Main Operators and How to Book

    Willer Express is the most foreign-visitor-friendly operator, with an English-language booking site, clear seat diagrams, and its distinctive curtained “Cocoon” seats. JR Bus (operating as JR Bus Kanto, JR Tokai Bus, and regional JR affiliates) runs reliable “Dream” sleeper coach routes, particularly Tokyo–Osaka and Tokyo–Kyoto, often departing from Tokyo Station or Shinjuku. Regional players like Kansai Bus, Orion Tour, and Seibu Bus fill in specific routes at lower prices but with less English support. Comparison sites such as Kosoku Bus and Bus Hikaku let you filter by price, seat type, and departure time across multiple operators at once — useful since the same route can vary by several thousand yen between companies on the same night. Payment is usually by credit card online, though some sites also allow konbini (convenience store) payment.

    What to Expect Onboard

    Most Tokyo departures leave from Busta Shinjuku, the large bus terminal built directly above Shinjuku Station’s south exit — it’s well signed but can be confusing on a first visit, so arrive at least 20–30 minutes early to find your gate. Buses typically depart between 22:00 and 23:30 and arrive at their destination between 5:00 and 7:00 the next morning, which means you’ll often be standing outside a train station before anything is open. It’s worth planning your first stop accordingly — many travelers head straight to a 24-hour manga café, an early-opening bathhouse, or a station coin locker to store luggage until sights open.

    Seats range from cramped 4-across rows (fine for short hops, tough for a full night if you’re tall) to individual reclining seats with curtains, USB ports, and blankets. Not every bus has an onboard toilet — check before booking if that matters to you, since rest stops at highway service areas (SA/PA) happen roughly every 2–3 hours and are your main chance to use a real restroom, buy a snack, or stretch. Under-bus luggage storage is standard and included in the fare, typically one or two bags per person with generous size limits, unlike some overseas budget carriers that charge for hold luggage. Many operators also offer women-only sections or entire women-only buses, which is worth requesting if it makes you more comfortable.

    Best Routes and Timing

    Overnight buses make the most sense on routes of roughly 6–12 hours by road — long enough that you’d otherwise burn a travel day, short enough that you actually get decent sleep. Tokyo–Osaka/Kyoto, Tokyo–Hiroshima, Tokyo–Sendai, and Tokyo–Kanazawa are the classic corridors, along with connections into Shikoku for travelers combining the Iya Valley and the 88 Temple Pilgrimage with a Tokyo start or end point. Summer and early autumn tend to run smoothly, but winter buses on mountain routes can face delays for snow chains, particularly anything crossing the Japan Alps or heading into Tohoku — build in a buffer day if your onward plans are tight. Once you arrive, remember that IC cards work seamlessly for local transit at your destination; see our guide to IC cards beyond Tokyo for which card to load up before you hop off the bus.

    Common Mistakes to Avoid

    The most common regret isn’t the price — it’s comfort. Skipping earplugs, an eye mask, and a neck pillow makes a real difference on a bus with dozens of strangers, ceiling lights, and highway noise. Booking the cheapest 4-across seat for a route over 8 hours is a mistake if you’re over about 175cm tall; pay the extra 2,000–4,000 yen for a 3-across or independent seat. Don’t assume you can eat a proper meal at rest stops — they’re geared toward quick snacks and drinks, not sit-down food, so grab a bento or onigiri from a convenience store before boarding. Finally, don’t underestimate how early and disorienting a 5:30am arrival can be; check that your first destination — a hotel, sento, or attraction — is actually open before you plan your morning around it.

    Budget, Mid-Range, and Splurge Picks

    For pure budget travel, a standard 4-across seat booked a few weeks ahead is hard to beat at 3,000–5,000 yen. For most travelers, a 3-across reclining seat in the 6,000–9,000 yen range hits the sweet spot of comfort and price. If you want the closest thing to actual sleep, splurge on a curtained Cocoon-style or independent seat at 10,000–15,000 yen — still cheaper than a Shinkansen ticket, with a proper night’s rest thrown in. And if your itinerary calls for real flexibility — multiple stops, rural areas, or odd-hour departures — it may be worth comparing against renting a car in Japan instead, particularly for road-trip-style routes where a bus schedule would box you in.
  • Renting a Car in Japan: License Rules, Costs & Best Road Trips

    Renting a Car in Japan: License Rules, Costs & Best Road Trips

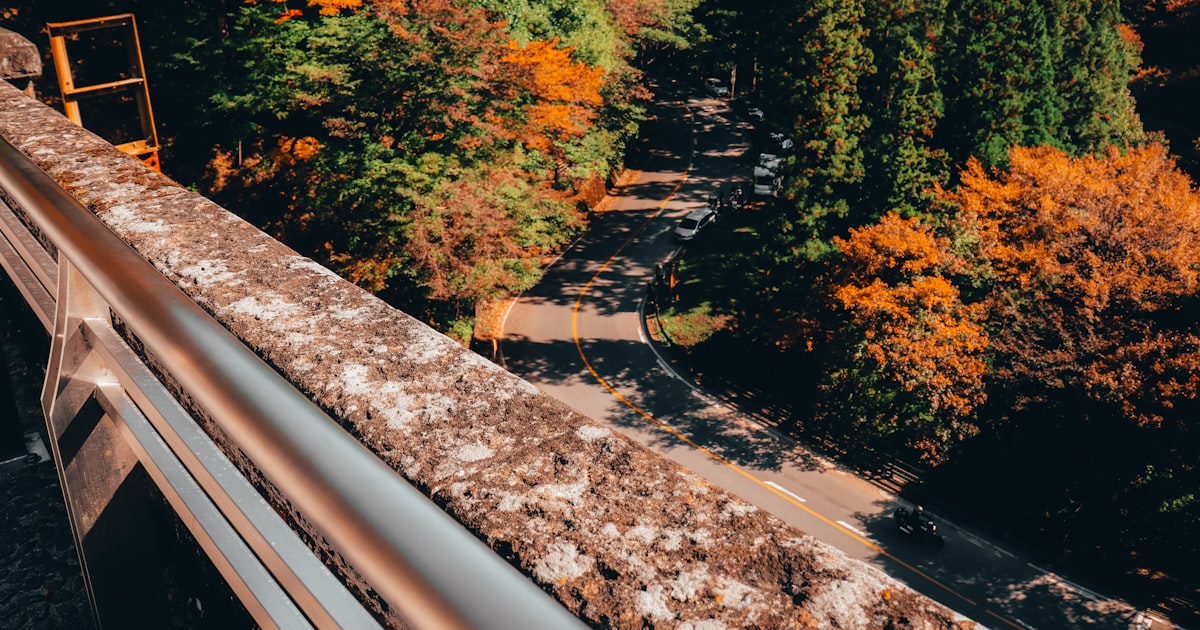
    Photo by Kishor on Unsplash

    Japan’s trains are famously good, which is exactly why most visitors never consider a rental car — and exactly why they miss the parts of Japan that trains don’t reach. The Iya Valley’s vine bridges, Noto Peninsula’s coastline, and back roads through the Japan Alps open up dramatically once you’re driving. But renting a car in Japan has a few rules that trip up first-timers, starting with the one document almost everyone forgets.

    Do You Need an International Driving Permit?

    Yes — and you must get it before you land. Japan recognizes the 1949 Geneva Convention International Driving Permit (IDP), which you apply for through your home country’s motoring authority (AAA in the US, CAA in Canada, the AA or RAC in the UK, and so on). It typically costs $20–35 USD equivalent and is issued same-day, valid for one year. Japan cannot issue one to you on arrival, and airport rental counters will turn you away without it.

    There’s one major exception: drivers licensed in France, Germany, Switzerland, Belgium, Monaco, and Taiwan aren’t part of the Geneva Convention system. Instead, you need an official Japanese translation of your home license, obtainable from the Japan Automobile Federation (JAF) or your country’s consulate in Japan. Everyone else — US, UK, Canada, Australia, most of Europe, Southeast Asia — needs the IDP. Bring your physical home license too; the IDP alone isn’t valid without it.

    Most companies require drivers to be at least 18, and some (particularly for larger vehicles or campervans) want at least one year of driving history on your home license.

    Choosing a Rental Company and What It Costs

    The big national chains — Toyota Rent a Car, Nippon Rent-A-Car, Times Car Rental, Orix Rent-A-Car, and Nissan Rent-A-Car — all have English-language websites and counters at major airports and train stations, which makes them the easiest starting point. Prices for a 24-hour rental typically run:

    • Budget: Kei car (yellow-plate minicar, seats 4) — around ¥5,000–6,500/day. Cheap and easy to park, but underpowered for mountain passes or highway merges with luggage aboard.
    • Mid-range: Compact sedan or hatchback (Toyota Yaris, Honda Fit class) — ¥6,500–9,500/day.
    • Splurge: SUV or minivan for groups, or a premium model — ¥12,000–20,000+/day.

    On top of the base rate, budget for Collision Damage Waiver insurance (¥1,000–2,000/day, often bundled in but confirm) and the Non-Operation Charge waiver (NOC, roughly ¥1,000–1,500/day) — without the NOC waiver, you’re liable for the company’s lost rental income if the car is damaged, even with CDW covering repairs. Renting an ETC toll card costs a flat ¥300–330. If you’re picking up in one city and dropping off in another, expect a one-way fee of ¥10,000–30,000+ depending on distance.

    Tolls, Gas, and Parking: The Hidden Costs

    Japan’s expressways are toll roads, and the tolls add up fast — Tokyo to Nagano runs roughly ¥5,000 one-way, for example. Get the ETC card and use the dedicated ETC lanes at tollgates; it deducts automatically and saves you from fumbling for cash at 80 km/h. Regular gasoline (レギュラー) runs around ¥170–185 per liter as of 2026; rental cars are returned with a full tank, so budget the equivalent of a top-up right before drop-off, or you’ll be charged a premium rate for the difference.

    Parking is the cost visitors underestimate most. Central Tokyo, Kyoto, and Osaka charge ¥300–500 per 30 minutes at coin parking lots (coordinated by locking wheel-lock systems), and can hit ¥2,000–3,000 for a full day even outside the very center. If your itinerary is mostly cities like Kyoto or Osaka, a car is often more hassle than help — save it for the legs where public transit thins out, and lean on regional IC cards for the city portions.

    Rules of the Road

    Japan drives on the left, with the steering wheel on the right side of the car. Expressway speed limits are generally 80–100 km/h, and city/rural roads 30–60 km/h — enforced strictly, with speed cameras common. Drink driving has a zero-tolerance policy with serious penalties even at low blood alcohol levels; if you’re planning an onsen town stop with dinner and drinks, don’t plan to drive afterward.

    Rental car navigation systems are usually in Japanese by default; ask staff to switch the language, or simply enter your destination’s phone number or a MAPCODE, which the nav systems handle more reliably than romanized addresses. Many rentals now include CarPlay/Android Auto, letting you run Google Maps from your phone instead. If you’re heading into snow country (Tohoku, Hokkaido, the Japan Alps) between December and March, confirm the car comes with studless winter tires — reputable agencies swap them automatically in season, but it’s worth asking outright.

    Common Mistakes to Avoid

    • Arriving without the IDP. This is the single most common reason travelers get turned away — and it can’t be fixed once you’re in Japan.
    • Renting a car for a city-heavy itinerary. If you’re mostly hopping between Tokyo, Kyoto, and Osaka, trains and buses (see our guide to overnight buses in Japan) are cheaper and less stressful than parking fees and tolls.
    • Skipping the pre-rental damage walkaround. Photograph every scratch with the staff present before driving off.
    • Ignoring narrow rural roads. Many countryside roads are one-lane with passing bays; go slowly and be ready to reverse.
    • Not checking earthquake and typhoon contingencies. If you’re driving through rural or coastal areas, it’s worth a quick read of our earthquake and disaster prep guide before you set off.

    Best Road Trips by Rental Car

    A few regions genuinely reward having your own wheels:

    • Shikoku: The smallest of Japan’s main islands has patchy rail coverage but spectacular driving — the vine bridges and gorges of the Iya Valley, the Naruto whirlpools, and stretches of the 88 Temple Pilgrimage route are all far easier by car. See our full Shikoku travel guide.
    • The Japan Alps: Base yourself in Matsumoto and drive into the mountains for alpine scenery that’s a real slog by bus, especially outside peak season.
    • Yakushima and Sado Island: Both islands are compact enough to circle in a day or two by car, and both have limited public transit once you’re off the main port town — see our guides to Yakushima’s ancient forests and Sado Island.

    Best timing for road trips is spring (April–May) and autumn (October–November), when mountain passes are clear and scenery is at its best; midsummer is fine but hot and humid for stops outside the AC, and winter driving in the Alps or Tohoku requires real snow-driving confidence even with the right tires. Whatever the season, book your car at least a few weeks ahead for the busiest windows — Golden Week (late April–early May), Obon (mid-August), and New Year — when fleets sell out at popular pickup points.

  • Umeshu: A Beginner’s Guide to Japan’s Plum Wine

    Umeshu: A Beginner’s Guide to Japan’s Plum Wine

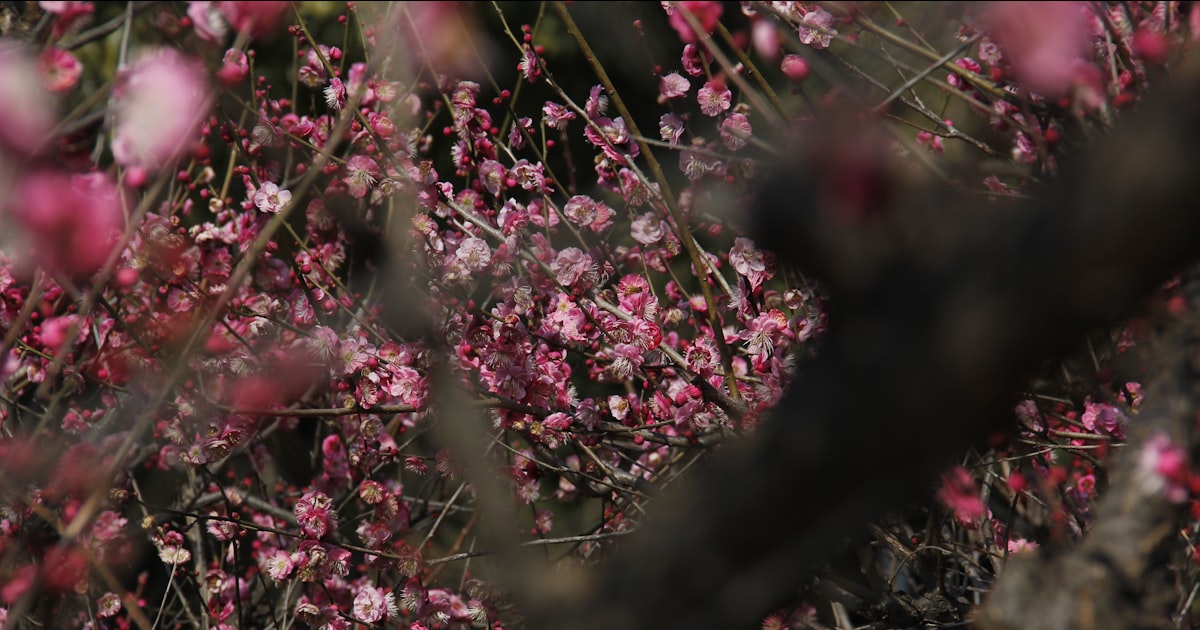
    Photo by Uttam Kumar Roy on Unsplash

    Umeshu (梅酒) shows up on every izakaya drinks menu, in every duty-free shop, and on convenience store shelves across Japan — yet most visitors have only a vague idea of what it is. It’s not wine in the grape sense, it’s sweeter than most people expect, and the good stuff is worlds away from the syrupy version poured at tourist-trap bars. Here’s what to know before you start tasting.

    What Exactly Is Umeshu?

    Umeshu is made by steeping unripe ume plums (closer to an apricot than a Western plum, botanically) in a clear spirit along with rock sugar for several months to a year. The sugar draws out juice and acidity from the fruit while the alcohol pulls out flavor compounds, leaving a drink that’s tart, fruity, and noticeably sweet, usually 10–15% ABV — lower than most spirits, higher than wine. Commercial versions can taste almost candy-like; artisan umeshu from a good producer tastes more like a stone-fruit liqueur with real backbone and acidity.

    Most umeshu is made with a neutral shochu base, which is why it pairs naturally with everything else in Japan’s shochu world — if you want the fuller picture of what that base spirit is and how it differs from sake, our guide to shochu is a useful companion read before you go bottle-shopping.

    Where Umeshu Actually Comes From

    Wakayama Prefecture, on the Kii Peninsula south of Osaka, produces roughly half of Japan’s ume crop, and the town of Minabe is considered the spiritual home of the fruit — you’ll see ume orchards blanketing the hillsides there in late February when the blossoms open, well before the fruit itself ripens. You don’t need to travel to Wakayama to drink well, though; Kyoto, Tokyo, and pretty much every regional city sell excellent regional umeshu, often labeled with the prefecture the plums came from (Wakayama-san ume is the label to look for if you want the real thing rather than a mass-market blend).

    Best Season for Tasting and Buying

    Ume trees blossom in February and March, but the fruit itself is harvested green and unripe in late May through June — this harvest window is called umeshi-zake season in producer regions, and it’s when supermarkets nationwide stock bags of fresh green ume alongside rock sugar and shochu for home-brewing, a popular seasonal ritual in Japanese households. If you’re visiting in June, this is also when department store basement food halls (depachika) tend to run umeshu tasting counters and seasonal displays, since June overlaps with Japan’s rainy season (tsuyu) and retailers lean into indoor, cozy products. You can buy and drink umeshu year-round, but if you want to see the fresh fruit itself and catch tasting events, late spring to early summer is the window.

    Where to Try and Buy It

    You don’t need to seek out a specialty bar — nearly every izakaya has at least one umeshu on the menu, usually served on the rocks or as an umeshu soda, typically ¥500–800 a glass. For browsing a wider range in one place, food-and-drink shopping streets are your best bet. In Kyoto, Nishiki Market has several shops selling regional umeshu by the bottle, often with small tasting pours available before you buy. In Tokyo, convenience stores and supermarkets stock reliable mass-market brands like Choya and Nakano BC in the ¥900–1,800 range for a 500ml–720ml bottle, and airport duty-free shops (Narita, Haneda, Kansai) sell gift-boxed versions that travel well. If you’re assembling a home bar setup or want proper rocks glasses to serve it in once you’re home, Kappabashi Kitchen Town in Tokyo sells restaurant-grade glassware at a fraction of department store prices.

    How to Drink It

    The most common serving style is umeshu on the rocks — poured over ice, which dilutes the sweetness as it melts. Umeshu soda (umeshu mixed with sparkling water) is lighter and more common in summer; umeshu with hot water (oyuwari) shows up in colder months and brings out a mellower, almost medicinal warmth. A small but growing number of bars also serve it neat as a digestif, which is really the only way to taste what a well-made bottle is doing — neat is where the difference between a ¥900 supermarket bottle and a ¥5,000 craft one becomes obvious.

    Budget, Mid-Range, and Splurge Bottles

    Budget (¥900–1,500): Choya and Nakano BC’s standard lines are widely available, reliably sweet, and a safe starting point if you’ve never tried umeshu before. Convenience store canned umeshu highballs (around 350ml, ¥150–250) are a fine way to sample the flavor without committing to a full bottle.

    Mid-range (¥1,800–3,500): Look for single-prefecture labels, especially anything marked Wakayama-san or Nanko-ume (a specific premium ume cultivar). These use better fruit and less added sugar, so the plum flavor and acidity come through more clearly instead of being buried in sweetness.

    Splurge (¥4,000–8,000+): Small-batch craft producers, often sold only at the brewery or at specialty liquor shops, use aged shochu or even sake as the base and let the umeshu mature for several years. These are worth seeking out if you’re already a fan of Japanese spirits — they taste closer to a fine sherry than to a fruit cooler.

    Common Mistakes to Avoid

    The biggest one is judging umeshu entirely by a cheap bottle — the mass-market stuff is intentionally sweet and approachable, and it’s not representative of what the category can do, the same way a cheap supermarket wine doesn’t represent what wine can be. Second, don’t assume all umeshu is low-proof and harmless; some artisan bottles push closer to 20% ABV, and the sweetness masks the alcohol easily. Third, if you’re buying bottles to bring home, check your destination country’s alcohol import allowance before loading up your suitcase — most travelers can bring one to three bottles duty-free, but limits vary widely. And if you’re gifting a bottle to someone, a nicely wrapped umeshu bottle makes a better souvenir than most trinkets; a furoshiki cloth wrap is a far more Japanese presentation than a plastic bag and doubles as a usable gift itself.

    Umeshu rewards a little curiosity beyond the tourist-menu pour. Try one glass on the rocks at an izakaya, then track down a single-prefecture bottle at a market or specialty shop — the gap between the two is usually enough to turn a polite sip into a genuine favorite.

  • Furoshiki: Japan’s Reusable Wrapping Cloth and How to Use One

    Furoshiki: Japan’s Reusable Wrapping Cloth and How to Use One

    Photo by freestocks on Unsplash

    Long before reusable tote bags became a global talking point, Japan already had one: the furoshiki. This square piece of cloth has been used for centuries to wrap, carry, and gift almost anything—bento boxes, sake bottles, gifts, even furniture. It folds flat into a pocket, costs less than a souvenir T-shirt, and doubles as a genuinely useful travel accessory. Here’s how to choose one, where to buy it, and how to actually use it once you’re home.

    What Is Furoshiki, and Why Should You Care?

    The word combines furo (bath) and shiki (to spread), a nod to its Edo-period use for bundling clothes at public bathhouses. Over time it became an all-purpose wrapping tool for merchants, gift-givers, and travelers, largely replaced by paper and plastic bags in the 20th century. In the last decade or two it’s had a genuine revival, partly on environmental grounds and partly because it’s simply elegant: one square of cloth, tied a few different ways, replaces gift wrap, a lunch bag, a wine carrier, and an emergency tote.

    For visitors, furoshiki make excellent souvenirs precisely because they’re light, flat, and useful the day you buy them—wrap your onsen toiletries in one, or use it to bundle up breakable souvenirs like Arita or Imari porcelain for the flight home.

    Choosing the Right Furoshiki: Sizes, Fabrics, and Prices

    Furoshiki are sold by size, measured in centimeters per side:

    • 45cm – the most common size, good for wrapping a small gift box, a bento, or a bottle of wine. Roughly ¥800–2,500 in cotton.
    • 68–70cm – wraps two bottles, a stack of books, or works as a small bag. Typically ¥1,500–4,000.
    • 90cm and up – large enough to use as an actual carry bag or to wrap bulky items. Often ¥3,000–8,000, more in silk.

    On fabric: cotton is the everyday choice—easy to wash, inexpensive, and fine for gifts or grocery-carrying. Rayon and chirimen (a crepe-textured synthetic or silk blend) have more drape, which matters for tying knots that need to hang nicely, like a bag handle. Pure silk furoshiki, often hand-dyed with traditional patterns, are the splurge option—expect ¥8,000–20,000 or more at specialty shops, and treat them as gift items or display pieces rather than daily carry cloths.

    Budget tip: 100-yen shops (Daiso, Seria) and Muji both stock simple cotton furoshiki for ¥300–1,500, which is plenty for practice and casual use. Save the specialty shops for a nicer pattern you’ll actually want to keep.

    Where to Buy Furoshiki in Japan

    Every department store in Japan (Takashimaya, Isetan, Daimaru) has a furoshiki section, usually near the gift-wrapping or tableware floor, with a wide range from ¥1,000 basics to museum-quality silk pieces. Kyoto is the spiritual home of the craft, thanks to the city’s textile history in the Nishijin district—look for small specialty shops selling hand-dyed cotton and chirimen furoshiki in traditional motifs like waves, cranes, and seasonal flowers.

    In Tokyo, old shitamachi neighborhoods are a good bet for traditional textile shops tucked between temples and old shopfronts—Yanaka in particular has small craft and textile stores worth a browse if you’re already there for the cats and senbei. If you’re shopping for kitchen-oriented cloths—large ones for wrapping food storage containers or bento—Kappabashi Kitchen Town carries practical cotton furoshiki alongside its restaurant-supply stock, generally cheaper than department store prices. Most independent shops open around 10:00 and close by 18:00–19:00; department store hours run later, typically to 20:00.

    Five Essential Furoshiki Wrapping Techniques

    You don’t need to learn dozens of knots—five will cover almost everything:

    • Otsukai-zutsumi (basic parcel wrap): Place the box diagonally in the center of the cloth, fold the near and far corners over the top, then tie the two side corners in a simple double knot on top. This is the default way to wrap a gift box or bento.
    • Bin-zutsumi (bottle wrap): Roll a bottle diagonally from one corner, then tie the two long ends around the neck with a bow. Makes a wine bottle look like an actual gift rather than something grabbed at the last minute.
    • Suika-zutsumi (round object wrap): Named for wrapping watermelons—gather the cloth around a round or irregular object and tie the four corners at the top, twisting the fabric taut as you go.
    • Kaban-zutsumi (bag knot): Tie two opposite corners together, then the other two, leaving one pair of knots longer to form a handle. With a 90cm cloth this becomes a genuinely usable tote.
    • Ichimai-zutsumi (flat wrap for books/laptops): Fold the cloth around a flat item like a book or tablet, tucking and tying at the ends—handy as an improvised padded sleeve.

    None of these require special skill; the whole point of furoshiki is that a few folds and one knot solve most wrapping problems.

    Common Mistakes First-Timers Make

    The most common issue is buying a cloth too small for the job—a 45cm furoshiki won’t wrap a bottle of sake comfortably, so size up if you’re unsure. The second is using slippery synthetic fabric for knots that need friction, like the bag handle knot; cotton or chirimen grips itself far better than smooth polyester. Finally, don’t over-tighten decorative bow knots meant to be untied by the recipient—Japanese gift-giving etiquette generally expects the cloth to be returned or reused, not kept wrapped around the item permanently.

    Best Season and Occasions to Use One

    Furoshiki have a natural place in Japan’s mid-year and year-end gift-giving seasons, ochugen (early-to-mid July) and oseibo (December), when boxed gifts of food or household goods change hands constantly—shops get noticeably busier with furoshiki and gift-wrap displays during these windows. Cherry blossom season is another good excuse: pack a bento in a furoshiki for a hanami picnic instead of disposable containers, a habit that pairs naturally with the general spirit of springtime outings described in our guide to Japan in spring. If you’re picking up sweets from a wagashi shop as a gift, ask to have the box wrapped in furoshiki rather than paper—it’s a small touch that locals notice, and pairs well with what you’ll learn in our beginner’s guide to wagashi.

    Bringing Furoshiki Home

    Pack a couple of cotton furoshiki in your suitcase before you fly home—they weigh almost nothing and can wrap fragile souvenirs, double as a laundry bag, or bundle up food picked up on a crawl through somewhere like Nishiki Market. Once home, a furoshiki makes a genuinely reusable gift wrap for birthdays and holidays, and it’s one of the few souvenirs from a Japan trip that gets more useful with time rather than sitting on a shelf.

  • Kappabashi Kitchen Town: Tokyo’s Restaurant Supply Street and What to Buy

    Kappabashi Kitchen Town: Tokyo’s Restaurant Supply Street and What to Buy

    Photo by Louie Martinez on Unsplash

    Between Asakusa and Ueno sits a street most tourists walk past without noticing it’s there — until they spot a giant golden chef’s head grinning down from a rooftop. That’s Kappabashi Dogu Suji, better known as Kappabashi Kitchen Town, a roughly 800-meter strip of shops that has supplied Tokyo’s restaurants, hotels, and food stalls with everything from sushi knives to plastic tempura since the early 20th century. It’s not a tourist market dressed up for visitors — it’s a working trade street where chefs still stock their kitchens — which is exactly why it’s worth a couple of hours if you care about Japanese cooking, design, or just want souvenirs that aren’t keychains.

    What Kappabashi actually is

    Kappabashi runs along Kappabashi Dogu Suji between Asakusa-dori and Kototoi-dori, lined with roughly 150 specialist shops. Each one tends to sell exactly one category of thing: a knife shop sells only knives, a ceramics shop only tableware, a signage shop only noren curtains and lanterns. This specialization is the whole appeal — instead of a general souvenir shop with a shelf of “Japanese knives,” you get a shop where the owner has sharpened knives for 40 years and will talk you through blade steel for ten minutes if you let them.

    The street’s unofficial mascot is the enormous white chef’s head statue on top of the Niimi Corporation building near the Kototoi-dori end — it’s the easiest landmark to navigate by and a popular photo stop.

    How to get there

    The closest station is Tawaramachi on the Ginza Line, about a 5-7 minute walk to the start of the shopping street. It’s also an easy 15-20 minute walk from Asakusa Station (handy to combine with a visit to Senso-ji) or from Ueno Station. If you’re staying near Ueno or Asakusa, there’s no need to bother with buses or taxis — walking is simplest, and it’s a good way to pass through quieter backstreets on the way. If you’re basing yourself further out and traveling around Japan by long-distance bus rather than the Shinkansen, see our guide to overnight buses in Japan for budget options into Tokyo.

    Opening hours and best timing

    Most shops open around 9:00-10:00am and close between 5:00 and 6:00pm. A meaningful number of shops close on Sundays, since this is a trade street built around restaurant supply chains rather than weekend shopping — Tuesday through Saturday mornings are the most reliable time to find everything open. Arrive by early afternoon to have real browsing time before shutters start coming down.

    If you can time your visit for early-to-mid October, look out for the annual Kappabashi Dogu Matsuri (tool festival), when the street strings up decorations, some shops run discounts, and the atmosphere is livelier than usual. Outside of that, any season works — this is an indoor, shop-to-shop street, so it’s a good rainy-day or extreme-heat option compared to an outdoor market. If you’re visiting in the muggier months, our guide to Japan in summer has tips on managing the heat between stops.

    What to buy

    Knives. This is Kappabashi’s headline category. Kama-asa Shoten is one of the best-known shops on the street, with cutlery running from workaday kitchen knives to serious hand-forged pieces, plus engraving service for gifts. Expect roughly ¥3,000-8,000 for a solid entry-level Japanese kitchen knife (a santoku or nakiri is a good all-rounder for home cooks), ¥15,000-50,000 for professional-grade steel, and beyond ¥50,000 for damascus or custom-forged blades. Bring your passport — many shops offer tax-free purchases on top of ¥5,000, and reputable shops will wrap blades for flight travel, but always pack knives in checked luggage, never carry-on.

    Plastic food samples (sampuru). Kappabashi is the historic center of Japan’s fake-food industry, the hyper-realistic plastic dishes displayed in restaurant windows nationwide. Shops like Maizuru sell everything from a single ¥500-1,500 sushi-piece keychain or magnet to full plates of “tempura” or “ramen” for ¥3,000-15,000, and some stores let you try a hands-on workshop to make your own tempura or lettuce piece for around ¥2,000-4,000 — a genuinely fun, kid-friendly activity.

    Ceramics and tableware. Donburi bowls, sake cups, plates, and serving dishes in both mass-produced and handmade styles, often cheaper than equivalent pieces sold as souvenirs elsewhere in Tokyo. If you want to go deeper into Japanese ceramics at the source rather than buying retail, our guide to Arita and Imari’s porcelain towns covers the production regions themselves.

    Bento boxes, tools, and small kitchen gear. Lacquered and plastic bento boxes, rice paddles, graters, molds, and copper tamagoyaki pans are all here at trade prices — a nice pairing if you’ve gotten interested in Japan’s bento culture after reading about station bento (ekiben) on the rails.

    Noren, lanterns, and shop signage. Fabric curtains and paper lanterns in traditional patterns, sold both as functional shop items and as decor souvenirs, typically ¥2,000-8,000 for a noren depending on size and fabric.

    Budget, mid-range, and splurge picks

    • Budget: a food-sample keychain or magnet (¥500-1,500), a basic paring or utility knife (¥2,000-4,000), or a single ceramic rice bowl (¥800-2,000).
    • Mid-range: a quality santoku knife (¥8,000-20,000), a copper tamagoyaki pan (¥5,000-10,000), or a full plastic food display piece (¥5,000-10,000).
    • Splurge: a hand-forged, custom-engraved chef’s knife from a specialist shop (¥30,000-80,000+), built to last decades with proper care.

    Common mistakes to avoid

    Don’t visit on a Sunday expecting everything open — you’ll find some shops shuttered and miss the specialists you came for. Don’t assume every knife shop offers tax-free processing or sharpening on the spot; ask before you commit, since policies vary shop to shop. Don’t pack a purchased knife in carry-on luggage — it will be confiscated at security, so plan to check your bag or ship the knife home separately if you’re traveling on to another city by air. And don’t rush through in twenty minutes — the value here is in the specialist shops, and a fast walk-through will just look like a slightly odd hardware street.

    Kappabashi pairs naturally with a wider wander through old-town Tokyo: it sits close to the low-rise, backstreet character of Yanaka’s shitamachi neighborhood, and if you’ve shopped a kitchen street like this before, it’s a fun comparison to Kyoto’s food-focused Nishiki Market — one sells the tools, the other sells what you’d cook with them.

  • Overnight Buses in Japan: The Budget Alternative to the Shinkansen

    Overnight Buses in Japan: The Budget Alternative to the Shinkansen

    Photo by Shigeki Wakabayashi on Unsplash

    The Shinkansen gets all the attention, but Japan’s overnight highway buses (夜行バス, yakō basu) are how a huge number of students, backpackers, and budget-minded locals actually get around the country. For a fraction of the bullet train fare, you can cover 500-1,000 km while you sleep, waking up in a new city with a full day ahead of you and a hotel night saved. They’re not for everyone, but for the right traveler and the right route, they’re one of the best value moves in Japan.

    Why Take a Bus Instead of the Shinkansen

    The math is simple: a Tokyo-Osaka overnight bus runs roughly ¥3,500-¥9,000 depending on the operator, season, and seat type, versus about ¥14,000-14,720 for an unreserved Nozomi seat one way. On longer routes the gap widens further — Tokyo to Hiroshima by bus is typically ¥8,000-¥13,000 against a Shinkansen fare north of ¥19,000. Because the bus departs late evening and arrives early morning, you also skip a night of hotel costs, which is often the bigger saving. The trade-off is time and comfort: a Tokyo-Osaka bus takes 7-9 hours versus 2.5 by rail, and you’re sitting (or semi-reclining) the whole way rather than lying flat.

    How Much You’ll Actually Save

    Pricing on Japanese overnight buses moves with demand, much like airline tickets, so booking early matters. As a rough guide: standard 4-row seating (yonretsu) on routes like Tokyo-Kyoto or Tokyo-Osaka starts around ¥3,000-¥5,000 on off-peak weeknights and climbs to ¥8,000-¥10,000 on Friday and Saturday departures. Premium 3-row or independent-seat buses run ¥8,000-¥15,000. On the busiest travel weeks — Golden Week (April 29-May 5), Obon (August 13-16), and New Year (December 28-January 3) — prices spike sharply and popular departures sell out weeks in advance, so the discount over the Shinkansen shrinks or disappears entirely. Outside those windows, a bus booked 2-3 weeks ahead is almost always your cheapest way to cover long distances.

    Choosing Your Seat: Bus Classes Explained

    Not all overnight buses are equal, and the seat type matters more than the operator name on most routes.

    • 4-row (yonretsu): The cheapest option, four seats across with a center aisle, similar to a standard coach seat with a bit more recline. Fine for shorter overnight hops (5-6 hours) but tiring on longer ones.
    • 3-row (sanretsu): Three seats across, meaningfully wider with deeper recline and usually a curtain or partition for privacy. This is the sweet spot for most travelers — a noticeable comfort jump for maybe ¥2,000-¥4,000 more.
    • Independent/pod seats: High-end buses (Willer Express’s Cocoon and Relax seats, JR Bus’s Dream Sleeper) offer individual shell-like seats or even flat-ish sleeping pods with privacy curtains, USB ports, and reading lights. Expect ¥12,000-¥20,000+, which starts to approach Shinkansen pricing but still beats it on very long routes while saving a hotel night.

    Booking an Overnight Bus

    The two biggest platforms for foreign travelers are Willer Express (willerexpress.com), which has a full English booking site and issues an e-ticket you show as a QR code, and Kosoku Bus / Bus Hikaku (aggregator sites comparing multiple operators, though largely Japanese-language). JR Bus (JR each region’s bus subsidiary) also runs reliable overnight routes bookable via their Japanese sites or at any JR ticket counter. For English-speakers, Willer is the easiest starting point — search your route and date, filter by seat class, and pay by credit card. Buses depart from major terminals: in Tokyo, that’s mostly the Shinjuku Expressway Bus Terminal (Busta Shinjuku), directly above Shinjuku Station’s south exit; in Osaka, it’s the Osaka Umeda Bus Terminal or Namba OCAT. Counters at these terminals are typically staffed from early morning until the last departure, often past midnight, and have coin lockers if you need to store bags beforehand.

    What to Expect on Board

    Boarding usually happens 15-20 minutes before departure, and drivers are strict about on-time boarding — arrive at your gate number with margin. Most buses have onboard toilets, though budget services on shorter routes sometimes don’t, relying instead on one or two rest-area stops (called SA or PA) roughly every 2-3 hours, where you can use the bathroom, buy a drink, or grab a snack from vending machines. Lights go off and the driver announces quiet hours shortly after departure — talking, phone calls, and even phone screen brightness are expected to be kept to a minimum out of consideration for sleeping passengers. Bring an eye mask, a neck pillow, and a light layer, since air conditioning can run cold. Buses typically arrive at their destination terminal between 5:30 and 7:30 AM, which is earlier than most hotel check-in times — plan to store luggage in a station locker and start your day with breakfast or a visit to a public bath before checking in.

    Best Routes and When to Use Them

    Overnight buses shine most on routes where the Shinkansen either doesn’t reach directly or costs disproportionately more for the distance. Heading to the Japan Alps, an overnight bus from Shinjuku to Matsumoto lets hikers arrive early enough to head straight into the mountains — worth pairing with our guide to Matsumoto, Castle, Soba & Gateway to the Japan Alps. For Shikoku, where Shinkansen coverage is limited, overnight buses from Tokyo to Takamatsu or Tokushima are a genuinely practical way in — see our Shikoku Travel Guide for what to do once you arrive. Kansai-to-Kyushu overnight buses, such as Osaka to Beppu, are another strong value route for onsen-bound travelers — pair it with our Beppu & Yufuin guide. Once you land at your destination, remember that regional IC cards work differently from Tokyo’s Suica/Pasmo network for local transit — our guide to IC cards beyond Tokyo covers ICOCA, SUGOCA, and the rest.

    Common Mistakes to Avoid

    The most frequent regret travelers report is booking the cheapest 4-row seat for a route over 7-8 hours and arriving too exhausted to enjoy the first day — pay the extra ¥2,000-¥3,000 for a 3-row seat on longer hauls. Second, don’t assume every bus has a toilet; check the listing before booking if that matters to you. Third, avoid booking overnight buses during Obon, New Year, or Golden Week unless you’ve reserved weeks ahead, since both prices and availability move fast. Finally, note that most overnight bus tickets are non-refundable or carry steep cancellation fees close to departure, unlike a flexible Shinkansen reserved ticket, so only book once your plans are firm.

    Used strategically — on the routes where the price and time savings are real, and with a seat class that matches how many hours you’ll actually be on board — overnight buses are one of the best budget tools for covering ground in Japan without burning through your travel fund on rail passes alone.

  • Japanese Incense (Kōdō): Types, Brands & Where to Buy

    Japanese Incense (Kōdō): Types, Brands & Where to Buy

    Photo by Becca Tapert on Unsplash

    Long before it became a souvenir-shop staple, incense in Japan was a formal art form called kōdō (香道), “the way of fragrance,” ranked alongside tea ceremony and flower arranging. You don’t need to study kōdō to appreciate what’s on offer today, but understanding a little about types, ingredients, and where the good stuff is actually sold will save you from bringing home a dusty souvenir-shop box that smells like synthetic potpourri. Here’s what to know before you shop.

    The Main Types of Japanese Incense

    Most Japanese incense falls into a few categories, and it helps to know the Japanese terms so you can read labels:

    • Senkō (線香) — the classic thin stick, burned upright in a holder or laid flat in an ash-filled burner (kōro). This is what most visitors picture and buy.
    • Uzumaki-kō (渦巻き香) — coil incense, prized for burning several hours unattended; common for temples and long meditation sessions.
    • Nerikoh (練香) — kneaded incense, small pellets of ground aromatics bound with honey or plum, warmed on charcoal rather than lit directly. This is the classical kōdō form and makes an elegant, less “smoky” gift.
    • Kōro-daki materials — loose wood chips (agarwood, sandalwood) for burning over charcoal or an electric incense warmer, popular with people who find stick smoke too strong.

    If you’re buying for someone who finds regular incense smoke overpowering, nerikoh or a small electric warmer with wood chips is the better gift — the scent is subtler and lasts through multiple short sessions.

    Ingredients Worth Knowing

    Quality and price come down almost entirely to what’s inside the stick. The two aromatics to look for on the label are jinkō (沈香), agarwood, and byakudan (白檀), sandalwood. Within agarwood, the highest grade is kyara (伽羅) — resin-dense wood from old Aquilaria trees, sold by the gram at prices that can run into tens of thousands of yen for even small amounts. Cheaper incense uses synthetic fragrance oils on a base of tabu-no-ki (machilus) bark powder, which is fine for everyday use but won’t have the depth of a real wood-based stick. Reputable shops list the ingredients on the box; if a box just says “floral scent” with no wood named, assume it’s synthetic.

    One practical note: raw agarwood and its chips are CITES-listed, so if you’re buying bulk raw wood chips (not finished, packaged incense sticks) rather than manufactured incense, check your home country’s import rules before you leave — ordinary boxed incense for personal use is not an issue.

    Brands to Look For

    A handful of long-running houses account for most of the quality incense sold in Japan:

    • Shoyeido (松栄堂) — Kyoto, founded 1705, one of the most respected names; their Horin and Kyo-nishiki lines are widely available and consistently good value.
    • Kyukyodo (鳩居堂) — founded 1663, sells both incense and traditional stationery; their Ginza and Kyoto (Teramachi) shops are destinations in themselves.
    • Baieido (梅栄堂) — an Osaka (Sakai) maker known among kōdō practitioners for its Kyara Koku and other high-end blends.
    • Nippon Kodo — Japan’s largest incense manufacturer; its retail arm, Lisn, sells contemporary, minimalist-packaged scents that are easier for first-timers to navigate.
    • Kunjudo (薫寿堂) — based on Awaji Island, reliably affordable and sold in Tokyu Hands and Loft stores nationwide.

    Where to Buy It

    Kyoto is the center of the trade. Shoyeido’s main shop is near the Kyoto Imperial Palace, and Kyukyodo has a Teramachi-dori location a short walk from downtown — close enough to combine with a visit to Nishiki Market if you’re already doing a Kyoto shopping crawl. Most of these shops let you test scents on paper strips before buying, so take the time to smell a few — incense names (“morning mist,” “plum blossom”) don’t always match what you’d expect.

    Tokyo options include Kyukyodo’s Ginza flagship (5-chome, a few minutes from Ginza Station) and Lisn’s boutique inside Omotesando Hills, which is the easiest spot for a modern, gift-ready selection if you’re short on time. Both are open daily, roughly 11:00–19:00, though hours shift around New Year’s, so check ahead if visiting late December or early January.

    For the full production story, Awaji Island makes an estimated 70% of all incense produced in Japan, and a few workshops there offer tours and factory-outlet pricing. It’s reachable by bus from Kobe (about an hour) or as a stop if you’re driving toward Shikoku — the same Kobe-Awaji-Naruto Expressway route covered in our Shikoku travel guide. It’s a niche detour, not a must-do, but worthwhile if incense is a specific interest.

    What to Expect to Pay

    Prices scale steeply with ingredient quality: Budget — a box of 40–50 everyday sticks (synthetic or light sandalwood scent) from Kunjudo or Nippon Kodo’s Kayuragi line runs roughly ¥500–900. Mid-range — Shoyeido’s Horin or Lisn’s boxed gift sets, using real sandalwood or light agarwood, typically ¥1,500–3,000 for 100+ sticks or a curated multi-scent box. Splurge — anything labeled kyara. Even a small presentation box of a handful of premium agarwood or kyara-blend sticks from Baieido or Kyukyodo can run ¥5,000–15,000, and raw kyara chips sold by the gram go well beyond that. There’s no shame in staying mid-range — most people can’t tell the difference between good sandalwood and true kyara without training.

    Common Mistakes

    The biggest one is buying without smelling — Japanese incense names are poetic, not descriptive, so a box you like the look of may smell nothing like what you imagined. Second is packing loose sticks in a suitcase without their box; they snap easily and the fragments are hard to burn evenly. Third is storing incense somewhere hot and humid once home — heat degrades the aromatic oils, so keep boxes in a cool, dry drawer rather than a bathroom cabinet. Finally, if you’re shopping for a household that also enjoys ceramics, a simple porcelain incense holder makes a nice companion purchase — see our guide to Arita and Imari porcelain for where to find one. And if this kind of slow, traditional craft appeals to you, our beginner’s guide to wagashi covers a similarly detail-oriented Japanese art form worth exploring on the same trip.

    Best Time to Shop

    There’s no strong seasonal angle to buying incense — shops operate year-round — but avoid the first three days of January, when many traditional Kyoto and Tokyo shops close for New Year’s. If you’re combining a Kyoto incense stop with sightseeing, spring and autumn foot traffic in the Teramachi and Gion areas is heavy, so an early morning visit (shops open around 9:00–10:00) means calmer browsing and more attentive staff for scent testing.

  • Buying a Katana in Japan: Real Swords, Replicas & Export Rules

    Buying a Katana in Japan: Real Swords, Replicas & Export Rules

    Photo by Seiya Maeda on Unsplash

    A katana is one of the few souvenirs that comes with actual paperwork attached to it. Buy the wrong kind, or skip a step, and you can end up with a sword you legally aren’t allowed to take out of the country — or one that gets confiscated at customs on the way home. Buy the right way, and it’s genuinely one of the most memorable things you can bring back from Japan. Here’s how the market actually works.

    Real Swords vs. Replicas: Know What You’re Buying

    Almost everything sold as a “katana” in Japan falls into one of three categories, and the differences matter a lot for price and legality.

    • Shinken (real swords, nihonto): Hand-forged from folded steel, with a genuine cutting edge. These are legally classified as art objects in Japan, not weapons, and every one must be registered with a prefectural Board of Education. Antique blades (pre-1876, when the samurai class lost the right to carry swords) make up most of what’s for sale; there are also living swordsmiths producing new, registered blades.
    • Iaito: Unsharpened practice swords used for iaido and other sword arts, usually made from a zinc-aluminum alloy rather than steel. They look the part but have no edge and aren’t legally classified as swords at all — no registration, no export permit needed.
    • Decorative replicas: Stainless-steel or die-cast “display” katana sold in souvenir shops and anime/pop-culture stores, often unsharpened and sometimes not even functional as a sword shape past the guard. Fine for wall display, not for iaido practice, and not investment pieces.

    If a shop can’t tell you clearly which of these three a sword is, that’s a red flag — walk away.

    Where to Buy

    Tokyo has the country’s biggest concentration of specialist sword dealers, many clustered in and around the Ginza and Nihonbashi areas, with English-speaking staff used to dealing with overseas collectors and full export-paperwork support built into the price. These shops carry everything from lower-cost antique blades to museum-grade pieces with certification papers from the NBTHK (the Society for the Preservation of Japanese Art Swords), which authenticates the smith, era, and quality of a blade — always ask whether a sword comes with NBTHK papers, since it materially affects both price and resale value.

    For something more hands-on, Seki City in Gifu Prefecture has been a center of Japanese swordsmithing for roughly 700 years and still bills itself as the “City of Blades.” It’s a reasonable day trip if you’re already routing through the Japan Alps region near Matsumoto, and its local museum runs live forging demonstrations on select days — check the schedule before you go, as these aren’t daily. If you’re connecting through Nagoya or the Kansai region by rail, the regional IC card guide is worth a look before you set off: IC Cards Beyond Tokyo.

    If you just want a fun, affordable prop or cosplay-grade replica rather than a real blade, skip the specialist dealers entirely and head to Nakano Broadway in Tokyo, where several shops sell anime and pop-culture replica swords alongside toys and collectibles at souvenir prices.

    What a Real Katana Actually Costs

    Prices vary enormously based on age, smith, condition, and papers:

    • Budget replica (decorative, unsharpened): ¥3,000–15,000
    • Iaito practice sword: ¥30,000–90,000
    • Entry-level antique blade, unsigned or minor smith: ¥150,000–400,000
    • Mid-range, signed blade with NBTHK papers: ¥500,000–1,500,000
    • Splurge — Juyo Token (“Important Sword”) designation or named master smith: ¥3,000,000 and up, sometimes well up

    A sword’s mounting (koshirae — the scabbard, hilt wrap, and fittings) is usually priced separately from the blade itself and can range from simple and inexpensive to elaborate pieces that cost as much as the blade. Don’t assume an ornate scabbard means an ornate — or even genuine — blade underneath it.

    The Legal Paperwork: Registration and Export Permits

    Every authentic Japanese sword in the country must carry a torokusho, a registration certificate issued by a prefectural Board of Education. This isn’t optional paperwork for collectors — it’s illegal to possess an unregistered real blade in Japan, tourist or not, so never buy a “real” sword from an unlicensed seller or without seeing its registration card.

    To take a registered sword out of Japan, you need an export permit from the Agency for Cultural Affairs (Bunkacho), which the seller applies for on your behalf using the sword’s registration details. Build in lead time: this typically takes one to a few weeks to process, so if you’re buying late in a short trip, ask the shop up front whether they can turn it around before you fly out, or whether they’ll need to ship the sword to you afterward. A small number of nationally designated masterpieces (Important Cultural Properties and above) cannot be exported at all — reputable dealers will know this and won’t sell you one to take home.

    Iaito and non-bladed decorative replicas skip all of this — no registration, no export permit, just pack and go.

    Getting It Home: Customs and Destination Rules

    At Japanese customs, carry the export permit together with the sword — it should never go in carry-on luggage; pack it well-protected in checked baggage or arrange courier shipping through the shop, which many Tokyo dealers offer as a standard service for international buyers.

    Just as importantly, check your home country’s rules before you buy, not after. Import restrictions on bladed weapons vary widely: some countries treat genuine antique or hand-forged traditional swords more leniently than mass-produced blades, while others require an import permit or restrict swords altogether. A shop that regularly ships internationally can usually tell you what paperwork past customers from your country have needed — ask before you commit to a purchase, especially an expensive one.

    Common Mistakes to Avoid

    • Assuming any “real-looking” sword is a real sword. Plenty of very convincing stainless-steel replicas are sold as souvenirs; they’re not nihonto and shouldn’t be priced like one.
    • Buying without seeing the registration card. No torokusho, no legal sword — regardless of how good a deal it looks like.
    • Leaving the export permit until the last minute. If you’re flying out in two days, a genuine antique blade almost certainly won’t clear paperwork in time — plan the purchase earlier in your trip or arrange shipping.
    • Skipping NBTHK papers to save money. An unpapered blade can still be genuine, but you’re relying entirely on the shop’s word for age, smith, and quality.
    • Not checking your home country’s import rules. Find out before you buy, not at your home airport.

    Done right, buying a katana is a slower, more deliberate purchase than most travel shopping — closer to buying art than buying a souvenir. Budget the extra time for paperwork, buy from an established dealer who handles exports routinely, and you’ll come home with a piece that has real history behind it rather than a duty-free curiosity.

  • Arita & Imari: Japan’s Historic Porcelain Towns and Where to Buy

    Arita & Imari: Japan’s Historic Porcelain Towns and Where to Buy

    Photo by Rob Maxwell on Unsplash

    Long before “Made in Japan” meant electronics, it meant porcelain. In the hills of Saga Prefecture on the island of Kyushu, the twin towns of Arita and Imari have been firing kilns since 1616, and the wares that came out of them once furnished the palaces of Europe. If you care about Japanese craft — the same instinct that draws people to wagashi or a well-poured hi-fi setup — this is one of the few places in Japan where you can watch a centuries-old industry still working at full speed, and buy directly from the kilns that make it.

    Why Arita and Imari Matter

    In 1616, a Korean potter working under the name Kanagae Sanbei (also known as Yi Sam-pyeong) discovered kaolin clay at Izumiyama, on the edge of what’s now Arita town. It was the first source of true porcelain-grade clay found in Japan, and it kicked off an industry that would dominate Japanese ceramics for the next four centuries. Arita became the production center; Imari, a port town a short distance away, became the shipping point. Dutch East India Company ships loaded Arita-made porcelain at Imari’s harbor and carried it to Europe, which is why the ware is still known internationally as “Imari ware” even though almost none of it was actually made in Imari itself.

    The most exclusive production happened at Okawachiyama, a small valley near Imari where the Nabeshima domain set up kilns making porcelain exclusively for the shogun and other daimyo. The valley was sealed off from outsiders, with guard posts at its entrance, to protect trade secrets — hence its nickname, the “secret kiln village.” That history is still visible today in the quality and formality of Nabeshima-style ware, which favors restrained, precisely painted designs compared to the more decorative Kakiemon and Imari-Nabeshima export styles.

    Getting There and When to Go

    Arita and Imari sit close together in Saga Prefecture, roughly 90 minutes from Fukuoka and about an hour from Nagasaki. From Hakata Station in Fukuoka, take a JR limited express (Kamome or similar) toward Sasebo/Nagasaki, then transfer to a JR Sasebo Line local train to Arita Station — the whole trip runs around 1.5–2 hours depending on connections. From Nagasaki, the trip is similar in length via the Sasebo Line. Imari is reachable from Arita by a short ride on the JR Sasebo Line or the private Matsuura Railway. If you’re travelling around Kyushu, a SUGOCA card covers all of these local trains — worth reading up on if you’re used to Tokyo’s Suica, since regional IC cards work a little differently; see IC Cards Beyond Tokyo for how they interoperate.

    Both towns are walkable once you arrive, but distances between kilns can be a few kilometers, so a rental bicycle (available near Arita Station for roughly ¥500–1,000 a day) or a short taxi hop is useful. Most kiln shops and galleries keep hours of around 9:00–17:00, and quite a few close one day a week (often Tuesday or Wednesday) — it’s worth checking a specific shop’s hours before making a special trip, since Arita is not a place where everything is open all the time. The single busiest week of the year is Golden Week (April 29–May 5), when the Arita Ceramics Fair takes over the town; if you want quiet browsing rather than crowds, aim for late spring or autumn outside that window. If your trip already lines up with cherry blossom season, our Japan in Spring guide has the broader timing context for late April travel.

    Arita: Shop Streets, Kilns and the Ceramic Museum

    Arita’s old shopping street, Uchiyama, runs along the former Nagasaki Kaido road and is lined with kiln shops, some in buildings over a hundred years old. Look for the tonbai walls tucked into side alleys — fences built from broken kiln bricks and discarded pottery shards, a distinctive bit of recycled architecture unique to this district.

    A few kilns worth prioritizing if you’re short on time:

    • Fukagawa Seiji — founded in 1894 and a longtime supplier to the Imperial Household; clean, formal designs, with a retail shop and small gallery.
    • Gen-emon Kiln — one of the oldest continuously operating kilns in Arita, known for indigo-and-white sometsuke patterns at relatively accessible prices.
    • Kakiemon Kiln — the home of the Kakiemon family’s signature milky-white nigoshide porcelain and overglaze enamel work; pieces here run from mid-range to serious splurge territory.

    For context before you shop, the Kyushu Ceramic Museum (Kyushu Toji Bunkakan), a short walk from Arita Station, has free admission and a strong permanent collection tracing the region’s ceramic history — closed Mondays. The Arita Ceramic Museum in the town center is smaller and charges a modest entry fee, but has good historical pieces if you want more depth. If you want a single, all-in-one stop, Arita Porcelain Park — a themed complex including a full-scale replica of Dresden’s Zwinger Palace — sells work from dozens of kilns under one roof, though prices there trend a bit higher than buying direct from individual kiln shops.

    Imari and Okawachiyama: The Secret Kiln Village

    Imari town itself is a working port with a pleasant riverside shopping arcade (Imari Otemon), but the real destination is Okawachiyama, about 15–20 minutes by taxi or local bus from Imari Station. This tiny valley of roughly thirty kilns still produces Nabeshima- and Imari-style ware, and it’s dense enough to explore entirely on foot in half a day. The valley is dotted with decorative ceramic-tiled lamp posts and gateposts made by local kilns — a nice reminder that this whole village is essentially a living showroom. An Okawachiyama Ceramic Museum near the entrance gives useful background on the domain-kiln system before you start browsing shops.

    Because Okawachiyama pieces historically served the shogunate, quality here tends to be high and prices reflect it — expect this to be your splurge stop rather than your bargain stop.

    The Arita Ceramics Fair: Japan’s Biggest Pottery Market

    Every year from April 29 to May 5, Arita hosts the Arita Ceramics Fair (Arita Tōki Ichi), a market that’s been running for well over a century. Roughly 4 kilometers of the main street fill with several hundred stalls from kilns and wholesalers across the region, and the crowds are enormous — this is one of Kyushu’s biggest annual events. The upside is pricing: because much of what’s sold is factory-direct or slightly imperfect stock (wake ari), you’ll find everyday tableware discounted well below gallery prices, sometimes to a few hundred yen per piece for seconds and overstock. The downside is that it’s crowded, hot, and not the setting for leisurely browsing of high-end pieces — if you want a calm, considered shopping experience with a kiln’s full range on display, visit outside the fair dates instead.

    What to Buy, What It Costs, and How to Ship It Home

    Budget (¥1,000–3,000): A single sake cup, small sometsuke (blue-and-white) dish, or chopstick rest from a mid-tier kiln shop. This is also the sweet spot for fair-week seconds.

    Mid-range (¥5,000–20,000): A rice bowl and matching dish set, a mid-size Gen-emon or Fukagawa Seiji piece, or a decorative sometsuke vase.

    Splurge (¥30,000 and well beyond): Kakiemon nigoshide ware, Nabeshima-style pieces from Okawachiyama, or signed work from a recognized kiln master — these can run into the hundreds of thousands of yen for museum-quality pieces, and some shops will happily show you what that tier looks like even if you’re not buying.

    Most established kiln shops in both towns are used to foreign visitors and can arrange international shipping for fragile purchases — ask before you buy, since packing porcelain safely in your own luggage is a real risk, not just a formality. Cash is still preferred at smaller family-run shops, though the bigger names accept cards. If you’re stacking a Kyushu itinerary, Arita and Imari pair naturally with a swing further south to the hot spring towns of Beppu and Yufuin.

    Common Mistakes to Avoid

    Don’t assume every shop is open every day — the smaller kiln-run shops especially keep irregular hours, and a wasted trip to a closed storefront is a common complaint from visitors who didn’t check ahead. Don’t try to see both Arita and Imari’s Okawachiyama district in a single rushed afternoon; budget a full day if you want to do both properly, since transfers between them eat more time than the map suggests. Don’t buy your only pieces during the Golden Week fair if you actually want to see a kiln’s full catalog — the fair is about volume and bargains, not curated selection. And don’t skip asking about shipping: porcelain is heavy and breakable, and a shop that ships regularly to the US or Europe will pack it far better than you can in a suitcase.

  • Nishiki Market: Kyoto’s Kitchen Street Food Crawl

    Nishiki Market: Kyoto’s Kitchen Street Food Crawl

    Photo by Julien on Unsplash

    Nishiki Market is a narrow, covered shopping street in central Kyoto that’s been feeding the city for roughly four centuries. Locals call it “Kyoto no Daidokoro” — Kyoto’s Kitchen — and while it’s now firmly on the tourist trail, it’s still where chefs from nearby ryokan and restaurants come to buy pickles, dried fish, and fresh tofu. For visitors, it’s one of the best places in Japan to graze your way through regional specialties without committing to a full sit-down meal. Here’s how to do it well.

    What Is Nishiki Market?

    Nishiki Market (Nishiki Ichiba) runs for about 400 meters, one block north of and parallel to Shijo-dori, between Teramachi and Takakura streets in the Nakagyo Ward. It’s a covered arcade lined with roughly 100 shops, ranging from third-generation pickle sellers to knife shops to stalls selling skewered seafood. The market dates back to the Edo period, when it operated as a wholesale fish market thanks to a reliable cold well beneath the street. That history is still visible in how seafood-heavy the offerings are, even blocks from the coast.

    Most shops open between 9:00 and 10:00 AM and close by 6:00 PM, though this varies stall by stall — some close as early as 5:00 PM, and a fair number take Wednesdays off. There’s no single “market hours” — treat individual shop signage as the real answer.

    Getting There and When to Go

    The market’s east and west entrances are a short walk from two subway/train options: Karasuma Station on the Hankyu Kyoto Line, or Shijo Station on the Kyoto City Subway Karasuma Line — both about 3-5 minutes on foot. Kawaramachi Station on the Hankyu line is close to the eastern end. From Kyoto Station, it’s roughly 15-20 minutes on foot, or a 5-minute ride plus walk via the Karasuma Line (Kyoto Station to Shijo Station, one stop). If you’re using an ICOCA card for the subway, our guide to IC cards beyond Tokyo covers how ICOCA works on Kyoto’s trains and buses.

    Timing matters more here than at most Kyoto sights. The market is genuinely packed from late morning through early evening, especially on weekends and during cherry blossom season (late March to early April) and autumn foliage season (mid-November). Arrive right at opening, around 9:30-10:00 AM on a weekday, and you’ll walk at a normal pace and get first pick of items that sell out, like fresh yuba or certain fish. By noon it can be shoulder-to-shoulder for the entire 400-meter stretch.

    What to Eat: A Stall-by-Stall Crawl

    You won’t need a map here — just walk the length of the arcade and follow what smells good. A few things worth specifically hunting for:

    • Tako tamago — a whole baby octopus stuffed with a quail egg on a skewer, one of the market’s most-photographed items, around 300-500 JPY.
    • Dashimaki tamago — Kyoto-style rolled omelette made with dashi stock, sold in slices from several long-running stalls, roughly 200-400 JPY per piece.
    • Yuba — fresh tofu skin, a Kyoto specialty, sold plain, fried, or as soft-serve; small tasting portions often run 100-300 JPY.
    • Tsukemono — Kyoto pickles are a market signature, and many shops offer free samples on toothpicks before you buy a pack (typically 500-1,500 JPY).
    • Seafood skewers — grilled scallop, unagi (eel), or fresh sashimi cups from the market’s fishmongers, generally 300-800 JPY depending on the item.
    • Matcha soft-serve and warabi mochi — a good palate cleanser between savory bites, around 400-500 JPY.

    If you want a broader primer on how to approach grazing stalls like these across Japan — what’s normal to eat on the spot versus take away — our Japanese street food guide is a useful companion. And if raw seafood is more your focus, several Nishiki stalls sell nigiri and sashimi cups worth trying alongside the tips in our sushi guide.

    Budget, Mid-Range, and Splurge Picks

    Nishiki works at almost any budget. On the low end, a full crawl of five or six skewers and small bites will run about 1,500-2,500 JPY per person — enough to constitute lunch. Mid-range visitors can add a proper sit-down bowl of Kyoto-style ramen or a donburi at one of the small counters tucked between stalls, typically 900-1,300 JPY, plus a wagashi confection or two for dessert; the market has several long-standing sweets shops, and our wagashi guide explains what to look for if you’re new to Japanese sweets. For a splurge, Aritsugu, a knife and kitchenware shop near the market’s eastern end with roots going back to the 16th century, sells handmade Japanese kitchen knives starting around 15,000 JPY and running well past 40,000-50,000 JPY for premium steel — a serious souvenir for anyone who cooks.

    Market Etiquette and Common Mistakes

    The biggest mistake visitors make is eating while walking. Nishiki has tightened up on this in recent years — many shops post signs asking customers to finish their food at or near the stall rather than strolling with it, partly because the arcade gets too narrow and crowded for it to be safe. Look for a small standing area near the stall, or step to the side, before you unwrap anything.

    Other things to know before you go: cash is still preferred at many of the older stalls, even though card and IC card payment has expanded; carry some yen just in case. Don’t expect English menus everywhere — pointing works fine, and prices are usually posted. Finally, pace yourself: it’s tempting to buy at the first stall with a line, but the food quality is consistently high throughout, so it’s worth walking the full length once before deciding what to actually eat.

    Beyond the Food: Souvenirs and Nearby Spots

    Past the food stalls, Nishiki has specialty shops for Kyoto-style ceramics, tea, sake cups, and kitchen tools that make better souvenirs than most airport gift shops. The market feeds directly into the covered Teramachi and Shinkyogoku shopping arcades at its eastern end, which are worth a wander for clothing and general shopping after you’ve eaten your fill. Nishiki is also a short walk from the Shijo-Kawaramachi area’s restaurants and bars, so it works well as a late-morning or early-afternoon stop before an evening elsewhere in the city — Kyoto’s growing craft beer scene, covered in our craft beer in Japan guide, has a few taprooms within easy reach downtown.

    Give yourself at least 90 minutes to walk the market properly and actually eat rather than just look, and go early to enjoy it at something close to a normal pace.