Japan Trove

Author: JapanTrove Editorial

  • Craft Beer in Japan: Breweries, Taprooms & Where to Drink

    Craft Beer in Japan: Breweries, Taprooms & Where to Drink

    Photo by Jay Wennington on Unsplash

    Japan’s beer scene isn’t just Asahi, Kirin, and Sapporo in vending machines. Since the mid-1990s a genuine craft beer culture — locals call it “ji-biru,” or local beer — has grown into hundreds of small breweries and a serious taproom scene in every major city. If you only associate Japan with lagers at izakaya, a few detours can completely change your impression of what’s in the glass.

    How Japan’s craft beer scene got started

    Until 1994, Japanese law required breweries to produce at least 2,000 kiloliters a year to get a license — a bar so high it locked out anyone but the big four (Asahi, Kirin, Sapporo, Suntory). A deregulation that year dropped the minimum to 60 kiloliters, and dozens of small breweries opened almost overnight. Many of those first-wave “ji-biru” breweries made mediocre novelty beers aimed at tourists and folded within a decade, but a handful — Yo-Ho Brewing, Kiuchi Brewery, Baird Brewing, Coedo — used the opening to build real quality-focused operations. Those four are still the names most likely to show up on a craft beer list today, alongside a newer 2010s–2020s wave of small IPA- and sour-focused breweries in Tokyo, Osaka, Kyoto, and Nagoya.

    Tokyo taprooms worth seeking out

    Tokyo has the country’s deepest taproom scene, and most pours run ¥900–1,500 for a pint (or the local equivalent, often 355ml or 473ml glasses), with flights of 4–5 small pours around ¥1,200–1,800.

    • Popeye (Ryogoku) — Long considered Tokyo’s best beer bar, with roughly 70 taps rotating daily, almost entirely Japanese craft. Arrive right at the 5pm weekday opening if you want a seat; it fills fast with regulars. Cash and card both accepted; no cover charge.
    • DevilCraft (multiple locations: Kanda, Hamamatsucho, Ebisu, Ryogoku) — American-style taproom-slash-pizzeria founded by expat homebrewers, strong on hoppy IPAs and Chicago-style deep dish. Good option if you want food with your flight.
    • Goodbeer Faucets (Shibuya) — 40 taps, a short walk from Shibuya Crossing, useful if you’re already out in that neighborhood and want a serious list without a special trip.
    • Baird Beer Taproom (Nakameguro) — Under the train tracks near Nakameguro Station, this is the Tokyo outpost of the Shizuoka-based Baird Brewing, one of the pioneers of the modern scene.

    All of these are standing-room-friendly, English-menu-equipped, and don’t require reservations for a couple of people on a weeknight.

    Breweries you can actually visit

    Few Japanese craft breweries run full tourist tap-room-and-tour operations like you’d find in the US or Belgium, but a few are set up for visitors:

    • Coedo Brewery (Kawagoe, Saitama) — Coedo’s amber Beniaka and pale Coedo Kyara are sold nationwide, but the brewery itself is in Kawagoe, the “Little Edo” town about 30 minutes from Ikebukuro by train. Easy to combine with a day trip to Kawagoe’s old warehouse district. This is a good day where a regional IC card is genuinely useful, since Kawagoe isn’t served by JR Tokyo lines alone — see our guide to IC cards beyond Tokyo if you’re routing through private railways.
    • Kiuchi Brewery / Hitachino Nest (Naka, Ibaraki) — Makers of the owl-labeled Hitachino Nest beers sold in bottle shops worldwide. The brewery, about 90 minutes from Tokyo by train, has a small shop and occasional tasting sessions; check current hours before going, as tour availability changes.
    • Yebisu Beer Museum (Ebisu, Tokyo) — Not craft in the small-batch sense, but Sapporo’s Yebisu Beer Museum in Ebisu Garden Place is free to enter, has historical exhibits, and a paid tasting counter (roughly ¥400–600 per glass) where you can compare Yebisu variants side by side. Open Tuesday–Sunday, closed Mondays.
    • Sapporo Beer Museum (Sapporo, Hokkaido) — Japan’s only beer museum, in the brewery’s original red-brick building. Museum entry is free; the tasting hall charges by the glass (around ¥200–600 depending on beer and size). The adjoining Sapporo Beer Garden does all-you-can-drink Genghis Khan barbecue sets, popular in summer.

    Regional beers worth tracking down

    Beyond Tokyo, look for Minoh Beer (Osaka, women-founded, consistently rated among Japan’s best), Shiga Kogen Beer (Nagano, from the same group as sake brewer Tamamura Honten), Kyoto Brewing Co. (Belgian- and American-style ales, small taproom near Fushimi), and Y.Market Brewing in Nagoya. If your trip includes onsen towns, several now stock local craft cans in their vending machines and gift shops — a nice pairing after a soak, whether you’re in a classic hot spring town or a modern facility like the ones covered in our super sento guide.

    Budget, mid-range, and splurge options

    You don’t need a dedicated beer crawl to try good craft beer in Japan:

    • Budget: Convenience stores (7-Eleven, Lawson, FamilyMart) and supermarkets stock 350ml cans of Yona Yona Ale, Hitachino Nest White Ale, and Coedo Kyara for roughly ¥250–320 — a fraction of taproom prices and a fine way to sample styles before committing to a bar tab.
    • Mid-range: A taproom flight (¥1,200–1,800) plus a small plate at any of the Tokyo spots above runs ¥3,000–4,000 per person for a relaxed evening.
    • Splurge: Some craft breweries run limited barrel-aged or collaboration releases sold only at the taproom or via lottery, priced ¥1,500–2,500 a glass — worth it if you’re a beer geek, skippable otherwise.

    Craft beer also pairs well with Japan’s street food culture — yakitori stalls and festival stands near taproom neighborhoods are an easy way to eat while you drink; see our Japanese street food guide for what to look for.

    Best time to go: festivals and season

    Outdoor beer gardens (biagaden) on department store rooftops and in parks run roughly May through September, often as all-you-can-drink (nomihodai) sets for ¥3,500–5,000 covering two hours. The Great Japan Beer Festival runs multiple city editions across the year — Tokyo and Osaka in spring, Yokohama and Sapporo in autumn — with entry around ¥1,500–2,000 plus a per-pour ticket system for dozens of Japanese craft breweries under one roof; it’s the single best way to sample widely in one afternoon. If your trip overlaps with peak heat, beer gardens are a good evening plan — our guide to Japan in summer covers timing and what else is worth doing in that heat and humidity.

    Common mistakes to avoid

    • Assuming “beer” on an izakaya menu means craft. Most izakaya menus list only mass-market lager (nama biru). If you want craft, go to a dedicated taproom or a bottle shop, not a generic izakaya.
    • Skipping the standing-room taprooms because they look small. Many of Tokyo’s best spots (Popeye included) are compact and can hit capacity by 6pm on weekdays — go early or expect a short wait rather than writing them off.
    • Not checking brewery tour availability in advance. Unlike big-brand breweries with daily scheduled tours (Kirin and Asahi both run factory tours at various plants, usually free with reservation), small craft breweries often only open their taproom on specific days or by appointment. Confirm hours the same week you plan to visit.
    • Forgetting IDs. Japan’s legal drinking age is 20, and some bars do check ID for anyone who looks under 30, foreign visitors included.

    If beer isn’t the only drink on your list, Japan’s other homegrown spirit is worth a detour too — see our beginner’s guide to shochu for where that fits into a night out.
  • Kinosaki Onsen: Japan’s Best Yukata-Clad Hot Spring Town

    Kinosaki Onsen: Japan’s Best Yukata-Clad Hot Spring Town

    Photo by Victoriano Izquierdo on Unsplash

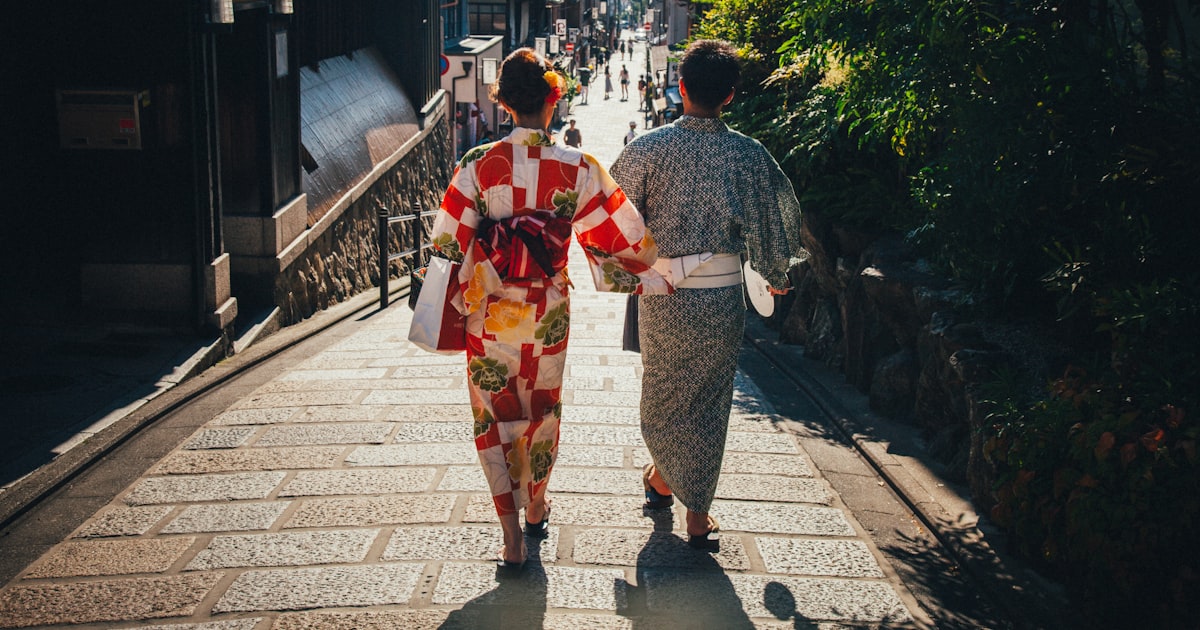
    Picture a narrow canal lined with weeping willows, wooden footbridges, and a string of low-slung inns, all of it filled at dusk with visitors clacking along in wooden geta and cotton yukata robes. That’s Kinosaki Onsen, a hot spring town on the Sea of Japan coast in Hyogo Prefecture that has built its entire identity around one idea: check into your ryokan, put on a yukata, and spend the evening bathhouse-hopping through town. Unlike hot spring resorts where the bathing happens behind closed doors at your hotel, Kinosaki’s tradition is public and social — and it’s one of the most photogenic small towns in Japan.

    Why Kinosaki Onsen Is Different

    Most onsen towns concentrate their baths inside individual ryokan. Kinosaki instead built seven separate public bathhouses (sotoyu) scattered along its main canal, each with its own architecture, history, and bathing style, and the local custom is that hotel guests bathe outside their inn rather than in it. Many ryokan in town have only small baths of their own, or none at all — guests are expected to go out in yukata after check-in and work their way through the sotoyu instead. If you want to understand how this differs from an ordinary neighborhood bathhouse, our guide to super sento versus onsen is a useful primer before you go, since Kinosaki’s baths are genuine hot spring water, not heated tap water.

    Getting There: Trains, Passes & Timing

    The town is built directly around JR Kinosaki Onsen Station, so there’s no bus transfer or taxi ride needed once you arrive. From Kyoto, take the JR Limited Express Kinosaki (or Hashidate, which through-runs on the same line) directly to Kinosaki Onsen Station; the ride takes roughly 2 hours 20 minutes to 2 hours 40 minutes depending on the departure. From Shin-Osaka or Osaka Station, take the JR Limited Express Kounotori, which covers the route in about 2.5 hours. Both are reserved-seat limited expresses, so booking a seat ahead (or using a JR pass that covers reserved seating) is worth it on weekends. If you’re flying into Kansai and starting from there, our Kansai Airport (KIX) to Osaka, Kyoto & Nara guide covers the first leg; from Osaka or Kyoto you then connect onto the Kounotori or Kinosaki limited express. Regional IC cards like ICOCA work for local transit and station shopping in the area, though the limited express itself requires a paper or app-based reserved ticket — see our guide to IC cards beyond Tokyo if you’re unsure how ICOCA works outside the Kansai metro core. Grabbing an ekiben at Shin-Osaka or Kyoto Station before boarding is a nice touch for the ride.

    The Seven Public Bathhouses (Sotoyu Meguri)

    The seven sotoyu are Ichino-yu (known for its cave-like rock bath and outdoor waterfall bath), Goshono-yu (the grandest, palace-style building with a rotenburo view), Satono-yu (the most modern, right next to the station), Jizo-yu, Yanagi-yu (small and quiet, near the old town center), Kono-yu (said to be the town’s founding bath, over 1,300 years old, with an open-air herbal bath), and Mandara-yu. Each has a different closing day on a rotating weekly schedule, so at least six are open on any given day; hours generally run from around 7:00 to 23:00, with last entry around 30 minutes before closing. Most ryokan issue guests a free all-access wristband or pass (often called a yumepa) covering all seven baths for the length of their stay, which is the main reason to book a room in town rather than day-trip. Day visitors without a ryokan pass can buy a day pass at the tourist information center near the station for roughly ¥1,300 for adults (about ¥650 for children), or pay individual entry of around ¥600–900 per bathhouse. Bring your own small towel, or buy one from any bathhouse or the many towel shops on the main street — most sotoyu sell inexpensive cotton towels at the entrance if you forget.

    Yukata Etiquette & What to Pack

    Ryokan supply yukata and geta as part of your stay, sized to fit, so you don’t need to bring your own. A few points that trip up first-timers: wrap the robe left side over right (right-over-left is how the dead are dressed for funerals), tie the obi sash at your natural waist, and don’t wear anything underneath except the thin undergarment your ryokan may provide. Geta take a bit of practice on the town’s stone bridges — small, shuffling steps work better than a normal stride. Bring a small drawstring or tote bag for your wallet, phone, and bathhouse pass, since yukata sleeves have no real pockets. Evenings can get breezy along the canal even in summer, so ask your ryokan for the optional haori jacket that layers over the yukata if you’re visiting outside the hottest months.

    Where to Stay: Budget, Mid-Range & Splurge Ryokan

    Budget travelers can find simple minshuku and guesthouse rooms without private baths from around ¥8,000–12,000 per person per night including breakfast, which is entirely workable here since you’re bathing at the sotoyu anyway. Mid-range ryokan with two meals included (dinner is usually a multi-course kaiseki meal) run roughly ¥20,000–35,000 per person per night, and this is where most visitors land — you get a proper tatami room, yukata, and the full sotoyu pass. Splurge properties with private in-room baths, river or garden views, and higher-grade crab or beef kaiseki can run ¥40,000–70,000+ per person. Because Kinosaki is a legitimately romantic setting, it’s a common stop on longer honeymoon itineraries alongside Kyoto or the Kansai coast; if that’s your trip, our Japan honeymoon guide has planning tips that apply well here. Book several weeks ahead for weekends, and months ahead for peak winter crab season or fireworks nights, since the town has a limited number of rooms and fills up fast.

    Best Time to Visit & Food (Matsuba Crab Season)

    Kinosaki sits on the Tajima coast of the Sea of Japan, one of Japan’s best regions for matsuba crab (snow crab), and the winter season from around November through March is when ryokan build entire dinner courses around it — boiled, grilled, and raw crab sashimi, often at a premium over other seasons. It’s the single biggest reason repeat visitors return in winter despite the cold. Autumn (October–November) brings good foliage along the canal and comfortable walking weather. Summer is hot and humid like the rest of Japan, but the town holds its Kinosaki Onsen Matsuri fireworks festival in early August, and yukata-strolling at night is still pleasant once the sun goes down; see our Japan in summer guide for what to expect heat-wise if you’re combining this with a Kansai summer trip. Spring is quieter and mild. Whatever season, plan to arrive by early-to-mid afternoon so you have time to check in, change into yukata, and enjoy a full evening of bathhouse-hopping before dinner.

    Common Mistakes to Avoid

    The most common misstep is treating Kinosaki as a day trip from Kyoto or Osaka — the train alone eats up 5 hours round trip, leaving little time to actually experience the yukata culture that makes the town special; staying at least one night is what makes the visit worthwhile. Second, don’t skip asking your ryokan about their sotoyu pass at check-in; a few budget guesthouses don’t automatically hand it over, and you don’t want to discover this after your first bathhouse turns you away. Third, standard onsen rules apply at every sotoyu: wash thoroughly at the shower stations before entering the water, tie up long hair, and know that most bathhouses still don’t admit visitors with visible tattoos, so check individual bathhouse policies in advance if this applies to you. Finally, many restaurants and some bathhouses close earlier than you’d expect in a resort town — the last entry cutoff around 22:30 comes faster than it feels, so don’t leave your final bath of the night until too late.

  • Yanaka: Tokyo’s Old Shitamachi Neighborhood — Cats, Senbei & Backstreets

    Yanaka: Tokyo’s Old Shitamachi Neighborhood — Cats, Senbei & Backstreets

    Photo by Y Y on Unsplash

    Why Yanaka Feels Different From the Rest of Tokyo

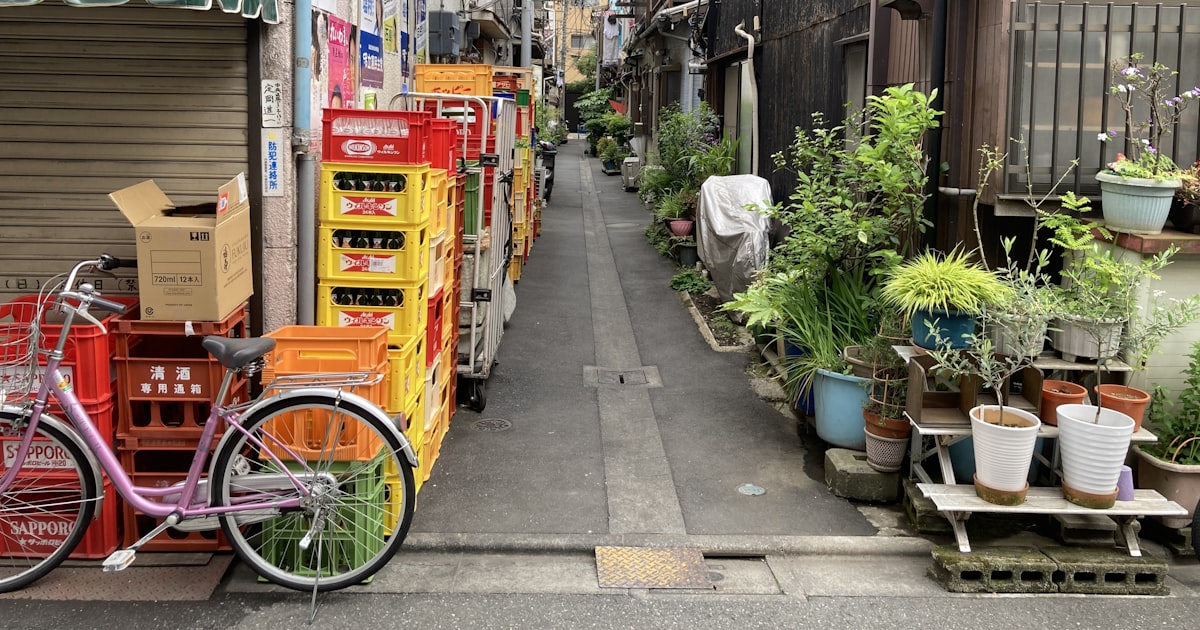
    Most of central Tokyo was flattened twice in the 20th century — first by the 1923 Great Kanto Earthquake, then by the firebombing raids of 1945. Yanaka, along with its neighbors Nezu and Sendagi (together nicknamed “Yanesen”), largely escaped both. The result is a district of narrow lanes, wooden houses, small temples, and family-run shops that still operate the way they did a century ago. There’s no single blockbuster attraction here — no castle, no five-story pagoda dominating the skyline — which is exactly why it rewards slow walking. You come to Yanaka to wander, not to check off a landmark.

    It’s also become known, somewhat unofficially, as Tokyo’s cat neighborhood. Between the old cemetery, the low rooftops, and a population of residents who feed and tolerate them, stray and semi-stray cats have become a genuine local identity, showing up on shop signs, snacks, and souvenirs throughout the area.

    Getting There and When to Go

    The easiest approach is Nippori Station (西日暮里/日暮里), reachable directly on the JR Yamanote Line and JR Keihin-Tohoku Line, about 20 minutes from Tokyo Station and 5 minutes from Ueno. Nippori is also a stop on the Keisei Line, so travelers arriving via the Keisei Skyliner from Narita Airport can detour into Yanaka with luggage in tow before checking into a hotel, though coin lockers at the station make that easier. From Nippori’s north exit, it’s about a 5-minute walk to the start of the main shopping street. Sendagi Station on the Chiyoda Line is a second option if you’re coming from Omotesando or Otemachi. If you haven’t used Tokyo’s rail system before, it’s worth reading up on how to get around Tokyo before you go, since Yanaka involves a mix of JR and subway lines depending on where you’re staying.

    Go on a weekday morning if you can — Yanaka Ginza gets genuinely crowded on weekend afternoons, with tour groups filling the narrow street. Weekday visits between 10:00 and noon are far more pleasant. Late afternoon, around 16:00–17:00, is the other sweet spot: this is when the neighborhood’s famous sunset staircase earns its name. Cherry blossom season (typically late March to early April) is the single busiest period, since Yanaka Cemetery is one of Tokyo’s best low-key hanami spots — see our guide to Japan in spring for bloom timing if you’re planning around it.

    Yanaka Ginza: The Sunset Stairs to Senbei and Cat Everything

    The heart of the district is Yanaka Ginza, a roughly 170-meter pedestrian shopping street lined with about 70 small shops. You reach it by descending Yuyake Dandan (“Sunset Steps”), a short staircase that frames a postcard view down into the street, especially striking around golden hour. Most shops here open around 10:00 and close by 19:00, though hours vary by owner and a fair number close one day a week (often Wednesday), so don’t build your whole visit around one specific store.

    Senbei (rice crackers) are the street’s signature snack. Several old-fashioned senbei shops grill crackers to order right in the doorway, filling the street with the smell of soy sauce and toasted rice; expect to pay roughly ¥150–400 depending on size and flavor, sold loose by the piece or in small gift bags. For something sweeter, look for Yanaka Shippoya, known for cat-tail-shaped imagawayaki (a thick, pan-fried cake similar to dorayaki) for around ¥250–300 each — it’s one of the more photographed food stalls on the street, but the queue rarely takes more than a few minutes on weekdays. If you want a broader primer on Japanese snack culture before you go, our street food guide covers what else to look for on streets like this one.

    Yanaka Cemetery: Cherry Blossoms and Quiet Backstreets

    A five-minute walk from Yanaka Ginza brings you to Yanaka Reien, a sprawling public cemetery that doubles as one of the area’s most atmospheric public spaces. It’s free to enter and open all day, though it’s a working cemetery, so keep voices down and don’t treat gravesites as photo props. The central cherry-tree-lined avenue is a popular but far less crowded alternative to Ueno Park during hanami season, and the grounds are pleasant to walk through even outside bloom, since the old stone lanterns, moss-covered graves, and resident cats give it a genuinely calm, almost rural feel in the middle of the city. The last Tokugawa shogun, Yoshinobu, is buried here, along with several other notable historical figures. Tennoji Temple, at the edge of the cemetery, has a large seated bronze Buddha dating to the early 1700s that survived the era’s disasters largely intact.

    Beyond the Main Street: Temples, Galleries and Old Kissaten

    Yanaka rewards ducking off the main street more than almost anywhere else in Tokyo. Within a 10–15 minute walk of Yanaka Ginza you’ll find dozens of small temples (the area has over 70), quiet residential lanes, and a handful of small museums and galleries worth the detour:

    Asakura Museum of Sculpture, the former home and studio of sculptor Fumio Asakura, is built around a striking interior garden courtyard and costs around ¥500 to enter; it’s typically closed Mondays and Thursdays, so check before you walk over. SCAI The Bathhouse is a contemporary art gallery installed in a converted 200-year-old sento (public bathhouse) — entry is usually free, and it’s a good stop if you’re already interested in bathhouse culture; for context on how sento differ from onsen, see our guide to super sento. For a coffee break, Kayaba Coffee occupies a beautifully preserved early-1900s wooden building and serves coffee for around ¥600–700; it gets busy on weekends, so aim for a weekday visit.

    What to Buy: Senbei, Cat Goods and Paper Crafts

    Beyond senbei, Yanaka’s other classic purchase is washi (traditional paper) goods from Isetatsu, a chiyogami paper shop founded in 1864 that’s still making and selling block-printed paper crafts — small items like paper boxes, fans, and origami sheets start around ¥300–500, with larger boxed sets running into the thousands of yen. If you’re building out a broader interest in traditional Japanese sweets while you’re in the area, the shops along Yanaka Ginza and Nezu sell wagashi alongside the senbei; our beginner’s guide to wagashi is useful background if you want to know what you’re looking at before buying. Cat-themed goods — magnets, tote bags, small ceramic figures — are sold from souvenir stalls throughout the street, generally in the ¥300–1,500 range depending on the item; quality varies a lot stall to stall, so it’s worth browsing two or three before buying rather than grabbing the first cute thing you see.

    Common Mistakes and Practical Tips

    The most common mistake is treating Yanaka as a 30-minute stop between other Tokyo sights. The neighborhood is small on a map but slow in practice — the backstreets, not the main shopping street, are the actual point, and rushing through Yanaka Ginza alone will make it feel like a slightly quainter version of any other Tokyo shopping street. Budget at least two hours, and ideally a half day if you want to include the cemetery and a museum.

    Second, don’t assume every shop takes cards — many of the older senbei and craft shops in Yanaka are cash-only or IC-card-only (Suica/Pasmo), so carry some cash. Third, if you’re visiting specifically for cats, know that they’re wild or semi-feral animals living around a cemetery and temple grounds, not a curated attraction — feeding them, especially without knowing local rules, is discouraged, and sightings can’t be guaranteed on any given day. Finally, avoid weekend early afternoons if you can; the single narrow street of Yanaka Ginza becomes a slow shuffle of tour groups from around midday Saturday and Sunday, which undercuts exactly the unhurried atmosphere that makes the area worth visiting in the first place.

  • Nakano Broadway: Tokyo’s Other Otaku Mecca (Vintage Toys, Manga & Idol Goods)

    Nakano Broadway: Tokyo’s Other Otaku Mecca (Vintage Toys, Manga & Idol Goods)

    Photo by Jezael Melgoza on Unsplash

    If Akihabara feels like a neon-lit assault on the senses these days — all duty-free electronics shops and tourist-oriented maid cafes — Nakano Broadway is what otaku culture looked like before it became a global brand. This four-story shopping complex in a quiet residential neighborhood west of Shinjuku has been the beating heart of Japan’s collector scene since the 1980s, and it’s still where serious buyers go for vintage toys, out-of-print manga, and idol merchandise you won’t find anywhere else.

    What Is Nakano Broadway?

    Built in 1966 as a upscale residential and shopping complex, Nakano Broadway has evolved into a warren of roughly 300 small, independently run shops packed into four floors above a covered arcade. The building itself is unassuming — even a little worn around the edges — which is exactly why long-time collectors prefer it. There’s no single “store”; instead you’re browsing dozens of specialist stalls, many run by a single owner who has spent decades building a reputation in one narrow niche: 1970s tokusatsu figures, Showa-era tin toys, shojo manga first editions, or bromides (photo cards) of retired idols.

    The anchor tenant is Mandarake, the used-goods chain that essentially built its empire here before expanding nationwide. Mandarake doesn’t operate as one shop in Nakano Broadway — it runs upward of 25 separate specialized outlets scattered across the complex, each focused on a specific category (shonen manga, doujinshi, vintage toys, cosplay, idol goods, cel animation art, and more). Learning to navigate which Mandarake shop sells what is half the fun.

    Getting There

    Nakano Station is one stop past Shinjuku on the JR Chuo Line (about 5 minutes on a rapid train) and is also served by the Tokyo Metro Tozai Line. From the station’s north exit, walk straight through the covered Nakano Sun Mall shopping arcade — about 5 minutes — and Nakano Broadway is at the far end. If you’re using a Suica or Pasmo IC card for your trip, our guide on how to get around Tokyo covers exactly how these cards work on the JR and Metro lines you’ll need. The Sun Mall arcade itself is worth a slow walk — cheap sushi counters, a 100-yen shop, and old-school snack stands make it a good spot to fuel up before diving into the collectibles floors.

    What You’ll Find on Each Floor

    The ground and second floors lean toward general shopping — jewelry, clothing, and a scattering of hobby shops — but from the second floor up it shifts hard into collector territory. Vintage toy shops cluster with Ultraman, Godzilla, and Gundam figures from the 1960s through 1990s; manga specialists stock everything from 100-yen bargain-bin volumes to sealed first-print runs worth tens of thousands of yen; and idol-goods shops sell everything from used concert merchandise and photo cards to out-of-print CDs from disbanded groups. There are also dedicated shops for retro video games and consoles, military and airsoft collectibles, watches, and even a few specializing in horror and adult-oriented collectibles (clearly labeled, generally on upper floors). Most individual shops are tiny — some barely larger than a closet — so expect to duck in and out of a lot of doorways rather than browsing one continuous space.

    What to Expect to Pay

    Prices vary enormously by category and condition. Used manga volumes commonly run ¥100–¥300 each in bulk bins, while complete rare sets or first-edition volumes with obi (paper bands) can run into the tens of thousands of yen. Vintage tin toys and Showa-era character figures typically start around ¥1,000–¥3,000 for common items, but well-preserved rare pieces (a boxed 1960s Ultraman figure, for instance) can fetch ¥30,000–¥100,000 or more. Idol goods are similarly wide-ranging: loose photo cards can be had for a few hundred yen, while limited concert merchandise or discontinued CDs/DVDs from popular groups can command a premium from resellers. Because most shops are independently owned, prices aren’t standardized — the same figure might be ¥2,000 cheaper two doors down, so it pays to walk the whole floor before buying.

    Opening Hours and Best Time to Visit

    Most shops, including Mandarake’s outlets, open around noon and close around 8:00 PM — this is not a morning destination. Weekday afternoons (Tuesday through Friday) are noticeably quieter than weekends, when local collectors and increasing numbers of international visitors crowd the narrow aisles. Because the whole complex is indoor and air-conditioned, it’s also a smart escape during Tokyo’s brutal midsummer heat — if you’re visiting during the season covered in our guide to Japan in summer, an afternoon here is a comfortable alternative to walking outdoor markets. Avoid public holidays and the first weekend of any month if you want elbow room, since that’s when new stock and rare drops tend to bring in serious collectors.

    Common Mistakes to Avoid

    • Expecting one big store. Treating Nakano Broadway like a department store means you’ll miss most of it. Budget at least 2–3 hours and expect to backtrack floors as you spot shop directories.
    • Assuming cards work everywhere. Many of the smallest independent shops are still cash-only, even though the larger Mandarake outlets accept cards and sometimes IC card payment. Carry enough yen in cash to avoid missing out on a find because the shop can’t process your card.
    • Not checking export/authenticity concerns. Some vintage toys and figures are extremely fragile or have reproduction parts; ask shop staff directly (many have some English) about originality before paying premium prices for rare items.
    • Skipping the smaller floors. Casual visitors gravitate to the manga and toy shops near the entrance, but some of the best idol-goods and retro game finds are tucked into the quieter upper floors.

    Budget, Mid-Range, and Splurge Strategies

    On a tight budget, stick to the used-manga bargain bins and general toy bins where individual items run ¥100–¥1,000 — you can walk away with an armful of nostalgic finds for under ¥3,000. Mid-range shoppers should focus on complete, boxed figures or idol merchandise in the ¥3,000–¥15,000 range, which is where condition and completeness (original box, instructions, accessories) matter most for resale value. If you’re ready to splurge, the rarest items — first-edition manga sets, mint-condition 1960s tokusatsu figures, or discontinued idol collector’s editions — live in glass cases and often require asking staff to bring them out; these can run ¥50,000 and well beyond for true grails. Whatever your budget, Nakano Broadway rewards patience over speed, so don’t rush your first visit.

  • Loft & Hands: Japan’s Variety Store Souvenir Guide

    Loft & Hands: Japan’s Variety Store Souvenir Guide

    Loft and Tokyu Hands (now “Hands”) are Japan’s beloved variety/lifestyle stores — floors of clever gadgets, stationery, beauty, travel goods, and quirky finds. They’re souvenir goldmines. Here’s what to look for.

    What are Loft & Hands?

    Both are multi-floor “variety stores” packed with well-designed everyday goods — think a curated, mid-range step up from a 100-yen shop. Loft leans stationery, beauty, and lifestyle; Hands leans DIY, tools, travel, and hobby — but they overlap a lot.

    Best things to buy

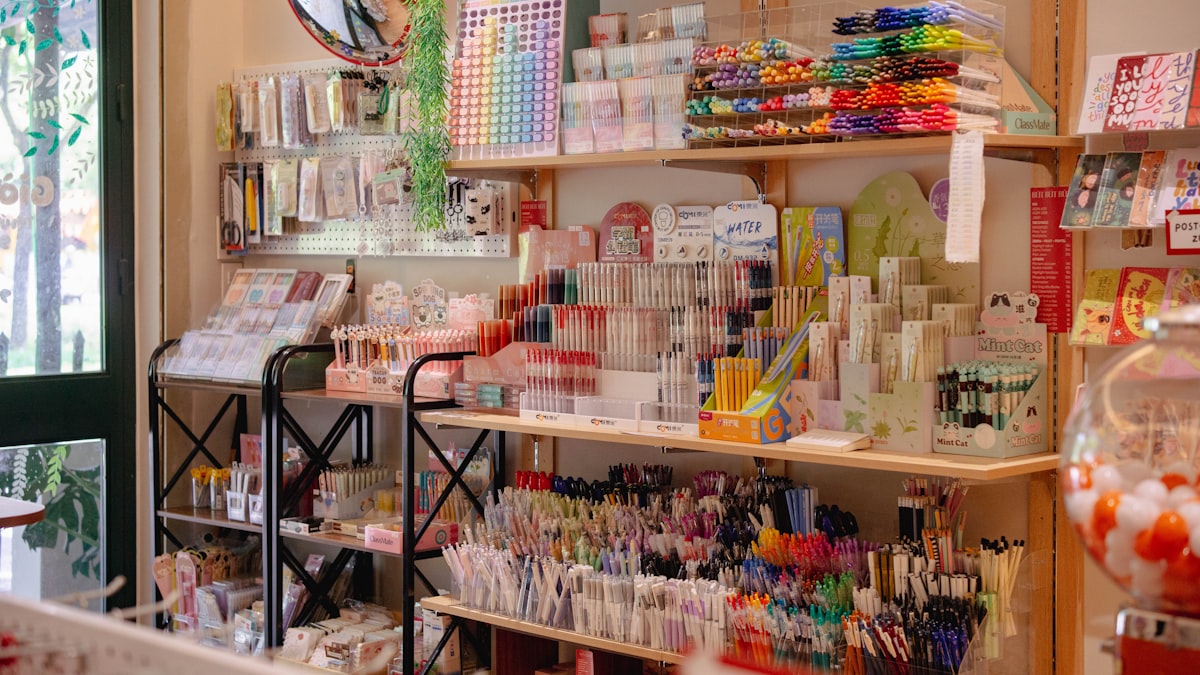
    • Stationery — pens, planners, and washi tape galore; see Japanese stationery.
    • Beauty & self-care — tools, masks, and gadgets; see beauty tools.
    • Travel goods — packing organizers, compact umbrellas, gadgets.
    • Kitchen & home gadgets — clever tools that make great gifts.
    • Quirky novelties — the “only in Japan” section is a rabbit hole.

    Where to find them

    • Flagship and large branches in Shibuya, Shinjuku, Ginza, and major cities — often in or near stations and malls.

    Shopping tips

    • Bring your passport for tax-free over the threshold.
    • Great one-stop shops for practical, giftable souvenirs that pack flat.
    • Cheaper basics? Compare with 100-yen shops and Muji; for rock-bottom prices try Don Quijote.

    A relaxed hour here yields half your souvenir list. More in our best gifts from Japan guide.

    What things typically cost

    • Most Loft and Hands items run JPY 300-2,000, with the sweet spot for gift shopping around JPY 500-1,200 for stationery, beauty tools, or small kitchen gadgets.
    • Both stores skew slightly pricier than Daiso but noticeably cheaper than department store equivalents — a genuine middle ground worth browsing before deciding where to spend on a specific item.
    • Flagship branches (Shibuya Loft, Shinjuku Hands) are large enough that a thorough browse takes 45-90 minutes if you’re actually reading labels and comparing options rather than skimming.

    Common mistakes to avoid

    • Assuming Loft and Hands stock the same things — Loft leans more toward beauty, stationery, and lifestyle goods, while Hands leans toward DIY, hobby, and outdoor gear; if you’re hunting for something specific, check which one is more likely to carry it before wasting time in the wrong store.
    • Not comparing prices with Daiso or Muji before buying basics — some overlapping items (simple stationery, storage boxes) are genuinely cheaper at 100-yen shops, while Loft/Hands wins on more unique or higher-quality gadgets.
    • Skipping the seasonal sections — both chains rotate limited seasonal goods (sakura-themed items in spring, Halloween novelties in autumn) that disappear once the season ends.

    Building a souvenir haul efficiently

    A single hour at a large Loft or Hands branch can realistically cover half a gift list — stationery for coworkers, a beauty gadget for a friend, and a quirky novelty item for yourself. Pair the visit with a nearby 100-yen shop stop for the cheaper basics to round out the list without overspending on everything.

    Tax-free thresholds in practice

    Since individual items tend to be inexpensive, reaching the tax-free minimum purchase threshold in one visit is easier if you consolidate a full shopping list into a single transaction rather than making several smaller purchases across return visits — ask staff about the current threshold, since it can change, and always bring your passport in case you cross it unexpectedly.

  • Japanese Department Stores & Depachika Food Halls

    Japanese Department Stores & Depachika Food Halls

    Japanese department stores (depato) are an experience in themselves — impeccable service, whole floors of food, and everything from luxury to souvenirs under one roof. Here’s how to shop them, especially the legendary food halls.

    The depachika (food hall)

    The basement food floors, or depachika, are the highlight: dazzling counters of bento, wagashi sweets, chocolates, deli, and gifts. Don’t miss:

    • Beautiful boxed sweets and chocolate — perfect gifts.
    • Ready-to-eat bento and deli — great value, superb quality.
    • Closing-time discounts — fresh items get marked down late afternoon/evening.

    The main chains

    • Isetan, Mitsukoshi, Takashimaya, Daimaru, Matsuya — the big names, each with flagship stores.
    • Often located right at or above major stations for easy access.

    What else to buy

    • Ceramics & homeware — see our homeware guide.
    • Cosmetics counters — J-beauty brands; see makeup and skincare.
    • Kimono & traditional goods, plus seasonal gift corners.

    Shopping tips

    • Bring your passport for tax-free (dedicated counters handle it).
    • Service is famously polite — staff may bow and even escort you; enjoy it.
    • Rooftops sometimes have gardens or shrines; top floors often have restaurant districts (restaurant “resutoran-gai”).
    • Go to the depachika hungry — free samples abound.

    Find them in Ginza, Shinjuku, and every major city. More in our Tokyo guide.

    What things cost at a depachika

    • Ready-made bento boxes run JPY 800-2,500 depending on quality; a good rule of thumb is that a busy counter with a visible line usually signals better value and freshness.
    • Boxed sweets and chocolate gift sets run JPY 1,000-5,000, with the higher end reserved for beautifully packaged, individually wrapped assortments meant specifically as formal gifts (omiyage).
    • Timing your visit for 60-90 minutes before closing can mean 20-50% discounts on prepared food as staff mark down items that won’t be sold fresh the next day — a genuinely useful budget dinner strategy in any major city.

    Common mistakes to avoid

    • Rushing through without sampling — many counters offer small free samples, especially for sweets and pickles; trying before buying is normal practice, not an imposition on staff.
    • Assuming all department stores are equally tourist-friendly for tax-free processing — flagship branches of Isetan, Takashimaya, and Mitsukoshi have dedicated tax-free counters with English support, while smaller branches may not.
    • Skipping the upper floors entirely — restaurant districts (resutoran-gai) on top floors often have excellent set-lunch deals with fewer crowds than street-level restaurants nearby.

    Best time to visit a depachika

    Late morning on a weekday is the quietest and most pleasant time to browse without crowds, while early evening (just before the discount window) offers the best combination of full selection and an emerging bargain hunt as staff start marking down the day’s unsold items.

    Depachika as a solo-friendly dinner option

    For solo travelers or anyone tired after a full day of sightseeing, a depachika bento eaten back at your hotel is a genuinely excellent, no-reservation-needed dinner option — restaurant-quality food without the logistics of finding and sitting alone at a sit-down restaurant.

  • Ginza Shopping Guide: Luxury, Depachika & Flagships

    Ginza Shopping Guide: Luxury, Depachika & Flagships

    Ginza is Tokyo’s most elegant shopping district — flagship boutiques, historic department stores, and refined dining. Whether you’re window-shopping or splurging, here’s how to enjoy it.

    What Ginza is known for

    • Luxury flagships — the global fashion houses line Chuo-dori.
    • Historic department stores — Mitsukoshi, Matsuya, and Wako with its iconic clock tower.
    • Uniqlo & Muji flagships — the giant Ginza stores have the widest ranges; see Uniqlo vs Muji and Muji must-buys.
    • Depachika — the department-store food halls are a must for edible gifts and sweets.

    Don’t-miss stops

    • Ginza Six — a stylish mall with art installations and a rooftop garden.
    • Itoya — a legendary multi-floor stationery emporium; see Japanese stationery.
    • Weekend pedestrian paradise — Chuo-dori closes to cars on weekend afternoons.

    Shopping smart

    • Bring your passport for tax-free at department stores.
    • Depachika discount seafood/deli near closing time is a fun (and tasty) hack.
    • For cheaper souvenirs, pair with Don Quijote or 100-yen shops elsewhere.

    Getting there

    Ginza Station (multiple lines) drops you in the heart of it; grab an IC card. It pairs well with nearby Tsukiji. More in our Tokyo guide.

    What things cost in Ginza

    • A set lunch at even a well-regarded Ginza restaurant often runs JPY 2,000-4,000, a fraction of the equivalent dinner price — lunch is genuinely the way to experience Ginza dining without a splurge-level bill.
    • Window-shopping is free, and Ginza Six’s rooftop garden costs nothing to visit, making it possible to spend a full afternoon in the district without buying anything beyond a coffee.
    • Itoya’s stationery ranges from JPY 200 pens to museum-piece fountain pens well into six figures — browse the lower floors for affordable gifts and work up if a splurge item catches your eye.

    Common mistakes to avoid

    • Visiting on a Monday — some galleries, smaller boutiques, and specific floors within larger stores close or reduce hours on Mondays; check ahead if a specific shop is your reason for visiting.
    • Missing the weekend pedestrian paradise hours — Chuo-dori closes to traffic on weekend afternoons, transforming the main street into a walkable promenade; visiting on a weekday misses this entirely.
    • Assuming Ginza is only for luxury spending — the depachika food halls and Uniqlo/Muji flagships offer genuinely accessible price points alongside the high-end boutiques.

    Pairing Ginza with a fish-market morning

    Ginza sits within easy walking or short train distance of Tsukiji’s outer market, making an early sushi breakfast followed by a late-morning Ginza wander a popular and efficient combination for a first Tokyo visit.

    A relaxed half-day plan

    Start at Itoya for stationery browsing, walk Chuo-dori’s flagship stores at a window-shopping pace, stop into a department store depachika for a late lunch or snacks, and finish at Ginza Six’s rooftop garden before heading toward Tsukiji or back to your hotel — a comfortable structure that doesn’t require rushing between any single must-see stop.

  • Pocket WiFi vs eSIM in Japan: Which to Choose

    Pocket WiFi vs eSIM in Japan: Which to Choose

    Some links below are affiliate links. If you buy through them, Japan Trove may earn a small commission at no extra cost to you.

    Staying connected in Japan is easy — the question is pocket wifi or eSIM? For most travelers the answer is now clear. Here’s the honest comparison.

    Quick answer

    For solo travelers and couples with modern phones, an eSIM is usually cheaper, simpler, and nothing to carry or return. Pocket wifi still wins for families/groups sharing one connection, older phones, or if you need to connect laptops and cameras.

    eSIM — pros & cons

    • ✅ Cheap, instant (install before you fly), nothing to pick up or return.
    • ✅ Keeps your home number active for calls/texts.
    • ❌ Needs an eSIM-compatible, unlocked phone.
    • ❌ Only connects that one device (unless you hotspot).

    See our full best eSIM for Japan guide.

    Pocket wifi — pros & cons

    • ✅ Connects several devices at once — great for families and groups.
    • ✅ Works with any phone/laptop; often higher data allowances.
    • ❌ A device (and charger) to carry, keep charged, and return.
    • ❌ Everyone stays together (the wifi walks off with whoever holds it).
    • ❌ Usually pricier per person for solo travelers.

    Which should you pick?

    • Solo / couple, modern phone → eSIM.
    • Family or group sharing → pocket wifi (one rental covers everyone).
    • Old/locked phone or need laptop data → pocket wifi.
    • Heavy data user → compare unlimited plans on both.

    How to get each

    • eSIM: buy online and install before departure — compare on Klook .
    • Pocket wifi: reserve online, pick up at the airport, return by mail/airport drop.

    Whichever you choose, pair it with an IC card and our first-timer tips.

    What each option actually costs

    • eSIM: unlimited or high-data plans for a 1-2 week trip typically run JPY 1,500-4,000 total per person, activated instantly online before departure.
    • Pocket wifi: a similar-length rental runs JPY 500-1,200 per day, so a 7-day trip lands around JPY 3,500-8,000 for the device — but that single cost covers everyone sharing it, which changes the math fast for a family of four.
    • Break-even point: for solo and couple trips, eSIM is almost always cheaper; for groups of three or more sharing one device, pocket wifi frequently comes out ahead per person.

    Common mistakes to avoid

    • Buying an eSIM without checking phone compatibility first — older or carrier-locked phones (especially some purchased on installment plans) can’t install a second eSIM profile; check your phone’s settings for eSIM support before buying.
    • Forgetting to return pocket wifi on time — most rentals require drop-off at the airport or a postbox before a specific date, and late fees can add up if you lose track of the return window during a busy final travel day.
    • Assuming free airport or station wifi will cover your needs — it’s inconsistent and often requires repeated re-registration, making it a poor primary solution for a full trip.

    A quick decision shortcut

    If you’re traveling alone or as a couple with unlocked modern phones (iPhone XS or newer, most recent Android flagships), buy an eSIM before you fly and skip pocket wifi entirely. If you’re traveling with kids, older relatives, or need to keep a laptop connected on the road, a single pocket wifi rental removes the hassle of managing multiple individual data plans.

    Combining both for a longer trip

    Some travelers on trips longer than two weeks buy a cheap eSIM for personal use while also renting pocket wifi during a specific stretch (like a multi-day group tour) where several devices genuinely need to connect at once — the two options aren’t mutually exclusive if your trip has distinctly different phases.

  • Japanese Toilets Explained: Washlets, Buttons & Squat

    Japanese Toilets Explained: Washlets, Buttons & Squat

    Japanese toilets are a genuine travel highlight — heated seats, bidets, and buttons galore. But they can baffle first-timers. Here’s your friendly guide to Japan’s famous washlets (and the occasional squat toilet).

    The high-tech washlet

    Many toilets are washlets with a control panel of buttons. The essentials:

    • Flush — look for 大 (big/large) and 小 (small) for full or light flush. It may be a lever, a wall panel, or a sensor — not always on the seat panel.
    • Bidet buttons — おしり (rear wash) and ビデ (front wash); often with pressure/position controls.
    • Stop — 止 (stop) ends the spray. This is the button you’ll want to find first.
    • Heated seat, dryer, and deodorizer on fancier models.

    The “privacy sound” button

    A button labeled 音 (sound) or a musical note plays a flushing sound to mask any noise — a beloved feature (especially in women’s restrooms, sometimes as an automatic sensor called Otohime).

    Squat toilets (still around)

    Older stations, parks, and rural spots may have squat toilets. Face the hood/flush end, feet either side, and squat. Carry tissues — some don’t have paper.

    Good to know

    • Carry a small pack of tissues (often handed out free on the street) and a hand towel — some restrooms lack paper towels.
    • Public toilets are widespread, clean, and free — konbini, stations, and department stores are reliable.
    • Don’t flush anything but paper; sanitary bins are provided.
    • Toilet slippers exist in homes and ryokan — swap into them and back out. See our etiquette guide.

    Want one at home?

    Washlet seats are a popular souvenir/purchase — check voltage compatibility first; see our electronics buying guide. First trip? Read first-timer tips.

    Reading the buttons like a local

    • Most washlet panels group flush controls separately from bidet controls — the flush is often a small lever or separate wall-mounted button, not on the seat panel itself, which confuses many first-time users searching only the seat-side panel.
    • Pressure and nozzle position dials (if present) let you fine-tune the bidet spray — start on the lowest setting, since default factory settings can be stronger than expected.
    • A dryer function (if available) is usually a separate button from the bidet controls, often marked with a wind or fan icon.

    Common mistakes to avoid

    • Panicking and pressing random buttons — nearly every washlet has a clearly marked stop button (止 or a red icon); learning to spot it first removes most of the anxiety around trying the other functions.
    • Forgetting toilet slippers exist at ryokan and some homes — these are separate from the house slippers you wear elsewhere and should be swapped back out immediately after leaving the bathroom, a common etiquette slip for first-timers.
    • Assuming every public restroom has hand dryers or paper towels — many don’t, which is why locals carry a small hand towel; picking one up early in your trip (sold everywhere, including 100-yen shops) solves this permanently.

    Where to find reliably good public toilets

    Train stations, department stores, and konbini restrooms are consistently clean, free, and equipped with modern facilities, making them a reliable fallback anywhere in a city — unlike some countries, there’s no need to buy something or ask permission to use a station or konbini restroom while out sightseeing.

    Buying a washlet to take home

    If a trip converts you into a washlet believer, note that most models sold in Japan are built for Japan’s toilet bowl shapes and 100V electrical standard — check compatibility with your home country’s plumbing and voltage carefully before buying one as a souvenir, since not every model ships or installs easily overseas.

  • Do You Tip in Japan? Tipping Etiquette Explained

    Do You Tip in Japan? Tipping Etiquette Explained

    Short answer: no, you don’t tip in Japan — and trying to can cause confusion. Here’s exactly how it works so you’re never caught out.

    The rule

    Tipping is not part of Japanese culture. Good service is the standard and is already included in the price. Leaving extra cash at a restaurant, taxi, or hotel can genuinely confuse staff — someone may even chase after you to return the “forgotten” money.

    Situations travelers ask about

    • Restaurants & bars — no tip. Just pay the bill (often at a front register).
    • Taxis — no tip; round-ups aren’t expected. Doors open automatically — don’t touch them.
    • Hotels — no tip for standard service. A high-end ryokan may have a service charge already on the bill.
    • Tour guides — the one gray area; a private guide may accept a thank-you gift, but it’s not required.

    Service charges vs tips

    Some upscale restaurants, hotels, and izakaya add a service charge or a small otoshi (seating appetizer) to the bill. That’s not a tip you add — it’s already itemized.

    How to show appreciation instead

    • A sincere “gochisousama deshita” (thank you for the meal) or “arigatou gozaimasu.”
    • If you truly want to give a gift to a guide, present cash in an envelope with both hands — never loose bills.
    • Learn a few phrases — see our phrases guide.

    Bottom line

    Skip the tip, pay the exact bill, and say thanks — that’s perfect. More do’s and don’ts in our etiquette guide, money in Japan, and common travel mistakes.

    Why the no-tipping norm exists

    Japanese service culture treats attentiveness and quality as a baseline professional standard, not something that should require extra payment to unlock — the concept of tipping for better service can actually read as implying the standard service wasn’t already complete, which is part of why offering money can create genuine confusion rather than simple gratitude.

    Situations that trip travelers up

    • Ryokan staff carrying your bags or serving an elaborate kaiseki dinner — even this high-touch, personal service doesn’t expect a tip; the nightly rate already reflects it.
    • Bartenders at a cocktail bar after an exceptional round — rounding up or leaving change on the counter is unnecessary and will typically be returned to you.
    • Delivery or hotel staff bringing something to your room — a polite thank you is the complete, correct response.

    The one real exception: envelope gifts

    For an exceptional, personalized service like a private tour guide who went well beyond the norm, some travelers choose to offer a small thank-you gift rather than cash directly — if you do want to give money in this specific context, present it in a plain envelope, offered with both hands, rather than handing over loose bills, which can feel transactional and out of place.

    What to expect if you try to tip anyway

    Leaving cash on a restaurant table is likely to result in a server chasing you down the street to return it, genuinely believing you left it behind by accident — it happens often enough to first-time visitors that it’s worth expecting rather than being caught off guard by well-meaning staff insisting you take your money back.