Japan Trove

Author: JapanTrove Editorial

  • Golden Gai: Shinjuku’s Tiny Bar Alleys and How to Drink There

    Golden Gai: Shinjuku’s Tiny Bar Alleys and How to Drink There

    Photo by Mateo Krossler on Unsplash

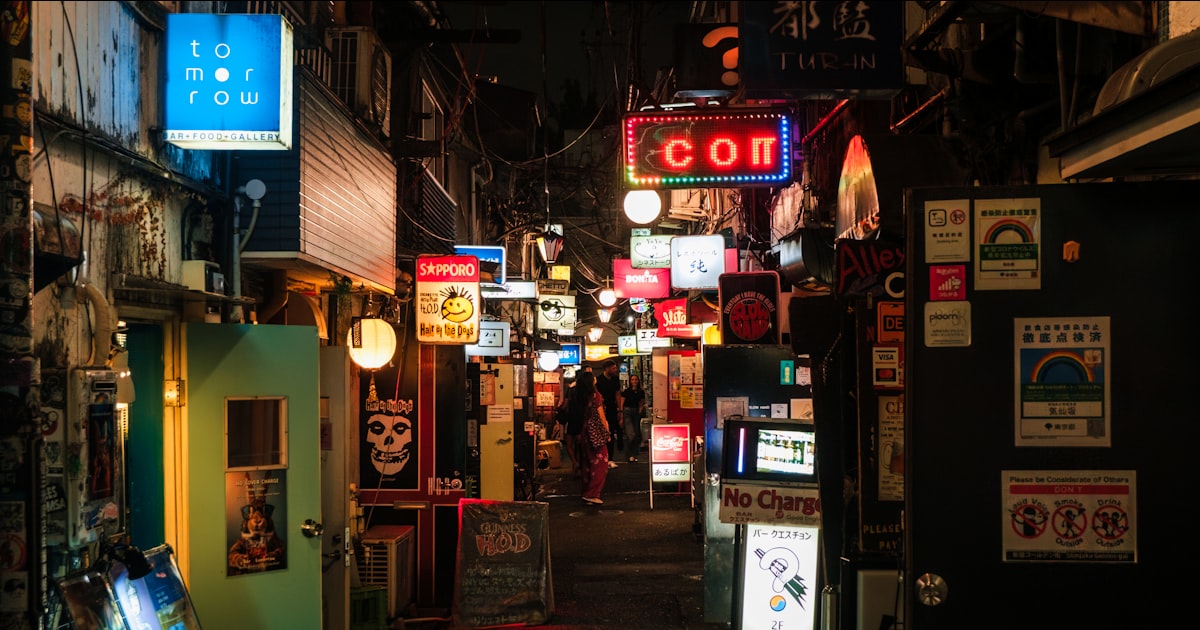
    Golden Gai is six narrow alleys packed with roughly 200 bars, most no bigger than a closet, tucked into a single block of Shinjuku between the neon chaos of Kabukicho and the quiet grounds of Hanazono Shrine. It survived post-war black-market roots and decades of redevelopment pressure, and today it’s one of the last places in Tokyo where you can still drink shoulder-to-shoulder with a bar owner who’s been pouring the same five seats for thirty years. It’s touristy in places now, but it’s not a theme park — these are real, working bars, and knowing the unwritten rules before you go makes the difference between a great night and an awkward five minutes on the doorstep.

    What Golden Gai Actually Is

    Each “bar” here is typically one room: a counter, five to fifteen stools, and a theme or obsession that the owner (called the mama or master) has built the whole place around — old French New Wave films, punk records, horror movies, Okinawan music, shogi. There’s no single unifying style; the fun is in the variety packed into an area you can walk end-to-end in about five minutes. Most buildings are two storeys, with a second tiny bar stacked directly above the first, reached by a steep, narrow staircase.

    Getting There and Timing Your Visit

    The closest station is Shinjuku Sanchome (Marunouchi, Fukutoshin, or Toei Shinjuku lines) — take exit B2 or B3 and it’s a 3–5 minute walk. From the sprawling JR Shinjuku Station, it’s about a 10–12 minute walk northeast, or you can walk through Kabukicho, which is part of the experience if you don’t mind the touting.

    Most bars open somewhere between 7–8pm and run until 3–5am; a handful open earlier, around 6pm. Golden Gai has almost no daytime life — there’s nothing to see before dark. Go on a weeknight (Tuesday to Thursday) if you want an easier time getting a seat; Friday and Saturday nights get crowded fast, and with only five or six stools per bar, a couple of large groups can fill a place in minutes. Arriving by 8–9pm gives you the best odds before the after-work crowd settles in. There’s no real seasonal angle since everything happens indoors, but summer alleys get uncomfortably humid and packed with smoke, so an air-conditioned bar with the door shut is genuinely a relief in July and August.

    How the Bars Actually Work

    This is the part that trips up first-timers. Almost every bar charges a seat charge (seki-ryo or chaji), typically ¥500–¥2,000 per person, on top of your drinks — this is standard practice, not a scam, and it’s how tiny bars with only a few seats stay in business. It should be posted somewhere near the entrance or on a card at the counter; if you don’t see it, ask “Seki-ryo wa arimasu ka?” before sitting down. Drinks themselves usually run ¥600–¥1,200 for a highball, beer, or simple cocktail.

    Cash is still king. Many bars are cash-only, and Golden Gai is one of the few areas in Tokyo where you shouldn’t assume a card machine exists. Carry at least ¥5,000–¥6,000 for an evening covering two or three bars. Bar-hopping is normal and expected here — nobody stays in one place all night — but each new bar means a new seat charge.

    Some doors have signs reading “jimoto no kata nomi” (local regulars only) or simply look closed even when they’re not. Respect those and move on rather than pushing the door open to check. A good number of bars, especially the more famous ones, are used to foreign visitors and will have English menus or an English-speaking owner — look for small English signage near the entrance as a signal.

    Where to Drink: Budget to Splurge

    • Budget: Look for bars advertising no cover charge or a low flat fee (around ¥500) plus a one-drink minimum. Highball- and beer-focused counters in the Nichome-dori alley tend to be the most casual and welcoming to walk-ins.
    • Mid-range: Themed bars like Albatross (multiple floors, chandeliers, eclectic decor) or the cinema-themed La Jetée run a ¥1,000–¥1,500 seat charge and are well used to tourists, with staff who can chat in basic English.
    • Splurge: A few counters specialize in aged whisky or rare shochu, where a proper pour can run ¥2,000–¥4,000 and the seat charge is higher. If you’re building a serious drinks itinerary in Tokyo, it’s also worth reading our guide to craft beer in Japan for taprooms with a more conventional pricing structure, and our primer on umeshu if you want to order Japan’s plum wine instead of another highball once you’re seated.

    Etiquette and Common Mistakes

    • Don’t walk in with a large group. Five people trying to enter a five-seat bar is a non-starter; split up or find a bigger space. Two or three people is the sweet spot.
    • Ask before sitting, and ask about the charge. A quick “Ii desu ka?” (is it okay?) at the door and a nod from the owner is the norm before you take a stool.
    • Don’t photograph the interior or other patrons without asking. Exterior alley shots are fine and everyone takes them; pointing a phone at the counter is not.
    • Don’t expect food. A few bars serve light snacks, but Golden Gai isn’t for dinner — eat in Kabukicho or Shinjuku first.
    • Check the last train. Shinjuku Sanchome’s last trains run around 12:20–12:40am depending on the line; after that you’re looking at a taxi or an all-nighter until the first trains resume around 5am.

    Beyond the Bars

    If you want a quieter, daytime contrast to Golden Gai’s late-night intensity, Shinjuku’s older, low-rise neighbor Yanaka offers the same sense of old, human-scale Tokyo backstreets but by daylight, with none of the drinking. Hanazono Shrine, right next to Golden Gai, is also worth a quick daytime walk-through before you come back after dark for the bars — it’s a strange, pleasant contrast to duck through torii gates a few steps from where you’ll be squeezing onto a barstool that night.

    Golden Gai rewards curiosity more than planning. Pick an alley, peek through a few doors, and follow whatever theme catches your eye — that’s really the whole method.
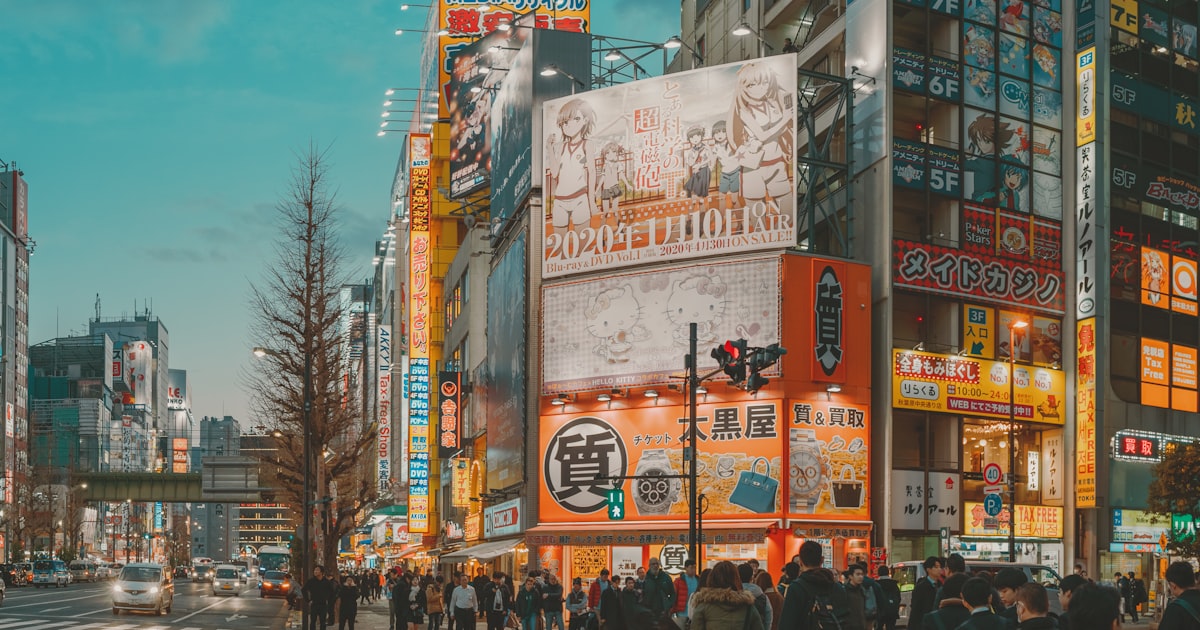
  • Shimokitazawa: Tokyo’s Thrift, Vintage & Indie Music Neighborhood

    Shimokitazawa: Tokyo’s Thrift, Vintage & Indie Music Neighborhood

    Photo by ayumi kubo on Unsplash

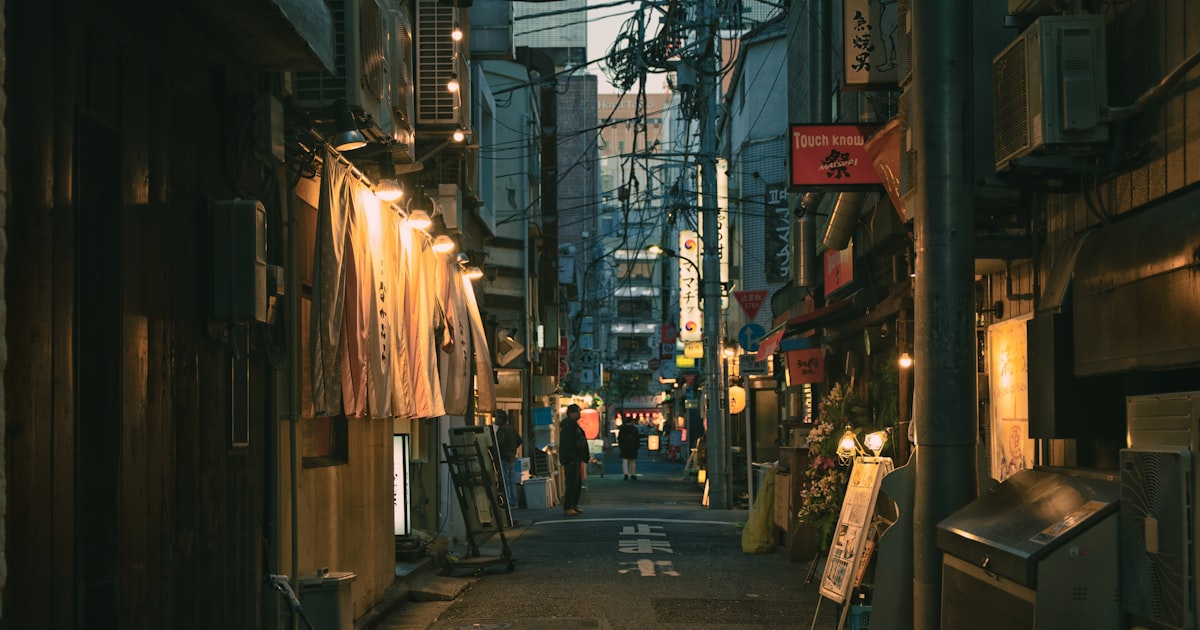
    Shimokitazawa (locals just say “Shimokita”) is the neighborhood Tokyo sends its art students, musicians, and secondhand-clothing obsessives to live in. Unlike the glossy vintage boutiques of Harajuku’s Cat Street, Shimokita’s shops are packed into a tangle of narrow, low-rise backstreets that feel more like a college town than a capital city. It’s small enough to cover on foot in an afternoon, but dense enough with shops, record stores, and live houses that most visitors end up staying much longer than planned.

    Why Shimokitazawa Is Different

    Shimokitazawa has been Tokyo’s countercultural neighborhood since the 1960s theater and folk-music scene took root here, and that identity has never really faded. What makes it distinct from other shopping districts is the sheer density of independently owned shops rather than chains — vintage clothing, used records, handmade jewelry, and small theaters sit shoulder to shoulder along streets barely wide enough for two people to pass. It rewards wandering more than any single “must-see” address, though the area does have well-known anchor shops that longtime fans return to on every visit.

    Getting There and Timing Your Visit

    Shimokitazawa Station is served by two lines: the Odakyu Odawara Line (about 4 minutes from Shinjuku on an express train, roughly ¥160) and the Keio Inokashira Line (about 5 minutes from Shibuya, roughly ¥140). Both lines take a standard IC card (Suica/Pasmo), so there’s nothing special to plan for on the transit side. Weekday mornings and early afternoons (opening time to around 2pm) are noticeably calmer for browsing vintage racks without a crowd; by Saturday evening the main lanes near the station get genuinely packed. Most shops don’t open until 11:00 or noon and close by 20:00–21:00, so this isn’t a neighborhood for an early-morning visit — treat it as a late-morning-through-evening stop, and pair it with dinner or a live show so you’re not rushing. Spring and autumn are the most comfortable seasons for the outdoor alleys; summer humidity makes the covered arcades near the station a welcome relief.

    Thrift and Vintage Shopping: What to Expect

    Shimokita is Tokyo’s best-known secondhand clothing district, with dozens of shops clustered south and north of the station. Long-running names to look for include Chicago (a multi-floor shop with a strong selection of vintage kimono alongside Americana clothing), Flamingo, New York Joe Exchange (which also buys and sells on the spot), Haight & Ashbury, and several Big Time and Used Mix branches scattered through the side streets. Expect band and graphic T-shirts from roughly ¥1,500–4,000, vintage denim from ¥6,000–25,000 depending on brand and condition, and flight jackets or heavy outerwear often ¥10,000 and up. A common misconception is that Japanese vintage is cheap — it isn’t. Shops here curate and grade condition carefully, and rare or Americana pieces are priced closer to (sometimes above) what you’d pay in the US or Europe. The value is in the selection and condition, not bargain pricing. If you’re also curious about Tokyo’s other major secondhand and collector shopping district, Nakano Broadway covers vintage toys, idol goods, and manga rather than clothing, and makes a good complementary half-day trip.

    Record Shops and Live Music Venues

    Shimokitazawa’s record shops are a big part of its identity. Jet Set and Disk Union both have strong secondhand vinyl and CD selections spanning rock, jazz, and city pop, with used records commonly running ¥500–3,000 and rarer original pressings well beyond that. Flash Disc Ranch is a smaller, denser shop worth digging through if you’re after used vinyl bargains. The neighborhood is equally known for its live houses (small music venues) — Shimokitazawa Club Que and Basement Bar are long-standing spots for indie rock and punk, while Mona Records leans toward folk and singer-songwriter acts. Cover charges (often called a “door charge” or *charge*) typically run ¥2,000–3,500 and frequently include one drink ticket; most venues are cash-only at the door, so carry yen rather than assuming card payment. Shows are usually listed on venue websites or Twitter/X a few weeks ahead — walk-ins are common for smaller weekday shows but riskier for weekend headline acts.

    Bonus Track, Reload, and the New Indie Scene

    Between roughly 2019 and 2022, the Odakyu Line here was moved underground, freeing up a long strip of surface land beside the station. That space became two redevelopment projects, Bonus Track and Reload, filled with small independent shops, bakeries, breweries, and cafes built in a low, open-air style that echoes the neighborhood’s older backstreets rather than replacing them. It’s a good stop if you want a calmer, more curated contrast to the denser vintage lanes, and it’s where several newer craft beer taprooms and natural wine bars have opened. If beer is part of your Japan itinerary, our guide to craft beer in Japan covers taprooms in Tokyo and beyond worth building into a longer crawl.

    Cafes, Bars, and Fueling Up

    Shimokita has a dense concentration of small cafes and standing bars rather than large restaurants, which suits its walk-and-graze rhythm. Budget travelers can eat well here: curry shops and ramen counters serve full meals for ¥800–1,200, and the neighborhood’s many small izakaya (some seating under ten people) are ideal for an early evening drink and small plates before a live show. For a splurge, look toward the sit-down restaurants around Reload, where dinner with drinks runs ¥4,000–6,000 per person. If you’re coming from another older Tokyo neighborhood on your itinerary, Shimokita’s energy is a useful contrast to somewhere like Yanaka, Tokyo’s quieter old shitamachi district — pairing the two on different days gives a good sense of how differently Tokyo’s neighborhoods have aged.

    Common Mistakes to Avoid

    • Arriving too early. Most shops open at 11:00–12:00; showing up at 9am means empty streets and shuttered storefronts.
    • Expecting steep discounts. Curated vintage is priced for its condition and rarity, not as a bargain bin — bring realistic expectations, especially for Americana and denim.
    • Not carrying cash. Many smaller vintage shops, record stores, and live house doors are cash-only; ATMs at the station’s convenience stores are the easiest backup.
    • Skipping the side streets. The most interesting small shops are often one block off the main pedestrian lanes near the station, not directly on them.
    • Treating it as a quick stop. Shimokita rewards slow, unplanned wandering far more than a checklist of specific addresses — budget at least three to four hours.

    Shimokitazawa doesn’t have a single landmark that defines a visit the way a temple or tower might elsewhere in Tokyo — its appeal is cumulative, built from an afternoon of digging through record bins, trying on secondhand jackets, and ending the night at a small live house. Come with an open afternoon, cash in your wallet, and no fixed shopping list, and it tends to deliver more than neighborhoods with a bigger reputation.

  • Pokemon Trading Cards in Japan: Where to Buy Singles, Sealed Packs & Grading

    Pokemon Trading Cards in Japan: Where to Buy Singles, Sealed Packs & Grading

    Photo by Y S on Unsplash

    Japan is where Pokemon cards are printed, and Japanese-language product is consistently cheaper, released faster, and easier to find in bulk than in North America or Europe. A new expansion drops in Japan two to four months before its English counterpart, the singles market is enormous because trading card shops have existed in cities like Tokyo and Osaka for decades, and grading infrastructure has caught up in the last two years now that PSA operates a Tokyo submission center. Whether you want a shrink-wrapped booster box at a fair price, a specific vintage single, or a card graded before you fly home, Japan can do all three — but each goal points to a different part of the country and a different shopping strategy.

    Sealed Product: Pokemon Centers and the Lottery System

    The official Pokemon Center stores are the obvious starting point for sealed booster packs and boxes at retail price. A standard 5-card booster pack runs 165 yen, and a sealed box of 30 packs is typically around 5,500 yen, tax included. Tokyo has several branches, including Pokemon Center Mega Tokyo in Sunshine City (Ikebukuro), Pokemon Center Tokyo Skytree, Pokemon Center Tokyo DX and Shibuya. Osaka has Pokemon Center Osaka DX in Umeda, with smaller branches in Kyoto, Nagoya, Fukuoka, Sapporo and Yokohama. Most keep mall hours of roughly 10:00 to 20:00.

    The catch is that popular sets sell out within minutes of release, so Pokemon Centers now handle new expansions almost entirely through a lottery (chuusen) system: you register interest online or via the Pokemon Center app in the days before release, and winners are told when and how much they can buy, usually capped at one or two boxes per person with ID checked at pickup. Walking in on release day expecting open stock rarely works for a hot set; older, back-catalog product is far easier to just buy off the shelf. New main-series expansions release roughly every six to eight weeks, almost always on a Friday.

    Big-Box Stores and Convenience Buys

    Beyond the official stores, Bic Camera, Yodobashi Camera and Don Quijote all stock sealed Pokemon booster boxes and packs in their toy or hobby sections, generally at or near retail price, and their stock isn’t as instantly mobbed as a Pokemon Center’s. Toys”R”Us Japan locations are another reliable, low-drama option, especially outside Tokyo and Osaka. None of these run public lotteries, so it’s genuinely first-come, first-served; checking shelves on a weekday morning right after opening is your best shot at a fresh restock.

    Hunting Singles: Nakano Broadway, Akihabara and Den Den Town

    For individual cards rather than sealed product, Tokyo’s card shop scene is concentrated in two neighborhoods. Nakano Broadway, a few stops from Shinjuku, has multiple dedicated trading card shops stacked across its upper floors alongside the manga and toy stores it’s better known for. It’s a great one-stop mix of graded singles, bulk commons in dollar-bin-style boxes, and genuine vintage cards, and pairs naturally with an afternoon spent browsing the rest of the building — see our full guide to Nakano Broadway: Tokyo’s Other Otaku Mecca. Akihabara is the other pole, with the multi-floor Mandarake complex devoting real estate to Pokemon singles, plus independent shops and chains like Yu-Yu-Tei scattered through the backstreets off the main strip. Expect cash-only registers at smaller shops and locked glass cases for anything graded or high-value.

    If you’re also spending time in the Kansai region, Osaka’s Den Den Town (Nipponbashi) is a smaller, less crowded version of Akihabara with its own Mandarake branch and several independent card shops. If you’re covering both cities on one trip, our guide to JR Regional Rail Passes for Kansai and beyond is worth checking before you buy Shinkansen tickets separately, and once you’re in either city an IC card gets you through subway and train gates without fumbling for cash — see IC Cards Beyond Tokyo if you haven’t used ICOCA before.

    Getting Cards Graded in Japan

    Grading used to mean shipping cards to the US and waiting months, but PSA opened a submission center in Tokyo in 2023 that accepts orders and payment in yen without the international shipping step, which has shortened turnaround and removed a lot of the customs uncertainty. Pricing is tiered by declared value and turnaround speed, so check PSA’s current Japan submission fees directly before committing, since they’re adjusted periodically. CGC has also been expanding its presence in Japan through partnered shops. If you’d rather not handle submission logistics yourself, established shops such as Mint and Hareruya offer agency services, submitting cards to PSA on your behalf for a service fee on top of the grading cost.

    If you’d rather skip the wait entirely, both Mandarake and Nakano Broadway’s card shops sell already-graded slabs, including PSA 10 examples of vintage cards, directly off the shelf. You pay a premium over raw price, but you walk out with a finished product the same day.

    Common Mistakes to Avoid

    The biggest one is buying from resellers loitering outside popular stores on release day; they mark sealed product up well beyond retail, and there’s no reason to pay it when back-catalog boxes are sitting on shelves elsewhere. Second, don’t assume any single store will have stock of a hot new set the day you show up — the lottery system exists precisely because demand outstrips supply. Third, inspect secondhand singles closely before buying, since Japanese shops grade condition on their own internal scales that don’t map neatly to English-market terms, and whitening or soft corners can hide under a sleeve. Finally, if you’re carrying anything valuable or graded home, keep it in your carry-on rather than checked luggage; slabs are bulky but not heavy, and rough baggage handling can crack the case.

    Best Time to Visit and Budget Tips

    For sealed product, timing your visit to land a few days after a new release, rather than on release day itself, usually means less lottery competition and calmer shelf stock. For singles hunting, weekday mornings are quieter than weekends at both Nakano Broadway and Akihabara, and shops often restock display cases on Mondays after weekend trade-ins. Budget-wise, bulk commons and playset singles at Nakano Broadway or Den Den Town are the cheapest way to build a collection; mid-range shoppers do well buying sealed boxes at Pokemon Center or Bic Camera retail prices; and if you’re splurging, graded vintage cards — especially early Base Set-era Charizard cards — can run from tens of thousands of yen into the high six figures depending on grade and rarity.

  • JR Regional Rail Passes: Kansai, Hokuriku & Other Area Passes Explained

    JR Regional Rail Passes: Kansai, Hokuriku & Other Area Passes Explained

    Photo by Spenser Sembrat on Unsplash

    The nationwide Japan Rail Pass gets all the attention, but if your trip is staying inside one region — say, Kansai, the Hokuriku coast, or Hokkaido — a regional JR pass is very often cheaper and better matched to what you’re actually doing. These passes are sold by the individual JR companies (JR West, JR Hokkaido, JR Central) rather than the Japan Rail group as a whole, they’re restricted to specific lines and prefectures, and most are only available to travelers on a temporary visitor visa. Here’s how the main ones stack up and how to avoid wasting money on the wrong one.

    Why go regional instead of nationwide

    Since the nationwide 7-day Ordinary Japan Rail Pass now costs around ¥50,000 for adults, it only pays for itself if you’re covering serious distance — Tokyo to Kyoto to Hiroshima to Kanazawa in a single loop, for example. If your plan is more like “base myself in Osaka or Kyoto and make day trips,” or “spend a week exploring one coastline,” a regional pass targeted at that footprint usually costs a third to half as much and covers everything you’ll actually ride. The tradeoff is that regional passes won’t get you back to Tokyo or Narita/Haneda — you’ll need a separate ticket, an overnight bus (see our guide to overnight buses as a Shinkansen alternative), or a one-way Shinkansen fare for the legs outside the pass area.

    Kansai Area Pass vs. Kansai Wide Area Pass

    JR West sells two passes that get confused constantly, and picking the wrong one is the single most common mistake travelers make here.

    The Kansai Area Pass is the city-hopping option: it covers local and rapid JR trains between Osaka, Kyoto, Kobe, Nara, and Himeji, plus the Haruka airport express (non-reserved seats) to and from Kansai Airport. As of 2025, adult prices run roughly ¥2,800 for 1 day, ¥4,600 for 2 days, ¥5,600 for 3 days, and ¥7,000 for 4 days. It does not cover the subway, Hankyu, Keihan, or Kintetsu lines — a real trap, since the fastest way to Nara or Fushimi Inari is often a private railway, not JR. Check current fares on JR West’s official site before buying, as these are revised periodically.

    The Kansai Wide Area Pass is a different animal: 5 consecutive days for about ¥12,000 (adult), and it includes reserved seats on limited expresses, not just local trains. That opens up day trips that the basic pass can’t touch — Himeji Castle, the San’in coast, Kii-Tanabe near the Kumano Kodo, and crucially, the Kinosaki Onsen hot spring town via the limited express Kounotori, which would otherwise cost close to ¥6,000 round trip on its own. If an onsen weekend is on your itinerary, this pass alone can justify itself.

    If you’re only moving around within Osaka or Kyoto proper on any given day, it’s worth comparing against just tapping an ICOCA IC card — for light travel days, pay-as-you-go can beat the pass price outright.

    Hokuriku Arch Pass: Tokyo, Nagoya, Osaka to Kanazawa

    Since the Hokuriku Shinkansen extended to Kanazawa and beyond, this region has become one of the easiest add-ons to a Kansai or Tokyo trip. The Hokuriku Arch Pass is a 7-day pass, priced around ¥24,500 for adults, and it’s genuinely built for tourists: it covers a round-trip Shinkansen journey from Tokyo, Nagoya, or Osaka into the Hokuriku region, plus unlimited non-reserved travel on the Hokuriku Shinkansen, the Shirasagi limited express (Nagoya–Kanazawa), and local JR lines around Toyama, Kanazawa, and Fukui for the full week. A handful of reserved-seat uses are included too. For a trip built around lacquerware, gold leaf, and porcelain shopping in Kanazawa — including Kutani ware — this is close to unbeatable value, since a single one-way Shinkansen fare from Tokyo to Kanazawa alone runs over ¥14,000.

    San’yo-San’in and Setouchi Passes for Western Honshu

    Two lesser-known JR West passes cover the stretch west of Osaka that most first-time visitors skip and most repeat visitors love.

    The San’yo-San’in Area Pass (7 consecutive days, around ¥19,000 adult) rides the San’yo Shinkansen down to Shimonoseki and loops back along the San’in coastal line through Tottori, Matsue, and Izumo — useful if sand dunes, Izumo Taisha, or the quieter, less-touristed coast appeal more than another temple crawl.

    The Setouchi Area Pass (4 consecutive days, roughly ¥10,000) is built around the Seto Inland Sea, linking Okayama, Hiroshima, Takamatsu, and Matsuyama, with some included ferry crossings. It’s a natural match if you’re extending into Shikoku for the Iya Valley or the 88 Temple Pilgrimage rather than doubling back through Kansai.

    JR Hokkaido Rail Pass

    Hokkaido’s distances are deceptive on a map — Sapporo to Kushiro or Wakkanai is a genuine half-day journey — and point-to-point limited express fares add up fast. The JR Hokkaido Rail Pass comes in several formats: a 3-day consecutive pass (around ¥24,000), a 4-day flexible pass usable on any 4 days within a 10-day window (around ¥26,000), a 5-day consecutive pass (around ¥28,000), and a 7-day consecutive pass (around ¥32,000), all adult ordinary-car prices. The flexible option is worth the small premium if your plan mixes train days with days spent hiking or soaking in onsen where you won’t touch a train at all. For genuinely remote corners like Shiretoko, pairing a shorter rail pass with a few days of rental car driving is usually more practical than trying to rail-pass the whole trip.

    Buying, activating, and common mistakes

    Most regional passes can be bought either as an exchange voucher before departure or directly at JR ticket offices and vending machines inside Japan — you’ll need your passport and a temporary visitor entry stamp either way, since these passes aren’t sold to residents. A few things trip people up repeatedly:

    • Assuming “JR” means “all trains.” Regional passes exclude subways and private railways (Hankyu, Keihan, Kintetsu, Nankai, Meitetsu). Budget separate fare or an IC card top-up for those legs.
    • Not checking the reserved-seat allowance. Some passes cap the number of reserved-seat bookings; once you hit the limit you’re back to non-reserved cars, which can mean standing during peak periods like Golden Week or Obon.
    • Buying a wide-area pass for a city-only trip. If you’re not leaving Osaka or Kyoto on most days, the cheaper area pass — or no pass at all — beats a wide-area pass every time.
    • Ignoring the calendar. Consecutive-day passes start counting the moment you activate them, so activate on the morning of your first travel day, not the day you land.

    As a rough budget guide: an ICOCA card alone is the budget option for single-city stays, an Area or Setouchi-style pass is solid mid-range value for a regional loop of 3–5 days, and the Kansai Wide Area or Hokuriku Arch passes are the splurge-worthy picks when they unlock an otherwise-expensive limited express or Shinkansen leg you were going to take anyway.

  • Kutani Ware: Kanazawa’s Colorful Porcelain and Where to Buy

    Kutani Ware: Kanazawa’s Colorful Porcelain and Where to Buy

    Photo by Kazuo ota on Unsplash

    A Porcelain Style Born From Failure

    Kutani ware (九谷焼, Kutani-yaki) gets its name from Kutani, a small village in what is now the Kaga area of Ishikawa Prefecture, where kilns began firing porcelain around 1655. Production stopped abruptly roughly 70 years later — historians still argue over whether it was exhausted clay resources, financial collapse, or something else — and the kilns sat dormant for nearly 80 years. When production revived in the early 1800s under new kilns like Kasugayama and Yoshidaya, it kept the old name and the bold aesthetic that made the original ware famous. Today "Kutani-yaki" is produced across the wider Kaga region — Kanazawa, Kaga City, Komatsu, and Nomi — but Kanazawa, with its dense concentration of craft shops and easy access from Tokyo and Kyoto, is where most visitors will actually see and buy it.

    What to Look For: Five Colors and a Few Key Styles

    Kutani ware is instantly recognizable once you know the palette: gosai, the five colors of green, yellow, red, purple, and deep blue, applied in thick, glossy overglaze enamels that often cover almost the entire surface of a piece. This is a very different look from the airy blue-and-white porcelain of Arita — if you want a point of comparison, our guide to Arita & Imari covers Japan’s other major porcelain region, and seeing both styles side by side makes the difference click immediately. Within Kutani ware itself, dealers and collectors distinguish several sub-styles: Ao-Kutani (heavy on green and yellow, little to no red, from the original 17th-century kilns), the Yoshidaya revival style that echoes it, Iidaya (red-dominant with fine gold linework), and Shoza style, a Meiji-era export favorite dense with red and gold. None of this is essential to enjoy the ware, but knowing the terms helps you ask better questions in shops and understand why a similar-looking bowl can cost ¥3,000 in one store and ¥80,000 in another.

    Where to Buy in Kanazawa City

    You don’t need to leave central Kanazawa to find genuine, well-made pieces. A few reliable stops:

    • Ishikawa-ken Kanko Bussankan (Ishikawa Prefectural Products Center), right by the Ishikawa Gate entrance to Kenrokuen Garden. It’s a multi-floor showcase of regional crafts — Kutani ware, Wajima lacquerware, gold leaf — with clearly labeled kiln and artist names, generally open around 9:00–18:00 with no fixed closed day. It’s the easiest place to compare price points in one visit.
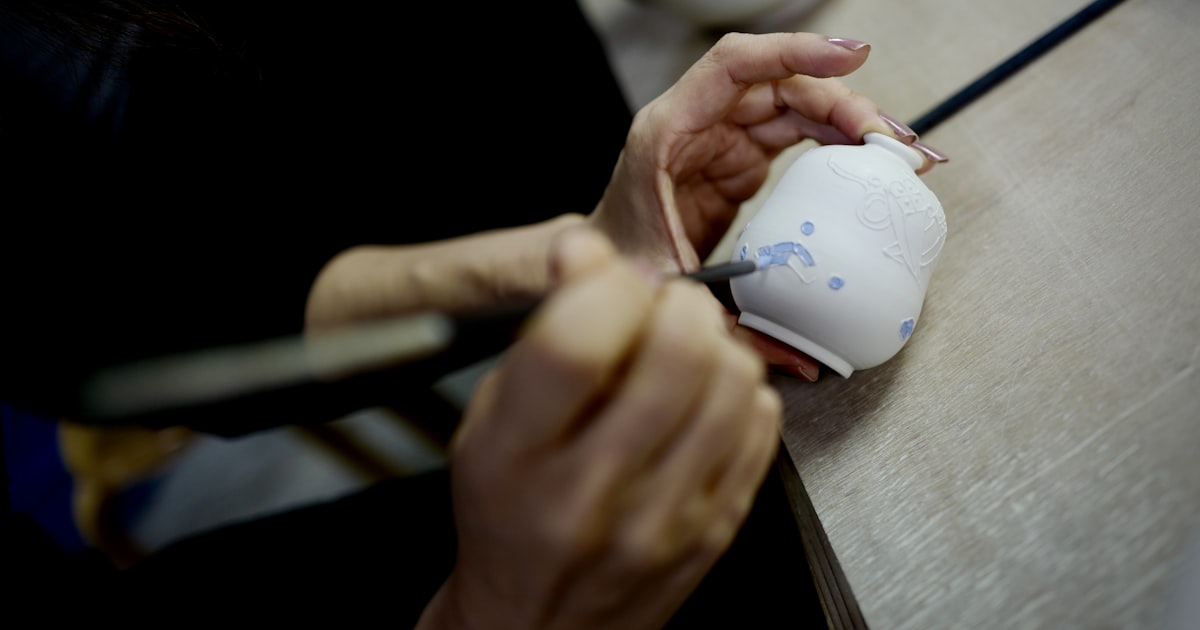
    • Kutani Kosen-gama, a working kiln and shop near Nomachi in central Kanazawa, where you can see pieces being painted and sometimes try hand-painting a small item yourself. Good for understanding how much labor goes into a single plate.
    • Higashi Chaya District, the old geisha quarter, has several craft boutiques mixing Kutani ware with gold-leaf goods; quality varies more here, so check for a maker’s mark before buying anything priced like a serious piece.
    • Kanazawa Station’s Rinto/Anto shopping arcades, useful for a last-minute purchase before your train — open into the evening, though selection leans toward smaller, giftable items.

    Day Trip to the Source: Kaga and Nomi

    If you have half a day to spare, the actual kiln towns are worth the trip. Nomi City has a cluster of studios collectively promoted as the Kutani Ceramic Art Village, plus a dedicated Kutani ware museum, while Kaga City (which includes the original Kutani village site) has working kilns that sell seconds and overstock at noticeably lower prices than city boutiques. Both are reachable by local train and a short bus or taxi ride from Kanazawa Station, but if you’re also planning to explore the wider Kaga countryside — hot spring towns, rural back roads — it may be worth reading our guide to renting a car in Japan and combining the pottery towns with a small road trip. Time it right and you can catch the Kutani Chawan Matsuri (Kutani Bowl Festival), an annual outdoor market held in early May in the Kutani area where kilns clear out inventory at a fraction of retail price — it’s popular with Japanese collectors, so go early in the day for the best selection.

    What to Expect to Pay

    Budget (under ¥3,000): chopstick rests (¥800–1,500), a single sake cup or guinomi (¥1,500–3,000), and small dishes make easy, packable souvenirs.

    Mid-range (¥3,000–15,000): a rice bowl, teacup, or small decorative plate typically runs ¥4,000–9,000; matched pairs or small sets push toward ¥15,000.

    Splurge (¥30,000+): artist-signed vases and large decorative plates from named kilns commonly sell for ¥30,000–150,000, and genuine antique Ko-Kutani or Yoshidaya pieces at specialist dealers can run well into six figures. Larger stores offer tax-free shopping on purchases over ¥5,000 (pre-tax) with your passport, which is worth asking about before you pay.

    Common Mistakes to Avoid

    Not everything colorful and floral in a Kanazawa souvenir shop is genuine hand-painted Kutani ware — cheaper transferware imitations exist, so flip a piece over and look for a kiln seal or maker’s mark, and don’t hesitate to ask staff whether a piece is tegaki (hand-painted) or printed. Second, porcelain is heavy and breakable: ask the shop for proper packing, or if you’re buying several pieces, ask about domestic courier (takkyubin) shipping to your next hotel or straight to the airport so you’re not carrying fragile boxes on trains. Third, heavily gold-decorated pieces are typically decorative only and shouldn’t go in a microwave or dishwasher, whatever the shop clerk may or may not mention. And finally, don’t leave your shopping until the last twenty minutes before a Shinkansen departure — station shops get crowded right before peak departure times, and careful gift-wrapping takes longer than you’d expect.

    Getting There and Practical Tips

    Kanazawa is about 2.5 hours from Tokyo on the Hokuriku Shinkansen, or roughly 2.5–3 hours from Osaka, Kyoto, or Nagoya via limited express trains. Local buses around the city accept regional IC cards — see our guide to IC cards beyond Tokyo if you’re not sure which one works where. There’s no strict best season for shopping itself, but pairing your visit with cherry blossoms at Kenrokuen in early April or autumn foliage in November makes for a prettier trip overall. If you’d rather wrap a delicate piece the traditional way instead of asking for plastic packaging, it’s worth picking up a furoshiki cloth beforehand — our guide to furoshiki wrapping covers a few knots sturdy enough for a boxed teacup.

  • Shimanami Kaido: Cycling Japan’s Island-Hopping Expressway

    Shimanami Kaido: Cycling Japan’s Island-Hopping Expressway

    Photo by Ray Waller on Unsplash

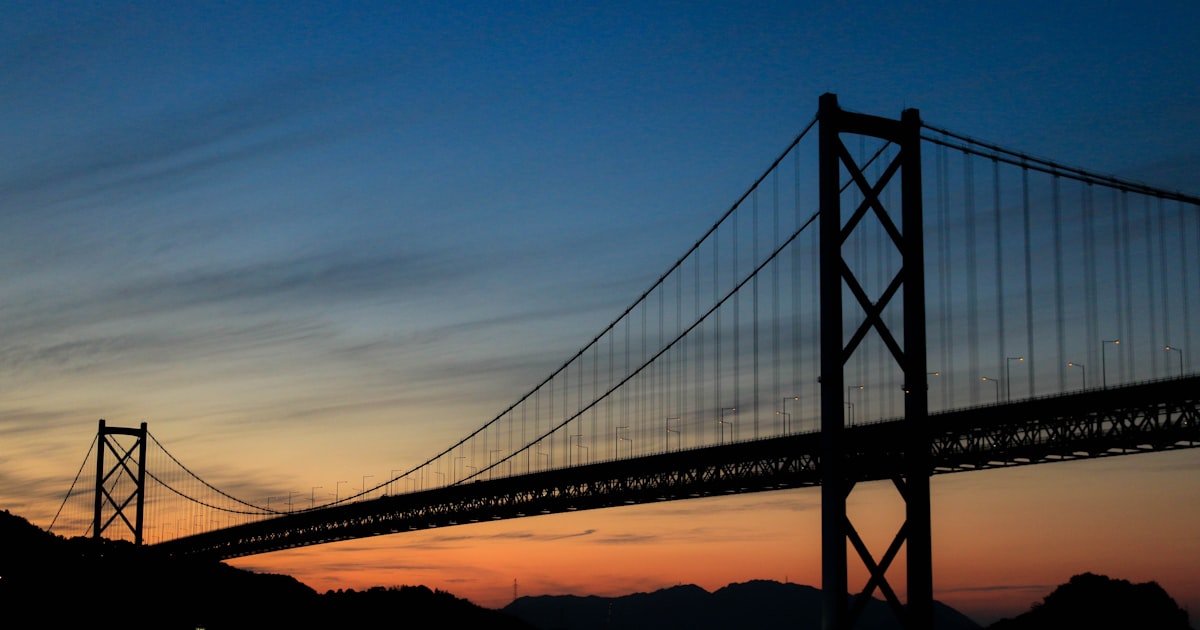
    The Shimanami Kaido is a roughly 70-kilometer expressway that links Onomichi on the Honshu mainland to Imabari on the island of Shikoku, hopping across six small islands in the Seto Inland Sea via a chain of dramatic suspension and cable-stayed bridges. Unlike most of Japan’s expressways, this one has a dedicated, well-marked cycling lane running its entire length, which is why it’s routinely ranked among the best long-distance bike routes in Asia. You don’t need to be a serious cyclist to do it — the route is flat where it needs to be, the climbs onto the bridges are gentle and gradual, and rental shops make it easy to show up with nothing and leave with everything you need.

    Why Cycle the Shimanami Kaido

    The appeal is the combination of engineering and scenery: you ride across some of the longest suspension bridges in the world with open sea on both sides, then drop down onto quiet island roads lined with citrus orchards, fishing harbors, and small shrines. The full route (Onomichi to Imabari or the reverse) is well within reach for an average rider in a single long day — most people take 6 to 8 hours including stops — but splitting it into two days with an overnight on one of the islands lets you actually enjoy the temples, cafes, and lookout points instead of racing the clock.

    Getting There

    Onomichi, the Honshu starting point, is reached via JR Fukuyama Station on the Sanyo Shinkansen line, then a roughly 15-minute ride on the local JR Sanyo Line to Onomichi Station. Imabari, the Shikoku endpoint, is served by limited express trains from Matsuyama and by long-distance and overnight buses from cities including Osaka, Hiroshima, and Tokyo — a budget-friendly option worth considering if you’d rather save shinkansen money for the trip itself; see our guide to overnight buses in Japan for how these work. If you’re combining the ride with a wider loop through Shikoku, our Shikoku travel guide covers onward stops like the Iya Valley and Naruto whirlpools, both reachable from Imabari in a day or two. Regional IC cards work on trains and buses on both ends of the route; if you’re not already carrying one, our guide to IC cards beyond Tokyo explains which one covers this area (ICOCA, on the Honshu side).

    The Route: Bridges and Islands

    From Onomichi you cross, in order, Mukaishima, Innoshima, Ikuchijima, Omishima, Hakatajima, and Oshima before reaching Imabari — six islands and seven major bridge crossings in total. The cycling course is marked with a continuous blue line painted on the road surface, so navigation is almost foolproof; you simply follow the blue line and the blue-and-white directional signs at every junction. Cyclists currently cross all of the toll bridges for free, a policy the local governments introduced to encourage cycling tourism, so the only costs on the route itself are food, drinks, and any detours you make off the main course. Worth noting: the dedicated bike lane is separate from the car expressway on most bridges, but on a couple of sections cyclists share a narrower path with pedestrians, so keep your speed down near the bridge approaches, especially on Kurushima-Kaikyo Bridge near Imabari, which has its own observation park worth a stop.

    Renting a Bike (and Getting It Back)

    You don’t need to bring your own bicycle. Sanyo Shimanami Rental Cycle operates around 14 terminals along the route, including at Onomichi and Imabari, and lets you pick up at one terminal and drop off at another — ideal for a one-way ride. Standard city bikes run roughly 2,000 yen per day, cross bikes and road bikes cost more (around 3,000-4,500 yen), and electric-assist bikes are also available at higher-traffic terminals for riders worried about the bridge climbs. You’ll pay a refundable deposit (around 1,000 yen) that’s returned when you drop the bike at any terminal, plus a small one-way return fee if you don’t return to your starting point. Terminals typically operate from around 7:00 or 8:00 AM until 17:00-19:00 depending on the season, and bikes must be returned before closing — plan your day around this if you’re not staying overnight partway.

    Best Time to Go

    Spring (late March through May) and autumn (October and November) are the sweet spot — mild temperatures, low humidity, and good visibility across the water. Early June through July is the rainy season, and August brings intense heat and humidity that make the exposed bridge sections genuinely tough going; September and early October carry typhoon risk, which can shut down bridge crossings on short notice. Weekday rides are noticeably quieter than weekends, when the route fills with local cycling clubs and tour groups, particularly around Ikuchijima’s Setoda area.

    Where to Eat and Sleep Along the Way

    Onomichi is known for its soy-based ramen (around 700-900 yen a bowl) — worth trying before you set off. On Ikuchijima, the town of Setoda is the region’s citrus hub, with lemon soft-serve, lemon udon, and other lemon-themed snacks sold near Kosanji Temple, a flamboyant temple complex with a marble sculpture garden (admission around 1,400 yen). Imabari is famous for its yakitori, grilled over charcoal in a distinctive skewer-and-iron-plate style. For accommodation, budget travelers can find cycling-terminal guesthouses and hostels from around 3,000-5,000 yen a night, while business hotels in Onomichi and Imabari run 6,000-9,000 yen. For a splurge, Azumi Setoda in a restored 140-year-old merchant house on Ikuchijima offers high-end kaiseki dinners and private garden onsen from around 35,000-50,000 yen per night — a genuinely memorable way to break up the ride. Whichever route you take, pack a change of clothes for the evening; after a full day of riding you’ll want it, and our guide to doing laundry in Japan is handy if you’re stretching a light packing list over a longer trip.

    Common Mistakes to Avoid

    Carry cash — island convenience stores and small food stalls between towns don’t always take cards. Don’t underestimate the wind on the bridge sections; even a flat-feeling route can slow you down considerably when crossing open water in a headwind. Book island accommodation ahead during spring and autumn weekends, since options on the smaller islands are limited and fill quickly. Check the rental terminal’s closing time before you set off, factoring in stops for photos and food, since arriving late can mean scrambling for a taxi or an unplanned overnight. And if cycling 70 km in a day doesn’t appeal, it’s entirely possible to drive the route instead — see our guide to renting a car in Japan for licensing rules and costs — or ride only the most scenic middle section, between Ikuchijima and Omishima, and bus back rather than committing to the full crossing.

  • Ise Jingu: Visiting Japan’s Most Sacred Shrine

    Ise Jingu: Visiting Japan’s Most Sacred Shrine

    Photo by Pietro De Grandi on Unsplash

    Ise Jingu isn’t a single shrine — it’s a complex of 125 shrines spread across the forests of Ise City in Mie Prefecture, and it sits at the top of Shinto’s spiritual hierarchy. This is where Amaterasu Omikami, the sun goddess and mythical ancestor of the Imperial family, is enshrined, and where one of Japan’s three sacred Imperial Regalia is kept. Unlike Kyoto’s temples, Ise doesn’t rely on flashy architecture or vermillion paint — the appeal is the atmosphere: thousand-year-old cypress trees, gravel paths, and a quiet sense that you’ve stepped somewhere genuinely old. It’s a full day trip, not a quick stop, so it’s worth planning around.

    Geku and Naiku: What to See

    The complex splits into two main shrines, and tradition says you visit them in order.

    • Geku (Outer Shrine) — dedicated to Toyouke Omikami, the goddess of food, agriculture, and industry. It’s a short walk from Ise-shi and Ujiyamada stations, making it the natural first stop.
    • Naiku (Inner Shrine) — the holiest site in Shinto, dedicated to Amaterasu herself. This is the one with the famous Uji Bridge crossing the Isuzu River, the sacred grounds where the mirror Yata no Kagami is said to be kept, and the oldest cypress trees on the property.

    Both are free to enter — there’s no admission fee anywhere on the grounds, which is unusual for a site this significant. Photography is allowed in the outer areas but banned closer to the main sanctuary buildings at both shrines; look for the signs and roped-off boundaries and don’t push past them for a photo. Every 20 years, the entire shrine is rebuilt on an adjacent plot in a Shinto ritual called Shikinen Sengu — the last rebuild was in 2013, so the next is due in 2033. The old materials are recycled into shrines across Japan, and the alternating empty plot next to each shrine is part of the experience even when nothing new is being built.

    Getting There

    The gateway stations are Ise-shi and Ujiyamada, both served by Kintetsu limited express trains and just a few minutes apart on foot.

    • From Osaka (Namba): Kintetsu limited express to Ise-shi, about 2 hours 10 minutes, roughly ¥4,000–4,500 one way depending on the train.
    • From Kyoto: Kintetsu limited express, around 2 hours, similar fare range — this is usually the most direct option since JR doesn’t run a fast through service.
    • From Nagoya: Kintetsu limited express, about 1 hour 25 minutes, roughly ¥3,000–3,300 one way.
    • From Tokyo: There’s no direct train — take the Shinkansen to Nagoya, then transfer to the Kintetsu limited express. Budget travelers can also look at an overnight bus route into the Ise-Shima area to save on the Shinkansen fare; see our guide to overnight buses in Japan for how these work.

    Kintetsu’s ordinary trains and station gates accept regional IC cards, though limited express seats require a separate paper reservation even if you tap in with a card — our guide to IC cards beyond Tokyo covers which cards work where. From Ise-shi/Ujiyamada Station, Geku is a 5-minute walk. To reach Naiku, take the CAN bus from bus stop 2 (about 15 minutes, roughly ¥440 one way) or a taxi (around ¥1,500–2,000). If you’re road-tripping through the Kansai/Mie region, driving is also an easy option and parking near both shrines is plentiful; see our guide to renting a car in Japan for license requirements and costs.

    Opening Hours and Best Timing

    Both shrines are open every day of the year, with no closed days. Gates open at 5am, but closing time shifts by month — as early as 4pm in December and as late as 7pm during the summer months — so check the current month’s schedule before you go rather than assuming a fixed time. Arriving right at opening is genuinely worth it: the crowds are thin, the light through the cypress canopy is at its best, and the walk to Naiku’s inner sanctuary feels far more atmospheric without a queue.

    Avoid New Year’s if you can — millions of visitors come for hatsumode (the first shrine visit of the year), and the approach roads and Oharaimachi street become extremely congested. Spring (cherry blossoms in early April) and autumn (foliage in mid-to-late November) are the most attractive times to visit, while summer is hot and humid with less shade than you’d expect given the trees. Plan for at least half a day if you want to see both shrines properly, and a full day if you’re combining Ise with nearby Toba or Futami.

    Oharaimachi and Okage Yokocho: Eating and Shopping

    The approach to Naiku is lined with Oharaimachi, a preserved Edo-period street, and its historic shopping arcade Okage Yokocho branching off it. This is where most people eat lunch and pick up souvenirs, and it’s genuinely enjoyable rather than just a tourist trap. The signature local sweet is akafuku mochi — soft rice cake wrapped in sweetened red bean paste, sold by the shop that’s been making it since 1707, for around ¥270 for a plate of two with tea. If you want more context on this kind of traditional sweet before you go, our beginner’s guide to wagashi is a useful primer. Beyond mochi, expect grilled Ise udon (a thick, dark-broth noodle dish unique to the area, around ¥600–800 a bowl), local sake tasting stalls, and shops selling Ise-katagami stencils and other regional crafts.

    Etiquette and Common Mistakes

    A few things trip up first-time visitors:

    • Don’t walk down the center of the path. The middle is traditionally reserved for the gods — walk slightly to either side, especially when crossing the bridges.
    • Bow before crossing the torii gates, both entering and leaving, at each shrine.
    • Skip Naiku on a tight schedule rather than Geku. If you’re short on time, Naiku is the priority — it’s the more significant of the two and the one with the Uji Bridge and old-growth forest.
    • Don’t expect gift shops or food stalls on the shrine grounds themselves — that’s all concentrated at Oharaimachi near Naiku, not inside the sacred precincts.
    • Photography is restricted near the inner sanctuaries at both shrines — this isn’t loosely enforced, so don’t try to sneak a shot past the barrier.

    Extending the Trip

    Ise pairs naturally with two nearby spots. Futami, a short train ride from Ise-shi, has the Meoto Iwa (“Wedded Rocks”) — two rocks joined by a sacred rope, best seen near sunrise in summer. Toba, about 15 minutes further by train, is home to Mikimoto Pearl Island, the birthplace of the cultured pearl industry, with a museum and pearl jewelry for sale at a range of budgets. Either makes a good half-day add-on if you’re staying in the area overnight rather than doing Ise as a pure day trip from Osaka, Kyoto, or Nagoya.

  • Purikura: Japan’s Photo Booth Culture and How to Use One

    What Is Purikura, and Why Should You Try One?

    Purikura (プリクラ, short for “print club”) is Japan’s version of the photo booth, but calling it that undersells the experience. Instead of a plain black-and-white strip, you get a sheet of small, sticker-backed photos where your skin has been smoothed, your eyes enlarged, and your legs subtly lengthened by software that’s been refined since the machines first appeared in game centers in 1995. It’s less “photo booth” and more “mini beauty studio crossed with an arcade game,” and it remains one of the most popular things Japanese teenagers, university students, and groups of friends do together on a day out. For visitors, it’s a fun, cheap souvenir that’s more personal than anything you can buy in a shop, and a genuine slice of Japanese youth culture rather than something staged for tourists.

    Where to Find Purikura Booths

    You don’t need to search hard — purikura machines are tucked into game centers (arcades) all over the country. The reliable chains to look for are GiGO (formerly Sega), Taito Station, Namco, and Round1, all of which dedicate at least part of a floor to purikura booths alongside claw machines and video games.

    For the biggest selection, head to a dedicated purikura arcade rather than a general game center. In Tokyo, Purikura no Mecca in Shibuya is the standout — a multi-floor arcade near Center Gai (a few minutes on foot from Shibuya Station’s Hachiko exit) that’s entirely purikura, with dozens of machines running different themes, backgrounds, and camera effects. Harajuku and Ikebukuro also have strong clusters of machines aimed at a younger crowd. In Osaka, the Amerika-mura (Amemura) district near Shinsaibashi is the equivalent hub, packed with purikura shops alongside secondhand fashion stores.

    Most purikura arcades open around 10:00 or 11:00 and run until 23:00–24:00; some locations in Shinjuku and Osaka’s Dotonbori/Amemura area stay open later or even 24 hours. If you’re combining a purikura session with other Tokyo pop-culture stops, Nakano Broadway makes a good pairing for the same day trip, since both scratch the same otaku-adjacent itch.

    How Much Does It Cost and What Do You Get?

    A single session typically costs ¥400–¥700, paid in coins or occasionally by IC transit card (like Suica or Pasmo) at newer machines. That price covers the booth for one round of shooting and printing, split however many people are crammed into the booth — most machines are built for 2–4 people, so the cost per person is often less than a vending-machine drink.

    What you get is one sheet of stickers, usually cut into a grid of small photos you can peel apart and stick on phone cases, notebooks, or postcards home. Many modern machines also let you save digital copies to your phone, either through a dedicated app (frequently Japanese-only) or by scanning a QR code that appears on screen after printing — factor in a data fee of roughly ¥100–¥200 on top of the base price if you want this option.

    Step-by-Step: How to Use a Purikura Machine

    The process is fairly consistent across brands, even if the touchscreen menus are almost entirely in Japanese:

    • Pick a machine and pay. Look for an empty booth, check the coin slot or IC card reader, and insert payment. Newer machines show a language toggle (look for “English”) on the opening screen — use it if available.
    • Choose your background and frame. Before shooting, you’ll usually select a themed background (seasonal, pastel, glittery, etc.) and sometimes a filter strength for the skin-smoothing/eye-enlarging effect.
    • Pose for the shots. A countdown timer fires off 6–10 photos in quick succession. Machines often display sample poses on screen — copy them if you’re not sure what to do, and move fast, since the timer doesn’t wait.
    • Move to the decoration side. After shooting, you shuffle to a separate half of the booth (sometimes behind a curtain) with a stylus and touchscreen. Here you write text, add stamps and stickers, and crop/arrange the layout.
    • Print and collect. Hit the print button, wait roughly one to two minutes, and your sticker sheet dispenses from a slot, usually alongside a QR code for digital copies.

    Best Times to Go (and Crowds to Avoid)

    Weekday afternoons, right after arcades open, are the quietest window — you’ll often have your pick of machines. Weekends, especially Saturday afternoons and evenings, get busy with local students, and popular arcades like Purikura no Mecca can have every booth occupied with a short queue. If you’re traveling in December, some machines rotate in Christmas- or New Year-themed backgrounds for a few weeks, and similarly around Halloween in late October — a nice bonus if your trip timing lines up, but not something worth planning a whole visit around.

    Common Mistakes First-Timers Make

    The most frequent stumble is bringing too large a group — booths are physically sized for 2–4 people, and squeezing in six means someone gets cropped out of every shot. Another is assuming every machine accepts cards; many older units are coin-only, so keep ¥100 coins on hand. Don’t be startled by the auto-applied filters either — the enlarged eyes and smoothed skin are standard, not a setting you can easily turn off, and some visitors find the effect stronger than expected the first time they see the preview. Finally, don’t skip the QR/app step if you want digital copies: walk away without scanning it and your only record is the physical sticker sheet, which fades over time and can’t be reprinted once you leave the booth.

    Budget, Mid-Range, and Splurge Options

    For a no-frills first try, any GiGO or Taito Station machine in a general arcade runs about ¥400 and is perfectly serviceable. For more variety in backgrounds, props, and camera angles, spend the extra ¥100–¥300 at a dedicated arcade like Purikura no Mecca or an Amemura purikura shop, where machines are refreshed more often with newer effects. If you want to make an afternoon of it, some purikura shops near Harajuku and Amemura rent costumes, wigs, and colored contacts for an extra ¥1,000–¥2,000, letting you theme the whole shoot — a fun splurge if you’re traveling with friends and want more than just a quick sticker sheet. Whichever tier you pick, bring some cash, since even in a country that’s increasingly cashless, purikura remains a coins-in-the-slot experience at plenty of machines.

  • Animal Cafes in Japan: Cats, Owls, Hedgehogs & Etiquette

    Animal Cafes in Japan: Cats, Owls, Hedgehogs & Etiquette

    Photo by Benjamin Wong on Unsplash

    Japan didn’t invent the idea of hanging out with animals over coffee, but it perfected it. Faced with small apartments and strict no-pet building rules, city dwellers turned to animal cafes for a fix of fur, feathers, and quills — and the concept has since become a full-blown tourist activity. There are now cafes built around cats, owls, hedgehogs, rabbits, otters, and even micro-pigs, mostly clustered in Tokyo but increasingly common in Osaka and Kyoto too. Here’s what to actually expect, what it costs, and how not to be the visitor everyone side-eyes.

    Why Animal Cafes Exist in Japan

    Most rental apartments in Japanese cities either ban pets outright or charge steep pet deposits, and long work hours make daily pet care hard for a lot of people. Animal cafes fill that gap — locals go to destress on a lunch break, and tourists go because, frankly, cuddling a hedgehog for 20 minutes is a genuinely fun way to spend a rainy afternoon. The first cat cafe opened in Osaka in 2004 and the format exploded from there. Today Tokyo alone has well over 100 cat cafes, plus dozens of owl, hedgehog, rabbit, and reptile spots, mostly concentrated in Ikebukuro, Shinjuku, Harajuku, and Akihabara.

    Cat Cafes: What to Expect and Where to Go

    Cat cafes are the easiest entry point and the most widespread. Expect to pay a per-time-block fee rather than a flat entry price — typically ¥1,200–¥1,800 for the first 30 minutes, then roughly ¥150–¥250 per additional 10 minutes, often with a free drink (coffee, tea, or juice) included in the base fee. Some chains, like Cat Café MoCha (branches in Shinjuku, Shibuya, and Ikebukuro) and Nekorobi in Ikebukuro, run on this model and are reliably clean and well-run. Hours are generally 10:00 or 11:00 am to 8:00 or 9:00 pm, and most require you to sanitize your hands and remove shoes or bags at the entrance.

    Budget tip: weekday mornings right at opening are quietest, since the cats haven’t been handled all day and are more likely to be awake and curious rather than hiding to nap. Weekends after 2:00 pm get crowded, especially in Ikebukuro, and some popular cafes cap the number of guests inside at once, so you may queue outside for 15–30 minutes. If you’re already exploring Tokyo’s old-town side, Yanaka is worth combining with a cafe visit — it’s one of the city’s famous “cat neighborhoods,” with free-roaming (but not petting-friendly) cats wandering the backstreets alongside senbei shops and a genuinely relaxed, non-touristy cat-spotting walk.

    Owl Cafes: Prices, Rules & Ethical Considerations

    Owl cafes are a step up in both cost and controversy. Expect to pay ¥2,000–¥3,500 for a 45–60 minute session, usually booked as a timed slot rather than walk-in, since only a handful of guests are let in at once. Well-known spots include Fukurou no Mise (Harajuku and Asakusa) and Akiba Fukurou in Akihabara. You’ll typically get a briefing on how to hold your arm still while a bird is perched, and staff supervise every interaction closely — owls are easily stressed by sudden movement, flash photography, and loud noise.

    Worth knowing before you book: welfare standards vary a lot between cafes, and some animal-rights groups have raised concerns about keeping nocturnal birds in bright, noisy daytime environments. If you go, choose a cafe that limits group size, keeps lighting dim, and lets birds retreat to perches away from guests rather than tethering them constantly for photos. If a cafe pressures you into non-stop handling or flash photos, that’s a sign to leave a review rather than repeat visitors.

    Hedgehog, Rabbit & Other Small-Animal Cafes

    Hedgehog cafes are a Harajuku and Roppongi specialty — Harry (also known for its hedgehog and owl combo locations) is one of the originals. Expect around ¥1,500–�art¥2,200 for 30 minutes, gloves provided, since hedgehog quills aren’t painful but can be scratchy for sensitive hands. Sessions are usually shorter than cat cafes because hedgehogs are solitary, easily overstimulated animals that tire of handling fast — a good cafe will limit each hedgehog to short handling windows and rotate them out to rest.

    Rabbit cafes (common in Harajuku and Osaka’s Dotonbori area) run similarly, around ¥1,200–¥1,800 per 30–40 minutes, and tend to be gentler experiences since rabbits can roam a larger floor area rather than being picked up constantly. Micro-pig and capybara cafes exist too but are rarer and often booking-only — check the cafe’s own site or a same-day phone call before showing up, since English-language booking pages aren’t always kept current.

    Etiquette: Common Mistakes to Avoid

    Most bad reviews of animal cafes trace back to visitor behavior, not the cafe itself. A few rules that apply almost everywhere:

    • Don’t wake sleeping animals. Cats and owls in particular are usually left alone if resting — staff will tell you which ones are off-limits.
    • No flash photography. This is a hard rule at owl cafes and strongly discouraged at all others; it startles animals and can cause real stress over repeated exposure.
    • Don’t pick animals up yourself. Let staff hand you the animal, especially with owls and hedgehogs — improper handling is how animals (and hands) get hurt.
    • Wash and sanitize hands both entering and after handling different animals, especially between species areas.
    • Don’t bring outside food, and keep your voice down. Many cafes are small, shared spaces, and loud groups stress the animals more than anything else.
    • Respect time limits. If your slot is 45 minutes, staff will ask you to wrap up — there’s usually a queue behind you.

    Practical Tips: Booking, Timing & Budget

    Cat cafes are mostly walk-in, but owl, hedgehog, and other small-animal cafes increasingly require advance reservations through their own website or apps like Klook — especially on weekends and during school holidays (late July–August, New Year, Golden Week in early May). If you’re traveling with kids, check minimum age requirements; several owl cafes set a minimum age around 6–10 for safety reasons.

    Budget-wise, a single cat cafe visit runs about ¥1,500–¥2,500 all in with a drink; an owl cafe session lands around ¥2,500–¥3,500; hedgehogs and rabbits are the cheapest at ¥1,200–¥2,200. If you want to sample several types in one day, Ikebukuro is the most efficient base — it has cat, owl, and small-animal cafes within a few minutes’ walk of each other around the east exit of the station. Since most of these are compact, indoor experiences, they’re also a good rainy-day or extreme-heat option; if you’re visiting during Japan’s peak summer heat, animal cafes are a genuinely pleasant way to fill a midday block without melting outside. And if you’re routing between cities to hit multiple cafe neighborhoods, brushing up on regional transit cards via IC cards beyond Tokyo will save you the hassle of buying separate tickets everywhere.

    One last practical note: bag storage is usually available (coin lockers or shelving at the entrance), but bring cash — a fair number of smaller cafes, especially owl and hedgehog spots, still don’t take cards.

  • Doing Laundry in Japan: Coin Laundries, Hotels & What You’ll Need

    Doing Laundry in Japan: Coin Laundries, Hotels & What You’ll Need

    Photo by Jakub Stekla on Unsplash

    Pack light, wash as you go — it’s the single best strategy for a trip longer than a week in Japan, and the country makes it easy once you know the system. Coin laundries are everywhere, hotel options range from free washer-dryers to full valet service, and everything you need to do a load is sold at the nearest drugstore. Here’s exactly how it works, what it costs, and the mistakes that trip up first-timers.

    Coin Laundries (Koin Randorī): How They Work

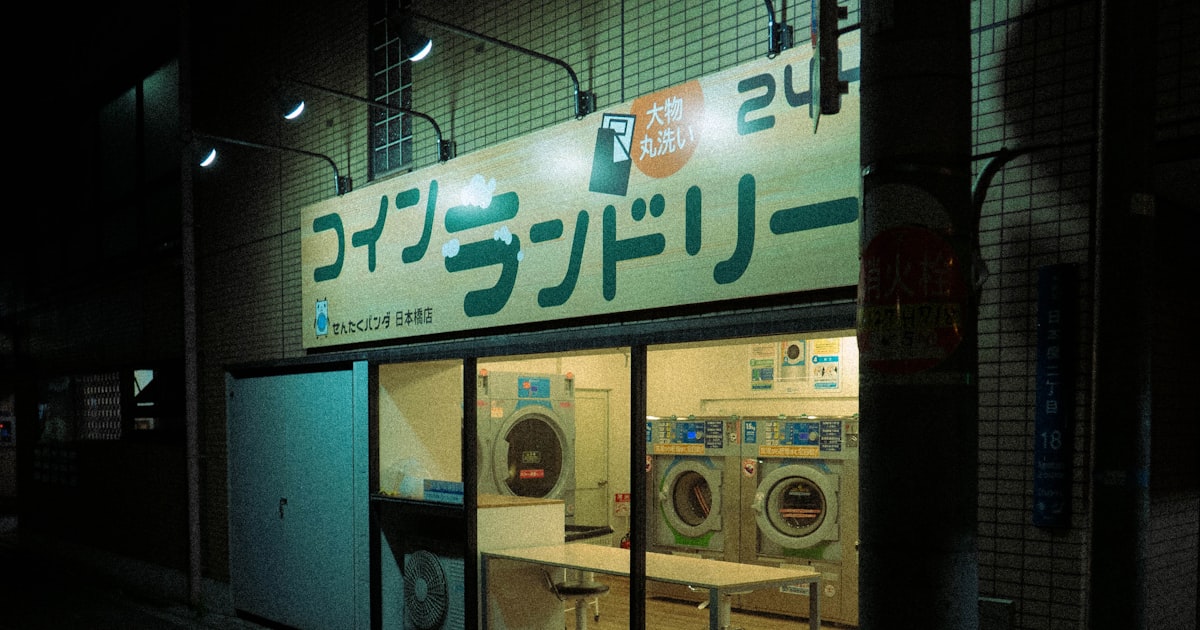
    A コインランドリー (koin randorī) is a self-service laundromat, and you’ll find one within a few blocks of almost any train station or residential neighborhood, even in small towns. They’re unstaffed, open 24 hours in most cases, and machines take coins (¥100 pieces are essential) or, increasingly, IC transit cards and PayPay.

    Typical pricing: a standard washer (7–8 kg) runs ¥300–500 per load, and larger washers (10–12 kg, useful for futon or several days’ worth of clothes) run ¥600–800. Dryers are coin-fed in blocks of time rather than one flat fee — expect ¥100 per 10–12 minutes, and Japanese dryers run cooler than American ones, so a full load of cotton clothing often needs 40–60 minutes (¥400–600) to get properly dry. Bring a stack of ¥100 coins; break larger bills at a convenience store first, since most machines don’t give change for anything bigger.

    Some coin laundries are stand-alone buildings; others are attached to a super sento bathhouse, so you can toss in a load, soak for 45 minutes, and come back to dry clothes — a genuinely efficient combo if you’re near one of the facilities in our guide to super sento. To find one, search “コインランドリー” or “laundromat” on Google Maps near your accommodation; the app’s Japanese-language listings are far more complete than English ones.

    Hotel and Ryokan Laundry Options

    Business hotel chains (Toyoko Inn, APA, Super Hotel, Route Inn) are the most laundry-friendly accommodation in Japan. Most have a small coin laundry room on one of the upper floors, priced the same as a standalone laundromat (¥200–300 wash, ¥100/10 min dry) and reserved for guests only, which means no wait and no lugging a bag down the street. It’s worth checking this when booking if laundry is a priority — it’s usually listed under hotel facilities.

    Mid-range and upscale hotels typically don’t have self-service machines but offer a send-out laundry service instead: you fill out a slip, bag your clothes, and get them back same-day or next-day, professionally washed and folded. This is priced per item, not per load — a T-shirt might be ¥300–500, a pair of trousers ¥500–800, and a jacket considerably more — so a full bag can easily run ¥3,000–5,000. It’s convenient but not a budget option; use it for a few key items rather than your whole wardrobe.

    Ryokan, including those in onsen towns like the ones covered in our Kinosaki Onsen guide, almost never have guest laundry machines, since stays are typically one or two nights and the whole point is not doing chores. If you’re settling into a ryokan town for several nights of onsen-hopping, do a load at a coin laundry before you arrive rather than trying to find one there.

    What to Buy (and What to Pack)

    Don’t bother bringing large bottles of detergent — it adds weight and you can buy everything you need cheaply once you land. Drugstores like Matsumoto Kiyoshi, Sundrug, and Daikoku, plus most supermarkets, sell single-use detergent pods (a box of 10–20 runs ¥300–500), travel-size bottles of liquid detergent, and mesh laundry bags (¥100–300) for delicates. Convenience stores (7-Eleven, Lawson, FamilyMart) carry a more limited selection but usually stock at least one small detergent option in a pinch.

    Two things worth packing from home: a small tube or capsule-style stain remover pen, since Japanese drugstores mostly stock spray-on stain treatments in Japanese-only packaging that’s hard to read on the fly, and a couple of flat rubber sink stoppers if you plan to hand-wash in your hotel sink — Japanese sinks don’t always have stoppers built in. A collapsible travel clothesline with suction hooks is genuinely useful, since drying space in hotel rooms is limited.

    Drying: The Part That Actually Trips People Up

    The biggest laundry mistake in Japan isn’t washing — it’s underestimating drying time. Japanese home and coin-laundry dryers are gentler and cooler than what many visitors are used to, so a load that would take 30 minutes elsewhere can take an hour. Budget the coins accordingly, or plan to dry heavier items (jeans, hoodies) overnight on a hotel towel rack or clothesline instead of paying for extra dryer cycles.

    Season matters a lot here. During Japan’s rainy season (tsuyu, roughly early June to mid-July) and the humid peak of summer — see our guide to Japan in summer — air-drying indoors barely works at all; humidity sits above 70% for weeks, and clothes hung in a room can take two days to dry and start to smell musty. In this window, pay for the full dryer cycle rather than trying to save a few hundred yen air-drying. In autumn and winter, indoor air is dry enough that hang-drying overnight works fine, and it’s the cheaper choice.

    Common Mistakes to Avoid

    Skipping detergent measurements: Japanese washers are usually smaller-capacity than what you’re used to, so a home-country “one scoop” habit can oversud a small drum. Follow the line markings on the machine or the pod instructions.

    Not carrying coins: many laundromats, especially older ones, only take ¥100 coins and don’t make change. Get a stack of ten to twenty coins in cash before you go, ideally from a convenience store register when you buy something small.

    Assuming ryokan or capsule hotels have machines: they usually don’t. If you’re island-hopping or doing a multi-day itinerary through somewhere remote like Yakushima or the Shikoku pilgrimage route, plan your laundry stop for the last city hotel before you head somewhere rural, not after.

    Budget vs. Splurge Summary

    Budget: self-service coin laundry, wash and dry yourself, roughly ¥700–1,200 total per load including coins and a pod of detergent. Mid-range: business hotel coin laundry room, similar pricing but with the convenience of doing it in-house overnight, useful if you’re arriving late after an overnight bus and want clean clothes waiting the next morning. Splurge: hotel valet service for a handful of items you want professionally pressed, at ¥300–800 per piece — reasonable for a business shirt before a meeting, expensive if you try to do your whole suitcase that way.