Japan Trove

Category: Getting Around

Trains, the shinkansen, IC cards, eSIMs, and getting from the airport — Japan transport made simple.

  • Kansai Airport (KIX) to Osaka, Kyoto & Nara

    Kansai Airport (KIX) to Osaka, Kyoto & Nara

    Landing at Kansai International Airport (KIX) for Kyoto, Osaka, or Nara? Getting from the airport into the city is easy once you know your options. Here’s the practical guide.

    KIX to Osaka

    • Nankai Rapi:t — a sleek limited express to Namba (~40 min).
    • JR Haruka / Kansai Airport Rapid — to Tennoji and Osaka Station.
    • Airport buses reach major hotels and areas directly.

    KIX to Kyoto

    • JR Haruka Express — the direct train to Kyoto Station (~75–80 min).
    • Look at the ICOCA & Haruka combo (discounted express + IC card) if it fits your plans.

    KIX to Nara

    Take the JR line via Tennoji, or an airport bus. Allow around 1.5 hours. See our Nara guide.

    Tickets & tips

    • Grab an IC card (ICOCA in Kansai) — it works on almost everything.
    • Reserve express seats at busy times; luggage space can be limited.
    • Consider luggage forwarding from the airport to your hotel to travel hands-free.
    • Set up an eSIM before you land so maps work immediately.

    Good to know

    • KIX is built on an artificial island — allow buffer time in bad weather.
    • Arriving at Osaka’s other airport (Itami/ITM)? It’s closer to the city, mainly domestic.
    • Plan the rest with our Osaka and Kyoto guides.

    Typical costs

    • Nankai Rapi:t to Namba costs around JPY 1,450 one-way (reserved seat); the regular Nankai limited express is cheaper at roughly JPY 970 but takes a bit longer.
    • JR Haruka to Kyoto runs about JPY 3,600 one-way in an unreserved seat, or less with the ICOCA & Haruka discount ticket aimed at overseas visitors.
    • Airport limousine buses run JPY 2,000-2,800 depending on destination and are a good option with heavy luggage or a hotel far from a train line.

    Common mistakes to avoid

    • Missing the last train — KIX train services thin out late at night; check the last Haruka/Rapi:t departure time if your flight lands after 9-10pm, or budget for a taxi or airport hotel.
    • Not checking which Osaka station you actually need — Namba, Shin-Osaka, and Osaka/Umeda are all separate hubs on different lines; confirm which one is closest to your hotel before choosing a route.
    • Assuming KIX and Itami (Osaka’s domestic airport) are interchangeable when booking connecting flights — they are a significant distance apart with no direct rail link between them.

    If you’re continuing onward

    Travelers heading straight to Kyoto or Nara without stopping in Osaka can go directly via JR without changing at Osaka Station, which saves both time and a transfer with luggage. If Kyoto is your first stop, see our 2-day Kyoto itinerary for how to spend the rest of arrival day.

    Late-night and early-morning arrivals

    If your flight lands very late or you have an early departure, staying at an airport-area hotel near KIX for one night is often cheaper and less stressful than rushing for the last train with jet lag and luggage. Several hotels run shuttle buses to the terminal, and this small buffer can save a rough, expensive taxi ride into Osaka or Kyoto after midnight.

    Traveling with young kids or heavy luggage

    Families and anyone with multiple large suitcases should lean toward the airport limousine bus or a taxi/private transfer over the train options, since KIX’s rail platforms involve stairs and walking that get harder with a stroller or several bags. If you are heading onward to Kyoto or Nara rather than stopping in Osaka, consider shipping bulky luggage ahead via takkyubin luggage forwarding from the airport counter so you travel light for the rest of arrival day.
  • How to Get Around Tokyo: Trains, Subway & IC Cards

    How to Get Around Tokyo: Trains, Subway & IC Cards

    Tokyo’s transport looks intimidating but is actually one of the easiest and most reliable systems in the world once you know the basics. Here’s how to get around the city with confidence.

    Start with an IC card

    Get a Suica or Pasmo (or use a mobile version) — tap in and out of any train, subway, or bus, and pay at konbini too. It removes all the ticket-buying hassle. See our IC card guide.

    Trains & subways

    • JR Yamanote Line — the green loop connecting major hubs (Tokyo, Shinjuku, Shibuya, Ueno). Your backbone.
    • Tokyo Metro & Toei subways — dense coverage for everywhere in between.
    • Use a maps app for the fastest route and platform/exit info — see our trains guide.

    Key survival tips

    • Note your exit name/number, not just the station — big stations have dozens of exits.
    • Avoid rush hour (roughly 7:30–9:30am, 5:30–7:30pm) if you can — trains get packed.
    • Stand on the correct side of escalators (left in Tokyo) and let passengers off first.
    • Keep quiet on trains and avoid phone calls.

    Other options

    • Taxis — clean and reliable but pricey; doors open automatically (no tipping — see tipping).
    • Walking — neighborhoods are dense and rewarding on foot.
    • Buses — useful in some areas; tap your IC card.

    Do you need the JR Pass in Tokyo?

    Usually no — a nationwide JR Pass rarely pays off for city-only travel; just use your IC card. Pair this with our Tokyo guide and 3-day itinerary.

    What a day of Tokyo transport costs

    • Most single subway/train rides within central Tokyo run JPY 170-320 depending on distance; a full day of sightseeing with several transfers typically totals JPY 1,000-1,500 on your IC card.
    • Tokyo Metro and Toei day passes (around JPY 800-900 combined) can pay off on a day with 5+ rides, but for most first-timers tapping an IC card per ride ends up simpler and similarly priced.
    • Taxis start around JPY 500-700 for the first kilometer or so and climb quickly — fine for a short late-night hop with luggage, expensive for anything cross-town.

    Common mistakes to avoid

    • Confusing similarly named stations — Tokyo has several stations with near-identical names in different areas; always check the line name and a couple of stops in each direction on your map app, not just the station name.
    • Standing on the wrong side of the platform — some lines share platforms for both directions; check the electronic board or ask, since boarding the wrong direction is an easy early mistake.
    • Trying to time a rush-hour ride with heavy luggage from the airport — route large-suitcase travel around 7:30-9:30am and 5:30-7:30pm if you can, or use the Narita Express/Skyliner and its luggage racks instead of a packed commuter line.

    Getting oriented fast

    If you only remember one thing, remember the Yamanote Line loop — nearly every major area worth visiting on a first trip (Tokyo, Ueno, Ikebukuro, Shinjuku, Shibuya) sits directly on it or a short transfer away. Pair this guide with our 3-day Tokyo itinerary to see how the areas connect in practice.

    Accessibility & traveling with luggage or a stroller

    Most central Tokyo stations have step-free elevator routes, though they are not always the most obvious path from the ticket gate — station staff will point you to the right elevator if you ask. Rush hour with a stroller or large suitcase is genuinely difficult; if you must travel with bulky luggage during the day, the Narita Express, Skyliner, or a taxi are more comfortable choices than a packed Yamanote Line car. See our accessible Japan guide for more on navigating with mobility needs.

    Apps and tools that actually help

    Google Maps handles Tokyo train routing well, including live platform and exit numbers, and works offline once cached if your eSIM connection drops underground. The Japan Official Travel App and each subway operator’s own app add fare and first/last train details that Google Maps sometimes lacks. Set your home country’s transit card off before you land so your phone doesn’t try to use it by mistake at the ticket gates.

  • Pocket WiFi vs eSIM in Japan: Which to Choose

    Pocket WiFi vs eSIM in Japan: Which to Choose

    Some links below are affiliate links. If you buy through them, Japan Trove may earn a small commission at no extra cost to you.

    Staying connected in Japan is easy — the question is pocket wifi or eSIM? For most travelers the answer is now clear. Here’s the honest comparison.

    Quick answer

    For solo travelers and couples with modern phones, an eSIM is usually cheaper, simpler, and nothing to carry or return. Pocket wifi still wins for families/groups sharing one connection, older phones, or if you need to connect laptops and cameras.

    eSIM — pros & cons

    • ✅ Cheap, instant (install before you fly), nothing to pick up or return.
    • ✅ Keeps your home number active for calls/texts.
    • ❌ Needs an eSIM-compatible, unlocked phone.
    • ❌ Only connects that one device (unless you hotspot).

    See our full best eSIM for Japan guide.

    Pocket wifi — pros & cons

    • ✅ Connects several devices at once — great for families and groups.
    • ✅ Works with any phone/laptop; often higher data allowances.
    • ❌ A device (and charger) to carry, keep charged, and return.
    • ❌ Everyone stays together (the wifi walks off with whoever holds it).
    • ❌ Usually pricier per person for solo travelers.

    Which should you pick?

    • Solo / couple, modern phone → eSIM.
    • Family or group sharing → pocket wifi (one rental covers everyone).
    • Old/locked phone or need laptop data → pocket wifi.
    • Heavy data user → compare unlimited plans on both.

    How to get each

    • eSIM: buy online and install before departure — compare on Klook .
    • Pocket wifi: reserve online, pick up at the airport, return by mail/airport drop.

    Whichever you choose, pair it with an IC card and our first-timer tips.

    What each option actually costs

    • eSIM: unlimited or high-data plans for a 1-2 week trip typically run JPY 1,500-4,000 total per person, activated instantly online before departure.
    • Pocket wifi: a similar-length rental runs JPY 500-1,200 per day, so a 7-day trip lands around JPY 3,500-8,000 for the device — but that single cost covers everyone sharing it, which changes the math fast for a family of four.
    • Break-even point: for solo and couple trips, eSIM is almost always cheaper; for groups of three or more sharing one device, pocket wifi frequently comes out ahead per person.

    Common mistakes to avoid

    • Buying an eSIM without checking phone compatibility first — older or carrier-locked phones (especially some purchased on installment plans) can’t install a second eSIM profile; check your phone’s settings for eSIM support before buying.
    • Forgetting to return pocket wifi on time — most rentals require drop-off at the airport or a postbox before a specific date, and late fees can add up if you lose track of the return window during a busy final travel day.
    • Assuming free airport or station wifi will cover your needs — it’s inconsistent and often requires repeated re-registration, making it a poor primary solution for a full trip.

    A quick decision shortcut

    If you’re traveling alone or as a couple with unlocked modern phones (iPhone XS or newer, most recent Android flagships), buy an eSIM before you fly and skip pocket wifi entirely. If you’re traveling with kids, older relatives, or need to keep a laptop connected on the road, a single pocket wifi rental removes the hassle of managing multiple individual data plans.

    Combining both for a longer trip

    Some travelers on trips longer than two weeks buy a cheap eSIM for personal use while also renting pocket wifi during a specific stretch (like a multi-day group tour) where several devices genuinely need to connect at once — the two options aren’t mutually exclusive if your trip has distinctly different phases.

  • Luggage Forwarding in Japan (Takkyubin): Travel Hands-Free

    Luggage Forwarding in Japan (Takkyubin): Travel Hands-Free

    One of Japan’s best-kept travel secrets: send your suitcase ahead and travel hands-free. It’s called takkyubin, and once you try it you’ll never lug bags up station stairs again.

    What is takkyubin?

    A cheap, ultra-reliable courier service (Yamato’s “Ta-Q-Bin” is the famous one, with a black-cat logo) that forwards luggage hotel-to-hotel, airport-to-hotel, or hotel-to-airport — usually next day.

    Why travelers love it

    • No wrestling bags on crowded trains or up stairs.
    • Shinkansen-friendly — avoid the oversized-luggage reservation hassle on the bullet train.
    • Day-trip freedom — send your suitcase ahead and explore a stopover city with just a daypack.
    • Reliable — Japan’s couriers are famously punctual and careful.

    How to use it

    1. Ask your hotel front desk — most handle takkyubin directly.
    2. Fill in a slip with the destination hotel’s address (they can help).
    3. Pay a few thousand yen per bag; hand it over by the daily cut-off.
    4. Your bag arrives at the next hotel, usually the next day.

    Also available at

    • Konbini and airport counters (great for airport-to-hotel on arrival).
    • Cold/frozen forwarding exists too — handy for food souvenirs.

    Smart ways to use it

    • Overnight bag trick: forward the big suitcase, keep one night’s essentials in a daypack.
    • Send souvenirs ahead to the airport so you’re not overweight at check-in.
    • Allow 1–2 days — it’s not instant, so plan cut-offs around your route.

    Travel light and love Japan more. Pair with our packing list and train guide.

    Costs & timing at a glance

    Expect roughly 1,500–2,500 yen per medium suitcase between cities, depending on size and distance, with most deliveries arriving the next day. Same-day is not guaranteed, so send bags a day ahead of when you’ll need them. Airport-to-hotel on arrival (and hotel-to-airport before departure) is one of the most useful uses — you land or fly out hands-free.

    Forwarding vs coin lockers

    For a few hours between check-out and check-in, station coin lockers (payable by IC card) are cheaper and instant. For moving bags to your next city or skipping the crowded shinkansen luggage shuffle, forwarding wins.

    Common mistakes to avoid

    • Sending a bag the same day you need it at the destination — takkyubin is reliable but not instant; next-day delivery is standard, so plan a one-night buffer, especially for a hotel-to-hotel forward on a tight multi-city schedule.
    • Missing the daily cut-off time — most hotel front desks and konbini counters have a specific afternoon cut-off (often 3-5pm) for next-day delivery; missing it can push arrival back an extra day.
    • Forwarding a bag you’ll need before it arrives — always keep a full night’s essentials (medication, chargers, a change of clothes) in your daypack rather than assuming the timing will work out exactly.

    Using it for more than luggage

    Beyond suitcases, takkyubin handles oversized sports equipment (ski gear, golf clubs), boxed souvenirs too bulky to carry, and even chilled or frozen regional food purchases — a genuinely useful service if you’ve bought fresh seafood or perishable regional specialties and want them to arrive home (or at your next hotel) properly refrigerated rather than carried in a bag all day.

    International shipping versus domestic forwarding

    It’s worth noting that standard takkyubin only moves items within Japan — if you want to ship purchases directly overseas, that’s a separate international shipping service (sometimes offered by the same courier company, sometimes not) with different pricing and customs paperwork, so don’t assume the domestic hotel-to-hotel service extends to your home country’s address.

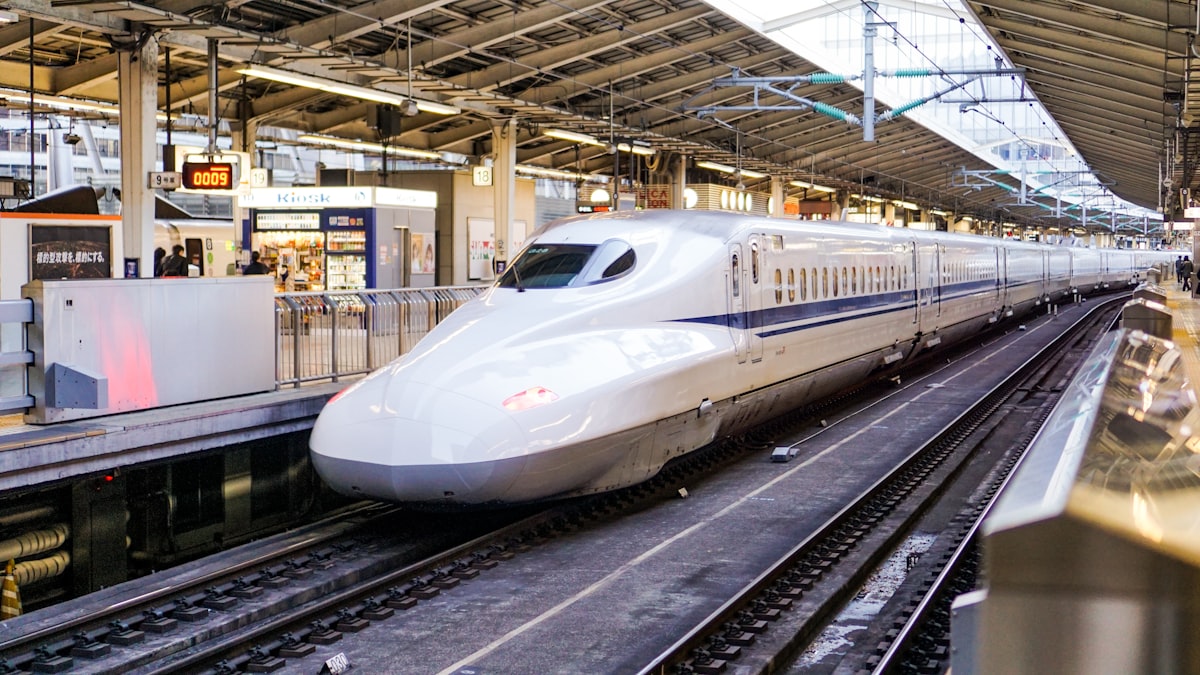
  • Tokyo to Kyoto by Bullet Train: The Complete Guide

    Tokyo to Kyoto by Bullet Train: The Complete Guide

    Some links below are affiliate links. If you book through them, Japan Trove may earn a small commission at no extra cost to you.

    The bullet train from Tokyo to Kyoto is a rite of passage — fast, smooth, and with a chance to spot Mt. Fuji from your seat. Here’s exactly how to do it.

    The basics

    • Time: about 2 hours 15 minutes on the fastest trains.
    • Line: the Tokaido Shinkansen, from Tokyo Station (or Shinagawa) to Kyoto Station.
    • Trains: Nozomi (fastest), Hikari (slightly slower, covered by the JR Pass), and Kodama (all-stops).

    Nozomi vs Hikari — which to take

    Nozomi is fastest but not covered by the standard Japan Rail Pass. If you have the pass, take a Hikari (only ~15 minutes slower). Paying cash? Nozomi is fine and runs most frequently.

    Reserved vs non-reserved seats

    • Non-reserved cars are cheaper and fine off-peak — just queue on the platform.
    • Reserved is worth it during holidays and busy seasons like cherry blossom time.
    • Green Car (first class) has roomier seats for a premium.

    Get the Fuji view

    Sit on the right-hand (D/E) side heading from Tokyo to Kyoto for the best Mt. Fuji view, roughly 40–45 minutes in. On clear days it’s spectacular.

    How to buy tickets

    • Ticket machines and JR ticket offices at the station (English available).
    • Reserve online in advance for peace of mind — handy at peak times. Compare rail options and passes on Klook .
    • Have an IC card for the local trains at each end.

    Pro tips

    • Grab an ekiben (station bento) before boarding — a classic shinkansen ritual.
    • Oversized luggage needs a reserved spot; otherwise use luggage forwarding to travel light.
    • Stay connected with an eSIM.

    Arriving in Kyoto? Jump to our Kyoto guide and where to stay.

    What the ride typically costs

    • An unreserved Nozomi seat Tokyo-Kyoto runs about JPY 13,320 one-way; a reserved seat adds a few hundred yen more, and Green Car (first class) runs roughly JPY 18,000-19,000.
    • Booking through official channels or reliable ticket machines avoids markup — there’s no meaningful discount for advance purchase on standard fares the way there might be for flights, so timing your purchase doesn’t change the price much.
    • An ekiben lunch (JPY 900-1,800) and a canned coffee or tea (JPY 130-160) round out a comfortable one-way trip budget without needing to plan a separate meal stop.

    Common mistakes to avoid

    • Boarding a Nozomi with a nationwide JR Pass — this is one of the most common and costly mistakes pass holders make; the standard Japan Rail Pass explicitly excludes Nozomi and Mizuho trains, and staff will require an upgrade payment or redirect you to a Hikari if you board by mistake.
    • Standing in line for a popular non-reserved car during a holiday weekend — non-reserved cars can fill to standing room during Golden Week, Obon, or New Year; reserving a seat in advance for these dates is worth the small extra step.
    • Missing the Fuji viewing window because you’re absorbed in a phone or laptop — the mountain is visible for only a few minutes around the 40-45 minute mark from Tokyo; a phone reminder timed to departure helps you look up at the right moment.

    What to do if it’s cloudy

    Since Fuji is often obscured, don’t build your whole trip’s excitement around the shinkansen sighting alone — treat it as a nice bonus on top of a dedicated Fuji-area stop like Kawaguchiko or Hakone, where you have more time and multiple chances across a stay to catch a clear view.

    Making a short stopover along the way

    The Tokaido Shinkansen passes through Nagoya, making it easy to break the Tokyo-Kyoto journey with a half-day stop if you have the time and a flexible ticket — see our Nagoya guide for what a quick stopover there can add to an otherwise point-to-point train ride.

  • How to Use Japanese Trains: A Simple Guide for Tourists

    How to Use Japanese Trains: A Simple Guide for Tourists

    Some links below are affiliate links. If you buy through them, Japan Trove may earn a small commission at no extra cost to you.

    Japan’s trains are fast, punctual, and cover almost everywhere — and once you know the basics, they’re the best way to get around. Here’s a simple guide to riding them with confidence.

    The types of train

    • Local & rapid — city and suburban trains; tap in with an IC card.
    • Limited express — faster regional trains, sometimes needing a reserved seat.
    • Shinkansen (bullet train) — long-distance; buy a ticket (and optionally reserve a seat).
    • Subways & private railways — run by different companies but the same IC card works.

    The easiest way to pay: an IC card

    Get a Suica or Pasmo (or add one to your phone). Tap in at the gate, tap out at your destination, and the fare is calculated automatically. It also works on buses and at konbini.

    Finding your train

    • Use Google Maps — it shows the exact line, platform, departure time, and even which car to board.
    • Follow the colored line signs; stations are well-marked in English.
    • Check the train type on the platform board — a “rapid” or “express” may skip your stop.

    Shinkansen basics

    • Buy at a ticket machine or counter; you can also reserve online.
    • Non-reserved cars are cheaper and fine off-peak; reserve seats for busy times and with luggage.
    • Note the fastest Nozomi/Mizuho trains aren’t covered by the nationwide pass — check the JR Pass guide.

    Etiquette

    Keep quiet, set your phone to silent, queue on the platform markings, let people off first, and keep backpacks off your back in crowds. More in our etiquette guide.

    Handy tips

    • Luggage forwarding (takkyubin) saves hauling big bags on transfer days.
    • Rush hours (roughly 7–9am, 5–7pm) are packed — avoid if you can.
    • Get an eSIM so maps and times are always to hand.

    Ready to plan the route? Start with the 7-day itinerary.

    What train travel typically costs

    • Local and rapid train fares within a city run JPY 150-400 per ride, while limited express reserved seats add a modest surcharge (JPY 500-1,500) on top of the base fare for regional trips.
    • A shinkansen reserved seat typically costs a few hundred yen more than non-reserved, a small price for guaranteed seating during busy travel periods.
    • An IC card requires a refundable deposit (usually JPY 500 for a physical card) that’s returned when you cancel the card before leaving Japan — mobile IC cards on a compatible phone skip this deposit entirely.

    Common mistakes to avoid

    • Boarding a rapid or express train without checking if it skips your stop — these skip smaller stations to save time; the platform board and train livery usually indicate the service type, but double-checking with a maps app before boarding prevents an accidental overshoot.
    • Assuming every station is equally simple — large interchange stations (Shinjuku, Tokyo, Osaka) can require a genuine 10-15 minute walk between platforms on different lines; build transfer buffer time into any tight connection.
    • Standing near the doors during boarding without letting passengers off first — this is one of the most visible etiquette breaches for first-time visitors and slows down the whole platform.

    Reading a Japanese train platform board

    Most boards display the train type (local, rapid, express), departure time, and final destination, usually with an English toggle at major stations — learning to read just these three fields, even without full station name recognition, is often enough to confidently confirm you’re boarding the right train.

    Traveling with large luggage

    Rush-hour commuter trains and large suitcases are a genuinely difficult combination — if you must travel during peak hours with heavy bags, consider a limited express or shinkansen with dedicated luggage space instead of a standard commuter line, or shift your travel time by even 30-60 minutes to avoid the worst of the crowd.

  • Suica vs Pasmo: Which IC Card to Get (and How)

    Suica vs Pasmo: Which IC Card to Get (and How)

    Some links below are affiliate links. If you book through them, Japan Trove may earn a small commission at no extra cost to you.

    An IC card is the single most useful thing you’ll get in Japan. Tap it to ride any train, subway, or bus, and use it to pay at convenience stores, vending machines, and lots of shops. Here’s how Suica, Pasmo, and the tourist versions compare.

    Suica vs Pasmo — what’s the difference?

    Honestly, almost none. Both are rechargeable tap cards that work nationwide on nearly all transit and at the same shops. Suica is run by JR East, Pasmo by the private railways. Pick whichever you can get first.

    Mobile Suica/Pasmo — the best option for many

    If you have an iPhone (or Apple Watch), you can add a Suica or Pasmo straight into Apple Wallet and top it up with your credit card — no physical card, no queue, no deposit. This is often the easiest route for visitors. Some Android/Google Pay setups support it too, depending on region.

    Physical cards for tourists

    Due to a chip shortage, standard plastic Suica/Pasmo have had limited availability at times. Tourist versions to look for:

    • Welcome Suica — no deposit, valid 28 days, for visitors.
    • Pasmo Passport — similar tourist card.

    You buy these at airport stations and major terminals. If mobile Suica works on your phone, though, you may not need a physical card at all.

    How to use it

    • Top up at any station machine (cash) or, on mobile, with your card.
    • Tap in and out at train gates — it calculates the fare automatically.
    • Pay at konbini by saying the card name and tapping.

    Do you still need a rail pass?

    IC cards handle city travel and short hops perfectly. For long-distance Shinkansen trips, that’s a separate decision — see whether the JR Pass is worth it. For everything else, an IC card plus an eSIM covers your day-to-day. New to Japan? Start with our first-timer tips.

    What an IC card typically costs

    • A physical Suica or Pasmo requires a JPY 500 deposit (refunded when you return the card before leaving Japan, along with any remaining balance minus a small handling fee).
    • Mobile Suica/Pasmo through Apple Wallet has no deposit at all, and top-ups happen instantly via your linked credit card rather than requiring a station machine.
    • Welcome Suica and Pasmo Passport tourist cards skip the deposit but expire after a fixed period (typically 28 days), after which any remaining balance is simply lost — fine for a single trip, but worth knowing if you’re a repeat visitor who might want a card usable across future trips.

    Common mistakes to avoid

    • Buying a physical card unnecessarily when mobile Suica would work — if you have a compatible iPhone, setting up Mobile Suica before you land is genuinely faster and avoids ever needing to find a card issuing machine or queue at the airport.
    • Forgetting to refund a physical card’s deposit before departure — station service counters (not ticket machines) process the deposit-and-balance refund, and this isn’t available at every station, so plan the return for a major hub before your final departure.
    • Assuming a low balance will always work — while it’s largely true that IC cards handle any short trip fare, an insufficient balance at some gates can trigger a stop; keeping a small buffer (JPY 1,000+) avoids this friction.

    Using your IC card beyond trains

    Nearly every konbini, many vending machines, and a growing number of restaurants and shops accept IC card taps for payment, not just transit — treating it as a general-purpose tap-to-pay card for small purchases throughout the day, not only for train fares, makes it even more valuable during a trip.

    What happens if your card gets lost

    A registered (named) physical Suica or Pasmo can have its remaining balance transferred to a replacement card if lost, while an anonymous or mobile card generally cannot be recovered the same way — registering your card at purchase, where offered, is a small extra step worth taking if you’re loading a significant balance.

  • Narita & Haneda to Tokyo: How to Get into the City

    Narita & Haneda to Tokyo: How to Get into the City

    Some links below are affiliate links. If you book through them, Japan Trove may earn a small commission at no extra cost to you.

    Tokyo has two airports, and they’re very different distances from the city. Here’s the simple guide to getting from Narita and Haneda into central Tokyo without overpaying or getting lost.

    From Haneda (close — 30–45 min)

    Haneda is the closer, easier airport. Best options:

    • Keikyu Line / Tokyo Monorail — cheap and fast to Shinagawa/Hamamatsucho, then connect on the Yamanote line. Tap in with a Suica/Pasmo.
    • Airport Limousine Bus — direct to major hotels; great with luggage.
    • Taxi — reasonable at night if you’re a group heading to a central hotel.

    From Narita (far — 60–90 min)

    Narita is ~60 km out, so the transfer matters more:

    • Keisei Skyliner — fastest to Ueno/Nippori (about 40 min); buy discounted tickets in advance.
    • Narita Express (N’EX) — direct to Tokyo, Shibuya, Shinjuku, Yokohama; comfortable with big bags.
    • Airport Limousine Bus — door-to-hotel, no transfers.
    • Budget buses — cheapest to Tokyo Station if you’re watching every yen.

    You can pre-book Skyliner, N’EX, and bus tickets in English (often discounted) on Klook , which saves queueing at the airport counter.

    Which to choose

    • Light bags, want cheapest: trains + IC card.
    • Lots of luggage / late arrival: Limousine Bus or taxi straight to the hotel.
    • Narita to west Tokyo (Shinjuku/Shibuya): N’EX; to Ueno/Asakusa: Skyliner.

    Before you land

    Have your eSIM active so maps work immediately, know which neighborhood your hotel is in, and grab an IC card at the station. Then you’re ready for the 7-day itinerary.

    What each option typically costs

    • From Haneda, the Keikyu Line/Tokyo Monorail runs JPY 300-700 depending on your final destination, while an airport limousine bus runs JPY 1,200-1,500 to major hotel areas.
    • From Narita, the Skyliner runs about JPY 2,570 one-way to Ueno (discounted further with advance online booking), the Narita Express runs JPY 3,250-4,000 depending on destination, and budget buses can run as low as JPY 1,300-2,000 to Tokyo Station.
    • A taxi from Narita into central Tokyo runs JPY 20,000-25,000, dramatically more than any train option — reasonable only for very late arrivals with no other option or a large group splitting the cost evenly.

    Common mistakes to avoid

    • Assuming Narita and Haneda are interchangeable for planning purposes — the distance and cost difference is substantial; always confirm which airport your specific flight uses well before arrival, since assuming Haneda’s shorter transfer time when you’re actually flying into Narita can throw off tight connection plans.
    • Not pre-booking discounted Skyliner or N’EX tickets — online advance booking through official sites or platforms like Klook is often meaningfully cheaper than buying at the airport counter, and it also skips the ticket queue on arrival.
    • Choosing the cheapest bus option with heavy luggage and a late-night arrival — budget buses take longer and have less frequent departures late at night; the extra cost of a faster train option is often worth it when you’re jet-lagged and eager to reach your hotel.

    Timing your arrival transfer

    Both airports’ fastest train services (Skyliner, N’EX, Keikyu) run less frequently late at night, so a flight landing after 9-10pm may face longer waits or a switch to a taxi or airport hotel — checking the last train departure time for your specific route before booking flights avoids an unwelcome late-night surprise.

    Connecting between the two airports

    If your itinerary requires flying into one Tokyo airport and departing from the other, budget at least 90 minutes to two hours for the direct airport-to-airport bus, longer if you’re routing through the city instead — this connection is often overlooked when booking separate one-way flights into and out of Tokyo.

  • Best eSIM for Japan (2026): Airalo vs Holafly vs Pocket Wi-Fi

    Best eSIM for Japan (2026): Airalo vs Holafly vs Pocket Wi-Fi

    Some links below are affiliate links. If you buy through them, Japan Trove may earn a small commission at no extra cost to you.

    Japan is not a place you want to land without data — you’ll need maps, train apps, and translation from minute one. The easiest fix in 2026 is an eSIM: you install it before you fly and your phone connects the moment you touch down, no picking up a pocket Wi-Fi at the airport. Here’s how the main options compare.

    eSIM vs pocket Wi-Fi vs physical SIM

    • eSIM — best for most solo travelers and couples. Instant, cheap, nothing to return.
    • Pocket Wi-Fi — best for families or groups sharing one connection, or if your phone doesn’t support eSIM.
    • Physical SIM — fine, but you have to swap your home SIM and can’t receive normal texts/calls on it.

    First, check your phone supports eSIM (most iPhones since XS and recent Pixel/Galaxy do) and is carrier-unlocked.

    The main eSIM providers for Japan

    Airalo

    The biggest global eSIM store. Cheap data-only plans, huge range of sizes, and a clean app. Great value if you’re a light-to-moderate data user. → Airalo

    Holafly

    Known for unlimited-data plans and 24/7 support. Costs more than Airalo per day, but if you stream, tether, or just don’t want to think about running out, it’s the stress-free pick. → Holafly

    Ubigi & Sakura Mobile

    Ubigi offers strong native-network speeds; Sakura Mobile is a Japan-specialist with English support and both eSIM and pocket Wi-Fi. → Sakura Mobile

    How much data do you actually need?

    • Light (maps, messaging, occasional browsing): ~1 GB per 3–4 days.
    • Typical tourist: ~3–5 GB per week.
    • Heavy (video, tethering a laptop, lots of uploads): unlimited plan.

    Set-up tip

    Install and activate the eSIM before you leave home, but set it to turn on when you arrive (the app explains this). That way you’re connected at the airport without burning data early. Turn on data roaming for the eSIM line and set it as your data line, keeping your home number for texts.

    With data sorted, plan the rest of the trip: our 7-day Japan itinerary, whether the JR Pass is worth it, and where to stay in Tokyo.

    What each option typically costs

    • Airalo’s data-only plans for Japan run roughly $4.50-$25 depending on data size (1GB to 20GB), among the cheapest options for light-to-moderate users.
    • Holafly’s unlimited plans run roughly $19-$60 depending on trip length, a flat rate that removes any need to monitor usage — worth the premium specifically for heavy streamers or anyone tethering a laptop.
    • Pocket Wi-Fi rentals run roughly $5-$10/day, which becomes cost-competitive with individual eSIMs once you’re splitting one device across 3+ people in a family or group.

    Common mistakes to avoid

    • Installing but not activating the eSIM correctly before departure — most providers require you to install the profile ahead of time but leave the actual data plan inactive until arrival; check your specific provider’s activation instructions rather than assuming it works identically to a previous trip elsewhere.
    • Forgetting to set the new eSIM as your primary data line — your phone may default to trying your home SIM for data (incurring roaming charges) unless you specifically switch the data line setting after installing the eSIM.
    • Buying too little data for a longer trip assuming light usage — offline map caching, translation apps, and photo backups all consume more data than pure messaging; err slightly higher than your first estimate, especially for trips over a week.

    Backup options if your eSIM has issues

    Free wifi at konbini, train stations, and many cafes can serve as an emergency backup if an eSIM fails to activate on arrival, though it’s inconsistent enough that it shouldn’t be your primary plan — keeping your eSIM provider’s support chat or email accessible (via that same wifi) is the fastest way to resolve activation problems on the ground.

    Choosing between multiple short trips and one long one

    If you’re visiting Japan multiple times in a year or making a single extended trip, comparing the per-day cost of a longer unlimited plan against buying several smaller data packages separately can reveal meaningful savings one way or the other — worth a quick calculation specific to your provider’s pricing tiers before defaulting to whichever plan size looks simplest.