Japan Trove

Category: Travel

Practical, up-to-date guides for traveling in Japan — itineraries, rail passes, eSIMs, where to stay, seasonal timing, etiquette, and the local know-how that makes a trip smoother. Written with real Japanese sources so you get the answer that actually works on the ground, not the recycled tourist one.

  • Taking a Local Fishing Boat Charter in Japan: Booking a Half-Day Trip as a Tourist

    Taking a Local Fishing Boat Charter in Japan: Booking a Half-Day Trip as a Tourist

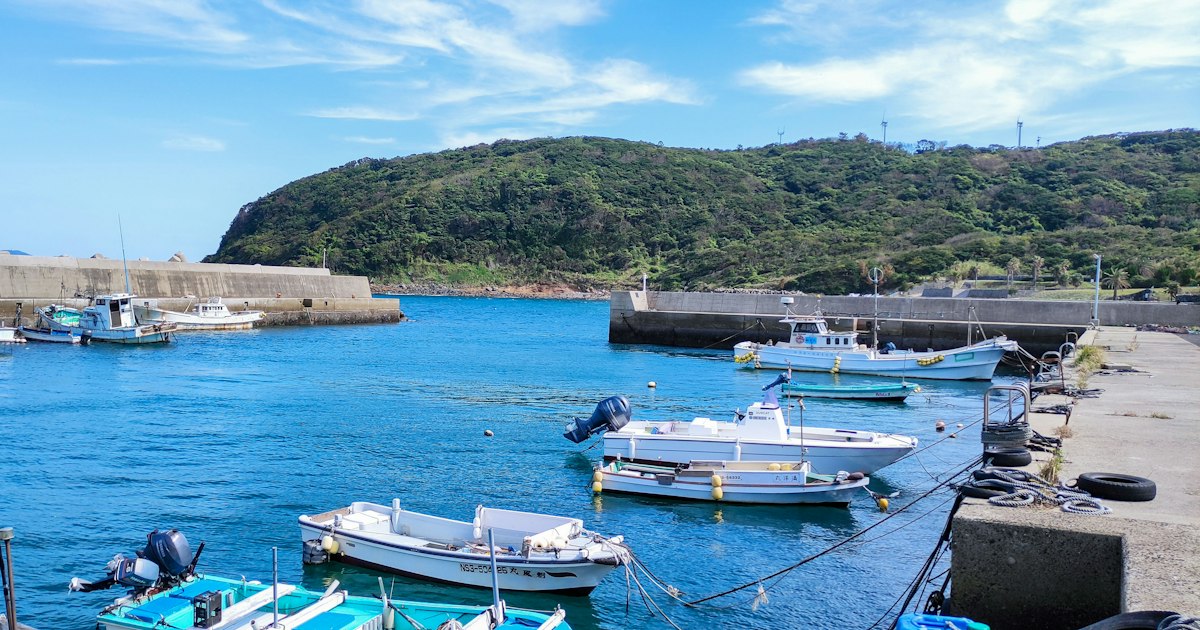
    Photo by Keisuke Kuribara on Unsplash

    Most visitors to Japan see the ocean from a train window or a ferry deck, but chartering a local fishing boat puts you on the water with someone who actually knows where the fish are. It’s one of the few travel experiences in Japan that’s both genuinely local and surprisingly easy to book, even with no Japanese and no fishing experience. Here’s how half-day charters actually work, what they cost, and the mistakes that trip up first-timers.

    What a “half-day charter” actually means

    In Japanese, this kind of trip is usually advertised as chibune (小舟, small boat) or yagyu-sen fishing charters, though you’ll most often find them listed simply as “釣り船” (tsuribune, fishing boat) on booking sites. A half-day trip typically runs 4-5 hours, split into morning (asa-mawari, roughly 6:00-11:00) and afternoon (hiru-mawari, roughly 12:00-17:00) slots, depending on tides and the port. Full-day trips exist too, but half-day is the sweet spot for tourists — long enough to actually catch something, short enough to leave you an afternoon or morning free for everything else on your itinerary.

    Boats fall into two categories: group charters (noriai), where you join other anglers on a shared boat for a fixed per-person price, and private charters (kashikiri), where you book the whole boat for your group. Group charters are cheaper but less flexible on timing; private charters cost more but the captain will often tailor the trip to what you want to catch.

    How much it costs

    Prices vary by region and target fish, but as a rule of thumb:

    • Budget (¥8,000-12,000 per person): Group charter targeting easy species like aji (horse mackerel), kisu (sillago), or squid, departing from a smaller regional port. Rod rental and bait usually add ¥1,000-2,000.
    • Mid-range (¥15,000-25,000 per person): Group or small private charter for tai (sea bream), kawahagi (filefish), or light jigging trips near Tokyo Bay, Sagami Bay, or the Seto Inland Sea.
    • Splurge (¥60,000-120,000 for the whole boat, 2-6 people): Private charter for offshore jigging, tuna, or kingfish, often including all gear, ice, and sometimes a crew member who fillets your catch at the dock.

    Rod and reel rental (rentaru tackle) generally runs ¥1,500-3,000 for a half-day set. Life jackets are mandatory and almost always included free. Bait (esa) is often a separate small charge, ¥500-1,500, paid in cash at the shop before boarding.

    Booking as a non-Japanese speaker

    This is the part that scares people off unnecessarily. Most working fishing ports have at least one or two shops with online booking, and increasingly these support English:

    • Umitsuri Goo (uotsuri.net) and Tsuribune.net are Japanese-language aggregators, but you can plug a port name into Google Translate’s camera mode to navigate them, or just call and say “English OK?” — many captains who work near resort towns (Izu, Kamakura, Okinawa) have fielded tourist calls before.
    • In tourist-heavy areas like Okinawa, Izu, and Kanazawa, English-language charter operators cater specifically to foreign visitors and list directly on their own sites or through activity marketplaces.
    • Hotel concierges in coastal towns can often call and book on your behalf — this is genuinely one of the most reliable methods, and worth trying even at a mid-range business hotel.
    • If you’re already using YAMAP for hiking, note it doesn’t cover marine activities, but the same instinct — searching for activity-specific Japanese apps rather than English ones — applies here too.

    Whichever route you use, book at least 3-5 days ahead in peak season (July-September) and 1-2 weeks ahead for popular tuna or kingfish charters, which fill up with repeat local customers.

    Best season and timing

    Japan’s coastal fishing calendar varies by species and region, but general patterns hold:

    • Spring (March-May): Sea bream (tai) and squid season around Honshu’s Pacific coast; mild seas, good for beginners.
    • Summer (June-August): Aji, kisu, and light jigging for bonito; hot but calm mornings. Avoid booking during Obon week in mid-August, when both boats and lodging near ports get booked solid by domestic travelers.
    • Autumn (September-November): Widely considered peak season for flavor and variety — kawahagi, tachiuo (needlefish), and the start of winter tai runs.
    • Winter (December-February): Rougher seas on the Pacific side but excellent on the sheltered Seto Inland Sea and in Kyushu; this is prime season for amberjack and buri.

    Morning departures almost always outperform afternoon ones for both weather and fish activity. If you’re prone to seasickness, ask specifically whether the trip stays in a bay (wan-nai) versus open water (gaiyo) — bay trips are calmer and better for a first charter.

    What to bring and what mistakes to avoid

    • Don’t skip seasickness medicine. Take it the night before and again an hour before departure, even if you’ve never been seasick — small fishing boats pitch far more than ferries.
    • Don’t wear street shoes. Boat decks get wet and fishy; non-slip deck shoes or old sneakers are expected, and some boats have a no-shoes, provided-slippers policy similar to the indoor rule covered in our toire surippa guide — ask before boarding rather than assuming.
    • Don’t forget cash. Many smaller port shops still don’t take cards; bring enough for the charter fee, rental, bait, and ice for your catch.
    • Don’t assume you keep everything you catch. Some charters expect you to release undersized fish per local regulations, and a few deduct a small cleaning/bagging fee if you want your catch filleted at the dock.
    • Do confirm the pickup point. “The harbor” can mean several different piers; captains usually text or call the morning of to confirm, so make sure you’ve given a number that works in Japan or arranged Wi-Fi calling.
    • Pack light outerwear even in summer — it’s noticeably colder and windier on open water than on land, similar to how packing for thin-walled ryokan rooms (see our guide on sleep masks and earplugs for hotel rooms) is about preparing for conditions you don’t expect from a glossy brochure.

    Where to base yourself

    You don’t need to be near a major city to find a good charter — in fact, smaller ports often have more availability and lower prices. Good regions to center a trip around include Izu Peninsula and Sagami Bay (easy day trip from Tokyo), the Seto Inland Sea around Hiroshima and Matsuyama, Okinawa’s reef-fishing charters, and Kyushu’s coast near Fukuoka or Nagasaki. If you’re already routing through Kyushu by rail, it’s worth grabbing supplies before boarding — our rundown of JR Kyushu station snacks covers easy options for an early departure when port-side shops aren’t open yet.

    A half-day charter won’t fit every itinerary, but if you’ve got a free morning near any coastal town, it’s a low-risk way to spend a few hours with a local captain, come back with dinner, and see a side of Japan that most tourist itineraries never touch.
  • Shinjuku Gyoen vs Yoyogi Park: Picking the Right Tokyo Park for Your Day

    Shinjuku Gyoen vs Yoyogi Park: Picking the Right Tokyo Park for Your Day

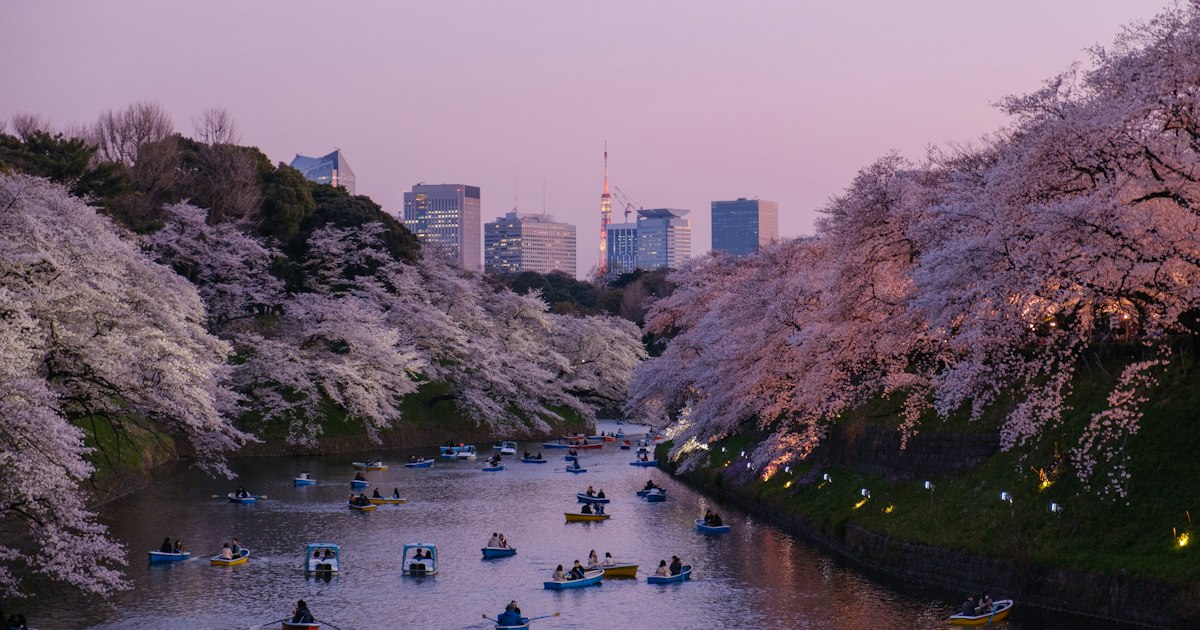
    Photo by Yu Kato on Unsplash

    Tokyo has dozens of parks, but two keep landing on every first-timer’s list: Shinjuku Gyoen and Yoyogi Park. They’re only about 2 km apart, yet they couldn’t feel more different once you’re inside. One is a manicured, ticketed garden where you can’t crack open a beer; the other is a free, anything-goes lawn where drum circles and picnic blankets take over every weekend. Here’s how to tell them apart and pick the right one for the day you actually have planned.

    Shinjuku Gyoen at a Glance

    Shinjuku Gyoen is a former imperial garden split into three distinct styles: a French formal garden with rose beds, an English landscape garden of open lawns and mature trees, and a traditional Japanese garden with ponds, a teahouse, and carefully pruned pines. There’s also a greenhouse with tropical and subtropical plants, which is a nice detour on a rainy or cold day.

    • Hours: 9:00–16:30, last entry 16:00 (hours are sometimes extended to around 18:00 during peak cherry blossom season — check the official site before you go).
    • Closed: Mondays (or Tuesday if Monday is a public holiday), plus a year-end closure from December 29 to January 3.
    • Admission: 500 yen for adults, 250 yen for students, free for young children. Buy at the gate or via the ticket machines — no reservation needed for regular visits.
    • Rules: No alcohol, no ball games, no large tarps or group sports gear. Small picnic blankets are fine.

    The payoff for the ticket and the rules is space that never feels mobbed, even on a busy Saturday, and three totally different garden moods within a single walk.

    Yoyogi Park at a Glance

    Yoyogi Park is a big, free, unticketed city park next to Harajuku and Meiji Jingu. There’s no entry fee and no closing gate on the main paths, though some fenced sections close in the evening. It’s the park where Tokyo actually relaxes: joggers, dog walkers, skateboarders, salsa dancers, and groups sharing convenience-store beers on tarps spread across the lawn.

    • Hours/Admission: Free, no fixed closing time for the open areas.
    • Atmosphere: Casual and loud in a good way — alcohol is allowed, music and street performance are common, and on weekends you’ll often stumble into a flea market, food truck gathering, or an event like Earth Day Tokyo in April.
    • Nearby: Meiji Jingu shrine forest is a two-minute walk, and Takeshita Street / Harajuku’s shopping is right next door.

    Which Park Fits Your Day

    Choose Shinjuku Gyoen if you want a quiet, photogenic walk, you’re visiting during cherry blossom or autumn leaf season and want to avoid the biggest crowds, or you’re combining the visit with shopping and dining in Shinjuku. It also pairs well with a slower, more reflective pace — think of it as the garden equivalent of a proper sit-down meal.

    Choose Yoyogi Park if you want a free, flexible stop you can duck into for twenty minutes or three hours, you’re pairing it with Harajuku shopping and Meiji Jingu, or you specifically want the social, picnic-and-performers energy. It’s also the better pick if your schedule is loose and you don’t want to worry about closing times or an entry fee.

    If you have a full day and don’t mind a short train ride between the two, many visitors do both: Meiji Jingu and Yoyogi Park in the morning, then Shinjuku Gyoen in the afternoon after lunch in Shinjuku.

    Getting There and Timing It Right

    Shinjuku Gyoen has three entrances: Shinjuku Gate (about a 5-minute walk from Shinjuku-sanchome Station or the south side of JR Shinjuku Station), Okido Gate, and Sendagaya Gate near Sendagaya Station on the JR Chuo-Sobu Line. Sendagaya Gate tends to be the least crowded entry point.

    Yoyogi Park is easiest from Yoyogi-Koen Station (Chiyoda Line) on its western side, or from Harajuku Station (JR Yamanote Line) and Meiji-Jingumae Station if you’re coming from the Meiji Jingu / Harajuku side.

    Peak cherry blossom season (typically late March to early April in Tokyo) and the Golden Week holidays in early May are the busiest windows for both parks — expect long lines at Shinjuku Gyoen’s ticket gates and a packed lawn at Yoyogi Park. Weekday mornings are noticeably calmer at both. If you’re trying to plan your whole trip around Japan’s crowd patterns rather than just these two parks, it’s worth reading up on how Obon and other peak weeks affect travel nationwide, since the same logic of “book and arrive early” applies to Tokyo’s parks in sakura season.

    Autumn foliage at Shinjuku Gyoen usually peaks in mid-to-late November, and it’s a much less frantic alternative to the cherry blossom crowds if your travel dates are flexible.

    Common Mistakes to Avoid

    • Bringing alcohol or a sports ball to Shinjuku Gyoen. Staff do enforce the no-alcohol and no-ball-games rules, and you’ll be asked to put things away.
    • Showing up right at closing time. Shinjuku Gyoen’s last admission is 16:00, well before actual closing — arriving at 16:15 means you won’t get in at all.
    • Not bringing a trash bag to Yoyogi Park. Public bins are scarce, especially on busy weekends, and the Japanese norm is to pack out your own trash rather than leave it by a full bin.
    • Underestimating the walk between Yoyogi Park’s gates. It’s a genuinely large park — if you’re meeting friends, agree on a specific landmark (the fountain, a particular gate) rather than just “Yoyogi Park.”
    • Visiting Shinjuku Gyoen on a Monday without checking. It’s the one day it’s reliably closed outside the New Year break.

    Budget to Splurge: Making the Most of Either Park

    Budget: Yoyogi Park costs nothing beyond transit, and a convenience-store picnic (onigiri, drinks, snacks) run under 1,000 yen per person. Shinjuku Gyoen’s 500 yen entry is one of the cheapest green-space experiences in central Tokyo.

    Mid-range: Pack a proper picnic with a reusable blanket and cooler bag — if you didn’t bring one from home, Decathlon Japan sells inexpensive foldable picnic mats, small coolers, and portable chairs that are easy to carry on the train and just as easy to resell or leave behind before you fly home.

    Splurge: At Shinjuku Gyoen, stop at the Japanese garden’s teahouse, Rakuu-tei, for a seasonal matcha-and-wagashi set in a proper tatami setting — a small but memorable way to slow down mid-visit. After either park, Shinjuku itself has every price tier of dining within a ten-minute walk, from standing soba counters to department store restaurant floors.

    Either park works well as a half-day anchor for a Tokyo itinerary. The real decision is about pace and mood: pay a little and get calm, structured beauty at Shinjuku Gyoen, or pay nothing and get Tokyo’s most relaxed, unscripted public space at Yoyogi Park. Many visitors end up doing both on different days of their trip — and once you know the hours and rules going in, neither one will eat up more time than you planned.

  • Takadanobaba: Tokyo’s Student Neighborhood of Cheap Ramen and Retro Arcades

    Takadanobaba: Tokyo’s Student Neighborhood of Cheap Ramen and Retro Arcades

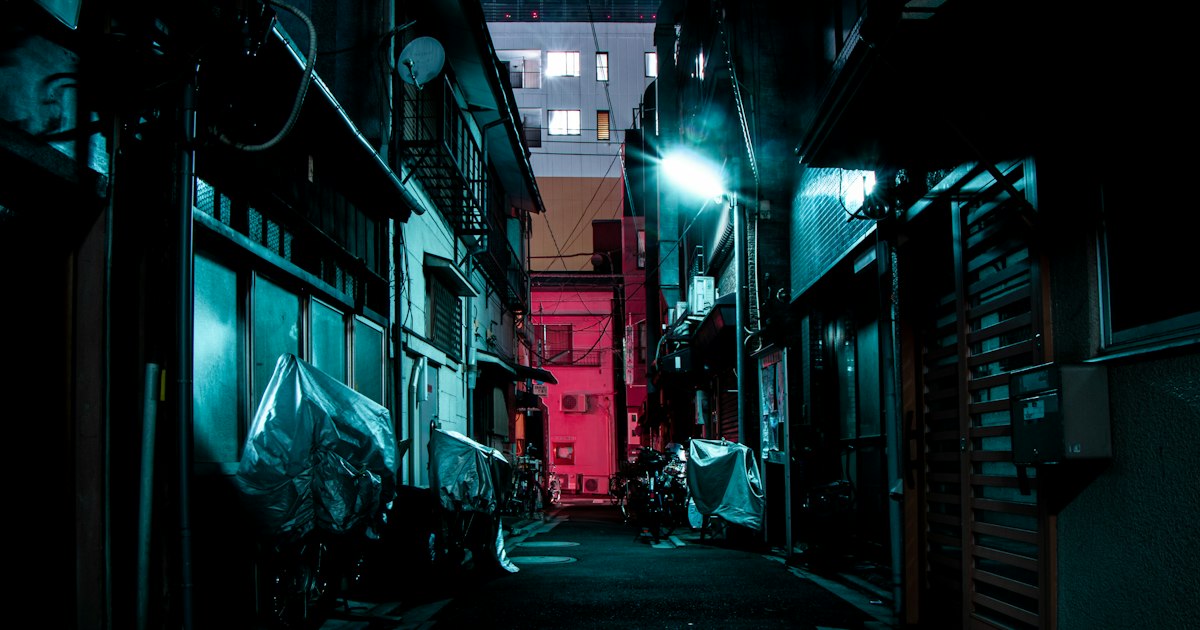
    Photo by Frank Okay on Unsplash

    Most visitors to Tokyo never make it to Takadanobaba, and that’s exactly why it’s worth the detour. Squeezed between Shinjuku and Ikebukuro on the Yamanote Line, this is a working student neighborhood built around Waseda University — which means cheap, filling food, a genuine retro gaming scene, and almost none of the tourist pricing you’ll find in Shibuya or Shinjuku. It’s not a postcard destination; it’s a place to eat well on a budget and see a slice of everyday Tokyo life.

    Where Takadanobaba Is and How to Get There

    Takadanobaba Station sits on the JR Yamanote Line, about 5 minutes from Shinjuku and 5 minutes from Ikebukuro, so it’s easy to fold into a day that includes either of those hubs. The Tozai subway line and the Seibu Shinjuku Line also stop here, the latter being the fastest route if you’re coming from the Seibu-Shinjuku side of the city. There’s no need to buy a special ticket or pass — a regular IC card (Suica or Pasmo) covers all three lines.

    One detail worth knowing before you arrive: the station’s departure melody is the theme song from Astro Boy (Tetsuwan Atom). Tezuka Osamu’s animation studio, Mushi Production, was based near here in the 1960s, and the neighborhood still leans into the connection with character banners and signage around the station. It’s a small, easily missed detail that makes the area feel distinct from Tokyo’s more polished entertainment districts.

    The Ramen Scene: Cheap, Filling, and Student-Priced

    Takadanobaba has one of the highest concentrations of ramen shops per block in Tokyo, a direct result of feeding tens of thousands of Waseda students on a budget. Bowls commonly run ¥700–¥950, noticeably cheaper than equivalent shops in central Tokyo, and portions tend to be generous — many shops offer free or cheap rice refills (kaedama-style extras) aimed squarely at hungry 20-year-olds.

    You’ll find a real mix of styles within a five-minute walk of the station: shoyu and tonkotsu shops, a few tsukemen (dipping noodle) specialists, and the kind of no-frills counter-seating spots where you order from a ticket machine, slurp, and leave within 15 minutes. There’s no single “must-visit” shop that dominates the area — part of the fun is picking whichever line looks shortest and most local. Lunch (roughly 11:30am–2pm) and late evening (after 9pm, once arcade and club crowds get hungry) are the busiest windows; a 3pm or late-afternoon visit will get you a seat with no wait.

    If you’re staying nearby and want a night off from going out, it’s worth knowing that Uber Eats and Demae-can both cover this area well, since it’s dense with restaurants that cater to a delivery-heavy student population — useful if you’re jet-lagged and don’t want to deal with a crowded counter.

    Retro Arcades: Mikado and the Gaming Underground

    Takadanobaba’s other claim to fame is its arcade scene, and the centerpiece is Game In Mikado, a multi-floor retro game center that’s internationally known among classic arcade and fighting game enthusiasts. Unlike the flashy, crane-game-dominated arcades in Akihabara or Shibuya, Mikado preserves genuinely old cabinets — shoot-’em-ups, beat-’em-ups, and classic fighting games from the 1980s and ’90s — alongside a serious competitive fighting-game community that plays there daily. It’s a working arcade, not a museum, so don’t be surprised to see intense, high-level matches happening at the cabinets next to casual tourists.

    Most machines cost ¥100 per play, consistent with old-school arcade pricing rather than the inflated rates you sometimes see in more touristed areas. If you have even a passing interest in classic video games, this is one of the few places left in Tokyo where you can play the originals on original hardware, not emulators. Go on a weekday afternoon if you want to watch without the evening crowd; weekend evenings are when the competitive scene is in full swing and the place is loudest and liveliest.

    Best Time to Visit

    Takadanobaba is a year-round destination since it’s mostly indoor dining and gaming, but a few timing notes matter. During university breaks — late July through September, and again around late December to early February — the student population thins out and some shops run shorter hours or close for a stretch, so the area feels quieter than its usual buzz. If you’re visiting in peak summer, remember that Tokyo heat is genuinely dangerous for midday walking between shops; check Japan’s extreme heat warning guidance before planning an afternoon of ramen-hopping on foot in July or August, and lean toward evening visits instead.

    If your trip happens to fall during Obon in mid-August, note that this is also one of the few times university-area businesses may run reduced hours alongside the national travel crunch — worth checking what to expect during Obon travel if that’s part of your itinerary.

    Budget, Mid-Range, and Splurge Options

    • Budget: A ramen bowl (¥700–¥950) plus ¥100–¥300 in arcade plays makes for a full afternoon under ¥1,200. Standing-counter izakaya near the station also serve small plates from around ¥300–¥500, popular with students stretching a night out.
    • Mid-range: Sit-down izakaya with table service and a full drink menu run ¥2,500–¥4,000 per person for a casual dinner with a few rounds of drinks — comparable to most Tokyo neighborhoods, just with smaller crowds.
    • Splurge: There isn’t much of a high-end dining scene in Takadanobaba itself — that’s not really what the neighborhood is for. If you want a proper splurge meal, it’s a five-minute train ride to Shinjuku, where the options scale up considerably.

    Common Mistakes to Avoid

    • Treating it as a half-day trip from central Tokyo without a plan. Takadanobaba rewards wandering more than box-checking — there’s no single landmark to rush to, so build in time to just walk the side streets around the station.
    • Showing up at lunch on a weekday expecting arcade energy. Mikado and the other game centers are at their liveliest in the evening and on weekends; midday is mostly students between classes.
    • Expecting English menus everywhere. This is a local, not touristy, neighborhood — many ramen shops use ticket machines with Japanese-only buttons. Pointing at a photo or asking a neighbor what they ordered works fine, and it’s part of the experience.
    • Skipping cash. While more shops accept IC cards now, some of the smaller ramen counters and standing bars are still cash-only, so carry a few thousand yen in small bills.

    Takadanobaba won’t show up on most first-timer itineraries, and that’s precisely its appeal: cheap, honest food, a genuinely niche arcade scene, and a neighborhood that’s still organized around real students rather than tourists. Pair it with a Shinjuku or Ikebukuro day and you’ll see a side of Tokyo that most visitors miss entirely.

  • Traveling During Obon: Why Flights and Trains Sell Out and How to Plan Around Japan’s Busiest Travel Week

    Traveling During Obon: Why Flights and Trains Sell Out and How to Plan Around Japan’s Busiest Travel Week

    Photo by Jeffrey Chai on Unsplash

    If you’ve ever tried to book a Shinkansen seat for mid-August and found every reserved car sold out a month in advance, you’ve run into Obon — the week when roughly half of Japan tries to go home at once. It’s not a public holiday, which confuses a lot of visitors, but it might be the single most disruptive week of the year for trains, flights, and highways. Here’s what’s actually happening and how to plan a trip that doesn’t get stuck in the middle of it.

    When Exactly Is Obon (and Why the Dates Vary)

    Obon is a Buddhist tradition honoring ancestral spirits, observed by families visiting and cleaning graves, then returning to their hometowns. Most of Japan — Kansai, Kyushu, Tohoku, and beyond — observes it August 13–16, following the old lunar calendar shifted to the modern one. Tokyo and parts of the Kanto region are the exception: they keep the original lunar-calendar timing and observe Obon in mid-July (around July 13–16) instead. This split matters for travelers, because it means Tokyo-based domestic travel pressure actually peaks twice in summer — a smaller bump in mid-July and the massive nationwide crunch in mid-August.

    Obon itself isn’t a national holiday, so companies aren’t legally required to give time off. In practice, most Japanese companies close for a shuchu kyuka (concentrated holiday) of about a week around August 13–16, which is exactly why the whole country seems to move at once — everyone has the same few days off, so everyone books the same trains.

    Why Trains and Flights Sell Out So Fast

    JR opens Shinkansen reserved-seat bookings exactly one month before departure (for example, tickets for August 14 go on sale July 15). For Obon departures, popular trains on the Tokaido, Sanyo, and Tohoku Shinkansen lines can sell out within hours of that window opening, especially early morning and evening departures on the outbound Friday/Saturday before Obon and the return Sunday/Monday after. If you miss reserved seating, non-reserved (jiyuseki) cars during peak Obon days can mean standing for an hour or more, even on long routes like Tokyo–Osaka.

    Domestic flights follow the same pattern — ANA and JAL routes to Fukuoka, Sapporo, and Okinawa see fares climb well above normal pricing as seats fill, sometimes doubling compared to a non-peak week. Airports themselves get congested too; Haneda and Itami see security lines stretch much longer than usual on the Friday before Obon.

    Highways are arguably worse. NEXCO (the expressway operators) publishes an annual Obon traffic forecast, and it regularly predicts jams of 40–50 km or more on routes like the Tomei Expressway near Gotemba and the Chugoku Expressway, with travel times tripling. If you’re planning a road trip and want a feel for how central these highway rest stops are to Japanese road culture even in normal times, it’s worth reading about Japan’s expressway service areas before you find yourself parked in one for an extra two hours.

    The Peak Days to Avoid — and the Sweet Spot

    The single worst days to travel are the Saturday and Sunday immediately before Obon (the outbound rush) and the Sunday and Monday immediately after (the return rush). In a typical year where Obon runs August 13–16, that means avoiding Saturday–Sunday August 8–9 (outbound) and Sunday–Monday August 16–17 (return) if at all possible.

    Counterintuitively, the actual Obon holidays themselves — August 13 through 15 — are often calmer for travel than the days flanking them, because most people have already arrived at their destination by then. If your schedule allows it, shifting your long-distance travel to land on August 13 or 14 rather than the weekend before can mean the difference between a sold-out train and a half-empty one.

    How to Book Before Everything Disappears

    • Shinkansen: Book the moment the one-month window opens, ideally through the JR East or Smart EX app at 10:00am on the release date. If you can’t get the exact train, book any reserved seat on a nearby departure rather than risking standing room.
    • Flights: Domestic fares for Obon week are often locked in 2–3 months ahead at reasonable prices (¥15,000–25,000 one-way Tokyo–Fukuoka, for example); waiting until a month out can push that past ¥35,000–40,000 each way.
    • Hotels: Popular destinations like Kyoto, Hokkaido, and Okinawa see room rates rise 30–50% during Obon week, and budget business hotels sell out first. Book accommodation as early as flights, not after.
    • Rental cars: Fleets in Hokkaido and Okinawa, the two most popular Obon getaway regions, are often fully booked a month out — reserve early even if your dates are flexible.

    Smart Alternatives When Everything’s Full

    If you’re planning a trip without flexibility and discover everything’s sold out, overnight highway buses are usually the last resource with capacity, since fleets are larger and routes more numerous than Shinkansen schedules. Comparing the overnight bus seat classes is worth doing in advance — see our guide to Willer Express’s Cocoon and Relax class seats for what a comfortable overnight option actually looks like. Buses do get caught in the same highway jams, though, so budget extra hours either way.

    Another option is simply avoiding the nationwide crunch altogether by picking a trip that doesn’t depend on long-distance transport during the worst days — city-based itineraries, or regions reachable by local trains rather than Shinkansen transfers, suffer far less disruption. If your trip already falls in August regardless, it’s also worth reading about Japan’s extreme heat warnings, since Obon week coincides with the country’s hottest, most humid stretch — a relevant factor if you end up standing in a non-reserved train car or queuing outdoors at a station.

    Common Mistakes Visitors Make

    The biggest mistake foreign travelers make is not realizing Obon isn’t a fixed public holiday on a calendar they can look up easily — it sneaks up because it’s cultural rather than statutory. The second is assuming train travel in Japan is always easy to book on short notice; outside of Obon, Golden Week (late April–early May), and New Year, that’s largely true, which makes visitors complacent about this one week. The third is booking a Tokyo–Kyoto–Osaka itinerary that requires three separate long-distance train legs during peak Obon days, when a single well-timed inter-city move plus local exploration would be far less stressful.

    If your trip dates happen to land in mid-August, it’s not a reason to change plans — Japan is still fully open for travel, just busier. The fix is simple: book transport and lodging as early as the one-month Shinkansen window allows, avoid the weekend bookends around August 13–16, and build in slack for highway delays if you’re driving. Travelers who plan around these dates rather than through them tend to have the smoothest Obon-week trips.

  • Riding Japan’s Retro City Streetcars: Hiroshima, Nagasaki, Kumamoto and Matsuyama

    Riding Japan’s Retro City Streetcars: Hiroshima, Nagasaki, Kumamoto and Matsuyama

    Photo by Ikarovski on Unsplash

    Long before the Shinkansen existed, streetcars were weaving through Japanese cities — and in four cities, they still are. Hiroshima, Nagasaki, Kumamoto and Matsuyama each kept their tram networks running through decades when most other Japanese cities tore the rails out for buses and subways. Riding them isn’t just nostalgia tourism: these trams are still the fastest, cheapest way to reach many of each city’s main sights, and a handful of the actual vintage cars from the 1910s-1950s are still in daily service. Here’s how to use each system without wasting time or money.

    Why these four cities still have streetcars

    Hiroshima, Nagasaki, Kumamoto and Matsuyama all built their tram networks in the early 20th century, and all four avoided the postwar push to replace trams with subways or buses — partly due to geography (narrow streets hemmed in by hills or rivers made subway construction costly) and partly civic pride. Hiroshima’s network is the most famous because several cars survived the atomic bombing in 1945 and were repaired and put back into service; a few of those “Hiroden” cars from the 1940s still run on regular routes today, not in a museum. Matsuyama and Kumamoto run restored pre-war cars on select days, while Nagasaki’s hilly, narrow streets make its single-line tram arguably the most useful of the four for simple point-to-point sightseeing.

    Hiroshima: the biggest network, flat fare, atomic-bomb-survivor cars

    Hiroden (Hiroshima Electric Railway) runs eight tram routes covering the whole city, with cars arriving every few minutes on main lines. Fares are flat: ¥220 for adults regardless of distance within the city (slightly more on the line out to Miyajimaguchi, where you connect to the ferry for Miyajima island). Pay by IC card (Suica, Pasmo, ICOCA all work) by tapping on and off, or pay cash into the box by the driver when you exit. A one-day streetcar pass costs around ¥900 and pays for itself after about four rides — worth it if you’re hitting the Peace Memorial Park, Hiroshima Castle, and Shukkeien Garden in one day. Look for car numbers 650 and 651 on the Eba or Hiroshima Port lines; these are the originals that survived 1945 and still run scheduled service, not a special exhibit train. Avoid boarding during the 7:30-8:30am and 5-6:30pm rush, when cars fill with commuters and a rolling suitcase becomes a real liability.

    Nagasaki: one simple line, cheapest flat fare in Japan

    Nagasaki’s tram network has four numbered routes but they mostly overlap on a single north-south corridor, making it nearly impossible to get lost. The flat fare is ¥140 (IC card or exact change), one of the cheapest tram rides anywhere in the country. A one-day pass is ¥700 and is sold at the tourist information counter inside Nagasaki Station or from the tram drivers themselves — ask for “ichinichi jōsha-ken.” The tram is the easiest way to reach the Atomic Bomb Museum and Peace Park (get off at Matsuyamamachi) and the Dejima and Chinatown area (Nigiwaibashi or Tsukimachi stops). If you’re extending the trip out to the Dutch trading history on Hirado, note that’s a separate bus/train journey outside the tram network — see our guide to Hirado’s Dutch trading post, castle and Christian history for how to connect onward.

    Kumamoto: castle access and the restored 1920s cars

    Kumamoto’s tram has two routes (A and B lines) that split near Kumamoto Station and both end up looping through downtown. Flat fare is ¥180 for adults, and a one-day pass (¥500) is a clear win if you’re also riding the Shiromegurin loop bus to Kumamoto Castle, since some day-pass versions cover both. The castle itself is a 15-minute walk from the Kumamoto-Jōtōmae tram stop. Kumamoto occasionally runs a restored 1924 tram car (the “171” or similar heritage units) on weekends and holidays as a nostalgia service — check with the Kumamoto City Transportation Bureau website or the tourist information desk at the station on the day, since the schedule isn’t fixed far in advance and depends on maintenance status.

    Matsuyama: the Botchan Train and Dogo Onsen access

    Matsuyama’s Iyotetsu network mixes modern trams with the “Botchan Ressha,” a diesel-powered replica of a Meiji-era steam train that runs on tram tracks through the city center — it’s a tourist novelty with a separate, higher fare (around ¥1,300 one-way) rather than a practical commuter option. The regular tram fare is a flat ¥200, and the most useful route for visitors runs between Matsuyama City Station and Dogo Onsen, one of Japan’s oldest hot spring towns, in about 25 minutes. If you’re building a longer Shikoku itinerary that includes food experiences, pair this with the udon-making classes in nearby Kagawa — Matsuyama and Takamatsu are well connected by train, making a two- or three-day Shikoku loop realistic.

    Common mistakes foreign visitors make

    • Trying to use a Shinkansen IC balance assumption. IC cards work on all four networks, but balance and boarding rules differ from Tokyo subways — in Hiroshima and Kumamoto, some cars require you to tap on at the front door and off at the rear, the reverse of Tokyo convention. Watch what other passengers do if signage isn’t obvious.
    • Not having coins for the fare box. If your IC card runs low, you’ll need exact or near-exact change; drivers carry limited change and larger bills can cause delays. Keep ¥1,000 in small coins and bills as backup, especially in Nagasaki and Matsuyama where cash-only moments still happen on older cars.
    • Boarding the wrong direction on a looping line. Hiroshima’s and Kumamoto’s lines branch and loop; check the destination placard on the front of the car, not just the line color, since the same line number can terminate in different places depending on time of day.
    • Bringing oversized luggage during rush hour. These are single-car trams with narrow aisles, not high-capacity subway trains. If you’re arriving with large suitcases, take a taxi from the station to your hotel and use the tram unencumbered for sightseeing days.

    Best timing and practical logistics

    Spring (late March-April, cherry blossoms) and autumn (November, foliage) are the best times to combine tram sightseeing with comfortable walking weather in all four cities. Summer is brutal — Hiroshima and Kumamoto regularly see highs that trigger official heat warnings, and trams are not air-conditioned as aggressively as modern subway trains, so if you’re traveling in July or August, check our guide on planning sightseeing safely around Japan’s extreme heat warnings and front-load outdoor tram-hopping to early morning. All four tram systems operate roughly 6am to 11pm daily with no holiday closures, though frequency drops substantially after 9pm, especially in Nagasaki and Matsuyama, so don’t count on a tram showing up within five minutes late at night the way you might on a Hiroshima main line at rush hour.

    Budget, mid-range and splurge approaches

    Budget travelers should buy the one-day pass only if doing four or more rides; otherwise pay-per-ride with an IC card is cheaper and more flexible. Mid-range visitors can comfortably combine a tram day-pass with a single taxi ride for luggage transfer between station and hotel, keeping total local transport under ¥2,000 a day per person. The closest thing to a “splurge” here is Matsuyama’s Botchan Ressha, which is worth the roughly ¥1,300 fare once for the novelty and photos, but isn’t worth repeating for actual transportation — use the regular ¥200 tram for everyday trips to Dogo Onsen instead.

  • Taking Your Dog on the Shinkansen: Carrier Size Rules and Pet Tickets

    Taking Your Dog on the Shinkansen: Carrier Size Rules and Pet Tickets

    Photo by Ayla Verschueren on Unsplash

    Japan’s bullet trains are famous for punctuality and quiet carriages, not for pet-friendliness — but small dogs and cats do ride the Shinkansen every day, legally and comfortably, if their owners follow a short list of rules. The catch is that none of this is explained in English at the ticket counter, and the carrier-size requirement trips up more travelers than the fee does. Here’s exactly what JR requires, what it costs, and what to do if your dog doesn’t qualify.

    Can You Actually Bring a Dog on the Shinkansen?

    Yes, but only as hand luggage, not as a passenger. Japan Railways (JR East, JR Central, JR West, and the other JR companies) classify small animals under the same rule as oversized bags: they travel in your possession, inside a fully enclosed carrier, for the duration of the trip. There is no pet car, no pet seat, and no way to buy your dog its own ticket. If your dog can’t stay zipped inside a bag or crate for the whole journey — including a three-hour Tokyo–Osaka run — the Shinkansen isn’t the right option, regardless of size.

    This rule applies to dogs, cats, birds, and similar small animals. Larger dogs, and any animal that can’t be fully contained, aren’t permitted on JR trains at all, with the exception of certified service dogs, which travel unboxed with their handler under separate rules.

    Carrier Size and Weight Rules You Must Follow

    JR’s nationwide standard for carry-on animals (listed under “hand-carried items,” or tenimochi-hin) is:

    • The combined length, width, and height of the carrier must not exceed roughly 70 cm (and no single side over about 90–100 cm, depending on the JR company).
    • Total weight, including the animal and the carrier itself, must stay under 10 kg.
    • The carrier must completely enclose the animal — no head, paws, or tail poking out, and the animal must not be visible enough to disturb other passengers.
    • The animal must stay silent and odor-free enough not to bother people nearby. Persistent barking or whining can get you asked to move to the vestibule area between cars.

    In practice this means a soft-sided pet carrier bag (the kind airlines also accept) works far better than a hard plastic crate, both for the size limit and for keeping your dog calm and out of sight. Weigh your dog plus the empty carrier at home before you travel — small dogs like Chihuahuas, toy poodles, and Pomeranians usually clear the limit easily; anything near 8–9 kg on its own is cutting it close once the carrier weight is added.

    Buying the Pet Ticket

    You don’t buy a ticket for your dog in the usual sense — you pay a flat hand-luggage handling fee of ¥290 per animal per trip (the same fee JR charges for oversized items like large suitcases or sports equipment). This is called a tenimochi-hin ryōkin fee. You can pay it:

    • At a staffed JR ticket window (midori-no-madoguchi) when buying your Shinkansen ticket — say “pet, is that okay?” and staff will usually understand and process it.
    • At the gate or on board, if a conductor asks — it’s safer to proactively mention the carrier rather than wait to be asked.

    This fee isn’t bundled into rail passes. If you’re using a regional pass for a day trip — the JR Tokyo Wide Pass, for example, which covers Shinkansen segments out to Nikko, Karuizawa, and the Mt. Fuji area — you’ll still need to pay the ¥290 pet fee separately at the window, since the pass only covers your own fare.

    Boarding and Seat Etiquette

    Keep the carrier on your lap or on the floor between your feet — never on an empty seat, and never in the overhead luggage rack, where staff can’t account for it and ventilation is poor. If you’re traveling with a companion, booking two adjacent reserved seats and keeping the carrier on the floor by the window seat gives your dog the calmest ride. Avoid the very front or back cars near the conductor’s cabin on busy routes; aim for off-peak departures (late morning, early afternoon) when carriages are quieter and you’re less likely to be seated next to someone with allergies or a fear of dogs.

    Give your dog a last bathroom break before boarding — there’s nowhere appropriate to relieve a dog on board, and Shinkansen toilets are not an option. Bring a absorbent puppy pad inside the carrier just in case, plus water in a no-spill bottle for longer runs like Tokyo–Hiroshima.

    When Your Dog Is Too Big: Alternatives

    If your dog exceeds the 10 kg/70 cm limit, the Shinkansen is off the table, and realistically so are intercity buses — operators like the ones behind Willer Express’s overnight bus seats generally don’t accept pets outside of certified service animals, the same restriction as JR. For a dog too large to carry, your workable options are:

    • Rent a car. This gives you full control and lets you stop for breaks — budget roughly ¥8,000–¥15,000/day for a compact rental plus expressway tolls.
    • Pet transport couriers. Japanese delivery companies run dedicated pet-shipping services between major cities, with climate-controlled vehicles; these need to be booked days in advance and cost significantly more than a train ticket.
    • Domestic flights. Japanese airlines (ANA, JAL) accept larger dogs in temperature-controlled cargo holds on many routes, with size and breed restrictions and advance booking required — worth comparing against a long train ride for cross-country trips like Tokyo–Sapporo.

    Best Season and Common Mistakes

    Midsummer is the hardest time to travel with a dog in Japan, carrier or not — platforms and taxi queues get brutally hot, and extreme heat warning days in July and August make even short walks between the ticket gate and the platform risky for a dog zipped into a bag. Spring (April–May) and autumn (October–November) are far more comfortable, with mild station temperatures and fewer sudden thunderstorm delays that leave you stuck holding a restless dog on a crowded platform.

    The most common mistakes visitors make: assuming a hard-sided travel crate is fine (it often exceeds the 70 cm combined-side limit once you add dimensions), forgetting to prepay the ¥290 fee and getting stopped at the gate, and underestimating how disruptive barking is in Japan’s otherwise silent carriages — practice calm carrier time at home before the trip. Lastly, don’t assume this rule only applies to long-distance Shinkansen; the same hand-luggage pet rule applies to regular JR trains and most private commuter lines too, so the carrier habit is worth building in before you even leave Tokyo.

  • Ordering Food Delivery in Japan: Uber Eats, Demae-can and Tipping Norms for Tourists

    Ordering Food Delivery in Japan: Uber Eats, Demae-can and Tipping Norms for Tourists

    Photo by Chris Lawton on Unsplash

    After a long day of sightseeing, sometimes the last thing you want to do is find a restaurant, wait for a table, and sit through a full meal. Japan’s food delivery apps are a legitimate option even for short-term visitors — you don’t need a Japanese phone number, a My Number card, or fluent Japanese to get a bowl of ramen or a konbini run delivered to your hotel room. This guide covers the two main platforms, what delivery actually costs, how to pay without a Japanese bank account, where delivery works (and where it doesn’t), and the one cultural habit that trips up almost every first-timer: tipping.

    Uber Eats vs Demae-can: Which One to Use

    Uber Eats is the easiest for tourists because it runs on the same global app and account you already use at home. Download the regular Uber Eats app, switch your location to Japan once you land (it detects GPS automatically), and your home country’s card usually works without any changes. Coverage is strong in central Tokyo, Osaka, Kyoto, Yokohama, Nagoya, Fukuoka, and Sapporo, but thins out fast once you’re outside the main wards or city centers — a ryokan in a small onsen town almost certainly won’t have it.

    Demae-can (出前館) is the older, Japan-grown rival, now partly owned by LINE Yahoo, and it actually has broader coverage in secondary cities and residential areas than Uber Eats. The catch is that the app is almost entirely in Japanese, though it can be switched to English in settings on the newer version. Demae-can tends to have more local chain restaurants (Sukiya, Ootoya, CoCo Ichibanya) and even some drugstore and convenience store delivery that Uber Eats doesn’t cover in certain areas. If Uber Eats shows nothing near your accommodation, it’s worth checking Demae-can before giving up.

    What Delivery Actually Costs

    Budget roughly this on top of the menu price:

    • Delivery fee: ¥150–¥500 depending on distance and demand; surges during lunch (12:00–13:00) and dinner (18:00–20:00) rush hours
    • Service fee: typically 10% of the subtotal on Uber Eats
    • Small-order fee: some restaurants charge an extra ¥100–¥200 if your order is under roughly ¥1,000–¥1,500
    • Minimum order: most restaurants set a floor around ¥700–¥1,000 before delivery is even offered

    A realistic example: a ¥1,200 katsudon set plus a ¥350 delivery fee and ¥120 service fee lands around ¥1,670 total — noticeably more than eating in, but often cheaper than a taxi there and back. If you’re trying to stretch a food budget, grabbing something from a convenience store or depachika (department store basement food hall) in person will almost always beat delivery on price.

    Payment Without a Japanese Bank Account

    This is usually the biggest worry for visitors and it’s rarely an issue in practice. Both apps accept foreign-issued Visa and Mastercard credit/debit cards saved directly in-app — no Japanese bank account or address required. Apple Pay and Google Pay linked to your home card also work on Uber Eats. If you’d rather not put a card online, both platforms support cash-on-delivery at many (not all) restaurants — look for a “cash” or “現金” payment option at checkout, and keep small bills ready since drivers rarely carry much change for a ¥10,000 note.

    Delivering to Hotels, Ryokan and Rental Apartments

    Hotels: give the hotel’s exact address and name the property clearly in the delivery notes field (e.g., “Please leave at front desk, Hotel XYZ, room 412”). Many drivers will call the front desk or hand the order to staff rather than coming up to your floor, so let the front desk know you’re expecting a delivery, especially at business hotels with controlled lobby access.

    Ryokan and traditional inns: delivery success is hit-or-miss. Staff may be uncomfortable with outside food being brought in, and the building may not have a clear street-facing entrance for a scooter to find. It’s worth asking at check-in before ordering.

    Short-term rental apartments (minpaku): these are usually the easiest, since you control the entry process yourself — just include the building name, unit number, and any gate/intercom code in the delivery instructions. If your rental uses an induction cooktop and you’d rather cook than order out, our guide to Japanese induction cooktops (IH stoves) explains how to actually get one working.

    Tipping: Just Don’t

    This is the one rule that catches almost every first-time user off guard. Tipping is not expected on Uber Eats or Demae-can, and there’s no in-app tipping prompt the way there is in the US. Drivers are paid a set delivery fee by the platform; handing over extra cash at the door can genuinely confuse them, and some will politely refuse it. If you want to show appreciation, a simple “arigatou gozaimasu” when they hand over the bag is the norm — that’s it. This mirrors the no-tipping culture across Japan generally, the same reason you don’t tip at restaurants, taxis, or hotels.

    Best Times to Order and Common Mistakes

    Delivery works year-round, but it’s especially useful during Japan’s brutal summer heat, when walking even ten minutes to a restaurant is unpleasant — see our guide on extreme heat warnings (necchusho keikai) for why staying indoors during midday in July and August is a real safety consideration, not just comfort. Rainy season (June) and typhoon days are the other sweet spot, since delivery fees often spike but the alternative is getting soaked.

    Common mistakes to avoid:

    • Not setting the pin precisely: GPS pins in dense Japanese cities can be off by a building or two; drag the map pin to your actual entrance, not just the general block.
    • Ignoring delivery notes: a short note like “no elevator access code, please call” (even auto-translated) saves real back-and-forth.
    • Ordering from closed restaurants: app listings sometimes lag behind actual hours, especially for small independent shops that close for a mid-afternoon break between lunch and dinner service.
    • Assuming dietary filters are reliable: allergen and ingredient labeling on delivery apps is inconsistent. If you have strict dietary needs, our guide to kosher food in Japan is a useful model for how to verify certification directly with a restaurant rather than trusting app tags alone.

    When Delivery Isn’t the Right Tool

    If you’re traveling with luggage or gear you need shipped rather than eaten, these apps won’t help — that’s a job for PUDO stations and konbini pickup, which solve the parallel problem of receiving packages as a short-term visitor without a fixed address. And if you’re staying somewhere rural or mountainous — a ski town, a small fishing village, an onsen ryokan outside the city grid — don’t count on delivery coverage at all; check in-app for your exact address before you commit to staying in without a backup plan for dinner.

  • YAMAP: The Hiking App Every Trail Runner and Day-Hiker in Japan Actually Uses

    YAMAP: The Hiking App Every Trail Runner and Day-Hiker in Japan Actually Uses

    Photo by Ryuta F. on Unsplash

    If you spend a Saturday morning at any trailhead in Japan — Mt. Takao, Mt. Fuji’s fifth station, the ridgelines above Kamikochi — you’ll notice almost every hiker checking the same app before they start walking. It isn’t Google Maps. It’s YAMAP, a Fukuoka-made hiking app that has quietly become the default navigation and safety tool for Japanese hikers and trail runners. Foreign visitors rarely hear about it before their trip, which is a shame, because it solves a very specific problem: Japan’s mountains have almost no cell signal, and most mapping apps are useless the moment you lose it.

    What Makes YAMAP Different From Google Maps or AllTrails

    YAMAP’s core trick is that it tracks your position using your phone’s built-in GPS chip, not your data connection. GPS satellites work fine deep in a valley with zero bars of signal — what you actually need is a map that’s already stored on your phone. YAMAP lets you download detailed topographic maps for specific mountain areas while you still have Wi-Fi or data, then switch your phone to airplane mode (saving battery) and keep tracking your route, elevation, pace, and distance with no connection at all.

    AllTrails works similarly in theory, but its Japan trail coverage is thin and the user-submitted data is sparse. YAMAP’s entire user base is Japanese day-hikers and trail runners, so the trail network, estimated hiking times, and real-time conditions are far denser and more current for Japanese mountains specifically.

    Setting It Up Before You Leave Cell Service

    Download the app (iOS/Android, free) and create an account before you leave your hotel or the airport — it’s available in English, which is a relatively recent and welcome addition for inbound visitors. Search for your destination mountain or trail by name, and look for the “download map” or offline map option for that area. Do this over hotel Wi-Fi the night before; trailhead parking lots and station platforms often still have decent signal, but ravines and ridgelines an hour in usually won’t.

    A common mistake is assuming you’ll just download the map once you’re near the trailhead. Many trailheads — especially for Mt. Fuji’s Yoshida, Fujinomiya, Subashiri, and Gotemba routes, or anything in the Japanese Alps — are already in dead zones by the time you arrive. Download at the hotel, the konbini, or on the train in.

    Reading Trail Reports Like a Local

    The feature that actually makes YAMAP worth using isn’t the map — it’s the activity log feed. Every hiker who finishes a route can post their recorded track along with photos, notes, and timestamps. Before you set out, you can search recent activity on your exact trail and see, often from the same week, whether there’s snow on a pass, a bridge washed out, a bear sighting, or whether the azaleas or autumn leaves are actually out. For trails that change seasonally — river crossings, snowfields on Fuji in early July, typhoon damage in September — this is more reliable than any official website, because it’s dated and photographed by someone who was there days ago.

    This is also how you get realistic time estimates. Japanese trail signage often gives conservative times aimed at the average hiker; the app’s aggregated data from thousands of recorded hikes gives you a more honest range for your own pace.

    Safety Features Worth Turning On

    Japan takes mountain safety seriously, partly because rescue costs and search operations for missing hikers are a real and recurring issue. YAMAP has two features visitors should actually use:

    • Tozan todoke (climbing plan submission): for many popular mountains, you can file a simple hiking plan through the app — which route, which date, when you expect to finish — that’s shared with local safety authorities and can be checked against if you’re overdue.
    • Location sharing / “mikake” tracking: you can let a friend or family member follow your live position on a web link, so someone off-mountain knows where you are without needing the app themselves.

    Neither replaces common sense — tell a human your plan too, carry a paper map as backup, and don’t rely on your phone’s battery lasting all day in cold weather.

    Best Seasons and Trails to Try It On

    For a first outing, Mt. Takao near Tokyo is the easiest test case: well-marked, short, and reachable via the Keio Line from Shinjuku. If you’re using the JR Tokyo Wide Pass for day trips, the Fuji Five Lakes area and Nikko’s lower trails both have decent YAMAP coverage and make a good pairing with the pass’s 3-day window. Fuji’s official climbing season runs roughly early July through early September; outside that window the mountain huts close and conditions turn genuinely dangerous, so the app’s season-specific trail reports matter even more.

    Midsummer hiking anywhere below the alpine zone means starting at dawn — Japan’s July and August heat warnings are not exaggerated, and it’s worth reading our guide on Japan’s extreme heat warnings before planning a midday ascent. Spring (April–May) and autumn (late October–November) are the most comfortable windows for most day hikes, and also when the trail-report feed is busiest with photos, so you’ll get the best real-time intel.

    Common Mistakes Foreign Visitors Make

    • Not downloading the offline map in advance — the single most common failure, usually discovered only once it’s too late to fix.
    • Underdressing for elevation — a sunny Tokyo morning can mean near-freezing wind on a ridge an hour’s climb up. Layering with something like Uniqlo HeatTech under a windproof shell is a cheap, packable fix many visiting hikers overlook.
    • Trusting old reviews over recent activity logs — a five-year-old blog post about a trail is far less useful than a YAMAP report from last weekend.
    • Draining the phone battery — leaving data/Wi-Fi searching on burns battery fast even with no signal; switch to airplane mode once your map is downloaded.

    Free vs Premium: Do You Need to Pay

    The free tier covers everything a visiting day-hiker actually needs: offline maps, GPS tracking, activity recording, and the trail report feed. YAMAP PREMIUM, a paid annual subscription, adds things like broader offline map storage, ad removal, and some extended trail-condition detail — genuinely useful for frequent Japan-based hikers, but not something a short-term visitor doing a handful of day hikes needs to bother with. Try the free version first; if you end up hiking in Japan more than once or twice, the premium tier is a small, worthwhile upgrade.

    Whether you’re doing a single Mt. Takao morning between city sightseeing or stringing together a multi-day Alps itinerary, the habit worth building is simple: download the map before you leave signal, check the recent activity log before you commit to a route, and let someone know your plan. That’s the whole reason an entire country of hikers switched to this one app.

  • Willer Express and Japan’s Luxury Overnight Bus Seats: Cocoon vs Relax Class Compared

    Willer Express and Japan’s Luxury Overnight Bus Seats: Cocoon vs Relax Class Compared

    Photo by 515 Freedom on Unsplash

    Japan’s bullet trains get all the attention, but for travelers watching their budget, the country’s overnight highway buses are one of the best-kept secrets in domestic transport. Willer Express, the biggest operator in this space, has spent years turning what used to be a cramped, sleepless ordeal into something closer to a lie-flat airline seat — at a fraction of the price. If you’re trying to decide between its two signature premium classes, Cocoon and Relax, here’s what actually separates them, what they cost, and how to book without making the rookie mistakes most first-timers do.

    Why Take a Bus Instead of a Train or Flight

    An overnight bus saves you a hotel night and lets you travel while you sleep, which is the real appeal. A Tokyo–Osaka Shinkansen ticket runs about 14,000 JPY one-way and takes roughly 2.5 hours during the day. A Willer Express overnight bus on the same route can cost as little as 3,000–5,000 JPY in a standard seat, or 8,000–15,000 JPY for a premium Cocoon or Relax seat — and you arrive at your destination around 6:00–7:00 AM, ready to start the day. For day-trip-heavy itineraries around Tokyo, a rail pass like the JR Tokyo Wide Pass is still the better tool, but for longer hauls between major cities — Tokyo to Osaka, Kyoto, Hiroshima, or even as far as Fukuoka — the overnight bus is where Willer Express earns its reputation.

    Cocoon Class: Japan’s Pod-Style Overnight Seat

    Cocoon is Willer’s flagship seat and the reason the company gets written up in design and travel press. Each seat is a shell-shaped pod with high curved wings on either side, a privacy curtain that pulls across the aisle opening, and a recline angle of around 140 degrees — not fully flat, but close enough that most passengers genuinely sleep. Each pod includes an individual reading light, a power outlet, a leg rest that extends to meet the seat in front, a blanket, and slippers. Buses are configured with just three seats across a 2+1 layout, so even the “single” side rows get a window and an aisle with no one directly beside you.

    Expect to pay roughly 8,000–16,000 JPY one-way for Cocoon class on a Tokyo–Osaka or Tokyo–Kyoto run, with prices climbing during Golden Week, Obon, and New Year’s. Some buses offer a “Cocoon Premium” or double-decker variant with slightly larger pods and curtains that close more completely — worth the extra 1,000–2,000 JPY if privacy matters more to you than price.

    Relax Class: The Comfortable Mid-Range Option

    Relax class is Willer’s step below Cocoon, and it’s the sweet spot for travelers who want real comfort without paying premium-class prices. Seats are wider than a standard bus seat, usually arranged 3-across instead of 4, with a deep recline, a footrest, and a curtain for partial privacy — but no shell-style wings and no fully enclosed pod feel. You still get a power outlet and often a small reading light, but legroom and seat depth are noticeably less generous than Cocoon.

    Pricing typically lands around 4,500–8,000 JPY one-way on major routes, making it roughly half the cost of Cocoon. For a trip of five or six hours, Relax is genuinely comfortable; for longer overnight runs of eight-plus hours, the gap in sleep quality between Relax and Cocoon becomes more noticeable, especially for anyone over about 175cm tall.

    Cocoon vs Relax: Which One Is Worth It

    • Budget: Standard seats (non-Cocoon, non-Relax) start around 3,000 JPY and are fine for short overnight hops of five hours or less if you can sleep sitting upright.
    • Mid-range: Relax class (4,500–8,000 JPY) is the best value-to-comfort ratio for most travelers on routes under seven hours.
    • Splurge: Cocoon class (8,000–16,000 JPY) is worth it for longer overnight runs, for taller travelers, or for anyone who wants an actual night’s sleep before sightseeing the next morning.

    A good rule of thumb: if the bus departure-to-arrival window is under six hours, save the money and book Relax or even a standard seat. If it’s eight hours or more — say Tokyo to Hiroshima — Cocoon pays for itself in how functional you’ll feel the next day.

    Booking, Boarding, and What to Pack

    Book through Willer’s English-language website or app, ideally one to three weeks ahead for popular routes and classes — Cocoon seats on Friday and holiday-eve departures sell out fastest. Payment is by credit card online; if you’re paying cash at a convenience store counter or withdrawing yen for the trip, check your convenience store ATM withdrawal limit in advance so you’re not caught short at the terminal. Buses depart from major hubs like Tokyo’s Shinjuku or Ikebukuro and Osaka’s Umeda, and most stop once or twice overnight at an expressway rest area, so it’s worth reading up on Japan’s expressway service area culture before you go — these stops are where you’ll find a bathroom, hot drinks, and sometimes surprisingly good food at 2 AM.

    Pack light layers rather than a heavy coat: the bus air conditioning runs cold year-round, and a base layer like Uniqlo HeatTech under a t-shirt is more useful than a bulky jacket you can’t fold into overhead storage. Bring earplugs and an eye mask regardless of class — even Cocoon’s curtain doesn’t block engine noise or the occasional reading light from a neighboring pod.

    Best Season and Timing for Overnight Buses

    Overnight buses run year-round and are least crowded (and cheapest) from late January through February and in June, outside Golden Week and the summer holiday rush. Avoid booking around Obon (mid-August) and New Year’s unless you reserve six to eight weeks out, as both price and availability swing hard. Winter travelers should note that mountain routes — anything crossing from Honshu toward Niigata or the Sea of Japan coast — occasionally run late due to snow, so build in slack if you have a same-morning connection.

    Common Mistakes First-Time Riders Make

    The most frequent error is booking a standard seat for an eight-hour-plus route and assuming it’ll feel like Relax class — it won’t, and you’ll land exhausted. The second is skipping the seat-class description and assuming “Cocoon” is available on every departure; many routes only run Cocoon buses on specific days of the week, so check before you lock in dates around the rest of your itinerary. Finally, don’t forget your passport before boarding — Willer doesn’t require ID checks for domestic routes, but if you do lose your passport mid-trip, knowing the embassy replacement process ahead of time will save you a panicked search when you’re far from a consulate.

  • Japan’s Extreme Heat Warnings (Necchusho Keikai): How to Plan Sightseeing Safely in July and August

    Japan’s Extreme Heat Warnings (Necchusho Keikai): How to Plan Sightseeing Safely in July and August

    Photo by Ryo Yoshitake on Unsplash

    If you’ve booked a Japan trip for July or August and started seeing phone alerts in Japanese you can’t read, there’s a good chance it’s a Necchusho Keikai Alert — an extreme heat warning. Japan’s summers aren’t just “hot,” they’re a genuine health hazard: Tokyo regularly sits at 33–36°C with humidity above 70%, and thousands of people are hospitalized for heatstroke (necchusho) every summer, a meaningful share of them tourists who didn’t adjust their walking-heavy itineraries. This guide explains what the alerts mean and how to restructure a day of sightseeing around them instead of fighting through them.

    What the Necchusho Keikai Alert Actually Means

    Since 2020, Japan’s Ministry of the Environment and Japan Meteorological Agency have jointly issued the Necchusho Keikai Alert (熱中症警戒アラート, “Heatstroke Warning Alert”) whenever the WBGT (Wet Bulb Globe Temperature) index is forecast to hit 33 or higher in a prefecture the next day. This isn’t the regular air temperature you see on a weather app — WBGT folds in humidity and direct sunlight, which is why a 34°C day with heavy humidity feels far more dangerous than a 36°C day in dry air. Since 2024, there’s also a second, rarer tier: the Necchusho Tokubetsu Keikai Alert (Extreme Heat Special Warning), triggered when WBGT is expected to reach 35+ across a wide area. That tier opens designated “cooling shelters” (shisho hinan shisetsu) — usually community centers, libraries, or city offices — where anyone can walk in and sit in air conditioning for free, no purchase or ID required.

    You’ll see these alerts on NHK broadcasts, the Yahoo! Japan weather app, and as push notifications on Japanese phones through the J-Alert system. They don’t close attractions or cancel trains, but they are the government’s way of saying: reduce outdoor activity, especially midday.

    Reading the WBGT Number Before You Head Out

    The Ministry of Environment publishes real-time WBGT readings by region on its official site (search “環境省 熱中症予防情報” or “WBGT” plus your city name). As a rough guide: under 25 is caution, 25–28 is warning, 28–31 is severe warning (strenuous outdoor activity should stop), and 31+ is danger — avoid outdoor exercise and sightseeing entirely if you can. In practice, Kyoto and Osaka basin cities often run a degree or two hotter than coastal Tokyo on the same day because the surrounding hills trap heat, so don’t assume a forecast you saw for one city applies to the next one on your itinerary.

    Rethinking Your Daily Itinerary for July–August

    The single biggest adjustment is timing, not gear. Shrines, temples, and outdoor markets in Japan typically open by 6–9am, which is the one genuinely comfortable window in summer — temperatures are often 8–10°C cooler than the 1–3pm peak. Fushimi Inari, Arashiyama’s bamboo grove, and Nara Park are all dramatically more pleasant (and less crowded) before 8am than at noon. Flip your itinerary: do outdoor, walking-heavy sights at dawn, retreat indoors from 11am to 3pm, and save a second outdoor pass for after 5pm when the sun has dropped, even if the air is still warm.

    If your trip includes hiking — Mount Hiei near Kyoto, for instance, home to the Kaihogyo marathon monks and Enryaku-ji — start before 7am or reschedule to spring or autumn entirely. Mountain trails have little shade and no convenience stores, which is exactly the combination that causes heatstroke cases every year.

    Smart Gear: What to Buy and Where

    Japan sells excellent, cheap heat-coping gear, and most of it is sold right next to the ticket gates you’re already walking through:

    • Handheld neck fans (携帯扇風機) — ¥1,500–4,000 at Don Quijote, Bic Camera, or convenience stores; USB-rechargeable and genuinely effective.
    • Cooling towels/scarves (冷却タオル) — ¥500–1,500 at drugstores; wet and wring them out, they stay cool for hours.
    • Electrolyte drinks — Pocari Sweat and Aquarius (¥150–180 at any konbini) replace salt lost through sweat far better than plain water alone; drink one per few hours if you’re outside a lot.
    • Kinchaku-style portable parasols

    Budget travelers can get by with a ¥150 drugstore cooling towel and konbini drinks; mid-range travelers add a neck fan; if you want to splurge, Uniqlo and Workman sell UV-cut, moisture-wicking shirts (¥1,500–3,000) designed for exactly this climate — the summer counterpart to the brand’s better-known HeatTech winter layering system.

    Indoor and Cool-Climate Escape Options

    When the alert is active, lean into Japan’s huge menu of air-conditioned indoor attractions rather than treating them as a backup plan: aquariums, teamLab-style digital art museums, department store basements (depachika), covered shopping arcades, and train stations themselves are all fully climate-controlled and usually free to enter and wander.

    For day trips, consider swapping a hot city itinerary for somewhere genuinely cooler. The JR Tokyo Wide Pass covers Nikko and Karuizawa, both highland towns that sit several degrees cooler than central Tokyo thanks to elevation — Karuizawa in particular has been a Japanese summer-retreat town since the Meiji era for exactly this reason. If you’re island-hopping in Okinawa or Kagoshima, a destination like Yoron Island trades sightseeing-by-foot for swimming and snorkeling, which keeps you cool rather than exposed. And wherever you are, a cold glass of sanpincha jasmine tea — Okinawa’s everyday cooling drink — is a better hydration habit than iced coffee, since it’s usually drunk unsweetened and in volume.

    Common Mistakes Foreign Visitors Make

    The most frequent error is building a European-style walking itinerary (temple at 10am, lunch at 12, museum at 2, shopping street at 4) that keeps you outside during the three worst hours of the day. The second is underestimating humidity — visitors from drier climates often don’t feel how much they’re sweating until they’re already dehydrated. The third is skipping breakfast or lunch to “save time,” which removes the salt your body needs to retain water. And the fourth is wearing dark, heavy clothing packed for a different season; light-colored, loose, breathable fabric matters as much as sunscreen in July and August.

    What to Do If You or Someone Else Shows Heat Illness Signs

    Early heatstroke symptoms are dizziness, headache, nausea, and stopping sweating despite the heat. If this happens: get into shade or AC immediately, loosen clothing, apply cool water or ice to the neck, armpits, and groin, and sip an electrolyte drink if the person is conscious and able to swallow. Any convenience store, station office, or shop will let a visibly unwell tourist sit in their AC — you don’t need to ask permission, just explain “necchusho” (熱中症) and staff will usually help proactively. If symptoms include confusion, vomiting, or loss of consciousness, call 119 for an ambulance (free in Japan) rather than trying to push through to the next attraction. It’s worth keeping your passport and embassy contact details accessible in case a hospital visit is needed, since Japanese ER intake will ask for ID.

    None of this means skipping summer travel to Japan — festivals, fireworks, and beach season all peak in July and August. It just means treating the Necchusho Keikai Alert the way locals do: as a scheduling tool, not background noise.