Japan Trove

Category: Travel

Practical, up-to-date guides for traveling in Japan — itineraries, rail passes, eSIMs, where to stay, seasonal timing, etiquette, and the local know-how that makes a trip smoother. Written with real Japanese sources so you get the answer that actually works on the ground, not the recycled tourist one.

  • Fuji Hakone Pass vs Hakone Free Pass: Which Multi-Transport Day Pass Fits Your Trip

    Fuji Hakone Pass vs Hakone Free Pass: Which Multi-Transport Day Pass Fits Your Trip

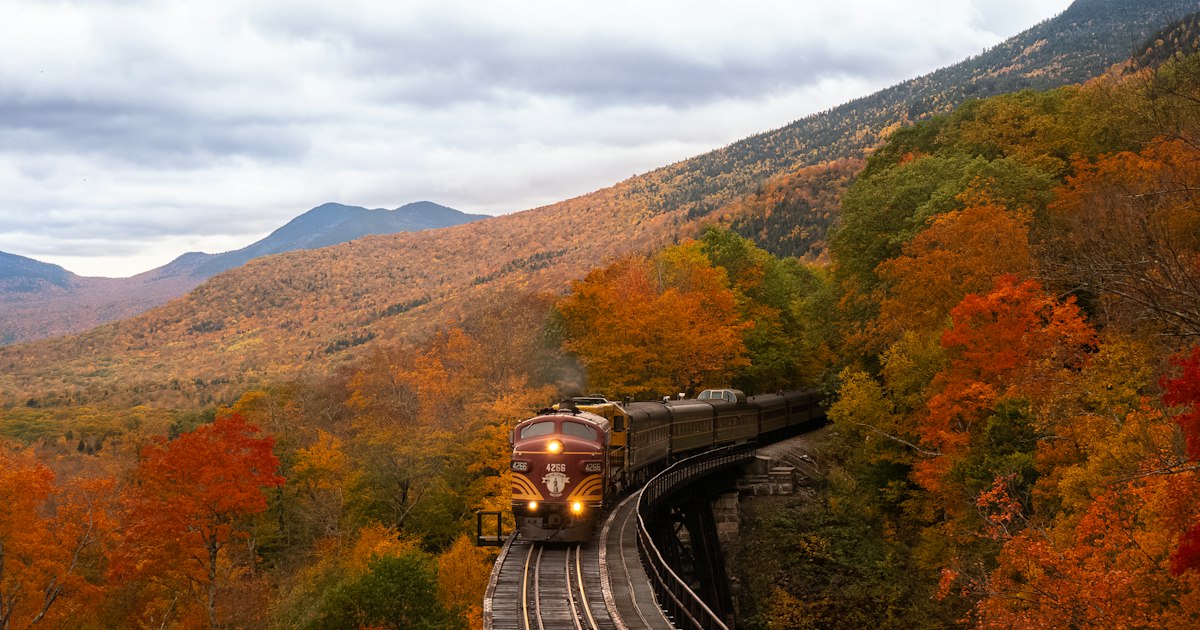
    Photo by Balazs Busznyak on Unsplash

    If you’re planning a day or two around Hakone, you’ll run into two similarly named passes almost immediately: the Hakone Freepass and the Fuji Hakone Pass. Both are sold by Odakyu Railway, both cover a tangle of trains, buses, ropeways, and a pirate ship, and both are easy to confuse at the ticket counter. The difference comes down to one thing — whether your trip stays inside Hakone or stretches across the mountain to the Fuji Five Lakes. Here’s what each pass actually gets you, what it costs, and which one saves you money.

    What Each Pass Actually Covers

    The Hakone Freepass is the classic Hakone ticket. It bundles your round-trip Odakyu Line train between Shinjuku and Odawara with unlimited rides on the Hakone Tozan Railway, Hakone Tozan Bus (on designated routes), the Hakone Ropeway, the Hakone Tozan Cable Car, and the Hakone Sightseeing Cruise (“pirate ship”) across Lake Ashi. It’s built for the loop that most visitors already have in mind: Odawara to Hakone-Yumoto, up through Gora and the ropeway to Owakudani, down to Togendai, across the lake, and back by bus.

    The Fuji Hakone Pass covers the same Hakone network but swaps out the Shinjuku–Odawara train leg and adds the bus connection over to the Fuji Five Lakes area — specifically the Hakone–Kawaguchiko highway bus, local Fujikyu buses around Kawaguchiko and Lake Yamanaka, and the Mt. Fuji Panoramic Ropeway at Kawaguchiko. In short: Hakone Freepass is Hakone-only with the Tokyo train included; Fuji Hakone Pass is Hakone-plus-Fuji with the Tokyo train excluded.

    Price Breakdown: Which One Costs Less

    Pricing changes periodically, so always confirm current yen amounts at an Odakyu ticket counter or the official Odakyu website before you travel, but as a rough guide:

    • Hakone Freepass (round trip from Shinjuku): around ¥6,100 for 2 days, ¥6,500 for 3 days for adults; children are roughly half price. Starting from Odawara instead of Shinjuku (if you’re already staying near there) is cheaper, closer to ¥5,000–5,400.
    • Fuji Hakone Pass: a 3-day-only pass priced around ¥8,000 for adults, with children around half that. This price does not include the Shinjuku–Odawara train segment — you’ll need a separate Odakyu Line ticket (a regular ticket runs under ¥900 one-way, or you can pay extra for a reserved Romancecar seat) to get from Tokyo to the Hakone gateway.

    So for a Hakone-only trip, the Freepass is almost always the better deal because it folds in your Tokyo-to-Odawara transport for a lower total price. The Fuji Hakone Pass only pays off once you’re actually crossing into the Fuji Five Lakes region, since that highway bus and the Fujikyu network aren’t cheap to cobble together ticket-by-ticket.

    Fuji Hakone Pass: Best for Combining Fuji Five Lakes with Hakone

    If your itinerary includes a night near Kawaguchiko — for Mt. Fuji views, the Panoramic Ropeway, or the Oshino Hakkai village — the Fuji Hakone Pass is the more efficient choice over buying separate tickets for each leg. The pass is valid for 3 consecutive days, which is tight if you want to linger in both regions; most travelers use day one for Hakone sightseeing, day two for the bus transfer and Fuji Five Lakes exploring, and day three for the return loop back through Hakone before heading to Odawara or Tokyo by separate train ticket.

    Budget travelers should know the highway bus between Hakone-Yumoto/Togendai and Kawaguchiko takes roughly an hour to 90 minutes and the pass makes that transfer essentially “free” once you’ve paid for the pass — buying that one bus ticket alone can run ¥2,000+ each way, so if you’re doing the Hakone-to-Fuji crossing at all, the pass usually wins even before counting the ropeway and local bus use on the Fuji side.

    Hakone Freepass: Best for a Focused Hakone-Only Trip

    For visitors doing a single day trip or an overnight stay entirely within Hakone — ropeway views of Owakudani, the pirate ship across Lake Ashi, a soak at a hot spring ryokan — the Hakone Freepass is simpler and cheaper. It also comes with small perks worth knowing about: discounted admission at several Hakone attractions, including a reduced ticket price at the Hakone Open-Air Museum, one of the better-paced stops on the Tozan Railway route between Gora and the ropeway station.

    If you’re staying overnight and want to end the day in a hot spring without sharing a bath with strangers, pair your pass-based itinerary with a reserved private bath — see our guide to booking a private onsen room (kashikiri buro) for how reservations and pricing work at Hakone ryokan.

    How and Where to Buy Your Pass

    Both passes are sold at Odakyu’s dedicated travel service centers, most usefully the one inside Shinjuku Station near the Odakyu Romancecar ticket gates, as well as at Odawara Station and major Hakone stations like Hakone-Yumoto. If you’re departing from Shinjuku, build in extra time to find the right counter — Shinjuku is Japan’s busiest station and the Odakyu entrances are a separate wing from the JR side. Our Shinjuku Station wayfinding guide covers how to find the Odakyu ticket machines and Romancecar platforms without doubling back through the wrong exit.

    Both passes can also be bought online in advance through Odakyu’s official site, which lets you skip the counter line and pick up a voucher that’s exchanged for the physical pass at a machine. If you want a reserved Romancecar seat from Shinjuku (the faster, more comfortable option over the regular Odakyu Line train, with seat reservation typically adding a few hundred yen), book that separately — it is never bundled into either pass.

    Common Mistakes to Avoid

    • Buying the Fuji Hakone Pass for a Hakone-only trip. Since it excludes the Shinjuku–Odawara train, you’ll pay more overall than just getting the Freepass, even though “Fuji Hakone” sounds like the upgraded option.
    • Underestimating travel time between regions. The Hakone-to-Kawaguchiko bus run can be delayed by weekend traffic on mountain roads, especially during autumn foliage (mid-to-late November) and cherry blossom season (early April) — build in a buffer rather than a tight connection.
    • Forgetting the pirate ship and ropeway can close for weather or maintenance. High winds occasionally suspend the Hakone Ropeway or the Lake Ashi cruise; check Odakyu’s site for service alerts on the morning of your trip since the pass itself isn’t refunded for weather closures.
    • Not checking the Freepass validity window carefully. The 2-day and 3-day counts run on consecutive calendar days from first use, not 24-hour blocks — a late afternoon start on day one eats into your trip more than it looks like on paper.

    Sample Itineraries for Each Pass

    2-day Hakone Freepass (budget, Hakone-only): Day 1 — Shinjuku to Odawara to Hakone-Yumoto, Tozan Railway up to Gora, Open-Air Museum, ropeway to Owakudani for the sulfur vents. Day 2 — ropeway onward to Togendai, pirate ship across Lake Ashi to Hakone-machi for the shrine’s lakeside torii gate, bus back to Odawara.

    3-day Fuji Hakone Pass (mid-range, two regions): Day 1 — Hakone loop as above. Day 2 — highway bus to Kawaguchiko, Panoramic Ropeway for Fuji views, afternoon at Oshino Hakkai. Day 3 — bus back through Hakone for a final onsen stop before returning to Odawara on a separately purchased train ticket.

    Whichever you choose, the pass pays for itself fastest when you actually use the ropeway, cruise, and at least one bus leg — if your plan is mostly walking and taxis, do the math on individual tickets before assuming the pass is cheaper.
  • Booking a Private Onsen Room (Kashikiri Buro): A Guide for Travelers Who Don’t Want to Share a Bath

    Booking a Private Onsen Room (Kashikiri Buro): A Guide for Travelers Who Don’t Want to Share a Bath

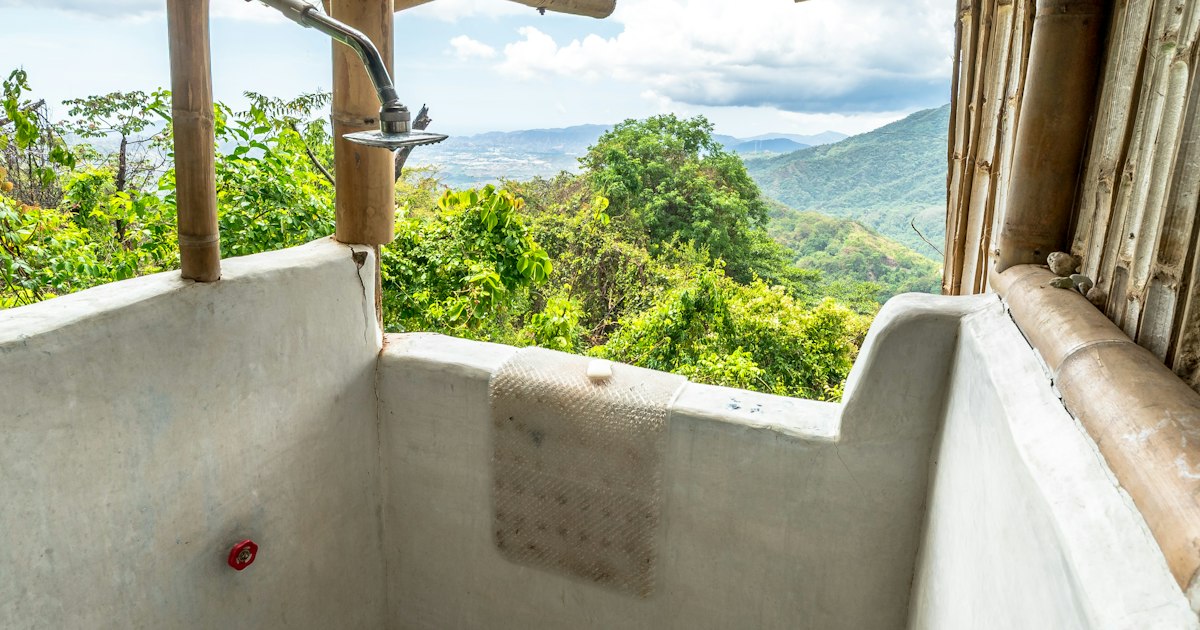
    Photo by Marc Wieland on Unsplash

    Japan’s communal onsen are a beautiful tradition, but they’re not for everyone. Maybe you have tattoos that many bathhouses still turn away, maybe you’re traveling with young kids or a partner and want to soak together, or maybe the idea of being naked in a room full of strangers just isn’t your thing. The good news is that you don’t have to skip hot springs entirely. A huge number of ryokan and onsen hotels offer kashikiri buro — literally “rental bath” — a private bathing room you reserve for your own exclusive use, usually in 45- to 60-minute slots. Here’s how the system actually works and how to book one without overpaying or showing up at the wrong time.

    What exactly is a kashikiri buro?

    A kashikiri buro is a small, private bath — sometimes indoor, sometimes a rotenburo (open-air bath) with a garden or mountain view — that’s locked and reserved for one party at a time. Unlike the main communal baths (daiyokujo), you don’t need to worry about tattoo policies, nervous kids splashing near strangers, or language barriers over bathing etiquette. Many are large enough for two to four people, making them popular with couples, families, and friends who want to soak together rather than split up by gender, which is how most communal baths are organized.

    There are two common formats. Some ryokan have a handful of dedicated kashikiri rooms separate from the main baths, bookable in time slots throughout the day. Others simply let you reserve the entire communal bath for a window when it’s normally closed to the public, often late at night or early morning. Either way, the mechanics are similar: you sign up for a slot, you get the room to yourselves, and you lock the door from inside while you’re in there.

    How to book: in-room, front desk, or online

    Three main booking methods exist, and it’s worth knowing all three before you arrive:

    • Pre-booked with your stay: Some ryokan include a free kashikiri session as part of a room package, especially at higher-end properties. This is usually confirmed when you book your stay or upon check-in.
    • Reserved at check-in: The most common method. A sign-up sheet or digital tablet at the front desk lists available time slots for that evening and the next morning. Slots fill up fast at popular ryokan, so ask about kashikiri availability the moment you check in, not after dinner.
    • In-room reservation system: Larger properties sometimes use a phone extension or in-room tablet where you dial a code to book directly from your room.

    If you’re booking your accommodation yourself rather than through a travel agent, search listings for the terms “kashikiri buro,” “private onsen,” or “family bath” (kazoku-buro) — these are the keywords Japanese booking sites use, and many international booking platforms now translate them directly.

    What it costs: budget, mid-range, and splurge

    Pricing varies widely by region and property tier:

    • Budget (free–¥1,500 per slot): Many mid-range ryokan include one or two kashikiri sessions per stay at no extra charge, especially if you book directly. Some simple hot spring inns charge a small flat fee of around ¥1,000–¥1,500 for a 45-minute slot regardless of party size.
    • Mid-range (¥2,000–¥5,000 per slot): This is the most common pricing bracket, typically for 45–60 minutes, charged per room rather than per person. Hakone, Kinosaki, and Kusatsu properties frequently fall in this range.
    • Splurge (¥6,000–¥15,000+, or a private in-room bath): Top-tier ryokan often build a private rotenburo directly into select guest rooms, so the “booking” is really just reserving that room type when you reserve your stay. These rooms cost significantly more per night but remove the time-limit pressure entirely — you can soak whenever you like, as often as you like.

    Note that many onsen towns also charge a small local bathing tax on top of your room rate — if you’re budgeting for a hot spring trip, it’s worth reading about Japan’s onsen bathing tax (nyuyokuzei) so the extra charge on your final bill doesn’t surprise you.

    Best times to book and how long you get

    Slots are usually sold in 45-minute or 60-minute blocks, run back-to-back from around 3pm (after rooms open) until as late as midnight, then again from early morning (around 6am) until breakfast. The two most popular windows — right after check-in before dinner, and first thing after waking up — book out fastest, so grab one of those if you want convenient timing, or take an off-peak slot (late evening or right at opening) if you’d rather have a longer, less rushed soak without anyone waiting outside the door.

    Seasonally, kashikiri rooms with outdoor views are at their best in late autumn (November) for foliage and in winter (December–February) for snow-rimmed baths with steam rising off the water — both are peak demand periods, so book your ryokan stay, and your bath slot, well in advance.

    Common mistakes to avoid

    • Not booking early enough. Kashikiri slots are limited — often just 4-8 per day at a given property — and the best times go first. Ask at check-in, not after you’ve unpacked.
    • Overstaying your slot. Another guest is often waiting right after you. Rinse and dress with a few minutes to spare rather than right at the buzzer.
    • Bringing soap or shampoo into the tub water. Even in a private bath, the same onsen rule applies everywhere in Japan: wash and rinse completely at the shower station before entering the tub. The bathwater is shared conceptually with the next guest, and keeping it clean matters.
    • Assuming kashikiri means swimwear is fine. Nearly all kashikiri baths still follow the no-swimsuit, bathe-naked convention, same as communal onsen — the “private” part refers to who’s in the room with you, not a looser dress code.
    • Forgetting to lock the door. Slide the “in use” sign or lock the latch from inside; this is what signals to staff and other guests that the room is occupied.

    A good option if you’re nervous about communal bathing

    If tattoos, modesty, or simply being new to the onsen tradition are holding you back from trying a hot spring at all, kashikiri buro is the easiest on-ramp. You get the full experience — the mineral-rich water, the ritual of washing first, the quiet soak — without the social pressure of a shared space. It’s a popular choice for first-time visitors easing into Japanese bathing customs the same way many ease into other traditions, the way someone might try on a secondhand kimono before committing to buying one new, low-pressure, and on their own terms.

    If you’re planning a hot spring getaway as part of a broader Hakone itinerary, pair your soak with a cultural stop like the Hakone Open-Air Museum earlier in the day, then return to your ryokan in the afternoon to book that evening’s kashikiri slot before dinner — that’s the sweet spot many repeat visitors aim for.

    The bottom line

    Kashikiri buro turns Japan’s onsen culture from something you might feel you have to opt out of into something you can comfortably opt into, on your own terms. Ask about availability the moment you check in, expect to pay anywhere from nothing to around ¥5,000 for a standard 45–60 minute slot, and treat the bathing etiquette exactly as seriously as you would in a communal bath. Do that, and a private soak becomes one of the most relaxing parts of any Japan trip — not a hurdle to work around.

  • Shinjuku Station’s Labyrinth: A Practical Wayfinding Guide for the World’s Busiest Station

    Shinjuku Station’s Labyrinth: A Practical Wayfinding Guide for the World’s Busiest Station

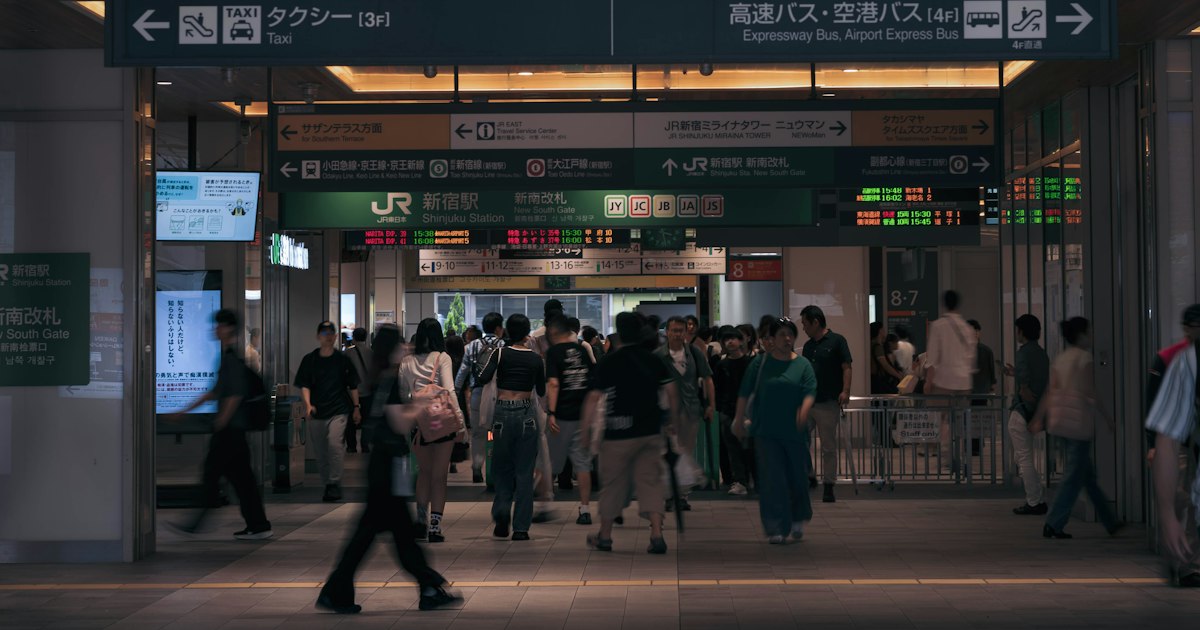
    Photo by Fumiaki Hayashi on Unsplash

    Shinjuku Station moves more than three million passengers a day, spreads across more than 200 exits, and is shared by five different railway operators plus a separate station next door that also calls itself “Shinjuku.” It’s officially recognized by Guinness World Records as the busiest train station on Earth, and the first time you try to find your platform, it feels like it. The good news is that the chaos has a logic to it — once you know the landmarks, the fare-gate quirks, and a few rookie traps to avoid, Shinjuku stops being scary and becomes one of the most useful hubs in Tokyo.

    Why Shinjuku Station Feels Like a Maze

    The confusion comes from scale, not design failure. JR East, Odakyu, Keio, Tokyo Metro, and the Toei subway each run their own lines through overlapping concourses, and each company has built its own exits, signage style, and underground passages over nearly a century. Add Seibu-Shinjuku Station — a separate building about a 10-minute walk from the main complex, used by the Seibu Shinjuku Line — and you can see why even Tokyo residents sometimes resurface on the wrong side of the building. Treat your first visit as a scouting mission: give yourself an extra 10-15 minutes buffer the first time you transfer here, especially with luggage.

    The Big Four Exits and What’s Near Each One

    Instead of memorizing a track map, memorize what’s above ground at each main exit — it’s the fastest way to self-correct when you’re lost.

    • East Exit (Higashi-guchi): Studio Alta’s video screen, the Kabukicho entertainment district, Golden Gai’s tiny alley bars, and Don Quijote. If you’re heading to a show at one of Tokyo’s theatrical dinner shows, this is almost always your exit.
    • West Exit (Nishi-guchi): The skyscraper district, Odakyu and Keio department stores, and the Tokyo Metropolitan Government Building, which has a free observation deck around 202m up (usually open 9:30am-10:30pm, with occasional maintenance closures — check before you go up).
    • South Exit (Minami-guchi) and New South Exit: Busta Shinjuku, the country’s largest bus terminal, plus Takashimaya Times Square and the NEWoMan shopping complex. This is where most long-distance and airport buses depart.
    • Southern Terrace: A quieter, street-level walkway linking the South Exit area to Odakyu’s building — handy for avoiding underground crowds if you just want fresh air between transfers.

    JR vs. Private Railways: How the Fare Gates Trip People Up

    The single biggest mistake foreign visitors make at Shinjuku is assuming it’s one unified station you can walk through freely. It isn’t. JR East, Odakyu, Keio, Tokyo Metro, and Toei each operate behind their own fare gates. If your IC card (Suica or Pasmo) is tapped into the JR side, you generally cannot walk through to the Odakyu or Keio platforms without exiting one set of gates and tapping into another — the fare recalculates automatically, so this isn’t a problem for your wallet, just for your sense of direction. Follow the color-coded line signs (JR uses green for the Yamanote Line, orange for the Chuo Line) rather than trying to beeline toward a platform number, since numbering resets between operators.

    Also worth knowing: Shinjuku-Sanchome Station (Marunouchi Line, Toei Shinjuku Line, Fukutoshin Line) and Tochomae Station (Oedo Line, right by the Metropolitan Government Building) are both separate stations a short walk from the main Shinjuku Station complex, not exits of it. If a map app routes you through one of these, don’t panic — it’s often genuinely the faster path, just not technically “inside” Shinjuku Station.

    Avoiding the Worst of the Crowds

    Weekday rush hours — roughly 7:30-9:30am and 5:30-7:30pm — turn the main concourses and the Yamanote Line platforms into a dense, fast-moving river of commuters. If you’re dragging luggage or traveling with kids, it’s worth timing your transfer outside those windows. Midday (11am-3pm) and after 8pm are noticeably calmer. Weekends are busy in a different way — shopping and entertainment crowds around the East and South Exits — but the pure commuter crush is gone, making it a slightly easier time to practice navigating before a weekday trip through the station.

    Tools and Apps That Actually Help

    Google Maps’ transit directions are generally reliable for exit numbers inside Shinjuku, and it’s worth zooming in before you arrive so you recognize exit names in Japanese characters as well as English (station signage mixes both). The Japan Official Travel App and Navitime Japan Travel both include indoor station maps that are more detailed than generic map apps for exactly this kind of multi-operator station. If you just need a bathroom break mid-transfer, Shinjuku has well-maintained public restrooms on most concourse levels — our guide to finding a public restroom in Japan covers the apps and station-facility signage that make this easy anywhere, not just here.

    Common Mistakes First-Timers Make

    • Confusing JR Shinjuku with Seibu-Shinjuku Station. They are different buildings about 10 minutes apart on foot. Check which one your ticket or app directions actually specify.
    • Trying to transfer underground between operators without exiting fare gates. It usually isn’t possible — budget time to tap out, walk, and tap back in.
    • Skipping breakfast because there’s “no time” between trains. Shinjuku has several standing soba counters right in the station that fit easily into a short layover — see our guide to Tokyo’s standing soba stalls for exactly this situation.
    • Not using a locker for daytime sightseeing. Coin lockers throughout the station run roughly ¥400-700 depending on size, letting you drop bags before exploring Kabukicho or the skyscraper district instead of hauling them around all day.
    • Underestimating walk times between exits. The East and West Exits, for instance, are a genuine 10-15 minute walk apart via underground passages — don’t assume “same station” means “same door.”

    Quick Reference: Getting To and From Shinjuku

    Shinjuku is a major long-distance hub as well as a city hub. The Narita Express connects Narita Airport to Shinjuku in roughly 80-90 minutes for around ¥3,250 one-way. Odakyu’s Romancecar runs limited-express service toward Hakone from the West Exit side in about 85 minutes. Busta Shinjuku, at the South Exit, handles highway buses to destinations across Japan, including ski regions and hot-spring towns well beyond the city — if a quieter powder destination like Appi Kogen or a resort town such as Nasu Highland is on your itinerary, this is often where that journey starts. Whichever direction you’re headed, arrive at Shinjuku with a little extra time, follow the exit landmarks rather than platform numbers, and the “world’s busiest station” label starts to feel more like a fun fact than a warning.

  • Coin-Operated Car Washes in Japan: How to Use One as a Renter

    Coin-Operated Car Washes in Japan: How to Use One as a Renter

    Photo by Clément M. on Unsplash

    If you’ve rented a car in Japan for a road trip through the countryside, you’ve probably spotted them: small, unmanned concrete lots with a row of hoses, a coin slot, and a lot of kanji you can’t read. These are koin sensha-jou (コイン洗車場), Japan’s ubiquitous self-service coin car washes, and they’re one of the most useful — and most confusing — pieces of roadside infrastructure for a foreign renter. Here’s how to actually use one without wasting coins or your rental return time.

    What a Coin-Operated Car Wash Actually Is

    Unlike the drive-through tunnel washes common in North America, Japanese coin car washes are DIY bays you pull your car into and operate yourself with 100-yen coins. Each bay typically has a wall-mounted control panel with buttons for different functions — high-pressure rinse, foam shampoo, wax/coating, and sometimes an undercarriage spray — plus a separate coin-operated vacuum unit nearby for the interior. There’s no attendant, no reservation, and usually no English signage, but the process is mechanical enough that you can figure it out on sight once you know what to look for.

    They’re almost always open 24 hours, since there’s no staff to schedule. You’ll find them standing alone on suburban roads, attached to gas stations, and occasionally at highway rest stops (SA/PA) on long-distance routes.

    Finding One as a Renter

    Coin car washes are rare in dense city centers — Tokyo’s 23 wards or central Osaka — simply because there’s no space for the bays, which is the same reason street parking barely exists there either (see our guide to coin parking in Japan for the bigger picture on how space-constrained Japanese cities handle cars). You’ll have much better luck once you’re outside the city: along national highways (kokudo), near interchanges, and in suburban and rural areas where land is cheaper.

    The easiest way to find one is Google Maps — search “コイン洗車” (koin sensha) or just “car wash” and switch to Japanese results if nothing shows up in English. Maps will show you distance, and most listings include a small photo so you can preview the bay layout before you arrive. If you’re already driving and see a sign with the kanji 洗車 (sensha, “car wash”), that’s your cue — it’s usually blue-and-white signage visible from the road.

    Step-by-Step: How to Use the Bay

    • Pull all the way in — pull forward until your front tires line up with the floor markings, leaving room behind you for the hose to reach every panel.
    • Read the panel before inserting coins — buttons are usually labeled with pictograms (a spray nozzle for rinse, bubbles for shampoo, a shiny car for wax) even where the text is Japanese-only. Figure out which button you want before you pay, because the timer starts the moment you insert a coin.
    • Insert 100-yen coins — most machines only take ¥100 coins, not ¥500 or bills, and each coin buys roughly 60–90 seconds depending on the function selected. Higher-priced functions like foam wax eat time faster per coin.
    • Work quickly and keep feeding coins — the hose cuts off abruptly when time runs out, often mid-rinse, so have a stack of coins ready rather than running back and forth to a change machine.
    • Finish with the vacuum — the coin-operated vacuum is usually a separate unit at the edge of the lot, also ¥100 per few minutes, with an air blower option for dashboard and vents.

    What It Actually Costs

    Budget (¥300–¥500): A quick high-pressure rinse to blast off mud or dust — two or three ¥100 coins, no soap.

    Mid-range (¥600–¥1,000): Full cycle — foam shampoo, rinse, and a basic wax — plus a few minutes of vacuuming. This is the realistic cost for cleaning a rental before a return.

    Splurge (¥1,200+): Adding undercarriage spray (useful after driving snow-country roads where salt has been laid down) and a glass-coating wax option, which some machines offer as a premium button.

    Bring at least ten ¥100 coins (¥1,000) if you’re doing a full wash — running out mid-cycle with wet soap on the car and no change machine nearby is a common and avoidable frustration. A growing number of newer machines accept IC cards (Suica/Pasmo) or PayPay, but don’t count on it; coins are still the universal fallback.

    Best Times and Seasons to Go

    Spring (March–May) is peak pollen (kafun) season in much of Japan, and cars parked outside overnight pick up a visible yellow-green dust — a quick rinse makes a real difference if you’re returning a rental that’s been sitting. Early summer brings the rainy season (tsuyu, roughly June into mid-July), when mud splash from wet roads accumulates fast on wheel arches and lower panels. If you’ve driven through a ski region in winter, road salt on the undercarriage is worth rinsing off before a long return drive, both for your own view out the windshield and because salt residue is one thing rental staff do sometimes flag.

    Avoid weekend late mornings near popular rural tourist routes — that’s when coin wash bays near highway interchanges get a short queue of locals doing their weekly wash. Weekday mornings or evenings are nearly always empty.

    Common Mistakes Renters Make

    • Not scouting the panel before paying — accidentally mashing the wax button when you only wanted a rinse burns through coins fast.
    • Standing the nozzle too close to the car — the pressure is genuinely strong; holding it too near the glass or body panels can streak or even chip old paint/stickers. Keep it roughly arm’s length away.
    • Forgetting the vacuum is a separate machine — don’t assume the wash bay cleans the interior; the vacuum unit is a different coin slot entirely, usually a few meters away.
    • Blocking the bay — these are single-car stalls with no waiting area; if someone’s parked outside scrolling their phone, they’re probably waiting for you to finish.
    • Bringing your own car shampoo — these machines dispense their own soap through the hose; outside products won’t work with the equipment and can clog the nozzle.

    Do You Even Need to Wash Before Returning a Rental?

    For most Japanese rental companies (Toyota Rent-a-Car, Nippon Rent-a-Car, Times Car, and similar), a normal amount of road dust or light rain spatter is completely fine and does not need to be washed off before return — it’s priced into the rental the same way minor wear is. Where a coin wash genuinely earns its ¥500–¥1,000 is after driving on unpaved forest roads, through heavy mud, after a day at the beach (sand and salt air), or through snow country with road salt — visibly dirty cars, especially ones returned muddy or with interior sand, can occasionally trigger a cleaning fee that costs more than the wash itself would have. When in doubt, a quick ¥300 rinse ten minutes before you drop the car off is cheap insurance, and it’s a far less stressful errand than, say, hunting for a public restroom on the same road trip — both are unmanned, self-serve, and far more common once you know the signage to look for.

  • Robot Restaurant and Tokyo’s Theatrical Dinner Shows: What First-Timers Should Know

    Robot Restaurant and Tokyo’s Theatrical Dinner Shows: What First-Timers Should Know

    Photo by Denys Nevozhai on Unsplash

    For years, “Robot Restaurant” was the single most-asked-about night out in Tokyo — a strobe-lit, taiko-drumming, neon-robot spectacle in the back alleys of Kabukicho that showed up on every “weird Japan” listicle. If you’re planning a trip and have that exact show on your list, there’s some bad news and some good news: the original venue is gone, but Tokyo’s appetite for over-the-top theatrical dinner shows very much isn’t. Here’s what actually happened, what’s still running, and how to pick an experience that’s worth your yen.

    What happened to the original Robot Restaurant

    The Robot Restaurant that opened in 2012 in Shinjuku’s Kabukicho district — the one with the oversized LED robots, taiko drums, and bikini-clad dancers riding dinosaurs — shut its doors for good in the years following the pandemic. It never fully recovered from the 2020–2021 closures, and the venue has not reopened under that name. If you see a site offering “Robot Restaurant Tokyo tickets,” treat it with caution: it’s either reselling tickets to an unrelated show, listing a venue that no longer exists, or trying to capture search traffic from the old brand’s fame. Always check a venue’s official site and recent reviews (within the last few months) before paying for anything labeled “Robot Restaurant” — don’t rely on a listing’s photos alone, since many still use old publicity shots.

    This matters because Kabukicho is also Tokyo’s densest nightlife touting zone. Street staff offering to walk you to a “robot show” or “bar with a show” are almost always commission-based touts, and some have led tourists into bars with inflated bills. The rule in Kabukicho is simple: never follow someone who approaches you on the street with a show or bar offer, no matter how official their lanyard looks.

    What’s still running: Tokyo’s current theatrical dinner shows

    The closest thing to that same “loud, costumed, only-in-Japan” energy today is the ninja-themed restaurant chain with locations in Akasaka and Shinjuku. Staff dressed as ninja perform tableside sleight-of-hand (coin and card tricks, small “magic” flourishes before your dishes arrive), the interior is built like a dim stone maze with hidden doors, and the food is a genuine multi-course dinner rather than a snack box — expect course menus in the roughly ¥8,000–15,000 per person range, before drinks. Reservations are essential, especially for Friday/Saturday evening slots and parties of 4+; same-day walk-ins can usually only be fit in on weeknights.

    A second category worth knowing about is the fantasy/anime-adjacent themed restaurants (Alice in Wonderland-style interiors, costumed staff, elaborate plated desserts) scattered around Shinjuku, Ginza, and Omotesando. These lean more “immersive themed dining” than “stage show,” with no fixed performance time — you’re paying for the room and the photo ops as much as the food, with set courses typically in the ¥4,000–7,000 range. They’re a good lower-stakes option if a full-blown show isn’t your priority.

    For something more purely theatrical with less emphasis on the meal, look at dinner-cruise shows on Tokyo Bay and hotel dinner shows (often jazz, magic, or variety acts paired with a set dinner) — these rotate seasonally and are usually booked through the hotel or cruise operator’s own site rather than general ticket resellers.

    How the format actually works

    Whichever venue you choose, the shape of the evening is fairly consistent: you check in 15–30 minutes before your reserved slot, are seated at communal or semi-private tables, and the show runs in waves between courses rather than as one continuous performance — so there’s usually a 60–90 minute total runtime once you include the meal. Photography without flash is almost always allowed and even encouraged (staff will often offer to take your photo), but video with flash or using tripods/selfie sticks is commonly restricted because it blocks other guests’ sightlines in small rooms. Alcohol is typically available but not always included in the course price — check this before you order, since drink packages can add ¥2,000–4,000 per person.

    Budget, mid-range, and splurge options

    • Budget (~¥4,000–6,000): Themed cafés and fantasy-restaurant lunch sets — lighter on spectacle, but a real taste of Tokyo’s costumed-dining culture without a dinner-show price tag.
    • Mid-range (~¥8,000–12,000): Standard ninja-restaurant dinner course, or a hotel dinner show with a set menu and a 45-minute variety act.
    • Splurge (¥15,000+): Premium course menus with private-room options, Tokyo Bay dinner cruises with a full show, or add-on experiences like a personal ninja “lesson” before the meal.

    Across all tiers, book 1–2 weeks ahead in peak travel seasons (late March–April for cherry blossoms, July–August summer break, late December–early January); weeknight slots in quieter months (June, September, February) are far easier to get same-week and sometimes slightly cheaper.

    Common mistakes first-timers make

    The biggest one is booking “Robot Restaurant” tickets from a third-party site without checking whether the venue still exists — read the most recent reviews, not just the star rating, since defunct listings can sit online for years. The second is underestimating travel time within Kabukicho or Akasaka: these districts are a maze of narrow streets and basement entrances, and Google Maps pins can be off by a block, so budget an extra 10–15 minutes to find the actual door. Third, people often skip eating beforehand assuming the “dinner” course will be filling — portions at theatrical dinner shows are usually modest since the point is the performance, so eat a proper meal earlier if you’re hungry. Finally, don’t assume every show is kid-friendly; some ninja and fantasy-restaurant shows involve loud noise, strobe lighting, or mildly suggestive theming, so check the venue’s own age guidance if you’re bringing children.

    Getting there and timing your visit

    Akasaka is served by the Akasaka or Akasaka-mitsuke stations (Chiyoda, Ginza, and Marunouchi lines), a short walk from most venues; Shinjuku locations are a 5–10 minute walk from Shinjuku Station’s east exit through Kabukicho. Both areas are safe to walk through in the evening but busy and bright — if you need a restroom before or after the show, train stations and konbini are your most reliable option in these districts, and it’s worth knowing the general tactics for finding one in Japan before you’re stuck between stops. Evening shows typically run two or three seatings between 5:30pm and 9:30pm, so if you’re also sightseeing that day, plan the show as your last stop rather than squeezing it between other activities — rushing from a shrine visit across town rarely leaves enough buffer once trains and check-in time are factored in.

    If the robot-and-neon aesthetic was the actual draw for you rather than the dinner format, it’s worth noting that Tokyo’s tokusatsu and kaiju fandom runs much deeper than one restaurant — there’s a whole retail and collectible side to that world worth exploring, covered in our guide to hunting Ultraman, Kamen Rider, and Godzilla merch in Japan. And if you want a different kind of immersive, participatory Tokyo night out that doesn’t involve food at all, Japan’s real-life escape room craze scratches a similar “only in Japan” itch and is easy for English-speaking tourists to join.

  • Finding a Public Restroom in Japan: Toilet-Finding Apps, Konbini & Station Facilities

    Finding a Public Restroom in Japan: Toilet-Finding Apps, Konbini & Station Facilities

    Photo by Levi Meir Clancy on Unsplash

    Japan has a reputation for being the easiest country in the world to find a clean toilet, and for the most part that’s true — but “easiest” doesn’t mean “obvious.” Konbini policies vary by chain and by branch, station restrooms are sometimes inside the ticket gates and sometimes outside, and the apps that locals use aren’t the ones that show up first in an English app store search. Here’s how to actually find a restroom in Japan, fast, wherever you are.

    Convenience Stores: Usually Fine, Not Always Free-For-All

    Seven-Eleven, Lawson, and FamilyMart are the backbone of Japan’s public restroom network, and most branches will let you use the toilet without buying anything. But this isn’t a universal legal right — it’s a courtesy that varies by store, and a few things matter:

    • Ask first. A quick “sumimasen, toire wa arimasu ka?” (excuse me, is there a toilet?) at the register is expected, especially at smaller or older branches where the toilet is staff-controlled and may require a key or code written on a card.
    • Urban flagship stores sometimes say no. Densely packed locations in areas like Shinjuku or Shibuya occasionally restrict restroom use to customers only, or close it for cleaning. If one branch says no, the next konbini is rarely more than a few minutes’ walk away.
    • Buying something is good manners, not a requirement. A ¥120 bottle of tea is a cheap way to say thank you if you’ve used the facilities and have five minutes to spare.

    Konbini toilets are almost always Western-style with a washlet (heated seat, bidet function), and most now stock toilet paper reliably, though it’s still smart to carry a small pack of tissues as backup.

    Train and Subway Stations: Your Most Reliable Default

    Every JR station and most private-line and subway stations have free public restrooms, and in larger stations there are usually two sets — one inside the paid area (past the ticket gates) and one outside it, so you don’t need a valid ticket just to use the toilet. Look for the pictogram signage near station exits or consult the station’s posted floor map, which almost always marks restrooms in multiple languages.

    A few practical notes:

    • Major terminal stations (Tokyo, Shinjuku, Osaka, Kyoto) have large, well-maintained restroom banks with baby-changing tables and accessible stalls, usually near the central concourse or Shinkansen platforms.
    • Smaller rural or older stations may still have a squat-style (washiki) toilet alongside the Western one — not a problem, just budget a little extra time if you’re unfamiliar with the style.
    • Coin-operated toilets (around ¥20–100) have mostly disappeared, but you’ll occasionally still find one at an older regional station or roadside rest stop. Keep a bit of small change on hand just in case.

    If you’re road-tripping rather than training, the same logic applies at highway service areas (SA) and parking areas (PA), which have free, well-kept restrooms open 24 hours — useful to know if you’re also navigating where to park in Japan on a longer drive.

    Toilet-Finding Apps That Actually Work

    Skip the generic “find a bathroom” apps built for other countries — they have poor Japan coverage. Use these instead:

    • Japan Official Travel App (JNTO) — the national tourism board’s free app includes a restroom layer alongside its offline maps, Wi-Fi finder, and disaster alerts. Good baseline coverage in cities and tourist areas.
    • Google Maps — searching “toilet” or “restroom” near your current location works surprisingly well in Japanese cities, pulling in konbini, station, and park facilities with user ratings and photos.
    • NAVITIME for Japan Travel — the English tourist version of Japan’s most-used transit app includes a restroom search filter alongside train routing, handy if you’re already using it to plan your route.
    • Check A Toilet (トイレ情報共有サービス) — a Japanese-language crowdsourced map specifically for accessible and multipurpose toilets; worth trying even with basic Japanese, since it’s more granular on wheelchair access and ostomate facilities than general map apps.

    In Shibuya specifically, keep an eye out for The Tokyo Toilet project — 17 architect-designed public restrooms (by names like Tadao Ando and Kengo Kuma) scattered around the ward since 2020–2023, all free, all immaculately maintained, and worth a detour if you’re nearby and curious about design as much as plumbing.

    Department Stores, Malls, and Other Backup Options

    When you want guaranteed cleanliness and don’t mind a short walk, department stores (Takashimaya, Isetan, Daimaru, Mitsukoshi) have restrooms on nearly every floor, typically open during store hours (roughly 10:00–20:00), with baby rooms and lounge-style waiting areas near the women’s facilities on several floors. Shopping malls and large electronics stores (Bic Camera, Yodobashi) follow similar hours and standards.

    Cinemas are another reliable option if you happen to be near one — the restrooms at TOHO Cinemas and other major theater chains are open to anyone passing through the lobby, not just ticket holders, and tend to be spacious and well-stocked.

    Parks and shrine/temple grounds usually have at least a basic public toilet near the entrance, though standards vary more here — some are modern and spotless, others are older squat-style blocks with no soap or hand dryer, so carrying tissues and a small bottle of hand sanitizer is a good habit for temple-hopping days.

    Common Mistakes to Avoid

    • Not carrying tissues. Most restrooms have toilet paper, but older park and shrine facilities sometimes run out or never had a dispenser to begin with. A small pocket pack solves this permanently.
    • Assuming hand dryers exist. Many public restrooms, including some konbini and older stations, have neither dryers nor paper towels post-pandemic. A small handkerchief is standard carry for locals for exactly this reason.
    • Forgetting store-hour restrictions. Department store and mall restrooms close with the building — don’t count on them late at night or very early morning; stations and konbini are open far longer (many 24 hours).
    • Panicking in a crowded station. Signage can be easy to miss in rush-hour crowds at places like Shinjuku Station. Look up, not around — restroom signs are almost always mounted overhead with a running-figure pictogram, visible above the crowd.

    Between konbini, stations, and a decent map app, you’re rarely more than a five-minute walk from a clean, free restroom anywhere in urban Japan — the main skill is just knowing where to look first.

  • Japan’s Onsen Bathing Tax (Nyuyokuzei): The Small Local Fee on Your Hot Spring Stay

    Japan’s Onsen Bathing Tax (Nyuyokuzei): The Small Local Fee on Your Hot Spring Stay

    Photo by Tayawee Supan on Unsplash

    If you’ve ever checked out of a ryokan in Japan and noticed a mysterious ¥150 line item you don’t remember ordering, you’ve met the nyuyokuzei (入湯税), Japan’s local onsen bathing tax. It’s tiny, it’s legal, and almost nobody explains it to foreign visitors before they see it on the bill. Here’s exactly what it is, how much to budget for it, and how to avoid the confusion that trips up first-time onsen guests.

    What Exactly Is the Nyuyokuzei?

    Nyuyokuzei literally means “bathing entry tax.” It’s a municipal tax authorized under Japan’s Local Tax Act, charged by cities, towns, and villages that have designated hot spring (onsen) facilities within their borders. Unlike national consumption tax, this money stays local — it’s what’s called a “purpose tax” (mokutekizei), meaning the municipality is required to spend it on specific things related to the hot spring itself, rather than folding it into the general budget.

    It only applies to genuine onsen — water that meets the mineral content or temperature standards defined under Japan’s Hot Springs Act. A standard municipal sento (public bathhouse) using heated tap water generally isn’t subject to it, though a sento that pipes in real hot spring water usually is.

    How Much Will You Actually Pay

    The long-standing national reference amount is ¥150 per person, per night, which is what most onsen towns actually charge — you’ll see it at well-known destinations like Hakone, Kusatsu, Atami, and Yunoyama. Some municipalities charge less for day-trip bathing (higaeri onsen) than for overnight stays, often ¥50–100 for a single soak versus the full ¥150 for an overnight guest. A few towns scale the rate by type of lodging, charging large hotels with their own fire brigade obligations slightly more per guest than small family-run inns.

    The important thing to know: it’s charged per person, per night, not per bath. If you stay two nights at a ryokan in a town with the ¥150 rate, expect ¥300 added to your total bill, not ¥150 regardless of length of stay. For a family of four staying one night, that’s roughly ¥600 on top of the room rate — not enough to change a budget, but enough to notice if you’re counting exact cash for checkout.

    How and When It’s Collected

    Ryokan and hotels are the ones legally required to collect it and pass it on to the municipality, so in practice you’ll almost never pay it directly to a government office. Most properties simply add it as a separate line item on your final bill, labeled 入湯税 (nyuyokuzei) in Japanese, sometimes written in English as “bathing tax” or “onsen tax.” It’s usually settled at checkout alongside your room charge, and most places accept it by card along with everything else — though smaller family-run inns in rural onsen towns may still prefer cash, so keep a bit of small change on hand just in case.

    Large day-use bathing facilities and “super sento” onsen theme parks that use genuine hot spring water often build the tax into their posted admission price rather than itemizing it, so you may never see the charge broken out at all — it’s simply baked into the ¥800–¥1,500 entry fee typical of these facilities.

    Who Is Exempt

    Exemptions vary by municipality, but a few patterns are common across most onsen towns. Young children — typically defined as those not yet in elementary school, so around age 6 and under — are usually exempt entirely. Elementary school-age children are often charged a reduced rate or exempted as well, though the cutoff age differs town to town. Some municipalities also exempt day-trip bathers if the bathing fee itself falls under a low threshold (often around ¥300–500), on the logic that a quick, cheap soak shouldn’t carry the same levy as a full overnight stay. None of this is standardized nationally, so if you’re traveling with kids, it’s worth asking your ryokan directly rather than assuming.

    Where the Money Goes

    Because it’s a purpose tax, municipalities can’t spend nyuyokuzei revenue on just anything — it’s earmarked for things that keep the onsen town functioning as an onsen town. That typically includes maintaining public foot baths (ashiyu) and bathing facilities, environmental monitoring and protection of the hot spring source itself (natural onsen sources can and do deplete or shift if overused), sewage and wastewater treatment for mineral-heavy bath water, and — somewhat surprisingly — local fire service funding, since many classic onsen towns are dense with older wooden ryokan buildings that carry real fire risk. If you’ve enjoyed a free public foot bath in a hot spring town like the ones around Nasu Highland, that facility was very likely funded in part by this tax.

    Common Mistakes and Confusions

    The most frequent mix-up is confusing nyuyokuzei with the separate “accommodation tax” (shukuhakuzei) that cities like Tokyo, Osaka, Kyoto, and Kanazawa now charge on hotel stays generally, onsen or not. Accommodation tax is based on your room rate per night (for example, Tokyo’s tiers run roughly ¥100–¥200 depending on price, Kyoto’s up to ¥1,000 for higher-end stays) and has nothing to do with hot springs. If you’re staying at a city hotel in one of these cities and it also happens to have an onsen bath, you could legitimately see both taxes on the same bill — it’s not a duplicate charge or an error.

    The second common mistake is assuming the tax applies only to traditional ryokan. It applies equally to business hotels with an onsen bathing floor, to campgrounds and glamping sites with a hot spring tap, and to day-use facilities — so don’t be surprised to see it attached to a modern hotel stay far from anything that looks like a classic hot spring resort.

    Practical Tips for Planning Your Onsen Trip

    Budget an extra ¥150–300 per adult per night when pricing out an onsen stay — it’s small enough that it rarely changes a decision, but it explains why your final receipt doesn’t quite match the room rate you booked online. If you’re visiting a riverside or rural destination like Takaragawa Onsen in Gunma, ask at check-in whether the tax is itemized or already included in your quoted rate, since remote ryokan sometimes fold it into an all-inclusive per-person price rather than listing it separately. And if the main appeal of your trip is the soak-and-relax experience rather than the scenery, pair your onsen stay with a proper shiatsu or amma massage booking — many onsen ryokan offer this on-site, and it’s a nice way to round out a trip where you’ve already budgeted for the bathing tax anyway.

    In the end, nyuyokuzei is one of the more harmless small fees you’ll encounter in Japan — far smaller than tipping culture or service charges elsewhere, clearly itemized when it does appear, and reinvested directly into the town you’re visiting. Knowing it’s coming just means one less surprise on your final bill.

  • Watching a Movie in Japan: TOHO Cinemas, Subtitled Screenings & Discount Days for Tourists

    Watching a Movie in Japan: TOHO Cinemas, Subtitled Screenings & Discount Days for Tourists

    Photo by Rina Kemppainen on Unsplash

    Catching a movie in Japan is one of the easiest ways to kill a rainy afternoon, cool off during a humid summer week, or just see how a different country does the moviegoing ritual. TOHO Cinemas, the country’s largest chain, runs the screens most tourists end up at — including the Godzilla-topped multiplex in Shinjuku’s Kabukicho — and nearly every Hollywood release there comes with Japanese subtitles rather than a dub. Here’s how to find the right screening, pay the right price, and avoid the mistakes that catch first-timers off guard.

    Why TOHO Cinemas Is the Easiest Chain for Tourists to Navigate

    TOHO Cinemas operates dozens of multiplexes across Japan, usually inside shopping malls or entertainment complexes, which means clean restrooms, food courts, and air conditioning are never far away. Compared to smaller independent theaters (mini-shiatā), TOHO’s booking site and in-app seat maps are more consistently laid out, and major locations in Tokyo and Osaka get the widest release slate, including subtitled prints of new Hollywood films day-and-date with — or within a few weeks of — their US release. Other big chains worth knowing are Aeon Cinema and United Cinemas, which follow similar pricing and subtitle conventions, so the advice below largely applies to them too.

    Finding Subtitled Screenings: 字幕 vs 吹替

    This is the single most important thing to understand before you book. Foreign live-action films in Japan are shown almost exclusively with Japanese subtitles (字幕版, jimakuban) — dubbing is rare for anything that isn’t aimed at young children. Foreign animated films, however, are usually offered in both a subtitled version (字幕版) and a Japanese-dubbed version (吹替版, fukikaeban), and theaters list these as separate showtimes. When you pull up showtimes on the TOHO Cinemas website or app, look for “字幕” next to the time slot; “吹替” means the dialogue has been re-recorded in Japanese with no English audio or subtitles at all. If a listing shows no label, it’s a live-action film and is safe to assume it’s subtitled — but double-check for kids’ animation, where the dubbed version often outnumbers subtitled showtimes.

    Japanese Films With English Subtitles (Yes, They Exist)

    If you want to watch a Japanese-language blockbuster rather than a Hollywood import, your options are narrower but real. Flagship Tokyo screens — particularly TOHO Cinemas Hibiya, TOHO Cinemas Roppongi Hills, and TOHO Cinemas Shinjuku — periodically run big domestic hits (major anime films, Studio Ghibli re-releases, popular live-action adaptations) with a dedicated 英語字幕版 (English-subtitled version) showtime, aimed squarely at tourists and resident expats. These showings are limited in number and tend to run for a few weeks after a title’s general release, so they won’t appear for every film or at every branch. The only reliable way to confirm one exists is to search the film’s name plus “英語字幕” on the theater’s site, or check the showtime grid for that exact label — regular showtimes of the same film will not have subtitles.

    Ticket Prices and the Discount Days Worth Planning Around

    Standard adult tickets at TOHO Cinemas run about ¥2,000, with university and college students (ID required) at roughly ¥1,500, and children from toddler age through junior high around ¥1,000. Seniors 60 and over get a discounted rate near ¥1,300. A few discount days make a real dent in the price:

    • TOHO Cinema Day — the 1st of every month, all tickets drop to around ¥1,500 regardless of age.
    • Ladies’ Day — Wednesdays, women pay a discounted rate (around ¥1,300–1,400) at most locations.
    • Late Show / Early Show — the last screening after roughly 8pm and the first screening of the day are both discounted, usually to around ¥1,500.
    • Couple discounts — if you’re traveling with a partner and your combined age is 100 or more, ask about the “husband and wife” discount, which brings two tickets to about ¥2,500 total.

    Premium formats — IMAX, 4DX, Dolby Cinema — add a surcharge of roughly ¥600–1,000 on top of the base ticket, which is worth it for a big action or anime release but unnecessary for most dramas. Popcorn runs about ¥600–700 and a drink around ¥500, both noticeably cheaper than many Western chains.

    Booking Your Seat: App, Website, and Kiosk

    Every TOHO Cinemas screening uses assigned seating, selected at the time of booking — there’s no general-admission scramble for seats like at some older theaters. You can book through the TOHO Cinemas website, the TOHO Cinemas smartphone app, or a touch-screen kiosk in the lobby, all of which let you pick your exact seat from a map before paying by credit card or cash. Arriving even five minutes after showtime risks missing the opening minutes, since Japanese theaters start promptly and don’t tend to run long pre-show trailers. If you’d rather lock in a seat without fumbling through a Japanese-only kiosk screen, book online in advance and just scan your QR code or print voucher at the gate.

    Getting There: Flagship Screens Worth the Trip

    TOHO Cinemas Shinjuku, inside Shinjuku Toho Building in Kabukicho, is the one with the giant Godzilla head looming over the rooftop terrace — a free photo stop even if you’re not seeing a film, a two-minute walk from Shinjuku Station’s east exit. TOHO Cinemas Roppongi Hills, inside the Roppongi Hills Mori Tower complex, has some of Tokyo’s largest screens and is a five-minute walk from Roppongi Station. Suburban multiplexes attached to shopping malls are often the cheapest and least crowded option, especially on weekday afternoons, but they’re usually built around car access rather than train lines — if you’re driving out to one, it’s worth knowing the rules around coin parking lots and parking apps in Japan before you set off, since mall parking isn’t always free for cinema-only visits.

    Common Mistakes to Avoid

    The most frequent misstep is assuming a popular Japanese anime film will have English subtitles just because it’s playing at a tourist-friendly theater — check for the explicit 英語字幕 label rather than guessing. The second is confusing 字幕 (subtitled) and 吹替 (dubbed) when booking a foreign animated film, which can mean sitting through two hours of Japanese dialogue with no English support at all. Third, don’t show up expecting open seating; if you book a seat at the back and the theater is empty, you can’t simply move to the front — reserved seating is enforced. Finally, remember theaters here expect near-total silence during the film: no talking, and phones should be off rather than just on silent, since even the glow is considered disruptive in a dark room.

    If you’re building out a full day of offbeat Tokyo entertainment around your movie, two solid pairings are a nazotoki escape room beforehand or a night of live puroresu wrestling afterward — both are the kind of distinctly Japanese experiences that make more sense once you’ve figured out how ticketing and reserved seating work at a place like TOHO Cinemas.

  • Multiple-Entry Visas and Re-Entry Permits for Frequent Visitors to Japan

    Multiple-Entry Visas and Re-Entry Permits for Frequent Visitors to Japan

    Photo by David on Unsplash

    If you’re the kind of traveler who visits Japan two or three times a year — for shopping runs, ski seasons, or just because you can’t stay away — getting a fresh single-entry tourist visa (or re-triggering visa-waiver entry) every single time gets old fast. The good news is that Japan has several mechanisms for frequent visitors, from multiple-entry visas issued by Japanese embassies to re-entry permits for people who already hold residency. The bad news is that these systems are easy to confuse, and mixing them up can cost you a flight home or an unplanned visa run. Here’s how they actually work.

    Visa-exempt countries: you may not need a “multiple-entry visa” at all

    If you hold a passport from one of roughly 70 countries and regions with visa-exemption arrangements with Japan (the US, UK, Canada, Australia, most of the EU, Singapore, South Korea, and others), you don’t apply for a visa to enter Japan as a tourist. Each entry gets you a 15, 30, or 90-day stamp (90 days for most Western passports), and you can re-enter as many times as you like — there’s no cap on the number of visa-free trips per year. The only soft limit is immigration officers’ discretion: if you’re re-entering every few weeks with no clear pattern of return to your home country, you may be asked questions at the counter about your purpose of visit, since repeated short stays can look like someone working or living in Japan without the correct status. Carrying a return/onward ticket, proof of accommodation, and a plausible reason (shopping, skiing, visiting family) usually resolves this in under a minute.

    In other words, “multiple-entry visa” is really only a question for travelers who are not visa-exempt and would otherwise need to apply for a new visa before every trip.

    Multiple-entry visas for non-exempt nationalities

    Travelers from countries without a visa waiver (including China, India, the Philippines, Vietnam, and others) normally need a tourist visa for every entry. Japanese embassies and consulates issue multiple-entry tourist visas to frequent visitors who meet certain criteria — typically a demonstrated travel history to Japan, the US, the UK, or Schengen countries, or sufficient financial means. These visas are usually valid for 3 or 5 years and allow stays of up to 15, 30, or 90 days per visit, depending on nationality and visa type.

    • Who qualifies: generally applicants who have visited Japan before on a single-entry visa, or who hold valid US/UK/multiple-Schengen visas with travel history, or high-income applicants in certain countries.
    • Where to apply: your home country’s Japanese embassy or consulate, or an accredited travel agency (mandatory in some countries, such as China).
    • Fee: around ¥3,000 for a single-entry visa and ¥6,000 for a multiple-entry visa, paid in local currency equivalent — exact amounts vary by embassy and currency.
    • Processing time: usually 5 working days, longer during peak seasons (spring before cherry blossoms, December holidays) — apply at least 3-4 weeks before departure.

    A common mistake: assuming a multiple-entry visa means unlimited stay. It doesn’t — each individual stay is still capped at the number of days printed on the visa, and you must exit and re-enter to “reset” it. Overstaying even by a day, even on a multiple-entry visa, typically voids the visa and can trigger a re-entry ban.

    Re-entry permits: a completely different thing for residents

    This is where terminology trips people up. A “re-entry permit” (再入国許可, sainyūkoku kyoka) is not for tourists — it’s for people who already hold a status of residence in Japan (work visa, spouse visa, student visa, permanent residency) and want to leave and come back without losing that status. Since 2012, most residents don’t need to apply for this separately: as long as you hold a valid residence card (在留カード) and re-enter within one year (or before your status of residence expires, whichever is sooner), it’s treated as a “special re-entry permit” automatically — you just need to tick the re-entry box on the disembarkation card or at the automated gates when leaving.

    If you’ll be outside Japan for more than a year, you need to apply for an actual re-entry permit at an immigration office before you leave, which costs ¥3,000 (single) or ¥6,000 (multiple, valid up to 5 years, matching your remaining period of stay). Permanent residents can get re-entry permits valid up to 5 or 6 years. Losing your residence card or letting your re-entry window lapse abroad means your status of residence is cancelled — you’d have to apply for a fresh visa from scratch, which is a far bigger headache than a late flight.

    Common mistakes that catch frequent visitors off guard

    • Confusing visa-free entries with a “visa run” scheme. Some travelers try to extend their time in Japan by leaving for a day trip to South Korea or Taiwan and flying straight back. Immigration has become noticeably stricter about this since around 2019 — if your passport shows a pattern of short exits and immediate re-entries with no real travel elsewhere, you can be denied landing permission.
    • Letting a multiple-entry visa’s per-stay limit lapse unnoticed. The visa being “valid” for 5 years doesn’t mean any single stay can run that long.
    • Forgetting the re-entry permit before a long trip home. If you’re a resident (for work, study, or marriage) heading home for more than 12 months, check your remaining period of stay and re-entry eligibility before booking — this is one area worth confirming directly with your regional immigration bureau, not a travel forum.
    • Assuming passport photos taken abroad will meet Japanese visa-application specs. Embassies are strict about size and background. If you’re already in Japan and need photos for a visa renewal, residence card, or other application, the coin-operated ID photo booths found outside most train stations produce compliant photos for about ¥700-800 in a few minutes.

    Practical tips for genuinely frequent visitors

    If you’re visa-exempt and simply visiting often — say, a skier doing both the winter season at a resort like Appi Kogen and a cherry-blossom trip a few months later — there’s genuinely nothing extra to apply for. Just keep your passport valid for the length of each stay, keep proof of your return ticket handy, and space your trips out naturally rather than entering and exiting in tight loops. Seasoned repeat visitors also keep digital copies of past itineraries and hotel bookings on their phone, since immigration officers occasionally ask for a quick history if your passport is getting dense with Japan stamps.

    For non-exempt nationalities applying for a multiple-entry visa, timing matters: apply in a quieter season (avoid the weeks right before Golden Week in late April/early May or the New Year holidays) since consulates process faster outside peak demand. Budget travelers can usually self-apply directly at the consulate; in countries where an accredited agent is mandatory, expect an added service fee on top of the visa fee itself, often ¥1,500-3,000 depending on the agency.

    Whichever category you fall into, the paperwork is the easy part — once you land, remember that Japanese hotels are legally required to copy your passport details at check-in regardless of how many times you’ve stayed before, a process explained in more detail in our guide to checking into a Japanese hotel as a foreign guest.

  • Japan’s Coin-Operated ID Photo Booths: Where Tourists Can Get Passport & Visa Photos

    Japan’s Coin-Operated ID Photo Booths: Where Tourists Can Get Passport & Visa Photos

    Photo by BREAKIFY on Unsplash

    Lost your passport halfway through a trip, need a last-minute visa photo for the next leg of your journey, or applying for a residence card while you’re already in Japan? You don’t need to track down a photography studio. Japan is covered in coin-operated ID photo booths — simple, self-service machines tucked into train stations, drugstores, and electronics shops — that spit out a correctly sized set of ID photos in about two minutes. Here’s how to actually use one.

    What Exactly Are These Photo Booths?

    Known in Japanese as shōmei shashinki (証明写真機, “certification photo machine”), these are small enclosed booths with a stool, a curtain, a built-in camera, and a plain backdrop (usually pale blue, grey, or white). You sit down, pay, select a photo type on a touchscreen, and the machine takes several shots, lets you pick the best one, and prints it in a standardized layout — typically a strip of 2 to 6 photos on a single sheet, pre-cut or scored for easy separation. Many newer machines also issue a downloadable digital file (via QR code or a printed data card) for online visa applications that require an uploaded image rather than a physical print.

    These are not photo-sticker (“purikura”) booths — those are a separate, decorative category found in game arcades. ID photo machines are purely functional, with no filters, borders, or fun backgrounds.

    How Much Do They Cost and What Do You Get

    Expect to pay roughly ¥700–1,000 for a standard set of prints at an older or basic machine. Newer touchscreen machines with multilingual menus and a digital-data option tend to run ¥1,000–1,400. Most machines take coins and ¥1,000 notes; a growing number also accept IC cards (Suica, PASMO) or credit cards, but don’t count on it — carry cash, especially coins, as a backup.

    A single payment usually produces one sheet with multiple photos of the same pose, sized for whichever document type you selected. If you need photos for two different purposes (say, a passport renewal and a residence card), you’ll typically need to pay and shoot twice, since the crop and dimensions differ.

    Step-by-Step: Using a Coin-Operated ID Photo Machine

    • 1. Choose your photo type on the touchscreen. Most machines made in the last several years offer an English-language menu with presets like “Passport,” “Visa,” “Resume/ID photo (履歴書),” and “Driver’s license,” each pre-programmed to the correct crop dimensions.
    • 2. Pay first, then sit. On many machines you insert money before the curtain and seat are usable — read the instructions on the payment panel before climbing in.
    • 3. Adjust the stool height using the lever or button so your head sits inside the guide frame shown on the small preview screen.
    • 4. Close the curtain, remove hats and sunglasses, and keep a neutral expression — most passport and visa specs require a closed mouth and no smiling.
    • 5. Follow the countdown. The machine usually fires off 2–4 shots automatically; you then pick your preferred one from the preview screen.
    • 6. Collect your prints from the dispensing slot after 60–120 seconds of printing and drying time.

    Where to Find Them

    You’ll find these booths just outside the ticket gates of nearly every major JR and subway station (Shinjuku, Tokyo, Shibuya, Kyoto, Osaka Station, and similar hubs all have several), inside or beside post offices, and in large drugstores, discount stores like Don Quijote, and electronics retailers such as Bic Camera and Yodobashi Camera — the camera shops sometimes also offer a staffed photo counter as an alternative. Narita and Haneda airports have them too, which is useful if you need a photo on arrival for a residence card application or on departure for an onward visa. Booths are generally accessible 24 hours a day if they’re in an open station concourse, though ones inside a shop or post office only work during that building’s opening hours (commonly 9:00–20:00 or similar).

    If you’re also navigating other coin-operated infrastructure in Japan — parking meters, laundromats, and the like — the logic is similar to what’s covered in this guide to coin parking lots and apps: pay first, follow the on-screen prompts, and keep small bills and coins on hand.

    Passport, Visa, or Residence Card — Picking the Right Size

    This is where tourists most often go wrong. Different documents require different photo dimensions:

    • US passport: 2 x 2 inches (51 x 51mm), with specific head-size proportions.
    • Japanese passport/residence documents: 45 x 35mm.
    • Schengen/UK visas and many other countries: 35 x 45mm, similar to Japan’s standard.

    Always select your destination country or document type from the menu rather than guessing — the machine crops and sizes the print automatically once you choose correctly, so there’s no need to measure anything yourself. If your target menu doesn’t list your specific country, choose the closest generic “passport” or “ID photo” option and double-check the output dimensions printed on the sheet against your consulate’s or passport office’s published requirements before you submit it. This matters if you’re mid-trip and need to visit an embassy — for context on what ID checks look like elsewhere in Japan, see this guide on passport and ID rules when checking into a Japanese hotel.

    Common Mistakes to Avoid

    • Wearing glasses with glare or tinted lenses. Most embassies reject photos with reflections or anything obscuring the eyes; take glasses off unless medically necessary, and if you must wear them, angle your head slightly to avoid screen glare from the booth’s internal lighting.
    • Hair covering the eyebrows or hairline. Many document specs require your full face outline and eyebrows visible.
    • Light-colored clothing that blends into the backdrop. Since most machines use a pale blue or white background, wearing white or pale blue clothing can make your outline hard to distinguish — darker, solid colors photograph more reliably.
    • Selecting the wrong document preset. A “resume photo” (used for Japanese job and rental applications) is a different crop and expression style than a passport photo — smiling slightly is sometimes fine for a resume shot but is typically disallowed for passports and visas.
    • Using a photo that’s too old. Many visa applications require a photo taken within the last 6 months; don’t reuse prints from an earlier trip.

    Budget, Mid-Range, and Splurge Options

    For most travelers, the coin-operated booth itself is already the budget option at ¥700–1,400, and it’s perfectly sufficient for passport renewals, visa applications, and residence card paperwork. If you want a second pair of eyes checking your pose and attire before you pay, camera shops like Bic Camera, Yodobashi, and Kitamura often run a staffed photo counter (roughly ¥1,000–1,800) where an employee frames the shot and can flag an obvious issue — the mid-range choice when you’d rather not risk a rejected photo at a foreign consulate. For something more polished — needed occasionally for professional visa categories, modeling portfolios, or official Japanese documents like a residence card photo for long-term visa holders — a dedicated photo studio (写真館, shashinkan) offers lighting and retouching for roughly ¥2,000–4,000 and up, with an appointment usually required rather than walk-in service.

    Whichever option you choose, keep the printed sheet (or digital file) safe until you’ve completed your application — most booths don’t store your image after you leave, so if you need multiple copies for different offices, it’s worth asking the machine for an extra print the first time rather than paying to shoot again later.