Japan Trove

Category: Travel

Practical, up-to-date guides for traveling in Japan — itineraries, rail passes, eSIMs, where to stay, seasonal timing, etiquette, and the local know-how that makes a trip smoother. Written with real Japanese sources so you get the answer that actually works on the ground, not the recycled tourist one.

  • Japanese Expressway Service Areas: The Highway Rest Stop Culture Road-Trippers Shouldn’t Skip

    Japanese Expressway Service Areas: The Highway Rest Stop Culture Road-Trippers Shouldn’t Skip

    Photo by Valentin Lacoste on Unsplash

    If you’re renting a car in Japan — for a Hokkaido ski trip, a Tohoku countryside loop, or a drive down the Izu Peninsula — you’ll pass dozens of signs for “SA” and “PA” before you figure out what they mean. Service Areas (SA) and Parking Areas (PA) are Japan’s version of the highway rest stop, but calling them that undersells them badly. Many function as mini food halls, regional gift shops, and tourist attractions in their own right, and some are worth timing your drive around rather than just pulling into out of necessity.

    What’s the difference between an SA and a PA?

    Service Areas (サービスエリア) are the larger stops, spaced roughly every 50 km on major expressways, with full restaurants, food courts, gas stations, and large gift shops. Parking Areas (パーキングエリア) are smaller, spaced every 15 km or so, and historically just had vending machines and toilets — though plenty of larger PAs now have convenience stores or a single food counter. Both are free to enter and use; you only pay for what you buy or the toll you’re already paying for the expressway itself. Toilets are always free and open 24 hours, even at PAs with no shops.

    You can’t just drive past one you fancy — SA/PAs are only accessible from the expressway itself, not from regular roads, and almost always only serve traffic heading in one direction (there’s a mirror-image facility on the opposite side for the other direction). Rental car GPS units and Google Maps both mark them clearly, so it’s easy to plan a stop a few exits ahead.

    Why they’re worth planning around, not just stopping at

    Because SAs cluster regional specialties, they work like a tasting tour of whatever prefecture you’re driving through. A short, non-exhaustive list of what’s become genuinely famous:

    • Tarumi SA (Hyogo, Kobe-Awaji route) — one of the best Akashi Kaikyo Bridge views in the country, especially at sunset.
    • Ena Kyodo SA (Gifu, Chuo Expressway) — views of Mt. Ena and a well-regarded local gift shop for Gifu sweets and sake.
    • Hida Kiso River SA (Gifu) — a full food court, river views, and easy access to Hida beef dishes without leaving the highway.
    • Someido PA (near Hiroshima) and other Chugoku-route stops often carry local specialties like momiji manju you’d otherwise only find in town.
    • Many SAs near Tohoku and Niigata sell regional noodle products in their gift shops — if you’re road-tripping that region, it’s a good place to pick up dried versions of things like hegi soba to bring home.

    Food courts typically run from around 7:00 or 8:00 to 21:00 or 22:00, though hours vary by facility and individual tenant — some ramen or udon counters close as early as 20:00. Gas stations at SAs are usually open 24 hours on major routes, but not always on quieter regional expressways, so don’t assume one will be available at 3 a.m. outside the Tokyo–Osaka–Nagoya corridor.

    What to actually eat there

    Service area food has a reputation (sometimes deserved) for being overpriced and mediocre, but the better ones take regional pride seriously. A few categories worth seeking out:

    • Budget (¥300–¥700): Soft-serve ice cream in local flavors (wasabi, yuzu, black sesame), regional senbei, and onigiri from the attached convenience store. Vending machines at PAs often sell surprisingly good canned coffee and regional soft drinks you won’t find in Tokyo.
    • Mid-range (¥800–¥1,500): A bowl of regional ramen or udon, a katsu-don, or a tray of local gyoza. Hokkaido SAs often do excellent soup curry or seafood don in this range.
    • Splurge (¥1,800–¥3,500): Wagyu or Hida beef steak sets, kaisen (seafood) rice bowls at coastal SAs, or seasonal crab meals in winter along the Hokuriku and San-in routes. These are the meals worth building a lunch stop around rather than grabbing on the way past.

    Skewered foods are common at SA food courts too — if you’ve had dengaku or other grilled skewer snacks in town, you’ll often spot a roadside version at the counter.

    Shopping: regional omiyage without the detour

    SAs are one of the most efficient places to buy regional souvenirs (omiyage), because the larger ones stock products from the whole prefecture, not just the immediate town. If you’re trying to cover gift lists for coworkers or family without adding stops to your itinerary, budget 20–30 minutes at one well-stocked SA per driving day. Look for:

    • Regional preserved foods — tsukudani-style simmered seafood and seaweed is a common SA gift-shop item in coastal prefectures; it travels well and doesn’t need refrigeration, similar to the tsukudani sold in city department stores, often at a lower price.
    • Prefecture-specific sweets and sake, usually with sample tasting counters at the larger SAs.
    • Character and mascot goods tied to the region (yuru-kyara), which make cheap, lightweight gifts.

    Bring cash in small denominations — many SA shops and food counters, especially smaller ones off the main Tokyo–Nagoya–Osaka corridor, still don’t take credit cards for purchases under a few hundred yen, and IC transit cards aren’t reliably accepted either. If you’re running low, note that convenience store ATMs inside major SAs work the same way as ones in town, with the same per-transaction withdrawal limits.

    Timing your stops and avoiding the common mistakes

    • Don’t skip the first SA out of a major city on a holiday weekend. Golden Week (late April–early May), Obon (mid-August), and New Year’s are notorious for SA parking lots filling up and food courts having 30+ minute waits. Stop earlier than you think you need to, or time your break for off-peak hours (before 11:30 or after 13:30 for lunch).
    • Don’t assume every SA has a restaurant. Smaller ones, and most PAs, may only have vending machines and toilets. Check the facility icons on your rental car’s nav system or Google Maps before committing to “we’ll eat at the next stop.”
    • Fuel up earlier than you think. Gas stations are far less frequent than SAs/PAs themselves, especially in Hokkaido and rural Tohoku, where two or three SAs in a row might have no pump at all. Don’t let the tank drop below a quarter on long rural stretches.
    • Mind your clothing for season. Winter driving in Tohoku or Hokkaido means SA parking lots are often icy and exposed; if you’re layering for a road trip in snow country, the same HeatTech-style thermal layering that works for city walking works well for quick, cold SA stops too.
    • You can’t switch directions. If you realize you wanted the SA on the opposite carriageway, you generally can’t get to it without exiting the expressway and re-entering — plan your side in advance if a specific SA’s view or shop is the reason for the stop.

    Best season for an SA-hopping road trip

    Spring (April) and autumn (October–November) give the clearest mountain and coastal views from scenic SAs like Tarumi or Ena Kyodo, and food courts tend to be less crowded than in peak summer. Summer brings seasonal fruit soft-serve and matsuri-adjacent snacks but also the highest crowds and hottest parking lots. Winter is prime time for crab, oyster, and nabe-style hot dishes at SAs along the San-in and Hokuriku coasts, but check tire and road conditions if you’re driving through snow country — SA stops can be your main warm-up point on a long winter leg.

    If this is your first time renting a car in Japan, know that SA/PA facilities are genuinely one of the more foreigner-friendly parts of the experience: signage is bilingual at almost all major stops, toilets are Western-style at most newer facilities, and staff are used to tourists pulling in confused about what “SA 2km” actually means. Build in one real meal stop per 2–3 hours of driving, and you’ll end up remembering the road trip as much for what you ate along the way as for the destination.
  • JR Tokyo Wide Pass: The 3-Day Pass for Nikko, Fuji & Karuizawa Day Trips

    JR Tokyo Wide Pass: The 3-Day Pass for Nikko, Fuji & Karuizawa Day Trips

    Photo by Yu on Unsplash

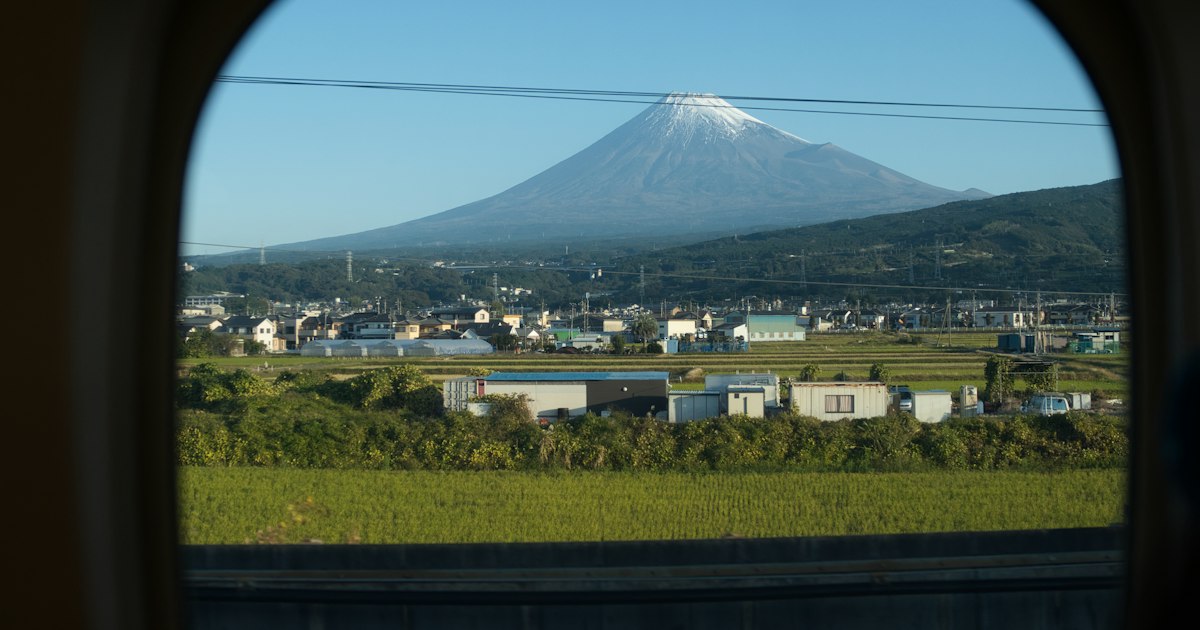
    If your Tokyo itinerary includes more than one day trip into the surrounding mountains, the JR Tokyo Wide Pass is one of the few rail passes that can genuinely save you money without requiring you to leave the Greater Tokyo area. It covers three consecutive days of unlimited rides on JR East lines within a roughly 100km radius of the city, including the Narita Express, the Nikko line, the Joshin’etsu Shinkansen to Karuizawa, and the Fujikawaguchiko line toward Mt. Fuji. Here’s how it actually works, what it costs, and when it isn’t worth buying.

    What the Pass Covers and What It Costs

    The JR Tokyo Wide Pass costs 15,000 yen for adults and 7,500 yen for children aged 6–11, valid for three consecutive days. It covers unlimited rides on JR East trains within its coverage zone, including:

    • Narita Express (N’EX) to and from Narita Airport
    • JR lines to Nikko and Kinugawa Onsen (Tobu lines are not included, but JR’s Nikko Line via Utsunomiya is)
    • The Joshin’etsu Shinkansen between Tokyo and Karuizawa
    • JR lines toward Kawaguchiko and the Mt. Fuji area, including the Fujikyu Railway section
    • GALA Yuzawa Shinkansen service in winter ski season
    • Reserved seats on covered Shinkansen and limited express trains, with up to four seat reservations made free of charge per booking at any JR East ticket office or via the JR East app

    It does not cover the Tokaido Shinkansen toward Kyoto/Osaka, Tokyo Metro or Toei subway lines, or private railways like Tobu, Odakyu, or Hakone Tozan — a frequent point of confusion for visitors planning to combine this pass with a Hakone trip (which runs on Odakyu and Hakone Tozan lines, not JR).

    Where to Buy It and Who Can Use It

    The pass is sold exclusively to travelers on a temporary visitor visa — you’ll need to show your passport at purchase and again when boarding. You can buy it at JR East Travel Service Centers at Narita Airport, Haneda Airport, Tokyo Station, Shinjuku Station, Ueno Station, and several other major stations, or reserve it in advance online through the JR East website and pick it up on arrival. Advance online purchase is worth doing in peak seasons (cherry blossom weeks and autumn foliage weeks) since ticket counters can have long queues. If you’ve lost your passport mid-trip, note that you’ll need it to activate or exchange any JR pass voucher, which is one more reason to sort out a replacement quickly — see our guide on embassy passport replacement steps for tourists if that happens.

    Doing the Math: Is It Worth It?

    The pass pays for itself quickly if you’re doing multiple trips. A round-trip Shinkansen ticket from Tokyo to Karuizawa alone runs about 10,000–11,000 yen depending on train type and seat class, and a round trip to the Kawaguchiko/Fuji Five Lakes area via limited express and local transfers runs roughly 4,000–5,000 yen. Combine any two of Nikko (about 5,000–6,000 yen round trip via JR), Karuizawa, and Fuji in three days, and you’re already past the 15,000 yen pass price. Add the Narita Express leg (around 3,070 yen one-way from Narita to Tokyo on a discounted N’EX round-trip fare, more at full price) and the pass becomes an easy win for most itineraries that start or end at Narita.

    Where it stops being worth it: if you only plan one day trip, or you’re staying entirely within central Tokyo and only need subway and JR Yamanote Line rides, skip it — regular IC card taps on Suica or Pasmo will be cheaper and more flexible, including at machines beyond the usual ticket gates (see which station kiosks actually take IC card tap-to-pay).

    Planning the Three Days

    Most visitors split the pass across three single-destination days rather than cramming legs together, since each trip already eats 2–4 hours round trip:

    • Nikko: JR Shinkansen to Utsunomiya, then transfer to the JR Nikko Line local train — total about 2 hours each way. Toshogu Shrine is open 8:00–17:00 (April–October) and 8:00–16:00 (November–March); budget a full day. Early spring and late autumn weekdays are far less crowded than weekend foliage season in November.
    • Karuizawa: About 65–70 minutes each way on the Joshin’etsu Shinkansen from Tokyo Station. This is a mountain resort town with outlet shopping, Shiraito Falls, and cooler summer temperatures — a popular escape from Tokyo’s July–August heat. Many shops and the main outlet mall open around 10:00.
    • Mt. Fuji area: JR trains run to Otsuki, where you transfer to the Fujikyu Railway toward Kawaguchiko — about 2–2.5 hours total each way. This is the one leg where the pass doesn’t get you all the way to the lake views on its own; many travelers pair the train ride with local buses or a ropeway once there. If your main goal is the best Fuji photo rather than the town itself, compare this route against the Hakone approach in our Hakone Ropeway vs Komagatake Ropeway guide, since Hakone isn’t covered by this pass at all and requires separate Odakyu tickets.

    Common Mistakes

    • Assuming it covers Hakone or Tobu Nikko trains. It doesn’t — those are private railways. Double-check which operator runs your specific route before buying.
    • Not reserving seats ahead on weekends. Shinkansen and limited express cars fill up on Saturdays and holidays, especially toward Karuizawa and Nikko in peak foliage weeks. Reserve your four free seat bookings as soon as you know your dates, at any JR East ticket counter or via the app.
    • Buying it for a single day trip. If you’re only going to Nikko once and doing nothing else outside central Tokyo, a one-way or round-trip ticket is cheaper than the full 15,000 yen pass.
    • Forgetting the clock starts on first use, not purchase. The three days are consecutive calendar days from your first ride, so plan your three outings back-to-back or close together to get full value.

    Budget, Mid-Range, and Splurge Approaches

    Budget travelers can stretch the pass further by combining it with convenience-store meals and conbini ATMs for cash on travel days — withdrawal limits vary by machine, which is worth knowing before you’re standing at a rural station counter (see our breakdown of convenience store ATM withdrawal limits). Mid-range travelers typically pair the pass with one onsen day in Kinugawa or a ryokan night near Lake Kawaguchiko. Splurge travelers can use the Shinkansen’s Green Car reserved seats toward Karuizawa for extra legroom on the fastest leg of the trip, still within the pass’s free reservation allowance — just confirm Green Car availability counts toward your reservations, since standard-car seats are more consistently guaranteed to be included free of charge.

    Overall, the JR Tokyo Wide Pass rewards travelers who treat Tokyo as a hub rather than a single destination. If your three days include even two of Nikko, Karuizawa, and the Fuji Five Lakes, buy it before you land — the savings and the seat-reservation convenience make the math straightforward.

  • Losing Your Passport in Japan: Embassy Replacement Steps for Tourists

    Losing Your Passport in Japan: Embassy Replacement Steps for Tourists

    Photo by Damaris Isenschmid on Unsplash

    Losing a passport is one of the few travel mishaps that can genuinely derail a trip to Japan, but it’s also one of the most procedurally predictable. Japan has a clear, well-trodden process for replacing a lost or stolen passport, and most tourists are back on schedule within one to three business days if they follow the steps in the right order. Here’s exactly what to do, who to call, and what it costs.

    Step 1: Report the Loss to the Police First

    Before you contact your embassy, go to the nearest koban (neighborhood police box) or a regular police station and file a lost-property or theft report. This is not optional — almost every embassy will ask for the police report number before issuing a replacement passport, and airlines or immigration staff may also want to see it.

    Tell the officer “pasupōto o funshitsu shimashita” (I lost my passport) or “pasupōto ga tōnan ni aimashita” (my passport was stolen) if it was taken. The officer will fill out a short form and give you a receipt with a reference number — in Japanese this is often called a juri bangō (受理番号). This takes 15–30 minutes and is free. If your hotel front desk can come with you or write down the details in Japanese beforehand, the process goes noticeably faster, since smaller kobans don’t always have English-speaking staff.

    Where to Go: Embassy and Consulate Locations

    Most Western countries have their main diplomatic mission in Tokyo, with smaller consulates in a few other cities:

    • United States: Embassy in Akasaka, Minato-ku, Tokyo (nearest stations: Tameike-sanno or Akasaka). Consulates in Osaka-Kobe, Naha (Okinawa), Fukuoka, and Sapporo, though the smaller posts offer limited emergency-only services.
    • United Kingdom: Embassy near Hanzomon, Chiyoda-ku, Tokyo.
    • Canada: Embassy in Akasaka, Minato-ku, Tokyo, with an honorary consul network in other regions for basic assistance only.
    • Australia: Embassy in Mita, Minato-ku, Tokyo.

    Consular sections generally open on weekday mornings only, and most require an online appointment booking even for emergencies — though if you call the after-hours emergency line and explain you’ve lost your passport, staff will usually fit you in same-day or next business day. Don’t just show up without calling first; call the main embassy switchboard, explain the situation, and ask for American/British/Canadian/Australian Citizen Services specifically.

    What to Bring to Your Appointment

    Pack the following before you go:

    • The police report number or printed receipt
    • Any backup ID — a driver’s license, old expired passport, or a photo/photocopy of your passport’s data page saved on your phone or email
    • Proof of citizenship if you have it (birth certificate copy, naturalization certificate)
    • Two passport-style photos (passport-sized photo booths are common at train stations and inside convenience stores and camera shops like Bic Camera or Yodobashi Camera, typically ¥700–1,000 for a printed set)
    • Your flight itinerary, if you need an emergency document to make a specific departure
    • Cash or a credit card for the replacement fee

    If you’re short on cash because your wallet was lost along with your passport, note that Japanese convenience store ATMs have per-transaction withdrawal caps that vary by card — it’s worth checking how much you can actually pull per transaction so you’re not caught short at the embassy counter.

    Costs and Processing Times

    Fees and timelines vary by nationality and change periodically, so confirm the current amount on your embassy’s website before you go, but as a rough guide:

    • United States: A full-validity replacement book runs roughly $130–165 depending on current execution fees, payable in cash (yen equivalent) or sometimes card. If you have an upcoming flight, Tokyo can often issue a limited-validity emergency passport within 24–48 hours for genuinely urgent travel; a full passport otherwise takes about one to two weeks.
    • United Kingdom: An Emergency Travel Document generally costs in the region of £100–£150 and is usually issued within one to two business days.
    • Canada: An emergency travel document carries a smaller service fee, typically under CAD $50, and is also fast — often same or next day for urgent cases.
    • Australia: Replacement passports issued abroad are charged at the standard full passport fee, with emergency documents available for imminent travel.

    Budget option: skip the taxi and photo studio, use a station photo booth, and let the embassy process a standard-timeline replacement if your flight isn’t imminent. Splurge option: pay for same-day emergency processing and a taxi between the police station, photo booth, and embassy if your flight is within 48 hours — the time saved is usually worth it when a missed flight costs far more.

    Getting Through Immigration to Fly Home

    Your new passport won’t have the entry stamp or landing permission sticker that was in the original, so Japanese immigration can’t automatically see when and how you arrived. Bring your police report and, if you have it, a copy of your original entry stamp or boarding pass stub to the airport. Arrive at least 30–60 minutes earlier than you normally would — immigration officers will look up your entry record in their system using your name and old passport number (which you should have noted down or photographed before the trip), then process your departure manually. This is routine for them, but it does take longer than a normal exit, so build in the buffer.

    Common Mistakes to Avoid

    • Going to the embassy before the police: most embassies won’t proceed without a police report number, so skipping this step just means a second trip.
    • Not booking an appointment: even for emergencies, most posts want you to call or book online rather than walk in cold.
    • Having no backup ID or photo of your passport: this is the single biggest slowdown. Without it, proving your identity and citizenship takes much longer.
    • Underestimating travel time between offices: the police station, photo booth, and embassy may be in different parts of the city — plan the route, don’t improvise it.
    • Forgetting your visa/residence documentation if you’re not a short-stay tourist: this adds an extra layer most tourists don’t need to worry about, but long-stay visitors should also contact Japanese immigration separately.

    Before You Even Leave Home

    The fix for most of this stress is preventive. Photograph or scan the data page of your passport and store it in cloud storage and offline (email it to yourself, save a copy on your phone). Keep a printed photocopy in your luggage, separate from where you carry the original. Note your embassy’s emergency contact number in your phone before you land. A lost passport is stressful, but it’s rarely trip-ending if you’ve got that backup documentation ready — much the same logic as carrying a spare plan for any mid-trip mishap, the way travelers budget for things like unexpected gear repairs mid-trip rather than letting one problem become the whole story of the trip.

  • Japanese Convenience Store ATM Withdrawal Limits: How Much Cash You Can Actually Pull Per Transaction

    Japanese Convenience Store ATM Withdrawal Limits: How Much Cash You Can Actually Pull Per Transaction

    Photo by Shigeki Wakabayashi on Unsplash

    If you’ve ever stood in front of a Seven Bank ATM in Tokyo at 11pm, card in hand, watching the screen reject your request for ¥100,000 and wondering what number actually works — this guide is for you. Japan’s convenience store ATMs are the backbone of cash access for visitors, since most Japanese businesses still prefer cash and many rural shops, shrines, and ryokan don’t take foreign cards at all. But the machines have quirks, limits, and fee structures that catch almost every first-time traveler off guard. Here’s exactly how much you can withdraw, where, and how to avoid wasting a transaction fee on a declined attempt.

    The short answer: typical per-transaction limits

    For foreign-issued cards (Visa, Mastercard, JCB, American Express, UnionPay, and cards on the Plus/Cirrus networks), the realistic per-transaction ceiling at Japan’s convenience store ATMs is:

    • Seven Bank ATMs (7-Eleven): up to ¥100,000 ($650-700 depending on exchange rate) per transaction for most foreign cards, though some banks cap their own cards lower regardless of what the machine allows.
    • Lawson Bank ATMs (Lawson stores): typically ¥100,000 per transaction as well, though some machines default to a ¥50,000 suggestion screen — you can usually select a custom amount up to the max.
    • E-net ATMs (FamilyMart, some Lawson, Don Quijote): often cap foreign cards lower, around ¥50,000-¥100,000 depending on the specific machine and your card issuer.
    • Japan Post Bank ATMs (inside post offices, not convenience stores): up to ¥50,000 per transaction for foreign cards is common, though this varies.

    The real ceiling, though, is almost never set by the Japanese ATM — it’s set by your own bank. Seven Bank’s machine will happily offer you ¥100,000, but if your home bank caps foreign ATM withdrawals at $300 equivalent per transaction or per day, the transaction will be declined after the Japanese side approves it, and depending on your bank, you may still be charged a fee for the attempt. Call your bank before you leave and ask specifically about per-transaction and daily international ATM limits — not just “can I use my card abroad.”

    Why 7-Eleven (Seven Bank) is the most reliable option

    Seven Bank ATMs are purpose-built for foreign cards and are the most consistently dependable option across Japan — they’re in virtually every 7-Eleven, which means they’re open 24/7 since the stores themselves never close. The interface has a dedicated English/Chinese/Korean/Portuguese/Thai menu, clearly states the fee before you confirm, and rarely has the “foreign card not accepted” problem that plagues older bank ATMs. If you’re withdrawing cash late at night, during a holiday, or in a smaller city, 7-Eleven is your safest bet precisely because the stores are everywhere and never shut.

    Lawson and FamilyMart ATMs are generally fine too, but machine models vary by store — a FamilyMart in central Osaka might have a newer, friendlier machine than one in a small town, where the ATM may still be running older software with stricter foreign-card handling.

    Fees: what you’ll actually pay per withdrawal

    Convenience store ATMs charge a flat transaction fee regardless of how much you withdraw, so pulling the maximum amount per visit is almost always cheaper than making several small withdrawals:

    • Seven Bank: ¥220 for most foreign cards during the day, rising to around ¥220-¥330 depending on time of day (late-night and early-morning withdrawals sometimes carry a slightly higher fee).
    • Lawson/E-net: similar range, roughly ¥200-¥280 per transaction.

    On top of the Japanese ATM’s fee, your home bank may also charge its own foreign-transaction or ATM fee (often $3-5 or a percentage of the amount), and your card network applies its own exchange rate margin. The math is simple: withdrawing ¥100,000 once costs you one flat fee; withdrawing ¥20,000 five times costs you five flat fees for the same total cash. Budget-conscious travelers should plan one or two larger withdrawals per week rather than frequent small ones.

    Daily limits vs. per-transaction limits — don’t confuse the two

    This is where most people get tripped up. A per-transaction limit is the maximum the machine will dispense in a single operation. A daily limit is the total your card issuer allows across all withdrawals in a 24-hour period, which may be lower than what the machine itself is willing to give you in one go. For example, Seven Bank may offer you up to ¥100,000 per transaction, but if your bank’s daily foreign withdrawal cap is $500, you’ll hit that ceiling on your second attempt even though the Japanese machine never refused you.

    If you need more cash than your daily limit allows — say, for a cash-only ryokan deposit or a large souvenir haul — plan across two calendar days rather than trying to force it through in one. Machines will generally let you try again after a decline without locking the card, but repeated consecutive declines (from a hidden mismatch in PIN entry, say) can trigger a temporary freeze from your bank’s fraud system, which is far more disruptive mid-trip.

    Common mistakes that waste a transaction or trigger a freeze

    • Entering a 6-digit PIN at a 4-digit screen incorrectly formatted. Most Japanese ATMs expect a 4-digit PIN; if your card uses a longer PIN, check with your bank in advance about how it should be entered — getting it wrong twice can lock your card.
    • Not checking “credit” vs. “debit” withdrawal mode. Some machines will ask whether you’re withdrawing as a cash advance against a credit card or a standard debit withdrawal — picking the wrong one can trigger cash-advance fees and interest that start accruing immediately, which is far more expensive than any ATM fee.
    • Assuming all machines are open 24 hours. The ATM itself usually matches the store’s hours — 7-Eleven machines are genuinely 24/7, but some standalone bank ATMs inside train stations or post offices close overnight or on bank holidays.
    • Not notifying your bank before travel. Even without a hard block, unexpected international withdrawals are one of the most common triggers for a bank’s fraud-detection system to freeze a card mid-trip.

    Withdrawing cash often turns into its own small ritual on a Japan trip — much like the late-night oden and fried chicken run at the hot case after you’ve topped up your wallet. It’s worth building both into your evening convenience store stop.

    How much cash should you actually carry?

    Japan has gotten more card-friendly in recent years, but cash is still essential for: temple and shrine donation boxes, small family-run restaurants, local buses outside major cities, coin lockers, and some markets. A reasonable rule of thumb for a first-time visitor is to carry ¥10,000-¥20,000 in cash at any given time for daily incidentals, topping up every few days with a single larger ATM withdrawal rather than daily small ones. If your trip includes IC card top-ups for trains and vending machines, note that most ATMs don’t load Suica or Pasmo directly — you’ll do that separately at station machines, which is covered in our guide to which station kiosks actually take IC card tap-to-pay.

    Budget, mid-range, and splurge cash strategies

    • Budget traveler: Withdraw the full ¥100,000 limit once or twice per week at 7-Eleven to minimize flat fees, and track your home bank’s exchange margin so you’re not surprised by the final cost.
    • Mid-range traveler: Use a no-foreign-transaction-fee travel card (several US and EU banks now offer these) paired with Seven Bank withdrawals — this combination usually gets you the best effective exchange rate with minimal fee stacking.
    • Splurge/convenience-first traveler: Prepay a travel money card loaded in yen before departure, then use convenience store ATMs only as a backup — you avoid live exchange rate fluctuation but typically lock in a slightly worse rate upfront.

    Whichever route you choose, 7-Eleven’s Seven Bank machines remain the single most dependable cash source anywhere in Japan — reliable enough that it’s worth structuring your cash planning around their locations rather than hunting for a specific bank branch.

  • Japanese Vending Machine Umbrella Stands at Hotels: Borrowing Etiquette and Where They’re Free

    Japanese Vending Machine Umbrella Stands at Hotels: Borrowing Etiquette and Where They’re Free

    Photo by James Pere on Unsplash

    You step out of your hotel into a downpour you didn’t plan for, and there, by the front door, is a stand full of umbrellas — some locked in place with a coin slot, some just sitting in a plastic bin with a handwritten sign. Are they free? Do you owe a deposit? Can you keep it for the whole trip? Japan’s hotel umbrella systems look simple but run on unwritten rules that trip up almost every first-time visitor. Here’s how they actually work, season by season, so you don’t end up soaked, embarrassed, or accidentally walking off with someone else’s umbrella.

    How Hotel Umbrella Lending Actually Works

    Most mid-range and budget Japanese hotels — think business hotel chains like Toyo Inn, Super Hotel, Dormy Inn, and Route Inn — keep a small stock of loaner umbrellas near the front desk or entrance, usually plain black or clear vinyl ones branded with the hotel’s logo. These exist purely as a guest courtesy: there’s no listed price anywhere because they’re not for sale. You simply take one on your way out and return it when you’re done, ideally the same day or before checkout.

    Separately, you’ll often see a free-standing metal or plastic rack with individual coin-locking slots — this is the “vending machine” style stand people mean when they ask about this. Each slot holds one umbrella and locks when you insert a ¥100 coin, exactly like a station coin locker. The coin isn’t a rental fee; it’s a deposit mechanism that comes back to you when you unlock the slot to retrieve the umbrella. These racks are common at hotel entrances, department stores, and train stations precisely because unsecured umbrella stands invite theft — the coin lock is what keeps your umbrella (or the hotel’s loaner) from disappearing while you’re inside.

    Borrowing Etiquette: What’s Expected of You

    The system runs on trust, and Japanese guests follow a few unspoken rules that are worth copying:

    • Return it to the same stand, same hotel. These umbrellas aren’t meant to leave with you on a multi-city trip. If you check out before the rain clears, ask the front desk — some will let you keep it and drop it off at a sister property, but don’t assume this.
    • Don’t take the nicest one. If there’s a mix of plain loaner umbrellas and a few better-quality ones near the door, the better ones often belong to staff or long-term guests. Stick to the ones clearly stacked in the labeled bin or rack.
    • Dry it before you prop it back. A quick shake outside the entrance before you return it is standard courtesy — nobody wants to grab a dripping umbrella from the stand.
    • Don’t hoard the coin-lock slots. If you brought your own umbrella and the hotel has limited coin-lock spaces for guests, using one just to keep your own umbrella secured while you duck into a shop isn’t the intended use — those are really there for hotel loaners and bikes-and-umbrella storage.

    Where Loaner Umbrellas Are Genuinely Free

    As a rule of thumb: budget and mid-range business hotels almost always have a free loaner umbrella bin, no request needed, no deposit, no sign-up. You’ll find it either bolted by the entrance or just inside near the shoe-change area. Ryokan and smaller family-run inns are a mixed bag — many keep two or three umbrellas behind the front desk and will hand you one if you simply ask (“kasa, onegaishimasu” — “an umbrella, please”). Large international hotel chains and luxury properties are the least likely to have an open-access bin; instead, the concierge will often lend you a proper branded umbrella on request, sometimes logging your room number so it’s returned.

    If you’re unsure whether a stand is free-to-borrow or coin-locked-deposit, look for the coin slots. No slots, no locks, just an open rack = free. Individual locking compartments = deposit system, and the coin comes back when you return it.

    When the Hotel Doesn’t Have One: Backup Options

    Not every hotel stocks umbrellas, and loaner stock runs out fast during a sudden storm. Your fallback options, cheapest to most convenient:

    • Convenience stores (¥500–700): Every Lawson, 7-Eleven, and FamilyMart sells disposable clear vinyl umbrellas (biniigasa) right near the entrance — often the same stores that run the hot-food case covered in our convenience store hot case guide. These are the fastest option and genuinely yours to keep.
    • Station vending machines: Some train stations have standalone umbrella vending machines, usually accepting coins and sometimes IC card tap-to-pay — see our breakdown of which station kiosks actually take Suica/Pasmo if you’re relying on a card rather than cash.
    • Umbrella-sharing apps: In Tokyo and a few other major cities, the iKasa app lets you rent an umbrella from one of hundreds of smart racks and return it to any other rack in the network — useful if your hotel has no loaner system and you’re moving between neighborhoods anyway.

    Common Mistakes Visitors Make

    • Assuming the coin-lock stand is a vending machine selling umbrellas. It isn’t — it dispenses nothing for sale; the coin is a refundable lock deposit.
    • Walking off with a hotel loaner for the rest of the trip. Staff notice, and it can come up awkwardly at checkout.
    • Not carrying ¥100 coins. Coin-lock stands don’t take cards or larger bills, so keep a few 100-yen coins on hand during rainy season.
    • Leaving a wet umbrella fully open to dry in the lobby. Use the small plastic sleeve bags (biniigasa-bukuro) usually mounted by the door — a dispenser box with a plastic bag and small stand is standard at hotel and shop entrances specifically so dripping umbrellas don’t make floors slippery.

    Best Timing: Japan’s Rainy Seasons to Watch For

    You’re most likely to need any of this between early June and late July, during tsuyu (the rainy season), when most of Honshu sees persistent, unpredictable showers. September and early October bring a second wave tied to typhoon season, with heavier but shorter bursts. Winter visitors to areas like the Sea of Japan coast or Hokuriku should expect sudden sleet rather than steady rain, which is exactly when a hotel’s free loaner stand earns its keep — pack light on umbrellas yourself and lean on what’s waiting by the door instead.

  • Suica & Pasmo at Vending Machines: Which Station Kiosks Actually Take IC Card Tap-to-Pay

    Suica & Pasmo at Vending Machines: Which Station Kiosks Actually Take IC Card Tap-to-Pay

    Photo by Taewoo Kim on Unsplash

    If you’ve ever stood on a Japanese train platform holding your Suica or Pasmo card up to a vending machine, wondering whether it will beep green or just sit there blinking, you’re not alone. IC card tap-to-pay is one of the most convenient things about traveling in Japan, but it is not universal — and the gap between “this machine takes IC cards” and “this machine only takes coins” trips up even people who’ve been in the country for weeks. Here’s how to actually tell the difference, where the good machines live, and what’s worth buying from them.

    Why Some Vending Machines Take IC Cards and Others Don’t

    Japan has roughly 2.2 million vending machines nationwide, and the overwhelming majority of them — the ones outside convenience stores, on random street corners, in apartment building lobbies — are still coin-and-bill only, or at most accept a handful of mobile payment QR codes. IC card readers cost the operator extra money to install and maintain, so they tend to show up where the operator has a direct relationship with a card network’s parent company.

    That’s exactly the case inside train stations. JR East, Tokyo Metro, and the private railways (Odakyu, Tokyu, Keio, and others) run or license vending machines through subsidiary brands, and because Suica and Pasmo are literally railway-company products, equipping station machines with IC readers is cheap and strategically useful — it keeps you spending inside the fare-gate ecosystem. Look for the small green Suica penguin logo or the IC card symbol (a radiating-wave icon) printed near the coin slot. If you see it, tap works; if you don’t, assume cash only.

    The Acure Machines: JR East’s Tap-to-Pay Network

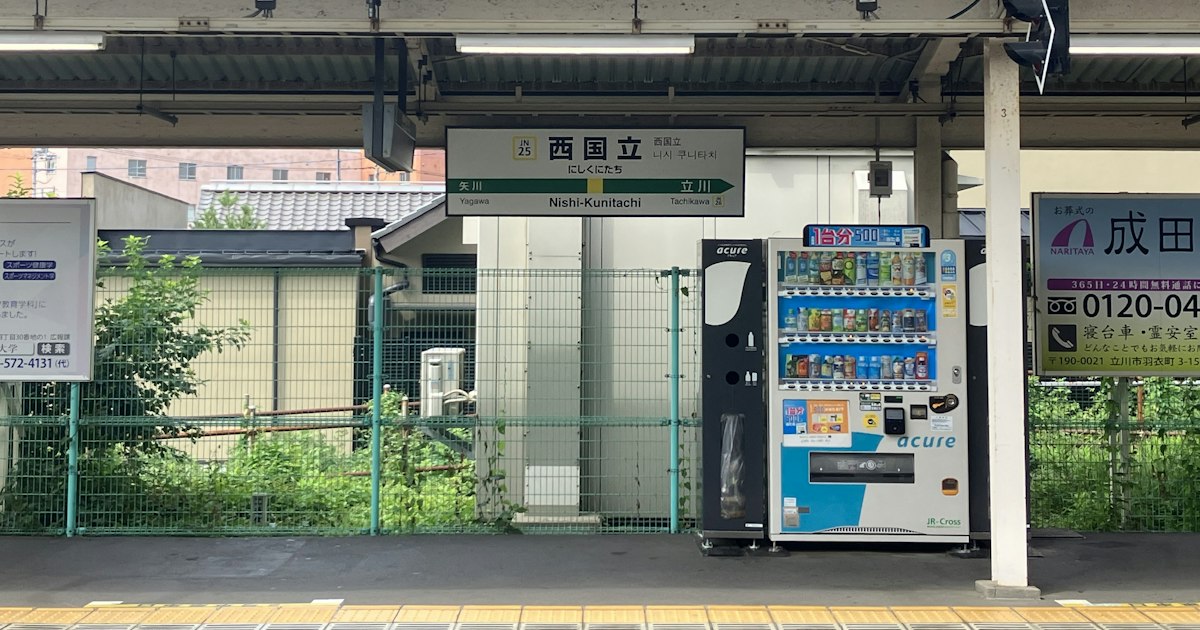
    The brand to recognize is acure (アキュア), JR East’s in-house vending machine operator. Acure machines are everywhere inside JR East stations in the Tokyo, Yokohama, and northern Kanto area — on platforms, in corridors between gates, and clustered near station exits. Nearly all of them accept Suica (and by extension Pasmo, Icoca, and the other nine regionally issued IC cards that are mutually compatible under Japan’s “10 card” transportation IC alliance).

    • Drink machines: standard canned and bottled drinks run about ¥130–¥160, with some “hot & cold” specialty machines charging ¥180–¥280 for items like fresh-brewed coffee or seasonal fruit drinks.
    • Acure Bakery machines: these are the fun ones — vending machines that dispense actual fresh bread (melon pan, curry pan, custard-filled rolls) baked that morning, priced around ¥280–¥420. You’ll find them at larger stations like Shinagawa, Omiya, and Tachikawa.
    • Snack and ice cream machines: chips, chocolate, and ice cream bars in the ¥150–¥300 range, often tucked near platform benches.

    Machines located inside the ticket gates (after you’ve tapped in) are more consistently IC-enabled than ones in the station’s outer concourse, since those are squarely within JR East’s own retail footprint. If you’re killing time waiting for a train, that’s the better hunting ground.

    What About Pasmo, Icoca, and Other Regional Cards?

    Because of the nationwide IC interoperability agreement, a Pasmo card works identically to Suica at these machines — same tap, same speed, same beep. The same goes for Icoca (Kansai), Sugoca (Kyushu), Toica (Tokai), and the other regional cards, as long as you’re using them within Japan. Mobile Suica and Mobile Pasmo on your phone (via Apple Pay or Google Pay) work the same way — just hold the phone near the reader, no need to unlock it.

    One real limitation: Welcome Suica and other tourist-oriented temporary IC cards work exactly the same as regular Suica at vending machines, so there’s no downside there. The actual gotcha is balance — unlike at a ticket gate, a vending machine will usually just reject the tap silently if your balance is too low, rather than telling you how much you’re short. Top up with at least a few hundred yen of buffer before you start browsing snacks.

    Beyond Vending Machines: Newdays and Station Kiosks

    Don’t limit yourself to the vending machine wall — JR East’s Newdays convenience stores, which sit inside or right outside the gates at nearly every JR East station, accept Suica/Pasmo at the register for anything in the store: onigiri, bento boxes, canned coffee, regional snack boxes, even umbrellas on a rainy day. These aren’t technically vending machines, but they function the same way for a tourist’s purposes — tap, grab, go, no cash needed. If you’re caught in a sudden downpour and don’t have an umbrella, it’s also worth knowing about iKasa, Japan’s umbrella-sharing app, which has rental stands at many of the same stations and is often a cheaper option than buying a ¥500 convenience store umbrella outright.

    Common Mistakes Tourists Make

    • Assuming all vending machines are the same. A machine ten meters from an IC-enabled one, operated by a different company, may be coins-only. Check the logo every time rather than assuming based on the last machine you used.
    • Forgetting Shinkansen platform machines are different. Many bullet train platform vending machines are run by JR Central or JR West rather than JR East’s acure network, and IC acceptance varies more there — some still want coins or bills for drinks, especially older machines on regional Shinkansen lines.
    • Tapping twice. If a tap doesn’t register instantly, resist the urge to tap again immediately — some readers need a full second to process, and a second tap mid-transaction can cause a double charge that you’ll need to sort out at a station fare adjustment machine.
    • Overbuying drinks to carry home. If you’re stocking up on Pocari Sweat or other Japanese drinks as souvenirs, remember liquids over 100ml can’t go in carry-on luggage — see our guide on TSA rules for liquids and locks on your flight home before you load up your suitcase.

    Timing and Practical Tips

    Vending machines never close, but restocking schedules matter for the bakery machines specifically — acure Bakery units are typically refilled in the early morning and again in the early afternoon, so items can sell out by evening rush hour (around 6–8pm) at busy stations. If you want the full selection of fresh bread, aim for mid-morning (10am–noon) when the morning commute crowd has thinned but stock hasn’t been picked over yet.

    For drinks specifically, Japan’s ion and electrolyte drinks — Pocari Sweat, Aquarius, and the medical-grade OS-1 — are stocked in most of these same machines and are worth understanding before you grab one, since OS-1 in particular is formulated for rehydration therapy rather than casual refreshment. Our full breakdown of Japan’s ion-drink culture covers which one you actually want on a hot summer platform versus after a long flight.

    Budget-wise, a vending machine snack run rarely breaks ¥500 even if you grab a drink and a bread item, which makes it one of the cheapest ways to eat on the move in Japan — no need to leave the station, no language barrier, and increasingly, no need to carry cash at all.

  • Dart Bars in Japan: Where Locals Play Electronic Darts and How to Join a Game

    Dart Bars in Japan: Where Locals Play Electronic Darts and How to Join a Game

    Photo by Alex Knight on Unsplash

    Walk into almost any small bar district in Japan after dark and you’ll hear it before you see it — the rapid-fire plastic clatter of soft-tip darts hitting a lit-up electronic board, followed by a synthesized voice calling out a score in Japanese or English. Electronic darts is one of Japan’s biggest low-key nightlife hobbies, and unlike a lot of “local culture,” it’s genuinely easy for a visitor to walk in off the street and play a game with strangers tonight. Here’s how the scene actually works and how to get a board.

    Why Electronic Darts Took Over Japan’s Bars

    Steel-tip darts never really caught on in Japan, but soft-tip electronic darts exploded in the 2000s once networked machines arrived. The boards are segmented plastic (not bristle), scored automatically by sensors, and connected online so every throw gets logged to your personal rating. That rating system is the whole reason the hobby is social rather than solitary — regulars check their rank, challenge people a level above them, and bar staff will often pair up two strangers who are hovering near the same machine. It’s one of the few nightlife activities where showing up alone is completely normal.

    DARTSLIVE vs. PHOENIX: The Two Networks

    Nearly every machine in the country runs on one of two competing networks, DARTSLIVE or PHOENIX. Functionally they’re similar: you tap or insert a membership card (sold at the counter for roughly ¥300–500), and the machine tracks your “rating” across every bar in Japan using that network. You don’t need a card to play — paying per game in cash works fine — but if you think you’ll play more than once during your trip, buying a card is worth it since it also unlocks English-language menu screens on most newer cabinets. Standard game formats are “01” (usually 501 or 301, reduce your score to zero) and “Cricket” (close out numbers 15–20 and the bullseye). Staff will usually set the machine to English rules on request.

    Where to Find Dart Bars

    Tokyo’s densest concentrations are in Shibuya, Shinjuku (especially around Kabukicho), Roppongi, and Ikebukuro — small bars, often one flight up or down a narrow building, with one to four machines. Osaka’s equivalent districts are Namba and Umeda. The fastest way to find one on the ground is to search “dart bar” or the Japanese term ダーツバー on Google Maps for your neighborhood; look for a signboard listing drink prices with a small dartboard icon.

    If you’d rather skip bar etiquette entirely, two chains make it foolproof. Round1 Stadium, a nationwide amusement complex with bowling, karaoke, and arcade games, has dart machines in most locations, pays per play with coins or a prepaid card, and needs zero Japanese — just point at the machine. HUB, the British-style pub chain with branches across Tokyo, Osaka, and Yokohama, has dart boards in many of its locations and a drinking culture that welcomes solo foreign customers; it’s a gentle entry point before you try a smaller independent bar.

    What It Actually Costs

    Budget venues (HUB, chain izakaya with a dart corner): drinks run ¥500–800, and dart play is often free or a flat ¥100–200 per game loaded via coin slot.

    Mid-range independent dart bars: expect a table or seat charge of ¥500–1,000 per person (sometimes waived if you order within the first 30 minutes), plus ¥100–200 per game, plus drinks at standard bar prices. Many run a one-drink minimum rather than a strict cover.

    Splurge: dart bars with private VIP booths or late-night “deep night” charges (after 1am or so) can push the per-person cost to ¥2,000–3,000 for a few hours including drinks — still cheap compared to a night out in most Western cities.

    Round1 is the exception to all of this: pure pay-per-play, roughly ¥100–300 per game, no cover, no drink minimum.

    How to Actually Join a Game

    The social mechanics are simpler than they look. If a machine is free, you can just walk up and play solo — nobody will bother you. If you want to join locals, the easiest opening is to stand near an occupied board, watch a round, and ask “ご一緒にどうですか?” (go-isshoni dō desu ka — “want to play together?”) or just a friendly “one more?” in English — darts terminology is almost entirely English loanwords (bull, ton-eighty, bust), so the language barrier during actual play is minimal. Staff behind the counter are usually happy to broker an introduction if you tell them you’re new to a venue, especially on a quieter weeknight when regulars are more likely to be standing around waiting for a fourth player.

    There’s no tipping — don’t try, it just confuses people. Buying a round of drinks for the group you played with is the polite way to say thanks if you had a good game.

    Best Timing and Common Mistakes

    Weeknights (Monday–Thursday), especially 7–9pm before the after-work crowd peaks, are the easiest time for a visitor to get a board without waiting and to find locals willing to slow down and explain the scoring. Weekend nights are livelier but many bars run informal weekly leagues — if you walk in and a whole bar is quietly focused on a tournament bracket on a screen, that’s a league night, and it’s polite to ask before claiming a machine rather than assuming it’s open play.

    A few other things that trip up visitors:

    • Bars serving alcohol require everyone present to be 20 or older — bring ID, even if you look well past it.
    • Steel-tip darts from home won’t work on these boards; the tips need to be soft plastic or they’ll damage the sensors (and staff will stop you).
    • Some smaller, older dart bars still allow smoking, grandfathered under Japan’s 2020 indoor smoking law for small existing venues — worth checking a bar’s signage if you’re sensitive to it.
    • Don’t assume play is free just because the bar charges a seat fee; ask “ダーツは一回いくらですか?” (how much per game?) before you start running up a tab on a shared machine.

    Bringing the Hobby Home

    If you get hooked, a basic soft-tip dart set (board-compatible tips, shafts, flights) costs ¥2,000–5,000 at sporting goods stores or electronics chains, and most airlines treat a boxed set as normal checked or carry-on luggage. If you’d rather order gear before you fly out and have it waiting at your hotel, the Rakuten Ichiba guide for overseas shoppers covers how to navigate checkout and shipping as a non-resident. And if darts bars are turning your evening into a wider “weird Japanese games” crawl, the traditional beanbag game covered in our otedama guide is a nice daytime contrast, while Street Kart Tokyo makes a fun same-night pairing if you want more adrenaline before you settle into a bar stool. If rain catches you between venues, remember you can grab a cheap umbrella on the spot through iKasa rather than buying one you’ll never use again.

  • iKasa: Japan’s Umbrella-Sharing App and How Tourists Can Borrow a Rain Umbrella

    iKasa: Japan’s Umbrella-Sharing App and How Tourists Can Borrow a Rain Umbrella

    Photo by Pema G. Lama on Unsplash

    Japan’s rainy season and sudden afternoon downpours catch almost every visitor off guard at least once. Rather than buying a flimsy ¥500 convenience-store umbrella you’ll abandon at your hotel, tourists in Tokyo (and a growing number of other cities) can now borrow one on the spot through iKasa, an app-based umbrella-sharing service. Here’s exactly how it works, what it costs, and where to find a stand.

    What Is iKasa and How It Works

    iKasa (アイカサ, pronounced “eye-kasa,” a play on the Japanese word for umbrella, kasa) is an umbrella rental network run by Nature Innovation Group. Instead of owning an umbrella, you unlock one from a street-side stand using your smartphone, use it for as long as you need, and return it to any iKasa stand — not necessarily the one you borrowed it from. The umbrellas are sturdy, plain navy or clear vinyl, built to survive hundreds of rentals rather than one windy afternoon.

    The stands themselves are simple metal racks holding 10–20 umbrellas, each secured by a lock that releases when you scan a QR code with the app. You’ll find them bolted near station exits, inside convenience stores, in office building lobbies, and at some cafes and hotels — anywhere foot traffic is heavy during rain.

    Setting Up the App and Borrowing Your First Umbrella

    To use iKasa, download the iKasa app (iOS and Android) or access it through the LINE mini-app if you already have LINE installed. Setup requires:

    • A phone number for SMS verification
    • A credit or debit card registered for payment

    Once registered, open the app, scan the QR code on the umbrella stand you’re standing at, and the app releases one umbrella automatically. There’s no paperwork, no deposit, and no need to speak Japanese at the stand itself — the interaction happens entirely through your phone screen. To return an umbrella, find any iKasa stand with an open slot, slot the umbrella in, and scan again (or tap “return” in the app) to end the rental.

    A practical note for tourists: international phone numbers don’t always receive the SMS verification code reliably, and some users report needing a Japan-issued SIM or a number on a major carrier to get through sign-up smoothly. If you’re relying on an eSIM or a prepaid tourist SIM, test the sign-up process early in your trip rather than discovering a problem the moment it starts pouring.

    Where to Find iKasa Stands

    Coverage is heaviest in central Tokyo — Shibuya, Shinjuku, Roppongi, Tokyo Station, Ikebukuro, and the wider Yamanote Line loop all have dense clusters of stands, often right at station exits where you’d otherwise get soaked walking to your destination. Many Family Mart convenience store locations in these areas host a stand just inside or beside the entrance, which doubles as a handy landmark since Family Mart signage is easy to spot from a distance. The app’s in-app map shows live stand locations and how many umbrellas are currently available at each one, so check before you set out rather than hunting on foot.

    Outside Tokyo, coverage has expanded to parts of Osaka and a handful of other cities, but it’s far thinner — don’t count on finding a stand in smaller towns, rural areas, or most of Kyoto’s older neighborhoods. If your itinerary includes day trips like the Oyama Afuri Shrine hike in Kanagawa, assume you’ll need your own umbrella or rain jacket once you leave the central Tokyo network.

    Pricing: Pay-Per-Use vs Monthly Pass

    iKasa’s standard rate is ¥70 (tax included) for the first 24 hours, with the same ¥70 charged again for each additional 24-hour block you keep the umbrella. For a short trip, this is the option most tourists will use — borrow it when the rain starts, return it within a day or two, and you’ve spent less than the price of a vending-machine drink.

    For travelers staying longer and expecting repeated rain, iKasa has also offered an unlimited monthly subscription plan priced in the low hundreds of yen per month — worth checking the app for current terms if your trip spans several weeks during a wet stretch, since subscription pricing and availability can shift over time.

    Either way, there’s no deposit held and no penalty for returning the umbrella to a different stand than where you picked it up, which is the main advantage over simply buying one outright.

    Best Time of Year to Rely on iKasa

    Japan’s rainy season (tsuyu) runs roughly early June through mid-July in most of Honshu, with Okinawa starting earlier in May. This is when iKasa earns its keep — steady, unpredictable drizzle that makes carrying your own umbrella everywhere impractical but going without one miserable. Typhoon season (August through October) brings heavier, wind-driven rain where a shared umbrella may not hold up as well as a proper storm-grade one you’d buy for ¥1,500–2,500 at a department store. Winter rain in Tokyo tends to be lighter and less frequent, though if you’re also dealing with cold mornings and evenings, pairing an umbrella with a stash of disposable pocket warmers (kairo) is a smart combo for sightseeing in December and January.

    Common Mistakes Tourists Make

    • Not checking stand availability before leaving the hotel. Stands can run empty during a sudden downpour when everyone has the same idea. Check the app map first.
    • Assuming nationwide coverage. iKasa is concentrated in Tokyo and parts of Osaka. If you’re heading to rural Kyoto Prefecture, somewhere like Kayabuki-no-Sato’s thatched-roof village, bring your own.
    • Forgetting to return it. The per-day charge keeps accruing until you return the umbrella to a stand, so an umbrella left in a suitcase or hotel room racks up charges on your card.
    • Packing it for the flight home. iKasa umbrellas belong to the network, not to you — and if you do buy a nice folding umbrella as a souvenir, check how it packs alongside other purchases; our guide to TSA rules and Japanese suitcase locks covers what else to watch for when packing for the flight home.

    Budget, Mid-Range, and Splurge Alternatives

    If iKasa isn’t available where you are, convenience stores (7-Eleven, Lawson, Family Mart) sell basic clear vinyl umbrellas for roughly ¥500–700 — fine for one storm, usually not built to survive a second. Mid-range options at drugstores or ¥100 shops like Daiso run ¥300–500 for a slightly sturdier folding model worth keeping for the rest of your trip. For a genuine splurge and a far better souvenir than a disposable umbrella, Japanese department stores sell beautifully made wooden-handled or UV-protective umbrellas from ¥3,000–8,000 — a nicer keepsake than anything you’ll find at an airport gift shop, and worth factoring into your Tokyo itinerary the same way you might plan a stop for a novelty souvenir like a school recorder or pianica from a Japanese stationery store.

    For most short city stays, though, iKasa remains the simplest fix: no planning ahead, no carrying a dead-weight umbrella on sunny days, and a total cost that’s easy to shrug off even if you only use it once.

  • Street Kart Tokyo: Driving a Real-Life Mario Kart Through the City’s Streets

    Street Kart Tokyo: Driving a Real-Life Mario Kart Through the City’s Streets

    Photo by Bohdan Maylove on Unsplash

    If you’ve ever wanted to tear past Tokyo Tower or weave through Shibuya’s neon canyons in a tiny go-kart, you’re not imagining it — companies across Tokyo now run exactly this experience on real public roads. It’s become one of the most photographed things a visitor can do in the city, but it’s also more regulated and more expensive than most people expect going in. Here’s what you actually need to know before you book.

    What the Experience Actually Is (and Isn’t)

    These tours put you behind the wheel of a small, open-air kart — technically registered as a kei car or mini-vehicle — and send you out onto normal city streets in a guided convoy, following a lead driver who communicates with the group over a radio earpiece. You stop at traffic lights, merge with real buses and taxis, and follow Japanese road rules the entire time. It is not a closed-course ride.

    Worth knowing up front: these companies cannot legally dress you as Mario, Luigi, or any other Nintendo character. The original operator, once widely known as “MariCar,” lost a long-running trademark and copyright case brought by Nintendo (the Tokyo courts ultimately ordered tens of millions of yen in damages), and the business rebranded around 2020 as Street Kart, dropping the Nintendo costumes and branding entirely. You’ll still find costume rental — think superheroes, mascots, and other generic characters — just nothing with a plumber’s mustache.

    The License You Need Before You Book

    This trips up more travelers than anything else. Because you’re driving on public roads, every driver needs a license valid in Japan — there’s no “just ride along” option, since these are single-seat karts. In practice that means one of:

    • A Japanese driver’s license
    • An International Driving Permit (IDP) issued under the 1949 Geneva Convention — the kind most US, UK, Canadian, and Australian visitors can get from their home motoring association before the trip
    • A license from a small list of countries (including France, Germany, Switzerland, Belgium, Monaco, and Taiwan) that Japan recognizes directly without an IDP, provided it comes with an official Japanese translation

    If your home country isn’t party to the Geneva Convention and doesn’t have a bilateral agreement with Japan, you may not be able to drive at all, no exceptions. Double-check this weeks before your trip, not the morning of — IDPs typically can’t be issued once you’ve already left your home country.

    Choosing a Course: Akihabara, Shibuya, Odaiba and Asakusa

    Most operators run several set routes from a few hub locations, and you book by course rather than by generic “Tokyo tour”:

    • Akihabara — the original hub and usually the easiest to book; routes loop through the electronics district and often extend toward the Imperial Palace area.
    • Shibuya — built around getting a kart’s-eye view of the famous scramble crossing and Shibuya’s backstreets.
    • Odaiba — a waterfront course with Rainbow Bridge and bay views, generally calmer traffic than central routes.
    • Asakusa — pairs well with a temple visit; if you’re already heading that way for Sensoji, it’s worth building in time afterward to browse Asakusa’s older shopping streets, including the centuries-old spice shop Yagenbori, a short walk from the temple.

    Routes and exact start points shift occasionally, so confirm the pickup location on your booking confirmation rather than assuming it matches the shop’s main address.

    Prices, Hours and How to Book

    Expect to pay roughly ¥8,000–¥16,000 per person depending on course length (typically 1, 2, or 3 hours) and whether you add costume rental or a GoPro-style photo/video package — these add-ons are usually a few thousand yen extra. Most locations operate from around mid-morning into the early evening, with the last tour departures generally in the late afternoon; exact hours vary by location and season, so check the current schedule on the operator’s site when you book, not when you show up.

    Book online in advance — same-day walk-ins are possible but far less reliable, especially on weekends and during peak cherry blossom or autumn foliage weeks. Bring your passport and your license/IDP in physical form; photos on your phone are generally not accepted as valid ID.

    Best Time of Year (and Day) to Ride

    Spring (late March–April) and autumn (October–November) offer the most comfortable driving weather and the best visibility for photos, but they’re also the most heavily booked windows in Tokyo generally. Summer rides are doable but genuinely hot and humid in an open-air kart with no air conditioning — hydrate beforehand. Winter rides are cold since there’s no windshield heater; if you’re booking December through February, dress for the wind chill and consider tucking a couple of disposable kairo hand warmers into your gloves before you set off. Weekday morning slots tend to have lighter traffic and shorter waits than weekend afternoons.

    Common Mistakes First-Timers Make

    • Assuming an IDP isn’t necessary. It almost always is, and you cannot get one in Japan after arrival.
    • Booking the wrong course location. Akihabara, Shibuya, and Odaiba are different shops with different pickup points — don’t assume they’re interchangeable.
    • Forgetting that everyone in the group must hold a valid license. There’s no “I’ll just sit this one out and film” option since these are solo karts, not passenger seats.
    • Wearing sandals or loose skirts/dresses. You’re operating foot pedals in an open vehicle; closed-toe shoes and clothing that won’t flap into the wheel area are the practical choice.
    • Skipping travel insurance. This is street driving among real traffic — confirm your travel insurance or credit card coverage actually extends to this kind of activity before you go.

    Pack light for the ride itself — bags don’t fit well in the kart, and valuables are better left at your hotel. If you’re still sorting out what to bring in your checked luggage versus carry-on for the rest of the trip, our guide on packing rules for liquids and locks on your flight home is worth a read before you leave.

    Getting There

    The Akihabara hub is a short walk from Akihabara Station (JR Yamanote/Sobu lines, plus Hibiya and Tsukuba Express lines), making it the most straightforward to reach without a car. Shibuya and Odaiba locations are similarly close to their namesake stations — Shibuya Station and Daiba/Tokyo Teleport stations on the Yurikamome and Rinkai lines, respectively. Arrive at least 15–20 minutes before your slot for the safety briefing and paperwork; latecomers can lose their spot entirely since the group departs together.

  • TSA vs Japanese Suitcase Locks: Packing Rules for Liquids and Locks on Your Flight Home

    TSA vs Japanese Suitcase Locks: Packing Rules for Liquids and Locks on Your Flight Home

    Photo by Dimitri Karastelev on Unsplash

    You’ve spent two weeks filling your suitcase with sake, skincare, snacks, and a few things you didn’t know you needed until you saw them in a Tokyu Hands aisle. Now it’s the night before your flight home, and you’re staring at a padlock you bought at a 100-yen shop wondering if it’s going to get cut off at the airport. The liquids-and-locks problem catches almost every first-time visitor, and the rules are a little different depending on where you’re flying from and who’s doing the screening. Here’s what actually matters.

    The Liquids Rule Applies in Japan Too, Not Just at Your Home Airport

    Many travelers assume the “3-1-1” liquids rule (3.4 oz / 100ml containers, one quart-sized clear bag, one bag per passenger) is a TSA-only thing they’ll deal with when they land back in the US. It isn’t — it’s an ICAO-based international standard, and Narita, Haneda, Kansai, and every other Japanese international airport enforces the same 100ml-per-container limit at the security checkpoint before you even board. If you’re flying to the US, the TSA rule is really just the mirror image of the screening you already passed through in Japan.

    The practical issue is that Japanese drugstore and department store liquids are rarely sold in 100ml bottles. Toners, essences, and lotions from brands sold at Japanese drugstores commonly come in 150ml–200ml bottles, and sake and shoyu gift sets are almost always 180ml–720ml. None of that fits in your carry-on quart bag. If you’re stocking up on skincare — see our drugstore picks for acne patches and spot treatments for what’s actually worth buying — plan to pack full-size liquids in checked luggage, not your carry-on, full stop. Patches and sheet masks are solid, not liquid, so they’re fine in a carry-on regardless of size.

    TSA-Recognized Locks vs. the Lock You Bought at Don Quijote

    This is where most people get caught out. TSA agents in the US are authorized to open your checked bag for inspection, and if your lock isn’t one they can open, they’re allowed to cut it off — and they will, with no compensation for the lock or any damage to the zipper pull. The locks they can open without cutting are “Travel Sentry” locks, identifiable by a small red diamond logo stamped on the lock body. These have a universal master-key system that security agents at major airports (not just in the US) can access.

    Japanese suitcase brands sell both kinds. Mid-range and premium Japanese luggage (Samsonite Japan, ACE, Legend Walker) typically includes a built-in combination lock with the Travel Sentry diamond on the dial housing — check the lock face for it. Budget suitcases, and especially standalone padlocks sold cheaply at 100-yen shops or souvenir stalls, usually don’t have it. If you’ve locked your suitcase with a non-TSA padlock and a US-bound flight triggers a manual inspection, that lock gets cut, no matter how nice it looked.

    If you’re also buying something with real resale or sentimental value to pack — antique coins, a vintage guitar, or anything you’d hate to see damaged by a forced inspection — it’s worth being extra conservative with locks. That logic applies whether you’re hauling home a koban coin from an antique dealer or a case you picked up for a used guitar from Ochanomizu — don’t lock the hard case at all if security is likely to want a look, or use a TSA-recognized lock so it can be opened without force.

    Where to Buy a TSA-Compatible Lock Before You Fly

    You don’t need to bring one from home. Tokyu Hands and Don Quijote both carry TSA-marked combination locks for roughly ¥800–¥1,500, usually in the travel-goods or luggage accessories section. Don Quijote stores in tourist areas like Shibuya, Akihabara, and Shinjuku stay open very late (many locations run until 2am or 5am, some 24 hours), so it’s an easy last-minute stop the night before departure. Muji also sells simple TSA-compatible cable locks for around ¥990. Look specifically for the red diamond logo on the packaging — “key lock” or “combination lock” alone doesn’t guarantee it’s Travel Sentry-approved.

    Duty-Free Sake, Whisky, and Cosmetics: The Exception That Trips People Up

    Once you clear security at a Japanese airport, duty-free shops sell liquids — sake, whisky, perfume, skincare — in quantities well over 100ml, and that’s legal because they’re sealed in a tamper-evident STEB (security tamper-evident bag) with your boarding pass and receipt visible inside. That bag lets you carry it onto the plane even though it exceeds the normal limit.

    The catch is connecting flights. If your Japan–US itinerary involves a layover where you have to clear security again (common with some routings through other countries), that STEB bag may need to be re-screened, and depending on the connecting airport’s rules, it can be confiscated even though it was perfectly legal when you bought it. If you have a direct flight home, duty-free liquids in the sealed bag are safe to carry on. If you’re connecting anywhere, pack any duty-free liquids in checked luggage instead, or buy them in your home airport’s own duty-free zone if available.

    Common Mistakes to Avoid

    • Packing full-size skincare or sauce bottles in your carry-on — anything over 100ml needs to go in checked luggage, even if it was sealed at the store.
    • Locking checked bags with a non-TSA padlock — it may simply get cut off during a random or triggered inspection.
    • Forgetting that kairo body warmers and other pressurized or heat-generating items have their own rules — the iron-oxide type sold everywhere in winter (see our guide to kairo warmers) are fine in checked or carry-on since they’re not pressurized, but always keep them in original packaging so security can identify them at a glance.
    • Packing kitchen knives or a heavy teppan griddle plate in carry-on — bladed items and anything resembling a weapon must go in checked luggage; if you bought a hinoki cutting board or kitchen knife set, pack them checked and wrapped, not in your carry-on.
    • Assuming you have to carry everything at all — if your haul has gotten too big or too liquid-heavy to fly home safely, it’s often cheaper and less stressful to ship it. Shipping overseas purchases through Rakuten or a forwarding service sidesteps the liquids and locks problem entirely for anything you don’t need to hand-carry.

    A Simple Packing Strategy for the Flight Home

    Sort your purchases into three piles before you even think about locks: carry-on solids and sub-100ml liquids, checked-bag liquids and anything bladed or fragile, and “ship it instead” for bulky or liquid-heavy items you bought mainly as gifts. Lock only your checked bag, and only with a Travel Sentry-marked lock. Leave your carry-on unlocked — security needs to open it anyway, and an unlocked bag moves through the line faster. Budget travelers can skip buying a lock altogether and use a zip-tie or the suitcase’s built-in strap instead; it won’t stop a determined thief, but it does show if the bag’s been opened, and it’s not something TSA needs to cut.