Japan Trove

Category: Uncategorized

  • Kissaten: Japan’s Retro Coffee Shops and What to Order

    Kissaten: Japan’s Retro Coffee Shops and What to Order

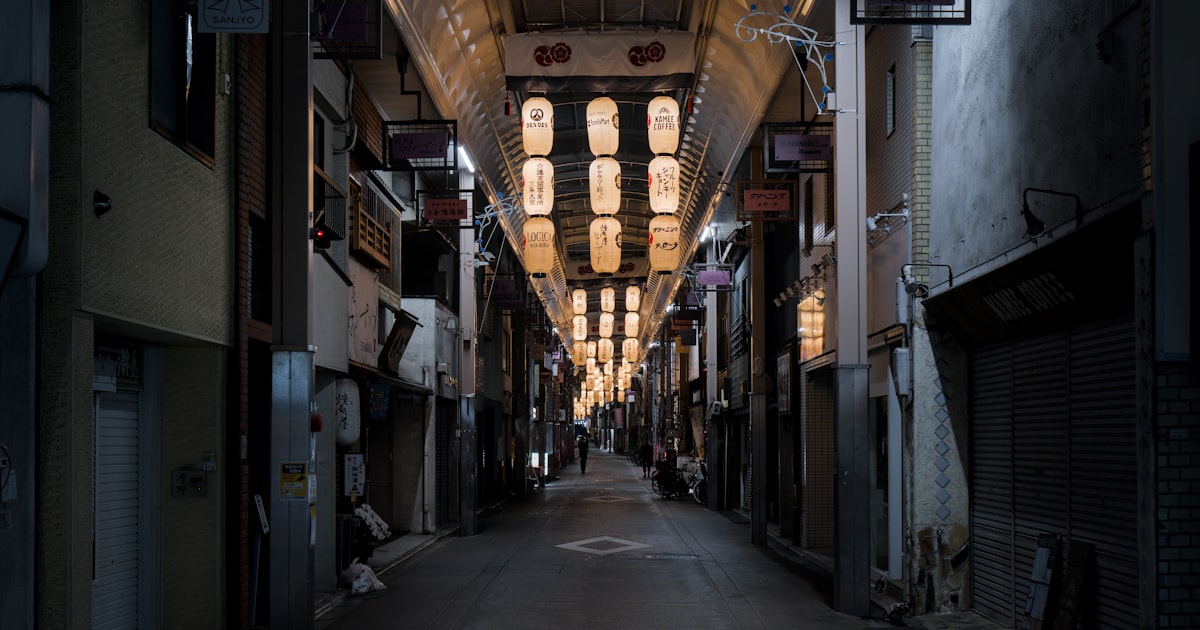
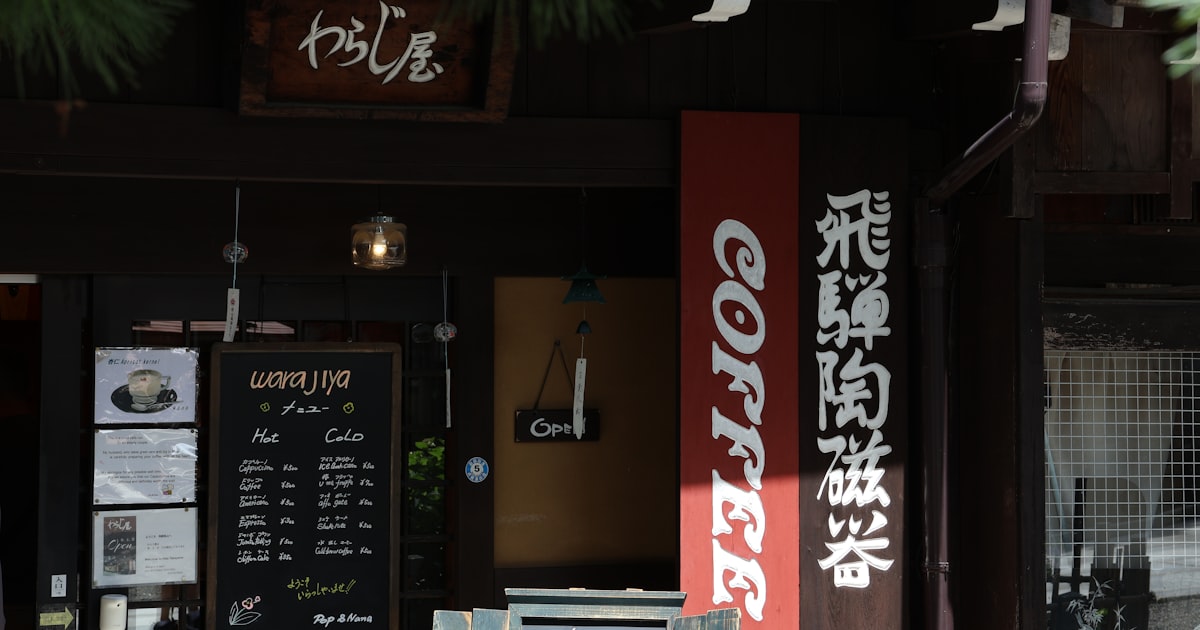
    Photo by Yanhao Fang on Unsplash

    Long before third-wave coffee bars and convenience-store lattes took over Japan, there was the kissaten (喫茶店) — a dim, wood-paneled coffee shop with siphon pots bubbling behind the counter, jazz or classical music on the speakers, and a menu of naporitan spaghetti and cream soda floats that hasn’t changed since the Shōwa era. Kissaten are a different species from Japan’s modern specialty cafes: slower, smokier (some still allow indoor smoking), and steeped in a hospitality style that treats a single cup of coffee as worth an hour of your time. If you want a genuinely retro slice of Japan that most tourists walk right past, this is it.

    What Is a Kissaten, Exactly?

    “Kissaten” literally means “tea-drinking shop,” a term that dates to the early 20th century when Western-style coffee culture first arrived in Japan. Legally and culturally, a kissaten is distinct from a café: it’s typically family-run, doesn’t serve alcohol (though some jazz kissaten quietly do), and survives on a menu that hasn’t been updated in decades — thick-cut toast, hand-drip or siphon coffee, and old-fashioned “yōshoku” (Japanese-Western fusion) plates like omurice and naporitan. Many kissaten were built in the 1950s–1970s coffee boom and are now run by second-generation owners, often octogenarians, which is part of the appeal: you’re sitting in a living time capsule, not a themed recreation.

    What to Order: The Kissaten Classics

    The menu is where kissaten culture really shows itself. A few dishes to look for:

    • Naporitan — spaghetti tossed with ketchup, sausage, and peppers, invented in postwar Japan as a riff on “Neapolitan” pasta. Usually ¥800–1,200.
    • Morning service (mōningu) — order any coffee before 11am and many kissaten throw in free toast, a boiled egg, and sometimes yogurt or salad. This tradition is strongest in Nagoya, where some shops still price the whole set at ¥500–600.
    • Cream soda — bright green melon soda with a scoop of vanilla ice cream floating on top, around ¥700–900. Purely nostalgic, and very photogenic.
    • Pizza toast — thick white bread topped with ketchup, cheese, and ham, grilled until crisp.
    • Siphon or Nel-drip coffee — brewed slowly at the counter in glass siphon vacuum pots or cloth (nel) filters. This is the thing to order at a serious kissaten; expect ¥600–1,300 depending on the shop’s reputation and bean rarity.

    Don’t expect oat milk or extensive customization — kissaten coffee is usually served one way, sometimes with sugar and cream on the side, and that’s the point.

    Tokyo’s Best Kissaten and How to Get There

    Tokyo has dozens of standout kissaten, but three are worth planning around:

    • Kayaba Coffee (Yanaka) — a 1916 building turned coffee shop, in the old-Tokyo neighborhood of Yanesen. A 5-minute walk from Nezu Station (Chiyoda Line) or Sendagi Station (Chiyoda Line). Open roughly 8am–11pm; go early for the egg sandwich morning set.
    • Café de l’Ambre (Ginza) — founded in 1948 and still run with the philosophy that coffee beans, like wine, improve with age. A short walk from Ginza-itchōme Station. Coffee runs ¥650–1,500; this is the splurge option for serious coffee drinkers.
    • Chatei Hatou (Shibuya) — a hushed, formal kissaten a few minutes from Shibuya Station’s Hachikō exit, known for meticulous hand-drip coffee poured tableside. Expect to pay ¥1,000+ per cup and to sit in near-silence — it’s the opposite experience of Shibuya Crossing outside.

    If you’re spending an evening bar-hopping nearby, Golden Gai’s tiny alleys have a similar retro-Shōwa atmosphere after dark, and a few of its bars are essentially night-shift kissaten with jazz records instead of coffee siphons.

    Kyoto and Nagoya Kissaten Worth the Detour

    Kyoto’s Smart Coffee (Smart Kissa), near Sanjo Station, opened in 1932 and is often cited as the city’s oldest surviving kissaten. It’s famous for its French toast and a morning set served until 11am; a coffee-and-toast combo runs around ¥800–1,000, and there’s usually a short line on weekend mornings, so arrive by 9am if you want a table.

    Nagoya deserves special mention as Japan’s morning-service capital — the free-toast-and-egg custom is thought to have started there in the 1950s among local businessmen, and chains like Komeda Coffee (now nationwide) still honor it. If you’re road-tripping through the region, it’s worth pairing a Nagoya kissaten stop with a stretch break at a michi-no-eki roadside station, where you can pick up local snacks for the rest of the drive.

    Budget, Mid-Range, and Splurge Options

    Kissaten pricing is refreshingly transparent and rarely surges with tourism the way some cafes do:

    • Budget (¥400–700): Neighborhood kissaten in residential areas or near train stations, where a basic blend coffee is often cheaper than a convenience-store canned coffee plus snack. Look for shops with hand-lettered menus and no English signage — these are usually the least touristed and least expensive.
    • Mid-range (¥700–1,000): Named shops like Kayaba Coffee or Smart Coffee, where you’re paying a bit more for atmosphere, a historic building, or a well-known morning set.
    • Splurge (¥1,000–1,500+): Single-origin, aged, or rare-bean pours at places like Café de l’Ambre or Chatei Hatou, where the coffee itself is the destination, not a side order to a meal.

    Common Mistakes First-Timers Make

    A few things trip up visitors:

    • Treating it like a quick coffee stop. Kissaten culture is built around lingering — nobody will rush you, but nobody expects you to rush either. Budget at least 30–45 minutes.
    • Expecting to pay at the register on the way out only. Many kissaten still use handwritten paper checks or a small tray system; watch what other customers do, or simply take your bill to the counter.
    • Assuming everywhere is non-smoking. Older kissaten were grandfathered out of Japan’s 2020 indoor smoking ban if they meet certain size and registration conditions, so some small shops still permit smoking. If it matters to you, check a shop’s website or a recent review before visiting.
    • Showing up during the lunch rush expecting quiet. Between roughly 11:30am and 1:30pm, kissaten near business districts fill with regulars ordering set lunches; late morning (9–11am) or mid-afternoon (2–5pm) is calmer and better for savoring the morning-service menu.

    Best Time to Go

    Kissaten work year-round since they’re entirely indoors, which makes them a good rainy-day or extreme-heat plan in summer, or a warm mid-winter break between temple visits. Morning-service deals are only available before 11am, so if that’s your goal, build it into the start of your day rather than treating it as a lunch stop. Weekday mornings are consistently quieter than weekends at famous shops like Smart Coffee, where a Saturday queue can add 15–20 minutes to your wait.

    Kissaten pair naturally with a slow, analog day out — the kind of afternoon you might also spend browsing vintage shops in Shimokitazawa or working through a plate of old-school Japanese curry rice at a nearby diner. None of it is flashy, and that’s exactly why it’s worth seeking out.
  • Takoyaki: Osaka’s Octopus Balls and Where to Eat the Best

    Takoyaki: Osaka’s Octopus Balls and Where to Eat the Best

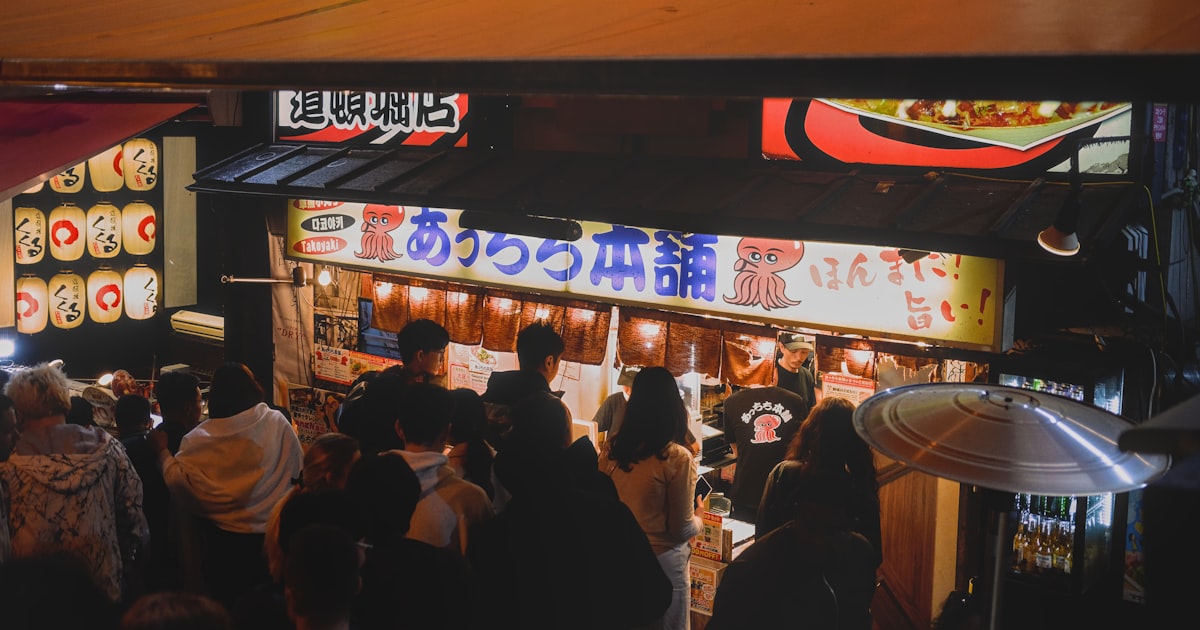
    Photo by Aoi on Unsplash

    Crisp on the outside, molten and slightly gooey inside, and dotted with a whole piece of octopus — takoyaki is Osaka’s signature street food, and no trip to the city is complete without eating it hot off the griddle. It looks simple: a golf-ball-sized batter sphere brushed with sauce and mayo. But there’s real technique behind a good one, real history behind the dish, and a few rookie mistakes that trip up almost every first-time visitor. Here’s how to find the best takoyaki in Osaka and eat it the way locals do.

    What Exactly Is Takoyaki?

    Takoyaki (たこ焼き, literally “grilled octopus”) is a ball-shaped snack made from a wheat-flour batter poured into a specialized half-sphere griddle, then filled with a chunk of boiled octopus, tempura scraps (tenkasu), pickled ginger, and green onion. The cook flips each ball with a metal pick as it cooks, building a thin, crisp shell around a soft, custardy center. Finished balls are brushed with a Worcestershire-style takoyaki sauce, striped with Japanese mayonnaise, and dusted with dried bonito flakes (katsuobushi) and green seaweed powder (aonori). A standard order is 6 or 8 pieces in a paper tray or boat, meant to be shared or eaten solo as a snack rather than a full meal.

    A Bit of History: Born in Osaka in the 1930s

    Takoyaki was invented in Osaka in 1935 by a street vendor named Tomekichi Endo, who adapted an earlier snack called “radio-yaki” by swapping in octopus — a nod to Osaka’s strong seafood culture and its Akashi-yaki dish (a similar egg-rich octopus ball from nearby Akashi, eaten dipped in dashi broth rather than sauce). The dish caught on fast in Osaka’s working-class neighborhoods and spread nationwide after World War II. Osaka still treats takoyaki as a point of civic pride — many households even own a home takoyaki griddle for parties, and you’ll find takoyaki-flavored snacks, keychains, and plushies all over the city’s souvenir shops.

    Where to Eat the Best Takoyaki in Osaka

    Dotonbori is the obvious starting point and genuinely delivers. Along the canal and its side streets you’ll find several long-running specialists:

    • Aizuya (会津屋) – widely credited as running in the direct lineage of the original 1935 recipe, serving a simpler, sauce-free style so you taste the octopus and dashi-based batter. A few locations near Dotonbori and Namba.
    • Takoyaki Doraku Wanaka – a Dotonbori institution with the giant lit-up crab sign nearby; balls come with a noticeably crisp shell and generous octopus chunks. Around 600–700 JPY for 8 pieces.
    • Juhachiban (十八番) – a small, always-busy stand tucked in the backstreets off the main canal, popular with locals for its molten, almost soupy center.

    For a different scene, head to Shinsekai, the retro neighborhood under Tsutenkaku Tower, where Wanaka (Sakuraya Honten) is the original outpost of the Dotonbori chain above and considered by many Osakans to be the better version — less touristy, slightly cheaper, and open late. If you’d rather sample several styles side by side in one stop, the Osaka Takoyaki Museum at Universal CityWalk Osaka (right outside Universal Studios Japan, on the JR Yumesaki Line) gathers stalls from several famous Osaka takoyaki brands under one roof, which is a convenient way to compare shops without crossing town — handy if you’re already heading to USJ for the day.

    How Much It Costs and What to Expect

    Takoyaki is one of the cheapest hot meals you’ll find in Japan. Expect roughly 500–800 JPY for 8 pieces at a street stall, and 600–1,000 JPY at a sit-down izakaya version with extra toppings like cheese, spicy mayo, or negi-shio (green onion and salt, no sauce). Most stalls are cash-friendly and increasingly take IC cards (Suica/ICOCA) or PayPay; don’t assume every tiny stand takes credit cards. There’s no real “splurge” tier for takoyaki itself — even upscale versions rarely exceed 1,200 JPY — but some restaurants serve it as part of a larger okonomiyaki-and-teppan set menu for 2,000–3,000 JPY if you want a fuller meal built around it.

    How to Order and Eat It Like a Local

    Most stalls are order-at-the-window, pay-first operations — point at the menu photo or say the number of pieces you want (“hachi-ko,” 8 pieces, or “roku-ko,” 6 pieces). The single biggest rookie mistake is biting straight into a fresh ball: the center holds heat far longer than the crust suggests, and burnt-mouth takoyaki injuries are common enough among tourists that it’s practically a running joke in Osaka. Let it sit for a minute, or eat it in two bites so the steam escapes. Use the wooden pick or toothpick provided rather than your fingers — the outside can still be surprisingly hot even after the center has cooled. If you don’t like mayo, ask for “mayo nashi” (no mayo) before they finish topping it, since scraping it off afterward ruins the texture. And don’t fill up before trying it — portions are small on purpose, so it’s meant to be one stop of several on a street food crawl, similar in spirit to grazing through Nishiki Market in Kyoto.

    Best Time to Go

    Takoyaki is a year-round food with no real seasonal peak, but timing your visit still matters for the experience. Dotonbori stalls are least crowded on weekday afternoons (2–5pm); evenings and weekends bring long lines, especially at the famous names. Most stands open around 10 or 11am and stay open until 10 or 11pm, with some late-night spots in Shinsekai running past midnight. If you want to watch the griddle work up close without being jostled by crowds, arrive right at opening.

    Getting There

    Dotonbori and Shinsekai are both easily reached on foot or by subway from Namba or Shinsaibashi stations, and are typically covered by regional rail passes if you’re coming in from elsewhere in Kansai — check the JR Regional Rail Passes for Kansai if you’re planning a wider loop through the region. If you’re arriving from Tokyo on a budget, an overnight bus is a common way to save on the trip down. And if you fall hard enough for takoyaki that you want to make it at home, takoyaki griddle pans (both electric and stovetop) are sold at kitchen supply shops around Osaka and at Tokyo’s Kappabashi Kitchen Town, which stocks the professional-grade cast iron versions used by actual stalls.

  • Unagi: Japan’s Grilled Eel and Where to Eat It

    Unagi: Japan’s Grilled Eel and Where to Eat It

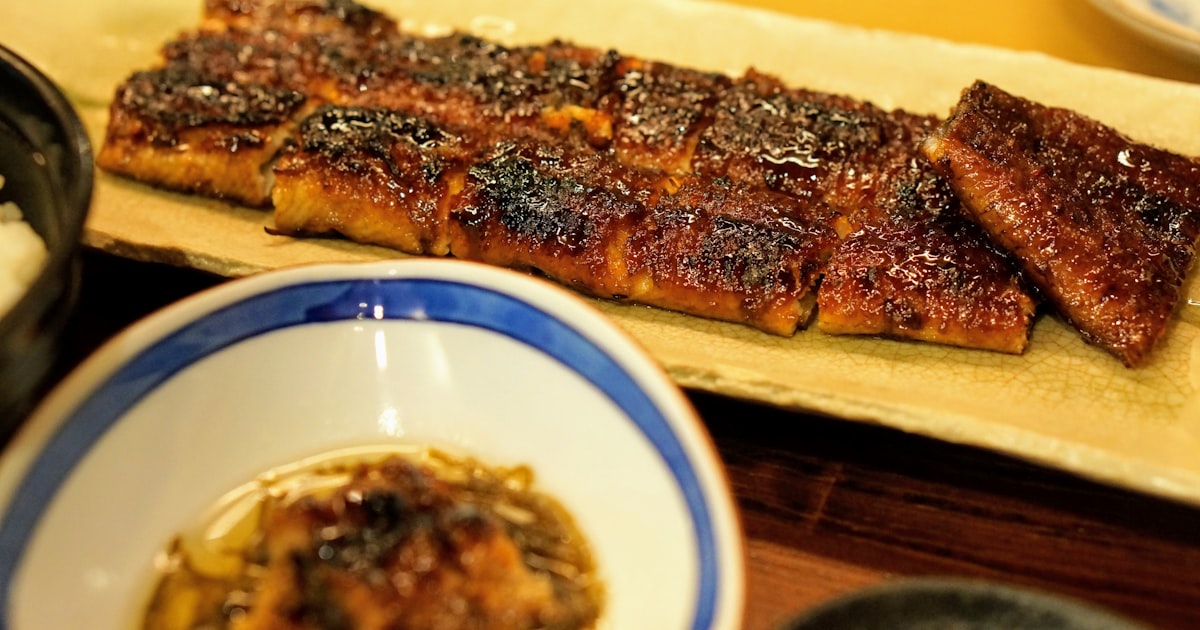
    Photo by Takuma Tsubaki on Unsplash

    Unagi, or freshwater eel, is one of Japan’s oldest comfort foods — smoky, sweet, and rich enough that a small portion feels like a full meal. It’s also one of the more expensive everyday dishes you’ll encounter, thanks to decades of declining wild eel stocks, so knowing how to order it well and where to spend your money makes a real difference. Here’s what to know before you sit down.

    What Is Unagi, and Why Do Japanese People Eat It in Summer?

    Unagi refers specifically to freshwater eel (as opposed to anago, saltwater conger eel, which is milder and more common in sushi). It’s split down the back or belly, deboned, skewered, and grilled with a sweet-savory tare sauce made from soy sauce, mirin, and sugar — the same style of glaze used on yakitori, but thicker and glossier.

    The tradition of eating unagi in midsummer comes from Doyo no Ushi no Hi, the “Day of the Ox” in the old lunar calendar, which usually falls in late July. The custom is said to date back to the Edo period, when a shop owner asked the scholar Hiraga Gennai for help with slow summer sales; his marketing angle — that eating unagi on this day fights summer fatigue — stuck for over 200 years. In practice, this means unagi shops get very busy and some raise prices slightly around that date, so if you want a quieter, cheaper meal, aim for any other week in summer or autumn, when eel is arguably at its best condition anyway.

    Kanto vs Kansai: Two Ways to Grill an Eel

    Japan has a genuine east-west split in unagi preparation, and it’s worth knowing before you order. In Tokyo and the Kanto region, the eel is butterflied from the back, steamed to render out fat and soften the flesh, then grilled — producing a texture so tender it barely needs chewing. In Kansai (Osaka, Kyoto) and much of western Japan, the eel is split from the belly and grilled directly with no steaming step, giving a crisper, slightly charred skin and a firmer bite. Neither is “correct”; they’re just different, and trying both if your trip covers both regions is a good way to appreciate the difference. If you’re building a Kyoto food day around this, the stalls and counters of Nishiki Market occasionally have grilled eel skewers worth flagging down alongside the market’s other specialties.

    How to Order: Unadon, Unaju, Hitsumabushi, and Shirayaki

    Menus can look intimidating, but the core options are simple:

    Unadon — eel over rice in a round lacquer or ceramic bowl (donburi). The everyday, slightly more casual version.
    Unaju — the same idea served in a square lacquer box (jubako), generally considered a step up in presentation and often price.
    Hitsumabushi — a Nagoya specialty where chopped eel over rice is meant to be eaten three (or four) ways: first plain, then with chopped scallions, nori, and wasabi mixed in, then with hot dashi or green tea poured over it like ochazuke, and a final bowl however you liked best. It’s genuinely more fun to eat than a standard unadon and worth seeking out if you pass through Nagoya.
    Shirayaki — eel grilled plain with no tare, dipped in salt or wasabi-soy. It shows off the eel’s own flavor and is a good order if you find kabayaki sauce too sweet, or want to pair the eel with sake.

    Where to Eat Unagi: By Budget

    Budget (¥1,000–¥2,000): Chain restaurants and department store basement (depachika) counters sell compact unadon or unagi bento, and convenience stores sometimes carry unagi bowls as a seasonal item around Doyo no Ushi no Hi. Portions are smaller and the eel is usually imported and pre-processed, but it’s a legitimate way to try the dish without commitment.

    Mid-range (¥3,000–¥6,000): Dedicated unagi specialty shops (unagi-ya) in most cities fall here. You’ll get a proper unaju set with liver soup (kimosui) and pickles, freshly grilled to order — expect a wait, since good shops grill in small batches rather than pre-cooking.

    Splurge (¥6,000–¥15,000+): Old, established unagi restaurants that source domestic (kokusan) eel and have been perfecting their tare — some recipes are decades or over a century old — for generations. Nodaiwa in Azabu, Tokyo, dates back over 250 years and is one of the most famous names in this category; expect to book ahead and possibly queue even with a reservation.

    Regions Worth a Detour for Eel

    A few places have built real reputations around unagi. Hamamatsu, on Lake Hamana between Tokyo and Nagoya on the Tokaido Shinkansen line, is one of Japan’s historic eel-farming centers and has unagi restaurants clustered around the station. Nagoya is the place for hitsumabushi — Atsuta Houraiken, founded in 1873 near Atsuta Shrine, is credited with inventing the dish. Yanagawa in Fukuoka Prefecture, a small canal town, is known for seiro mushi, a steamed version of unaju where the rice and eel are steamed together in a bamboo box — a distinct texture from the grilled versions elsewhere. If you’re routing a Kansai-area trip that includes any of these regions, check whether a JR regional rail pass covers your route before buying individual tickets.

    Common Mistakes to Avoid

    Don’t show up at a well-known unagi restaurant right at opening on a summer weekend without a reservation or a plan to wait — many places grill to order and can sell out of the day’s eel entirely by mid-afternoon, especially around Doyo no Ushi no Hi. Don’t assume unadon and unaju are interchangeably priced; the box version is often ¥500–¥1,500 more for the same eel. And don’t skip the kimosui (eel liver soup) that comes with set meals — it’s included, mild, and a nice contrast to the rich, sweet main dish. If you’re new to ordering rice-bowl meals in Japanese and want a gentler introduction to reading a donburi menu, our guide to Japanese curry rice covers similar bowl terminology and etiquette.

    A Note on Sustainability

    Japanese eel (Anguilla japonica) is listed as endangered by the IUCN, and glass eel (young eel) catches have declined sharply over recent decades, which is the main reason prices have risen steadily. Most unagi served in Japan today is farmed from wild-caught glass eels rather than fully wild-caught adults, and a portion is imported, often from other parts of Asia. This isn’t a reason to avoid unagi entirely — it remains a legal, regulated food — but it’s worth knowing why a bowl that used to be an everyday lunch is now, in many shops, a special-occasion meal.

  • Japanese Curry Rice: A Beginner’s Guide to Kare Raisu

    Japanese Curry Rice: A Beginner’s Guide to Kare Raisu

    Photo by Kelsey He on Unsplash

    Ask any Japanese kid what they want for dinner and there’s a good chance the answer is kare raisu — curry rice. It’s not the curry you’ll find in India or Thailand; it’s a thick, mildly sweet, roux-based stew that Japan adopted from British naval cooks in the Meiji era and then made entirely its own. It’s cheap, it’s everywhere, and it’s one of the easiest ways for a visitor to eat well on a tight schedule. Here’s how to actually order it, where to eat it, and what to avoid.

    What Makes Japanese Curry Different

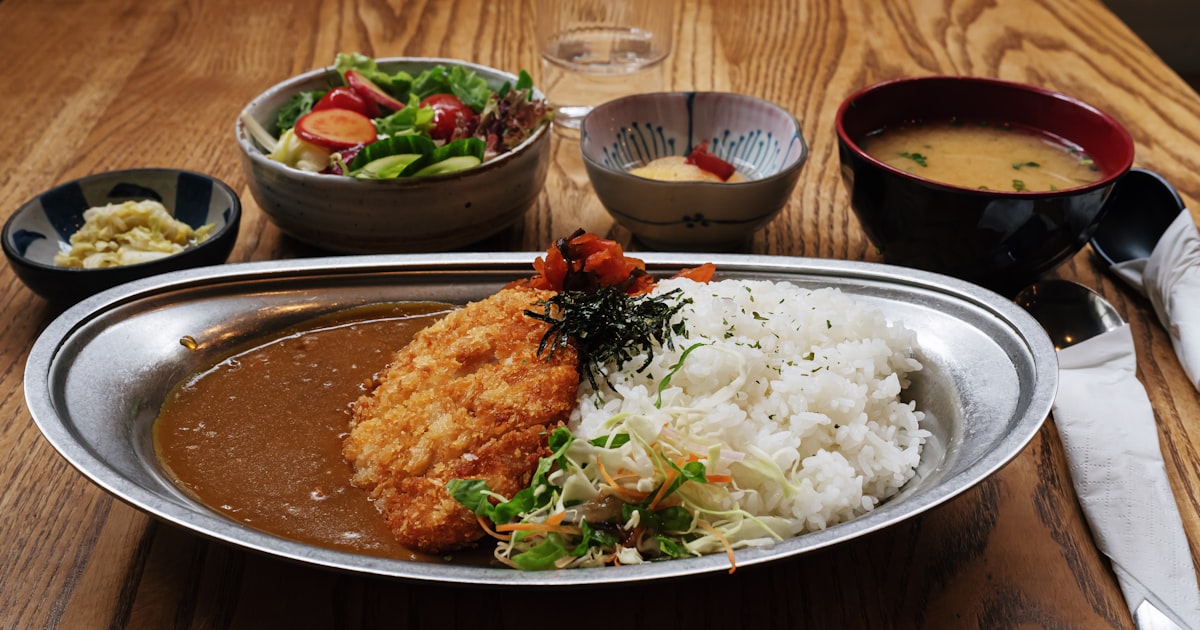
    Japanese curry is built on a roux — flour, fat, and curry spices cooked into a solid block — melted into a pot of stewed onions, carrots, potatoes, and meat (usually pork, beef, or chicken). The result is thick, glossy, and closer to a gravy than a soup. It’s mild by South or Southeast Asian standards even at “hot” settings, with a rounded sweetness from caramelized onion, apple, or honey that’s often added to commercial roux. Don’t expect chili heat; expect umami and comfort-food richness. It’s typically ladled over a mound of short-grain white rice on an oval plate, often with a small pile of fukujinzuke (sweet pickled vegetables) or raw shredded cabbage on the side.

    Where to Eat It: Chains, Specialty Shops, and Regional Styles

    You don’t need to hunt this down — it will find you. The most useful entry point is CoCo Ichibanya (CoCo Ichi), Japan’s biggest curry chain with well over a thousand locations nationwide, including inside train stations and airports. A base plate runs about ¥700–900, and the appeal is total customization: you choose your spice level (usually 1 to 10, sometimes higher), rice amount (from a light 200g to over 1kg at no extra charge, though very large portions cost a bit more), and toppings — cheese, a fried pork cutlet (katsu), a fried egg, or vegetables — each added for roughly ¥100–400. Most branches are open from around 11am to 11pm; some in Tokyo run near 24 hours.

    For a very different, thicker, darker style, look for Go Go Curry or curry counters around Kanazawa — this is “Kanazawa curry,” served on a metal plate with shredded cabbage, no rice-plate ceremony, and a fork instead of a spoon. It’s rich, almost espresso-dark, and a specialty worth seeking out if you’re already exploring that region for its crafts — see our guide to Kutani Ware in Kanazawa and pair a pottery afternoon with a curry lunch. Elsewhere, don’t overlook kare udon (curry broth over thick noodles) or curry bread (kare pan) from any bakery, both cheap ways to try the flavor in a different format.

    If you’re grazing through a food market, Kyoto’s Nishiki Market occasionally has stalls selling curry-stuffed buns or curry croquettes as a quick snack between stops — a good low-commitment way to sample the flavor without sitting down for a full meal.

    How to Order Like You’ve Done This Before

    At a counter like CoCo Ichibanya, the order goes: base curry type (there are usually a few, like plain, cheese, or a seafood option) → spice level → rice amount → toppings, all read off a laminated picture menu or ordered via ticket machine at some locations. A word of caution for beginners: the spice scale is not linear the way you might expect. Level 1–3 is genuinely mild; by level 5 it has real heat; level 10 and above is a serious, slow-building burn that many regulars build up to over repeat visits, not something to jump into on a first try. Start at level 2 or 3 if you have no reference point, and remember rice amount is usually free to adjust, so there’s no cost penalty in asking for less if you’re not sure how hungry you are.

    Budget, Mid-Range, and Splurge

    Budget (¥400–800): Convami-style bakery curry bread, a bowl of kare udon at a standing noodle counter, or a basic CoCo Ichibanya plate with no toppings. Convenience store curry-in-a-bag (retort pouch, heated at the register) is even cheaper, around ¥300–500, and surprisingly decent for a 2am hunger fix.

    Mid-range (¥900–1,500): A loaded CoCo Ichibanya or Go Go Curry plate with katsu and cheese, or a sit-down curry specialty restaurant (many independent shops in Tokyo and Osaka serve a slow-simmered version with better-quality meat in this range).

    Splurge (¥2,000–4,000+): A handful of high-end restaurants, particularly in Tokyo, serve “European-style” curry with wagyu beef or long-simmered demi-glace bases — some chefs treat curry as a serious craft dish rather than a fast-food staple. These usually require no reservation but do have lines at peak lunch hours (12–1pm), so aim for 11:30am or after 1:30pm.

    Bringing the Flavor Home

    Curry roux blocks (brands like House Vermont Curry, Golden Curry, and Java Curry) are sold in every supermarket and convenience store for ¥150–300 a box and pack flat in a suitcase — an easy, cheap souvenir that actually gets used. If you want to cook with proper gear once you’re home, Tokyo’s Kappabashi Kitchen Town is the place to pick up the oval curry plates restaurants actually use, along with the distinctive curry spoon (flat-edged, meant for scooping rice and sauce together in one motion). Most Kappabashi shops open around 9am–5 or 6pm, and many close on Sundays, so check before making a special trip.

    Common Mistakes to Avoid

    • Assuming “curry” means spicy. Default Japanese curry is mild; you have to actively choose a hot level where it’s offered.
    • Mixing the curry into the rice before eating. Most locals eat it in sections — a bite of curry-soaked rice, then plain rice — rather than stirring the whole plate into a uniform mush, though nobody will stop you either way.
    • Skipping the pickles. The red fukujinzuke or pale pink beni shoga aren’t garnish for show — their acidity cuts the richness of the roux, and it’s worth trying a bite with and without.
    • Overordering rice out of habit. Because large portions are often free, it’s easy to over-order and leave a mountain of rice; ask for a smaller size if you’re not sure, since most places let you upsize but not always downsize after the fact.

    Best Time to Go

    Curry has no real season — it’s a year-round comfort food, if anything more popular in winter for its warmth and in summer as a cheap, filling lunch that pairs well with a cold drink afterward (if you want to turn it into a proper evening, Japan’s growing craft beer scene makes a good chaser to a spicy plate). The main timing tip is about crowds, not weather: chain restaurants near stations and office districts get slammed from 12–1pm on weekdays, so eating slightly earlier or later gets you a table without a wait almost anywhere in the country.

  • Shimanami Kaido: Cycling Japan’s Island-Hopping Expressway

    Shimanami Kaido: Cycling Japan’s Island-Hopping Expressway

    Photo by Ray Waller on Unsplash

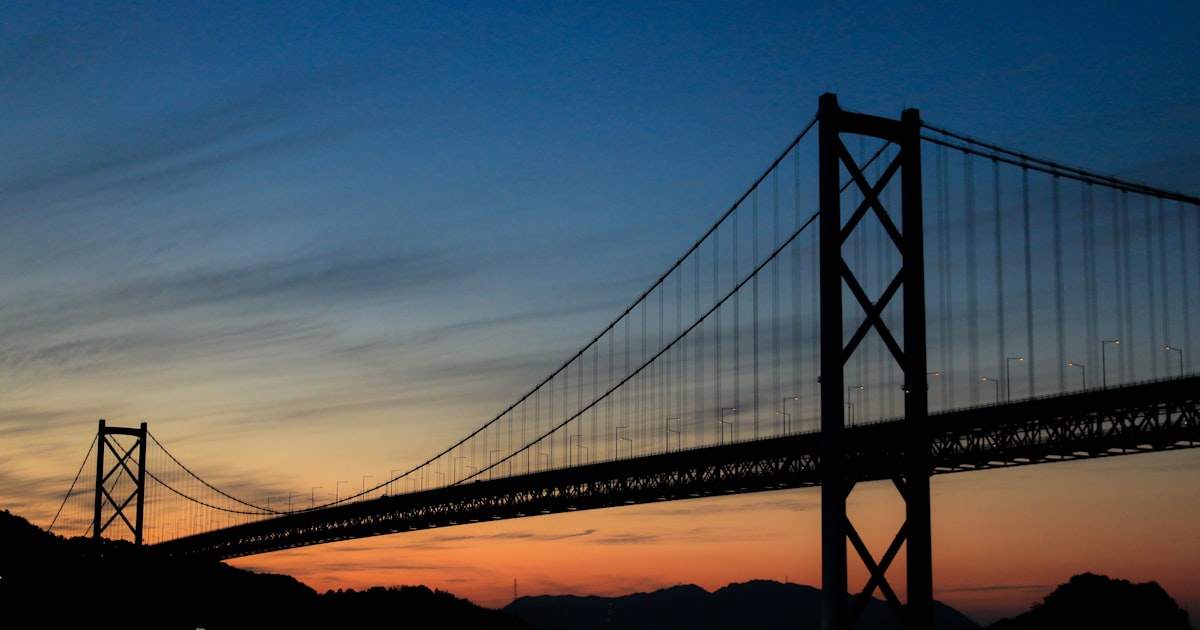
    The Shimanami Kaido is a roughly 70-kilometer expressway that links Onomichi on the Honshu mainland to Imabari on the island of Shikoku, hopping across six small islands in the Seto Inland Sea via a chain of dramatic suspension and cable-stayed bridges. Unlike most of Japan’s expressways, this one has a dedicated, well-marked cycling lane running its entire length, which is why it’s routinely ranked among the best long-distance bike routes in Asia. You don’t need to be a serious cyclist to do it — the route is flat where it needs to be, the climbs onto the bridges are gentle and gradual, and rental shops make it easy to show up with nothing and leave with everything you need.

    Why Cycle the Shimanami Kaido

    The appeal is the combination of engineering and scenery: you ride across some of the longest suspension bridges in the world with open sea on both sides, then drop down onto quiet island roads lined with citrus orchards, fishing harbors, and small shrines. The full route (Onomichi to Imabari or the reverse) is well within reach for an average rider in a single long day — most people take 6 to 8 hours including stops — but splitting it into two days with an overnight on one of the islands lets you actually enjoy the temples, cafes, and lookout points instead of racing the clock.

    Getting There

    Onomichi, the Honshu starting point, is reached via JR Fukuyama Station on the Sanyo Shinkansen line, then a roughly 15-minute ride on the local JR Sanyo Line to Onomichi Station. Imabari, the Shikoku endpoint, is served by limited express trains from Matsuyama and by long-distance and overnight buses from cities including Osaka, Hiroshima, and Tokyo — a budget-friendly option worth considering if you’d rather save shinkansen money for the trip itself; see our guide to overnight buses in Japan for how these work. If you’re combining the ride with a wider loop through Shikoku, our Shikoku travel guide covers onward stops like the Iya Valley and Naruto whirlpools, both reachable from Imabari in a day or two. Regional IC cards work on trains and buses on both ends of the route; if you’re not already carrying one, our guide to IC cards beyond Tokyo explains which one covers this area (ICOCA, on the Honshu side).

    The Route: Bridges and Islands

    From Onomichi you cross, in order, Mukaishima, Innoshima, Ikuchijima, Omishima, Hakatajima, and Oshima before reaching Imabari — six islands and seven major bridge crossings in total. The cycling course is marked with a continuous blue line painted on the road surface, so navigation is almost foolproof; you simply follow the blue line and the blue-and-white directional signs at every junction. Cyclists currently cross all of the toll bridges for free, a policy the local governments introduced to encourage cycling tourism, so the only costs on the route itself are food, drinks, and any detours you make off the main course. Worth noting: the dedicated bike lane is separate from the car expressway on most bridges, but on a couple of sections cyclists share a narrower path with pedestrians, so keep your speed down near the bridge approaches, especially on Kurushima-Kaikyo Bridge near Imabari, which has its own observation park worth a stop.

    Renting a Bike (and Getting It Back)

    You don’t need to bring your own bicycle. Sanyo Shimanami Rental Cycle operates around 14 terminals along the route, including at Onomichi and Imabari, and lets you pick up at one terminal and drop off at another — ideal for a one-way ride. Standard city bikes run roughly 2,000 yen per day, cross bikes and road bikes cost more (around 3,000-4,500 yen), and electric-assist bikes are also available at higher-traffic terminals for riders worried about the bridge climbs. You’ll pay a refundable deposit (around 1,000 yen) that’s returned when you drop the bike at any terminal, plus a small one-way return fee if you don’t return to your starting point. Terminals typically operate from around 7:00 or 8:00 AM until 17:00-19:00 depending on the season, and bikes must be returned before closing — plan your day around this if you’re not staying overnight partway.

    Best Time to Go

    Spring (late March through May) and autumn (October and November) are the sweet spot — mild temperatures, low humidity, and good visibility across the water. Early June through July is the rainy season, and August brings intense heat and humidity that make the exposed bridge sections genuinely tough going; September and early October carry typhoon risk, which can shut down bridge crossings on short notice. Weekday rides are noticeably quieter than weekends, when the route fills with local cycling clubs and tour groups, particularly around Ikuchijima’s Setoda area.

    Where to Eat and Sleep Along the Way

    Onomichi is known for its soy-based ramen (around 700-900 yen a bowl) — worth trying before you set off. On Ikuchijima, the town of Setoda is the region’s citrus hub, with lemon soft-serve, lemon udon, and other lemon-themed snacks sold near Kosanji Temple, a flamboyant temple complex with a marble sculpture garden (admission around 1,400 yen). Imabari is famous for its yakitori, grilled over charcoal in a distinctive skewer-and-iron-plate style. For accommodation, budget travelers can find cycling-terminal guesthouses and hostels from around 3,000-5,000 yen a night, while business hotels in Onomichi and Imabari run 6,000-9,000 yen. For a splurge, Azumi Setoda in a restored 140-year-old merchant house on Ikuchijima offers high-end kaiseki dinners and private garden onsen from around 35,000-50,000 yen per night — a genuinely memorable way to break up the ride. Whichever route you take, pack a change of clothes for the evening; after a full day of riding you’ll want it, and our guide to doing laundry in Japan is handy if you’re stretching a light packing list over a longer trip.

    Common Mistakes to Avoid

    Carry cash — island convenience stores and small food stalls between towns don’t always take cards. Don’t underestimate the wind on the bridge sections; even a flat-feeling route can slow you down considerably when crossing open water in a headwind. Book island accommodation ahead during spring and autumn weekends, since options on the smaller islands are limited and fill quickly. Check the rental terminal’s closing time before you set off, factoring in stops for photos and food, since arriving late can mean scrambling for a taxi or an unplanned overnight. And if cycling 70 km in a day doesn’t appeal, it’s entirely possible to drive the route instead — see our guide to renting a car in Japan for licensing rules and costs — or ride only the most scenic middle section, between Ikuchijima and Omishima, and bus back rather than committing to the full crossing.

  • Ise Jingu: Visiting Japan’s Most Sacred Shrine

    Ise Jingu: Visiting Japan’s Most Sacred Shrine

    Photo by Pietro De Grandi on Unsplash

    Ise Jingu isn’t a single shrine — it’s a complex of 125 shrines spread across the forests of Ise City in Mie Prefecture, and it sits at the top of Shinto’s spiritual hierarchy. This is where Amaterasu Omikami, the sun goddess and mythical ancestor of the Imperial family, is enshrined, and where one of Japan’s three sacred Imperial Regalia is kept. Unlike Kyoto’s temples, Ise doesn’t rely on flashy architecture or vermillion paint — the appeal is the atmosphere: thousand-year-old cypress trees, gravel paths, and a quiet sense that you’ve stepped somewhere genuinely old. It’s a full day trip, not a quick stop, so it’s worth planning around.

    Geku and Naiku: What to See

    The complex splits into two main shrines, and tradition says you visit them in order.

    • Geku (Outer Shrine) — dedicated to Toyouke Omikami, the goddess of food, agriculture, and industry. It’s a short walk from Ise-shi and Ujiyamada stations, making it the natural first stop.
    • Naiku (Inner Shrine) — the holiest site in Shinto, dedicated to Amaterasu herself. This is the one with the famous Uji Bridge crossing the Isuzu River, the sacred grounds where the mirror Yata no Kagami is said to be kept, and the oldest cypress trees on the property.

    Both are free to enter — there’s no admission fee anywhere on the grounds, which is unusual for a site this significant. Photography is allowed in the outer areas but banned closer to the main sanctuary buildings at both shrines; look for the signs and roped-off boundaries and don’t push past them for a photo. Every 20 years, the entire shrine is rebuilt on an adjacent plot in a Shinto ritual called Shikinen Sengu — the last rebuild was in 2013, so the next is due in 2033. The old materials are recycled into shrines across Japan, and the alternating empty plot next to each shrine is part of the experience even when nothing new is being built.

    Getting There

    The gateway stations are Ise-shi and Ujiyamada, both served by Kintetsu limited express trains and just a few minutes apart on foot.

    • From Osaka (Namba): Kintetsu limited express to Ise-shi, about 2 hours 10 minutes, roughly ¥4,000–4,500 one way depending on the train.
    • From Kyoto: Kintetsu limited express, around 2 hours, similar fare range — this is usually the most direct option since JR doesn’t run a fast through service.
    • From Nagoya: Kintetsu limited express, about 1 hour 25 minutes, roughly ¥3,000–3,300 one way.
    • From Tokyo: There’s no direct train — take the Shinkansen to Nagoya, then transfer to the Kintetsu limited express. Budget travelers can also look at an overnight bus route into the Ise-Shima area to save on the Shinkansen fare; see our guide to overnight buses in Japan for how these work.

    Kintetsu’s ordinary trains and station gates accept regional IC cards, though limited express seats require a separate paper reservation even if you tap in with a card — our guide to IC cards beyond Tokyo covers which cards work where. From Ise-shi/Ujiyamada Station, Geku is a 5-minute walk. To reach Naiku, take the CAN bus from bus stop 2 (about 15 minutes, roughly ¥440 one way) or a taxi (around ¥1,500–2,000). If you’re road-tripping through the Kansai/Mie region, driving is also an easy option and parking near both shrines is plentiful; see our guide to renting a car in Japan for license requirements and costs.

    Opening Hours and Best Timing

    Both shrines are open every day of the year, with no closed days. Gates open at 5am, but closing time shifts by month — as early as 4pm in December and as late as 7pm during the summer months — so check the current month’s schedule before you go rather than assuming a fixed time. Arriving right at opening is genuinely worth it: the crowds are thin, the light through the cypress canopy is at its best, and the walk to Naiku’s inner sanctuary feels far more atmospheric without a queue.

    Avoid New Year’s if you can — millions of visitors come for hatsumode (the first shrine visit of the year), and the approach roads and Oharaimachi street become extremely congested. Spring (cherry blossoms in early April) and autumn (foliage in mid-to-late November) are the most attractive times to visit, while summer is hot and humid with less shade than you’d expect given the trees. Plan for at least half a day if you want to see both shrines properly, and a full day if you’re combining Ise with nearby Toba or Futami.

    Oharaimachi and Okage Yokocho: Eating and Shopping

    The approach to Naiku is lined with Oharaimachi, a preserved Edo-period street, and its historic shopping arcade Okage Yokocho branching off it. This is where most people eat lunch and pick up souvenirs, and it’s genuinely enjoyable rather than just a tourist trap. The signature local sweet is akafuku mochi — soft rice cake wrapped in sweetened red bean paste, sold by the shop that’s been making it since 1707, for around ¥270 for a plate of two with tea. If you want more context on this kind of traditional sweet before you go, our beginner’s guide to wagashi is a useful primer. Beyond mochi, expect grilled Ise udon (a thick, dark-broth noodle dish unique to the area, around ¥600–800 a bowl), local sake tasting stalls, and shops selling Ise-katagami stencils and other regional crafts.

    Etiquette and Common Mistakes

    A few things trip up first-time visitors:

    • Don’t walk down the center of the path. The middle is traditionally reserved for the gods — walk slightly to either side, especially when crossing the bridges.
    • Bow before crossing the torii gates, both entering and leaving, at each shrine.
    • Skip Naiku on a tight schedule rather than Geku. If you’re short on time, Naiku is the priority — it’s the more significant of the two and the one with the Uji Bridge and old-growth forest.
    • Don’t expect gift shops or food stalls on the shrine grounds themselves — that’s all concentrated at Oharaimachi near Naiku, not inside the sacred precincts.
    • Photography is restricted near the inner sanctuaries at both shrines — this isn’t loosely enforced, so don’t try to sneak a shot past the barrier.

    Extending the Trip

    Ise pairs naturally with two nearby spots. Futami, a short train ride from Ise-shi, has the Meoto Iwa (“Wedded Rocks”) — two rocks joined by a sacred rope, best seen near sunrise in summer. Toba, about 15 minutes further by train, is home to Mikimoto Pearl Island, the birthplace of the cultured pearl industry, with a museum and pearl jewelry for sale at a range of budgets. Either makes a good half-day add-on if you’re staying in the area overnight rather than doing Ise as a pure day trip from Osaka, Kyoto, or Nagoya.

  • Purikura: Japan’s Photo Booth Culture and How to Use One

    What Is Purikura, and Why Should You Try One?

    Purikura (プリクラ, short for “print club”) is Japan’s version of the photo booth, but calling it that undersells the experience. Instead of a plain black-and-white strip, you get a sheet of small, sticker-backed photos where your skin has been smoothed, your eyes enlarged, and your legs subtly lengthened by software that’s been refined since the machines first appeared in game centers in 1995. It’s less “photo booth” and more “mini beauty studio crossed with an arcade game,” and it remains one of the most popular things Japanese teenagers, university students, and groups of friends do together on a day out. For visitors, it’s a fun, cheap souvenir that’s more personal than anything you can buy in a shop, and a genuine slice of Japanese youth culture rather than something staged for tourists.

    Where to Find Purikura Booths

    You don’t need to search hard — purikura machines are tucked into game centers (arcades) all over the country. The reliable chains to look for are GiGO (formerly Sega), Taito Station, Namco, and Round1, all of which dedicate at least part of a floor to purikura booths alongside claw machines and video games.

    For the biggest selection, head to a dedicated purikura arcade rather than a general game center. In Tokyo, Purikura no Mecca in Shibuya is the standout — a multi-floor arcade near Center Gai (a few minutes on foot from Shibuya Station’s Hachiko exit) that’s entirely purikura, with dozens of machines running different themes, backgrounds, and camera effects. Harajuku and Ikebukuro also have strong clusters of machines aimed at a younger crowd. In Osaka, the Amerika-mura (Amemura) district near Shinsaibashi is the equivalent hub, packed with purikura shops alongside secondhand fashion stores.

    Most purikura arcades open around 10:00 or 11:00 and run until 23:00–24:00; some locations in Shinjuku and Osaka’s Dotonbori/Amemura area stay open later or even 24 hours. If you’re combining a purikura session with other Tokyo pop-culture stops, Nakano Broadway makes a good pairing for the same day trip, since both scratch the same otaku-adjacent itch.

    How Much Does It Cost and What Do You Get?

    A single session typically costs ¥400–¥700, paid in coins or occasionally by IC transit card (like Suica or Pasmo) at newer machines. That price covers the booth for one round of shooting and printing, split however many people are crammed into the booth — most machines are built for 2–4 people, so the cost per person is often less than a vending-machine drink.

    What you get is one sheet of stickers, usually cut into a grid of small photos you can peel apart and stick on phone cases, notebooks, or postcards home. Many modern machines also let you save digital copies to your phone, either through a dedicated app (frequently Japanese-only) or by scanning a QR code that appears on screen after printing — factor in a data fee of roughly ¥100–¥200 on top of the base price if you want this option.

    Step-by-Step: How to Use a Purikura Machine

    The process is fairly consistent across brands, even if the touchscreen menus are almost entirely in Japanese:

    • Pick a machine and pay. Look for an empty booth, check the coin slot or IC card reader, and insert payment. Newer machines show a language toggle (look for “English”) on the opening screen — use it if available.
    • Choose your background and frame. Before shooting, you’ll usually select a themed background (seasonal, pastel, glittery, etc.) and sometimes a filter strength for the skin-smoothing/eye-enlarging effect.
    • Pose for the shots. A countdown timer fires off 6–10 photos in quick succession. Machines often display sample poses on screen — copy them if you’re not sure what to do, and move fast, since the timer doesn’t wait.
    • Move to the decoration side. After shooting, you shuffle to a separate half of the booth (sometimes behind a curtain) with a stylus and touchscreen. Here you write text, add stamps and stickers, and crop/arrange the layout.
    • Print and collect. Hit the print button, wait roughly one to two minutes, and your sticker sheet dispenses from a slot, usually alongside a QR code for digital copies.

    Best Times to Go (and Crowds to Avoid)

    Weekday afternoons, right after arcades open, are the quietest window — you’ll often have your pick of machines. Weekends, especially Saturday afternoons and evenings, get busy with local students, and popular arcades like Purikura no Mecca can have every booth occupied with a short queue. If you’re traveling in December, some machines rotate in Christmas- or New Year-themed backgrounds for a few weeks, and similarly around Halloween in late October — a nice bonus if your trip timing lines up, but not something worth planning a whole visit around.

    Common Mistakes First-Timers Make

    The most frequent stumble is bringing too large a group — booths are physically sized for 2–4 people, and squeezing in six means someone gets cropped out of every shot. Another is assuming every machine accepts cards; many older units are coin-only, so keep ¥100 coins on hand. Don’t be startled by the auto-applied filters either — the enlarged eyes and smoothed skin are standard, not a setting you can easily turn off, and some visitors find the effect stronger than expected the first time they see the preview. Finally, don’t skip the QR/app step if you want digital copies: walk away without scanning it and your only record is the physical sticker sheet, which fades over time and can’t be reprinted once you leave the booth.

    Budget, Mid-Range, and Splurge Options

    For a no-frills first try, any GiGO or Taito Station machine in a general arcade runs about ¥400 and is perfectly serviceable. For more variety in backgrounds, props, and camera angles, spend the extra ¥100–¥300 at a dedicated arcade like Purikura no Mecca or an Amemura purikura shop, where machines are refreshed more often with newer effects. If you want to make an afternoon of it, some purikura shops near Harajuku and Amemura rent costumes, wigs, and colored contacts for an extra ¥1,000–¥2,000, letting you theme the whole shoot — a fun splurge if you’re traveling with friends and want more than just a quick sticker sheet. Whichever tier you pick, bring some cash, since even in a country that’s increasingly cashless, purikura remains a coins-in-the-slot experience at plenty of machines.

  • Umeshu: A Beginner’s Guide to Japan’s Plum Wine

    Umeshu: A Beginner’s Guide to Japan’s Plum Wine

    Photo by Uttam Kumar Roy on Unsplash

    Umeshu (梅酒) shows up on every izakaya drinks menu, in every duty-free shop, and on convenience store shelves across Japan — yet most visitors have only a vague idea of what it is. It’s not wine in the grape sense, it’s sweeter than most people expect, and the good stuff is worlds away from the syrupy version poured at tourist-trap bars. Here’s what to know before you start tasting.

    What Exactly Is Umeshu?

    Umeshu is made by steeping unripe ume plums (closer to an apricot than a Western plum, botanically) in a clear spirit along with rock sugar for several months to a year. The sugar draws out juice and acidity from the fruit while the alcohol pulls out flavor compounds, leaving a drink that’s tart, fruity, and noticeably sweet, usually 10–15% ABV — lower than most spirits, higher than wine. Commercial versions can taste almost candy-like; artisan umeshu from a good producer tastes more like a stone-fruit liqueur with real backbone and acidity.

    Most umeshu is made with a neutral shochu base, which is why it pairs naturally with everything else in Japan’s shochu world — if you want the fuller picture of what that base spirit is and how it differs from sake, our guide to shochu is a useful companion read before you go bottle-shopping.

    Where Umeshu Actually Comes From

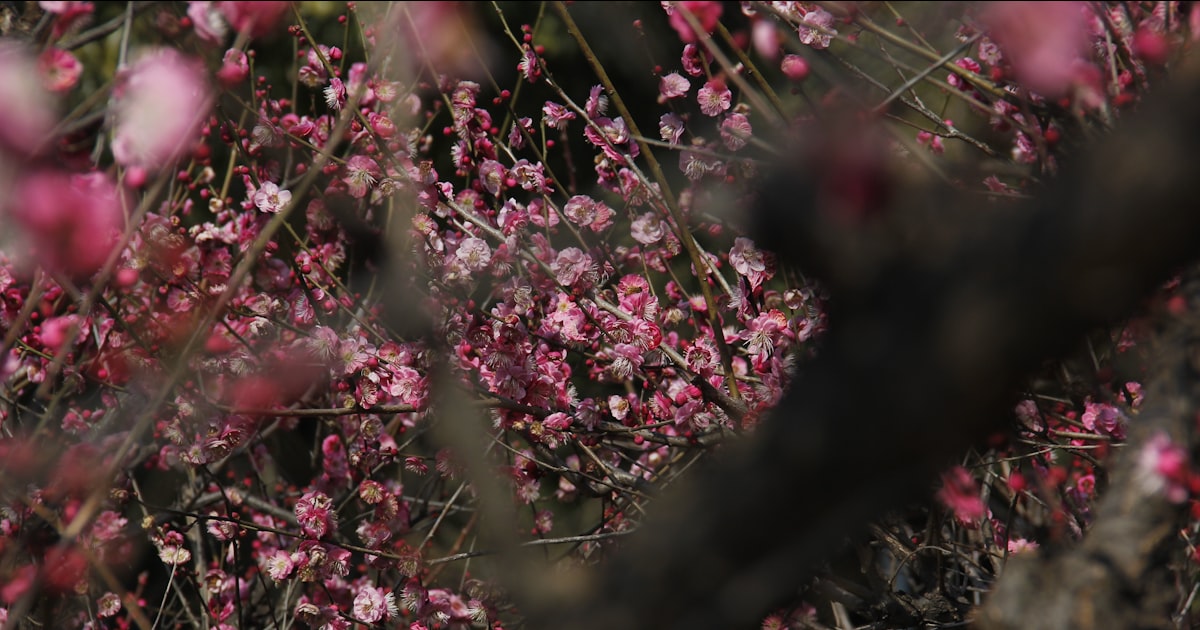
    Wakayama Prefecture, on the Kii Peninsula south of Osaka, produces roughly half of Japan’s ume crop, and the town of Minabe is considered the spiritual home of the fruit — you’ll see ume orchards blanketing the hillsides there in late February when the blossoms open, well before the fruit itself ripens. You don’t need to travel to Wakayama to drink well, though; Kyoto, Tokyo, and pretty much every regional city sell excellent regional umeshu, often labeled with the prefecture the plums came from (Wakayama-san ume is the label to look for if you want the real thing rather than a mass-market blend).

    Best Season for Tasting and Buying

    Ume trees blossom in February and March, but the fruit itself is harvested green and unripe in late May through June — this harvest window is called umeshi-zake season in producer regions, and it’s when supermarkets nationwide stock bags of fresh green ume alongside rock sugar and shochu for home-brewing, a popular seasonal ritual in Japanese households. If you’re visiting in June, this is also when department store basement food halls (depachika) tend to run umeshu tasting counters and seasonal displays, since June overlaps with Japan’s rainy season (tsuyu) and retailers lean into indoor, cozy products. You can buy and drink umeshu year-round, but if you want to see the fresh fruit itself and catch tasting events, late spring to early summer is the window.

    Where to Try and Buy It

    You don’t need to seek out a specialty bar — nearly every izakaya has at least one umeshu on the menu, usually served on the rocks or as an umeshu soda, typically ¥500–800 a glass. For browsing a wider range in one place, food-and-drink shopping streets are your best bet. In Kyoto, Nishiki Market has several shops selling regional umeshu by the bottle, often with small tasting pours available before you buy. In Tokyo, convenience stores and supermarkets stock reliable mass-market brands like Choya and Nakano BC in the ¥900–1,800 range for a 500ml–720ml bottle, and airport duty-free shops (Narita, Haneda, Kansai) sell gift-boxed versions that travel well. If you’re assembling a home bar setup or want proper rocks glasses to serve it in once you’re home, Kappabashi Kitchen Town in Tokyo sells restaurant-grade glassware at a fraction of department store prices.

    How to Drink It

    The most common serving style is umeshu on the rocks — poured over ice, which dilutes the sweetness as it melts. Umeshu soda (umeshu mixed with sparkling water) is lighter and more common in summer; umeshu with hot water (oyuwari) shows up in colder months and brings out a mellower, almost medicinal warmth. A small but growing number of bars also serve it neat as a digestif, which is really the only way to taste what a well-made bottle is doing — neat is where the difference between a ¥900 supermarket bottle and a ¥5,000 craft one becomes obvious.

    Budget, Mid-Range, and Splurge Bottles

    Budget (¥900–1,500): Choya and Nakano BC’s standard lines are widely available, reliably sweet, and a safe starting point if you’ve never tried umeshu before. Convenience store canned umeshu highballs (around 350ml, ¥150–250) are a fine way to sample the flavor without committing to a full bottle.

    Mid-range (¥1,800–3,500): Look for single-prefecture labels, especially anything marked Wakayama-san or Nanko-ume (a specific premium ume cultivar). These use better fruit and less added sugar, so the plum flavor and acidity come through more clearly instead of being buried in sweetness.

    Splurge (¥4,000–8,000+): Small-batch craft producers, often sold only at the brewery or at specialty liquor shops, use aged shochu or even sake as the base and let the umeshu mature for several years. These are worth seeking out if you’re already a fan of Japanese spirits — they taste closer to a fine sherry than to a fruit cooler.

    Common Mistakes to Avoid

    The biggest one is judging umeshu entirely by a cheap bottle — the mass-market stuff is intentionally sweet and approachable, and it’s not representative of what the category can do, the same way a cheap supermarket wine doesn’t represent what wine can be. Second, don’t assume all umeshu is low-proof and harmless; some artisan bottles push closer to 20% ABV, and the sweetness masks the alcohol easily. Third, if you’re buying bottles to bring home, check your destination country’s alcohol import allowance before loading up your suitcase — most travelers can bring one to three bottles duty-free, but limits vary widely. And if you’re gifting a bottle to someone, a nicely wrapped umeshu bottle makes a better souvenir than most trinkets; a furoshiki cloth wrap is a far more Japanese presentation than a plastic bag and doubles as a usable gift itself.

    Umeshu rewards a little curiosity beyond the tourist-menu pour. Try one glass on the rocks at an izakaya, then track down a single-prefecture bottle at a market or specialty shop — the gap between the two is usually enough to turn a polite sip into a genuine favorite.

  • Nishiki Market: Kyoto’s Kitchen Street Food Crawl

    Nishiki Market: Kyoto’s Kitchen Street Food Crawl

    Photo by Julien on Unsplash

    Nishiki Market is a narrow, covered shopping street in central Kyoto that’s been feeding the city for roughly four centuries. Locals call it “Kyoto no Daidokoro” — Kyoto’s Kitchen — and while it’s now firmly on the tourist trail, it’s still where chefs from nearby ryokan and restaurants come to buy pickles, dried fish, and fresh tofu. For visitors, it’s one of the best places in Japan to graze your way through regional specialties without committing to a full sit-down meal. Here’s how to do it well.

    What Is Nishiki Market?

    Nishiki Market (Nishiki Ichiba) runs for about 400 meters, one block north of and parallel to Shijo-dori, between Teramachi and Takakura streets in the Nakagyo Ward. It’s a covered arcade lined with roughly 100 shops, ranging from third-generation pickle sellers to knife shops to stalls selling skewered seafood. The market dates back to the Edo period, when it operated as a wholesale fish market thanks to a reliable cold well beneath the street. That history is still visible in how seafood-heavy the offerings are, even blocks from the coast.

    Most shops open between 9:00 and 10:00 AM and close by 6:00 PM, though this varies stall by stall — some close as early as 5:00 PM, and a fair number take Wednesdays off. There’s no single “market hours” — treat individual shop signage as the real answer.

    Getting There and When to Go

    The market’s east and west entrances are a short walk from two subway/train options: Karasuma Station on the Hankyu Kyoto Line, or Shijo Station on the Kyoto City Subway Karasuma Line — both about 3-5 minutes on foot. Kawaramachi Station on the Hankyu line is close to the eastern end. From Kyoto Station, it’s roughly 15-20 minutes on foot, or a 5-minute ride plus walk via the Karasuma Line (Kyoto Station to Shijo Station, one stop). If you’re using an ICOCA card for the subway, our guide to IC cards beyond Tokyo covers how ICOCA works on Kyoto’s trains and buses.

    Timing matters more here than at most Kyoto sights. The market is genuinely packed from late morning through early evening, especially on weekends and during cherry blossom season (late March to early April) and autumn foliage season (mid-November). Arrive right at opening, around 9:30-10:00 AM on a weekday, and you’ll walk at a normal pace and get first pick of items that sell out, like fresh yuba or certain fish. By noon it can be shoulder-to-shoulder for the entire 400-meter stretch.

    What to Eat: A Stall-by-Stall Crawl

    You won’t need a map here — just walk the length of the arcade and follow what smells good. A few things worth specifically hunting for:

    • Tako tamago — a whole baby octopus stuffed with a quail egg on a skewer, one of the market’s most-photographed items, around 300-500 JPY.
    • Dashimaki tamago — Kyoto-style rolled omelette made with dashi stock, sold in slices from several long-running stalls, roughly 200-400 JPY per piece.
    • Yuba — fresh tofu skin, a Kyoto specialty, sold plain, fried, or as soft-serve; small tasting portions often run 100-300 JPY.
    • Tsukemono — Kyoto pickles are a market signature, and many shops offer free samples on toothpicks before you buy a pack (typically 500-1,500 JPY).
    • Seafood skewers — grilled scallop, unagi (eel), or fresh sashimi cups from the market’s fishmongers, generally 300-800 JPY depending on the item.
    • Matcha soft-serve and warabi mochi — a good palate cleanser between savory bites, around 400-500 JPY.

    If you want a broader primer on how to approach grazing stalls like these across Japan — what’s normal to eat on the spot versus take away — our Japanese street food guide is a useful companion. And if raw seafood is more your focus, several Nishiki stalls sell nigiri and sashimi cups worth trying alongside the tips in our sushi guide.

    Budget, Mid-Range, and Splurge Picks

    Nishiki works at almost any budget. On the low end, a full crawl of five or six skewers and small bites will run about 1,500-2,500 JPY per person — enough to constitute lunch. Mid-range visitors can add a proper sit-down bowl of Kyoto-style ramen or a donburi at one of the small counters tucked between stalls, typically 900-1,300 JPY, plus a wagashi confection or two for dessert; the market has several long-standing sweets shops, and our wagashi guide explains what to look for if you’re new to Japanese sweets. For a splurge, Aritsugu, a knife and kitchenware shop near the market’s eastern end with roots going back to the 16th century, sells handmade Japanese kitchen knives starting around 15,000 JPY and running well past 40,000-50,000 JPY for premium steel — a serious souvenir for anyone who cooks.

    Market Etiquette and Common Mistakes

    The biggest mistake visitors make is eating while walking. Nishiki has tightened up on this in recent years — many shops post signs asking customers to finish their food at or near the stall rather than strolling with it, partly because the arcade gets too narrow and crowded for it to be safe. Look for a small standing area near the stall, or step to the side, before you unwrap anything.

    Other things to know before you go: cash is still preferred at many of the older stalls, even though card and IC card payment has expanded; carry some yen just in case. Don’t expect English menus everywhere — pointing works fine, and prices are usually posted. Finally, pace yourself: it’s tempting to buy at the first stall with a line, but the food quality is consistently high throughout, so it’s worth walking the full length once before deciding what to actually eat.

    Beyond the Food: Souvenirs and Nearby Spots

    Past the food stalls, Nishiki has specialty shops for Kyoto-style ceramics, tea, sake cups, and kitchen tools that make better souvenirs than most airport gift shops. The market feeds directly into the covered Teramachi and Shinkyogoku shopping arcades at its eastern end, which are worth a wander for clothing and general shopping after you’ve eaten your fill. Nishiki is also a short walk from the Shijo-Kawaramachi area’s restaurants and bars, so it works well as a late-morning or early-afternoon stop before an evening elsewhere in the city — Kyoto’s growing craft beer scene, covered in our craft beer in Japan guide, has a few taprooms within easy reach downtown.

    Give yourself at least 90 minutes to walk the market properly and actually eat rather than just look, and go early to enjoy it at something close to a normal pace.