Japan Trove

Author: JapanTrove Editorial

  • Zenko-ji: Nagano’s Ancient Pilgrimage Temple and Its Old Town

    Zenko-ji: Nagano’s Ancient Pilgrimage Temple and Its Old Town

    Photo by Dino Reichmuth on Unsplash

    Long before Japan’s Buddhist temples split into rival sects, pilgrims were already walking the approach to Zenko-ji. The temple in Nagano City has no sectarian affiliation of its own — it’s jointly run by Tendai and Jodo-shu priests — which is part of why it has drawn ordinary worshippers, not just members of one school, for over 1,400 years. Today it’s one of the most rewarding day trips in central Japan: a working temple with a genuinely strange pilgrimage ritual, fronted by an old town street still selling the same local specialties it always has.

    A Temple Older Than Japan’s Buddhist Sects

    Zenko-ji’s origin story dates to 642 CE, when a statue of Amida Nyorai said to be the first Buddhist image ever brought to Japan was enshrined here. That statue — the Ikko Sanzon Amida Nyorai — has been a “hibutsu,” a hidden Buddha, ever since: it has not been shown to anyone, including the temple’s own priests, for well over a millennium. What visitors see instead is a stand-in copy, the Maedachi Honzon, unveiled to the public only during the Gokaicho festival held roughly every seven years (the most recent was in 2022). Even then, the original stays hidden. Check the temple’s official site before you plan a trip around this event, since exact dates and the scale of crowds vary.

    The current Hondo (Main Hall) dates to 1707 and is a National Treasure — one of the largest wooden structures in Japan, with a distinctive T-shaped roofline. It’s still an active place of worship, not a museum piece: the Oasaji morning service, led by resident priests who bless pilgrims by touching prayer beads to their heads as they file past, happens daily at dawn and is free to watch.

    Getting There

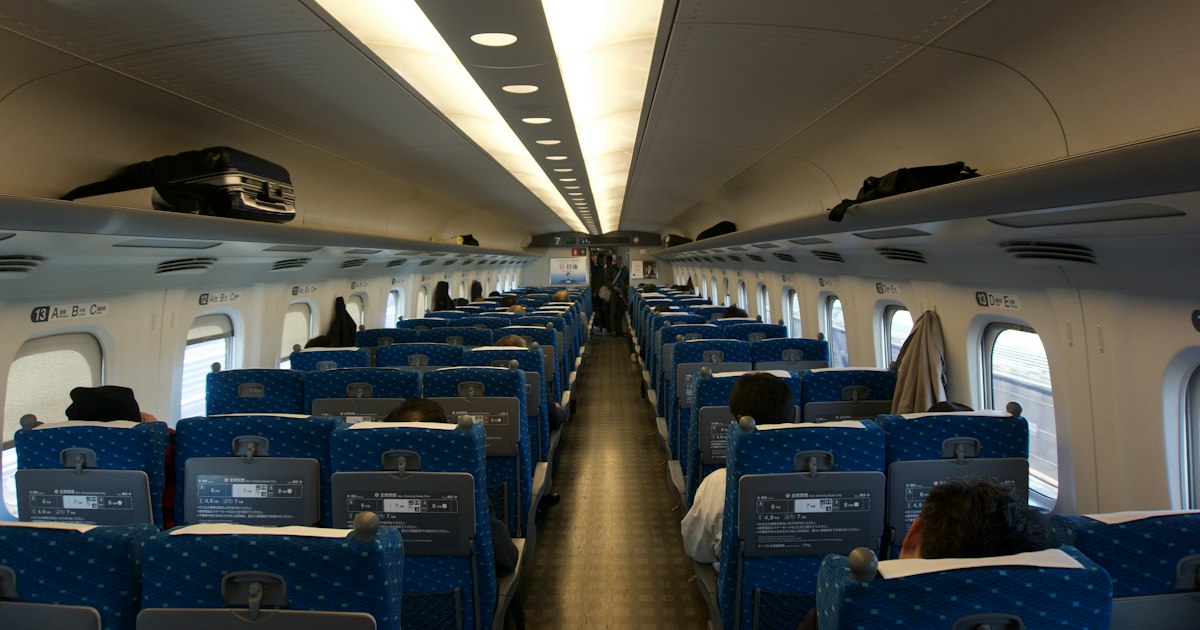
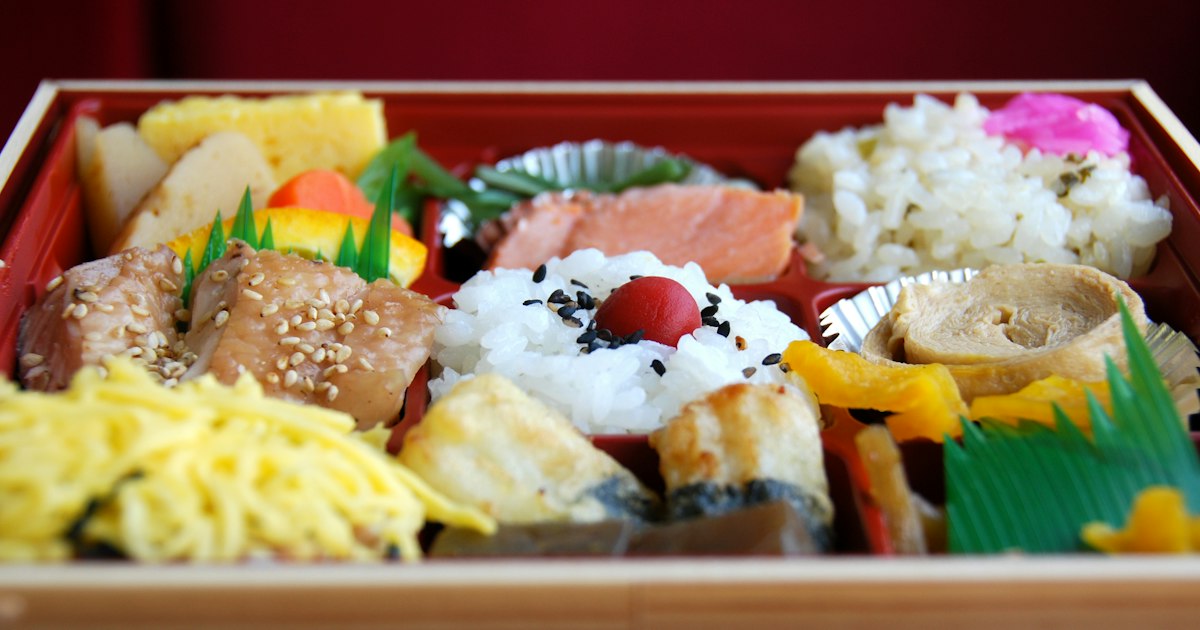
    Zenko-ji sits in Nagano City, reachable from Tokyo Station in about 80–90 minutes on the Hokuriku Shinkansen (Kagayaki service; Asama trains take a bit longer). A one-way reserved seat runs roughly ¥8,000–8,500. If you want extra legroom and a quieter car for the ride, it’s worth reading up on Green Car and Gran Class seating before you book — Gran Class in particular is a comfortable way to start a day-trip morning. Grab an eki-ben for the ride if you’re curious about Japan’s boxed-lunch culture; our guide to bento boxes covers what to look for at the platform stalls.

    From Nagano Station, the temple is about a 30-minute walk straight up Chuo-dori, or a 15-minute bus ride (Alpico or Nagaden buses bound for “Zenkoji” or “Daimon,” roughly ¥160–180) to the Zenkoji-daimon stop. A taxi is about ¥1,200–1,500 and takes 10 minutes. Walking one way and busing back is a good way to see the old town at your own pace without doing the full round trip on foot.

    What to See and Do Inside

    Ticketing here is modular, so decide in advance what you actually want to see. As of recent seasons: entry to the Hondo’s inner sanctuary and the Okaidan meguri (see below) costs about ¥500; a separate ticket for the Sanmon Gate’s upper level costs about ¥500; the History Museum and Sutra Repository (Kyozo) are around ¥300 together. A combined ticket covering all of the above runs about ¥1,000 and is the better deal if you’re doing more than one.

    The Okaidan meguri is the main reason to budget extra time. It’s a pilgrimage walk through a completely unlit passage beneath the main altar, directly under where the hidden Buddha is enshrined. You feel your way along the wall in total darkness until your hand finds a metal lock — the “key to paradise” — and touching it is said to guarantee salvation. It sounds like a gimmick until you’re actually in there; the darkness is total, there’s no way to cheat by using a phone light, and it’s genuinely disorienting for a minute or two. Mildly claustrophobic travelers should know it’s a narrow single-file passage with no way to turn back once you’ve started, though it only takes a few minutes to complete.

    The Sanmon Gate (rebuilt 1750) can be climbed for a view down Nakamise-dori and a look at the Hondo’s roofline from above — worth it on a clear day. The Nio-mon Gate at the base of the approach, guarded by two fierce wooden statues, is the classic photo stop before you start walking up.

    Nakamise-dori and the Old Town

    The approach street between Nio-mon and the temple grounds, Nakamise-dori, is lined with shops that have been selling the same categories of goods for generations: Buddhist altar items, hand-dipped candles, and local Nagano specialties. Look out for Yawataya Isogoro, a shichimi (seven-spice) shop founded in the Edo period that’s still grinding its own blend — a good, packable souvenir. Oyaki, steamed or grilled dumplings stuffed with pickled vegetables, mushroom, or red bean, are sold from several stalls along the street and make a solid ¥150–300 snack while you walk. Nagano Prefecture is also serious soba country (the local buckwheat is called Shinshu soba), and several sit-down shops near the gate serve it cold with a simple dipping sauce — a better lunch stop than anything near the station.

    Beyond the temple itself, Chuo-dori has been renovated with wide, tree-lined sidewalks and small galleries and cafés in converted machiya-style buildings, making the 30-minute walk from the station worthwhile rather than just a means to an end.

    Best Time to Visit

    Early-to-mid April brings cherry blossoms along the approach and in the temple grounds. Early-to-mid November is peak autumn color, with the maples around the precinct turning while daytime crowds stay manageable compared to Kyoto or Nikko. Summer (Obon in mid-August especially) brings lantern festivals and evening events but also heat and humidity. Winter is genuinely the quietest and, with snow on the Hondo’s roof, one of the most atmospheric times to see it — Nagano City is also a reasonable base if you’re combining the temple with a ski trip; Hakuba Valley is about an hour away by car or train-plus-bus and pairs naturally with a Zenko-ji morning.

    Common Mistakes to Avoid

    • Expecting to see the actual hidden Buddha. Even during Gokaicho, only the stand-in statue is unveiled — the original has not been shown to anyone in centuries, and it never will be on your trip either.
    • Buying tickets separately when the combined pass is cheaper. If you want the inner sanctuary, Okaidan, Sanmon, and museum, the ~¥1,000 combined ticket beats paying for each individually.
    • Skipping the morning service. Oasaji happens daily at dawn (the exact time shifts with sunrise, so check the day’s schedule at the temple or your hotel), and it’s the one part of a Zenko-ji visit that can’t be replicated at a museum — it’s a live ritual, not a display.
    • Rushing the Okaidan. Trailing hand on the wall, moving slowly, is the whole point. People who try to hurry through in the dark are the ones who bump into the person ahead of them.
    • Visiting during a Gokaicho year without booking accommodation early. The once-every-seven-years unveiling draws large national crowds and fills Nagano City’s hotels months out.

    Zenko-ji rewards a half-day rather than a rushed hour: walk the old town slowly, do the morning service if your schedule allows it, and don’t skip the dark tunnel under the altar — it’s the one part of the visit you can’t get anywhere else in Japan.
  • Hanabi Taikai: Japan’s Best Fireworks Festivals and How to Watch Them

    Hanabi Taikai: Japan’s Best Fireworks Festivals and How to Watch Them

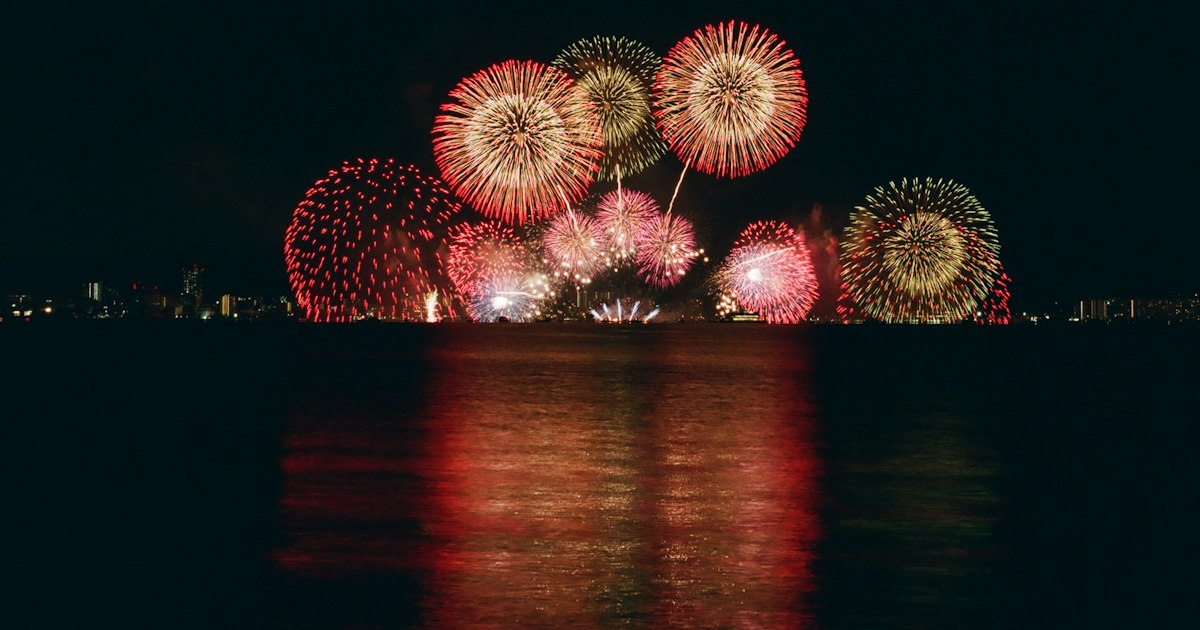
    Photo by MIO ITO on Unsplash

    From late July through August, Japan turns its rivers, lakes, and harbors into stages for hanabi taikai — fireworks festivals that can run for over an hour and launch tens of thousands of shells in a single night. These aren’t municipal Fourth-of-July shows; some are judged competitions between master pyrotechnicians, complete with named shell types, synchronized music, and reserved seating that sells out months in advance. If you’re planning a summer trip to Japan, timing it around one of these festivals is one of the best ways to see the country at its most festive. Here’s how to pick one, get there, and actually enjoy it instead of standing in a crowd for three hours.

    Why Hanabi Taikai Are a Different Kind of Fireworks Show

    Hanabi (花火, “fire flowers”) has been a summer tradition in Japan since the Edo period, when the Ryogoku Kawabiraki festival in Tokyo doubled as a memorial for plague and famine victims. That layered meaning — celebration plus remembrance — still shapes the biggest festivals today. Many are also competitive: companies called hanabi-shi compete for prizes judged on shell symmetry, color transitions, and how cleanly a shell forms a perfect sphere (“warimono”) as it opens. Announcers call out the name of each shell and its maker, and crowds actually watch quietly for the technical rounds before erupting for the finale.

    Because these are outdoor, free-to-attend (mostly) events with no ticket gate, the challenge isn’t getting in — it’s getting a spot with a clear sightline and a way home afterward.

    The Big Three Competition Festivals

    Japan’s three most prestigious fireworks competitions are Omagari, Tsuchiura, and Nagaoka. All three sell paid reserved seating, and all three genuinely sell out.

    • Omagari National Fireworks Competition (Daisen City, Akita) — held the last Saturday of August. Considered the most technically judged event in the country; around 28 top companies compete. Reserved seat tickets (roughly ¥3,000–¥15,000) go on sale in spring and disappear fast. Reached via the Akita Shinkansen to Omagari Station, about 3.5–4 hours from Tokyo.
    • Tsuchiura All Japan Fireworks Competition (Ibaraki) — held the first Saturday of October, later than most, making it a good option if your trip falls outside the July–August peak. About an hour from Tokyo via the Joban Line to Tsuchiura Station.
    • Nagaoka Fireworks Festival (Niigata) — held August 2–3 every year without fail. Famous for its “Phoenix” (Fenix) shells, launched as a tribute to the city’s recovery from WWII air raids and the 2004 Chuetsu earthquake. Around 1.3 million people attend over the two nights. Reserved seats along the Shinano River run roughly ¥4,000–¥12,000 and are sold via lottery months ahead. Nagaoka Station sits on the Joetsu Shinkansen, about 1 hour 20 minutes from Tokyo — if you’re making a long day trip, it’s worth reading about Green Car and Gran Class seating for the ride home, since trains out of Nagaoka after the finale get packed fast.

    The Easiest Option for First-Timers: Sumida River, Tokyo

    If you don’t want to plan around a lottery or a long train ride, the Sumida River Fireworks Festival (Sumida-gawa Hanabi Taikai) is the most accessible major hanabi in the country. Held on the last Saturday of July, it launches around 20,000 fireworks from two competing sites along the river between Asakusa and the Tokyo Skytree, and it’s completely free to view from public riverbank space.

    Practical details:

    • Where to stand: Sumida Park (both banks, near Asakusa Station) offers the classic view with the Skytree in frame. Arrive by early afternoon — spots fill up 4–5 hours before the 7pm start.
    • Paid alternative: Riverside restaurants, rooftop bars, and hotel rooms with river views sell fireworks-viewing packages, typically ¥8,000–¥30,000+ per person including a meal — a good splurge option if you’d rather not sit on a tarp for hours.
    • Getting home: This is the real challenge. Asakusa Station and nearby lines get severely congested right after the finale. Budget an extra hour, or walk a few stations away before boarding.

    Beyond Tokyo: Lake Suwa and Tenjin Matsuri

    Two other festivals are worth building a trip around if your dates align:

    • Lake Suwa Fireworks Festival (Nagano, mid-August) — one of Japan’s longest-running hanabi events, launching upward of 40,000 shells over the lake. The mountain backdrop and water reflections make it one of the most photogenic shows in the country. Suwa Station is on the JR Chuo Line, roughly 2.5 hours from Tokyo.
    • Tenjin Matsuri (Osaka, July 24–25) — technically a shrine festival, not a dedicated hanabi taikai, but its second night combines a river boat procession with around 5,000 fireworks over the Okawa River. It’s one of Japan’s three great traditional festivals, so expect it to double as a cultural event, not just a fireworks show.

    How to Actually Get a Good Seat

    Free viewing is genuinely free, but “good” is relative. A few rules apply almost everywhere:

    • Paid seats sell out first, and early. For Nagaoka and Omagari, tickets typically go on sale online in spring (April–May) for a summer festival. If you’re planning around one of these, check the official festival site as soon as your travel dates firm up.
    • Free spots require patience, not luck. Locals routinely stake out riverside ground 3–6 hours ahead with a plastic or vinyl sheet. A traditional woven mat (goza) made from igusa rush grass is still what many families bring to sit on — it’s cooler and more comfortable than plastic on a hot pavement, and it’s the same material used in tatami flooring goods you can buy as a souvenir afterward.
    • Pack food rather than rely on festival stalls. Yatai (food stalls) exist but the queues are long and prices are inflated. A compact bento box picked up at the station beforehand is the easiest way to eat comfortably while waiting for the show to start.
    • Bring cash and something to drink. Many festivals, especially in regional cities like Nagaoka, are held in areas famous for sake — pouring a little into a proper set of sake cups and a tokkuri while waiting for the fireworks is a very normal way to spend the evening if you’re not driving.

    Common Mistakes to Avoid

    • Underestimating the crowds on the way home. Trains and buses near major festivals can be full for well over an hour after the finale. If you have an early Shinkansen or flight the next morning, don’t cut it close.
    • Assuming you can walk in and find riverside space at 6pm. For Sumida River and the Big Three competitions, that spot is long gone. Arrive early or budget for a paid seat.
    • Booking accommodation too late. Hotels in Nagaoka, Omagari, and similarly sized festival towns sell out for these dates a year in advance in some cases. If a specific festival is the centerpiece of your trip, book lodging before flights.
    • Skipping rain-date awareness. Most hanabi taikai proceed in light rain but postpone for typhoons or heavy storms, usually to the following day. Check the official festival account (X/Twitter is commonly used for real-time updates) on the day of.

    Budget, Mid-Range, and Splurge Planning

    • Budget: Free riverside viewing at Sumida River or Lake Suwa, station bento for dinner, standard local transport. Total cost beyond your existing trip: essentially ¥0–¥2,000.
    • Mid-range: A reserved seat ticket at Nagaoka or Omagari (¥4,000–¥12,000), Shinkansen fare from Tokyo, and a casual dinner nearby.
    • Splurge: A riverside restaurant or rooftop viewing package in Tokyo (¥8,000–¥30,000+ per person) or a ryokan stay in Nagaoka/Suwa with a private or semi-private view, avoiding the crowd crush entirely.

    Whichever festival you choose, the format is the same everywhere: get there early, bring your own comfort (seat, food, drink), and expect the walk home to take longer than the show itself. That trade-off is exactly why hanabi taikai still pack riverbanks a century after they started.

  • Nada & Fushimi: Japan’s Sake Brewing Districts and How to Visit

    Nada & Fushimi: Japan’s Sake Brewing Districts and How to Visit

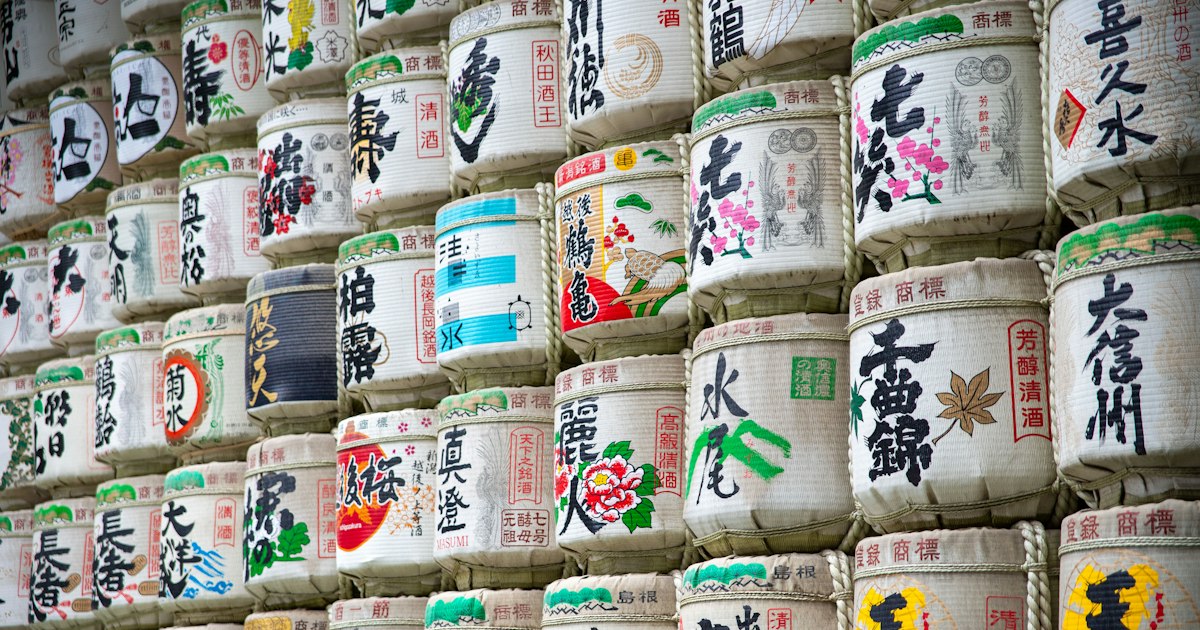
    Photo by Vinicius on Unsplash

    Most visitors taste Japanese sake in a restaurant without ever seeing where it comes from. But two of the country’s most important brewing districts sit within easy day-trip range of Osaka and Kyoto: Nada, on Kobe’s waterfront, and Fushimi, in southern Kyoto. Between them they produce roughly a third of all sake made in Japan, and both have turned their historic breweries into museums, tasting rooms, and walkable shopping streets. Here’s how to visit either one — or both — without wasting a day on closed doors.

    Why Nada and Fushimi Became Sake Capitals

    Sake quality comes down to water and rice, and both districts got lucky with water. Nada’s breweries draw on “miyamizu,” a mineral-rich, iron-poor hard water discovered in the Nishinomiya area in 1840 that produces drier, fuller-bodied sake — this is the home of big names like Hakutsuru, Kikumasamune, Ozeki, and Kenbishi. Fushimi’s water is the opposite: soft, low-mineral water nicknamed “Fushimizu,” which yields smoother, slightly sweeter sake, historically favored for its gentler style. Gekkeikan and Kizakura are the best-known Fushimi producers still brewing on-site today. If you’ve already read our guide to sake cups and tokkuri, this is the natural next stop — seeing where the liquid itself is made before you shop for the vessel to drink it from.

    Nada: Kobe’s Hard-Water Sake Belt

    Nada isn’t one museum but a strip of breweries spread across Kobe’s Higashinada and Nada wards, most within walking or short-taxi distance of each other along the coast.

    • Hakutsuru Sake Brewery Museum (Hakutsuru Shuzo Shiryokan) — free admission, generally open 9:30–16:30 (closed New Year holidays). Housed in a preserved wooden kura, it uses life-size mannequins to show the pre-mechanized brewing process, and finishes with a small tasting counter and shop.
    • Kikumasamune Sake Brewery Museum — also free, similar hours, closed Mondays (or the following day if Monday is a holiday). Smaller and more old-tool-focused than Hakutsuru’s.
    • Sakura Masamune Kinenkan — a compact, low-key museum a short walk from the other two, worth combining rather than visiting alone.

    Getting there: From Osaka (Umeda), take the JR Kobe Line rapid service to Sumiyoshi or Rokko Michi Station (about 15–20 minutes), or the Hanshin Railway to Uozaki Station, which sits closest to Hakutsuru and Kikumasamune. From Kyoto, figure roughly 45–55 minutes by JR. If you’re traveling from further afield and want extra legroom for the ride, our Green Car guide explains when the upgrade is worth it on these routes. Once in Nada, the museums are a 10–15 minute walk apart — comfortable on foot, or rentable bicycles are available near some stations.

    Fushimi: Kyoto’s Canal-Side Sake Village

    Fushimi’s brewing quarter centers on the Chushojima and Fushimi-Momoyama area, a neighborhood of white-walled kura and a preserved canal that once carried sake barrels to Osaka by boat.

    • Gekkeikan Okura Sake Museum — admission is ¥600 for adults, which includes tastings of three sakes and a small souvenir cup to keep. Open roughly 9:30–16:30 (last entry 16:00); closed around New Year and a few irregular dates, so check ahead if visiting late December or early January.
    • Kizakura Kappa Country — free to enter the gallery and shop; the attached brewery restaurant serves food alongside tasting flights for a few hundred yen per glass. Closed Wednesdays.
    • Jikkoku-bune canal boat — a seasonal (roughly mid-March through early December) 55-minute ride along the old sake-transport canal, around ¥1,500 for adults, mostly running weekends and holidays with a midsummer break. It’s touristy but genuinely explains why this location mattered historically.

    Getting there: From Kyoto Station, take the JR Nara Line to Momoyama Station (about 15 minutes), or ride the Keihan Main Line from Sanjo or Gion-Shijo to Fushimi-Momoyama Station (roughly 20 minutes). The Kintetsu Kyoto Line’s Momoyama-Goryomae Station also works. Everything worth seeing is within a 15–20 minute walk of these stations. Note this is a different “Fushimi” experience than Fushimi Inari Shrine’s torii gates a few kilometers north — don’t assume one visit covers both, since the shrine and the sake district are separate trips.

    Best Time to Visit

    Both districts’ museums operate year-round, but two windows matter. Actual brewing happens in the cooler months, roughly December through March, when some breweries (not the general-admission museums, but select ones offering tour bookings) allow closer looks at active fermentation tanks — worth asking about if you read Japanese or book through a local tour operator, since these aren’t drop-in experiences. For general visiting, spring (March–April) pairs well with Fushimi because Fushimi-Momoyama’s castle grounds and nearby canal are pleasant during cherry blossom season, and Nada’s coastal walk is comfortable in the same weeks. Avoid the peak of summer if possible — Kansai’s August heat makes the outdoor canal and walking routes between breweries unpleasant, and the Jikkoku-bune boat sometimes pauses in the hottest stretch.

    Tasting, Buying, and Shipping Sake Home

    Every museum and most brewery shops sell bottles on-site, often including limited releases not distributed nationally, at prices ranging from about ¥1,000 for a standard 720ml bottle to several thousand yen for premium ginjo or daiginjo grades. A few practical notes: liquids over 100ml can’t go in carry-on luggage, so plan to pack bottles in checked bags (wrap them well — brewery shops usually sell protective bottle bags for a few hundred yen) or ship them separately via a courier service like Yamato Transport, which most shops can arrange for domestic addresses or, at some larger shops, international shipping. If you’re also carrying medication through customs on this trip, it’s worth reviewing our guide to Japan’s customs rules for medicine separately, since sake and pharmaceutical restrictions are handled by different rules entirely.

    Common Mistakes to Avoid

    • Assuming every brewery offers walk-in tours. Most of what’s open to casual visitors is the museum/shop portion, not the working brewery floor. Actual production tours typically require advance reservation, often in Japanese, and aren’t available at every facility.
    • Visiting on a Monday without checking. Kikumasamune and several smaller sites close Mondays; Kizakura closes Wednesdays. A five-minute check before you go saves a wasted trip.
    • Trying to do both districts in one day. Nada and Fushimi are roughly an hour apart by train with a transfer, and each deserves at least half a day. Pick one per day if you want to actually taste and shop rather than just transit.
    • Skipping food. Sake tastes different with food than sipped alone at a counter — Kizakura’s restaurant and several small izakaya near both districts serve dishes built around the local sake, which makes the tasting much more informative.

    Planning by Budget

    Budget (under ¥2,000): Stick to the free museums (Hakutsuru, Kikumasamune, Kizakura’s gallery) and buy one modest bottle to take home.

    Mid-range (¥3,000–6,000): Add the Gekkeikan Okura Museum’s ¥600 tasting ticket, the Jikkoku-bune boat ride, and lunch at a brewery restaurant.

    Splurge (¥8,000+): Book a guided sake-pairing tour through a local operator that includes a reserved brewery visit, a multi-course meal matched to different sake styles, and a premium daiginjo bottle to take home — these run from around ¥8,000–15,000 per person depending on the operator and season.

  • Green Car & Gran Class: Japan’s First-Class Train Seats Explained

    Green Car & Gran Class: Japan’s First-Class Train Seats Explained

    Photo by Marek Lumi on Unsplash

    Japan’s trains are already famous for being clean, punctual, and comfortable in standard class — so why would anyone pay extra? Because on long Shinkansen rides, overnight-adjacent journeys, or trips with heavy luggage, the difference between “fine” and “genuinely relaxing” is real. Green Car and Gran Class are Japan Railways’ two tiers of premium seating, and they’re far less complicated (and often less expensive) than international business or first class. Here’s exactly what you’re paying for and when it’s worth it.

    What Exactly Is “Green Car”?

    Green Car (グリーン車, guriin-sha) is JR’s long-standing first-class car, found on most Shinkansen trains, many limited express services, and some Tokyo-area commuter lines. It’s marked with a green four-leaf-clover logo on the platform and the carriage exterior. On Shinkansen, Green Car typically means 2+2 seating (instead of 2+3 in standard class), meaning every seat is a window or aisle seat with noticeably more legroom, a footrest, individual reading lights, and a quieter car since it’s usually less crowded. There’s no meal service or lounge access — it’s an upgraded seat, not a first-class cabin experience.

    You pay for Green Car as an add-on: a “Green fee” (グリーン料金) stacked on top of your normal base fare and any limited express/Shinkansen surcharge. You can’t buy a Green Car ticket alone — it always sits on top of a regular ticket.

    Gran Class: The Actual First Class

    Gran Class is a step above Green Car and only exists on specific Shinkansen routes: the Tohoku/Hokkaido Shinkansen (Hayabusa and some Komachi services running E5/E6 series trains between Tokyo and Aomori/Hakodate) and the Hokuriku Shinkansen (Kagayaki services on E7/W7 series trains between Tokyo and Kanazawa/Tsuruga). It is not available on the Tokaido/Sanyo Shinkansen between Tokyo, Osaka, and points west — a common point of confusion for first-time visitors planning a Kansai trip.

    Gran Class seats are wide, leather, 1+2 across the aisle, and recline further than any other seat on a Japanese train. A dedicated attendant serves a light meal or snack, plus tea, coffee, wine, or Japanese sake, all included in the fare. It’s the closest thing Japan has to a domestic first-class cabin, and on a three-to-four-hour ride to Hokkaido or Kanazawa, it genuinely feels like a mini flight experience rather than a train ride.

    How Much Extra Does It Cost

    Prices scale with distance, so think in terms of the surcharge rather than a flat fee. As a rough guide:

    • Green Car surcharge on Tokaido Shinkansen (e.g., Tokyo–Osaka on Nozomi/Hikari): roughly ¥4,000–5,500 on top of the standard reserved-seat fare, bringing a one-way Tokyo–Osaka Green Car ticket to somewhere around ¥18,000–20,000.
    • Green Car on shorter Shinkansen hops (e.g., Tokyo–Nagano, Tokyo–Sendai): typically an extra ¥2,000–3,500.
    • Gran Class: generally an additional ¥10,000–15,000 over the standard fare for longer routes like Tokyo–Hakodate or Tokyo–Kanazawa — meaning a full Gran Class fare often lands between ¥27,000 and ¥33,000 one way, meal and drinks included.

    These figures move with JR’s periodic fare revisions, so treat them as planning estimates and confirm the exact price at booking — JR’s ticket machines and the official booking apps always show the current fare before you pay.

    Commuter Green Car: Tokyo’s Everyday Upgrade

    Separate from the Shinkansen version, JR East runs Green Car double-decker carriages on the Shonan-Shinjuku Line, Ueno-Tokyo Line, Yokosuka Line, and Chuo Line rapid services around Tokyo. These don’t require reservations — you just tap a Green Car IC ticket (bought from the small green ticket machines on the platform or added directly through a Suica/PASMO-linked app) and sit in any open seat. Fares are flat-ish by distance band, roughly ¥800–1,000 for most trips, and it’s a nice way to guarantee a seat with luggage during rush hour, say if you’re heading out to Nakameguro or beyond during a crowded commute window.

    How to Book Green Car and Gran Class Seats

    You can reserve both at any JR ticket counter (midori-no-madoguchi), at the green ticket vending machines found in every major station, or online through JR’s official reservation platforms (JR East’s train reservation site, or the Tokaido/Sanyo Shinkansen’s EX app for routes through Osaka). Gran Class in particular sells out on holidays and during peak season, so book as early as possible — JR opens reservations one month ahead to the day. If you’re heading to snow country, this matters most right before ski season opens; travelers booking a Shinkansen-plus-bus route up to Hakuba Valley around New Year or February weekends should lock in Green Car seats well ahead for the heavy-luggage leg to Nagano.

    Note that the standard 7-day/14-day/21-day Japan Rail Pass no longer includes Green Car access as of the October 2023 price revision unless you specifically buy the Green Car version of the pass, which costs meaningfully more than the ordinary pass. Gran Class is never covered by any JR Pass, at any tier — you always pay the difference or the full fare out of pocket.

    Is It Worth It? Budget, Mid-Range, and Splurge Picks

    Budget: Stick with standard reserved seats for rides under 90 minutes — the difference in comfort is minor and not worth the surcharge. This covers most day trips, including regional hops toward Setouchi Triennale islands via Okayama or Takamatsu.
    Mid-range: Green Car earns its keep on trips over two hours, especially with luggage, kids, or a laptop you want to work on. It’s also worth it on limited express trains with only single-digit Green Car seats, like the Shiokaze service to Matsuyama for a visit to Dogo Onsen, where the extra space and quiet make a real difference on a three-hour ride.
    Splurge: If your route includes Hayabusa to Hakodate or Kagayaki to Kanazawa, Gran Class is a genuine treat and, per-hour, is often cheaper than premium airline seating for a comparable distance.

    Common Mistakes to Avoid

    The biggest mistake is assuming Gran Class exists everywhere — it doesn’t run on the busiest tourist route, Tokyo–Kyoto–Osaka, so don’t build an itinerary around it without checking the specific train series first. The second is boarding a Green Car without a valid Green ticket or Green Car IC charge; conductors do check, and you’ll be asked to pay the fare on the spot, sometimes at a higher on-board rate. Third, don’t confuse “Green Car” with “first class” in the Western sense — there’s no separate check-in, lounge, or boarding priority, so arrive with the same timing buffer you would for any Shinkansen departure. Finally, remember seat reservations are per-train: a Green Car reservation ties you to that specific departure, so if you need flexibility, ask the ticket agent about open-ticket options before committing.

  • Yosegi Zaiku: Hakone’s Mosaic Wood Puzzle Boxes and Where to Buy

    Yosegi Zaiku: Hakone’s Mosaic Wood Puzzle Boxes and Where to Buy

    Photo by Karen Vardazaryan on Unsplash

    In the hills above Hakone-Yumoto, thin strips of naturally colored wood are glued, sliced, and pressed into geometric patterns so precise they look printed — until you run a thumbnail across the surface and feel the grain. This is yosegi zaiku, a 200-year-old marquetry craft, and its most famous product is the himitsu-bako, or “secret box,” a puzzle box you can only open by sliding its panels in a specific sequence. If you’re passing through Hakone on an onsen trip or a day out from Tokyo, it’s one of the few souvenirs that’s genuinely handmade, distinctly regional, and useful long after your suitcase is unpacked. Here’s how the craft works, where it’s made, and how to buy the real thing without overpaying for a printed imitation.

    What Makes Yosegi Zaiku Different

    Unlike lacquerware or painted crafts, yosegi zaiku uses no dye at all. Artisans exploit the natural color range of local and regional woods — pale magnolia (hō), reddish-brown cherry (sakura), dark walnut, yellowish katsura, and greenish sassafras (kuromoji) among others — cutting them into rods and gluing dozens together into a striped or geometric block called a tane-ita. That block is then shaved with a plane into paper-thin sheets (zuku), which are applied like veneer to boxes, trays, and coasters. A single sheet a millimeter thick can carry an entire pattern, which is why genuine pieces feel slightly textured and show grain when you look closely, while cheap “yosegi-style” gift shop items are often just printed paper wrapped around plain wood. Rubbing a finger over the surface is the simplest way to tell them apart.

    Himitsu-bako: How the Puzzle Boxes Actually Work

    The signature product is the himitsu-bako, a box that opens only after you push or slide specific panels in the correct order. Complexity is measured in “moves” (kaijo): a basic box might take 4 moves, mid-range boxes commonly take 10–21 moves, and elaborate ones reach 66 moves or more. Some artisans build trick boxes within trick boxes, or boxes that require moves in more than one direction. Prices scale with move count and box size:

    • Budget (¥1,500–¥4,000): Small 4- to 12-move boxes, roughly palm-sized, often sold at station kiosks and the Hatajuku workshops. Fine as a first puzzle box or a light souvenir.
    • Mid-range (¥5,000–¥20,000): 14- to 30-move boxes with denser, more intricate patterns, sized to hold small jewelry or business cards.
    • Splurge (¥30,000–¥150,000+): Large, master-crafted boxes with 50+ moves, sometimes signed by a named artisan, sold at specialty shops and museum galleries rather than souvenir counters.

    Test any box before buying if the shop allows it — ask staff to show you the sequence once, then try it yourself. Never force a panel that won’t move; the mechanisms rely on precise friction-fit joinery, and forcing a stuck panel is the single most common way tourists damage them.

    Hatajuku: The Birthplace Village

    Yosegi zaiku originated in Hatajuku, a small settlement on the old Tokaido highway between Hakone-Yumoto and Moto-Hakone, shaded by a famous avenue of cedars planted in the 1600s. It’s still the center of production today. From Hakone-Yumoto Station, take the Hakone Tozan Bus bound for Togendai or Moto-Hakone and get off at the “Hatajuku” stop — the ride takes about 10–15 minutes and buses run frequently, but check the schedule since Hakone buses can be crowded on weekends and during autumn foliage season (mid-to-late November).

    The village’s Hatajuku Yosegi Kaikan (畑宿寄木会館) is a small museum and shop where you can watch artisans work and try a hands-on coaster-making session, typically around ¥1,500–¥2,000 depending on the pattern chosen, taking 30–45 minutes. It’s open most days but closes irregularly for craftsmen’s schedules, so it’s worth calling ahead or checking with your ryokan concierge on the day. A handful of family-run workshops in the village sell directly from their storefronts, generally cheaper than equivalent pieces bought in central Hakone-Yumoto, though selection is smaller and cash is often preferred.

    Where to Buy in Hakone-Yumoto and Beyond

    If you don’t have time for Hatajuku, Hakone-Yumoto itself — the gateway town where the Odakyu Romancecar and local buses converge — has several dedicated yosegi shops along and near the main shopping street (Yumoto Chaya-dori), typically open around 9:00–18:00. Look for shops that display the wood block (tane-ita) used to cut their veneer; that’s a good sign the pieces are shop-made rather than imported patterned paper. The Hakone-Machi/Motohakone Honma Yosegi Museum area near Moto-Hakone also has an attached shop with higher-end, artisan-attributed pieces if you want documentation of who made what you’re buying.

    For travelers who won’t make it to Hakone at all, some department store craft floors in Tokyo (Nihonbashi Takashimaya and similar) carry a curated selection of Hakone yosegi goods, though prices run 10–20% higher than buying locally and the selection is thinner. If wooden Japanese craft objects are your interest more broadly, it’s worth comparing yosegi zaiku against other regional woodcraft and traditional game pieces — see our guide to Shogi & Go Sets for another wood-based collectible with its own regional workshops, or our piece on Tatami & Igusa Goods if you’re building out a small collection of Japanese natural-material crafts.

    Best Time to Visit and Practical Timing

    Hakone is a year-round destination, but for craft shopping specifically, weekday mornings are best — Hatajuku’s small shops and workshop counters can feel cramped when tour buses arrive midday, and the coaster-making sessions fill up fastest on weekends and Japanese holidays. Early spring (March–April) and late autumn (November) bring the heaviest tourist traffic overall because of blossoms and foliage, so if your main goal is a relaxed shopping and workshop experience rather than scenery, aim for a weekday in late spring or early summer. Whatever the season, arrive at Hatajuku before early afternoon; several family workshops close by 16:00–17:00 and don’t reopen.

    Common Mistakes to Avoid

    • Buying “yosegi-pattern” items instead of yosegi zaiku: Printed paper or vinyl wrapped around plain wood is common in generic souvenir shops nationwide. Genuine pieces show real wood grain and slight texture; ask directly if the item is zuku (wood veneer) or printed.
    • Not testing the puzzle mechanism in-store: A box that seems stuck may just need a specific first move. Buying without confirming you (or the shop) can open it risks going home with a box you can never unlock.
    • Assuming all “puzzle boxes” are equal: Move count varies wildly at similar price points between shops. Ask the move count before comparing prices.
    • Skipping the workshop because of time pressure: Even 30 minutes at Hatajuku making your own coaster gives a far better sense of the craft’s difficulty than browsing finished goods, and the small fee usually includes materials to take home.
    • Forgetting humidity sensitivity: The wood veneer can shrink slightly in very dry climates (like heated homes in winter). Store finished pieces away from direct heating vents to avoid hairline surface cracks over time.

    Done right, a yosegi zaiku box is a rare souvenir that rewards handling rather than just sitting on a shelf — and tracing it back to a specific workshop in Hatajuku gives the trip itself a little more shape too.

  • Bento Boxes: A Buying Guide to Japan’s Lunchbox Culture

    Bento Boxes: A Buying Guide to Japan’s Lunchbox Culture

    Photo by Hikari Graf on Unsplash

    A bento box looks simple until you’re standing in a Tokyu Hands aisle facing two hundred options in six materials and four price tiers. The Japanese lunchbox is a genuine design category — engineered for portion control, leak-proofing, and the specific geometry of rice, not just a cute container with cartoon ears on it. This guide breaks down what’s actually worth buying, where to find it, and how much you should expect to pay.

    What “Bento Box” Actually Means in Japan

    In Japanese, bentō-bako (弁当箱) refers to any lunchbox, but the culture around it is specific: compartments (or dividers) that keep rice separate from mains and pickles, a size calibrated to roughly 600–700ml for an adult lunch, and a lid that seals well enough to go in a bag sideways. Tourist shops sell character-themed plastic boxes as souvenirs, which is fine, but if you want something you’ll actually use at home, look past the Studio Ghibli aisle toward the materials section — that’s where the real differences in quality and price live.

    The Four Materials Worth Knowing

    Plastic (purasuchikku): Lightweight, microwave- and dishwasher-safe, and the most practical for daily use. Reputable brands like Skater, Tiger Corporation, and Zojirushi make double-layer plastic bento with locking lids for ¥1,500–¥3,500. This is what most Japanese office workers actually carry.

    Aluminum: The nostalgic, slightly clattery style from Shōwa-era school lunches. Not microwavable, but cheap (¥800–¥1,800) and genuinely durable — some people’s aluminum bento outlive several plastic replacements.

    Magewappa (bent wood): Thin sheets of cedar or cypress steamed and bent into an oval, traditionally from Odate in Akita Prefecture. Wood absorbs excess moisture from rice, which is why rice tends to taste noticeably better out of one. Expect ¥5,000–¥15,000 for a genuine hand-finished piece; cheaper “wood-style” versions with a plastic liner run ¥2,000–¥4,000 and are a reasonable compromise if you don’t want to hand-wash wood daily.

    Lacquerware (shikki/nurimono): Urushi-lacquered wood or resin bases, often from Wajima, Aizu, or Kishu lacquerware regions. These are the splurge tier — ¥10,000 to well over ¥50,000 for artisan pieces — and they’re not really “lunchbox for the office” items so much as heirloom objects you’d use for special occasions or display. If lacquerware interests you as a category, it’s worth comparing against other regional craft buying guides like Sake Cups & Tokkuri, since the same urushi techniques and price logic apply.

    Where to Buy: From ¥110 to Artisan-Made

    100-yen shops (Daiso, Seria, Can Do): Genuinely good for basic plastic bento at ¥110–¥330, plus rice molds, dividers ( baran ), and silicone cup liners. Fine for a starter box or a gift for a kid, not built for years of daily use.

    Tokyu Hands and Loft: Mid-range department stores with the best single-stop selection — usually a full floor or section dedicated to bento and kitchen goods, with English-friendly signage in flagship Tokyo/Osaka branches. This is the easiest place to compare brands side by side.

    Kappabashi Kitchen Town, Tokyo: Taito ward’s restaurant-supply district (nearest station: Tawaramachi on the Ginza Line, about 5 minutes on foot) is the best place for serious buyers — dozens of specialty shops sell professional-grade lacquerware, wood bento, and lunchbox accessories alongside the district’s famous plastic food replicas. If you’re making the trip, it pairs naturally with a stop covered in our Kappabashi sampuru guide — most shops open around 9:00–10:00am and close by 5:00–6:00pm, and some are closed Sundays, so a weekday morning visit is safest.

    Department store basements (depachika) and specialty craft shops: For regional pottery-style bento (ceramic isn’t practical for carrying, but ceramic lunch sets are sold for home use) or porcelain side dishes to pack alongside your bento, it’s worth browsing ceramics guides like Tobe Ware for matching kitchenware.

    Sizing: The Number That Actually Matters

    Japanese bento are sold by volume in milliliters, and this is the spec to check before anything else. As a rule of thumb: 300–400ml suits a small child or a light lunch, 500–600ml is standard for an adult woman’s portion, and 650–800ml+ suits an adult man or anyone packing a full rice-plus-protein-plus-sides meal. Buying based on looks alone is the single most common mistake — a beautiful magewappa box that turns out to be 350ml will leave you hungry by 2pm.

    Accessories Worth Adding

    • Furoshiki or bento bag (¥800–�¥2,500): A wrapping cloth or insulated pouch keeps the box from sliding around and doubles as a placemat.
    • Rice molds (¥300–¥800): Plastic press molds for making onigiri-style rice balls or panda/bear shapes — a Daiso staple.
    • Divider cups and baran sheets (¥200–¥500): Silicone cups keep sauces and pickles from touching other food; green plastic baran sheets are the classic garnish/divider.
    • An ice pack lid or cooling gel sheet (¥500–¥1,500): Genuinely necessary if you’re carrying a bento through a Japanese summer — food safety, not aesthetics.

    Common Mistakes to Avoid

    Don’t buy a box without checking whether it’s microwave- and dishwasher-safe if that matters to you — many wood and lacquer pieces explicitly are not, and the packaging will say so in Japanese only (look for 電子レンジ不可 = “not microwavable”). Don’t assume a locking, “leak-proof” claim means liquid-proof for a full soup — most are rated for slight moisture, not miso soup. And don’t skip the smell test on lacquerware: genuine urushi has a faint, not unpleasant lacquer smell that fades within a few weeks of use; a strong chemical odor on a cheap “lacquer-style” resin box is a sign of poor quality, not authenticity.

    Best Time to Shop

    There’s no strong seasonal pricing pattern for bento boxes, but two windows are worth knowing. New school and fiscal years start in April, so stores restock bento sections heavily from late February through April with the widest selection of the year. And late December through early January sees discounting on the previous year’s character/seasonal designs as shops clear stock for New Year merchandise. If you’re combining a Kappabashi trip with other Tokyo neighborhoods, it’s an easy add-on to a day that also includes canal-side browsing in Nakameguro.

    For a first bento box to actually use, a mid-range double-layer plastic model from Skater or Tiger at ¥2,000–¥3,000 is the safe, practical choice. If you want one souvenir-grade piece to bring home, a Kappabashi-bought magewappa box is the better investment than lacquerware unless you’re prepared to hand-wash and air-dry it after every use — which, for most travelers, ends up being the real deciding factor.

  • Souffle Pancakes: Tokyo’s Fluffiest Dessert Craze and Where to Try Them

    Souffle Pancakes: Tokyo’s Fluffiest Dessert Craze and Where to Try Them

    Photo by Allen Y on Unsplash

    Somewhere around 2015, a wobbly, cloud-like pancake took over Tokyo’s cafe scene and never really left. Souffle pancakes — thick, jiggly discs made by folding whipped egg whites into the batter — turned into one of the city’s most photographed desserts, spawning queues that snake around city blocks well before opening time. If you’re planning a Japan trip and want to taste the real thing (not the flattened, syrup-soaked version that’s since spread worldwide), here’s what actually works: where to go, what it costs, and how to avoid wasting half your vacation day in line.

    What Makes a Pancake “Souffle” in Japan

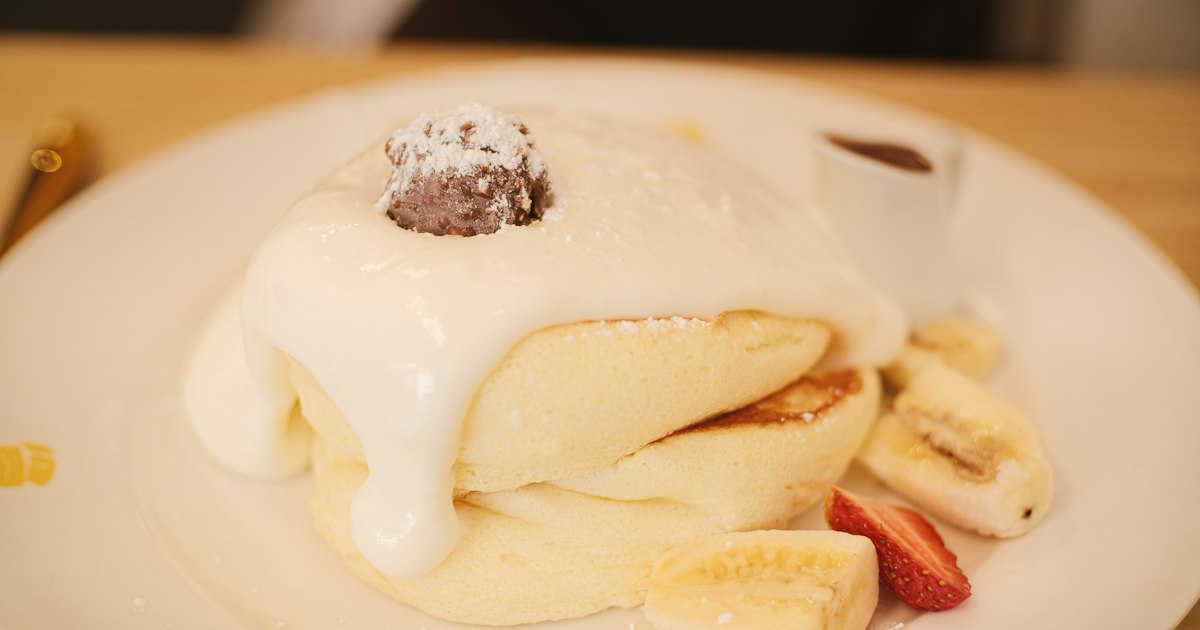
    Standard American pancakes use baking powder for lift. Japanese souffle pancakes (スフレパンケーキ, sufure pankeeki) instead use a meringue-based batter — egg whites whipped stiff, then folded in — and are often cooked in metal rings over low heat for 15-20 minutes, sometimes with a lid to steam them like a soft cheesecake. The result is a pancake that’s 4-5 cm thick, barely holds its shape, and wobbles when the plate is set down. Because they’re essentially baked rather than griddled quickly, cafes can’t rush an order — this is the root cause of almost every wait-time frustration you’ll read about below.

    Where the Craze Began

    The current boom traces to a handful of shops that opened between 2014 and 2017. Gram Cafe & Pancakes started in Shinsaibashi, Osaka in 2014 and is credited with popularizing the extra-jiggly, ring-cooked style, served on a wooden board with a scoop of vanilla ice cream. Shiawase no Pancake (“A Happy Pancake”) opened in Naha, Okinawa the same year, building its reputation on a ricotta-cheese batter drizzled with acacia honey. Flipper’s, which markets itself as “The Original Fluffy Pancake,” launched in Harajuku in 2016 and became the most Instagrammed of the bunch with its “Kiseki no Pancake” (Miracle Pancake). All three expanded into Tokyo and now have multiple branches across the city.

    Best Souffle Pancake Spots in Tokyo

    Budget (around ¥1,200-1,500): Gram Cafe & Pancakes has branches in Harajuku and Shibuya where a stack of three original pancakes with ice cream runs about ¥1,280. Portions are generous enough to split if you’re not overly hungry.

    Mid-range (around ¥1,500-1,900): Shiawase no Pancake’s Omotesando and Shibuya locations serve their signature ricotta pancakes with honey for roughly ¥1,650, and seasonal fruit versions (strawberry in winter/spring, mango in summer) push closer to ¥1,900. Flipper’s Miracle Pancake set is similarly priced, around ¥1,650-1,850 depending on toppings, and its Ginza and Ebisu branches tend to have shorter lines than the original Harajuku shop.

    Splurge (¥2,000+): Hotel cafes and department-store restaurant floors (Ginza Six, Shibuya Scramble Square) occasionally run limited-edition souffle pancake plates with premium fruit, matcha, or hojicha components that reach ¥2,200-2,800. These rotate seasonally, so check the specific restaurant’s website before making a special trip.

    If you’re already wandering the canal-side cafes of Nakameguro, several smaller independent cafes there serve their own souffle pancake versions with much shorter waits than the big-name chains — worth checking if you want the experience without the queue.

    When to Go: Timing and Queues

    Most souffle pancake shops open between 9:00 and 11:00 AM, and the popular ones (Flipper’s Harajuku especially) can have a line forming 30-45 minutes before opening on weekends. Weekday mornings, particularly Tuesday through Thursday, are dramatically calmer — arriving right at opening on a weekday can mean walking straight in, versus a 60-90 minute wait on a Saturday afternoon. Because the batter is cooked to order, expect an additional 15-20 minute kitchen wait after you sit down, even outside peak hours — factor that into any tight itinerary. Few of these cafes take reservations for walk-in casual dining; a rare exception is occasional online booking slots that some Flipper’s branches open for weekday lunch, listed on their official site a few weeks in advance.

    How to Order and What to Expect

    Most menus have English translations or picture menus, and staff at tourist-heavy branches (Harajuku, Shibuya, Ginza) generally handle English fine. A typical set includes two or three pancakes, a topping (fruit, ice cream, whipped cream, or a flavored syrup), and often a drink for a small additional charge (around ¥300-500). Note that many shops enforce a last-order time roughly 30 minutes before closing, since the cooking process takes so long — don’t assume you can dash in right before close.

    Common Mistakes to Avoid

    • Showing up on a weekend afternoon expecting a quick bite. This is the single biggest time-waster; shift to a weekday morning instead.
    • Ordering and expecting fast service. The cooking time is inherent to the dish, not a sign of a bad restaurant — build in 30-45 minutes minimum from order to plate.
    • Skipping the wait list sign-up. Busy branches use a paper list or a QR-code queuing app at the door; if you don’t sign up immediately on arrival, you lose your place in line even while standing nearby.
    • Assuming every branch of a chain is identical. Menus, prices, and even pancake thickness can vary slightly location to location — the flagship shop is usually the most consistent with what you’ve seen online.
    • Traveling far for a “limited edition” flavor without confirming it’s still running. Seasonal toppings rotate every few months and sell out; check the shop’s official social media the morning of your visit.

    Beyond the Pancake: Rounding Out a Dessert Day

    If souffle pancakes only whet your appetite for Japan’s other retro-cute desserts, pair your outing with a visit to a proper purin specialist — the old-fashioned custard pudding scene overlaps with a lot of the same neighborhoods and clientele. And before you commit to a cafe based on photos alone, remember that the plastic display models outside many Tokyo restaurants — known as sampuru — are worth a glance on your way in; souffle pancake shops often use hyper-realistic replicas to show exactly how tall and jiggly that day’s batch will be, which is a surprisingly reliable preview before you commit to the wait.

    Souffle pancakes are very much a “be there for the experience” dessert rather than a quick snack, so treat it as a standalone activity rather than something to squeeze between sightseeing stops. Pick a weekday morning, pick one shop rather than chasing three, and you’ll get the fluffy, wobbly stack everyone’s photos promised — without losing half your day to a line.

  • Sumo Stable Morning Practice Tours: How to Watch Asa-geiko in Tokyo

    Sumo Stable Morning Practice Tours: How to Watch Asa-geiko in Tokyo

    Photo by Alessio Roversi on Unsplash

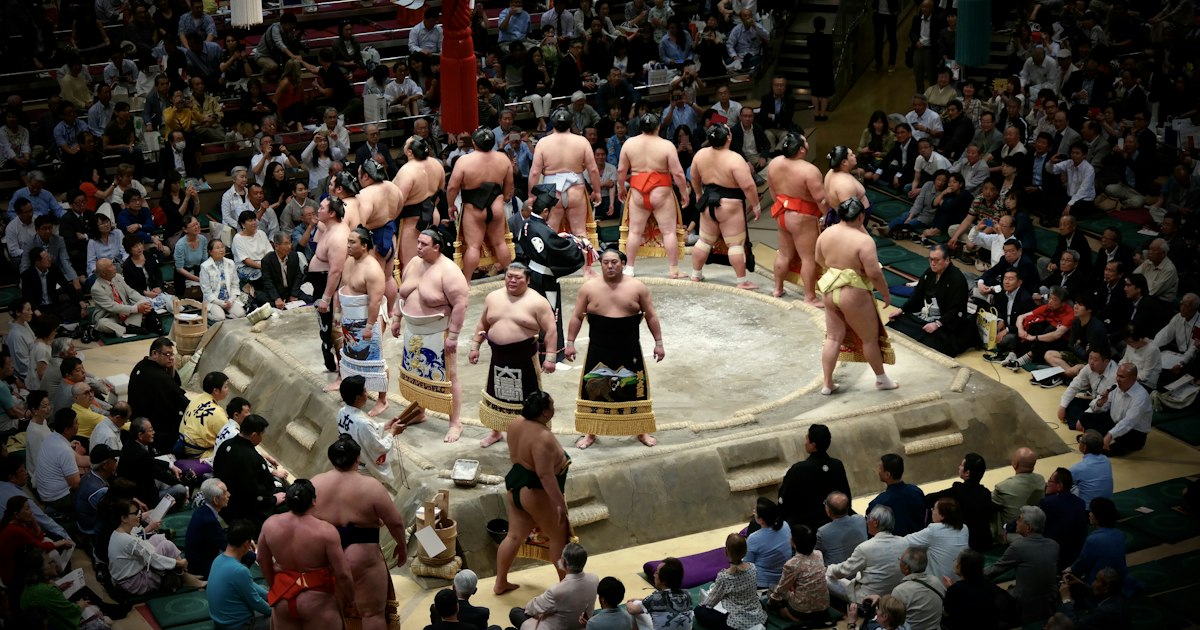
    Long before the first tourist steps into Ryogoku Kokugikan, sumo wrestlers are already at work. Asa-geiko, or morning practice, is where the sport actually happens — hours of drilling, sparring, and conditioning that start as early as 5:30 or 6:00 AM and wrap up by mid-morning. Watching it is one of the few ways to see sumo up close, in near silence, without a ticket to a tournament. Here’s how to actually do it in Tokyo, what it costs, and how not to get politely thrown out.

    What Is Asa-geiko, and Why Watch It

    Every sumo stable (heya) runs its own training schedule, but the general rhythm is the same: junior wrestlers arrive first and drill basic movements, then senior and top-division wrestlers join for bout-style sparring on the clay dohyo, all under the eye of the stablemaster. There’s no music, no announcer, no crowd noise — just the slap of hands on skin, bare feet on clay, and the occasional short correction shouted by the coach. It’s a completely different experience from the pageantry of a tournament day, and for many visitors it’s the more memorable of the two because you’re watching training, not performance.

    The Free Option: Arashio Stable’s Street-Side Window

    Arashio-beya, in Nihonbashi-Hamacho (Chuo-ku), is the one stable in Tokyo that welcomes the general public without a reservation, a fee, or an introduction. The stable has a floor-to-ceiling window facing the street, and on training mornings you can simply stand on the sidewalk and watch. Practice generally runs from around 7:30 or 8:00 AM, though exact times shift with the stable’s schedule, and there’s no charge at all.

    The catch: it’s first-come, first-served, standing-room, and entirely dependent on whether the wrestlers are actually in Tokyo and training that day (more on timing below). There’s no printed schedule for tourists, so check the stable’s own website or ask your hotel concierge the same week you plan to go. Keep quiet, don’t use flash photography, and don’t block the sidewalk for residents — this is a public street, not a designated viewing area.

    Booking a Guided Morning Practice Tour

    Most other stables don’t take walk-in foreign visitors — stablemasters are training athletes, not running a tourist attraction, and few speak English. The practical way in is through a small-group tour operator that has an existing relationship with a specific stable. These run in a few tiers:

    • Budget: The Arashio window above — 0 JPY, no booking needed.
    • Mid-range: Small-group guided tours to a cooperating stable, typically around 8,000–12,000 JPY per person, usually including an English-speaking guide, a background briefing on sumo culture, and transport logistics from a meeting point near Ryogoku Station.
    • Splurge: Tours bundled with a chanko nabe lunch, sometimes at a restaurant run by a retired wrestler, or private/small-private tours with a dedicated interpreter — these commonly run 15,000–25,000 JPY per person.

    Group sizes are small by design (often 4–8 people), so book at least a week or two ahead — longer if your trip falls near a tournament, when demand spikes and some stables reduce visitor access altogether.

    When to Go: Timing Around the Tournament Calendar

    Tokyo hosts three of sumo’s six annual grand tournaments (honbasho) at Ryogoku Kokugikan: January, May, and September. This calendar matters enormously for asa-geiko: during the 15 days of a tournament itself, wrestlers compete at the Kokugikan and don’t hold practice at the stable, so there’s nothing to see. Right after a tournament ends, many stables give wrestlers several days of rest, and practice can be light or paused.

    The best window is the run-up to a tournament — roughly the three to six weeks before a Tokyo honbasho — when training intensifies and stables are in full keiko mode. If your trip lines up with early-to-mid December, April, or August, you’re timing it well. Outside of the three Tokyo tournaments (the other three are held in Osaka, Nagoya, and Fukuoka), some Tokyo stables still train but on a lighter schedule, so confirm before building your morning around it.

    Getting to Ryogoku and Nihonbashi-Hamacho

    Ryogoku Station, served by both the JR Sobu Line and the Toei Oedo Line, is the anchor for the sumo district — about 10 minutes from Akihabara and 25–30 minutes from Shinjuku. Most sumo stables cluster within a 10–15 minute walk of the station in Sumida ward. Arashio Stable is the exception: it’s across the Sumida River in Chuo ward, closer to Ningyocho Station (Hibiya Line or Toei Shinjuku Line) than to Ryogoku, roughly a 15-minute walk between the two if you want to combine both areas in one morning.

    Because practice starts so early, plan your route the night before — trains before 7 AM in Tokyo are reliable but infrequent compared to rush hour, and there’s no recovering a missed morning session; stables don’t repeat practice later in the day.

    Etiquette Rules and Common Mistakes

    The single biggest mistake visitors make is treating this like a show. It isn’t — you’re a guest observing a professional athlete’s training session, and stablemasters will end a visit early if visitors are disruptive. Ground rules that apply almost everywhere:

    • Total silence. No talking, no phone sounds, during active practice.
    • No flash photography and, at many stables, no video at all — confirm with your guide or check signage.
    • No eating or drinking while observing.
    • Remove hats if you’re seated indoors at a stable.
    • Sit where you’re told and don’t point your feet toward the dohyo — follow your guide’s seating instructions exactly.
    • Arrive 15–30 minutes early. Doors or the best window spots fill up, and latecomers can be turned away.

    The second most common mistake is assuming asa-geiko happens every single day of the year — it doesn’t, for the calendar reasons above — and showing up to a dark, empty stable window.

    After the Practice: Chanko Nabe and More

    Once practice wraps up, the Ryogoku area is full of chanko nabe restaurants, many run by former wrestlers, serving the same hearty hot-pot stew that fuels sumo training. Lunch sets typically run 1,500–3,000 JPY, and quite a few restaurants display plastic food models in the window so you can choose your bowl before sitting down — a good moment to recognize the craft behind those displays, covered in our guide to Sampuru: Japan’s Plastic Food Replicas and Where to Buy Them. If a chanko lunch stretches into an evening out, a set of traditional cups is a nice way to keep the trip going at home — see our guide to sake cups and tokkuri. And if the disciplined, ritual side of sumo appeals to you, it pairs well with another slow, tradition-bound Japanese pastime — our guide to shogi and go sets is worth a look before you leave the neighborhood.

  • Fugu: Japan’s Pufferfish Dish and Where to Eat It Safely

    Fugu: Japan’s Pufferfish Dish and Where to Eat It Safely

    Photo by Dan Gold on Unsplash

    Fugu, Japan’s famously poisonous pufferfish, has a reputation that scares off almost as many travelers as it attracts. The truth is that eating fugu in Japan is remarkably safe — safer, statistically, than the fugu horror stories suggest — as long as you eat it where you’re supposed to: a licensed restaurant. This guide covers how the licensing system actually works, when to go for the best fish, where to eat it in the cities that do it best, and what a meal will realistically cost you.

    Why Fugu Has a Reputation for Danger

    Pufferfish carry tetrodotoxin, a neurotoxin concentrated in the liver, ovaries, skin, and intestines, with none in well-prepared muscle meat. There’s no antidote, and a lethal dose can be smaller than a grain of rice. That’s the scary part. The reassuring part is that Japan has regulated fugu preparation since the 1950s: every chef who serves fugu to the public must pass a prefectural licensing exam that includes a practical test — correctly identifying and removing the toxic organs from a live fish within a time limit, on top of written questions on toxicology and law. Restaurants must display their license, and the toxic parts are collected and disposed of under supervision, not just thrown in a regular kitchen bin. Fatalities now almost always trace back to amateurs who catch and prepare their own fugu, not licensed restaurants.

    Best Season and Where Fugu Comes From

    Fugu season runs roughly October through March, peaking in the coldest months of December through February, when the fish is fattiest and the flesh firms up for the paper-thin sashimi style called tessa. Some restaurants serve farmed fugu year-round, but if you want the traditional winter experience, plan a trip between November and February. Torafugu (tiger pufferfish) is the premium species and the one most associated with high-end kaiseki-style fugu courses. Shimonoseki, at the western tip of Honshu facing Kyushu across the Kanmon Strait, handles the vast majority of Japan’s fugu — an estimated 70-80% of the domestic catch passes through its Karato Market, where you can watch the fugu auction (best viewed on weekend mornings, roughly 8:00–10:00) and buy fugu-based snacks and sashimi sets directly from market stalls for a few thousand yen.

    Where to Eat Fugu Safely: City by City

    Shimonoseki is the spiritual home of fugu and the cheapest place to try it well. Around Karato Market and the nearby Kaikyo Yume Tower area, casual fugu restaurants serve set lunches. It’s also an easy day trip from Fukuoka — if you’re building out a Kyushu food itinerary, it pairs naturally with a stop for motsunabe in Fukuoka.

    Osaka is the most tourist-friendly fugu city. Dotonbori’s Zuboraya chain (look for the giant illuminated fugu lantern sign) has served fugu since 1920 and offers approachable set courses without requiring reservations weeks in advance. Osaka diners even have a local pun for it: fugu is nicknamed “teppo” (pistol) because eating it is supposedly a gamble — “hit and you die.” It’s said with a grin, not a warning.

    Tokyo has fugu at every price point, from casual izakaya-style spots in Shinjuku and Shimbashi to formal ryotei in Ginza and Akasaka where a full-course kaiseki fugu dinner can run well over ¥20,000 per person. Reservations matter more here — call or book online at least a few days ahead for dinner, especially December through February.

    What to Order and What It Costs

    A typical fugu course (fugu course or fugu kaiseki) moves through several stages, and most restaurants offer set menus rather than à la carte ordering, which makes budgeting easy:

    • Tessa — paper-thin raw fugu sashimi, arranged in a chrysanthemum or crane pattern on a large plate, often with ponzu and grated daikon-chili (momiji oroshi).
    • Fugu-kara-age — deep-fried fugu, a crowd-pleasing way to try it if raw fish isn’t your thing.
    • Fugu-chiri (or tecchiri) — a hot pot with fugu, tofu, and vegetables, typically the meal’s centerpiece.
    • Zosui — a rice porridge cooked at the end in the leftover hot pot broth, considered the proper way to finish the meal.
    • Hire-zake — warm sake with a toasted, dried fugu fin steeped in it; smoky and worth trying at least once.

    Budget guide: a casual lunch set with tessa and tempura runs roughly ¥3,000–5,000. A mid-range dinner course with tessa, hot pot, and zosui is typically ¥8,000–15,000 per person. Splurge-tier kaiseki courses at top ryotei, especially in Tokyo or Kyoto, start around ¥20,000 and can climb past ¥40,000 with premium torafugu and sake pairings. If you want to sip your hire-zake properly at home afterward, a small ceramic tokkuri set makes a nice souvenir — see our guide to sake cups and tokkuri for what to look for.

    Common Mistakes to Avoid

    • Never buy fugu from an unlicensed source. This mainly applies if you’re tempted to try preparing it yourself from a market purchase abroad or from a non-restaurant vendor in Japan — don’t. Licensed restaurants are the only safe way to eat it.
    • Don’t assume every seafood restaurant serves it. Fugu licensing is separate from general food service permits, so not every sushi or izakaya spot is authorized, even in fugu-heavy regions. Look for the fugu lantern sign or ask before sitting down.
    • Skip walk-in dining for dinner in peak season. December and January weekends book up, particularly in Tokyo and Osaka’s better-known restaurants — reserve ahead rather than showing up hoping for a table.
    • Don’t expect a strong “fishy” flavor. Fugu is prized for its clean, faintly sweet taste and springy texture rather than bold flavor — if you’re expecting something dramatic, the appeal is really in the ritual and the chef’s knife skill, not the taste alone.
    • Fugu liver (kimo) is illegal to serve in restaurants nationwide, even though some regions historically ate it and old-timers may talk about it fondly. Any restaurant offering you fugu liver is breaking the law — treat it as a red flag, not a delicacy to seek out.

    A Few Practical Notes for Visitors

    Many fugu specialty restaurants are small, counter-style operations with limited English menus, so it helps to recognize the set-course names above before you go. Fugu restaurants often display plastic food models in the window — the same sampuru replicas found outside restaurants nationwide — which makes it easy to point at the course you want even without shared language. If you’re building a broader “adventurous eating” itinerary through western Japan, fugu pairs well with a stop for basashi in Kumamoto further south in Kyushu.

    Fugu isn’t a stunt food — treated properly, it’s a genuinely refined, seasonal dish that Japanese diners take seriously enough to regulate by law. Eat it at a licensed restaurant, go in winter if you can, and you’ll come away understanding why people keep coming back for it.

  • Calbee & Regional Potato Chip Flavors: A Snack-Hunting Guide Across Japan

    Calbee & Regional Potato Chip Flavors: A Snack-Hunting Guide Across Japan

    Photo by Josh Marty on Unsplash

    If you’ve only ever eaten Calbee’s Consommé Punch or Shiawase Butter chips from an import shop back home, you’ve tasted maybe two percent of what the company actually makes. Calbee, Japan’s biggest potato chip maker since it launched the category in 1975, runs a sprawling network of region-limited flavors sold only in certain prefectures, at certain airports, or on certain highway service areas. Hunting them down has become a genuine souvenir sport for visitors — cheap, packable, and a much better story than another keychain. Here’s how to actually find them.

    Why Calbee Makes Regional-Only Flavors

    Japan’s omiyage (souvenir gift) culture rewards products that can’t be bought just anywhere. Calbee leans into this hard, producing chip flavors tied to a specific prefecture’s food identity and distributing them almost exclusively within that region, in airport shops, or in station gift kiosks. It’s the same logic behind region-only Kit Kats, and it means a bag of chips can double as proof you actually went somewhere. The flavors also skew savory rather than sweet, so they work as a snack on the train home, not just a gift to leave unopened on a shelf.

    Where to Actually Find Them

    Four channels cover almost everything:

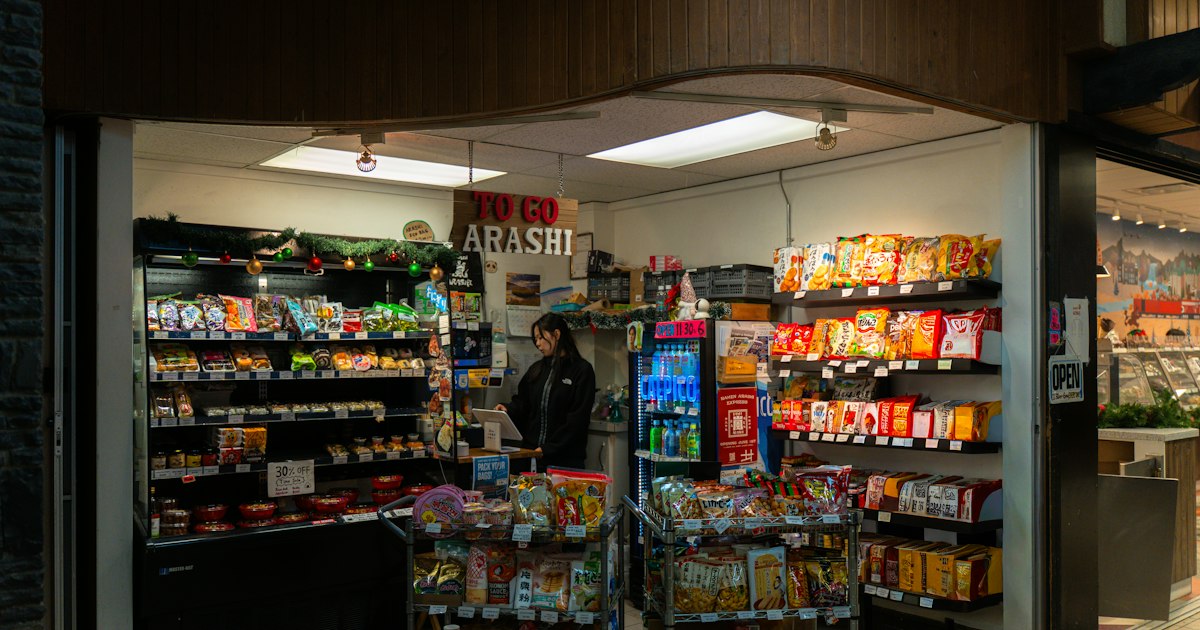
    • Convenience stores (konbini) in the region itself — 7-Eleven, Lawson, and FamilyMart stock local Calbee flavors alongside the national lineup, usually for ¥150–¥190 a standard bag.
    • Airport shops — domestic terminals (Shin-Chitose, Fukuoka, Kansai, Haneda’s regional gift corners) sell boxed multi-packs of nearby-prefecture flavors, typically ¥600–¥1,200 for 5–10 mini bags, aimed squarely at travelers who won’t be back.
    • Highway service areas (SA/PA) — if you’re on a road trip or bus tour, these often carry flavors you won’t find in city konbini at all.
    • Calbee Plus stores — a small chain of Calbee-branded shops (Tokyo Solamachi at Tokyo Skytree Town is the most visitor-accessible one) selling freshly fried chips and store-exclusive flavors you can’t get in bags anywhere else. Solamachi keeps roughly standard mall hours, around 10:00–21:00, but always check the shop directly since food-floor hours can run later or shorter than the mall’s.

    Department store depachika basement food halls are worth a scan too — they sometimes carry the boxed gift versions even outside the home region, at a markup.

    A Region-by-Region Flavor Map

    Flavors rotate and get discontinued without warning, so treat this as a hunting guide rather than a checklist — but these are the pairings Calbee has leaned on for years:

    • Hokkaido — butter, milk, and shoyu-butter flavors dominate, echoing the island’s dairy and lamb-heavy food culture; if you’re already tasting your way through Hokkaido’s grilled lamb scene, read our Jingisukan guide for where to eat the real thing before you snack on the chip version.
    • Kyushu / Fukuoka — mentaiko (spicy cod roe) and tonkotsu-style flavors show up around Fukuoka airport and Hakata Station, playing off the same broth culture behind the region’s motsunabe hot pot.
    • Yamanashi / Chubu — miso-forward flavors turn up around the Fuji Five Lakes and Kofu area, in the same spirit as the region’s hoto noodle soup.
    • Shikoku / Ehime — citrus (yuzu, iyokan) flavors are common around Matsuyama; pair a bag with a soak at Dogo Onsen if you’re in the area.
    • Kansai — okonomiyaki and takoyaki-sauce flavors around Osaka lean into the city’s street-food identity.
    • Tohoku — regional soy sauce and miso variations appear here too, often more pungent and less sweet than the Kanto norm.

    Best Season and Timing to Chip-Hunt

    Two timing factors matter more than region. First, Calbee runs seasonal limited flavors nationwide on top of the regional ones — sweet potato and matsutake-adjacent flavors in autumn, yuzu or citrus around winter, and occasional sakura-tinted spring editions. Stack a regional trip with the right season and you’ll find double the variety on the shelf. Second, buy early in your trip, not on the last day: region-limited stock at small konbini can sell out, especially near train stations during peak travel weekends, and airport gift shops sometimes run low on the most popular boxed sets by evening flights. If you spot a flavor you like, grab it — don’t assume you’ll see it again at the next stop.

    Budget, Mid-Range, and Splurge Options

    Budget (¥150–¥200): A single standard bag from a local convenience store — the cheapest way to try a flavor, and honestly the freshest, since konbini turn over stock fast.
    Mid-range (¥600–�¥1,200): Boxed airport multi-packs with 5–10 individually wrapped mini bags, several flavors per box — the easiest option if you’re buying gifts for a group back home and want everything sealed for the flight.
    Splurge (¥1,500+): Calbee Plus store-exclusive fresh-fried chips or large collector gift tins, sold only at the flagship shops — not cheap for what’s inside, but genuinely unavailable anywhere else.

    Common Mistakes to Avoid

    • Assuming Tokyo has everything. It doesn’t. Regional flavors are deliberately kept out of the capital’s convenience stores to preserve their souvenir value — you generally need to be in or near the source prefecture, or catch the airport version.
    • Buying only at the airport on departure day. Airport prices run higher than konbini, and popular boxes sell out by late afternoon during busy travel seasons. Buy a few in-region first, then top up at the airport if needed.
    • Packing chips in a checked bag without cushioning. Bags puff up with air for freshness and crush easily; wrap them in clothing or keep them in a carry-on if you’re bringing several home.
    • Skipping the small print on weight limits. If you’re buying a dozen boxes as gifts, they add up in both weight and bulk — factor this in alongside anything else you’re packing, especially if you’re also bringing back fragile souvenirs.

    Final Tip

    Treat Calbee flavor-hunting the way you’d treat any regional food specialty in Japan: as a reason to get off the well-trodden Tokyo–Kyoto–Osaka line, not just something to grab at Narita on the way out. The chips are inexpensive, they don’t need refrigeration, and unlike most souvenirs, everyone actually uses them the moment they get home.