Japan Trove

Author: JapanTrove Editorial

  • Zaru Soba Etiquette: How to Order and Slurp Japan’s Cold Noodles

    Zaru Soba Etiquette: How to Order and Slurp Japan’s Cold Noodles

    Photo by Michael Lee on Unsplash

    On a humid August afternoon in Tokyo, walking into an air-conditioned soba shop and being handed a bamboo tray of glistening cold noodles feels like a small miracle. Zaru soba — chilled buckwheat noodles served on a bamboo mat with a dipping sauce — is one of Japan’s simplest and most affordable dishes, but it comes with a surprising number of unwritten rules. Get them right and you’ll eat like a local; get them wrong and you’ll still enjoy the noodles, just with a few curious glances from the counter staff. Here’s what to actually do.

    What Zaru Soba Is (and How It Differs from Mori Soba)

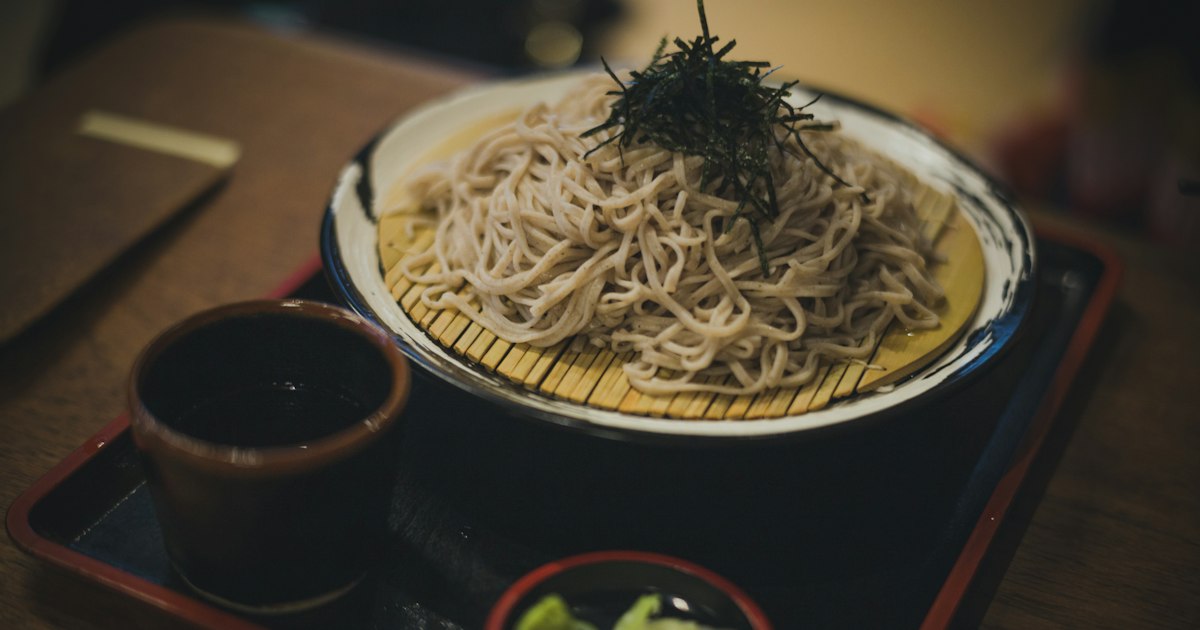
    Soba noodles are made from buckwheat flour, giving them a gray-brown color and a nutty, slightly earthy flavor that’s distinct from wheat-based udon or ramen. Zaru soba is the cold version: noodles are boiled, rinsed in cold water to firm them up and stop the cooking, then piled onto a bamboo-slatted tray called a zaru. You dip small bunches into a cold, concentrated sauce called tsuyu before eating.

    You’ll often see “mori soba” on the same menu, usually 50–100 yen cheaper. The only real difference is that zaru soba comes topped with a pinch of shredded nori (seaweed), while mori soba doesn’t. Some shops also offer “seiro soba,” an older term for essentially the same dish, named after the steaming tray noodles were historically served on. Don’t overthink the naming — if a shop has several similar names on the menu, the cold basic version is what you want in summer.

    Where and When to Order It

    Zaru soba is a warm-weather food. It appears on menus year-round, but it’s genuinely at its best from June through September, when the cold noodles offer relief from Japan’s heat and humidity. Many shops actually swap in hot soba (kake soba or tanuki soba) as their default recommendation once autumn arrives, though zaru soba remains available. If you visit in December or January, don’t be surprised if a shop suggests a hot bowl instead — it’s not a mistake, just a seasonal nudge.

    For lunch, standalone soba shops (sobaya) are everywhere near train stations, and many open around 11:00 and close their kitchens by 15:00 or so before reopening for dinner around 17:00–20:00. Standing soba stalls inside train stations — quick, cheap, and popular with commuters — serve continuously through the day and are worth trying if you’re catching a train and want a fast, authentic bite. Chain shops like Fuji Soba, Yudetaro, and Komoro Soba are reliable, inexpensive, and often open very late, sometimes 24 hours in busy areas like Shinjuku or Shibuya.

    Reading the Menu and What to Order

    A basic plate of zaru soba typically costs 500–900 yen at a standing counter or chain shop, and 900–1,500 yen at a proper sit-down sobaya. Specialty or artisanal soba restaurants using stone-ground, freshly made noodles can run 1,500–3,000 yen for a modest plate — you’re paying for the noodle quality and the craft, not a bigger portion.

    • Budget (500–900 yen): Station stand-and-eat counters and casual chains. Fast, no-frills, good for a quick lunch between sightseeing stops.
    • Mid-range (900–1,500 yen): Neighborhood sobaya, often family-run, with better noodle texture and homemade tsuyu.
    • Splurge (2,000 yen+): Restaurants specializing in te-uchi soba (hand-cut noodles), sometimes served as a tasting course with tempura on the side, pushing the total to 3,000–5,000 yen.

    A common add-on is “soba-yu” — the hot, starchy water the noodles were boiled in. After finishing your noodles, the server (or a pot left at your table) offers it so you can pour it into your leftover tsuyu and drink it like a light broth. This is standard practice at proper soba restaurants, not something you need to request, though at fast chains it may not be offered at all.

    How to Dip and Eat Zaru Soba

    The tsuyu is meant to be strong and salty on its own — it’s designed to be used as a dip, not a soup to submerge the noodles in. Pick up a small bundle of noodles with your chopsticks (roughly a bite or two’s worth, not a huge clump), dip just the bottom third to half into the sauce, and eat. Dunking the entire bundle makes the dish overwhelmingly salty and is one of the most common mistakes visitors make.

    If condiments like wasabi, grated daikon, or chopped scallion are provided on a small side plate, add a small amount directly into your tsuyu cup rather than onto the noodles themselves. Mix it in gradually and taste as you go — you can always add more, but you can’t take it out.

    Slurping: Why It Happens and Whether You Should Do It

    Slurping noodles audibly is genuinely normal in Japan and isn’t considered rude the way it might be elsewhere. It serves a practical purpose too: pulling air in while eating helps cool the noodles slightly and is said to enhance the aroma of the buckwheat as it passes over your palate. You don’t need to force loud slurping to seem polite — plenty of Japanese diners eat soba quietly — but you also shouldn’t feel embarrassed if a slurp slips out. What does read as unusual is eating soba very slowly; it’s traditionally a fast, casual food, and lingering excessively over a cold plate that’s meant to be eaten while still cool can look odd in a busy shop.

    Other small points of etiquette: it’s fine to hold the tray and tilt it slightly toward you toward the end to gather the last noodles, and you don’t need to finish every drop of the dipping sauce. Tipping isn’t expected anywhere in Japan, including soba shops.

    Common Mistakes to Avoid

    • Over-dipping: submerging the whole noodle bundle in tsuyu, resulting in an overly salty bite.
    • Ordering zaru soba expecting a large meal: portions are intentionally light; if you’re hungry, pair it with a side of tempura (tenzaru soba combines both, usually 1,200–2,000 yen) or a side of rice.
    • Skipping the soba-yu: at sit-down restaurants, not trying the noodle water at the end means missing part of the intended experience.
    • Assuming all “soba” is cold: if you want the chilled version, look specifically for “zaru,” “mori,” or “seiro” on the menu — plain “soba” listings are often the hot version by default.

    Zaru soba pairs naturally with other quick, casual Japanese dining experiences worth trying on the same trip — if you’re building out a food-focused itinerary, dishes like karaage or a visit to Fukuoka’s yatai food stalls make good companions to a soba lunch. For evenings, a stop at a tachinomi standing bar follows the same unpretentious, quick-service spirit that makes soba shops so easy to enjoy as a visitor.
  • Karaage: Japan’s Fried Chicken and Where to Find the Best

    Karaage: Japan’s Fried Chicken and Where to Find the Best

    Photo by You Le on Unsplash

    Ask any resident of Japan what they’d want for their last meal, and karaage will come up more often than sushi. This deep-fried, marinated chicken — crunchy outside, juicy inside — shows up at izakayas, convenience stores, train station bento counters, and dedicated specialty shops from Hokkaido to Okinawa. It’s cheap, fast, and endlessly variable. Here’s how to understand what you’re eating and where to track down the versions worth a detour.

    What makes karaage different from “fried chicken”

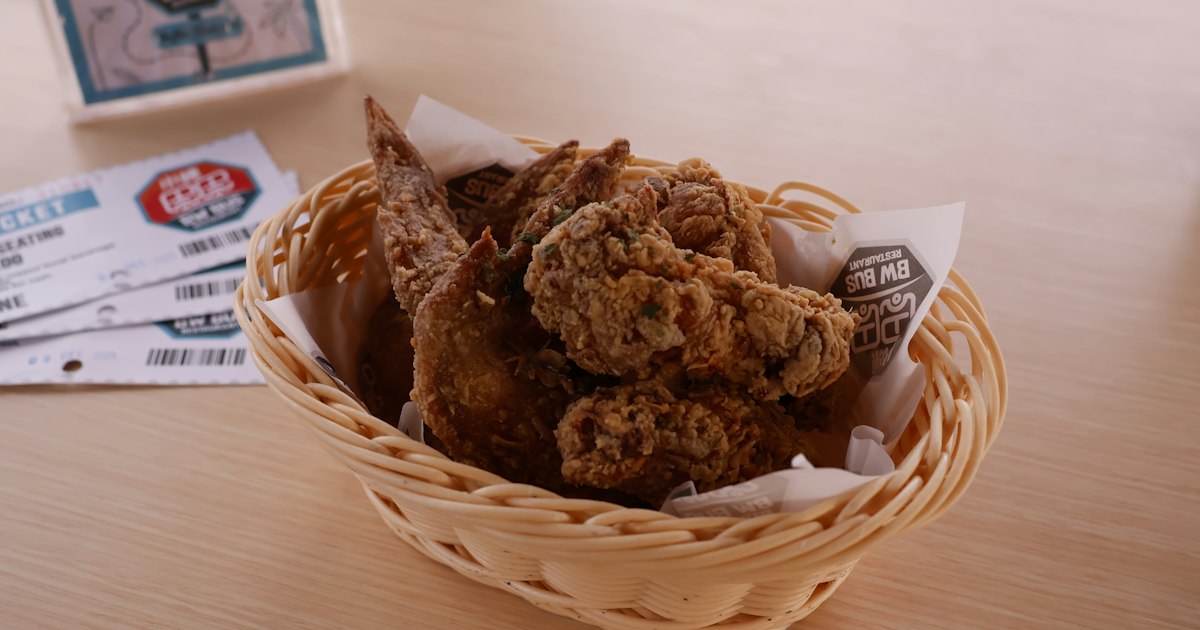
    Karaage (唐揚げ) refers to bite-sized pieces of chicken — usually thigh, sometimes breast — marinated before frying, rather than battered and fried like Western-style fried chicken or coated in a thick tempura batter. The marinade is the heart of the dish: soy sauce, sake, grated ginger, and garlic are the base, sometimes with a touch of sesame oil or sugar. The chicken is then dusted lightly in potato starch (katakuri-ko) or a wheat-starch blend, which fries up thinner and craggier than flour, giving karaage its signature shattering crust without a heavy shell. Double-frying at a lower then higher temperature is common at serious shops, which is why the best karaage stays crisp even after it cools — a trait that matters a lot once you realize how often it’s eaten as takeout or in a bento.

    Where to eat it: budget, mid-range, and splurge

    Budget (¥100–¥400): Convenience stores (7-Eleven, Lawson, FamilyMart) sell hot karaage from a heated case near the register — usually 2-3 pieces for around ¥200–¥300. It’s genuinely decent and a great late-night or train-platform snack. Supermarket deli counters sell trays of 4-6 pieces for ¥300–¥500, often fried fresh in the afternoon before dinner rush.

    Mid-range (¥600–¥1,200): This is where dedicated karaage specialty shops and izakayas shine. A standard izakaya order of 5-6 pieces runs ¥600–¥900 and pairs naturally with a cold beer — if you want to see how locals structure a casual drinking session around small fried and grilled plates, it’s worth reading about tachinomi standing bars, where karaage is a standard order alongside a quick glass of something cold. Fast-casual karaage-don (fried chicken over rice) at chain shops like Karayama or Karaage Bou runs ¥600–¥800 for a full meal.

    Splurge (¥1,500 and up): Some izakayas and specialty restaurants use branded regional chicken (jidori) — Nagoya Cochin, Satsuma jidori, or Awa Odori Chicken from Tokushima — fried to order in small batches. Expect ¥1,500–¥2,500 for a plate at a proper sit-down restaurant specializing in this. It’s a noticeably different texture: firmer bite, more chicken flavor, less filler.

    Regional karaage worth traveling for

    Karaage has genuine regional identity in Japan, and a few places have built reputations around it:

    • Nakatsu, Oita (Kyushu): Widely considered the spiritual home of modern karaage specialty shops, with dozens of takeout counters competing on marinade recipes. If you’re routing through Kyushu, Fukuoka is the natural base — and while there, don’t miss the open-air food stalls covered in our guide to Fukuoka’s yatai food stalls in Nakasu, several of which serve excellent karaage alongside ramen and yakitori.
    • Kochi, Shikoku: Known for “tosa jiro” chicken karaage with a garlic-forward marinade, often sold as street food.
    • Tokushima: Home to Awa Odori Chicken, a branded local breed used in upscale karaage. If your trip includes the summer dance festival, pairing a visit with the food scene is easy — see our guide to Awa Odori and how to join in.

    How to order and what to look for

    Most karaage specialty shops (look for signs reading 唐揚げ専門店) sell by weight or by piece count, typically in 100g increments (around ¥250–¥350 per 100g). You’ll often be asked to choose a sauce or flavor: shio (salt), shoyu (soy, the classic), mayo, or spicy mayo. If it’s your first time, order plain shoyu or shio to taste the marinade itself before branching out. At izakayas, karaage usually arrives with a wedge of lemon and Kewpie mayonnaise on the side — squeezing lemon directly on someone else’s portion without asking is a minor faux pas, so squeeze onto your own plate or ask first.

    Common mistakes to avoid

    • Ordering it stone cold from a convenience store fridge: Always check it’s from the heated case (hot snack counter), not the refrigerated sandwich shelf — cold, pre-packaged karaage is a different, much worse product.
    • Assuming all karaage is the same: Breast-meat karaage (mune) is leaner and drier; thigh (momo) is the standard for juiciness. If a menu doesn’t specify, thigh is the safer default.
    • Skipping takeout because you think it won’t stay crisp: Good karaage shops fry to order specifically because it travels well — it’s a legitimate option for a train journey or a hotel room dinner, unlike most fried foods.
    • Not asking about spice level: Some shops offer a chili-spiked version (karashi or piri-kara) that can be much hotter than expected — ask if you’re unsure.

    Best timing and practical tips

    Karaage isn’t seasonal — it’s a year-round, any-time-of-day food — but freshness windows matter more than season. Supermarket deli counters restock hot trays around 5-6pm for the dinner rush, so that’s the best window for fresh, never-sat-under-a-heat-lamp pieces. Specialty takeout shops near stations tend to have lines forming around lunch (12-1pm) and again in early evening; arriving right after opening (many open around 10-11am) avoids both. Most standalone karaage shops don’t take reservations and are cash-friendly but increasingly accept IC cards like Suica and Pasmo. If you’re building out a broader food itinerary around Japan’s regional specialties, it’s worth also looking at dishes tied to a specific place and season, like the firefly squid season in Toyama or Nagoya’s hitsumabushi — karaage travels well as an anytime anchor between more time-sensitive food stops.

  • Koenji: Tokyo’s Vintage Clothing & Punk Rock Neighborhood

    Koenji: Tokyo’s Vintage Clothing & Punk Rock Neighborhood

    Photo by Ivan Yurkin on Unsplash

    While tour buses idle outside Harajuku, Koenji quietly gets on with being Tokyo’s real vintage-clothing capital. This low-rise neighborhood in Suginami Ward, about ten minutes west of Shinjuku, has spent five decades collecting secondhand clothing dealers, punk and hardcore live houses, and a街-level DIY energy that Shimokitazawa’s gentrification has largely traded away. There’s no single “sight” to check off — the appeal is wandering narrow arcades, flipping through 500-yen bins and rare Levi’s alike, and ending the night in a sweaty basement club. Here’s how to do it properly.

    Where Koenji Is and How to Get There

    Koenji Station is on the JR Chuo-Sobu Line, the orange local (each-station) train — about 10 minutes from Shinjuku and 4 minutes from Nakano. From Tokyo Station, a direct local train takes roughly 25–30 minutes; alternatively, ride the faster Chuo Rapid Line to Nakano or Shinjuku and transfer to the local line, since most rapid services don’t stop at Koenji. There’s no need for a taxi or bus — everything worth seeing is within a 10-minute walk of the station’s north and south exits.

    The neighborhood splits cleanly: the north side (Kitaguchi) has the PAL and Look shopping arcades plus the famous “Kitakore” building, a cluster of tiny punk and vintage boutiques stacked on top of each other; the south side (Minamiguchi) is quieter, with more record shops, cafes, and standing bars tucked into back alleys.

    Vintage Shopping: Where to Dig for Treasure

    Koenji has an unusually high density of used-clothing stores for a neighborhood this size — easily 50+ shops within a 15-minute walk. A few reliable anchors:

    • Kinji Used Clothing — a long-running secondhand chain (also in Harajuku and Shimokitazawa) with a huge, densely packed Koenji branch. Basic tees and shirts start around 500–1,500 yen; jackets and outerwear run 2,000–6,000 yen.
    • Flamingo — another chain staple, strong on Americana, work jackets, and band tees, similarly priced to Kinji.
    • Kitakore Building — a ramshackle multi-story building on the north side housing a handful of independent punk-fashion and one-of-a-kind vintage shops. Prices here skew higher and more curated — think 5,000–30,000 yen for standout pieces like military surplus, leather, or rare band merch.

    Budget for a full afternoon: 3,000–8,000 yen gets you a couple of solid finds at the chain stores. Mid-range shoppers hunting curated vintage denim, band tees, or 90s streetwear should expect 5,000–20,000 yen per item. Splurge territory — rare vintage Levi’s (pre-1970s), original tour merch, or vintage designer pieces — can run 20,000–100,000+ yen at the more specialized boutiques.

    Cash matters here: many of the smaller independent shops are cash-only or have low card minimums, so carry at least 10,000–15,000 yen in cash if you’re planning to buy. Convenience store ATMs (7-Eleven, Family Mart) near the station accept foreign cards.

    Most vintage shops open around 12:00–13:00 and close by 20:00, and quite a few keep irregular closing days (futeikyū), especially midweek. If you’re making a special trip for one specific shop, check its Instagram or Twitter/X the morning of — hours shift often and aren’t always reflected on Google Maps.

    The Punk Rock Scene: Live Houses and Record Shops

    Koenji has been a punk and underground-rock hub since the late 1970s, and it still hosts a cluster of small live houses (raibuhausu) within a few blocks of the station — venues like UFO CLUB, 20000V, and Koenji SHOW BOAT regularly book local punk, hardcore, and garage-rock acts. Tickets for a weeknight show typically run 2,000–3,500 yen, often with an additional one-drink charge (500–700 yen) paid at the door. Shows usually start early by Western standards — doors around 18:00–19:00 — so you can catch a set and still make a late train home.

    Alongside the live houses, Koenji has a strong scattering of used-record shops specializing in vinyl — punk, rockabilly, reggae, and Japanese underground pressings are all easy to find, often at better prices than the bigger record stores in Shibuya or Shimokitazawa.

    Koenji Awa Odori: Tokyo’s Biggest Street Dance Festival

    If you can time your visit for the last weekend of August, Koenji hosts its Awa Odori — a dance festival modeled on the original event from Tokushima, and now one of the largest in the Kanto region, drawing well over a million spectators across two days. Dozens of dance troupes (ren) in traditional costume parade through the shopping streets to taiko drums and shamisen, and the whole neighborhood turns into a street party. It’s free to watch from the sidelines, though the best viewing spots along the main route fill up fast — arrive at least an hour before a parade slot if you want a clear view. For background on the original festival this one draws from, see our guide to Awa Odori in Tokushima.

    Best Time to Visit and Practical Tips

    Weekday afternoons (roughly 13:00–17:00) are the quietest time to browse shops without crowds. Weekends bring more foot traffic and more shops staying open into the evening, which is useful if you also want to catch a live show. Avoid the very end of December through early January — a large share of small independent shops close for New Year’s, sometimes for a week or more.

    Aside from Awa Odori weekend, Koenji doesn’t get uncomfortably crowded, and there’s no need to book anything in advance for shopping. If you’re staying out late for a show and don’t want to worry about the last train, Koenji is close enough to Shinjuku that a manga kissa near the station makes a cheap, workable overnight fallback.

    Common Mistakes to Avoid

    • Showing up before noon — most vintage shops simply aren’t open yet, and you’ll be stuck looking at shuttered doors.
    • Confusing Koenji with Shimokitazawa — both are vintage-shopping neighborhoods on rail lines out of Shinjuku, but Koenji is grittier, cheaper, and more punk-focused, while Shimokitazawa has become more polished and theater-adjacent. If you only have time for one and want the rawer, less touristy experience, pick Koenji.
    • Assuming cards work everywhere — bring cash, especially for the smaller independent boutiques.
    • Skipping the arcades off the main street — the PAL and Look shopping streets get the foot traffic, but some of the best-priced finds are in the quieter alleys branching off them.

    Where to Eat and Drink After Shopping

    Koenji’s south side has a good concentration of cheap izakaya and standing bars, a great fit if you want a quick, casual drink between shops or before a live show — our guide to tachinomi standing bar culture covers the etiquette if you haven’t tried one. Expect to spend 1,500–3,000 yen for a couple of drinks and small plates at a typical standing bar here, noticeably cheaper than equivalent spots in Shinjuku or Shibuya.

    Koenji rewards slow wandering more than a checklist. Budget half a day minimum, wear comfortable shoes for uneven arcade pavement, and don’t be afraid to duck into shops that look closed-for-business from the outside — in this neighborhood, that’s often just the aesthetic.

  • Rebun & Rishiri: Hokkaido’s Remote Flower Islands Off Wakkanai

    Rebun & Rishiri: Hokkaido’s Remote Flower Islands Off Wakkanai

    Photo by Mesut Kaya on Unsplash

    At the very top of Japan’s map, past where the trains stop making sense and the phone signal gets patchy, two round islands sit in the Sea of Japan off Wakkanai: Rebun and Rishiri. One is flat and covered in wildflowers that bloom at sea level instead of up a mountainside. The other is a single volcanic cone rising straight out of the ocean. Together they’re one of the more rewarding detours in Hokkaido for travelers who’ve already done Sapporo, Furano, and Otaru and want somewhere the tour buses don’t reach.

    Where These Islands Are, and Why Bother

    Rebun and Rishiri sit roughly 40-60 km off Wakkanai, Japan’s northernmost city, and are close enough to each other that a short ferry connects them directly. Rishiri is dominated by Mt. Rishiri (Rishiri-Fuji), a 1,721 m stratovolcano that fills almost the entire island — its silhouette is the reason people call it “the Fuji of the north.” Rebun is lower and rockier, famous as a flower island: because of the cold, foggy northern climate, alpine plants that would normally only grow near mountain summits bloom right along its coastal cliffs, no climbing required. If you’ve enjoyed the flower fields at Furano and Biei, this is a wilder, saltier version of the same idea.

    Getting to Wakkanai First

    Everything starts in Wakkanai. From Tokyo, ANA flies direct into Wakkanai Airport (about 3.5 hours); from Sapporo’s New Chitose Airport it’s around 50 minutes by air. The overland option is the JR Limited Express Soya from Sapporo Station, a roughly 5-hour ride up through Asahikawa — worth booking a reserved seat, and if you want a bit more comfort for that long haul, it’s the kind of train where upgrading matters, similar to the calculus in our Green Car and Gran Class guide. Rail fans collecting station stamps will also find plenty to add to a notebook along the Soya Main Line — see our piece on eki stamp rallies if that’s your thing. Budget a night in Wakkanai either way, since the first ferry out is early morning.

    Ferries: Fares, Times, and Booking

    Heartland Ferry runs the routes: Wakkanai to Oshidomari (Rishiri) takes about 1 hour 40 minutes, Wakkanai to Kafuka (Rebun) about 1 hour 55 minutes, and the short hop between Oshidomari and Kafuka takes roughly 40 minutes. Expect second-class one-way fares in the ballpark of ¥2,700-3,000 for the mainland-to-island routes and around ¥1,000-1,500 for the inter-island crossing — always check Heartland Ferry’s current timetable and fares before you go, since schedules thin out sharply outside summer and seas here can be rough enough to cancel sailings on short notice. In peak July-August season, book at least a few days ahead, especially if you’re also reserving a rental car on Rishiri. A common mistake is planning a single tight day-trip to one island; ferries are infrequent enough that missing the last boat back means an unplanned overnight.

    Best Time to Go

    The window that matters is June through August. Rebun’s wildflowers peak from mid-June to late July; by September most are done and many guesthouses and rental shops start closing for the season. Summer highs only reach about 20-24°C, fog rolls in without warning, and Mt. Rishiri is frequently capped in cloud even on sunny beach days below — pack a windproof layer no matter the forecast. From October the islands shift into a long, harsh winter with drastically reduced ferry service, so this really is a summer-only trip for most visitors.

    Rebun Island: The Flower Trails

    Rebun’s signature activity is the “8-Hour Course” (Hachijikan Course), a coastal trail running from Cape Sukoton at the island’s northern tip down to Motochi, passing cliffs, fishing hamlets, and meadows thick with species found almost nowhere else, including the endemic Rebun edelweiss (Rebun usuyukiso) and Rebun’s own lady’s slipper orchid (Rebun atsumori-sou). It’s a genuine full-day hike, not a stroll, so most people take a bus or taxi to the Sukoton starting point in the morning and catch a return bus from Motochi in the late afternoon. If eight hours sounds like too much, shorter 4-hour and 2-hour sections cover the best flower terrain without the full commitment — ask at the Kafuka ferry terminal tourist information desk for the current bus schedule, since it’s built around the hiking trail and changes seasonally.

    Rishiri Island: Volcano and Coastal Loop

    Rishiri offers two very different paces. Climbing Mt. Rishiri itself is a serious undertaking — a 10-11 hour round trip from near sea level, open roughly July to September, with no mountain hut for overnight shelter and no water sources on the upper slopes, so it demands an early start, real hiking gear, and a clear weather window. Most visitors instead rent a bicycle or small car at Oshidomari port and circle the roughly 60 km coastal road that rings the island’s base, stopping at Himenuma Pond (which mirrors the volcano on calm days), Peshi Cape, and local uni and seafood stalls along the way. A day’s car rental runs roughly ¥6,000-8,000; bicycles are considerably cheaper and are the more popular choice given how flat the loop road is.

    Eating, Sleeping, and Practical Mistakes to Avoid

    Both islands are famous for uni (sea urchin), in season roughly June through August, and Rishiri kombu, considered among Japan’s finest kelp and the base for much of the country’s high-end dashi. Try uni-don at a port-side shokudo in Oshidomari or Kafuka for somewhere in the ¥3,000-5,000 range depending on the season and grade. Accommodation on both islands leans heavily toward small family-run minshuku, typically ¥7,000-10,000 per person with two meals included, plus a handful of proper hotels near each port for those who want a splurge with private bathrooms and sea views. Book ahead in July and August — room counts are small and fill fast.

    The biggest practical trap: convenience stores are scarce to nonexistent on both islands, and card acceptance is inconsistent outside hotels, so bring more cash than you think you need. Cell coverage also gets patchy on Rishiri’s mountain trail and Rebun’s northern coast, so download offline maps and tell your accommodation your hiking plan before you set out. If you’re stitching this into a longer remote-Japan itinerary, the same “go slow, plan ferries carefully” mindset applies here as with Japan’s other island detours — see our guide to Japan’s cat islands for a similar small-boat, small-town rhythm further south. Give Rebun and Rishiri at least two full days, ideally three, and you’ll come away with a side of Hokkaido almost no first-time visitor sees.

  • Awa Odori: Tokushima’s Great Dance Festival and How to Join In

    Awa Odori: Tokushima’s Great Dance Festival and How to Join In

    Photo by Atul Vinayak on Unsplash

    Every August, the city of Tokushima on the island of Shikoku fills with the sound of shamisen, taiko drums, and hundreds of dancers moving through the streets in a shuffling, two-step rhythm that locals have performed for over 400 years. Awa Odori is Japan’s largest dance festival, drawing over a million visitors to a city of roughly 250,000 people for four nights in mid-August. Unlike most festivals where you stand and watch, Awa Odori is built around a saying you’ll hear repeated everywhere: “Odoru aho ni miru aho, onaji aho nara odorana son son” — the dancing fool and the watching fool are both fools, so you might as well dance. This guide covers when to go, how to get there, where to watch, and exactly how to join a dance group yourself.

    What Is Awa Odori?

    Awa Odori began as a Bon Odori dance tied to the Obon holiday, when Japanese families traditionally honor their ancestors’ spirits. “Awa” is the old name for Tokushima Prefecture, and “odori” means dance. Today it’s organized around ren (連) — dance troupes, often numbering 50 to over 100 members, each with its own choreography, costumes, and musicians playing shamisen, taiko, kane bells, and shinobue flutes. Men dance in a low, grounded crouch with bent knees; women dance on the balls of their feet in tall geta sandals, arms raised in a distinctive curved gesture. Some ren are neighborhood or company groups that have performed together for generations; others are university clubs or informal collectives. Watching a full ren move down a street in formation, drums and chanting building as they pass, is genuinely one of the most exciting live performances in Japan.

    When to Go: Dates and Timing

    The main festival runs August 12–15 every year, rain or shine, from roughly 6:00 PM to 10:30 PM each night. These dates don’t shift with the calendar the way some Japanese festivals do, so it’s easy to plan around. Arrive by late afternoon on your chosen day — the streets around the main venues get crowded well before dancing starts, and food stalls (yatai) selling grilled skewers, Tokushima ramen, and beer open early. The final night, August 15, tends to be the most crowded as many ren perform their most elaborate routines before the festival closes. If you want a fuller but calmer experience, the first night (Aug 12) is slightly less packed. Outside these four days, smaller Awa Odori performances happen elsewhere in Japan (Tokyo’s Kōenji hosts a well-known version in late August), but Tokushima’s is the original and by far the largest.

    How to Get to Tokushima

    Tokushima Station is the hub, and most festival venues are within a 10-minute walk of it. From Tokyo, the fastest option is a flight to Tokushima Awaodori Airport (about 1 hour from Haneda), then a 30-minute bus into the city. From Osaka or Kobe, highway buses take around 2.5–3 hours and are the most common way locals get there. By train, there’s no shinkansen to Tokushima — the standard route from Okayama is the JR Marine Liner across the Seto-Ohashi Bridge to Okayama, then the limited express Uzushio into Tokushima, roughly 2.5 hours total. If you’re using a Japan Rail Pass or simply want to travel in more comfort on the Uzushio, it’s worth knowing what upgraded seating actually gets you — see our guide to Green Car and Gran Class seating before you book. Book any train or bus during festival week well in advance; seats sell out days ahead.

    Where to Watch and What Tickets Cost

    There are two main performance areas downtown: the Ekimae (station-front) venue and the Minami-Uchimachi venue, both lined with temporary grandstands called sajiki seki. Paid reserved seats typically run around 2,000–4,000 yen depending on venue and row, and can be booked in advance through the official Awa Odori Kaikan website or on-site ticket counters closer to the date — they often sell out for the final two nights. Free standing viewing areas exist along the same streets and side roads, and honestly offer a perfectly good experience if you arrive an hour early and claim a spot along the barrier rope. A good budget strategy is to watch one paid show for the full choreography and sound experience, then wander the free areas afterward to catch smaller, more spontaneous ren performances in the side streets, which tend to be looser and more fun to be near.

    How to Actually Join the Dance

    This is what makes Awa Odori different from most festivals: tourists can dance in it, no experience required. Every night, “niwaka-ren” (pickup troupes) form at designated spots — historically near the Shinmachi River area and at organized tourist-participation zones — where staff teach a simplified version of the basic step in a few minutes and then lead a group parade through the streets. Some hotels and tourist information counters coordinate sign-ups for these; ask at the Tokushima Station tourist information desk when you arrive, since exact meeting points and times shift slightly year to year. Wearing a yukata isn’t required to join a niwaka-ren, but rental shops near the station offer them for the evening, and it does make you feel like part of the scene rather than a spectator with a phone out. The step itself is simpler than it looks from the sidelines: “same-side arm and leg forward” is the beginner’s cue — don’t overthink the arm curves, just keep moving with the beat.

    Common Mistakes to Avoid

    The single biggest mistake is showing up without lodging booked. Tokushima’s hotel inventory is small relative to the crowd it pulls in August, and prices spike two to three times normal rates for the festival dates — book three to six months out if you want anything central. If you get shut out, Tokushima does have a few manga kissa near the station that work as a legitimate backup for a night; our guide to manga kissa as a budget overnight stay explains how those work if you’ve never used one. Travelers looking for a quieter, more traditional base nearby in rural Shikoku might also consider a kominka farmhouse stay outside the city center. Other mistakes: wearing sandals that aren’t secure (you’ll be standing and shuffling for hours on paved streets), underestimating the heat and humidity (mid-August in Tokushima is brutal — bring water and a hand towel), and trying to see everything in one night. Two nights lets you watch professionally on night one and dance yourself on night two without exhausting yourself.

    Beyond the Four Nights

    If your trip doesn’t line up with August 12–15, the Awa Odori Kaikan hall in central Tokushima stages shortened Awa Odori performances year-round, generally several times daily, with an admission fee in the 800–1,000 yen range for the dance show alone. The same building has a ropeway up Mt. Bizan for a skyline view of the city, which pairs well as a half-day outing. It’s a solid substitute if your dates don’t work, though it’s worth being upfront with yourself that it’s a taste of the festival, not a replacement for the real thing — the energy of a packed street with a dozen ren competing for attention is what makes Awa Odori worth planning a trip around in the first place.

  • Kominka Stays: Sleeping in Japan’s Traditional Farmhouses

    Kominka Stays: Sleeping in Japan’s Traditional Farmhouses

    Photo by kai muro on Unsplash

    Long before capsule hotels and glass-walled apartments defined Japanese travel, families lived in kominka — thick-beamed farmhouses with soot-blackened rafters, irori sunken hearths, and roofs of thatch or heavy tile built to survive deep snow. Many of these houses are now inns, and sleeping in one is one of the most atmospheric things you can do in rural Japan: you’re not looking at a museum piece, you’re cooking rice over a fire pit inside one. Here’s how to actually plan a stay, not just admire the photos.

    What Is a Kominka, Exactly?

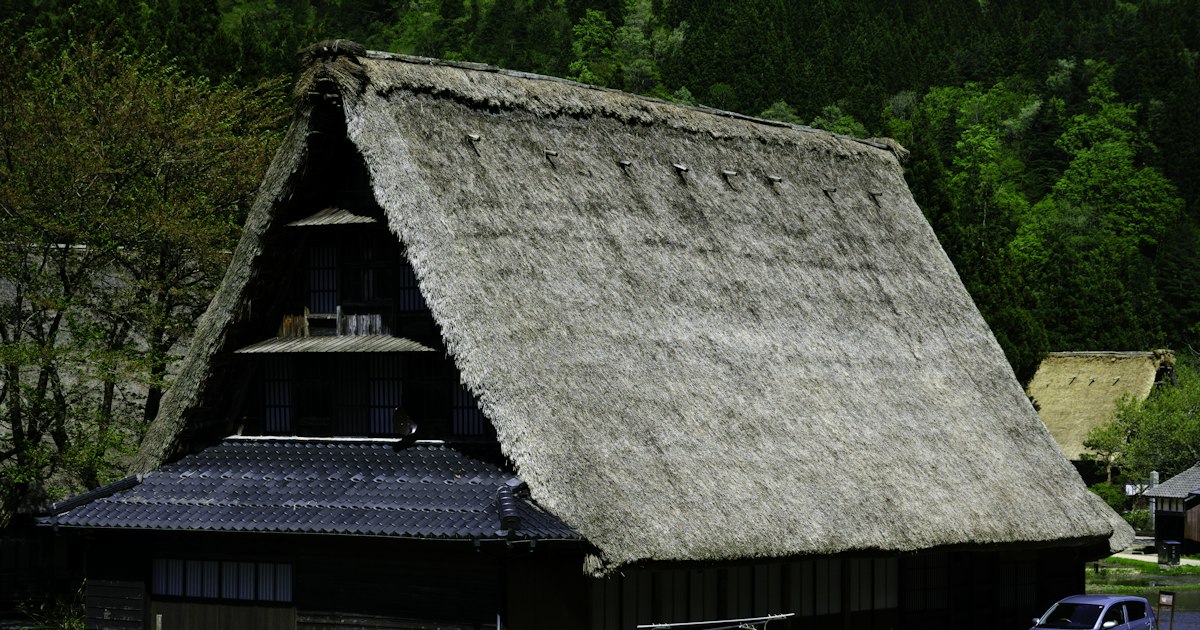
    “Kominka” (古民家) literally means “old private house,” generally referring to wooden homes built before 1950, though the most prized examples date to the Edo or Meiji periods. Two features define the experience: the irori, a sunken square hearth in the floor used for cooking and heating, and exposed structural beams — often massive, curved timbers selected for their natural shape rather than cut straight. Roof style varies by region: the steep, hands-together “gassho-zukuri” thatched roofs of Shirakawa-go and Gokayama exist specifically to shed heavy snow, while farmhouses in Kyoto’s Miyama or Tokushima’s Iya Valley tend toward wide tiled or thatched roofs suited to different climates.

    Owners generally fall into two camps: family-run minshuku (guesthouse-style, often with home-cooked meals and shared bathrooms) and renovated boutique properties, sometimes operated as single-house rentals or as part of a “distributed hotel” brand where several restored kominka in one village function as scattered rooms of a single inn, with a shared reception building.

    Where to Find Them: Best Regions for Kominka Stays

    Shirakawa-go and Gokayama (Gifu/Toyama) — the UNESCO-listed gassho-zukuri villages are the most famous kominka destination. A handful of the farmhouses inside Shirakawa-go’s Ogimachi village itself take overnight guests (only around a dozen do, and they book out months ahead for winter). Gokayama, less crowded and about 30–40 minutes further by car or bus, has similar houses at lower prices. If you’re routing through Toyama anyway, it’s worth pairing with the coast — see our guide to firefly squid season in Toyama if you’re visiting between March and May.

    Hida-Takayama (Gifu) — a well-preserved Edo-era town with several kominka inns in the surrounding countryside, easily combined with a stop for the region’s famous good-luck charm; see our sarubobo guide for where to shop in town before heading out to a farmhouse.

    Miyama (Kyoto Prefecture) — Kayabuki-no-Sato is a working village of around 40 thatched-roof houses roughly 90 minutes from Kyoto Station by bus/train combination; a few operate as inns, giving you a rural counterpoint to temple-heavy Kyoto itineraries.

    Iya Valley (Tokushima, Shikoku) — one of Japan’s most remote, dramatic settings, with vine bridges and steep mountainsides; kominka here are often standalone rentals rather than staffed minshuku, so you need a rental car.

    Nagano and the Japan Alps — scattered kominka stays exist around Matsumoto and the old post towns of the Nakasendo (Tsumago, Magome). If your trip already includes Zenko-ji’s old pilgrimage town, several farmhouse inns are within an hour’s drive.

    Budget, Mid-Range, and Splurge Options

    Budget (¥8,000–15,000 per person, with two meals): Family-run minshuku in Gokayama or Miyama, shared bathrooms, futon on tatami, home-cooked mountain vegetable dinners. Expect basic heating (a kerosene stove or the irori itself) rather than central air — bring warm layers if visiting outside summer.

    Mid-range (¥20,000–40,000 per night, often per house or per two people): Renovated single-house rentals with private modern bathrooms, kitchens, and Wi-Fi, common in Iya Valley and parts of Kyoto’s countryside. You get privacy and self-catering flexibility but no included meals.

    Splurge (¥40,000–100,000+ per person, per night): “Distributed hotel” brands that restore multiple kominka into a single luxury property — think a proper reception lodge, kaiseki dinners using local ingredients, and one restored house per couple or family. These exist in Niigata, Nara, Hyogo, and elsewhere and are usually the most comfortable way to experience the aesthetic without sacrificing heating or plumbing.

    Getting There and Best Season to Visit

    Almost none of these properties are near a shinkansen station — that’s the point. Typical routing is shinkansen or limited express to a regional hub, then a local bus, rental car, or inn pickup for the final leg. For Shirakawa-go/Gokayama, most travelers take a bus from Takayama, Kanazawa, or Toyama Station; if you’re coming a longer distance, consider whether a Green Car seat is worth it for the approach leg, since the rural transfers afterward are unavoidable regardless of how you started. Iya Valley and most Miyama properties effectively require a rental car — public transit exists but runs a handful of times a day.

    Season matters more here than almost anywhere else in Japan. Winter (late December–February) is when Shirakawa-go’s thatched roofs under snow look most like the postcards, but rooms in the village itself sell out 3–6 months ahead and heating is genuinely basic — the irori keeps the main room warm, not the whole house. Autumn (October–November) gives you foliage with milder temperatures and easier booking. Summer is green and lush but Iya Valley and Miyama can be hot and humid with limited air conditioning in older buildings. Spring works well if you’re combining a kominka stay with cherry blossoms or, further north, timing it around Toyama’s firefly squid season.

    Booking, Amenities, and Etiquette

    Book directly with the inn by phone or email where possible — many smaller minshuku aren’t on major international booking platforms, and some only take reservations in Japanese. Where they do appear online, book 2–3 months ahead for shoulder season and 4–6 months for winter weekends. Confirm meal plans explicitly: many kominka minshuku default to two meals included (dinner and breakfast), and cancelling that plan last-minute is considered rude given the amount of prep involved.

    Expect to remove shoes at the entrance, sleep on futon rather than a bed (ask in advance if you have mobility concerns), and in older properties, share a bathroom down the hall. Wi-Fi is common now but not universal — don’t assume it in the countryside. If the irori is lit, don’t step over it or place bags on the hearth’s wooden frame; ask before adding your own wood.

    Common Mistakes to Avoid

    • Assuming central heating. Old timber-and-paper construction is drafty by design. Winter stays without a private modern bathroom can mean a genuinely cold walk down the hall at night — pack layers and slippers.
    • Booking Shirakawa-go last-minute. The village caps overnight guests to protect the historic site; if you don’t plan months ahead for winter, Gokayama or Hida-Takayama are far more realistic fallbacks with a similar feel.
    • Skipping the rental car for Iya Valley or Miyama. Bus schedules can be as sparse as 3–4 runs a day; without a car you may be stuck at the property or paying for taxis with long waits.
    • Not confirming payment method. Many small family-run inns are still cash-only. Bring enough yen, since the nearest ATM may be a real drive away.
    • Treating it like a hotel. These are often someone’s family home for generations. Quiet hours, shared spaces, and set mealtimes are the norm — it’s a homestay experience more than a hospitality-industry one, and that’s exactly what makes it worth doing.
  • Eki Stamp Rallies: Japan’s Train Station Stamp-Collecting Hobby

    Eki Stamp Rallies: Japan’s Train Station Stamp-Collecting Hobby

    Photo by Karen Z on Unsplash

    Tucked in a corner near the ticket gates of thousands of Japanese train stations sits a small wooden or rubber stamp, usually free to use, waiting for anyone curious enough to press it into a notebook. This is the eki stamp (駅スタンプ, eki sutanpu), and chasing them down is one of the cheapest, most rewarding souvenir hobbies you can pick up in Japan. No entry fee, no reservation, no app required — just a notebook, an ink pad, and a willingness to detour off the main tourist path.

    What Exactly Is an Eki Stamp?

    Eki stamps are commemorative rubber or wooden stamps placed at train stations by JR (Japan Railways) and many private railway companies. Each one is unique to its station, typically featuring a local landmark, mascot, festival, or seasonal motif rendered in fine linework — a torii gate for a shrine town, a castle silhouette, a bowl of the region’s famous noodles. They’ve existed in some form since the early 20th century, originally intended to prove a traveler had actually visited a station (useful for expense reports and pilgrimage records alike), and evolved into a beloved collecting culture, similar in spirit to national park passport stamps in the US or eki stamps’ close cousin, the temple goshuin.

    Most stamps are free and self-service: you find the stand (often near the ticket gate, in the station office, or by the tourist information counter), ink it on the built-in pad, and press it into your own notebook. A small number of newer or promotional stamps require asking station staff, especially at smaller unstaffed stations where the stamp may be kept behind the counter to prevent theft or misuse.

    Getting Started: What to Bring

    You don’t need anything Japan-specific to begin, but a few items make the hobby much smoother:

    • A stamp notebook (goshuincho-style or blank sketchbook): Stationery shops and Tokyu Hands/Loft stores sell dedicated eki stamp books for around ¥800–¥2,000, often with thick, ink-resistant paper. A plain sketchbook works fine too.
    • Wet wipes or a small towel: Communal ink pads dry out unevenly and can smudge your hands.
    • A backup ink pad: Rural stations sometimes let their pads run dry; carrying a small red or black stamp pad (sold at ¥100 shops) saves you from a faded impression.
    • A pencil case or hard-backed notebook: Stamping on a soft surface produces a blurry result — press against something firm, like the station wall’s stamp shelf, which is usually built for this purpose.

    Where to Find the Best Stamps

    Coverage varies by region and railway operator, so it helps to know where the hobby rewards the most effort:

    • JR East stations across Tokyo and the Tohoku/Joshinetsu region have some of the most detailed and frequently refreshed designs, often tied to seasonal campaigns.
    • Sightseeing-line stations in Hokkaido, the Japan Alps, and rural Kyushu tend to have charming, hand-carved-looking stamps because they see fewer visitors and the design hasn’t been mass-replaced in decades.
    • Private railways like Odakyu, Tobu, and Hankyu run their own stamp programs, sometimes with collectible stamp rally cards distributed for a limited campaign period rather than permanent station stamps.
    • Shinkansen stations usually have a stamp near the gate, making them an easy freebie if you’re already passing through on a long-distance trip, including if you’re riding in Green Car or Gran Class and have a few extra minutes before boarding.

    If your itinerary includes a detour to Zenko-ji in Nagano or the mountain town covered in our Hida Takayama guide, check the local station before you leave — regional stamps there often depict the exact landmark you just visited, which makes a nice pairing in your notebook.

    Understanding Stamp Rallies (Suranpu Rari)

    Beyond permanent station stamps, railway companies regularly run limited-time “stamp rally” campaigns (スタンプラリー), where you collect stamps from a set list of stations — often 5 to 30 — within a defined period, usually a few weeks to a few months. Complete the set and mail in or submit your card at a designated station to enter a prize drawing, which might include regional snacks, character goods, or a small cash-value voucher.

    These campaigns tend to cluster around:

    • Spring (March–May):
    • Summer (July–August): festival and fireworks-themed rallies, useful to pair with a trip built around hanabi taikai fireworks festivals.
    • Autumn (October–November): foliage-viewing rallies on mountain and rural lines.

    Rally details are announced on each railway company’s Japanese-language website and at station posters roughly a month before launch; there’s no unified English portal, so if you’re chasing a specific rally, it’s worth asking at a JR Midori-no-Madoguchi counter or a tourist information desk once you arrive.

    Budget, Mid-Range, and Splurge Approaches

    Budget (free): Just use station stamps as you naturally pass through on your existing itinerary. Zero extra cost, zero detours required.

    Mid-range (¥1,000–¥3,000): Buy a dedicated stamp notebook and plan one or two short detours to stations known for good designs, perhaps combined with a regional day trip you were already taking — the kind of loop that also suits picking up regional snacks, similar to the hunting approach in our Calbee regional chip flavors guide.

    Splurge (¥5,000+): Some enthusiasts buy multi-day rail passes specifically to chase a full stamp rally set across a prefecture, or take a scenic sleeper or limited express solely to reach remote stamp locations — not far in spirit from riders who book the Sunrise Izumo or Sunrise Seto sleeper trains for the experience of the journey itself.

    Timing, Hours, and Practical Tips

    Station stamps are generally available whenever the station itself is staffed or open, which for major stations means early morning until last train (often 5:00 or 6:00 to past 23:00). Smaller rural stations may only have stamps accessible during staffed hours, commonly 8:00–17:00 or 18:00, and unstaffed stations sometimes remove the stamp entirely outside of tourist season to prevent vandalism — if a stamp you researched online isn’t at the stand, ask at a nearby tourist information center rather than assuming it’s gone for good.

    Common mistakes to avoid:

    • Pressing too hard or too fast: A firm, even, single press works better than multiple stamps on top of each other, which is the most common way people ruin a good impression.
    • Assuming every station has one: Not all stations participate, particularly smaller subway stops in big cities. Search “[station name] 駅スタンプ” before making a special trip.
    • Ignoring the ink pad condition: If it looks dry, press gently first as a test on scrap paper before committing your notebook page.
    • Rushing during rally season: Popular character-collaboration rallies can draw crowds at small stations; if you’re combining stamping with a tight train connection, budget an extra 5–10 minutes.

    Making It Part of a Bigger Trip

    The real appeal of eki stamps is that they reward the kind of slow, curious travel that a tight sightseeing itinerary usually squeezes out. A stamp rally gives you a reason to get off at a station you’d otherwise skip, wander a few blocks, and stumble onto a local shop or shrine you’d never have found on Google Maps alone. Treat it as a light structure for your trip rather than the whole point of it — a notebook that fills up naturally as a byproduct of exploring, much like collecting omamori amulets at shrines along the way becomes its own quiet record of where you’ve been.

  • Tachinomi: Japan’s Standing Bar Culture and How to Order

    Tachinomi: Japan’s Standing Bar Culture and How to Order

    Photo by Alva Pratt on Unsplash

    Duck under a red lantern near any major train station in Japan after 5pm and you’ll likely find a cluster of people drinking on their feet, elbows on a narrow counter, nursing a beer and a skewer between train connections. This is tachinomi (立ち飲み), literally “standing drinking,” and it’s one of the most useful drinking cultures for travelers to understand — it’s cheap, fast, unpretentious, and completely welcoming to solo visitors who don’t speak Japanese. Here’s how it works and how to do it right.

    What Is Tachinomi, and Why Stand to Drink?

    A tachinomiya is a bar with no seats — just a counter, sometimes just a shelf bolted to the wall. The lack of seating isn’t a quirk; it’s the business model. No chairs means faster turnover, lower rent, and no table charge (the seating fee, or otoshi, that adds 300–500 JPY to a bill at a regular izakaya). That savings gets passed to the customer: a glass of beer often runs 400–500 JPY, a cup of sake 300–500 JPY, and small plates of food 300–800 JPY. The unspoken rule is that you drink one or two rounds, eat a couple of small dishes, and move on — either home or to the next bar (a practice called hashigo-zake, “ladder drinking”). It’s a completely different rhythm from a sit-down izakaya where you settle in for the night.

    Where to Find the Best Standing Bars

    Tachinomi cluster wherever there’s heavy commuter foot traffic, especially under and around train tracks, since the cheap rent under elevated lines suits the low-margin, high-volume model.

    • Tokyo — Yurakucho and Shinbashi: The arches under the Yamanote Line tracks between Yurakucho and Shimbashi stations are lined with tiny standing bars and yakitori counters — the classic after-work salaryman scene, and completely open to tourists.
    • Tokyo — Tsukiji: A handful of standing bars near the old Tsukiji outer market pour sake from as early as 9–10am, aimed at market workers finishing their overnight shift. It’s a strange, memorable experience to drink chilled sake with fresh seafood at breakfast time.
    • Osaka — Shinsekai and Umeda: Osaka arguably has the densest tachinomi culture in Japan, tied to its no-nonsense food-and-drink identity. Shinsekai’s bars pair well with a plate of kushikatsu (fried skewers).
    • Kyoto — Fushimi: Kyoto’s sake-brewing district has small standing tasting counters attached to breweries, a good stop if you’re already exploring the area covered in our guide to Nada & Fushimi’s sake brewing districts.

    If tachinomi feels too enclosed for your taste, the open-air yatai carts of Fukuoka’s Nakasu district scratch a similar itch — casual, cheap, and highly sociable — and we cover ordering etiquette there in our guide to Fukuoka’s yatai food stalls.

    How to Order: A Step-by-Step Walkthrough

    Systems vary slightly by shop, but the general flow is:

    • Find a gap at the counter. There’s no host stand and no “table for one” — you just walk up to any open spot. If it’s full, people expect you to wait outside or come back later.
    • Order your first drink at the counter, either by pointing at a menu, reading a laminated card, or telling staff directly. Common opening phrases: “Nama, hitotsu” (one draft beer) or “Reishu, hitotsu” (one cold sake).
    • Pick a few small dishes (otsumami) from the menu board — often handwritten and Japanese-only, but staff are used to pointing and simple English words like “recommend?” working fine.
    • Pay as you go or run a tab. Some tachinomi collect payment per item as it’s served (common at ticket-based or market-style bars); others keep a running tally and settle when you leave, similar to a regular bar. If unsure, ask “Barabara desu ka?” (pay separately?) or just wait to see if they hand you a bill after each order.
    • Close out by saying “Okaikei onegaishimasu” (check, please) when you’re ready to go.

    Cash is still king at older, traditional tachinomi — many are cash-only, so carry 1,000–3,000 JPY in small bills and coins. Newer or chain-style standing bars increasingly take IC transit cards (Suica, Pasmo) or credit cards, but don’t count on it.

    What to Order (and What It Costs)

    Menus lean toward things that are quick to prepare and pair with alcohol rather than full meals:

    • Drinks: draft beer (nama biiru) 400–600 JPY, a glass of sake (300–600 JPY depending on grade), a highball (350–450 JPY), or shochu on the rocks (350–500 JPY).
    • Food: yakitori skewers (120–250 JPY each), oden stewed in dashi broth (100–300 JPY per item, especially good in the colder months), sashimi plates (500–900 JPY), motsuni (simmered offal, 400–600 JPY), and pickles or edamame as a quick starter (200–400 JPY).
    • A realistic budget: two drinks and two small plates typically lands around 1,500–2,500 JPY per person — a fraction of a sit-down izakaya tab.

    For a splurge, seek out sake-focused tachinomi that stock rare regional brews by the glass — flights of three or four premium sakes can run 2,000–4,000 JPY but let you sample bottles that never leave Japan.

    Etiquette and Common Mistakes

    A few things trip up first-timers:

    • Don’t look for a seat. There isn’t one. Leaning on the counter or a wall-mounted shelf is normal.
    • Don’t overstay during peak hours (6–8pm). With no seating, turnover is the whole point; lingering for hours over one beer while people wait outside is considered rude.
    • Don’t assume card payment. Always have cash as a backup.
    • Don’t expect an English menu. Pointing at what your neighbor is eating and saying “Onaji mono” (same thing) works well in a pinch.
    • Watch the last train. Tachinomi hop naturally into a long night, and Tokyo’s trains stop around midnight to 1am. If you’ve missed it, a manga kissa is a legitimate, cheap fallback — see our guide to manga kissa as a budget overnight stay rather than paying for a late-night taxi across town.

    Best Time to Go

    Most tachinomi open around 3–5pm and run until 11pm or midnight, though a few near fish markets open in the morning for early shift workers. Weekdays are best: many close on Sundays or public holidays, and the after-work rush from 6–8pm is the liveliest — but also the most crowded, so arriving right at opening time gets you counter space without the wait. Winter is prime season, since hot sake (atsukan) and simmered oden dishes are at their best in the cold, though tachinomi run year-round. If you’re in Osaka chasing seasonal seafood, a tachinomi is also a low-key way to try fugu outside of a formal restaurant setting — see our guide to fugu and where to eat it safely for which shops are licensed to prepare it.

    Tachinomi reward curiosity over caution — walk in, point at the menu, and you’ll likely end up chatting with the stranger next to you before your first drink is even finished. It’s one of the few places in Japan where the language barrier barely slows you down.

  • Churaumi Aquarium and Japan’s Best Aquariums: A Practical Guide

    Churaumi Aquarium and Japan’s Best Aquariums: A Practical Guide

    Photo by Pengxiao Xu on Unsplash

    Japan takes aquariums seriously, and nowhere is that clearer than at the Okinawa Churaumi Aquarium, home to one of the largest viewing tanks on Earth and some of the only captive whale sharks in the country. But it’s far from the only reason to plan an aquarium day — from Tokyo Skytree’s penguin colony to Osaka’s ring-of-fire tour of the Pacific, Japan’s aquariums are genuinely worth building an itinerary around. Here’s what to know before you go, starting with the big one.

    Why Churaumi Aquarium Is Worth the Trip North

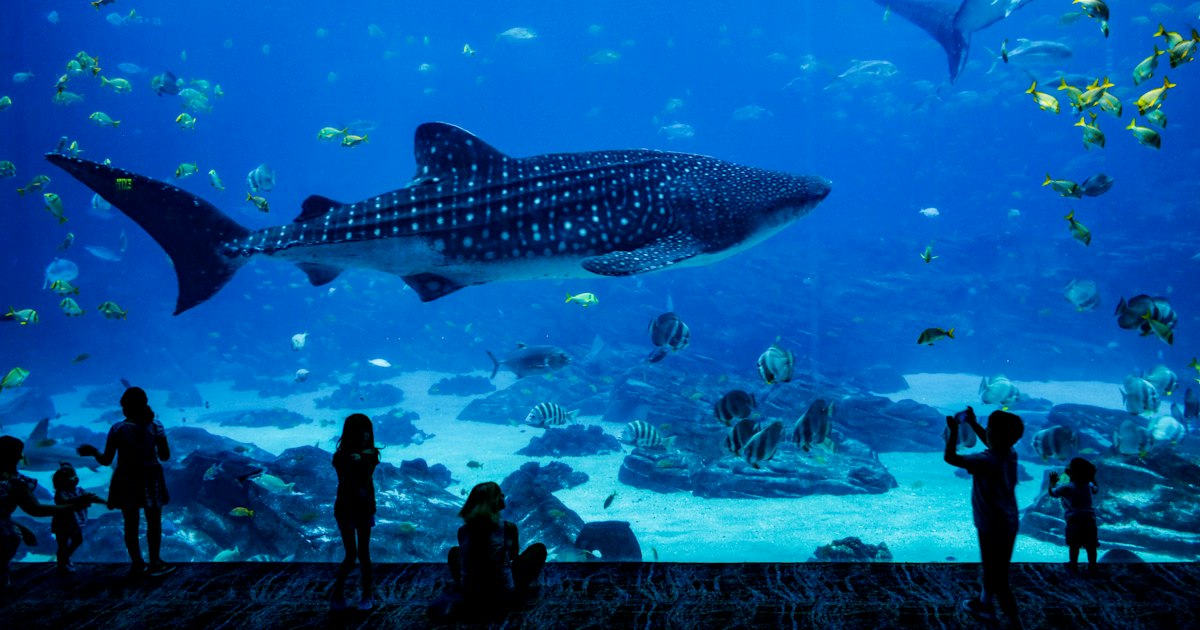
    Churaumi Aquarium sits inside Ocean Expo Park in Motobu, on the Motobu Peninsula in northern Okinawa (Yanbaru), a solid 90 minutes to two hours from Naha depending on traffic. The centerpiece is the Kuroshio Sea tank, a single acrylic panel over 8 meters tall and 22 meters wide holding 7,500 tons of water — big enough for whale sharks and manta rays to swim in slow, unhurried loops just a few feet from your face. It’s one of the few places in the world where you can reliably see a whale shark up close without diving. Beyond the headline tank, the aquarium walks you through a “Coral Reef” corridor, a touch pool, and a deep-sea zone with bioluminescent creatures, and the surrounding Ocean Expo Park has a free beach, manatee pool, and dolphin lagoon included in the same admission complex.

    Getting There, Hours, and Tickets

    There’s no train to this part of Okinawa — the Yui Rail monorail only covers central Naha, so you’ll need a rental car or a bus. By car, take the Okinawa Expressway north from Naha, exit at Kyoda IC, then follow Route 84 toward Motobu; budget 90 minutes without traffic. Without a car, the Yanbaru Express highway bus runs direct from Naha Bus Terminal to the aquarium in roughly 2–2.5 hours, with a one-way fare in the ¥2,000–2,500 range. If you’re flying in on a late arrival or catching an early departure bus, a manga kissa near Naha Airport is a cheap way to bridge the gap without booking a full hotel night.

    Standard hours are 8:30 AM–6:30 PM (last entry 5:30 PM), extended to 8:00 PM (last entry 7:00 PM) during the peak summer stretch from mid-July through the end of August. The aquarium closes for maintenance on a set day in early December each year — check the official calendar before locking in a winter visit. Admission for adults runs ¥2,180, high school students ¥1,440, elementary and junior high ¥710, and under-6 is free; if you arrive after 4:00 PM, discounted evening tickets bring the adult price down to around ¥1,540. Buying combo or advance tickets online can shave a bit more off and, more importantly, skip the ticket-counter line.

    Best Time to Visit and What Not to Miss

    Go right at opening (8:30 AM) or in the last two hours before close — tour buses from Naha hotels tend to arrive mid-morning and cluster around the Kuroshio tank until early afternoon. Whale shark and manta feedings happen a few times daily at posted times (usually late morning and mid-afternoon); check the schedule board near the entrance the moment you arrive so you can time your visit to the tank for feeding. The upper-floor viewing deck over the main tank gives you a top-down view of the whale sharks that most visitors skip because they don’t realize it’s there — worth the extra few minutes. If you’re visiting between roughly December and April, the parking lot and surrounding park are a bonus: this is Japan’s earliest cherry blossom season, so a Motobu trip can double as a very early-hanami day out.

    Common Mistakes to Avoid

    • Underestimating the drive time. This isn’t a Naha city attraction — treat it as a full-day trip, not an afternoon add-on.
    • Skipping the rest of Ocean Expo Park. Your aquarium ticket doesn’t cover everything in the park, but the Emerald Beach and tropical dream center are free and easy to combine with your visit — don’t rush straight back to the car.
    • Visiting on a weekend or holiday without a plan. Weekends and Japanese national holidays bring heavy crowds and full parking lots; if your dates are flexible, go on a weekday.
    • Assuming there’s a train. Double-check your bus or rental car logistics before you land in Okinawa — this is the single most common planning mistake for first-time visitors.

    Japan’s Other Great Aquariums

    If Churaumi isn’t on your route, or you want a second aquarium day elsewhere in Japan, a few stand out:

    • Osaka Kaiyukan (Tempozan Harbor Village, Osaka): Also home to whale sharks, built around a “Ring of Fire” concept that tours Pacific ecosystems floor by floor. Adult admission is around ¥2,700–2,800; it’s a short walk from Osakako Station on the subway, making it far more accessible than Churaumi for anyone based in Kansai.
    • Sumida Aquarium (Tokyo Skytree Town, Tokyo): Compact and central, best known for its open-air penguin pool with no glass barrier and a jellyfish tank set to changing light and music. Easy to fold into a Skytree/Asakusa day.
    • Enoshima Aquarium (Kanagawa): An easy day trip from Tokyo via the Odakyu line or Enoden, famous for its sardine “tornado” show and jellyfish displays, with Enoshima Island and Kamakura’s temples both within walking or short-train distance for the rest of the day.
    • Kyoto Aquarium: An inland aquarium a short walk from Kyoto Station, notable for its Japanese giant salamander tank — a species you won’t easily see elsewhere.

    Rounding Out an Okinawa or Island Trip

    Because getting to Churaumi already means committing to a full day (or an overnight stay in the north), it pairs naturally with other Yanbaru-area stops like Nakijin Castle ruins or the Kouri Bridge. If island travel and slower, nature-driven itineraries are what draw you to Okinawa in the first place, it’s worth knowing Japan has other distinctive island experiences too — from the gallery-hopping Setouchi Triennale in the Seto Inland Sea to the famously cat-populated Aoshima and Tashirojima further north. None of them require a passport stamp, but each rewards the kind of unhurried, one-region-at-a-time planning that a Churaumi day trip demands.

    Budget Planning at a Glance

    For a solo traveler, a realistic Churaumi day runs: ¥2,180 admission, ¥2,000–5,000 for transport depending on bus versus rental car, and lunch at the on-site food court (¥800–1,500 for a set meal, including Okinawan classics like taco rice). Splurge travelers can add a stay at one of the resort hotels along the Motobu or Nago coastline to turn it into an overnight beach trip rather than a there-and-back day; budget travelers can do the whole thing round-trip from Naha by bus for well under ¥10,000 total, aquarium ticket included.

  • Firefly Squid Season in Toyama: Hotaru Ika and Where to Try It

    Firefly Squid Season in Toyama: Hotaru Ika and Where to Try It

    Photo by Trevor McKinnon on Unsplash

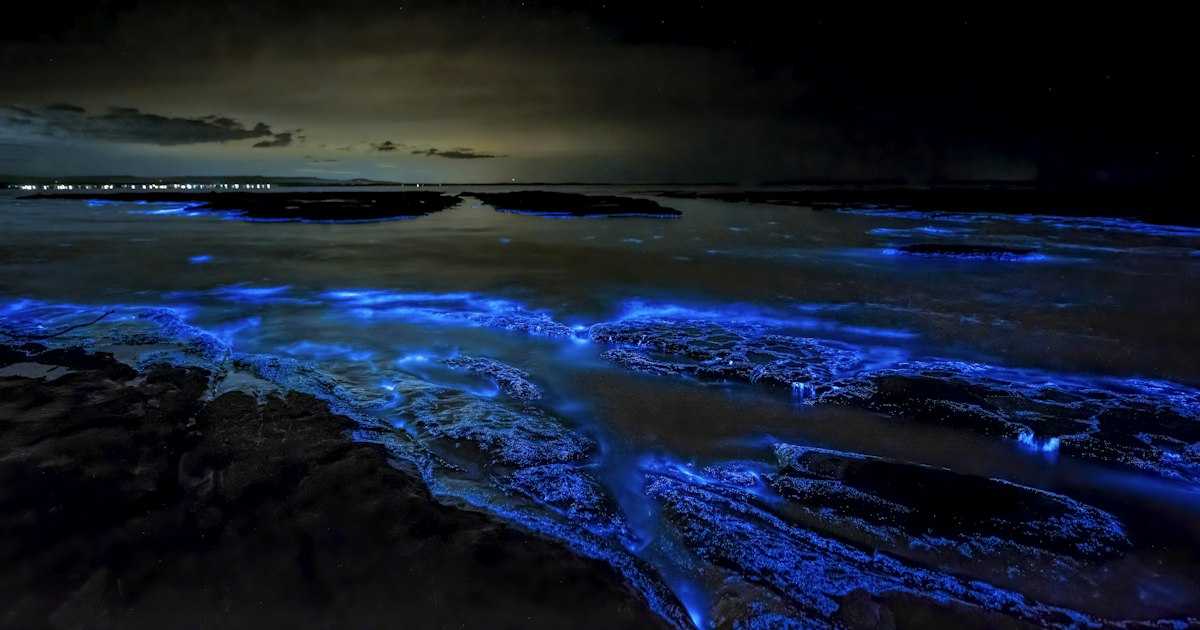
    Every spring, the dark waters of Toyama Bay light up with one of Japan’s strangest natural spectacles: thousands of firefly squid rising to the surface and glowing an eerie blue. Hotaru ika (蛍烏賊, Watasenia scintillans) are only about 3-7 cm long, but they carry photophores that flash light for mating and defense — and for a few weeks each year, Toyama is the best place on earth to see and eat them. Here’s how to plan the trip properly, from the pre-dawn boat tours to the izakaya counters where they end up on your plate.

    What Makes Toyama’s Firefly Squid Special

    Firefly squid live throughout the Sea of Japan, but Toyama Bay is unusual because the seafloor drops off so steeply close to shore that the squid come in to spawn in shallow water near the coast, especially around the town of Namerikawa. The stretch of coastline where they gather has been protected as a Special Natural Monument since the 1920s, which is part of why this is treated as a genuine regional icon rather than just a seasonal seafood item — you’ll see hotaru ika motifs on manhole covers, station signage, and local sake labels around Toyama City.

    Season and Best Timing

    The season runs roughly mid-March through May, with the best glow-watching and freshest catch generally in April. A few things affect your odds on any given night:

    • Moon phase: darker, moonless nights make the glow far more visible.
    • Tide and wind: calm seas and an incoming tide push squid closer to shore; rough weather cancels viewing boats outright.
    • Time of night: the squid rise in the very early hours, well before sunrise — this is not an after-dinner activity.

    Because conditions matter so much, build in at least two nights in the area if seeing the live glow is your priority, and treat one clear viewing as a bonus rather than a guarantee.

    Watching the Glow: Boat Tours and Shore Viewing

    The main way to see firefly squid glowing in the wild is a firefly squid viewing boat (hotaru ika kansen) departing from Namerikawa fishing port, usually leaving around 1:30-3:00 AM during peak season. Tours run only when conditions allow, are frequently cancelled or rescheduled at short notice, and typically cost somewhere in the ¥2,000-2,500 range per adult — book ahead through the local tourism association rather than showing up on the night, and always confirm the current schedule and price before you travel, since operating dates shift slightly year to year. If you can’t manage the early boat departure, some years also see limited shore viewing or shallow-water scooping events near Namerikawa when the squid wash in especially close, though this is far less reliable than the boat.

    The Firefly Squid Museum in Namerikawa

    Right on the coast in Namerikawa, the Hotarui-ka Miryoku Taikan-kan (Firefly Squid Museum) is worth building your visit around, whether or not you get on a boat. It has tanks and exhibits explaining the squid’s biology and the local fishery, and during the season it occasionally darkens a tank so visitors can see the bioluminescence up close without going out on the water. Admission is inexpensive (roughly ¥500 for adults, less for children), and hours are typically around 9:00 AM to 5:00 PM, though the museum closes on some winter days and hours can vary by season — check the current schedule before you go. Namerikawa is about 15-20 minutes from Toyama Station by local train on the JR Ainokaze Toyama Line.

    Where to Eat Hotaru Ika in Toyama

    You don’t need to catch the tide right to taste hotaru ika — from March into May it shows up all over Toyama City. The classic preparation is boiled and dressed in vinegar-miso (sumiso-ae), which balances the squid’s rich, slightly bitter liver against a tangy sauce; it’s also served as tempura, in simmered dishes, and as sushi and sashimi when it’s fresh enough.

    • Budget (¥300-800 per dish): Izakayas around Toyama Station and the Sogawa entertainment district serve hotaru ika sumiso-ae as a small plate, and department-store basement food halls (depachika, such as at Daiwa near the station) sell prepared trays to go.
    • Mid-range (¥1,500-3,500 for a meal): Toyama is famous nationally for its conveyor-belt and counter sushi because Toyama Bay yields such a wide variety of fish — look for set menus pairing hotaru ika sushi with shiroebi (white shrimp), the bay’s other signature delicacy.
    • Splurge (¥6,000+): Kaiseki-style dinners at ryokan and specialty seafood restaurants will incorporate hotaru ika as one course among several seasonal Toyama Bay dishes, often alongside sake from a local brewery.

    If you’re interested in the drink side of the meal, it’s worth reading about Japan’s sake brewing districts before you go, since Toyama’s own breweries make food-pairing sake specifically meant for the region’s seafood, and a set of sake cups and a tokkuri make a fitting, packable souvenir from the trip.

    Getting to Toyama and Namerikawa

    Toyama City is on the Hokuriku Shinkansen line, about 2 hours 10 minutes from Tokyo and around 20 minutes from Kanazawa — an easy add-on if you’re already doing a Hokuriku or Kanazawa itinerary. If you want extra legroom and quiet for the ride in, it’s worth knowing how Green Car and Gran Class seating works on shinkansen before you book. From Toyama Station, Namerikawa is a short hop on the JR Ainokaze Toyama Line; if you’re taking a pre-dawn viewing boat, you’ll need a taxi or your own car, since local trains don’t run at 1-2 AM.

    Common Mistakes to Avoid

    • Assuming any night will do: the glow is genuinely weather- and tide-dependent — check conditions and be ready for a cancelled or rescheduled boat.
    • Skipping the liver on your first try: the slightly bitter hepatopancreas is part of what makes sumiso-ae taste the way it does; if you’re squeamish, tempura is a gentler introduction.
    • Only visiting Toyama City: the actual glowing spectacle happens off Namerikawa’s coast, not downtown — factor in the extra travel time and, ideally, a night lodging near Namerikawa or Toyama Station rather than a rushed day trip.
    • Forgetting freshness windows: raw hotaru ika sashimi has食中毒 (food-safety) considerations around parasites, so reputable restaurants freeze it appropriately first — stick to established restaurants rather than buying raw squid to prepare yourself.

    Firefly squid season is brief, weather-dependent, and very much a local specialty rather than a big-city attraction — which is exactly what makes it worth the detour. Pair a few nights in Toyama with a Kanazawa or Hokuriku itinerary, stay flexible about which night you go out on the water, and you’ll come away with one of the more genuinely offbeat travel memories Japan has to offer.