Japan Trove

Author: JapanTrove Editorial

  • Furano & Biei: Hokkaido’s Lavender Fields and Patchwork Hills

    Furano & Biei: Hokkaido’s Lavender Fields and Patchwork Hills

    Photo by Cindy Bissig on Unsplash

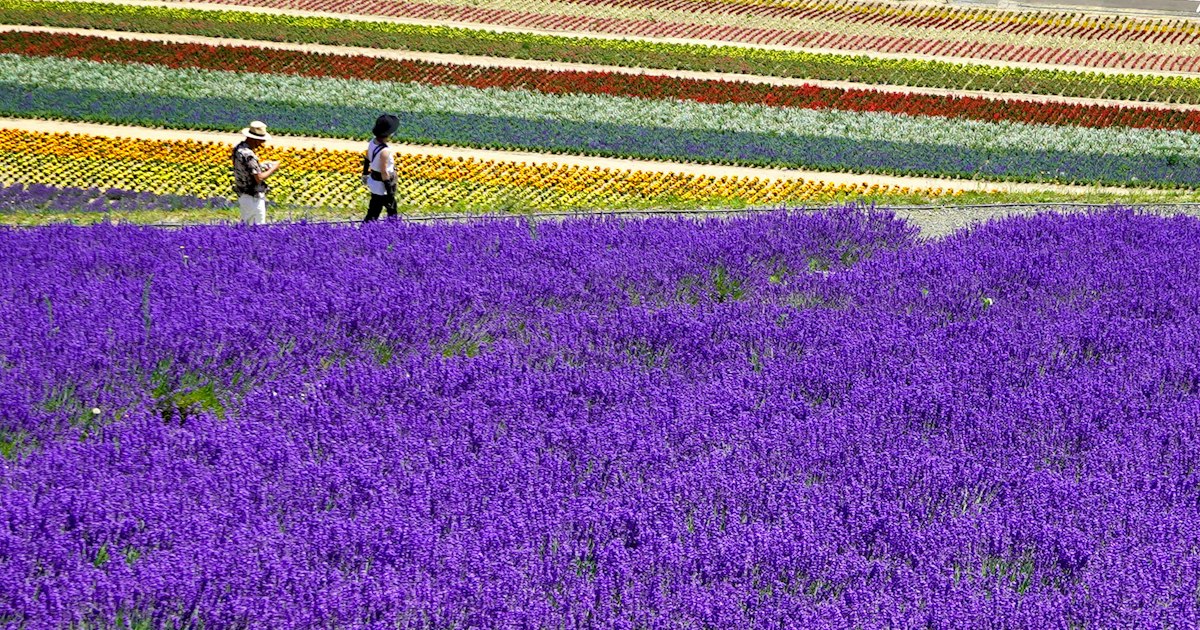
    Every July, the rolling farmland of central Hokkaido turns into stripes of purple, yellow, and green, and photos of it end up on half the “best of Japan” lists on the internet. But Furano and Biei are two distinct towns with different rhythms — one built around lavender, the other around a patchwork of crop fields that changes color through the seasons. Here’s how to actually plan the trip, not just admire it on a screen.

    When to Go: Lavender Season vs. Patchwork Views

    Lavender has a short, specific window. Farm Tomita’s fields are usually at their best from mid-July to early August, with the single deepest-purple week typically falling around July 20–31. Arrive in June or September expecting the postcard shot and you’ll see mostly green. Biei’s “patchwork hills,” by contrast, are a slower show — potato, wheat, beet, and corn fields ripen and get harvested on staggered schedules from May through October, so the color combinations shift week to week rather than peaking once. Winter (roughly December to March) is its own separate attraction: the same hills under snow, with bare trees like the famous Ken and Mary’s Tree standing alone in white, draw photographers even though nothing is blooming.

    If lavender is the priority, book a July trip. If you just want the classic rolling-hills scenery with fewer crowds, late May to June or September are easier and cheaper.

    Farm Tomita and Furano’s Lavender Fields

    Farm Tomita in Nakafurano is the original and still the most-visited lavender farm — admission is free, and it stays open year-round, though hours shrink outside summer (roughly 8:30am–6pm in July–August, closer to 9am–5pm in shoulder months, and reduced hours through winter when the fields are dormant). Besides the lavender field itself, there’s a lavender-scented soft-serve stand, a dried-flower distillery you can peek into, and several other flower fields (poppies, marigolds) blooming alongside it in summer.

    The nearest regular train stop is Nakafurano Station, about a 25-minute walk away. In lavender season, JR also opens a seasonal flag-stop called Lavender Batake Station right next to the farm — trains only call there roughly mid-June through early September, so check current JR Hokkaido timetables before relying on it. If you’re traveling by rail, an ekiben (station lunch box) makes the ride more pleasant than searching for food once you arrive; our guide to Japan’s bento box culture covers how to pick a good one.

    Biei’s Patchwork Hills and the Blue Pond

    Biei has no single “main gate” — its appeal is a network of viewpoints scattered across farmland, connected by roads with names like Patchwork Road and Panorama Road. Highlights include the solitary Ken and Mary’s Tree (named after a 1970s car commercial), the Seven Star Tree, and the hill once nicknamed “Mild Seven Hill” after the cigarette ad it appeared in. All of these are free to view from the roadside, but they sit on private farmland — stay on the road and don’t walk into the crops. Local farmers have put up “please do not enter” signs after years of tourists trampling fields for photos, and it’s a real source of friction with the community.

    The other must-see is Blue Pond (Aoi Ike), about 3km from Biei Station — free, strikingly blue-turquoise from dissolved minerals, and best photographed in the still air of early morning. Shikisai no Oka, a private flower farm on the hills, charges an entrance fee (around ¥500 for adults in peak season, free in winter) and adds buggy and horseback rides as paid extras.

    Getting There and Getting Around

    From Sapporo, take a JR limited express (Lilac or Kamui) to Asahikawa — about 1 hour 25 minutes, roughly ¥4,700–5,000 unreserved. From Asahikawa, the local JR Furano Line continues to Biei (about 30 minutes) and on to Furano (another hour or so). If you’re traveling in comfort, some limited expresses on this route offer Green Car seating; see our guide to Green Car and Gran Class if the extra legroom and quieter car appeal to you for the ride out.

    In summer (roughly late June to early September, weekends and holidays), JR runs the Furano Biei Norokko-go, a slow open-window sightseeing train between Asahikawa, Biei, and Furano that stops at Lavender Batake Station — it needs a small seat reservation fee on top of the base fare and is worth it for the views alone.

    The catch: Biei’s hill viewpoints are not walkable from the station and barely served by regular buses. Renting a car is the easiest way to see them. If you’re not driving, rental bicycles (including e-bikes) are available near Biei Station for around ¥1,500–2,000 a day — fine for the Blue Pond, harder for the hillier Patchwork Road loop. A seasonal sightseeing bus (the “Twinkle Bus,” running roughly late April to early November) loops past the main viewpoints for about ¥500–800 per ride or a day pass around ¥1,500, and is the best car-free option for the patchwork hills.

    Where to Eat and What to Buy

    Furano is Hokkaido’s melon country — roadside stands and Furano Marche sell whole Furano melons from around ¥1,500 to ¥3,000 depending on size and grade, plus melon soft-serve for a few hundred yen. The Furano Cheese Factory and neighboring Wine Factory both offer free tastings and tours, and make an easy stop between the train station and Farm Tomita. Biei is known for its potatoes and corn, sold grilled or as chips at farm stands in summer; if you want to keep hunting for Hokkaido-specific snack flavors after you leave, our guide to Calbee’s regional potato chip flavors is a good next stop, since Hokkaido gets several exclusive varieties.

    Common Mistakes to Avoid

    • Coming for lavender outside July. Fields bloom for roughly three to four weeks; the rest of the year they’re green stubble.
    • Assuming trains cover everything. The JR line connects the towns, but most of Biei’s iconic viewpoints require a car, bike, or the seasonal bus.
    • Walking into the fields for photos. These are working farms, not gardens — stepping into crops for a shot is a genuine problem for local farmers.
    • Booking accommodation last-minute in July. Both towns are small with limited hotel and ryokan capacity, and rooms sell out weeks ahead during peak lavender season.
    • Skipping a rain-day plan. Hokkaido summers can be humid and showery; the Furano Wine and Cheese Factories, plus Biei’s small galleries, are good indoor fallbacks.

    Budget, Mid-Range, and Splurge Options

    On a budget, a day trip from Asahikawa or even Sapporo by regular JR trains, free lavender viewing at Farm Tomita, and a melon soft-serve for a few hundred yen can cover the essentials for well under ¥10,000 all in, including train fare. Mid-range travelers should consider staying one night in Furano or Biei (guesthouses and business hotels generally run ¥8,000–15,000 for a double) and renting a car for a full day (roughly ¥6,000–9,000 plus fuel) to properly cover Biei’s scattered viewpoints. For a splurge, Furano has a handful of resort hotels with private onsen baths and hill views, and a private guided car tour with a local driver-guide (often ¥25,000–40,000 for a half day) takes the guesswork out of finding the best-lit patchwork angles at the right time of day.
  • Japan’s Cat Islands: Visiting Aoshima and Tashirojima

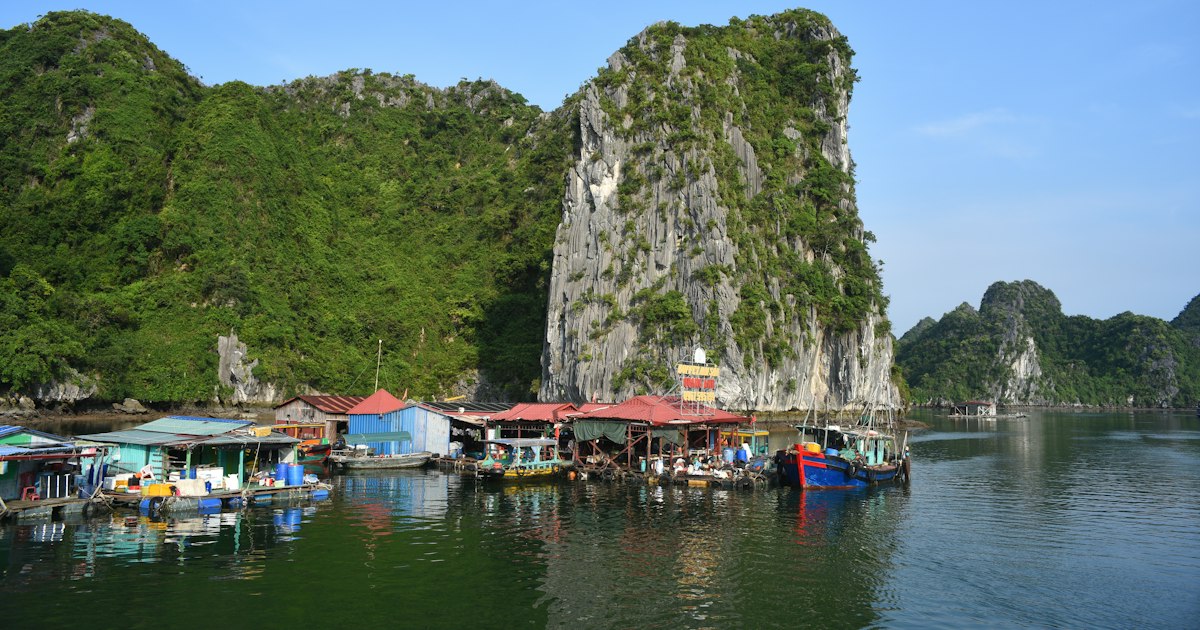
    Japan’s Cat Islands: Visiting Aoshima and Tashirojima

    Photo by Ama Journey on Unsplash

    Japan has two islands where cats outnumber people by a wide margin, and both are real, working fishing communities rather than tourist stage sets. Aoshima in Ehime Prefecture and Tashirojima in Miyagi Prefecture are on opposite ends of the country, each reachable only by a small local ferry, and each with its own quirks around timing, food, and etiquette. This guide covers what you actually need to know before you go — schedules, costs, and the mistakes that turn a magical day trip into a stranded afternoon.

    Aoshima vs. Tashirojima: which one fits your trip

    Aoshima sits in the Uwakai Sea off Ozu City in Ehime, on Shikoku — a good add-on if you’re already exploring the Seto Inland Sea or heading toward Matsuyama. It’s tiny, has almost no infrastructure, and is best visited as a half-day trip. Tashirojima sits in Ishinomaki Bay in Miyagi, about an hour from Sendai, and is more visitor-ready: it has a cat shrine, a small cluster of cat-shaped guest cabins, and a slightly more forgiving ferry schedule.

    If you’re on a Tokyo-Tohoku itinerary, Tashirojima is the easier stop. If you’re doing a Shikoku or Seto Inland Sea loop — perhaps combining it with the art islands covered in our guide to the Setouchi Triennale — Aoshima fits naturally into that route.

    Getting to Aoshima: ferries from Nagahama Port

    Aoshima is reached from Nagahama Port in Ozu City. Nagahama Station is on the JR Yosan Line, about 20–30 minutes by local train from Iyo-Ohzu (itself roughly an hour from Matsuyama). From Nagahama Station it’s a short walk to the port.

    The ferry to Aoshima runs only twice a day in each direction — typically a morning departure around 8:00 and an early-afternoon departure around 14:00, with return sailings about 30–40 minutes after arrival. The crossing itself takes roughly 35–45 minutes. A round trip costs in the ballpark of ¥1,000–1,500 per adult; buy your ticket at the small counter at the port, not online. Because there are only two boats a day, missing one means either a very long wait or spending the night with no lodging on the island — check the current timetable at the port or with Ozu City tourism before you go, since sailings are sometimes reduced in bad weather or off-season.

    Aoshima itself has no shops, no vending machines, and no restaurant. There is no accommodation. Bring your own water and snacks, and plan your visit entirely around the return ferry time.

    Getting to Tashirojima: ferries from Ishinomaki

    Tashirojima is reached from Ishinomaki, about an hour from Sendai by the JR Senseki Line or Ishinomaki Line. From Ishinomaki Station, it’s roughly a 15-minute walk (or a short taxi ride) to the ferry terminal near the old Ishinomaki fishing port.

    Ferries run several times a day, more frequently than Aoshima’s, with the crossing taking about 25–45 minutes depending on which of the island’s two ports — Odomari or Nitoda — the boat calls at. One-way fares are generally in the ¥1,500–2,000 range. Odomari, on the south side, is where most cats congregate near the harbor and where the island’s cat shrine, Neko-jinja, sits on a small hill. Nitoda, on the north side, is quieter and closer to the “Manga Island” cat-shaped cabins.

    Because Ishinomaki also has real sightseeing (it’s a major Tohoku fishing port with its own manga museum, tied to hometown artist Shotaro Ishinomaki), you can comfortably build a full day around the ferry crossing rather than rushing back for a single afternoon boat.

    Best season and timing for a cat island day trip

    Spring and autumn are the most comfortable seasons for both islands — mild temperatures make the walk around the harbor and hillside paths far more pleasant, and cats tend to be more active and visible outdoors rather than hiding in the shade. Midsummer visits are workable but hot and humid, with cats often napping in whatever shade they can find during the middle of the day; aim for the first ferry over if you’re going in July or August.

    Winter is quieter and colder, but cats still gather around the harbor, especially where locals feed them, so it’s not a bad option if you’re already in the region. Whatever the season, go early: cats are generally most active in the morning and get sleepier as the day warms up, and an early ferry gives you a buffer if the return schedule is tight.

    Rules, etiquette, and common mistakes

    Both islands are inhabited, working communities with a handful of mostly elderly residents — not open-air zoos. A few practical rules matter:

    • Don’t feed the cats without asking. Locals manage feeding on a schedule; random treats or people-food can make cats sick and create conflict with residents who care for them daily.
    • No dogs on Tashirojima. This is a long-standing local rule tied to the island’s identity as a cat sanctuary — leave pets at home.
    • Bring cash and supplies. Neither island has convenience stores or ATMs. Aoshima in particular has nothing at all — no toilets beyond a very basic one near the port, no food for sale.
    • Don’t miss the last ferry. This is the single biggest mistake visitors make. With only two sailings a day on Aoshima, arriving five minutes late to the dock can mean waiting hours or missing the last boat entirely. Set an alarm and head back with real margin.
    • Watch for strays that aren’t strays. Cats can look scruffy but almost all are cared for by residents or volunteer groups — don’t attempt to “rescue” or take one home.

    Where to stay, eat, and spend

    Budget: Both islands are best done as day trips with zero on-island spending beyond the ferry fare — pack a convenience-store lunch from Nagahama or Ishinomaki before boarding. If you need a cheap base for an early ferry, Ishinomaki and Sendai both have manga kissa where you can crash overnight for a fraction of a hotel rate.

    Mid-range: On Tashirojima, the “Manga Island” cat-shaped cabins near Nitoda port (designed by manga artists and run through the local tourism association) let you actually stay overnight on a cat island — a genuinely unusual experience, typically booked in advance through Ishinomaki’s tourism office rather than standard hotel sites. Expect a simple, no-frills stay rather than a resort.

    Splurge: There’s no luxury lodging on either island by design — the closest thing to a splurge is chartering a private boat from Nagahama or Ishinomaki if you want flexible timing outside the scheduled ferries, which local operators can sometimes arrange for a negotiated fee.

    If you visit Neko-jinja on Tashirojima, it’s a genuine Shinto shrine, so treat it with the same respect you would any other — a small coin offering is appropriate, and if you’re collecting shrine amulets on your trip, it’s worth reading up on omamori before you go so you know what you’re buying and how to use it.

    Planning the rest of your trip around it

    Aoshima pairs naturally with a wider Shikoku or Seto Inland Sea itinerary, including the art-island hopping of the Setouchi Triennale region. Tashirojima pairs well with Sendai and the Tohoku coast. If you’re traveling long distances between these regions and Tokyo, it’s worth checking whether a sleeper train or a Green Car seat makes sense for the long-haul leg, since both cat islands are genuinely remote detours rather than convenient stopovers — the payoff is a day spent somewhere almost no other foreign visitor bothers to reach.

  • Maid Cafes in Akihabara: What to Expect and How to Behave

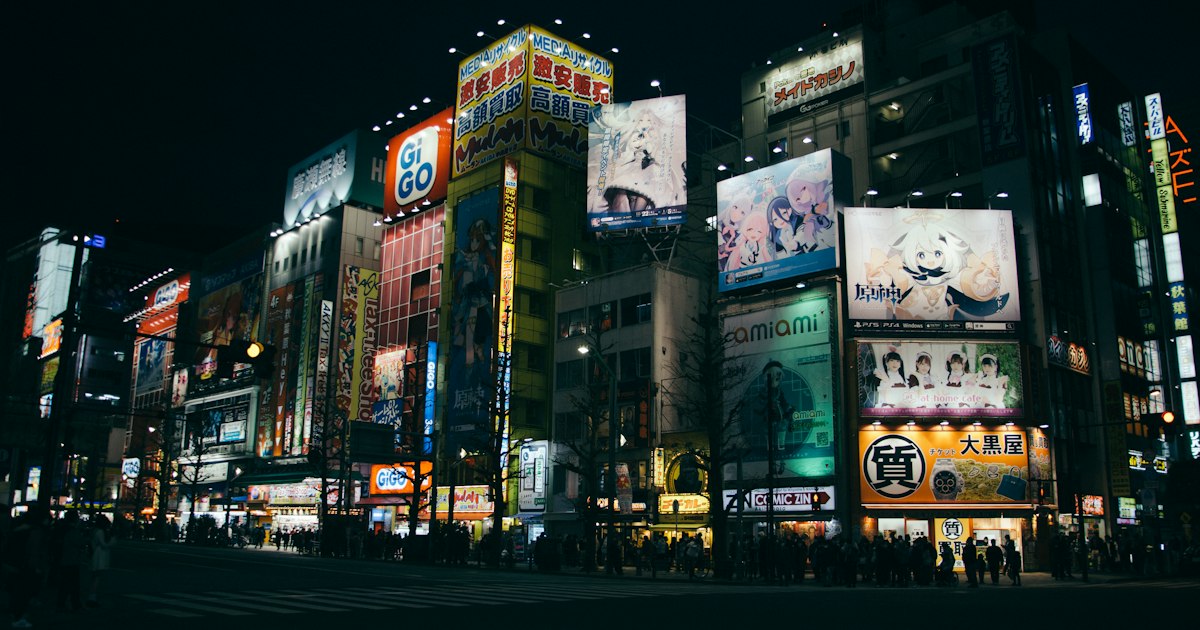
    Maid Cafes in Akihabara: What to Expect and How to Behave

    Photo by Chloe Evans on Unsplash

    Maid cafes are one of those Akihabara experiences that get built up so much in anime and YouTube videos that the reality can feel confusing once you’re standing outside one, staring at a sandwich-board menu covered in cartoon characters and unfamiliar pricing rules. This guide skips the hype and covers what actually happens inside, what it costs, and the etiquette that keeps both you and the staff comfortable.

    What a Maid Cafe Actually Is

    A maid cafe is a themed restaurant where staff dress in French-maid-style uniforms and treat customers as “master” or “princess” (goshujin-sama / ojou-sama) for the duration of the visit. The food is simple — omurice, parfaits, curry, drinks — and it’s secondary to the performance: staff draw ketchup hearts on your plate, lead short chants before you eat, and sometimes perform a song or dance set between tables. It’s closer to a themed dinner-theater experience than a “date” or hostess bar, and the vast majority of customers are ordinary tourists, families, and solo travelers rather than anime superfans.

    Where to Find Them in Akihabara

    Akihabara (a few minutes’ walk from Akihabara Station’s Electric Town exit) has the highest concentration of maid cafes in Japan. The two most tourist-friendly, English-menu-equipped chains are:

    • @home cafe — several branches stacked in the same building near the Chuo-dori main street, the most famous and beginner-friendly option.
    • Maidreamin — multiple locations across Akihabara with English-speaking staff at the busier branches and a similar format.

    Both post their hours and current branch locations on signage and staff hand out flyers on the street outside the station — that’s normal touting, not a scam, though always confirm the price sheet before you sit down. Most cafes run from around 11:00 or 12:00 until 20:00–22:00, with earlier last-order times, and hours shift on weekends and holidays, so treat any time you find online as approximate and check the door signage on the day.

    How Much It Costs

    Pricing is modular rather than a single admission fee, which is what trips up most first-timers:

    • Budget (~¥2,000–2,500 total): A seating/table charge (commonly ¥700–900 for a set time block) plus one required drink or light dish (roughly ¥900–1,300). This is the minimum to sit down and get the basic maid greeting and photo-op menu.
    • Mid-range (~¥3,000–4,500): Add a themed meal (omurice or curry sets typically ¥1,300–1,800), a dessert, and one or two “cheki” instant photos with a maid (usually ¥1,000–1,300 each, cash only in most cases).
    • Splurge (¥5,000+): Extended visits with multiple photos, small merchandise (charms, postcards, bookmarks around ¥500–1,500), and sometimes a paid mini-show or birthday/anniversary package if your visit coincides with a celebration event.

    Bring cash. Card payment is spotty even now, and cheki photos in particular are almost always cash-only. There’s often also a small “renewal” or time-based reseating charge if you want to stay past your allotted block — ask when you sit down so there are no surprises on the bill.

    House Rules and How to Behave

    Every cafe hands you a short rule sheet (often in English) at the door, but the core etiquette is consistent everywhere:

    • No touching the staff — no handshakes, high-fives initiated by you, or physical contact beyond what a maid offers first (some cafes do a small hand-heart gesture together).
    • No photos or video of the maids except through the paid cheki system or in designated photo moments; phones are otherwise meant to stay off or down during performances.
    • No asking for personal information — real names, social media, or meeting outside the cafe. Staff use cafe nicknames only.
    • Join the chants when asked (usually a short “moe moe kyun” gesture before your food) — it feels awkward the first time, but it’s expected and part of what you’re paying for, not optional theater you can opt out of.
    • Finish what you order — food waste is frowned upon, and portions are usually small enough that this isn’t a hardship.

    Staff are generally patient with tourists who are visibly unsure what to do — just watch the table next to you or ask quietly, and someone will walk you through it.

    Common Mistakes First-Timers Make

    The most frequent misstep is treating the visit like a bar and expecting to linger for hours over one drink — most cafes are built around a fixed time block (often 30–60 minutes), after which staff will politely ask if you want to renew or head out. Another is skipping the entrance/table charge in the total budget and being surprised at checkout, since menus display food and drink prices prominently but the seating charge is sometimes only on a separate card. Large groups should also confirm seating availability in advance during evenings and weekends, since popular branches queue up fast after 18:00. Finally, treating the maids as if the cafe were a hostess club — flirting, asking for contact info — will get you a firm but polite correction; the fantasy is scripted and platonic by design.

    Best Time to Visit

    Weekday afternoons (roughly 13:00–17:00) are the quietest and easiest for a relaxed, unrushed visit with shorter waits. Weekends and evenings after work hours are busiest with a mix of tourists and regulars, and some cafes run special seasonal events — Halloween costumes in October, Christmas-themed menus in December, cherry-blossom decor in spring — which add novelty but also longer lines. If you’re combining Akihabara with a broader Tokyo culture day, it pairs naturally with a morning visit to see traditional Japan up close, such as a sumo stable morning practice tour, before heading to Akihabara’s very different, very modern side in the afternoon.

    Getting There and Nearby Options

    Akihabara Station is served by the JR Yamanote, Sobu, and Hibiya/Tsukuba Express lines, about 10 minutes from Tokyo Station and 20–25 minutes from Shinjuku or Shibuya. Exit toward Electric Town and the main maid cafe cluster is within a five-minute walk along Chuo-dori. If you’re curious about the uniform culture that inspires the maid aesthetic in the first place, the seifuku shops in Harajuku are worth a separate visit. And if you end up staying in the neighborhood late after an evening of cafe-hopping and arcades, Akihabara has several branches of Japan’s manga kissa internet cafes, a legitimately cheap overnight option if you miss the last train home.

  • Manga Kissa: Japan’s Internet Cafes as a Budget Overnight Stay

    Manga Kissa: Japan’s Internet Cafes as a Budget Overnight Stay

    Photo by Leongsan on Unsplash

    Miss the last train, land on a red-eye flight with nowhere booked yet, or just want to stretch a shoestring budget across a few more nights in Tokyo? The manga kissa (漫画喫茶, “comic cafe”) is one of Japan’s most useful budget-travel secrets. For the price of a mid-range restaurant meal, you get a private reclining booth, unlimited soft drinks, a shower, and free Wi-Fi — open 24 hours, no reservation required. It’s not a hotel, but for one night it doesn’t need to be.

    What Is a Manga Kissa, Exactly?

    Manga kissa started as comic-book reading lounges — walls of manga volumes, individual booths with a TV or PC, and pay-by-the-hour pricing. Today most chains have expanded into full “complex cafes” (kanzen kanshitsu, or “internet cafe”) with private lie-flat or semi-flat booths, showers, drink bars, and sometimes laundry machines. You’ll find them clustered near major train stations — Shinjuku, Shibuya, Ikebukuro, Osaka’s Namba, and Fukuoka’s Tenjin all have dense clusters open around the clock.

    Crucially, they’re licensed as “internet cafes,” not lodging, so there’s no front-desk check-in the way a hotel requires — you pick a plan at a ticket machine or counter, get assigned a booth number, and that’s it.

    How Much Does It Cost?

    Pricing is almost always tiered by time block, and the overnight “night pack” (yoru pack, ヨルパック) is the one budget travelers want:

    • First-time membership card: 300–500 yen, one-time, required by most chains (bring your passport)
    • 3-hour pack: roughly 1,300–1,900 yen
    • Night pack (around 9pm/10pm–morning, 6–9 hours): roughly 1,900–2,900 yen
    • Drink bar (soft drinks, tea, coffee): usually included in the pack price, sometimes a flat 200–300 yen add-on
    • Shower: 300–500 yen extra, towel usually included or rented for ~100 yen

    All told, a night at a manga kissa typically runs 2,000–3,500 yen — well under even a capsule hotel (4,000–6,000 yen) and far below a business hotel room. Payment is by cash or IC card (Suica/Pasmo) at most locations; some now take credit cards too, but don’t count on it everywhere.

    What You Actually Get (Amenities)

    Booth types vary by chain and location, so check the seat map at booking:

    • Flat mat booths (フラットシート): the closest thing to a bed — a reclining seat that folds fully flat, curtained off, roughly 1×2 meters
    • Reclining chair booths: a large massage-chair-style seat, fine for a nap but not great for a full night’s sleep
    • Pair/box seats: larger enclosed rooms for two people, sometimes with a small sofa

    Every booth has a PC with internet access, and most chains offer free manga and magazines to read. Showers, sinks with toiletries for sale, vending machines, and sometimes simple food (curry rice, instant ramen) round things out. What you generally don’t get: a proper bed, silence (thin partitions, not soundproof walls), or daylight — many booths are windowless. Bring earplugs and an eye mask if you’re a light sleeper.

    Best Chains and Where to Find Them

    A few nationwide chains are reliable for foreign visitors because they’re large, well-signed, and used to non-Japanese-speaking guests:

    • Kaikatsu Club (快活CLUB): Japan’s largest chain, strong on flat-mat booths, found in almost every major city
    • Manboo (まんぼう): similar footprint, popular in Tokyo and Osaka entertainment districts
    • Bagus (バグース): common in Kansai, often has darts/karaoke combos
    • Media Cafe Popeye: frequent choice near Shinjuku and Shin-Osaka stations
    • Jiyu Kukan (自遊空間): good density around Tokyo’s Yamanote line stations

    Look for locations inside or right outside major stations — they’re the most convenient for an early departure, and useful if you’re trying to time a first Shinkansen out or, say, an early-morning outing like the sumo stable morning practice tours in Tokyo, which often start before 7am.

    When a Manga Kissa Makes Sense (and When It Doesn’t)

    It’s the right call when you’ve missed the last train (Tokyo’s subway and JR lines stop around midnight–1am) and a taxi back to your hotel would cost more than the night itself; when you land on a cheap red-eye and need a few hours before check-in opens; or when you’re stretching a trip during a sold-out period, like around a big hanabi taikai fireworks festival, when every hotel and capsule bed nearby is booked solid.

    It’s the wrong call if you need real sleep before a demanding travel day — the lighting, noise, and short seats add up over multiple nights. If you’re chasing overnight travel with a proper bed and moving distance at the same time, Japan’s sleeper trains like the Sunrise Izumo and Sunrise Seto are the better splurge, and for a long daytime journey in real comfort, the Green Car or Gran Class seats are worth the upgrade instead.

    Booking, Checking In, and Etiquette

    Most locations don’t take advance reservations for casual overnight stays — you simply walk in, and during peak periods (weekend nights, festival season, New Year) popular locations near stations can fill up by 11pm–midnight. If you’re relying on one as a backup plan, scope out two or three options near your station in advance using Google Maps, and have a backup neighborhood in mind.

    At check-in, staff will ask for ID (your passport works) to issue the membership card, then assign your booth. Basic house rules apply everywhere: no loud calls or video without headphones, no bringing in outside food in some locations (drinks from the bar are fine), and keep noise down after a certain hour since most guests are sleeping. Smoking booths and floors are usually separated from non-smoking — double-check if it matters to you, as older locations can still be smoky near entrances.

    Common Mistakes to Avoid

    • Assuming English support: ticket machines increasingly have an English toggle, but staff may not speak much English — a translation app helps for questions about shower timing or extending your stay
    • Forgetting the membership fee: that 300–500 yen card fee is separate from your time pack and is charged the first visit to each chain (each chain’s card is separate — a Kaikatsu Club card won’t work at Manboo)
    • Not checking the extension cutoff: night packs have a fixed end time; overstaying gets billed at the hourly rate, which adds up fast
    • Leaving valuables unsecured: booths have curtains, not locking doors — use the small lockers most locations provide for bags and electronics
    • Booking the wrong seat type: reclining chairs are fine for a two-hour nap but rough for six-plus hours; pay the small difference for a flat-mat booth if you actually need to sleep

    Used well, a manga kissa isn’t a downgrade so much as a different kind of Japan experience — cheap, always open, and oddly comfortable once you’ve found your chain of choice. Keep one in your back pocket for the nights your itinerary doesn’t quite line up with the trains.

  • Sleeper Trains in Japan: Riding the Sunrise Izumo & Sunrise Seto

    Sleeper Trains in Japan: Riding the Sunrise Izumo & Sunrise Seto

    Photo by Julien on Unsplash

    Japan’s bullet trains are so fast and frequent that overnight trains have mostly disappeared — except for one pair. The Sunrise Izumo and Sunrise Seto are the last regularly scheduled sleeper trains in the country, coupling together for the run out of Tokyo each night before splitting in two and rolling on to opposite ends of western Japan. For train fans, budget travelers who want to skip a hotel night, or anyone tired of domestic flights, it’s one of the most memorable ways to get around the country.

    What Are the Sunrise Izumo and Sunrise Seto?

    Both trains leave Tokyo Station coupled as a single 14-car set and travel together as far as Okayama, where they split. The Sunrise Izumo continues northwest through Okayama and Tottori prefectures to Izumoshi, near Izumo Taisha, one of Japan’s most important Shinto shrines. The Sunrise Seto crosses the Seto Ohashi Bridge into Shikoku and terminates in Takamatsu, the gateway city for the Seto Inland Sea art islands. Because they run as one train for most of the journey, you can book either destination from the same nightly departure.

    These are JR East and JR West joint services, operated with the 285 series sleeper trainset that has been in use since 1998. There is no dining car, so plan your food before boarding — a station bento from Tokyo Station is the easiest option, and it’s worth reading our bento box buying guide if you want to pick something more interesting than a standard convenience-store box. (If that link doesn’t resolve, use our general bento guide at japantrove.com.)

    The Route and Schedule

    The Sunrise Izumo/Seto departs Tokyo Station at 21:50 nightly from a dedicated platform, with an additional stop at Yokohama shortly after. It then runs through Shizuoka, Hamamatsu, and Toyohashi before reaching Okayama around 6:00 the next morning, where the two trains uncouple. The Sunrise Seto arrives in Takamatsu around 7:27, while the Sunrise Izumo continues on through Yonago and Matsue, reaching Izumoshi around 9:58. In the opposite direction, both trains depart their western terminals in the evening and arrive back in Tokyo the next morning around 7:00–8:00. Times shift slightly with each JR timetable revision, so confirm exact departure and arrival times on the JR West or JR East website before you travel.

    Because the whole point is sleeping through the journey, timing works out well if you’d otherwise burn a full travel day on the Shinkansen — you go to bed in Tokyo and wake up already in Izumo or on Shikoku, with a full day ahead of you.

    Room Types and What They Cost

    Fares are built in three layers: the base fare, the limited express (tokkyu) surcharge, and — for private rooms — a bed charge on top. Approximate one-way totals from Tokyo to Izumoshi or Takamatsu:

    • Nobinobi Zaseki (budget): Open carpeted sleeping berths with no bed or blanket provided (bring your own or rent one onboard) and no extra room charge — you pay only the base fare plus limited express fee, roughly ¥11,000–13,000 total. This is the only seat type covered in full by the Japan Rail Pass with no supplement.
    • Single (mid-range): A private single-occupancy compartment with a real bed, reading light, and a door that locks. Expect roughly ¥18,000–21,000 total including the room charge. This is the most common way to ride if you want privacy without splurging.
    • Single Twin / Single Deluxe (splurge): Larger private rooms with a wider bed and more floor space; Single Deluxe is the largest solo cabin on the train, closer to a small hotel room with a window seat. Expect roughly ¥26,000–29,000 total one-way.
    • B Twin / Sunrise Twin: Two-person compartments for couples or friends traveling together, priced per room rather than per person.

    If you’re weighing whether to spend on a private cabin versus riding cheap and comparing it to how JR prices its other premium seating, our guide to Green Car & Gran Class is a useful reference point — the Sunrise’s Single Deluxe sits in roughly the same comfort tier as Gran Class, just horizontal.

    How to Book Tickets

    This is the part that trips people up. Sunrise Izumo/Seto tickets go on sale exactly one month before the travel date, at 10:00 AM Japan time, through JR ticket windows (Midori no Madoguchi), JR travel agencies, or the JR East/JR West online reservation systems. Nobinobi Zaseki, being free of a room charge, is by far the most popular option and regularly sells out within minutes of going on sale — especially for Friday and Saturday departures, and during Golden Week, Obon, and New Year. If you want that berth, be at a ticket machine or on the booking site right at the 10:00 AM mark exactly 30 days ahead.

    Private rooms are easier to secure but still book up on weekends and holiday periods a week or two out. If you’re relying on a Japan Rail Pass, note that the pass covers Nobinobi Zaseki entirely, but for any private room you’ll need to pay the bed charge separately even with a valid pass — the base fare and limited express fee are covered, the room itself is not.

    What to Expect Onboard

    Every car has shared shower rooms operated with a card (sold from a vending machine onboard, limited quantity per departure, so don’t wait until the last stop before Okayama to grab one). There are vending machines for drinks and snacks but no proper meal service, which is why stocking up at Tokyo Station beforehand matters. Private rooms have a reading light, a small table, and an outlet; Nobinobi Zaseki berths are simply carpeted platforms divided by low partitions, comfortable enough for a night but worth bringing an eye mask and earplugs for. Announcements are made in Japanese and English at major stops, and the train is generally quiet after lights-out, but it is still a shared space — light sleepers should budget for a private room.

    Best Timing and Common Mistakes

    Weekday departures (Sunday through Thursday night) are noticeably easier to book than Friday and Saturday, and almost any date is harder during Golden Week (late April–early May), Obon (mid-August), and the New Year holidays. The most common mistakes are assuming you can just show up and buy a ticket at the station (Nobinobi Zaseki is reserved-only and routinely sold out), forgetting that there’s no dining car, and not checking which half of the train your carriage is in — Izumo and Seto cars are adjacent but split at Okayama, so boarding the wrong car means ending up in the wrong city.

    If you’re arriving in Takamatsu on the Sunrise Seto, it’s a natural jumping-off point for the Seto Inland Sea art islands — Naoshima, Teshima, and the wider Setouchi Triennale circuit are all a short ferry ride from the port, and our guide to Teshima is a good next stop if you want somewhere quieter than Naoshima. Arriving fresh off an overnight train and straight onto a morning ferry is one of the more efficient ways to start a Shikoku or art-island itinerary without losing a travel day to transit.

  • Hitsumabushi: Nagoya’s Layered Grilled Eel and Rice Specialty

    Hitsumabushi: Nagoya’s Layered Grilled Eel and Rice Specialty

    Photo by Xavier Chng on Unsplash

    If you only eat one meal in Nagoya, make it hitsumabushi. This is grilled freshwater eel (unagi) sliced and laid over rice in a lacquered wooden tub, and it’s eaten in a specific four-stage ritual that turns one dish into three different meals plus a bonus round. It’s rich, a little expensive, and genuinely worth the wait — but only if you know how to order it and eat it. Here’s what to expect before you go.

    What Makes Hitsumabushi Different From Unadon

    Unadon is a straightforward bowl of rice topped with a whole grilled eel fillet. Hitsumabushi is Nagoya’s own variation: the eel is chopped into smaller pieces and mixed evenly through the rice in a round wooden tub (ohitsu), then served with a rice paddle, a pot of dashi or hot tea, and condiments like nori, wasabi, and chopped scallion on the side. The point of chopping and mixing the eel is portion control — you divide the tub into four equal servings with the paddle before you start eating, because each quarter gets treated differently.

    The dish is said to have originated at Atsuta Horaiken, a Nagoya eel restaurant dating to the 1870s, though the exact backstory (staff eating broken leftover pieces, or minimizing waste during busy service) varies by who’s telling it. Either way, it’s now considered one of Nagoya’s signature dishes alongside miso katsu and tebasaki chicken wings.

    The Correct Way to Eat It (Four Ways in One Bowl)

    Once your tub arrives, use the paddle to split it into four roughly equal portions without removing any rice from the tub. Then:

    • First quarter — eat it plain, straight from the tub, to taste the eel and sauce on their own.
    • Second quarter — scoop it into your individual bowl and add the condiments (nori strips, wasabi, scallion) to change the flavor profile.
    • Third quarter — scoop it into the bowl, add the condiments again, then pour the hot dashi or tea over it ochazuke-style, so it becomes a light, savory soup.
    • Fourth quarter — eat it however you decided you liked best after trying the first three.

    Staff at traditional shops will often explain this on a card or small sign at the table, sometimes in English. Don’t rush; the whole point is contrast between the three styles, so pace yourself rather than plowing through the tub in one method.

    Where to Try It in Nagoya

    Splurge: Atsuta Horaiken is the classic choice and the closest thing to “the original.” The Jingu branch, a short walk from Atsuta Shrine, and the Honten (main shop) near Marunouchi are the two most-visited locations. Expect to pay roughly ¥4,000–5,500 for a hitsumabushi set depending on size (small/regular/large), and be ready to queue — there’s no reservation system at the historic branches, and waits of 60–90 minutes are normal on weekends and around lunch. Hours are typically 11:30–14:00 and 16:30–20:30, and the Honten is closed on Wednesdays, so check the current schedule before you go since eel restaurants adjust holidays seasonally.

    Mid-range: Unagi Naritaya has multiple branches around Nagoya Station and takes reservations, which makes it far more convenient for visitors on a schedule. A hitsumabushi set runs roughly ¥3,000–4,000, and portions are generous. This is the best pick if you want the real dish without burning half a travel day on a queue.

    A different take: Yamamotoya Sohonten serves its own hitsumabushi-style eel with a heavier, slightly spiced sauce and a more intense flavor — some travelers prefer it, others find it too rich. It’s a good second visit if you’re an eel fan staying in Nagoya more than a day.

    Budget: Department store restaurant floors (depachika) and station-adjacent set-meal restaurants sometimes offer smaller hitsumabushi-style lunch sets for ¥2,000–2,800, especially at lunch. Portions are smaller and the eel quality varies, but it’s a reasonable way to try the format without the splurge price.

    Getting There and Best Times to Go

    Nagoya sits on the Tokaido Shinkansen line, about 100 minutes from Tokyo and around 50 minutes from Shin-Osaka on a Nozomi or Hikari train, so it works well as a day trip or a one-night stop between the two cities. If you want extra legroom and a quieter car for the ride in, the Green Car is worth considering on a longer Shinkansen leg. From Nagoya Station, the Atsuta Shrine area (and the Jingu branch of Atsuta Horaiken) is a short subway or train ride away, and it pairs naturally with a shrine visit — Atsuta Shrine is one of Japan’s most important Shinto sites, and shops nearby sell omamori if you want a souvenir with more meaning than a keychain (see our guide to omamori and what they represent).

    Go for an early lunch (11:00–11:30 arrival) or a mid-afternoon window between lunch and dinner rushes if you want to minimize queueing at the popular shops. Weekday lunches are noticeably calmer than weekend lunches. There’s no strong seasonal closure to worry about — eel is served year-round — but late July, around the traditional “Day of the Ox” (doyo no ushi no hi) when eating eel for stamina is a nationwide custom, sees the heaviest local demand and the longest lines.

    Price and Why Eel Isn’t Cheap Anymore

    Japanese eel (Anguilla japonica) stocks have declined for years, and glass eel (juvenile eel used for farming) catches have been unpredictable, which has pushed prices up across the country. Don’t expect a hitsumabushi bargain — a proper set at a dedicated eel restaurant will rarely dip under ¥3,000, and the well-known shops sit closer to ¥4,000–5,500. Treat it as a planned splurge meal rather than a casual lunch, and budget accordingly if you’re also trying other Nagoya specialties like miso katsu or tebasaki on the same trip.

    Common Mistakes to Avoid

    • Eating it like unadon. If you don’t divide the tub into fourths first, you’ll finish the eel before reaching the ochazuke stage — that’s the most common regret visitors report.
    • Skipping the queue math. Historic shops like Atsuta Horaiken don’t take reservations, so arriving at peak lunchtime without a backup plan can eat 90 minutes of your itinerary.
    • Assuming all locations are equal. Branches of the same restaurant can vary in wait time and even slightly in menu — the Jingu branch near Atsuta Shrine is usually busier than smaller satellite locations.
    • Overpouring the dashi. Add it gradually to the third portion; too much turns the rice soupy and dilutes the eel flavor rather than complementing it.

    If you enjoy eel and want to compare it against another Nagoya-region seasonal specialty with strict serving etiquette, it’s worth reading up on fugu and where to eat it safely before heading further into central Japan. And if you’re curious about the soy-based tare sauce brushed onto the eel while it grills, our guide to Japanese soy sauce regional styles covers how those glazes differ by region. Eel also pairs well with a dry, slightly warm sake — if that interests you, see our overview of Japan’s major sake brewing districts for context on what to order alongside your tub.

  • Fukuoka’s Yatai Food Stalls: Nakasu’s Open-Air Carts and How to Order

    Fukuoka’s Yatai Food Stalls: Nakasu’s Open-Air Carts and How to Order

    Photo by Wkndr on Unsplash

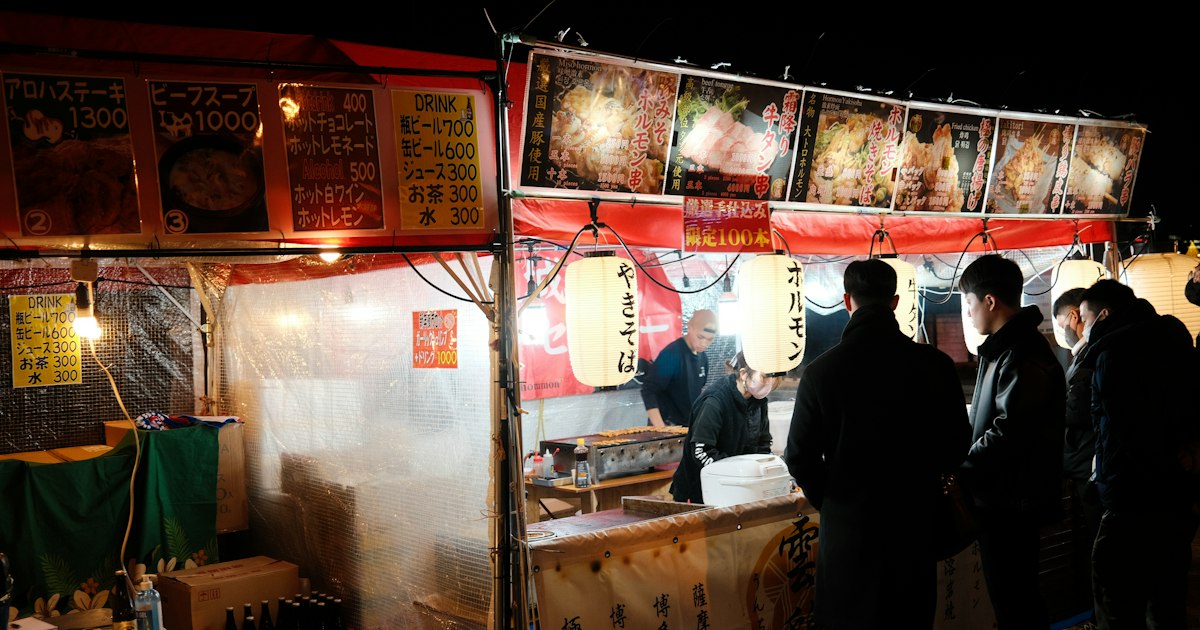
    Every evening around sunset, a strip of riverside pavement in central Fukuoka fills with wheeled carts, plastic tarps, and folding stools. Chefs light burners, hang paper lanterns, and within an hour a parking lot has become one of Japan’s last surviving open-air dining scenes. This is Nakasu’s yatai district — and while the ramen and yakitori are reason enough to go, the ordering etiquette trips up almost every first-time visitor. Here’s what you actually need to know.

    What Makes Nakasu’s Yatai Different

    Yatai are mobile food stalls — essentially a cart with a counter, a tarp roof, and eight to ten stools — that get assembled each evening and packed away by early morning. Fukuoka is the only major Japanese city where this culture survives at scale, with roughly 100 licensed stalls citywide, split mainly between Nakasu (around 40 stalls), Tenjin, and Nagahama. Nakasu, the narrow island between the Naka and Hakata rivers, has the highest concentration and the most atmospheric setting, with stalls lined up along the riverside promenade facing the water and the Fukuoka Tower-lit skyline behind you.

    Each stall specializes in a narrow menu — one might do only tonkotsu ramen, another only yakitori, another motsunabe (Fukuoka’s beef and pork offal hot pot) or tempura. Regulars “yatai hop,” eating a small plate or bowl at two or three stalls over the course of an evening rather than settling in at one.

    Getting There and Best Time to Go

    The closest station is Nakasu-Kawabata on the subway’s Kuko Line, about a two-minute walk to the riverside stalls. From Tenjin, it’s a 10–15 minute walk across the Fukuhaku Deai Bridge. If you’re arriving from Tokyo or Osaka, the Sanyo/Kyushu Shinkansen runs directly into Hakata Station, about 15 minutes by subway or taxi from Nakasu — worth booking a Green Car seat if you want extra legroom on the long ride down.

    Stalls typically open around 6pm and run until 1–2am, though exact hours vary stall by stall and many close on Sundays or in bad weather (there’s no shelter beyond a tarp, so rain thins the crowds). Late spring and autumn are the most comfortable seasons to sit outside for a couple of hours; winter stalls stay open with vinyl side-curtains and portable heaters, while summer nights can be humid but lively. Arrive by 6:30–7pm on weeknights to get a seat without waiting; Friday and Saturday nights from 7pm onward routinely produce short queues at the popular stalls.

    How the Ordering System Actually Works

    There’s no host stand — you simply take an open stool at the counter, and the chef will greet you and often hand over a simple menu (some near Nakasu now have English or photo menus, given the tourist traffic). Most stalls charge a small seating/otsumami fee, typically 300–500 yen, similar to the otoshi charge at a standard izakaya — it usually comes with a small starter dish. Almost every yatai is cash-only, so bring enough 1,000-yen notes; don’t count on a card or IC card reader.

    Because seating is limited to under a dozen stools, there’s an unspoken norm of not overstaying — plan for roughly 60–90 minutes per stall if it’s busy, then move on to the next one. Groups larger than four are hard to seat together, so parties often split across two stalls or wait for a full pair of open seats.

    What to Order (and What It Costs)

    Nakasu’s signature dish is Hakata-style tonkotsu ramen — thin noodles in a cloudy pork-bone broth, usually 700–900 yen a bowl, with a side option to order “kaedama” (an extra portion of noodles for the leftover broth, around 150 yen). Yakitori skewers run 150–350 yen each depending on the cut. Hakata gyoza, pan-fried with a thin, crisp skin, typically comes in sets of five or six for 400–600 yen. If you want the true Fukuoka specialty, order motsunabe — a hot pot of beef or pork offal, garlic, chives, and cabbage in a soy or miso broth, usually sold as a set for two people at 1,500–2,500 yen. The broth here often reflects Kyushu’s sweeter soy sauce tradition, which is worth knowing if you’re curious about how regional shoyu styles change a dish’s flavor. Beer runs about 500–600 yen, and a small flask of local sake is usually 600–900 yen.

    Budget, Mid-Range, and Splurge Nights

    On a tight budget, one bowl of ramen and a drink at a single stall comes to around 1,200–1,500 yen. A mid-range night — hopping two or three stalls with a few yakitori skewers, gyoza, and drinks at each — lands around 4,000–6,000 yen per person, which is the most common way locals do it. For a splurge, seek out one of the handful of yatai known for higher-end motsunabe or seasonal seafood, where a full course with sake pairing can run 8,000–10,000 yen; some of these require a phone reservation, which a hotel concierge can usually help arrange. If pufferfish is on your list for the trip, Fukuoka is also one of the best and safest places in Japan to try fugu, though it’s served at dedicated restaurants rather than at yatai carts.

    Common Mistakes First-Timers Make

    • Showing up too early. Most stalls aren’t set up before 6pm; arriving at 5pm just means an empty lot.
    • Expecting to pay by card. Bring cash — very few stalls take anything else.
    • Not knowing about the seat charge. The 300–500 yen otsumami fee isn’t optional and isn’t a scam; it’s standard practice.
    • Overstaying during peak hours. On a packed Friday night, lingering for two-plus hours at a ten-seat stall is considered inconsiderate when people are waiting.
    • Turning up as a group of six or more. Stalls physically can’t seat large parties together — split up or pick a bigger izakaya instead.
    • Skipping the closed days. Many stalls are shut on Sundays or rotate days off, so if you have one specific stall in mind, check ahead rather than assuming it’ll be there.

    Etiquette Tips for a Smooth Night

    Let the chef direct you to an open seat rather than picking your own — space is tight and they’re managing the flow. Order isn’t complicated: point at the menu or say the dish name, and food usually arrives within a few minutes since portions are small. Chatting with the strangers next to you is part of the culture, not an intrusion — the counter seating is designed for it. Mention any allergies up front, since these are one- or two-person operations with little room to improvise substitutions. Tipping isn’t expected. And if you’re visiting Fukuoka in late summer, check whether your dates overlap with one of the region’s fireworks festivals — Nakasu gets especially lively on those nights, so book your yatai plans around the crowds rather than against them.

  • Japanese Oral Care: Toothpaste, Toothbrushes & Mouthwash Worth Buying

    Japanese Oral Care: Toothpaste, Toothbrushes & Mouthwash Worth Buying

    Photo by Content Pixie on Unsplash

    Japanese drugstores are a rabbit hole. What starts as a quick stop for sunscreen or eye drops usually ends with you standing in the oral care aisle, staring at forty kinds of toothpaste in Hello Kitty tubes, medicinal-looking mouthwash bottles, and toothbrushes engineered with more precision than some kitchen gadgets. It’s not hype — Japan’s oral care industry is genuinely ahead of the curve on bristle design, enamel-repair formulas, and breath care, and most of it costs less than the equivalent “Japanese import” price you’d pay back home. Here’s what’s actually worth buying, where to find it, and what to know before you check out.

    Why Japanese Oral Care Stands Out

    Two things set these products apart. First, ingredient innovation: brands like Apagard built entire product lines around hydroxyapatite, a mineral that mimics tooth enamel and remineralizes microscopic damage — it was a niche Japanese-only ingredient for years before slowly appearing in Western products. Second, obsessive attention to mouthfeel and bristle mechanics. Japanese toothbrush makers treat bristle taper, tuft density, and handle angle the way camera makers treat lenses. Combine that with flavors you won’t find elsewhere — salt, matcha, plum, even charcoal-black pastes — and a single drugstore visit can replace an entire year’s dental aisle shopping.

    Toothpaste Worth Packing Home

    Skip the tourist-shelf souvenir packs and look for these:

    • Apagard Premio / Royace (¥1,800–2,600 for 100g) — the hydroxyapatite whitening paste dentists actually recommend. Premio is the everyday version; Royace adds a stronger polishing formula.
    • Sunstar Ora2 (¥350–600) — the budget-friendly stain-removal line found in every convenience store, with a genuinely satisfying foam and citrus-mint flavor.
    • Kobayashi Breath Labo / Nonio toothpaste (¥400–550) — built specifically around long-lasting breath freshness rather than just cleaning.
    • Shiseido Ha to Haguki (Tooth & Gum) (¥600–900) — a mild, medicinal-tasting paste aimed at gum sensitivity, popular with older Japanese shoppers.

    One important note: Japanese toothpaste historically capped fluoride at 1000ppm, well below the 1450ppm common in the US and Europe. Regulations changed in 2017 to allow up to 1500ppm, and most major brands now print the fluoride concentration clearly on the box — look for “フッ素” (fluoride) followed by the ppm number if you want to match what you use at home.

    Toothbrushes: Where the Real Engineering Is

    This is the category that surprises people most. Japanese toothbrushes are sold by bristle hardness (ふつう/normal, やわらかめ/soft, かため/hard) and by highly specific use cases — there are brushes designed just for the back molars, just for braces, just for sensitive gumlines.

    • Ci Medical brushes (¥250–400 each) — a dental-professional brand sold in drugstores, prized for ultra-thin tapered bristles that clean between teeth without floss-level effort.
    • Systema toothbrushes (¥200–350) — the compact, angled head is designed to reach the back of the mouth; a favorite with Japanese dentists for its gum-line access.
    • EBiSU brushes (¥300–500) — another dental-clinic-adjacent brand with unusually soft, dense bristle tips.

    Buy two or three of different hardness levels — at these prices it’s cheap experimentation, and most travelers find at least one style noticeably better than what’s sold at home.

    Mouthwash and Breath Care

    Japan takes breath odor seriously, partly due to the social etiquette around close-quarters conversation on trains and in offices. That’s produced some genuinely excellent products:

    • GUM mouthwash (¥1,000–1,400 for 250–500ml) — a Sunstar brand focused on gum health, alcohol and non-alcohol versions available.
    • Nonio mouthwash (¥550–750) — punchy, long-lasting mint, sold in small travel bottles as well as full size.
    • Breath care tablets and sprays (¥300–600) — brands like FRISK and Mintia sell alongside the mouthwash and make easy, packable stocking stuffers.

    If you’re chasing novelty flavors the way some travelers chase regional snack variants — the same instinct that drives people to hunt down regional Calbee potato chip flavors — the oral care aisle rewards that same curiosity. Seasonal and regional toothpaste flavors (yuzu, sakura, even wasabi as a novelty) show up periodically, especially in department store basements and specialty drugstores.

    Where to Buy and What to Expect to Pay

    You don’t need to hunt for a specialty shop — every neighborhood has options, and prices vary more by chain than by location:

    • Matsumoto Kiyoshi — Japan’s largest drugstore chain, typically open 9:00 or 10:00 to 22:00. Reliable stock of every mainstream brand, plus a tax-free counter for purchases over ¥5,000 before tax.
    • Don Quijote — many locations open until 2:00–5:00 AM or run 24 hours, useful if you’re shopping after a late flight or evening out. Prices run slightly higher than dedicated drugstores but the selection is huge and chaotic in the best way.
    • Daiso and other ¥100 shops — travel-size toothbrushes, tongue scrapers, and interdental brushes for ¥110 each. Not the place for premium toothpaste, but great for cheap, disposable extras.
    • Tokyu Hands and Loft — better for design-forward toothbrushes and gift-boxed sets than for everyday deals, but worth a look if you’re shopping in areas like Nakameguro, where small boutique drugstores stock curated, harder-to-find brands.

    Budget travelers can put together a solid haul — toothpaste, brush, and travel mouthwash — for under ¥1,500 total. Mid-range shoppers land around ¥3,000–4,000 for a few tubes of Apagard, a couple of Ci brushes, and full-size mouthwash. The splurge move is stocking up on Apagard Royace and gifting sets, which can run ¥5,000–8,000 but last months and make genuinely appreciated souvenirs for anyone dental-obsessed back home.

    Common Mistakes to Avoid

    A few things trip up first-time buyers:

    • Assuming ppm matches home. If you rely on high-fluoride paste for sensitive teeth, check the box rather than assuming it matches your usual brand.
    • Packing full-size mouthwash in carry-on luggage. Airport security in Japan enforces the standard 100ml liquid limit for carry-on; buy mouthwash near the end of your trip and either check it or purchase travel-size bottles.
    • Overbuying without checking customs rules at home. Whitening pastes and some breath-care products are classified as quasi-drugs in Japan, and rules on quantities differ by destination country. If you’re also picking up any medicated items, it’s worth reviewing the customs rules for bringing medicine into and out of Japan before you check out.
    • Skipping the receipt for tax-free purchases. Tax-free eligibility requires your passport at checkout and spending over ¥5,000 before tax at a single participating store in one transaction — stacking small purchases across different stores won’t qualify.

    There’s no real seasonality to oral care shopping — stock stays consistent year-round, though department stores sometimes run gift-set promotions around Japanese gift-giving seasons in July (ochugen) and December (oseibo), which is a good time to find nicely packaged sets at a discount. Otherwise, any drugstore visit on any day of your trip will get you sorted.

  • Sarubobo: Hida Takayama’s Faceless Good-Luck Doll and Where to Buy

    Sarubobo: Hida Takayama’s Faceless Good-Luck Doll and Where to Buy

    Photo by Rogério Toledo on Unsplash

    In the old town of Hida Takayama, tucked between mountain ranges in northern Gifu Prefecture, you’ll spot a small red figure hanging in shop windows, tied to backpacks, and stacked on market tables by the dozen. It has no eyes, no nose, no mouth — just a rounded red body, stubby limbs, and a knotted head. This is the sarubobo, one of Japan’s most charming and least understood good-luck charms. Here’s what it actually means, and where to buy one that’s worth bringing home.

    What Is a Sarubobo, and Why No Face?

    Sarubobo (さるぼぼ) literally means “baby monkey” in the local Hida dialect. The dolls were traditionally handmade by grandmothers from scraps of old kimono cloth, stuffed with cotton, and given to grandchildren and new mothers as protective charms — for safe childbirth, a good marriage, and general household luck. Red was the original and most common color, chosen because red was believed to ward off illness and misfortune, and because it was historically an expensive, valuable dye.

    The absence of a face is deliberate, not unfinished. Without specific features, the doll doesn’t have a fixed expression, so it’s said to take on the mood of its owner and reflect back whatever feeling it’s given — a kind of blank-slate companion rather than a fixed character. Some older explanations also tie it to the idea that a faceless charm can’t “see” misfortune coming toward its owner, so it can absorb bad luck more readily. If you’ve read about omamori, the paper-and-cloth amulets sold at shrines and temples, sarubobo work on a similar principle — a portable object carrying a specific wish — but they’re a folk craft item rather than a blessed religious object, so you won’t find them for sale inside shrine grounds the way you would omamori.

    What the Colors Mean

    Modern sarubobo makers have expanded well beyond the original red, and each color is now marketed with its own wish, similar to how omamori are color-coded by purpose. The most common pairings you’ll see on shop signage in Takayama:

    • Red — the traditional color, for good match-making, marriage, and general good fortune
    • Pink — love and romance
    • Yellow — money and financial luck
    • Blue — success in work or study
    • Green — health
    • Purple — longevity
    • Black — protection from traffic accidents, sometimes sold as a car charm

    Don’t take the color chart too seriously as ancient doctrine — it’s a fairly recent tourism-era addition layered onto an older folk object, similar to how omamori shrines expanded from one or two general charms into dozens of specific ones for exams, safe driving, and matchmaking. Buy the color that appeals to you or matches the occasion (pink for a friend’s wedding, yellow for a coworker starting a new job) and don’t worry about getting it “wrong.”

    Where to Buy Sarubobo in Takayama

    You can find mass-produced sarubobo keychains all over Japan, including in Tokyo souvenir shops, but for the real Hida-made article, buy in Takayama itself.

    • Miyagawa Morning Market (Miyagawa Asaichi) — a row of open-air stalls along the Miyagawa River in the old town, open roughly 7:00am–12:00pm from April to October and 8:00am–12:00pm from November to March. Several stalls sell handmade sarubobo alongside pickles, produce, and local crafts. This is a good spot for one-of-a-kind, slightly rougher handmade pieces rather than uniform factory versions.
    • Jinya-mae Morning Market — a smaller market directly in front of Takayama Jinya (the old government house), with similar hours and a similar mix of craft stalls.
    • Sanmachi Suji old town district — the preserved Edo-period merchant streets a short walk from the station, lined with craft shops, sake breweries, and souvenir stores that stock sarubobo in every size, from tiny phone charms to large plush versions. Shops here generally run 9:00am–5:00pm.
    • Shops along Kokubunji-dori, the street connecting JR Takayama Station to the old town, including dedicated sarubobo specialty stores where you can see the full color range and size range side by side.

    Because sarubobo were originally handmade at home, quality and stitching vary shop to shop — it’s worth comparing a couple of stalls or stores before buying if you want a tighter weave and cleaner seams rather than the cheapest keychain version.

    How Much to Budget

    • Budget (roughly ¥500–800): small keychain or strap-sized sarubobo, a few centimeters tall — the easy, pack-light souvenir
    • Mid-range (roughly ¥1,000–1,500): standard hanging doll, around 10–15cm, the size most commonly seen displayed in homes and cars
    • Splurge (roughly ¥3,000–6,000+): large plush versions, sets in multiple colors, or sarubobo incorporated into other goods like pouches, phone cases, or Hida-Shunkei style lacquerware accents

    Prices are generally fixed and non-negotiable at both the morning markets and shops. Cash is still useful at the market stalls, though most old-town shops now take cards.

    Best Time to Visit

    Takayama is worth visiting for its own sake, not just for sarubobo shopping. Spring (early-mid April) and autumn (early-mid October) bring the Takayama Festival, with enormous, elaborately carved floats paraded through the old town — one of Japan’s most famous festivals and a spectacular time to combine sightseeing with souvenir shopping, though accommodation books up and prices rise well in advance. If you want the morning markets without festival crowds, aim for a weekday in late spring or autumn when the weather is mild and the old town is still walkable without long queues. Winter brings heavy snow and a quieter, more atmospheric old town, but some outdoor stalls scale back.

    Getting to Takayama

    Takayama sits on the JR Takayama Line. The most common route is the limited express Hida from Nagoya, taking around 2 hours 20 minutes; there’s also a direct line from Toyama (around 1.5 hours), useful if you’re coming from the Hokuriku side after visiting Kanazawa. Highway buses connect Takayama to Tokyo (Shinjuku, around 5.5 hours), Kyoto and Osaka, and Matsumoto (around 2 hours 40 minutes), which is handy if you’re combining Takayama with the Japan Alps or Kamikochi. If you’re using a rail pass that covers reserved seating on limited express trains, it’s worth checking whether an upgraded seat class makes sense for the Nagoya–Takayama leg — see our guide to Green Car and Gran Class seating for how those upgrades work and whether they’re worth it on a given route.

    Common Mistakes to Avoid

    • Buying from a generic Tokyo souvenir shop and assuming it’s the same thing. You’ll find sarubobo-branded goods nationwide, but the ones actually made in Hida tend to have better stitching and are the more meaningful version to bring home from this specific trip.
    • Arriving at the morning markets after noon. Both markets wind down by midday, and stalls pack up promptly — plan sarubobo shopping for the morning, not as an afternoon add-on.
    • Overpaying for a “matched set” you don’t need. Multi-color gift boxes are marketed hard to tourists; a single doll in the color that matches your wish is just as authentic and much cheaper.
    • Forgetting it’s a folk charm, not a blessed religious item. Unlike omamori, sarubobo aren’t consecrated at a shrine, so there’s no ritual return period or disposal custom to worry about — it’s fine to keep one indefinitely or give it as a casual gift.

    If you’re building out a broader Japan souvenir list beyond Takayama, it’s worth browsing regional craft guides like Hakone’s yosegi zaiku mosaic boxes for another distinctive, place-specific buy that travels well and holds up better as a keepsake than generic gift-shop items.

  • Omamori: Japan’s Shrine and Temple Amulets and What They Mean

    Omamori: Japan’s Shrine and Temple Amulets and What They Mean

    Photo by Johnny Ho on Unsplash

    Walk up to any shrine or temple counter in Japan and you’ll see rows of small brocade pouches hanging on pegs — pink for love, blue for travel, gold for money. These are omamori, and they’re one of the easiest, most meaningful souvenirs a visitor can bring home, as long as you understand what you’re actually buying and how to treat it. Here’s what the pouches mean, where to get ones that feel authentic to your trip, and the etiquette mistakes most tourists don’t realize they’re making.

    What an Omamori Actually Is

    Omamori (お守り) are small cloth-wrapped amulets sold at both Shinto shrines and Buddhist temples in Japan. Inside the sealed pouch is a paper or wooden talisman inscribed with a prayer, blessed by the shrine or temple’s priests. The pouch itself is never meant to be opened — doing so is considered to release or “spend” the blessing, which is the single most common mistake visitors make. You’re supposed to carry it with you (in a bag, on a keychain, in a car) or keep it somewhere meaningful at home, not display the contents.

    Unlike a generic souvenir, an omamori is technically only “real” if it comes from an actual shrine or temple’s sales counter (called a juyosho), not a gift shop or train station kiosk selling look-alikes. That distinction matters if you want the genuine article rather than a novelty item.

    The Main Types and What They’re For

    Most shrines and temples stock a similar core lineup, and the kanji on the front usually tells you the purpose even if you can’t read them fluently:

    • Kotsu-anzen (交通安全) — traffic and travel safety, popular for rental car keychains
    • En-musubi (縁結び) — love and good relationships
    • Gakugyo-joju (学業成就) — academic success, big with students before exam season (January–February)
    • Kanai-anzen (家内安全) — family and household safety
    • Shobai-hanjo (商売繁盛) — business prosperity
    • Anzan (安産) — safe childbirth
    • Byoki-heiyu (病気平癒) — health and recovery from illness

    Many shrines now also sell novelty and collaboration omamori — Hello Kitty, Studio Ghibli tie-ins, or ones shaped like Wi-Fi symbols for “IT security” (Kanda Myojin in Tokyo is famous for this, reflecting its location near Akihabara’s electronics and gaming district).

    Where to Buy Them

    You don’t need to seek out anything obscure — omamori are sold at essentially every shrine and temple in the country, from tiny neighborhood shrines to major pilgrimage sites. What changes the experience is context. Visiting a temple with real pilgrimage history, like Zenko-ji in Nagano, and picking up an omamori there afterward gives the object a story that a random shrine near your hotel won’t. Similarly, shrines tied to a specific purpose are worth a small detour: Suitengu in Tokyo for safe childbirth charms, Dazaifu Tenmangu near Fukuoka or Yushima Tenjin in Tokyo for academic success (both dedicated to Sugawara no Michizane, Japan’s deity of scholarship), and Kanda Myojin for the tech-themed ones mentioned above.

    Sales counters typically open around 9:00am and close by 5:00pm, even at shrines whose grounds are accessible 24 hours. If you’re visiting a famous site during a busy season, get there earlier in the day — popular limited-edition or seasonal designs can sell out.

    How Much They Cost

    Budget (500–1,000 yen): The standard cloth omamori at almost any shrine or temple falls in this range. This is the normal price — if you see one costing far less at a souvenir shop, it isn’t a real blessed amulet.

    Mid-range (1,000–2,000 yen): Character collaborations, larger or more elaborately embroidered designs, and omamori from famous shrines with high foot traffic (Meiji Jingu, Senso-ji, Fushimi Inari) often sit here.

    Splurge (2,000–5,000 yen): Special hand-tied or gold-thread editions, larger household charms meant to be hung at home rather than carried, and omamori from major shrines like Ise Jingu or Izumo Taisha that involve more elaborate blessing rituals.

    There’s no cost benefit to buying multiples of the same type “just in case” — one omamori per purpose is standard, and stacking several for the same wish isn’t believed to multiply the effect.

    Etiquette: What to Do (and Not Do)

    • Don’t open the pouch. The talisman inside isn’t meant to be seen once it leaves the shrine.
    • Don’t throw an old one in the trash. Omamori are traditionally good for about one year. When you’re ready to retire one, the respectful way is to return it to a shrine or temple’s collection box (labeled something like 古札納め所, kofuda osamedokoro), where it will be ritually burned rather than discarded as garbage.
    • Return it to the same tradition, if not the same place. Shrine-bought omamori should ideally go back to a Shinto shrine, and temple-bought ones to a Buddhist temple, though most sites are relaxed about accepting either from travelers who can’t make it back to the exact location.
    • Hatsumode (New Year, roughly Jan 1–3) is the traditional swap point — many Japanese people buy a fresh omamori and return last year’s model during the same shrine visit, and shrines are well set up for it then, though it does mean bigger crowds.
    • Taking one out of Japan is completely fine — omamori aren’t restricted for export or import, unlike some other categories of goods travelers ask about (if you’re also researching what you can and can’t bring in and out of the country, see this guide on bringing medicine into and out of Japan).

    Making It Part of a Bigger Souvenir Haul

    Omamori pack flat and cost little, which makes them an easy add-on to a shopping day rather than a destination in themselves. If you’re building out a small collection to bring home as gifts, a Hakone yosegi zaiku puzzle box makes a nice display case for a set of amulets once you’re home, and if the idea of objects carrying protective meaning appeals to you, the mended indigo textiles covered in this guide to sashiko and boro come from a similar cultural instinct — reinforcing and protecting something worn close to daily life.

    Best Timing for a Visit

    Any time of year works, since shrines and temples sell omamori year-round, but two windows are worth knowing. Early January (Hatsumode) is the liveliest time to see omamori culture in action, with long lines and fresh stock, though it’s also the most crowded period at major shrines. Late January through early February is exam season in Japan, so academic-success charms at places like Yushima Tenjin see a real spike in local visitors — an interesting time to visit if you want to see the amulet’s purpose playing out in real time rather than just reading about it.