Japan Trove

Author: JapanTrove Editorial

  • Matsue & Izumo Taisha: San’in’s Castle Town and Ancient Shrine

    Matsue & Izumo Taisha: San’in’s Castle Town and Ancient Shrine

    Photo by Dana Andreea Gheorghe on Unsplash

    San’in — the quiet coastal region on Honshu’s Sea of Japan side — rarely makes a first-time Japan itinerary, and that’s exactly its appeal. Matsue and Izumo Taisha sit about 40 minutes apart in Shimane Prefecture, pairing one of Japan’s twelve surviving original castles with one of its two most important Shinto shrines. Neither location is crowded even in peak season, both are manageable as a long day trip or an easy overnight, and together they show a side of Japan that feels unhurried and lived-in rather than staged for tourists.

    Getting to Matsue and Izumo

    The honest answer is that San’in is remote, and that’s part of the planning. From Tokyo, the fastest route is flying into Izumo Airport (about 90 minutes from Haneda) or Yonago Airport near Matsue, then a bus or taxi into town. From Osaka or Kyoto, the Super Yakumo limited express runs from Okayama through Yonago to Matsue in roughly 2.5 hours; you’d reach Okayama first via Shinkansen. There’s no dedicated regional rail pass that makes this route free — the JR West passes cover parts of it, so it’s worth checking the coverage maps in our regional JR rail passes guide and the Kansai/Hokuriku pass breakdown before booking, since the Yakumo isn’t always included and a one-way reserved seat runs around 6,000-7,000 yen from Okayama. Once in Matsue, the Lakeline Bus loops past the main sights for 220 yen a ride or 550 yen for a one-day pass. Between Matsue Station and Izumo Taisha, the Ichibata Railway (locals call it the “Bataden”) takes about an hour with a transfer at Kawato, or a direct bus from Matsue takes roughly an hour for around 1,000 yen.

    Matsue Castle: the real thing

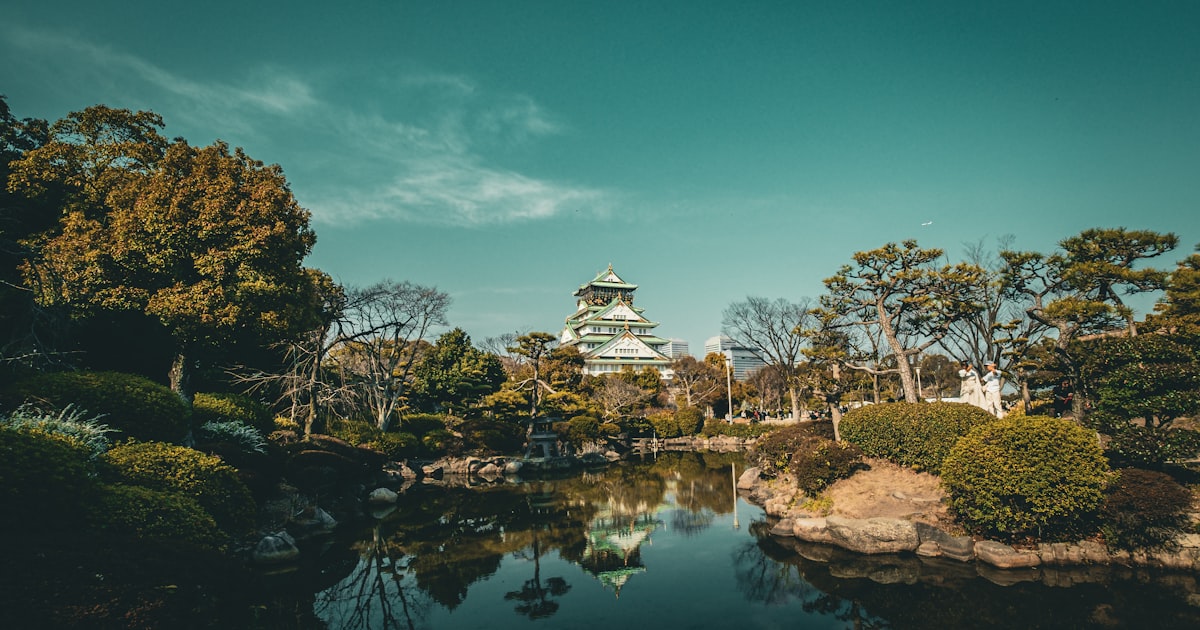
    Matsue Castle, completed in 1611, is one of only twelve Japanese castles with an original wooden keep — no concrete reconstruction, no elevator, just steep dark-wood staircases and centuries-old joinery. It was designated a National Treasure in 2015. Admission is 680 yen for adults, and the keep is open 8:30am to 6:30pm from April through September, and 8:30am to 5pm the rest of the year (last entry 30 minutes before close). Budget about an hour, more if you want to linger on the top floor, which gives a full view over Lake Shinji and the castle town. The surrounding Shiroyama Park is free to walk and especially worth it in early April, when roughly 190 cherry trees bloom around the moat — locals rate it among the best castle-and-sakura combinations in western Japan, without the Himeji-level crowds.

    Right below the castle, the Shiomi Nawate samurai district has preserved earthen walls and pine trees along a canal, plus the former residence of writer Lafcadio Hearn, who lived in Matsue in the 1890s and wrote some of the first English-language accounts of Japanese ghost stories and folk customs — a small museum next door covers his life for 400 yen.

    Lake Shinji and the canal boats

    Matsue calls itself the “Water City,” and the easiest way to understand why is a ride on the Horikawa Sugoi sightseeing boats, which circle the castle moat for about 50 minutes. Tickets are 1,600 yen for adults, boats run roughly every 15-20 minutes from 9am to sunset, and in winter the boats have kotatsu-style heated floors since the roof lowers to pass under bridges. Separately, Lake Shinji itself is famous for sunset — the western shore near Shirakata Tenmangu Shrine fills with people watching the sun drop into the water most clear evenings, and it costs nothing. If you’re a coffee person, note that Matsue and greater Shimane have an unusually strong kissaten culture tied to the region’s tea traditions; if you want to know what to order, our kissaten guide covers the etiquette and classic menu items you’ll find in the town’s old coffee shops.

    Izumo Taisha: one of Japan’s oldest shrines

    Izumo Taisha’s exact founding date isn’t recorded, but it’s mentioned in Japan’s oldest chronicles from the 8th century and is considered, alongside Ise Jingu, one of the two most important shrines in Shinto. The shrine is dedicated to Okuninushi, the god of marriage and relationships, which makes it a popular pilgrimage for people praying for good matches — you’ll see this reflected in the ema (prayer plaques) left at the site. The shrine grounds are open 24 hours and free to enter; the main hall (honden), a National Treasure rebuilt in 1744, is the tallest shrine building in Japan though the interior is closed to the public except during rare special openings.

    The most distinctive feature is the shimenawa — massive twisted straw ropes, the largest around 13 meters long and weighing several tons — hanging over the Kaguraden hall entrance. Tradition holds that all of Japan’s Shinto gods gather at Izumo Taisha every October (the old lunar tenth month), which is why that month is called Kannazuki, “month without gods,” everywhere else in Japan but Kamiarizuki, “month with gods,” here. If your trip lines up with it, the Kamiari Festival period draws bigger crowds and extra ceremonies. Otherwise, plan for 1.5-2 hours at the shrine, and go in early morning if you want photos of the shimenawa and torii gates without other visitors in frame.

    Common mistakes to avoid

    • Underestimating the distances. San’in isn’t compact like Kyoto — factor in real transit time between Matsue Station, the castle area, and Izumo Taisha rather than assuming everything is walkable.
    • Praying the wrong way. Izumo Taisha uses a distinctive “two bows, four claps, one bow” ritual at the main hall, unlike the standard two-clap sequence used almost everywhere else in Japan. Watch what other visitors do before you approach.
    • Skipping the castle’s last admission window. The keep’s last entry is 30 minutes before closing, and staff do enforce it — don’t arrive at 6pm expecting to climb to the top floor.
    • Traveling in high summer without a plan for heat. Both sites involve outdoor walking with limited shade; spring (cherry blossoms) and autumn are far more comfortable and scenic.

    Where to eat and what to buy

    Matsue’s signature dish is shijimi clam miso soup, sourced from Lake Shinji — nearly every local restaurant serves it, typically 500-800 yen as a side. For a sit-down meal, Warabi-tei near the castle serves set lunches with shijimi soup and local fish from around 1,500 yen. Izumo soba, made with unhulled buckwheat and served cold in stacked lacquered bowls (warigo soba), is the other regional specialty — expect 900-1,300 yen near Izumo Taisha’s approach street, Shinmon-dori, which is also lined with shops selling local sake, magatama bead jewelry (Izumo has an ancient jade-carving tradition), and sweets. If you pick up ceramics, sake, or other breakables here, our guide to shipping souvenirs home covers packing and comparing post office versus courier rates so you’re not carrying fragile items the rest of your trip.

    Budget, mid-range, and splurge notes

    On a budget, a day trip from Matsue costs little beyond transit: castle admission (680 yen), a bus pass (550 yen), and cheap soba or convenience-store food keeps you well under 5,000 yen excluding lodging. Mid-range travelers should consider staying one night in Matsue rather than day-tripping from Okayama or Hiroshima — business hotels near the station run 8,000-12,000 yen and free up a full second day for Izumo Taisha without a rushed transit schedule. For a splurge, Tamatsukuri Onsen, a hot spring town about 15 minutes from Matsue Station, has been used for bathing since the 8th century and is said to make skin beautiful; ryokan there with kaiseki dinner and private onsen access range from 25,000-45,000 yen per person, and it pairs naturally with a castle-and-shrine itinerary as an overnight base.
  • Onomichi: Setouchi’s Cat-Filled Port Town and Ramen

    Onomichi: Setouchi’s Cat-Filled Port Town and Ramen

    Photo by Ashton Christiansen on Unsplash

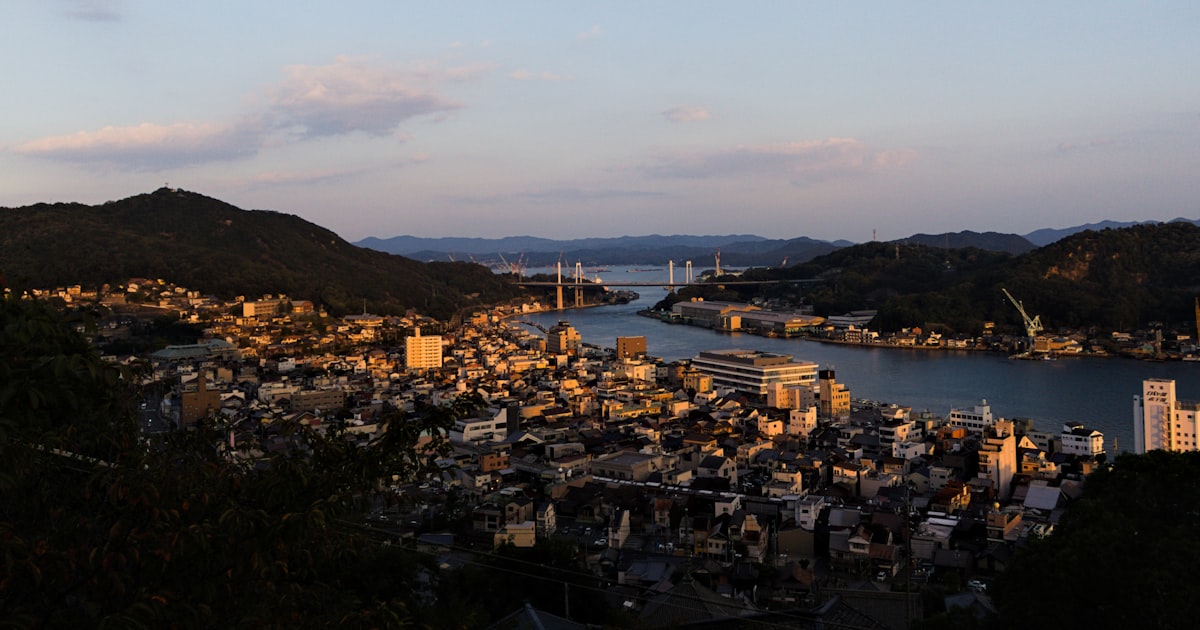
    Wedged between a hillside of temples and the calm waters of the Seto Inland Sea, Onomichi doesn’t try very hard to impress you — and that’s exactly why it works. Narrow stone paths wind past wooden houses, stray cats doze on sun-warmed steps, and the smell of soy-sauce ramen drifts out of shopfronts that have been serving the same recipe for decades. It’s a half-day or full-day stop, easy to reach from Hiroshima or Okayama, and a natural jumping-off point for the Shimanami Kaido cycling route to Shikoku.

    Getting to Onomichi

    Onomichi sits on the Sanyo Main Line in Hiroshima Prefecture. The most reliable route is Shinkansen to Fukuyama Station, then a local JR Sanyo Line train to Onomichi Station (about 15–20 minutes, roughly ¥330). From Osaka, that’s about 90 minutes total; from Hiroshima city, about 70 minutes with the same transfer at Fukuyama.

    There’s also a Shinkansen station called Shin-Onomichi, but only the slower Kodama trains stop there, and it’s inland — you’ll still need a 10-minute bus or taxi ride to reach the old town and waterfront, so most travelers find the Fukuyama transfer simpler. If you’re covering the wider Sanyo corridor (Hiroshima, Okayama, Kobe) by rail, check whether a regional JR West rail pass covers your route before buying individual tickets — it often pencils out cheaper for multi-stop itineraries.

    Onomichi Station itself sits right on the waterfront, a two-minute walk from the ferry terminal and the start of Cat Alley — there’s no need for local buses once you arrive.

    Neko no Hosomichi (Cat Alley) and the Cat Art Gallery

    The hillside behind Onomichi Station is laced with a maze of stepped alleys collectively nicknamed Neko no Hosomichi, or “Cat Alley.” Locals have long fed the neighborhood’s stray cats, and over the years the path has filled up with cat-shaped stones, hand-painted signs, and small shrines to feline visitors — plus, if you’re lucky and visit in the cooler morning or late-afternoon hours, actual cats napping on warm stone steps.

    Partway up the hill is the tiny Onomichi Neko no Bijutsukan (Cat Art Gallery), a converted storage building covered in painted “fuku-ishi” stones by local artist Yoshiaki Uchida — free to peek into, with a donation box inside. Don’t expect a den of cats sitting in wait for photos; they move around depending on the sun and the time of day, so if the alley looks quiet, try again an hour later rather than assuming they’ve vanished.

    Wear shoes with grip — the paths are a mix of stone stairs, steep concrete slopes, and gravel, and they get slippery after rain.

    Senkoji Temple, the Ropeway, and the Temple Walk

    Cat Alley threads directly into Onomichi’s “Temple Walk,” a roughly 2.5 km course connecting 25 temples scattered across the hillside. You don’t need to visit all of them — Senkoji Temple, with its vivid vermillion pagoda overlooking the harbor, is the highlight and the natural turnaround point.

    You can walk up (15–20 minutes of stairs from the base) or take the Onomichi Ropeway, which climbs to Senkoji Park in about 3 minutes. As of recent fares, a round trip runs roughly ¥700 for adults and ¥350 for children, with the ropeway typically running from around 9:00 to 17:15 (last ascent slightly earlier) — hours shift seasonally, so it’s worth confirming at the base station on arrival rather than assuming a fixed schedule. From the observation deck at the top, the view over Onomichi’s rooftops, the strait, and the Shimanami Kaido’s first bridge is the best photo op in town.

    Onomichi Ramen: What to Order and Where

    Onomichi is one of Japan’s recognized regional ramen styles, distinct for its soy-sauce (shoyu) base built on pork and seafood stock, topped with chunks of pork back fat (seabura) that melt slowly into the broth as you eat — richer than a typical shoyu bowl but not greasy in the tonkotsu sense. Flat, slightly chewy noodles are standard.

    A basic bowl runs about ¥700–900, making this one of the cheapest genuinely memorable meals in the region. Shukaen and Tacchan are two long-running shops near the station frequently named by locals as reference points for the style, though queues form at lunch on weekends — arriving right at opening (usually 11:00) or after 2pm avoids the worst of it. Most shops are cash-only or IC-card only, so carry some yen.

    If you want a change of pace after ramen, Onomichi’s covered shopping arcade (Onomichi Hondori) has old-school kissaten-style coffee shops tucked between the noodle counters — a useful contrast if you’ve already read our guide to Japan’s retro kissaten and want to spot the style here too.

    Best Time to Visit

    Spring (late March–April) brings cherry blossoms to Senkoji Park and comfortable walking weather for the hillside stairs. Autumn (late October–November) is equally pleasant and less crowded. Summer is hot and humid with strong sun on the exposed stone paths — bring water and a hat if you’re doing the full temple walk. Winter is mild by Japanese standards but the sea wind off the strait can be sharp, especially at the ropeway’s upper station.

    Onomichi also makes sense as a stopover for anyone tackling the Shimanami Kaido cycling route, since the town is the official Honshu-side starting point — spring and autumn are the best seasons for that ride too, avoiding both summer heat and winter headwinds.

    Budget, Mid-Range, and Splurge

    • Budget: A day of ramen (¥800), ropeway round trip (¥700), and wandering Cat Alley (free) comes in well under ¥3,000. Guesthouses near the station run roughly ¥3,500–5,000 per night for a dorm bed.
    • Mid-range: Business hotels near Onomichi Station run about ¥8,000–13,000 per night for a double room, putting you within walking distance of everything above.
    • Splurge: Onomichi U2, a converted waterfront warehouse with a hotel, bakery, and cycling-focused shop, runs closer to ¥20,000+ per night and is popular with Shimanami Kaido riders wanting a comfortable base before or after the ride.

    Common Mistakes and Nearby Pairings

    The most common misstep is treating Onomichi as a quick two-hour photo stop — the temple walk and ropeway alone take half a day if you’re not rushing, and trying to cram in Cat Alley, Senkoji, and a proper ramen sit-down in under two hours means missing most of it. Second, don’t count on cats being visible on demand; they’re strays, not a managed attraction, and midday heat sends most of them into hiding. Third, if you’re combining this with a Shikoku crossing, check ferry and last-bicycle-rental return times before you commit to the full ropeway-and-temple loop, since the two don’t always fit in one afternoon.

    Onomichi pairs naturally with a day in Kurashiki’s Bikan Historical Quarter, about an hour away by train through Okayama Prefecture — both are compact, walkable old towns that reward a slow pace rather than a checklist. If you pick up local citrus sweets, ramen kits, or ceramics along the way, our guide to shipping souvenirs home from Japan covers the cheapest way to send them on rather than hauling them for the rest of your trip.

  • Kurashiki Bikan Historical Quarter: Okayama’s Canal Town

    Kurashiki Bikan Historical Quarter: Okayama’s Canal Town

    Photo by Austin Curtis on Unsplash

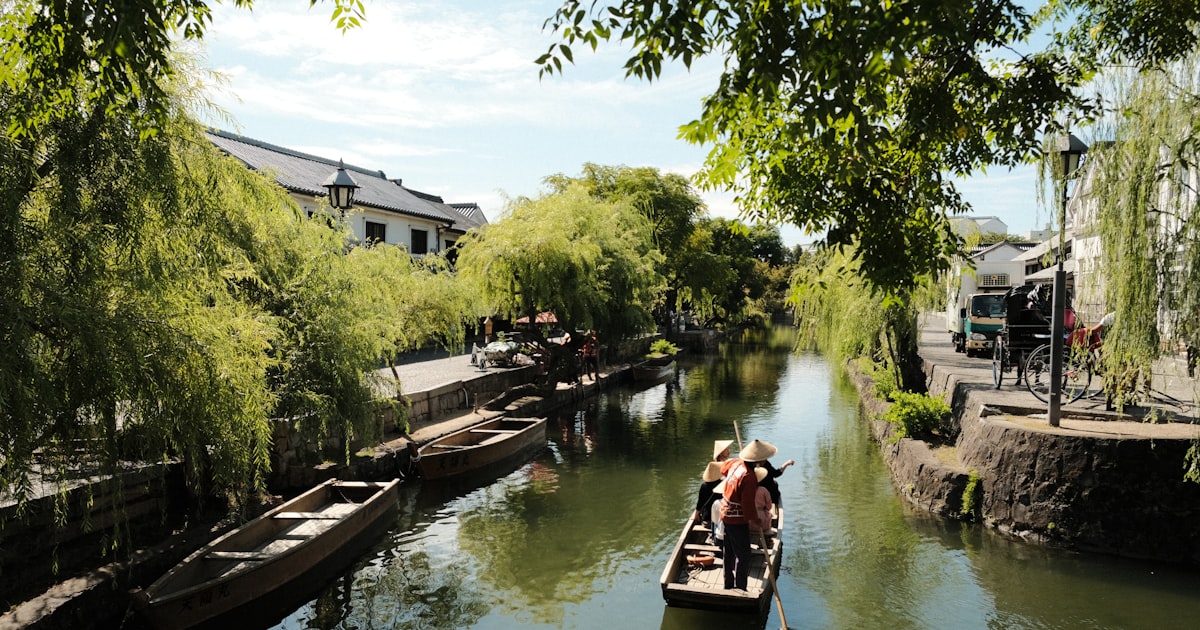
    An hour or so west of Osaka, the city of Kurashiki hides a few blocks of white-walled storehouses, black tile roofs, and weeping willows draped over a canal that once floated rice and cotton down to the port. The Bikan Historical Quarter survived Japan’s 20th-century rebuilding boom because Kurashiki’s merchant families and a wealthy industrialist family, the Oharas, protected it — and today it’s one of the best-preserved Edo-period townscapes in the country, small enough to see properly in half a day. Here’s how to actually plan the visit.

    Getting to Kurashiki

    The gateway is Okayama Station, on the Sanyo Shinkansen line — about 45 minutes from Shin-Osaka, 3 hours 10 minutes from Tokyo, and roughly 35 minutes from Hiroshima. From Okayama Station, take the JR Sanyo Line to Kurashiki Station (15–17 minutes, around ¥330 one-way; rapid trains are a couple of minutes faster). The Bikan Historical Quarter is then a flat, easy 15-minute walk south from Kurashiki Station’s south exit — just follow the signs and the crowds.

    One trap to avoid: some Shinkansen trains (Kodama services only) stop at a station called Shin-Kurashiki, not Kurashiki Station. Shin-Kurashiki is nowhere near the canal district and requires a bus or taxi to reach it — always route through Okayama Station and the regular Kurashiki Station instead. If you’re working out rail passes for the wider region, it’s worth reading up on the Regional JR Rail Passes before you go, since a JR West pass covering the Sanyo corridor can cover this leg along with Osaka, Kyoto, and Hiroshima.

    What to See in the Canal District

    The quarter itself — the canal, the willow-lined stone paths, the rows of former rice and sugar warehouses (kura) now housing cafés and shops — costs nothing to wander, and that’s really the main event. Give yourself at least an hour just to walk the length of the canal and duck down the side streets.

    A few specific stops worth building time around:

    • Ohara Museum of Art — Japan’s first museum of Western art, opened in 1930 by industrialist Ohara Magosaburo. The main gallery holds genuine works by El Greco, Monet, Gauguin, Matisse, and Picasso, which is a genuinely startling thing to find in a small Japanese canal town. Open roughly 9:00–17:00 (last entry 16:30), closed Mondays (if Monday is a public holiday, it closes the following Tuesday instead). Adult admission is around ¥2,000 — check the museum’s own site for current pricing before you go, since it has risen in recent years.
    • Kurashiki River boat ride — a short traditional boat trip along the canal, running most days (weather permitting) for roughly ¥500 for adults and ¥300 for children. Tickets are sold same-day at a booth near Nakabashi Bridge on a first-come basis and do sell out on busy afternoons, so buy yours early if you want to ride.
    • Kurashiki Ivy Square — a former Meiji-era textile mill, its red brick walls now thick with ivy, converted into a hotel, restaurants, and small museums (including a memorial hall on the mill’s history). Free to walk through even if you’re not staying or dining there.
    • Japan Rural Toy Museum and Kurashiki Archaeological Museum — smaller, cheap (a few hundred yen each), and good rainy-day fillers if the main museum feels like too much of a detour.

    Shopping for Local Crafts

    Kurashiki has its own craft identity worth shopping for beyond generic souvenirs. Look for hand-blown Kurashiki glass (Kurashiki garasu) — cloudy, slightly greenish glassware made in small workshops around the quarter — and Bizen ware pottery from the nearby town of Bizen, which is sold in several shops here even though it’s fired elsewhere. If denim interests you, Kurashiki’s Kojima district is considered the birthplace of Japanese domestic jeans manufacturing; Kojima Jeans Street is about 20–30 minutes away by bus or train from Kurashiki Station and is a worthwhile add-on for denim fans with a bit more time.

    If you end up buying pottery, glass, or anything bulky and fragile, it’s usually easier to ship it home rather than carry it — our guide to shipping souvenirs home from Japan compares post office and courier options and pricing.

    Best Time to Visit

    Spring (late March–April) brings the willows into fresh green leaf alongside cherry blossoms along the canal, and it’s the most photogenic — and most crowded — season. Autumn, especially November, turns the Ivy Square walls red and brings pleasant walking weather. Early June through mid-July is Japan’s rainy season; it’s quieter and the canal still looks good under an umbrella, but expect intermittent rain. Weekends and national holidays (especially Golden Week in early May) bring heavy day-tripper crowds by late morning — arriving before 9:30am, or visiting on a weekday, makes a real difference to how peaceful the streets feel.

    Budget, Mid-Range, and Splurge Options

    Budget: The canal walk itself is free, and a convenience-store or bakery lunch runs ¥500–800. Skip the museums and you can spend an enjoyable couple of hours here for the cost of the train ticket.
    Mid-range: Add Ohara Museum admission (~¥2,000), a canal boat ride (~¥500), and lunch at one of the local udon or kappo restaurants in a converted kura (¥1,200–2,500), and you’re looking at a full, satisfying half-day for around ¥4,000–5,000.
    Splurge: Stay overnight in one of the historic ryokan built into the old merchant houses right in the Bikan Quarter, such as Ryokan Kurashiki, or in a room at Kurashiki Ivy Square. Rates for a proper heritage ryokan stay run well above standard business hotel prices — expect a premium for the atmosphere — but it buys you the canal at dusk and dawn without a single tour group in sight, which is a genuinely different experience from a daytime visit.

    Common Mistakes to Avoid

    • Visiting on a Monday and finding the Ohara Museum, the district’s headline attraction, closed.
    • Getting off at Shin-Kurashiki instead of Kurashiki Station and adding an unnecessary taxi ride.
    • Treating it as a 30-minute photo stop. Between the museums, the boat ride, and lunch, most visitors are happier with 3–4 hours than a rushed hour between trains.
    • Arriving at midday on a weekend and fighting crowds along the narrowest stretch of towpath — an early morning or late afternoon visit is far more pleasant.

    Kurashiki pairs naturally with a wider Chugoku/Kansai itinerary — it sits roughly between Kyoto/Osaka and Hiroshima on the Shinkansen line, and travelers extending south can combine it with a cycling day on the Shimanami Kaido. If it’s the preserved streetscape itself that appeals to you, it’s also worth comparing notes with Tsumago and Magome on the old Nakasendo highway — a very different, mountain-postal-town take on the same idea of protecting old Japan from the wrecking ball.

  • Nagasaki Travel Guide: Dejima, Chinatown & the Peace Park

    Nagasaki Travel Guide: Dejima, Chinatown & the Peace Park

    Photo by Zion C on Unsplash

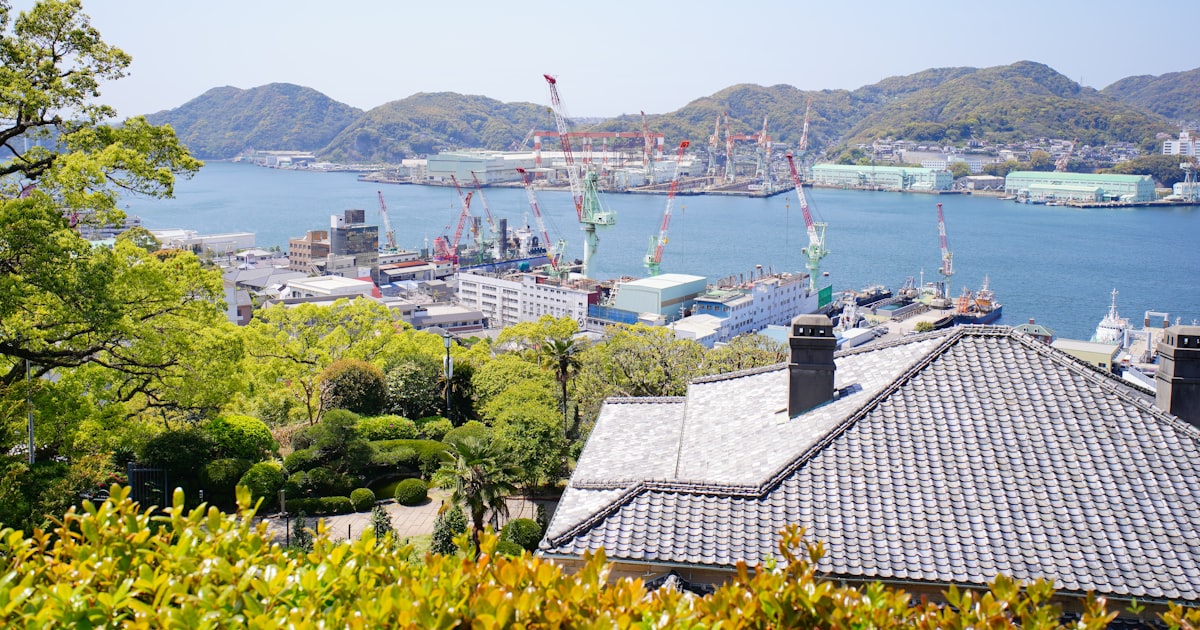
    Nagasaki doesn’t fit the usual Japan itinerary — it’s tucked into the southwest corner of Kyushu, a harbor city that spent 200 years as Japan’s only legal window to the outside world. That history is still walkable in a single day: a Dutch trading post, Japan’s oldest Chinatown, and a Peace Park that anchors one of the most sobering half-days you’ll spend in the country. Here’s how to see all three properly, plus what trips people up.

    Getting to Nagasaki

    From Fukuoka/Hakata, take the Kamome limited express to Takeo-Onsen, then transfer across the platform to the Nishi Kyushu Shinkansen for the final leg into Nagasaki Station — the whole trip runs about 1 hour 20 minutes to 1 hour 30 minutes and costs roughly ¥6,000–6,500 one way with reserved seating. It’s a same-day-doable trip from Fukuoka, but rushed; an overnight in Nagasaki lets you actually enjoy dinner and the night view without watching the clock. If you’re driving in from elsewhere in Kyushu, the Nagasaki Expressway is straightforward, and it’s worth breaking up the drive with a stop — see our guide to Michi-no-Eki roadside stations for what to expect. Nagasaki Airport also has direct flights from Tokyo (Haneda) in around 2 hours, with a limousine bus into the city center.

    Once you’re there, the city’s tram network (built in 1915 and still the main way to get around) charges a flat ¥140 per ride regardless of distance, or ¥600 for an unlimited one-day pass sold at the tourist information center inside the station. Dejima, Chinatown, and the Peace Park sit on three different tram lines, so the day pass pays for itself after about four rides.

    Dejima: The Artificial Island That Opened Japan

    During Japan’s roughly 220 years of national isolation (sakoku), Dejima was the single fan-shaped island in Nagasaki Harbor where Dutch traders were permitted to live and do business — the only officially sanctioned contact point between Japan and the West. Land reclamation long ago swallowed the harbor around it, so today Dejima sits inland, restored as an open-air museum of reconstructed warehouses, merchant houses, and the residence of the Dutch trade chief.

    Admission is around ¥520 for adults, and it’s open daily from 8:00 am to 9:00 pm (last entry 8:40 pm) — genuinely one of the most flexible hours of any historical site in Japan, so it’s easy to slot in before dinner. Budget 60–90 minutes. One detail worth knowing before you go: Dejima is also where coffee first entered Japan, brought in by Dutch traders in the 18th century — if that kind of history appeals, it pairs nicely with a stop at one of Japan’s retro kissaten coffee shops afterward.

    Nagasaki Chinatown: Champon, Sara Udon & the Lantern Festival

    Shinchi Chinatown is one of Japan’s three official Chinatowns (alongside Yokohama and Kobe), and unlike the other two, it grew directly out of Dejima-era trade — Chinese merchants had their own restricted quarter here from the 1680s onward. It’s compact, just a few blocks, but dense with places to eat.

    The two dishes to order are champon (a thick noodle soup loaded with pork, seafood, and vegetables in a milky broth) and sara udon (crispy fried noodles under a similar topping, sauce poured tableside). Expect ¥1,000–1,500 for a bowl at a sit-down restaurant; Shikairo, the restaurant credited with inventing champon in 1899, is the famous but touristy option — it’s fine, just expect a wait around lunch. For something cheaper, the street-food stalls sell steamed buns and pork gyoza for a few hundred yen each, good for grazing rather than a sit-down meal.

    Time your visit around the Nagasaki Lantern Festival if you can — it runs for about two weeks around Chinese New Year (typically mid-to-late January into February) and turns Chinatown and the nearby Nakashima River into a sea of red lanterns and Chinese lion dances. It’s free to walk through and is by far the liveliest the city gets outside of summer.

    The Peace Park & Atomic Bomb Museum

    Nagasaki was the second city hit by an atomic bomb, on August 9, 1945, and the Peace Park sits near the hypocenter, about a 5-minute walk from the tram stop of the same name. The park itself — dominated by the 10-meter bronze Peace Statue, its right hand pointing skyward toward the threat, left hand extended for peace — is free and open around the clock.

    The Atomic Bomb Museum next door is the part that needs real time. Admission is ¥200 for adults, and it’s open 8:30 am–5:30 pm (extended to 6:30 pm from May through August). Plan for at least 60–90 minutes; the exhibits move chronologically from the moment of the blast through the medical and social aftermath, and it’s dense with testimony, not something to rush. The small Hypocenter Park a few minutes’ walk away marks the exact point of detonation with a simple black stone pillar — quieter and easy to miss, but worth the short detour. Most visitors do the museum and both parks as one continuous 2–2.5 hour block rather than splitting it up.

    Beyond the Big Three

    If you have a second day, Glover Garden is the natural add-on: a hillside cluster of former foreign-merchant residences from the late 1800s, including the Glover House itself, with harbor views. Admission is around ¥620, open 8:00 am–6:00 pm (later in summer). Nearby is Megane Bridge (“Spectacles Bridge”), a stone arched bridge from 1634 whose reflection in the Nakashima River forms a pair of “eyeglasses” — free to see and a 10-minute walk from Chinatown, so it’s easy to combine.

    For a splurge, ride the Nagasaki Ropeway up Mount Inasa at dusk — round-trip tickets run about ¥1,250, and the summit is ranked among Japan’s three great night views alongside Hakodate and Kobe. Buy your castella (Nagasaki’s signature sponge cake, from shops like Fukusaya or Bunmeido) before you leave the city center, since it doesn’t travel as well as sealed snacks; if you’re mailing gifts home instead of carrying them, our guide to shipping souvenirs from Japan covers post office versus courier options.

    Best Time to Visit & Common Mistakes

    Spring (late March–April) and autumn (November) bring the most comfortable weather and, in spring, cherry blossoms around Glover Garden and the Peace Park. Summer is hot and humid and coincides with the somber August 9 Peace Memorial Ceremony — meaningful if you want to be present for it, but expect the Peace Park to be closed to casual sightseeing that morning. Winter is quiet and mild by Japanese standards, and the Lantern Festival makes January/February a legitimate reason to visit despite the cold.

    The most common mistake is treating Nagasaki as a rushed day trip from Fukuoka and trying to cram Dejima, Chinatown, the Peace Park, and Glover Garden into one afternoon — something has to give, usually the museum, which is the one place you shouldn’t rush. The second is skipping the tram day pass and paying cash each ride, which adds up fast once you’re crossing the city more than three or four times. If you’re short on time, prioritize the Peace Park and Atomic Bomb Museum plus one of Dejima or Chinatown, and save the rest for a return trip.

  • Shipping Souvenirs Home from Japan: Post Office vs Courier Guide

    Shipping Souvenirs Home from Japan: Post Office vs Courier Guide

    Photo by Markus Winkler on Unsplash

    You’ve filled your suitcase with Kutani ware, a set of chopsticks, maybe a pair of Akoya pearl earrings — and now it won’t close. Shipping souvenirs home is often cheaper and safer than checking an overstuffed bag, but Japan gives you two very different systems to choose from: Japan Post’s international mail and private couriers like DHL, FedEx, and UPS. Here’s how to pick the right one, what it actually costs, and how to avoid the packing mistakes that ruin fragile gifts in transit.

    Why Ship Instead of Carry?

    Airlines charge steep excess-baggage fees (often ¥15,000–¥30,000 or more per extra bag depending on route and carrier), and fragile items like ceramics or glass wind chimes rarely survive being crammed into checked luggage. Shipping also frees up suitcase space mid-trip — useful if you’re buying bulky items early, like Kutani ware in Kanazawa (see our Kutani Ware buying guide) or a full haul of sealed Pokémon booster boxes (see our Pokémon cards in Japan guide) with weeks of travel still ahead of you.

    Japan Post: EMS, Airmail, and Surface Mail Explained

    Japan Post (Yu-Bin) is the budget-friendly default and has three international speed tiers:

    • EMS (Express Mail Service) — the fastest and most reliable option, with tracking and up to ¥6 million of automatic compensation coverage on request. Delivery typically takes 2–5 business days to the US, Europe, or Australia. As a rough guide from recent rate tables, a 5kg box runs about ¥11,000–13,000 to North America and ¥13,000–15,000 to Europe — always confirm current rates with the clerk or Japan Post’s online EMS calculator, since they’re revised periodically.
    • Airmail (small packet or parcel) — cheaper than EMS, no tracking guarantee on the cheapest tier, and delivery takes roughly 1–2 weeks. Good for lightweight, low-value items like postcards or textiles.
    • Surface mail — the cheapest option by far but painfully slow (6–12 weeks) and not offered to every country; ask the counter clerk whether it’s currently available on your route.

    Post offices sell their own EMS-branded cardboard boxes in several sizes for roughly ¥260–¥600, which is worth doing since the box dimensions are pre-approved for shipping and save you guesswork.

    International Couriers: DHL, FedEx, and UPS

    Private couriers cost more but offer real advantages: door-to-door pickup (from your hotel in some cases), better real-time tracking, English-language customer service, and stronger insurance options for high-value items. Expect a similarly sized 5kg box to run ¥15,000–¥25,000+ for express service, depending on destination and speed tier. This is the better choice for genuinely valuable purchases — a Mikimoto pearl necklace (see our Mikimoto & Akoya pearls guide) or graded trading cards — where you want full insured value and a guaranteed delivery window rather than the cheapest possible rate. Drop-off locations exist in most major cities, though pickup requests usually need to be booked a day ahead via each courier’s website or phone line.

    Packing Fragile and High-Value Souvenirs

    This is where most shipments go wrong. A few concrete rules:

    • Ceramics and glassware (Kutani ware, Arita porcelain, glass furin wind chimes) need double-boxing: wrap each piece individually in bubble wrap, nest it in a smaller box with padding on all six sides, then place that box inside a larger one with more cushioning around it. A single layer of newspaper is not enough — Japan Post and couriers both explicitly limit liability for inadequately packed fragile goods.
    • Flat items like ukiyo-e woodblock prints should go in a rigid mailer tube or flat cardboard mailer, never folded.
    • Sealed collectibles like Pokémon booster boxes should be padded on all sides to prevent corner crushing, and always declare the actual purchase value — undervaluing to dodge duty can void insurance claims if the box is damaged or lost.
    • Ask the post office or courier counter for extra packing tape and filler material on the spot; most keep some behind the counter even if it’s not openly displayed.

    Customs Forms, Duty, and Restricted Items

    Every international parcel needs a customs declaration (form CN22 for lower-value items, CN23 for higher-value or heavier ones). List contents specifically (“ceramic tableware,” “trading cards,” “pearl jewelry”) and the real purchase price — vague descriptions like “gift” or “souvenir” can trigger customs holds. Check your home country’s duty-free personal import allowance before shipping, since exceeding it means you may owe duty on arrival. Alcohol (sake, whisky) and certain foods have their own restrictions both for export from Japan and import into your home country, so verify before buying in bulk.

    Where and When to Ship

    Neighborhood post offices generally keep counter hours of 9:00–17:00 on weekdays only, but larger central post offices in big cities (Tokyo Central Post Office near Tokyo Station, for example) stay open later on weekdays and often open Saturdays too — worth seeking out if you’re shipping on a tight schedule. Avoid shipping right around New Year’s (late December–early January) and Golden Week (late April–early May), when Japan Post processing slows significantly due to national holidays. If you’re picking up regional souvenirs on a longer rail itinerary — say, ceramics in Kanazawa or lacquerware along the Nakasendo route through Tsumago and Magome — it’s often easier to ship each purchase home in stages rather than carrying everything to a single shipping point at the end of your trip.

    Post Office vs Courier: Which Should You Choose?

    Budget: Japan Post airmail or surface mail for lightweight, low-value items you’re not in a hurry to receive. Mid-range: Japan Post EMS — the sweet spot for most travelers, balancing speed, tracking, and cost for a standard box of souvenirs. Splurge: DHL, FedEx, or UPS for high-value, fragile, or time-sensitive shipments where guaranteed insurance and door-to-door pickup are worth the premium. Whichever you choose, weigh and measure your box before you go to the counter, bring your passport for the customs form, and keep the tracking receipt until the package arrives — it’s your only proof if something goes missing.

  • Renting a City Bike in Kyoto & Tokyo: Bike-Share for Sightseeing

    Renting a City Bike in Kyoto & Tokyo: Bike-Share for Sightseeing

    Photo by HANVIN CHEONG on Unsplash

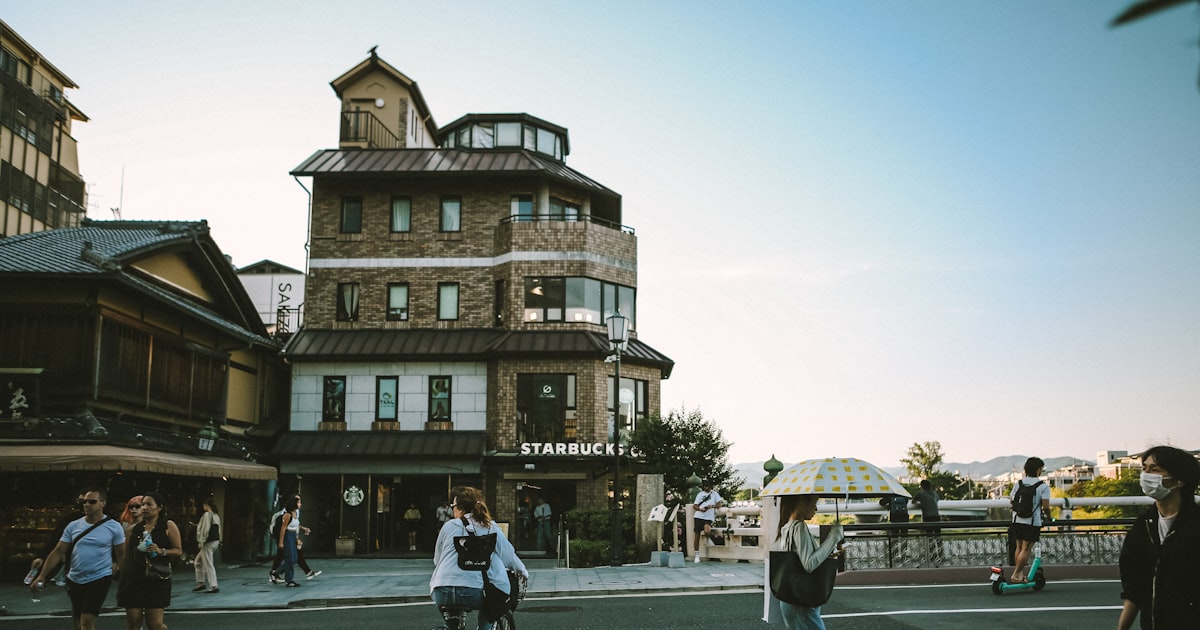
    Japan’s trains are famously punctual, but they can’t take you down a quiet backstreet lined with machiya townhouses or along a river path lit up at dusk. A rental bike can. Both Kyoto and Tokyo now have dense, easy-to-use bike-share networks aimed squarely at tourists, and pairing them with a day of walking or subway-hopping is one of the best low-cost upgrades you can make to a Japan itinerary. Here’s how the systems actually work, what they cost, and where they shine.

    Two Different Systems, One App

    Kyoto and Tokyo both run on the same underlying network — Docomo Bike Share, branded locally as PiPPA in Kyoto and simply “Docomo Bike Share” in Tokyo’s central wards (Chiyoda, Chuo, Minato, Shinjuku, Shibuya, Koto, Sumida, and several others). These are dock-based systems: you unlock a bike from a docking port using a smartphone app, ride it, and return it to any port in the network — not necessarily the one you started at. This is genuinely convenient for one-way sightseeing, like riding from Kyoto Station up to Nijo Castle and returning the bike there instead of pedaling back.

    Alongside the app-based network, both cities also have old-school rental shops that hand you a bike for the day and expect it back at closing time. These tend to have better bikes (including proper e-bikes and road bikes), sometimes offer guided tours, and are worth it if you want one long ride rather than short hops between sights.

    Setting Up: The App, Registration, and Unlocking

    Download the “Docomo Bike Share” app (available in English) before you land, and register a credit card in advance — doing this on Kyoto Station wifi with a jetlagged brain is annoying. Once registered, you reserve a bike at a nearby port through the app, which sends a unique unlock code or lets you scan a QR code on the bike’s handlebar-mounted lock box. Returning is just as simple: slot the bike into any empty dock in the network and the app confirms the return and shows the final charge.

    A few practical notes: ports do run out of bikes (and out of empty slots to return to) during busy periods, so check availability in the app before you commit to a route. Baskets are standard, but bike sizes are limited — these are city bikes, not built for anyone much over 185cm or for serious hills.

    Kyoto: Where It Works Best

    Kyoto is close to ideal for cycling — mostly flat, laid out on a grid in the central city, and full of temples and gardens that sit awkwardly far from the nearest subway stop. PiPPA ports cluster around Kyoto Station, Gion-Shijo, Kawaramachi, Nijo Castle, and up toward Kinkaku-ji and Ginkaku-ji, so you can string together a route — say, Nijo Castle to the Philosopher’s Path — without backtracking to a train.

    For a full day out, the Kyoto Cycling Tour Project (KCTP), a short walk from Kyoto Station’s south (Nara-guchi) exit, rents traditional city bikes from around ¥1,000/day and e-bikes from roughly ¥1,800–2,000/day, and also runs guided cycling tours if you’d rather not navigate solo. Arashiyama, the Fushimi Inari approach, and Nishiki Market are all better done on foot once you arrive — narrow lanes, stairs, and heavy foot traffic make cycling there impractical or against local rules.

    Tokyo: Where It Works Best

    Tokyo’s network is much larger — well over 500 ports across the central wards — which makes it more useful for connecting neighborhoods than for touring any single district. A popular loop links the Imperial Palace, Ginza, and Tsukiji Outer Market; another covers Asakusa across the Sumida River to the newer riverside parks near Kiyosumi. Because coverage is ward-by-ward, double-check the app’s map before setting off — a route that drifts into a ward without ports can leave you stuck without a place to dock the bike.

    Tokyo traffic is heavier and less forgiving than Kyoto’s, so stick to wide arterial roads with painted bike lanes or genuinely quiet backstreets, and avoid rush hour (roughly 7:30–9:30am and 5:30–7:30pm) if you can.

    What It Costs: Budget to Splurge

    • Budget — bike-share pay-as-you-go: Roughly ¥165 for the first 30 minutes on Docomo Bike Share/PiPPA, with the same rate charged per additional 30-minute block. Fine for short hops between sights.
    • Mid-range — bike-share day pass or shop rental: A 1-day pass on the bike-share app runs around ¥1,600–1,700 (each individual ride is capped at 30 minutes before extra charges kick in, so you re-dock and re-unlock for longer outings). A standard mama-chari from a rental shop like KCTP costs about ¥1,000–1,300/day with no time-block restrictions.
    • Splurge — e-bikes and guided tours: E-bike rental runs roughly ¥2,000–3,500/day, well worth it for Kyoto’s temple hills or a longer Tokyo river route. Guided half-day or full-day cycling tours (English-speaking) typically start around ¥8,000–12,000 per person and include route planning, a knowledgeable guide, and often a rest stop or two.

    If you’re already planning long-distance cycling rather than city sightseeing, the dedicated route on the Shimanami Kaido is a completely different — and spectacular — kind of ride, worth building a separate day or two around.

    Rules, Etiquette, and Common Mistakes

    • Ride on the road, keep left. Japan drives on the left, and bicycles are legally vehicles that belong on the road unless a sidewalk is specifically marked for shared use.
    • Helmets are recommended, not required. Since a 2023 law change, wearing a helmet is an “effort obligation” for all cyclists in Japan — encouraged but not enforced for adults. Rental shops rarely provide them by default; ask if you want one.
    • No phone use, no umbrella-holding, no riding while intoxicated. These are actively enforced and carry real fines.
    • Don’t assume free-floating return. Bike-share bikes must go back into a designated dock, not just be left on a street corner — leaving one outside a port can trigger a fee or a lockout on your account.
    • Check port availability before you ride, not after. Arriving at a temple to find every dock full (or arriving to rent and finding no bikes) is the single most common frustration; the app shows live counts.

    Best Season and Timing

    Spring (late March–May) and autumn (October–November) are the sweet spot — mild temperatures and, in Kyoto especially, cherry blossoms or fall foliage along canal and river paths that are genuinely better seen by bike than by bus. Summer (July–August) means high heat and humidity that make cycling uncomfortable by midday; if you ride then, go early morning or after 4pm. The rainy season (tsuyu), roughly mid-June to mid-July, makes bike-share far less appealing — Japan’s convenience stores sell cheap umbrellas, but riding in rain on an unfamiliar city bike isn’t worth the hassle. Whatever the season, aim to start by mid-morning; both networks get heavily used by commuters before 9am, which can mean empty docks right when you’re hoping to start your day.

  • Tsumago & Magome: Walking the Nakasendo’s Best-Preserved Postal Towns

    Tsumago & Magome: Walking the Nakasendo’s Best-Preserved Postal Towns

    Photo by Yosuke Ota on Unsplash

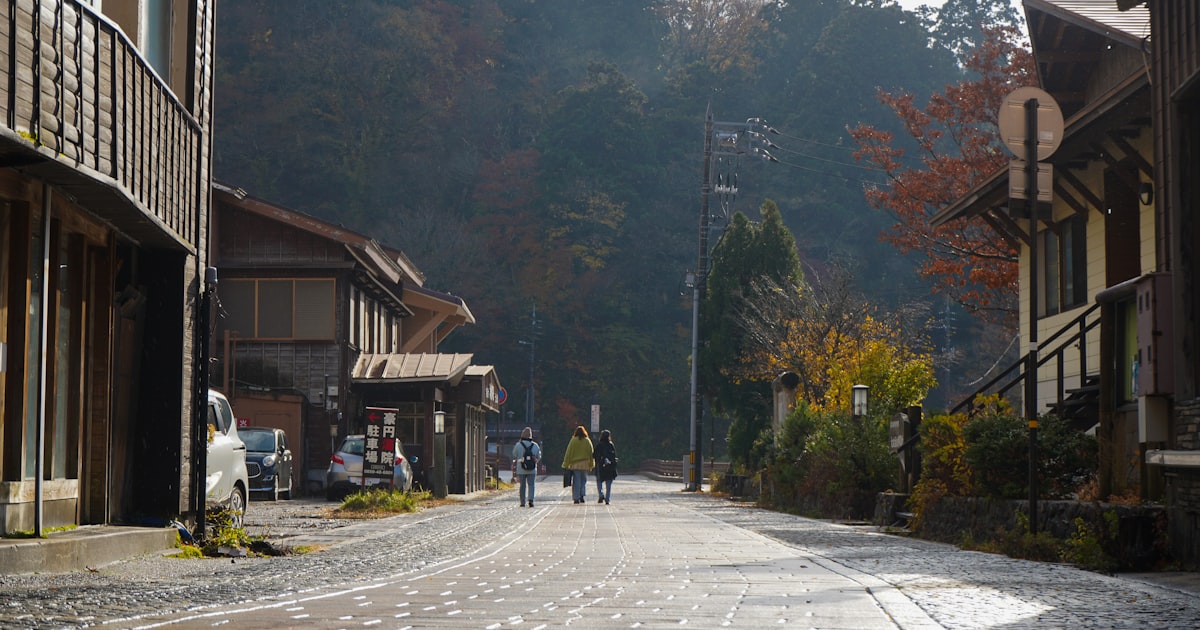
    Long before the Shinkansen, travelers between Edo (Tokyo) and Kyoto walked the Nakasendo, a mountain highway lined with post towns where they could rest, eat, and change horses. Most of those towns were paved over or burned down decades ago. Tsumago and Magome, tucked into the Kiso Valley on the Nagano–Gifu border, are the two that survived — and the roughly 8km trail connecting them is the single best way to feel what Edo-period travel actually looked and sounded like, minus the blisters that come with walking the whole highway.

    Why Tsumago and Magome, and Not Some Other Post Town

    Tsumago (in Nagiso, Nagano Prefecture) was the first town in Japan to pass local ordinances, back in the 1970s, banning residents from selling or renting their historic houses and requiring that power lines and vending machines stay out of sight. The result is a street of dark wood facades, lattice windows, and hanging lanterns with almost nothing modern visible during the day — cars are barred from the main street from around 8:30am to 5pm. Magome (in Nakatsugawa, Gifu Prefecture) sits on a steep hillside with a stone-paved main street lined with shops and inns; it was rebuilt after fires in 1895 and 1915, so it feels slightly more polished and touristy, but it’s still an atmospheric, car-light village with sweeping views toward Ena-san on clear days. Together they bookend the most scenic and best-signposted stretch of the old highway.

    Getting There: Trains, Buses, and Driving

    Both towns are most easily reached from Nagoya via the JR Chuo Line. Take a limited express Shinano (around 45–50 minutes, roughly ¥3,000–3,500 with reserved seat) or a slower local/rapid train (about 80–90 minutes, around ¥1,200) to Nakatsugawa Station. From there, a Nohi Bus runs to Magome in about 25–30 minutes for roughly ¥600. For Tsumago, stay on the Chuo Line one stop further to Nagiso Station, then take a local bus (about 10 minutes, around ¥300) up to the village.

    If you’re coming from Tokyo, the Chuo Line connects through Shiojiri and Matsumoto rather than Nagoya, adding time; most visitors find it faster to route through Nagoya first. If you don’t already have a Shinkansen ticket booked, an overnight bus from Tokyo to Nagoya is a genuinely useful budget option that also saves you a night of accommodation — see our guide to overnight buses in Japan for how that works. Drivers should note that neither town has a train station right in the center; if you’re doing a wider Kiso Valley road trip, the region’s michi-no-eki roadside stations are worth stopping at for local produce, clean restrooms, and a break from mountain driving.

    Walking the Trail: Route, Timing, and What to Expect

    The Magome–Tsumago trail is about 7.8–8km and takes most people 2.5 to 3 hours at a relaxed pace, not counting stops. Most walkers start in Magome and head to Tsumago, since it’s a gentler net descent overall, though the first hour out of Magome climbs steadily to the Magome-toge pass at around 801m elevation before dropping into forest. The path is a mix of paved lanes, stone steps, and dirt forest track, well signposted in English with wooden markers and distance signs. Along the way you’ll pass the Magome-toge teahouse (free tea for walkers, seasonal), a couple of waterfalls (Otaki and Medaki), and a stretch of forest where boxes of bear bells are provided for hikers to ring — bears are a real if rare concern in this valley, so use them.

    You don’t need special gear beyond decent walking shoes; sneakers are fine in dry conditions. There are vending machines and a rest hut roughly at the halfway point, but no convenience stores on the trail itself, so carry water and any snacks you want. Toilets exist at a few marked points along the route.

    Luggage Forwarding and Multi-Day Itineraries

    Neither town’s tourist information office wants you carrying a full suitcase over the pass, so both offices run a same-day luggage forwarding service between roughly mid-March and late November. Drop your bag at one town’s tourist office by late morning (the Magome office generally cuts off around 11:30am), pay a flat fee of about ¥1,000 per bag, and your luggage is trucked around by road and waiting at the other town’s office by early-to-mid afternoon. It only runs one direction per day, so plan your walking direction to match your bag’s route, and confirm the current cutoff time when you arrive, since it shifts slightly by season.

    Some travelers extend the walk into a longer Nakasendo itinerary, continuing on to Narai or Kiso-Fukushima over two or three days and staying in small minshuku or ryokan along the way. If you’re stringing together multiple nights in small mountain towns, it’s worth reading up on doing laundry in Japan before you go, since coin laundries are sparse once you’re off the main train lines and many small inns don’t offer laundry service.

    Best Season and Time of Day

    Spring (mid-April to early May, for fresh greenery and mild temperatures) and autumn (late October to mid-November, for foliage) are the most popular and most photogenic times to walk. Summer is doable but humid and buggy in the forest sections; winter is quiet and atmospheric but the pass can have icy patches, and some facilities along the trail close or reduce hours, so check conditions before setting out. Whatever the season, start early — aim to be walking from Magome by 9 or 10am. This gets you into Tsumago’s main street while it’s still car-free and before the mid-afternoon tour bus crowds from Nagoya arrive.

    Where to Eat, Stay, and Shop

    Budget: both towns have simple soba and udon shops along their main streets, generally ¥900–1,400 for a bowl, plus stalls selling gohei-mochi (grilled rice skewers coated in a sweet-savory sesame or walnut miso glaze, around ¥200–300 each) — a genuinely local Kiso Valley snack worth trying at least once. Mid-range: a set lunch featuring local Kiso soba or river fish (ayu, grilled whole) at a sit-down restaurant runs roughly ¥1,800–3,000. Splurge: staying overnight in one of Tsumago’s traditional ryokan or minshuku, several housed in genuine Edo-period buildings, typically costs ¥12,000–20,000 per person with two meals included — book well ahead, since rooms are limited and fill fast in foliage season. Shops in both towns sell local woodcraft, lacquerware, and hand-dyed textiles; if you’re building out a broader Japanese crafts collection on this trip, it’s a nice complement to browsing Kutani ware in Kanazawa or picking up a piece from our guide to ukiyo-e woodblock prints elsewhere on your itinerary.

    Common Mistakes to Avoid

    • Treating it as a round trip in one day without checking bus schedules. Buses between Nakatsugawa/Nagiso and the two villages aren’t frequent — often just once or twice an hour — so check return times before you start walking, especially if you’re day-tripping back to Nagoya.
    • Skipping the bear bells. The forested middle section genuinely passes through bear habitat; ring the provided bells rather than assuming it’s just tourist decoration.
    • Arriving in Tsumago too late. Most shops and the honjin/wakihonjin historic buildings close by around 5pm, and the tourist office’s luggage counter has a hard cutoff — arriving after 3 or 4pm means missing half of what makes the town worth the trip.
    • Assuming credit cards work everywhere. Many small shops, teahouses, and food stalls in both towns are cash-only; withdraw yen before you leave Nagoya or Nakatsugawa, since ATMs are scarce on the trail.
    • Wearing the wrong shoes. The trail is mostly gentle, but the stone-paved sections in Magome and the forest floor after rain get slippery — trainers with decent tread are fine, but flip-flops or heeled sandals are a bad idea.

    Done right, Tsumago and Magome cost a single train ticket, a bus fare or two, and an easy afternoon of walking — and they deliver a more convincing sense of pre-modern Japan than almost anywhere else within day-trip range of Nagoya.

  • Enoshima: The Island Day Trip Near Kamakura

    Enoshima: The Island Day Trip Near Kamakura

    Photo by Kate Kasiutich on Unsplash

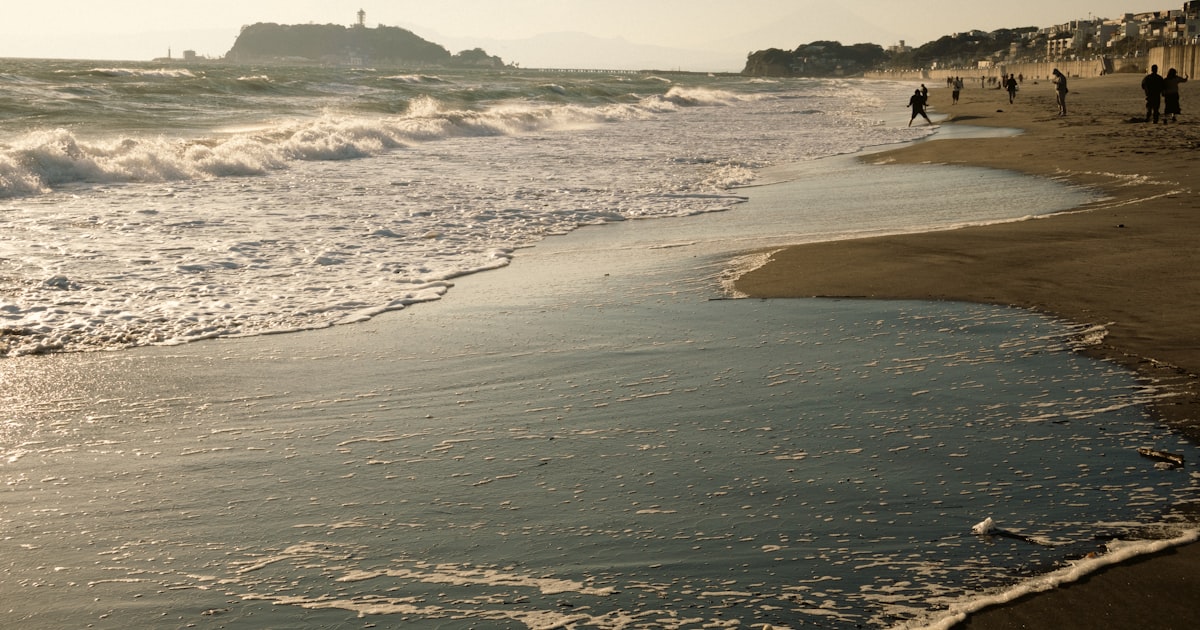
    Enoshima is the island most Kamakura day-trippers only glimpse from the beach — a green, shrine-covered hump connected to the mainland by a footbridge, with sea caves at one end and a lighthouse-observation tower at the other. It’s compact enough to see in half a day but hilly enough that you’ll want good shoes, and it pairs naturally with a morning in Kamakura before you head back to Tokyo. Here’s what you actually need to know before you go.

    Getting There

    Most travelers combine Enoshima with Kamakura, and the easiest way to move between the two is the Enoshima Electric Railway (Enoden), a slow, single-track tram line that hugs the coast. From Kamakura Station, ride the Enoden about 25 minutes to Enoshima Station; the one-way fare is around ¥310. If you’ll be hopping on and off — Kamakura’s temples, Hase’s Great Buddha, and Enoshima all sit along this line — the Enoden’s one-day pass (“Noriorikun,” around ¥800) pays for itself after three or four rides.

    Coming straight from Tokyo, the Odakyu Line runs from Shinjuku to Katase-Enoshima Station, about 70–90 minutes depending on the train, with a reserved-seat Romancecar option if you want to avoid standing. Odakyu also sells a combined Enoshima-Kamakura Freepass covering the round trip from Shinjuku plus unlimited rides on local lines in the area, which is worth pricing against individual tickets if you’re doing both destinations in one day. A third option, the Shonan Monorail, runs from Ofuna Station (on the JR Tokaido Line) to Shonan-Enoshima Station — useful if you’re starting from a JR line covered by a rail pass; see our guide to regional JR rail passes for what JR East coverage does and doesn’t include this far south of Tokyo. If you’d rather drive, note that Enoshima’s parking lots fill up and get expensive on weekends and holidays — our guide to renting a car in Japan covers what to expect on coastal roads like this one, but the train is genuinely less hassle here.

    Whichever line you take, you’ll cross the Enoshima Benten Bridge on foot to reach the island itself — about a 10-minute walk from Katase-Enoshima or Enoshima Station.

    Enoshima Shrine and the Escar

    The island is essentially one hill, and Enoshima Jinja is spread across it in three parts: Hetsunomiya, Nakatsunomiya, and Okutsunomiya, connected by a steep stone path lined with souvenir shops and food stalls. The shrine is dedicated to Benzaiten, the goddess of music, wealth, and the sea, and one hall houses a nude statue of her — a design that surprises some first-time visitors but is a legitimate and centuries-old object of worship, not a novelty.

    To skip some of the climbing, the Enoshima Escar is a series of outdoor escalators running up through the hillside in three sections, priced per section or as a combined ticket (roughly ¥360 for adults for the full run). It’s genuinely worth it in summer heat or if you’re short on time — you still walk plenty on the way back down and out to the far end of the island.

    Samuel Cocking Garden and the Sea Candle

    Near the top of the island, the Samuel Cocking Garden is a small botanical garden built on the foundations of a 19th-century British merchant’s greenhouses, worth a quick walk-through and especially pretty when seasonal flowers are out. Inside it stands the Enoshima Sea Candle, an observation lighthouse tower with a deck offering 360-degree views — on a clear winter day you can see Mount Fuji across Sagami Bay, which is the single best reason to time your visit for a cold, dry morning. Entry to the tower runs around ¥500 for adults, with a combined ticket for the garden and tower typically saving a bit over paying separately. At night the whole hillside sometimes hosts seasonal illumination events (most notably in winter), which draw bigger crowds and mean the last Enoden or Odakyu trains back matter more than usual.

    Iwaya Caves

    Keep walking past the garden and down the far side of the island and you’ll reach Chigogafuchi, a rocky tidal area with good sunset views, and eventually the Iwaya Caves at the island’s western tip — two shallow sea caves that were historically a pilgrimage site linked to the Enoshima Jinja legend. Admission is around ¥500 and includes a candle lantern, since the caves aren’t electrically lit. This is the far end of the island, roughly 30–40 minutes of walking from the bridge, so budget accordingly — it’s easy to underestimate how much of Enoshima is stairs and slope rather than flat path.

    What to Eat

    Shirasu (tiny whitebait) is the local specialty, caught in Sagami Bay and served raw, boiled, or dried over rice as shirasu-don at restaurants along the shopping street up to the shrine and in Katase. It’s genuinely a regional dish worth trying here rather than a tourist gimmick — prices for a bowl generally run ¥1,200–2,000. If you’d rather have sushi in a more familiar format, there are conveyor-belt chains around Fujisawa and Kamakura stations; our comparison of kaiten-zushi chains is useful if you want a reliable, budget-friendly fallback. For a quick snack on the shrine approach, tako-senbei (flattened, pressed whole octopus crackers) and grilled squid on a stick are the classic street food here. Note that the Enoshima Aquarium, one of the better aquariums in the Tokyo area, is actually on the mainland near Katase-Enoshima Station, not on the island — easy to combine with your visit if you’re traveling with kids.

    Best Time to Visit and Common Mistakes

    Weekday mornings are dramatically quieter than weekends, when the shrine approach and Escar lines can get genuinely crowded. Winter (December–February) gives you the clearest odds of seeing Mount Fuji from the Sea Candle, while summer brings heat, humidity, and beach crowds on the mainland side, plus fireworks displays in some years. The most common mistake is underestimating the walking and stairs — flat shoes matter — and the second is arriving late in the afternoon expecting to see everything; the caves and far side of the island genuinely take a few hours round-trip if you’re walking, not riding the Escar both ways. Plan on a half day minimum, and if you’re pairing it with Kamakura, do Kamakura’s temples first thing in the morning and save Enoshima for a slower, sunset-timed afternoon.

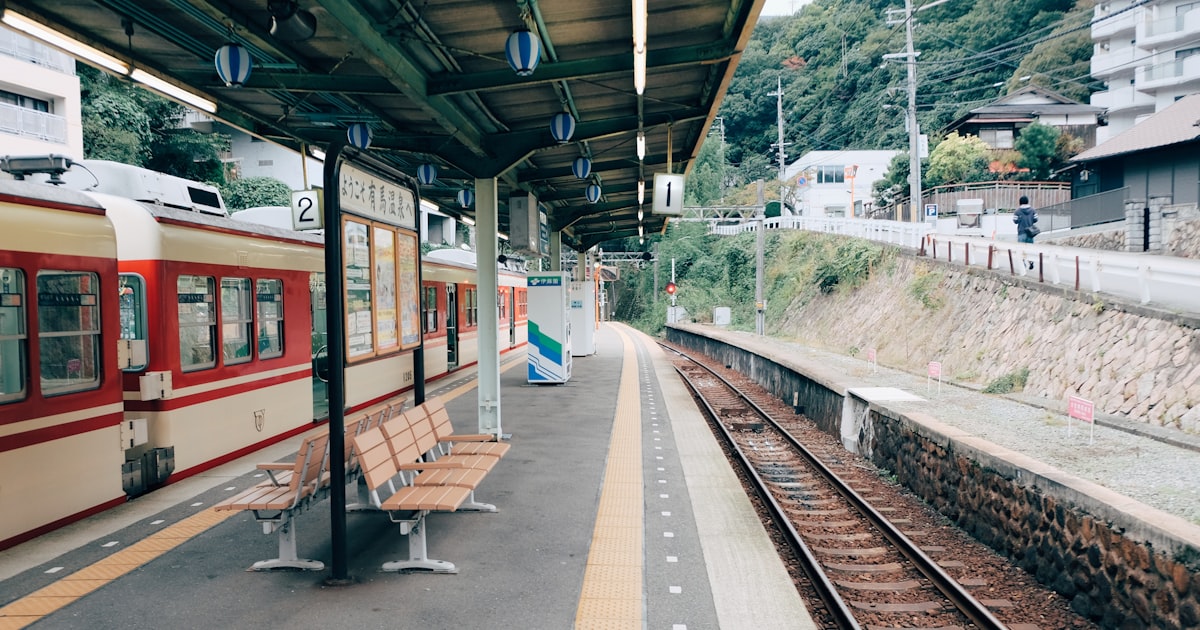
  • Arima Onsen: Kobe’s Ancient Hot Spring Town

    Arima Onsen: Kobe’s Ancient Hot Spring Town

    Photo by note thanun on Unsplash

    Tucked into the hills above Kobe, Arima Onsen has been drawing bathers for over a thousand years — it gets a mention in the 8th-century Nihon Shoki, and both Toyotomi Hideyoshi and the Buddhist monk Gyoki are said to have soaked here. Unlike remote mountain onsen towns that eat up a full day of travel, Arima sits close enough to Kobe and Osaka that you can do it as a half-day or overnight trip without much planning. Here’s what you actually need to know before you go.

    Why Arima Onsen Is Worth the Detour

    Arima is one of Japan’s “three ancient springs” (Nihon Sankei) alongside Dogo Onsen and Shirahama Onsen, and it’s rare in having two chemically distinct hot spring waters bubbling up within a few hundred meters of each other. The town itself is compact — a cluster of steep, narrow streets lined with ryokan, souvenir shops, and public bathhouses that you can walk end to end in about 15 minutes. That makes it an easy add-on if you’re already based in Kobe or Osaka and want a genuine onsen experience without committing to a multi-hour train ride into the mountains.

    Two Waters: Kinsen (Gold) and Ginsen (Silver)

    Arima’s defining feature is having two types of spring water with different mineral content:

    • Kinsen (金泉, “gold spring”) — iron- and salt-rich water that oxidizes to a rust-orange/reddish-brown color on contact with air. It’s said to be good for muscle and joint pain and improving circulation. This is the more famous of the two and what most public baths in town serve.
    • Ginsen (銀泉, “silver spring”) — clear water containing radium and carbonate, lighter and cooler, believed to help with fatigue and skin conditions.

    Most ryokan pipe in one or both types, so if you have a preference, check before booking. Note that Kinsen’s iron content can stain light-colored swimwear or towels, so bring a dark or old towel if you’re precious about it.

    Getting There: Trains, Buses, and the Ropeway

    From Kobe’s Sannomiya or Shin-Kobe stations, the most direct option is the Shinki Bus (via the Hankyu/Shinki bus network), which runs straight to Arima Onsen in about 30 minutes for roughly ¥720–750 one-way, IC card accepted. From Osaka (Umeda), Hankyu operates a direct highway bus in around 60–70 minutes for about ¥1,400 one-way — book ahead on weekends, since seats sell out.

    The train route is slower but scenic: take the Kobe Electric Railway (Kobe Dentetsu) Arima Line, changing at Shin-Kaichi or Tanigami depending on your starting point, for a total travel time of around 60–70 minutes. If you’re combining Arima with a Mount Rokko visit, the Arima-Rokko Ropeway links Arima Onsen Station directly to the Rokko Garden Terrace area (roughly ¥1,000 one-way, operating hours generally 9am–5pm, with reduced winter schedules) — from there you can take the Rokko cable car down to the city side and bus back into Kobe, making a loop instead of backtracking. If you’re driving in from Osaka on the Chugoku or Meishin expressways, it’s worth checking the roadside stations (michi-no-eki) along the route for a coffee or produce break, and see our guide to renting a car in Japan if self-driving is on the table — parking in Arima itself is limited and many ryokan charge ¥1,000–1,500/night for a spot.

    Where to Soak: Public Bathhouses vs. Ryokan Day Baths

    You don’t need to stay overnight to bathe in Arima. Two public bathhouses anchor the town:

    • Kin no Yu (金の湯) — the Kinsen gold-water bathhouse, entry around ¥800 for adults, open roughly 8am–10pm (last entry 9:30pm), closed the 2nd and 4th Tuesday of the month. There’s also a free foot bath (ashiyu) just outside for anyone who doesn’t want to pay for a full soak.
    • Gin no Yu (銀の湯) — the Ginsen silver-water bathhouse, entry around ¥700, open roughly 9am–9pm, closed the 1st and 3rd Tuesday. A combined ticket for both is available for a small discount.

    Budget travelers can hit both bathhouses for well under ¥2,000 total. Mid-range and splurge travelers should look at ryokan day-bathing (higaeri onsen), where non-guests can pay to use a ryokan’s private baths, typically ¥1,500–2,500 for a couple of hours — Taiko no Yu and Gosho-bo are well-known for this. If you want the full experience, an overnight ryokan stay with kaiseki dinner runs anywhere from about ¥20,000 to well over ¥50,000 per person depending on the property and season, and usually includes unlimited access to the inn’s own baths.

    Best Time to Visit and How Much Time to Budget

    Arima works year-round, but late November is peak season for autumn foliage on the surrounding hillsides, and the town gets genuinely crowded — book ryokan and bus seats well in advance if you’re going then. Summer is quieter and hot, which pairs oddly well with a cool Ginsen soak. For a day trip, budget 4–6 hours including travel from Kobe: enough time for one or two baths, a walk through the shopping streets, and a meal. If you want to add the ropeway/Mount Rokko loop, plan for closer to a full day.

    Shopping and Snacking in the Onsen Streets

    The two main shopping lanes, Yumoto-zaka and Ne-no-yu-zaka, are worth a slow wander. Look for tansan senbei — thin, slightly sweet crackers made using Arima’s naturally carbonated spring water, sold in most souvenir shops for around ¥500–800 a box. Arima is also known for Arima-ningyo-fude, decorative writing brushes with a small wooden doll dangling from the handle that pops out when you write, and for Arima-goma, hand-spun wooden tops — both make more distinctive souvenirs than the usual keychain. If you’re building out a broader souvenir list from your Japan trip, it’s worth comparing these regional crafts against more widely available items like carved hanko stamps or Akoya pearl jewelry, which you’ll find more easily in Kobe or Osaka’s main shopping districts. Note that quite a few of the smaller family-run shops in Arima are cash-only, so carry some yen.

    Common Mistakes to Avoid

    • Assuming both public baths keep the same hours and closed days. Kin no Yu and Gin no Yu close on different Tuesdays — check the calendar before you build your day around visiting both.
    • Not booking weekend ryokan baths or buses ahead. Arima is a popular weekend escape for Kobe and Osaka residents, and both accommodation and the Hankyu highway bus can sell out.
    • Bringing light-colored towels into a Kinsen bath. The iron content will stain fabric orange-brown — bathhouses sell inexpensive towels if you forget.
    • Missing the last bus back. Direct buses to Sannomiya and Osaka thin out in the evening; if you’re day-tripping, check the return schedule before you get comfortable in the bath.
    • Treating it purely as a bathing stop. The Taiko no Yudono Ato ruins — the excavated remains of Hideyoshi’s private bath — are a small but interesting historical stop most visitors walk right past.

    If your itinerary already has you routing through the Kansai region, it’s worth checking whether the Kansai regional rail passes cover any of your connecting legs into Kobe or Osaka, though note that Arima’s own local buses and the Kobe Dentetsu line generally fall outside standard JR pass coverage, so you’ll pay those fares separately.

  • Mikimoto & Akoya Pearls: A Buyer’s Guide to Japanese Pearl Jewelry

    Mikimoto & Akoya Pearls: A Buyer’s Guide to Japanese Pearl Jewelry

    Photo by Kelly Sikkema on Unsplash

    Japan didn’t just perfect the cultured pearl — it invented it. In 1893, Kokichi Mikimoto successfully cultured the world’s first pearl on Ago Bay in Mie Prefecture, and the Akoya pearl he pioneered is still considered the gold standard for round, high-luster white and cream pearls. If you’re shopping for jewelry in Japan, pearls are one of the few souvenirs that are both a genuine local specialty and a serious investment piece. Here’s how to buy them without overpaying or being fooled by a cheap freshwater imitation.

    Why Buy Pearls in Japan Specifically

    Akoya pearls are cultured almost exclusively in Japan (with smaller-scale production in China and Vietnam), and roughly 70% of the world’s pearls — regardless of origin — pass through processing, matching, and grading facilities in Kobe before reaching global markets. That means the selection, quality control, and price transparency in Japan are hard to match elsewhere. You’re buying closer to the source, from sellers who see thousands of pearls a week and can explain exactly what you’re getting.

    Understanding Akoya Pearl Quality

    Before you shop, learn the four things that actually drive price:

    • Size — Akoya pearls typically run 6mm to 9mm. Anything over 9mm is rare and priced accordingly.
    • Luster — the sharp, mirror-like shine unique to Akoya pearls. Hold the strand under a light; you should see a crisp reflection, not a hazy glow.
    • Surface — minor blemishes are normal and don’t ruin value; heavy pitting or cracks should drop the price noticeably.
    • Matching — for a necklace, uniform color and size across all pearls is labor-intensive and adds real cost. A well-matched strand is a sign of a serious retailer.

    Ask any shop for a certificate or at minimum a clear statement of whether pearls are natural saltwater Akoya, freshwater (Japan also produces some, generally cheaper), or dyed. Reputable stores will tell you unprompted.

    Where to Buy: Mikimoto and the Alternatives

    Mikimoto’s flagship is the pink building at 4-5-5 Ginza, Chuo-ku, Tokyo — a few minutes’ walk from Ginza Station. It’s the most reliable place to see museum-quality pearls and buy with total confidence, though you’re paying for the brand name and craftsmanship, not just the pearl itself. Expect the store to be open roughly late morning to early evening daily (hours shift seasonally, so check ahead if you have a specific time in mind). Staff speak English and are used to tourists browsing without buying.

    For better value on comparable quality, department stores (Mitsukoshi, Isetan, Takashimaya) carry Akoya pearls from Japanese jewelers like Tasaki and Kokichi alongside Mikimoto, letting you compare side by side in one afternoon. Kobe’s Motomachi and Sannomiya districts, near the historic pearl-processing district, are worth a look if you’re already in Kansai — prices there can run noticeably lower than Tokyo boutiques for equivalent quality, since you’re closer to the wholesale trade.

    Mikimoto Pearl Island: A Day Trip to the Source

    If you want to see where it all started, Mikimoto Pearl Island sits just offshore in Toba, Mie Prefecture — the actual site of Kokichi Mikimoto’s first cultured pearl. Admission is roughly ¥1,650–1,800 for adults, and the site includes a small museum on pearl history plus live demonstrations by ama (traditional female pearl divers) several times a day, weather permitting. There’s an on-site shop with a wider range of price points than the Ginza flagship, including smaller souvenir pieces that make sense for a casual buyer rather than a serious collector.

    Toba is most easily reached by Kintetsu Railway from Nagoya or Osaka/Kyoto (around 1.5–2.5 hours depending on your start point); it’s also a natural stop if you’re already visiting nearby Ise Jingu, Japan’s most sacred shrine, about 20–30 minutes away by train. If you’re building a longer Kansai loop, it’s worth comparing rail pass options — see our breakdown of regional JR passes for Kansai and Hokuriku — or consider renting a car if you want to combine the pearl island with other Mie Peninsula stops at your own pace.

    Budget, Mid-Range, and Splurge Strategies

    Budget (¥5,000–30,000): Single-pearl earrings, pendants, or a short choker in smaller sizes (6–6.5mm) are the easiest entry point. Department store jewelry counters and the Pearl Island gift shop are good hunting grounds.
    Mid-range (¥50,000–300,000): A well-matched 7–7.5mm Akoya strand with decent luster from a reputable non-flagship jeweler lands here. This is where most serious first-time buyers should be looking — real quality without paying purely for a brand name.
    Splurge (¥300,000+): Mikimoto-branded strands, larger sizes (8mm+), or exceptional luster and matching push well into six or seven figures in yen. If you’re spending this much, ask for independent grading documentation, not just a store receipt.

    Common Mistakes to Avoid

    • Assuming “pearl” means Akoya. Cheaper shell-bead or freshwater pearls are sold everywhere in tourist areas at a fraction of the price — fine as costume jewelry, but not what you want if you’re paying Akoya prices.
    • Skipping the tax-free paperwork. Jewelry over ¥5,000 qualifies for Japan’s consumption tax exemption at participating stores if you show your passport at checkout — ask before you pay, not after.
    • Buying the first strand you see. Even within one shop, luster and matching vary a lot between strands at the same price point. Ask to compare two or three side by side.
    • Ignoring the clasp and stringing. A cheap clasp on an otherwise good strand is a red flag, and pearl necklaces should be restrung periodically — ask whether the shop offers restringing service, since silk cord stretches over years of wear.

    Best Time to Visit and Practical Tips

    Mikimoto Pearl Island’s ama diving demonstrations run year-round but are most comfortable to watch in spring and autumn; midsummer is hot and humid, midwinter divers still work but sessions can be shorter. Ginza’s Mikimoto store is a fine rainy-day activity regardless of season. If pearls are just one stop on a broader Japan shopping trip, note that most department stores also stock traditional crafts worth comparing for gift value — our guides to furoshiki wrapping cloth and other souvenir categories cover how the Japanese gift-giving culture around presentation (many jewelers wrap purchases beautifully by default) can shape what you choose to buy and bring home.