Japan Trove

Category: Travel

Practical, up-to-date guides for traveling in Japan — itineraries, rail passes, eSIMs, where to stay, seasonal timing, etiquette, and the local know-how that makes a trip smoother. Written with real Japanese sources so you get the answer that actually works on the ground, not the recycled tourist one.

  • Currency Exchange in Japan: Airport Counters, Daikokuya & When Cash Beats Cards

    Currency Exchange in Japan: Airport Counters, Daikokuya & When Cash Beats Cards

    Photo by Franck V. on Unsplash

    Japan is more cashless than it used to be, but it’s still not a country where you can leave your wallet at home and tap your way through a trip. Between airport exchange counters with mediocre rates, city pawnshop-turned-currency-chains like Daikokuya, and convenience store ATMs that quietly charge you less than you’d expect, there’s a real difference between showing up prepared and losing 5,000 yen to bad timing. Here’s how the actual math works.

    Airport Counters: Convenient, But You Pay For It

    Every major Japanese airport — Narita, Haneda, Kansai, Chubu — has currency exchange counters run by operators like Travelex, GPA, or SMBC Trust Bank, usually clustered right after you clear customs and again before security on departure. They’re open to match flight schedules, typically from around 6:00 or 7:00 am until the last international arrival, sometimes as late as 10:00 or 11:00 pm at the busiest terminals.

    The convenience is real: no appointment, no hunting around a neighborhood, and you can do it the moment you land. The cost is also real. Airport counters generally run 3-5% off the mid-market rate once you factor in their buy/sell spread and any flat commission. On a ¥100,000 exchange, that’s ¥3,000-5,000 you didn’t need to give up. A reasonable strategy is to exchange a small amount at the airport — enough for a train ticket, a konbini meal, and a taxi if needed, maybe ¥10,000-15,000 — and do the rest in the city where rates are better.

    Daikokuya and the City Exchange Chains

    Daikokuya (大黒屋) started as a used-luxury-goods and pawn chain, but many of its central Tokyo and Osaka branches also run currency exchange counters, and they’re popular with travelers precisely because their rates tend to beat both airport counters and ordinary banks — often by 1-2 percentage points. You’ll find exchange-capable branches in high-traffic areas like Shinjuku, Shibuya, Ikebukuro, and Akihabara in Tokyo, and around Dotonbori and Namba in Osaka. Hours are generally shop-standard, roughly 10:00 am to 8:00 pm, seven days a week.

    Other dedicated city-center exchangers worth knowing about include World Currency Shop and Daiko, which operate similarly — small storefronts near major stations, no appointment needed, rates posted on an electronic board out front that update through the day. Because these shops compete directly with each other in dense shopping districts, it’s worth glancing at the posted rate at two or three storefronts before committing if you’re changing a large amount; a five-minute walk can be worth more than the time it costs.

    One practical note: bring a clean, newer bill if you’re exchanging foreign cash into yen — Japanese exchange counters are notably picky about creased, old, or marked banknotes, and some will refuse worn bills outright or offer a worse rate for them.

    ATMs: Often the Best Deal Hiding in Plain Sight

    If your bank card doesn’t charge a foreign transaction fee, withdrawing cash directly from a Seven Bank ATM (inside any 7-Eleven) or a Japan Post Bank ATM is frequently the cheapest way to get yen, since you’re getting your card network’s exchange rate rather than a storefront’s marked-up spread. Seven Bank charges international cards a flat ¥220 fee per withdrawal regardless of amount, which on a ¥50,000 withdrawal is a far smaller percentage hit than most exchange counters. Japan Post Bank ATMs, found in post offices nationwide, work similarly and are useful in smaller towns where Seven Bank machines are scarcer.

    The catch is your home bank may still charge its own foreign ATM fee on top, so check that before relying on this method entirely. It’s also worth carrying a Suica or similar IC card for day-to-day transit and konbini purchases — topping one up with cash at a station machine is simple, and if you want the card itself as a souvenir rather than just a transit tool, the Suica Penguin mascot merch is worth a detour for collectors.

    When Cash Still Beats Cards

    Tokyo, Osaka, and Kyoto’s major shopping streets are genuinely card-friendly now, but Japan’s cashless shift is uneven. You’ll still hit cash-only situations at: small family-run restaurants and izakaya, shrine and temple fee boxes, local buses in many regions (exact change is often required, or you tap an IC card instead), countryside vending machines, festival food stalls, and rural ryokan. The farther you get from major stations, the more this matters — if you’re island-hopping on local ferries like those covered in our Inland Sea ferry guide, or visiting remote natural sites, don’t count on a card reader being nearby at all.

    Car rentals and car-sharing are a mixed bag too — most major rental counters take credit cards fine, but if you’re using an app-based service like Times Car or Careco for a short hop, as outlined in our guide to car-sharing apps in Japan, registration is card-based but you’ll still want cash on hand for parking machines and tolls in areas without ETC. And if you’re driving at all, sort out your International Driving Permit before you land — that’s a paperwork problem cash can’t solve.

    Common Mistakes to Avoid

    • Exchanging all your cash at the airport out of habit. Change a small buffer there, do the bulk in the city.
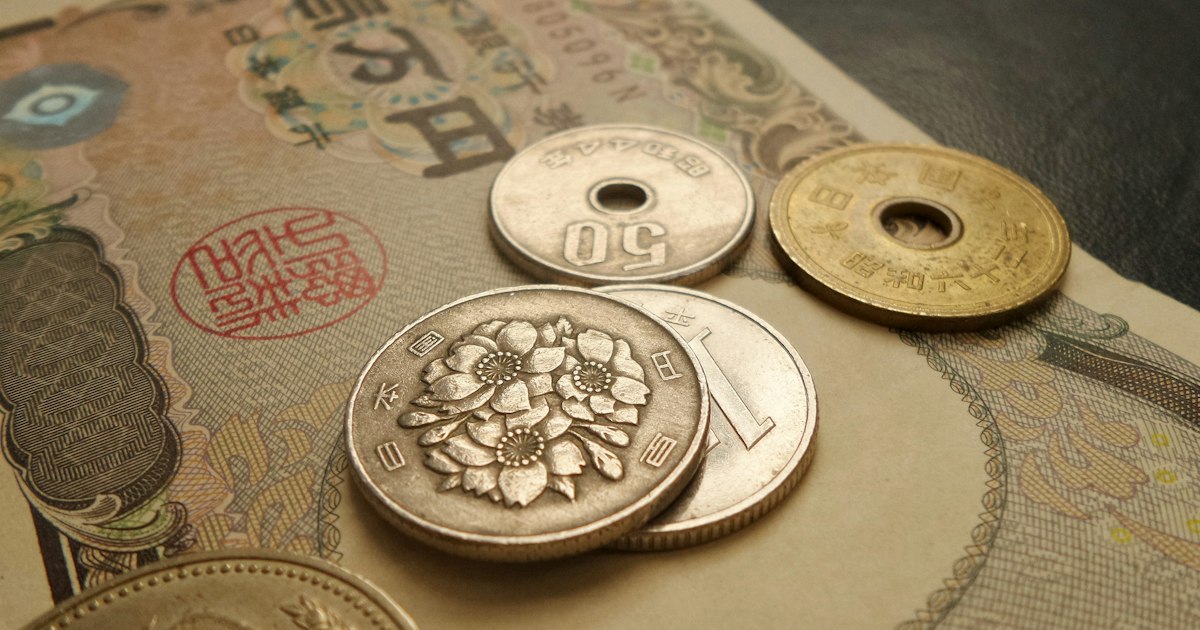
    • Forgetting Japan is still partly a coin economy. ¥1, ¥5, ¥10, ¥50, ¥100, and ¥500 coins add up fast in a wallet; many travelers end up with ¥3,000+ in unspent coins by trip’s end. Use them at vending machines and konbini registers rather than hoarding them.
    • Assuming your home bank’s “no foreign fee” card works everywhere. Some older Japanese ATMs reject foreign-issued cards outright; Seven Bank and Japan Post Bank machines are the most reliable bets.
    • Not checking posted rates before exchanging a large sum. A one percentage point difference on ¥200,000 is ¥2,000 — worth the extra few minutes of comparison shopping between storefronts.

    A Simple Rule of Thumb

    Land with a little cash from home or your airport ATM, change a small amount at the airport counter for immediate needs, then do any larger exchange at a city chain like Daikokuya once you’ve settled in. Lean on cards and IC cards for everyday spending in cities, but keep ¥5,000-10,000 in cash as a floor at all times once you leave major urban centers — it’s the difference between a minor inconvenience and a stranded afternoon.
  • International Driving Permits for Japan: Which Countries’ Licenses Actually Work

    International Driving Permits for Japan: Which Countries’ Licenses Actually Work

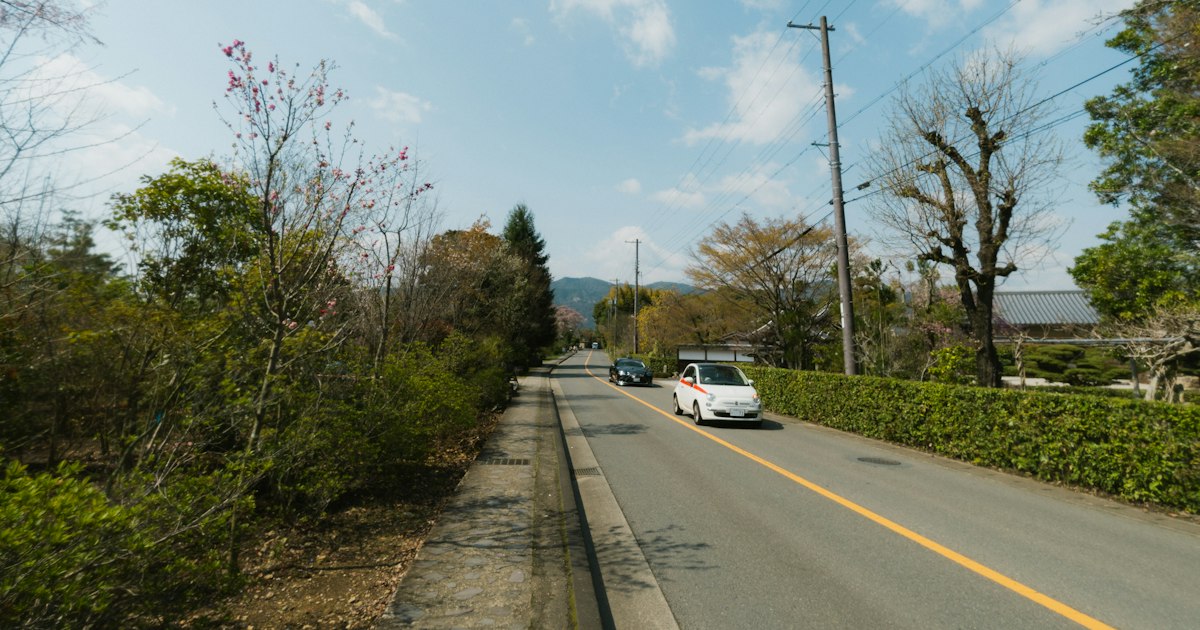
    Photo by Ryuta on Unsplash

    Every year, foreign visitors show up at Japanese car rental counters with a driver’s license in hand, only to be turned away because the paperwork behind that license doesn’t match what Japanese law requires. The rules aren’t complicated once you know them, but they trip up a surprising number of travelers — especially ones who assumed any “international” document would do. Here’s what actually works, country by country, and where people get it wrong.

    The baseline rule: the 1949 Geneva Convention

    Japan recognizes International Driving Permits (IDPs) issued under the 1949 Geneva Convention on Road Traffic. If your home country is a party to that treaty — this includes the United States, United Kingdom, Canada, Australia, New Zealand, most of the EU, South Korea, and dozens of others — you can get a Geneva-convention IDP from your home country’s authorized motoring association and drive in Japan on it, alongside your regular domestic license.

    The IDP is valid in Japan for one year from the date you enter the country, or until the permit’s own printed expiry date, whichever comes first. You must carry three things together whenever you drive: your passport, your valid domestic license, and the IDP itself. The IDP alone is not a license — it’s a certified translation, and it means nothing without the original license sitting next to it.

    Six countries that skip the IDP entirely

    There’s a separate, lesser-known track for drivers from Switzerland, Germany, France, Belgium, Monaco, and Taiwan. These places have bilateral arrangements with Japan that let their license holders drive using their original license plus an official Japanese translation — no IDP required at all.

    That translation is produced by the Japan Automobile Federation (JAF), Japan’s national motoring organization. It costs around ¥4,250 and can be requested by mail before your trip or in person at JAF offices in major cities once you’ve landed; mail processing typically takes about a week, so build that into your schedule if you’re planning to pick up a rental car on day one. Taiwanese travelers in particular should know this — a Taiwanese IDP isn’t the relevant document here; it’s the JAF translation that gets checked at the counter.

    Licenses that don’t work in Japan, period

    This is where the real confusion happens. Several large source markets for Japan tourism — mainland China being the most significant — are not parties to the 1949 Geneva Convention. China operates under the newer 1968 Vienna Convention, which Japan has never ratified. That means a Chinese IDP, even a genuine one issued by Chinese authorities, is not valid for driving in Japan, and China isn’t on the bilateral translation list either. In practice, Chinese license holders generally cannot legally rent and drive a car in Japan at all, with no quick workaround — this catches out enough travelers that it’s worth repeating to anyone planning a trip around a self-drive itinerary. Other countries outside the Geneva Convention framework face the same gap, so if you’re unsure, check whether your country is a signatory before you build a road trip around renting a car.

    How to actually get an IDP before you fly

    You cannot obtain a valid IDP once you’re in Japan — it has to be issued by your home country before departure. A few concrete examples:

    • United States: AAA or the American Automobile Touring Alliance (the two authorized issuers) will issue one same-day in person for about $20, plus two passport-style photos. Mail applications take a couple of weeks.
    • United Kingdom: Apply through the Post Office for £5.50; many branches issue it the same day if you bring the right form, a photo, and your license.
    • Canada: CAA issues IDPs for roughly CAD $25, same-day at most branches.
    • Australia: The Australian Automobile Association offers both a physical permit and a digital version through its app, around AUD $50–60.

    Whichever country you’re from, apply at least two to three weeks ahead if you’re going by mail, or the same week if your local motoring club offers walk-in service.

    Common mistakes that get rentals cancelled

    Rental companies tightened their checks hard after a string of accidents involving foreign drivers on invalid permits, and staff now scrutinize documents closely. The most frequent issues: showing up with an IDP but no original home license (the IDP is useless alone); assuming a digital photo of the IDP is acceptable (most counters want the physical booklet); and discovering mid-trip that the IDP expired a year after a previous Japan visit, not after this one. If you’re also considering short city hops rather than a full rental, apps like those covered in Times Car and Careco for short hops without a rental counter apply the exact same license rules at sign-up, so there’s no shortcut there either.

    Where having the right paperwork actually pays off

    The places where a valid IDP genuinely changes your trip are the rural and island routes public transport barely touches. Self-driving opens up castle towns like Obuse in Nagano, river valleys like the Shimanto River in Kochi, and multi-island routes where you’d otherwise be timing your day around inland sea ferry schedules. For these trips, a mid-range compact car (around ¥6,000–9,000/day) is usually plenty; budget travelers can look at kei cars for ¥4,000–5,000/day, while a campervan for a multi-night rural loop runs ¥15,000+ per day in peak season (Golden Week, mid-August, and New Year’s command premium rates and should be booked a month or more out). Just make sure the permit in your wallet matches the rules above before you commit to the itinerary.

  • Inland Sea Ferry Hopping: Island-to-Island Boat Schedules Beyond Naoshima

    Inland Sea Ferry Hopping: Island-to-Island Boat Schedules Beyond Naoshima

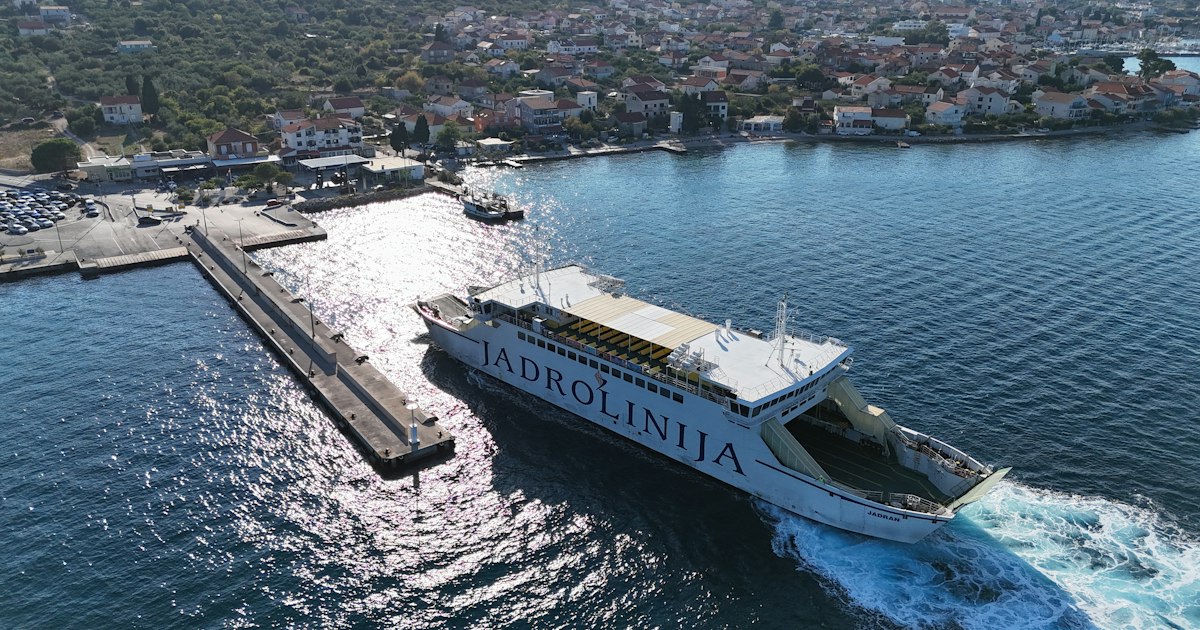
    Photo by Lukas on Unsplash

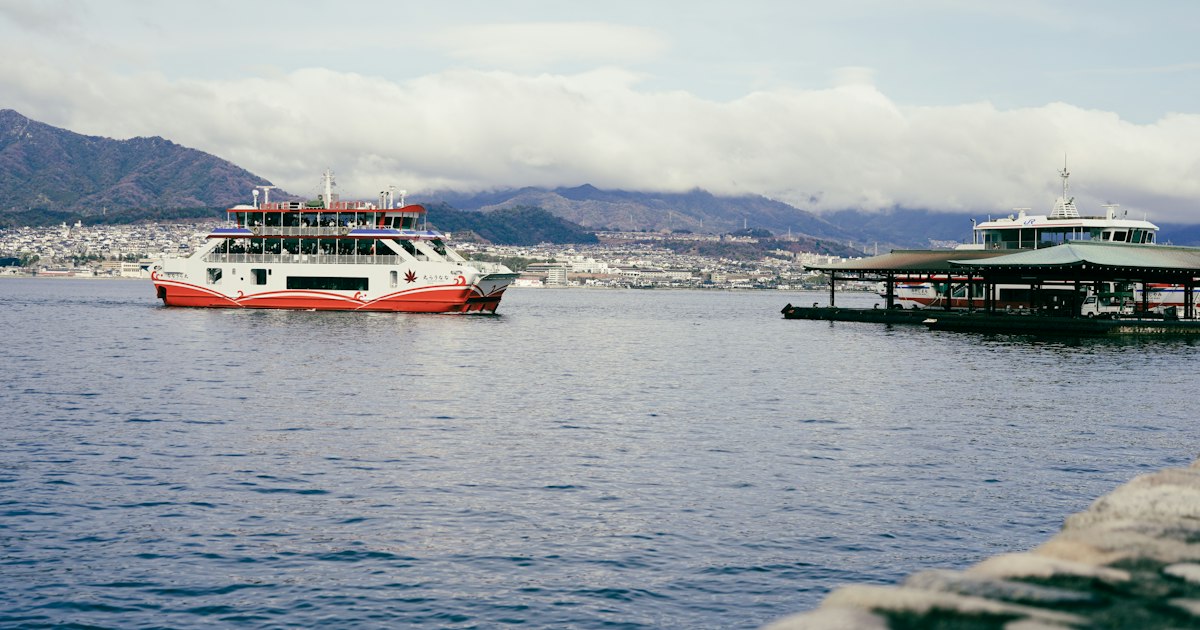
    Naoshima gets all the attention, but it’s just one stop on a much bigger network of passenger ferries criss-crossing the Seto Inland Sea. Once you understand the hub ports and how thin the schedules really are, you can string together a two- or three-island day that most visitors never attempt — Ogijima’s cat-filled alleys, Teshima’s rice terraces and art museums, Inujima’s old copper refinery, or Shodoshima’s olive groves. This guide covers the routes, rough fares, and the scheduling mistakes that strand people overnight.

    The two hub ports: Takamatsu and Uno

    Almost every island ferry in this part of the Inland Sea radiates from one of two ports, and picking the right one changes your whole day.

    • Takamatsu Port (on Shikoku, a short walk from JR Takamatsu Station) is the busier hub, run mainly by Shikoku Kisen. From here you can reach Naoshima, Megijima, Ogijima, Teshima, Shodoshima, and the seasonal “art line” boat to Inujima.
    • Uno Port (on the Honshu/Okayama side, reached via the JR Uno Line from Okayama Station, about 40 minutes) is quieter and often cheaper for Naoshima, Teshima, and Inujima, since it’s closer and sees fewer tour groups.

    Deciding between them usually comes down to whether you’re coming from Okayama or Takamatsu that morning — don’t try to do both hubs in one day unless you’ve mapped out the connecting ferry times in advance.

    Megijima and Ogijima: the easiest half-day loop

    These two small islands sit so close to Takamatsu that they’re genuinely doable as a half-day trip. Megijima (known for its “Oni ga Shima” demon-cave legend) is about 20 minutes out by ferry, and Ogijima — famous for its steep, narrow lanes and the lattice-roofed “Ogi Terrace” structure near the port — is roughly 40 minutes out, with some boats stopping at Megijima first. Fares are modest, generally in the ¥300–550 one-way range depending on the boat, and there are usually five or six sailings a day on weekdays, a bit more on weekends. The catch: boats often run only every 1.5–3 hours, so if you miss the one you planned, you may be waiting a while rather than catching “the next one.”

    Teshima and Inujima: the art-island detour

    Teshima (home to the Teshima Art Museum and its curved concrete “water drop” building) and Inujima (home to the Seirensho Art Museum, built into a former copper refinery) are reachable from both Takamatsu and Uno, plus a seasonal direct boat that links Naoshima–Teshima–Inujima on the same run during peak art-tourism months. This is convenient, but it’s also the schedule most likely to have only three or four departures a day outside of festival periods, so treat the timetable as fixed waypoints rather than a flexible train service. One-way fares typically land somewhere between ¥700 and ¥1,500 depending on distance and boat type. If you’re combining this with Naoshima in one day, build in a buffer — a single delay at any leg can cascade into missing the last connection home.

    Shodoshima: the big island with its own rhythm

    Shodoshima is large enough to feel like a destination in its own right rather than a quick stopover — it’s known for olive cultivation, soy sauce breweries, and the Kankakei Gorge ropeway. Ferries run to Tonosho Port from Takamatsu (around an hour), and there are additional routes from Okayama-side ports and even Himeji, which makes it a useful bridge if you’re traveling between Shikoku and the Kansai/Chugoku region rather than backtracking. Because the island is spread out, most visitors rent a bicycle at the port or use a car rental counter near Tonosho once they arrive; if you’d rather skip a traditional rental counter, it’s worth checking whether a car-sharing app like Times Car or Careco has a pod near the port for short hops around the island. If you specifically want to bring your own rental car across by sea rather than renting fresh on each island, that’s a different system entirely — see our guide to car ferries in the Seto Inland Sea for how vehicle boarding, pricing, and reservations work.

    Best season and timing

    Spring (April–May) and autumn (October–November) offer the calmest seas and the most comfortable walking weather between ports and sights. Summer brings typhoon risk from roughly August through September — ferries do get cancelled or suspended with little notice when a storm approaches, so build a buffer day into any itinerary that depends on a specific island crossing. Winter schedules thin out noticeably, with some routes dropping to two or three sailings a day, and a few smaller island connections reduce service further on weekdays. If a Setouchi Triennale art festival session happens to overlap with your trip, expect added boats and much heavier crowds on the art-focused routes (Naoshima–Teshima–Inujima especially) — check whether your travel dates fall inside a session before assuming normal off-season schedules apply.

    Common mistakes to avoid

    • Assuming frequent service. Most inter-island routes run a handful of times a day, not every 15–30 minutes. Always check the day’s printed or online timetable before you plan a multi-island route.
    • Missing the last boat back. On smaller islands, the final return sailing can be mid-afternoon, not evening. Confirm the last departure time the moment you arrive, not when you’re ready to leave.
    • Relying on cards. Many small-island ticket windows and vending machines are cash-only. Carry enough small-denomination yen for the whole day.
    • Weekday vs. weekend confusion. Several routes run noticeably different schedules on weekdays versus weekends and holidays — don’t assume the Saturday timetable you saw online applies to your Tuesday visit.
    • Ignoring weather cancellations. Rough seas can suspend smaller boats even when mainland weather looks fine. If a crossing is essential to your plans, have a fallback.

    Budget, mid-range, and splurge options

    On a budget, buy single one-way tickets at each port as you go and get around islands on foot or on a rented bicycle (often ¥500–1,500 a day), skipping taxis entirely. For a mid-range trip, base yourself one night on Shodoshima or Teshima at a local guesthouse so you’re not racing the last ferry every evening, and spread a multi-island loop across two days instead of one. If you want to splurge, a private charter boat or water taxi gives you full control over timing between islands — useful if you’re traveling with a small group and want to see three islands without being locked to public ferry hours, and it pairs well with a stay at one of the design-forward resorts or upscale glamping properties that have opened around the Inland Sea in recent years.

  • Shinkansen Smoking Rooms: Where They’re Located and How They Work

    Shinkansen Smoking Rooms: Where They’re Located and How They Work

    Photo by Hanhan H on Unsplash

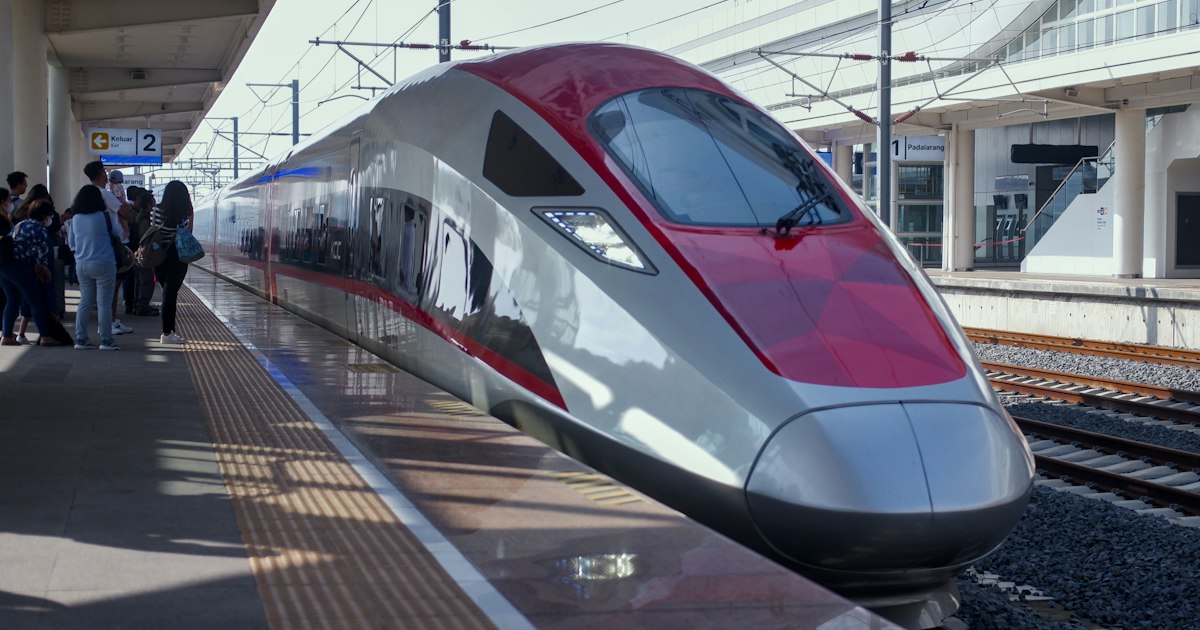
    If you smoke and you’re riding the Shinkansen, the rules have gotten confusing fast. A few years ago almost every bullet train had an onboard smoking room tucked between cars. Today, depending on which line you’re riding, that room might not exist anymore — or it might be exactly where it’s always been. Here’s what’s actually true in 2026, line by line, plus how to find the room on your specific train before you’re standing in the aisle with a cigarette and nowhere to go.

    The Big Change: Tokaido Shinkansen Is Now Smoke-Free Onboard

    The most-used bullet train route in the country — the Tokaido Shinkansen between Tokyo, Nagoya, Kyoto, and Osaka (Nozomi, Hikari, and Kodama services) — no longer has smoking rooms on any of its trains. JR Central phased them out of its N700S and N700A fleets, completing the switch by 2024. If you’re booking Tokyo–Kyoto or Tokyo–Osaka, plan on a fully non-smoking two-and-a-half-hour ride with no onboard option at all.

    This matters for connecting trips too: Nozomi and some Hikari services continue past Osaka onto the San’yo Shinkansen toward Hiroshima and Hakata, and because it’s the same physical train, those extended runs are smoke-free as well. The old rule of thumb — “there’s always a smoking room a few cars down” — simply doesn’t apply on this line anymore.

    Where Smoking Rooms Still Exist

    JR East’s network is where smoking rooms survive. As of now, you can still find them on:

    • Tohoku/Hokkaido Shinkansen (Hayabusa, Yamabiko, Hayate) running Tokyo–Sendai–Shin-Aomori–Shin-Hakodate-Hokuto
    • Akita Shinkansen (Komachi)
    • Yamagata Shinkansen (Tsubasa)
    • Joetsu Shinkansen (Toki, Tanigawa)
    • Hokuriku Shinkansen (Kagayaki, Hakutaka) running Tokyo–Nagano–Kanazawa

    Not every single trainset on these lines is guaranteed to have one — fleets get renovated gradually — but as a general rule, JR East has kept smoking rooms in service far longer than JR Central. If your itinerary includes somewhere like Obuse via the Hokuriku Shinkansen to Nagano, or a side trip from Tokyo up toward Lake Chuzenji and Kegon Falls via the Tohoku Shinkansen to Utsunomiya, you’re on a line where smoking rooms are still realistic to count on.

    Kyushu Shinkansen (Sakura, Mizuho, Tsubame) and San’yo-only Kodama services are mixed and have been trending toward removal too, so don’t assume — verify before you board (see below).

    How to Find the Smoking Room on Your Train

    Smoking rooms are never in a fixed car number across the whole network — it depends on the specific train type (E5, E6, E7, W7, and so on), and car numbering runs in opposite directions depending on the service. The reliable ways to check:

    • Car diagrams inside the train — every car has a facilities chart posted near the doors showing toilets, the multipurpose room, and the smoking room (marked with a cigarette icon) for that entire train.
    • JR East’s or JR West’s official site — before booking, their “train facilities” or seating guide pages show smoking room locations per train type.
    • Ask the conductor (shashō) when they pass through checking tickets — they’ll point you in the right direction without needing much Japanese; “tabako-beya wa dokodesu ka” (Where’s the smoking room?) works fine.
    • Walk and look — smoking rooms sit at one end of a car, behind a glass door, usually near the vestibule between carriages, not inside the main seating area.

    If you have a choice of seat when booking, picking a seat in or near the car that has the smoking room saves you from walking the length of a moving 16-car train — useful on longer hauls like Tokyo to Shin-Hakodate-Hokuto, which takes over four hours.

    What’s Inside: Size, Rules, and Etiquette

    Don’t expect a lounge. A Shinkansen smoking room is a small glass-walled booth, standing room only, built for two to four people at a time with a strong ventilation/air-filtration unit running constantly. There are no seats, no tables, and no food or drinks allowed inside. Heated tobacco products (IQOS, glo, Ploom) use the same room as regular cigarettes — there’s no separate space for them. Vaping with nicotine-free e-liquid is generally tolerated the same way, but when in doubt, treat it as a smoking room rule, not a free-for-all.

    The room is shared across all ticket classes — ordinary car, Green Car, and Gran Class passengers all use the same smoking room if the train has one; there’s no separate smoking room reserved for Green Car. Keep visits brief during busy travel periods (Friday evenings, Sunday afternoons, holiday weeks like Golden Week or New Year) since two or three people can fill the booth and create a short queue.

    Platform Smoking Booths: Your Backup Option

    Most major Shinkansen stations — Tokyo, Shin-Osaka, Sendai, Omiya, Nagano, Kanazawa — have enclosed smoking booths on the platforms themselves, separate from the trains. These are free to use, open during normal station operating hours (roughly first train around 6am to last train around midnight), and are a good move if you have a layover of 10 minutes or more between transfers, or if you’re boarding a Tokaido Shinkansen that has no onboard option at all. Look for the glass booth with a cigarette icon near the platform’s vending machines or benches; staff can point you to the nearest one if you ask at the gate.

    Common Mistakes to Avoid

    • Assuming every bullet train has a smoking room. The Tokaido Shinkansen doesn’t anymore, and the trend elsewhere is toward removal, not addition.
    • Confusing the multipurpose room with the smoking room. The multipurpose room (tamokuteki-shitsu) is for nursing mothers, wheelchair users, and people who feel unwell — smoking there is not allowed and will get you politely but firmly redirected.
    • Lighting up in the vestibule or restroom. Fines and a very uncomfortable conversation with the conductor are both possible; smoke detectors in train toilets are standard.
    • Not checking before buying a ticket. If smoking access matters to your trip, confirm it when you book rather than discovering the answer once you’re already on board.

    A pack of cigarettes in Japan currently runs around 600 yen, and convenience stores near every major station sell them — but remember Japan requires a domestic Taspo card or a staffed register purchase, so pick up what you need before boarding rather than counting on finding cigarettes en route.

    If train travel in Japan has you curious about more than just where to smoke, it’s worth a look at Japan’s trainspotting subculture — the obsession with Shinkansen design runs deep here, and understanding it makes the ride itself more interesting, smoking room or not.

  • Kanda Myojin: Tokyo’s Tech-Blessing Shrine Near Akihabara

    Kanda Myojin: Tokyo’s Tech-Blessing Shrine Near Akihabara

    Photo by Tim D on Unsplash

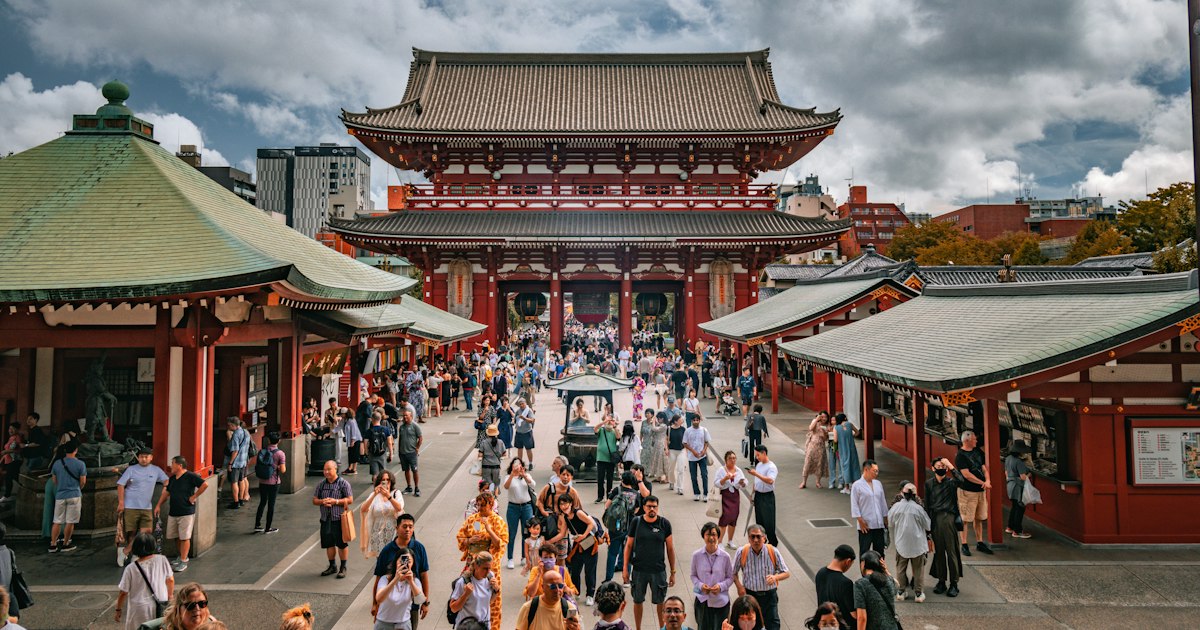
    Tucked on a quiet hill a short walk from Akihabara’s blinking signage, Kanda Myojin looks at first glance like any other vermillion-and-gold Shinto shrine in central Tokyo. Look closer and you’ll notice something odd for a 1,300-year-old institution: a gift shop selling amulets for computer servers, a steady trickle of IT workers in company lanyards bowing at the main hall, and anime fans photographing a gate that appears in a popular idol series. Kanda Myojin has quietly become Tokyo’s unofficial shrine for the tech industry, and it’s one of the easiest worthwhile detours you can make if you’re already spending a day in Akihabara.

    A Shrine That Adopted the Digital Age

    Kanda Myojin (officially Kanda Jinja) was founded in 730 AD, making it older than Tokyo itself. It enshrines three deities: Daikokuten (good harvests and matrimony), Ebisu (business prosperity), and Taira no Masakado, a 10th-century warrior who was deified and became a guardian spirit for the city. For centuries the shrine protected 108 neighborhoods of old Edo, including the area that eventually became Akihabara’s electronics and otaku culture district.

    That geographic accident is the whole story. As Akihabara shifted from postwar radio parts to PCs, servers, and anime goods, local shop owners and engineers kept coming to their neighborhood shrine for blessings — just for new kinds of businesses. The shrine responded by formally offering an “IT Information Safety” omamori (情報安全御守), explicitly blessing computers, data, and networks against crashes and breaches. It sounds like a novelty, but Japanese companies genuinely buy these for server rooms, and individual visitors pick them up half as a joke, half sincerely, before a big product launch or exam season.

    What You’ll Actually See

    The approach through the Zuishinmon gate — a 1975 concrete rebuild of the original Edo-period structure, painted in bright vermillion with ornate carved beams — is the shrine’s most photogenic spot. Inside the main courtyard stands a striking 6.6-meter bronze statue of Daikokuten, one of the largest in Japan, along with the main hall (honden) where most visitors stop to pray. Behind the main hall is a smaller shrine office and the EDOCCO cultural complex, which houses a café and a well-stocked omamori and souvenir shop — this is where the IT amulets, along with more traditional good-luck charms for business, romance, and traffic safety, are sold.

    Fans of the anime franchise Love Live! will also recognize the shrine — it served as the real-world basis for a fictional shrine in the series, and it’s a minor pilgrimage stop for that fandom, with dedicated anime-collaboration goods sold seasonally.

    Getting There From Akihabara

    Kanda Myojin sits at 2-16-2 Sotokanda, Chiyoda-ku, about a 7-10 minute walk north from Akihabara Station’s Electric Town exit — just keep heading uphill away from the main electronics strip. If you’re coming by train directly, JR Ochanomizu Station (Chuo-Sobu Line) is closer, about a 5-minute walk, as is Tokyo Metro’s Shin-Ochanomizu Station on the Chiyoda Line. Train enthusiasts should know Ochanomizu is a decent spot to watch Chuo Line traffic pass below the station — worth a glance if you’re the kind of traveler drawn to Japan’s trainspotting subculture.

    The shrine grounds are open 24 hours and entry is free. The shrine office and omamori shop, however, keep standard hours — generally 9:00 am to 5:00 pm daily — so plan your souvenir shopping within that window rather than a late-night visit.

    Best Time to Visit

    Any season works for a quick visit, since the shrine is compact and mostly outdoors. Weekday mornings are calmest, before Akihabara’s crowds build up. The one date worth planning around is the Kanda Matsuri, one of Edo’s three great festivals (alongside the Sanno and Fukagawa festivals). It’s held in mid-May in odd-numbered years — meaning the next full-scale festival falls in 2027 — and features a grand procession of around 300 people and dozens of mikoshi (portable shrines) winding through the neighborhoods the shrine protects. In off years, a scaled-down version still happens, but the big parade is worth timing a trip around if your visit happens to line up.

    What to Buy and What It Costs

    Budget: a standard omamori runs 800-1,000 yen, and the goshuin (shrine stamp) for your collection book costs 500 yen. These make genuinely practical, low-cost souvenirs that beat most mass-produced Akihabara merchandise for authenticity.

    Mid-range: the IT Information Safety omamori is the signature purchase, typically priced similarly to other charms (around 1,000 yen), and makes a far better gift for a programmer or gamer friend than another keychain. The shop also sells business-prosperity and traffic-safety charms if you want something more universally useful.

    Splurge: companies and individuals can request a formal kigansai blessing ceremony — a short norito prayer performed by a priest for things like new product launches, website go-lives, or business openings. Fees for these formal prayers generally start in the several-thousand-yen range and require advance arrangement through the shrine office; this is a niche option but a memorable one if you’re launching something in Japan.

    Common Mistakes to Avoid

    Don’t rush through on the way to Akihabara’s shops and skip the shrine office entirely — the IT omamori is the whole reason to detour here, and it’s only sold during office hours, not around the clock. Don’t assume the shrine will be empty; on weekends and especially during New Year’s hatsumode (the first shrine visit of the year), it gets genuinely crowded with both tourists and locals seeking business luck for the year ahead. And don’t photograph the main hall’s interior or priests performing ceremonies up close — standard shrine etiquette (quiet voices, no flash near worshippers, a small bow before approaching) applies here just as it would anywhere else.

    If you’re building out a full Akihabara day, Kanda Myojin pairs naturally with electronics and character-goods shopping — it’s an easy add-on before or after browsing for things like Suica Penguin and other IC card mascot merchandise, much of which is sold in shops a short walk from the shrine. And if the idea of a luck-based calendar shaping big decisions intrigues you, it’s worth knowing that many visitors here also consult Japan’s six-day luck calendar before choosing an auspicious date for a shrine visit, product launch, or wedding — the same cultural logic that makes blessing a server rack feel perfectly normal in Tokyo.

  • Car-Sharing Apps in Japan: Times Car and Careco for Short Hops Without a Rental Counter

    Car-Sharing Apps in Japan: Times Car and Careco for Short Hops Without a Rental Counter

    Photo by Helena Lila on Unsplash

    Not every drive in Japan calls for a full-day rental with a counter, an insurance upsell, and a queue of other travelers waiting for the same compact car. If you just need a vehicle for two or three hours — a supermarket run before a self-catered weekly stay, a loop out to a lake, or a hop between a train station and a trailhead — Japan’s car-sharing networks are built exactly for that. The two biggest are Times Car and Careco, and both let you book, unlock, and return a car entirely through a smartphone app, with no staff member ever handing you a key.

    How Car-Sharing Differs from a Rental Car

    A traditional rental is priced by the day and picked up at a counter where a staff member checks your license, walks around the car for damage, and files paperwork. Car-sharing is priced in 15-minute blocks, cars sit unattended in small parking bays scattered across cities and suburbs, and the entire transaction — reservation, unlock, return — happens through an app or an IC card tapped against a reader in the windshield. There’s no front desk, no fuel top-up requirement (cars are usually returned with the same gauge level or charged a small refueling fee that’s built into the rate), and no need to be anywhere near an airport or station. The tradeoff is smaller cars, usually compact hatchbacks or kei cars, and a limit on how far you can roam before mileage charges stack up.

    Times Car: The Biggest Network

    Times Car is run by the same company behind the Times coin parking lots you’ve probably already seen on nearly every city block in Japan, which is also why it has the densest station network of any car-sharing service in the country — well into the thousands of locations, concentrated in Tokyo, Osaka, Nagoya, and other urban centers but reaching plenty of smaller towns too. Cars are parked inside regular Times lots, usually in a reserved bay near the entrance with a charging/key box mounted on a post.

    Pricing works on a membership-plus-usage model: a one-time registration fee and a small monthly basic fee (both roughly ¥1,000–¥1,700, depending on current promotions) that get credited back against whatever you actually drive, plus a time-based rate that’s typically in the ¥280–¥300 range per 15 minutes for the smallest car class, with a distance charge once you pass the included kilometers. For a short errand of an hour or two, total cost usually lands somewhere between ¥1,200 and ¥2,500. Rates and included-distance allowances shift periodically, so always confirm the live price shown in the app before confirming a booking rather than relying on a number you saw online.

    Careco: The Other Major Option

    Careco is Times Car’s main nationwide competitor, with a station network that’s noticeably smaller outside the biggest cities but still strong in Tokyo, Kanagawa, and the Kansai region. Instead of sitting inside coin parking lots, Careco cars are more often tucked into condominium parking areas, convenience store lots, and dedicated small bays, so stations can feel a bit more residential and occasionally slightly harder to spot on a first visit than a Times lot. Pricing follows the same general shape as Times Car — a time-based rate per 15 minutes plus a per-kilometer charge beyond an included allowance — and in practice the two services end up costing similar amounts for a short trip, so it’s worth checking both apps for whichever has a closer station to where you’re staying rather than assuming one is reliably cheaper.

    What You Need to Sign Up

    Because you’re driving on Japanese roads, the licensing rules are identical to renting a car: you need either a Japanese driver’s license, a valid International Driving Permit issued under the 1949 Geneva Convention alongside your home license, or — if you’re from one of the handful of countries not covered by that convention (Germany, Switzerland, France, Belgium, Monaco, and Taiwan) — an official Japanese translation of your license from JAF or the relevant embassy. An IDP from a country whose license isn’t Geneva-recognized (including most US-issued IDPs paired with licenses from certain states, or UK/some other documents) won’t be accepted, so sort this out before you leave home, not at the parking bay.

    Registration itself is done in the app: a photo of your license and/or passport, a payment card, and in some cases a Japanese phone number or address. Times Car has leaned further into tourist-friendly sign-up in recent years with a short-term membership option aimed at visitors who only need the service for a few days, which trims the paperwork down to passport plus IDP. Careco’s process has historically assumed a resident user base, so if you’re visiting for a short trip it’s worth checking Times Car first and treating Careco as the backup if there’s a station much closer to your accommodation. Either way, build in 15–30 minutes for the registration and verification step before your first booking — don’t expect to sign up and drive away five minutes later.

    Common Mistakes Foreign Visitors Make

    • Booking a car for a trip better suited to a full rental. Car-sharing mileage limits and the small vehicle classes make sense for local errands or a half-day loop, but a multi-day trip with luggage is usually cheaper and less stressful through a standard rental, where you also get a bigger car and no return-to-the-same-spot restriction.
    • Forgetting the one-way restriction. Nearly all car-sharing bookings require you to return the car to the exact same station you took it from — there’s no dropping it off across town. Plan a round trip, not a one-way journey.
    • Not checking real-time availability before walking to a station. Popular stations near stations or shopping streets fill up fast on weekends; the app shows live availability, so check it right before you leave rather than assuming a car will be there.
    • Ignoring the fuel/charge rule. Most plans expect the car back with roughly the same fuel or battery level, or they deduct a small refueling fee automatically — either is fine, but running the tank down to empty without checking the plan’s policy can trigger a surprise charge.

    When Car-Sharing Actually Beats a Rental

    Car-sharing earns its keep on short, specific hops: picking up groceries and a compact rice cooker for a weekly mansion stay, driving out from a quiet base like Yudanaka to the apple orchards and soba shops that sit beyond the Jigokudani crowds, or doing a scenic loop around Lake Chuzenji and Kegon Falls from a hotel in Nikko without committing to a full-day rental you’ll only use for three hours. It also works well as a last-mile option when a glamping site is a short but awkward drive from the nearest station — handy before or after a stay covered in our guide to glamping in Japan. Where it doesn’t help is island-hopping or long rural routes with no stations nearby — for that kind of trip, something like the approach described in our guide to car ferries in the Seto Inland Sea with a conventional rental car is still the better tool. Keep both options in your back pocket: a rental counter for the long legs of a trip, and a car-sharing app on your phone for the short ones in between.

  • Shin-Okubo: Tokyo’s Koreatown for K-Pop Goods, Korean BBQ & Beauty

    Shin-Okubo: Tokyo’s Koreatown for K-Pop Goods, Korean BBQ & Beauty

    Photo by Jezael Melgoza on Unsplash

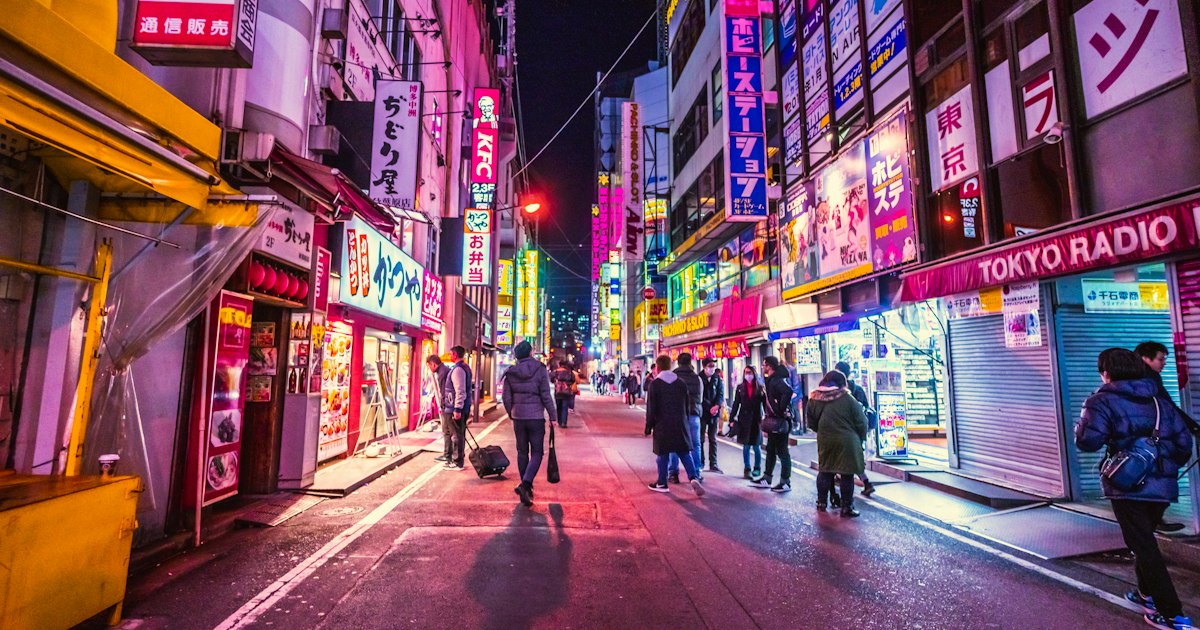
    Tucked just one stop north of Shinjuku on the JR Yamanote Line, Shin-Okubo is where Tokyo goes for Korean food, K-pop merchandise, and Korean skincare — often all in the same afternoon. Since the early 2000s, the neighborhood’s main drag (Shin-Okubo-dori, nicknamed Koreatown or K-Town) has filled with cheese dakgalbi restaurants, photocard shops, and beauty stores stacked three stories high. It’s compact, walkable, and — unlike a lot of Tokyo’s bigger shopping districts — can be fully explored in two or three hours.

    Getting There

    Shin-Okubo Station (JR Yamanote Line) puts you right at the top of the main street as soon as you exit. If you’re coming from the Shinjuku side, Okubo Station on the Seibu-Shinjuku Line and Shin-Okubo on the Toei Oedo Line’s nearby Higashi-Shinjuku exit are both within a 10-minute walk. From central Tokyo stations like Tokyo or Shibuya, budget 20-30 minutes door to door. Because it’s one stop from Shinjuku, it’s easy to tack onto a day that starts or ends in that area — many visitors walk the 15-20 minutes between Shin-Okubo and Shinjuku Station instead of riding, since it cuts straight past Kabukicho.

    K-Pop Shopping: What to Expect

    The main street and its side alleys are dense with shops selling albums, photocards, light sticks, and trading-card accessories for both current and older K-pop groups. Multi-floor stores are common — ground floor for new releases and merchandise, upper floors for photocards, used albums, and fan goods sorted by group. Expect to pay roughly 2,000-4,000 yen for a new album with photobook, and anywhere from a few hundred yen to several thousand for individual photocards depending on rarity and demand. Several shops specialize in “random” photocard draws from sealed packs, which is a fun but non-refundable gamble — if you want a specific member or card, look for shops that sell singles by name instead.

    Most shops open around 11:00 and stay open until 21:00 or 22:00, with some later on weekends. Weekday mornings and early afternoons are noticeably calmer; Saturday afternoons and evenings, especially after a group’s new release, can mean shoulder-to-shoulder crowds on a street that’s only about four meters wide. If you’re shopping for a specific artist’s new merchandise, arriving on a weekday within the first week of release still gives decent stock without the weekend crush.

    Korean BBQ and Street Food

    Korean BBQ (yakiniku-style, but with Korean marinades and banchan side dishes) is everywhere, with all-you-can-eat courses typically running 2,980-4,500 yen per person for 90-120 minutes, and à la carte galbi or samgyeopsal plates from around 1,000-1,800 yen. Cheese dakgalbi — stir-fried chicken and vegetables in gochujang sauce, topped with melted mozzarella — is the dish most associated with the neighborhood, usually priced 1,500-2,200 yen per person with a two-person minimum order at most places.

    For something quicker, the street-food stalls and small counters sell Korean fried chicken (from about 500 yen for a small portion), tteokbokki, hotteok (sweet filled pancakes, around 300-500 yen), and bingsu shaved ice in summer. Lines form fast at the most popular stalls on weekends, so if a particular shop has a crowd of five or more outside, it’s often worth circling back on your way out rather than waiting it out immediately.

    Korean Beauty Shopping

    Korean skincare and cosmetics stores sit alongside the K-pop shops, often carrying brands that are harder to find — or pricier — outside Korea: sheet masks, cushion foundations, and the glass-skin serums and essences that drove the whole K-beauty wave. Prices are generally comparable to or slightly above Korean retail but still often cheaper than importing. Many shops offer tester products and English-speaking or English-signage help, since the clientele is heavily international. If you’re comparing against Japanese domestic beauty and personal-care staples — which lean more toward sensitive-skin, fragrance-light formulas — it’s worth knowing how the two countries’ approaches to things like deodorants and antiperspirants diverge, since Japanese formulas are generally milder and marketed differently than what’s standard in Korea or the West.

    Shin-Okubo isn’t the only specialty shopping stop worth working into a Tokyo itinerary — if loungewear and comfort basics are also on your list, Gelato Pique’s flagship and department store counters are a similarly concentrated, easy-to-plan-around shopping detour elsewhere in the city.

    Budget, Mid-Range, and Splurge Options

    • Budget: Street food stalls (500-1,000 yen per item), a shared order of tteokbokki, and browsing photocard shops without buying the sealed random packs.
    • Mid-range: A sit-down cheese dakgalbi or galbi meal (1,500-3,000 yen per person) plus one or two K-beauty items or a single album.
    • Splurge: All-you-can-eat Korean BBQ with premium cuts (4,000-6,000+ yen per person), paired with a shopping run for a full K-pop merchandise set — light stick, album, and photobook can easily add up to 10,000-15,000 yen for a dedicated fan.

    Best Time to Visit and Common Mistakes

    Weekday late mornings (around 11:00-13:00) offer the calmest browsing and shortest food lines. Avoid Saturday from early afternoon through evening unless you don’t mind crowds — it’s genuinely one of the busiest single streets in Tokyo at that time. The most common mistakes visitors make: assuming every restaurant takes walk-ins without a wait (popular cheese dakgalbi spots often have a queue by lunchtime on weekends), buying sealed “random” photocards expecting a specific result, and not checking that a restaurant’s BBQ course has a minimum order size (often two people) before sitting down solo.

    Because the neighborhood borders Kabukicho, it’s also worth knowing what you’re walking past after dark. Kabukicho has a dense cluster of hostess and host clubs that aggressively tout for customers on the street — our guide to Tokyo’s hostess bar districts and why tourists should steer clear explains how those touts operate and the surprise-bill scams that can follow, which is useful context if you’re walking between Shin-Okubo and Shinjuku Station after your shopping trip.

    Practical Tips

    Bring cash as a backup — many smaller specialty shops and food stalls are card-friendly but not all accept IC transit cards (Suica/Pasmo) the way convenience stores do. Shop bags get heavy fast if you’re buying cosmetics and albums in the same trip, so consider making beauty shopping and food/merchandise shopping two separate passes if you’re also carrying luggage. Finally, if you’re after a specific K-pop group’s merchandise for a concert or anniversary, call ahead or check a shop’s social media, since restocks and event-tied releases move quickly and inventory varies store to store even on the same block.

  • Car Ferries in the Seto Inland Sea: Taking a Rental Car Between the Islands

    Car Ferries in the Seto Inland Sea: Taking a Rental Car Between the Islands

    Photo by Zion C on Unsplash

    The Seto Inland Sea is one of the few places in Japan where a rental car can genuinely open up a trip — not by driving further, but by driving onto a boat. Dozens of car ferries link the mainland to islands like Shodoshima, Naoshima, and Teshima, and a few long-haul routes connect Honshu to Shikoku directly across the water. Done right, it’s one of the most relaxing ways to island-hop in Japan. Done without checking the fine print first, it can also strand you at a port with a car you’re not actually allowed to load. Here’s what to know before you drive up the ramp.

    Why Take a Car Ferry Here Instead of Flying or Driving the Bridges

    The Seto Inland Sea sits between Honshu, Shikoku, and Kyushu, dotted with hundreds of islands, many of them connected to each other (but not to the mainland) by toll bridges like the Shimanami Kaido. For islands without a bridge — Shodoshima, Naoshima, Teshima, Megijima, and others — a car ferry is the only way to bring your own vehicle across. The appeal is simple: no repacking bags for a train-and-taxi relay, no waiting on local buses that run four times a day, and the freedom to chase a sunset view or a tucked-away beach on an island’s back roads. For travelers already combining this region with inland Honshu detours, it pairs naturally with places like Takeda Castle Ruins in Hyogo, which sits an easy drive north of the Himeji ferry ports.

    The Routes Worth Knowing

    A few routes carry the bulk of tourist traffic:

    • Uno (Okayama) to Naoshima (Miyanoura), ~20 minutes — operated by Shikoku Kisen, roughly 8-10 sailings a day. Passenger fare is around ¥300-320 one way; a standard compact car runs roughly ¥1,600-2,000, plus the driver’s passenger fare.
    • Uno to Teshima (Ieura), ~40 minutes — similar operator and fare structure, fewer daily departures.
    • Takamatsu to Shodoshima (Tonosho), ~1 hour — run by Shikoku Ferry and Shodoshima Ferry on alternating schedules; vehicle fares scale by car length, roughly ¥3,000-5,000 for a standard car.
    • Himeji to Shodoshima (Fukuda), ~1 hour 40 minutes — useful if you’re coming from the Kansai side rather than Shikoku.
    • Hiroshima to Matsuyama, ~2 hours 45 minutes — the long-haul option connecting Honshu directly to Shikoku. This is the one most worth planning around if you want to skip backtracking through Okayama.

    Fares and schedules shift with fuel surcharges and seasonal timetables, so always check the operator’s own site (Shikoku Kisen, Shikoku Ferry, or Setonaikai Kisen) within a week or two of travel rather than relying on numbers from a blog — this guide’s figures are a planning baseline, not a quote.

    The Rental Car Catch Nobody Mentions

    This is the part that trips people up: many Japanese rental car contracts explicitly restrict transporting the vehicle on a ferry, or require advance notice and a signed waiver before you’re covered. The insurance that comes bundled with the rental (and the optional collision damage waiver you probably paid for) can be voided if the car is damaged while on a vessel and the company wasn’t told in advance. This isn’t universal — some companies are completely fine with it, especially on routes they know tourists use, like Uno-Naoshima — but it varies by company, by branch, and sometimes by specific car class.

    Call or email the rental counter before you book and ask directly: “Can I take this car on a ferry? Does my insurance still apply?” Get the answer in writing if you can (a confirmation email is enough). Major chains like Toyota Rent a Car, Nippon Rent-A-Car, and Times Car tend to allow it on well-known island routes but may ask you to notify the specific branch beforehand. One-way rentals that start on the mainland and end on an island (or vice versa) are rarer and worth confirming separately, since not every branch network covers island drop-off points.

    How Booking and Boarding Actually Works

    Most short Seto Inland Sea routes don’t require advance reservations for cars — you simply drive up, pay at a ticket window or vending machine, and queue in a marked lane, similar to a toll booth. Longer or more popular routes (Hiroshima-Matsuyama, and Shodoshima sailings around weekends and holidays) do benefit from a phone or online reservation, especially if you’re traveling with a larger vehicle or during Golden Week, Obon, or New Year’s.

    Arrive at least 20-30 minutes before departure for short hops and 40-60 minutes for longer crossings — staff load vehicles by size and sometimes by destination lane, and latecomers can be turned away even with a valid ticket. Once aboard, you leave the car on the vehicle deck (engine off, handbrake on) and head upstairs to passenger seating; most ferries have simple snack counters, and some on the Matsuyama route have reclining tatami rest areas worth grabbing early.

    Best Season and Timing

    Spring (April-May) and autumn (October-November) bring the calmest seas and clearest views of the islands from the deck — summer is popular but hazier and busier, especially if your trip overlaps with the Setouchi Triennale art festival years, when Naoshima and Teshima ferries fill up fast. Winter sailings run less frequently and are more exposed to cancellation from wind, so build in a buffer day if a ferry crossing is the only way to reach your next stop. Whatever the season, check the operator’s site the morning of travel — these are small vessels on open water, and rough weather cancels sailings with little notice.

    Common Mistakes to Avoid

    • Not confirming ferry coverage with the rental company first — the single most common and costly mistake.
    • Assuming every island has a car ferry — some smaller islands (Megijima, Ogijima) are passenger-only; bring a bike or plan to walk.
    • Cutting boarding time too close — vehicle loading closes before the posted departure time, not at it.
    • Ignoring vehicle length when buying a ticket — fares are tiered by car length, and misreporting it at the counter can mean a recalculation (or a queue delay) at boarding.
    • Planning a same-day return without a buffer — weather cancellations are infrequent but real, especially outside summer.

    Budget, Mid-Range, and Splurge Ways to Do It

    On a budget, stick to the short Uno-Naoshima or Uno-Teshima hops, which keep both ferry fare and rental car days to a minimum, and consider a basic business hotel or campsite rather than island resorts — if you want an upgraded outdoor stay without actually roughing it, the options covered in this guide to glamping in Japan extend to a few Setouchi island sites. Mid-range travelers basing themselves in Takamatsu or Onomichi for several days of island hopping often do better in a weekly apartment than a hotel — if that’s the plan, it’s worth packing light cooking gear, covered in this guide to compact kitchen gear for short-term stays, rather than eating out every meal. For a splurge, the Hiroshima-Matsuyama long ferry paired with a private car rental lets you build a loose, multi-day loop through Shikoku and back without ever touching a train schedule — slower than the Shinkansen, but it’s the version of the trip where the journey is the point.

  • Glamping in Japan: Luxury Outdoor Stays for Travelers Who Don’t Want to Rough It

    Glamping in Japan: Luxury Outdoor Stays for Travelers Who Don’t Want to Rough It

    Photo by Jack Sparrow on Unsplash

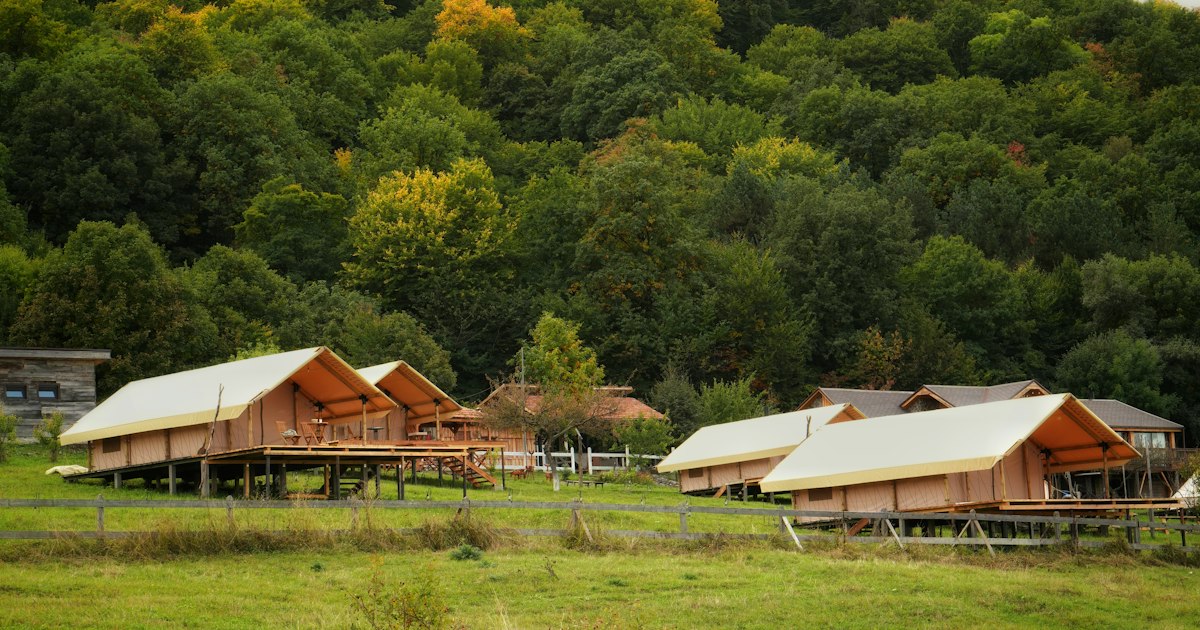
    Glamping — “glamorous camping” — has quietly become one of Japan’s fastest-growing travel trends, and it’s easy to see why. You get a heated or air-conditioned canvas suite with a real bed, a private deck overlooking a lake or forest, a chef-prepared barbecue dinner, and often an onsen bath, all without pitching a tent or digging a fire pit. For travelers who want nature without the gear, the learning curve, or the cold ground, it’s one of the best middle grounds Japan offers between a ryokan and a national park campsite.

    Why Glamping Has Exploded in Japan

    Japan’s domestic travel boom after 2020 pushed a wave of resort operators — Hoshino Resorts, Snow Peak, and a long tail of independent operators — into building glamping sites on land that was previously underused forest, lakeshore, or farmland. The appeal for Japanese travelers was the same as for foreign visitors now discovering it: a car trip to a beautiful, often remote, setting with none of the logistics of traditional camping. Most sites also lean hard into regional identity, serving local Wagyu, Hida beef, or Kyushu pork at the evening barbecue and stocking the camp store with prefecture-specific snacks and sake.

    Budget, Mid-Range, and Splurge: What You Actually Get

    Budget (¥8,000–15,000 per person/night): Shared-facility sites, usually a canvas bell tent with a futon or simple bed frame, shared bathhouse, and a self-cook or simple set-menu BBQ. Think PICA-brand sites (run by Hoshino Resorts) in places like Yamanakako or Fujino — comfortable, clean, but closer to “upgraded campsite” than resort.

    Mid-range (¥20,000–40,000 per person/night): This is where most Western visitors land. Expect a private en-suite bathroom, air conditioning or heating, a proper bed, and a full-course regional dinner cooked over an open hearth or grill. Snow Peak’s “Land Station” sites (Hakuba, Niigata, Rokko) and the GRAX brand (Nasu Shirakawa, Izu) sit in this tier, often with heated floors that make even winter stays comfortable.

    Splurge (¥50,000–150,000+ per night, often per unit rather than per person): Hoshinoya-level properties and a handful of independent luxury domes add private onsen baths, kaiseki-style dinners, and architect-designed tents with floor-to-ceiling views. Some lakeside properties near Yamanakako or Kawaguchiko charge this much for a Mt. Fuji view from a hot tub, and it’s genuinely worth it for a special-occasion night.

    The Best Regions and When to Go

    Spring (April–May) and autumn (October–November) are the sweet spot almost everywhere — mild enough for evenings on a deck, with cherry blossoms or foliage as a bonus. Summer glamping works well in the mountains and highlands (Hakuba, Nasu, Fujino) where altitude keeps nights cool, but lowland or seaside sites can be hot, humid, and buggy from July through early September. Winter is its own draw at heated sites with kotatsu or in-tent fireplaces — snow outside, warmth inside — and this is when demand (and prices) spike around Hakuba and Nozawa Onsen because of ski season.

    Regionally, Yamanashi and Shizuoka (Mt. Fuji views), Nagano (Hakuba, the Japan Alps), Hokkaido (Furano, Niseko in summer), and Kyushu (Oita and Kumamoto’s volcanic highlands) are the strongest clusters. If you’re building a Nikko itinerary, several glamping sites around Oku-Nikko pair naturally with a day at Lake Chuzenji and Kegon Falls, letting you combine a scenic lake loop with a comfortable night outdoors rather than rushing back to Tokyo. In Hyogo, glamping around the Kinosaki and Harima area makes a good base for chasing the cloud sea at Takeda Castle Ruins, which peaks in the early morning between September and November — plan to leave the campsite before dawn if that’s the goal. Kyushu’s Oita prefecture has a growing glamping scene too, and it sits close enough to Hita’s mountain hot springs and cedar rafting to combine both in a two-night trip.

    How to Get There

    Almost every glamping site in Japan assumes you have a car. Most are 20–90 minutes from the nearest shinkansen or major train station, and while a handful (mostly the bigger Hoshino Resorts properties) run a paid shuttle bus that must be reserved in advance, many smaller independent sites have no public transport option at all. If you don’t want to rent a car, filter your search specifically for “no car needed” or “shuttle available” before booking — don’t assume a taxi will be easy to find at a rural site after dark, because many rural taxi companies stop dispatching by early evening.

    What to Pack (and What to Skip)

    Most mid-range and luxury sites provide bedding, towels, and basic toiletries, so you don’t need a sleeping bag or pillow. What people consistently underpack: a warm layer for after sunset (mountain and lakeside sites drop 10°C+ once the sun goes down, even in July), closed-toe shoes for walking to shared bathhouses at night, and insect repellent for anything near water or forest edge between May and September. If you want gear that won’t take up suitcase space, Standard Products and Threeppy stock inexpensive, well-designed outdoor essentials — collapsible cups, compact towels, insect patches — that are easy to pick up in any city before you head out.

    Common Mistakes to Avoid

    • Assuming dinner is included. Many budget and even some mid-range sites sell the BBQ dinner as a separate plan that must be reserved at booking, not on arrival — walk-up add-ons are often unavailable or sold out by check-in.
    • Not checking the rain policy. Open-air BBQ dinners are frequently moved to a covered pavilion or cancelled with a partial refund in heavy rain; ask about this before booking if you’re traveling in Japan’s June–July rainy season.
    • Booking a weekend in peak season without a waitlist backup. Popular sites near Mt. Fuji and Hakuba sell out 2–3 months ahead for autumn weekends and New Year’s week — book on a weekday if your dates are flexible.
    • Expecting an onsen at every site. “Hot spring” and “bathhouse” are not interchangeable in listings — a shared shower block is common at budget sites, while a genuine onsen (natural mineral spring) is a mid-range-and-up feature worth confirming directly.

    Glamping won’t replace a ryokan stay or a serious backcountry trek, but as a one- or two-night add-on to a longer Japan itinerary, it delivers a kind of nature access — quiet forests, star-filled skies, lakeside sunrises — that’s hard to get any other way without carrying your own tent.

  • Kabuki-za’s Single-Act Gallery Seats: Watching One Scene in Ginza for Under 2,000 Yen

    Kabuki-za’s Single-Act Gallery Seats: Watching One Scene in Ginza for Under 2,000 Yen

    Photo by Yu Kato on Unsplash

    Most visitors assume a kabuki show means a half-day commitment and a ticket price to match. At Kabuki-za in Ginza, that’s not true. The theater sells single-act tickets for its top-floor gallery — no reservation, no formal dress, no four-hour sit — and you can be in and out in under an hour for less than the price of a conveyor-belt sushi lunch. Here’s how the system actually works and how to use it without wasting a trip.

    What Are Makumi-seki Seats?

    Kabuki-za’s regular tickets cover an entire program — a full matinee or evening block made up of several acts from different plays, often running three to four hours. The theater also sells a separate category called makumi-seki (幕見席, literally “act-watching seats”), which lets you pay for just one act at a time. These seats are on the 4th floor, in a gallery set apart from the main seating, with their own ticket counter, their own entrance, and their own elevator. You watch one act — typically 20 minutes to just over an hour, depending on the scene — then leave or buy a ticket for the next one if you want to stay.

    This isn’t a tourist gimmick; it’s a long-standing option Japanese theatergoers use too, especially students and regulars who want to catch a specific famous scene without paying for the whole program.

    How Much Do They Cost — and What You Get

    Makumi-seki prices are set per act and vary by length and prominence of the scene, but most acts run roughly 1,000 to 2,000 yen. A short dance piece might be on the cheaper end; a long, plot-heavy act or a famous actor’s signature scene tends to sit near the top of that range. Either way, you’re paying a fraction of what a full-program ticket costs (those can run from around 4,000 yen up to well over 20,000 yen for premium seating).

    What you don’t get: an earphone guide. The English and Japanese audio guides that explain plot and dialogue for main-floor ticket holders are not available to makumi-seki customers. The gallery is also high up and set back, so the stage can look distant — renting the coin-operated binoculars available on the 4th floor (a small fee, exact change needed) makes a real difference for facial expressions and costume detail.

    Where to Buy Tickets and When to Line Up

    Tickets are sold same-day only, in person, at the dedicated makumi-seki ticket machines near the theater’s side entrance — there is no advance booking, no phone reservation, and no online purchase for this category. The machines typically start selling for each act roughly 30 to 60 minutes before that act begins, and sales stop once the house is full or the act starts, whichever comes first.

    Popular acts — a famous lead actor’s big scene, or the final act of a program — can sell out within minutes of the machine opening, especially on weekends. If there’s a specific scene you want to see, check the day’s program and act times on the Kabuki-za website that morning, then plan to be at the machine at least 20–30 minutes before it opens for that act. If you just want “a kabuki experience” rather than one particular scene, you have more flexibility and can often walk up and buy on the spot.

    Getting to Kabuki-za in Ginza

    Kabuki-za sits right above Higashi-Ginza Station, served directly by the Toei Asakusa and Tokyo Metro Hibiya lines — you can walk from the platform into the building without going outside. It’s also about a 5–7 minute walk from Ginza Station on the Ginza, Marunouchi, and Hibiya lines, through Ginza’s main shopping streets. Coin lockers are available in the building for bags, which is useful since large luggage isn’t practical to carry into the gallery seats.

    If you’re killing time before an act starts, Ginza’s backstreets are worth a wander — just be aware that some of the area’s nightlife blocks cater specifically to a different crowd. If you’re curious about what to avoid after dark, this guide to Ginza’s hostess bar districts explains what those storefronts are and why tourists should keep walking.

    Best Times and Programs to Catch

    Kabuki-za runs programs essentially year-round, changing roughly monthly, with most days split into a matinee block (generally starting around late morning) and an evening block (generally starting mid-afternoon to early evening), each made up of three or four acts from different plays. There’s no single “best season” — the makumi-seki system runs the same way every month — but a few practical notes: summer and New Year programs tend to feature more visually spectacular, crowd-pleasing pieces (dance numbers, famous revenge dramas) that are good picks for a first single-act visit, since they’re easier to follow without dialogue. Weekday afternoons are noticeably less crowded at the makumi-seki machine than weekend and holiday slots.

    If you want a quieter cultural experience to pair with this one, Tokyo has other free or near-free windows into tradition — watching a Shinto wedding procession at Meiji Shrine costs nothing and takes about as much time as a single kabuki act.

    Common Mistakes First-Timers Make

    • Showing up right when the act starts. The ticket machine often sells out before curtain, especially for marquee scenes. Arrive for the machine opening, not the act’s start time.
    • Not checking which act is which. Programs list multiple acts from different, unrelated plays. If you only want to see a famous actor or a specific story, check the cast and synopsis for that act specifically — buying blind can mean watching a scene you have no context for.
    • Expecting an earphone guide. Since makumi-seki doesn’t include one, read a short synopsis of the act beforehand (the theater’s website usually has a brief outline) so you’re not completely lost on plot.
    • Trying to pay by card only. Bring cash in small bills and coins — the ticket machines and binocular rental are built around exact change.
    • Skipping the intermission snacks. Even for a single act, there’s often a short gap before and after where the 4th floor’s small snack counter sells tea and sweets. It’s a good moment to try hojicha, the roasted green tea that pairs well with the wagashi sold in the building.

    Budget, Mid-Range, and Splurge Options

    For a true budget visit, pick one makumi-seki act for 1,000–2,000 yen, skip the binocular rental, and bring your own water — total cost under 2,000 yen for a genuine kabuki experience. Mid-range visitors can watch two or three consecutive acts back-to-back (buying a new ticket for each), which adds up to a few thousand yen but gives a fuller sense of a program’s arc without committing to the whole day. For a splurge, a full-program ticket in the main hall with the English earphone guide included gives you proper seating, intermissions long enough for a sit-down meal in the building’s restaurants, and the complete story from start to finish — worth it if kabuki turns out to be your thing after a cheap first taste in the gallery.