Japan Trove

Category: Travel

Practical, up-to-date guides for traveling in Japan — itineraries, rail passes, eSIMs, where to stay, seasonal timing, etiquette, and the local know-how that makes a trip smoother. Written with real Japanese sources so you get the answer that actually works on the ground, not the recycled tourist one.

  • First Cabin vs Nine Hours: Comparing Japan’s Capsule Hotel Chains

    First Cabin vs Nine Hours: Comparing Japan’s Capsule Hotel Chains

    Photo by Denys Nevozhai on Unsplash

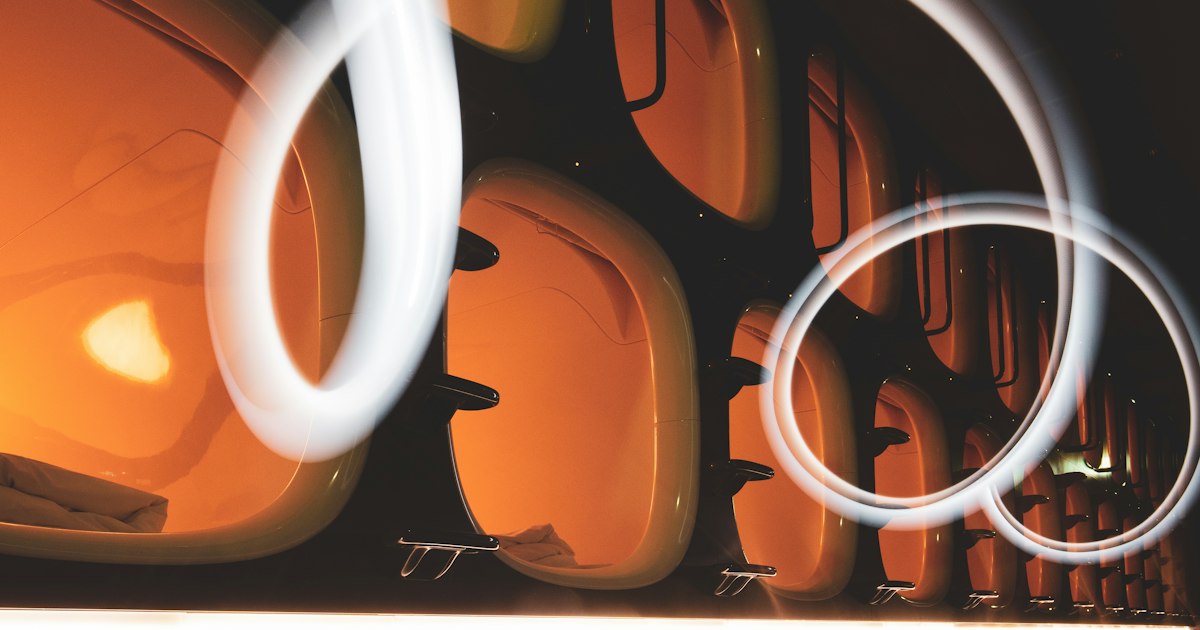
    Capsule hotels have evolved a long way from the cramped overnight-sauna pods built for salarymen who missed the last train. Today, two chains dominate the modern capsule scene for travelers: First Cabin, with its airplane-cabin-inspired rooms, and Nine Hours, the minimalist pod design you’ve probably seen in magazine spreads. Both are clean, affordable, and far more comfortable than their name suggests — but they’re built on different ideas of what a capsule hotel should be. Here’s how to pick the right one.

    What “Capsule Hotel” Actually Means in 2026

    Neither First Cabin nor Nine Hours is a true windowless box anymore. Both separate sleeping areas from bathing facilities — you get a private sleeping space (a “cabin” or “pod”) plus shared showers, toilets, and a lounge or vending area down the hall. Nothing is en-suite, so pack a small toiletry kit and don’t expect a bathroom door in your room. Shoes come off at the entrance and go into a locker; you’ll be given a key, wristband, or PIN code for your personal locker where luggage is stored during the day.

    First Cabin: Airplane-Style Comfort

    First Cabin’s whole concept is built around the idea of an airline cabin — “First Class” cabins are roughly 5 square meters with a sliding door, a real mattress, a flat-screen TV, and enough headroom to sit up comfortably, while “Business Class” rooms are smaller, closed off with a roll-down shutter instead of a door, and sized closer to a single bed with a shelf. Expect to pay roughly ¥6,000–¥9,000 a night for a First Class cabin and ¥4,500–¥6,500 for Business Class, depending on the city and season.

    Locations include Tsukiji, Akasaka, and Haneda Airport in Tokyo, plus Kyoto, Osaka (Shinsaibashi and Namba), Kobe, Nagoya, and Fukuoka. Several properties — notably the Kyoto and Kobe branches — are built inside restored or heritage-style buildings, so the lobby and common bath areas often have more personality than a typical business hotel. Check-in is usually from 16:00–17:00 and checkout around 10:00, with luggage storage available if you arrive early or need to linger after checkout.

    Nine Hours: Minimalist Efficiency

    Nine Hours takes its name from a simple formula: 1 hour to shower, 7 hours to sleep, 1 hour to get ready. The pods themselves are compact fiberglass capsules — just enough room to sit up and stretch out, with a light and sound-dimming interior, a reading light, and an alarm you set from inside. There’s no TV and no desk; this is a sleep-focused design, not a lounge-around-your-room one. Rates typically run ¥4,000–¥5,800 a night, making it one of the cheapest clean, private-sleep options in any major Japanese city.

    You’ll find Nine Hours locations in Kyoto (steps from Kyoto Station), Kanda and Akasaka in Tokyo, Narita Airport’s Terminal 2, Namba in Osaka, Sapporo, Fukuoka, and Sendai. Floors are strictly separated by gender, with separate locker rooms, showers, and pod floors for men and women — mixed-gender couples or friends will check in together but sleep on different floors. Check-in generally opens at 17:00, and checkout is 10:00, both enforced fairly strictly since pods are cleaned and reset between guests.

    Price, Amenities, and Comfort Compared

    • Cheapest overall: Nine Hours, especially for solo travelers who don’t need a TV or extra space.
    • Most “room-like” feel: First Cabin’s First Class cabins, which are the closest thing to a tiny private hotel room you’ll find in this price bracket.
    • Design and photogenic factor: Nine Hours wins for the sleek, almost futuristic pod aesthetic; First Cabin wins for cabins with actual doors and a bit more individuality between locations.
    • Baths: Some First Cabin locations (Kyoto, Kobe) have larger communal bath areas worth lingering in; Nine Hours sticks to efficient individual shower stalls.
    • Luggage: Both offer lockers sized for a carry-on, but neither easily fits a large suitcase — if you’re traveling with big luggage, plan to use station lockers or a forwarding service instead.

    Who Should Choose Which

    Budget solo travelers and backpackers will usually be happiest at Nine Hours — it’s cheaper, the design is genuinely restful, and the stations they’re built near (Kyoto Station, Narita, Kanda) make early flights or trains painless. Travelers who want a bit more room to unpack, charge devices at a desk, or watch Japanese TV before bed will prefer First Cabin’s First Class tier. Couples or friends traveling together should know that both chains separate guests by gender once you’re past the lobby — if you want to actually share a room, look at a capsule hotel elsewhere or a standard business hotel instead.

    Either chain is also a smart pick on a night when you’ve stayed out later than planned. If you’re out drinking and tracking the clock, it helps to understand how izakaya tabs and nomihodai deals work before you order, and to know how shuden (last train) times work — both First Cabin and Nine Hours have locations near major stations that are built exactly for travelers who cut it close.

    Booking Tips and Common Mistakes

    • Book directly or through major OTAs well ahead for weekend stays. Both chains’ city-center locations (Kyoto especially) sell out fast during cherry blossom season (late March–early April) and autumn foliage (mid-November), and school trip season in Kyoto and Nara can also tighten up availability at nearby budget stays.
    • Don’t assume you can check in early. Both chains are strict about the 16:00–17:00 check-in window; arriving earlier usually just means dropping bags at the front desk, not getting into your cabin.
    • Bring your own basic toiletries if you’re picky about brands — amenities are provided, but they’re the standard small-bottle variety. If you’re also stocking up on Japanese skincare while you’re here, it’s worth understanding why Japanese skincare routines lean so heavily on toner and lotion before you buy a full routine’s worth to pack home.
    • Snoring and noise carry. Pods and cabins reduce light and sound but aren’t soundproof booths — light sleepers should pack earplugs regardless of which chain they choose.
    • Settle your IC card balance before you leave the country. If your stay is near the end of your trip, it’s a good moment to handle getting your Suica or Pasmo deposit refunded rather than leaving it for a rushed airport departure.

    The Bottom Line

    Nine Hours and First Cabin solve the same problem — affordable, clean, private sleep in expensive Japanese city centers — with two different philosophies. Nine Hours is the cheaper, more minimalist, airport-friendly option; First Cabin is the slightly pricier, more room-like experience with a bit more character between locations. Neither is a downgrade from a hotel so much as a different kind of stay, and either one is a perfectly comfortable base for a night or two between the places you’re actually there to see.
  • Getting Your Suica or Pasmo Deposit Refunded Before You Leave Japan

    Getting Your Suica or Pasmo Deposit Refunded Before You Leave Japan

    Photo by Louis Zhang on Unsplash

    That little IC card you’ve been tapping on every train gate, vending machine, and convenience store register since you landed is quietly holding onto ¥500 of your money — and possibly a lot more if you never got around to spending down the balance. Suica and Pasmo cards are refundable, but the process only works at specific counters with specific hours, and a lot of travelers find this out the hard way at the airport with twenty minutes before boarding. Here’s how to actually get your money back, and when it’s smarter not to bother.

    What Happens to Your Suica or Pasmo Deposit

    Every plastic Suica or Pasmo card issued in Japan carries a ¥500 refundable deposit, separate from whatever travel balance you’ve loaded onto it. When you return the card, the issuer hands back that ¥500 plus your remaining balance — minus a ¥220 handling fee. If your remaining balance is ¥220 or less, the fee simply absorbs it and you still get the full ¥500 deposit back with nothing extra. The only way to lose money on the deal is if you have a meaningful balance left and still choose to refund rather than spend it.

    This only applies to the standard plastic cards sold at ticket counters and vending machines. Mobile Suica on Apple Pay or Android, and the tourist-only “Welcome Suica” or “PASMO PASSPORT” cards, work differently — more on that below.

    Where to Get Your Suica Refunded (JR East)

    Suica is issued by JR East, so refunds happen at JR East’s staffed ticket counters, known as “Midori no Madoguchi” (green ticket windows), found at most major JR East stations — Tokyo, Shinjuku, Shibuya, Ueno, and similar hub stations typically keep these open from around 5:30am to 11pm. You cannot refund a Suica at an unstaffed ticket machine; it requires a staff member to process the deposit return.

    Conveniently, both Narita Airport (Terminals 1, 2, and 3) and the JR East side of major city stations have these counters, so you don’t need to make a special trip across town on your last day. If you’re departing from Haneda, note that Haneda’s rail access is mostly Keikyu and the Tokyo Monorail rather than JR East, so it’s safer to refund your Suica at a JR East station in the city before you head to the airport rather than counting on finding a counter there.

    Where to Get Your Pasmo Refunded

    Pasmo is issued jointly by Tokyo’s private railways and subway operators (Tokyo Metro, Toei, Keio, Odakyu, Tokyu, Keikyu, and others), so refunds happen at those companies’ commuter-pass counters rather than at JR windows. Look for the ticket counter at larger terminal stations — Shinjuku, Shibuya, and Ikebukuro all have them — rather than small suburban stops, and expect shorter hours than JR counters, often somewhere in the 10am–7pm range depending on the operator. If you’re short on time, it’s worth checking which specific counter at your station handles Pasmo refunds before you queue, since not every window at a big station does.

    Welcome Suica, Pasmo Passport, and Mobile Cards: Special Cases

    If you picked up a tourist-specific “Welcome Suica” or “PASMO PASSPORT” at the airport, there’s no ¥500 deposit on these cards and, importantly, no cash refund of the remaining balance either. They’re designed to be used up and discarded, with Welcome Suica typically expiring 28 days after issue. If you went this route, your only move is to spend the balance down to zero before you leave — there’s nothing to reclaim.

    Mobile Suica or Pasmo loaded onto Apple Pay or a phone’s wallet app also carries no physical deposit, so there’s nothing to refund in that sense. Any leftover balance stays in the app and can technically be used again on a future trip (balances on mobile Suica don’t vanish), so many travelers just leave a small amount sitting there for next time rather than trying to extract cash from it.

    The Smarter Budget Move: Spend It Down Instead

    Because the ¥220 handling fee only kicks in on amounts above that threshold, the most cost-effective strategy for most travelers isn’t refunding at all — it’s spending the balance down to under ¥220 before your last day, then just keeping the card as a cheap souvenir or quietly accepting the ¥500 deposit loss if it’s not worth your time to queue. Suica and Pasmo work at train and subway gates nationwide, nearly all convenience stores, many vending machines, and plenty of coin lockers, so working off ¥1,000–¥3,000 over your last couple of days is easy — grab a drink before catching one of the last trains of the night, or pay for a locker at the station instead of pulling out cash.

    The one caveat: IC cards don’t work on every line in Japan. Some rural and sightseeing railways, especially older or single-operator lines, still require paper tickets — the steam-powered Oigawa Railway in Shizuoka is one example — so don’t assume you can tap your way through your entire itinerary right up to departure day.

    Common Mistakes to Avoid

    • Trying to refund at any ticket machine. Refunds require a staffed counter — Midori no Madoguchi for Suica, a commuter-pass window for Pasmo — not the automated fare machines.
    • Assuming Haneda has a JR counter. It mostly doesn’t; refund in the city before heading to Haneda, especially for a Suica.
    • Cutting it too close to boarding time. Counters close well before midnight and the line can be long during busy travel periods — budget at least 15–20 minutes, more around holidays.
    • Expecting a cash refund on a Welcome Suica, Pasmo Passport, or mobile card. None of these have a deposit or cash-back option.
    • Forgetting the balance check first. Tap the card at any ticket machine to see the remaining balance before deciding whether a refund is worth the trip to the counter.

    Timing It Right Before Your Flight

    Treat the refund as a task for your last full day in Japan, not your departure morning. If you’re flying out of Narita, the JR East ticket office there can handle it right before you head through security, which is genuinely convenient. If you’re flying out of Haneda, settle it at a JR East station in central Tokyo a day or two earlier, since your airport access there runs through Keikyu or the monorail instead. Around Golden Week, Obon, and the New Year holidays, station counters get noticeably busier with domestic travelers too, so build in extra buffer time if your trip overlaps with those dates.

    In the end, ¥500 plus a small leftover balance isn’t going to make or break your trip budget, but it’s a two-minute errand if you plan for it — and a mildly annoying one if you leave it for the last possible moment at the gate.

  • Last Trains in Japan: How Shuden Times Work and What Happens If You Miss One

    Last Trains in Japan: How Shuden Times Work and What Happens If You Miss One

    Photo by Misha Lee on Unsplash

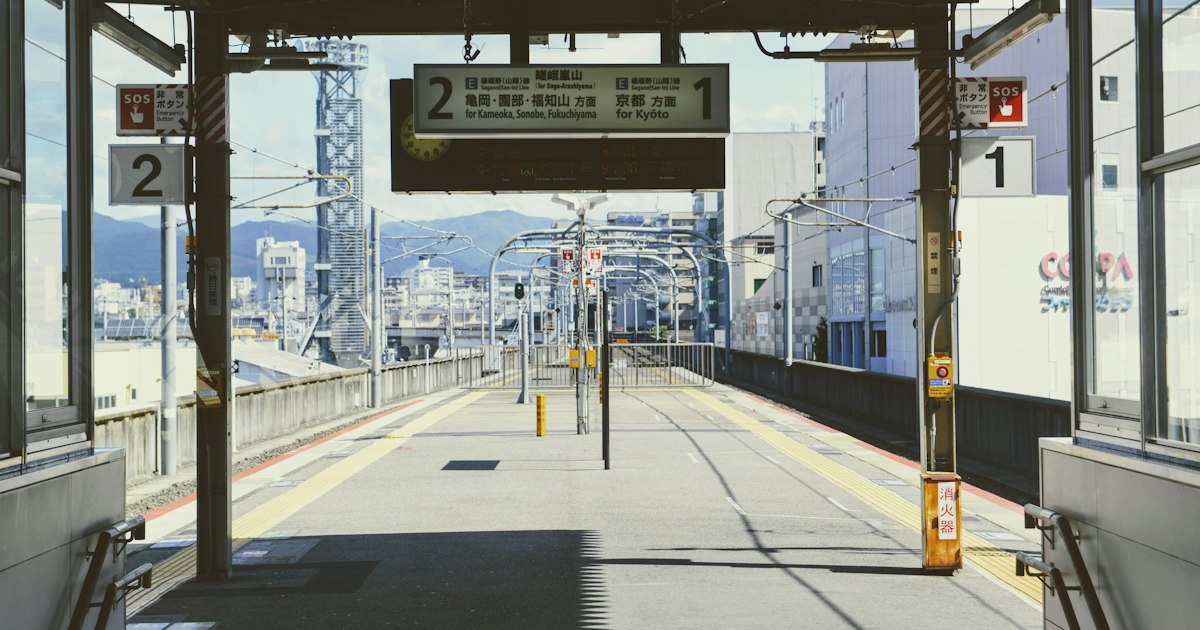
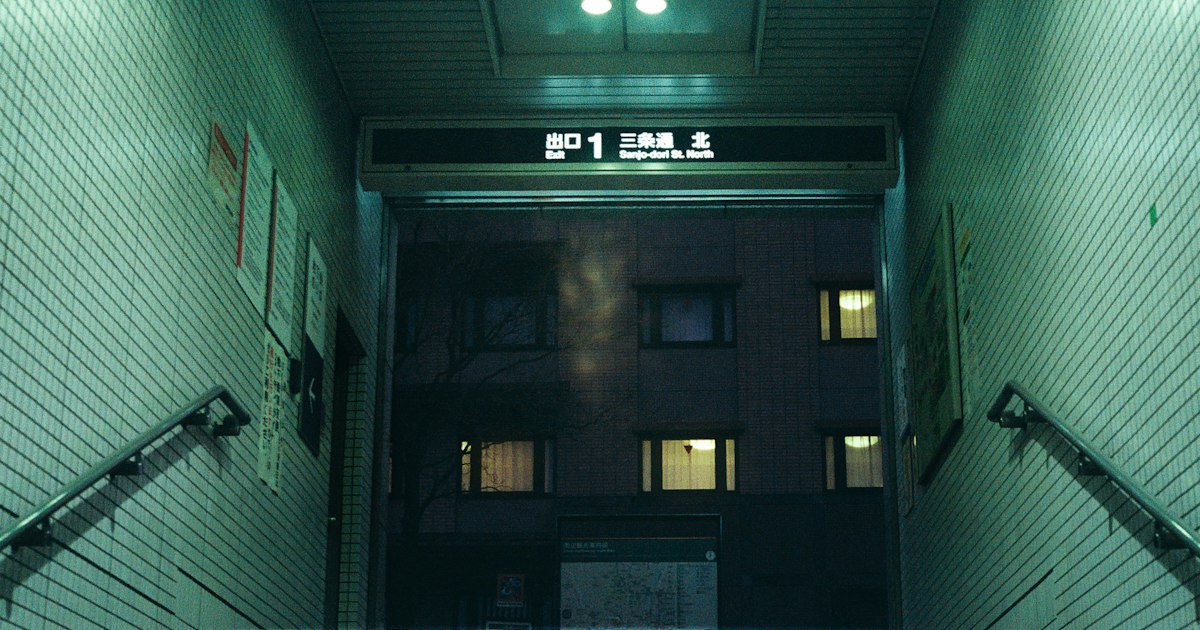
    Japan’s trains have a reputation for running like clockwork — which makes it easy to forget that most of them stop entirely for several hours overnight. The last train of the night, known as shuden (終電), can leave anywhere from 11:30pm to just after midnight depending on the line, the station, and even the direction you’re traveling. Miss it, and you’re not waiting ten minutes for the next one — you’re waiting until sometime after 5am. Here’s how shuden actually works and what to do if you cut it too close.

    Why Shuden Catches Visitors Off Guard

    In most major cities, public transit either runs 24 hours or tapers off gradually. Japan’s system does neither. Trains run on a tight, published schedule all day, then stop almost completely between roughly 1am and 5am — even in Tokyo, even on the Yamanote Line. There’s no late-night reduced service filling the gap; the rails are simply quiet. This catches a lot of travelers off guard, especially after a long dinner, a few drinks in an izakaya, or a late finish at a show, because the city itself doesn’t feel like it’s shutting down — the trains do.

    How Last Train Times Actually Work

    The term “last train” is a little misleading, because there isn’t one last train per line — there’s a last train for every station, and it’s not the same time everywhere. A train might depart its starting terminal at 12:40am, but if you’re boarding five stops down the line, your realistic last train is the last one that reaches your home station, which could be the 11:50pm departure, not the 12:40am one.

    Direction matters too. The last train heading into central Tokyo from the suburbs often runs later than the last train heading back out, since more people are commuting home than toward downtown at that hour. And if your trip requires a transfer, the real constraint is whichever connecting line stops running earliest — you can catch the last train on line A only to discover the last connection on line B at your transfer station already left ten minutes ago, stranding you mid-journey rather than at your final destination.

    Typical Last Train Windows

    These vary by exact station, but as a rough planning guide for major urban lines:

    • Tokyo (JR Yamanote, Tokyo Metro, private lines): most last trains from central hubs like Shinjuku, Shibuya, and Tokyo Station depart between 12:00am and 12:45am; trains reach outer suburban stations by around 1:00–1:30am.
    • Osaka (Midosuji Line, JR Osaka Loop Line): generally similar, with last departures from Umeda/Namba around midnight to 12:30am.
    • Kyoto: service winds down earlier than Tokyo or Osaka — many bus and local train routes have their last departures by 11:00–11:30pm, which trips up visitors staying outside the central tourist area.
    • Airport trains: the Narita Express and Keisei Skyliner to/from Narita, and the Keikyu/Tokyo Monorail to/from Haneda, typically have their last departures in the 9:30–11:00pm range — much earlier than city-center trains, since the ride is long.

    If you’re mapping out a travel day that includes a Shinkansen leg, remember that bullet trains also stop overnight; the last Nozomi, Hikari, or Kodama departures from major stations are usually done by around 9–10pm, well before local last trains. If you’re unsure which service fits your itinerary, our guide to choosing the right Tokaido Shinkansen train breaks down the schedule differences.

    The One Big Exception: New Year’s Eve

    On the night of December 31st into January 1st, many operators — including Tokyo Metro, Toei Subway, and JR East lines like the Yamanote — run trains all night so people can do hatsumode, the first shrine visit of the new year. This is a planned, well-publicized exception rather than a regular late-night service, and it doesn’t apply on other holidays like Obon or Golden Week, so don’t assume it extends to any other date.

    You Missed Shuden — Now What?

    If the last train is gone, you have a few realistic options, roughly from cheapest to priciest:

    • Manga kissa (internet/manga cafe): many offer an overnight “night pack,” typically ¥1,500–¥2,500 for roughly 8–10 hours, with a reclining chair, shower access at some locations, and free drinks. Budget-friendly and genuinely common among locals who miss their train.
    • All-night karaoke: a free-time overnight plan at a karaoke box often runs ¥2,000–¥3,000 per person, and it’s a reasonable option if you’re with a group.
    • Capsule hotel: expect roughly ¥3,000–¥6,000 for the night in a city-center location. Rooms fill up fast on weekend nights, so this isn’t guaranteed to have space at 1am.
    • Taxi: the most expensive but most direct option. Tokyo taxis add a roughly 20% late-night surcharge between about 10pm and 5am on top of the metered fare, so a cross-city ride that would cost ¥2,500 by day can run ¥3,500–¥4,500 or more at night — and considerably more over long distances. A taxi is fine for a short hop home but can get painfully expensive if you’re trying to cover real distance, like getting back from an airport.
    • Wait it out: many 24-hour izakaya, fast-food spots, and convenience stores let you sit until the first train (shihatsu, 始発) resumes, usually around 4:30–5:00am. If you’re near your destination anyway, this costs nothing but time.

    Common Mistakes That Strand Travelers

    • Assuming “last train” means the same time for every line. Always check the specific line and direction, not a general city-wide cutoff.
    • Not accounting for transfers. A multi-line trip is only as late as its earliest-closing connection — check the whole route, not just your boarding station.
    • Underestimating airport access cutoffs. Flying into Narita or Haneda late at night and assuming you can just train into the city is one of the most common planning errors; verify the last airport train before you land.
    • Forgetting Kyoto’s earlier curfew. Visitors used to Tokyo’s later trains sometimes get caught out by Kyoto’s buses and trains winding down well before 11:30pm.

    Checking Shuden Times Before You Go Out

    Japanese transit apps like Google Maps, Yahoo! Japan’s Norikae Annai, and Jorudan all show accurate last-train times for a specific route if you search a late-evening departure — the app will simply tell you if no train exists after a certain time. It’s worth checking this on your phone before you leave the bar or restaurant, not after. If language is a barrier when asking station staff about late connections, a tool like Pocketalk or another translation gadget can help clarify exactly which train is your last option. And if trains are done for the night but you still need to cover real distance between cities, it’s worth remembering Japan also runs overnight highway buses — Basta Shinjuku is the major hub for these, and a reasonable backup when the rails have gone quiet for the night.

  • Shugaku Ryoko Season: When Japanese School Trips Flood Kyoto and Nara’s Temples

    Shugaku Ryoko Season: When Japanese School Trips Flood Kyoto and Nara’s Temples

    Photo by Griffin Quinn on Unsplash

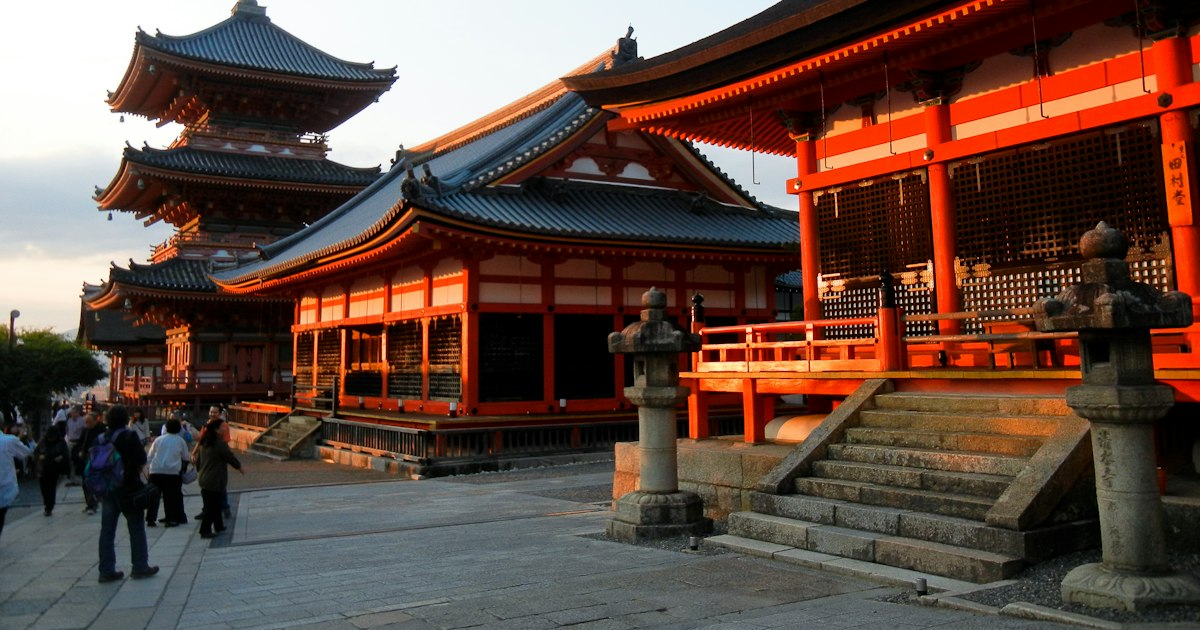
    If you’ve ever stood in front of Kiyomizu-dera or Todai-ji and found yourself suddenly surrounded by hundreds of teenagers in matching uniforms, clipboards in hand, you’ve met shugaku ryoko — Japan’s school trip season. It’s not a one-off event; it’s a predictable, recurring wave that hits Kyoto and Nara’s most famous sites hard enough to reshape your whole visit if you don’t plan around it. Here’s what’s actually happening, when it happens, and how to still have a great day at the temples.

    What Is Shugaku Ryoko?

    Shugaku ryoko (修学旅行) is the multi-day class trip that nearly every Japanese middle school and high school takes at least once, usually in the second or third year of junior high and the second year of high school. Kyoto and Nara are the classic destinations because they’re the heart of pre-modern Japanese history and culture — exactly what the national curriculum wants students to see in person. Groups travel by chartered bus or reserved train cars, stay in large ryokan or hotels built for group bookings, and spend their days rotating through temples, shrines, and museums in tightly scheduled blocks.

    A huge part of the itinerary is “han-betsu jishu kenshu” (班別自主研修) — small groups of 4-6 students navigate a set route on their own, worksheet in hand, with no teacher supervision. This is why you’ll see clusters of students moving independently rather than one giant marching column; it’s also why they’re often eager to stop and talk to foreign visitors, which we’ll get to below.

    When the Season Actually Hits

    There are two main windows, and they’re consistent year to year because schools deliberately avoid the rainy season (mid-June to mid-July) and the brutal midsummer heat:

    • Late April through June — the biggest window, peaking in May and the first half of June, timed to mild weather before the rains set in.
    • September through November — a second wave, heaviest in October and into early November, overlapping with autumn foliage season.

    Within those windows, trips run Monday through Friday almost exclusively — schools don’t travel on weekends. That single fact is the most useful thing to know: a Tuesday in late May at Kiyomizu-dera can feel like a festival, while the following Saturday can feel almost normal.

    Where You’ll Feel It Most

    Not every site is affected equally. The ones that sit on every school’s checklist get hit the hardest:

    • Kiyomizu-dera (Kyoto) — open 6:00 AM–6:00 PM, admission ¥500. Its wooden stage and the approach streets (Sannen-zaka, Ninen-zaka) become a slow shuffle by mid-morning on peak days.
    • Kinkaku-ji (Kyoto) — open 9:00 AM–5:00 PM, admission ¥500. The single-direction walking path means a large group ahead of you controls your pace.
    • Fushimi Inari Taisha (Kyoto) — free, open 24 hours. Less schedule-dependent since there’s no entry gate, but the first few hundred meters of torii gates still bottleneck badly by late morning.
    • Todai-ji and the Great Buddha Hall (Nara) — open 7:30 AM–5:30 PM April–October, 8:00 AM–5:00 PM November–March, admission ¥600. This is arguably the single most school-trip-saturated site in the country.
    • Nara Park — free and always open, but the deer-feeding areas near Todai-ji get chaotic when hundreds of students buy shika senbei (deer crackers, ¥200 a pack) at once.

    How to Beat the Crowds

    The fix isn’t avoiding Kyoto and Nara in these months — that’s overkill, since you’d be cutting out ideal weather and, in autumn, the best foliage of the year. The fix is timing within the day:

    • Budget move: Arrive at opening, or close to it. Kiyomizu-dera’s 6:00 AM opening is a gift — school groups rarely arrive before 9:30 or 10:00, since they’re usually eating breakfast at their hotel first. The same logic works for Fushimi Inari: walk the lower gates by 7:30 AM and you’ll have them nearly to yourself.
    • Mid-range move: Shift your schedule rather than your sites. Visit the big-name spots in the first two hours after opening or after 4:00 PM, and save midday for quieter alternatives like Kyoto’s eastern backstreets, a museum, or a sit-down lunch.
    • Splurge move: Some temples and ryokan run early-access or after-hours experiences during peak seasons — special night illumination events at Kiyomizu-dera and Kodai-ji happen in spring and autumn specifically because the organizers know daytime crowding is at its worst. These cost extra (often ¥400–¥600 on top of standard admission) but buy you a genuinely different, quieter experience of the same site.
    • If you have flexibility, shift sightseeing days to the weekend and save weekday mornings for things like shopping, museums, or day trips that aren’t on the school-trip circuit.

    Getting There Without the Bus Jams

    School groups travel almost entirely by chartered bus, and during peak months the parking areas near Kiyomizu-dera and the roads into Nara Park genuinely clog with them. If you’re coming from Tokyo, the Shinkansen to Kyoto sidesteps all of that — just be aware that the trains themselves sometimes carry a reserved school-group car during these windows, so don’t be surprised if one car on your train is unusually loud. Budget travelers using an overnight highway bus from a hub like Basta Shinjuku should book early in May, June, and October, since school-related charter demand pushes up competition for regular seats too.

    Once in Kyoto, getting to Nara is simple: the JR Nara Line’s rapid trains take about 45 minutes from Kyoto Station (around ¥710), or the Kintetsu Nara Line covers it in roughly 35–45 minutes depending on the train type. Either way, try to catch an earlier train — school groups typically move between Kyoto and Nara mid-morning, so an 8:00 AM departure beats a 10:00 AM one.

    The Upside: Students Want to Talk to You

    Here’s the part most first-time visitors don’t expect: those self-guided student groups often have an assignment to interview a foreign tourist in English — sometimes with a worksheet, sometimes just a few rehearsed questions and a photo. It’s genuinely charming, and saying yes for two or three minutes costs you almost nothing. If the language gap feels like too much, a translation gadget like those covered in our Pocketalk guide can smooth over the harder questions, though most of these exchanges work fine with simple English and a lot of smiling.

    Common Mistakes to Avoid

    • Scheduling your only Kyoto/Nara day on a weekday in peak season with no time buffer. If a tour or timed reservation is involved, build in extra walking time between sites.
    • Assuming all temples are equally crowded. Smaller, less famous temples a short walk from the big names are often completely calm even in peak weeks.
    • Not checking whether it’s a weekday. This single factor matters more than the specific month.
    • Treating student interview requests as a scam or hassle. They’re a school assignment, not a sales pitch — there’s no catch.

    Shugaku ryoko season isn’t something to dodge entirely — it’s a predictable rhythm you can plan around. Go early, go late, and expect a few friendly interruptions in between.

  • Tokara Islands: Japan’s Most Remote Inhabited Archipelago and the Ferry That Reaches It

    Tokara Islands: Japan’s Most Remote Inhabited Archipelago and the Ferry That Reaches It

    Photo by Yusheng Deng on Unsplash

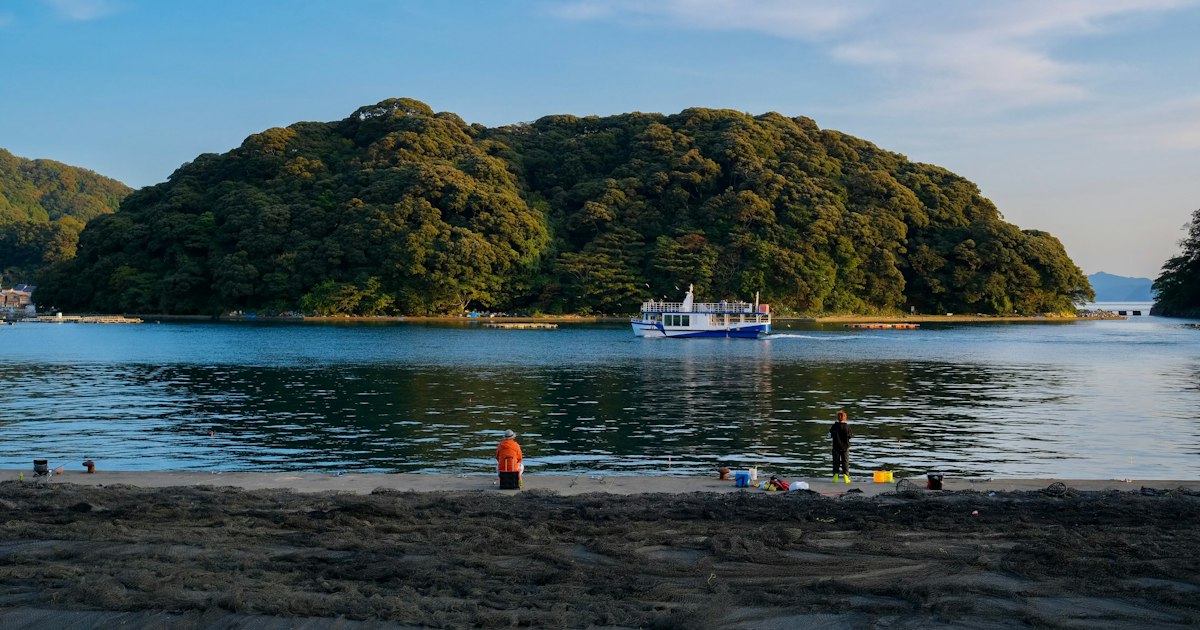
    South of Kyushu, strung out across open ocean between Yakushima and Amami Oshima, the Tokara Islands are about as far off the beaten path as Japan gets. There are no airports, no bridges, and no way to reach any of the seven inhabited islands except by a single village-run ferry that creeps down the chain once or twice a week. If you want a genuinely untouched slice of Japan — active volcanoes, masked festivals, turquoise water, and almost no other tourists — this is it. Here’s how the trip actually works.

    Where Are the Tokara Islands?

    Tokara (吐噶喇列島) is a chain of twelve small islands administered as a single municipality, Toshima Village (十島村), even though the village office itself is based in Kagoshima City on the mainland — there’s no “town hall island.” Seven islands are inhabited: Kuchinoshima, Nakanoshima, Tairajima, Suwanosejima, Akusekijima, Kodakarajima, and Takarajima, with total populations ranging from under 50 to around 200 people per island. Two more, Gajajima and Yokoatejima, are uninhabited but occasionally visited by researchers and lighthouse staff. The whole archipelago sits in the Satsunan island group, roughly between Yakushima to the north and Amami Oshima to the south, and it’s a very different experience from the better-known southern island hops you can reach from Nagasaki, like Iki Island or the sheltered bay cruises around Kujukushima — Tokara has no bridges, no regular tour boats, and nothing resembling a tourist infrastructure.

    The Ferry Toshima: Your Only Way In

    The only scheduled transport to Tokara is the Ferry Toshima (フェリーとしま2), a village-owned vessel that departs from Kagoshima’s South Pier (Minami-futo), a separate dock from the main Kagoshima Port terminal used by Yakushima and Amami ferries. The ship typically makes two round trips a week, working its way down the chain island by island before continuing to its final stop, Takarajima, and then reversing course on the way back. The full one-way run from Kagoshima to Takarajima takes around 12-13 hours overnight, while the nearer islands like Kuchinoshima or Nakanoshima are reached in roughly 4-7 hours. Because the boat calls at each island only briefly — sometimes just 15-20 minutes — and in many cases passengers and cargo are transferred by a smaller tender boat when there’s no proper pier, you need to be on deck and ready well before your island comes up.

    Booking Tickets and Choosing a Cabin Class

    There’s no English-language online booking system. Reservations are made by phone or fax directly with the Toshima Village ferry office in Kagoshima, and it’s strongly worth doing this at least a few weeks ahead, especially around festival dates (more below) when seats fill with returning residents. Fares are distance-based: expect roughly ¥3,000-4,000 one-way in 2nd class (open tatami floor) to the closer islands like Kuchinoshima or Nakanoshima, climbing to around ¥9,000-10,000 one-way for the full run to Takarajima or Kodakarajima. 1st-class cabins and a handful of private rooms cost more and are worth it for the overnight legs. Bring a Japanese speaker or a translation device if you’re calling to book — this is exactly the kind of situation a Pocketalk or similar translation gadget earns its keep, since the booking staff and island accommodation hosts generally don’t speak English.

    Best Time to Go (and When to Avoid)

    Late spring through early autumn (May-October) gives the calmest seas and the best swimming and snorkeling conditions, though typhoon season (roughly August-September) can cancel sailings with little notice — build slack into your itinerary, because a missed return ferry means waiting several days for the next one. Midsummer (July-August) is also when Akusekijima holds its Bōzesama festival, a masked ritual tied to the local lunar calendar that draws visitors and fills the ferry; if that’s your target, book months ahead. Winter sailings run but are rougher and colder, and some island guesthouses close seasonally, so confirm availability before you commit to dates.

    What to Expect on Each Island

    Each island has its own character but shares the same basic infrastructure: one or two minshuku (family-run guesthouses) with meals included, a small village shop with limited stock, and little to no public transport beyond what the guesthouse owner can arrange. Suwanosejima has an active volcano (Ontake) that vents almost continuously and has a small campsite popular with hardier travelers; Akusekijima is known for its Bōze masked festival and dramatic cliffside village; Kodakarajima has a sandy, swimmable lagoon that’s unusually calm for the chain; Takarajima — the southern terminus — has sea turtle nesting beaches and a reputation (likely more legend than fact) as a hideout for Edo-period pirate treasure, which is where its name (“treasure island”) comes from. None of the islands have convenience stores, ATMs, or hospitals beyond a basic clinic, so plan accordingly.

    Money, Connectivity, and Common Mistakes

    Bring all the cash you’ll need in yen before you leave Kagoshima — there are no ATMs on any Tokara island, and most minshuku expect cash payment for lodging and meals. If you haven’t sorted your yen, do it in Kagoshima city rather than hoping for a currency counter on arrival; see our guide to currency exchange in Japan for where rates are best before you head south. Mobile signal is patchy to nonexistent on several islands, so download offline maps and tell your accommodation your return ferry plans clearly, since schedule changes are announced locally rather than pushed to your phone. The single biggest mistake visitors make is treating this like a flexible island-hopping trip — with one ferry running a few times a week, you generally pick one or two islands per visit and build your whole trip around the sailing schedule, not the other way around.

    Budget, Mid-Range, and Splurge Tips

    Budget travelers can do a return trip to a near island like Nakanoshima for well under ¥10,000 in ferry fares plus roughly ¥6,000-8,000 per night for a minshuku with two meals included — there isn’t really a “cheap” option beyond that since lodging is essentially fixed-price full board everywhere. Mid-range travelers get the same experience just further down the chain, perhaps combining two islands in one trip if the ferry schedule allows a short stopover. The real splurge here isn’t luxury — it’s time: booking a full week so you’re not racing the ferry schedule, and arranging a private charter boat locally (through your minshuku host) to see sea caves or snorkeling spots the ferry never reaches. Whichever island you choose, pack snacks, a paper map, and patience; Tokara rewards travelers who come for the isolation itself, not for convenience.

  • Nozomi vs Hikari vs Kodama: Choosing the Right Tokaido Shinkansen Train for Your Trip

    Nozomi vs Hikari vs Kodama: Choosing the Right Tokaido Shinkansen Train for Your Trip

    Photo by Fikri Rasyid on Unsplash

    If you’re riding the Tokaido Shinkansen between Tokyo, Nagoya, Kyoto, and Osaka, the first decision you’ll face isn’t which seat to pick — it’s which of the three train types to board. Nozomi, Hikari, and Kodama run the exact same route on the exact same tracks, but they stop at different stations, take wildly different amounts of time, and — crucially for JR Pass holders — have different rules about who can ride them. Pick the wrong one and you could add an hour to a trip that should take 90 minutes, or accidentally board a train your pass doesn’t cover.

    The Basic Difference: Speed vs. Stops

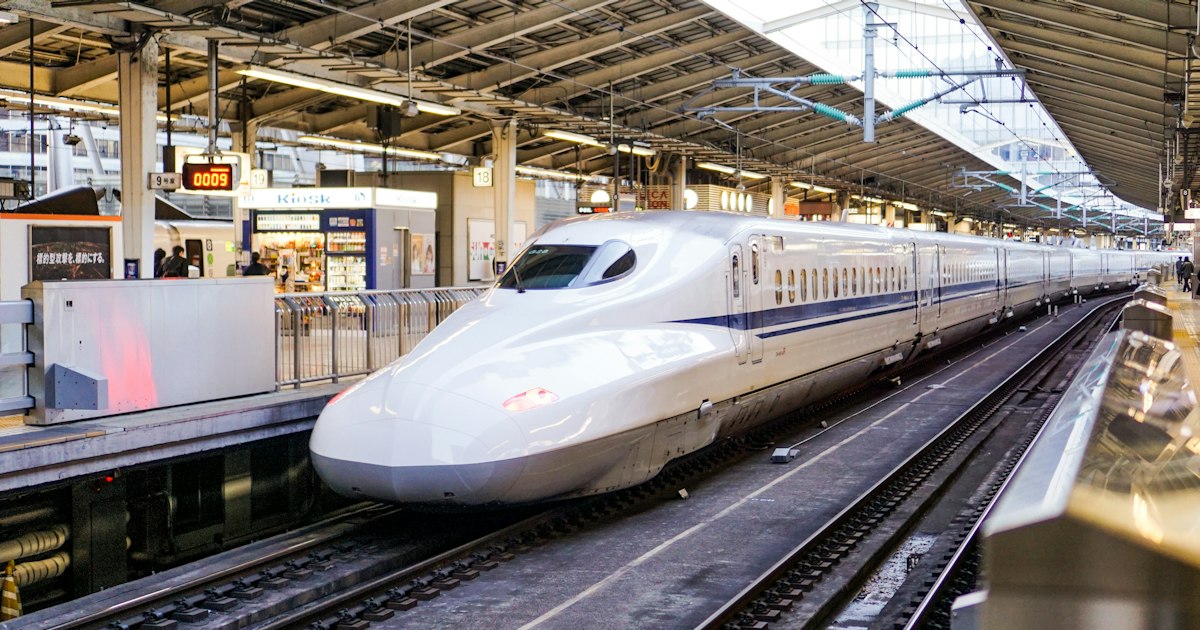
    All three trains are the same sleek white-and-blue Shinkansen, running on the same Tokaido Line between Tokyo and Shin-Osaka (with many continuing onward as Sanyo Shinkansen services to Hakata). The difference is simply how many stations they skip:

    • Nozomi (“hope”) is the fastest, stopping only at major hubs: Tokyo, Shinagawa, Shin-Yokohama, Nagoya, Kyoto, and Shin-Osaka. Tokyo to Shin-Osaka takes about 2 hours 22 minutes.
    • Hikari (“light”) makes a few more stops — places like Odawara, Shizuoka, or Maibara depending on the service — and takes roughly 2 hours 40 minutes to 3 hours for the same route.
    • Kodama (“echo”) stops at every single station, including small ones like Mishima, Kakegawa, and Gifu-Hashima. Tokyo to Shin-Osaka takes around 4 hours.

    For a one-way Tokyo–Kyoto trip, that’s the difference between a 2-hour-15-minute Nozomi ride and a 3.5-hour-plus Kodama slog. If your only goal is getting from A to B quickly, Nozomi almost always wins.

    The JR Pass Catch: Nozomi Is Off-Limits

    Here’s the detail that trips up more travelers than anything else: the ordinary Japan Rail Pass (and the regional JR Pass variants that cover the Tokaido line) does not cover Nozomi or the related Mizuho services on the Kyushu Shinkansen. Pass holders must ride Hikari or Kodama instead. If you tap into a Nozomi platform or try to board with just your pass, station staff will stop you at the gate — you can’t pay a top-up fee on the spot in all cases, so it’s better to know this before you’re standing on the platform with luggage and a train departing in two minutes.

    This isn’t a huge sacrifice. Since Hikari skips most minor stations, the time difference versus Nozomi over a Tokyo–Kyoto run is usually only 15–20 minutes. Kodama is the one to avoid for pass holders doing long hauls, since it adds well over an hour.

    If you’re weighing whether a JR Pass is worth buying at all for your itinerary, remember the pass only pays for itself on longer multi-city loops — for a single round trip between Tokyo and Osaka, individual tickets are often cheaper. Whichever way you travel, don’t forget to budget for Japan’s 1,000 yen departure tax when you eventually fly home.

    Prices Without a Pass

    If you’re buying individual tickets, prices are nearly identical across all three train types — you pay the same base fare plus a limited express surcharge regardless of whether you ride Nozomi, Hikari, or Kodama. For Tokyo to Shin-Osaka in an unreserved ordinary car, expect around 13,870 yen one-way (fare plus limited express charge combined). Reserved seats add roughly 200–720 yen depending on season and car. Green Car (first class) seats run about 18,380 yen one-way from Tokyo to Shin-Osaka.

    Shorter hops cost proportionally less: Tokyo to Nagoya is about 11,300 yen, and Nagoya to Kyoto is about 6,030 yen. Since the fare is the same no matter which train you choose, there’s rarely a financial reason to pick Kodama over Nozomi if you’re paying out of pocket — speed comes free.

    Tickets can be bought at JR ticket offices (midori-no-madoguchi), station ticket machines, or online via the SmartEX or Japan Rail Pass apps, which let you reserve seats and receive a QR code for the gates instead of a paper ticket.

    When Kodama Actually Makes Sense

    Kodama isn’t just the slow option — it has two genuine uses. First, if you’re hopping just one or two stops (say, Odawara to Atami, or Gifu-Hashima to Nagoya), Kodama is often the only train that stops there at all, since Nozomi and many Hikari services blow straight through smaller stations. Second, Kodama trains are consistently the least crowded of the three, especially in unreserved cars, which makes them a good fallback during peak travel windows like Golden Week (late April–early May), Obon (mid-August), and New Year’s, when Nozomi unreserved cars can fill up entirely and leave standing passengers for the first hour.

    There’s also a niche discount product called the “Kodama Economy Pass” sold as part of some travel packages, bundling a Kodama seat with a hotel stay at a lower combined price than booking separately — worth a glance if your schedule is flexible and you’re not in a hurry.

    Seasonal Timing and Crowding

    Weekday mornings and evenings on the Tokyo–Nagoya–Kyoto–Osaka corridor carry heavy business commuter traffic, and Nozomi reserved cars for popular departure times can sell out a day or more in advance during peak holiday weeks. Cherry blossom season (late March–early April) and autumn foliage season (mid-November) in Kyoto push leisure demand up sharply on top of the usual business travel, so reserving seats a few days ahead — rather than relying on unreserved cars — is the safer bet in those windows. Outside of peak weeks, unreserved cars (usually cars 1–3 on most Tokaido trains) are reliably easy to board even with no advance booking.

    Common Mistakes to Avoid

    • Boarding a Nozomi with a JR Pass. Double-check the train name on the departure board, not just the time — Nozomi, Hikari, and Kodama often depart from the same platform within minutes of each other.
    • Assuming Hikari stops everywhere between major cities. Hikari skips plenty of stations too; if your destination is a smaller stop, check the specific service’s stop pattern on the timetable, since not all Hikari trains stop at the same places.
    • Standing in the unreserved line during peak weeks. If you haven’t reserved a seat for a Golden Week or Obon departure, you may be standing for the whole trip — reserve ahead or take an earlier/later Kodama instead.
    • Not confirming the final destination of connecting services. Some Hikari and all Mizuho/Sakura trains continue past Shin-Osaka onto the Sanyo Shinkansen toward Hiroshima and Hakata — useful to know if you’re continuing west, confusing if you’re not.

    Once you’ve got the Nozomi/Hikari/Kodama distinction straight, the rest of Shinkansen travel is refreshingly simple: show up a few minutes early, find your car number painted on the platform, and the train will be within arm’s length of being dead on time. If language on signage or with station staff is a worry, a translation gadget like those covered in this guide to Pocketalk and other translation tools can smooth over last-minute platform confusion. And if your Shinkansen trip connects to a bus leg on either end, it’s worth knowing your way around a major terminal like Basta Shinjuku before you arrive.

  • Japan’s Departure Tax: The Hidden 1,000 Yen Fee in Every International Ticket

    Japan’s Departure Tax: The Hidden 1,000 Yen Fee in Every International Ticket

    Photo by David on Unsplash

    If your Japan trip costs a little more than the ticket price suggested, you’re not imagining it. Since January 7, 2019, every traveler leaving Japan by plane or ship has paid a 1,000 yen “International Tourist Tax” (国際観光旅客税), usually folded invisibly into your airfare. It’s small, it’s mandatory, and almost nobody notices it until they go looking. Here’s what it actually is, who doesn’t have to pay it, and how to make sure it doesn’t catch you off guard at the airport.

    What the Departure Tax Actually Is

    The Sashutsu Kokusai Kankō Ryokaku Zei, officially translated as the International Tourist Tax, is a flat 1,000 yen charge levied on anyone departing Japan by air or sea, regardless of nationality. It applies equally to foreign tourists and Japanese citizens. The revenue funds tourism infrastructure: multilingual signage, free Wi-Fi expansion at airports and stations, automated gates, and promotional campaigns for Japan’s tourism industry. It’s a modest but steady funding stream — the Japan Tourism Agency has used it to pay for things like the facial-recognition immigration gates now common at Narita and Haneda.

    Unlike a sales tax or hotel tax, you don’t pay this separately at a counter. It’s built into the cost of your international air or ferry ticket, collected by the airline or ferry operator and remitted to the government. So in nearly all cases, you’ve already paid it the moment you bought your ticket — you just didn’t see a line item for it.

    How It Shows Up on Your Ticket

    Airlines bundle the 1,000 yen into the “taxes, fees and charges” section of your fare breakdown, often listed under a code like “YQ” or simply folded into a lump “tax” figure alongside other charges such as the passenger service facility charge (which varies by airport — Narita and Haneda both charge their own separate facility fees on top of this tax). If you pull up your e-ticket receipt and look at the fare construction, you may see a notation like “JP ¥1000” buried in a list of a half-dozen other codes. Most travelers never dig this deep, and there’s no need to — the airline handles collection and payment to the government automatically as part of standard ticketing.

    Because it’s baked into the ticket price, you won’t be asked to pay cash at a departure tax counter the way travelers might expect in some Southeast Asian countries. There’s no physical tollbooth to clear before your flight. The only place this tax becomes visible is in your fare breakdown, and even then, it’s rarely itemized clearly enough to spot without knowing what to look for.

    Who Is Exempt

    A handful of groups don’t pay the tax:

    • Children under 2 years old at the time of departure.
    • Transit passengers who arrive in Japan and leave again within 24 hours without clearing immigration (a true airside connection).
    • Crew members on duty.
    • Passengers forced to leave Japan involuntarily due to circumstances like flight cancellations caused by the airline or severe weather, where the departure wasn’t the traveler’s choice.

    If you’re flying in and straight back out on a layover under 24 hours without going through immigration, you generally won’t be charged. But once you’ve entered Japan properly — even for a single night — you’ll pay the tax on the way out, just as everyone else does.

    Common Mistakes and Confusion Points

    The most frequent misunderstanding is travelers expecting to pay this in cash at the airport, the way departure taxes work in countries like Cambodia or (historically) Thailand. In Japan, there’s nothing to pay at the gate — if you’re confused about a “departure tax counter,” you’re thinking of a different country’s system, or possibly an older travel guide. Japan abolished any such cash-collection setup; this is purely a ticket-embedded charge.

    Another common mix-up: confusing this tax with Japan’s consumption tax refund on shopping (the duty-free system for goods bought during your trip) or with departure procedures like security and immigration lines. The 1,000 yen tax has nothing to do with your shopping purchases, and it doesn’t require you to show any receipt or stamp at departure. If you’re also planning to claim tax-free shopping refunds before your flight, budget extra time at the airport for that separate process — it’s unrelated to the departure tax but often confused with it by first-time visitors juggling multiple “tax” concepts at once.

    Some travelers also assume the tax applies per-trip rather than per-departure, but it’s charged every single time you leave Japan internationally — so a traveler who flies to South Korea for a weekend and returns to Japan, then flies home later, pays it on both outbound legs from Japan.

    Does It Actually Affect Your Budget?

    At roughly 1,000 yen (about 6-7 USD depending on exchange rates), this isn’t a tax that will derail a travel budget — it’s closer to the cost of a coffee at a convenience store. But it’s worth knowing about for two practical reasons. First, if you’re comparing fares across booking sites and one quote looks suspiciously lower than another for the same route and dates, double-check whether taxes and fees are fully included — occasionally discount aggregators display base fares before taxes, and the final checkout price will include this charge along with airport facility fees. Second, if you’re budgeting precisely for a long trip with multiple international legs out of Japan (for example, a trip that includes a side excursion to South Korea or Taiwan and back), remember each departure from Japan adds another 1,000 yen, which adds up slightly if you’re counting every yen for a tight multi-country itinerary.

    If you’re already tracking your yen carefully for cash-heavy purchases elsewhere in Japan — tax-free souvenir shopping, regional specialty goods, or paying for things where cards aren’t accepted — it helps to understand when cash beats cards in Japan so you’re not caught short at the airport on departure day.

    What to Do Before You Fly Out

    In practice, there’s very little action required on your part. You don’t need to find a kiosk, fill out a form, or carry exact change. The tax is handled entirely through your ticket purchase. That said, a few habits make departure day smoother:

    • Check your e-ticket fare breakdown before your trip if you’re curious — look for a Japan-specific tax code in the receipt PDF your airline or travel agent sent you.
    • Arrive at the airport with your usual buffer for international departures (most airlines recommend 2-3 hours for international flights from Narita or Haneda), since this tax doesn’t add any extra processing step to immigration or security.
    • If you’re also claiming a consumption tax refund on purchases, do that at the dedicated tax refund counter before checking in — it’s a separate line from anything related to the departure tax.
    • Don’t budget emergency cash specifically for this tax; it’s already paid. Save your remaining cash for last-minute purchases at airport shops instead.

    Whether you’re heading home after exploring geisha districts in Kanazawa’s Higashi Chaya district, island-hopping around Iki Island near Fukuoka, or catching a bus back to Tokyo through Basta Shinjuku before your flight, the departure tax is one line item you can safely ignore on the day itself — it’s already been handled. The only real value in knowing about it is understanding your fare breakdown and not mistaking it for a cash fee you need to hunt down at the gate.

  • Pocketalk and Translation Gadgets: How Tourists Bridge the Language Gap in Japan

    Pocketalk and Translation Gadgets: How Tourists Bridge the Language Gap in Japan

    Photo by ayumi kubo on Unsplash

    Japan is easy to travel through but hard to talk through. Train signage, menus, and ticket machines are increasingly bilingual, but the moment you need to ask a pharmacist about dosage, explain a food allergy, or haggle gently with a flea market seller, you’ll hit a wall. Translation gadgets like Pocketalk exist to patch that gap, and tourists rent or buy thousands of them every month. Here’s what actually works, what it costs, and where a simple phone app beats the hardware entirely.

    What Pocketalk Is, and Who Actually Needs One

    Pocketalk is a handheld translator made by the Japanese company Sourcenext — a device roughly the size of a large smartphone with a screen, a microphone, and a built-in global SIM, so it translates speech both ways without needing your phone’s data plan or Wi-Fi. You press a button, speak, and it displays and reads back the translation in the other language. Current models (Pocketalk S and the larger-screen Pocketalk S Plus) cover 70+ languages with reasonable accuracy for travel-level conversation: ordering food, asking directions, checking into a clinic.

    It’s most useful for travelers who (a) are not confident navigating a translation app mid-conversation, (b) are visiting rural areas or small family-run restaurants and ryokan where English drops off sharply, or (c) are traveling with older relatives who find phone apps fiddly. If you’re comfortable swiping between apps on your own phone, you likely don’t need separate hardware — more on that below.

    Renting a Pocketalk at the Airport

    You don’t need to buy one. Rental counters in the arrivals halls of Narita, Haneda, and Kansai airports — the same counters that rent pocket Wi-Fi and SIM cards — typically offer Pocketalk or similar devices for roughly ¥300–¥600 per day, with multi-day discounts. You can usually reserve online before your flight and pick up the device at a counter after landing, then return it either at a drop box at the departure airport or by mailing it back in a prepaid envelope. For a 7-day trip, budget around ¥2,500–¥4,000 total — cheaper than buying one outright if you’re not coming back to Japan soon. If you’re also sorting out cash and cards for the trip, it’s worth planning both errands together; see our guide to currency exchange in Japan for which airport counters are worth your time and which aren’t.

    Buying One in Japan: Where and How Much

    If you want to own one, Pocketalk is sold at major electronics chains — Bic Camera, Yodobashi Camera, and Don Quijote all stock it, with the biggest selection at flagship stores like Yodobashi Akiba (Akihabara) or Bic Camera Shinjuku East. Expect to pay roughly ¥29,800 for the standard Pocketalk S and ¥39,800 for the Pocketalk S Plus, each typically bundled with a set amount of included data (check whether the bundle covers one or two years — this matters if you plan to use it on future trips, since data plans expire). Tax-free shopping applies for visitors spending over ¥5,000 at a single store on the same day, so bring your passport to the register.

    If budget matters more than owning the newest model, Hard Off and sister chain Treasure Factory are worth a look — Japan’s biggest secondhand electronics network occasionally stocks used translation devices and older Pocketalk models at a fraction of retail. It’s a gamble on availability, but if you’re already browsing for cameras or other gear, it costs nothing to check. Our rundown of Hard Off and Treasure Factory explains how to shop the chain and what to inspect before buying used electronics.

    Free Alternatives: Google Translate and VoiceTra

    Before spending anything, try what’s already on your phone. Google Translate’s conversation mode handles two-way spoken exchange almost as well as Pocketalk for common travel situations, and its camera mode is genuinely excellent for Japan specifically — point it at a menu, a prescription label, or a shrine’s explanatory sign and it overlays translated text in real time. Download the Japanese offline language pack before you leave home (Settings > Offline Translation, roughly 40MB) so it still works without signal in elevators, basements, or rural train stations.

    VoiceTra is less famous but was built specifically for this exact purpose by Japan’s National Institute of Information and Communications Technology (NICT). It’s free, supports around 30 languages, and tends to handle Japanese travel and medical phrasing more precisely than general-purpose apps because it was trained for exactly these scenarios — useful to know if you’re searching for word-for-word phrases to show a pharmacist or doctor rather than a casual conversation. Apple’s own Translate app is a reasonable backup on iPhone and also works offline once you download the language.

    Where Gadgets Help — and Where They Fall Short

    Dedicated devices shine in loud environments (train platforms, busy kitchens) because their microphones are built for one job, and they feel less awkward to hand across a counter than unlocking your phone. They also help when your phone is low on battery or you’ve turned off data to save money. But they’re clumsy for anything visual — reading a sign, a form, or a bus timetable — where a phone’s camera translation is faster. If you’re navigating somewhere like Basta Shinjuku, with its wall of departure boards and gate numbers, your phone’s camera will solve the problem faster than speaking into a Pocketalk and waiting for an answer.

    Neither device nor app handles sarcasm, regional dialect, or fast colloquial speech well — service staff in tourist areas already adjust their speech for visitors, so the technology performs better there than it will in a backstreet izakaya where the owner speaks quickly and casually.

    Common Mistakes Tourists Make

    • Assuming the device works like Wi-Fi calling. Pocketalk’s SIM data is for translation only — it won’t give you general internet access, so don’t rely on it to check maps or email.
    • Not checking the data plan expiry before a return trip. A Pocketalk bought two years ago may have a lapsed data plan; check before you pack it, or you’ll be troubleshooting at the airport instead of using it.
    • Speaking in long sentences. Both apps and hardware translate short, simple phrases far more accurately than run-on sentences — “Where is the nearest pharmacy?” works better than a three-clause explanation of your symptoms.
    • Forgetting a charging cable. Rental devices usually come with one; purchased units sometimes don’t include a wall adapter, only a USB cable.

    Quick Buying Guide

    Budget: Google Translate + VoiceTra, both free, offline packs downloaded before departure. Covers 90% of tourist situations at zero cost.

    Mid-range: Rent a Pocketalk at the airport for ¥300–¥600/day, useful for a one- or two-week trip where you want a dedicated device as backup without committing to ownership.

    Splurge: Buy a Pocketalk S Plus (~¥39,800) if you travel to Japan regularly, deal with elderly relatives who find phones confusing, or work in a field (medical, hospitality) where reliable two-way speech translation matters more than a one-time trip cost.

    Whichever route you take, treat the gadget as a conversation starter rather than a guarantee — pointing, gestures, and a few memorized Japanese phrases still go a long way, and most Japanese service staff will meet you halfway if you show you’re trying.

  • Basta Shinjuku: Japan’s Massive Bus Terminal and How to Navigate It

    Basta Shinjuku: Japan’s Massive Bus Terminal and How to Navigate It

    Photo by kiki on Unsplash

    If you’ve booked a highway bus out of Tokyo, there’s a good chance your ticket says “Shinjuku” on it — and specifically, “Basta Shinjuku.” Opened in 2016 to replace a confusing scatter of curbside bus stops around the station, Basta Shinjuku (バスタ新宿) is now Japan’s largest bus terminal, funneling long-distance coaches to destinations as far as Osaka, Kyoto, and Aomori through a single four-story building. For a first-time visitor juggling luggage and a tight schedule, it can still feel like a maze. Here’s how to find it, use it, and not miss your bus.

    What Basta Shinjuku Actually Is

    Before 2016, highway buses leaving Tokyo from the Shinjuku area departed from more than a dozen different curbside stops scattered across several blocks — a system that regularly confused even locals. Basta Shinjuku consolidated all of that into one terminal sitting directly above JR Shinjuku Station’s New South Exit, inside the same complex as the Shinjuku Miraina Tower and the NEWoMan shopping mall. It now handles roughly 1,600 bus departures and arrivals a day, making it the busiest facility of its kind in the country. If your ticket just says “Shinjuku,” this building — not the sprawling station itself — is almost certainly where you need to be.

    How to Get There

    The terminal is on the 4th floor, reached via escalators and elevators from the New South Exit (新南口) side of JR Shinjuku Station. If you’re arriving by train:

    • JR lines (Yamanote, Chuo, Shonan-Shinjuku, Saikyo): follow signs for “New South Exit / Basta Shinjuku” — it’s a short, well-signed walk from the ticket gates.
    • Odakyu or Keio lines: exit toward the south side and follow the overhead walkway; it takes 5–8 minutes on foot.
    • Tokyo Metro or Toei subway: expect a 10–15 minute walk through the station, since the subway platforms sit on the opposite side of this enormous complex.

    Budget more transfer time than Google Maps suggests — Shinjuku Station is Japan’s busiest, and the signage between subway exits and the New South Exit is good but not instant. If you’re arriving with a large suitcase during rush hour (roughly 7:30–9:30am or 5:30–7:30pm), add another 10 minutes for crowd navigation.

    Navigating the Terminal Itself

    Basta Shinjuku is laid out across a few key floors:

    • 3rd floor: ticket counters for the major bus operators (Willer Express, JR Bus, Keio Bus, Odakyu highway bus, and others), a waiting lounge with seating, coin lockers, and restrooms.
    • 4th floor: the actual boarding area, with more than 20 numbered bays. Your ticket or the departure board will tell you which bay to head to — bay numbers do not correspond neatly to destinations, so always double-check the board rather than assuming.

    Departure boards are in Japanese and English and update in real time. Staff in the waiting area can usually help in basic English if a bus is delayed or a gate changes, which does happen during heavy traffic periods. Arrive at your boarding bay at least 10 minutes before departure — unlike trains, highway buses in Japan generally do not wait for stragglers, and the bay can be a few minutes’ walk from the ticket counters.

    Buying Tickets: Counter, Kiosk, or Online

    You can buy highway bus tickets three ways: online in advance (via operator websites or apps like Willer or Kosoku Bus), at a same-day counter, or occasionally at vending-machine-style kiosks for certain routes. For popular routes and weekend travel, booking a few days ahead is strongly recommended — walk-up tickets for Friday evening buses to Kyoto or Osaka often sell out. Most operators accept credit cards online, but some counter transactions are cash-only or card-only depending on the company, so it’s worth having both options ready; see our guide to currency exchange in Japan if you’re arriving with mostly foreign cash.

    Typical one-way fares out of Basta Shinjuku: Kawaguchiko (Mt. Fuji area), about ¥1,800–2,200, roughly 1 hour 45 minutes; Nagano, about ¥3,000–4,500; overnight buses to Kyoto or Osaka, anywhere from ¥3,500 budget seats to ¥9,000–11,000 for premium reclining seats; Narita Airport limousine buses, around ¥3,600; Haneda Airport, around ¥1,300–1,600. Prices swing with season, seat type, and how far ahead you book.

    Budget, Mid-Range, and Splurge Seating

    Overnight buses in particular come in several seat tiers worth knowing about before you book:

    • Budget: standard 4-across reclining seats, curtained but shared leg space — fine for one night if you’re young, flexible, and price-sensitive.
    • Mid-range: 3-across seats with more recline and a footrest, usually ¥1,000–2,000 more than budget fare.
    • Splurge: fully independent “cabin” seats with privacy curtains and USB power, often ¥9,000+ one way on routes like Shinjuku–Osaka. These sell out fastest, so book well in advance if you want one.

    If an overnight bus feels like too much of a gamble for comfort, it’s worth comparing against the Shinkansen for the same route — faster, pricier, and with its own quirks like designated smoking rooms on board for those who need them.

    Best Timing and Common Mistakes

    Avoid booking around Golden Week (late April–early May), Obon (mid-August), and New Year’s — fares rise and seats disappear weeks ahead. Winter routes toward Nagano or Niigata ski areas can also face delays or cancellations in heavy snow; if your onward plans involve driving rather than busing into those regions, our guide to winter driving precautions covers what to expect on snow routes.

    The most common visitor mistakes at Basta Shinjuku: confusing the New South Exit with the station’s main East or West exits (they’re a genuine 10+ minute walk apart), underestimating how long it takes to get from a subway platform to the 4th floor, and not checking the boarding bay number on the departure board before heading up — bay assignments can shift on short notice. Give yourself 20–30 minutes of buffer between arriving at Shinjuku Station and your bus’s departure time, and you’ll avoid the sprint that catches out a lot of first-timers.

  • Winter Driving in Hokkaido and Tohoku: Studded Tires, Black Ice & Rental Car Precautions

    Winter Driving in Hokkaido and Tohoku: Studded Tires, Black Ice & Rental Car Precautions

    Photo by Asmut Dante on Unsplash

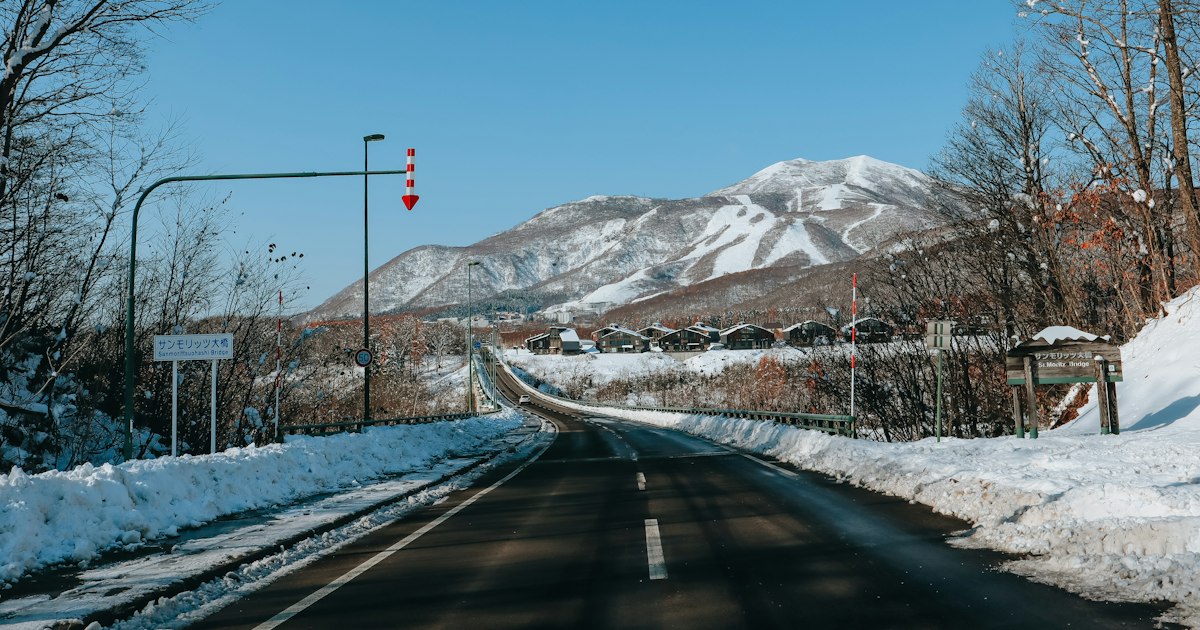
    Driving through a snow-banked pass in Hokkaido or threading between the ski towns of Tohoku is one of the best ways to see rural Japan in winter — but it’s a different driving environment than most visitors have faced before. Roads that look clear can be sheeted in invisible ice, rental car counters run on their own winter logic, and a single wrong assumption about tires can leave you stranded. Here’s what actually matters before you turn the key.

    Why Hokkaido and Tohoku Winter Driving Is Different

    Snowfall here isn’t an occasional dusting — Hokkaido’s interior and Tohoku’s mountain prefectures (Aomori, Akita, Yamagata) regularly see meters of accumulated snow between December and March. Main roads are plowed aggressively and kept open far more often than visitors expect, but side roads, mountain passes, and anything near the coast can close with little notice during a “bakuzatsu” (bomb cyclone) snowstorm or a whiteout ground blizzard (called doh-huri, 地吹雪, locally). Temperatures swing from a sunny -2°C midday to -15°C overnight, which matters more for driving than the snow itself — it’s the freeze-thaw cycle that creates the real hazard.

    Studded Tires Are Banned — What Rental Cars Actually Use

    This is the single most misunderstood point for foreign drivers: metal-studded tires have been effectively illegal on Japan’s paved roads since 1991, under a law passed to stop the dust pollution they caused in cities. So no rental car in Hokkaido or Tohoku will have actual spiked tires, and you don’t need to search for them. What you’ll get instead are studless winter tires (スタッドレスタイヤ, sutaddoresu) — soft rubber compounds with deep, flexible tread and micro-slits (sipes) that grip ice and compacted snow without studs. They’re genuinely effective, but they are not snow chains and have real limits on glare ice or steep, ungritted grades.

    Rental agencies in Hokkaido and snowy Tohoku prefectures fit studless tires as standard on every car from roughly early November through mid-April, usually with no extra fee — but always confirm this at booking if you’re renting outside that window, or if you’re picking up in a milder Tohoku city like Sendai and driving north into snow country, since cars based in non-snow regions may not be swapped over.

    Black Ice: The Danger You Won’t See Coming

    Locals call it kagamibari (鏡張り) — “mirror glaze” — and it’s the thing that catches visitors out, not falling snow. Black ice forms when melted snow refreezes into a thin, clear layer that looks exactly like wet asphalt. It’s most common in predictable spots: bridges and overpasses (which cool faster than ground-level road), tunnel entrances and exits, shaded curves that never get direct sun, and anywhere near rivers or the coast. The highest-risk hours are early morning and after sunset, and — counterintuitively — the shoulder seasons of late November and March are often more dangerous than deep January, because temperatures hover right around freezing and roads look dry and bare while still carrying a thin ice film.

    The only real defenses are behavioral: slow down well before bridges and tunnels, never brake or accelerate hard while turning, double your following distance, and assume any shaded patch after a sunny day is icy even if the rest of the road is wet and grippy.

    Renting a Car: Licenses, Costs, and What to Check at the Counter

    You’ll need either a Japanese-recognized International Driving Permit (the 1949 Geneva Convention version) or a licence from one of the handful of countries with a bilateral agreement — rules vary enough by nationality that it’s worth checking the specifics before you fly. Our guide to International Driving Permits for Japan breaks down which countries’ licenses actually work and which require a Japanese translation instead.

    At the counter, specifically ask for: studless tires confirmed (don’t just assume), a car with a battery-heated windshield washer line (freezes solid otherwise), an ice scraper and snow brush, and — if you’re heading into the mountains of Tohoku or Hokkaido’s interior — a set of tire chains as backup even though you likely won’t use them. Major nationwide chains like Toyota Rent a Car, Nippon Rent-A-Car, and Times Car all operate counters at New Chitose Airport (CTS) and the regional Tohoku airports (Aomori, Akita, Sendai), and winter is peak season, so book at least a few weeks ahead for ski-season weekends.

    Common Mistakes Visitors Make

    • Driving at summer speeds. Studless tires reduce stopping distance compared to bald summer tires, but they don’t eliminate physics — plan for roughly double your normal braking distance on packed snow and more on ice.
    • Letting the fuel tank run low. Keep it at least half full; if you get stuck or stopped in a whiteout, the engine is your only heat source, and rural gas stations can be far apart and occasionally cash-only or closed overnight.
    • Ignoring road closure reports. Mountain passes (Hokkaido’s Mt. Usu area, Tohoku’s Hakkoda range) close for hours or days during heavy snow. Check Japan Road Traffic Information Center reports or ask your rental counter before committing to a route.
    • Skipping the warm-up. Let the engine and cabin run for a couple of minutes before setting off — it clears window fog and lets the tires reach working temperature.
    • Using cruise control on snow or ice. It fights you if the car starts to slide; drive with manual throttle control in any winter condition.

    Budget, Mid-Range, and Splurge Rental Options

    Budget travelers can get a kei-class compact from a local Hokkaido agency for roughly ¥5,000–8,000 per day in winter — fine for short hops between towns but underpowered for long mountain drives. Mid-range renters typically land ¥8,000–12,000 per day with a major chain for a standard sedan or compact SUV with navigation included, a sensible default for most itineraries. If you want extra peace of mind — more ground clearance, 4WD, and cabin space for luggage and ski gear — a mid-size SUV like a Subaru Forester runs closer to ¥15,000–25,000 per day and is worth it for multi-day trips deep into snow country. If your plans only involve short urban errands in Sapporo or Sendai rather than highway driving, it’s also worth comparing against car-sharing apps like Times Car and Careco, which skip the counter entirely for hourly rentals.

    Practical Precautions Before You Set Off

    Carry a phone charger, a blanket, and some snacks in the car at all times — not for drama, but because getting stuck waiting for a plow or tow truck in rural Tohoku can take a couple of hours. Japan’s JAF (Japan Automobile Federation) roadside service is reliable and can assist non-members for a fee if your rental doesn’t already include coverage — ask about this at pickup. Keep some cash on hand for rural toll booths, parking, and smaller gas stations that don’t always take foreign cards; our guide to currency exchange in Japan covers where to get yen before you leave the city. Finally, build slack into your itinerary — a direct flight or train connection timed tightly around a winter drive is the easiest way to turn a snow delay into a missed flight.