Japan Trove

Category: Travel

Practical, up-to-date guides for traveling in Japan — itineraries, rail passes, eSIMs, where to stay, seasonal timing, etiquette, and the local know-how that makes a trip smoother. Written with real Japanese sources so you get the answer that actually works on the ground, not the recycled tourist one.

  • Tokyo Metro vs Toei Subway: Why Tokyo Has Two Separate Systems and How Transfers Work

    Tokyo Metro vs Toei Subway: Why Tokyo Has Two Separate Systems and How Transfers Work

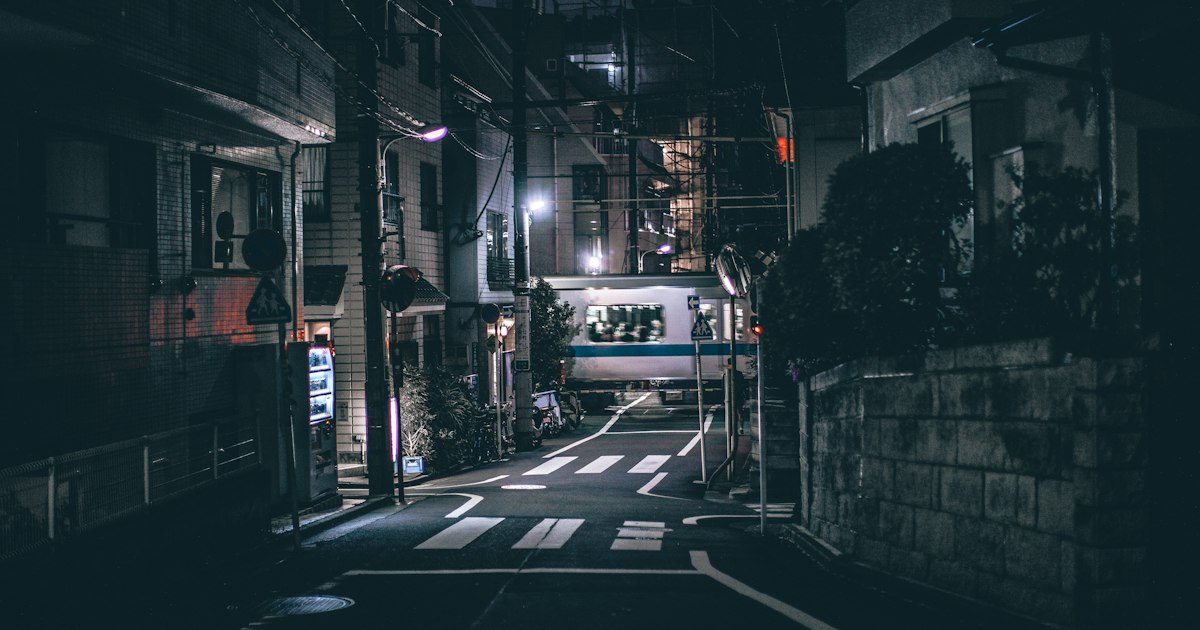
    Photo by Yerko Lucic on Unsplash

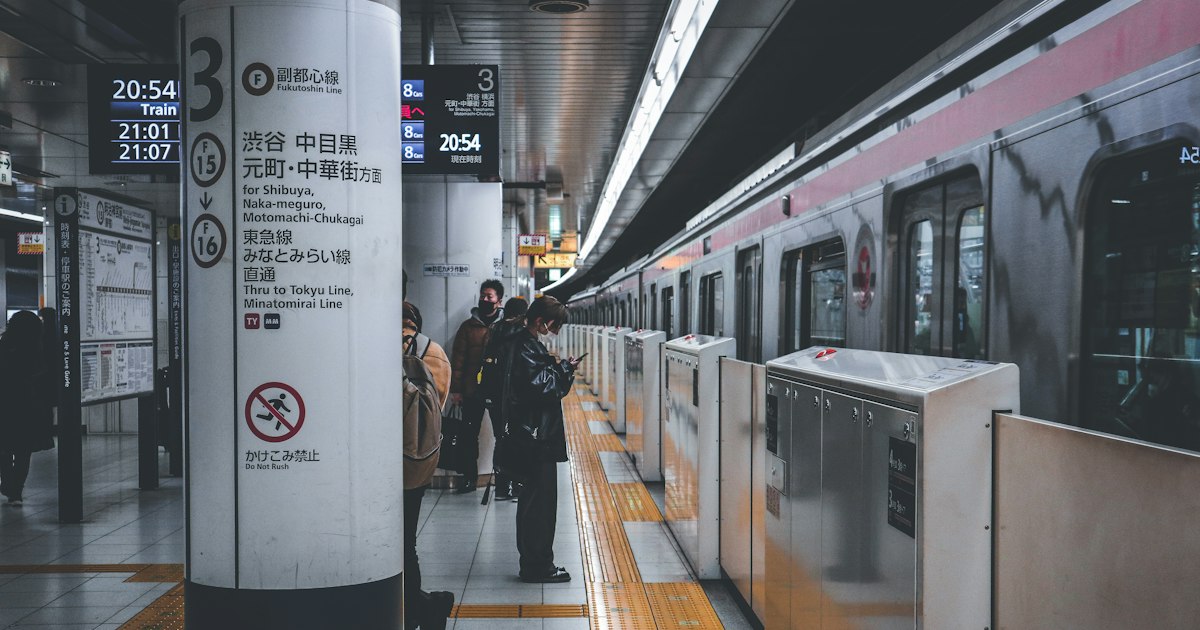
    If you’ve stared at a Tokyo subway map and wondered why some lines are labeled “Metro” and others “Toei,” and why your IC card balance sometimes drops more than expected on what felt like one continuous ride, you’ve bumped into one of Tokyo’s quirkiest pieces of infrastructure: two completely separate subway companies sharing the same tunnels, the same color-coded maps, and often the same station buildings. Understanding the split will save you money and confusion on every single day of your trip.

    Why Tokyo Has Two Subway Operators

    Tokyo Metro and the Toei Subway are not divisions of one company — they’re two independent operators that happen to run trains through the same city. Tokyo Metro Co., Ltd. is a semi-private company (majority-owned by the national government and the Tokyo Metropolitan Government, but run as a private railway) with nine lines: Ginza, Marunouchi, Hibiya, Tozai, Chiyoda, Yurakucho, Hanzomon, Namboku, and Fukutoshin. The Toei Subway, by contrast, is operated directly by the Tokyo Metropolitan Government’s Bureau of Transportation — the same bureau that runs Toei buses, the Arakawa streetcar, and the Nippori-Toneri Liner. It has four lines: Asakusa, Mita, Shinjuku, and Oedo.

    The split dates back to postwar urban planning: Tokyo Metro’s predecessor (Teito Rapid Transit Authority) built the earliest lines starting in 1927, while the city government later built its own lines to fill gaps the private operator wasn’t covering fast enough. Decades later, the two networks are deeply interwoven on the map but still run as separate businesses — which is why they never fully merged their fares, even though there’s been talk of integration for years.

    How to Tell Them Apart on the Map

    Tokyo Metro lines are usually labeled with a letter-and-number code and a colored circle logo (G for Ginza, M for Marunouchi, H for Hibiya, and so on). Toei lines use a different logo style and their own letters: A for Asakusa, I for Mita (confusingly, not M), S for Shinjuku, and E for Oedo. Station numbers on platform signs and exit maps always show which operator you’re on — if you see a blue “Toei” logo on the sign, you’ve left the Metro network, even if you never changed trains.

    This matters most in stations where both companies’ trains stop. Roppongi, for example, is served by both the Tokyo Metro Hibiya Line and the Toei Oedo Line — it’s a genuine two-operator hub, useful to know if you’re heading to the Roppongi nightlife and museum district. Shinjuku, Iidabashi, Monzen-nakacho, and Kuramae are other well-known crossover points.

    The Fare Problem: Why Switching Operators Can Cost You

    This is the part that trips up visitors. Because Tokyo Metro and Toei Subway are separate companies, each charges its own base fare — roughly ¥180 for the shortest IC-card rides, rising with distance, though both have adjusted fares slightly in recent revisions, so treat exact yen amounts as approximate and double-check the fare chart above the ticket machines. If your journey requires switching from a Metro line to a Toei line (or vice versa), you are technically paying two separate fares, not one combined fare for a single trip — even if you never leave the station building.

    Paper single tickets make this worse: you generally can’t buy one ticket that covers both networks for a standard fare-gate journey, so you’d need to exit, buy a second ticket, and pass through separate gates. This is the single biggest point of confusion for first-time riders coming from cities with unified metro systems.

    IC Cards Make Transfers Mostly Painless

    The good news: tapping in and out with a Suica or Pasmo card smooths almost all of this over. These IC cards work seamlessly across Tokyo Metro, Toei Subway, JR East, and most private railways nationwide, so you never have to think about which company you’re on to actually ride. On top of that, Tokyo Metro and Toei Subway offer an automatic IC-card transfer discount (roughly ¥70 off) when you switch between their networks at a connecting station within a set time window — a small but real saving that only applies to IC taps, never to paper tickets. If you haven’t set up your IC card yet, note that Suica and Pasmo are now mostly sold as physical cards to short-term visitors, or loaded onto a phone; either way, have it ready before your first subway ride, not after.

    Day Passes: Which One Actually Saves You Money

    If you’re doing heavy sightseeing by subway in a single day, a pass can beat pay-as-you-go fares — but only if you pick the right one for your route:

    • Tokyo Metro 24-Hour Ticket (around ¥600): unlimited rides on Tokyo Metro’s nine lines only, valid for 24 hours from first use (not calendar day). Good if your whole itinerary stays on Metro lines like Ginza or Marunouchi.
    • Toei One-Day Pass (around ¥700): unlimited rides on all four Toei Subway lines, plus Toei buses and the Arakawa streetcar. Useful for Asakusa-Oedo Line days.
    • Common One-Day Ticket (Tokyo Metro & Toei Subway) (around ¥900): covers both networks for a full day — the simplest option if your day genuinely mixes both companies’ lines.
    • Tokyo Furii Kippu / Tokyo Combination Ticket (around ¥1,600): adds JR East lines within central Tokyo and Toei buses on top of both subway networks — worth it only if you’re also riding the Yamanote or Chuo Line a lot that day.

    Pass prices get periodically revised, so confirm the current yen amount at any ticket machine or the Tokyo Metro/Toei websites before buying — but the logic of which pass fits which itinerary stays the same.

    Transfer Stations and Common Mistakes

    A few habits will save you real money and confusion:

    • Check the operator before tapping through a gate. Signage at transfer stations clearly marks “Tokyo Metro” gates versus “Toei” gates — tapping an IC card through the wrong set still works, it just charges you as if you started a brand-new trip rather than getting the transfer discount.
    • Don’t assume same-named stations are the same station. A few Metro and Toei stations with similar names sit blocks apart with no direct underground link — always check the walking distance on a map app rather than assuming a quick change.
    • If you’re heading to Yoyogi-Uehara for the quiet cafés near Sangubashi and Yoyogi-Uehara, that’s the Tokyo Metro Chiyoda Line’s southern terminus — useful to know if you’re coming from a Toei line and need to plan the switch at a hub like Otemachi.
    • Heading out to Ikebukuro? The Marunouchi, Yurakucho, and Fukutoshin Metro lines all reach it directly, which is handy if you’re making a day of Otome Road’s otaku shopping without needing Toei at all.
    • Going toward Odaiba? The Toei Oedo Line gets you to Daimon or Shiodome, where you switch to the separate Yurikamome monorail — a third operator again, with its own fare, before you reach the island.

    Quick Tips Before You Ride

    Load an IC card before your first ride and keep it topped up — it removes 90% of the operator confusion automatically. If you’re using paper tickets or passes, pay attention to which logo is on your pass and which gates you’re walking through, since mixing them up means paying twice. And when in doubt about whether a station transfer is “free” within the fare gates or requires exiting and re-entering, Google Maps’ transit directions in Japan are generally reliable at flagging it — look for instructions that say “change trains” (free, same side of the gates) versus a prompt to exit the station entirely.

    None of this makes Tokyo’s subway hard to use day to day — millions of commuters navigate it without a second thought. It just helps to know, before your first ride, that you’re dealing with two companies wearing one map.
  • Ikebukuro’s Otome Road: Tokyo’s Otaku Scene for Women

    Ikebukuro’s Otome Road: Tokyo’s Otaku Scene for Women

    Photo by Andre Benz on Unsplash

    While Akihabara gets all the foreign-tourist attention for anime and electronics, a quieter but equally dense otaku district has grown up on the other side of Tokyo in Ikebukuro. Otome Road (“Maiden Road”) is a short stretch of shops built around manga, boys’ love (BL) titles, otome games, idol goods, and cosplay supplies aimed primarily at female fans. If Akihabara feels like it was built for a different audience than you, Otome Road is worth the detour — it’s compact, walkable in an afternoon, and far less overwhelming than Akiba’s main strip.

    Where Otome Road Is and How to Get There

    Otome Road refers to Higashi-Ikebukuro 3-chome, the street running along the east side of Sunshine City mall. From Ikebukuro Station’s East Exit, it’s about a 10–12 minute walk: head toward Sunshine City (following signs or Google Maps) and the shop cluster starts just past the mall’s east side, near Sunshine 60-dori. You can also take the free Ikebukuro shuttle bus or the subway to Higashi-Ikebukuro Station (Yurakucho Line), which drops you about 5 minutes closer on foot.

    Ikebukuro Station itself is served by the JR Yamanote Line, Saikyo Line, and several private and subway lines, so it’s an easy add-on if you’re already circling central Tokyo by rail.

    What to Expect: The Core Shops

    The street is anchored by a handful of specialty stores rather than one giant complex:

    • Animate Ikebukuro Main Store — the flagship of Japan’s largest anime/manga retail chain, spread across multiple floors with manga, light novels, Blu-rays, character goods, and exclusive merchandise tied to currently airing shows. This is usually the busiest single stop on the street.
    • K-Books — not one shop but several specialized branches within a block of each other, split by category: secondhand manga and doujinshi, cosplay costumes and wigs, idol/voice-actor goods, and otome-game merchandise. Look for the branch signage carefully, since the inventory differs a lot between them.
    • Mandarake Ikebukuro — the secondhand otaku-goods chain’s Ikebukuro branch, good for used manga, cels, figures, and older BL/shoujo titles at lower prices than new releases.
    • Lashinbang — another used-goods shop strong on doujinshi, CDs, and character merchandise, often with good bargain bins.
    • Broccoli — a shop built around specific long-running otome and idol franchises, with its own branded character goods.

    Most of these stores open around 11:00 or noon and close at 20:00, though hours shift slightly by shop and season, so it’s worth checking the specific store’s hours for the day you’re going, especially around public holidays.

    The Butler Café Scene

    Otome Road is also where Tokyo’s “reverse maid café” concept lives: butler cafés, where male staff address guests as “Ojou-sama” (young lady) and the atmosphere is styled like an English manor rather than an anime maid café. Swallowtail, tucked just off the main road, is the best-known of these and the one most foreign visitors recognize from online write-ups. Expect a seated course (tea, dessert, or a light meal) lasting roughly an hour, with prices typically in the ¥3,000–5,000 range once the entry charge and course are combined. Reservations are essential — these cafés are small, popular with regulars, and slots can fill up days or weeks ahead, so book online before you arrive rather than walking in and hoping for a table.

    Best Time to Visit

    Weekday afternoons (roughly 13:00–17:00) are noticeably calmer than weekends, when the street fills with regular customers browsing new releases and restocked used goods. If a major anime or game is airing a new season, expect new merchandise drops and correspondingly bigger crowds at Animate in particular — new-release days (often Fridays or Saturdays) are the busiest. There’s no strong seasonal pattern tied to weather since everything here is indoors, but late December and early January can be hit by shortened holiday hours, so this isn’t the best window if your schedule is tight.

    Budget, Mid-Range, and Splurge Shopping

    Budget (under ¥2,000): Used doujinshi, secondhand manga volumes at Mandarake or Lashinbang (often ¥100–500 per volume), and small acrylic stands or badges from the used-goods bins.
    Mid-range (¥2,000–8,000): New manga box sets, character figures, and idol-goods blind boxes at Animate or K-Books; a butler café course at Swallowtail.
    Splurge (¥8,000+): Rare cel art or out-of-print doujinshi at Mandarake, full cosplay costume sets from K-Books’ costume branch, or complete figure collections.

    Many of the smaller used shops are cash-preferred or cash-only for cheaper items, so carry enough yen before you go — if you’re running low, a 7-Eleven or Japan Post Bank ATM nearby will handle most foreign cards reliably.

    Common Mistakes to Avoid

    • Treating it like Akihabara. Otome Road is smaller and more specialized; if you walk in expecting Akiba-scale crowds and multiple competing electronics megastores, you’ll be confused by how residential and quiet the surrounding blocks actually are.
    • Skipping the K-Books branch map. Because several K-Books stores sit close together with similar signage, visitors often wander into the wrong branch looking for cosplay items and find only doujinshi, or vice versa. Check the storefront category signs before going in.
    • Walking into a butler café without a reservation. Same-day walk-ins are frequently turned away, especially on weekends.
    • Buying fragile figures or glass-topped goods without padding. If you’re planning a big haul and your existing luggage won’t protect delicate items or has no room left, it’s worth sorting out packing before you leave Japan rather than after something breaks — our guide to buying a suitcase in Japan covers where to pick up an extra case cheaply if your shopping outgrows your bag.

    Pairing Otome Road With the Rest of Tokyo

    Otome Road works well as a half-day stop that you combine with Sunshine City itself (which has an aquarium and observation deck) or with a broader Tokyo otaku-and-pop-culture day. If you want to extend the theme, the giant Gundam statue and character shops over at Odaiba make a fun contrast on a different day, while Ikebukuro’s East Exit area also has plenty of standard shopping and dining if you’re traveling with someone less interested in manga and cosplay goods.

    Otome Road rewards visitors who come with a specific interest — a manga series, an idol group, a particular otome game — rather than those browsing with no agenda. Spend a little time before your trip figuring out which shop branches carry the goods you actually want, and you’ll get far more out of a short visit than wandering the street cold.

  • Odaiba: Tokyo’s Man-Made Island of Malls, Gundam & Rainbow Bridge Views

    Odaiba: Tokyo’s Man-Made Island of Malls, Gundam & Rainbow Bridge Views

    Photo by Akira Cake on Unsplash

    Odaiba is a chunk of reclaimed land in Tokyo Bay that Tokyo built for landfill and 1990s urban-planning dreams, then quietly turned into one of the city’s best weekend outings. It’s flat, walkable, full of malls with ocean views, and home to a full-scale Gundam statue that draws crowds of their own. It’s also a district that changes fast — several of its biggest former attractions have closed in the past few years — so this guide sticks to what’s actually open in 2026 and how to get the most out of a half-day or evening visit.

    Getting to Odaiba

    The most enjoyable way in is the Yurikamome Line, a fully automated elevated train that loops from Shimbashi Station (connected to the JR Yamanote Line, Ginza subway line, and Toei Asakusa Line) across the bay and onto the island. Because there’s no driver, grab a front-row seat for a free ride that swoops over Rainbow Bridge and gives you your first skyline view before you’ve even arrived. Fare from Shimbashi to Daiba or Odaiba-Kaihinkoen station runs about ¥330–400 with an IC card.

    A cheaper alternative is the Rinkai Line, which connects from Osaki Station (also reachable via JR Saikyo Line through-trains from Shinjuku and Ikebukuro) to Tokyo Teleport Station — the stop closest to DiverCity and Aqua City. It’s faster and usually cheaper than the Yurikamome but has none of the scenery.

    For something slower and more scenic, Tokyo Cruise operates water buses from Asakusa and Hinode Pier to Odaiba Seaside Park, including the futuristic Himiko and Hotaluna boats designed by anime artist Leiji Matsumoto. The ride from Asakusa takes roughly 50–60 minutes and costs around ¥1,560 one way — treat it as a scenic activity in its own right, not just transport.

    The Gundam Statue and Gundam Base Tokyo

    The single most-photographed thing on the island is the full-scale Gundam statue standing outside DiverCity Tokyo Plaza, near Tokyo Teleport Station. The current model is the RX-93ff ν Gundam, a roughly 19.7-meter statue that replaced the earlier Unicorn Gundam version in 2023. It periodically performs light-and-sound sequences at set times during the day — the schedule is posted near the statue and on DiverCity’s site, so check it on arrival rather than planning around a fixed time, since showtimes shift seasonally.

    Inside the mall, the 7th floor holds Gundam Base Tokyo, a cavernous official store stocked with Gunpla model kits across every scale and series, plus exclusive kits you won’t find elsewhere in Japan. Even non-modelers tend to spend longer here than planned. It keeps the same hours as the mall, roughly 10:00–21:00.

    Shopping: DiverCity, Aqua City, and DECKS Tokyo Beach

    Odaiba’s three main malls sit close enough together to cover on foot. DiverCity Tokyo Plaza (10:00–21:00 for shops, restaurants open later) mixes fashion with the Gundam draw. Aqua City Odaiba, right on the waterfront with the best head-on view of Rainbow Bridge from its terrace, runs similar hours and has a strong food court plus a small shrine on one of its upper floors. DECKS Tokyo Beach, split into two connected buildings, leans more toward entertainment than fashion: it houses the Tokyo Trick Art Museum (around ¥1,000 admission) and LEGOLAND Discovery Center Tokyo.

    None of these are duty-free bargain hunting grounds in the way Shinjuku or Ginza department stores are — treat Odaiba shopping as a bonus activity around the views and entertainment, not the main reason to come. If you’re hauling souvenirs and your existing suitcase is giving out, it’s worth knowing where to buy a replacement suitcase in Japan rather than trying to find one on the island itself.

    Rainbow Bridge and the Waterfront Park

    Odaiba Marine Park (Odaiba Kaihin Koen) is the free public park facing the bridge, with a small artificial beach and a replica Statue of Liberty that’s become its own photo stop. Swimming is generally not permitted here due to water quality, though the city has run occasional supervised test-swim events in recent summers — don’t plan a swim around it.

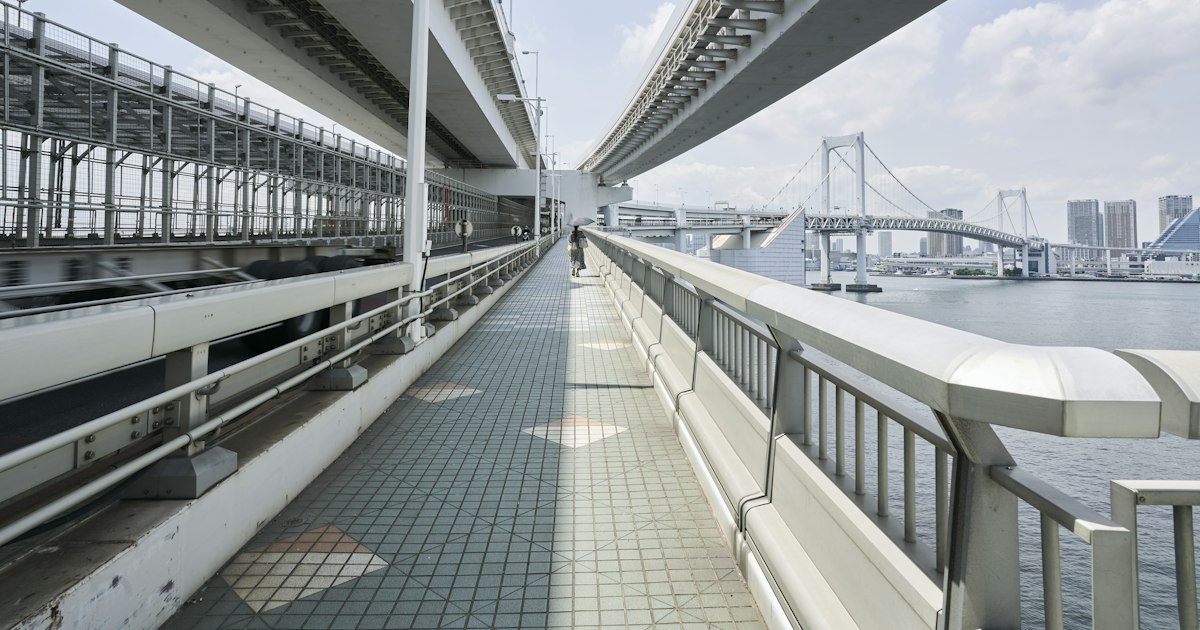
    What’s genuinely worth building time for is walking Rainbow Bridge itself. A pedestrian promenade on the lower level runs between the Shibaura/Minato side and Odaiba, free of charge, taking about 30–40 minutes one way with excellent bay views. Opening hours shift by season (roughly 9:00–21:00 in warmer months, 10:00–18:00 in winter), and the walkway closes for maintenance on a rotating basis — check the Metropolitan Expressway’s posted schedule before you go so you don’t arrive to locked gates. Evening is the best time for this: the bridge’s illumination (switching between white, red, and green lighting) and the Tokyo skyline behind it are best seen after sunset, and the park benches along Odaiba Marine Park are a free, crowd-light spot to watch it with no admission fee at all.

    Miraikan and Tokyo Joypolis

    The National Museum of Emerging Science and Innovation, known as Miraikan, is a genuinely good science museum built around the massive spherical Geo-Cosmos display and hands-on robotics exhibits. It’s open 10:00–17:00, closed Tuesdays, with adult admission at ¥630 (the dome theater costs extra) — cheap enough to combine with anything else on the island.

    Tokyo Joypolis, Sega’s indoor amusement park inside DECKS Tokyo Beach, is the pick for an evening of arcade games and VR rides regardless of weather. Pricing works two ways: a basic entrance fee of around ¥900, or an all-rides passport around ¥4,300 for adults — buy the passport only if you’re committed to riding multiple attractions, since entrance-only plus a couple of pay-per-ride tickets is often cheaper for a shorter visit. Hours vary by day of the week, so check before you go.

    Common Mistakes to Avoid

    Older blog posts and guidebooks still list Oedo Onsen Monogatari, the hot spring theme park that used to be Odaiba’s signature attraction — it closed permanently in September 2021 and doesn’t exist anymore. Similarly, Palette Town (the Ferris wheel, Toyota Mega Web, and Venus Fort) was fully demolished by the end of 2022; don’t plan a visit around any of it. And teamLab’s digital art museum, long associated with Odaiba, relocated: teamLab Borderless is now at Azabudai Hills and teamLab Planets is in Toyosu — neither is on the island anymore, so don’t budget Odaiba time expecting to see them.

    The other common mistake is underestimating distances. Odaiba looks compact on a map, but the walk from Tokyo Teleport Station to the far end of Odaiba Marine Park is a genuine 20–25 minutes, and summer heat on the shadeless waterfront is brutal. Odaiba is as flat and step-free as Tokyo gets, which makes it one of the easier districts for anyone renting a wheelchair or mobility scooter for their trip — but you’ll still want to plan routes around indoor mall corridors during peak heat or rain.

    Budget, Mid-Range, and Splurge

    On a tight budget, Odaiba costs nothing beyond transport: the Gundam statue, Rainbow Bridge walk, and Marine Park views are all free, and you can spend hours mall-browsing without buying anything. Mid-range visitors should budget roughly ¥3,000–6,000 for a mix of Miraikan, Joypolis, and a meal with a bridge view at Aqua City’s food court. For a splurge, several waterfront hotels — including the Hilton Tokyo Odaiba and Grand Nikko Tokyo Daiba — offer rooms with direct Rainbow Bridge or skyline views, and are worth it if you want to watch the bridge light up without leaving your room.

    If you need cash on the island, convenience store ATMs are plentiful inside the malls, and it’s worth knowing in advance how foreign cards actually work at Japan Post Bank ATMs in case you need a backup option. Odaiba pairs naturally with a full day that starts elsewhere in central Tokyo — if you’re staying near Roppongi’s museums and nightlife, it’s an easy half-day add-on via the Yurikamome or a short taxi to the Rainbow Bridge approach.

  • Roppongi: Tokyo’s Nightlife District and Its Art Museum Trio (Mori, Suntory, National Art Center)

    Roppongi: Tokyo’s Nightlife District and Its Art Museum Trio (Mori, Suntory, National Art Center)

    Photo by bady abbas on Unsplash

    Roppongi has two reputations, and both are true at once. By day, it’s home to one of Tokyo’s most concentrated clusters of serious art museums — three major institutions within a 15-minute walk of each other. By night, it turns into the city’s most famous (and most notorious) nightlife district, full of bars, clubs, and a long-running tout scene that catches out visitors who don’t know the warning signs. Here’s how to do both halves properly.

    Getting to Roppongi and Getting Oriented

    Roppongi Station is served by the Toei Oedo Line and the Hibiya Line, and the exits connect directly to Roppongi Hills via underground passage — useful on a rainy day or in midsummer heat. If you’re heading straight to Tokyo Midtown or the National Art Center, Roppongi-itchome Station on the Namboku Line is actually closer. The three museums form a loose triangle often marketed locally as the “Roppongi Art Triangle”: Mori Art Museum inside Roppongi Hills, Suntory Museum of Art inside Tokyo Midtown (about a 10–12 minute walk from Roppongi Hills), and the National Art Center a further 5-minute walk from Midtown. You can comfortably visit all three in one day if you start early and pace yourself, though each deserves at least 60–90 minutes.

    Mori Art Museum: Views and Contemporary Art, Open Late

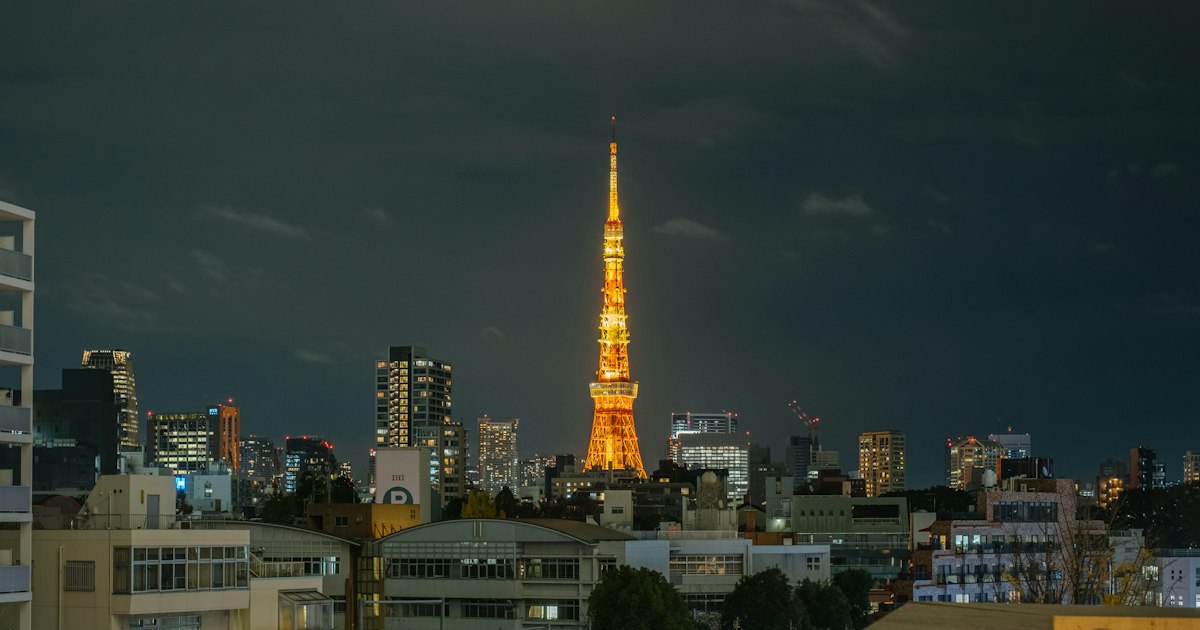
    Mori Art Museum occupies the 53rd floor of Mori Tower in Roppongi Hills and focuses on contemporary art — large-scale, often immersive exhibitions rather than a historical permanent collection. It’s one of the few major Tokyo museums open until 22:00 (last entry 21:30) every day except Tuesday, when it closes early at 17:00. That late closing time makes it an easy add-on to an evening out: come for the exhibition, then ride up to the 52nd-floor Tokyo City View observation deck for a night panorama over the city, including Tokyo Tower. Admission to the museum alone runs roughly ¥2,000, with combined museum-plus-observation-deck tickets around ¥2,200; exact pricing shifts slightly with each new exhibition, so check the current show before you go.

    Suntory Museum of Art: Japanese Craft and Design

    Suntory Museum of Art, on the third floor of the Galleria at Tokyo Midtown, is the counterpoint to Mori’s contemporary focus — it specializes in Japanese and Asian decorative arts: ceramics, lacquerware, textiles, glass, and ukiyo-e, drawn from its own holdings and rotated through themed exhibitions rather than displayed as one fixed collection. It’s closed on Tuesdays. Regular hours are 10:00–18:00, extended to 20:00 on Fridays and Saturdays, with last admission 30 minutes before close. Adult tickets typically run ¥1,300–1,600 depending on the exhibition. The space itself is small and calm compared to Mori’s crowds, which makes it a good stop if you want a quieter, more traditional counterpart to the rest of the day.

    The National Art Center, Tokyo

    The National Art Center (NACT) is unusual among major museums: it owns no permanent collection at all. Instead, the building — a striking undulating glass facade designed by Kisho Kurokawa — functions purely as exhibition space, hosting everything from major touring retrospectives to large juried shows by Japanese art associations. Entry to the building and lobby is free; each exhibition inside has its own separate ticket, generally in the ¥1,500–2,200 range. It’s closed Tuesdays, with hours matching Suntory’s: 10:00–18:00, until 20:00 on Fridays and Saturdays. Because the lineup changes completely and often, it’s worth checking what’s actually on before you commit — you might find a blockbuster Western museum loan or a niche group show, and the two experiences are very different.

    Timing, Tickets, and Avoiding Crowds

    If your schedule allows only one evening visit, make it Mori Art Museum, since it’s the one still open after dinner. For Suntory and NACT, aim for a Friday or Saturday and go after 17:00, when day-trip crowds thin out but the extended hours are still in effect. All three museums are step-free with elevator access throughout, which matters if you’re planning a full day on your feet — if you’re traveling with a mobility aid, it’s worth arranging rental gear in advance; see our guide on renting a wheelchair or mobility scooter in Japan for providers and pricing. A common mistake is assuming the three museums share a combination ticket — as of now they don’t operate a unified discount pass, so budget for each entry separately, and check each museum’s own website the morning of your visit since exhibition-based pricing changes with every rotation.

    Roppongi After Dark: What’s Genuinely Worth It

    Once the museums close, Roppongi shifts into its other identity. The area around Roppongi Crossing and the streets toward Gaien-Higashi-dori hold a dense mix of izakaya, cocktail bars, hostess clubs, and international nightclubs, drawing a mixed crowd of tourists, expats, and nightlife regulars. For a good cocktail without the chaos, Roppongi has several serious bars doing craft spirits properly — if you want to try Japanese gin while you’re out, our Japanese craft gin guide covers labels like Ki No Bi and Roku that regularly show up on Roppongi bar menus. If you need a late-night supply run — chargers, souvenirs, snacks — the 24-hour Don Quijote near the crossing stays open through the night; for bigger purchases like a new suitcase to haul everything home, see our guide to buying a suitcase in Japan, which covers Don Quijote pricing alongside dedicated luggage shops.

    Common Mistake: Touts and Overcharging Bars

    This is the single most important practical warning for Roppongi nightlife. Street touts — often polite, English-speaking, sometimes claiming to represent a “great bar” with cheap all-you-can-drink deals — are a long-running problem in this specific district, less common in most other parts of Tokyo. Following one can lead to a bar that charges wildly inflated bills, sometimes tens of thousands of yen for a round of drinks, with pressure tactics used if you try to leave without paying. The safest approach is simple: don’t engage with touts at all, choose bars and clubs you found yourself (signage, a door with a visible menu, or a recommendation), and confirm prices before ordering anything in an unfamiliar place. Stick to that one rule and Roppongi’s nightlife is genuinely fun and safe — it’s the touted venues specifically that cause almost all the bad experiences visitors report.

  • Returning a Rental Pocket Wi-Fi or SIM at the Airport: Drop Boxes and Deadlines Explained

    Returning a Rental Pocket Wi-Fi or SIM at the Airport: Drop Boxes and Deadlines Explained

    Photo by D YQ on Unsplash

    You’ve had a great trip, you’re at the airport with two hours to spare, and suddenly you remember the little pocket Wi-Fi router zipped into your backpack pocket. Returning rental Wi-Fi devices and SIM cards is usually quick and free — but only if you know where the drop box is and what time it closes. Miss the deadline and most providers will charge you for a “lost” device, sometimes the full retail price. Here’s exactly how the return process works at Japan’s main international airports.

    How Pocket Wi-Fi Returns Actually Work

    Almost every Japanese pocket Wi-Fi company — Ninja Wi-Fi, Japan Wireless, Global WiFi, Sakura Mobile, and similar — offers two return methods:

    • Airport drop box: a dedicated postbox-style bin, usually near the arrivals counter where you picked up the device or at a departure-area counter. You just drop the whole set (router, cable, pouch) into the box. No staff interaction needed, and these boxes are typically accessible 24 hours a day, even outside counter staffing hours.
    • Postal return: you mail the device back using a prepaid return envelope that was included in your rental set. This is useful if you’re flying out of a smaller regional airport without a counter, or if you’re returning it after your trip from home (less relevant for most tourists, but some providers allow mailing from any Japan Post mailbox before you leave the country).

    A smaller number of providers also offer in-person counter return if you’d rather get a receipt confirming the return on the spot — handy if you’re nervous about proof, since drop boxes don’t give you a receipt.

    Where to Find the Drop Boxes at Major Airports

    Narita Airport: Drop boxes are located at the same counters you rented from, typically in the arrival lobbies of Terminal 1 (both North and South wings), Terminal 2, and Terminal 3. If you rented through a counter desk, look for a labeled return box right beside it, usually visible as soon as you clear customs on arrival — but that same box works for returns before departure too, since you pass through the same arrival lobby area to reach check-in.

    Haneda Airport: Return boxes are in the International Terminal (Terminal 3) arrival area, near the same counters used for pickup (Keikyu/Tokyo Monorail side arrival floor). Domestic terminal travelers connecting internationally should double-check with their provider, since not all boxes serve both terminals.

    Kansai Airport (Osaka): Boxes are in the Terminal 1 arrival lobby, again next to the rental counters. Peach and other LCCs departing from Terminal 2 should confirm in advance — some providers only have boxes in Terminal 1.

    Chubu Centrair (Nagoya) and New Chitose (Sapporo): Coverage is thinner. Confirm before your trip whether your provider has a counter there at all; if not, you’ll be mailing the device back using the prepaid envelope.

    Return Deadlines You Need to Know

    This is where people get caught out. Two deadlines matter:

    • Your rental period end date — most providers charge daily, so if your plane leaves the morning after your contracted end date, you may already owe an extra day.
    • The return cutoff time on your departure day. Counter returns obviously need to happen during staffed hours (commonly around 6:30am–9:00pm, varying by provider and terminal). Drop-box returns are more forgiving since the boxes are usually accessible around the clock, but the provider still logs the return based on when the box is physically emptied, not the moment you drop it in — so dropping it in at 11pm the night before your early flight is safer than cutting it close at 5am.

    If you’re departing very early (a 6am flight, for example), returning the night before via drop box — rather than racing to a counter that opens at 7am — is the safer play.

    SIM Cards Work Differently

    If you rented a physical SIM card rather than a pocket Wi-Fi router, most providers don’t actually need it back at all — many SIM rentals are “no return required,” and you just recycle or keep the card as a souvenir. A few higher-value SIM plans (and virtually all pocket Wi-Fi routers, since the hardware is expensive) do require physical return, so check your rental confirmation email for the phrase “return required” or “no return necessary” rather than assuming. eSIMs, increasingly common now, need no physical return at all since there’s nothing to hand back — just let the data plan expire.

    Common Mistakes That Cost Money

    • Forgetting the charging cable or pouch. Some providers charge a parts-replacement fee (often a few thousand yen) if the cable or carrying case is missing, even if the router itself comes back fine.
    • Leaving the SIM card inside your phone. If your rental included a physical SIM installed in a phone or separate device, remove it before dropping the unit in the box — an empty slot means you’ve effectively mailed the SIM back to the provider by accident, or worse, kept a router that reads as “incomplete.”
    • Missing the deadline entirely. Non-return is typically billed as a lost-device fee, which for a pocket Wi-Fi router commonly runs in the ¥15,000–¥25,000 range — far more than the rental itself cost. If you realize you’re going to miss your flight’s drop-box window, contact the provider’s support line immediately; most would rather extend your rental by a day for a small fee than bill you for the whole device.
    • Assuming every terminal has a box. Low-cost carrier terminals and regional airports are the most common gaps. Confirm your terminal has return service before you build your packing schedule around it.

    Timing It With Your Last Hour at the Airport

    Pocket Wi-Fi return is a good anchor point for your pre-flight routine: do it right after check-in and before security, since you won’t need the device again once you’re in the departure area. That leaves your remaining time free for last-minute souvenir shopping or a final meal — if you’re flying out of Fukuoka, for instance, Hakata Station’s basement food floor is a good model for how to structure that final hour efficiently. And if your rental gear situation extends beyond connectivity — say you also rented mobility equipment for the trip — the same “return before security” logic applies; see our guide to renting a wheelchair or mobility scooter in Japan for how those return windows compare. If you’re also doing any last-minute luggage shuffling to fit souvenirs, our piece on buying a suitcase in Japan covers where to grab a cheap bag on the way to the airport.

    Quick Pre-Airport Checklist

    • Confirm your provider’s return method (drop box, counter, or mail) before you even leave home — it’s usually in the rental confirmation email.
    • Check your terminal specifically has a drop box; LCC terminals and regional airports are the most likely to lack one.
    • Pack the router, cable, and pouch together from day one so nothing gets left in a hotel drawer.
    • Return the night before if you have an early departure, rather than trusting a counter’s opening hours.
    • If you’re going to miss the deadline, call the provider’s support line before your flight, not after.
  • Japanese Vending Machine Cigarettes and Taspo Cards: What Smokers Need to Know

    Japanese Vending Machine Cigarettes and Taspo Cards: What Smokers Need to Know

    Photo by catrina farrell on Unsplash

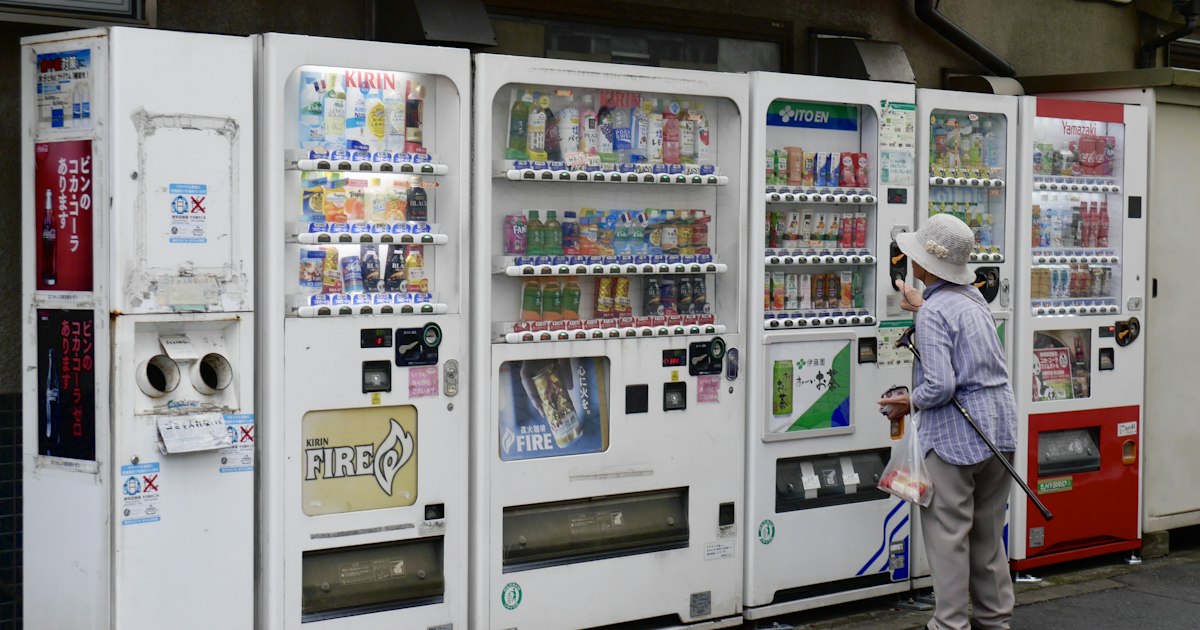
    Japan’s vending machines sell everything from hot coffee to fried food, but the one category tourists almost never get to use is cigarettes. If you’re a smoker planning a trip, it’s worth knowing upfront: the cigarette vending machine on the street corner outside your hotel is, for practical purposes, off-limits to you. Here’s why, and what to do instead.

    Why You Can’t Just Buy Cigarettes from a Machine

    Since 2008, Japan has required an age-verification IC card called Taspo to buy cigarettes from vending machines. The card was introduced to curb underage smoking after it became clear that honor-system age buttons on machines weren’t stopping minors. Every street-side cigarette vending machine now has a sensor that reads a Taspo card before it will dispense anything.

    Taspo cards are issued only to residents of Japan with a registered Japanese address, through an application process involving a mailed photo ID and a processing wait of several weeks. There is no tourist or short-term version. In short: as a visitor, you will not be able to get a Taspo card, and without one, the vending machine simply won’t work for you, no matter how much cash you feed it.

    Where Tourists Should Actually Buy Cigarettes

    The good news is that vending machines were never the main channel for buying tobacco in Japan anyway — convenience stores are. Any konbini (7-Eleven, Lawson, FamilyMart) sells cigarettes over the counter, no Taspo required, because the clerk handles age verification visually or by asking you to confirm you’re over 20 on a touchscreen prompt. This is the route every visitor uses.

    • Convenience stores: Open 24 hours in most urban areas. Tell the clerk the brand name (cigarettes are usually displayed on a board behind the counter, numbered or named) and they’ll pull it down for you.
    • Supermarkets and drugstores: Many larger supermarkets and drugstore chains (Don Quijote, Matsumoto Kiyoshi, some Aeon stores) also sell cigarettes at a dedicated counter or register.
    • Duty-free at airports: Narita, Haneda, Kansai, and Chubu airports sell cigarettes duty-free in departure areas, often cheaper than convenience store prices and with a wider range of international brands.

    Expect to pay roughly ¥500–¥650 for a pack of 20 at a convenience store, depending on the brand — Japanese brands like Mevius (formerly Mild Seven) and Seven Stars tend to sit at the lower end, while imported brands like Marlboro run slightly higher. Prices are fixed nationwide by law, so you won’t find better deals by shopping around domestically, though duty-free prices at the airport can undercut convenience stores by ¥100–¥150 per pack.

    What If You Still Encounter a Cigarette Vending Machine

    You’ll still spot the machines in older neighborhoods, outside small bars, and in some rural areas — they’re a fading but not extinct part of the streetscape. If you want to try your luck, look for the Taspo card reader, usually a small panel near the coin slot. Without a card to tap, the machine will reject your money or simply not activate the purchase buttons. Don’t waste time trying; walk to the nearest convenience store instead, which is almost always within a few minutes on foot in any city or town center.

    One workaround some long-term residents use is asking a Japanese friend or colleague to lend their Taspo card, but this isn’t something you can arrange as a short-term visitor, and it’s not worth the social awkwardness of asking a stranger.

    Smoking Rules You’ll Need to Navigate

    Buying cigarettes is only half the picture — where you can actually smoke them has gotten considerably more restrictive. Japan’s 2020 revision to the Health Promotion Act banned smoking inside restaurants, bars, and offices nationwide, with exceptions only for designated smoking rooms or venues that register as smoking-permitted (usually marked with signage at the entrance). Many cities, including Tokyo’s central wards, also ban smoking on ordinary streets and sidewalks — smoking is generally confined to designated outdoor smoking areas, which you’ll find near train stations, in parks, and outside office buildings, marked by ashtray stands and sometimes enclosed in glass booths.

    Practical tips:

    • Look for small glass-walled smoking booths near major stations like Shinjuku, Shibuya, and Ikebukuro — these are free to use and the most reliable legal option in central Tokyo.
    • Some cafes and bars still have smoking sections, often indicated by a cigarette icon near the entrance; ask “tabako, OK?” if you’re unsure.
    • Fines for smoking on banned streets are enforced in some wards (Chiyoda and Shibuya have issued on-the-spot fines of around ¥2,000), so don’t assume a quiet side street is fair game just because no one’s watching.
    • Hotel rooms are mixed — many hotels now offer only non-smoking rooms, so if you need a smoking room, specify it when booking rather than assuming one will be available.

    Bringing Your Own Cigarettes Into Japan

    If you’d rather not deal with brand-name hunting in a foreign language, Japan’s duty-free allowance lets visitors bring in up to 200 cigarettes (or equivalent in other tobacco products) without declaring them, which covers most people’s trip-length needs. Vapes and heated tobacco products like IQOS and Glo are a separate consideration — IQOS in particular is extremely popular in Japan and sold at convenience stores and dedicated IQOS stores, but devices and compatible heat-sticks purchased abroad aren’t always compatible with the Japanese market versions, so frequent IQOS users sometimes buy a Japan-market device on arrival rather than relying on one brought from home.

    A Quick Note on Cash and Payment

    Cigarette vending machines, where they do work for Taspo holders, are coin- and bill-only — no IC cards or QR payments. Convenience store cigarette purchases, on the other hand, can usually be paid for the same way as everything else in Japan these days: cash, IC transit cards like Suica, or QR code payment apps like PayPay. If you’re running low on yen, remember that Japan Post Bank ATMs reliably accept foreign cards for withdrawals, which is handy since not every corner ATM in Japan does.

    The Bottom Line

    Don’t plan around vending machines — as a tourist without a Taspo card, they’re essentially decorative. Buy your cigarettes at any convenience store or airport duty-free counter instead, keep an eye out for designated smoking areas since street smoking is increasingly restricted, and bring up to 200 cigarettes duty-free if you want to skip the shopping altogether. It’s a minor logistical quirk of Japan travel, but one worth knowing before you land rather than discovering at a machine that won’t take your coins.

  • Renting a Wheelchair or Mobility Scooter in Japan: Where to Book and What It Costs

    Renting a Wheelchair or Mobility Scooter in Japan: Where to Book and What It Costs

    Photo by BREAKIFY on Unsplash

    Japan’s reputation for step-free stations, tactile paving, and patient staff makes it one of the easier countries in Asia to navigate with limited mobility — but renting the right equipment still takes some planning. Free airport loans cover you for a few hours, theme parks rent by the day, and nationwide delivery services can have a scooter waiting in your hotel room for a two-week trip. Here’s how the options actually break down, with real prices and booking windows.

    Manual Wheelchair or Electric Scooter: Know the Difference First

    Most rental programs in Japan split into two categories: manual wheelchairs (which require a companion to push, or that you self-propel) and electric scooters, often called ECVs (electric convenience vehicles) or by the brand name WHILL, a Japanese company whose compact four-wheeled scooters have become the default at airports and attractions nationwide. Manual chairs are cheaper and fold small enough for shinkansen luggage racks; electric scooters are far less tiring for a full day of walking-heavy sightseeing but are heavier, need charging overnight, and don’t fold as compactly, which matters if you’re changing hotels every two or three nights.

    Free Wheelchair Loans at Airports and Train Stations

    Narita, Haneda, Kansai, and Chubu Centrair airports all lend manual wheelchairs free of charge from their special-assistance or information counters, and Haneda also has WHILL robotic scooters available for navigating the terminal — reservable through the airport’s accessibility desk or requested on arrival. There’s no charge, but during peak holiday periods (New Year, Golden Week in late April/early May, mid-August Obon) it’s worth contacting your airline’s special-assistance line 48 hours ahead so a chair is ready at the gate.

    JR and most private railway stations keep a small number of wheelchairs on hand for getting between the platform and the station exit, and staff will set up a boarding ramp for the train itself — but this requires advance notice, especially at smaller or rural stations that aren’t staffed around the clock. For shinkansen travel, request the multipurpose room or an accessible seat near a wheelchair space when you book your ticket, ideally a day or two ahead through a JR ticket office (midori-no-madoguchi) rather than an ordinary vending machine, which won’t have this option.

    Renting at Theme Parks and Major Attractions

    If your mobility needs are mostly for a single big day out, Tokyo Disney Resort and Universal Studios Japan both rent manual wheelchairs for roughly ¥500 per day and electric scooters for around ¥2,000 per day, available at guest services near the main entrance on a first-come, first-served basis (no advance reservation at most locations). Prices and exact rental points occasionally change, so it’s worth checking the park’s official accessibility page the week before your visit. Many museums, aquariums, and large shopping complexes — including big stations and department stores — also keep a few manual chairs at the information counter that you can borrow free for the day, no ID or deposit required in most cases.

    Nationwide Delivery Rental Services for Multi-Day Trips

    For a trip that spans several cities, the more useful option is a specialist rental company that ships an electric wheelchair or scooter directly to your first hotel and picks it up at your last. These services typically charge somewhere in the ¥3,000–¥6,000 range per day for an electric scooter, with discounted weekly rates often landing around ¥15,000–¥25,000, plus a separate delivery and collection fee of roughly ¥2,000–¥5,000 depending on distance. Manual wheelchairs through the same companies usually run cheaper. Book at least one to two weeks ahead of arrival — these are small operations without walk-in stock, and popular travel seasons fill their schedules fast. Most ask for a credit card on file for the deposit, though a few older operators still prefer a cash deposit paid on delivery, so having yen on hand matters; if you need to top up cash for that, Japan Post Bank ATMs are one of the most reliable options for foreign cards anywhere in the country.

    Costs at a Glance

    • Budget: Free airport and station wheelchair loans; free chairs at museums, department stores, and aquarium/zoo information counters.
    • Mid-range: Theme park day rentals, ¥500 (manual) to ¥2,000 (electric) per day, no reservation needed.
    • Splurge/long-trip: Hotel-delivery electric scooter rental for a multi-city itinerary, roughly ¥3,000–¥6,000/day or ¥15,000–¥25,000/week plus delivery fees, booked well in advance.

    Common Mistakes to Avoid

    The biggest one is assuming a scooter booked for Tokyo will also work in Kyoto or Osaka — most delivery rental companies serve specific regions or require you to arrange separate pickup/drop-off in each city, so confirm coverage before you build a multi-city itinerary around one rental. Second, don’t assume every attraction is step-free just because the station is: older temples, traditional ryokan, and narrow shopping streets (especially covered shotengai arcades and areas with original Edo- or Meiji-era layouts) can still have stairs, gravel, or raised thresholds, so check accessibility specifics for must-see sites rather than the city in general. Third, travelers often underestimate how much advance notice station staff need for ramp assistance on local and regional lines — walking up to the gate and expecting immediate help works at major Tokyo stations but is unreliable in smaller towns. Finally, if you’re renting a scooter rather than a manual chair, ask about charging cables and battery range up front; a scooter with a 20km range sounds generous until you’re covering a full day of museum-hopping and backtracking for a souvenir shop you missed.

    Timing Your Rental Around the Weather

    Outdoor mobility is noticeably easier in Japan’s spring (late March–April) and autumn (October–November) shoulder seasons, when temperatures are mild and rain is less frequent. Summer brings both heat and the rainy season, and travelers with mobility aids should pay particular attention to typhoon season, roughly August through October, since typhoons can suspend train services and close outdoor attractions with only a day or two of warning — not ideal when a rental scooter is scheduled for pickup on a fixed date. Building a one-day buffer into your itinerary around any scooter delivery or collection appointment during that window is cheap insurance against a schedule that otherwise can’t flex.

    One last practical note: plenty of rental counters, theme parks, and smaller attraction gift shops now accept PayPay or Rakuten Pay for incidental charges like extra-day fees, which is handy if you’d rather not carry a large cash deposit around all day. With the booking done and a rough weather buffer in place, the equipment itself is the easy part — Japan’s elevators, ramps, and station staff tend to do the rest.

  • Shimokita’s Rival: Sangubashi and Yoyogi-Uehara’s Quiet Cafe Backstreets

    Shimokita’s Rival: Sangubashi and Yoyogi-Uehara’s Quiet Cafe Backstreets

    Photo by ayumi kubo on Unsplash

    Shimokitazawa gets all the ink in guidebooks, but one Odakyu stop closer to Shinjuku sits a pair of neighborhoods that locals have been quietly colonizing with third-wave coffee and sandwich counters for over a decade. Sangubashi and Yoyogi-Uehara don’t have Shimokita’s thrift-shop density or live-music basements, but they have something arguably better for a slow morning: tree-lined backstreets along the western edge of Yoyogi Park, almost no tourist foot traffic, and a cafe scene that was built for residents rather than Instagram. If you’ve already done Shimokitazawa and want the quieter, more residential version of the same vibe, this is it.

    Where Are Sangubashi and Yoyogi-Uehara, Exactly?

    Both are stops on the Odakyu Odawara Line, directly between Shinjuku and Shimokitazawa — Sangubashi first, then Yoyogi-Uehara one stop later, then Shimokitazawa after that. The whole stretch runs along the western side of Yoyogi Park, which means the backstreets here are shaded by the park’s tree line rather than packed with shops shoulder to shoulder. Yoyogi-Uehara is also the southern terminus of the Tokyo Metro Chiyoda Line, so you can reach it directly from Otemachi, Omotesando, or Nijubashimae without changing at Shinjuku at all. The neighborhood immediately around Yoyogi-Uehara station blends into Tomigaya, the residential pocket that’s technically where most of the well-known cafes sit, but almost everyone just refers to the whole area as “Yoyogi-Uehara” or, more broadly, “Oku-Shibuya” (inner Shibuya).

    Getting There

    From Shinjuku Station, take the Odakyu Line (not the JR lines) to Sangubashi (about 5 minutes) or Yoyogi-Uehara (about 7 minutes); the fare is under ¥200 either way with an IC card. From central Tokyo via the Chiyoda Line, ride to the Yoyogi-Uehara terminus. Both stations are small and have only one or two exits, so orientation is easy — at Yoyogi-Uehara, take the exit toward Tomigaya and you’re within a 5-minute walk of most of the cafes mentioned below. Unlike Shimokitazawa, there’s no sprawling station-front shopping maze to navigate; you’re on a quiet street almost immediately.

    What Makes These Backstreets Different From Shimokitazawa

    Shimokitazawa built its identity on secondhand clothing, theater, and bar-hopping into the early hours. Sangubashi and Yoyogi-Uehara never had that density of nightlife — this is a residential district of low-rise apartments and old wooden houses, and the cafes that have moved in over the past 10–15 years fit that scale: small counters, five to twelve seats, specialty coffee roasted in-house or by well-known Tokyo roasters, and an emphasis on quality over volume. You won’t find racks of vintage jackets here, but you will find the kind of place where a barista actually has time to talk you through the beans on offer. It’s the neighborhood Tokyoites point to when they say Shimokita has gotten “too busy.”

    The Cafe Crawl: What to Expect and Where to Start

    A few names worth knowing if you want anchor points rather than wandering blind:

    • Fuglen Tokyo (Tomigaya, near Yoyogi-Uehara) — the Tokyo outpost of the Oslo coffee bar, known for pour-over coffee by day (around ¥600–700) and a cocktail bar atmosphere after dark with vintage Scandinavian furniture. It’s one of the few spots in the area open into the evening, typically until around midnight on weekends.
    • Camelback Sandwich & Espresso (Tomigaya) — a tiny standing-room sandwich counter famous for its tamagoyaki (Japanese omelet) sandwich, usually around ¥600–800. Lines form at lunchtime, so come at 11am or after 2pm.
    • Little Nap COFFEE STAND (west side of Yoyogi Park) — a stripped-down coffee stand with a handful of outdoor seats, popular with joggers finishing a loop of the park. Coffee runs roughly ¥450–600.

    Beyond these, the real pleasure is just walking the grid of streets between the park and Yamate-dori — you’ll pass bakeries, a few bookshop-cafes, and galleries with no signage in English, which is exactly the point. Budget-wise, a coffee-and-pastry stop here runs ¥800–1,200 per person; a full sandwich lunch is closer to ¥1,500. If you want to splurge, Fuglen’s evening cocktail menu (¥1,500–1,800 per drink) is the closest thing to a “night out” the area offers.

    Best Time to Visit

    Weekday mornings (9am–11am) are the quietest and most pleasant — you’ll often have a cafe nearly to yourself. Weekends, especially Saturday brunch hours, draw a steady stream of locals and a handful of cafe-hopping tourists, but nothing like Shimokitazawa’s weekend crowds. Spring (late March to early April) is particularly good timing because Yoyogi Park’s cherry blossoms are a 5–10 minute walk from either station, letting you combine a cafe crawl with hanami without the Ueno- or Shinjuku Gyoen-level crowds. Autumn foliage in November is the other sweet spot. Avoid high summer afternoons if you can — the backstreets have little shade once you’re off the park-side paths, and most of these cafes are small enough that air conditioning struggles on 35°C days.

    Paying and Budgeting

    Many of the smallest counters here still lean cash-first, though QR code payment acceptance has grown steadily; if you’re relying on PayPay or a similar app, it’s worth reading up on how QR code payments work for tourists in Japan before you go, since not every stand accepts foreign-issued cards through these apps. If you do need cash, there’s no convenient ATM cluster right at either station — your best bet is ducking into a convenience store on Yamate-dori, or if you want a bank-backed option, Japan Post Bank ATMs are reliable for foreign cards; see this guide to how foreign cards work at Japan Post Bank ATMs for the details on fees and limits.

    Common Mistakes to Avoid

    The biggest mix-up is confusing Yoyogi-Uehara with the JR Yoyogi station (one stop from Shinjuku on the Yamanote-adjacent lines) or with Yoyogi-Hachiman — all three are distinct stations in the same general area, and Google Maps will sometimes route you to the wrong one if you just type “Yoyogi.” Double-check you’re boarding the Odakyu Line specifically. Second mistake: treating this as a half-day destination the way you might Shimokitazawa — there isn’t enough density of shops to fill an afternoon, so it works best as a 2–3 hour cafe stop combined with a Yoyogi Park walk, or as a quieter final stop after Shimokitazawa itself (it’s one Odakyu stop away). Third: assuming every cafe is open all day. Several of the smaller spots close by 18:00 or take an irregular weekday off, so if you have a specific place in mind, check current hours before making the trip out. If you like this kind of low-key, resident-oriented neighborhood pairing of cafes and small shops, it’s worth comparing notes with Jiyugaoka’s sweets-and-boutique streets on the other side of the city — a similar philosophy, different train line.

  • Japan Post Bank ATMs: How Foreign Cards Actually Work for Cash Withdrawals

    Japan Post Bank ATMs: How Foreign Cards Actually Work for Cash Withdrawals

    Photo by Magic Mary on Unsplash

    If you’ve only researched 7-Eleven’s Seven Bank ATMs for cash in Japan, you’re missing one of the most reliable backup options in the country: Japan Post Bank, known locally as Yucho Ginko (ゆうちょ銀行). With a machine in nearly every post office — including small branches in towns where you won’t find a single convenience store — Japan Post Bank ATMs are often the only international-card-friendly cash point for miles. Here’s exactly how they work, what they cost, and where the common mistakes happen.

    Which Cards Actually Work

    Japan Post Bank ATMs accept foreign-issued cards carrying the Visa, Plus, Mastercard, Cirrus, JCB, American Express, Discover, or UnionPay logos. Debit and credit cards both work, as long as the card has a PIN set up for cash withdrawals — if your card only has a signature-based PIN for purchases, call your bank before you leave to confirm a withdrawal PIN is active. Chip cards are standard; if your card is stripe-only (rare these days), most machines still have a swipe slot as a fallback.

    One thing to double-check with your own bank: some smaller credit unions and prepaid travel cards aren’t linked to an international network at all, even if they show a Visa or Mastercard logo for purchases. Test the card at an airport ATM on arrival rather than finding out it fails in a rural town with no backup option.

    Step-by-Step: Making a Withdrawal

    • Insert your card and, when prompted, select the “English” button (usually top-right of the screen or a flag icon).
    • Choose “Withdrawal” from the English menu — it’s often listed before the Japanese-only banking menus for domestic customers.
    • Enter your PIN using the physical keypad, not the touchscreen.
    • Select or type the amount in yen. Many screens offer preset buttons (¥10,000 / ¥30,000 / ¥50,000) plus a custom amount option.
    • Take your cash, then your card, then the receipt — the machine dispenses them in that order and some travelers walk off after the cash and forget the card.

    Fees, Limits, and Exchange Rates

    Japan Post Bank charges its own flat fee for international card withdrawals — currently around ¥220 per transaction, posted on a sticker near the screen. On top of that, your home bank or card issuer will likely add its own foreign transaction fee and/or ATM fee, so check your card’s terms before you go. A few travel-focused debit cards (Wise, Charles Schwab, Revolut’s linked cards, etc.) reimburse or waive these foreign fees, which makes a real difference if you’re withdrawing cash multiple times during a two-week trip.

    Many machines cap a single withdrawal around ¥100,000, and your home bank may impose a lower daily limit of its own. If you need more than the per-transaction cap, you can usually repeat the withdrawal immediately — just know each repeat triggers another flat fee. The exchange rate applied is your card network’s rate at the time of the transaction, not a rate set by the ATM; always decline if the screen asks “Would you like to convert to your home currency?” (dynamic currency conversion) since the ATM’s own conversion rate is reliably worse than your card network’s.

    Where to Find Them and Opening Hours

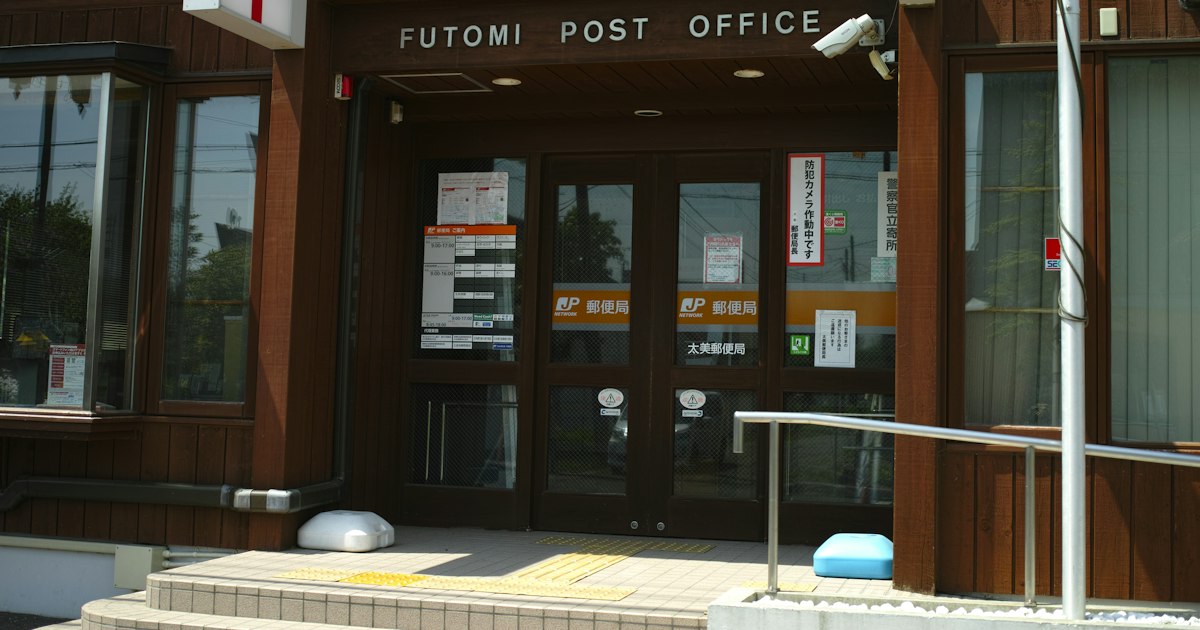
    Every post office in Japan has at least one ATM, and post offices exist in places convenience stores don’t bother opening — small fishing towns, mountain villages, and rural train junctions. If you’re exploring somewhere like the Noto Peninsula or the countryside around Mount Aso, the local post office ATM may be your only reliable cash option once you’re outside the main town center.

    Hours vary significantly by branch. Smaller post offices typically run their ATM on business hours only — roughly 9:00 to 17:00 or 18:00 on weekdays, often closed or very limited on weekends. Larger urban branches and main post offices in big cities extend this considerably, sometimes from around 7:00 to 23:00 or close to 24 hours on weekdays, with shorter weekend windows. There’s no universal rule, so glance at the hours sticker on the machine itself before relying on it late at night or on a Sunday — it’s the single most common letdown with these ATMs.

    Common Mistakes to Avoid

    • Assuming all post office ATMs are 24/7. Unlike Seven Bank machines, many close with the branch or shortly after.
    • Forgetting the card after the cash dispenses. The machine returns items in a specific order — cash first.
    • Accepting the ATM’s currency conversion offer. Always choose to be charged in Japanese yen (JPY), not your home currency.
    • Relying on a single card. Carry a backup card from a different network in case one is flagged for suspected fraud — common with foreign card use abroad.
    • Withdrawing too little, too often. With a flat per-transaction fee, pulling ¥10,000 five times costs five times the fee compared to one ¥50,000 withdrawal.

    Japan Post Bank vs. 7-Eleven: Which to Use When

    Seven Bank ATMs inside 7-Eleven stores are genuinely 24/7 and concentrated in cities, making them the better default for late-night withdrawals in Tokyo, Osaka, or any major station area. Japan Post Bank earns its place as the backup plan: it’s the one you’ll be grateful for in smaller towns, near traditional craft workshops, or on day trips to places like Lake Biwa where convenience store density drops off. A sensible strategy is to withdraw a slightly larger sum each time — enough for a few days of meals, transport, and souvenir shopping — rather than treating either network as guaranteed to be open when you need it.

    It’s also worth having cash on hand before big-ticket purchases where card payment or QR codes aren’t always accepted, such as at some local repair shops or when negotiating at a Don Quijote suitcase sale. For everyday purchases, though, digital payment has largely caught up — see our guide to using PayPay and Rakuten Pay as a tourist for when you can skip the ATM line entirely and pay by phone instead.

  • Golfing in Japan: Driving Ranges, Courses & Rental Clubs for Visitors

    Golfing in Japan: Driving Ranges, Courses & Rental Clubs for Visitors

    Photo by Eva Balogh on Unsplash

    Japan has more golf courses per capita than almost any country in the world, and it’s far more accessible to visitors than most people assume — you don’t need a membership, a set of clubs in your suitcase, or fluent Japanese to tee off. Between multi-story driving ranges tucked into city blocks and resort courses with onsen baths attached to the clubhouse, golf in Japan can be a one-hour practice session or a full-day outing. Here’s what it actually costs, how to book it, and what trips people up.

    Driving Ranges: Where to Hit Balls Without a Tee Time

    If you just want to hit balls for an hour, skip the course entirely and head to a driving range (gorufu renshūjō). Most Japanese cities have multi-level netted ranges near train stations — three or four tiers of bays stacked on top of each other, since land is expensive. You pay by the ball basket (often called a “dama”), typically ¥500–¥1,000 for about 50–100 balls, plus a small bay/mat fee (¥300–¥600) at some facilities. Clubs are almost always available to rent on-site for ¥200–¥500 per club or a flat set fee, so you can walk in empty-handed.

    Most ranges open early (6:00–7:00am) and run until 11pm or later, and many operate every day of the year. Payment is usually cash or IC card at a vending machine, though more ranges now accept QR code apps — if you’ve already set up PayPay or Rakuten Pay as a tourist, it’s worth checking whether the range takes it before you queue for change. No reservation is needed; just take a numbered ticket and wait for a bay, which rarely takes more than 10–15 minutes even on weekends.

    Golf Courses for Visitors: Booking, Fees & Dress Code

    Actually playing a round is more involved than Western golfers expect. Japanese courses are almost all 18-hole, par-72 layouts, and the vast majority require advance booking — same-day walk-ons are rare outside of resort areas. Book through the course’s website or a portal like GDO (Golf Digest Online) or Rakuten GORA, both of which have English-friendly search filters for “foreigner-friendly” or “no membership required” courses.

    Green fees vary enormously by region and day: expect roughly ¥8,000–¥15,000 on a weekday at a standard suburban course, climbing to ¥15,000–¥30,000+ on weekends near Tokyo or Osaka. Fees usually bundle a cart, but many traditional clubs still require a caddie (around ¥5,000 per group, split among players) rather than offering caddie-free “seruhu” (self) play — check which model the course uses when booking, since it changes your total cost and pace of play.

    Dress codes are stricter than in most countries: collared shirts, no jeans or shorts without proper golf attire, and soft-spike shoes only. Many clubs will turn you away at the pro shop if you show up in sneakers and a T-shirt, so confirm the dress policy when you book. Most clubs also close one weekday (commonly Monday) for course maintenance, so don’t assume every day is bookable.

    Renting Clubs, Shoes & Gear

    You don’t need to fly with clubs. Nearly every course rents full sets (driver through putter) for ¥3,000–¥5,000, plus shoe rental for ¥1,000–¥1,500 and glove purchase if needed. Rental sets skew toward men’s right-handed, mid-flex shafts, so left-handed or very tall/short players should call ahead to confirm availability.

    In cities, large sporting goods chains like GOLF5 and Victoria Golf also rent and sell equipment, and some will ship rental sets directly to your hotel or the course via Japan’s reliable takkyubin courier service for roughly ¥2,000–¥3,000 — handy if you’re staying in Tokyo but playing a course an hour outside the city and don’t want to haul a bag on the train. This is the same courier logistics that make Japan easy for shipping other bulky souvenirs home, similar to how rental fishing gear gets forwarded between regions for tourists who don’t want to carry equipment the whole trip.

    Best Season and Time of Day to Play

    Spring (April–May) and autumn (October–November) are the sweet spot nationwide — mild temperatures, good visibility, and courses at their greenest or most colorful. Summer brings heat and humidity that make an 18-hole round genuinely exhausting by the back nine, especially in Honshu’s inland valleys; book an early tee time (6:30–8:00am) if you’re playing June through August. Winter closes most courses in Hokkaido and the Tohoku snow belt entirely — some resort towns, including Niseko, run golf courses only from around May to October and switch to skiing for the rest of the year. Okinawa, by contrast, is playable year-round and is a popular winter golf escape for mainland Japanese golfers.

    Rainy season (tsuyu, mid-June to mid-July) and typhoon season can both disrupt outdoor plans — check how typhoon season affects travel timing if you’re booking a course for August or September, since courses will cancel and refund for severe weather but won’t for ordinary rain.

    Budget, Mid-Range & Splurge Options

    • Budget: A driving range session (¥1,000–¥1,500 total with rental clubs) or a weekday round at a no-frills public course (¥6,000–¥9,000, caddie-free, self-cart).
    • Mid-range: A weekend round at a well-maintained suburban club with caddie service, roughly ¥12,000–¥20,000 including rental clubs, shoes, and a post-round meal at the clubhouse restaurant (clubhouse dining is a real highlight — many serve excellent curry rice or soba for ¥800–¥1,500).
    • Splurge: Resort courses in Okinawa, Hokkaido, or Karuizawa designed by name-brand architects, often ¥20,000–¥40,000+ with onsen bathhouses on-site, full caddie service, and premium rental equipment (TaylorMade or Honma demo sets). Some of these pair naturally with a broader resort stay rather than a standalone golf day.

    Common Mistakes First-Time Golfers in Japan Make

    • Not booking far enough ahead. Popular weekend slots near major cities fill up 2–4 weeks out; weekdays are far more forgiving.
    • Underestimating the dress code. Clubs can and do refuse entry for jeans, cargo shorts, or non-golf sneakers.
    • Assuming solo play is allowed. Many traditional clubs require a minimum of two or three players, or will pair you with a stranger’s group rather than let you play alone.
    • Forgetting cash. While cities are increasingly cashless, rural clubhouses and caddie tips (not mandatory, but appreciated in some regions) may still expect cash.
    • Not checking left-handed club availability. Rental inventories lean heavily right-handed; call ahead if you need lefty clubs.

    Golf in Japan rewards a little upfront planning — book the tee time, confirm the dress code, and decide whether you want a caddie or a quiet self-paced round. Do that, and you’ll find it’s one of the most pleasant and well-organized ways to spend a day outside the usual temple-and-ramen circuit.