Japan Trove

Category: Travel

Practical, up-to-date guides for traveling in Japan — itineraries, rail passes, eSIMs, where to stay, seasonal timing, etiquette, and the local know-how that makes a trip smoother. Written with real Japanese sources so you get the answer that actually works on the ground, not the recycled tourist one.

  • Typhoon Season in Japan: When It Hits and How to Plan Your Trip Around It

    Typhoon Season in Japan: When It Hits and How to Plan Your Trip Around It

    Photo by T K on Unsplash

    If you’re booking a Japan trip anywhere between June and October, typhoon season deserves a line in your planning notes — not as a reason to cancel, but as a reason to build in flexibility. Most visitors who travel during this window never see more than a few rainy, windy days. But a direct hit can cancel flights, halt the Shinkansen for a day, and close ferry routes to islands you’d planned to visit. Here’s what actually happens, when the risk is highest, and how to plan around it without wrecking your itinerary.

    When Typhoon Season Actually Runs

    Japan’s typhoon season officially spans June through October, with the Japan Meteorological Agency (JMA) tracking tropical storms that form in the Pacific and move north or northwest toward the archipelago. The real peak is narrower: late July through September, with August and September seeing the most frequent and intense storms. September is historically the month most associated with major, infrastructure-disrupting typhoons hitting the main islands, including Tokyo and Osaka.

    Okinawa and the southern islands are exposed earlier and longer — typhoons can affect the Okinawa region from as early as May through November, since storms often track through the East China Sea before curving toward mainland Japan or dissipating. If your trip includes the Kerama Islands or other Okinawa day trips, check the forecast a few days out — ferry operators cancel sailings well before a storm actually arrives, as a precaution, which can strand a day trip even under blue skies.

    Which Regions Carry the Most Risk

    Typhoons don’t hit Japan evenly. Okinawa and the Kyushu coast see the most direct landfalls and the longest exposure window. Shikoku, Kii Peninsula (Wakayama), and the Tokai coast around Nagoya are also frequently in the path. Tokyo and the Kanto region get hit less often but not rarely — a storm tracking up the Pacific side can still bring a full day of train suspensions in the capital, usually once or twice per season.

    Remote coastal and island destinations are worth flagging specifically because ferry cancellations there aren’t just inconvenient, they can trap you. The Goto Islands off Nagasaki, for example, rely on a limited ferry and jetfoil schedule to the mainland — if a typhoon is approaching, operators often suspend service a day in advance and may not resume for another day or two after it passes. Build a buffer day into any itinerary that depends on a single boat departure.

    Hokkaido, by contrast, is rarely hit directly — most typhoons weaken or curve away before reaching that far north, so it’s a reasonable fallback region if you want outdoor-heavy travel in late summer with lower disruption risk.

    How to Track a Storm Before and During Your Trip

    The JMA website (jma.go.jp) publishes English-language typhoon tracking maps with projected paths and intensity, updated every few hours once a storm is active. For a simpler read, apps like Windy or the Japan-specific Yahoo! Weather app (ウェザー) show rain radar and wind forecasts that are more useful day-to-day than the official typhoon bulletins. If you don’t already have a reliable data connection for checking these on the move, sort that out before you land — see our guide to wifi and connectivity in Japan for pocket wifi and SIM options.

    A practical habit: once you’re within about five days of a suspected storm, check the forecast once a day rather than once at booking. JMA’s track predictions become meaningfully more accurate inside that window, and airlines/rail operators typically don’t announce cancellations until 24–48 hours out.

    What Actually Gets Disrupted

    Shinkansen lines run a planned, gradual slowdown rather than an abrupt stop — operators often announce reduced service or full suspension on affected sections 12–24 hours ahead, which is actually helpful because it gives you time to rebook. If your bullet train is cancelled, JR will fully refund the unused ticket or let you rebook for a later date at no extra charge, including Japan Rail Pass–covered trips (you simply don’t use that day’s allotment).

    Flights are less forgiving timing-wise: domestic and international carriers at Narita, Haneda, Kansai, and Naha tend to cancel flights the same day or the evening before, and budget carriers are quicker to cancel than JAL or ANA. If your flight is cancelled, airlines generally rebook you for free on the next available flight or issue a refund — but during a major storm, “next available” might be two days out. If you’re flying into or out of Tokyo and a typhoon is forecast near your arrival, the airport limousine bus is worth knowing about as a backup if trains are suspended but roads remain open — buses are sometimes still running when rail service has stopped.

    On the ground, convenience stores (Lawson, 7-Eleven, FamilyMart) sell out of bottled water, bread, and batteries fast in the 24 hours before a storm — a battery pack and a couple of bottles of water (roughly ¥150–250 each) bought a day early will save you a frustrating search. Most shops and restaurants simply close early or stay shut for the day; department stores and museums post closures on their own sites, not through a central system, so check individual venues if a storm is approaching on a day you have plans.

    Should You Avoid Booking in Typhoon Season?

    Not necessarily. The actual number of travel-disrupting days in any given summer is usually small — often just one or two days nationwide, concentrated in whichever region the storm hits. The bigger risk is booking an itinerary with zero slack: a single must-see day trip, a non-refundable show, or back-to-back island hops with no spare day. Build one buffer day into any multi-leg itinerary between June and October, and avoid scheduling island or ferry-dependent trips for your last full day before flying home.

    Travel insurance that explicitly covers “weather-related trip interruption” is worth the roughly ¥1,500–¥4,000 it typically costs for a one- to two-week policy — check that it covers rebooking costs, not just medical emergencies, since that’s what a typhoon actually costs you. If your dates are flexible, late April–May (before the rains) or November (after typhoon season, before winter) give you similar weather without the disruption risk — also worth checking against the 2026 public holiday calendar, since shoulder-season weeks can overlap with domestic holiday crowds.

    Common Mistakes to Avoid

    • Ignoring a storm because your city “looks fine” — rail operators suspend entire lines as a precaution even in areas with only moderate wind, to reposition trains safely before conditions worsen.
    • Not checking ferry schedules a day ahead — on routes to islands like Kerama or Goto, cancellations are announced the evening before, not the morning of.
    • Assuming all storms are equally disruptive — many “typhoons” that make headlines weaken to tropical storms before landfall and cause little more than a rainy afternoon. Check JMA’s category, not just the news alert.
    • Skipping travel insurance to save money — a cancelled connecting flight during peak season can cost far more to rebook last-minute than a policy would have cost upfront.
    • Planning island hopping for your final 48 hours — leave slack before any international flight home if your route includes a ferry-dependent leg.

    Typhoon season isn’t a reason to skip summer in Japan — festivals, fireworks, and (outside Okinawa) generally warm, sunny stretches still dominate the calendar. Just treat the forecast as part of your itinerary the same way you’d check opening hours, and keep one flexible day in your back pocket.
  • Jiyugaoka: Tokyo’s Sweets-and-Boutique Neighborhood

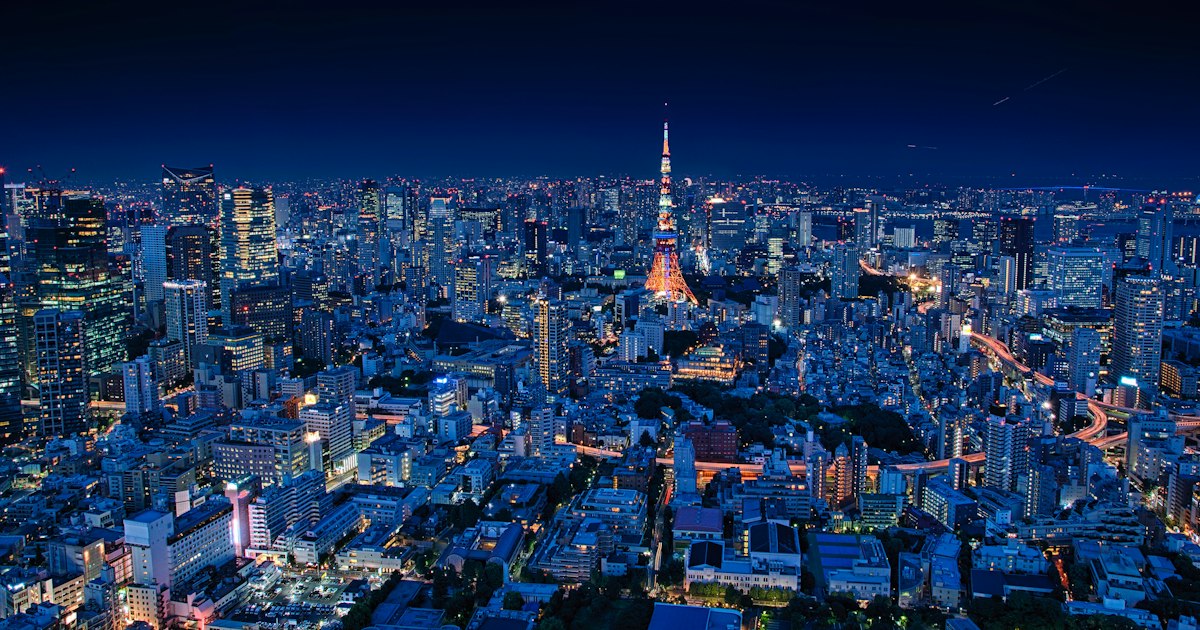
    Jiyugaoka: Tokyo’s Sweets-and-Boutique Neighborhood

    Photo by Takashi Miyazaki on Unsplash

    Jiyugaoka doesn’t show up on most first-time Tokyo itineraries, and that’s exactly its appeal. Tucked along the Tokyu Toyoko and Oimachi lines in southwest Tokyo, this neighborhood has spent decades cultivating a reputation as the city’s unofficial patisserie district — a place where French-trained pastry chefs, independent boutique owners, and a loyal local clientele have built something closer to a European village square than a Tokyo shopping strip. If you want a half-day escape from Shibuya’s crowds that still delivers serious shopping and genuinely excellent sweets, this is it.

    Getting There

    Jiyugaoka Station sits on the Tokyu Toyoko Line (direct from Shibuya, about 18 minutes, ¥280) and the Tokyu Oimachi Line (from Oimachi, near JR lines, about 15 minutes). Both lines converge at a single station, so orientation is simple: exit toward the “Marie Claire” or “Peacock” exits and you’re immediately in the shopping district. There’s no need for an airport-direct route here — most visitors fold Jiyugaoka into a day that starts elsewhere in central Tokyo. If you’re coming straight from the airport, see the Airport Limousine Bus guide for getting into the city center first, then transfer to the Tokyu network.

    The Sweets: What to Actually Buy

    Jiyugaoka’s nickname among Tokyoites is “sweets town,” earned honestly. A few standouts worth planning around:

    • Mont St. Clair — pastry chef Hironobu Tsujiguchi’s flagship shop, famous for layered mousse cakes (around ¥700–900 per slice) and seasonal fruit tarts. Arrive before 11am on weekends or expect a line.
    • Jiyugaoka Roll-ya — specializes in Japanese-style roll cakes (roll cake, ¥1,200–1,800 whole), lighter and less sweet than Western sponge cakes.
    • Sweets Forest — a small indoor complex gathering several patisserie brands under one roof, useful if you want to sample multiple shops without crossing streets.

    Budget ¥500–1,000 per person for a sit-down slice with coffee at a café counter, or ¥300–600 for a takeaway individual pastry. If you’d rather sample something distinctly Japanese and non-Western before or after the patisseries, the neighborhood’s cafés increasingly serve amazake, the sweet fermented rice drink — a good contrast to all the butter and cream.

    Boutique Shopping

    Beyond sweets, Jiyugaoka is a magnet for small, independent shops selling homeware, stationery, and imported goods — the kind of browsing-friendly retail that’s increasingly rare in central Tokyo’s chain-dominated shopping streets. La Vita, a Venice-themed outdoor shopping arcade near the station, houses interior design shops and a small canal with gondola photo ops (free to walk through, shops individually priced). Streets branching south of the station are lined with shops selling imported European tableware, candles, and leather goods, with prices generally running mid-range — expect ¥2,000–8,000 for smaller home goods and accessories.

    Stationery lovers should budget extra time here: several shops stock planners, washi tape, and notebooks from Japanese brands, including displays that occasionally carry Hobonichi Techo planners and accessories, a good stop if you’re building a stationery haul rather than fighting flagship-store crowds elsewhere in the city.

    Best Time to Visit

    Weekday mornings (10am–noon) are the calmest window — shops open around 10 or 11am, and the lines at famous patisseries haven’t formed yet. Weekends, especially Saturday afternoons, bring noticeably heavier foot traffic, both from Tokyo residents making a special trip and from tour groups. Spring (cherry blossom season along the nearby Kuhonbutsugawa Green Street canal walk) and autumn (foliage along the same path) are the most visually rewarding seasons, since Jiyugaoka’s charm leans heavily on its tree-lined streets and outdoor café seating. Before locking in dates, check the Japanese public holidays guide — long weekends and Golden Week push both the trains and the patisserie lines to their limits.

    Common Mistakes to Avoid

    • Treating it as an all-day destination. Jiyugaoka rewards a focused 2–4 hour visit, not a full day. Pair it with a nearby stop — Shimokitazawa for vintage shopping or central Shibuya for the afternoon — rather than over-scheduling the neighborhood itself.
    • Showing up on a Monday expecting everything open. A meaningful number of boutiques and smaller cafés close on Mondays or Tuesdays for a weekly rest day; this is more common here than in Shibuya or Shinjuku’s always-open retail. Check individual shop hours before making a special trip for one specific store.
    • Assuming cash isn’t needed. Larger patisseries and chain cafés take cards, but many of the smaller independent boutiques and bakery counters remain cash-preferred or cash-only. Carry ¥5,000–10,000 in small bills for a shopping afternoon.
    • Buying cakes to carry around all day. Fresh cream cakes don’t survive hours in a bag, especially in summer. If you’re buying a whole cake rather than eating a slice on the spot, make it your last stop before heading back to a hotel with a fridge, or ask the shop for an ice pack (保冷剤, horeizai) — most will include one on request at no charge.

    Budget, Mid-Range, and Splurge Options

    For a budget visit, stick to takeaway pastries (¥300–600 each) and the free La Vita arcade and canal walk — you can have a satisfying afternoon for under ¥2,000. Mid-range visitors should plan for a café sit-down (¥1,000–1,500 per person) plus one or two boutique purchases (¥3,000–8,000). For a splurge, Mont St. Clair’s seasonal tasting sets or a full decorated cake to-go (¥4,000–8,000, best ordered a day ahead for pickup) make for a memorable souvenir if you’re staying somewhere with refrigeration that evening.

    Jiyugaoka won’t anchor a Tokyo itinerary the way Shibuya or Asakusa will, but as a half-day detour for food-focused and boutique-minded travelers — the kind of visitor who’d also appreciate a neighborhood like Kuramae’s craft workshops — it delivers a side of Tokyo that’s unhurried, walkable, and genuinely distinct from the city’s bigger shopping districts.

  • Lost Something in Japan? How Koban Police Boxes and Lost-and-Found Offices Work

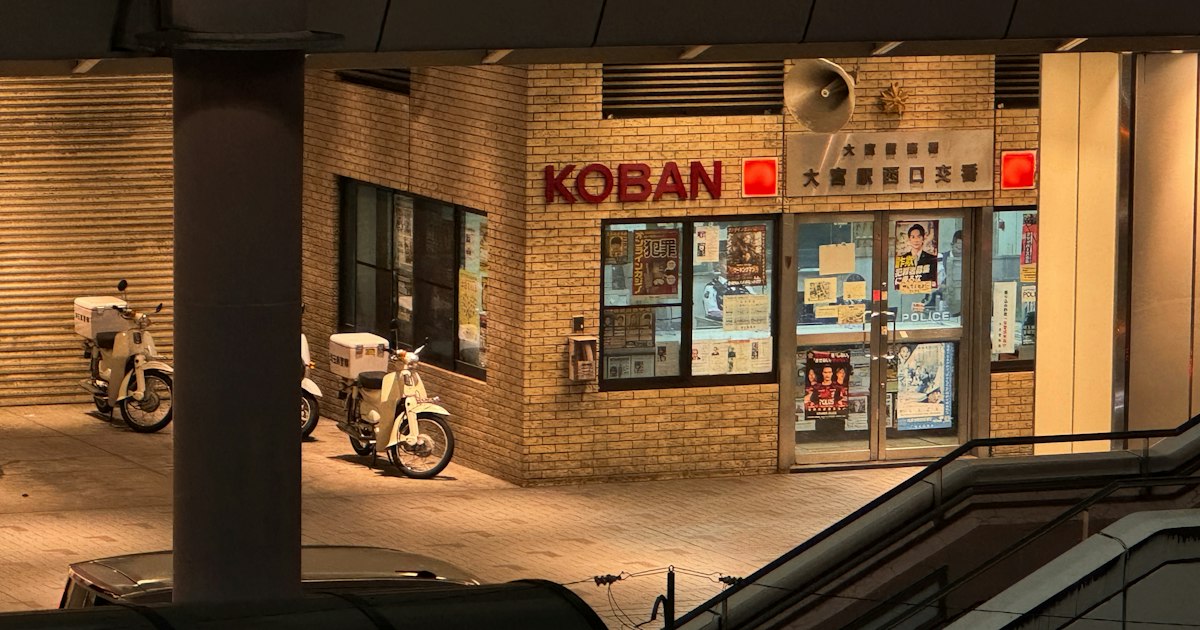
    Lost Something in Japan? How Koban Police Boxes and Lost-and-Found Offices Work

    Photo by Suzi Kim on Unsplash

    Japan has one of the highest rates of lost-item recovery in the world, and it isn’t luck — it’s a system. Wallets reappear with the cash still inside, phones turn up at train station counters, and umbrellas left on a bus seat get logged, tagged, and shelved for months. If you’ve lost something during your trip, don’t panic and don’t assume it’s gone. Here’s exactly how the koban (police box) and lost-and-found network works, and how to use it effectively as a visitor.

    What a koban actually is

    A koban (交番) is a small neighborhood police post, distinct from a full police station (keisatsusho). You’ll see them near train stations, shopping streets, and major intersections — recognizable by a red light out front and often a simple sign reading “KOBAN” in Roman letters. They’re staffed around the clock in busy areas, though smaller neighborhood koban may have officers on patrol rather than at the desk at any given moment.

    Kobans exist specifically to handle everyday, low-stakes community matters: directions, minor disputes, and — most usefully for travelers — lost and found. Under Japanese law, anyone who finds an item is strongly encouraged to hand it in to the nearest koban rather than keep it, and most people do. That cultural norm is the entire reason this system works as well as it does.

    Where to report a loss, by situation

    The right office depends entirely on where you lost the item:

    • Street, park, shop, or restaurant: Go to the nearest koban. If you didn’t see one, ask any shop staff — “koban wa doko desu ka?” works, or just show the English word “police” on your phone.
    • Train or subway: Don’t go to a koban first. Report it to station staff at the gate or the lost-and-found counter of the line you were riding. Items are typically held at the terminal station that day, then transferred to a central lost-item office after a few days (for JR East in Tokyo, this is the JR East Lost and Found office near Tokyo Station). Give the staff the exact train time, car number if you remember it, and seat or platform.
    • Bus, including airport limousine buses: Call the bus company directly with your route and approximate boarding time. If you were on an airport transfer, see our Airport Limousine Bus guide for the operator contact details — each company (Limon Bus, Keisei, etc.) runs its own lost-item line rather than a shared one.
    • Taxi: Call the taxi company (printed on your receipt) with the time and pickup/drop-off locations. If you didn’t get a receipt, the hotel or venue where you hailed it can often help trace the company.
    • Airport: Each terminal has its own lost-and-found counter — at Narita and Haneda these are separate from the airline counters and separate from each other by terminal, so go to the terminal you actually departed from or arrived at.
    • Hotel: Contact the front desk directly; most hold items for 3–6 months.

    What to bring and what to say

    You don’t need fluent Japanese, but a few concrete details dramatically speed things up:

    • Your passport or a photo of it (koban staff generally need to log an ID for the report)
    • The approximate date, time, and location — even “around 3pm near exit 2” is useful
    • A photo or precise description of the item, including brand and color
    • Your Japan contact number (a hotel landline or rental SIM number works) and, ideally, your return flight date so they know the window to reach you

    Koban officers in major cities and tourist areas are increasingly used to handling these reports in simple English, and many stations now have translation tablets at the counter. Write down key nouns beforehand if you’re worried about the language gap — “wallet” (財布, saifu), “phone” (携帯, keitai), and “passport” (パスポート) cover most cases.

    How long it takes and your odds of getting it back

    Realistic expectations: cash-free items like phones, cameras, and bags are found and returned at very high rates, especially if lost indoors (stations, shops, restaurants). Items with cash inside are also frequently returned intact — Japan’s reputation here is well earned, not just a travel myth. Processing usually takes a few days to a couple of weeks: the finder hands the item to a koban or station counter, it gets logged in a shared police database searchable by any station nationwide, and if you’ve filed a report with matching details, you’ll typically get a call or can call in to check status.

    If unclaimed, found items are legally held for about three months, after which ownership can transfer to the finder (or the item goes to the Tokyo Metropolitan Police’s unclaimed property, in the case of cash and valuables in the capital). So don’t wait until the week before you fly home to start looking — report it the same day if at all possible.

    Common mistakes travelers make

    • Going to a koban for a train item. Train lost-and-found is handled by the railway company, not the police, until the item is formally unclaimed. Going straight to the station counter saves a step.
    • Not knowing which train line you were on. If you transferred between operators (say, Tokyo Metro to JR), report to both — the company you were riding when you lost it, and the one you got off with if you’re unsure which leg it happened on.
    • Assuming email works. Most lost-and-found desks prefer phone calls or in-person visits over email, and few have English email support. A hotel concierge or your accommodation’s front desk calling on your behalf is often the fastest route.
    • Giving up too early. Items genuinely do surface a week or two later. If you’ve already left Japan, you can sometimes arrange for a found item to be mailed to you internationally (cash-on-delivery for the shipping cost), though this varies by municipality and item type.
    • Forgetting about public holidays. Station lost-and-found counters and some ward offices run reduced hours or close entirely on national holidays, which can delay a callback by a day or two — check our guide to Japanese public holidays if your loss happens around a long weekend.

    Replacing what you lost, in the meantime

    If the missing item is something you need immediately — a phone charger, adapter, or cable — don’t wait on the search before replacing it. Japan uses Type A plugs at 100V, so if you lost a charger that was already a step-down converter from a non-US market, see our guide to electrical outlets and voltage in Japan before buying a replacement at a convenience store or electronics shop like Bic Camera or Yodobashi, both of which stock basic chargers and adapters at every major station.

    The bottom line: Japan’s lost-and-found system is genuinely one of the best reasons to stay calm when something goes missing. Report quickly, be specific about time and place, use the right office for the right situation, and give it a week or two before assuming the worst.

  • Digital Nomad Guide to Japan: Visas, Coworking Spaces & Reliable Wifi

    Digital Nomad Guide to Japan: Visas, Coworking Spaces & Reliable Wifi

    Photo by Kevin Jody on Unsplash

    Japan has quietly become one of Asia’s most appealing bases for remote work — low crime, excellent trains, convenience stores on every corner, and coffee shops that don’t mind if you camp out for three hours. But the practical logistics of actually working here — which visa lets you do it legally, where to find a desk with decent monitors, and how to avoid buffering during a client call — trip up a lot of first-time nomads. Here’s what actually works in 2026.

    Visa options: tourist stays vs. the Digital Nomad Visa

    Most nationalities (the US, UK, Canada, Australia, most of the EU) can enter Japan visa-free for up to 90 days as a tourist. Technically, this status does not authorize any kind of work, including remote work for a foreign employer — immigration has historically turned a blind eye to someone answering Slack messages from a cafe, but it is a legal gray zone, not a sanctioned arrangement. If you’re doing short stints of a few weeks while mostly sightseeing, this is what almost everyone uses in practice.

    For longer, above-board stays, Japan launched a dedicated Digital Nomad Visa in 2024. It allows a stay of up to 6 months (not renewable consecutively — you must wait before reapplying) and is open only to nationals of countries that have a tax treaty with Japan, which covers most of North America, Europe, Australia, and parts of Asia. Requirements include:

    • Annual income of at least ¥10 million (roughly $65,000–70,000 USD, though the exact threshold is set in yen and fluctuates with the exchange rate)
    • Employment by, or contracting with, a company based outside Japan — you cannot work for a Japan-based client under this visa
    • Private health insurance covering your entire stay (Japan’s national health insurance is not available on this status)
    • A valid passport from an eligible country, plus proof of the above via bank statements, employment contracts, or invoices

    Spouses and children can accompany you on a dependent visa, but they also need private insurance. Apply at a Japanese embassy or consulate in your home country before you travel — processing typically takes 5–10 business days once your documents are complete, so don’t leave it until the week before departure.

    Common visa mistakes to avoid

    The biggest mistake is assuming the 90-day tourist entry can be extended or renewed by leaving and re-entering repeatedly. Immigration officers at the airport do watch for this pattern, and someone who’s clearly living in Japan on a string of tourist stamps can be denied entry or questioned at the border. The second mistake is accepting local, Japan-based client work while on a tourist or nomad visa — that crosses into unauthorized work regardless of how informal the arrangement feels. If your remote work is genuinely open-ended, it’s worth the paperwork for the proper visa rather than gambling on enforcement gaps.

    Coworking spaces by city

    Tokyo has the deepest bench. WeWork runs around 20 locations across the city (Marunouchi, Shibuya, Roppongi, and others), with day passes around ¥4,000–5,000 and hot-desk memberships from roughly ¥39,000–50,000 a month. Impact Hub Tokyo and The Hive (locations in Daikanyama and Shibuya) are smaller, community-oriented spaces aimed more at freelancers and startups, with day passes typically ¥3,000–3,500 and monthly plans from around ¥25,000–30,000. If you want a quieter, more residential working atmosphere, the craft-focused neighborhood covered in Kuramae has a handful of independent cafes and small studios that make a nice change of scenery from the big coworking chains.

    Osaka and Kyoto are cheaper and less crowded. Impact Hub Osaka and Kyoto’s Co-ba Kyoto run day passes in the ¥2,000–3,000 range. Fukuoka has emerged as a genuine nomad hub over the past few years thanks to lower living costs and a startup-friendly city government; Fukuoka Growth Next, housed in a converted elementary school, offers some of the most affordable coworking rates in the country.

    Budget tip: Japan’s 24-hour internet cafes (manga kissa chains like Manboo and Jiyu Kukan) aren’t glamorous, but a private booth with a desk, monitor, and fast wired internet runs around ¥400–600 for the first hour and often has discounted overnight packages (roughly ¥2,000–2,500) — useful if you’re pulling a late call with a client overseas or missed the last train home.

    Getting reliable wifi

    You have three realistic options, and which one wins depends on how long you’re staying:

    • Pocket wifi rental — providers like Ninja WiFi and Sakura Mobile rent handheld 4G/5G routers you pick up at the airport and return before you leave, from around ¥150–300 per day depending on data allowance. Good for groups sharing one connection.
    • eSIM — the easiest option if your phone supports it. Plans from providers like Sakura Mobile, Ubigi, or Mobal run roughly ¥4,000–7,000 for 30 days with 10–20GB of data, installed before you land with no physical SIM swap needed.
    • Physical prepaid SIM — sold at convenience stores and electronics chains like Bic Camera, useful if you need a Japanese phone number as well as data.

    Free wifi at convenience stores, train stations, and Starbucks is widespread but often unencrypted — fine for checking a map, risky for logging into client systems without a VPN. For any real work session, a personal connection (eSIM or pocket wifi) is worth the few hundred yen a day over relying on public networks.

    Timing your stay

    Avoid scheduling critical work weeks around Golden Week (late April–early May) or the New Year period — not because internet gets worse, but because coworking spaces, banks, and government offices (including immigration counters) close or run reduced hours, and trains get packed. Check the 2026 public holiday dates before booking a coworking membership or planning an in-person client meeting, since a multi-day closure can eat into a short membership term.

    Practical setup notes

    Japan runs on 100V, which is lower than the 220–240V standard in much of Europe, Australia, and the UK — most modern laptop chargers handle this fine, but older peripherals, monitors, or power strips may not. The plug shape (Type A, two flat pins) also differs from three-pin UK or European plugs. Worth reading the guide to electrical outlets and voltage in Japan before you pack, especially if you’re bringing a second monitor or other work gear rather than buying it locally.

    If you’re landing at Narita or Haneda and heading straight into a coworking membership or short-term apartment in central Tokyo, the airport limousine bus is the easiest way to get into the city with luggage and a laptop bag in tow, without wrestling train transfers after a long flight.

    Japan rewards nomads who treat the visa question seriously and the connectivity question casually — get the paperwork right, and the wifi and desks will take care of themselves.

  • Electrical Outlets & Voltage in Japan: A Charger and Appliance Guide for Travelers

    Electrical Outlets & Voltage in Japan: A Charger and Appliance Guide for Travelers

    Photo by Nichika Sakurai on Unsplash

    Japan’s electrical system trips up more travelers than it should, mostly because the plugs look so familiar. If you’re coming from North America, your charger will physically fit into a Japanese outlet — but “fits” and “works safely” aren’t always the same thing. Here’s what you actually need to know before you pack, plus what’s worth buying once you land.

    Japan’s Voltage and Plug Type, Explained

    Japan runs on 100 volts, which is lower than the 220–240V standard in Europe, Australia, and most of Asia, but close enough to North America’s 120V that most US and Canadian electronics work without any converter at all. The plugs themselves are Type A — two flat, parallel prongs, identical to a standard US plug — though some newer buildings and appliances use Type B, which adds a third round grounding pin. If your home country uses Type A or B plugs (US, Canada, Mexico, parts of Central America), you don’t need an adapter at all, just a voltage check on each device.

    Here’s the quirk unique to Japan: the country runs on two different frequencies. Eastern Japan, including Tokyo, Yokohama, and Sendai, uses 50Hz. Western Japan, including Osaka, Kyoto, Nagoya, and Hiroshima, uses 60Hz. The dividing line runs roughly through Shizuoka and Nagano. For almost everything travelers carry, this split doesn’t matter — but it’s why some older Japanese appliances (think rice cookers or clocks bought secondhand) are labeled for one region only.

    Do You Need a Plug Adapter, a Voltage Converter, or Neither?

    Break it down by what’s actually in your bag:

    • Phone, laptop, tablet, camera chargers: Almost all modern chargers are “dual voltage” or “wide range,” meaning they accept anywhere from 100V to 240V. Check the fine print on the charger brick itself — if it says “INPUT: 100-240V,” you’re fine with just a plug adapter, no converter needed.
    • Plugs from the UK, Australia, Europe, or most of Asia: You need a physical plug adapter (not a voltage converter) to make your three-pin or two-round-pin plug fit Japan’s flat two-prong outlets. These are cheap and small — buy one before you go or pick one up on arrival.
    • Hair dryers, straighteners, and curling irons: This is where people get burned, literally. Many hair tools are NOT dual voltage, especially higher-wattage ones from the UK, Europe, or Australia. Plugging a 220V hair dryer into a 100V Japanese outlet usually just makes it run weak and barely heat up — annoying but not dangerous. Plugging a 100V device into 220V without a converter, the reverse situation, can smoke or melt the device. Always check the label first.
    • CPAP machines, medical devices: Check manufacturer specs directly; most modern CPAPs are dual voltage, but confirm before you fly, not after.

    Where to Buy Adapters and Converters in Japan

    If you forget one at home, you have options the moment you land. Both Narita and Haneda airports have convenience stores and electronics counters in the arrivals area selling basic Type A/C/O plug adapters for around ¥1,000–1,500 — convenient but the most expensive place to buy one. Once you’re in the city, a 100 yen shop (Daiso, Seria) sells simple adapters for ¥110–330, though selection is limited to the most common plug types. For anything more specific — multi-country adapters, step-down voltage converters for hair tools, or power strips with USB ports — Don Quijote (open late, many locations 24 hours) and Bic Camera or Yodobashi Camera (typically 10am–9pm or 10pm) carry a much wider range, usually ¥1,500–5,000 depending on features. Bic Camera Shinjuku East Exit and Yodobashi Akiba are reliable bets if you’re near those stations anyway.

    Convenience stores like 7-Eleven or Lawson occasionally stock basic adapters near the register but don’t count on it — it varies by branch.

    Buying Japanese Appliances to Bring Home

    This is the flip side of the voltage question, and it matters if you’re shopping for electronics as souvenirs or gifts. Japan is famous for appliances worth bringing home — the Japanese electric shavers and epilators from Panasonic are a classic example, prized for build quality and precision. Before buying any appliance to take home, check whether it’s dual voltage (common on export-oriented or travel-marketed models) or 100V-only (common on rice cookers, kettles, and some beauty devices sold primarily for the domestic market). Big electronics retailers like Bic Camera and Yodobashi often stock a separate “overseas voltage” or export version of popular items specifically for tourists — ask staff, as many locations have English-speaking staff and tax-free counters for exactly this reason. If a device is 100V-only, you’ll need a step-down converter to use it safely back home, and for high-wattage items like hair dryers or rice cookers, that converter needs to be rated for the wattage, not just the voltage — a small travel converter won’t handle a 1200W appliance.

    Common Mistakes Travelers Make

    • Assuming “the plug fits” means “it’s safe.” Shape compatibility and voltage compatibility are separate questions.
    • Packing a UK/EU/AU hair tool without checking voltage. This is the single most common issue — travelers plug in a high-wattage straightener with no converter and either damage the device or trip the outlet’s circuit breaker in an older hotel or guesthouse.
    • Not checking for a three-prong grounded Type B outlet. Some appliances (especially washing machines and air conditioners) require grounding; most hotel room outlets are simple Type A and fine for travel electronics.
    • Buying a step-up/step-down converter sized for electronics but using it on a hair dryer. Check the wattage rating printed on the converter, not just “works in Japan.”
    • Forgetting USB-C or multi-port chargers still need a plug adapter. The USB side is universal, but the wall-plug side still needs to physically fit the outlet.

    A Quick Packing Checklist

    • Check every charger brick for “INPUT: 100-240V” before you fly — if it’s there, skip the converter and just bring an adapter if your home plug isn’t Type A.
    • Pack one universal travel adapter (covers Type A/C/O) rather than several single-purpose ones.
    • Leave high-wattage, non-dual-voltage hair tools at home, or buy a cheap one locally at Don Quijote for under ¥2,000 instead of risking your own.
    • If you’re buying a Japanese appliance to take home, ask the retailer directly whether it’s an export/dual-voltage version before paying — don’t assume from the box alone.

    Getting this right takes five minutes of label-checking before you leave home. It’s a small thing, but it’s the difference between a charger that just works and a scorched outlet in your hotel room on night one. For the rest of your pre-trip prep, it’s also worth a quick look at travel insurance for Japan, since most policies won’t cover a device you fried yourself with the wrong converter.

  • LGBTQ+ Travel in Japan: Safety, Scene & What to Know

    LGBTQ+ Travel in Japan: Safety, Scene & What to Know

    Photo by Jezael Melgoza on Unsplash

    Japan is consistently ranked one of the safest countries in the world for travelers, and that holds true for LGBTQ+ visitors too — but “safe” and “openly accepting” aren’t quite the same thing here. There’s no legal risk in being LGBTQ+ in Japan, yet public life runs on discretion rather than visibility, which can feel confusing if you’re used to Pride flags on storefronts or rainbow crosswalks. This guide covers what the law actually says, where the scene lives, how to time a trip around Pride events, and the small practical details — from love hotel policies to onsen etiquette — that make the difference between an awkward moment and a smooth one.

    Is Japan Safe for LGBTQ+ Travelers?

    Same-sex relationships have never been criminalized under modern Japanese law (a brief sodomy statute was repealed back in 1880), and violent hate crime against LGBTQ+ people is rare by international standards — Japan’s overall low crime rate applies here too. What Japan lacks is a national anti-discrimination law with real teeth. A 2023 “LGBT Understanding Promotion Act” encourages tolerance but doesn’t ban discrimination in housing, employment, or services, so protections vary a lot by city and employer. In practice, foreign visitors are generally treated as polite guests regardless of who they’re traveling with; the bigger issue tends to be invisibility — don’t expect staff to ask about a “partner” the way they might abroad, and don’t expect rainbow signage outside of a handful of neighborhoods.

    Marriage, Partnerships, and What They Mean for Visitors

    Japan does not recognize same-sex marriage nationally. Several regional high courts (Sapporo and Tokyo among them) have ruled the marriage ban unconstitutional in recent years, which has kept the issue politically live, but no national law has changed yet. Over 400 municipalities — including Tokyo, Osaka, and most major tourist cities — issue local “partnership certificates” (pātonāshippu seido) that can help with things like hospital visitation rights, but they carry no legal weight for immigration, inheritance, or taxes. For a short trip this is mostly academic: hotels and ryokan book same-sex couples into double or twin rooms without a second glance, and there’s no “proof of relationship” required anywhere a tourist would encounter.

    Where to Find the Scene

    Tokyo’s LGBTQ+ nightlife is concentrated in Shinjuku Ni-chome, a few blocks east of Shinjuku Station’s east exit, packed with an estimated 300+ bars — most absurdly small, seating 5 to 15 people. Many charge a seat charge (seki-ryō) of ¥500–1,000 on top of drinks, which usually run ¥700–1,500. A few well-known, foreigner-friendly spots to start the night: Advocates Café (a street-level bar with no cover charge, good for a first drink and bearings), Arty Farty, and Dragon Men. Pride House Tokyo Legacy, a small community center in Ni-chome, is a good stop for English-language info on local events and resources. Osaka’s equivalent district is Doyama-chō, tucked just north of Umeda/Kita Station, smaller and more local in feel. Smaller scenes also exist in Fukuoka, Sapporo, and Nagoya, usually one or two streets rather than a full district.

    • Budget night out: one bar, cover + two drinks, roughly ¥2,500–4,000
    • Mid-range: bar-hopping 2–3 spots in Ni-chome, ¥6,000–8,000
    • Splurge: a reserved table at a hostess/host-style show bar, ¥10,000+ per person

    Pride Events and Timing Your Trip

    Tokyo Rainbow Pride is Japan’s largest Pride event, held annually in late April or early May in and around Yoyogi Park, with a parade route through Shibuya and Harajuku. It’s free to attend, draws a large international crowd, and is a genuinely good excuse to build a trip around. If you’re flying in specifically for it, book flights and hotels well ahead — late April often overlaps with Golden Week, one of Japan’s busiest and most expensive travel windows, so it’s worth checking our guide to Japanese public holidays to avoid or plan around before locking in dates. Osaka’s Kansai Rainbow Festa typically runs in autumn (around October) in Osaka Castle Park, and Fukuoka and Sapporo each hold smaller Pride events in summer and early autumn respectively — exact dates shift year to year, so check local event pages a few months out rather than assuming a fixed date.

    Hotels, Onsens, and Practical Accommodation

    Standard hotels, business hotels, and ryokan have no policy against same-sex couples sharing a room — just book a double or twin bed as you normally would. The one category to watch is love hotels, which in some (older, rural) locations are set up only for opposite-sex pairs; city love hotels are generally more relaxed, but it’s not universal, so a quick look at reviews before booking saves an awkward front-desk moment. Traditional public baths are the trickier spot: sento and onsen are segregated strictly by sex at the entrance, which can be uncomfortable for trans travelers regardless of gender identity. The easiest workaround is booking a kashikiri (private rental) bath, usually ¥2,000–5,000 per hour, or choosing a ryokan with an en-suite bath in the room. If you want to try an onsen town properly, somewhere like Nozawa Onsen in Nagano has multiple free public baths, which also means multiple chances to find one quiet enough, or time of day quiet enough, to feel comfortable.

    Common Mistakes to Avoid

    • Expecting visible allyship. Staff silence isn’t hostility — overt PDA of any orientation is uncommon in public Japan, so a lack of reaction is normal, not a red flag.
    • Assuming Ni-chome bars are all tourist-friendly. Some small bars are regulars-only or Japanese-speaking-only by custom, not by hostility — look for English signage or ask at Pride House Tokyo Legacy for current recommendations.
    • Not checking a love hotel’s policy before arriving late at night with limited alternatives nearby.
    • Skipping travel insurance because the trip “feels low-risk.” Any trip benefits from coverage — see our guide to travel insurance for Japan for what to actually buy.

    Before You Go: Health, Insurance, and Resources

    Japan’s clinics and hospitals are excellent but can be cash-up-front for foreign visitors without local insurance, so travel insurance that covers medical treatment is worth having regardless of who you’re traveling with — our guide on what to do if you get sick in Japan walks through pharmacies, clinics, and when to head to a hospital. If you’re on hormone therapy or carrying related medication, bring a doctor’s letter and keep medication in original packaging, as Japanese customs can be strict about unlabeled prescriptions. Beyond that, the practical reality of LGBTQ+ travel in Japan is reassuring: it’s a country where you’re unlikely to face open hostility, the scene is real and findable once you know where to look, and most of the friction — if any — comes from Japan’s general culture of discretion rather than anything aimed at visitors specifically.

  • Airport Limousine Bus: Narita & Haneda to Tokyo Hotels Without a Train Transfer

    Airport Limousine Bus: Narita & Haneda to Tokyo Hotels Without a Train Transfer

    Photo by Levi Meir Clancy on Unsplash

    If you land in Tokyo with heavy suitcases and no interest in hauling them up and down train station stairs, the Airport Limousine Bus is the easiest fix. It’s not a limousine in the stretch-car sense — it’s a comfortable, reserved-seat coach that picks you up right at the airport terminal and drops you off at the door of dozens of major hotels and transit hubs around the city, with zero transfers. Here’s how the Narita and Haneda services actually work, what they cost, and where people trip up.

    Why Skip the Train Transfer in the First Place

    Trains like the Narita Express or Keisei Skyliner are faster on paper, but they only get you to a station — Tokyo, Shinjuku, Ueno. From there you still need a taxi, a subway connection, or a long walk with luggage, often through stairs and ticket gates with no elevator in sight. The Limousine Bus trades a bit of speed for door-to-door convenience: you board once at the airport and get off steps from your hotel lobby. For families, anyone with mobility issues, or travelers arriving jet-lagged after a long flight, that trade is usually worth it.

    Narita Airport Limousine Bus: Routes, Fares, and Timing

    The main operator is Friendly Airport Limousine, with counters on the arrival floors of Terminals 1, 2, and 3. Buses serve a long list of hotels in Shinjuku, Shinagawa, Ginza, Tokyo Station (Yaesu side), Akasaka, Shiodome, Asakusa, Ikebukuro, and Tokyo Disney Resort, among others.

    • Fare: around ¥3,600 one-way for adults to most central Tokyo hotels (children roughly half price). Discounted round-trip tickets are available if you’re booking both legs in advance.
    • Travel time: roughly 85–150 minutes depending on your destination and traffic — Tokyo Station and Ginza are on the faster end; Shinjuku and Ikebukuro take longer.
    • Frequency: buses run from around 6am until roughly 11pm–midnight, timed loosely around international flight banks, with departures every 20–40 minutes on popular routes and longer gaps late at night.

    Because Narita sits well outside the city, this route is also where traffic matters most — more on timing below.

    Haneda Airport Limousine Bus: Routes, Fares, and Timing

    Haneda’s bus network (run primarily by Keikyu Bus and Airport Transport Service) is cheaper and faster simply because the airport is closer to central Tokyo. Buses depart from the International Terminal arrivals floor and also serve Terminals 1 and 2 domestic.

    • Fare: typically ¥1,100–1,300 one-way to hotels in Shinagawa, Shiodome, or Tokyo Station; a bit more to Shinjuku or Ikebukuro.
    • Travel time: around 30–45 minutes to nearby areas like Shinagawa and Shiodome, up to 60–75 minutes for Shinjuku or Ikebukuro depending on traffic.
    • Frequency: departures roughly every 15–30 minutes during the day, thinning out late at night and before the first morning flights.

    If your flight is a redeye landing before 6am or departing after midnight, double-check the first/last bus times for your specific hotel route — some stop running earlier than the airport’s own operating hours.

    How to Buy Tickets and Board

    You don’t need to book ahead for most routes — just walk to the limousine bus counter on the arrivals floor, tell the staff your hotel name (or the nearest major hotel if yours isn’t a direct stop), and they’ll sell you a ticket for the next departure and tell you which bay to wait at. Payment is cash or card at the counter; some routes also let you pay the driver directly. Advance online reservations exist and are worth doing only during very busy periods (year-end holidays, Golden Week, major conventions) when seats on popular routes can sell out.

    Luggage goes in a stowed compartment underneath the bus — there’s no carry limit as strict as on trains, which is another reason this option works well for families or anyone bringing back large suitcases of shopping. If you’re planning to come home with bulky finds like a futon set or boxed appliances from a baby goods run at Akachan Honpo, the bus’s generous under-floor storage is genuinely more practical than fighting for luggage rack space on a train.

    Best Times to Ride — and When to Avoid the Bus Entirely

    The Limousine Bus’s one real weakness is traffic. Narita routes in particular can blow past their scheduled time by 30–60 minutes during evening rush hour (roughly 5pm–8pm) or on holiday travel days. Check our guide to Japanese public holidays before you fly — arriving at the start of a long weekend or around New Year’s can mean highways into Tokyo are jammed for hours, and on those days the train is genuinely more reliable even with a transfer. Outside of rush hour and holiday clusters, the bus runs close to its printed schedule and is the more relaxing choice.

    If you have a tight connection — a same-day Shinkansen departure, for instance — build in buffer time or consider the train instead. For context on how forgiving Japan’s rail system is if you do misjudge a connection, see our piece on missed Shinkansen transfer rules.

    Common Mistakes

    • Assuming every hotel is a direct stop. Smaller hotels and machiya-style inns often aren’t on the route list — check the operator’s stop list (or ask the counter staff) and pick the nearest major stop if needed.
    • Not budgeting extra time from Narita. Treat the printed travel time as a minimum, not a guarantee, especially in the evening.
    • Paying for a round-trip ticket you won’t use. The discount is only worth it if you’re genuinely certain of your return flight’s terminal and timing; plans change and airport-side refunds can be a hassle.
    • Forgetting travel insurance covers delay-related costs. If a late bus causes you to miss a connecting booking, it’s the kind of scenario covered by a decent policy — see our rundown on travel insurance for Japan.

    Budget, Mid-Range, and Splurge Options

    For budget travelers, the Limousine Bus itself is already the economical door-to-door option compared to a taxi, which can run ¥20,000–25,000 from Narita or ¥6,000–8,000 from Haneda to central Tokyo. Mid-range travelers get the same bus experience regardless of ticket type — there’s no “premium” bus tier, so the fare is simply the fare. For a genuine splurge with the same no-transfer convenience, a private airport transfer car (bookable through hotel concierges or transfer services) costs several times the bus fare but takes you directly with no shared stops, which matters most for late-night arrivals with small children or a lot of fragile luggage.

    Whichever budget you’re working with, the core appeal of the Limousine Bus stays the same: one ticket, one seat, and a straight shot to your hotel’s front door — no stairs, no transfers, no guesswork about which platform to find next.

  • Japanese Public Holidays: Which Dates to Avoid (or Plan Around) in 2026

    Japanese Public Holidays: Which Dates to Avoid (or Plan Around) in 2026

    Photo by Denys Nevozhai on Unsplash

    Japan has 16 national public holidays, and on their own they’re no big deal — most museums and shops stay open, and trains run on schedule. The trouble starts when holidays cluster into multi-day stretches, because that’s when 125 million residents travel domestically at the same time you’re trying to. Booking a hotel in Kyoto or reserving a Shinkansen seat during the wrong week can mean sold-out trains, 2-3x normal hotel rates, and shoulder-to-shoulder crowds at every major sight. Here’s what to actually watch for in 2026 and how to plan around it.

    Golden Week (April 29 – May 6, 2026): The One to Plan Around Most Carefully

    Golden Week is four separate holidays bunched together — Showa Day (April 29), Constitution Memorial Day (May 3), Greenery Day (May 4), and Children’s Day (May 5) — and in 2026 they fall across a Wednesday-to-Wednesday span that many Japanese workers bridge into a full nine-day break. This is the single busiest travel week of the year alongside Obon and New Year.

    What this means practically: reserved Shinkansen seats between Tokyo, Kyoto, and Osaka sell out days or weeks in advance, especially on the Tokaido Shinkansen. Hotels in Kyoto, Hakone, and other classic itinerary stops routinely double their rates and still fill up. If you must travel during Golden Week, book trains the moment reservations open (one month ahead, at 10am Japan time) and lock in accommodation 2-3 months out. Alternatively, lean into less touristed regions — this is a good window for a trip to a beach town like Shirahama or a quiet mountain escape near Tokyo like Okutama, where domestic crowds are lighter than in the headline cities.

    Obon (Mid-August, Unofficial but Unmissable)

    Obon isn’t a national public holiday on the calendar, but it’s the de facto summer travel week, typically falling around August 13-16. Many companies close for the full week, and it’s when city dwellers return to their hometowns to honor ancestors — meaning intercity trains and highways are jammed while, oddly, some Tokyo neighborhoods feel emptier than usual. Expect the same Shinkansen crush as Golden Week on travel days (especially August 13 and 16), plus peak summer heat and humidity. If your trip lands in this window, consider pairing it with a cooler retreat — Nozawa Onsen is pleasant in summer for hiking even without snow, and loungewear like jinbei is genuinely practical for the humidity, not just a souvenir.

    New Year (December 29 – January 3)

    This is the holiday that catches first-time visitors off guard, because unlike Golden Week it actually shuts things down. Many restaurants, small shops, and even some museums close for 3-5 days around January 1st, and department stores close on January 1st before reopening for “fukubukuro” lucky bag sales on the 2nd. Supermarkets and convenience stores stay open, so you won’t go hungry, but don’t plan a trip around trying a specific famous restaurant or craft workshop in this window — check hours in advance. On the upside, New Year brings hatsumode (the first shrine visit of the year), which is a genuinely special experience if you don’t mind queuing at places like Meiji Jingu or Senso-ji. If you’re in Japan for the lead-up, department store Christmas illuminations are also worth seeing — see our guide to Christmas in Japan for what’s actually open and what’s tradition versus marketing.

    Other 2026 Holidays Worth Knowing About

    • Coming of Age Day (January 12, 2026) — second Monday of January. Minor crowd impact for tourists, but you’ll see young women in elaborate furisode kimono around train stations and shrines, which is a nice photo opportunity rather than a hassle.
    • Culture Day (November 3, 2026) and Labor Thanksgiving Day (November 23, 2026) — both can create single long weekends (3 days) with a moderate bump in domestic travel and hotel rates, but nothing like Golden Week. Worth checking if your dates overlap, especially for weekend accommodation in Kyoto or Hakone.
    • Mountain Day (August 11, 2026) — falls right before Obon season ramps up, effectively extending the mid-August crunch by a few days.
    • Respect for the Aged Day (September 21, 2026) — sometimes creates a “Silver Week” bridge holiday similar in spirit to Golden Week, though shorter; worth a quick calendar check if you’re visiting in September.

    School graduation season (mid-to-late March) isn’t a public holiday either, but it’s worth a mention: it’s when you’ll see university students in hakama around campuses and shrines, and it overlaps with the start of cherry blossom season, so late March hotel availability tightens for reasons beyond the holiday calendar.

    How to Check Before You Book

    Japan’s holidays shift slightly year to year because several are tied to the equinox or defined by “nth Monday of the month” rules rather than a fixed date. Before finalizing flights, search “Japan public holidays [year]” close to your booking date rather than relying on a memorized list — a single day’s difference can matter if it shifts a holiday onto a Friday or Monday and creates a long weekend that wasn’t there before. It’s also worth cross-checking against school term breaks, since those add domestic family travel on top of the official holiday calendar.

    If You’re Stuck Traveling During a Peak Period

    Sometimes the dates aren’t negotiable. If you’re arriving during Golden Week or Obon regardless:

    • Book Shinkansen reserved seats the instant the one-month window opens, or plan to use non-reserved cars and arrive at the platform early — see our notes on Shinkansen transfer flexibility if your plans shift last-minute.
    • Reserve accommodation 2-3 months ahead
    • Shift your sightseeing clock — arrive at major temples and markets at opening time (many open 8-9am) rather than mid-morning, when tour groups and domestic travelers arrive in force.
    • Consider day trips to less obvious spots — somewhere like Kuramae in Tokyo offers craft workshops and a slower pace that holiday crowds tend to skip entirely.

    The bottom line: Japan’s public holidays themselves rarely close doors to visitors, but the travel surges around them can define your entire trip if you don’t plan for them. A quick calendar check before you lock in flights is the cheapest insurance you’ll buy for the whole trip.

  • Kuramae: Tokyo’s Quiet Craft Workshop Neighborhood

    Kuramae: Tokyo’s Quiet Craft Workshop Neighborhood

    Photo by David Edelstein on Unsplash

    Most first-time visitors to Tokyo never set foot in Kuramae, and that’s exactly why it’s worth the detour. Tucked along the Sumida River between Asakusa and Ryogoku, this former rice-warehouse district has quietly become one of the city’s best places to watch artisans actually make things — custom notebooks, hand-forged tools, blown glass, dyed textiles — rather than just buy them off a shelf. There are no crowds, no tour buses, and no souvenir shops selling the same keychains you saw in Asakusa. Just converted warehouses, narrow backstreets, and small workshops run by people who are genuinely happy to explain what they’re doing.

    Why Kuramae Became a Craft District

    The name Kuramae literally means “in front of the storehouse” — a reference to the Edo-period shogunate rice warehouses (kura) that once lined this stretch of the Sumida River. That warehouse heritage left behind a stock of sturdy, boxy brick and concrete buildings from the early 20th century that were cheap to rent and large enough for workshop use. Over the past 10-15 years, independent makers priced out of central Tokyo moved in, turning former storehouses and printing factories into ateliers, showrooms, and cafés. The result feels closer to a slow-paced maker’s village than a shopping district — most streets have more workshops than people on them at any given time.

    Getting There

    Kuramae Station sits at the junction of the Toei Asakusa Line and Toei Oedo Line, which makes it an easy add-on rather than a special trip. From Asakusa Station it’s a single stop (about 2 minutes) on the Asakusa Line, or a pleasant 15-20 minute walk north along the Sumida River promenade if the weather’s good. From Tokyo Station, it’s roughly 15-20 minutes via the Oedo Line with one transfer. If you’re planning a day that mixes subway-heavy sightseeing, it’s worth checking whether a Tokyo subway day pass pencils out cheaper than paying fare-by-fare, since Kuramae sits on the Toei network rather than the Tokyo Metro one.

    What to Do and Buy

    The signature Kuramae experience is building something yourself. Kakimori, a stationery shop near the station, lets you design a custom notebook from scratch — choose the cover, paper stock, binding rings, and page count, and staff assemble it on the spot while you wait, usually within 15-20 minutes. A basic custom notebook starts around ¥1,800-2,500 depending on materials; leather covers push the price higher. Next door, their sister space Ink Stand by Kakimori runs a build-your-own-ink workshop where you mix pigments to create a one-of-a-kind ink color, bottle it, and take it home — budget roughly ¥2,750 for a 30ml bottle including the blending session. Both are popular enough that weekend afternoons can mean a short wait, so arrive earlier in the day if you want to walk straight in.

    A few minutes’ walk away, SyuRo occupies a 1934 warehouse and sells beautifully made everyday goods — tin boxes, brooms, enamel ware, and stationery from small Japanese manufacturers — at prices that range from a few hundred yen for paper goods to several thousand for metalwork. Scattered around the same few blocks are smaller, easy-to-miss workshops for leatherwork, glass, and textile dyeing; signage is often minimal, so half the fun is simply wandering and peering through open doors. If you’re drawn to traditional Japanese kitchen tools rather than stationery, it’s also worth knowing that classic items like the suribachi and surikogi mortar-and-pestle set turn up in some of the pottery and homeware shops nearby, made in the same small-batch spirit as everything else in the neighborhood.

    Opening Hours and Timing

    This is a neighborhood of small, independently run shops, and that comes with small-shop hours: most workshops open around 11:00am or noon and close by 6:00-7:00pm, and many take one or two weekdays off entirely (closures vary shop to shop and change seasonally). Always check a shop’s current hours before making a special trip, especially midweek. Weekday late mornings to early afternoon are the quietest and most pleasant time to browse, since the handful of visitors who do come tend to arrive on weekend afternoons. Spring (cherry blossoms along the Sumida River walk) and autumn (mild temperatures for walking between workshops) are the most comfortable seasons; summer in Tokyo is humid enough that the riverside walk from Asakusa is less appealing, so taking the subway directly to Kuramae Station is the better call.

    Common Mistakes to Avoid

    • Treating it like Asakusa. There’s no single main street — the workshops are spread across several quiet blocks, so arriving without a rough map or a couple of shop names in mind means a lot of aimless walking.
    • Skipping reservations for hands-on experiences. Kakimori’s notebook-building and the ink-blending workshop can fill up, particularly on weekends; checking same-day availability or booking a slot ahead saves a wasted trip.
    • Visiting on a shop’s closed day. Because hours and closures differ shop by shop, confirm the specific place you want to see is actually open that day rather than assuming standard Tokyo retail hours apply.
    • Rushing it. Kuramae rewards slow browsing, not a checklist — budget at least half a day if you want to actually sit down and build a notebook or chat with a shop owner rather than just photograph storefronts.

    Budget, Mid-Range, and Splurge Options

    On a tight budget, you can spend a satisfying few hours here for well under ¥2,000 — a coffee at one of the small cafés tucked into the old warehouses, plus a few hundred yen on paper goods at SyuRo. For a mid-range outing, a custom Kakimori notebook (¥1,800-3,000) or an ink-blending session (around ¥2,750) gives you a genuine souvenir you made yourself, not something mass-produced. For a splurge, look for the leatherwork and glass ateliers that take custom orders — bespoke leather goods or hand-blown glassware commissioned on the spot can run from ¥8,000 well into five figures, depending on the maker and materials, but you leave with something no one else owns.

    Pairing Kuramae With the Rest of Your Day

    Kuramae’s location makes it easy to fold into a broader itinerary rather than a standalone destination. Asakusa is one subway stop or a short riverside walk south, making it simple to combine a Senso-ji temple visit with an afternoon of workshop-hopping. Ryogoku, home to the national sumo stadium and the Edo-Tokyo Museum, is one stop further on the Oedo Line if you want a dose of Edo-period history to match the neighborhood’s own warehouse past. Asakusabashi, one stop toward central Tokyo, is worth a short detour too — it’s Tokyo’s wholesale district for beads, craft supplies, and dollmaking, and pairs naturally with Kuramae’s maker-focused atmosphere. If stationery and paper crafts are what drew you here in the first place, it’s also worth reading up on Japan’s washi tape brands before you go, since several of the specialty paper shops in this part of Tokyo stock difficult-to-find regional lines you won’t see in big-box stores elsewhere in the city.

  • Travel Insurance for Japan: What to Buy and Why It Matters

    Travel Insurance for Japan: What to Buy and Why It Matters

    Photo by note thanun on Unsplash

    Japan is one of the safest countries you’ll ever visit, but “safe” doesn’t mean “cheap to get sick or hurt in.” A single night in a Japanese hospital can run ¥50,000–¥150,000, and an ambulance ride — while free at the point of use — won’t cover the treatment that follows. Travel insurance is the one purchase on your packing list that you’ll never regret and might desperately need. Here’s exactly what to buy, what it costs, and the mistakes that leave travelers paying out of pocket.

    Why Japan specifically requires real medical coverage

    Japan does not have reciprocal healthcare agreements with the US, UK, Australia, Canada, or most other tourist-origin countries. That means as a visitor, you pay 100% of the cost at the time of treatment — there’s no “foreigner discount” or government subsidy. Clinics and hospitals increasingly expect either cash, a Japanese-linked card, or proof of insurance before treating non-emergency cases. If you’ve read our guide on what to do if you get sick in Japan, you already know pharmacists and clinic staff will ask about payment method almost immediately. A basic walk-in clinic visit for a cold or stomach bug typically costs ¥5,000–¥10,000 without insurance; a same-day CT scan or X-ray after a fall can add another ¥15,000–¥40,000. Appendicitis surgery and a few days of hospitalization can realistically hit ¥1,000,000–¥2,000,000. None of that is urban-legend scare-mongering — it’s standard private-pay pricing at Japanese hospitals.

    What to actually buy: the coverage priority list

    Not all travel insurance is equal, and plenty of cheap policies look fine on paper but have gaps that matter in Japan specifically. Prioritize in this order:

    • Emergency medical coverage of at least $100,000 USD (roughly ¥15,000,000). This is non-negotiable. Hospitalization, surgery, and specialist care in Japan’s private system add up fast, especially in Tokyo and Osaka.
    • Medical evacuation/repatriation coverage. If you’re hiking in a remote area — say, around Okutama’s mountain trails or anywhere in rural Tohoku — a helicopter evacuation or flight home with a medical escort can cost $50,000+ on its own. Standard policies often cap this separately from general medical, so check the number explicitly.
    • Trip interruption/cancellation. Useful if a typhoon cancels your flight or a family emergency cuts the trip short, but secondary to medical coverage in importance.
    • Baggage and personal effects. Nice to have, low priority — Japan’s lost-and-found culture is famously good, and theft is rare.
    • Adventure/activity riders. If your itinerary includes skiing, diving (think the reefs around Ishigaki and the Yaeyama Islands), or serious mountain hiking, confirm these activities aren’t excluded — many standard policies quietly exclude “hazardous activities” unless you add a rider.

    Realistic costs and where budget, mid-range, and splurge differ

    For a two-week trip, expect to pay roughly:

    • Budget (~$30–50 USD for two weeks): Basic single-trip plans from insurers like World Nomads, SafetyWing, or Travelex. Fine for most travelers, but double-check the medical cap and evacuation limit — some budget plans cap medical at $50,000, which is tight for a major hospitalization.
    • Mid-range (~$60–100 USD for two weeks): Plans with $100,000+ medical, $250,000+ evacuation, and trip interruption bundled in. This is the sweet spot for most visitors and what we’d recommend defaulting to.
    • Splurge (~$150+ USD, or annual multi-trip plans): Higher medical caps ($500,000+), “cancel for any reason” riders, and rental car/equipment coverage. Worth it if you’re doing an extended, activity-heavy, or multi-country trip, or if you’re older and want higher medical ceilings.

    Credit card travel insurance (common with premium US and Canadian cards) is a real option but is almost always secondary coverage with lower medical caps than a dedicated policy — read the benefits guide for your specific card before relying on it alone.

    When to buy it and how it ties into your itinerary

    Buy your policy as soon as you’ve paid a non-refundable deposit on flights or accommodation — that’s the point at which trip cancellation coverage actually starts protecting money you’d otherwise lose. For medical coverage, it simply needs to be active before departure. There’s no seasonal pricing swing worth timing around, but risk profile does shift with season: winter trips to snow regions carry higher injury risk (skiing, icy sidewalks), while summer trips raise heat-exhaustion risk, especially for older travelers doing a lot of walking between sites like Hitachi Seaside Park or festival crowds at events like Nebuta Matsuri. If your trip involves a lot of train travel and you’re worried about missed connections, it’s worth knowing that Japan Rail is actually quite forgiving — see our piece on Shinkansen transfer rules — so trip-delay coverage matters less for rail delays than for international flight connections.

    Common mistakes that leave travelers exposed

    • Assuming a credit card’s “travel insurance” covers medical emergencies. Many only cover trip cancellation and baggage, not hospitalization.
    • Not reading the pre-existing condition clause. If you have a known condition, you often need to buy the policy within 14–21 days of your first trip deposit for it to be covered at all.
    • Skipping evacuation coverage because “Japan has great hospitals.” True, but getting to one from a remote onsen town or mountain trail is the actual problem evacuation coverage solves.
    • Not keeping receipts. Japanese clinics will give you an itemized receipt (shinryo meisho-sho) automatically — keep every piece of paper, since claims are routinely rejected for missing documentation.
    • Buying insurance after departure. Nearly every insurer requires the policy to be purchased before you leave home, with limited exceptions for extending an existing policy mid-trip.

    The bottom line

    Treat travel insurance as part of the trip budget alongside your Shinkansen tickets and accommodation, not an optional add-on. For most travelers, a mid-range policy with $100,000+ medical and solid evacuation coverage, bought within a few weeks of your first deposit, is the right call. It’s a small fraction of total trip cost and the one thing standing between a bad afternoon and a bad year.