Japan Trove

Category: Travel

Practical, up-to-date guides for traveling in Japan — itineraries, rail passes, eSIMs, where to stay, seasonal timing, etiquette, and the local know-how that makes a trip smoother. Written with real Japanese sources so you get the answer that actually works on the ground, not the recycled tourist one.

  • Ordering Food on the Shinkansen: QR Menus, Cart Service & What’s Still Available

    Ordering Food on the Shinkansen: QR Menus, Cart Service & What’s Still Available

    Photo by John Cameron on Unsplash

    A decade ago, the trolley girl pushing a cart of coffee, beer, and ice cream down the aisle was one of the small rituals of riding the Shinkansen. That ritual is mostly gone now. Japan’s bullet train operators have spent the last few years replacing in-car sales staff with QR-code ordering systems, and on many routes they’ve eliminated food service altogether. If you’re planning a long Shinkansen leg and assuming you can just buy lunch once you’re aboard, you need an updated plan — because on a growing number of trains, you can’t.

    Why the cart lady disappeared

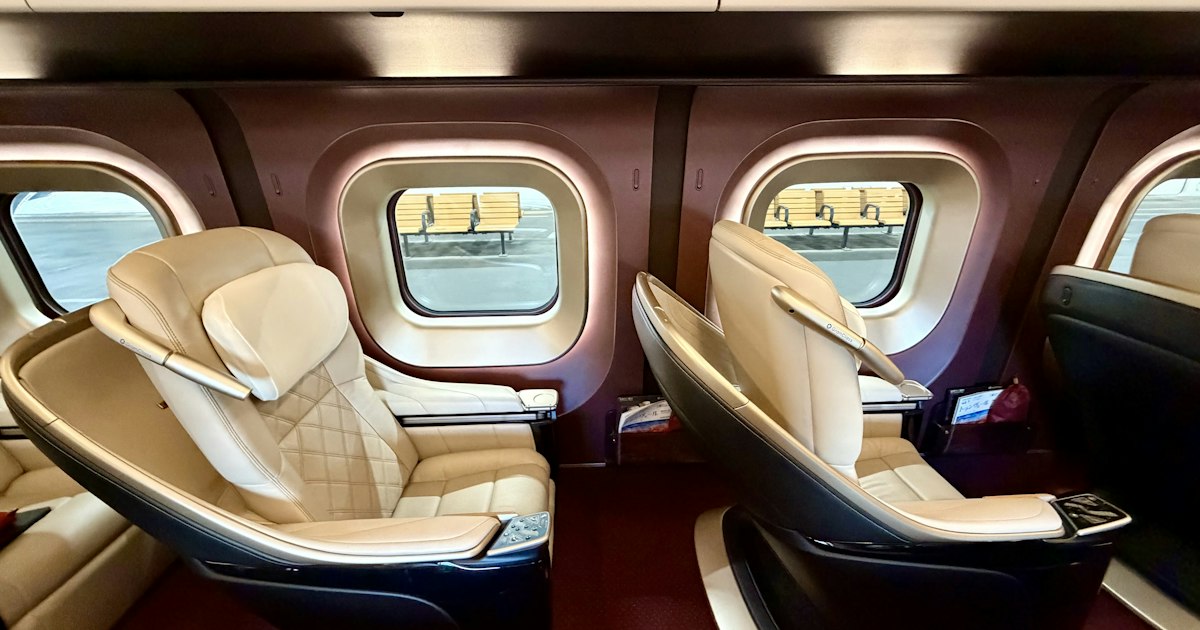
    JR Central, JR East, and JR West have all cited the same reasons for cutting trolley service: a shrinking labor pool willing to work the physically demanding job of pushing a heavy cart through swaying train cars for hours, and declining sales as more passengers pre-buy food at the station. JR Central ended trolley sales on all Tokaido Shinkansen trains (the Tokyo–Osaka line) in October 2023, replacing it with a tablet/QR ordering system in the Gran Class and Green Car coaches only. Ordinary-car passengers on the Tokaido line now get no in-seat food service at all. JR East and JR West have trimmed cart service on several Tohoku, Joetsu, and Sanyo/Kyushu routes too, though coverage varies train by train and is still being adjusted, so don’t assume last year’s experience holds for your trip.

    How the QR/tablet ordering system works (where it exists)

    On trains that still offer in-seat ordering — currently this means Green Car and Gran Class seats on the Tokaido Shinkansen’s N700S trains, plus some Green Car seats on JR East’s Tohoku/Hokuriku services — there’s a QR code printed on a card in the seat-back pocket or on the tray table. Scanning it opens a mobile ordering page (available in English) listing coffee, tea, beer, snacks, and a small selection of bento boxes. You order and pay by credit card through the page, and a staff member brings the item to your seat, usually within 10-15 minutes. Ordering generally closes about 30 minutes before the train reaches its final stop, and there’s often a cutoff window right after departure while the crew sets up, so don’t expect instant service in the first few minutes aboard. Menu and prices are modest — canned beer around ¥350-500, coffee around ¥300-400, simple sandwiches or snack boxes in the ¥500-900 range — and selection is deliberately limited compared to what you’d find on the platform.

    Where cart service still survives

    A physical trolley with a staff member is now the exception rather than the rule. As of 2026, you’re most likely to still see it on some Kyushu Shinkansen services and on certain JR West Sanyo Shinkansen runs, plus occasional seasonal or tourist-oriented trains. Even where it exists, don’t count on a full pass through every car — crews sometimes cover ordinary cars less frequently than Green Car, and a sold-out item (especially the better bento boxes or ice cream) simply doesn’t get restocked mid-journey. If you’re in an ordinary (non-Green) car on the Tokaido Shinkansen specifically, assume there is zero in-seat food service and plan accordingly.

    What to do instead: buy before you board

    The realistic strategy now is to treat the Shinkansen the way you’d treat a long flight — bring your own food. Every major Shinkansen station has extensive options inside the ticket gates and in the surrounding concourse:

    • Ekiben (station bento):
    • Shops inside the gates sell elaborate boxed meals specific to the region, often tied to local specialties. If you want a sit-down-worthy meal rather than a snack, this is the best use of your pre-boarding time — see our guide to kamameshi clay-pot rice ekiben and the stations famous for it for specific stalls worth seeking out, including at Tokyo, Yokokawa, and Nagano stations.

    • Convenience stores: A Newdays, 7-Eleven, or Lawson is almost always inside or right next to the gates. Onigiri (¥130-180), sandwiches, and the increasingly famous katsu sando (around ¥400-600) travel well and don’t need reheating.
    • Station restaurants: If you have 20-30 minutes before departure, many stations have casual chains serving things like hambagu that you can eat quickly before boarding rather than carrying it on.

    Buy drinks before boarding too. Vending machines exist in the space between cars on most Shinkansen sets, stocked with canned coffee, tea, and water (¥130-160), but they’re easy to miss if you’re not looking and some cars don’t have one nearby.

    Common mistakes to avoid

    The biggest mistake is assuming you’ll “just grab something on the train” the way you might remember from a previous trip — service levels have changed fast enough that even recent online reviews can be out of date. Second: don’t cut your station transfer time too close if you’re hoping to buy an ekiben, since the better stalls near Tokyo Station’s Shinkansen gates can have short queues at lunchtime rush (roughly 11:30am-1pm). Third, if you do board a Green Car with QR ordering, scan early — items sell out, especially the bento boxes, and the window for ordering closes well before arrival, not right up to the final stop. Finally, remember eating at your seat is completely normal and expected on the Shinkansen (unlike some other trains in Japan), so there’s no etiquette reason to hold off — the only constraint now is what you managed to bring with you.

    Timing it around your journey

    For trips of 2 hours or less — Tokyo to Nagoya, or Tokyo to Sendai, for instance — a convenience store snack is plenty. For longer hauls like Tokyo to Hakata (about 5 hours) or Tokyo to Shin-Osaka during peak holiday travel (New Year, Golden Week in early May, or mid-August Obon), buy a proper ekiben and a couple of drinks, since crowded departures mean less chance of flagging anyone down even where limited service exists. If your itinerary includes a stop in a food-forward city before a long Shinkansen leg, it’s worth timing lunch there rather than relying on the train at all.

    The bottom line: the Shinkansen itself is no longer a reliable place to source your meal. Treat the station concourse as the restaurant, and the train as simply where you eat it.
  • Enoden: Riding the Enoshima Electric Railway’s Seaside Single Track

    Enoden: Riding the Enoshima Electric Railway’s Seaside Single Track

    Photo by Roméo A. on Unsplash

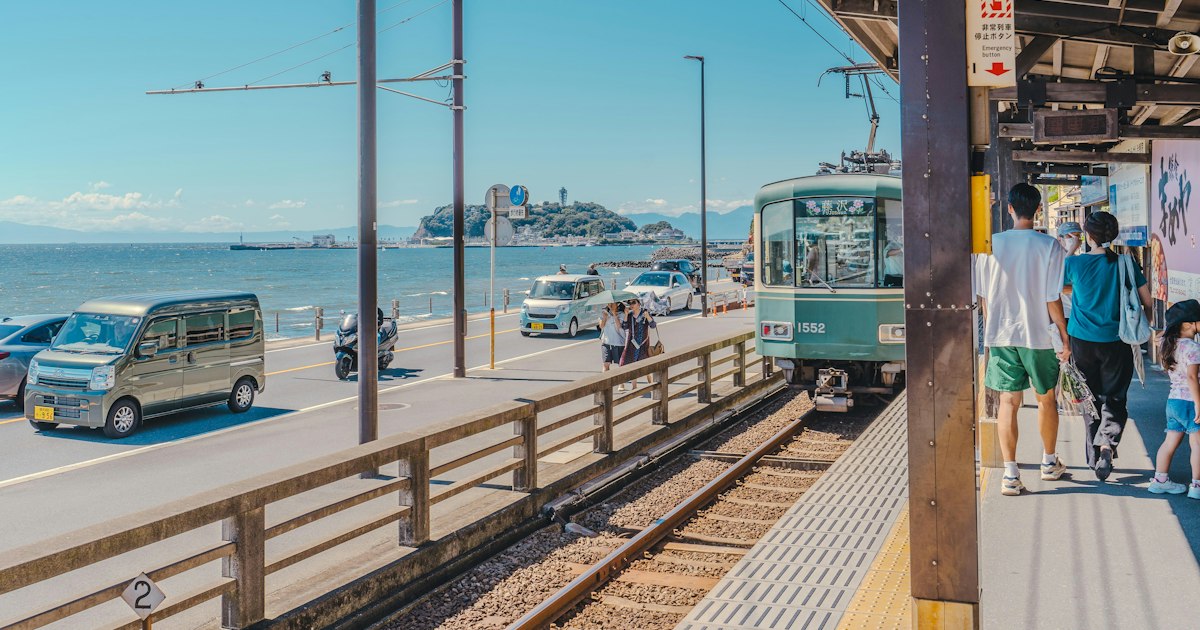
    The Enoshima Electric Railway — almost everyone just calls it the Enoden — is a 10-kilometer tram-like train line that threads through back gardens, runs down the middle of a public road, and skirts right along the Shonan coast between Kamakura and Fujisawa. It’s one of the oldest electric railways in Japan, opened in 1902, and riding the full line takes about 34 minutes, which tells you everything about its pace: slow, local, and scenic rather than efficient. If you’re spending a day in Kamakura, the Enoden isn’t just transport to the next temple — it’s a big part of the reason to come.

    What Makes the Enoden Worth Riding

    For most of its length, the Enoden runs on a single track, with passing loops built into certain stations so trains going opposite directions can cross. That single-track design is why the line feels so intimate: the two-car trains squeeze between houses close enough that you could almost touch a laundry line from the window, then suddenly open up onto the Pacific. The most photographed stretch is the short hop around Kamakurakokomae Station, where the train runs along an open seafront with Enoshima island and, on a clear winter day, Mount Fuji visible across the water. Another well-known section is near Koshigoe, where the tracks run directly in the road lane alongside cars, making it one of the few Japanese railways that functions almost like a street tram.

    Getting to the Enoden

    The southern terminus is Kamakura Station, reachable in about an hour from central Tokyo on the JR Yokosuka Line (direct from Tokyo, Shimbashi, or Yokohama stations) or via the JR Shonan-Shinjuku Line from Shinjuku/Shibuya. The northern terminus is Fujisawa Station, which connects to the Odakyu Line (useful if you’re coming from Shinjuku) and the JR Tokaido Line. Most visitors start in Kamakura, sightsee their way down the line by temple, and end at Enoshima or Fujisawa, rather than riding it end to end in one go.

    Fares and Passes

    Enoden fares are distance-based, running roughly ¥200 for a short hop up to around ¥310 for the full line between Kamakura and Fujisawa (half-price for children). You can pay with cash, IC cards like Suica or Pasmo, or buy paper tickets at station machines — note that some of the smaller stations have only a single ticket window or machine, so during peak hours queues form fast.

    If you plan to hop on and off more than two or three times, the one-day Enoshima-Kamakura Freepass (sold as an IC-linked pass, around ¥800 for adults) covers unlimited Enoden rides for the day and pays for itself quickly. Odakyu also sells a combined pass from Shinjuku that bundles the round-trip Odakyu fare to Fujisawa with unlimited Enoden rides — convenient if you’re starting from west Tokyo, though prices and conditions change periodically, so check current rates before you go.

    The Best Stops Along the Line

    • Hase — closest stop to Kotoku-in (the Great Buddha) and Hase-dera temple, both an easy walk from the station.
    • Gokurakuji — the line passes through a short tunnel here framed by cherry trees in late March/early April; the platform itself is a popular photo stop.
    • Kamakurakokomae — the ocean-view crossing made famous by the anime Slam Dunk, with Enoshima and (on clear days) Fuji visible from the platform and the pedestrian crossing beside it.
    • Enoshima — the jumping-off point for Enoshima island, its shrine complex, observation tower, and seafood restaurants along the approach road.
    • Fujisawa — the northern end, where you transfer back to JR or Odakyu lines.

    Best Time and Timing Tips

    Hydrangea (ajisai) season in June is the Enoden’s single busiest period, especially around Gokurakuji and Hase, and it overlaps with Japan’s rainy season (tsuyu) — pack more than a flimsy convenience-store umbrella, since you’ll likely be standing on exposed platforms; a sturdier clear vinyl umbrella is worth picking up locally if rain catches you off guard. Cherry blossom season (late March–early April) and clear winter days (December–February, for Fuji visibility from Kamakurakokomae) are the other peak windows. Weekday mornings before 10am are noticeably calmer than weekend afternoons, when trains can run standing-room-only and some platforms limit entry during the worst crowding.

    Common Mistakes to Avoid

    Don’t treat the Enoden as a fast way to get anywhere — it’s genuinely slow, and trying to cram it into a tight schedule between other Tokyo plans usually backfires. Don’t linger on the road crossing near Kamakurakokomae Station to recreate anime photos; it’s a real level crossing used by cars and a working train, and local authorities have had to intervene repeatedly because of tourists blocking it. Don’t assume every station has an IC card gate or large ticket machine — some are tiny unstaffed platforms, so keep small bills or a charged IC card on hand. And don’t skip the window seat: the views are the entire point, so if the first car you board is packed, it’s worth waiting for the next one.

    Where to Stay Nearby

    Budget travelers can day-trip from Tokyo and skip lodging entirely, but staying overnight lets you catch the coast at sunrise or sunset when the trains and crowds thin out. For a mid-range option with local character, a family-run minshuku in Kamakura or near Enoshima often costs less than a business hotel and comes with home-cooked breakfast. For a splurge, several hotels directly on the Shonan coast near Enoshima offer sea-view rooms. If you want to extend the trip beyond what the Enoden covers, the Shonan coast is also a popular stretch for renting a scooter and riding further along the coastal road toward Hakone or the Izu Peninsula.

    The Enoden won’t save you time, and it isn’t trying to. It’s a 120-year-old seaside tram doing exactly what it’s always done, and for a few hours of your Japan trip, that’s the whole appeal.

  • Ebisu: Tokyo’s Beer-Hall Neighborhood Built Around the Old Yebisu Brewery

    Ebisu: Tokyo’s Beer-Hall Neighborhood Built Around the Old Yebisu Brewery

    Photo by Denys Nevozhai on Unsplash

    Most Tokyo neighborhoods are named after a shrine, a river, or an old castle gate. Ebisu is named after a beer. In 1890, the Japan Beer Brewing Company built a brewery here and named its flagship lager Yebisu, after the Japanese god of fishermen and good fortune. A rail spur built to haul beer kegs to the port gave the surrounding stop its name — Ebisu Station — and the neighborhood grew up around it. The brewery itself relocated outside Tokyo decades ago, but its site is now Yebisu Garden Place, a mixed-use complex that still keeps the beer history alive, and the streets around the station are packed with izakaya and standing bars that make Ebisu one of the best places in Tokyo for an evening of eating and drinking without the Shibuya-level crowds.

    Getting to Ebisu

    Ebisu Station sits on the JR Yamanote Line, just one stop (about 2 minutes) south of Shibuya, and is also served by the JR Saikyo and Shonan-Shinjuku lines and the Tokyo Metro Hibiya Line. From Shinjuku it’s roughly 15 minutes on the Yamanote Line; from Tokyo Station, about 25 minutes via the Yamanote or Marunouchi/Hibiya transfer. There’s no need to book anything in advance — just tap in with an IC card (Suica/Pasmo) like anywhere else in the city.

    From the station’s East Exit, follow the signs for the “Skywalk,” a roughly 400-meter covered moving walkway that carries you directly to Yebisu Garden Place in about 5 minutes without crossing a single street. It’s a small, easy-to-miss convenience that makes Ebisu one of the more pleasant stations to arrive at with luggage or in the rain.

    Yebisu Garden Place and the Museum of Yebisu Beer

    Yebisu Garden Place opened in 1994 on the former brewery grounds and now holds offices, the Yebisu Garden Hall event space, restaurants, and the Tokyo Photographic Art Museum. At its center is the Museum of Yebisu Beer (Yebisu Beer Kinenkan), a compact museum run by Sapporo Breweries that traces the beer’s history with old bottles, posters, and brewing equipment.

    • Hours: roughly 11:00–18:00; closed Mondays (and around New Year’s) — check the day you visit, as hours shift seasonally.
    • Admission: the self-guided exhibition area is free to enter.
    • Tasting: a small tasting lounge on site sells flights of a few different Yebisu varieties by ticket machine, usually a few hundred yen per glass — a cheap, easy way to compare the brewery’s lineup side by side.
    • Guided tours: paid, Japanese-language tours of the brewing history exhibits run on a set schedule and are worth booking ahead if your Japanese is good enough to follow along; otherwise the exhibition alone is enough for most visitors.

    The square outside the museum, under the glass-roofed Chateau Restaurant building, hosts a famous Baccarat crystal chandelier each winter — more on timing below.

    Ebisu Yokocho: The Neighborhood’s Beer Hall at Night

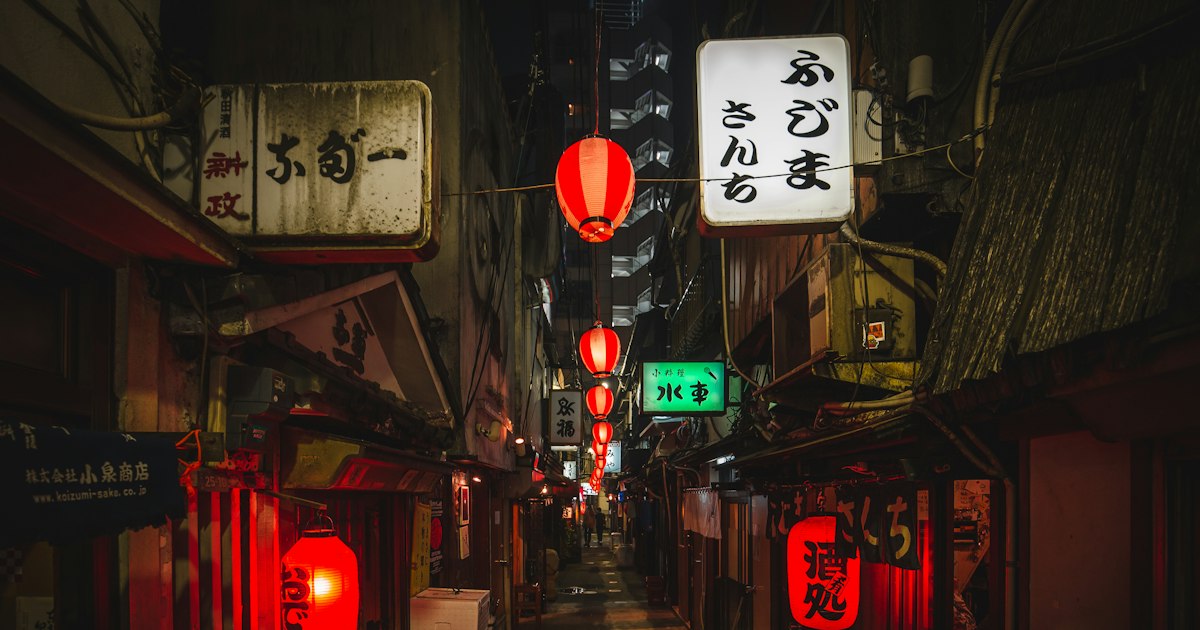
    If Yebisu Garden Place is the neighborhood’s daytime history lesson, Ebisu Yokocho is its nighttime payoff. Tucked just northwest of the station along a street lined with pachinko parlors, this covered alley was once a Showa-era black market and is now a cluster of around 20 tiny stalls serving yakitori, oden, sushi, and grilled seafood, all sharing a few long communal tables down the center. Most stalls open around 17:00 and stay busy until midnight or later; it gets loud, smoky, and genuinely fun, especially on weekends.

    Budget-wise, a few skewers and a mug of draft Yebisu run about ¥2,000–3,000 per person; order from two or three different stalls and you’ll have tried more of the alley than if you’d settled into one spot. It’s standing-room informal rather than a sit-down restaurant, so it pairs well with the kind of fast, cheap, stand-and-eat culture you’ll also find at Tokyo’s standing sushi bars — Ebisu has a few of those too, scattered on the streets south of the station.

    Best Time to Visit

    Ebisu works year-round, but a few windows make it better:

    • Winter evenings (mid-November to early January): Yebisu Garden Place runs a seasonal illumination, and the Baccarat chandelier in the central square is lit — it’s free to see and one of the better low-key Christmas-light spots in Tokyo, without Marunouchi-level crowds.
    • Weeknight early evening (17:00–19:00): the best window to grab seats at Ebisu Yokocho before it fills up; arrive after 19:30 on a Friday and you may be standing.
    • Summer: Yebisu Garden Place occasionally hosts a beer garden on its open plaza — a nice outdoor option if you’re there on a warm evening, though it’s seasonal and not guaranteed every year.

    Avoid treating this as a rainy-day indoor destination — the beer museum itself is small (30–45 minutes is plenty), so the appeal of Ebisu is really the walk between the brewery history and the alley food scene, which is more pleasant in dry weather. If rain catches you anyway, the Skywalk covers the station-to-Garden Place stretch, and a basic clear vinyl umbrella from a convenience store will handle the rest.

    Beyond the Beer: What’s Within Walking Distance

    Ebisu’s location makes it a good base for stringing together a half-day without hopping trains. Daikanyama, home to the flagship Tsutaya Books T-Site, is about a 12–15 minute walk northwest, and Nakameguro’s canal-side cafes are another 10 minutes past that. If you’d rather see a different side of Tokyo neighborhood life entirely, both Monzen-Nakacho and Gotokuji Temple make good contrasts — quieter, more residential, and nowhere near as beer-focused.

    Common Mistakes to Avoid

    • Arriving at the beer museum expecting a full brewery tour. The actual Yebisu brewing has long since moved elsewhere; this is a history museum and tasting room, not a working factory tour. Set expectations accordingly and budget it as a 30–45 minute stop, not a half-day.
    • Showing up to Ebisu Yokocho for lunch. Most stalls don’t open until late afternoon. If you’re hungry at midday, look toward the main streets around the station instead.
    • Skipping cash. Several of the smaller Yokocho stalls are cash-only or have low card minimums — carry a few thousand yen in small bills.
    • Confusing Ebisu with Ebisu-cho or other similarly named stops. Make sure your train app has you on the Yamanote/Hibiya Ebisu Station, not a different “Ebisu” exit on a local bus route.

    For a one-word summary: Ebisu rewards an evening visit far more than a daytime one. Come for the museum if you’re curious about the beer’s backstory, but come back after dark for the part of the neighborhood that actually earned it a reputation — the alley, the draft taps, and the crowd spilling out of Ebisu Yokocho onto the street.

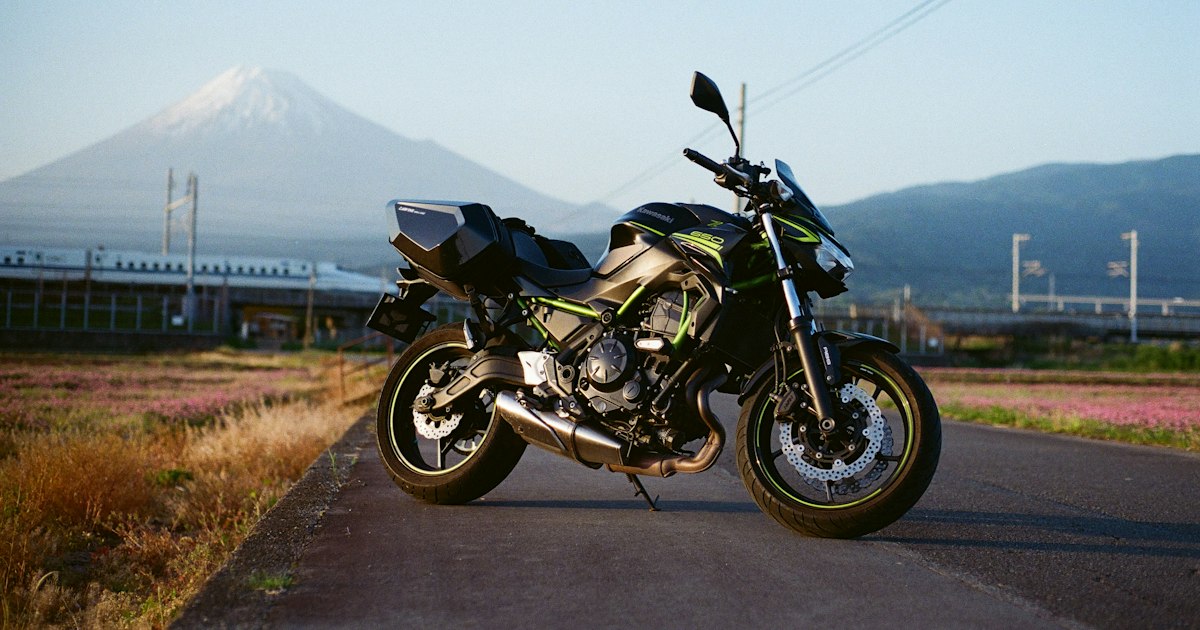
  • Renting a Motorcycle or Scooter in Japan: License Rules and Scenic Touring Routes

    Renting a Motorcycle or Scooter in Japan: License Rules and Scenic Touring Routes

    Photo by Spenser Sembrat on Unsplash

    Japan looks completely different from the seat of a scooter. Coastal roads that trains never touch, mountain passes above the tree line, rice-paddy backroads where the nearest convenience store is twenty minutes away—two wheels get you there. But motorcycle and scooter rental in Japan has its own rulebook, and the single most common mistake foreign visitors make (renting the wrong class of license or vehicle) can end a trip before it starts. Here’s what actually matters.

    Do You Need a Special License?

    Yes, and it’s stricter than car rental in one specific way. Like driving a car, you’ll need either a valid Japanese driver’s license, an International Driving Permit (IDP) issued under the 1949 Geneva Convention, or—if you hold a license from Switzerland, Germany, France, Belgium, Monaco, or Taiwan—an official Japanese translation of your home license arranged through JAF (Japan Automobile Federation).

    The catch: the Geneva Convention IDP has a specific category for motorcycles (usually listed as “A”), and it does not have a category for Japan’s smallest engine class, the 50cc “gentsuki” moped. If your home country’s licensing system doesn’t issue a motorcycle category on the IDP, you legally cannot rent anything—not even a 50cc scooter—no matter how harmless it looks. Shops will ask to see the motorcycle category explicitly before handing over keys, and reputable ones will turn you away rather than risk it. Before you travel, check your IDP application form for the motorcycle box, and if you’re unsure, email the rental shop with a photo of your license and IDP in advance.

    Where and How to Rent

    Rental shops cluster near train stations in cities and resort towns, with nationwide chains (Rental819 is the largest, with dozens of locations from Sapporo to Naha) alongside independent local operators who often cater specifically to touring riders and speak some English. Expect to show your passport, license, and IDP, sign a rental agreement in Japanese (ask for an English summary if needed), and leave a credit card for deposit.

    Typical daily rates, including basic liability insurance:

    • Budget: 50cc scooter, roughly ¥3,000–5,000/day—fine for a single city or short coastal hop, but barred from expressways and most car-only “motorway” sections.
    • Mid-range: 125cc–250cc scooter or light motorcycle, roughly ¥6,000–9,000/day—the sweet spot for most touring routes, since 125cc+ opens up expressway access.
    • Splurge: 400cc–750cc touring motorcycle, roughly ¥12,000–22,000/day plus upgraded collision-damage waiver insurance (¥1,500–2,500/day)—worth it for multi-day mountain or coastal routes with sustained highway stretches.

    Most shops want reservations at least a few days ahead, and far earlier around national holidays—see our guide to Japan’s Silver Week if your trip overlaps late September, since rental fleets can sell out completely during that cluster of holidays.

    Choosing the Right Engine Size for Your Route

    Engine size isn’t just about speed—it determines which roads you’re legally allowed to use. Japan’s expressways (toll roads marked with green signs) and many scenic “skyline” or “parkway” routes require at least 125cc. A 50cc scooter is restricted to ordinary roads, which is still plenty for exploring a single town or coastline, but will shut you out of some of the best mountain routes described below. If your plan involves any real distance between towns, rent at least a 125cc.

    Five Scenic Routes Worth the Ride

    Izu Skyline (Shizuoka): A ridge-top toll road south of Mt. Fuji with ocean views on one side and the volcano on the other—popular enough with Japanese riders that weekend mornings get crowded with sport bikes, so go on a weekday if you can.

    Noto Peninsula (Ishikawa): A full-day coastal loop past fishing villages, rice terraces that meet the sea, and almost no traffic once you’re past Wajima. Fuel stops are sparse on the northern tip, so top off before heading out.

    Aso Panorama Line (Kumamoto): A sweeping road across the rim of one of the world’s largest volcanic calderas in Kyushu, with grazing cattle and steam vents visible from the saddle.

    Sakurajima coastal road (Kagoshima): A short but dramatic loop around an active volcano rising straight out of the bay—easily combined with the city itself; see our guide to Kagoshima and Sakurajima for what to do once you park the bike.

    Hokkaido backroads (around Otaru and beyond): Wide, empty roads built for long sightlines, especially between Sapporo and the canal town of Otaru—a manageable half-day ride that pairs well with glassblowing studios and a seafood lunch at the end.

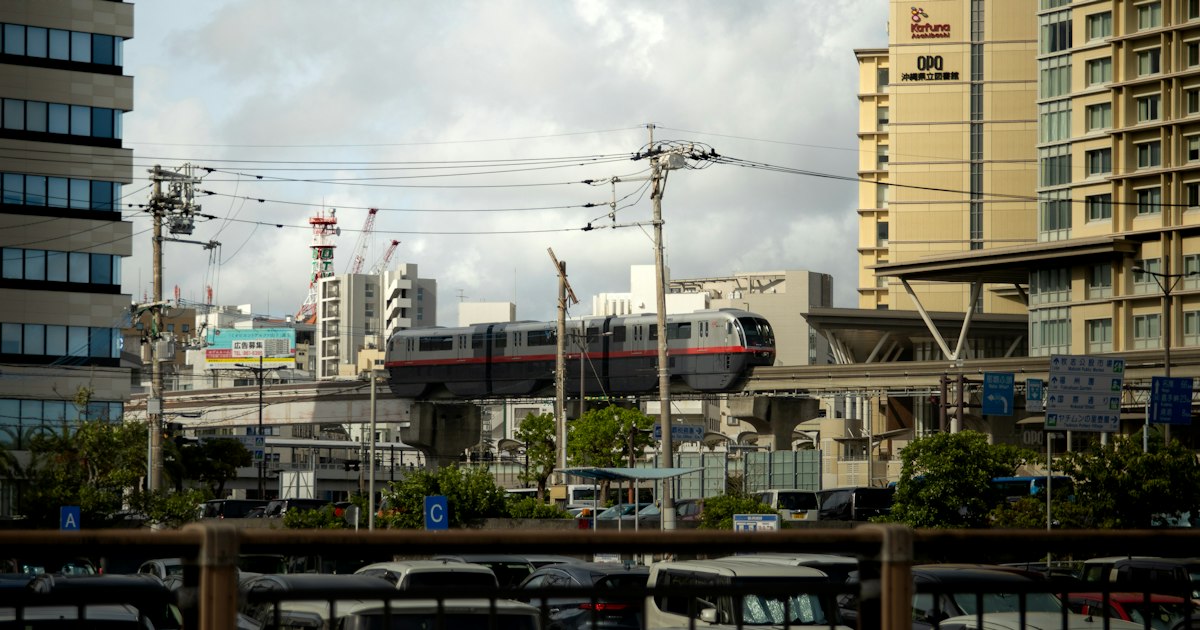
    If a route doesn’t call for a vehicle at all—dense city centers like Naha, for instance—public transit can be the better call; Okinawa’s Yui Rail monorail covers the city core well, leaving a rental scooter for day trips up the island instead.

    Season, Weather, and Timing

    Late April through early June and October through mid-November are the best windows: mild temperatures, low humidity, and (outside holiday weeks) manageable traffic. Avoid the rainy season (tsuyu, roughly mid-June to mid-July) and typhoon season (August–September) if you can, since mountain roads close with little warning when storms hit. Northern routes in Hokkaido and high-altitude passes elsewhere can see snow or ice as early as October and well into April, so always check road status before a long tour outside peak summer.

    Common Mistakes to Avoid

    • Assuming a 50cc rental is as simple as a car rental. It isn’t—see the IDP motorcycle category issue above.
    • Skipping the helmet. Helmets are legally required for riders and passengers on every class of motorized two-wheeler in Japan, no exceptions.
    • Underestimating rural fuel stops. Stations can be scarce on peninsula and mountain routes; fill up whenever you’re below half a tank.
    • Not budgeting for tolls. Expressways and skyline roads charge tolls, usually payable in cash at the booth if your rental bike isn’t fitted with an ETC card reader.
    • Booking lodging as an afterthought. For multi-day tours, a minshuku along the route makes a great overnight stop—home-cooked meals, a hot bath for tired shoulders, and often a covered spot to park the bike overnight.

    Get the license paperwork right before you fly, pick an engine size that matches your route, and the reward is some of the best open-road riding anywhere in Asia.

  • Gotokuji Temple: Tokyo’s Lucky Cat (Maneki-neko) Shrine and Its Sea of Statues

    Gotokuji Temple: Tokyo’s Lucky Cat (Maneki-neko) Shrine and Its Sea of Statues

    Photo by Elise Heikamp on Unsplash

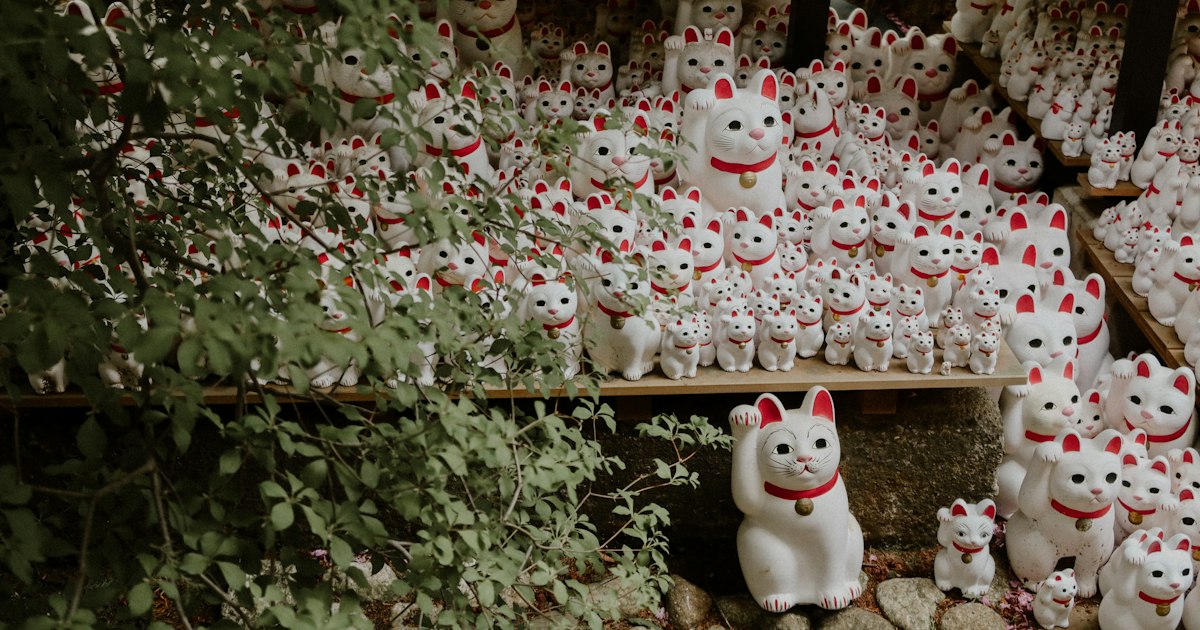
    Tucked into a quiet residential pocket of Setagaya, Gotokuji Temple doesn’t look like much from the street — just another Soto Zen temple with a cemetery and a pagoda. Then you round a corner and find thousands of small white ceramic cats staring back at you, paws raised in a permanent beckoning wave. This is where the maneki-neko, Japan’s famous “lucky cat” figurine, is said to have originated, and it’s one of the few places in Tokyo where a genuinely odd, photogenic sight costs nothing to see and sits almost entirely off the main tourist track.

    The Legend Behind Tokyo’s Luckiest Cats

    The story goes that in the 17th century, a feudal lord named Ii Naotaka was riding past Gotokuji during a thunderstorm when he saw a temple cat raising its paw as if beckoning him inside. He followed it in, took shelter, and narrowly avoided being struck by lightning (or, in some versions, simply received a cup of tea and a dharma talk that moved him). Grateful, he became a patron of the temple, and the Ii family’s fortunes — and the temple’s — grew. When the cat eventually died, the monks enshrined it, and the beckoning-cat motif became the temple’s symbol.

    Worth knowing before you go: Imado Shrine in Asakusa also claims to be the maneki-neko’s birthplace, and you’ll find this argument repeated on both sides with total confidence. There’s no definitive answer, so don’t be thrown off if you see competing claims — Gotokuji is the one most historians and most of the cat-statue tourism actually centers on.

    What You’ll Actually See at Gotokuji

    The cat field sits beside the temple’s three-story pagoda (built in 2006, with small carved cats worked into its details), and it’s exactly as described: tiered wooden shelves packed with maneki-neko figurines of every size, from palm-sized to nearly a foot tall, all facing roughly the same direction, all with one paw raised. Visitors buy a cat from the temple’s small shop, write a wish on it (or just hold it in mind), and either take it home or leave it on the shelves as an offering — which is why the collection keeps growing year over year rather than shrinking.

    The rest of the grounds are genuinely peaceful: a working cemetery, mature trees, and the graves of the Ii family, including Ii Naosuke, the Edo-period statesman assassinated in 1860 in the famous Sakuradamon Incident. It’s a real historical site, not a theme park, and the contrast between the solemn cemetery and the cheerful wall of cats is part of what makes the place memorable.

    Getting There

    Gotokuji is in Setagaya Ward, and there are two reasonable approaches:

    • Odakyu Line to Gotokuji Station — about 15 minutes from Shinjuku on a local train, then a 5–10 minute walk to the temple.
    • Tokyu Setagaya Line to Miyanosaka Station — this quaint, two-car local tram line connects from Sangenjaya (itself reachable via the Denentoshi Line from Shibuya), and Miyanosaka is only about a 5-minute walk from the temple gate, making it the closer option if you’re coming from that side of the city.

    Entry to the temple grounds is free, and there’s no gate or ticket booth — it functions like most neighborhood temples in Japan, open to the public roughly from early morning to early evening (a commonly cited window is around 6:00am–6:00pm, though this isn’t rigidly enforced the way a museum’s hours would be). There’s no admission fee, no English signage push, and no crowds funneling you through — bring cash for the cat shop since it’s a small operation.

    Best Time to Visit

    Weekday mornings are the sweet spot if you want photos of the cat shelves without other visitors in frame — this has become a popular stop for both tourists and Japanese visitors doing a “lucky spot” tour of Tokyo, and weekend afternoons can get surprisingly busy for such a small site. Spring brings cherry blossoms to the grounds, which pair nicely with the pagoda in photos, but the cats themselves are a year-round draw with no real seasonal advantage either way. Avoid treating this as a long stop — most visitors spend 20–40 minutes here, which makes it easy to combine with other low-key Tokyo neighborhoods for a half-day loop, similar in pace to a visit to Monzen-Nakacho on the other side of the city.

    Buying Your Own Maneki-neko (and Common Mistakes)

    The temple shop sells plain white ceramic cats in a few sizes, generally running from around ¥300 for the smallest to a few thousand yen for larger figures — simple, unglazed, and deliberately uniform rather than the colorful painted versions sold as souvenirs elsewhere in Japan. A goshuin (temple stamp) booklet entry, if you collect them, typically costs around ¥300.

    • Budget: A small cat (¥300–500) plus free entry is the whole trip.
    • Mid-range: A medium figurine (¥1,000–3,000) to display at home, often bought alongside a goshuin stamp.
    • Splurge: Larger statues or a full set in different sizes, running ¥5,000 and up.

    The most common mistake is expecting a shopping street or souvenir market — there isn’t one. This is a quiet, working temple with a cemetery, so keep voices down near the graves and don’t treat the whole site as a photo backdrop. The second common mistake is confusing Gotokuji with Imado Shrine and being surprised the “famous lucky cat street” of Asakusa isn’t here; Gotokuji is residential and understated by design. If you want colorful, painted maneki-neko as gifts rather than the plain temple-style ones, those are easier to find at shops near Asakusa or in general souvenir stores, and if you’re shopping for Japanese cat goods after you’re home, secondhand and specialty maneki-neko figures also turn up regularly on sites covered in guides like buying on Mercari Japan from abroad.

    Making the Most of the Visit

    Because the cat shelves are visually striking but the surrounding temple is hushed, this is a good spot to slow down rather than rush through for a single shot. If you’re someone who likes a physical keepsake beyond the figurine itself, this is also a natural place to use an instant camera — the dense rows of identical cats make for one of the more satisfying instant-print compositions in Tokyo, and if you need film or a camera before you go, it’s worth checking a guide to Instax Cheki culture and where to buy film. There’s no café or rest area on-site, so plan your coffee stop in Gotokuji or Sangenjaya before or after.

    Gotokuji rewards visitors who treat it as what it is: a real, still-functioning Buddhist temple that happens to have an extraordinary, slightly surreal detail tucked into one corner. Go early, go quietly, and budget half an hour — it’s one of Tokyo’s best free sights precisely because almost no one oversells it.

  • Minshuku: Japan’s Family-Run Guesthouses and How to Book One

    Minshuku: Japan’s Family-Run Guesthouses and How to Book One

    Photo by Viviana Nysaether on Unsplash

    Somewhere between a budget hotel and a full-service ryokan sits the minshuku: a family-run guesthouse where you sleep on futon in a tatami room, eat breakfast at a shared table, and often chat with the owner about the best fishing spot or hiking trail in town. Minshuku exist all over Japan, from fishing villages in Okinawa to ski towns in Nagano, and they’re one of the best ways to stay somewhere affordable while actually meeting Japanese people instead of just passing through a lobby. Here’s what they actually are, what they cost, and how to book one without the usual language-barrier headaches.

    What Exactly Is a Minshuku?

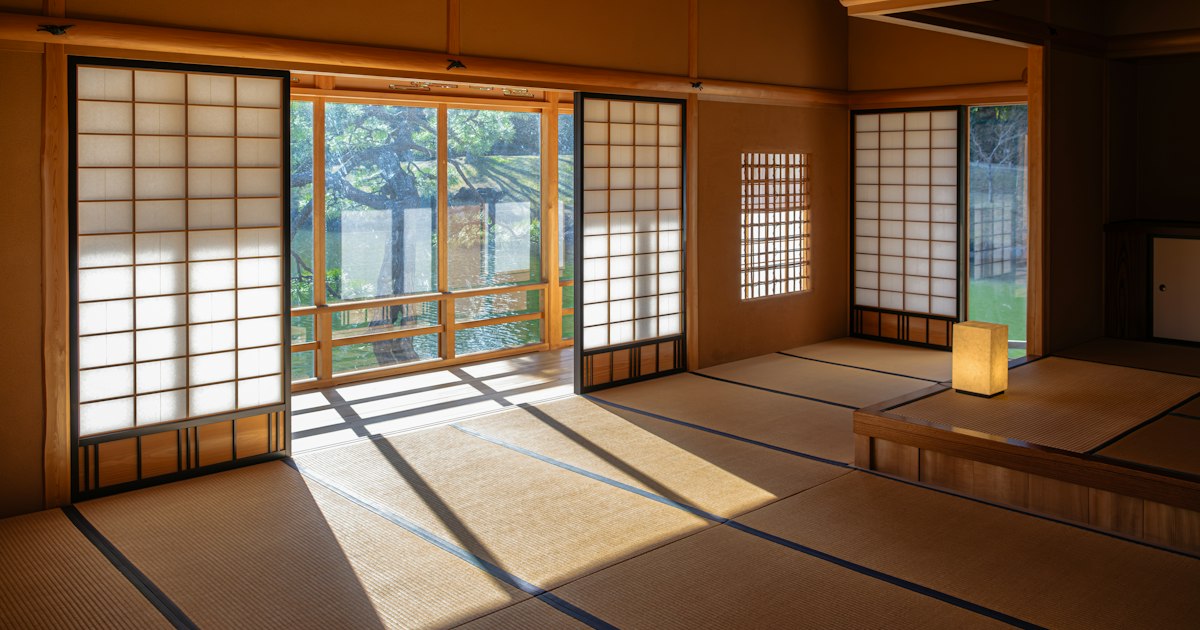
    A minshuku (民宿, literally “people’s lodging”) is essentially a Japanese bed-and-breakfast, usually run out of a private home or a small converted building by the same family for generations. The rooms are simple tatami-mat rooms with futon bedding laid out at night, a shared bathroom down the hall (though ensuite options exist at pricier places), and communal dining rather than in-room meal service. This is the key difference from a ryokan: ryokan are more formal, often have in-room kaiseki dinners, private onsen baths, and staff in yukata attending to every detail, while minshuku are homier, cheaper, and more hands-off. Think of it as the difference between a boutique hotel and staying at a friend’s parents’ house — both can be wonderful, but the experience and price point are completely different.

    What It Costs

    Budget minshuku without meals run roughly 4,000–6,000 JPY per person per night. Add breakfast and dinner (often the better deal, since home-cooked minshuku meals are a highlight) and expect 7,000–11,000 JPY per person. A handful of higher-end minshuku in popular hot spring or coastal towns, especially ones with ensuite bathrooms or ocean-view rooms, push toward 13,000–16,000 JPY per person with two meals — still well under a comparable ryokan stay, which frequently starts above 20,000 JPY per person. As a splurge option within the minshuku category, look for ones specializing in local seafood or mountain vegetable kaiseki-style dinners; you’ll pay more but the food is often the real reason to stay. Payment is frequently cash-only, especially in rural areas, so carry enough yen and don’t assume a card machine will be waiting at checkout.

    Where You’ll Find the Best Ones

    Minshuku cluster wherever Japanese domestic tourism has existed for decades: hot spring towns, coastal fishing villages, ski resorts, and mountain trailheads. Hot spring towns like Unzen Onsen in Nagasaki have a mix of ryokan and smaller minshuku clustered around the same boiling hot spring valley, and staying at a minshuku there is a far gentler hit to the wallet than the big hotel-onsen. Canal towns and port cities with a strong local-crafts identity, such as Otaru, also have minshuku tucked into residential streets a short walk from the main sights — a good option if you want to stay the night rather than day-trip from Sapporo. In cities, minshuku are rarer but not extinct; quiet, low-key Tokyo neighborhoods like Monzen-Nakacho occasionally have small family-run guesthouses mixed in among the temples and old shops, offering a quieter alternative to staying near Shinjuku or Shibuya. Near outdoor destinations like Takachiho Gorge in Miyazaki, minshuku are often the only lodging option within walking distance, run by families who’ve hosted hikers for decades and can tell you which trail entrance to use before the tour buses arrive.

    How to Book One

    The easiest route for foreign visitors is through Japanese booking sites with English interfaces — Jalan and Rakuten Travel list thousands of minshuku, though English detail can be thin for the smallest ones. International platforms like Booking.com also list a growing number of minshuku, especially in tourist-heavy areas, and these tend to have clearer English descriptions and instant confirmation. For very small, old-school minshuku that aren’t on any booking platform, you may need to call directly or have your hotel concierge or a Japanese-speaking friend call for you — many of these places are run by one or two elderly family members who don’t manage an online calendar. Book at least a few weeks ahead for popular seasons; minshuku rooms are limited (often fewer than ten), and they fill up fast around Golden Week, summer Obon in mid-August, and New Year. If your trip overlaps with the autumn holiday cluster, check Japan’s Silver Week dates before you book, since minshuku in scenic areas sell out fastest during that stretch and prices can jump accordingly.

    Etiquette and Common Mistakes

    Take your shoes off at the entrance (genkan) without being told — there’s almost always a step up and a shoe rack. Many minshuku have a curfew or a specific check-in window, often 3:00–6:00 PM, and dinner is frequently served at a fixed time like 6:30 or 7:00 PM rather than whenever you wander in, so confirm timing when you book rather than assuming hotel-style flexibility. Tattoos can occasionally be an issue if the minshuku has a shared bath, so ask ahead or bring a waterproof cover if you’re concerned, same as you would at any onsen facility. The most common mistake foreign guests make is expecting ryokan-level service — minshuku owners are gracious hosts but not hotel staff, so don’t expect someone to carry your bags up the stairs or restock towels without asking. The second most common mistake is skipping the included meals to save money; the home-cooked dinner is usually the actual value proposition, often featuring whatever the owner’s family caught, grew, or foraged that day.

    Packing and Practical Notes

    Bring your own basic toiletries, since smaller minshuku often provide only a towel and maybe a toothbrush, unlike big hotels stocked with amenities. Pack a light layer for walking to a shared bathroom down the hall at night. If you’re traveling with a baby or young child, call ahead — futon-and-tatami setups can actually be easier for toddlers than a Western bed, but not every minshuku has a crib or high chair, so it’s worth checking facilities in advance the way you would for any baby-friendly travel planning in Japan. Wi-Fi exists at most minshuku now, but don’t expect blazing speed in rural mountain or island locations. Finally, bring cash in small denominations for incidentals, since even minshuku that accept cards for the room rate often want cash for extras like laundry or a bottle of local sake at dinner.

    Is a Minshuku Right for Your Trip?

    Minshuku work best if you want a cheaper, more personal alternative to a ryokan, you’re comfortable with shared bathrooms and simple rooms, and you’re visiting places where family-run hospitality is genuinely part of the local character — hot spring valleys, fishing ports, mountain trailheads. They’re less ideal if you need late check-in flexibility, strict privacy, or don’t eat the kind of home-style Japanese food that’s typically served. For a first trip built around Tokyo and Kyoto’s major sights, a hotel or guesthouse hybrid might suit you better; but for a regional trip through smaller towns, a night or two at a minshuku is often the most memorable lodging of the whole itinerary.

  • Monzen-Nakacho: Tokyo’s Quiet Neighborhood Between Kiyosumi Gardens and the Sumida River

    Monzen-Nakacho: Tokyo’s Quiet Neighborhood Between Kiyosumi Gardens and the Sumida River

    Photo by El Salanzo on Unsplash

    Most first-time visitors to Tokyo never make it east of the Sumida River, and that’s exactly why Monzen-Nakacho is worth the detour. This Koto City neighborhood grew up around a shrine gate (the name literally means “in front of the gate”) and still feels like a working Tokyo district rather than a tourist set piece — shopping arcades selling senbei and tsukudani, old timber-merchant canals, and a Japanese garden that rarely gets crowded even on weekends. It pairs naturally with a half-day loop that takes in Kiyosumi Gardens, a historic shrine and temple, and a stretch of the Sumida River.

    Getting There

    Monzen-Nakacho Station is served by two lines: the Tokyo Metro Tozai Line and the Toei Oedo Line. From Otemachi or Nihonbashi, it’s about 7–10 minutes on the Tozai Line; from Shinjuku, figure roughly 20–25 minutes via the Oedo Line. If you’re coming straight from the airport, check Narita to Haneda (and Back): Routes, Time & Cost Compared first, since your arrival airport determines whether a quick transfer through Tokyo or Nihonbashi stations makes more sense before heading out this way.

    One nuance worth knowing in advance: Kiyosumi Gardens is actually closer to Kiyosumi-Shirakawa Station (Toei Oedo Line / Tokyo Metro Hanzomon Line, one stop from Monzen-Nakacho), about a 3-minute walk from exit A3. Monzen-Nakacho Station is the right stop for the shrine, temple, and shopping street, but if the garden is your main goal, riding one extra stop saves a 15-minute walk.

    Kiyosumi Gardens: A Quiet Edo-Era Stroll

    Kiyosumi Gardens (清澄庭園) is a strolling garden built around a central pond, originally developed in the Meiji era on the site of an Edo-period merchant’s villa. It’s small enough to cover in 45–60 minutes but landscaped with enough variety — stepping stones across the water, a teahouse, stone lanterns, and rocks shipped in from around Japan — that it doesn’t feel rushed.

    • Hours: 9:00 AM–5:00 PM (last entry 4:30 PM), open daily except December 29–January 1
    • Admission: ¥150 for adults, ¥70 for visitors 65 and older, free for junior high school age and younger
    • Best for: plum blossoms in February, fresh green in May, and koyo (autumn leaves) in late November to early December

    Unlike Shinjuku Gyoen or Rikugien, Kiyosumi rarely sees tour groups, so it’s a good option if you want garden photos without other people in every frame.

    Tomioka Hachimangu and Fukagawa Fudodo

    Near Monzen-Nakacho Station itself are two adjacent religious sites worth pairing together. Tomioka Hachimangu, founded in 1627, is historically tied to sumo — the shrine grounds hold stone monuments listing the names of every yokozuna champion, a relic of the era when the sport’s early tournaments were held here. On the 1st, 15th, and 28th of every month (weather permitting), the shrine grounds host a sizeable antique and flea market running from early morning until mid-afternoon, free to browse, with vendors selling old ceramics, kimono fabric, and vintage odds and ends.

    Right next door, Fukagawa Fudodo is a striking temple whose main hall is covered in gold Sanskrit characters. Several times a day, priests perform a goma fire ritual — chanting and drumming while burning wooden prayer sticks in front of the altar. It’s loud, dramatic, and free to watch from the hall; if your visit lines up with a session (times are posted at the entrance and shift slightly through the year), it’s worth staying for the full 20–30 minutes.

    Along the Sumida River and Kiba Park

    Kiyosumi Gardens actually borders a canal (Sendaibori) rather than the Sumida itself, but the river is only a few minutes’ walk further east. Eitai Bridge and Kiyosu Bridge both offer unobstructed river views and are far less photographed than the bridges near Asakusa, which makes for a calmer walk at sunset. If you want more green space, Kiba Park, a short ride away on the Tozai Line, is a large riverside park popular with local families and a good cherry blossom spot in late March/early April that doesn’t draw the Ueno-sized crowds.

    Where to Eat: Fukagawa-meshi and Local Favorites

    The neighborhood’s signature dish is Fukagawa-meshi (also called Fukagawa-don) — asari clams simmered in a savory broth and served over rice, sometimes poured tableside like a donburi. It’s a working-class Edo-period fisherman’s dish that’s survived at a handful of long-running restaurants near the shrine, with set meals typically running ¥900–¥1,600. For a faster, cheaper option, the shopping arcade near the station has standing noodle counters and bakeries; if you’re the type who likes Tokyo’s quicker counter-dining culture in general, Tachigui Sushi: Tokyo’s Standing Sushi Bars for a Fast, Affordable Meal covers that style of eating elsewhere in the city. On a cooler day after a garden walk, a bowl of warm red bean soup is a good way to thaw out — see Zenzai & Oshiruko: Japan’s Warm Red Bean Soup Dessert and Where to Try It for what to order and where it tends to show up on menus.

    Budget: convenience store onigiri and a garden bench, ¥300–500. Mid-range: a Fukagawa-meshi set lunch, ¥900–1,600. Splurge: a multi-course kaiseki dinner at one of the area’s quieter traditional restaurants, which can run ¥8,000–¥15,000 per person — worth reserving ahead since English menus are not guaranteed.

    Best Time to Visit

    Spring (late March–early April) and autumn (mid-November to early December) are the strongest windows, when the garden and riverside trees are at their best and temperatures are comfortable for walking. Summer is viable but humid with little shade along the river. If you’re planning around Japan’s broader holiday calendar, note that late September’s Silver Week can bring extra domestic travelers through Tokyo generally; see Japan’s Silver Week: The Autumn Holiday Cluster and How to Plan Around It if your trip overlaps with it, though Monzen-Nakacho itself stays noticeably calmer than central Tokyo even then.

    Common Mistakes to Avoid

    • Getting off at the wrong station for the garden. Kiyosumi Gardens is a short walk from Kiyosumi-Shirakawa Station, not Monzen-Nakacho Station — save yourself the extra 15 minutes.
    • Showing up on a non-market day expecting stalls. The Tomioka Hachimangu flea market only runs on the 1st, 15th, and 28th of the month; on other days the shrine grounds are quiet and stall-free.
    • Confusing this with Tsukishima’s monjayaki district. Monjayaki’s famous “Monja Street” is one Oedo Line stop away in Tsukishima, not in Monzen-Nakacho itself — easy to combine in one afternoon, but they’re different neighborhoods.
    • Expecting English signage everywhere. This is a genuinely local district; menus and shop signs are mostly Japanese-only, so a translation app helps more here than it would in Asakusa or Shibuya.
    • Visiting the garden right at closing. Last entry is 30 minutes before closing, and staff do enforce it — aim to arrive at least an hour before the 5:00 PM cutoff.

    Monzen-Nakacho won’t fill a full day on its own, but as a half-day add-on to a Tokyo itinerary — especially if you’re already heading toward Tsukishima, Kiba, or the Sumida River area — it offers a version of “old Tokyo” that most visitors skip entirely.

  • Okinawa’s Yui Rail: Naha’s Monorail and How to Use It to Explore the City

    Okinawa’s Yui Rail: Naha’s Monorail and How to Use It to Explore the City

    Photo by Bigfoot STNGR on Unsplash

    Okinawa doesn’t have bullet trains or a subway map thick with colored lines — it has one monorail, and it happens to be exactly the right size for a visitor base in Naha. The Yui Rail (ゆいレール) is a single elevated line that strings together the airport, the main shopping street, and the island’s most famous castle ruins in about half an hour. If you’re spending even one day in Naha before heading to the beaches, here’s how to actually use it.

    What the Yui Rail Is and Why You’ll Use It

    The Yui Rail is Okinawa’s only rail line, run by the Okinawa Urban Monorail company. It opened in 2003 and was extended in 2019, and it now runs 19 stations from Naha Airport Station to Tedako-Uranishi Station in neighboring Urasoe City, covering about 17 kilometers end to end in roughly 30 minutes. It’s elevated above the streets for its entire length, which has the nice side effect of giving you a free scenic ride over Naha’s rooftops and the harbor.

    For visitors, its usefulness comes down to geography: the airport, the Kokusai Dori shopping strip, and Shuri Castle — the three things almost everyone in Naha needs to reach — all sit directly on this one line. Everywhere else in Okinawa (the beaches, Churaumi Aquarium, the northern resorts) requires a rental car, highway bus, or taxi, since the monorail doesn’t extend beyond the Naha/Urasoe area.

    Fares, Passes, and IC Cards

    Fares are distance-based, starting at around ¥270 for the shortest hops and topping out at roughly ¥370 for riding the full line. If you’re making more than two or three trips in a day, the unlimited-ride passes are usually the better deal: a 1-day pass runs about ¥800 and a 2-day pass about ¥1,400 (adult prices), sold at ticket machines and the counter at Naha Airport Station. The 2-day pass also comes with small discounts on admission to Shuri Castle and a handful of other attractions, so it’s worth asking about at the counter.

    On IC cards: Okinawa has its own card, OKICA, which gives a small fare discount over cash tickets if you plan to live here a while. For a short visit, though, the better news is that the Yui Rail now accepts all ten of the major nationwide IC cards — Suica, PASMO, ICOCA, and the rest — so whatever card you’ve already loaded up in Tokyo or Osaka will simply tap through the gates in Naha too. That’s a relatively recent change; for years Okinawa’s rail was a notable exception to Japan’s otherwise interoperable IC network, so it’s a mistake that still trips up repeat visitors who remember the old rules. If you’re coming from Tokyo and curious why cards and gates work differently from one operator to the next in the first place, the quirks of overlapping transit systems are explained in our guide to Tokyo Metro vs Toei Subway.

    Key Stations for Visitors

    You don’t need to memorize all 19 stops — a handful matter for most trip plans:

    • Naha Airport Station — connected directly to the domestic terminal by a short walkway, and the starting point for almost every visitor’s trip.
    • Asahibashi / Miebashi — the closest stops to Naminoue Shrine, a small cliffside shrine with its own torii gate and a quiet beach beneath it. If you’re starting a goshuincho shrine stamp book on this trip, Naminoue is a good first stamp before you head further into Kyushu or the mainland.
    • Makishi — the stop for Kokusai Dori, Naha’s main shopping and dining street, and the Heiwa Dori covered market behind it, good for Okinawan souvenirs like sea-salt snacks, bitter-melon (goya) products, and awamori liquor.
    • Omoromachi — home to the DFS Galleria duty-free mall and the Naha Main Place shopping center, plus the Okinawa Prefectural Museum.
    • Shuri — the stop for Shuri Castle, former seat of the Ryukyu Kingdom and a UNESCO World Heritage site. Note that the castle itself is not right outside the station exit — it’s a 15 to 25 minute uphill walk (or a short taxi/bus ride), which catches a lot of first-time visitors off guard.

    Hours, Frequency, and Common Mistakes

    Trains run roughly from 6:00am to 11:30pm, departing every 10 to 15 minutes, with slightly more frequent service during the morning and evening rush. That’s a far cry from the 2-3 minute intervals you’d see on a Tokyo subway line, so it’s worth checking the posted timetable rather than assuming a train will show up the moment you reach the platform.

    The most common visitor mistakes are easy to avoid once you know them:

    • Missing the last train. Service stops around 11:30pm, earlier than big-city rail lines, so plan your evening around it or budget for a taxi back.
    • Assuming Shuri Castle is at the station. Build in the uphill walk, or grab the shuttle bus that runs from Shuri Station to the castle’s park entrance on weekends and peak season.
    • Not checking luggage space. Trains have limited luggage racks and no dedicated baggage car — if you’re heading straight from the airport with big suitcases, consider a taxi for that one leg and use the monorail once you’re unencumbered.
    • Treating it as island-wide transport. The Yui Rail only covers Naha and part of Urasoe. Reaching the northern beaches or the aquarium requires a bus or rental car.

    Families traveling with young kids will find most stations reasonably accessible, with elevators at every platform, though facilities vary station to station — our guide to nursing rooms, stroller access, and diaper changing in Japan is worth a look before you land if you’re traveling with an infant.

    Connecting to Buses and the Rest of Okinawa

    Because the monorail’s reach is limited, it works best as a hub rather than your only transport. Naha Bus Terminal, next to Asahibashi Station, is the main jumping-off point for highway buses to the northern resort areas, Churaumi Aquarium, and other parts of the island. If your itinerary includes the beaches around Chatan or the Motobu Peninsula, plan to pair the Yui Rail (for getting around Naha itself) with a rental car or long-distance bus for everything beyond it.

    Best Time to Ride

    Okinawa’s climate makes timing matter more here than on a typical mainland city trip. Summer (June through September) is hot and humid, and the elevated, partly open-air platforms offer little shade, so riding in the earlier morning or after sunset is far more comfortable. Typhoon season (roughly August through October) can occasionally suspend monorail service for safety; if a typhoon warning is issued, check the operator’s site or ask your hotel before heading to the station, since service can pause for hours at a time. Spring (March-April) and the cooler months from November through February are the most pleasant for a day of station-hopping between Kokusai Dori and Shuri Castle without the heat working against you.

  • Nursing Rooms, Stroller Access & Diaper Changing: Japan’s Baby-Friendly Facilities for Traveling Parents

    Nursing Rooms, Stroller Access & Diaper Changing: Japan’s Baby-Friendly Facilities for Traveling Parents

    Photo by Se. Tsuchiya on Unsplash

    Japan has a reputation for being tricky with strollers — narrow sidewalks, stairs at older stations, crowded trains — but it’s also one of the easier countries in Asia for nursing and diaper changes once you know where to look. The infrastructure exists; it’s just scattered across department stores, train stations, and a dedicated baby-facility network that most tourists never hear about. Here’s how to actually find it, what it costs (usually nothing), and the mistakes that trip up first-time parents.

    Start With “Akachan no Eki” and Baby Room Apps

    Many Japanese municipalities run a program called Akachan no Eki (“Baby Station”) — a network of registered facilities (community centers, pharmacies, malls, city offices) that guarantee a nursing space, a changing table, and hot water for formula, marked with a small baby-and-bottle sticker near the entrance. Tokyo, Osaka, and most major cities participate, though the signage is mostly in Japanese.

    The easiest way to find any of this on the ground is the free app Mamapapamap (ママパパマップ), made by baby brand Pigeon. It lists well over 90,000 facilities nationwide — nursing rooms, diaper-changing stations, and baby rest areas — searchable on a map, with icons for hot water, microwaves, and whether the space is private or shared. It’s in Japanese, but the map pins and icons are usable without reading it. Download it on hotel wifi before you head out for the day, since signal inside basement-level malls and stations is often weak.

    Department Stores and Shopping Malls: Your Most Reliable Option

    If you’re near a major department store (Isetan, Takashimaya, Daimaru, Seibu) or a big suburban mall, you have a baby room guaranteed. These are usually tucked on a mid-to-upper floor near the restrooms — often the same floor as the kids’ clothing section — and open during store hours, typically 10:00 to 20:00 or 21:00. Standard setup: a curtained or partitioned nursing area with chairs, a changing table, a hot-and-cold water dispenser for mixing formula, and sometimes a microwave. All of this is free and doesn’t require being a customer.

    Malls built in the last ten years tend to be the most generous with space — Lalaport, Aeon Mall, and the big complexes on Odaiba like DiverCity and Aqua City all have dedicated, well-signposted baby rooms with multiple private nursing stalls, which is useful if you’re spending a full day out there with kids anyway.

    Train Stations and the Shinkansen

    Coverage at train stations is uneven. Large JR and metro hub stations (Tokyo, Shinjuku, Shibuya, Osaka, Kyoto) usually have a multipurpose restroom (多目的トイレ) with a fold-down baby seat and changing table, and increasingly a separate nursing room nearby — look for a baby-chair pictogram on the station map near the ticket gates. Smaller stations may have nothing beyond a baby seat bolted inside a regular accessible stall, so don’t count on privacy for nursing outside the big stations.

    On the Shinkansen, every train has a multipurpose room (多目的室), free to use and not bookable in advance — it’s first-come-first-served, so ask a conductor to unlock it when you need it. It’s the best option for nursing or a diaper change on a long ride, since the regular onboard toilets are too small for a changing mat. If you’re navigating Tokyo’s subway network with a stroller rather than JR lines, it’s worth understanding how transfers actually work between the two separate systems — see our guide to the Tokyo Metro vs. Toei Subway split, since cross-system transfers sometimes mean exiting gates and re-entering, which is a lot more stressful with a stroller than a connecting corridor.

    Stroller Access: Elevators, Stairs, and When to Just Take a Taxi

    Elevator coverage has improved enormously since Tokyo and Osaka hosted major international events, and most central stations now have at least one step-free route from street to platform. The catch is that it’s often a long detour — one elevator serving the whole station, located far from your actual exit — and it’s not unusual to add 5–10 minutes to a transfer. Google Maps and the Navitime app both show elevator icons on station layouts, which is worth checking before you commit to a transfer with a sleeping baby in the stroller.

    Rush hour (7:30–9:30 and 17:30–19:30 on weekdays) is genuinely rough for strollers on Tokyo trains — cars are packed shoulder to shoulder and staff may ask you to fold the stroller and hold your child. If your schedule allows it, shift station travel to mid-morning or early afternoon. For anything involving multiple transfers, heavy bags, and a cranky toddler, a taxi is often worth the extra cost (a 20-minute Tokyo taxi ride runs roughly ¥2,000–3,500) — Japanese taxis have trunk space for a folded stroller and drivers are used to helping load it.

    Diapers, Formula, and Supplies on the Road

    You won’t need to pack diapers for the whole trip. Convenience stores (7-Eleven, Lawson, FamilyMart) stock a small range of diapers and wipes in a pinch, but for real selection and better prices go to a drugstore (Matsumoto Kiyoshi, Sundrug) or, best of all, a branch of Akachan Honpo, Japan’s dedicated baby superstore chain. A pack of Merries or Moony diapers runs roughly ¥1,500–2,200 depending on size and count, and Akachan Honpo locations almost always have their own free nursing and changing room on site, plus staff used to helping confused tourists. One fit note: Japanese diaper sizing (S/M/L/XL by weight in kg) tends to run slightly narrower than Western brands, so if your baby is between sizes, size up.

    Liquid baby formula in ready-to-pour cartons (by Meiji and Glico) has been sold since 2019 and is a genuine lifesaver for travel — no mixing, no hot water needed, just attach the included nipple. It’s pricier per feed than powder but worth it for a flight or Shinkansen ride.

    Airports: Covering Both Ends of the Trip

    Narita and Haneda both have multiple nursing rooms spread through their terminals, free to use, generally with the same hot-water-and-changing-table setup as department stores, plus some play areas for older siblings. If your itinerary has you connecting between the two airports — for a domestic flight or hotel change — note that it’s a longer, costlier trip than it looks on a map; our Narita to Haneda route comparison breaks down the bus, train, and taxi options, which matters more when you’re timing it around a feeding or nap schedule rather than just minimizing cost.

    Common Mistakes to Avoid

    • Assuming station-level toilets double as nursing rooms. They usually only have a changing seat, not a private nursing space — check the app first if privacy matters.
    • Not checking elevator routes before a transfer. A “step-free” station can still mean a 300-meter walk between elevators.
    • Traveling during rush hour with a stroller. Shift to off-peak hours whenever your schedule allows.
    • Packing a full diaper supply from home. It adds dead weight to your luggage for no reason — Akachan Honpo and drugstores have you covered within a day of landing.
  • Narita to Haneda (and Back): Routes, Time & Cost Compared

    Narita to Haneda (and Back): Routes, Time & Cost Compared

    Photo by Levi Meir Clancy on Unsplash

    Narita (NRT) and Haneda (HND) are roughly 80 km apart, on opposite sides of Tokyo Bay, and there is no direct train or monorail connecting them. If your itinerary has you landing at one and flying out of the other — a common situation for travelers combining an international arrival with a domestic hop, or switching airlines mid-trip — you need to budget real time and money for the transfer. Here’s what actually works, what it costs, and where people get caught out.

    Why This Transfer Trips People Up

    Unlike, say, Narita to central Tokyo, there’s no single fast rail line between the two airports. Every option involves either a long bus ride through variable traffic or a train journey with at least one transfer. Budget a minimum of 90 minutes door-to-door under ideal conditions, and closer to 2–3 hours if you’re traveling during rush hour or with a tight connection in mind. Build in a buffer — airlines and immigration won’t wait, and neither will Tokyo traffic.

    Option 1: The Direct Airport Limousine Bus

    The Friendly Airport Limousine bus is the simplest option because it’s genuinely direct — one seat, no transfers, and it handles big suitcases without you having to haul them up and down station stairs. Buses run between all terminals at both airports (Narita T1/T2/T3 and Haneda T1/T2/T3).

    • Time: Scheduled at 65–85 minutes, but realistically 1.5–2.5 hours when you factor in Tokyo’s expressway traffic, especially weekday evenings and holiday periods.
    • Cost: Roughly ¥3,200–3,600 one way for an adult (fares have crept up in recent years, so confirm the current price at the counter or online before you buy).
    • Booking: Reservations are recommended, especially for early morning or late evening departures, and can be made online or at the limousine bus counter in the arrivals hall.

    This is the best choice if you’re carrying multiple large bags, traveling with kids, or simply don’t want to deal with station transfers after a long flight.

    Option 2: The Train Through-Service (Keisei–Toei–Keikyu)

    There’s a lesser-known but useful rail option: a one-seat through-service that runs on the Keisei Narita Sky Access Line, continues through Tokyo on the Toei Asakusa Line, and finishes on the Keikyu Line straight into Haneda’s terminals. No platform-to-platform transfer is required because the same train continues through — you just stay seated.

    • Time: Around 100–110 minutes depending on the specific train (limited express services are faster than locals).
    • Cost: Roughly ¥1,500–1,700 total using an IC card (Suica/Pasmo), since the fare is a combination of three operators’ rates.
    • Frequency: Not every train runs this through-route — check the platform display or a transit app (Google Maps and Navitime both handle this correctly) rather than just hopping on the first Keisei train you see.

    Because this route cuts through central Tokyo on the Toei Asakusa Line, it’s worth understanding how Tokyo’s subway operators divide up the city — the fare and ticketing logic carries over to plenty of other trips you’ll take while in Japan.

    If your train doesn’t run through to Haneda, the backup plan is: Keisei line to Nippori or Keisei-Ueno, transfer to JR to Shinagawa, then the Keikyu Line or Tokyo Monorail into Haneda. It adds a transfer but trains run frequently, so it’s rarely a big delay.

    Option 3: Via Tokyo or Shinagawa Station (if you’re stopping in the city anyway)

    If your plan already includes a stop in central Tokyo — dropping bags at a hotel, grabbing a meal — it can make sense to break the journey rather than transfer airport-to-airport in one go. The Narita Express (N’EX) runs from Narita to Tokyo Station in about 60 minutes for roughly ¥3,250, and from Tokyo or Shinagawa it’s another 20–30 minutes to Haneda via the Keikyu Line or Tokyo Monorail for a few hundred yen more. It’s not cheaper than the other options, but it lets you split the trip around other errands instead of treating it as dead travel time.

    Option 4: Taxi or Private Car

    A taxi between the airports costs roughly ¥20,000–25,000 (plus expressway tolls), and takes 60–90 minutes without traffic — but Tokyo traffic is rarely cooperative, so treat 90 minutes as optimistic. The appeal is door-to-door convenience with zero transfers, which matters if you’re traveling very late at night, very early in the morning, or with someone who has mobility issues. For groups of three or four splitting the fare, it can land close to bus pricing per person. Private car services with fixed quotes are also available and worth comparing if you want price certainty up front.

    Timing Mistakes to Avoid

    • Assuming trains run as late as flights land. Through-service trains and connecting local lines thin out in the evening — if your flight lands after 9–10pm, check the last train times before counting on rail, or default to a taxi.
    • Underestimating rush hour. The limousine bus schedule assumes clear roads. Weekday evening traffic (roughly 5–7pm) can easily double the trip time.
    • Cutting connections too close. Given immigration/security lines plus a transfer that can run 90 minutes to 2.5 hours, a domestic connection with less than 3 hours of total buffer is risky, especially for a first international arrival with immigration and customs ahead of you.
    • Not confirming which terminal. Both airports have multiple terminals with their own bus stops and train station entrances — double-check your arrival and departure terminal before picking a route, since walking between terminals at either airport also takes time.

    Practical Tips

    Get an IC card (Suica or Pasmo, including the mobile versions) before you start — it removes the need to calculate exact train fares for a multi-operator through-journey and works on buses too. If you’re carrying rental Wi-Fi or a SIM that needs to go back before you leave Japan, sort that out before you commit to a transfer route, since drop boxes and return deadlines vary by airport — see our guide on returning a rental pocket Wi-Fi or SIM at the airport for specifics. And whichever route you pick, screenshot or write down your bus departure time and terminal — airport Wi-Fi isn’t always reliable, and limousine bus stops can be a short walk from where you land.

    Bottom line: for most travelers with normal luggage, the through-train is the best value (around ¥1,600, under two hours including some buffer). For those with heavy bags, tight timing anxiety, or late-night arrivals, the limousine bus or a taxi is worth the extra cost for the one-seat simplicity.