Japan Trove

Category: Travel

Practical, up-to-date guides for traveling in Japan — itineraries, rail passes, eSIMs, where to stay, seasonal timing, etiquette, and the local know-how that makes a trip smoother. Written with real Japanese sources so you get the answer that actually works on the ground, not the recycled tourist one.

  • What to Do If You Get Sick in Japan: Pharmacies, Clinics & Hospitals for Tourists

    What to Do If You Get Sick in Japan: Pharmacies, Clinics & Hospitals for Tourists

    Photo by Vincent Wong on Unsplash

    Getting sick on a trip is never fun, but Japan is one of the easier places in the world to handle it. The healthcare system is efficient, pharmacists are highly trained, and most cities have at least one clinic or hospital set up for foreign patients. The catch is that the system works differently from what you’re used to at home — knowing the basics before you need them will save you a lot of stress mid-fever.

    Know the Emergency Numbers Before You Need Them

    For a genuine emergency — chest pain, severe injury, difficulty breathing — call 119 for an ambulance (the same number covers fire). This works from any phone, including hotel landlines, and operators can often connect you to a translator, though response is faster if you have even a few words of Japanese or can hand the phone to hotel staff. Dial 110 for police. Ambulance transport itself is free regardless of insurance status, but the hospital treatment once you arrive is billed separately and in full if you’re not enrolled in Japan’s national insurance.

    For non-emergencies, the Japan Visitor Hotline (050-3816-2787) run by the Japan National Tourism Organization operates 24/7 in English, Chinese, and Korean, and can help you find a nearby clinic, explain symptoms over the phone, or act as an interpreter when you’re at a pharmacy counter. Save this number in your phone before you land.

    Pharmacies: Your First Stop for Minor Ailments

    For colds, stomach upsets, headaches, and travel fatigue, a drugstore (doraggusutoa) is usually all you need, and you don’t need a prescription or appointment. Chains like Matsumoto Kiyoshi, Sugi Pharmacy, Welcia, and Tsuruha are everywhere near train stations, typically open 9:00 or 10:00 to 20:00 or 21:00; in big cities like Tokyo and Osaka, some locations and most Don Quijote stores stay open past midnight or around the clock. A trained pharmacist (yakuzaishi) is usually on duty and can point you to the right product even with basic English and a translation app.

    Japanese brand names differ from what you know, so it helps to recognize these:

    • Pain/fever reducer: Loxonin S (loxoprofen) or Calonal/Tylenol (acetaminophen), roughly ¥700–¥1,200
    • Cold medicine: Pabron Gold or Benza Block, around ¥1,000–¥1,500
    • Upset stomach: Seirogan (a strong, very Japanese remedy) or Biofermin, around ¥800–¥1,500
    • Allergy relief: Allegra FX or Claritin EX, around ¥1,000–¥1,800

    A separate category, the dispensing pharmacy (chozai yakkyoku), fills prescriptions written by a doctor and is usually attached to or near a clinic — you can’t get prescription-strength medication at a regular drugstore counter.

    Visiting a Clinic: What to Expect and What It Costs

    If symptoms are more than a drugstore can handle — a bad flu, an ear infection, a sprained ankle — a local clinic (clinic or iin) is the next step, and walk-ins are generally accepted during opening hours (usually weekday mornings and afternoons, with a midday break, and often closed Thursday or Sunday). Without Japanese national health insurance, expect to pay the full self-pay rate: a basic consultation runs roughly ¥5,000–¥10,000, with additional charges for any tests, X-rays, or medication. Clinics expect payment in cash or by card at the time of visit, and you’ll get an itemized receipt to submit to your travel insurance later.

    Most clinics have little to no English, so this is where the Japan Visitor Hotline or a hotel concierge earns its keep. In major tourist areas, some clinics now advertise “English OK” on signage or Google listings — search “English speaking clinic” plus your city name, or check your hotel’s recommended list first, since many hotels have a standing relationship with a nearby doctor for exactly this situation.

    English-Speaking Hospitals in Major Cities

    For anything serious, head to a larger hospital with an international department. These see foreign patients regularly, have English-speaking staff or interpreters on call, and are used to insurance paperwork from abroad.

    • Tokyo: St. Luke’s International Hospital (Chuo-ku), Tokyo Medical and Surgical Clinic (Minato-ku)
    • Kyoto: Japan Baptist Hospital
    • Osaka: Yodogawa Christian Hospital

    Hospitalization without insurance is expensive — figure several hundred to over a thousand US dollars per day depending on the severity of your case — which is exactly why travel insurance matters more in Japan than the relatively low crime rate might suggest. Most credit card travel coverage has a low medical cap; a dedicated travel insurance policy with at least $50,000–$100,000 in medical coverage is worth the ¥1,000–¥3,000 per day it typically costs.

    Before You Go: Medication and Insurance Rules Worth Knowing

    Japan is strict about certain medications that are legal and common elsewhere. Pseudoephedrine (found in Sudafed and some Vicks products) and amphetamine-based ADHD medications like Adderall are banned outright — bringing them can lead to confiscation or worse at customs. If you take a prescription medication in a quantity beyond a one-month supply, or anything containing a controlled substance (including some codeine-based cough syrups), you need a Yunyu Kakunin-sho (import certificate), arranged in advance through a Japanese consulate or customs broker. For common, non-controlled prescriptions, travel with the medication in its original packaging plus a copy of your prescription or a doctor’s letter listing the generic (not brand) name, since Japanese pharmacists work from generic names and may not recognize a US or European brand.

    If Illness Forces You to Change Your Plans

    Sometimes getting sick means cutting a leg of the trip short or heading to a bigger city for better care. If you’re mid-itinerary on the Shinkansen network, it’s worth knowing how flexible Japan Rail actually is about changes — see our guide on Japan’s surprisingly lenient Shinkansen transfer rules, and if you booked online, our breakdown of Smart EX, EX App, and Ekinet covers how to rebook or refund a reserved ticket without a ticket counter visit. If the better option is flying back toward Tokyo or Osaka for a larger hospital, check LCC vs. JAL & ANA for domestic flights — same-day fares on the legacy carriers are often more flexible than budget airlines if your plans need to change at short notice.

    Common Mistakes to Avoid

    • Assuming NHS-style free care applies to you. Tourists pay full self-pay rates everywhere; travel insurance is what makes this manageable.
    • Walking into a hospital ER for something a pharmacist could solve. ERs are for genuine emergencies and will cost far more for a routine cold.
    • Packing banned medications without checking first. Confirm your prescriptions against Japan’s rules before you pack, not after you land.
    • Not writing down the generic name of your home medications. Brand names rarely translate, and pharmacists need the active ingredient to help you.

    None of this should overshadow the trip — Japan’s healthcare system is genuinely good, and most tourist encounters with it end with a quick drugstore visit and a few days of feeling better. Knowing where to go and what it costs just means one less thing to worry about if it happens.
  • Missed Your Shinkansen? Japan’s Surprisingly Lenient Transfer Rules

    Missed Your Shinkansen? Japan’s Surprisingly Lenient Transfer Rules

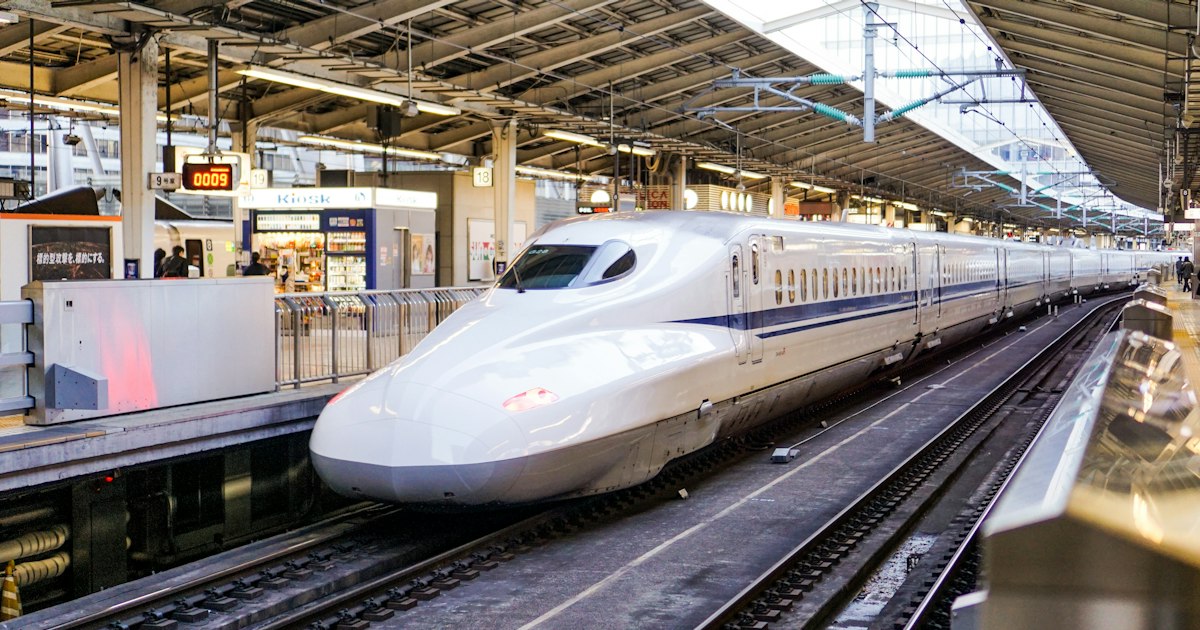
    Photo by Fikri Rasyid on Unsplash

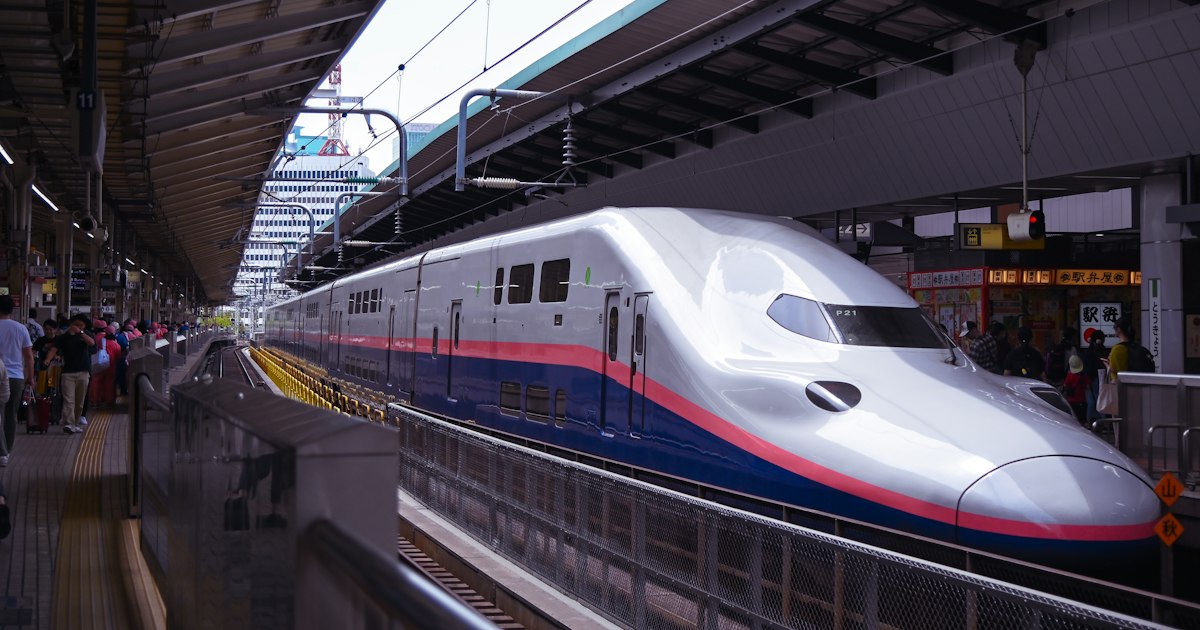
    You’re standing on the platform watching your Shinkansen pull away without you. In most countries, that’s the end of your ticket. In Japan, it often isn’t. Japan Railways has a set of transfer and change rules that are more forgiving than almost any foreign visitor expects — but they’re also full of specific conditions that determine whether “lenient” means free, cheap, or just “possible.” Here’s what actually happens, and what to do in the ten minutes after you realize you’re going to miss your train.

    Why Missing Your Train in Japan Isn’t the Disaster You Think

    The key thing to understand is that a Shinkansen ticket is really two tickets bundled together: the base fare ticket (jōshaken), which covers the distance between two stations, and the limited express surcharge (tokkyūken), which pays for the specific train and seat. Only the second part is tightly tied to a specific departure. The base fare portion has its own validity period — for trips over about 100 km, it’s valid for two days or more, with an extra day added for roughly every 200 km of distance. That means even if you miss your bullet train entirely, your base ticket is very often still good tomorrow. You’re not starting from zero; you’re just missing the express portion, which is the cheaper part to replace.

    The Official Rule: Free Changes — But Only Before Departure

    JR’s actual rule for a reserved-seat ticket is this: you can change the date, train, or seat once, free of charge, as long as you do it before the departure time printed on your ticket. Walk up to a staffed Midori no Madoguchi counter or a multi-function ticket machine, show your ticket, and they’ll rebook you onto a later train the same day (or a different day within the base ticket’s validity) with no fee. This is the rule worth remembering: the moment you sense you’ll miss a train, don’t wait until it’s gone — get to a counter or machine while the clock is still running in your favor. After the printed departure time passes, that specific free-change window officially closes.

    If you’ve already decided not to travel at all, a wholly unused reserved ticket can usually be refunded for a flat ¥220 handling fee, again provided it’s done within the validity period and, for the limited express portion, before the original train’s departure.

    Already Missed It? What Actually Happens at the Gate

    In practice, station staff and conductors are noticeably more flexible than the strict rulebook suggests. If you arrive at the gate and your train has literally just left, telling the staff “the train left without me” (or showing them your ticket and the clock) will usually get you one of two outcomes: they reissue you a seat on the next available train for free or for a small adjustment fee, or they point you toward the non-reserved cars and let the original ticket’s base fare carry you, with only the reserved-seat surcharge needing adjustment. This isn’t a guaranteed legal right — it’s discretionary goodwill — but it’s consistent enough that missing a train in Japan rarely means buying a full-price ticket from scratch. The exception is tickets explicitly marked non-refundable/non-changeable, which brings us to the next point.

    Unreserved Seats: Your Automatic Backup Plan

    On the Tokaido and Sanyo Shinkansen (Tokyo–Osaka–Hakata), cars 1 through 3 are non-reserved (jiyūseki) on almost every Nozomi, Hikari, and Kodama service. Since October 2023, JR Central also unified the limited express fare so reserved and non-reserved seats cost the same — there’s no longer a price penalty for sitting in the unreserved car. Practically, this means that if you have any valid ticket covering that route and you miss your reserved train, you can usually just walk onto the next train’s unreserved car and ride, sorting out the paperwork later if a conductor asks. This is the single most useful fact in this whole topic: on Japan’s busiest corridor, “missing your train” often just means “catching the next one and sitting in a different car.”

    The catch: not every Shinkansen line works this way. Many Tohoku, Hokuriku, and Akita/Yamagata route trains — the Hayabusa being the classic example — are entirely reserved-seating with no unreserved cars at all. On those lines, you genuinely need a new seat assignment, so head straight to a counter rather than assuming you can just hop on.

    E-Tickets Make This Even Easier

    If you booked through Smart EX, the EX app, or Ekinet rather than a paper ticket, changes are even smoother — you can usually swap your reserved train to a later departure directly in the app, often multiple times, right up until the original train leaves, with no trip to a counter required. This is one more reason to book digitally rather than at a machine if you’re at all unsure about your connection timing; our guide to Smart EX, the EX app, and Ekinet covers how to set these up before you travel. If you’re traveling on a Japan Rail Pass, the leniency is even more pronounced: seat reservations are issued free against the pass, so missing a train simply means walking back to a ticket office and getting a new reservation at no cost — the pass itself is unaffected.

    When the Rules Get Stricter: Discount Fares and Peak Season

    All of this leniency applies to standard, full-fare tickets. It does not reliably apply to deep-discount advance-purchase fares (like certain EX-Early tiers or package deals such as Puratto Kodama), which often explicitly prohibit changes or charge a real penalty for them — read the fine print at purchase if you booked the cheapest option available, since that’s precisely where the “it’s fine, just catch the next one” assumption breaks down.

    Timing matters too. During Golden Week (late April–early May), Obon (mid-August), and New Year (late December–early January), reserved cars sell out days in advance and unreserved cars fill standing-room-only within minutes of departure from a terminal station. “Just hop on the next one” is still technically true in these windows, but it may mean standing for an hour or more. If your trip falls in one of these periods, book your original reservation with extra buffer time rather than relying on the backup plan.

    Finally, if a missed connection throws your whole day off and you’re weighing whether to chase a replacement Shinkansen or just fly the remaining leg instead, it’s worth comparing costs — our breakdown of LCC vs. JAL and ANA for domestic flights is useful for exactly that kind of last-minute recalculation on longer routes.

    Quick Reference: What to Do the Moment You Realize You’re Late

    • Still before departure time: Go straight to a Midori no Madoguchi counter or ticket machine — free change, no questions asked.
    • Train just left, Tokaido/Sanyo Shinkansen: Walk to cars 1–3 on the next train and board as non-reserved; sort out any adjustment with the conductor.
    • Train just left, fully-reserved line (e.g., Tohoku Shinkansen): Go to the nearest JR counter immediately — you’ll need a new seat assignment.
    • Booked via Smart EX/EX app/Ekinet: Try changing it in the app first — it’s often instant.
    • Holding a JR Pass: Get a new free reservation; the pass isn’t affected.
    • Booked a deep-discount fare: Check the ticket’s terms before assuming any of the above applies.

    Japan’s railway system is built around precision, but the people running it understand that humans occasionally run late. Know the rules above and a missed Shinkansen becomes a minor inconvenience rather than a ruined itinerary.

  • Tokyo Subway Ticket vs Tono Furii Kippu: Which Unlimited Day Pass to Buy

    Tokyo Subway Ticket vs Tono Furii Kippu: Which Unlimited Day Pass to Buy

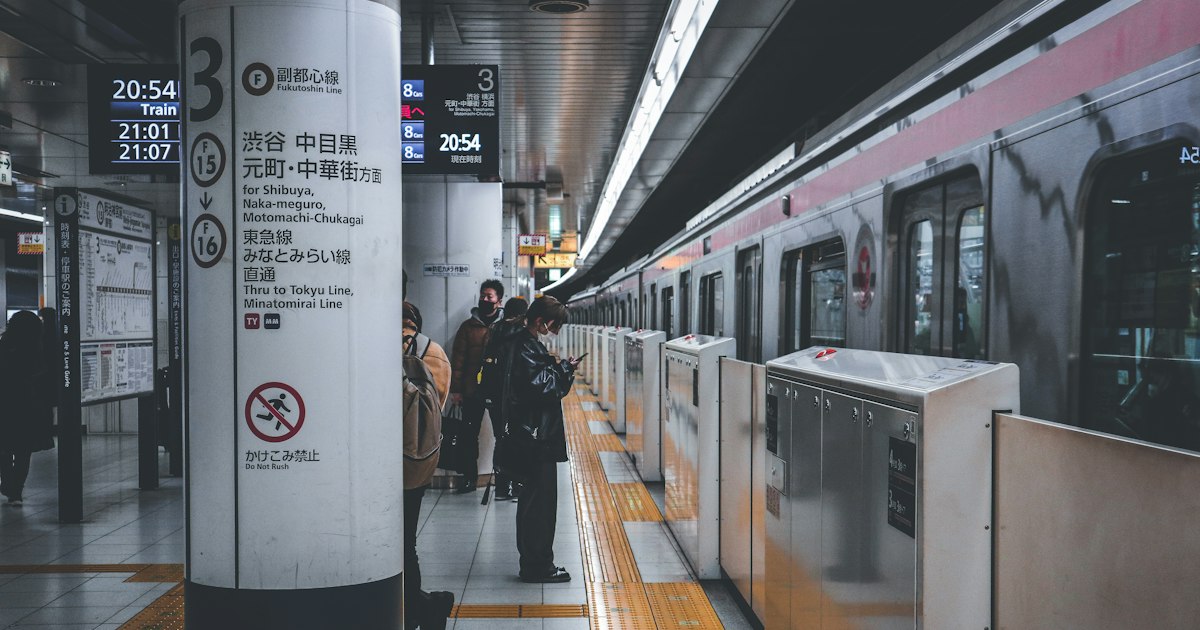
    Photo by BREAKIFY on Unsplash

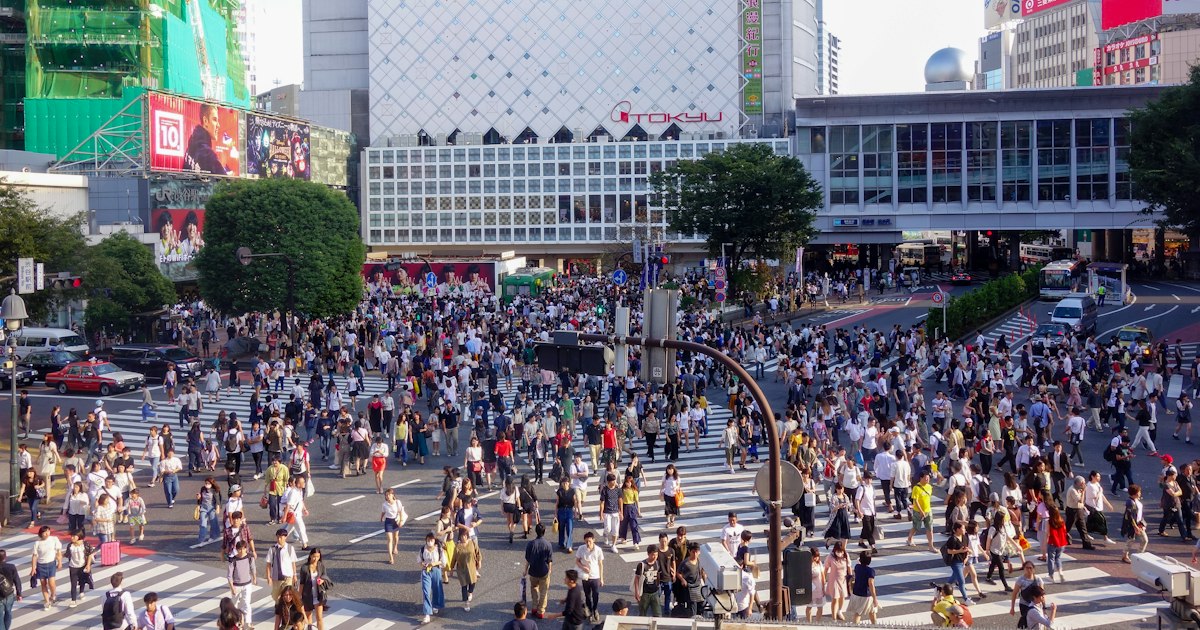
    Tokyo’s train map looks like a bowl of noodles, and the number of “unlimited ride” passes on offer doesn’t help — Tokyo Subway Ticket, Tokyo Furii Kippu (Tokyo Free Pass), Toei One-Day Pass, the JR Tokyo Wide Pass, and more all promise savings but cover different operators. If you’re only comparing two of the most commonly recommended options — the Tokyo Subway Ticket and the Tokyo Furii Kippu — here’s what actually separates them, and which one will save you money based on your real itinerary rather than a brochure.

    What Each Pass Actually Covers

    The Tokyo Subway Ticket covers exactly two operators: Tokyo Metro (9 lines) and Toei Subway (4 lines), for a combined 13 subway lines. It does not cover JR East trains (like the Yamanote Line) or any of Tokyo’s private railways (Keio, Odakyu, Tokyu, Keikyu, etc.). It’s sold in 24-hour, 48-hour, and 72-hour versions — note that these are full 24-hour blocks from first use, not calendar days, which matters if you start riding at 3pm.

    The Tokyo Furii Kippu (Tokyo Free Pass) is far broader. It covers Tokyo Metro, Toei Subway, Toei buses, the Toei Arakawa tram line, the Nippori-Toneri Liner, and — critically — JR East trains within the Tokyo metropolitan area (the 23 wards plus some surrounding zones). That JR coverage is the big differentiator: it includes the Yamanote Line loop, which the Tokyo Subway Ticket does not touch.

    Prices in Plain Numbers

    • Tokyo Subway Ticket: 24-hour ¥800 (adult) / 48-hour ¥1,200 / 72-hour ¥1,500. Child prices are roughly half.
    • Tokyo Furii Kippu: ¥1,600 for adults, valid for one calendar day only (it resets at midnight, not 24 hours from purchase). Children pay ¥800.

    At double the price of the 24-hour Subway Ticket, the Furii Kippu only pays off if you’re genuinely using JR lines or buses that day. If your plan is subway-only — say, Asakusa to Ginza to Roppongi — the cheaper Subway Ticket wins outright.

    Where to Buy Them

    The Tokyo Subway Ticket is sold at Narita and Haneda airport counters (which is handy since you can buy it on arrival before you’ve even touched a train), major Tokyo Metro station ticket windows, and the Tokyo Metro Pass Office at Ueno Station. It’s also bundled into some Narita Express and airport limousine bus combo tickets, so check what you’re buying before adding it separately.

    The Tokyo Furii Kippu is sold at Tokyo Metro and Toei Subway ticket offices and at JR East “Midori no Madoguchi” counters and ticket machines marked for it — not every machine sells it, so look for staffed counters if a machine doesn’t show the option. Unlike the Subway Ticket, it generally isn’t sold at the airports, so budget time to buy it once you’re already in the city, ideally the morning you plan to use it.

    Which One Actually Fits Your Day

    Run the math on your actual stops rather than assuming the broader pass is the better deal:

    • Budget, subway-heavy day (temples in Asakusa, shopping in Ginza, Shibuya crossing, Shinjuku nightlife): the 24-hour Subway Ticket at ¥800 beats paying individual Metro/Toei fares, which run ¥180–¥330 per ride. Three or four rides and you’re already ahead.
    • Mid-range, mixed day (using the Yamanote Line to hop between Shinjuku, Shibuya, and Tokyo Station, plus a subway leg or two): the Furii Kippu’s ¥1,600 only beats paying as you go if you’re taking roughly five or more rides that include JR segments. Fewer than that, and you’re better off paying individual fares or using an IC card like Suica/Pasmo and just tapping through.
    • Splurge / multi-day sightseeing marathon: the 48-hour (¥1,200) or 72-hour (¥1,500) Subway Ticket is the better long-game value if your must-see list — Tsukiji outer market, Yanaka, Roppongi museums — stays within subway reach. For 72 hours straight, you’d need a lot of JR-specific trips before the single-day Furii Kippu, bought twice, would pencil out cheaper.

    Common Mistakes Travelers Make

    The single biggest error is buying the Tokyo Subway Ticket assuming it covers the Yamanote Line — it doesn’t, and travelers end up paying a separate JR fare on top, erasing the savings. The second mistake is timing: the Subway Ticket’s “24 hours” starts ticking the moment you first tap in, so starting at 6pm gives you a full extra morning the next day, while the Furii Kippu expires at midnight regardless of when you started, even if that’s 9pm. If you’re arriving at Narita or Haneda late in the day, the Subway Ticket’s rolling 24-hour window is more forgiving.

    A third mistake is forgetting these passes don’t cover private railways — Keio, Odakyu, Tokyu, and Keikyu lines (useful for day trips to places like Chichibu via the Seibu or Tobu network, see our guide to Chichibu as an easy Tokyo day trip) require separate tickets or an IC card regardless of which pass you’re holding.

    What About Just Using an IC Card?

    For many visitors, especially those staying under a week and not planning an aggressive sightseeing sprint, a Suica or Pasmo IC card with pay-as-you-go tapping is simpler and often cheaper than either pass. You avoid doing the math entirely, and IC cards work across JR, subway, private rail, and most buses nationwide — useful if your trip extends beyond Tokyo to day trips like Kakunodate or further-flung regions reachable by Shinkansen. The passes only make sense once your single-day ride count climbs into the four-to-six range.

    The Bottom Line

    If your Tokyo day is subway stations and nothing else, buy the Tokyo Subway Ticket — it’s cheaper and more flexible across multiple days. If your route genuinely depends on the Yamanote Line loop or JR connections, the Tokyo Furii Kippu’s broader coverage justifies the higher single-day price, but only if you’re racking up enough rides to clear ¥1,600 in individual fares. When in doubt, tally your planned stops against a fare chart before you buy either one — the “unlimited” passes are only a deal when you actually use them enough to beat paying as you go.

  • Booking Shinkansen Tickets Online: Smart EX, EX App & Ekinet Explained

    Booking Shinkansen Tickets Online: Smart EX, EX App & Ekinet Explained

    Photo by Steenium on Unsplash

    Booking a Shinkansen ticket used to mean standing in a station line with a phrasebook. Now three overlapping online systems — Smart EX, the EX App, and Ekinet — let you reserve seats, pick your train, and walk straight to the platform on a QR code or IC card tap. The catch is that each one covers different train lines and different nationalities of credit card, so picking the wrong one wastes time. Here’s what each platform actually does, what it costs, and which one you need for your route.

    Why Bother Booking Online at All

    You can still buy paper tickets at any Shinkansen ticket window (midori-no-madoguchi) or from the orange touch-screen machines in JR stations, which are staffed roughly from the first train of the day until around 20:00–22:00 depending on the station. But booking online gets you three things a counter visit doesn’t: you can reserve a specific seat (window, non-smoking car, near the luggage racks) days or weeks in advance from your phone before you’ve even landed; you can change or cancel most tickets online without walking back to a station; and on JR East routes you can unlock discounted fares that aren’t available at the counter at all. During peak travel weeks — Golden Week (late April–early May), Obon (mid-August), and the New Year holiday (Dec 28–Jan 3) — reserved seats on popular trains sell out, so booking online in advance isn’t just convenient, it’s often the only way to guarantee a seat.

    Smart EX: The Easiest Option for Most Visitors

    Smart EX (smart-ex.jp, with an English interface and companion app) covers the Tokaido, Sanyo, and Kyushu Shinkansen — the single busiest corridor in the country, running Tokyo–Nagoya–Kyoto–Osaka–Hiroshima–Fukuoka/Hakata. It was built specifically to accept foreign-issued credit cards (Visa, Mastercard, Amex, JCB), which is the detail that trips up most first-timers: Smart EX works where Japan-only cards are required elsewhere. Sign up for free, enter your card, and book trains — a reserved non-Nozomi seat from Tokyo to Osaka runs about ¥13,870, while the fastest Nozomi service is roughly ¥14,720 one way in regular seating; Green Car (first class) adds around ¥4,000–5,000 on top. Once booked, you either register the ticket to a Suica/Pasmo IC card and simply tap through the gates, or show the QR code on your phone at the ticket gate — no paper, no counter visit needed. Note that Smart EX is separate from the Japan Rail Pass: if you’re using a pass, you still exchange it at a station counter and make seat reservations there or via a different JR East/West system, not through Smart EX.

    The EX App: Japan’s Native Version

    The EX App is the original, Japan-market version of the same Tokaido/Sanyo/Kyushu reservation system. Functionally it looks similar to Smart EX, but full use of EX App historically required an EX Card or JR-affiliated credit card issued to a Japanese address — a barrier most visitors can’t clear. In practice, there’s rarely a reason for a foreign traveler to use EX App over Smart EX, since Smart EX gives you the same trains, the same seat maps, and the same IC-card tap-through convenience while actually accepting your overseas card. If you already have a Japanese credit card from a previous long stay or working visa, EX App works fine, but for a standard visit, Smart EX is simply the right tool.

    Ekinet: For Tohoku, Hokuriku, and Everywhere North of Tokyo

    Smart EX and EX App don’t cover JR East’s Shinkansen lines — Tohoku, Joetsu, Hokuriku, Akita, and Yamagata. For those, you need Ekinet (eki-net.com), JR East’s own booking platform, which has had a usable English version for several years now. This is the system you’ll use heading to Sendai, Morioka, Akita (for day trips like Kakunodate’s samurai district), Niigata, or Kanazawa. A reserved seat from Tokyo to Shin-Aomori on the Hayabusa costs around ¥17,760, but Ekinet’s real value is its “Tokudane” discount fares — tickets booked roughly 3 to 13 days ahead on specific trains can run up to 30% cheaper than the standard reserved fare, a discount you genuinely cannot get at a ticket window. Ekinet accepts most major foreign credit cards for payment, and tickets are collected at a station kiosk with the same card or picked up as a QR/IC-linked ticket depending on the route. The tradeoff is a slightly clunkier interface than Smart EX and a booking window that opens exactly one month before travel at 5:30 am, so if you want a specific discounted seat on a popular date, set a reminder.

    Smart EX vs EX App vs Ekinet: Which One Do You Need

    The decision is really about geography, not preference. Heading along the Tokyo–Osaka–Fukuoka spine? Use Smart EX. Heading north toward Tohoku, Niigata, or Hokuriku, or want access to discount fares? Use Ekinet. Already hold a Japan-issued credit card and don’t mind the native interface? EX App works, but gives you no advantage over Smart EX for most travelers. If your trip spans both halves of the country — say Tokyo to Kyoto, then later Tokyo to Sendai — you’ll end up with accounts on both Smart EX and Ekinet, which is completely normal and not a sign you’ve done something wrong.

    Common Mistakes to Avoid

    • Assuming one account covers the whole country. Smart EX tickets won’t show up in Ekinet and vice versa — they’re genuinely separate systems with separate logins.
    • Booking a Nozomi or Hayabusa ticket thinking it’s covered by a Japan Rail Pass. The fastest Nozomi, Mizuho, and some Hayabusa services have surcharges or restrictions that passes don’t cover; check before booking.
    • Forgetting the IC card link step. With Smart EX, if you register a Suica or Pasmo to your reservation, that same physical card must be the one you tap at the gate — a different IC card won’t work even if it’s “yours.”
    • Missing the Ekinet discount window. Tokudane fares vanish once the discount quota for that train is sold, often days before departure, so booking “whenever” instead of as soon as the window opens means paying full price.
    • Overlooking scenic or sightseeing trains. Some special trains, like those covered in our guide to Japan’s best scenic sightseeing trains, require their own separate reservation process even if the route overlaps with a regular Shinkansen line.

    Budget, Mid-Range, and Splurge Booking Strategies

    On a tight budget, unreserved seats (jiyuseki) booked through any of these apps are the cheapest way to travel and are rarely full outside peak weeks — just board the correct unreserved cars and sit anywhere. For mid-range comfort, a standard reserved seat guarantees you a place and is worth the roughly ¥500–1,500 premium over unreserved, especially with luggage. For a splurge, Green Car seats offer two-across seating with far more legroom, and on some Tohoku Shinkansen runs you can even book Gran Class, which includes meal and drink service at the seat. And if your itinerary includes a long north-south hop — say Tokyo to Fukuoka — it’s worth comparing the Shinkansen fare and roughly 5-hour journey against flying; our breakdown of LCC vs JAL & ANA for domestic flights lays out when the plane actually wins. If you’re flying into central Japan first, note that Chubu Centrair Airport connects easily into the Tokaido Shinkansen network via Nagoya Station, making Smart EX your booking tool from the moment you land.

  • Kiyosumi-Shirakawa: Tokyo’s Third-Wave Coffee Neighborhood

    Kiyosumi-Shirakawa: Tokyo’s Third-Wave Coffee Neighborhood

    Photo by Zion C on Unsplash

    Ten years ago, Kiyosumi-Shirakawa was a quiet, canal-lined corner of Koto City known mostly for warehouses and one very good Edo-period garden. Then Blue Bottle Coffee chose it for its first store outside the United States, and the neighborhood quietly became ground zero for Tokyo’s specialty coffee scene. Today you can walk a 15-minute loop and pass half a dozen serious roasters, several converted warehouses turned design shops, and a strolling garden that predates all of them by about 150 years. Here’s how to actually plan a visit.

    Why Kiyosumi-Shirakawa Became Tokyo’s Coffee Capital

    Blue Bottle opened its Kiyosumi-Shirakawa Flagship Café in February 2015 — its first location outside the US — and picked the area partly because the old warehouse buildings offered the kind of raw, high-ceilinged space its roastery-café concept needed, and partly because land was cheap relative to Shibuya or Omotesando. Other roasters followed the same logic. Allpress Espresso, a New Zealand roaster, had already set up its Tokyo roastery nearby in 2014. Within a few years the area had a critical mass of independent roasters, and “third-wave coffee pilgrimage” became a standard line in Tokyo guidebooks. Unlike Harajuku or Shimokitazawa, none of this is engineered for tourists — it’s working roasteries that happen to pour excellent espresso.

    Getting There and When to Go

    Kiyosumi-Shirakawa Station is served by the Toei Oedo Line and the Tokyo Metro Hanzomon Line. From Otemachi it’s about 10 minutes on the Hanzomon Line; from Shinjuku, roughly 20–25 minutes via the Oedo Line with one transfer avoided entirely if you board at Shinjuku’s Oedo platform directly. A day pass isn’t necessary — single fares run ¥170–280 depending on your start point.

    Go on a weekday morning if you can. Blue Bottle and Arise get genuine lines on weekend afternoons, especially in cherry blossom season (late March–early April) and autumn foliage weeks (mid-November), when visitors combine coffee with the garden. Weekday mornings between opening and 11am are close to empty. Most cafés here open around 8–9am and close by 6–7pm, so this is a daytime neighborhood — don’t plan an evening visit expecting much beyond dinner at a local izakaya.

    The Roasters and Cafés Worth Your Time

    You don’t need to hit all of these — pick two or three based on your budget and walk between them.

    • Budget (¥400–600 for a coffee): ARiSE Coffee Roasters, tucked into a converted warehouse a few minutes from the station, roasts its own beans and keeps prices lower than the bigger names. A drip coffee runs around ¥450–500. No seating to speak of — it’s a stand-and-go or takeaway spot.
    • Mid-range (¥600–900): Blue Bottle Coffee’s Kiyosumi-Shirakawa Flagship Café is the obvious anchor — a latte is around ¥650–750, and the industrial-warehouse space with its own roasting equipment visible from the café is worth the visit even if you’ve been to Blue Bottle elsewhere. The Cream of the Crop Coffee, a tiny shop near Kiyosumi Teien run by a single dedicated roaster-barista, pours meticulous pour-overs for roughly ¥600–800; seating is extremely limited, so this works best as a quick stop rather than a lingering café visit.
    • Splurge: There isn’t really a “splurge” tier in the Western sense here — this isn’t a neighborhood of ¥2,000 specialty drinks. The closest thing is ordering single-origin pour-overs at Blue Bottle or Allpress, which run ¥800–1,000 depending on the bean, or pairing coffee with a full brunch at one of the café-restaurants near the station, where a meal set runs ¥1,500–2,500.

    If you want a point of comparison for how far Japan’s coffee culture has come, it’s worth contrasting these pour-overs with the surprisingly good convenience store coffee machines at Lawson or 7-Eleven, which cost a fraction of the price — Kiyosumi-Shirakawa is where you go when you want the artisanal version of the same drink.

    Fukagawa Fukadaso and the Neighborhood’s Design Shops

    Alongside the coffee, the neighborhood has a cluster of small design and craft shops, many occupying converted apartment buildings and warehouses — the most well-known being Fukadaso Garage, a renovated old apartment block that now houses a handful of independent shops and a café under one roof. Browsing here takes 30–45 minutes and pairs naturally with a coffee stop on either side. There’s no entry fee; you’re simply walking through a working retail space, so treat it with the same courtesy you would any small shop — ask before photographing merchandise or staff.

    Kiyosumi Teien: The Garden That Started It All

    Long before the coffee shops arrived, Kiyosumi Teien was the reason anyone came to this part of Koto City. It’s a classic Japanese strolling garden built around a central pond, originally developed in the Edo period and later owned by the Mitsubishi family, who donated it to Tokyo in the 1920s. Admission is a modest ¥150 for adults (free for elementary-school-age children and younger; discounted for seniors), and it’s open 9:00am–5:00pm with last entry at 4:30pm, closed December 29–January 1.

    The garden is small enough to walk in 30–40 minutes but rewards a slower pace — stepping stones cross parts of the pond, and the layout changes character every few dozen meters. Spring (cherry blossoms, late March–early April) and autumn (foliage, mid-to-late November) are the best windows, matching the coffee crowd’s peak season, so if you want both without crowds, aim for a weekday morning in late April or early December instead, just after the seasonal rush.

    Common Mistakes to Avoid

    • Treating it as a half-day Shibuya-style outing. Most shops and cafés close by early evening, and there’s little nightlife here — plan your visit for daytime hours.
    • Expecting seating everywhere. Several of the best roasters (ARiSE, The Cream of the Crop) have minimal or no seating. If you want to sit and work or linger, Blue Bottle is the safer bet.
    • Skipping the garden because it “isn’t the point” of a coffee trip. At ¥150 entry, it’s one of the cheapest things you’ll do in Tokyo, and it’s the actual historical anchor of the neighborhood — skipping it misses half the story.
    • Going on a weekend afternoon during cherry blossom or foliage season and being surprised by the line at Blue Bottle. If that’s your only available time, go right at opening.

    Quick Itinerary Tips

    A sensible half-day loop: arrive by 9:30am, start with a coffee at ARiSE or The Cream of the Crop, walk the 10 minutes to Kiyosumi Teien and spend 30–40 minutes there, browse Fukadaso Garage on the way back, and finish at Blue Bottle for a late-morning pour-over before lunch. Budget roughly ¥1,500–2,500 per person for two coffee stops and garden admission, more if you add a café meal. It’s an easy add-on to a Tokyo itinerary that already includes nearby Kiyosumi-Shirakawa-adjacent spots, and if you’re building out food stops elsewhere in the city, it pairs well with a tamago sando for the train ride or a detour to one of Tokyo’s milk bread bakeries worth a detour if you’re craving something sweeter than coffee before you head to your next stop.

  • Chubu Centrair Airport (NGO): Getting to Nagoya, Takayama & Ise

    Chubu Centrair Airport (NGO): Getting to Nagoya, Takayama & Ise

    Photo by Andy Kuo on Unsplash

    Chubu Centrair International Airport (NGO) sits on a reclaimed island in Ise Bay, about 35 km south of central Nagoya, and it’s the main gateway for central Japan — the Alps, Takayama’s old town, and the shrines of Ise-Shima. Unlike Narita or Kansai, Centrair is small and genuinely easy to navigate, but because it isn’t connected to the Shinkansen network, getting onward takes a bit of planning. Here’s how to reach Nagoya, Takayama, and Ise directly from the terminal.

    Getting to Nagoya Station

    The fastest and simplest option is the Meitetsu Centrair Line, which runs directly from a station inside the airport terminal to Nagoya Station — no transfers, no shuttle buses. Two train types make the run:

    • μ-SKY (limited express): around 28 minutes, all-reserved seating. Fare is roughly ¥1,230 base fare plus a ¥360 limited-express surcharge (about ¥1,590 total). Seats can be reserved at the airport ticket counter or via the Meitetsu app.
    • Regular/rapid express trains: around 40–45 minutes, no reservation needed, same ¥1,230 base fare. These run frequently (roughly every 10–15 minutes) and are the budget-friendly default if you don’t mind standing for part of the ride during peak hours.

    Buy tickets from the machines or counter just past arrivals — staff usually speak enough English to help with the μ-SKY reservation. If you’re connecting onward by domestic flight instead of train, it’s worth comparing options first in our guide to LCC vs JAL & ANA for domestic flights, since Centrair also serves routes to Okinawa and other long hops where a legacy carrier’s baggage allowance can beat a cheap LCC fare.

    Getting to Takayama

    There’s no train directly from the airport to Takayama, so you have two real choices:

    • Direct highway bus: Nohi Bus runs a limited number of direct departures between Centrair and Takayama, taking roughly 4 hours. Seats should be reserved in advance in cherry blossom and autumn leaf season, since this route sells out. This is the easier option if you have heavy luggage and don’t want to change trains mid-trip.
    • Train via Nagoya: Take the Meitetsu line into Nagoya Station, then transfer to the JR Hida limited express, which climbs through the Japanese Alps to Takayama in about 2 hours 15 minutes to 2 hours 40 minutes. This route is covered by the JR Takayama-Hokuriku Area Pass if you already have one, and the mountain scenery along the Hida River valley is genuinely one of the better train rides in the country — fans of scenic rail routes will want to also check our roundup of Japan’s best scenic sightseeing trains for other lines worth building a trip around.

    Whichever way you go, reserve seats on the Hida limited express or the direct bus as early as you can — both run infrequently, and a missed reservation can mean a multi-hour wait for the next one.

    Getting to Ise and Toba

    Ise-Shima is technically closer to the airport than Takayama, but it’s in neighboring Mie Prefecture and isn’t on the Meitetsu network, so the connection takes a little more legwork:

    • Highway bus: Mie Kotsu operates a limited daily service between Centrair and the Ise-Toba area, taking roughly 2 hours. Departures are infrequent (sometimes just one or two a day), so check the current schedule before you build your itinerary around it.
    • Train via Nagoya: The more flexible option is the Meitetsu line into Nagoya, followed by a Kintetsu limited express to Ise-shi or Toba Station (about 1 hour 20 minutes from Nagoya). Kintetsu runs these trains every 30–60 minutes, which makes it easier to build a schedule around than the direct bus.

    If shopping is part of your Ise-Shima plans, Mie Prefecture is also home to Yokkaichi’s Banko-yaki pottery tradition — our guide to Banko-yaki clay teapots covers where to find the real thing if you want a souvenir with some local history behind it rather than a generic gift-shop item.

    At the Airport: Facilities and Timing

    Centrair’s terminal is compact — you can walk from security to the furthest gate in under 10 minutes, which makes it one of the few Japanese airports where a 90-minute connection window is genuinely comfortable rather than stressful. Key things to know:

    • Shops and restaurants in the main terminal generally operate from around 7:00 AM to 9:00 PM, though hours shift seasonally and some close earlier on quiet days — don’t plan a late dinner here without checking current hours first.
    • There’s a rooftop observation deck (Sky Deck) that’s free to access and a good spot to watch takeoffs while you wait, especially around sunset.
    • Coin lockers and a baggage forwarding counter (Yamato Transport / takkyubin) are available in the arrivals area if you want to send luggage ahead to your hotel in Takayama or Nagoya rather than hauling it on a train.
    • If you land early and need a coffee before your connecting train, skip the airport café queue and grab one from a convenience store once you reach Nagoya Station — see our guide to using convenience store coffee machines for a quick, cheap fix that’s often better than it sounds.

    Best Timing and Seasonal Notes

    For Takayama, aim to arrive on an early flight if you’re heading there the same day — the last direct bus and the last convenient Hida limited express connection both tend to leave Nagoya by early evening, and missing them means an overnight in Nagoya instead. Cherry blossom season (late March–early April) and autumn foliage (mid-October to mid-November) are the two periods when both the Takayama bus and the Hida limited express sell out days in advance, so reserve as soon as your flight is booked. Ise-Shima is busiest around New Year (hatsumode visits to Ise Grand Shrine) and Golden Week in early May — bus and train seats on the Kintetsu line get tight both times.

    Common Mistakes to Avoid

    • Assuming Centrair connects to the Shinkansen: it doesn’t. Every onward journey funnels through Nagoya Station first, so budget the 28–45 minute Meitetsu ride into your total travel time.
    • Not reserving the Hida limited express or the Takayama bus: both have limited daily departures and sell out in peak season, unlike the frequent Meitetsu and Kintetsu trains.
    • Buying a μ-SKY ticket without realizing it’s reserved seating: if you just want the cheapest, most flexible option to Nagoya, the regular express trains work fine and run far more frequently.
    • Underestimating the Ise-Toba bus schedule: with only one or two direct departures a day, it’s easy to miss the window — the Nagoya-Kintetsu route is the safer backup plan.
  • LCC vs JAL & ANA for Domestic Flights in Japan: Which Wins on Long Hops?

    LCC vs JAL & ANA for Domestic Flights in Japan: Which Wins on Long Hops?

    Photo by Yuriko Kurihara on Unsplash

    Japan’s shinkansen network is justly famous, but it doesn’t reach everywhere — and on the truly long hops, like Tokyo to Okinawa or Tokyo to Sapporo, flying is almost always faster and often cheaper than the train. The tricky part is choosing between Japan’s budget carriers (Peach, Jetstar Japan, Spring Airlines Japan, Solaseed) and the full-service giants, JAL and ANA. Both can be the right call depending on the route, the season, and how much flexibility you need. Here’s how to decide.

    Why Flying Beats the Train on Japan’s Longest Routes

    Shinkansen is unbeatable for Tokyo–Osaka–Kyoto-style corridors, but once you’re looking at Tokyo to Fukuoka (about 5 hours by Shinkansen vs. 2 hours flying) or Tokyo to Sapporo (no bullet train option south of Hakodate, so it’s an 8+ hour slog by rail vs. a 1.5-hour flight), air travel wins decisively. Tokyo to Okinawa (Naha) has no rail option at all — it’s a roughly 2.5-hour flight or nothing. If you want the slower, scenic alternative for shorter or mid-distance legs, Japan’s sightseeing trains like those covered in Resort Shirakami and SL Hitoyoshi are worth it for the journey itself — but for Tokyo–Sapporo or Tokyo–Okinawa, you’re flying regardless of budget.

    Meet the Players: Who Actually Flies Where

    Japan’s main domestic LCCs are Peach Aviation (ANA-affiliated, hubbed at Kansai Airport with a strong Naha/Okinawa network), Jetstar Japan (JAL-affiliated, hubbed at Narita and Kansai), Spring Airlines Japan (Narita-based, routes to Hiroshima, Saga, Okinawa), and Solaseed Air (Kyushu-focused, out of Haneda and Miyazaki). One clarification worth making up front: Zipair, despite often being grouped with these, is JAL’s long-haul international budget arm — it flies to places like Honolulu, Bangkok, and Seoul, not between Japanese cities. If you need a cheap domestic hop, Zipair isn’t an option.

    JAL and ANA, by contrast, fly almost entirely out of Haneda for domestic routes (plus some Narita and regional services), reach nearly every regional airport in the country — including tiny ones LCCs skip entirely — and generally offer more frequent daily departures on popular routes.

    Price Comparison: What You’ll Actually Pay

    On a route like Tokyo–Okinawa (Naha), booking 2-3 months out, Peach or Jetstar one-way fares typically run ¥6,000–¥13,000. JAL and ANA’s walk-up fares on the same route can hit ¥25,000–¥35,000 one-way — but both airlines run advance-purchase discount fares (JAL’s “Saki-yoyaku,” ANA’s early-bird fares) that, booked 45–75 days ahead, often land around ¥13,000–¥18,000. That narrows the gap considerably. The LCCs still usually win on rock-bottom sale fares, but the full-service carriers are far more competitive than their rack rates suggest if you book early.

    Tokyo–Sapporo (New Chitose) and Tokyo–Fukuoka follow similar patterns: LCC fares from roughly ¥5,000–¥9,000 against JAL/ANA advance fares of ¥9,000–¥16,000.

    The Narita Trap and Other Common Mistakes

    The single biggest gotcha with LCCs flying out of Tokyo is that most use Narita, not Haneda. Haneda sits a 15-minute monorail ride from central Tokyo (around ¥500); getting to Narita costs ¥1,000–¥3,200 and takes 60-90 minutes depending on whether you take the Keisei line or the Narita Express. Factor that cost and time into your comparison, or the “cheap” LCC fare can end up costing you as much as JAL/ANA once you add transfers both ways.

    Other mistakes to avoid:

    • Not pre-paying for checked baggage online. Peach and Jetstar charge airport counter rates that can be double the online price — a bag that’s ¥1,500 if added at booking might be ¥3,500–¥4,000 at the airport.
    • Ignoring carry-on weight limits. LCCs enforce a strict 7kg carry-on limit and will weigh your bag at the gate; JAL and ANA are more lenient and also include 1-2 checked bags up to 20-23kg free in economy.
    • Booking non-refundable LCC fares for a tight itinerary. Change and cancellation fees on budget carriers are steep (sometimes close to the ticket price itself), while JAL/ANA’s standard fares usually allow date changes for a modest fee.

    When JAL and ANA Are Worth the Extra Yen

    Beyond flexibility and baggage, the full-service carriers earn their premium on remote-island routes. Some LCCs now reach Okinawa’s bigger outer islands directly — Peach flies to Miyakojima and Ishigaki, useful if you’re headed to the beaches covered in Miyakojima’s bridge-hopping island chain — but the tiniest airports are JAL-only territory. Yonaguni, Japan’s westernmost inhabited island and home to the underwater ruins divers come for, is served solely by JAL’s regional partner RAC out of Naha or Ishigaki — there’s no LCC alternative at all.

    JAL and ANA also win if you’re collecting miles on a Oneworld or Star Alliance account, if weather disruption is a risk (typhoon season rebooking is far smoother on full-service carriers with more daily frequencies), or if you need a same-day return where a cancelled LCC flight could strand you overnight.

    Booking Timing and Seasonal Spikes

    LCC seat sales typically appear 2-4 months before travel and sell out fast on popular routes. JAL/ANA’s early-bird fares open around 75 days out and shrink in availability as the date approaches. Avoid booking late for travel during Golden Week (April 29–May 5), Obon (mid-August), or New Year (December 28–January 3) — fares on every carrier spike 2-3x and economy seats vanish well before departure. If your trip falls in one of those windows, lock in flights the moment your dates are fixed, regardless of which airline you choose.

    Budget, Mid-Range, and Splurge: Tokyo–Okinawa as an Example

    • Budget: Peach or Jetstar from Narita, booked 2+ months ahead, prepaid checked bag — roughly ¥9,000–�¥14,000 one-way all-in.
    • Mid-range: ANA or JAL early-bird fare from Haneda — around ¥15,000–¥20,000 one-way, with free checked baggage, easier rebooking, and a far more convenient airport.
    • Splurge: JAL or ANA flexible/full fare booked close to departure — ¥25,000–¥35,000, but fully changeable and refundable, which is worth it if your plans are still uncertain.

    There’s no universally “right” carrier — just match the choice to the route and how much flexibility your itinerary actually needs. For short, firm-dated hops between major cities, the LCCs are hard to beat. For remote islands, bad-weather seasons, or itineraries still in flux, JAL and ANA’s extra yen usually pays for itself.

  • Resort Shirakami, SL Hitoyoshi & Japan’s Best Scenic Sightseeing Trains

    Resort Shirakami, SL Hitoyoshi & Japan’s Best Scenic Sightseeing Trains

    Photo by PJH on Unsplash

    Most visitors ride Japan’s trains purely to get from A to B, but a small fleet of “joyful trains” (JR’s own term, Joyful Train) turn the journey itself into the destination. These are limited-run sightseeing trains with panoramic windows, local sake bars, retro steam engines, or glass domes, running through coastline, gorges, and rice fields that the Shinkansen blasts past in a tunnel. Booking one takes a bit more planning than a normal JR ride, but the payoff — a slow, scenic afternoon instead of another transfer — is usually worth it. Here’s how to actually plan around the best ones.

    Resort Shirakami: Tohoku’s coastal classic

    Resort Shirakami runs along the Gono Line between Akita and Aomori prefectures, tracing the Sea of Japan coastline for much of the route. There are three different train sets in rotation — Aoike, Buna, and Kumagera — each with slightly different interior themes, but all share the same big draw: wide panoramic windows and, on some runs, a carriage with tatami-style seating or live local shamisen performances.

    The classic routing is between Akita Station and Hirosaki (or Aomori), about 3 hours each way, hugging cliffs and fishing villages with the sea on one side. Reservations are required for the seat you want (around 自由席/non-reserved seats exist but reserved seating, ¥840 on top of the base fare, guarantees a window view), and the train only runs a handful of times per day, so check current timetables on JR East’s site before building your itinerary — schedules shift by season and some runs are suspended in winter storms. Best season is actually winter for dramatic stormy-sea views, but late spring through autumn is more comfortable and reliable. If you hold a JR East rail pass covering Tohoku, the base fare is typically covered; you just add the reserved seat fee.

    Common mistake: assuming you can simply hop on. Reserved seats sell out days ahead during Golden Week and autumn foliage season (mid-October to early November), so book as soon as your dates are fixed.

    SL Hitoyoshi and Kyushu’s steam-train revival

    Kyushu has leaned hard into steam nostalgia. The SL Hitoyoshi, a genuine coal-fired steam locomotive, has historically run on the Hisatsu Line between Kumamoto and Hitoyoshi through the Kuma River gorge — though JR Kyushu suspends and reroutes steam services periodically due to typhoon damage on the line, so always verify current operating status directly with JR Kyushu before counting on it. When running, tickets require both a base fare and a seat reservation (a few hundred to around ¥1,000 extra depending on class), and the cars include a small observation deck and retro wood-paneled interiors.

    Kyushu’s SL network has shifted over the years — the SL Yufuin no Mori steam service and the diesel-powered Yufuin no Mori express (not actually steam, despite the name) running between Hakata/Fukuoka and Yufuin are more consistently operational and just as scenic, winding through mountains toward the hot-spring town. If steam specifically matters to you, treat it as a bonus rather than the plan, and build in a backup day.

    Other joyful trains worth the detour

    A few others reliably deliver:

    • Odoriko / Saphir Odoriko — runs from Tokyo to the Izu Peninsula’s hot-spring coast. The Saphir Odoriko is the premium version with all-reserved, roomier seating and a small private suite; book via JR East’s reservation system or at any JR ticket counter.
    • Umi Kaze / Setouchi trains — several short scenic runs hug the Seto Inland Sea, useful if you’re already island-hopping toward spots like Shodoshima.
    • SL Gunma / SL Takasaki — a more accessible steam option from Tokyo, running on weekends in warmer months through Gunma’s countryside, good for a day trip without the Kyushu-level uncertainty.
    • Belles Montagnes et Mer / Umikaze trains in Shikoku — smaller, charming local runs with wood interiors and ocean or mountain views depending on the line.

    How to book and what it actually costs

    Joyful trains run on standard JR tracks, so you pay the normal base fare plus a reserved-seat surcharge (usually ¥500–¥1,500) — there’s no separate “tourist train ticket” system. Reservations open about one month before travel and can be made at any JR ticket counter (midori no madoguchi), via JR’s online reservation systems where available, or through travel agents in Japan. English-language phone booking is limited, so if you’re not comfortable navigating a Japanese reservation screen, it’s easier to reserve in person once you’ve landed, or ask your hotel concierge to call ahead.

    Budget approach: ride the non-reserved cars where available and accept you might stand or miss a window seat. Mid-range: book reserved seating 2–4 weeks out. Splurge: Saphir Odoriko’s suite-class seating or a private green-car compartment on Resort Shirakami, both of which need to be booked as early as the reservation window allows.

    Timing your trip around these trains

    Most joyful trains don’t run daily — many operate only on weekends, holidays, or a few fixed departures per day, and schedules are published roughly 3–6 months in advance with revisions closer to departure. Build your scenic-train day around the train’s timetable, not the other way around: pick the date first, then slot sightseeing in nearby towns around the departure and arrival times. Autumn foliage (late October–November) and spring (April) are the most popular windows and the first to sell out; summer and winter are quieter and often cheaper to combine with onward hot-spring or coastal stays.

    Practical tips before you go

    • Bring food and drink — some trains have small local-product bars (Resort Shirakami’s is a highlight), but service is limited and cash-only on older trains.
    • Toilets exist but are basic; don’t expect Shinkansen-level facilities on older rolling stock.
    • Photography through moving windows works best on the shaded side of the car — check which side faces the coast or gorge before choosing a seat.
    • If a route is suspended (weather, track damage, maintenance), JR usually substitutes a regular limited express on the same line — you’ll still get where you’re going, just without the theming.

    None of these trains require advanced Japanese or elaborate planning — just a bit of lead time on reservations and a flexible attitude if a steam service gets rerouted. Treat the ride itself as a sightseeing stop on your itinerary, not a transfer, and you’ll end up with some of the most memorable hours of the whole trip.

  • Kiyosumi-Shirakawa: Tokyo’s Third-Wave Coffee and Garden Neighborhood

    Kiyosumi-Shirakawa: Tokyo’s Third-Wave Coffee and Garden Neighborhood

    Photo by Jezael Melgoza on Unsplash

    Ten years ago, Kiyosumi-Shirakawa was a quiet, canal-laced corner of Koto Ward known mostly for its lumberyards and one classical Edo-period garden. Then, in February 2015, Blue Bottle Coffee chose it for its first café outside the United States, and the neighborhood quietly became the epicenter of Tokyo’s specialty coffee scene. Today it’s one of the few areas in the city where you can spend a morning wandering between serious roasters, sit in a 17th-century strolling garden, and barely see another tourist. Here’s how to do it properly.

    Getting There

    Kiyosumi-Shirakawa Station is served by the Tokyo Metro Hanzomon Line and the Toei Oedo Line. From Otemachi it’s a direct ride of about 10–12 minutes on the Hanzomon Line; from Shinjuku, the Oedo Line takes roughly 25–30 minutes. If you’re coming from Asakusa or the Tokyo Skytree area, it’s also an easy one-transfer trip via Monzen-nakacho on the Tozai Line, and you can walk the 15–20 minutes between the two stations past Tomioka Hachimangu Shrine if the weather’s good. The neighborhood itself is flat and compact — almost everything worth seeing sits within a 10-minute walk of the station, so you don’t need taxis or buses once you arrive.

    Why Coffee Roasters Picked This Neighborhood

    Kiyosumi-Shirakawa’s appeal to roasters was practical before it was aesthetic: cheap warehouse space, wide streets for delivery trucks, and proximity to central Tokyo without central Tokyo rents. Blue Bottle’s arrival (its Japan roastery and café sit a few minutes from Kiyosumi Teien) drew international attention, and New Zealand’s Allpress Espresso opened its Tokyo roastery here the year before, in a converted garage with roasting equipment visible from the communal seating. A cluster of independent roasters followed, and the area is now informally known among Tokyo coffee people as a pilgrimage site — low-key, unpretentious, and still mostly residential in character.

    The Best Cafés to Visit

    • Blue Bottle Coffee Kiyosumi-Shirakawa — The original Japan location, in a converted warehouse with high ceilings and minimalist seating. Pour-over coffee runs roughly ¥600–700; expect a line on weekend mornings. Generally open 8:00–19:00.
    • Allpress Espresso Tokyo Roastery — Espresso drinks around ¥450–550, plus toast and pastries. The roastery itself is the draw: you can watch green beans being roasted a few meters from your table.
    • ARiSE Coffee Roasters — A tiny storefront near the station with rotating single-origin beans and takeaway cups, popular with locals rather than tourists.
    • Cream of the Crop Coffee — A compact space known for carefully sourced beans and friendly, English-capable staff.

    None of these are large; most seat well under 30 people, and several close as early as 18:00 or take an irregular weekday off, so don’t plan a late-afternoon café crawl without checking hours that day. If you’d rather compare this hand-poured scene against Japan’s other everyday coffee culture, it’s worth reading about convenience store coffee in Japan — the ¥100 machine brew at Lawson or 7-Eleven is the exact opposite experience, and both are worth having in the same trip.

    Kiyosumi Teien: The Garden That Gives the Area Its Name

    Kiyosumi Teien is a strolling garden built around a large pond, originally developed in the late 17th century and later expanded by the Iwasaki family (founders of Mitsubishi) in the Meiji era. Admission is ¥150 for adults, ¥70 for seniors 65 and over, and free for elementary-school-age children and younger. It’s open 9:00–17:00 (last entry 16:30) and closed December 29–January 1. The garden’s rock collection — stones gathered from famous quarries across Japan and arranged along the pond’s edge — is its most distinctive feature, and the view across the water toward the central island is especially good in the early morning before tour groups arrive. Autumn foliage (mid-November to early December) and spring are the best seasons; summer is quieter but hot and humid, with fewer visitors.

    If you want a more formal, ceremonial introduction to Japanese tea culture rather than just a nice garden to sit in, see our guide to tea ceremony experiences in Kyoto and Tokyo — several bookable sessions run in central Tokyo and pair naturally with a coffee-and-garden day like this one.

    Beyond Coffee and Garden

    The Fukagawa Edo Museum, a short walk from the garden, recreates a 19th-century Fukagawa streetscape indoors — tatami rooms, a reconstructed well, and shopfronts you can walk through. Admission is around ¥400 for adults, and it’s closed on the second and fourth Monday of the month (check the current schedule before going, since closures shift around holidays). Tomioka Hachimangu Shrine, about 15 minutes away toward Monzen-nakacho, hosts one of Tokyo’s largest annual festivals (Fukagawa Hachiman Matsuri) in mid-August and is worth combining with a Monzen-nakacho lunch stop if you’re walking between the two stations.

    Common Mistakes to Avoid

    • Treating it as an Asakusa/Skytree add-on. It’s connected by train but not genuinely walkable in a “quick detour” sense — budget it as its own half-day, not a 20-minute stop.
    • Going on a Monday. Some cafés and the Edo Museum take irregular or fixed Monday closures; always check the specific day you’re planning before you go.
    • Expecting big-city café hours. Several of the best roasters close by 18:00 or 19:00 and have limited seating — this is not a late-night neighborhood.
    • Skipping the garden because “it’s just coffee shops now.” Kiyosumi Teien is a genuinely good garden independent of the coffee scene, and the ¥150 entry fee is one of the cheapest worthwhile sights in Tokyo.

    Budget, Mid-Range, and Splurge

    On a budget, a garden ticket (¥150) plus a drip coffee at ARiSE or Cream of the Crop (around ¥450) covers a satisfying morning for well under ¥1,000. For a mid-range visit, add the Fukagawa Edo Museum (¥400) and a pour-over plus pastry at Blue Bottle or Allpress (¥1,000–1,500 total). To splurge, look for seasonal cupping or brewing workshops that the roasters occasionally run (announced on their own social media rather than listed permanently), or combine the trip with a formal tea ceremony booking elsewhere in the city for a fuller contrast between Japan’s oldest and newest approaches to a hot drink. Either way, this is one of the few Tokyo neighborhoods where ¥2,000–3,000 buys a genuinely complete, uncrowded day. For a different flavor of local Tokyo neighborhood — heavier on izakaya and nightlife than coffee and gardens — see our guide to Sangenjaya, and for upscale shopping and architecture, Omotesando makes a good contrast on the other end of the city.

  • Love Hotels in Japan: What They Are and How Tourists Can (and Can’t) Stay

    Love Hotels in Japan: What They Are and How Tourists Can (and Can’t) Stay

    Photo by Koukichi Takahashi on Unsplash

    Love hotels are one of the most misunderstood fixtures of Japanese city life. They’re not seedy back-alley operations — they’re a regulated, decades-old industry with over 20,000 properties nationwide, used by couples of all ages who want privacy, a theme room, or simply a few quiet hours away from thin apartment walls and multi-generational households. For visitors, they’re also a genuinely useful (and often cheap) accommodation option, as long as you understand the rules before you walk up to the check-in panel.

    What Exactly Is a Love Hotel?

    A love hotel is a short-stay hotel designed around privacy rather than service. Rooms are rented by couples for a few hours (“rest”) or overnight (“stay”), and the entire experience is built to avoid face-to-face interaction — no lobby chit-chat, no shared elevators with other guests, often no visible staff at all. The category took off in the 1960s–70s as Japanese cities grew denser and privacy at home became scarce, and it has since evolved into a legitimate, licensed segment of the hospitality industry governed by the Entertainment Business Control Law (Fūzoku Eigyō Law).

    Rooms range from plain and modern to elaborately themed — space capsules, karaoke suites, rooms with private pools or saunas — and almost always include a large bathtub, a big TV, and a stocked drink/snack machine. Think of it as a boutique hotel room rented in blocks of time rather than by the night.

    Rest vs. Stay: Understanding the Pricing System

    Pricing is split into two modes, displayed on a lit panel at the entrance or on a screen inside:

    • Rest (休憩, kyūkei): Typically 1.5–3 hours, priced around ¥2,900–¥6,000 depending on the room grade and city. Usually available from late morning until early evening.
    • Stay (宿泊, shukuhaku): An overnight block, usually check-in after 22:00–23:00 with check-out by 10:00–11:00 the next morning. Expect ¥6,000–¥15,000, with nicer theme rooms and Friday/Saturday nights pushing toward the top of that range.

    Some hotels also offer a “rest + stay” combo if you arrive in the evening and want to linger, which is usually cheaper than booking a stay from scratch. Prices are almost always posted outside or on the room-selection panel — there’s rarely any negotiation or hidden fee, though a handful of older places are cash-only, so carry yen just in case.

    How to Actually Check In (No Front Desk Awkwardness)

    The process is designed to be fast and anonymous:

    • Walk into the entrance lobby, where a backlit panel shows available rooms with photos and prices. Press the button for the room you want.
    • A key or electronic tag is dispensed from a small window or automatic gate — in most properties you’ll barely glimpse staff, if at all.
    • Take the private elevator or stairwell directly to your floor.
    • Payment happens either at a machine in the room (slide cash or a card into a slot by the door) or at a screened checkout window when you leave — you’re rarely asked for ID, and there’s no paperwork to fill out.

    If a hotel has no vacancies, the panel lights go dark or show “満室” (full) — just walk to the next one, since most love hotel districts cluster several properties within a block of each other.

    Where to Find Them: Best Neighborhoods

    Love hotels cluster in entertainment districts, usually within walking distance of nightlife and arcades:

    • Tokyo: Shibuya’s Dogenzaka slope (nicknamed “Love Hotel Hill”), a steep street of dozens of properties a 5-minute walk from Shibuya Station; also Ikebukuro and parts of Gotanda.
    • Osaka: Namba and Dotonbori have a dense concentration, easy to reach on foot after a night out.
    • Fukuoka: The Nakasu entertainment district.

    These same neighborhoods tend to be where you’ll find Japan’s arcade and gaming culture too — if you’re staying near Shibuya or Namba, it’s worth pairing the night with a stop at a crane game arcade or a pachinko parlor, both of which cluster in the same streets. For a quieter, more local-feeling night out before heading back, Tokyo’s Sangenjaya izakaya district is a good alternative base, though it has fewer love hotels than Shibuya or Ikebukuro.

    Can Tourists Stay? What’s Allowed and What’s Not

    Yes — tourists are generally welcome, and plenty of foreign couples use love hotels as a cheap, convenient, and surprisingly fun alternative to a standard hotel room. A few rules to know:

    • You need to be a couple (or at least present as a pair). Most love hotels won’t rent to solo travelers, and many historically wouldn’t rent to same-sex couples either — this is changing, especially in Tokyo and Osaka, but policy still varies property by property, so it can help to call ahead or use a booking app if you want certainty.
    • Walk-ins are the norm, not reservations. The vast majority of love hotels don’t take advance bookings — you simply show up and pick an available room from the panel. A few tourist-friendly properties now accept reservations through apps like Kaveli, which has English listings and photos, useful if you want to guarantee a themed room on a weekend.
    • Minors are not permitted, and some properties post signage limiting entry to adults only, in line with the entertainment business licensing law.
    • Groups larger than two are usually turned away — rooms and pricing are built around couples, not friend groups or families.

    Common Mistakes to Avoid

    • Assuming you can pay by card everywhere. Many older love hotels are cash-only or have unreliable card readers; always carry enough yen to cover the room.
    • Missing the check-out window. Overstaying a “stay” booking past 10–11am usually triggers an automatic extra “rest” or “stay” charge billed through the in-room payment machine — there’s no front desk to negotiate with.
    • Arriving with large suitcases. There’s no luggage storage or bellhop service, and rooms are compact; love hotels work best as a one- or two-night novelty, not your main base with all your luggage for a multi-city trip.
    • Confusing “rest” pricing for an overnight rate. Booking a rest block late in the evening can leave you scrambling at 1am when the clock runs out and the hotel wants you to re-pay for a stay.
    • Expecting hotel amenities like breakfast or concierge service. This is a private-room product, not a full-service stay — there’s a vending machine, not a restaurant.

    Budget, Mid-Range, and Splurge Picks

    Since individual love hotels change names and ownership often and rarely have English websites, think in terms of tiers rather than specific properties:

    • Budget (¥6,000–¥8,000/night): Simple, clean rooms on Dogenzaka or in Namba — plain decor, a double bed, bathtub, and TV. Fine for a one-off stay to save money versus a standard hotel.
    • Mid-range (¥9,000–¥13,000/night): Theme rooms with better bathrooms (sometimes a jet bath or small sauna), karaoke machines, and more spacious layouts — the sweet spot for most tourists wanting the “experience” without going all-in.
    • Splurge (¥14,000+/night): Flagship theme rooms — private pools, elaborate decor sets, multi-room suites — found at the larger, more famous properties in Shibuya and Osaka’s Minami district, often the ones featured in Japanese variety shows.

    Whichever tier you choose, a love hotel stay is one of the more memorable, low-cost ways to see a side of Japanese urban life that most guidebooks skip entirely — just go in knowing the rules, and it’s a smooth, surprisingly efficient system.