Japan Trove

Category: Uncategorized

  • Setouchi Triennale: Japan’s Island-Hopping Art Festival and How to Plan a Visit

    Setouchi Triennale: Japan’s Island-Hopping Art Festival and How to Plan a Visit

    Photo by Mika Wegelius on Unsplash

    Every three years, a scattering of small islands in the Seto Inland Sea fills with contemporary art — abandoned houses turned into installations, rice terraces dotted with sculpture, and a giant polka-dot pumpkin sitting on a stone pier facing the sea. The Setouchi Triennale is one of Japan’s most rewarding trips for travelers willing to plan around ferry schedules instead of train timetables, but it’s also one of the easiest festivals to get wrong if you show up without a plan. Here’s what you need to know before you go.

    What Is the Setouchi Triennale?

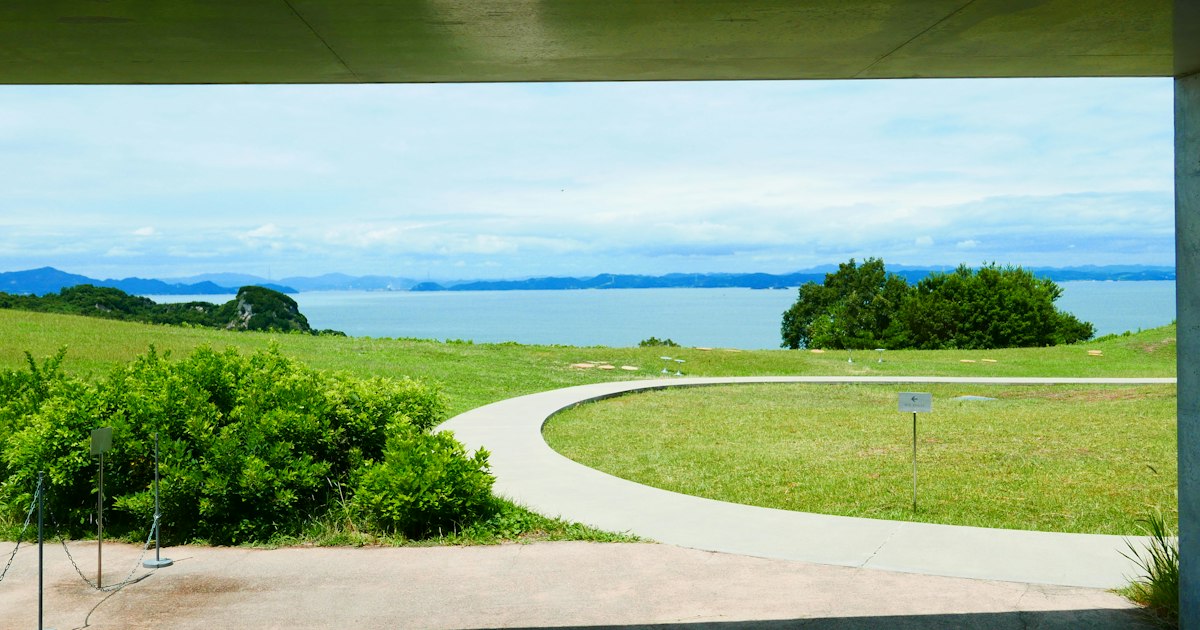
    The Setouchi Triennale is a contemporary art festival spread across roughly a dozen islands and two mainland port cities (Takamatsu in Kagawa Prefecture and Uno in Okayama Prefecture) in the Seto Inland Sea. It began in 2010 as an effort to revitalize islands that had been losing population for decades, using art as the draw. It has run every three years since — 2010, 2013, 2016, 2019, 2022, and most recently 2025 — with the next edition due in 2028. Unlike a single-venue museum show, the “art” here is the islands themselves: old fishing villages, disused schools, salt fields, and terraced hillsides host permanent and rotating installations you walk, cycle, or ferry between.

    The anchor islands are Naoshima and Teshima, both of which have become year-round art destinations even outside Triennale years. Naoshima is home to the Chichu Art Museum (built partly underground by Tadao Ando, with a room of Monet water lily paintings and a James Turrell light installation), the Benesse House Museum, and Yayoi Kusama’s yellow and red pumpkin sculptures. For a deeper look at Naoshima’s quieter neighbor, see our guide to Teshima, the quiet art island next to Naoshima, home to the Teshima Art Museum’s extraordinary droplet-shaped concrete shell.

    When to Go: The Three Sessions

    The Triennale doesn’t run continuously all year — it’s staged in three separate sessions, typically spring (mid-April to late May), summer (early August), and autumn (early October to early November), with the festival closed to Triennale programming in between. Some artworks and museums (Chichu Art Museum, Teshima Art Museum, the Art House Project) stay open year-round regardless of session, but many temporary installations and the food/event program only appear during these windows, so check the official session dates for the specific year before booking flights.

    Spring is the most popular and most crowded, especially over Golden Week (late April to early May) — book ferries and accommodation months ahead if traveling then. Summer brings intense heat and humidity, but also the Naoshima fireworks and a livelier island atmosphere. Autumn tends to have the best weather-to-crowd ratio: comfortable temperatures, fewer tour groups, and good light for photography.

    Getting There and Island-Hopping Logistics

    Takamatsu is the main gateway. It has its own airport with flights from Tokyo, and is about an hour from Okayama Station by JR limited express train (Okayama is a Shinkansen stop on the Sanyo line). From Takamatsu Port, ferries run to Naoshima (about 50 minutes), Teshima, Megijima, Ogijima, and other Triennale islands. Uno Port, near Okayama, is the shorter route to Naoshima — the ferry takes about 20 minutes and is the better option if you’re coming from the Kansai or Honshu side rather than Shikoku.

    The single biggest logistics trap is ferry frequency: outer islands like Ogijima, Oshima, or Awashima might only have four or five sailings a day, and the last boat back can leave as early as 4-5pm. Always check the return schedule for your specific island before you land — being stranded means an expensive taxi-and-hotel improvisation, not a quick fix. During Triennale sessions, special direct boats between islands (skipping the mainland ports) are added; these are worth building your itinerary around since they save significant backtracking.

    On Naoshima and Teshima, rental bicycles (including electric-assist models, roughly 500-1,500 yen per day) are the most practical way to get around — the islands are hilly, and walking between distant art sites eats your day. Naoshima also runs a free community bus loop between Miyanoura Port, Honmura, and the museum area, though it can be packed during peak sessions.

    Tickets and Budgeting

    Most individual artworks and museums are ticketed separately, but during Triennale sessions you can buy a Setouchi Triennale Passport that covers admission to most participating artworks across all islands — a full-triennale (all three sessions) passport has historically run around 5,000 yen for adults, with a single-session passport cheaper. The passport does not cover the handful of major standalone museums like Chichu Art Museum, which sells timed-entry tickets separately (historically around 2,100 yen) due to visitor caps.

    • Budget: Day trip from Okayama via Uno Port — ferry, bicycle rental, and passport can be done for well under 10,000 yen for the day, skipping the big-name paid museums.
    • Mid-range: Two to three days including one night on Naoshima or Teshima, covering the Triennale Passport plus Chichu Art Museum and a ryokan or guesthouse stay — budget roughly 20,000-35,000 yen per person all-in.
    • Splurge: Stay at Benesse House itself (the only accommodation that gives after-hours access to its museum galleries), which runs considerably higher than standard island lodging but is the only way to see the art with the crowds gone.

    Common Mistakes First-Timers Make

    The most common mistake is treating this like a normal city trip and trying to do too many islands in one day. Ferry connections between outlying islands are infrequent and don’t always sync well, so hopping from, say, Ogijima to Megijima to Naoshima in a single afternoon is rarely realistic — pick two islands per day at most. The second mistake is not booking Chichu Art Museum tickets in advance; it caps daily visitors and sells out during peak sessions. Third, many travelers underestimate how few shops and restaurants are open on the smaller islands — Ogijima and Awashima in particular have very limited dining, so carry cash (many small island businesses don’t take cards) and eat lunch before your ferry rather than assuming you’ll find something on arrival.

    Lastly, don’t skip Naoshima’s Honmura district in favor of only the museum cluster near Miyanoura Port — the Art House Project, where artists transformed old houses and even a former dentist’s residence into installations scattered through a real residential neighborhood, is some of the most memorable work on the island and is easy to miss if you rush straight to Chichu.

    Pairing the Trip With the Rest of the Seto Inland Sea

    If you have extra days, the Seto Inland Sea rewards lingering beyond the Triennale islands. Okunoshima, the rabbit island, is a short ferry ride from Tadanoumi Port on the Hiroshima side and makes an easy, very different day trip — wild rabbits and a WWII poison gas museum instead of contemporary art. On the Shikoku side, Matsuyama is about two hours from Takamatsu by train and home to Dogo Onsen, one of Japan’s oldest hot spring bathhouses — a relaxing bookend after days of island-hopping and gallery-walking. Both make sense as an extension rather than a detour, since Okayama, Takamatsu, and Matsuyama are all well connected by rail and ferry within the same region.

    The Setouchi Triennale rewards patience with ferry timetables more than any other festival in Japan, but that same slowness — waiting on a pier, watching the tide, arriving on an island with no convenience store — is a large part of what makes it feel different from anywhere else in the country.
  • Purin: Japan’s Old-Fashioned Custard Pudding and Where to Try It

    Purin: Japan’s Old-Fashioned Custard Pudding and Where to Try It

    Photo by Felippe Lopes on Unsplash

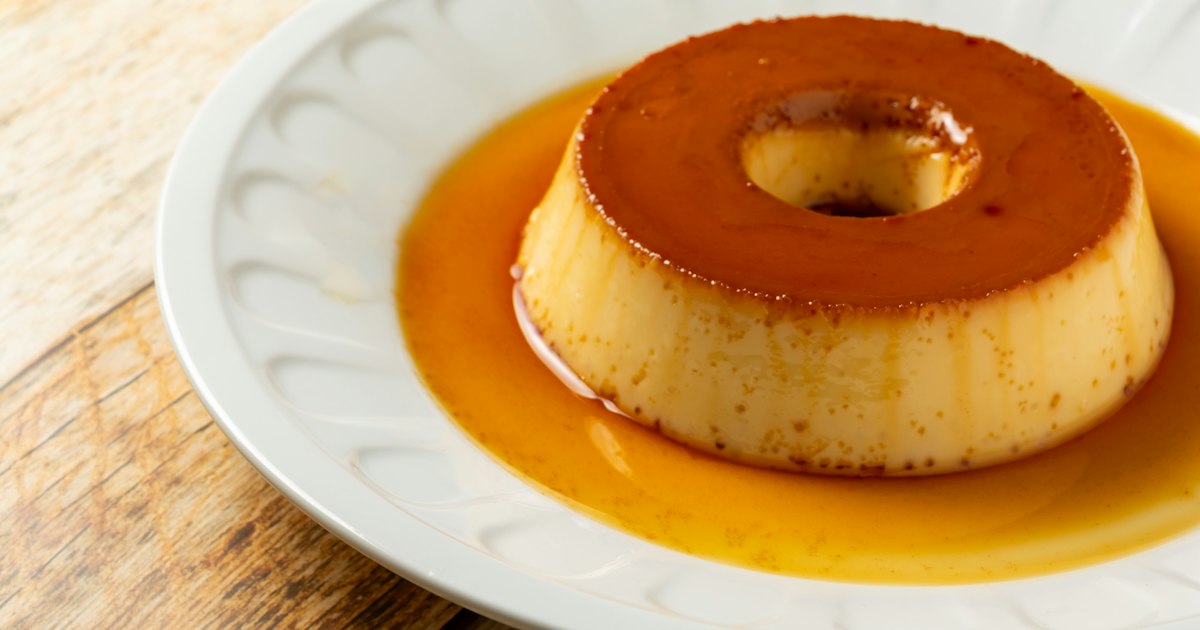
    Long before jiggly cheesecakes and fluffy pancakes took over Japanese dessert menus, there was purin — a dense, caramel-topped custard pudding that has been a fixture of Japanese cafés, convenience stores, and family dinner tables since the postwar years. It looks like a French crème caramel and shares its DNA, but decades of local tinkering have given it a texture, flavor, and cultural role that’s distinctly Japanese. If you’re planning a trip and want to understand what all the fuss is about — and where to actually eat it — here’s what you need to know.

    What Makes Japanese Purin Different

    Purin (プリン) is Japan’s adaptation of caramel custard pudding, but it splits into two very different camps. “Old-fashioned” or “retro” purin (昔ながらのプリン) is firm and dense, almost like a baked cheesecake in texture, with a layer of dark, slightly bitter caramel sauce (カラメル) on the bottom that turns into a glossy topping once you flip it out of its cup. This is the style that dominated coffee shops and department store restaurants from the 1960s through the 1980s, and it’s currently having a nostalgia-driven revival. The other camp is the ultra-soft, “purun-purun” jiggly pudding that became a social media sensation in the 2010s — so soft it barely holds its shape and wobbles when you tap the plate. Both are widely available, but they’re not interchangeable, and menus don’t always specify which one you’re getting, so it helps to ask.

    A Short History: From Hotel New Grand to the Konbini Cup

    Purin’s most famous origin story traces back to the Hotel New Grand in Yokohama, which is widely credited with inventing “pudding à la mode” (プリンアラモード) — a plated dessert combining custard pudding, whipped cream, and fresh fruit — for Allied officers stationed in Japan after World War II. That plated, fruit-topped format spread to hotel restaurants and old-school kissaten (coffee shops) nationwide and is still considered a classic order today. On the mass-market side, Morinaga launched its now-iconic cup pudding with the foil lid and caramel packet in 1967, and that same basic format — a small plastic cup you find in any convenience store or supermarket refrigerator case — is still how most people in Japan encounter purin day to day.

    Old-Fashioned vs. Jiggly: Know the Style Before You Order

    If a café menu says “なつかしいプリン” (natsukashii purin, “nostalgic pudding”) or “固めプリン” (katame purin, “firm pudding”), expect the dense, custardy retro style. If it says “とろけるプリン” (torokeru purin, “melting pudding”) or shows a photo of a pudding sagging dramatically off a spoon, that’s the soft, jiggly style. Both are usually topped with caramel sauce rather than fruit unless you’re ordering the à la mode version. Fake-food displays outside restaurants often feature purin as one of the sample dishes — if you’ve ever wondered how those uncannily realistic plastic desserts are made, our guide to sampuru, Japan’s plastic food replicas, explains the craft and where you can buy a pudding replica of your own as a souvenir.

    Where to Try Purin in Tokyo and Yokohama

    For the classic hotel-style pudding à la mode, go to the source: Hotel New Grand in Yokohama (10 Yamashita-cho, Naka-ku, a short walk from Yamashita Park and Chinatown), where “The Café” on the ground floor still serves the original-style dessert, generally priced in the ¥1,500–¥2,000 range. In Tokyo’s Ginza district, Shiseido Parlour (8-8-3 Ginza) is famous for its firm, old-fashioned baked pudding, sold both in the café upstairs and as a takeaway jar from the ground-floor shop; expect to pay roughly ¥500–¥600 per jar to go. A few blocks away, Ginza West (7-3-6 Ginza), a kissaten operating since the late 1940s, is a good spot for a sit-down pudding à la mode in an old-school European-café atmosphere. Most of these venues open around 11:00 and close by 20:00–21:00, and Ginza West is closed some public holidays, so it’s worth checking hours the day of your visit rather than assuming they match a weekday schedule.

    Where to Try Purin in Osaka and Kobe

    Kansai has its own dedicated purin culture. R.L (Ryoko Lecomte), based in Kobe, specializes in a smooth, melt-in-the-mouth style pudding sold in small jars — you’ll find a counter in the basement food halls (depachika) of major department stores like Hankyu Umeda in Osaka, generally priced around ¥400–¥500 each, making it an easy grab-and-go gift. For the jiggly extreme, head to Purin no Mise Pao in Osaka’s Nakazakicho neighborhood, known for its oversized, dramatically wobbly pudding and frequent queues on weekends — arrive close to opening if you want to avoid a long wait, and note that some locations are cash-only.

    Budget to Splurge: Convenience Stores, Cafés, and Department Store Gifts

    You don’t need a special trip to try purin — convenience stores like Lawson, 7-Eleven, and FamilyMart all stock individual cups for roughly ¥150–¥250, and they rotate seasonal flavors (strawberry and sakura in spring, matcha or mango in summer, chestnut or “premium rich” custard in winter), so it’s worth checking the chilled dessert case whenever you’re in one during your trip. Mid-range options are the café and depachika purins described above, generally ¥400–¥700. For a splurge, look for limited-edition gift boxes at department store food halls around Tokyo or Osaka, sometimes packaged with multiple flavors in a presentation box for ¥2,000–¥3,000 — a nice option if you’re hosting or attending a gathering with people who can eat it quickly. If you’re building out a broader Japanese sweets itinerary, pairing a purin stop with dorayaki or a slice of Nagasaki castella makes for a satisfying half-day dessert crawl, since all three represent different eras of Western influence on Japanese confectionery.

    Common Mistakes and Practical Tips

    The biggest mistake visitors make is treating purin as a shelf-stable souvenir to pack in a suitcase — it’s a chilled custard, not a dry snack, and it won’t survive a flight home unrefrigerated. Treat it as something to enjoy during your trip, not to bring back. Second, if you’re chasing a specific texture, don’t assume all purin is the same; read the menu description or ask “katame desu ka, torokeru desu ka?” (is this firm or melting?) before ordering, especially at unfamiliar cafés. Third, popular specialty shops like Pao in Osaka can sell out of their soft-serve-style jiggly pudding by early afternoon on weekends, so morning visits are safer. Finally, if you have any dietary concerns around dairy or egg content — relevant for travelers managing allergies alongside other health logistics, similar to the planning covered in our guide on bringing medicine into and out of Japan — note that virtually all purin contains both milk and egg, with no widely available substitute versions at the shops listed here.

    There’s no strong seasonal window for purin — it’s a year-round dessert — but department stores often run flavor promotions tied to summer and New Year gift-giving seasons, so late June through August and December are good times to catch limited editions. Whether you’re grabbing a ¥180 cup from a konbini fridge between train transfers or sitting down for a proper pudding à la mode in Yokohama, purin is one of the easiest, cheapest ways to taste a specific slice of postwar Japanese food history.

  • Japanese Soy Sauce (Shoyu): Regional Styles and Where to Buy

    Japanese Soy Sauce (Shoyu): Regional Styles and Where to Buy

    Photo by Hiroko Nishimura on Unsplash

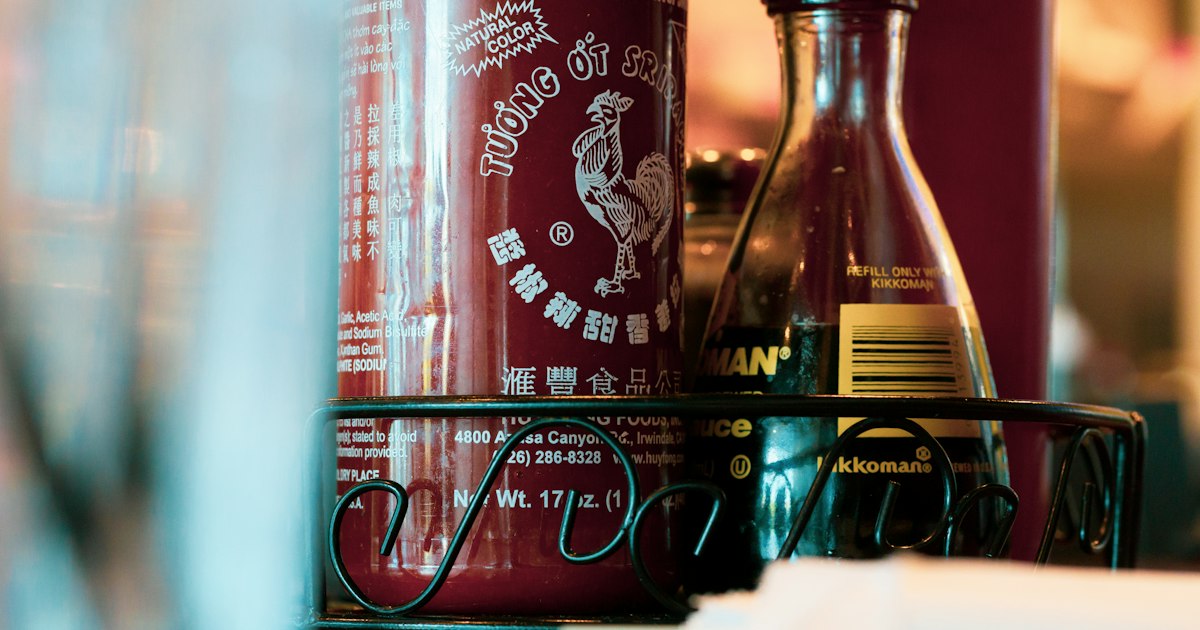
    Walk down the seasoning aisle of any Japanese supermarket and you’ll find twenty or more bottles labeled shoyu (醤油), ranging from ¥250 mass-market staples to ¥4,000 barrel-aged bottles sold in tiny gift boxes. Soy sauce is one of the easiest, most useful souvenirs to bring home from Japan — it’s not fragile in the way lacquerware or ceramics are, it’s genuinely used in everyday cooking rather than displayed on a shelf, and the regional differences are dramatic enough that a bottle from Shodoshima tastes nothing like a bottle from Kyoto. This guide covers the main styles, where they’re made, and how to actually buy and pack the stuff without it exploding in your suitcase.

    The Five Main Styles of Shoyu

    Almost all Japanese soy sauce falls into five categories, and knowing them will save you from buying the wrong bottle for the wrong dish:

    • Koikuchi (濃口) — “dark mouth,” the default soy sauce used in roughly 80% of Japanese households. All-purpose, balanced saltiness, dark reddish-brown. If a bottle just says “shoyu” with no other label, it’s this.
    • Usukuchi (淡口) — “light mouth,” lighter in color but actually saltier than koikuchi (roughly 10-15% more sodium). Centered on the Kansai region, used where cooks want seasoning without darkening the dish — clear broths, simmered vegetables. This is the classic beginner mistake: people assume “light” means less salty, and over-pour it.
    • Tamari (たまり) — thick, dark, made with little or no wheat, originally from the Chubu region (Aichi, Gifu, Mie). Rich umami, glossy finish, good for dipping sashimi or glazing grilled fish. Note that “tamari” doesn’t automatically mean gluten-free — some commercial tamari still contains a small percentage of wheat, so check the label if you need a wheat-free product.
    • Shiro (白) — “white” soy sauce, very pale and mostly wheat, sweet and delicate. Mainly from Aichi Prefecture, used in dishes like chawanmushi where color matters.
    • Saishikomi (再仕込み) — “twice-brewed,” made by using soy sauce instead of brine to ferment a second batch. Thicker, darker, and more expensive; associated with Yamaguchi and parts of Kyushu. Best used sparingly as a finishing sauce or dip rather than a cooking base.

    Japan’s Great Soy Sauce Regions

    A handful of places are worth knowing if you want to buy at the source rather than a supermarket shelf:

    • Noda and Choshi, Chiba Prefecture — Japan’s industrial soy sauce heartland since the Edo period, and still home to Kikkoman’s headquarters and largest plant. Not scenic, but historically the most important production center in the country.
    • Yuasa, Wakayama Prefecture — widely credited as the birthplace of Japanese soy sauce, developed in the 13th century from the liquid that pooled on top of fermenting kinzanji miso. The old town’s preserved merchant streets (a designated Important Preservation District) still have working breweries like Kadocho.
    • Tatsuno, Hyogo Prefecture — the historic center of usukuchi production, with a small soy sauce museum near Tatsuno Castle Park. A nice add-on if you’re already exploring the Kansai region.
    • Shodoshima, Kagawa Prefecture — the most rewarding place to actually visit as a traveler. The island still has several breweries fermenting in century-old wooden barrels (kioke), a technique nearly disappeared elsewhere in Japan. If you’re already island-hopping in the Seto Inland Sea toward Teshima, Shodoshima is an easy extension by ferry from Takamatsu (about 60 minutes) or Okayama’s Uno Port (about 70 minutes).

    Touring a Brewery

    Kikkoman’s Noda plant in Chiba runs factory tours (free, reservation required, roughly 90 minutes) that walk you through the brewing process and end in a tasting/shop area — reachable from central Tokyo via the Tobu Urban Park Line to Noda-shi Station in about an hour. Tour schedules and language availability change seasonally, so confirm current times on Kikkoman’s official site before planning your day around it.

    On Shodoshima, Yamaroku Shoyu is the best-known small brewery for visitors — you can see the 150-year-old wooden barrels in person, and a short paid tasting/tour (typically a few hundred yen) lets you compare barrel-aged tamari against factory-made soy sauce side by side. Autumn and winter are good times to visit, since fermentation activity and the barrel room’s smell are more pronounced in cooler weather, and it pairs naturally with a quieter, less crowded season on the art islands.

    Where to Buy

    You don’t need to visit a brewery to buy well — Japan makes it easy at every budget level:

    • Supermarkets (Life, Seijo Ishii, Ito-Yokado) — the cheapest source for everyday koikuchi and usukuchi, and a good place to compare regional brands you won’t find at home.
    • Depachika (department store basements) — Isetan Shinjuku and Takashimaya have curated soy sauce sections with regional and artisanal bottles, often in gift-box sizes made for travel.
    • Kaldi Coffee Farm — a national chain that stocks small-batch regional soy sauces alongside imported goods; useful if you’re not routing through a specific region.
    • Airport shops — Narita and Haneda sell compact, leak-tested travel bottles (100-200ml) specifically packaged for check-in luggage, which is the easiest option if you’re buying at the last minute.

    If you’re assembling a small Japanese pantry kit to bring home, a bottle of tamari pairs naturally with a good knife — and if you’re shopping for kitchen tools anyway, it’s worth reading about traditional whetstones (toishi) while you’re at it.

    Prices: Budget to Splurge

    • Budget: ¥250-¥450 for a 500ml-1L bottle of mainstream koikuchi (Kikkoman, Yamasa) — fine for everyday cooking, widely available, and cheap enough that price isn’t a reason to skip it.
    • Mid-range: ¥800-�¥2,000 for a 200-300ml bottle of regional or small-brewery soy sauce — this is the sweet spot for a souvenir with a real story behind it.
    • Splurge: ¥3,000-¥5,000 for barrel-aged specialties, like Yamaroku’s multi-year-aged tamari (sold as “Tsuru Bishio”) — sold in small bottles since a little goes a long way as a finishing drizzle, not a cooking staple.

    Common Mistakes to Avoid

    • Buying the giant 1.8L jug. It’s the cheapest per milliliter but heavy, bulky, and a liquid-leak risk in checked luggage. Stick to 200-500ml bottles for travel.
    • Packing it in a carry-on. Any bottle over 100ml needs to go in checked luggage — wrap it in a sealed bag and cushion it with clothing. Duty-free bottles bought after security in a tamper-evident bag are the one exception for onward international flights.
    • Confusing “light” with “low-sodium.” Usukuchi is paler in color but saltier than standard koikuchi — a common substitution error that over-salts a dish.
    • Leaving it unrefrigerated after opening. Shoyu oxidizes and loses aroma within a few weeks once opened, especially the smaller artisanal batches without preservatives — refrigerate after opening, just like at home.

    However you plan your trip — pairing a Shodoshima brewery visit with the art islands, or just grabbing a good bottle at a Tokyo depachika before you fly home — soy sauce is one of the rare souvenirs that’s cheap, light enough for most itineraries, and actually gets used rather than stored in a drawer. If you’re building out a broader Japanese food-culture itinerary, dishes like sukiyaki, which leans on a soy-based warishita sauce, or the soy dipping sauce served alongside Hokkaido’s jingisukan grilled lamb, are good places to actually taste regional shoyu in context before you decide which bottle to bring home.

  • Sashiko & Boro: Japan’s Mended Indigo Textile Craft and Where to Buy

    Sashiko & Boro: Japan’s Mended Indigo Textile Craft and Where to Buy

    Photo by Alyssa Strohmann on Unsplash

    Long before “visible mending” became a Western design trend, farmers and fishermen in northern Japan were doing it out of necessity. Sashiko — the geometric running-stitch technique — and boro, the patched, layered indigo textiles it created, grew out of a simple fact: cotton was scarce and expensive in cold regions, so nothing was thrown away. Today those mended jackets and stitched cloths are collected as folk art, and the techniques themselves have become a genuine souvenir category, from ¥500 thread skeins to museum-grade antique garments. Here’s where the craft actually comes from and where to buy it without overpaying for a printed imitation.

    What Sashiko and Boro Actually Are

    Sashiko (刺し子, “little stabs”) is a running stitch, usually white cotton thread on indigo-dyed cloth, originally used to reinforce worn fabric and add warmth by quilting two layers together. Boro (ぼろ, “rags” or “tatters”) refers to the textiles that resulted — garments, futon covers, and work cloths patched over and over, sometimes across generations, until the original base fabric was barely visible. Both trace back to the Edo and Meiji periods among rural households in Tohoku, where cotton didn’t grow well in the cold climate and every scrap of indigo-dyed hemp or cotton was recycled. What was once a mark of poverty is now prized for its improvised, one-of-a-kind geometry — genuine antique boro pieces sell in the same range as fine art textiles.

    The Three Great Sashiko Traditions of Tohoku

    Sashiko isn’t one uniform style — it developed regionally, and Japan recognizes three major schools, sometimes called the “three great sashiko”: Tsugaru Kogin-zashi from the Hirosaki area of Aomori (dense geometric patterns stitched on an odd number of threads, originally to make thin hemp work clothes warmer), Nanbu Hishizashi from Iwate (diamond-based motifs, historically used on farmers’ aprons and bags), and Shonai Sashiko from Yamagata’s coastal Shonai plain (bold, larger-scale patterns used on fishermen’s and firemen’s coats). If you’re visiting Iwate for other traditional crafts, it’s worth pairing a Nanbu Hishizashi stop with a look at Nambu Tekki cast iron kettles — both are Iwate Prefecture specialties often sold in the same craft shops around Morioka.

    Where to See Real Boro Textiles

    The most famous public collection of antique boro — assembled by folklorist Chuzaburo Tanaka from Aomori farmhouses — used to be displayed at the Amuse Museum in Asakusa, Tokyo, but that museum closed permanently in 2019, so don’t plan a visit around it. For seeing genuine pieces today, your best bets are specialist antique textile dealers in Tokyo and Kyoto (ask specifically for “boro” or “furugi,” old cloth) and the large outdoor antique markets, where dealers occasionally bring original farm textiles alongside kimono and pottery. The Oedo Antique Market at Tokyo International Forum (near Yurakucho Station) runs on the first and third Sunday of most months, roughly 9:00–16:00, admission free — arrive early, since good textile pieces get picked over by 10am. The Togo Shrine antique market in Harajuku (first, fourth, and fifth Sundays) starts as early as 4:00–5:00am for serious collectors and winds down by early afternoon.

    Where to Buy Boro and Sashiko in Tokyo, Kyoto, and Nagoya

    Kyoto has a stronger secondhand-textile culture than most cities, thanks to its kimono trade — vintage clothing shops around Kawaramachi and Shijo, such as the long-running Chicago, stock used kimono, obi, and occasionally patched work-cloth pieces alongside more conventional vintage fashion; expect to browse rather than find a curated boro section, since stock turns over constantly. In Nagoya, the Osu Shopping Arcade is worth a detour for its secondhand and bargain kimono dealers tucked among the arcade’s otaku and retro shops — it’s a good stop if you’re already island- or craft-hopping and want to check vintage indigo textiles without a dedicated trip. If you’re building a broader “traditional Japanese craft” shopping list for the same trip, our guides to Edo Kiriko cut glass and Japanese whetstones cover similarly specific, well-made souvenirs that pack flat and last.

    Where to Buy Sashiko Kits, Thread, and Modern Boro-Style Goods

    You don’t need to hunt down antiques to bring sashiko home — modern kits and materials are widely and affordably available. Olympus Thread Co., based in Osaka, is the standard brand for sashiko thread nationwide; a skein runs roughly ¥300–500 and is sold at any large craft store. Yuzawaya and Tokyu Hands (now branded Hands) both carry sashiko needle-and-thread starter kits (¥800–2,000) and pre-stamped coaster or coin-purse kits (¥1,500–3,500) that make a good self-contained souvenir or gift — most locations are open daily, roughly 10:00–20:00. For kogin-zashi specifically, the Tsugaru Kogin Institute in Hirosaki, Aomori sells finished coin purses, brooches, and table runners stitched by local artisans (roughly ¥2,000–6,000), along with kits for those who want to stitch their own; it’s a small operation, so hours can vary and it’s worth confirming before a special trip out. Online, Japan-based specialty shops like Sashi.co ship sashiko-specific needles, thimbles (yubinuki), and thread internationally if you’d rather order ahead than search in person.

    Budget, Mid-Range, and Splurge Buying Guide

    Budget (under ¥3,000): a few skeins of Olympus thread, a stamped coaster or handkerchief kit from Yuzawaya, or a small kogin-zashi accessory. Mid-range (¥5,000–20,000): a contemporary boro-style noragi work jacket, made new but using patchwork indigo techniques — sold at craft fairs and some Kyoto/Tokyo textile boutiques — or a finished sashiko tote bag. Splurge (¥30,000 and up): a genuine antique boro garment or futon cover from a specialist antique dealer, which functions more as a wall-hung textile artwork than clothing; prices scale with age, density of patching, and provenance, and can run well into six figures in yen for museum-quality pieces at established dealers.

    Best Time to Shop and Common Mistakes

    Outdoor antique markets are weather-dependent and thinner in the depths of summer heat or winter cold, so spring and autumn Sundays tend to have the best dealer turnout. The most common mistake is paying antique prices for machine-printed “boro-style” fabric — genuine pieces show irregular, hand-sewn stitching and visible layered patches on the reverse side, while printed imitations look too uniform up close. Second, don’t assume all sashiko thread is interchangeable with regular embroidery floss; sashiko thread is twisted differently and glides through fabric without the fraying you’d get from standard cotton floss, so buy the labeled product if you plan to actually stitch. Finally, indigo-dyed cotton can bleed dye when first washed, so wash any new indigo textile separately at least the first couple of times before it goes anywhere near lighter clothing.

  • Teshima: The Quiet Art Island Next to Naoshima

    Teshima: The Quiet Art Island Next to Naoshima

    Photo by Victor Lu on Unsplash

    Naoshima gets the crowds, the yellow pumpkin, and the Instagram queues. Teshima, one ferry hop away, gets a fraction of the visitors for art that’s arguably just as good — and a slower, greener island to wander while you see it. If you’ve already done Naoshima or want to skip its lines entirely, Teshima is where the Setouchi art islands start to feel personal again.

    Why Teshima Is Different From Naoshima

    Teshima (“island of abundance”) is a small, hilly island in the Seto Inland Sea with a year-round population of a few hundred people, mostly rice farmers. Unlike Naoshima, there’s no big-name museum cluster or resort hotel driving foot traffic — the handful of art sites are spread across terraced rice fields and old fishing hamlets, connected by narrow farm roads. You come here to walk or cycle between two or three carefully chosen works, not to check off a list. That pacing is the whole appeal, but it also means you need to plan transport and timing more carefully than on Naoshima, where everything clusters near one port.

    Getting to Teshima: Ferries and Timing

    There’s no bridge or direct flight — Teshima is ferry-only, and the ferries are infrequent enough that missing one can cost you two hours.

    • From Uno Port (Okayama): Take the JR Uno Line from Okayama Station to Uno Station (about 40–50 minutes), then walk 5 minutes to Uno Port. Ferries to Teshima’s Ieura Port take roughly 35 minutes and run several times daily, with more departures in summer and during Setouchi Triennale periods.
    • From Takamatsu Port (Kagawa): Ferries run to Teshima (Ieura or Karato port) in about 50–70 minutes, again a handful of times a day.
    • From Naoshima: Some seasonal boats connect Naoshima’s Miyanoura Port directly to Teshima, but schedules are limited and change by season — don’t count on this as your only route.

    Check the current timetable on the Setouchi Kanko / Ryobi Kisen ferry sites before you go, and build in a buffer — if you miss the last return ferry, you’re stuck overnight with very few lodging options. Buy tickets at the port window; they’re not usually bookable far in advance except during peak Triennale weekends.

    Getting Around: Bicycles Are Essential

    Teshima has almost no taxis and a limited community bus, so nearly everyone rents a bicycle at Ieura Port the moment they arrive. The island is hilly, so pay the extra few hundred yen for an electric-assist bike — a standard bike will wear you out on the climbs between sites. Expect to pay around ¥1,000–1,500 for a half-day e-bike rental, cash-friendly and first-come, first-served, so arrive on an early ferry in high season. Budget roughly 20–30 minutes of cycling between the main art sites, plus walking time once you park.

    The Art: What to See and What It Costs

    Teshima’s sites are deliberately few, and each charges separate admission — there’s no all-inclusive island pass, so factor ticket costs into your budget.

    • Teshima Art Museum — The headline site: a curved concrete shell by architect Ryue Nishizawa housing Rei Naito’s water-and-light installation “Matrix.” Admission is around ¥1,570 for adults. Hours shift seasonally (roughly 10:00–17:00 in the warmer months, shorter in winter), and the museum is closed on Tuesdays (or the following day if Tuesday is a public holiday). Go slow inside — it’s meant to be sat with, not photographed and left.
    • Les Archives du Coeur (Heart Room) — Christian Boltanski’s installation on the beach near Karato, where visitors can listen to (and record) recordings of human heartbeats. Admission is around ¥520, with a small extra fee if you want your own heartbeat archived.
    • Teshima Yokoo House — A traditional house in the Ieura settlement reworked with Tadanori Yokoo’s intensely colorful pop-art installations. Admission is around ¥520.

    Most of these sites close on Tuesdays and shut earlier in winter, so cross-check exact hours before finalizing your day — losing an hour to a closed museum is the most common Teshima mistake. If you’re chasing art islands in the Seto Inland Sea more broadly, it’s worth knowing Teshima isn’t the only offbeat option out here — Okunoshima, the rabbit island, is a very different kind of day trip in the same sea, further west.

    Where to Eat

    Food options are limited and small-scale, which is part of the charm but also a planning risk. Shima Kitchen (Shokudo), near the Yokoo House, serves a set lunch menu using local vegetables and rice — it’s popular enough that reservations or an early arrival are worth it in peak season. Beyond that, there are a couple of small cafés near Ieura Port and seasonal food stalls during the Setouchi Triennale, but nothing resembling a convenience store cluster. Bring snacks and water, especially if you’re cycling between sites in summer heat.

    • Budget: Bring onigiri or bakery items from Okayama or Takamatsu before you board the ferry — there’s no convenience store on Teshima itself.
    • Mid-range: A set lunch at Shima Kitchen or one of the port-side cafés, roughly ¥1,000–2,000.
    • Splurge: Combine your visit with a stay on nearby Naoshima or in Takamatsu, where dinner options are far more varied.

    Best Time to Visit and Common Mistakes

    Spring (April–May) and autumn (October–November) offer the most comfortable cycling weather and good light for the art itself. Summer is doable but hot and humid for hill cycling; winter brings shorter museum hours and colder ferry decks. If your trip lines up with a Setouchi Triennale year, Teshima gets temporary extra installations and more ferry departures — worth checking the Triennale dates specifically, since they run in separate spring, summer, and autumn sessions rather than continuously.

    The mistakes that trip up most visitors: arriving on a Tuesday when the main museum is closed, underestimating ferry infrequency and missing the last boat back, and trying to cram Teshima and Naoshima into one day — the ferry connections between them aren’t reliable enough for that. Pick one island per day, rent the e-bike, and let the pace be part of the trip.

    A Simple One-Day Plan

    Take the first practical morning ferry from Uno or Takamatsu into Ieura Port, rent an e-bike immediately, and ride to Teshima Art Museum first while the light and your legs are both fresh. From there, cycle to Teshima Yokoo House, have lunch at Shima Kitchen if you can get in, then finish at Les Archives du Coeur near the beach before returning the bike and catching an afternoon ferry back. That’s a realistic, unhurried loop — trying to add a fourth stop usually means rushing the museum that’s actually worth lingering in.

  • Dogo Onsen: Matsuyama’s Ancient Bathhouse and Ehime’s Hot Spring Town

    Dogo Onsen: Matsuyama’s Ancient Bathhouse and Ehime’s Hot Spring Town

    Photo by kai muro on Unsplash

    Dogo Onsen, in the city of Matsuyama on the island of Shikoku, claims to be Japan’s oldest hot spring, with a history stretching back some 3,000 years and mentions in the 8th-century chronicle Nihon Shoki. Unlike hot spring towns built around a single ryokan strip, Dogo Onsen is a genuine neighborhood: a public bathhouse, a covered shopping arcade, tram tracks, and dozens of inns radiating out from one wooden building that has been drawing bathers since the Meiji era. Here’s what you actually need to know to visit it well.

    A 3,000-Year-Old Hot Spring in the Heart of Matsuyama

    The centerpiece is Dogo Onsen Honkan, a three-story wooden bathhouse completed in 1894 and designated an Important Cultural Property. Its rambling, turreted silhouette is often cited as an inspiration for the bathhouse in Studio Ghibli’s Spirited Away, though the studio has never confirmed a direct link — the resemblance is enough that fans still make the pilgrimage. The Honkan underwent a major earthquake-retrofitting renovation that began in phases from December 2019, with construction scaffolding wrapped around sections of the building for several years; the full building reopened to bathers in 2024. It’s worth checking current signage or the official Dogo Onsen website for any short-term closures before you go, since heritage buildings this old periodically need touch-up work.

    Getting to Dogo Onsen

    From JR Matsuyama Station, take the Iyotetsu tram (streetcar) bound for Dogo Onsen — the ride takes roughly 20–25 minutes with a flat fare of around 200 yen, paid in cash as you exit. Trams run every 10–15 minutes and this is genuinely one of the more charming ways to arrive anywhere in Japan; some cars are restored retro models. From Matsuyama Airport, an airport limousine bus runs directly to Dogo Onsen in about 40–45 minutes. If you’re coming from Osaka or Tokyo, flying into Matsuyama is usually faster than the train-and-ferry combination, though the Seto Inland Sea ferry route via Hiroshima is a scenic alternative if you’re already touring that region — it also makes it easy to tack on a stop at Okunoshima, the rabbit island, on the same loop.

    Inside Dogo Onsen Honkan: What to Expect and What It Costs

    The Honkan is open daily, roughly 6:00 AM to 11:00 PM (last entry around 10:30 PM), 365 days a year. There’s no single “ticket” — pricing is tiered by which bath and how much lounging space you want:

    • Kami-no-yu (God’s Bath), bathing only: around 700 yen for adults — just the soak, towel not included.
    • Kami-no-yu with 2nd-floor tatami rest room: around 1,700 yen — includes a yukata robe, tea, and a rice cracker in a communal resting hall.
    • Tama-no-yu (Spirit’s Bath), with 2nd-floor room: around 2,700 yen.
    • Tama-no-yu with a private resting room: around 3,400 yen, the closest thing to a splurge option within the Honkan itself.

    Treat these as approximate — the building went through a lengthy renovation and prices have shifted before, so confirm the current chart at the entrance. Baths are gender-separated and, as with virtually all Japanese public baths, swimsuits are not worn; wash thoroughly at the shower stations before entering the tub. The water itself is a mild alkaline simple spring (tanjun-sen), gentle enough to bathe in daily, which is exactly what generations of locals have done.

    Tsubaki-no-yu Annex and Free Foot Baths

    Right next to the Honkan is Tsubaki-no-yu, a newer annex built in 1953 that draws from the same source but costs less and moves faster — a good choice if the Honkan queue is long or you just want a straightforward soak without the ceremony. Entry runs roughly 400–500 yen for adults. If you don’t want to bathe at all, several free ashiyu (foot baths) are scattered around Dogo Onsen Station and the shopping arcade, including one inside the station building itself — a nice way to sample the water on a tight schedule or with kids in tow.

    Where to Stay: Budget, Mid-Range, and Splurge Ryokan

    Dogo Onsen town has lodging at every level, and most properties offer their own in-house baths plus easy walking access to the Honkan.

    • Budget: business hotels and simple guesthouses near Dogo Onsen Station or back toward Matsuyama Station, often 6,000–9,000 yen per night for a single, without meals.
    • Mid-range: traditional ryokan with tatami rooms, yukata, and a kaiseki dinner included, typically 15,000–25,000 yen per person per night.
    • Splurge: higher-end properties like Dogo Yaya, Funaya, or Dogokan, with private in-room baths and multi-course dinners featuring Seto Inland Sea seafood and Ehime citrus, often 30,000–50,000+ yen per person per night.

    Booking a ryokan here is worth it even on a short trip — many stays include free or discounted admission to the Honkan, and soaking right before bed (or right after breakfast) is the whole point of visiting a hot spring town rather than just the bathhouse.

    Beyond the Bath: Dogo Onsen Shopping Street and Botchan Culture

    The covered Dogo Onsen shopping arcade runs from the tram terminal to the Honkan’s front steps and is worth twenty minutes even if you’re not bathing. Look for Botchan dango — three-color skewered rice dumplings named after Natsume Soseki’s 1906 novel Botchan, which is set in Matsuyama and namechecks the bathhouse directly — along with Ehime mikan (citrus) sweets, Imabari towels, and stalls selling onsen tamago snacks, the soft-set hot-spring-cooked eggs found at bathing towns across Japan (if you haven’t tried one, our guide to onsen tamago covers how they’re made and where else to find them). On the hour, the Botchan Karakuri Clock outside the station puts on a short mechanical show with figures from the novel — worth timing a coffee break around.

    Best Time to Visit and Common Mistakes to Avoid

    Dogo Onsen works year-round thanks to Shikoku’s mild climate — winters rarely get harsh, making it a comfortable off-season alternative to mountain hot spring towns like Karuizawa. Spring (April) and autumn (November) bring the most pleasant walking weather and lighter crowds than the summer holiday season. The most common visitor mistakes: arriving with a swimsuit (not permitted in the communal baths), skipping the pre-bath shower, and assuming the Honkan is fully cashless — bring some cash for the ticket counters and locker deposits. Tattoo policies at Japanese bathhouses vary and change over time, so if you have visible tattoos, ask at your ryokan’s front desk or check current signage rather than assuming either way. Finally, don’t rush it — locals treat Dogo Onsen as a slow ritual, not a photo stop, and the town rewards visitors who budget at least half a day rather than squeezing it between other Matsuyama sights.

  • Okunoshima: Japan’s Rabbit Island in the Seto Inland Sea

    Okunoshima: Japan’s Rabbit Island in the Seto Inland Sea

    Photo by Da-shika on Unsplash

    Okunoshima is a small island in Hiroshima Prefecture’s Seto Inland Sea where several hundred wild rabbits roam freely across beaches, forest paths, and an abandoned World War II poison gas factory. It’s an easy half-day or full-day trip from Hiroshima, and unlike many “hidden gem” destinations, it genuinely delivers: rabbits will hop up to your feet within minutes of stepping off the ferry. Here’s how to plan the trip properly, including the details most guides skip.

    How to get to Okunoshima

    The island itself has no bridge — you reach it by ferry from Tadanoumi Port, a small port town between Hiroshima and Onomichi.

    • From Hiroshima Station: Take the JR Kure Line (local/rapid) directly to Tadanoumi Station, about 1 hour 20 minutes. Alternatively, ride the Sanyo Shinkansen or Sanyo Main Line to Mihara Station (about 20–40 minutes) and transfer to the JR Kure Line to Tadanoumi (about 15 minutes) — this combo is often faster overall and worth it if you’re already carrying a rail pass. If you’re routing through the Shinkansen with big suitcases, check Shinkansen oversized luggage rules before you book seats, since Mihara is a standard-car stop with limited oversized-baggage space.
    • From Tadanoumi Station to the port: It’s a flat 5-minute walk to Tadanoumi Port, well signposted with rabbit mascots.
    • Ferry: Setonaikai Kisen runs the Tadanoumi–Okunoshima ferry, a 12–15 minute crossing. Boats run roughly hourly (more frequently on weekends and holidays), with the first departure around 7:00 am and the last around 5:00–6:00 pm depending on the season. One-way fare is about ¥320 for adults (roughly ¥620 round-trip), with reduced fares for children. Schedules shift seasonally, so check the current timetable on the Setonaikai Kisen website before you go — missing the last boat back means an overnight stay is your only option.

    Total travel time from central Hiroshima is around 2 hours door-to-port each way, so budget a full day if you want more than a quick rabbit photo stop.

    Best time to visit

    Spring (April–May) and autumn (October–November) are ideal — mild temperatures keep the rabbits active and visible throughout the day. In midsummer, rabbits mostly hide in shade during the hottest hours (roughly 11 am–3 pm) and only come out in force early morning or late afternoon; if you’re visiting in July or August, plan around those windows and bring your own water, as shade is limited on the open hillside trails. Winter is quieter and colder but still workable, with rabbits clustering near the ferry terminal and picnic areas where visitors are most likely to feed them. Weekday mornings, right after the first or second ferry, are consistently the least crowded time to visit.

    Feeding and interacting with the rabbits

    This is where most visitors make avoidable mistakes:

    • Don’t bring cabbage, lettuce, or bread from the mainland. Rich, wet vegetables and bread can cause digestive problems in rabbits that survive on a fairly restricted island diet. Buy dry rabbit food (sold as small bags, roughly ¥100–¥200) at the shop near the ferry terminal or at the Kyukamura hotel shop instead.
    • Feed from an open palm, not by hand-holding food close to your body — rabbits can nip fingers by accident when several compete for one pellet.
    • Don’t pick the rabbits up. It stresses them and can injure them; signage around the island asks visitors not to chase or grab them. Kneeling to their level gets you just as good a photo.
    • Early morning and just before the last ferry are the calmest times — midday brings tour groups and the rabbits get overwhelmed with food, some visibly avoiding the crowds by that point.

    The island’s wartime history

    Okunoshima’s rabbits get the attention, but the island has a heavier backstory. From 1929 to 1945, the Imperial Japanese Army operated a secret poison gas factory here, producing mustard and tear gas — the island was deliberately removed from contemporary maps to keep the facility hidden. The Okunoshima Poison Gas Museum (Doku Gasu Shiryokan), a short walk from the ferry terminal, documents this history with equipment, photographs, and worker testimonies. Admission is around ¥100 for adults and ¥50 for students, and it’s open daily from 9:00 am to 5:00 pm (last entry 4:30 pm). It’s a sobering, worthwhile counterpoint to the island’s cuter reputation, and the overgrown concrete ruins of the old factory buildings — now rabbit shelters — are scattered along the coastal walking path.

    Getting around and what else to do

    A paved loop road circles the island, about 4.3 km, walkable in 1.5–2 hours at a relaxed pace, or you can rent a bicycle near the hotel for roughly ¥300–¥500 for a few hours. Along the way you’ll pass small beaches, a golf course, and several overgrown gun batteries and munitions storage ruins from the same wartime period. There are no shops or convenience stores beyond the ferry terminal and hotel, so pick up drinks and snacks before boarding if you’re staying past a couple hours — vending machines exist but are limited.

    Where to eat and stay

    Kyukamura Okunoshima is the only accommodation on the island, a public resort-style lodge run by Japan’s national park lodge chain.

    • Budget: The island has a small campground (roughly ¥500–¥1,000 per site) if you’re equipped with your own gear — a good option for early-morning rabbit access before day-trippers arrive.
    • Mid-range: Kyukamura’s standard rooms with two meals (Seto Inland Sea seafood-focused dinner and breakfast) run roughly ¥13,000–¥20,000 per person per night — reasonable for a hotel with essentially the whole island to itself after the last ferry leaves.
    • Splurge: There isn’t a luxury option on Okunoshima itself; if you want a higher-end stay, base yourself in Onomichi or Hiroshima city and treat Okunoshima as a day trip instead.

    The Kyukamura restaurant is the only real dining option on the island outside vending machines, so if you’re day-tripping, eat before or after in Tadanoumi or back in Hiroshima.

    Common mistakes to avoid

    • Missing the last ferry — there’s no way off the island afterward except the hotel, so double-check the return schedule before you disembark.
    • Visiting at midday in summer expecting rabbits everywhere — they’ll be resting in shade.
    • Skipping the Poison Gas Museum because it seems like a detour — it’s a five-minute walk from the terminal and adds real context to what you’re seeing.
    • Forgetting cash — the ferry, food shop, and museum are all cash-friendly but not guaranteed to take cards.

    If you’re building out a Hiroshima-area itinerary with a few offbeat stops, Okunoshima pairs well with a broader look at Japan’s lesser-visited destinations — the Tottori Sand Dunes and mountain escapes like Karuizawa show a similarly different side of the country from the usual temple-and-city circuit.

  • Basashi: Kumamoto’s Horse Meat Sashimi Tradition

    Basashi: Kumamoto’s Horse Meat Sashimi Tradition

    Photo by lin zhaohai on Unsplash

    In most of Japan, horse meat shows up as an occasional novelty. In Kumamoto, it’s a point of civic pride. Basashi — thin slices of raw horse meat dipped in soy sauce with ginger, garlic, and a dab of grated garlic or karashi mustard — has been part of the local diet since the samurai era, and today it’s one of the first things locals recommend to visitors before they’ve even asked. If the idea of raw horse sounds intimidating, this guide will tell you exactly what to order, what it costs, and how to eat it without the rookie mistakes.

    What Is Basashi?

    Basashi (馬刺し) means “horse sashimi.” The meat is served raw, sliced thin, and chilled — often on a bed of shredded onion or shiso leaf. It’s sometimes called sakura niku (“cherry blossom meat”) because of its deep pink-red color, which is more vivid than beef and noticeably leaner. The taste is mild and slightly sweet, closer to lean tuna or venison than to beef, and the texture is tender rather than chewy.

    Kumamoto Prefecture is widely regarded as Japan’s basashi capital, producing and consuming more horse meat than almost anywhere else in the country. The tradition is often traced back to the samurai general Kato Kiyomasa, who is said to have eaten horse meat during a food shortage on a military campaign in Korea and brought the custom home. Whether or not the legend is exact, Kumamoto has run with it for centuries.

    The Cuts: From Lean Akami to Fatty Tategami

    A proper basashi order isn’t just “horse meat” — it’s a menu of distinct cuts, and knowing them helps you order intelligently:

    • Akami — the standard lean red meat, mild and slightly sweet. This is the safe starting point.
    • Koune — a fattier cut from the neck, with visible marbling. Richer and more melt-in-the-mouth than akami.
    • Tategami — the mane fat, nearly pure white and extremely rich. It’s served in small portions because a little goes a long way; think of it as the horse-meat equivalent of pure fatback.
    • Reba sashi — raw horse liver. After raw beef liver sales were banned nationwide in 2012 over food-safety concerns, raw horse liver became one of the few legal ways to still get sashimi-style liver in Japan, and Kumamoto restaurants lean into it.

    Most izakayas sell a moriawase (assorted plate) with three or four of these cuts side by side, which is the best way to compare them on a first visit.

    Where to Eat Basashi in Kumamoto

    You’ll find basashi on the menu at almost any izakaya in central Kumamoto City, particularly around the Shimotori and Kamitori covered shopping arcades near Kumamoto Castle, and around Suizenji Jojuen garden.

    • Budget: A basic akami plate at a casual izakaya runs roughly ¥600–900, and an assorted moriawase plate is typically ¥1,200–2,500. Many lunch spots also serve a basashi-don (basashi over rice) for around ¥900–1,300, which is a cheap, low-commitment way to try it.
    • Mid-range: Specialist basashi restaurants — places that focus on horse meat rather than treating it as one izakaya item among many — charge more for graded, higher-quality cuts, generally ¥2,500–4,500 for a proper multi-cut set with drinks.
    • Splurge: A few dedicated basashi restaurants offer full course menus (kaiseki-style, pairing several cuts with local shochu or sake) in the ¥5,000–8,000 per person range. These are worth it if you want to taste the difference between commodity-grade and top-grade meat side by side.

    Most izakayas open for dinner from around 17:00 and serve until 23:00 or later; reservations aren’t usually necessary for walk-in izakaya dining, but it’s worth booking ahead for the dedicated basashi specialty restaurants, especially on weekends.

    How to Order and Eat It Like a Local

    The classic condiment is a small dish of soy sauce mixed with grated ginger and garlic; some restaurants also offer karashi mustard on the side. Dip lightly — the meat’s flavor is delicate, and drowning it in soy sauce is the single most common mistake visitors make. Take one piece at a time rather than pre-mixing everything into the sauce dish.

    Start with akami before working up to koune or tategami; going straight for the fattiest cut can be overwhelming if you’re not used to raw animal fat. If reba sashi is on the menu, ask staff whether it’s fresh that day — quality places rotate stock carefully and won’t hesitate to tell you if it’s not at its best. Basashi pairs naturally with cold beer, shochu, or a canned highball; if you want to explore Japan’s broader canned-drink culture while you’re at it, our guide to chu-hi and Japan’s canned cocktail culture is a good companion read.

    One more point of confusion: basashi is not the same as sakura nabe, a cooked horse meat hot pot associated with places like Kumagaya in Saitama. If you’d rather compare Japan’s hot pot traditions than eat things raw, our breakdown of shabu-shabu vs. sukiyaki covers the cooked side of the spectrum.

    Getting to Kumamoto and Best Time to Go

    Kumamoto City is reached via the Kyushu Shinkansen from Hakata Station in Fukuoka in about 33–50 minutes depending on the train, or by direct flight into Aso Kumamoto Airport (about 1 hour 45 minutes from Tokyo Haneda). If you’re routing through Fukuoka anyway, it’s worth pairing your trip with the city’s own signature dish — see our guide to motsunabe, Fukuoka’s offal hot pot, for another regional specialty on the way.

    Basashi is served year-round and doesn’t have a strict seasonal peak, so there’s no need to time a trip around it specifically. That said, many visitors combine a Kumamoto food stop with a visit to Kumamoto Castle or Suizenji Jojuen, both of which are especially pleasant in spring (cherry blossoms) and autumn (fall foliage), making those shoulder seasons a natural pairing rather than a requirement.

    Bringing Basashi Home as a Souvenir

    Vacuum-packed, frozen basashi is sold at Kumamoto Airport, department store food halls, and specialty shops around the city, usually as a combo pack of two or three cuts for roughly ¥1,500–3,500. It’s a genuinely popular omiyage (souvenir gift) among Japanese travelers themselves, not just something aimed at tourists.

    If you’re carrying a frozen or chilled pack onward by Shinkansen rather than flying straight home, keep in mind that insulated cooler bags and ice packs count toward your carry-on space, and oversized luggage on reserved seats has its own rules — our guide to Shinkansen oversized luggage rules explains what you need to book in advance. For international travel, note that fresh or frozen meat products are generally restricted or prohibited entry into many countries, including the US, EU, and Australia — check your destination’s customs rules before you pack a cooler bag full of basashi, since vacuum sealing alone doesn’t guarantee it will clear customs.

  • Motsunabe: Fukuoka’s Offal Hot Pot and Where to Eat It

    Motsunabe: Fukuoka’s Offal Hot Pot and Where to Eat It

    Photo by Roméo A. on Unsplash

    Fukuoka has given Japan two famous bowls of food: tonkotsu ramen and motsunabe. The ramen gets all the international attention, but ask any local what they’d order on a cold night with a group of friends, and the answer is almost always motsunabe — a bubbling hot pot of beef or pork offal, chives, cabbage, and garlic in a rich miso or soy broth. It’s cheap, communal, unbelievably flavorful, and one of the best reasons to spend an evening in Hakata or Tenjin.

    What Exactly Is Motsunabe?

    Motsu means “offal” or “innards” — specifically beef or pork small intestine (shoujou) and large intestine (daichou) in this case. Don’t let the ingredient list scare you off: the offal is cleaned and simmered until tender, with almost none of the gaminess you might expect. It has a texture somewhere between chewy and gelatinous, and it soaks up the broth beautifully.

    The pot itself is piled high with a mountain of garlic chives (nira) and cabbage, plus whole cloves of garlic and dried red chili, then simmered tableside on a portable burner. There are two main broth styles: shoyu (soy-based, clear and savory) and miso (richer and slightly sweet). Miso is the more traditional Fukuoka style and the one most first-timers should try. Some shops also do a mizutaki-style water-based broth, but that’s less common for motsunabe specifically.

    How to Order and Eat It

    Motsunabe is built for two or more people — most restaurants won’t serve a single portion, and honestly, the communal aspect is half the point. A standard course for two runs roughly ¥3,000–¥5,000 total, or about ¥1,500–¥2,500 per person, before drinks. Many restaurants offer set courses (often called “course” or “nabe set”) that include the hot pot plus a few small starters and sometimes a dessert, typically ¥3,500–¥5,000 per person.

    The single most important word to know is shime (締め) — the “ending.” After you’ve eaten the meat and vegetables, the leftover broth is far too good to waste, so you order either champon noodles or a bowl of rice to finish it. This is not optional in spirit; skipping the shime is like leaving half your meal on the table. Noodles are the classic choice and usually cost an extra ¥300–¥500.

    If you’re comparing this to other Japanese hot pots you may have tried, our guide to shabu-shabu vs. sukiyaki covers the more famous beef-focused styles — motsunabe sits in a different, funkier lane, closer in spirit to the wrestler-fueling chanko nabe than to a delicate shabu-shabu dinner.

    Where to Eat It in Fukuoka

    Budget: Motsunabe Rakutenchi — A long-running local chain with several branches around Tenjin and Nakasu. Course menus start around ¥3,500 per person, and it’s a reliable, no-frills introduction to the dish. English menus are available at the larger branches, which makes it a low-stress first stop.

    Mid-range: Motsunabe Yamanaka (もつ鍋 やま中) — One of the most respected names in the city, with a Tenjin branch that regularly has a line out the door on weekend evenings. Their miso-based broth is a benchmark for what motsunabe should taste like. Expect to pay ¥4,000–¥5,500 per person for a full course with drinks. Reservations are strongly recommended, especially Friday and Saturday nights — call ahead or book through your hotel’s concierge if you don’t speak Japanese.

    Mid-range: Ohashiya (大橋屋) — Popular with both locals and tourists, with a good balance of quality and approachability. Course sets run roughly ¥3,800–¥4,800 per person, and portions are generous.

    Splurge: Motsunabe Oyama (もつ鍋 おおやま) — Known for higher-grade offal and a refined take on the dish; a full course with drinks can run ¥6,000–¥8,000 per person. Worth it if you want to taste the difference good sourcing makes, but book ahead.

    For something looser and cheaper, the open-air yatai food stalls along the Nakasu riverside sometimes serve simplified motsunabe or motsuyaki (grilled offal skewers) for ¥1,000–¥2,000, alongside ramen and oden — a fun, informal way to sample the flavor if you’re stall-hopping rather than sitting down for a full dinner.

    Best Time to Go

    Motsunabe is eaten year-round, but it’s fundamentally cold-weather comfort food, and demand (and quality) peaks from late autumn through winter, roughly November through February. Restaurants are busiest on weekend evenings; if you’re visiting during peak winter months, aim to arrive right at opening (usually 17:00 or 17:30) or book a reservation, since walk-in waits of 30–60 minutes are common at the well-known spots.

    Getting There

    Almost every recommended restaurant is within walking distance of Tenjin Station or Nakasukawabata Station on the Fukuoka City Subway, both a few minutes from Hakata Station by train. If you’re arriving in Fukuoka by Shinkansen from Osaka, Hiroshima, or elsewhere on the Sanyo line, Hakata Station is the terminus — from there it’s a 5–10 minute subway ride into Tenjin. If you’re traveling with big suitcases straight off the bullet train, it’s worth checking our guide to Shinkansen oversized luggage rules before you go, so you’re not hauling bags through a packed dinner restaurant.

    Common Mistakes to Avoid

    • Ordering for one person. Most motsunabe restaurants require a minimum of two diners per pot. If you’re traveling solo, ask at the counter — a few casual spots will accommodate solo diners, but many will politely decline.
    • Skipping the shime. The broth is the reward for finishing the meat and vegetables — don’t fill up on cabbage and miss it.
    • Showing up hungry with no reservation on a Saturday. The famous shops genuinely sell out or run 45+ minute waits. If you have your heart set on a specific restaurant, call ahead or reserve online the day before.
    • Assuming all motsunabe tastes the same. Broth style (miso vs. shoyu), the ratio of chives to offal, and the cut of intestine used vary a lot between shops — it’s worth trying two different restaurants if you’re in Fukuoka for a few days.
    • Not pacing your drinks. A frosty beer or a canned highball pairs perfectly with the rich broth — if you want to explore Japan’s canned drink scene further, see our rundown of chu-hi and Japan’s canned cocktail culture.

    Motsunabe isn’t a dish you order on a whim in a hurry — it’s a slow, shared, sleeves-rolled-up kind of meal. Budget a full two hours, bring a friend or three, and let the pot simmer while you talk. That, as much as the broth itself, is why Fukuoka locals keep coming back to it all winter long.

  • Jingisukan: Hokkaido’s Grilled Lamb BBQ and Where to Eat It

    Jingisukan: Hokkaido’s Grilled Lamb BBQ and Where to Eat It

    Photo by Jay Wennington on Unsplash

    If you’ve spent any time in Sapporo, you’ve probably caught a whiff of it before you saw it: charred, garlicky, unmistakably meaty smoke drifting out of a restaurant doorway. That’s Jingisukan (ジンギスカン), Hokkaido’s signature grilled lamb and mutton barbecue, cooked on a distinctive domed skillet and eaten communally with beer in hand. It’s one of the few Japanese dishes that’s genuinely rare outside its home region, and it’s worth planning a meal around if you’re heading north.

    What Exactly Is Jingisukan?

    Jingisukan is thinly sliced lamb (and sometimes mutton) grilled on a convex cast-iron or steel dome, often called a “helmet grill” because of its shape — legend has it the design was inspired by the helmets of Mongolian warriors, which is also where the dish gets its name (a Japanese rendering of “Genghis Khan”). The meat cooks on the raised center while vegetables — cabbage, onion, bean sprouts, and pumpkin are common — sit around the rim, catching the flavorful fat and juices as they run down.

    There are two main styles you’ll encounter:

    • 味付き (ajitsuki) — meat pre-marinated in a soy-based, garlic-and-ginger sauce before grilling. This is the more traditional, everyday style and what most tourist-friendly restaurants serve.
    • 生ラム (nama-ramu) — unmarinated raw lamb, grilled plain and dipped afterward in a tare sauce at the table. This style lets you actually taste the lamb and is favored by connoisseurs.

    Lamb (young sheep, called “lamb” or specifically genghis using spring lamb) tends to be milder and more tender; mutton (older sheep) has a stronger flavor and is generally cheaper. Most restaurants offer both, so don’t hesitate to order a mix if it’s your first time.

    Where the Dish Actually Comes From

    Jingisukan isn’t ancient — it developed in Hokkaido in the early-to-mid 20th century, when the Japanese government promoted sheep farming on the island to supply wool for military uniforms. Lamb and mutton became abundant, and locals developed the grilling style to make use of the meat. Today Hokkaido still consumes more lamb per capita than anywhere else in Japan, and Jingisukan has become as central to the island’s food identity as fresh seafood or dairy.

    Best Places to Eat Jingisukan in Sapporo

    Sapporo is the easiest and most reliable place to try it, with options across every budget.

    • Budget: Daruma (Sumire Jingisukan or Daruma Honten, Susukino) — Small, smoky, no-frills counters in the Susukino nightlife district. Expect to pay roughly ¥1,200–1,800 for a plate of meat and sit shoulder-to-shoulder with locals. Cash is often preferred, and there may be a short wait after 7pm.
    • Mid-range: Sapporo Beer Garden (Sapporo Bier Garten), Higashi Ward — Set inside the red-brick former Sapporo Brewery buildings, this is the most famous Jingisukan destination for visitors. It runs an all-you-can-eat-and-drink course (typically around ¥4,000–5,500 for 100 minutes, depending on the plan and season) pairing lamb with the brewery’s own beer straight from the source. Open daily, roughly 11:30am–10pm, though hours shift seasonally, so check ahead if you’re planning a specific date.
    • Mid-range: Matsuo Jingisukan — A well-known chain with several branches around Sapporo (including one near Odori Park) that’s popular for its sweet-savory marinade. Expect roughly ¥1,500–2,500 per person for a satisfying meal; English menus are available at the more tourist-frequented locations.
    • Splurge: Specialty nama-ramu (raw lamb) restaurants — Higher-end spots serving unmarinated, carefully sourced lamb (sometimes imported New Zealand or Australian lamb, sometimes domestic) can run ¥5,000–8,000+ per person, especially with premium cuts or a course meal. These are worth it if you already know you like lamb and want to taste it without a heavy marinade masking the flavor.

    Outside Sapporo, Takikawa (a city in central Hokkaido) is considered something of a Jingisukan heartland with several respected local restaurants, and you’ll also find good options in Asahikawa and at ski resort towns like Niseko during winter season.

    How to Order and Eat It

    Most restaurants let you order set courses (a fixed amount of meat and vegetables) or à la carte plates. A typical solo portion is around 150–200g of meat. Grilling is usually self-serve at your table — staff will show you how if you look unsure, and it’s completely normal to ask. Put the vegetables around the rim first to render fat and prevent them from burning, then lay the meat on the dome’s high point. Don’t overcrowd the grill; cook in batches so everything gets proper contact with the heat.

    Beer is the near-universal pairing — the fattiness of the lamb cuts through a crisp Sapporo or Asahi lager beautifully — but if you’d rather try something distinctly Japanese and lighter, a canned chu-hi is also a common choice at casual spots; if you want to know what to look for, see our guide to Chu-Hi and Japan’s canned cocktail culture.

    Best Season and Timing

    Jingisukan is eaten year-round in Hokkaido, but it has a strong seasonal identity in two directions. In summer, outdoor beer-garden versions (like Sapporo Beer Garden’s rooftop and courtyard seating, and pop-up grills in Odori Park during the Sapporo Summer Festival, roughly late July through mid-August) are hugely popular and worth booking ahead for. In winter, it’s a classic après-ski meal in resort towns like Niseko and Furano, eaten indoors to warm up after a day on the slopes. If you’re visiting Hokkaido for the snow, pairing a ski day with a Jingisukan dinner is a natural combination — and if illuminated winter scenery is also on your list, check our guide to Japan’s winter illuminations for nearby light festivals to visit the same evening.

    Common Mistakes First-Timers Make

    • Assuming it’s beef or pork. Some visitors order Jingisukan expecting a generic yakiniku experience and are surprised by the distinct, slightly gamey flavor of lamb or mutton. If you’re unsure whether you like lamb, start with the ajitsuki (marinated) style — the sauce mellows the flavor considerably.
    • Overcooking the meat. Thin-sliced lamb cooks in well under a minute per side on a hot dome grill. Leaving it too long dries it out fast — pull pieces off as soon as they lose their pink color.
    • Skipping the vegetables. The cabbage and onion around the rim aren’t a garnish — they soak up rendered lamb fat and are often the best part of the meal. Don’t ignore them.
    • Not booking ahead in peak season. Popular spots like Sapporo Beer Garden get busy during summer festival season and around major holidays; a same-day walk-in can mean a long wait.

    Getting There

    Sapporo is most easily reached by flying into New Chitose Airport, with a roughly 40-minute rapid train into central Sapporo Station. If you’re coming from Tokyo or elsewhere on Honshu by rail via the Shinkansen and connecting service, note that Hokkaido Shinkansen routes currently terminate at Shin-Hakodate-Hokuto, requiring a transfer — and if you’re traveling with a lot of luggage for a ski or multi-city trip, it’s worth reviewing Shinkansen oversized luggage rules before you book seats. Once in Sapporo, both Susukino and the Sapporo Beer Garden area are easily reachable by subway or a short taxi ride from Sapporo Station.

    However you get there, Jingisukan is one of those dishes that rewards a little planning — book ahead for beer garden season, come hungry, and don’t be shy about asking your server how the grill works. It’s casual, communal food, and half the fun is the smoke, the sizzle, and the beer in your hand while you do it yourself.