Japan Trove

Author: JapanTrove Editorial

  • Nagashi Somen: Japan’s Flowing Noodle Experience and Where to Try It

    Nagashi Somen: Japan’s Flowing Noodle Experience and Where to Try It

    Photo by Eleonora Albasi on Unsplash

    Somewhere between a meal and a game, nagashi somen sends thin, chilled wheat noodles shooting down a bamboo flume of cold running water, and you catch them with chopsticks before they slide past. It’s one of the most photogenic ways to eat in Japan during the hot, humid summer months, and it’s far easier to experience than most visitors assume. Here’s how it works, where to go, and how not to embarrass yourself at the flume.

    What Exactly Is Nagashi Somen?

    Somen are very thin wheat noodles, usually eaten cold with a light soy-and-dashi dipping sauce called tsuyu, often topped with grated ginger, sliced scallion, or a dab of wasabi. In the “nagashi” (flowing) version, a length of split bamboo is set up as a chute with water running through it, and noodles are fed in from the top in small batches. Diners sit along the sides with chopsticks ready, snag a few strands as they pass, dip them in a small cup of tsuyu, and eat. It’s communal, a little competitive, and genuinely refreshing on a sweltering afternoon — the water is usually drawn straight from a mountain stream, so it stays cold even in August.

    The exact origin is debated — several towns in Kyushu claim to have invented it in the postwar years — but it spread nationwide as a summer restaurant gimmick and is now a fixture of the season, alongside kakigori shaved ice as one of Japan’s classic warm-weather treats.

    Where to Try It: Kibune, Kyoto

    The single best-known spot for visitors is Kibune (貴船), a small riverside village in the mountains north of Kyoto. Several restaurants here build “kawadoko” — wooden platforms suspended directly over the Kibune River — so you dine with your feet almost skimming the water while the temperature drops several degrees below downtown Kyoto. The most famous is Hirobun (ひろ文), which runs a long bamboo flume down the middle of its riverside platform specifically for nagashi somen.

    • What it costs: Expect roughly ¥1,300–¥1,900 for an all-you-can-eat nagashi somen set (prices are revised most years, so treat this as a ballpark rather than a fixed figure).
    • How it works: You’re seated at the flume, noodles come down continuously in batches, and you signal for more (or stop) using a small marker or by simply waiting for the next batch to keep flowing. Portions are generous — most people find one round plenty.
    • Hours and season: The kawadoko platforms typically operate from around the first week of May through late September, with lunch service roughly 11:00–15:00 (an evening izakaya menu often continues later without the noodle flume). Exact dates shift year to year depending on weather and river conditions, so check ahead if you’re visiting at the very start or end of the season.
    • Reservations: Not always required for lunch, but weekends and August afternoons get busy — arriving right at opening or booking ahead avoids a wait in the heat.

    How to Get to Kibune

    From central Kyoto, take the Eizan Electric Railway from Demachiyanagi Station to Kibuneguchi Station (about 30 minutes, roughly ¥470 one-way). From Kibuneguchi, it’s either a short Kyoto Bus ride or a scenic 25–30 minute walk uphill along the river to Kibune village. The neighboring village of Kurama, one stop earlier on the same line, has its own onsen and the atmospheric Kurama-dera temple, so many visitors combine both into a half-day trip out of the city. If you’re coming from Kyoto Station and don’t want to haul luggage the whole way, it’s worth reading up on coin lockers in Japan to stash your bags before heading out.

    Best Season and Timing

    Nagashi somen is strictly a warm-weather food — most restaurants only run the flumes from late spring through early autumn, since the whole appeal is the contrast between icy water and summer heat. July and August are peak season and peak crowds; early May or September gives you cooler mountain air, thinner crowds, and (in Kibune specifically) fewer mosquitoes near the river. Aim for a weekday lunch if you can — weekend afternoons in July and August can mean a 30–60 minute wait for a table at the most popular kawadoko restaurants.

    Other Ways to Experience It

    Kibune isn’t the only option. Summer festivals, beer gardens, and department store rooftop events around the country frequently set up temporary bamboo flumes as a one-off attraction — keep an eye out at local matsuri if you’re traveling outside Kyoto in July or August. Some ryokan and mountain resorts with their own streams also offer it as a seasonal lunch add-on.

    If you want to try it at home, compact plastic or bamboo nagashi somen flume sets (some with a small circulating pump) are sold at Japanese home goods stores and larger supermarkets, and dried somen noodles themselves are cheap and available everywhere — a bundle at a discount grocery chain like the ones covered in this guide to gyomu super and local supermarkets in Japan typically costs a few hundred yen for enough to feed a family.

    Common Mistakes to Avoid

    • Grabbing too much at once. The etiquette is to take a modest few strands per pass and let others get their turn — the noodles keep coming, so there’s no need to scoop a whole clump.
    • Dipping the whole bite in the shared tsuyu pot. You’re given an individual cup; don’t double-dip communal sauce if it’s set up that way.
    • Wrong chopstick technique. Fast-moving wet noodles are genuinely harder to catch than they look. If your own chopstick skills are rusty, it’s worth a quick refresher — see this guide to Japanese chopsticks for grip basics before you’re racing cold noodles downstream.
    • Showing up starving. A single somen course, even all-you-can-eat, is light on calories. Many Kibune restaurants pair it with a small kaiseki-style set (tempura, rice, pickles) for a fuller lunch — worth asking about if you want more than noodles.
    • Assuming it runs year-round. Because the flumes depend on outdoor river platforms, most locations close for winter entirely. Don’t plan a trip around it outside roughly May–September.

    Budget, Mid-Range, and Splurge Options

    At the budget end, a bowl of ordinary chilled somen at any noodle shop or home-cooked with a store-bought flume kit costs next to nothing. Mid-range is the classic Kibune experience — around ¥1,500–¥2,000 for the all-you-can-eat nagashi somen course at Hirobun or similar kawadoko restaurants, plus transport. For a splurge, several Kibune ryokan and restaurants offer a full kawadoko kaiseki lunch (grilled river fish, seasonal vegetables, a small hot course) with nagashi somen served as the finale, running roughly ¥5,000–¥10,000 per person — a good option if you want the riverside atmosphere paired with a proper multi-course meal rather than noodles alone.
  • Ainu Culture in Hokkaido: Museums, Crafts & Japan’s Indigenous Heritage

    Ainu Culture in Hokkaido: Museums, Crafts & Japan’s Indigenous Heritage

    Photo by pen_ash on Unsplash

    Most visitors to Japan leave with the impression that the country’s culture is a single, unbroken thread. Hokkaido tells a different story. The island is the traditional homeland of the Ainu, an Indigenous people with their own language, spiritual traditions, and craft heritage that developed independently from mainland Japanese culture for centuries. Ainu culture isn’t a museum piece frozen in the past — it’s actively practiced today, and Hokkaido has several excellent places to learn about it properly, respectfully, and in some depth. Here’s where to go, what it costs, and how to avoid the mistakes most first-time visitors make.

    Upopoy: Japan’s National Ainu Museum and Park

    Upopoy, which opened in July 2020 on the shore of Lake Poroto in Shiraoi, is the government-run flagship site for Ainu culture and by far the easiest to reach. The complex includes the National Ainu Museum, an outdoor park with reconstructed cise (traditional thatched dwellings), a reconstructed kotan (village) setting, and a performance theater where staff — many of them Ainu themselves — demonstrate traditional dance, music, and crafts throughout the day.

    • Hours: 9:00–17:00 (extended to 18:00 during peak summer months); closed most Mondays, with the closure shifting to the following weekday if Monday is a public holiday, plus a New Year closure.
    • Admission: around ¥1,200 for adults, ¥600 for university and high school students, and free for junior high students and younger.
    • Access: Shiraoi Station is roughly 25–40 minutes from New Chitose Airport and about an hour from Sapporo Station by JR limited express (Hokuto or Suzuran lines). From the station it’s about a 10-minute walk to the entrance.

    Budget at least 2.5–3 hours here — the museum’s core exhibits alone (language, spirituality, clothing, hunting and fishing tools) reward a slow pace, and the outdoor performances run on a schedule worth checking ahead. Shiraoi also sits conveniently between New Chitose Airport and Noboribetsu Onsen, so it works well as a stop on the way to or from a hot spring stay rather than a dedicated round trip from Sapporo.

    Akanko Ainu Kotan: A Living Ainu Village

    In eastern Hokkaido, on the shore of Lake Akan (also known for its marimo algae balls), Akanko Ainu Kotan is one of the largest Ainu communities in the country, with around three dozen households. Unlike Upopoy, this is a real residential neighborhood, not a purpose-built museum — the main street is lined with family-run craft shops selling wood carvings and embroidery, and in the evening the Ikor theater stages Ainu dance performances. Traditional Ainu dance was recognized by UNESCO as Intangible Cultural Heritage in 2009, and seeing it performed live by community members here carries more weight than any video.

    Akan is a genuine trip in itself: from Kushiro Airport it’s about an hour by bus, and from Sapporo it’s a 3.5–4 hour journey by car, bus, or train-and-bus combination. It’s not something to bolt onto a Sapporo-only itinerary — plan a night in the Akan hot spring area if you want to see the evening show without rushing back.

    Nibutani: The Heartland of Ainu Heritage

    The small settlement of Nibutani, in Biratori Town south of Sapporo, has outsized historical importance. It’s home to two neighboring museums — the Kayano Shigeru Nibutani Ainu Museum and the Biratori Town Museum of Nibutani Ainu Culture — both built around collections of everyday tools, ceremonial robes, and household items rather than staged reconstructions. Kayano Shigeru, who founded the first collection here, became the first Ainu member of Japan’s national Diet and was central to the modern movement for Ainu cultural recognition. Nibutani is also where you’re most likely to watch working artisans carve wooden trays or weave textiles in small home studios rather than in a retail display case. It’s remote and best reached by rental car; there’s no convenient train access, which is exactly why it stays quieter than Upopoy or Akan.

    Understanding Ainu Crafts: What to Look For and Buy

    A few craft forms show up repeatedly across all three sites, and knowing what you’re looking at makes shopping far more satisfying:

    • Attus: cloth hand-woven from the inner bark fiber of the Japanese elm tree — slow, labor-intensive work traditionally used for clothing.
    • Cut-work embroidery: swirling appliqué patterns called moreu, historically believed to ward off misfortune, now applied to modern accessories as well as traditional robes.
    • Ita: carved wooden trays and bowls with geometric or spiral motifs.
    • Mukkuri: a small bamboo mouth harp with a distinctive twangy sound — inexpensive, easy to pack, and usually demonstrated in museum shops before you buy.

    One nuance worth knowing: the carved wooden bears sold across Hokkaido souvenir shops are not an ancient Ainu tradition. The craft traces back to the 1920s in Yakumo, where a Swiss-inspired wood bear was brought back as a sample and local artisans — Ainu and non-Ainu — developed it into what became a regional specialty. That doesn’t make a well-carved bear a bad souvenir, but it’s a different story from the ita trays or embroidery you’ll see at Akan and Nibutani, which draw on genuinely older techniques. For authenticity, buy directly from the craft shops in Akanko Ainu Kotan or the artisan studios around Nibutani rather than generic gift shops in Sapporo or Otaru — you’re paying a fair price for hand work and can usually meet the maker. Shoppers who enjoy comparing regional Japanese craft traditions might also like our guides to Kokeshi Dolls from Tohoku and the pottery towns of Mashiko and Bizen, and our buying guide to Japanese chopsticks covers similar questions of artisan-made versus mass-produced.

    Budget, Mid-Range, and Splurge Options

    • Budget: Upopoy’s standard ¥1,200 ticket plus browsing the free-to-enter craft shops in Akan Kotan.
    • Mid-range: add a hands-on workshop at Upopoy, such as mukkuri-making or embroidery (typically a modest add-on fee beyond admission), plus a seat at the evening dance performance at Akan’s Ikor theater.
    • Splurge: commission a piece directly from a named artisan in Nibutani — a substantial hand-woven attus textile or a large carved ita tray can run well into the tens of thousands of yen, but you leave with something genuinely one-of-a-kind and a story about who made it.

    Best Time to Visit and Planning Tips

    Upopoy is a year-round destination since most of the museum is indoors, but summer (July–September) brings the fullest schedule of outdoor performances and the best weather for walking the Lake Poroto shoreline. Winter visits are quieter, with performances moved indoors — still worthwhile, just less atmospheric outside. If you’re arriving at New Chitose Airport with luggage and plan to visit Shiraoi before continuing to Sapporo or Noboribetsu, our guide to coin lockers in Japan is worth a look so you’re not dragging suitcases around the museum.

    Common Mistakes to Avoid

    The biggest one is treating Ainu culture as purely historical — the staff performing dances at Upopoy and Akan, and the artisans carving in Nibutani, are practicing a living culture, not re-enacting a dead one. Second, don’t rush Upopoy in under two hours; the exhibits are dense and the outdoor performance schedule is easy to miss if you’re moving too fast. Third, check the Monday closure before you build a tight itinerary around it. And finally, don’t assume a Sapporo-based trip automatically covers “Hokkaido’s Ainu heritage” — Upopoy is an easy add-on, but Akan and Nibutani require real travel time from the capital, so decide early whether they fit your schedule rather than discovering the distance too late.

  • Kichijoji: Tokyo’s Most Livable Neighborhood — Inokashira Park & Shopping

    Kichijoji: Tokyo’s Most Livable Neighborhood — Inokashira Park & Shopping

    Photo by Su San Lee on Unsplash

    Ask Tokyoites where they’d most like to live and Kichijoji comes up almost every time. This leafy, walkable neighborhood in western Tokyo has topped SUUMO’s annual “most desirable place to live” ranking for years running, and it’s easy to see why once you’re standing at the edge of Inokashira Park with a coffee in hand. For visitors, Kichijoji offers something the Shibuya-Shinjuku-Ginza circuit doesn’t: a genuine residential feel, a big green park, one of Japan’s most-loved small museums, and a shopping scene built around independent boutiques rather than flagship stores. It’s an easy half-day or full-day trip from central Tokyo, and it rewards slow wandering more than a checklist.

    Getting to Kichijoji

    Kichijoji Station is served by two lines, which makes it convenient from almost anywhere in the city. The JR Chuo Line rapid train from Shinjuku takes about 14 minutes (around ¥230). From Shibuya, hop on the Keio Inokashira Line — a semi-express (kyuko) train gets you there in roughly 16–17 minutes for about ¥200–250. There’s no need to reserve seats or use a limited express; these are regular commuter trains, so expect standing room during weekday rush hours (7:30–9:00am and 5:30–7:30pm).

    The station itself has a maze of exits, but signs for “Park Exit” (Koen-guchi) will point you toward Inokashira Park, while the “North Exit” (Kita-guchi) leads to Sun Road and Harmonica Yokocho. If you’re arriving with luggage before continuing elsewhere in Tokyo, the station and nearby Yodobashi Camera building both have coin lockers — for sizing and pricing before you go, see this guide to coin lockers in Japan.

    Inokashira Park: Boating, a Jealous Goddess, and Cherry Blossoms

    Inokashira Park (Inokashira Onshi Koen) is a five-minute walk south of the station and centers on a long, willow-lined pond. Rowboats and swan-shaped pedal boats are available for rent from a dock near the pond’s north side, typically for around ¥700–800 per 30 minutes; the rental booth generally operates from 9:30am until dusk, though hours shift seasonally, so check the signage on arrival. There’s a local legend attached to the boats worth knowing: Benzaiten, the goddess enshrined at the small shrine on the pond’s island, is said to grow jealous of couples who ride together, supposedly cursing them to break up. Most Tokyoites treat it as a fun superstition rather than a real deterrent, but you’ll hear it mentioned often.

    The park also has a modest zoo and aquarium section (adult admission around ¥400), wooded walking paths, and a wide grassy square that fills with picnickers on weekends. If you want to eat park-side, pick up onigiri from a convenience store or supermarket on your way in rather than searching for food once you’re inside — our guide to onigiri covers what to look for and how to read the fillings. Cherry blossoms typically peak in late March to early April, when the pond becomes one of Tokyo’s best hanami spots and gets genuinely crowded; November brings a quieter but equally striking wash of autumn color.

    The Ghibli Museum

    At the park’s southwestern edge (technically just over the border in Mitaka) sits the Ghibli Museum, designed by Hayao Miyazaki himself. It’s small, whimsical, and deliberately light on English signage — the idea is to explore and discover rather than read placards. Adult tickets cost around ¥1,000, but the catch is that tickets are not sold at the door. They go on sale on the 10th of each month for entry dates in the following month, through the Lawson Ticket system (either online or at a Loppi machine in any Lawson convenience store), and popular entry slots — especially weekends — often sell out within hours. If a visit here matters to you, build your Tokyo dates around ticket availability rather than the other way around. The museum is closed on Tuesdays and has fixed timed-entry slots (10am, 12pm, 2pm, and 4pm), so arrive on time. Photography is not allowed inside, which is part of what keeps the experience feeling intimate.

    Harmonica Yokocho: Retro Alleys for Eating and Drinking

    Just north of the station, Harmonica Yokocho is a tight grid of alleyways lined with tiny bars, yakitori counters, and standing-room izakaya, many seating only six to ten people. The name comes from the narrow, tightly packed stalls resembling harmonica reeds — it dates back to a black-market area that sprang up after World War II and never lost its scrappy charm. This is a good place for an early dinner or a post-park drink; most spots open around 5pm, though a handful of coffee and food stalls run in the daytime too. Expect cash-only counters in many of the smaller bars, and don’t expect English menus — pointing at what your neighbor is eating works fine. It’s atmospheric rather than polished, which is exactly the appeal.

    Shopping in Kichijoji

    Kichijoji’s shopping strength is its density of independent shops rather than any single mega-mall. Sun Road, the covered arcade running from the station’s north exit, mixes bakeries, drugstores, and casual fashion and is the easiest starting point. Just beyond it, Nakamichi-dori and the surrounding backstreets are where Kichijoji earns its reputation among Tokyo locals: secondhand clothing stores, small press bookshops, and zakka (lifestyle goods) boutiques selling ceramics, stationery, and homeware from independent Japanese makers. If you’re building a collection of everyday Japanese housewares to bring home, keep an eye out for noren doorway curtains or simple lacquer and wood pieces in these shops — browsing here is a nice complement to more specialized craft-town shopping.

    For groceries or self-catering, Kichijoji has several supermarkets within a few minutes of the station, including budget chains that are popular with residents rather than tourists — a good chance to shop the way locals actually do; see our guide to Gyomu Super and local supermarkets for what to expect and how to navigate one. On the department-store end, Kirarina Kichijoji sits directly above the station’s south side, and a Yodobashi Camera electronics store is a short walk away if you need chargers, SIM cards, or last-minute electronics.

    Best Time to Visit and Common Mistakes

    Weekday mornings and early afternoons are the calmest time to explore — Kichijoji is a residential neighborhood first, so it doesn’t have the 24-hour buzz of Shinjuku, and many smaller shops open around 11am rather than earlier. Weekends, especially with good weather, bring heavy crowds to both the park and Sun Road. The most common mistake visitors make is treating Kichijoji as a quick stopover on the way to the Ghibli Museum without checking ticket availability first — by the time many travelers think to book, their preferred dates are gone. Book Ghibli tickets as early as the sale window allows, and treat the park, alleys, and shopping streets as worth a dedicated half-day even without a museum slot. The second common mistake is rushing straight from the station to the park without wandering Harmonica Yokocho or the backstreets around Nakamichi-dori — that unplanned wandering is where Kichijoji’s actual character lives.

  • Coin Lockers in Japan: Sizes, Prices, Apps & Where to Store Your Luggage

    Coin Lockers in Japan: Sizes, Prices, Apps & Where to Store Your Luggage

    Photo by Thiago Yonamine on Unsplash

    Nothing derails a good sightseeing day like dragging a suitcase up and down station stairs. Japan’s coin lockers solve this cheaply and reliably — but only if you know which size you need, how much cash (or IC card balance) to carry, and what to do when every locker at Kyoto or Shibuya Station is full, which happens more often than guidebooks admit. Here’s what actually works.

    How Coin Lockers Work in Japan

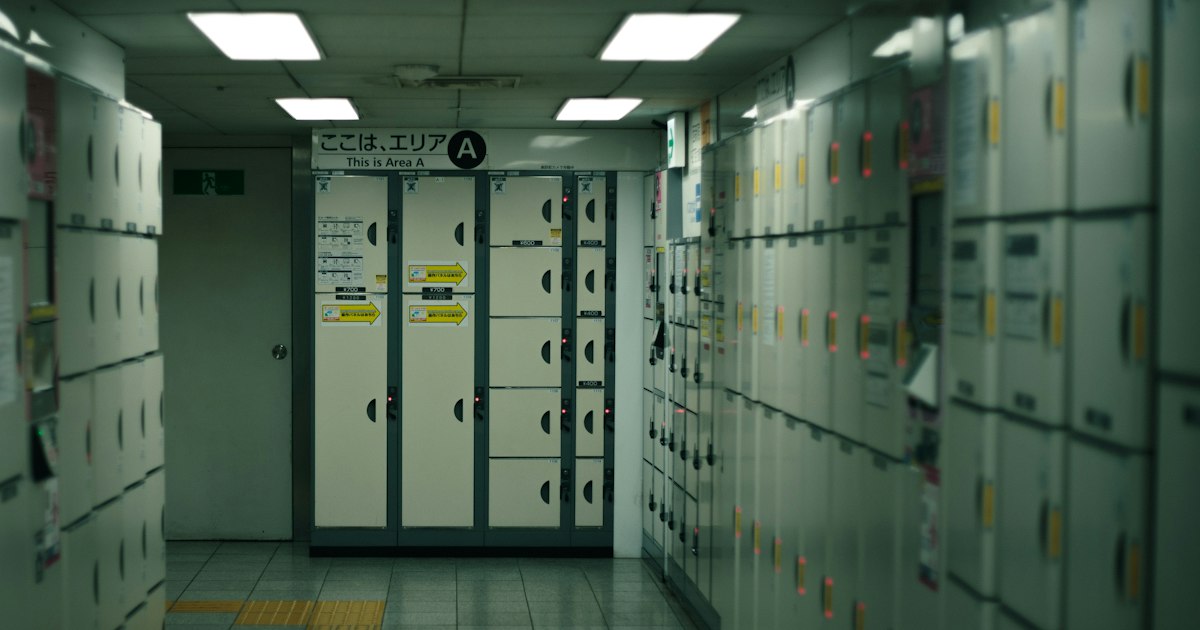
    Coin lockers are self-service, pay-on-entry storage units found at train and subway stations, airports, shopping malls, and tourist sites. You pick an empty locker, load your bag, pay, and take a key or a printed receipt with a QR code or PIN. Older lockers use physical keys; most stations have now switched to keyless systems where you pay by card, IC card (Suica, PASMO, ICOCA), or cash and unlock the locker later by scanning a receipt or entering a code at a touch panel.

    Almost all lockers accept 100-yen coins, and newer touch-panel units take IC cards and sometimes credit cards. Carry a stack of 100-yen coins anyway — rural stations and older locker banks are still coin-only, and change machines nearby aren’t guaranteed.

    One important rule: most coin lockers are day-use only, resetting at midnight or at the start of station operating hours (typically around 4:00-5:00 AM). If you leave a bag in overnight, you’ll usually owe an extra day’s fee, sometimes double, when you return. A few 24-hour lockers at major hubs like Tokyo, Shinjuku, and Osaka Station are built for multi-day storage and charge per calendar day instead.

    Locker Sizes and Prices

    Sizes are fairly standardized nationwide, though pricing varies slightly by operator (JR East, JR West, Kotsu Kaikan, and private mall operators all run their own networks):

    • Small (S) — roughly 34 x 34 x 57 cm, fits a backpack or small daypack. ¥300-¥500/day.
    • Medium (M) — roughly 57 x 34 x 57 cm, fits a carry-on suitcase (20-22 inch). ¥400-¥700/day.
    • Large (L) — roughly 57 x 57 x 57 cm or bigger, fits a large checked suitcase. ¥600-¥900/day.
    • Extra-large — found mainly at airports and Shinkansen hubs, big enough for oversized luggage or two suitcases. ¥800-¥1,200/day.

    Budget travelers: a small locker is enough for a day pack while you explore, freeing you from carrying souvenirs or a jacket. Mid-range: most visitors need a medium locker for one rolling suitcase. Splurge/family trips: at Tokyo, Shin-Osaka, or Kyoto Station, book the extra-large lockers early in the day — they’re the first to sell out, especially during cherry blossom season (late March-early April) and autumn foliage season (mid-November), when everyone is switching hotels mid-trip.

    Best Apps and Tools for Finding an Empty Locker

    The single biggest headache with coin lockers isn’t cost — it’s availability. Popular stations sell out of lockers by mid-morning during peak travel weeks. A few tools help:

    • Coin Locker Navi (coinlocker-navi.com) — a Japanese-run site and app showing real-time-ish locker locations and sizes at major stations in Tokyo, Osaka, Kyoto, and beyond. Not always live-updated for vacancy, but excellent for finding where locker banks physically are, since they’re often tucked behind concourses or on different floors than you’d expect.
    • Google Maps — search “coin locker” near your station; user-submitted photos often show whether a bank looked full recently.
    • Ecbo Cloak and Nimble Storage — apps that let you reserve luggage storage in advance at partner shops, cafes, and hotels rather than gambling on station lockers. Useful backup when lockers are the bottleneck, and bookable ahead of a big travel day.

    None of these apps show live vacancy for every locker bank — Japan doesn’t have a unified national system — so the real strategy is arriving early (before 9:00 AM) or having a backup plan ready.

    Where to Find Them: Stations, Airports, and Tourist Spots

    Coin lockers cluster around ticket gates, but the biggest banks are usually one level up or down from the platforms, near coin locker signage (a suitcase icon with a key). At sprawling stations — Tokyo, Shinjuku, Osaka, Kyoto — lockers are scattered across multiple exits (Yaesu vs. Marunouchi side at Tokyo Station, for example), so check a locker map before you start walking with a heavy bag.

    At airports, Narita and Haneda have locker banks in the arrival and departure lobbies, plus luggage forwarding counters (takkyubin) that can ship your suitcase ahead to your hotel or back to the airport for ¥2,000-¥3,000 — genuinely worth it if you’re doing a multi-city trip and don’t want to lug everything through every transfer.

    Tourist areas with heavy foot traffic — Kyoto Station (the gateway if you’re heading to the Arashiyama Bamboo Grove), Asakusa, Dotonbori — also have locker banks, though these fill fast on weekends. If you’re day-tripping somewhere remote, like Amanohashidate or the boathouses at Ine no Funaya, check locker availability before you go — smaller stations may have only a handful of units, or none at all, and the nearest tourist information center is often your best bet for staffed storage instead.

    Common Mistakes to Avoid

    • Losing your receipt or key. Keyless lockers print a receipt with a barcode or PIN — photograph it immediately as backup. Losing it means finding station staff, showing ID, and possibly paying a fee to prove the bag is yours.
    • Assuming 24-hour access. Many station lockers are only accessible during station operating hours, generally around 5:00 AM to midnight. If your locker is behind ticket gates, you’ll also need a valid ticket to reach it, which matters if you’re storing bags before an early Shinkansen and returning after using a different ticket.
    • Not carrying coins. Even in cashless-friendly Japan, plenty of locker banks — especially outside big cities — are coin-only. Keep a stash of 100-yen coins for this exact purpose, alongside vending machines and Setsubun-season shrine offering boxes.
    • Overpacking a locker last-minute. If you’re heading out shopping — for pottery in Mashiko or Bizen, or fountain pens in Jimbocho — remember lockers have fixed dimensions; fragile or oddly shaped purchases (a folded wagasa umbrella, boxed ceramics) may need to go in your carry bag instead, not jammed into a locker door.

    When Lockers Are Full: Backup Options

    If every locker at your station is taken, don’t panic. Larger stations often have a staffed baggage counter (temporarily storing bags for a flat daily fee, usually ¥500-¥1,000 per item, no size limit). Hotels — even before official check-in time — will almost always hold luggage for guests, and many now do so for non-guests too via the Ecbo Cloak network. Convenience stores don’t offer storage, but tourist information centers near major shrines and stations sometimes do, particularly in Kyoto and Nara.

    For longer stretches — say you want your bags gone for several days while you island-hop or take a long-distance ferry — luggage forwarding (takkyubin, run by Yamato or Sagawa) is more reliable than hoping a locker stays free. Drop your suitcase at a hotel front desk or convenience store in the morning, and it typically arrives at your next hotel by early evening the next day for ¥1,500-¥3,000 depending on size and distance.

    Plan your locker strategy the way you’d plan a train transfer: know the size you need, arrive early at busy stations, and always have a plan B. It’s a small detail, but it’s the difference between a relaxed day of sightseeing and an hour spent circling a station concourse with a suitcase.

  • Japanese Chopsticks (Hashi): A Buying Guide from Wakasa Lacquerware to Everyday Sets

    Japanese Chopsticks (Hashi): A Buying Guide from Wakasa Lacquerware to Everyday Sets

    Photo by Danielle-Claude Bélanger on Unsplash

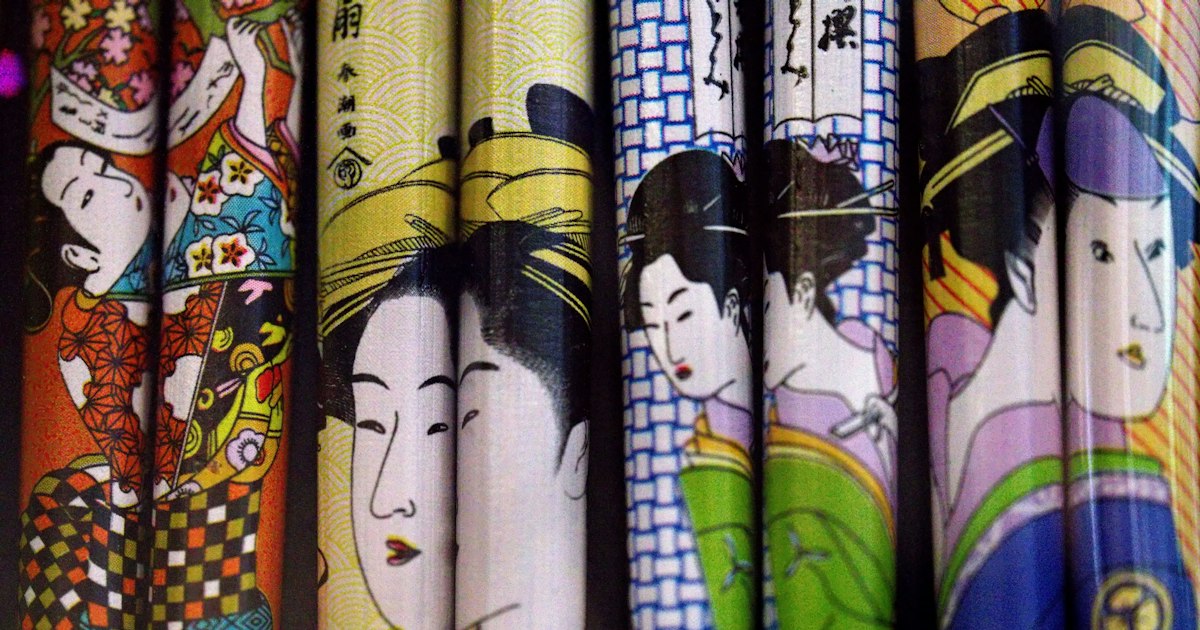
    Chopsticks seem like the simplest souvenir you could bring home from Japan — until you’re standing in front of a wall of hundreds of them, in every length, wood, and lacquer finish imaginable, with prices ranging from 100 yen to 100,000 yen. Japan takes hashi (箸) seriously enough to have an entire town, Obama in Fukui Prefecture, built around one style of lacquerware chopstick. This guide walks through what actually separates a cheap set from a good one, where the famous regional styles come from, and how to buy something you’ll actually use rather than leave in a drawer.

    Why Japanese chopsticks differ from Chinese or Korean ones

    Japanese hashi are shorter and taper to a finer point than Chinese chopsticks, which are longer and blunter, and unlike Korean chopsticks they’re almost never made of metal. The pointed tip exists because Japanese food culture involves a lot of precision work — picking small bones out of grilled fish, separating rice grains, lifting delicate pieces of sashimi. That’s also why fish-eating households often own dedicated “fish chopsticks” that are thinner and more pointed than everyday pairs. If you’ve read our guide to yakiniku in Japan, you’ve already seen the other end of the spectrum: thick, disposable waribashi used for grilling, which prioritize grip and heat resistance over finesse.

    Wakasa lacquerware: Japan’s chopstick capital

    Obama City in Fukui Prefecture produces the vast majority of Japan’s lacquered chopsticks, a craft called Wakasa-nuri that dates back roughly 400 years. What makes it distinctive is the technique: layers of colored lacquer are built up over embedded materials like eggshell, seashell, or pine needles, then the surface is ground down and polished so those layers appear as a marbled, almost geological pattern. A single pair can involve over 20 coats of lacquer and take months to finish, which is why hand-finished Wakasa pieces cost far more than printed or dipped imitations.

    You can visit the source at the Wakasa Nuribashi Kaikan (Wakasa Lacquerware Museum) in Obama, which has a retail floor plus hands-on workshops where you can polish or decorate your own pair for roughly 1,500–3,000 yen, finished the same day. It’s usually open 8:30am–5:00pm, closed around New Year’s; getting there from Kyoto takes about two hours by direct highway bus or JR limited express with a transfer, so it’s really a day-trip destination rather than a stop you fold into a Kyoto city itinerary. Late spring and autumn are the most comfortable times to visit, since Obama has hot, humid summers.

    Other regional styles worth knowing

    Wakasa isn’t the only name on the label. Echizen, also in Fukui, makes plainer but very durable lacquered hashi at a lower price point. Kishu lacquerware from Wakayama (also known for its own layered techniques) and Kaga-nuri from Ishikawa lean toward gold maki-e decoration rather than the marbled Wakasa look. If you’re already touring craft towns, this pairs naturally with a stop at Mashiko or Bizen for pottery — a good hashi-and-plate combination makes a more coherent souvenir than either item alone, and pairing lacquerware with stoneware is exactly how these are used in home dining in Japan.

    Budget, mid-range, and splurge options

    You don’t need to spend a lot to bring home something decent. Realistic price bands:

    • Budget (100–800 yen): Painted or printed wood chopsticks from 100-yen shops, drugstores, or supermarkets. Fine for daily use, but the pattern is usually printed on rather than layered, and the tips wear down faster. Our guide to Gyomu Super and local supermarkets covers where to find these alongside groceries if you just want a functional set.
    • Mid-range (1,500–5,000 yen): Machine-assisted Wakasa or Echizen lacquerware, natural wood (chestnut, cherry) with a few coats of lacquer or urushi-style resin, often sold in gift boxes at department stores and craft shops. This is the sweet spot for a souvenir that looks handmade and holds up for years.
    • Splurge (8,000–50,000+ yen): Fully hand-applied maki-e or shell-inlay work, sometimes with your name lacquered onto the chopstick in gold. Specialty shops like Hashikoubou Shibata in Osaka or long-established hashi retailers in Tokyo’s Nihonbashi and Ginza districts stock these and will often engrave a name while you wait, similar to the personalization you’d get with a high-end Japanese fountain pen — another category where craftsmanship and personalization justify the price jump.

    Sizing and material: what actually matters

    Length is the detail most visitors skip and regret. Japanese hashi are traditionally sized to the user’s hand — measure from the tip of your thumb to the tip of your index finger when spread into an L-shape (called “ipponbune” sizing), then add about 1.5x that length; specialty shops will do this measurement for you on request. As a rough guide, women’s sets run 20–21cm, men’s 22.5–24cm, and children’s sets scale down from there. A too-long chopstick is hard to control; a too-short one feels cramped.

    On material: natural lacquer (urushi) is more chip-resistant and ages well but is not dishwasher safe and shouldn’t soak in water. Cheaper polyurethane-coated sets tolerate dishwashers better but the coating eventually peels at the tip, which is the single most common complaint with budget chopsticks. If a set is going into daily rotation rather than a display shelf, ask specifically whether the finish is urushi or synthetic before you buy.

    Common mistakes to avoid

    • Buying disposable-style waribashi as a “traditional” souvenir. Those are meant for single use at restaurants, not lacquered as gifts — don’t confuse the two categories in a shop.
    • Skipping the size check. A beautiful pair that’s the wrong length for the recipient’s hand won’t get used.
    • Machine-washing hand-lacquered pieces. Even mid-range Wakasa lacquerware should be hand-washed and dried promptly; prolonged soaking dulls the polish.
    • Assuming all “Wakasa-style” chopsticks are made in Wakasa. The name is sometimes used generically for the marbled-layer look even on pieces produced elsewhere; if provenance matters to you, check for a maker’s mark or ask the shop directly.

    Whether you end up with a 300-yen pair from a supermarket rack or a hand-polished set from Obama with your name lacquered into the handle, the same rule applies to any Japanese craft souvenir, from tenugui hand towels to folding fans: buy it for how you’ll actually use it at home, not just how it looks on the shop shelf.

  • Wagasa: Japan’s Traditional Oil-Paper Umbrellas and Where to Buy

    Wagasa: Japan’s Traditional Oil-Paper Umbrellas and Where to Buy

    Photo by Yeh Xintong on Unsplash

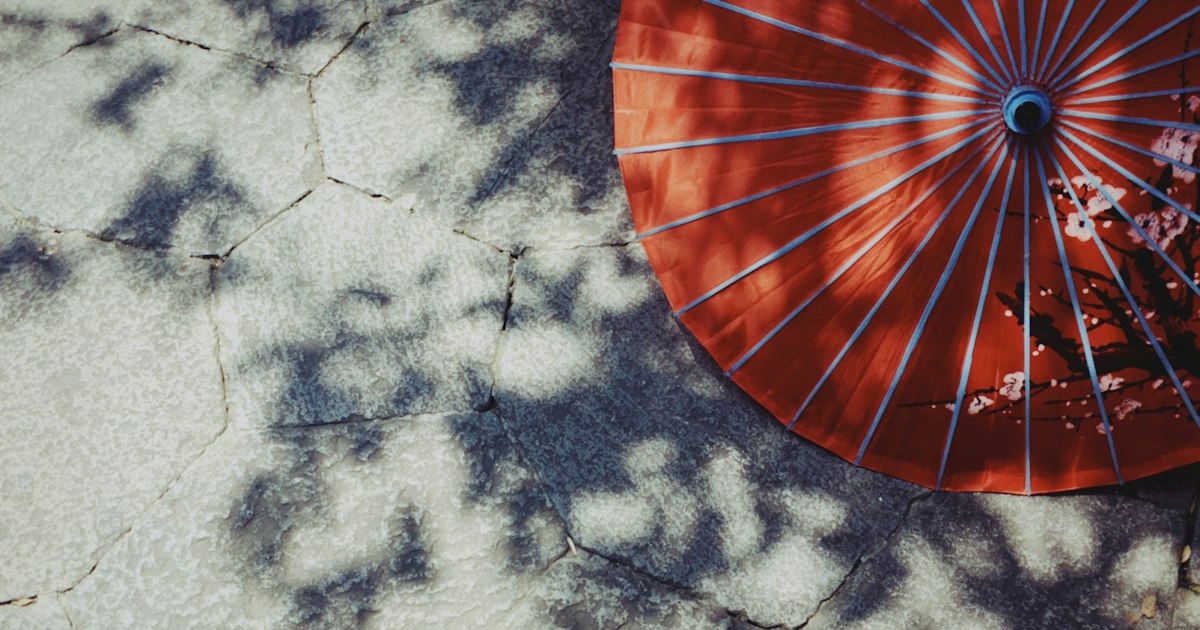
    Walk through Kyoto’s Higashiyama district or a Gifu craft workshop and you’ll eventually spot one: a round, ribbed umbrella made of bamboo and paper, glowing amber when backlit by the sun. This is wagasa (和傘), Japan’s traditional oil-paper umbrella, and it’s one of the country’s most beautiful — and least understood — souvenirs. A good wagasa is a working piece of engineering as much as it is decor, and knowing what you’re buying makes the difference between a treasured object and a paper umbrella that falls apart in a Tokyo drizzle. Here’s what to know before you shop.

    What Actually Makes a Wagasa

    A wagasa’s frame is made from dozens of thin bamboo ribs (often 30-70, compared to 8 on a typical Western umbrella), lashed together with cotton or silk thread at the hub in patterns that are half structural, half decorative. The canopy is washi, Japanese mulberry paper, coated with kaki-shibu (fermented persimmon tannin) or perilla (egoma) oil to make it water-resistant and give it that glossy, faintly amber sheen. The handle and shaft are usually unlacquered bamboo or cedar.

    This construction is why wagasa are heavier and slower to open than a folding umbrella — and why the good ones are genuinely rain-worthy, not just photogenic. It’s also why they need different care: a wagasa should be opened fully and left to air-dry after rain, never furled up wet, or the paper will mildew and the thread will loosen.

    The Main Types You’ll See

    • Janome-gasa (蛇の目傘) — the “snake’s eye” umbrella, named for the concentric ring pattern on the canopy. Lighter and more refined-looking; the classic choice for rain use with kimono.
    • Bangasa (番傘) — sturdier, plainer, originally a workhorse umbrella for merchants and rickshaw drivers. Thicker ribs, often navy or indigo paper, built for actual daily rain.
    • Higasa (日傘) — a sun parasol rather than a rain umbrella, often more decorative, with painted florals or gold leaf. Not waterproofed the same way, so don’t take one out in a downpour.

    If you want something you can genuinely use back home in wet weather, ask specifically for a rain-use (雨傘, amagasa) janome or bangasa — shops will tell you plainly if a piece is decorative-only.

    Where to Buy in Kyoto

    Kyoto is the easiest city to shop for wagasa as a visitor, with several long-established makers clustered in the historic streets near Kiyomizu-dera and Gion. Kasagen, on the slope near Yasaka Shrine, is one of the best-known names — a small storefront stacked with janome and bangasa in the ¥8,000–¥30,000 range, plus smaller decorative pieces from around ¥3,000. Tsujikura, with a shop in Kyoto and another in Kanazawa, is another old maker worth comparing prices at, since styles and finishes vary noticeably between the two shops. Most of these shops keep daily hours roughly 10:00–18:00, though it’s worth checking ahead since small family-run stores sometimes close for a day mid-week or during obon and New Year.

    Because this area sits right along the walk up to Kiyomizu-dera, it pairs naturally with a half-day of craft shopping — if you’re also curious about other traditional textiles, the noren doorway curtains and tenugui hand towels sold in the same neighborhoods make lighter, cheaper, and far more packable souvenirs than an umbrella if luggage space is tight.

    Gifu: The Wagasa Capital

    If you want to see wagasa actually being made, head to Gifu City, which for decades has produced the large majority of Japan’s wagasa and is still home to several working ateliers, some of which allow visitors to watch craftsmen assemble the bamboo ribs and stretch paper over the frame. Gifu wagasa tend to be sold both at workshop storefronts and at local craft cooperatives, generally in a similar price band to Kyoto (roughly ¥7,000 for a simple janome up to ¥50,000+ for a large, elaborately patterned piece). Gifu is about 20 minutes by train from Nagoya, making it a workable day trip if you’re routing between Kyoto and Tokyo, or if you’re already exploring other regional crafts — the pottery towns covered in our guide to Mashiko and Bizen follow a similar model of small-city craft tourism worth building a day around.

    Shopping in Tokyo

    Tokyo has fewer specialist wagasa shops than Kyoto, but options exist. Wagasa Tsujikura operates a Tokyo location, and department stores like Takashimaya and Isetan occasionally carry a curated wagasa selection in their crafts or kimono-accessory floors, especially around early summer when rainy-season goods are stocked. Expect Tokyo department store prices to run slightly higher than buying direct from a Kyoto or Gifu maker, since you’re paying for the retail markup, but it’s a reasonable option if your itinerary doesn’t include Kansai.

    Budget, Mid-Range, and Splurge

    • Budget (¥2,000–¥5,000): Small decorative wagasa or higasa parasols, often mass-produced rather than hand-assembled. Fine as a display piece or interior photo prop, not meant for daily rain use.
    • Mid-range (¥8,000–¥25,000): A genuine hand-assembled janome-gasa or bangasa from a Kyoto or Gifu maker, oiled and usable in real rain. This is the sweet spot for most visitors who want an authentic, functional piece.
    • Splurge (¥30,000–¥100,000+): Large, intricately patterned janome-gasa with fine thread work at the hub, sometimes made to order. These are collector pieces and traditionally part of formal kimono or tea-ceremony dress.

    Common Mistakes to Avoid

    The biggest mistake is treating a wagasa like a folding travel umbrella: cramming it into a suitcase will crack the bamboo ribs, and rolling it up wet will mildew the paper within days. Buy one near the end of your trip if possible, carry it upright in a bag or its original wrapping, and let it dry fully open indoors after any rain exposure before storing it. Second, don’t assume every pretty wagasa is rainproof — many higasa sun parasols are not oiled for water resistance, so confirm with the shop if you intend to use it as a working umbrella rather than a display piece. Finally, rainy season (tsuyu, mid-June to mid-July) is genuinely the best time to buy, since it’s when shops restock and when you’ll actually get to test yours in Japanese rain before flying home.

  • Kakigori: Japan’s Shaved Ice Dessert and Where to Try the Best

    Kakigori: Japan’s Shaved Ice Dessert and Where to Try the Best

    Photo by Heng Chiu on Unsplash

    Forget everything you know about shaved ice from a beach boardwalk. Japanese kakigori is a different animal entirely — snow-fine, cloud-light, and built around ingredients like matcha, seasonal fruit, and condensed milk rather than neon syrup. What used to be a simple summer treat at shrine festivals has, over the past decade, turned into a full-blown culinary obsession, with specialist shops queuing customers up before they even open. Here’s how to understand kakigori, when to go, and where to spend your money for the best bowl.

    What Is Kakigori, Exactly?

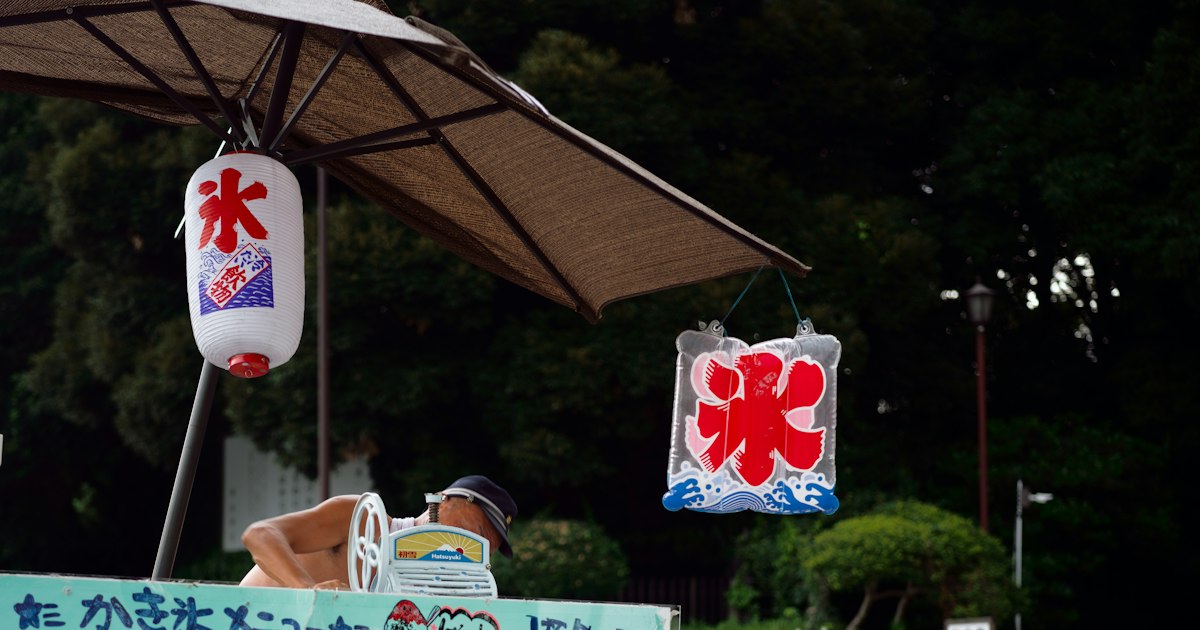
    Kakigori (かき氷) is shaved ice, but the Japanese version is prized for its texture — ideally so fine it melts on contact with your tongue rather than crunching. The dessert has a surprisingly long history: it’s mentioned in Sei Shonagon’s 11th-century diary The Pillow Book, where she describes ice shavings drizzled with sweet amazura vine syrup as a luxury enjoyed by Heian-era nobility, since ice itself was rare and precious before refrigeration. The festival-stall version most visitors encounter today — a paper cup of ice doused in neon strawberry, lemon, or “blue Hawaii” syrup for around 300–500 yen — descends from that tradition, but a parallel high-end scene has exploded in Tokyo, Kyoto, and beyond, treating kakigori more like a dessert-tasting menu than a snack.

    Natural Ice vs. Machine Ice: Why It Matters

    The single biggest factor separating a forgettable kakigori from a memorable one is the ice itself. Most shops use ice frozen quickly in machines, which contains more air bubbles and shaves into slightly coarser flakes. The shops chasing perfection instead use tennennhyo (天然氷) — natural ice harvested slowly from outdoor ponds in winter, traditionally in places like Nikko in Tochigi Prefecture. Because it freezes gradually over weeks, natural ice is denser and purer, and it shaves into gossamer-thin ribbons that genuinely dissolve in your mouth rather than melting into a puddle of sugar water. If a shop advertises tennennhyo or names its ice supplier on the menu, that’s a strong signal you’re in serious kakigori territory — and usually worth the higher price and the wait.

    Best Season and Timing to Go

    Kakigori is fundamentally a warm-weather food: the season runs roughly from late April or May through September, peaking in July and August when Tokyo’s heat and humidity make a bowl of shaved ice feel essential. Popular artisan shops sell out of their daily ice supply by early afternoon in peak summer, so the real trick is timing — arrive on a weekday morning, ideally right at opening, since weekends can mean waits of an hour or more once word gets around on social media. A handful of shops now run kakigori through autumn and even winter with heated seating, positioning it as a dessert rather than a purely seasonal cooling snack, but availability and hours shift year to year, so check a shop’s social media accounts the morning of your visit before making a special trip.

    Where to Try the Best Kakigori

    Tokyo’s most famous destination is the Yanaka neighborhood, a quiet, low-rise area near Nippori Station (Yamanote and Keisei lines, about a 5-minute walk) that’s also worth visiting for its old shopping street, Yanaka Ginza. The area is home to some of the city’s most talked-about kakigori specialists, where shaved natural ice is piled over fresh seasonal fruit purees, matcha syrup made in-house, or hojicha and kinako (roasted soybean flour) for a more traditional flavor profile. Expect to wait — queues form before opening in summer — and expect to eat in, since kakigori is not a take-away food; it collapses within minutes of being shaved.

    Beyond Tokyo, kyoto’s teahouses and cafés near the historic districts often serve excellent matcha or hojicha kakigori alongside classic sweets, and it pairs naturally with a day spent wandering somewhere green and unhurried, like the Arashiyama Bamboo Grove. If your trip takes you through Setouchi or the San’in coast, look for shops using local fruit — melon in Shizuoka-adjacent regions, or Tottori pears further west — since regional specialty kakigori often showcases produce you won’t find shaved into ice anywhere else.

    Budget, Mid-Range, and Splurge Options

    Kakigori spans a wide price range, and knowing which tier you’re in helps set expectations:

    • Budget (300–600 yen): Festival stalls, convenience stores, and old-school shaved ice counters serving machine-made ice with bottled syrup. Fun, nostalgic, and perfectly refreshing, but not the fine-textured experience specialty shops are known for.
    • Mid-range (900–1,800 yen): Café and dessert-shop kakigori using better ice and made-to-order syrups — matcha, black sugar (kokuto), strawberry puree, or condensed milk with anko (sweet red bean). This is the sweet spot for most visitors: real craftsmanship without a long commitment of time or money.
    • Splurge (2,000–4,000+ yen): Natural-ice specialists piling on premium seasonal fruit — think whole strawberries, muskmelon, or white peach — sometimes with multiple layers of flavored ice and cream folded inside the bowl. These are the ones featured constantly on Japanese food shows and social media, and the ones worth planning a morning around. If you’re already the type of traveler chasing Japan’s fruit obsession, this is a natural extension of that interest — see our guide to fruit sando and Japan’s luxury fruit culture for more on why fruit here commands such reverence and such prices.

    Common Mistakes to Avoid

    A few things trip up first-time kakigori visitors. First, don’t show up in the late afternoon at a famous shop expecting to get in — many sell out of ice or stop taking orders once the day’s supply runs low, especially in August. Second, don’t order it to go; ask a shop for takeout and you’ll likely be politely told no, because the ice is meant to be eaten within minutes while it’s still fluffy. Third, resist stirring it like a slushie — the joy of good kakigori is in the contrast between the barely-frozen top layer and the flavor pooled at the bottom, so eat it as layered rather than mixing it into soup. Finally, don’t assume all kakigori is interchangeable with shave ice back home; the appeal here is specifically about texture, so if a bowl tastes icy or crunchy rather than snow-soft, you’ve likely hit a machine-ice shop rather than a specialist one.

    A Sweet Souvenir Option

    If you fall for kakigori and want to recreate it at home, small hand-crank shaved ice machines and bottled Japanese syrups (matcha, kuromitsu black sugar syrup, strawberry) are sold at general merchandise stores and larger supermarkets — the kind of find worth browsing for on a grocery run using our guide to Gyomu Super and local supermarkets. And if you’re building out a broader list of Japanese sweets to try beyond kakigori, don’t miss taiyaki and imagawayaki, the fish-shaped filled pastries that make an equally iconic — and far more portable — Japanese treat.

  • Daruma Dolls: Japan’s Goal-Setting Talisman and Where to Buy

    Daruma Dolls: Japan’s Goal-Setting Talisman and Where to Buy

    Photo by Max Tcvetkov on Unsplash

    That round, red, slightly unnerving doll staring back at you from souvenir shelves across Japan is a daruma — part good-luck charm, part goal-tracker, part folk art. Unlike most souvenirs, a daruma isn’t meant to just sit on a shelf; it’s meant to be used. Here’s what it actually means, how the eye-painting ritual works, and where to buy one that’s more than a mass-produced trinket.

    What Is a Daruma Doll, and Why Does It Have No Eyes?

    Daruma dolls are modeled after Bodhidharma, the semi-legendary monk credited with founding Zen Buddhism, who is said to have meditated facing a wall for nine years — losing the use of his limbs in the process, which is why daruma have no arms or legs, just a round, hollow, papier-mâché body. That body is weighted at the bottom, so no matter how hard you knock it over, it rights itself. This “roly-poly” quality is the whole point: daruma embody the proverb nanakorobi yaoki — “fall down seven times, get up eight.”

    Most daruma are sold with two blank white circles where the eyes should be. That’s not a manufacturing shortcut — it’s the mechanism of the ritual.

    The Goal-Setting Ritual: How to Use a Daruma

    When you set a goal — passing an exam, starting a business, winning an election, recovering from illness — you paint in the left eye (the doll’s left, your right as you face it) with black ink while stating your intention. The daruma then sits somewhere visible, usually on a household altar, desk, or shop counter, as a daily reminder of the commitment. Only once the goal is achieved do you paint the second eye, “completing” the doll. This is genuinely still practiced — Japanese election candidates painting a daruma eye on victory night is a recurring image on the news every campaign season.

    Traditionally daruma are red, a color believed to ward off illness and misfortune, but modern makers sell them in colors keyed to specific wishes: gold or yellow for money and safety, pink for love, green for health, blue for career success, purple for longevity. None of this is centuries-old doctrine — it’s a relatively recent marketing layer on top of the older red-for-protection tradition — but it’s fun to shop by if you have a specific goal in mind.

    Takasaki: The Daruma Capital of Japan

    If you want an authentic, hand-painted daruma rather than a factory souvenir, go to Takasaki in Gunma Prefecture, which produces around 80% of Japan’s daruma dolls and has done so since the late 1700s. The city’s daruma are made by local craftsmen who hand-paint the face and eyebrows (often stylized as a crane and turtle, both longevity symbols) in a distinctive style known as Takasaki Daruma.

    The center of it all is Shorinzan Daruma-ji, a temple on the edge of the city where daruma-making began. The temple grounds are open daily, roughly 8:30am–5pm, and are worth visiting even outside market season to see the hall lined with thousands of retired daruma awaiting their annual burning ceremony. To get there from Tokyo, take the JR Joetsu Shinkansen to Takasaki Station (about 50 minutes from Tokyo Station, or roughly 2 hours on the regular JR Takasaki Line if you’re using a rail pass without shinkansen coverage), then a short taxi ride (about 15 minutes, roughly ¥2,000–2,500) or local bus toward Shorinzan.

    Other Places to Buy: Markets, Temples, and Souvenir Shops

    Takasaki isn’t the only option, and you don’t need to travel to Gunma just for a daruma:

    • Shorinzan Daruma Ichi (Takasaki): the biggest daruma market in Japan, held January 6–7 each year, with hundreds of stalls selling every size at the source.
    • Jindaiji Daruma Ichi (Chofu, Tokyo): one of Japan’s “three great daruma markets,” held around March 3–4 at Jindaiji Temple — a much easier day trip from central Tokyo, roughly 20 minutes by bus from Chofu Station.
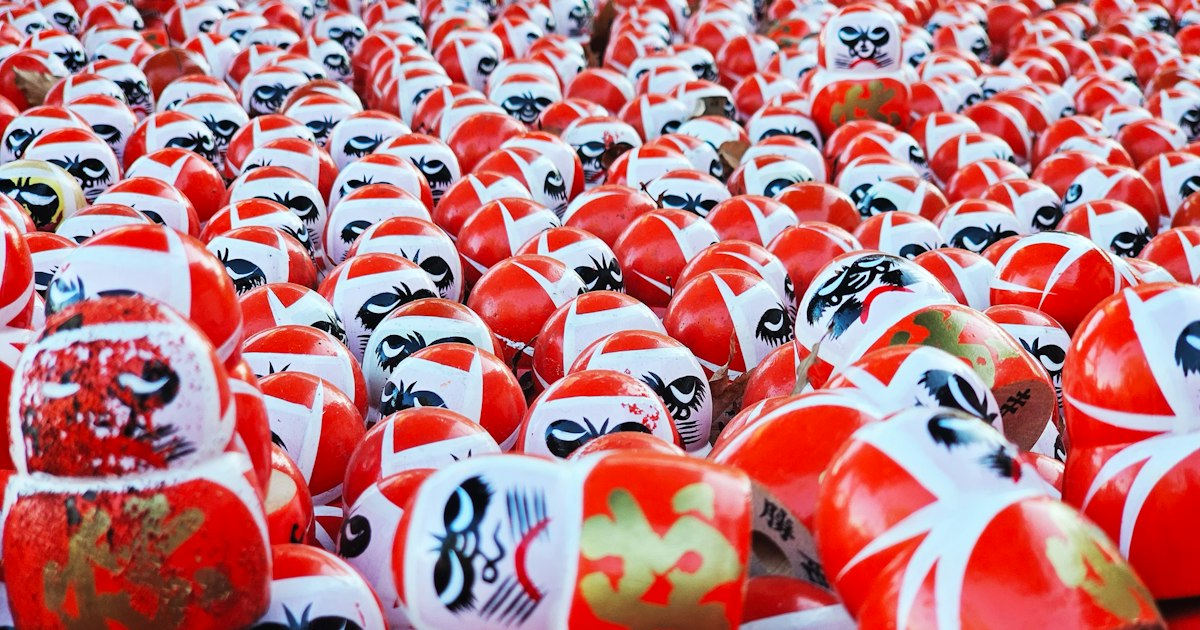
    • Katsuoji Temple (Minoh, Osaka Prefecture): nicknamed the “victory daruma temple,” its grounds are covered in tens of thousands of small red daruma left by visitors praying for success. Admission is around ¥400. It pairs well with a walk to nearby Minoh Falls.
    • Souvenir shops everywhere: Asakusa’s Nakamise shopping street in Tokyo, Kyoto’s Nishiki Market area, and Don Quijote stores nationwide all stock smaller daruma year-round, though quality and craftsmanship vary widely.

    If you’re building out a broader shopping list of Japanese folk crafts on the same trip, it’s worth comparing daruma to other regional dolls like the kokeshi dolls of Tohoku — both are simple, symbolic, handcrafted, and tied to specific production towns rather than mass manufacturing.

    Sizes, Prices, and Colors: Budget to Splurge

    Budget (¥500–¥1,500): Small souvenir daruma, roughly 5–8cm tall, sold at Nakamise, Don Quijote, or station gift shops. Fine for a quick gift, but usually machine-stenciled rather than hand-painted.

    Mid-range (¥2,000–¥6,000): Genuine Takasaki daruma in the 12–18cm range, hand-painted by a named workshop, sold at Shorinzan or specialty craft stores. This is the sweet spot for a first “real” daruma.

    Splurge (¥10,000–¥30,000+): Large daruma (30cm and up), sometimes custom-ordered with calligraphy or a company name painted on the belly for a business launch — a common corporate gift in Japan for a new store opening or product launch.

    Best Time to Visit

    Early January through early March is the daruma season in Japan, bookended by the Takasaki market (Jan 6–7) and the Jindaiji market (Mar 3–4), which roughly overlaps with the run-up to Setsubun in early February — another good-luck ritual worth combining into the same winter Japan itinerary if you’re interested in seasonal customs. Outside those market dates, temples and craft shops sell daruma year-round, so there’s no need to time a trip specifically around them unless you want the festival atmosphere.

    Common Mistakes to Avoid

    • Painting both eyes at once. This defeats the purpose — the second eye is meant to be earned, not painted for symmetry on day one.
    • Throwing an old daruma in regular household trash. The proper way to retire a daruma, completed or not, is to return it to a temple for a ceremonial burning (often at New Year’s dontoyaki bonfires), not the bin. Most temples, including Shorinzan, accept old daruma from any region, not just their own.
    • Assuming any red round doll is “the same.” Regional styles differ noticeably — Takasaki, Shirakawa (Fukushima), and Mibu (Kyoto) daruma all have distinct eyebrow and mustache patterns, so a souvenir-shop version won’t match what you’ll see at a craft market.
    • Forgetting it’s fragile-ish. Papier-mâché daruma pack well in a suitcase if wrapped, but avoid checking them loose in luggage — the paint can chip on the raised eyebrows and mustache.

    A daruma makes an unusually good souvenir precisely because it isn’t passive — it’s a small, physical commitment device you actually engage with, whether that’s a goal you set the day you buy it or one you finish months later back home when you finally paint in that second eye.

  • Wagyu Grades Explained: A5, Kobe, Hida & How to Buy the Best

    Wagyu Grades Explained: A5, Kobe, Hida & How to Buy the Best

    Photo by Emerson Vieira on Unsplash

    Walk into any department store food hall or yakiniku restaurant in Japan and you’ll see “A5” plastered on menus like it’s a magic word. It sells beef, but most visitors have no idea what the letter and number actually measure — or why a “Kobe beef” sign in a random Tokyo alley is almost always a red flag. Here’s what the grading system really tells you, how the famous regional brands differ, and how to buy wagyu at every budget without getting ripped off.

    How Japan’s Wagyu Grading System Actually Works

    Japanese beef is graded on two separate axes, stamped together as something like “A5” or “B3”:

    • Yield grade (A, B, or C): how much usable meat comes off the carcass. A is highest yield, C is lowest. This has nothing to do with flavor — it’s a butchery efficiency score.
    • Quality grade (1–5): based on four factors — marbling, meat color/brightness, firmness/texture, and fat color/quality. Marbling is scored separately on the BMS (Beef Marbling Standard) scale of 1–12, and a 5-quality-grade cut needs a BMS of roughly 8–12.

    So “A5” simply means top yield efficiency plus top quality score — it doesn’t guarantee a specific breed, region, or even that you’re eating a famous brand. A generic, unbranded A5 cut from a supermarket in Hokkaido and a certified Kobe A5 fillet are graded on the same scale but are worlds apart in price and pedigree.

    A5 Isn’t Always “Best” — A Common Misconception

    Heavy marbling (high BMS) means more fat, which means more richness — but it also means smaller portions satisfy you faster, and some diners genuinely prefer the leaner chew and deeper beefy flavor of an A3 or A4 cut, especially for yakiniku where you’re eating several courses of meat over an hour. If you’re new to wagyu, ordering a full A5 course from the start can feel overwhelming; many local diners mix grades across a meal, starting leaner and finishing with a small A5 piece. If you want to understand cuts, sauces, and how locals actually order at the grill, our Yakiniku in Japan guide walks through it step by step.

    Kobe Beef: Famous, Strictly Controlled, Often Faked

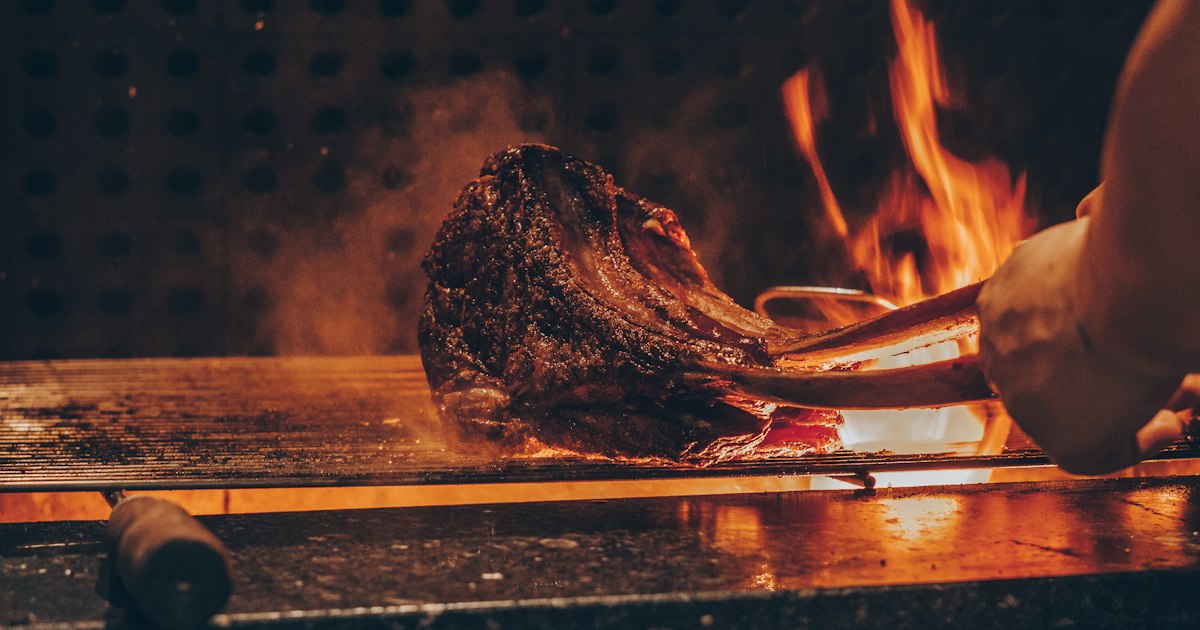
    “Kobe beef” is a protected brand name, not a grade. To legally carry the label, the cattle must be Tajima-strain black wagyu born, raised, and slaughtered in Hyogo Prefecture, meet a BMS of 6 or higher, and fall within specific carcass weight limits, all certified by the Kobe Beef Marketing & Distribution Promotion Association. Genuine Kobe beef comes with a certificate showing the animal’s 10-digit individual identification number, which you can trace back to the specific farm.

    Because the name carries so much cachet, it’s widely misused overseas and even domestically by restaurants serving unrelated wagyu. If you want the real thing, eat it in Kobe itself or at a restaurant that displays the certification. Shin-Kobe Station is about 13 minutes from Shin-Osaka by Shinkansen, or roughly 3 hours from Tokyo. Expect to pay around ¥8,000–15,000 for a lunch course with a small (100g) steak, and ¥20,000–40,000+ for a proper dinner course at a well-known teppanyaki house — prices scale steeply with cut and grade, and fillet (heré) runs cheaper than sirloin (rōsu).

    Hida Beef: Gifu’s Excellent, More Affordable Alternative

    Hida-gyu is black wagyu raised in Gifu Prefecture for at least 14 months, graded A3 or above (and often reaches A5). It doesn’t have Kobe’s global name recognition, which is exactly why it’s good value — you’re paying for the beef, not the brand story. The best place to try it is Takayama’s old town, where street stalls near the Miyagawa and Jinya-mae morning markets (open roughly 7am–12pm, 8am–12pm in winter) sell Hida beef nigiri sushi for about ¥300–600 per piece, seared tableside with a small torch. Sit-down restaurants in the same district serve Hida beef steak sets from around ¥3,000–8,000 for lunch.

    Takayama is reached via the JR Hida limited express from Nagoya (about 2.5 hours) or from Toyama on the Takayama Line, or by highway bus from Tokyo, Kyoto, or Osaka (roughly 5–6 hours, cheaper than the train). Autumn and winter are the most atmospheric times to visit, when the old town’s wooden facades and sake breweries pair naturally with a hot bowl of beef and rice.

    Other Regional Brands Worth Knowing

    • Matsusaka beef (Mie): famously raised on a diet that has included beer and massage in some farming traditions; prized for very high marbling and a buttery, almost sweet fat.
    • Omi beef (Shiga): considered one of Japan’s three oldest wagyu brands, with records going back centuries; known for a cleaner, less fatty balance than Kobe or Matsusaka.
    • Yonezawa beef (Yamagata): a Tohoku brand favored by beef connoisseurs for its balance of marbling and firm texture, often cheaper than the big three near Kansai.

    None of these names guarantee flavor by themselves — always check for a grade and, ideally, a certificate or traceability number alongside the brand name.

    Where to Buy: Budget, Mid-Range, and Splurge

    Budget: Local supermarkets and butcher counters sell A3–A4 wagyu (often unbranded or regional, non-premium brands) for roughly ¥1,500–3,500 per 100g depending on cut — perfectly good for a home yakiniku night. Our guide to grocery shopping in Japan covers how to navigate supermarket meat labeling if you’re cooking in a rental kitchen.

    Mid-range: Department store basement food halls (depachika) carry certified regional brands in gift boxes — a good option if you want to bring wagyu home as an edible souvenir, similar in spirit to the gift-giving culture around premium produce covered in our luxury fruit culture guide. Vacuum-sealed, chilled wagyu can travel in checked luggage for a day or two, but check your home country’s customs rules on meat imports before you buy — many countries prohibit bringing in fresh beef entirely.

    Splurge: A full-course kaiseki-style wagyu dinner (multiple cuts, sukiyaki or shabu-shabu course, sometimes a hot stone grill course) at a specialist restaurant in Tokyo, Kyoto, or Kobe typically runs ¥15,000–35,000 per person.

    Common Mistakes to Avoid

    • Assuming “A5” means “Kobe”: A5 is a grade any wagyu can earn; Kobe is one specific certified brand among hundreds.
    • Ordering only A5 for a whole yakiniku meal: the richness adds up fast and 2–3 pieces per person is often plenty; mix in A3–A4 cuts or non-beef items.
    • Buying “Kobe beef” outside Japan at a steep discount: genuine exports are limited and expensive; heavily discounted “Kobe” abroad is almost never certified.
    • Skipping the certificate at high-end restaurants: if a restaurant claims Kobe or another certified brand, it’s reasonable to ask to see the traceability certificate — reputable places display or offer it without hesitation.

    Once you know what the letters and numbers mean, you can order with confidence anywhere from a Takayama street stall to a Kobe teppanyaki counter — and skip the tourist-trap “Kobe beef” signs that have nothing to do with the real thing.

  • Arashiyama Bamboo Grove & Iwatayama Monkey Park: Kyoto’s Forest Walk

    Arashiyama Bamboo Grove & Iwatayama Monkey Park: Kyoto’s Forest Walk

    Photo by Duong Nguyen on Unsplash

    Arashiyama sits at the western edge of Kyoto, where a swaying bamboo corridor, a mountainside full of wild monkeys, and a postcard-perfect river bridge all sit within a 20-minute walk of each other. It’s one of the few places in Kyoto where you can combine a forest walk, wildlife encounter, and temple visit without a car or a tour bus. Here’s how to do it efficiently, without wasting half your day standing in a crowd of selfie sticks.

    Getting There: Trains to Arashiyama

    Three train lines reach Arashiyama, and picking the right one saves you a transfer:

    • JR Sagano/San-in Line to JR Saga-Arashiyama Station — the fastest option from Kyoto Station, about 15–20 minutes and roughly ¥240 one-way. Best if you’re staying near Kyoto Station.
    • Keifuku Electric Railroad (Randen) to Arashiyama Station — a slower, scenic tram from Shijo-Omiya (near Shijo-Kawaramachi), about 25 minutes, ¥250 flat fare. This station drops you closest to the bamboo grove entrance.
    • Hankyu Arashiyama Line to Arashiyama Station — convenient if you’re coming from Osaka via the Hankyu Kyoto Line, requiring one change at Katsura.

    From any of the three stations, it’s a 5–15 minute walk to the bamboo grove entrance near Tenryu-ji Temple. There’s no need to book anything in advance for the walk itself — it’s an open, free path.

    Walking the Bamboo Grove

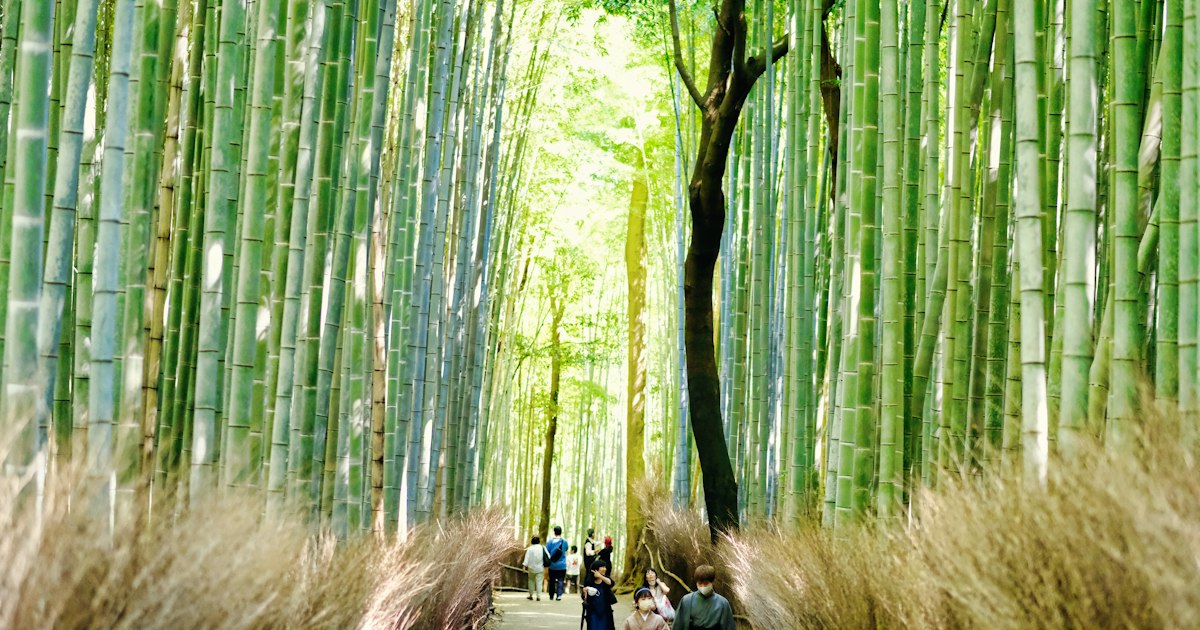
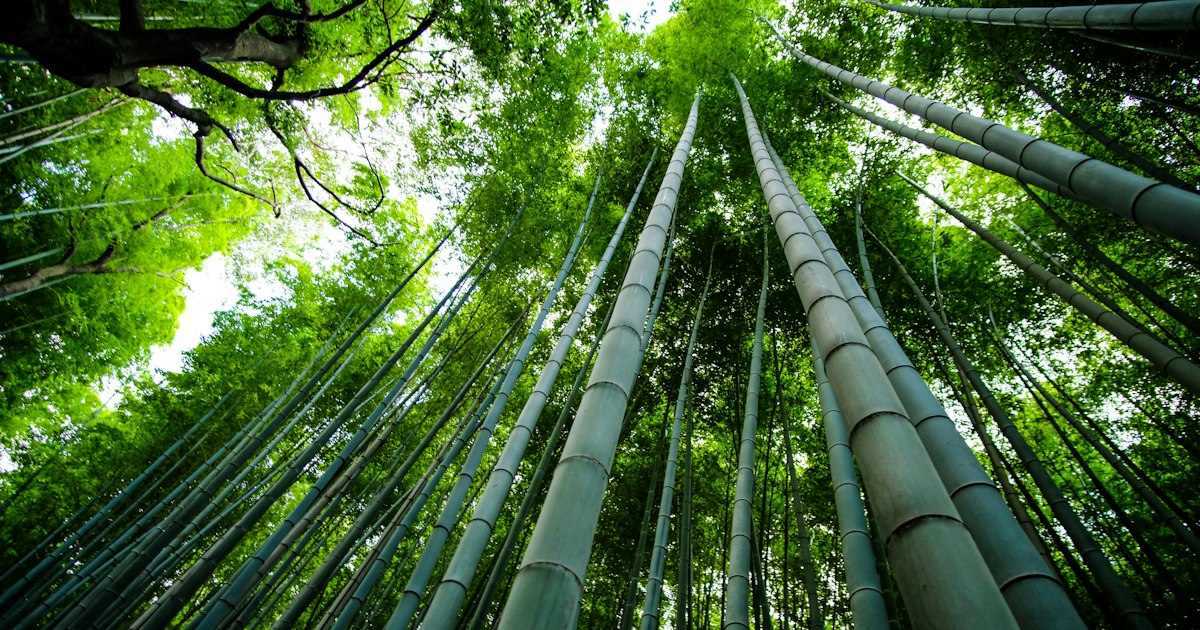
    The Arashiyama Bamboo Grove (also called the Sagano Bamboo Forest) is a roughly 500-meter path lined with towering bamboo stalks, running between Tenryu-ji Temple’s north gate and the Okochi Sanso Villa. It costs nothing to walk through and is open 24 hours, since it’s a public path rather than a ticketed attraction. The walk itself takes 10–15 minutes at a relaxed pace, though most visitors linger for photos.

    Managed expectations help here: the grove is narrower and shorter than photos suggest, and by mid-morning in peak season it can feel more like a queue than a forest walk. Go early (see timing section below) and you’ll get long, empty stretches of path with just the sound of wind moving through the stalks — locals call this “the sound of bamboo,” and it was even selected by Japan’s Ministry of the Environment as one of the country’s 100 soundscapes worth preserving.

    Iwatayama Monkey Park: Hours, Prices, and the Hike Up

    On the south side of the Togetsukyo Bridge, Iwatayama Monkey Park is home to around 120 wild Japanese macaques living freely on the mountainside. Getting there requires a 20–30 minute uphill walk from the entrance gate — it’s a dirt and gravel trail, not a paved path, so wear real shoes rather than sandals.

    • Admission: ¥550 for adults, ¥250 for children (elementary school age).
    • Hours: generally 9:00–17:00 in warmer months and 9:00–16:30 in winter, with last entry about 30 minutes before closing. Hours shift seasonally, so check the day of your visit if possible.
    • At the top: a viewing hut where you can buy small bags of food (apple slices, peanuts) to hand-feed the monkeys through wire mesh — this is the only sanctioned feeding method.

    The reward for the climb is a genuinely good view over Kyoto city, plus close-up monkey encounters you won’t get at a zoo. Budget at least 90 minutes total for the round trip and time at the top.

    Best Time to Visit

    For the bamboo grove, arrive before 8:00 AM. Tour groups and day-trippers from central Kyoto typically start flowing in from 9:30 onward, and by midday in cherry blossom season (late March–early April) or autumn foliage season (mid-to-late November) the path can be genuinely packed shoulder-to-shoulper. Late afternoon, an hour or so before sunset, is the second-best window — quieter, with warmer light through the leaves, though you’ll lose the option of visiting Iwatayama Monkey Park afterward since it closes earlier.

    For the monkey park, weekday mornings right after opening are calmest. Rain doesn’t close the park, but heavy rain makes the uphill trail slick and less pleasant, and the monkeys tend to retreat further into the trees, so a dry morning is ideal.

    Seasonally, spring and autumn are the most beautiful but the most crowded; early summer (May–June, before the rainy season peaks) and winter weekdays are underrated — the bamboo looks the same year-round, and winter mornings can mean you have the path nearly to yourself.

    Nearby: Tenryu-ji, Togetsukyo Bridge, and the Sagano Train

    Tenryu-ji Temple, a UNESCO World Heritage Site right beside the bamboo grove’s entrance, has one of Kyoto’s best strolling gardens, built around a pond with the mountains as a backdrop. Garden-only entry runs around ¥500, with an additional fee if you want to enter the temple buildings.

    Togetsukyo Bridge (“Moon Crossing Bridge”) spans the Katsura River just south of the grove and is worth walking across for the mountain view alone. From near the station you’ll also find food stalls selling grilled dango, roasted chestnuts, and seasonal treats — if you’re a fan of Japan’s fish-shaped sweets, this is a good area to pick up taiyaki or imagawayaki for the walk.

    If you want to extend the visit, the Sagano Scenic Railway (“Romantic Train”) runs open-air trolley cars along the Hozu River gorge from Torokko Saga Station, a short walk from the bamboo grove; one-way tickets run about ¥880 and are worth reserving ahead in peak season since they sell out. It doesn’t operate on Wednesdays or during a winter maintenance closure, so check the schedule before planning around it.

    Common Mistakes to Avoid

    • Arriving mid-morning in peak season — you’ll spend more time dodging crowds than looking at bamboo.
    • Making direct eye contact with the macaques — monkeys read prolonged staring as a threat. Keep your gaze soft and don’t smile with bared teeth close to them.
    • Bringing food or plastic bags outside the feeding hut — the monkeys are wild and will grab visibly held food or dangling bags. Keep snacks zipped away until you’re inside the designated feeding area.
    • Wearing sandals or slip-on shoes for the monkey park hike — the trail is uneven gravel and can be slippery after rain.
    • Treating the bamboo grove as a half-day activity — the walk itself is short. Pair it with the monkey park, Tenryu-ji, or a riverside lunch to make the trip worthwhile.

    Budget, Mid-Range, and Splurge Options

    Budget (free–¥1,000): Walk the bamboo grove (free), cross Togetsukyo Bridge, and grab a street snack. Total cost can be close to zero beyond train fare.

    Mid-range (¥2,000–¥4,000): Add Iwatayama Monkey Park (¥550) and Tenryu-ji’s garden (¥500), plus lunch at one of the tofu or yudofu restaurants near the temple, which typically run ¥1,500–¥3,000 per person.

    Splurge (¥6,000+): Combine the Sagano Romantic Train (¥880 one-way) with a Hozugawa River boat ride back down the gorge — a roughly two-hour guided descent that costs around ¥5,000–¥6,000 per adult — for a full loop through the valley by rail and water.

    If you pick up bamboo crafts, folding fans, or ceramics from the shops near the station, keep in mind that fragile items are easiest to send home rather than carry — our guide to shipping souvenirs from Japan compares post office and courier options.

    Arashiyama pairs naturally with other slower-paced corners of Kyoto Prefecture if you have extra days — the boathouse village of Ine no Funaya and the sandbar views at Amanohashidate both make for a worthwhile detour north of the city, though they require a half-day or more of train travel each way.