Japan Trove

Author: JapanTrove Editorial

  • Shabu-Shabu vs Sukiyaki: Japan’s Hot Pot Styles Explained

    Shabu-Shabu vs Sukiyaki: Japan’s Hot Pot Styles Explained

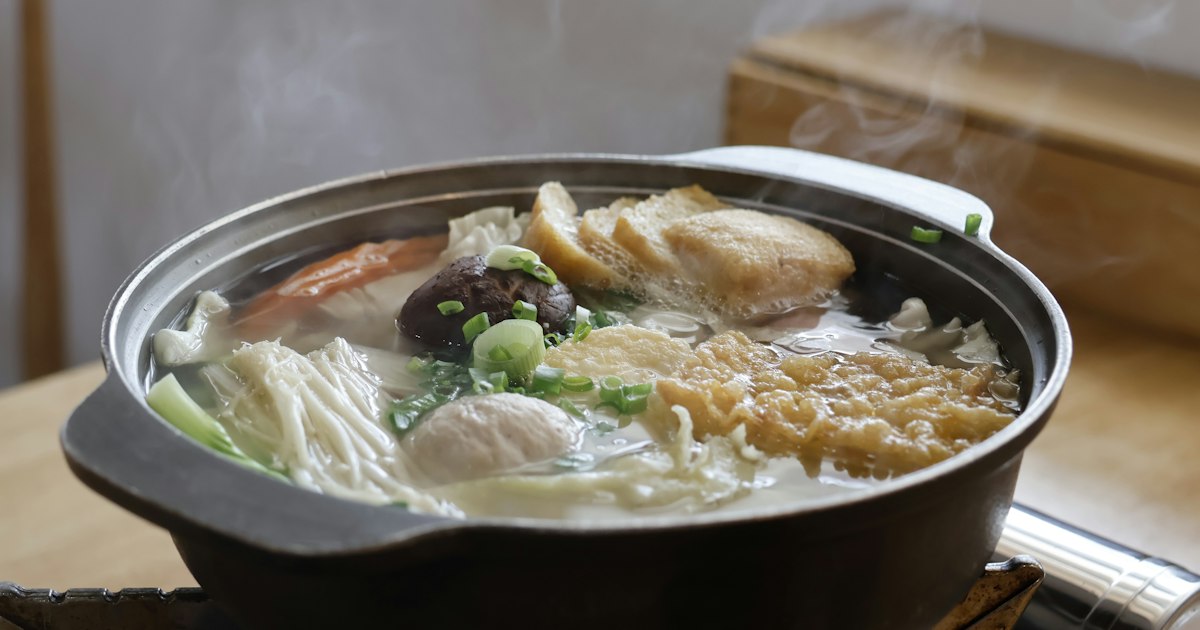
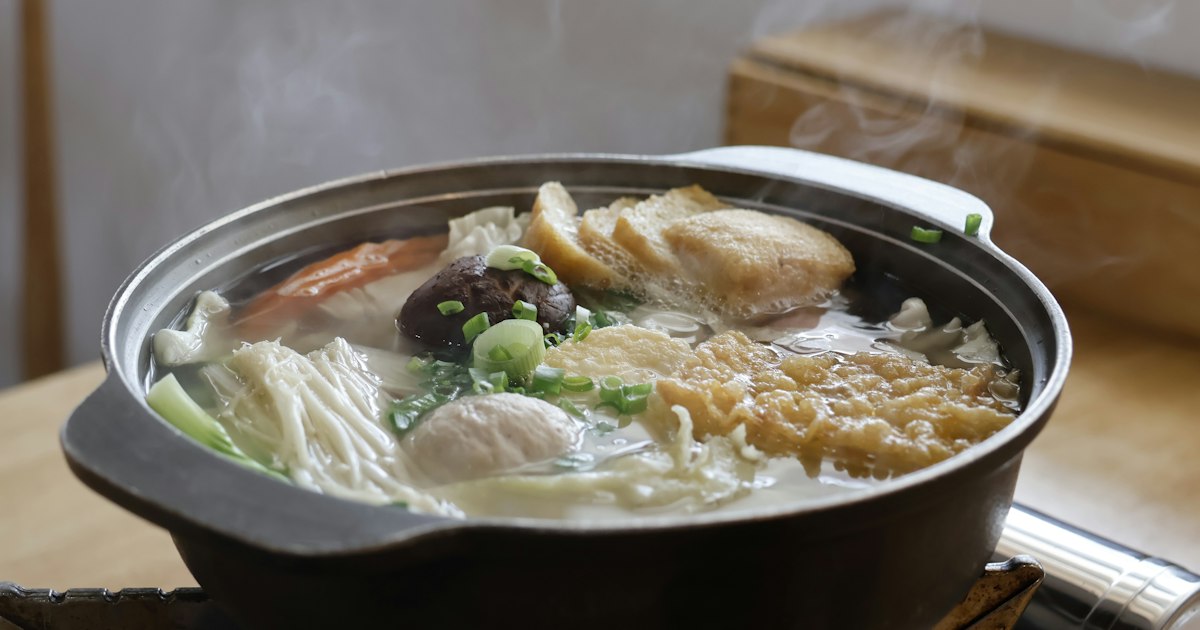
    Photo by You Le on Unsplash

    Walk into any Japanese hot pot restaurant menu and you’ll usually see both shabu-shabu and sukiyaki listed side by side, often at similar prices, which makes the choice confusing if you’ve never tried either. Both involve thinly sliced beef, a simmering pot at your table, and a communal, slow-paced meal — but the broth, the dipping sauces, and even the table etiquette are completely different. Here’s what actually separates them, what to expect price-wise, and where to try each style without wasting a meal on a tourist trap.

    The Core Difference: Broth vs. Sauce-Simmered

    Shabu-shabu (“swish-swish,” named for the sound of the meat moving through the pot) is cooked in a light, clear broth — usually kombu (kelp) dashi, sometimes with a chicken or pork base. You swish paper-thin slices of beef or pork through the hot broth for just a few seconds until they turn pale pink, then dip them into one of two sauces: ponzu (citrus-soy) or goma dare (sesame sauce). Vegetables and tofu cook in the same pot and get scooped out with the broth.

    Sukiyaki is richer and sweeter. The meat and vegetables are cooked directly in a shallow iron pan with warishita, a mixture of soy sauce, sugar, and mirin, which caramelizes slightly against the hot pan. Instead of a dipping sauce, each piece is dipped in a small bowl of raw beaten egg before eating — the egg cools the food and adds a silky, custard-like coating. Sukiyaki is noticeably sweeter and more filling than shabu-shabu, which stays light and clean-tasting even after a full meal.

    What You’ll Actually Pay

    Price depends heavily on the beef grade, since both dishes live or die on thinly sliced meat quality:

    • Budget (¥1,500–3,000 per person): Chain restaurants like Shabuyo, Nabezo, or On-Yasai offer all-you-can-eat shabu-shabu with pork and standard beef, often with unlimited vegetables and a soft-drink bar. Good for a filling meal but not a wagyu experience.
    • Mid-range (¥4,000–7,000 per person): Set courses at dedicated shabu-shabu or sukiyaki restaurants using Japanese Black (kuroge wagyu) beef, usually including appetizers, a set amount of meat, vegetables, and a rice or noodle finish (zosui or udon cooked in the leftover broth).
    • Splurge (¥10,000–25,000+ per person): Restaurants specializing in A5 wagyu, such as long-established sukiyaki houses in Tokyo’s Ginza or Kyoto’s Gion, where marbled beef is sliced tableside. This is the category where sukiyaki historically shines, since the dish was originally developed as a showcase for premium beef in the Meiji era.

    Note that many restaurants charge per-person minimums for hot pot (often requiring at least two diners), and some add a table charge (otoshi or seki-ryo) of a few hundred yen even before you order.

    Which One Should You Order?

    If you’re watching calories, want a lighter meal, or are traveling with vegetarians who can pick around the meat easily, shabu-shabu is the more flexible choice — the clear broth lets vegetable and mushroom flavors come through, and ponzu cuts through richness well in summer. If you want a heartier, more indulgent meal that feels distinctly “special occasion,” sukiyaki is the better pick, especially in colder months when the sweet, rich sauce feels comforting. Many first-time visitors are unsure about eating raw egg — it’s pasteurized to a food-safety standard in Japan and is standard practice, but if you’d rather skip it, just ask for the egg on the side or omit it; the restaurant won’t blink.

    Common Mistakes First-Timers Make

    • Overcooking the shabu-shabu beef. Because the slices are so thin, 5–10 seconds in the broth is enough. Leaving it in longer, the way you might cook chicken, turns it gray and chewy.
    • Drinking the sukiyaki sauce straight. Warishita is intensely salty-sweet on its own — it’s meant to coat the food, not be sipped like soup.
    • Skipping the ending course. After the meat and vegetables are gone, ask for zosui (rice simmered in the broth) or udon noodles to finish the pot — it’s often not automatically included and needs to be ordered separately, but it’s the best part of the meal since it absorbs all the concentrated flavor.
    • Booking a table for one. Because pots are shared, many traditional shabu-shabu and sukiyaki restaurants require a minimum of two people, and some don’t accommodate solo diners at all — check before you go if you’re traveling alone.

    Best Time to Go

    Hot pot is technically available year-round in Japan (many restaurants run air conditioning specifically so they can serve it in summer), but it’s considered a winter dish, and menus, seasonal vegetables, and set courses are richest from November through March. If you’re visiting Nagano for the snow monkeys at Jigokudani or heading up to Karuizawa in the cooler months, a sukiyaki or shabu-shabu dinner afterward is a natural pairing with the cold-weather scenery. Reservations are strongly recommended for dinner at any well-reviewed shabu-shabu or sukiyaki restaurant, especially on weekends — walk-ins often face 30–60 minute waits or turned-away service once the pots are fully booked.

    Other Japanese Hot Pot Styles Worth Knowing

    Shabu-shabu and sukiyaki are the two most internationally famous nabe (hot pot) styles, but they’re part of a much larger family. If you enjoy the format, look out for chanko nabe, the protein-heavy stew sumo wrestlers eat to bulk up — you can read our full guide to chanko nabe and where to eat it, and if you’re near Tokyo’s sumo stadium, our Ryogoku neighborhood guide lists specific chanko restaurants near the arena. Regional hot pots like Hokkaido’s ishikari nabe (salmon and miso) and Yonezawa’s beef-focused pots are also worth seeking out if you’re traveling outside the major cities.

    Where to Try Both in One Trip

    Tokyo has dedicated restaurants for each style in nearly every major district, so it’s easy to try shabu-shabu one night and sukiyaki the next without much planning. If you’re building out a food-focused itinerary, pair a hot pot dinner with a visit to a neighborhood known for casual eating and shopping, like Kichijoji, which has a good mix of mid-range restaurants and a relaxed, local atmosphere away from the more tourist-heavy central wards. Most restaurants open for dinner around 17:00–17:30 and stop taking last orders between 21:30 and 22:00, so plan to arrive on the earlier side if you want a relaxed pace rather than rushing through the final rice course.
  • Chanko Nabe: Sumo Wrestlers’ Hot Pot and Where to Eat It

    Chanko Nabe: Sumo Wrestlers’ Hot Pot and Where to Eat It

    Photo by You Le on Unsplash

    Chanko nabe is the stew that built sumo. It’s the communal hot pot eaten by wrestlers in training, and while it was never designed for tourists, it has become one of Tokyo’s most satisfying cold-weather meals — a bubbling pot of chicken, fish, tofu, and vegetables shared at the table, usually within walking distance of the sport’s spiritual home. If you’re curious what a 150kg athlete eats to build strength (not just bulk, despite the stereotype), this guide covers what chanko actually is, where to eat it in Tokyo, and how to avoid the tourist-trap version.

    What Is Chanko Nabe, Exactly?

    Chanko is less a single recipe than a category. At its core it’s a one-pot stew simmered at the table in a shared broth — usually shoyu (soy sauce), miso, or a clear shio (salt) base — packed with chicken meatballs or thigh meat, fish, tofu, mushrooms, cabbage, and other vegetables. Each sumo stable (heya) has its own house version, often passed down by the stable’s cooks, who are frequently retired wrestlers themselves.

    Two details surprise most first-timers. First, chanko is deliberately protein- and vegetable-heavy rather than just calorie-dense; wrestlers gain mass through volume eating and training, not through the stew alone. Second, chicken is the traditional main protein specifically because chickens stand on two legs — the idea of a wrestler “going down on all fours” (as a four-legged animal would) is considered bad luck before a match, so pork and beef were historically avoided in stable kitchens, though many restaurants now offer them anyway.

    Why Sumo Wrestlers Eat It — and Why You Should Try It

    In a sumo stable, chanko isn’t just dinner, it’s a daily ritual tied to rank. Junior wrestlers wake before dawn to train on empty stomachs, then cook and serve chanko to their seniors before eating themselves — often two enormous meals a day totaling several thousand calories, followed by a nap that helps convert the meal into mass. For visitors, the appeal is simpler: it’s a warming, communal, genuinely delicious hot pot, mild enough for most palates, and eating it near the sport’s home turf adds an atmosphere you can’t get from a random izakaya menu.

    Ryogoku: Tokyo’s Chanko Nabe Neighborhood

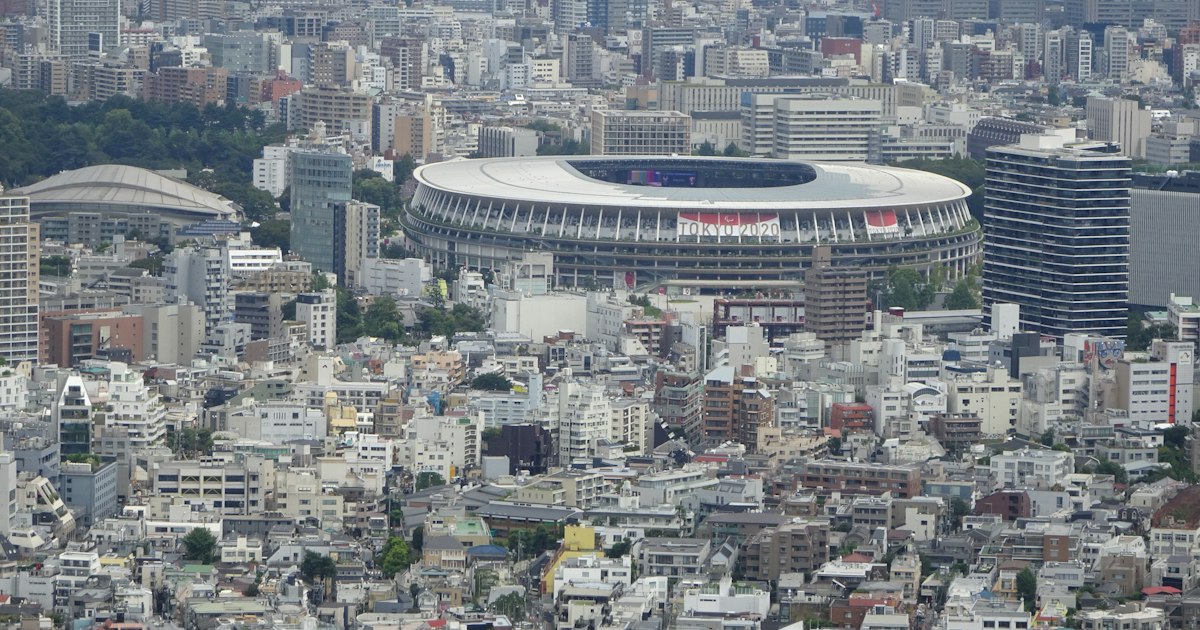
    Nearly every serious chanko restaurant in Tokyo clusters around Ryogoku, the sumo district on the east side of the Sumida River, home to Ryogoku Kokugikan (the national sumo stadium) and dozens of active stables. Many restaurants here are run by retired wrestlers, and some occupy former stable buildings — a few even keep the dohyo (clay ring) intact as a dining room centerpiece. For a full walking guide to the neighborhood, its stables, and the stadium itself, see our Ryogoku sumo district guide, which pairs well with this article if you want to combine a stadium visit with dinner.

    Ryogoku Station is served by both the JR Sobu Line (a few minutes from Akihabara) and the Toei Oedo Line, making it an easy add-on to a day that includes Akihabara or Ueno. If you’re coming from Ueno, the bargain shopping streets of Ameyoko Market are about 15–20 minutes away by train, so an afternoon of shopping followed by chanko for dinner is a realistic combo.

    Where to Eat: Budget, Mid-Range, and Splurge Options

    Chanko restaurants in Ryogoku span a wide price range depending on whether you go for a quick lunch set or a full multi-course dinner.

    • Budget (lunch, roughly ¥1,300–2,000): Most chanko restaurants offer a weekday lunch teishoku — a single-serving pot with rice, pickles, and miso soup. This is the cheapest way to try chanko and doesn’t require a reservation. Lunch service typically runs from around 11:30 to 14:00.
    • Mid-range (dinner course, roughly ¥4,000–6,500 per person): Restaurants like Chanko Kirishima and Tomoegata offer set dinner courses with a shared pot plus several side dishes (sashimi, grilled fish, rice, dessert). Portions are meant for sharing, so groups of 2–4 get the best value.
    • Splurge (roughly ¥7,000–10,000+ per person): A handful of restaurants occupy former stable buildings with a preserved dohyo — Yoshiba, in a converted Miyagino-beya building, is the best-known example. Expect a cover charge or higher course minimum for the atmosphere, plus premium ingredient upgrades like crab or wagyu additions to the pot.

    Kawasaki, one of the oldest chanko restaurants in the area (dating to the 1930s), is worth seeking out for a more old-school, less touristy atmosphere, though it keeps shorter hours and is often closed on Sundays — call ahead or check current hours before making the trip.

    Best Time to Visit: Tournament Season vs. Off-Season

    Tokyo hosts three of Japan’s six annual Grand Sumo tournaments (honbasho) at Ryogoku Kokugikan — in January, May, and September, each running about two weeks. During these windows, Ryogoku is at its liveliest: wrestlers in yukata walk between stables and the stadium, restaurants get busy with a mix of fans and tourists, and same-day walk-in seating becomes unreliable, especially for dinner. If your trip lines up with a tournament, book chanko dinner reservations at least a few days ahead.

    Outside tournament months, the neighborhood is quieter and restaurants are easier to walk into without a reservation, though you’ll see fewer wrestlers on the street. Chanko itself is a year-round dish, but as a hot pot it’s most enjoyable — and most restaurants are busiest — from autumn through early spring (roughly October to March).

    Common Mistakes to Avoid

    • Showing up without a reservation on a weekend or during a tournament. The best-known restaurants seat 30–60 people and fill up fast; a phone reservation (many hotel concierges will call for you) or an online booking a day or two ahead avoids disappointment.
    • Ordering a la carte when a course is better value. Set courses almost always work out cheaper than piecing together the same components individually, and they’re designed to showcase the restaurant’s specific broth style.
    • Going alone and ordering the full pot. Chanko is built for sharing; solo diners should stick to the lunch teishoku rather than a multi-person hot pot portion.
    • Skipping the rice at the end. Many restaurants offer zosui — rice simmered in the leftover broth to make a light porridge — as a final course. It’s often not automatic, so ask if it’s included or available as an add-on.

    Practical Tips for Your Visit

    Most chanko restaurants accept credit cards, but smaller, older establishments may be cash-only or card-only above a certain amount, so carry some cash as backup. If you’re arriving with luggage on a same-day trip — say, heading to Ryogoku right after a shinkansen arrival — Tokyo Station and most major stations have coin lockers; our guide to coin lockers in Japan covers sizes, prices, and locator apps so you’re not carrying a suitcase into a hot pot dinner.

    If chanko whets your appetite for other regional Tokyo specialties, Tsukishima’s griddle-cooked monjayaki is another neighborhood built almost entirely around one dish, and makes a good comparison trip if you have an extra evening in the city.

  • Ryogoku: Tokyo’s Sumo District & Where to Eat Chanko Nabe

    Ryogoku: Tokyo’s Sumo District & Where to Eat Chanko Nabe

    Photo by Martin Pfirrmann on Unsplash

    Most visitors to Tokyo never make it east of the Sumida River, which is exactly why Ryogoku feels different from the rest of the city. This unassuming neighborhood has been sumo’s home turf since the Edo period, and it’s still where wrestlers train, compete, and — crucially for hungry travelers — where the stew that built their bodies is served in dozens of no-nonsense restaurants. Whether you time your trip around a tournament or just wander through on an ordinary Tuesday, Ryogoku offers one of Tokyo’s most distinctive half-day (or full-day) outings.

    Why Ryogoku Is Tokyo’s Sumo Capital

    Ryogoku Kokugikan, the national sumo arena, has anchored this district since 1985 (an earlier version stood here from 1909). Around it cluster dozens of sumo-beya (training stables) where wrestlers live communally and train under strict hierarchy, plus the Sumida Hokusai Museum and the Edo-Tokyo Museum, both within a short walk. Street-level details give the neighborhood away even when nothing is happening at the arena: bronze plaques set into the sidewalk mark the handprints of past yokozuna, and stable names are posted on nondescript buildings that look like apartment blocks from the outside.

    Watching a Grand Sumo Tournament at Ryogoku Kokugikan

    Three of Japan’s six annual Grand Sumo tournaments (honbasho) are held in Tokyo, at Ryogoku Kokugikan: January, May, and September, each running 15 consecutive days starting on a Sunday. If your trip lines up with one of these windows, it’s worth building a day around it — the atmosphere, with fans cracking open bento and beer as the ranks climb toward the top-division bouts in late afternoon, is unlike anything else in Tokyo.

    Ticket prices vary widely by seat type: same-day unreserved balcony seats (jiyuseki) run around ¥2,200 and are sold at the box office from early morning on tournament days — arrive well before opening if you want one, as they sell out fast. Arena chair seats (isu-seki) generally fall between ¥3,800 and ¥11,300, while ringside box seats (masu-seki), sold for groups of 2-4 sitting on cushions, can run ¥10,000-¥20,000+ per person. Advance tickets go on sale roughly a month before each tournament through the Japan Sumo Association’s official ticket site. Top-division wrestlers usually enter the ring from around 3:30pm, with the final bouts finishing around 6pm, so a half-day visit is enough even if you arrive mid-afternoon.

    Outside tournament dates, the Sumo Museum inside the Kokugikan building is still open on weekdays (free entry when no honbasho is running) and displays wrestler portraits, ceremonial aprons, and historical woodblock prints — a good consolation if your dates don’t align with a basho.

    Catching a Morning Practice Session

    If you can’t catch a tournament, watching a stable’s morning practice (asageiko) is arguably the more intimate experience. Training typically runs from around 7am to 10am, and a handful of stables allow outside visitors, though rules change often and etiquette is strict — silence, no flash photography, and sitting exactly where you’re told. Because access shifts season to season and some stables only accept visitors through an approved guide or tour operator, it’s worth booking through a reputable sumo-stable tour company rather than showing up unannounced.

    What Is Chanko Nabe, and Why Do Wrestlers Eat It?

    Chanko nabe is the communal hot pot that fuels a sumo wrestler’s enormous caloric needs — a simmering pot of chicken or fish broth loaded with vegetables, tofu, and meat or seafood, usually eaten alongside heaps of rice and beer to add bulk. Chicken-based chanko is the most traditional version (chicken stands on two legs, considered more auspicious for a wrestler who shouldn’t “fall” to all fours), but modern chanko restaurants serve miso, soy-based, and even sukiyaki-style variations. Because stables cook enormous batches daily, many retired wrestlers open restaurants after their careers end, which is why Ryogoku has one of the highest concentrations of chanko restaurants anywhere in Japan — several run by former rikishi themselves.

    Best Chanko Nabe Restaurants in Ryogoku

    Budget: Look for lunch teishoku (set meal) deals, which many chanko shops offer on weekdays for around ¥1,500-¥2,000 — a bowl of chanko, rice, and pickles. This is the cheapest way to try the real thing without committing to a full dinner course.

    Mid-range: Chanko Tomoegata and Chanko Kirishima (the latter founded by a former sekiwake-ranked wrestler) both serve dinner courses in the ¥3,500-¥6,000 range, with tatami seating and a genuinely sumo-world atmosphere — photos, banners, and memorabilia line the walls. Chanko Kawasaki, one of the oldest chanko restaurants in the city (dating to the 1930s), is beloved for its rich, old-school chicken broth; note it’s closed on Sundays and Mondays, so plan around that.

    Splurge: Chanko Yoshiba is the standout special-occasion pick — it occupies the actual building of a former sumo stable, complete with a real indoor dohyo (ring) you can sit around while you eat. Full-course dinners with premium ingredients and private rooms run roughly ¥8,000-¥12,000 per person, and it’s worth booking ahead, especially on weekends.

    A note on logistics: many chanko restaurants close between lunch and dinner service (roughly 2pm-5pm) and some don’t take walk-ins in the evening during busy periods, so reserving by phone or through your hotel concierge is a good idea if you have a specific restaurant in mind.

    Getting There and Practical Tips

    Ryogoku Station is served by both the JR Sobu Line (local trains only — the rapid service doesn’t stop here) and the Toei Oedo subway line. From the JR station’s west exit, it’s about a 5-minute walk to Kokugikan; the sumo-plaque-lined sidewalks make the walk itself part of the experience. If you’re arriving with luggage straight from the airport or before a shinkansen departure, it’s worth stashing bags in a coin locker near the station rather than lugging them through the arena crowds — see our guide to coin lockers in Japan for sizes and pricing.

    The best time to visit is clearly during a January, May, or September honbasho, but even off-season, Ryogoku is a worthwhile half-day trip paired with the Sumida Hokusai Museum or a stroll along the river toward Tsukishima, another Tokyo neighborhood with its own singular food culture — see our guide to monjayaki in Tsukishima. If you’re building a broader itinerary of Tokyo’s old-fashioned neighborhoods, Ryogoku pairs naturally with Ameyoko Market in Ueno or Sugamo’s old-fashioned shopping street, both a short train ride away.

    Common Mistakes to Avoid

    Don’t assume same-day tickets will be available for popular tournament days — the final weekend of each basho, when championship bouts are decided, sells out well in advance. Don’t visit expecting Ryogoku Kokugikan to be active year-round; outside the three Tokyo tournament months, the arena itself is quiet, so build your trip around the museum and restaurants instead. And don’t skip reservations for dinner at well-known chanko spots like Yoshiba or Kawasaki, especially on weekends — these are neighborhood institutions with limited seating, not tourist-volume restaurants built to handle walk-in crowds.

  • Osu Shopping Arcade: Nagoya’s Retro, Otaku & Bargain Street

    Osu Shopping Arcade: Nagoya’s Retro, Otaku & Bargain Street

    Photo by Lucrezia Carnelos on Unsplash

    Ask a Tokyoite about Nagoya and shopping rarely comes up first — but locals know better. Tucked a few subway stops from Nagoya Station, Osu Shopping Arcade (大須商店街) is a sprawling, covered maze of over 1,200 shops where retro video games, secondhand kimono, Taiwanese street food, and Akihabara-style otaku goods all sit within a few blocks of a 14th-century Buddhist temple. It’s less polished than Tokyo’s big-name districts and that’s exactly the appeal: real bargains, no crowds fighting you for sidewalk space, and a strong local Nagoya flavor.

    What Makes Osu Different from Akihabara or Ameyoko

    Osu often gets called “Nagoya’s Akihabara,” but it’s really a hybrid. The northern end, near Osu Kannon Temple, leans otaku — manga, anime figures, retro consoles, trading cards, and cosplay supply shops. The southern and central arcades feel more like Tokyo’s Ameyoko Market: dense rows of secondhand clothing, discount electronics, imported snacks, and street food stalls selling everything from Taiwanese fried chicken to Korean tteokbokki. What ties it together is the roof — Osu’s arcades are almost entirely covered, so it’s a genuinely good rainy-day or midsummer destination when other outdoor shopping streets become miserable.

    The whole district radiates out from Osu Kannon Temple (founded 1333, moved to its current site in 1612), which still hosts a used book and antiques flea market on the 18th and 28th of every month in the temple grounds — worth timing your visit around if you like hunting for old woodblock prints, ceramics, and curios.

    Getting to Osu Shopping Arcade

    From Nagoya Station, take the Higashiyama Subway Line to Fushimi Station, transfer to the Tsurumai Line, and get off at Osu Kannon Station — about 10-12 minutes total, with subway fare starting around ¥210-240 depending on distance. Alternatively, the Meijo Line stops at Kamimaesu or Yaba-cho, both a short walk into the arcades from the east side. If you’re coming straight off the Shinkansen with bags, note that Nagoya Station has plenty of coin lockers before you head out — our guide to coin lockers in Japan covers sizes and prices if you’d rather shop hands-free. And if you’re continuing on to Osu straight from a long-distance train ride, it’s worth reviewing Shinkansen oversized luggage rules before you buy anything bulky here that you’ll need to haul back.

    Most shops open around 10:00 or 11:00 and close by 19:00-20:00, though hours vary widely by store — secondhand and hobby shops tend to keep later hours than food stalls. Many independent shops close one weekday, often Wednesday, so if you have a specific store in mind, check before making a special trip.

    What to Buy: Otaku Goods, Retro Games & Secondhand Treasures

    Osu’s hobby shops cluster mainly along Niomon-dori and the streets just north of the temple. Retro game stores stock everything from Famicom cartridges (roughly ¥500-3,000 depending on rarity) to working CRT-era consoles, and several shops specialize in used trading cards — if you’re into Pokémon, One Piece, or Yu-Gi-Oh, it’s worth budgeting extra time here; see our guide to trading card games beyond Pokémon for what to look for and roughly what things should cost.

    For secondhand goods, Osu is home to Komehyo, a Nagoya-founded resale chain whose flagship multi-floor store here sells everything from used luxury handbags and watches to vintage kimono and jewelry — genuinely one of the best places in Japan to browse authenticated secondhand brand goods at a discount versus buying new. Smaller vintage clothing racks scattered through the arcades sell items for as little as ¥300-1,000, and cosplay and costume shops cater to the district’s strong ties to Nagoya’s cosplay scene (the World Cosplay Summit, held in Nagoya each summer, uses Osu as an informal gathering spot for costumed fans during the event).

    Best Time to Visit and Osu’s Festivals

    Weekday mornings are the quietest time to browse without crowds. Weekends bring out street performers, food stall lines, and noticeably more foot traffic — lively, but slower going if you’re trying to dig through bargain bins. Because the arcades are covered, Osu is a smart pick during Japan’s rainy season (tsuyu, roughly June into mid-July) or on brutally hot August afternoons when you want shade.

    The biggest event is the Osu Daido Chonin Matsuri, typically held over a weekend in mid-October, when the streets fill with samba dancers, taiko drummers, and food vendors — fun to experience, but expect the arcades to be packed shoulder-to-shoulder if you’re there primarily to shop. If quiet browsing is your priority, avoid that weekend; if you want atmosphere and don’t mind crowds, plan around it.

    Budget, Mid-Range & Splurge Shopping

    • Budget: Secondhand clothing racks (¥300-1,000 per item), street food (Taiwanese fried chicken, taiyaki, and skewers generally ¥300-600), and bargain-bin retro games and manga volumes.
    • Mid-range: Graded trading cards, curated anime figures and merchandise, mid-tier used cameras and electronics, and entry-level secondhand designer accessories at Komehyo (think ¥5,000-30,000).
    • Splurge: Komehyo’s higher-end floors carry authenticated luxury watches, fine jewelry, and rare vintage kimono that can run into six figures in yen — a legitimate alternative to Tokyo’s resale boutiques, often with less competition for the best pieces.

    Common Mistakes to Avoid

    The most common misstep is treating Osu like a compact, single-street district you can “do” in 30 minutes — it’s actually a sprawling grid of interconnected covered arcades, and it’s easy to miss entire otaku-focused side streets if you don’t wander deliberately north toward the temple. Second, bring cash: while larger stores like Komehyo take cards, a lot of the best bargain-bin and street food vendors are cash-only, and there are fewer international ATMs scattered through the arcade than in central Tokyo. Third, don’t assume every shop is open every day — irregular weekday closures (especially Wednesdays) catch visitors who show up expecting an Akihabara-style district that never closes. Finally, if antiques and vintage goods are your main interest, check the calendar before you go; showing up on a random Tuesday means missing the 18th/28th temple flea market entirely, which is genuinely one of the better vintage-hunting opportunities in the Nagoya area, comparable in spirit to markets like Kyoto’s Toji Temple Market.

    Osu rewards visitors who give it a full afternoon rather than a rushed stopover between Shinkansen connections. Pair it with a visit to Osu Kannon Temple itself, grab street food for lunch, and budget time to dig — the best finds here aren’t on display shelves, they’re in the ¥300 bins.

  • Karuizawa: Tokyo’s Favorite Mountain Resort Getaway

    Karuizawa: Tokyo’s Favorite Mountain Resort Getaway

    Photo by Kishor on Unsplash

    When Tokyo turns into a sauna in July and August, the capital’s elite have had a simple solution for over a century: get on a train and go up a mountain. Karuizawa, a resort town in Nagano Prefecture sitting at roughly 1,000 meters below the slopes of the active volcano Mt. Asama, has been Tokyo’s favorite cool-weather escape since a Canadian missionary named Alexander Croft Shaw built a summer cottage here in 1886. Japan’s imperial family still keeps a villa nearby — Emperor Akihito famously met Empress Michiko on a Karuizawa tennis court in 1957 — and today the town draws a mix of old-money summer residents, outlet shoppers, cyclists, and honeymooners. Here’s how to do it right as a day-tripper or overnight visitor.

    Getting There: The Shinkansen from Tokyo

    Karuizawa’s biggest advantage over other mountain destinations is speed: the Hokuriku Shinkansen connects Tokyo Station to Karuizawa Station directly, with no transfers. The fastest trains, called Kagayaki, take around 65–70 minutes; the slightly slower Asama trains, which stop more frequently, take about 75–80 minutes. One-way fares run roughly ¥5,500–6,500 depending on the seat type and train.

    One detail that trips up rail pass holders: the Kagayaki service is excluded from the national Japan Rail Pass, exactly like the Nozomi on the Tokaido line. If you’re traveling on a JR Pass, you need to book an Asama (or Hakutaka) service instead — the ticket machine or JR staff can point you to the right train. A cheaper but much slower alternative is the highway bus from Shinjuku or Ikebukuro, which costs around ¥2,500–3,500 one way but takes closer to three hours, longer in weekend traffic.

    Best Time to Visit

    Summer (late June through August) is peak season for a reason: while Tokyo bakes in the mid-30s°C, Karuizawa’s daytime highs usually stay in the mid-20s. That comfort comes at a cost — Old Ginza and the outlet mall get genuinely crowded on August weekends and during Obon (mid-August), and the town’s narrow roads can jam with traffic. Autumn, roughly mid-October to early November, brings excellent foliage around Kumoba Pond and the Usui Pass with far thinner crowds. Winter turns Karuizawa into a modest ski destination, with the Karuizawa Prince Hotel Ski Resort operating from around December to March and doubling as one of the easiest beginner ski trips from Tokyo. Spring is quiet and green but many attractions, especially anything nature-focused, are at their least dramatic.

    Old Karuizawa Ginza and the Outlet Mall

    The town splits into two very different shopping experiences, both walkable from Karuizawa Station. Old Karuizawa Ginza, about a 15–20 minute walk (or a short bus ride) from the station, is a roughly 700-meter pedestrian-friendly street lined with jam shops, bakeries, souvenir stores, and small churches like the Shaw Memorial Church, built on the site of the original missionary cottage. Sawaya Jam, founded in 1949, is the classic stop for a jar of blueberry or plum jam to take home.

    Right next to the station’s east exit is the opposite extreme: Karuizawa Prince Shopping Plaza, one of Japan’s largest outlet malls, with roughly 240 stores spread across several zones. Hours are typically 10:00–19:00, extending later in peak summer and shortening slightly in winter, so check the current season’s hours before planning a late visit. If you’re combining a shopping run with luggage you don’t want to drag around, the station itself has coin lockers — see our guide to coin lockers in Japan for sizes and pricing if you’re stashing bags before heading out to explore.

    Outdoor Highlights Worth the Trip

    Karuizawa’s best moments are outside the shopping streets. Kumoba Pond, nicknamed “Swan Lake,” is a free, short walk from Old Ginza and one of the prettiest autumn foliage spots in town. Shiraito Falls, a wide, curtain-like waterfall about 70 meters across but only 3 meters tall, is free to visit but sits roughly 25 minutes from the station by bus or car — it’s not walkable, so budget transit time. The same goes for the Usui Pass and its Meiji-era brick Eyeglass Bridge (Megane-bashi), a former railway viaduct now popular with hikers.

    The town is genuinely flat and bike-friendly, and rental shops near the station rent bicycles for roughly ¥1,000–1,500 for a few hours or around ¥2,000 for a full day — often the most efficient way to link Old Ginza, Kumoba Pond, and the Hoshino area without waiting on buses. In the Hoshino area, Harunire Terrace offers riverside dining and shops, the free-to-enter Karuizawa Kogen Church is a popular wedding chapel worth a quiet look, and the Tonbo no Yu hot spring offers day-use bathing for around ¥1,350. If snow monkeys and hot springs are more your speed, Nagano Prefecture’s other famous cold-weather draw, Jigokudani Monkey Park, is elsewhere in the prefecture and worth knowing about if you’re building a longer Nagano itinerary rather than a single Karuizawa day trip.

    Where to Stay: Budget to Splurge

    For a budget visit, Karuizawa works well as a day trip — take an early Asama train, rent a bike, picnic by Kumoba Pond, and you can spend close to nothing beyond transport and food. Mid-range travelers will find pensions (Western-style guesthouses, a Karuizawa specialty since the Meiji era) and business hotels running roughly ¥8,000–15,000 a night, with the outlet mall and Tonbo no Yu onsen as easy add-ons. At the top end, Hoshinoya Karuizawa and the villa wing of the Karuizawa Prince Hotel offer forest-set luxury from around ¥40,000 a night and up, and are worth it if you want the “imperial retreat” version of the trip rather than the outlet-mall version.

    Common Mistakes to Avoid

    • Booking a Kagayaki with a JR Pass. It won’t be honored at the gate — use Asama or Hakutaka services instead.
    • Visiting on an August weekend without a plan. Old Ginza and the outlet mall get packed, and road traffic can turn a 10-minute taxi ride into 40 minutes.
    • Assuming everything is walkable. Shiraito Falls and the Usui Pass are several kilometers from the station — rent a bike, take a bus, or budget real transit time.
    • Missing the last bus back. Local buses to Shiraito Falls and the Hoshino area run infrequently and often stop by early evening, especially outside summer — check the return time before you head out.
    • Carrying only cards. Many small bakeries, jam shops, and cafes along Old Ginza are cash-preferred, so bring yen.

    Karuizawa rewards a little planning more than most Tokyo day trips: get the train class right, pick your season deliberately, and split your time between the outlet mall and the quieter forest side of town, and you’ll understand exactly why it’s been Tokyo’s escape valve for well over a hundred years.

  • Trading Card Games Beyond Pokémon: One Piece, Yu-Gi-Oh & Dragon Ball Super in Japan

    Trading Card Games Beyond Pokémon: One Piece, Yu-Gi-Oh & Dragon Ball Super in Japan

    Photo by Turquo Cabbit on Unsplash

    Pokémon gets all the headlines, but Japan’s trading card game scene runs much deeper. One Piece Card Game, Yu-Gi-Oh!’s original Japanese OCG, and Dragon Ball Super Card Game (now rebranded as Fusion World) each have thriving domestic markets with cheaper singles, exclusive art, and shops that simply don’t exist outside Japan. If you play any of these games — or just want souvenirs with real collector value — here’s how to shop for them without wasting a day or overpaying.

    Why Buy These Games in Japan Instead of at Home

    All three games are printed in Japan first, months before (or in some cases instead of) international releases, so the card pool is deeper and prices are lower at the source. A One Piece Card Game booster pack retails for about ¥180 (tax included), with a 24-pack box running roughly ¥4,300–4,500 — noticeably cheaper than the equivalent English-language box abroad. Yu-Gi-Oh! OCG packs are similarly priced around ¥165–180 for five cards, and Dragon Ball Super Fusion World boosters run about ¥180 for twelve cards. Japan also gets alternate-art “parallel” and secret rares that sometimes never appear in the English versions at all, which is a big part of why collectors specifically hunt for Japanese print runs.

    One Piece Card Game: Bandai’s Breakout Hit

    Launched by Bandai in 2022, the One Piece Card Game has become the most-played non-Pokémon TCG in Japanese card shops, and store shelf space reflects it. New booster sets and structure decks (starter decks built around a specific character, about ¥1,000 each) release roughly every two to three months, and single-card prices for chase cards like Leader alternate arts can spike into the tens of thousands of yen right after a set drops, then settle within a few weeks. If you’re after a specific card, checking prices a month after release rather than on launch day saves real money.

    Yu-Gi-Oh! OCG vs the English TCG: What Actually Differs

    Japan’s Yu-Gi-Oh! is the “OCG” (Official Card Game), and it’s a genuinely different product from the English TCG sold in North America and Europe — not just a translation. Card text, errata, and even some rulings differ, and Japan often gets cards or reprints years before Western release. Artwork can differ too, especially on older cards and “20th/25th Secret Rare” reprints exclusive to Japan. The catch for competitive players: official tournament rules require every card in a deck to be the same language edition, so you can’t mix Japanese and English cards in a legal deck — buy OCG cards for collecting, display, or playing casually with OCG-only decks, not to slot into an English tournament deck.

    Dragon Ball Super Card Game (Fusion World)

    Bandai relaunched the Dragon Ball card game in 2023 as Fusion World, with a new rulebook and card frame that replaced the original 2020 series. This means older “Series 1-14” Dragon Ball Super cards and new Fusion World cards are separate ecosystems — double-check which one a shop’s binder or box actually is before buying, since both are still sold and displayed side by side in most stores. Structure/starter decks are around ¥1,500–2,000 and are the easiest entry point if you’ve never played.

    Where to Shop: Akihabara, Nakano Broadway & Osaka’s Den Den Town

    Tokyo’s best hunting ground is Akihabara, where chains like Yellow Submarine (multiple branches, most open roughly 11:00–20:00) and Toranoana stock new product and organized singles binders by rarity, and Mandarake’s Akihabara Complex mixes secondhand cards with everything else otaku-related. For deeper secondhand and vintage searching, Mandarake’s flagship at Nakano Broadway (a short ride from Shinjuku) has multiple dedicated card-specialist stalls under one roof — it’s slower-paced and less crowded than Akihabara, worth combining with a stop at Kichijoji on the same rail line if you want a calmer neighborhood to decompress in afterward. In Osaka, Den Den Town (Nipponbashi) is the Kansai equivalent of Akihabara, packed with card shops like Media World and Trading Card Camp that often have better prices than Tokyo simply because of lower foot traffic. Hareruya, a specialist chain with Osaka and Tokyo locations, focuses on higher-end singles and is a good stop if you’re chasing a specific rare card rather than browsing.

    Most of these shops are cash-friendly but increasingly take IC cards (Suica/Pasmo) and credit cards for larger purchases; smaller specialist stalls inside places like Nakano Broadway may still be cash-only, so carry ¥10,000–20,000 in bills if you’re planning to buy singles.

    Budget, Mid-Range, and Splurge Approaches

    • Budget: Buy structure/starter decks (¥1,000–2,000) rather than random boosters if you just want a playable deck to bring home — no gacha risk, and they include exclusive cards not sold as singles.
    • Mid-range: A booster box (24 packs, ¥4,300–5,500 depending on game) gives you a real shot at chase cards and enough commons/uncommons to build multiple decks; splitting a box with a friend is common practice among Japanese players too.
    • Splurge: Graded or near-mint alternate-art Leader/Secret Rares can run from ¥10,000 to well over ¥100,000 at specialist shops like Hareruya — these are investment-grade purchases, so ask for a receipt and check the shop’s authentication stamp or sleeve before paying.

    Common Mistakes to Avoid

    The most frequent misstep is confusing print eras — buying old Dragon Ball Super cards thinking they work with Fusion World decks, or picking up a Yu-Gi-Oh! OCG card assuming it’s tournament-legal in an English TCG deck back home. Second is shopping on a set’s launch day: prices for chase pulls are artificially inflated for the first one to two weeks before settling. Third is skipping the tax-free counter — many of these shops process duty-free purchases over ¥5,000 with your passport, which is easy to forget when you’re focused on digging through binders. Finally, if you’re buying boxes rather than singles, remember that sealed product is bulky; if you’re continuing on to other cities, a coin locker (see our guide on coin lockers in Japan) at Akihabara or Namba station lets you keep shopping without hauling boxes around all day, and if you’ve gone all-in on booster boxes, check the Shinkansen oversized luggage rules before you try to carry an extra suitcase of cardboard onto a reserved seat.

    If you want to turn a shopping trip into a full day out, pair Akihabara with a morning at Ameyoko Market in nearby Ueno — it’s a 15-minute train ride away and gives you a bargain-hunting warm-up before you get into more specialized card-shop browsing in the afternoon.

  • Shinkansen Oversized Luggage Rules: Reservations & What Counts

    Shinkansen Oversized Luggage Rules: Reservations & What Counts

    Photo by henry perks on Unsplash

    If you’re packing a full-size suitcase for Japan — especially if you plan to shop your way across the country — there’s a Shinkansen rule that catches a lot of first-time visitors off guard. Since 2020, some bullet trains require you to reserve a specific seat if your bag is “oversized,” and showing up without one can mean an on-the-spot fee or an awkward conversation with a conductor. Here’s exactly what the rule covers, how to book around it, and how to avoid getting caught out.

    Which Shinkansen Lines This Applies To

    The oversized luggage reservation system applies specifically to the Tokaido, Sanyo, and Kyushu Shinkansen — the lines run by JR Central, JR West, and JR Kyushu that connect Tokyo, Nagoya, Kyoto, Osaka, Hiroshima, and Hakata/Fukuoka. This covers the Nozomi, Hikari, Kodama, Sakura, and Mizuho services, which is the route most tourists actually use.

    The Tohoku, Joetsu, and Hokuriku Shinkansen (JR East’s lines heading north to Sendai, Niigata, and Kanazawa) don’t enforce this mandatory reservation system, though you should still be considerate about where you stow large bags since space is limited on any train.

    What Actually Counts as “Oversized”

    This is the part people get wrong most often. The rule isn’t about weight or how a bag “looks” — it’s a specific measurement: the sum of a bag’s three dimensions (length + width + height, including wheels and handles).

    • Under 160cm total: No reservation needed. Most carry-on bags and even many mid-size suitcases fall here.
    • 160cm–250cm total: This is “oversized” and requires the special seat reservation. A typical large checked suitcase (the kind airlines cap around 158cm) very often lands in this zone.
    • Over 250cm total: Not allowed onboard at all. This covers things like large musical instrument cases, bicycles (unless properly bagged), and oversized sports equipment — you’ll need a delivery service instead.

    A quick gut check: if your suitcase is the kind you’d check on an international flight rather than carry on, assume it needs a reservation. Grab a tape measure before you go if you’re unsure — station staff have measured bags at the platform gate during spot checks.

    How to Reserve an Oversized-Luggage Seat

    The good news: the reservation itself is free. You’re not paying extra for the bag, just booking a seat in a row that has extra space behind it — usually the last row of a reserved car, where there’s no seat reclining into the gap behind you.

    You can reserve one when you book your Shinkansen ticket through:

    • Ticket counters (Midori no Madoguchi) at any JR station — just tell staff you have oversized luggage.
    • Ticket vending machines with English-language options at major stations.
    • Online via EKINET, SmartEX, or the JR West/JR Central reservation portals, where you select an “oversized baggage” seat during booking.

    Book as early as you can — ideally a few days ahead. Each train only has a limited number of these seats (often just one row of 3–5 seats per car), and they fill up fast during peak travel windows like Golden Week (late April–early May), Obon (mid-August), and the New Year holidays. If you’re traveling then, treat this reservation like you would any other in-demand travel booking and lock it in as soon as your dates are set.

    What Happens If You Don’t Reserve

    If you board with an oversized bag and no reservation, conductors can charge an on-the-spot fee of 1,000 yen. In practice, enforcement varies — some conductors are lenient with confused tourists, but on busy trains where the oversized seats are already occupied, you may simply be asked to move, store the bag elsewhere, or pay up. It’s a small fee in the scheme of a Japan trip, but it’s an easy one to avoid entirely with a two-minute reservation.

    Common Mistakes to Avoid

    • Assuming your bag is fine because it fit as carry-on at home. Airline “cabin bag” limits and this rule use different math — many airline-legal cabin cases are still over 160cm by this measurement.
    • Not accounting for shopping hauls. If you’re leaving Japan with a stuffed suitcase after buying things like a rice cooker or other bulky souvenirs, your bag’s dimensions (and weight) may have changed since you packed it — remeasure before your Shinkansen leg.
    • Booking a seat but forgetting it must be in a car with oversized space. Not every reserved car has one; the booking system should route you correctly, but double-check the seat row shown on your ticket.
    • Trying to reserve at the last minute during peak season. If oversized seats are sold out, your options shrink to arriving very early to try standby space or using a luggage delivery service instead.

    Alternatives If You Can’t Get a Reservation

    If the oversized seats are booked out, or you’d rather not deal with hauling a huge suitcase through stations at all, Japan’s luggage forwarding services (takkyubin) are a genuinely good option. Companies like Yamato Transport (kuro neko) will pick up your bag from a hotel and deliver it to your next hotel, usually overnight, for roughly 2,000–3,000 yen per large bag. It’s a favorite trick among experienced Japan travelers for exactly this kind of situation — you travel light on the train and your suitcase meets you at the next city.

    For shorter stints — say, you want to explore a city car-free for a day before a Shinkansen leg — check out our guide to coin lockers in Japan, which covers sizes, prices, and locker-finding apps for stashing bags at the station while you sightsee nearby.

    The bottom line: measure your bag, reserve early if it’s over 160cm, and you’ll breeze through what’s otherwise one of the more confusing rules for first-time Shinkansen riders.

  • Chu-Hi and Japan’s Canned Cocktail Culture: What to Try

    Chu-Hi and Japan’s Canned Cocktail Culture: What to Try

    Photo by Daniel Tseng on Unsplash

    Walk into any convenience store in Japan and you’ll find an entire wall of slim, colorful cans — some soft and fruity, others stamped with warnings in bold red text. This is chu-hi (チューハイ), Japan’s answer to the hard seltzer, and it’s one of the most fun, least-explained parts of a trip here. Unlike beer or sake, chu-hi doesn’t get its own guidebook chapter, but it’s cheap, everywhere, and varies wildly in strength — which makes it easy to get wrong if you don’t know what you’re looking at. Here’s what it actually is and how to drink it like you’ve done this before.

    What Is Chu-Hi, Exactly?

    Chu-hi is short for “shochu highball” — originally shochu (a distilled spirit) mixed with soda water and flavoring, served in izakayas long before it came in a can. The canned, convenience-store version usually swaps shochu for a neutral distilled base (often called “spirits” on the label) mixed with carbonated water, real or artificial fruit flavor, and sometimes a small amount of juice. It’s Japan’s equivalent of a hard seltzer or RTD (ready-to-drink) cocktail, but it predates that trend by decades and the category is far more developed — you’ll see 30-plus flavors on a single shelf, from grapefruit and lemon to more unusual ones like shikuwasa (a small Okinawan citrus), white peach, or salted lychee.

    The Big Brands to Know

    A handful of names dominate the shelf, and each has a different personality:

    • Suntory Strong Zero (-196°C Strong Zero) — the one with the loud red-and-black can, 9% ABV, frozen-fruit flavor made using a “-196°C freeze-crushing” process. This is the drink locals joke about for hitting harder than it tastes. A 350ml can runs about ¥160–190, a 500ml around ¥230–260 at convenience stores.
    • Suntory Horoyoi — the gentle, pastel-can opposite of Strong Zero, usually 3–5% ABV and genuinely fruity (muscat grape, white sour, mixed berry). “Horoyoi” literally means “pleasantly tipsy,” and it’s aimed at people who want the flavor without much of the alcohol.
    • Kirin Hyoketsu — a cleaner, less sweet style that leans on real fruit juice and less added sugar; a good choice if Strong Zero-style drinks taste too artificial to you.
    • Asahi Slat and Choya’s canned umeshu sours — Choya’s plum wine (umeshu) sodas are worth seeking out if you like something less citrus-forward and a bit sweeter.

    If you’re doing an izakaya crawl in a neighborhood with a good bar scene — Kichijoji is a great one for this, with a dense cluster of small standing bars near the station — you’ll also find draft chu-hi (nama chu-hi) made fresh with shochu and soda, usually cheaper than beer and a good way to try the “real” version before you commit to a case of cans.

    Reading the Can: ABV Is the Whole Game

    This is the part visitors get wrong most often: the cute, fruity can and the aggressive-looking can can have the same or wildly different alcohol content, and there’s no consistent visual logic to it. ABV is printed in small text, usually near the ingredients list, as a percentage. As a rough guide:

    • 3–5% ABV — Horoyoi and similar “light” lines, roughly beer strength.
    • 6–8% ABV — standard chu-hi and most Hyoketsu varieties.
    • 9% ABV — Strong Zero and other “Strong” series cans, closer to wine strength per can, and often sold in 500ml sizes, meaning a single can can equal two to three standard drinks.

    Japan’s legal drinking age is 20, and convenience stores will ask you to confirm your age on the self-checkout screen (a simple on-screen button tap, no ID check in most cases, though staff can ask to see a passport). There’s no open-container law, so drinking a can on a park bench or riverside is completely normal — just avoid drinking on trains during rush hour, which is considered poor etiquette even though it’s not illegal.

    Where to Buy Chu-Hi

    You genuinely don’t need to seek this out — 7-Eleven, Lawson, and FamilyMart all stock a full fridge of chu-hi, and prices are fixed nationwide, so there’s no bargaining or hunting for deals like with souvenirs. For volume and selection, supermarkets and discount stores like Don Quijote beat convenience stores on price, especially if you buy multi-packs. If you’re already exploring Tokyo’s discount shopping streets, Ameyoko Market in Ueno has several liquor shops with deep chu-hi and shochu selections at prices below convenience-store rate, plus imported and limited-edition cans you won’t see elsewhere. Seasonal and regional flavors are worth watching for — sakura and yuzu editions appear around March, and kaki (persimmon) or kōtatsu-themed cans show up in autumn, tied to when a flavor is genuinely in season.

    Pairing Chu-Hi With Food

    Chu-hi’s acidity and carbonation make it a natural match for grilled and fried food — it’s the default drink order at most yakiniku restaurants for exactly this reason, cutting through the fat of grilled meat the way a crisp lager does. If you’re working through a yakiniku meal, a lemon or grapefruit chu-hi alongside the beef is a very normal, very good combination. It also holds up well against rich, savory street food — a hot, batter-heavy dish like okonomiyaki pairs nicely with something citrusy and cold to balance the sauce and mayo. Sweeter varieties like Horoyoi’s grape or peach flavors work better as an after-dinner sipper than a meal pairing.

    Common Mistakes First-Timers Make

    • Judging strength by flavor. A “white peach” can tastes like juice but can still be 8–9% ABV. Always check the printed percentage, not the flavor name.
    • Mixing Strong Zero-style cans like beer. At 9% and often 500ml, one can is genuinely equivalent to 2–3 standard drinks — treat it accordingly, especially on an empty stomach or after a day of walking in the heat.
    • Assuming all brands taste the same. Horoyoi, Hyoketsu, and Strong Zero are aimed at completely different drinkers — buy a single can of each before committing to a multi-pack of one brand.
    • Forgetting recycling etiquette. Japan is strict about separating cans from burnable trash. Convenience stores have a recycling bin near the entrance specifically for cans and bottles bought there — use it rather than carrying an empty can around looking for a general trash bin, which are genuinely hard to find on the street.

    Bringing Some Home

    Chu-hi doesn’t travel in checked luggage well as a souvenir — cans are heavy and airport security limits liquids in carry-on — so the easiest option is buying a bottle of flavored shochu or a boxed set at an airport duty-free shop just before your flight. Most countries allow returning travelers to bring home a small duty-free alcohol allowance (commonly a bottle or two, sometimes stated in liters rather than by can count), but the exact limit depends on your home country’s customs rules, so check that before you buy in bulk. If you just want the memory rather than the bottle, the better souvenir is often a local liquor shop’s regional or limited-edition can label — lightweight, cheap, and a genuinely unique flavor snapshot of wherever you found it.

  • Onitsuka Tiger & Japanese Sneaker Brands: Where to Buy

    Onitsuka Tiger & Japanese Sneaker Brands: Where to Buy

    Photo by Jesus Esteban on Unsplash

    Japan didn’t just perfect the running shoe — it quietly built one of the most interesting sneaker cultures on the planet, from Kobe-born Onitsuka Tiger to century-old rubber-shoe makers in Kyushu that most tourists never hear about. If you’re planning to shop for sneakers in Japan, here’s what’s actually worth your time and yen, with real prices and locations rather than vague “go check Harajuku” advice.

    Onitsuka Tiger 101: The Kobe Brand Behind the Stripes

    Onitsuka Tiger was founded in Kobe in 1949 by Kihachiro Onitsuka, originally as a basketball shoe maker. In 1977 it merged with two other companies to form ASICS, but the Onitsuka Tiger name was revived in 2002 as a retro-lifestyle line, aimed squarely at fashion rather than performance. The shoe you’ve almost certainly seen — the low-top with the curved side stripe — is the MEXICO 66, designed for the 1968 Mexico City Olympics and still the brand’s best-seller today.

    Because Onitsuka Tiger and ASICS are legally the same company, you’ll sometimes find both brands’ shoes sold in the same store, especially at outlets. They’re marketed very differently, though: ASICS leans into running and sport performance, while Onitsuka Tiger is pure street style, with frequent collaborations (Andersson Bell, Kiko Kostadinov, and various Japanese designers have all done capsule collections).

    Where to Buy Onitsuka Tiger in Tokyo

    The flagship store is in Harajuku, on Jingumae-dori near the Harajuku/Omotesando crossing — an easy walk from Harajuku Station. It carries the full current lineup plus Japan-exclusive and limited colorways you won’t find abroad, and it’s generally open around 11:00–20:00 daily. A second well-stocked location is in Ginza, useful if you’re already shopping that side of town.

    Expect to pay:

    • Classic canvas MEXICO 66: roughly ¥13,200–¥16,500
    • Leather/suede MEXICO 66 and similar models: roughly ¥16,500–¥22,000
    • Limited-edition or designer collaborations: ¥25,000–¥45,000+, and these sell out fast in-store

    If you’re touring Harajuku’s backstreets afterward, note that this neighborhood is one of the best in Tokyo for pairing sneaker shopping with people-watching — it’s a completely different energy from the nostalgic, elderly-focused shopping street at Sugamo, Tokyo’s “Grandma’s Harajuku”, which is worth visiting for contrast on a quieter day.

    Beyond Onitsuka Tiger: Other Japanese Sneaker Brands Worth Knowing

    If you only shop for Onitsuka Tiger, you’ll miss some of Japan’s best-kept sneaker secrets:

    • ASICS — the performance sibling brand, with an excellent Sportstyle line (Gel-1130, Gel-Kayano, Gel-Lyte III) that runs ¥9,000–¥16,000 and is often cheaper in Japan than overseas due to exchange rates and local-market pricing.
    • Mizuno — another Kobe-founded sports brand, strong on running shoes and retro-styled sneakers in the ¥10,000–¥18,000 range.
    • Moonstar — based in Kurume, Fukuoka, and in business since 1873. Their canvas sneakers (look for the “Made in Kurume” line) are simple, well-made, and affordable at ¥7,000–¥15,000.
    • Spingle Move — handmade vulcanized-sole sneakers from Himeji, Hyogo. Small-batch, distinctly Japanese in fit and finish, usually ¥18,700–¥22,000.
    • Patrick — technically a French name, but the license has been owned and run by a Japanese company since the 1980s, and it’s now sold almost exclusively in Japan. Retro runner styles run ¥15,000–¥25,000.

    None of these brands are as famous internationally as Onitsuka Tiger, which is exactly why they’re worth seeking out — you’re buying something you genuinely can’t easily get at home.

    Budget, Mid-Range, and Splurge Shopping Strategy

    Budget: Moonstar canvas sneakers or basic ASICS running models, both easily found in department store shoe floors and sporting goods chains for under ¥10,000.

    Mid-range: Standard Onitsuka Tiger MEXICO 66 (¥13,000–¥18,000) or Spingle Move — the sweet spot for a souvenir pair that still feels distinctly Japanese-made.

    Splurge: Limited Onitsuka Tiger collaborations, or a trip to a specialty sneaker consignment shop for rare vintage ASICS or Nike Japan-exclusive releases, which can run ¥30,000–¥100,000+ depending on rarity.

    Outlet Malls and Bargain Hunting

    Onitsuka Tiger and ASICS both run outlet stores at Gotemba Premium Outlets (near Mt. Fuji, about 90 minutes from Tokyo by direct bus) and Rinku Premium Outlets (near Kansai Airport), where discontinued colorways and past-season stock typically sell at 20–50% off retail. These are worth timing into a Fuji day trip or an arrival/departure day at Kansai Airport rather than a dedicated visit.

    For secondhand and closeout sneakers in central Tokyo, Ueno’s Ameyoko Market has several footwear shops mixing new discount stock with used pairs — it’s chaotic but genuinely cheap, and worth a look if you’re already in the area for the market’s food stalls. If you’d rather browse smaller, curated select shops that stock imported and Japanese sneaker labels side by side, the boutiques around Kichijoji are a calmer, less touristy alternative to Harajuku.

    Common Mistakes and Practical Tips

    • Sizing is in centimeters, not US/UK/EU. Staff can convert, but if you know your foot length in cm you’ll avoid guesswork — Japanese fit also tends to run slightly narrower than US sizing.
    • Tax-free shopping requires your passport and a minimum spend — generally ¥5,000 or more in general goods at a single store on the same day qualifies for the 10% consumption tax exemption. Not every small boutique offers this, so ask before you buy if it matters to you.
    • Sale timing: Japan’s two main clearance seasons are early January (also when stores release “fukubukuro” lucky bags, sometimes including sneaker brands) and early July. Outlet prices, by contrast, are good year-round.
    • Don’t buy your only pair of walking shoes on day one of a long trip — break new sneakers in gradually, especially if you’re covering a lot of ground on cobblestones or temple grounds.
    • Shoe boxes take up real luggage space. If you’re sneaker shopping mid-trip rather than at the end, a same-day coin locker can save you from carrying boxes around all day, or ask the store to ship your purchase directly to your hotel or home country.

    Whether you leave Japan with a pair of classic MEXICO 66s or a harder-to-find pair of Kurume canvas sneakers, sneaker shopping here rewards a bit of research — the interesting brands aren’t always the ones with the biggest storefront.

  • Japanese Manhole Covers: A Traveler’s Guide to Drainspotting

    Japanese Manhole Covers: A Traveler’s Guide to Drainspotting

    Photo by Alexandre Valdivia on Unsplash

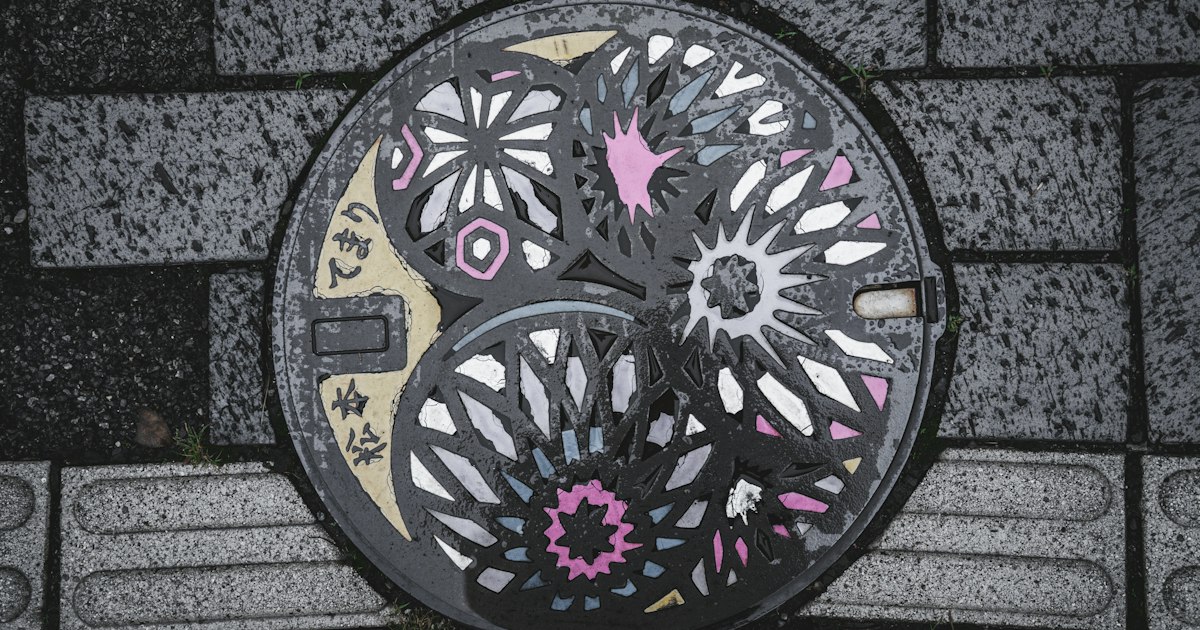
    Look down. In Japan, some of the country’s most charming and least-visited “attractions” are bolted into the pavement beneath your feet. Since the 1980s, hundreds of Japanese municipalities have commissioned custom manhole covers — cherry blossoms, koi, castles, folk heroes, and even anime characters cast in iron and painted by hand — turning sewer infrastructure into a nationwide open-air art gallery. The hobby of photographing and collecting these has a name, “drainspotting,” and it costs nothing but a little curiosity and a phone camera. Here’s how to do it properly.

    What Is “Drainspotting,” and Why Is Japan Obsessed With Pretty Manholes?

    The term was popularized by the 2010 photo book Drainspotting: Japanese Manhole Covers by Australian photographer Remo Camerota, who spent years documenting the country’s design manholes (デザインマンホール). Unlike the plain gray discs found in most cities, roughly 95% of Japan’s ~1,700 municipalities have at least one custom design, often several, tied to a local flower, festival, mascot, or famous product. Many are also produced in a limited-run “color version” (カラーマンホール), hand-painted and usually installed near a train station, city hall, or tourist information center rather than out on a busy road — which conveniently makes them easier and safer to photograph.

    A Short History: How a Government Bureaucrat Turned Sewers Into Art

    Credit goes to Yasutake Kameda, an official at Japan’s then Ministry of Construction, who in the mid-1980s pushed for decorative manhole designs as a way to build public support for expensive sewer infrastructure spending — money that was, and still is, a hard sell to taxpayers who never see it. Giving each town its own artistic cover turned a buried utility into civic pride. The idea spread fast, and by the 2000s “manhole tourism” had become its own quiet subculture, with local sewerage bureaus leaning into it rather than fighting it.

    Where to Find the Best Manhole Covers (Tokyo and Beyond)

    You don’t need to plan a special trip — manholes reward whatever walking you’re already doing. A few reliable starting points:

    • Azabu-Juban, Tokyo — Sailor Moon–themed covers near the shopping street, tied to the anime’s setting.
    • Takadanobaba, Tokyo — Astro Boy (Tetsuwan Atom) covers honoring creator Osamu Tezuka’s old studio in the area.
    • Kawasaki — Doraemon designs near the Fujiko F. Fujio Museum.
    • Hokuei, Tottori Prefecture — a full “Conan Road” of Detective Conan manholes, since creator Gosho Aoyama grew up there. If you’re already heading to the Tottori Sand Dunes, this makes an easy same-day add-on by local train and rental car.
    • Neighborhood shopping streets — older, low-traffic shotengai are surprisingly good hunting grounds because covers near shopfronts get less foot and vehicle wear. Try a slow walk through Kichijoji or the retro streets of Sugamo, both of which reward unhurried, on-foot exploring anyway.

    Manhole Cards: Japan’s Free Collectible Game for Drain Nerds

    Since 2016, an organization called GKP (the Sewerage Public Relations Platform Japan) has issued official “manhole cards” — trading-card-sized collectibles with a photo of a local design on the front and technical details on the back. There are now well over 900 designs available at distribution points across the country: city halls, water treatment plant visitor centers, tourist information offices, and sometimes local museums. The cards are completely free, limited to one per person per visit, and can only be picked up in person (no mail requests, no online ordering) — part of the appeal is that it forces you to actually go to the town. Pickup counters generally follow local government hours, commonly 8:30am–5:15pm on weekdays and sometimes shorter hours or closures on weekends, so check the specific location before making a special trip. The official list of distribution points is searchable on GKP’s manhole card website by prefecture.

    Best Season and Time of Day for Manhole Photography

    Manholes don’t care about seasons the way cherry blossoms or autumn leaves do, which is exactly what makes this a great “backup plan” activity for a rainy travel day. That said, a few timing notes help: early morning (before 8am) gives you soft light and empty sidewalks, which matters because you’ll often be crouching in the middle of a pedestrian path. Overcast days are actually ideal for photographing painted color-versions, since direct sun creates harsh glare off the enamel-like paint. Light rain can deepen the colors nicely, but a wet cover is slippery — see the safety note below. Spring (March–April) is a bonus season only because many towns’ cherry-blossom-themed covers look best photographed alongside real sakura in the background.

    Common Mistakes First-Time Drainspotters Make

    • Standing on the cover to photograph it. Wet or painted metal is genuinely slippery, and a car or bicycle may be approaching from behind you — always shoot from the side, not straddling the design.
    • Blocking traffic or shop entrances. The best covers are often right in front of a train station exit or shop door. Take your photo quickly and step aside.
    • Assuming every city has one. Rural or newly-merged municipalities sometimes only have the old prefecture-standard design. Search ahead on sites like the manhole card database rather than wandering blind.
    • Forgetting cash isn’t needed but ID sometimes is. A few manhole card counters located inside government buildings ask you to sign a simple visitor log; nothing formal, but don’t be surprised.
    • Treating it as a five-minute photo op. The most satisfying way to do this is to fold it into a walk you’re already taking — combine it with grazing through Ameyoko Market in Ueno, for instance, rather than a dedicated trip.

    Budget, Mid-Range, and Splurge: Bringing the Hobby Home

    This is one of the few Japan hobbies that’s genuinely free at every tier. Budget: photograph covers with your phone and collect manhole cards — ¥0 total, aside from transport to reach smaller towns. Mid-range: many city sewerage bureaus and local souvenir shops now sell manhole-themed goods — replica coasters, keychains, and stickers of local designs typically run ¥500–1,500. Splurge: a handful of towns sell small cast-resin or metal miniature replicas of their most famous covers as display pieces, generally ¥3,000–6,000, though stock is limited and usually only available locally, not online. If you’re traveling light and don’t want to carry souvenirs around all day, drop them in a station locker — see our guide to coin lockers in Japan for sizes and prices — and collect them at the end of your trip.

    Drainspotting rewards exactly the kind of unhurried, look-around-you travel that Japan does so well. You don’t need a special itinerary, just a habit of glancing down between temples, ramen shops, and train platforms — and a small folder to keep your growing stack of free cards.