Japan Trove

Author: JapanTrove Editorial

  • Japanese Manhole Covers: A Traveler’s Guide to Drainspotting

    Japanese Manhole Covers: A Traveler’s Guide to Drainspotting

    Photo by Alexandre Valdivia on Unsplash

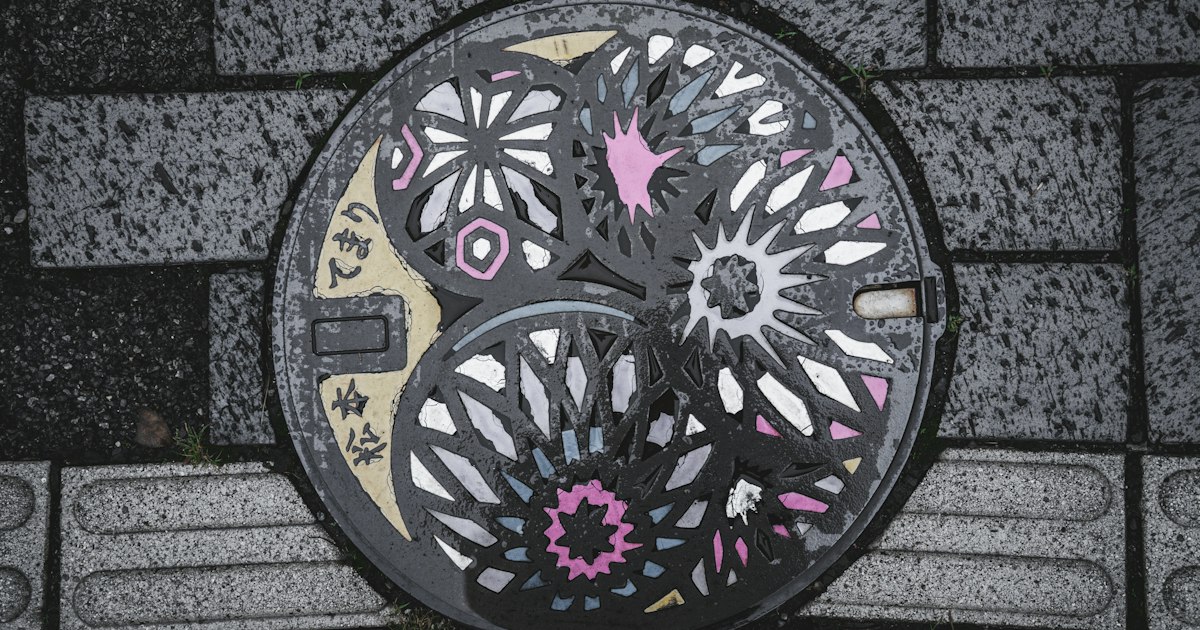
    Look down. In Japan, some of the country’s most charming and least-visited “attractions” are bolted into the pavement beneath your feet. Since the 1980s, hundreds of Japanese municipalities have commissioned custom manhole covers — cherry blossoms, koi, castles, folk heroes, and even anime characters cast in iron and painted by hand — turning sewer infrastructure into a nationwide open-air art gallery. The hobby of photographing and collecting these has a name, “drainspotting,” and it costs nothing but a little curiosity and a phone camera. Here’s how to do it properly.

    What Is “Drainspotting,” and Why Is Japan Obsessed With Pretty Manholes?

    The term was popularized by the 2010 photo book Drainspotting: Japanese Manhole Covers by Australian photographer Remo Camerota, who spent years documenting the country’s design manholes (デザインマンホール). Unlike the plain gray discs found in most cities, roughly 95% of Japan’s ~1,700 municipalities have at least one custom design, often several, tied to a local flower, festival, mascot, or famous product. Many are also produced in a limited-run “color version” (カラーマンホール), hand-painted and usually installed near a train station, city hall, or tourist information center rather than out on a busy road — which conveniently makes them easier and safer to photograph.

    A Short History: How a Government Bureaucrat Turned Sewers Into Art

    Credit goes to Yasutake Kameda, an official at Japan’s then Ministry of Construction, who in the mid-1980s pushed for decorative manhole designs as a way to build public support for expensive sewer infrastructure spending — money that was, and still is, a hard sell to taxpayers who never see it. Giving each town its own artistic cover turned a buried utility into civic pride. The idea spread fast, and by the 2000s “manhole tourism” had become its own quiet subculture, with local sewerage bureaus leaning into it rather than fighting it.

    Where to Find the Best Manhole Covers (Tokyo and Beyond)

    You don’t need to plan a special trip — manholes reward whatever walking you’re already doing. A few reliable starting points:

    • Azabu-Juban, Tokyo — Sailor Moon–themed covers near the shopping street, tied to the anime’s setting.
    • Takadanobaba, Tokyo — Astro Boy (Tetsuwan Atom) covers honoring creator Osamu Tezuka’s old studio in the area.
    • Kawasaki — Doraemon designs near the Fujiko F. Fujio Museum.
    • Hokuei, Tottori Prefecture — a full “Conan Road” of Detective Conan manholes, since creator Gosho Aoyama grew up there. If you’re already heading to the Tottori Sand Dunes, this makes an easy same-day add-on by local train and rental car.
    • Neighborhood shopping streets — older, low-traffic shotengai are surprisingly good hunting grounds because covers near shopfronts get less foot and vehicle wear. Try a slow walk through Kichijoji or the retro streets of Sugamo, both of which reward unhurried, on-foot exploring anyway.

    Manhole Cards: Japan’s Free Collectible Game for Drain Nerds

    Since 2016, an organization called GKP (the Sewerage Public Relations Platform Japan) has issued official “manhole cards” — trading-card-sized collectibles with a photo of a local design on the front and technical details on the back. There are now well over 900 designs available at distribution points across the country: city halls, water treatment plant visitor centers, tourist information offices, and sometimes local museums. The cards are completely free, limited to one per person per visit, and can only be picked up in person (no mail requests, no online ordering) — part of the appeal is that it forces you to actually go to the town. Pickup counters generally follow local government hours, commonly 8:30am–5:15pm on weekdays and sometimes shorter hours or closures on weekends, so check the specific location before making a special trip. The official list of distribution points is searchable on GKP’s manhole card website by prefecture.

    Best Season and Time of Day for Manhole Photography

    Manholes don’t care about seasons the way cherry blossoms or autumn leaves do, which is exactly what makes this a great “backup plan” activity for a rainy travel day. That said, a few timing notes help: early morning (before 8am) gives you soft light and empty sidewalks, which matters because you’ll often be crouching in the middle of a pedestrian path. Overcast days are actually ideal for photographing painted color-versions, since direct sun creates harsh glare off the enamel-like paint. Light rain can deepen the colors nicely, but a wet cover is slippery — see the safety note below. Spring (March–April) is a bonus season only because many towns’ cherry-blossom-themed covers look best photographed alongside real sakura in the background.

    Common Mistakes First-Time Drainspotters Make

    • Standing on the cover to photograph it. Wet or painted metal is genuinely slippery, and a car or bicycle may be approaching from behind you — always shoot from the side, not straddling the design.
    • Blocking traffic or shop entrances. The best covers are often right in front of a train station exit or shop door. Take your photo quickly and step aside.
    • Assuming every city has one. Rural or newly-merged municipalities sometimes only have the old prefecture-standard design. Search ahead on sites like the manhole card database rather than wandering blind.
    • Forgetting cash isn’t needed but ID sometimes is. A few manhole card counters located inside government buildings ask you to sign a simple visitor log; nothing formal, but don’t be surprised.
    • Treating it as a five-minute photo op. The most satisfying way to do this is to fold it into a walk you’re already taking — combine it with grazing through Ameyoko Market in Ueno, for instance, rather than a dedicated trip.

    Budget, Mid-Range, and Splurge: Bringing the Hobby Home

    This is one of the few Japan hobbies that’s genuinely free at every tier. Budget: photograph covers with your phone and collect manhole cards — ¥0 total, aside from transport to reach smaller towns. Mid-range: many city sewerage bureaus and local souvenir shops now sell manhole-themed goods — replica coasters, keychains, and stickers of local designs typically run ¥500–1,500. Splurge: a handful of towns sell small cast-resin or metal miniature replicas of their most famous covers as display pieces, generally ¥3,000–6,000, though stock is limited and usually only available locally, not online. If you’re traveling light and don’t want to carry souvenirs around all day, drop them in a station locker — see our guide to coin lockers in Japan for sizes and prices — and collect them at the end of your trip.

    Drainspotting rewards exactly the kind of unhurried, look-around-you travel that Japan does so well. You don’t need a special itinerary, just a habit of glancing down between temples, ramen shops, and train platforms — and a small folder to keep your growing stack of free cards.
  • Tottori Sand Dunes: Japan’s Desert Landscape and How to Visit

    Tottori Sand Dunes: Japan’s Desert Landscape and How to Visit

    Photo by Nakaharu Line on Unsplash

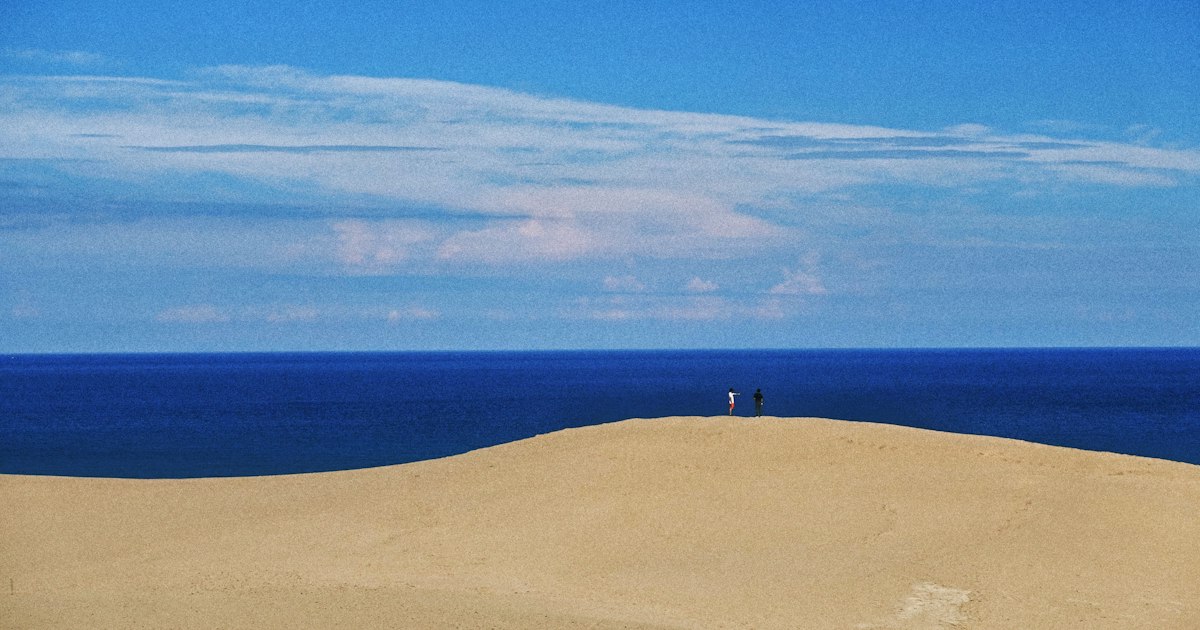
    Most people picture rice paddies and neon cities when they think of Japan, not rolling sand dunes that stretch to the horizon. The Tottori Sand Dunes (Tottori Sakyu), on the Sea of Japan coast in Tottori Prefecture, are the exception — a genuinely strange and photogenic landscape that feels closer to Inner Mongolia than to Kyoto. They’re one of the easiest “wow” day trips in the quieter San’in region, and far less crowded than anything in the Kansai or Kanto tourist circuits.

    What Makes the Tottori Sand Dunes Unique

    Formed over roughly 100,000 years by sand carried down the Sendai River and reshaped by coastal winds, the dunes stretch about 16 km along the coast and up to 2.4 km inland, with some peaks reaching over 45 meters high. They’re part of the San’in Kaigan UNESCO Global Geopark, and the whole area is free to enter and open 24 hours a day — there are no gates or admission fees for the dunes themselves, only for the paid attractions around them.

    The signature feature is Umanose (“horse’s back”), the tall central ridge that gives you a sweeping view of the Sea of Japan on one side and the dune field on the other. Climbing it takes 15–20 minutes through soft sand and is more of a workout than it looks — wear shoes you don’t mind filling with sand, or go barefoot like many locals do.

    How to Get There

    Tottori City has no shinkansen station, which is part of why it stays uncrowded. Realistic routes:

    • From Kyoto or Osaka: the JR “Super Hakuto” limited express runs directly to Tottori Station in about 2.5–3 hours (around ¥6,000–7,000 one-way, covered by some JR passes).
    • From Okayama: the JR “Super Inaba” limited express takes about 2 hours and is the fastest shinkansen-plus-transfer combination from Tokyo or Hiroshima direction.
    • By plane: Tottori Airport has flights from Tokyo Haneda (about 1 hour 15 minutes), which is often the quickest option if you’re coming from eastern Japan.

    From Tottori Station, take the Loop Kirinjishi bus or a regular route bus bound for “Sakyu” (sand dunes) from bus stop 0 or 1 outside the station’s north exit. The ride takes about 20–25 minutes and costs roughly ¥370–420 each way; a one-day bus pass is worth it if you’re also stopping at the Sand Museum. If you’re arriving with luggage, don’t drag it to the dunes — Tottori Station has coin lockers in various sizes near the ticket gates, so it’s worth checking our guide to coin lockers in Japan for sizes and pricing before you go.

    Best Time and Time of Day to Visit

    Spring (April–May) and autumn (October–November) offer the most comfortable temperatures for walking in loose sand. Summer is workable but the sand surface can get hot enough to burn bare feet by midday, and humidity makes the climb up Umanose tougher than it looks. Winter brings a real chance of snow dusting the dunes — beautiful in photos but cold and windy, with occasional closures of the paid attractions.

    Whatever season, aim for early morning (right after sunrise) or the two hours before sunset. Not only is the light better for photos and the wind ripples (“fūmon”) on the sand more visible, but the crowds and tour buses thin out dramatically outside midday hours.

    What to Do Once You’re There

    Beyond the walk up Umanose, a cluster of activities sits near the main entrance:

    • Sand dune lift (Sakyu Center): a paid conveyor/escalator system that carries you partway up so you skip the steepest climb, roughly ¥650–700 round trip. Useful if you have mobility concerns or just want to save energy for the walk back.
    • Camel rides: photo-only sits on a camel run about ¥1,300, while a short guided ride is closer to ¥3,000. It’s touristy but genuinely fun for kids, and it leans into the “desert” theme.
    • Sandboarding: board rental is available near the entrance for a few hundred yen per hour if you want to try sliding down the steeper slopes.
    • Paragliding: tandem flights are offered seasonally by local operators for a splurge-level experience (typically several thousand yen), weather permitting.

    The Sand Museum Next Door

    Right by the bus stop is the Tottori Sand Museum, the only museum in the world exhibiting sand sculptures indoors. A completely new set of sculptures — carved from imported sand by international artists — goes up around a different country or theme roughly once a year. Entrance runs about ¥800–900 for adults, and hours are typically 9:00–17:00 (extended in peak summer months), with a closure period between exhibits, usually in early January, so check the current schedule before building your trip around it. Budget 45–60 minutes to walk through.

    Common Mistakes to Avoid

    • Wearing the wrong shoes. Sand gets everywhere; sandals or shoes you can easily empty out beat sneakers with high sides.
    • Underestimating the walk. The dunes look flat from photos but the climb to Umanose and back can take 45 minutes to an hour round trip in soft sand — bring water, especially in summer.
    • Treating it as a half-day trip from Kyoto or Osaka. Travel time alone eats 5+ hours round trip; plan to stay overnight in Tottori City or the nearby Kaike Onsen area if you want to see the dunes at both sunrise and sunset.
    • Skipping local food. Tottori Prefecture is known for its snow crab in winter and for Tottori Wagyu beef — if you’re curious how it compares to Kobe or Hida beef, our wagyu grades guide explains what the grading letters and numbers actually mean before you order.

    Making It Part of a Bigger San’in Trip

    The Tottori Sand Dunes work well as an anchor for a slower loop through the San’in coast, an area most first-time visitors to Japan skip entirely. If you enjoyed the idea of an unusual, low-crowd coastal destination, the boathouse village of Ine no Funaya in Kyoto Prefecture makes a similarly offbeat stop along the same general region, combining well with Tottori if you’re routing through by rental car or local rail rather than doubling back to Kyoto or Osaka each time.

    On a budget, the dunes themselves plus bus fare can be a sub-¥1,000 outing; add the lift, Sand Museum, and a camel photo and you’re comfortably mid-range at ¥3,000–4,000 per person. For a splurge day, pair a paragliding flight with a hotel overlooking the coast and a crab or wagyu dinner in town — a fitting way to close out a visit to one of Japan’s most unexpected landscapes.

  • Jigokudani Monkey Park: Where Nagano’s Snow Monkeys Soak in Hot Springs

    Jigokudani Monkey Park: Where Nagano’s Snow Monkeys Soak in Hot Springs

    Photo by Jonathan Ansel Moy de Vitry on Unsplash

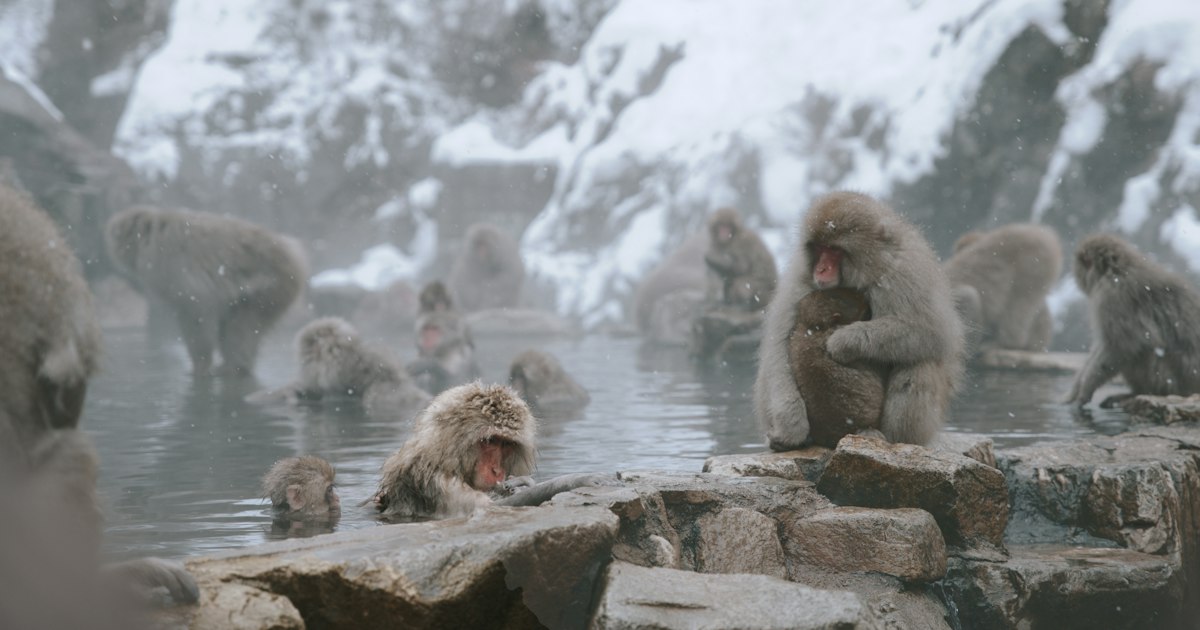
    In a narrow valley outside the small town of Yamanouchi, Nagano Prefecture, wild Japanese macaques climb down from the forest, wade into a steaming rock pool, and sit there looking utterly unbothered — sometimes with snow piling up on their heads. Jigokudani Yaen-koen, better known internationally as the Jigokudani Monkey Park, is one of the few places on Earth where you can watch this happen a few meters away, unfenced. It’s become one of the most-searched day trips from Tokyo, and for good reason, but it also gets some basic logistics wrong in a lot of trip-planning blogs. Here’s what’s actually true on the ground.

    Why This Park Exists (and Why the Monkeys Bathe)

    “Jigokudani” means “Hell’s Valley,” named for the steam and boiling water that rise from the cliffs here — this is volcanic hot-spring country, part of the same geothermal system that feeds the region’s onsen towns. The monkey park itself opened in 1964 as a way to observe the local troop of Japanese macaques without them raiding nearby farms or onsen ryokan. Park staff scatter grain and soybeans in a specific area near the outdoor pool to keep the troop nearby, which is why the monkeys reliably show up close to the water rather than staying deep in the forest. The bathing behavior is genuinely their own choice, not a performance — they do it to stay warm, and younger monkeys often turn it into play.

    Getting There: Nagano Station to the Trailhead

    Access takes a bit of assembly, but it’s straightforward once you know the sequence:

    • Shinkansen to Nagano Station — about 90 minutes from Tokyo Station on the Hokuriku Shinkansen.
    • Nagano Electric Railway (Nagaden) to Yudanaka Station — roughly 45–50 minutes, around ¥1,300 one-way. This line is not covered by the Japan Rail Pass, since it’s a private railway.
    • Local bus from Yudanaka Station to Kanbayashi Onsen bus stop — about 15 minutes, roughly ¥300.
    • Walk the forest trail to the park entrance — about 1.6 km (roughly 30–40 minutes), gently uphill through cedar forest.

    If you’d rather not juggle three separate tickets, Nagano Dentetsu sells a combined “Snow Monkey Pass” covering the train and bus legs, usually valid for one or two days — worth pricing against buying tickets separately if you’re also stopping in Yudanaka. Some travelers instead book a direct round-trip bus from Nagano Station straight to the park entrance, which skips the train change entirely and can be worth the extra cost if you’re short on time or traveling with kids.

    Before you leave Tokyo, drop your main luggage in a coin locker rather than hauling it to Nagano — a day trip to Jigokudani involves a forest walk in boots, not something you want to do with a rolling suitcase. Our guide to coin lockers in Japan covers sizes, prices, and the apps that show which stations still have space.

    Opening Hours and Admission

    The park’s hours shift by season, so check before you build your schedule around it:

    • Late April–October: 8:30 AM–5:00 PM
    • November–late April: 9:00 AM–4:00 PM

    Admission is ¥800 for adults, ¥400 for elementary school children, and free for preschoolers. It’s cash-based at the gate, so bring yen — there’s no ATM at the entrance. There’s no advance booking or timed-entry system; you simply walk in, though the last stretch of forest trail closes access to latecomers close to closing time, so aim to arrive at least an hour before the park shuts.

    Best Time to Visit

    This is the detail most visitors get wrong: the monkeys are present year-round, but they only reliably sit in the hot spring when it’s cold. In summer, you’ll see plenty of monkeys around the park — grooming, foraging, chasing each other across the rocks — but the pool itself is often empty because they have no reason to want a hot bath.

    For the classic “snow monkey in an onsen” scene, aim for December through March, ideally after a fresh snowfall, which is also when the valley looks the most dramatic. January and February are the most reliable months for actual snow on the ground. Early morning (right at opening) tends to have fewer crowds and better light for photos, and the monkeys are often more active before they’ve eaten their fill for the day.

    What to Wear and Common Mistakes

    The forest trail and viewing area are unpaved dirt and stone, and in winter they ice over. Regular sneakers are genuinely risky here — waterproof boots with real tread, or boots plus slip-on ice cleats (many convenience stores and outdoor shops in Nagano sell cheap ones), make the walk far safer. Trekking poles help too if you have them.

    A few other things people get wrong on-site:

    • Don’t bring food or let it show. These are wild animals; a rustling bag or visible snack can draw a monkey straight at you.
    • Don’t make prolonged eye contact. Macaques read a fixed stare as a threat display. A glance for a photo is fine; staring them down is not.
    • Don’t touch them, even if one sits close to you on the path — it happens often, and staff generally allow it as long as visitors stay passive.
    • Don’t underestimate the walk in bad weather. It’s not stroller-friendly, and carrying a small child on an icy uphill trail is harder than it looks in photos.

    There are no lockers or full-service restaurants inside the park itself, just a small shop near the entrance, so eat beforehand or bring a light snack for the walk.

    Where to Stay and What Else to See Nearby

    Most visitors do this as a day trip from Nagano or even Tokyo, but staying overnight in the area lets you see the park at opening, before tour groups arrive, and lets you soak in a hot spring yourself afterward.

    • Budget: Guesthouses in Yudanaka Onsen, from roughly ¥5,000–8,000/night per person, often with access to a public bathhouse.
    • Mid-range: Ryokan in Kanbayashi Onsen or Shibu Onsen, generally ¥15,000–25,000/night per person with dinner and breakfast included — Shibu Onsen’s old wooden streets and public bathhouse-hopping (yumeguri) pair well with a monkey park visit.
    • Splurge: Larger ryokan in Yudanaka with private outdoor baths (kashikiri-buro) run ¥30,000+ per person but let you have your own hot-spring moment without an audience.

    If you have extra time in the area, Yamanouchi sits close to Shiga Kogen for hiking or skiing depending on the season, and Nagano City itself is worth a stop for Zenkoji Temple. If snow monkeys become a theme of your trip, note that Kyoto has its own version with a very different vibe — the Iwatayama Monkey Park in Arashiyama lets you feed monkeys from inside a cage while they roam free outside, more accessible but far less atmospheric than Jigokudani’s snowbound hot spring.

    After a cold morning watching monkeys bathe, Nagano Prefecture is also a solid place to eat well — the region is known for Shinshu beef, and if you’re curious how it stacks up against more famous names, our guide to wagyu grading explains what the A5 and regional labels actually mean before you order.

    Jigokudani rewards a little planning more than most day trips in Japan — get the season and the footwear right, and it’s one of the most memorable few hours you’ll spend in the country.

  • Japanese Rice Cookers: Zojirushi, Tiger & Panasonic Buying Guide

    Japanese Rice Cookers: Zojirushi, Tiger & Panasonic Buying Guide

    Photo by MChe Lee on Unsplash

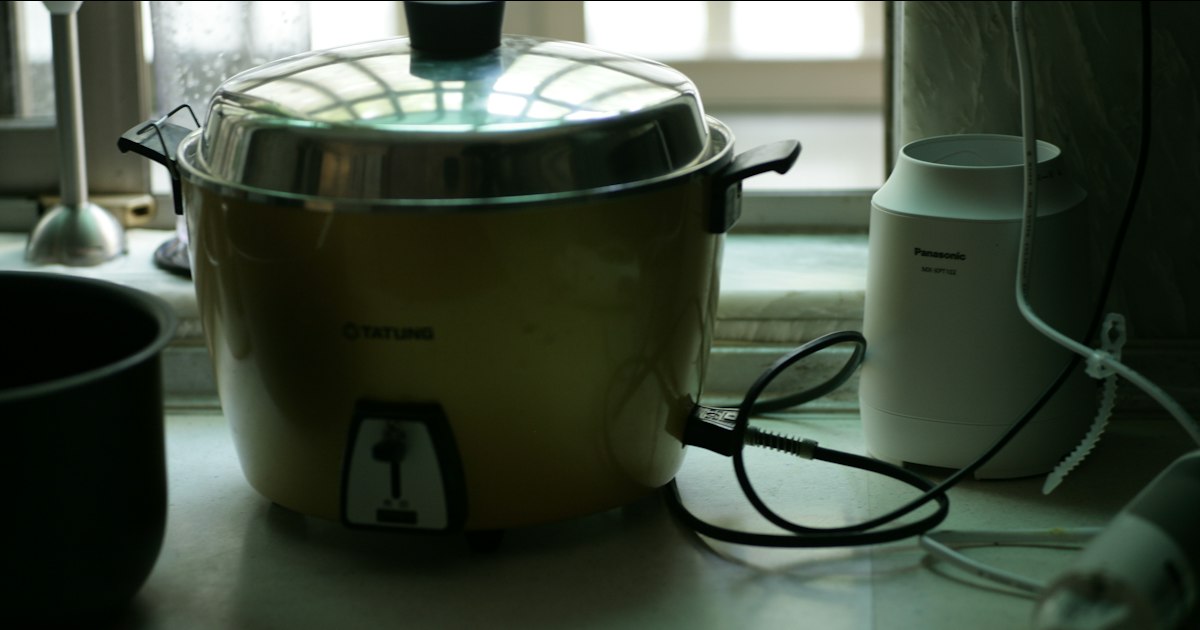
    Ask any Japanese home cook what single appliance they’d never live without, and the answer is almost always the same: the rice cooker. What looks like a simple kitchen gadget to outsiders is, in Japan, a genuinely engineered product — brands like Zojirushi, Tiger, and Panasonic compete fiercely on pressure technology, heating precision, and even the shape of the inner pot. If you’re planning to bring one home, here’s what actually matters before you buy, what things really cost, and the mistakes that trip up most travelers.

    Why buy a rice cooker in Japan instead of at home

    The top-tier machines sold in Japan — especially Zojirushi’s and Tiger’s pressure-IH (“atsuryoku IH”) models — are frequently a generation or two ahead of what’s exported overseas, and the most advanced multi-pressure models are often Japan-market exclusives. You’ll also find far more variety in pot size, from single-person 3-go (roughly 3-cup) travel-friendly models up to large 1-sho (10-cup) cookers for big households, which is a range you rarely see on shelves in the US or Europe. Prices in Japan are also generally lower than importing the same model, once you factor in tax-free shopping (more on that below).

    Zojirushi vs Tiger vs Panasonic: what’s actually different

    All three brands make excellent cookers, and the real differences come down to texture philosophy and interface design rather than one being objectively “best.”

    • Zojirushi is known for its “Umami” pressure cooking cycles and multiple rice-texture settings (softer, harder, sushi rice, porridge, etc.). Their pots are usually thick-walled for even heat, and menus increasingly include English display options on export-oriented models.
    • Tiger leans into “Gozu” (5-layer or multi-layer) pot construction with very high pressure ranges, which fans say produces a slightly chewier, more distinct grain — popular with sushi restaurants and serious home cooks.
    • Panasonic tends to be the most affordable of the three at equivalent tiers, with strong basic IH performance and reliable customer support, but fewer ultra-premium pressure options than Zojirushi or Tiger.

    If you eat a lot of short-grain Japanese rice at home, any of the three will be a noticeable upgrade over a generic Western rice cooker. If you’re also cooking things like porridge, cake, or slow-cooked dishes, check the specific model’s “menu” list — Zojirushi and Tiger both include multi-cook functions on mid-to-high tiers.

    IH, pressure IH, or basic microcomputer — what the tech actually means

    Rice cookers in Japan are sold in three broad tiers, and understanding this saves you from overpaying or underbuying:

    • Microcomputer (Micom), no IH: heats from a bottom plate only. Budget option, fine for everyday rice but less even. Roughly ¥8,000–¥15,000.
    • IH (Induction Heating): heats the entire pot via induction, giving more even, controllable cooking. This is the mainstream mid-range choice most Japanese households actually buy. Roughly ¥25,000–¥45,000.
    • Pressure IH: adds pressure cycling on top of induction heating, pushing moisture into each grain for a plumper, glossier result. This is where Zojirushi’s and Tiger’s flagship models live. Roughly ¥50,000–¥90,000, with some limited-edition or extra-large pressure models exceeding ¥100,000.

    For most travelers, a mid-range IH model is the sweet spot — genuinely better rice than anything sold abroad, without flagship pricing.

    Budget, mid-range, and splurge picks

    Budget (¥8,000–¥15,000): A basic Panasonic or Tiger microcomputer model in the 3–5.5 cup range. Good as a dorm, apartment, or backup cooker; not going to wow anyone but reliably cooks decent rice.

    Mid-range (¥25,000–¥45,000): A 5.5-cup Zojirushi or Panasonic IH model. This tier is where the jump in rice quality becomes obvious, and it’s the size most single travelers can still fit in checked luggage.

    Splurge (¥50,000 and up): Zojirushi’s or Tiger’s pressure IH flagships with multiple pressure levels and specialty menus. Worth it if you cook rice daily and care about texture the way some people care about coffee brewing methods — otherwise it’s overkill for occasional use.

    The voltage problem — read this before you buy

    This is the single most common mistake: Japanese electronics run on 100V, and most rice cookers sold in Japan — especially the higher-wattage pressure IH models — are 100V-only, with a Japan-style Type A plug. Plugging one into a 120V outlet in North America will often still work but isn’t officially supported and can shorten the appliance’s life or void any warranty service outside Japan; plugging one into 220–240V (Europe, UK, Australia) without a proper step-down transformer can damage it or pose a fire risk. Pressure IH models draw significant wattage (often 1,200–1,400W), so a small universal travel adapter is not enough — you need a real voltage converter rated for that wattage, and even then, results vary. If you live outside Japan and want the top-tier experience without the voltage hassle, note that Zojirushi does sell a handful of export-specific 120V models directly in the US market, which may be a simpler option than converting a Japan-market unit.

    Also worth knowing: Japan’s own domestic power is split between 50Hz (Eastern Japan, including Tokyo) and 60Hz (Western Japan, including Osaka), but virtually all modern rice cookers are dual-frequency internally, so this isn’t something you need to worry about while still in Japan.

    Where to buy, and how to get the tax-free discount

    The big electronics chains are the easiest and safest bet, since they stock the full current lineup, offer tax-free processing for tourists, and their staff are used to helping foreign buyers with export models.

    • Yodobashi Camera Akiba (Akihabara, Tokyo) — the flagship store near JR Akihabara Station’s Electric Town exit, open roughly 9:30am–10pm daily, has the largest rice cooker floor space in the city with working display units you can compare side by side.
    • Bic Camera — multiple locations including Yurakucho and Shinjuku, typically open 10am–9pm or 10pm, with competitive tax-free pricing and English-speaking staff at major branches.

    For tax-free shopping, bring your passport (physical, not a photo) — purchases over ¥5,000 before tax qualify for 10% consumption tax exemption, processed at the counter or a dedicated tax-free desk at checkout. The store will seal your purchase in a bag; in general you shouldn’t open it until you’ve left Japan, since customs can theoretically check. If you’re combining rice cooker shopping with a day of exploring nearby neighborhoods, Ameyoko Market and Kichijoji are both worth the detour for the rest of your shopping list, and if you’d rather not carry a boxed rice cooker around all day, stashing it in one of Japan’s coin lockers while you continue sightseeing is a practical option — just check the locker’s size class first, since pressure IH boxes are bulkier than they look.

    Common mistakes to avoid

    • Buying the biggest pot “just in case.” A 1-sho (10-cup) cooker is designed for large families or events, not a couple — it’s heavier, pricier, and overkill for most travelers’ luggage allowance.
    • Ignoring the box weight and size. Flagship pressure IH cookers can weigh 5–6kg boxed. Check your airline’s checked-baggage weight limit before committing to a splurge model.
    • Assuming the display will be in English. Many Japan-market models are Japanese-only, though icons are usually intuitive enough with a quick look at the manual’s photos; if English matters to you, ask staff specifically before purchasing.
    • Forgetting the inner pot’s coating warranty. Non-stick inner pots wear out over years of use, and replacement pots for Japan-market models can be hard to source once you’re back home — factor that into long-term cost.

    Once you’ve got the rice sorted, the rest of a proper Japanese meal setup follows naturally — a good pair of chopsticks and a freshly cooked bowl of rice are really all you need to appreciate what these machines are built for, whether you’re pairing it with natto for breakfast or a proper A5 wagyu dinner.

  • Sugamo: Tokyo’s Old-Fashioned Shopping Street Known as “Grandma’s Harajuku”

    Sugamo: Tokyo’s Old-Fashioned Shopping Street Known as “Grandma’s Harajuku”

    Photo by pen_ash on Unsplash

    Skip the neon and the crowds for a morning and head to Sugamo, a neighborhood in northern Tokyo where the shopping street still moves at a grandmother’s pace. Locals call it “Obaachan no Harajuku” — Grandma’s Harajuku — because it’s the place where Tokyo’s senior citizens come to shop, pray, and gossip over rice crackers, the same way teenagers flock to Harajuku’s Takeshita-dori. It’s unpolished, cheap, and one of the most genuinely local shopping experiences left in central Tokyo.

    Why Sugamo Is Called “Grandma’s Harajuku”

    The nickname isn’t just cute marketing — it’s an accurate description of the crowd. Jizo-dori, the roughly 800-meter covered-and-open shopping street at the heart of Sugamo, is lined with shops selling exactly what an older Japanese shopper wants: sensible clothing, folk remedies, traditional sweets, and religious goods, all at prices that haven’t caught up with inflation elsewhere in Tokyo. There’s no flagship fashion brand here and nothing aimed at tourists. That’s the appeal — you’re seeing how a Tokyo shopping street functioned before department stores and konbini took over, and how it still functions for the generation that grew up with it.

    If you enjoyed the gritty, deal-hunting energy of Ameyoko Market near Ueno, Sugamo scratches a similar itch but with a completely different clientele and merchandise — think slippers and salted rice crackers instead of sneakers and fresh seafood.

    Kogan-ji Temple and the Washing Kannon Statue

    The spiritual center of Sugamo is Kogan-ji Temple, better known as Togenuki Jizo-son (“the thorn-removing Jizo”). Legend holds that a maidservant swallowed a needle and was cured after praying to an image of the temple’s Jizo, and the temple has been associated with healing ever since. Most visitors don’t see the actual Jizo statue — it’s a hibutsu, a hidden image kept out of public view — but everyone lines up for the Arai Kannon, a stone Kannon statue in the temple courtyard. The custom is simple: buy a thin cloth (tenugui) from the stall nearby, dip it in water, and rub the part of the statue that corresponds to whatever ails you. Decades of grateful scrubbing have visibly worn down the statue’s face and shoulders.

    The temple grounds are free to enter and open from early morning to early evening; the main hall’s office for omamori and goshuin generally keeps daytime hours, roughly 9am to 4pm. The street and temple are busiest on “four days” — the 4th, 14th, and 24th of every month — when a temple market (ennichi) fills the street with extra stalls. If you want the full old-Tokyo atmosphere, time your visit for one of those dates; if you’d rather browse without the crowds, go on any other weekday morning.

    What to Shop For on Jizo-dori

    Sugamo’s signature souvenir is red underwear. Red has long been considered an auspicious, health-protecting color in Japanese folk belief, particularly for the lower back and hips, and multiple shops along the street sell nothing but red long johns, red socks, and red waistbands, typically priced from around ¥1,000 to ¥3,000. It sounds like a novelty until you realize half the shoppers around you are buying it in bulk for their own use, not as a joke gift.

    Food is the other reason to come. Look for shops selling shio daifuku (salt-flavored mochi with sweet bean paste) for around ¥120–200 apiece — the salt-sweet balance is a local specialty and lines form outside the most popular shops by mid-morning. There’s also a well-known senbei (rice cracker) shop on the street selling oversized, hand-grilled crackers in the ¥300–800 range per pack, plus general dagashi-style candy stalls where nothing costs more than a few hundred yen. If you like the idea of hunting down region-specific sweets, it pairs well with a stop at a taiyaki or imagawayaki stand — read our guide to taiyaki and imagawayaki before you go so you know what to order.

    Clothing shops here sell practical, generously cut basics — cardigans, house shoes, aprons — rather than fashion. It’s a good place to find a genuinely useful, inexpensive souvenir instead of another keychain.

    Getting There, Hours, and Best Time to Visit

    Sugamo Station is on the JR Yamanote Line and the Toei Mita Line, about 20–25 minutes from Tokyo Station or Shinjuku with no transfer needed if you’re already near a Yamanote Line stop. From the station, Jizo-dori is a two-minute walk and runs roughly 800 meters to Koshinzuka Station on the Toei Arakawa Line (the “Sakura Tram”), so you can walk the street in one direction and hop on a different train at the far end.

    Most shops open between 9:30am and 10am and close by around 6pm, with irregular closing days that vary shop to shop, so this is a daytime destination rather than an evening one. Weekday mornings are calm and pleasant; the 4/14/24 market days are lively but crowded, especially around the temple. Spring and autumn are the most comfortable seasons to walk the street, but Sugamo works year-round since most of it is covered or has awnings.

    Because it’s compact and low-key, Sugamo is easy to combine with another neighborhood in a single day — it pairs naturally with a stop in Kichijoji if you want to contrast old Tokyo with one of the city’s most popular residential shopping areas, though note they’re on opposite sides of the city, so pick one per day rather than rushing between them.

    Budget, Mid-Range, and Splurge Picks

    • Budget: A tenugui cloth for the Arai Kannon ritual (a few hundred yen) plus a bag of dagashi candy — you can have a full experience for under ¥1,000.
    • Mid-range: A red underwear set (¥1,000–3,000) and a box of shio daifuku or senbei to bring home (¥500–1,000) makes a satisfying, authentically local souvenir haul for ¥2,000–4,000.
    • Splurge: Some shops along the street sell higher-quality wool or cashmere cardigans and traditional textiles in the ¥5,000–15,000 range — good options if you want a genuinely warm, well-made piece of clothing rather than a trinket.

    Common Mistakes to Avoid

    Don’t visit expecting a fast, tourist-oriented experience — many shopkeepers are older and don’t speak English, menus and labels are almost entirely in Japanese, and cash is still king in a lot of the smaller stalls, so bring yen rather than relying on cards. Don’t skip the Arai Kannon ritual out of shyness; it’s normal and expected, and nobody will mind a foreign visitor joining in respectfully. Don’t come in the evening — this is a daytime, temple-market street, and by 6 or 7pm most shutters are down. Finally, don’t rush it: Sugamo rewards slow browsing far more than a quick photo stop, so budget at least 90 minutes to walk the full street, visit the temple, and actually eat something.

    If you’re carrying luggage on a day trip that includes Sugamo, it’s worth checking our guide to coin lockers in Japan so you’re not lugging a suitcase up and down a crowded temple market.

  • Ameyoko Market: Ueno’s Bargain Shopping Street Guide

    Ameyoko Market: Ueno’s Bargain Shopping Street Guide

    Photo by Luke Galloway on Unsplash

    Wedged into the elevated train tracks between Ueno and Okachimachi stations, Ameyoko is Tokyo’s loudest, cheapest, and most chaotic shopping street — and that’s exactly the point. Vendors shout out prices, dried fish and fresh tuna sit side by side with discount sneakers and knockoff sunglasses, and nobody minds if you just want to wander and snack your way through. Here’s how to actually shop it well.

    What Is Ameyoko Market?

    Ameyoko — short for Ameya-Yokocho, “candy shop alley” — grew out of the black markets that sprang up around Ueno Station after World War II. Some vendors sold homemade candy (ame) when sugar was scarce; others say the name comes from “America,” since imported American goods were a big part of the early trade. Either way, the bargain-market identity stuck. Today it’s about 500 meters of narrow street and covered arcade, packed with roughly 400 shops and stalls selling everything from fresh seafood and dried bonito flakes to cosmetics, luggage, army surplus jackets, and bags of imported snacks.

    It’s not a polished, curated experience — it’s a working market that locals still use for cheap groceries, especially around New Year’s. That’s part of the charm.

    How to Get There

    Ameyoko runs directly alongside and under the JR train tracks connecting Ueno and Okachimachi stations, so it’s easy to reach from several directions:

    • JR Ueno Station (Yamanote, Keihin-Tohoku, Utsunomiya, Takasaki, Joban lines) — use the Hirokoji exit or Shinobazu exit, about a 1-2 minute walk.
    • JR Okachimachi Station — exit and you’re at the south end of the market immediately.
    • Ueno-hirokoji Station (Ginza Line) or Naka-okachimachi Station (Oedo Line) also drop you within a couple minutes’ walk.

    If you’re coming straight from Narita or Haneda with luggage, it’s worth stashing your bags before you dive in — the alleys get narrow and crowded fast. See our guide to coin lockers in Japan for sizes and prices; Ueno Station has a large bank of lockers near most exits.

    What to Buy (and What It Costs)

    Ameyoko is really several markets stacked together:

    • Dried seafood and snacks: Bags of dried squid, small fish, and seaweed snacks typically run ¥300-800. This is one of the best places in Tokyo to buy bulk katsuobushi (dried bonito flakes) or niboshi for making dashi at home.
    • Fresh seafood: Whole tuna, uni, king crab legs, and sea urchin are sold by weight, with prices posted (and often shouted). Expect to pay a premium versus a supermarket for the best cuts, but well below department-store prices — a small tray of uni might run ¥1,000-3,000 depending on grade and season.
    • Fruit: Whole melons, strawberries, and mixed fruit cups are sold cheap by street-stall standards, often ¥300-500 for a cup.
    • Sneakers and bags: Several multi-floor stores sell brand-name sneakers and sports gear at discount prices, particularly worth checking if you wear common sizes.
    • Cosmetics and drugstore goods: A few shops specialize in discounted Japanese skincare and makeup — good for gift-buying, but compare a couple of stores since pricing isn’t always uniform.
    • Imported and ethnic foods: A legacy of the postwar import trade, several stalls sell spices, snacks, and ingredients from India, Southeast Asia, and beyond — unusual for a “Japanese souvenir” street and worth a look if you cook.

    Prices are mostly fixed and posted, but at the seafood and fruit stalls it doesn’t hurt to ask if there’s a deal on the last few pieces, especially later in the day.

    Street Food to Try Along the Way

    You don’t need a sit-down meal here — the fun is grazing. Look for grilled skewers, fried gyoza, fresh-cut fruit, and stalls doing takoyaki or okonomiyaki-style griddle snacks. If you want something sweet, keep an eye out for taiyaki and imagawayaki stands nearby; we cover both in our guide to Japan’s fish-shaped sweet snacks. Most street food here costs ¥200-600 per item, so it’s easy to sample five or six things without denting your budget.

    Best Time to Visit

    Most shops open around 10:00am and close between 7:00 and 8:00pm, though hours vary by vendor since almost every stall is independently owned — don’t expect uniform closing times, and a few shops close midweek. Weekday mornings and early afternoons are noticeably calmer than weekend afternoons, when the main strip can get shoulder-to-shoulder.

    The single busiest, most iconic time to visit is December 30-31, when Tokyo households descend on Ameyoko to buy osechi (New Year’s food) ingredients — crab, fish roe, mochi, dried goods — and vendors shout deals over a wall of noise. It’s a genuine spectacle and worth experiencing once, but go in expecting crowds, not a leisurely browse. If you want that energy without the peak crush, the last week of December generally is livelier than any other time of year.

    Common Mistakes to Avoid

    • Assuming card payment everywhere: Many stalls, especially food and small goods vendors, are cash-only. Carry yen in small bills.
    • Expecting to haggle everywhere: Some seafood and fruit vendors will deal, particularly near closing time, but most shops post fixed prices and haggling isn’t the norm — don’t push it at cosmetics or clothing stores.
    • Photographing vendors and stalls without asking: Some sellers don’t mind, others do, particularly at small family-run counters. Ask first.
    • Buying fresh seafood without a way to keep it cold: If you’re not eating it same-day, think twice before buying raw fish or uni — most hotel rooms don’t have proper refrigeration for it. Dried goods travel much better.
    • Only sticking to the main strip: The parallel side alleys (particularly toward Okachimachi) have some of the better bargains and are much less crowded than the central covered arcade.

    Budget, Mid-Range, and Splurge Picks

    Budget (under ¥1,000): A bag of dried snacks, a cup of cut fruit, and a couple of skewers or a taiyaki makes for a filling, cheap grazing session.
    Mid-range (¥1,000-5,000): A gift box of assorted dried seafood or bonito flakes, a pair of discount sneakers, or a modest tray of fresh seafood to eat that day.
    Splurge (¥5,000+): Premium uni, whole king crab legs, or a large seafood gift set for bringing home to family — just confirm it’ll survive your travel day before committing.

    Ameyoko pairs naturally with a broader Ueno day — the park, museums, and zoo are a short walk away — but if you want to compare it against Tokyo’s other great neighborhood-shopping experience, our guide to Kichijoji’s shops and Inokashira Park is a good next stop, and food lovers heading back toward the bay can follow up with Tsukishima’s monjayaki district for dinner.

  • Okonomiyaki Showdown: Osaka vs Hiroshima Style Explained

    Okonomiyaki Showdown: Osaka vs Hiroshima Style Explained

    Photo by Daniel Hooper 🌊 on Unsplash

    Okonomiyaki translates loosely as “grilled how you like it,” and that name causes more confusion than it solves. Ask for okonomiyaki in Osaka and you’ll get a thick, mixed batter pancake studded with cabbage and pork. Order the same dish in Hiroshima and you’ll get something else entirely: a tall, layered stack built around a bed of yakisoba noodles. Both are proudly regional, both are fiercely defended by locals, and neither city considers the other’s version to be “real” okonomiyaki. Here’s how to tell them apart, where to eat each, and how to order without fumbling the etiquette.

    The Core Difference: Mixed vs Layered

    Osaka-style okonomiyaki (also called Kansai-style) starts as a batter — flour, grated nagaimo yam, dashi, egg, and shredded cabbage — that gets mixed together in a bowl before hitting the griddle. Pork belly, squid, or shrimp go into the same mix, so every bite has a fairly even distribution of ingredients. It cooks into one cohesive pancake, roughly 3-4 cm thick.

    Hiroshima-style okonomiyaki never mixes the batter with the fillings. Instead, a thin crepe-like layer of batter is laid down first, then topped separately with a mountain of cabbage (often two to three times more than the Osaka version), bean sprouts, pork belly, and a full portion of yakisoba or udon noodles, with a fried egg either mixed in or placed on top at the end. It’s assembled in distinct layers and pressed down as it cooks, ending up taller and more structured — closer to a savory layer cake than a pancake. If you’ve tried Tokyo’s monjayaki, which uses a much runnier batter eaten straight off the griddle, it’s worth knowing that’s a third regional cousin entirely — see our guide to Monjayaki in Tsukishima if you’re curious how it compares.

    Osaka: Where and How to Eat It

    Dotonbori is the obvious starting point — the canal-side strip is lined with okonomiyaki chains and standalone shops, many with illuminated signs and picture menus for tourists. For a more local scene, head to Shinsekai or the backstreets around Namba, where prices run lower and portions are generous. A standard plate of pork or mixed-seafood okonomiyaki typically costs ¥900-1,400 at a casual shop; add cheese, mochi, or extra seafood and you’ll land closer to ¥1,600-2,000. Most okonomiyaki restaurants open around 11:00 or 11:30 for lunch, close for a mid-afternoon break, then reopen around 17:00-17:30 through 22:00 or later — check the specific shop, since hours vary more than you’d expect for a casual food category.

    Many Osaka shops let you cook your own okonomiyaki at a built-in teppan grill at your table, which is part of the fun but also where first-timers go wrong (more on that below). Staff will usually cook it for you on request if you’d rather not risk it, and there’s no shame in asking.

    Hiroshima: Where and How to Eat It

    The essential stop is Okonomimura, a narrow multi-floor building in the Shintenchi district near Hondori shopping arcade, packed with roughly 25 small okonomiyaki counters, each seating just a handful of people around its own griddle. There’s no single “best” stall — regulars have their favorites, and picking one mostly comes down to which counter has a seat free. A standard Hiroshima-style plate with noodles, egg, and pork runs about ¥1,000-1,500; piling on squid, cheese, or extra noodles (“double”) pushes it to ¥1,700-2,200. Most stalls are open through lunch and dinner, roughly 11:00-22:00, though individual counters set their own last-order times, often around 21:00-21:30.

    Unlike in Osaka, you almost never cook your own okonomiyaki in Hiroshima — the chef builds and flips the layered stack for you on a shared griddle built into the counter, then serves it directly onto a small plate in front of you on the same hot surface. This is largely a spectator dish here, which makes counter seating at Okonomimura genuinely entertaining even before the food arrives.

    How to Order Like a Local

    In Osaka, decide on your protein or seafood up front (pork = buta-tama, squid = ika-tama, mixed = mikkusu), and if the shop hands you a spatula (hera), that’s your cooking tool — use it to flip and to eat directly off the griddle instead of a fork. Don’t press down on the pancake while it cooks; that squeezes out moisture and makes it dense rather than fluffy. Let it cook undisturbed for several minutes per side.

    In Hiroshima, you’ll typically be asked whether you want soba or udon noodles, and whether you want the egg mixed in or fried flat on top (many locals prefer it folded underneath as a final layer). “Nikutama soba” — pork, egg, soba noodles — is the standard order if you’re not sure what to get. Sauce is applied generously by the chef before serving in both cities, so there’s usually no need to add more, though a squeeze bottle is normally on the table if you want extra, along with aonori (dried seaweed flakes) and katsuobushi (bonito flakes) to finish it.

    Best Time to Visit and Common Mistakes

    Okonomiyaki is a year-round comfort food, but it’s especially popular in the cooler months (November-March) when a hot griddle dish in a warm shop is genuinely appealing after a day of sightseeing. Lunchtime (11:30-13:00) is the easiest window to walk into a popular shop without a wait; dinner service, especially at Okonomimura and well-known Dotonbori spots, can mean a 20-30 minute queue after 18:30 on weekends.

    The most common mistake at DIY-grill shops in Osaka is flipping too early, before the underside has set — wait until the edges look dry and slightly crisp. The second is over-ordering: a single okonomiyaki plate is a filling meal on its own, closer to a large pizza than a side dish, so it’s rarely necessary to order more than one per person plus a shared side like yakisoba. If you’re carrying luggage between train stations while city-hopping between Osaka and Hiroshima, it’s worth stashing bags in a station locker rather than lugging them into a cramped okonomiyaki counter — our guide to coin lockers in Japan covers sizes and prices at major stations.

    Budget, Mid-Range, and Splurge

    Budget (¥800-1,200): a simple pork or vegetable okonomiyaki at a no-frills neighborhood shop in either city, often cash-only and counter-seating only. Mid-range (¥1,300-2,000): seafood-mixed versions with cheese or mochi add-ins, plus a drink, at well-reviewed shops in Dotonbori or Okonomimura. Splurge (¥2,500+): a full course at a teppanyaki-style restaurant pairing okonomiyaki with other griddled dishes like yakisoba and grilled seafood, sometimes alongside premium wagyu cuts — if you’re chasing that kind of grilled-meat experience elsewhere in Japan, our guides to yakiniku ordering etiquette and wagyu grades are useful companion reading. Either way, okonomiyaki remains one of the best-value hot meals in both cities, and trying both regional styles back to back is one of the more satisfying culinary comparisons you can make on a Kansai-to-Hiroshima itinerary.

  • Monjayaki: Tsukishima’s Tokyo-Style Griddle Dish and Where to Try It

    Monjayaki: Tsukishima’s Tokyo-Style Griddle Dish and Where to Try It

    Photo by Martijn Baudoin on Unsplash

    Okonomiyaki gets all the international fame, but ask a Tokyoite what they crave on a rainy weeknight and there’s a good chance the answer is monjayaki — a runnier, stickier, distinctly Tokyo cousin of the savory griddle pancake, cooked and eaten directly off a hot teppan with a tiny metal spatula. It looks messy, sounds unfamiliar, and is one of the most fun, low-cost meals you can have in the city. This guide covers what monjayaki actually is, why the Tsukishima neighborhood became its unofficial capital, and how to order and eat it without feeling lost.

    What Is Monjayaki, Exactly?

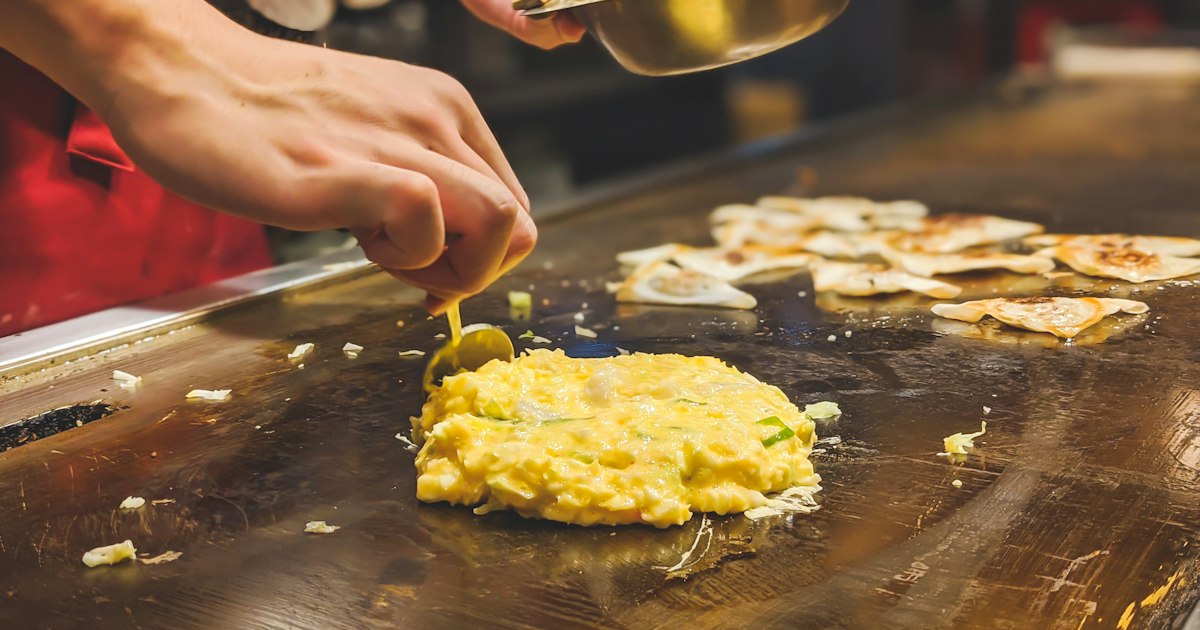
    Monjayaki starts life as a thin, almost soupy batter of flour and dashi stock, mixed with shredded cabbage and whatever fillings you choose — classics include mochi cheese, pork and kimchi, corn and butter, mentaiko (spicy cod roe), and seafood mixes. Unlike okonomiyaki, which is flipped into a firm pancake, monjayaki is cooked in stages on a shared iron griddle (teppan) built into your table, and it never fully solidifies. The finished texture is closer to a thick, savory, slightly crispy-at-the-edges stew that you scrape up in small bites directly from the griddle.

    It originated as a cheap snack for Tokyo children in the early 20th century (the name is thought to come from “moji-yaki,” because kids would trace characters in the batter as it cooked) and later became a full sit-down restaurant meal, especially in the working-class districts east of the Sumida River.

    Why Tsukishima Is Tokyo’s Monja Capital

    Tsukishima, a former dockworkers’ district on reclaimed land in Chuo Ward, is where monjayaki restaurants cluster most densely. Its main strip, Tsukishima Nishinaka-dori — universally known as “Monja Street” — runs for about 400 meters and is lined with roughly 50-70 monjayaki restaurants, many family-run for two or three generations. The street is lit with paper lanterns and old-fashioned signage, and it fills with a mix of local families, salarymen, and increasingly, tourists in the evenings, especially Friday and Saturday nights and weekend lunches.

    Because the format is naturally communal — everyone cooks and shares off the same griddle — it’s a good choice for a group dinner, and most restaurants are set up with that in mind.

    Getting to Tsukishima’s Monja Street

    Tsukishima Station is served by the Tokyo Metro Yurakucho Line and the Toei Oedo Line. From the station, Monja Street is a 3-5 minute walk (exit 7 or 8 puts you close). It’s also a pleasant 15-20 minute walk or short taxi ride from Tsukiji, so it pairs naturally with a morning at the outer market followed by a monja dinner, or you can combine it with a visit to Ginza, which is about 15 minutes away by train or a 25-30 minute walk along the water.

    If you’re carrying luggage from elsewhere in the city, note that Tsukishima Station itself has limited storage, so it’s worth checking a guide to coin lockers in Japan and stashing bags at a larger nearby station like Tokyo or Ginza before you come.

    How to Cook and Eat Monjayaki Like a Local

    Most restaurants expect you to cook it yourself, and staff will usually demonstrate the first round if you look uncertain — don’t hesitate to ask, as fumbling this dish is a rite of passage even for Japanese first-timers.

    • Drain, then pour: The solid ingredients (cabbage, meat, toppings) come out first in a bowl with the liquid batter poured around them. Strain most of the liquid off using the bowl’s edge, and cook the solids first in a ring on the griddle, like building a dam.
    • Pour the batter into the well: Once the solids are sizzling, pour the reserved liquid into the center and let it bubble and thicken for a minute or two.
    • Mix and spread thin: Combine everything into a thin, even layer across the hot griddle — the thinner it’s spread, the better the crispy bits (called “okoge”) that form underneath.
    • Eat straight off the griddle: Use the small metal spatula (hera) provided to scrape up small portions and eat directly, letting it continue to crisp between bites. It stays hot on the teppan the whole meal, so there’s no rush.

    A useful tip: order one flavor per person or share two to three flavors across a group of four, since portions are modest and half the fun is trying different fillings.

    Where to Eat: Budget, Mid-Range, and Splurge Picks

    Prices across Monja Street are fairly uniform, which makes it easy to budget.

    • Budget (roughly ¥800-1,300 per monja serving): Standalone, unfussy shops along the main strip serving classic cabbage, pork, or seafood monja. A meal for two with a couple of plates and drinks typically runs ¥3,000-4,000 total. Many of these are cash-friendly local institutions with paper menus and no English signage — part of the charm.
    • Mid-range (roughly ¥1,300-2,200 per monja, plus sides): Larger, more tourist-comfortable restaurants with English or picture menus, additional yakisoba and teppan-grilled seafood options, and sometimes an all-you-can-eat course (tabehodai) in the ¥3,000-4,500 range per person for 90-120 minutes — good value if you’re hungry and want to sample several flavors.
    • Splurge: A handful of shops add premium seafood or wagyu beef to their monja and okonomiyaki menus, pushing individual dishes toward ¥2,500-3,500. If you’re curious how Japanese beef grading works before ordering a wagyu-topped monja or teppan side dish, it’s worth a quick look at this guide to wagyu grades first.

    Most restaurants are open for dinner from around 17:00 or 17:30 until 22:00-23:00, with a number also open for lunch from around 11:30. Hours vary shop by shop and some close one weekday, so it’s worth checking a specific restaurant’s listing on the day if you have your heart set on one particular spot.

    Best Time to Visit and Common Mistakes

    Weekday early evenings (before 18:30) are the easiest time to walk in without a wait. Weekend evenings can mean a 20-40 minute queue at the most popular shops, so arriving right at opening or going on a weekday lunch is the smartest move if you dislike lines. Winter is arguably the best season to try monja — the hot griddle and steamy, bubbling batter feel especially good on a cold night, though it’s enjoyable year-round.

    Common first-timer mistakes:

    • Flipping it like okonomiyaki: Monja is never flipped into a solid pancake — resist the urge, and just spread and eat in stages.
    • Eating with chopsticks only: Use the small hera spatula for scraping and eating; chopsticks are usually just for picking up solid ingredients beforehand.
    • Not asking about seating fees: Some shops add a small table or oshibori (wet towel) charge of a few hundred yen — not unusual in Japan, but worth knowing so the bill doesn’t surprise you.
    • Skipping the griddle cleanup between rounds: If you order a second flavor, staff or the table itself will usually scrape the griddle clean first; let the burnt bits get cleared so the next batch doesn’t taste off.

    Rounding Out a Tokyo Food Day

    Tsukishima works well as one stop in a broader Tokyo food itinerary. If you’re building out a day of casual, hands-on Japanese dishes, it pairs naturally with a yakiniku dinner on another night, a stop for taiyaki or imagawayaki as a sweet snack afterward, and — if you’re feeling adventurous — working up to trying natto at breakfast the next morning. None of these dishes are difficult to find, but Tsukishima remains the one place in Tokyo where monjayaki isn’t just available — it’s the entire point of the neighborhood, cooked, scraped, and shared one small spatula at a time.

  • Shigaraki Ware: Japan’s Tanuki Pottery Town and Where to Buy

    Shigaraki Ware: Japan’s Tanuki Pottery Town and Where to Buy

    Photo by Yunfan Li on Unsplash

    In the hills of Shiga Prefecture, about 90 minutes from Kyoto, sits a small town where thousands of pot-bellied raccoon dogs stand guard outside shops, train stations, and restaurants. Shigaraki (信楽) is one of Japan’s “Six Ancient Kilns,” a pottery tradition stretching back over 1,200 years, and today it’s best known internationally for the grinning tanuki statues that have become an unofficial mascot of Japanese folk luck. If you want ceramics with real history behind them — not just a souvenir shelf at the airport — Shigaraki is worth the day trip.

    What Is Shigaraki Ware?

    Shigaraki-yaki is unglazed or lightly glazed stoneware fired at high heat, prized for its rough, earthy texture and the natural ash-glaze effects (called bidoro, glassy green-blue streaks) that form when wood-ash melts onto the clay during firing. The local clay is coarse and full of tiny feldspar particles that burn out in the kiln, leaving a pitted, warm surface unlike the smoother porcelain you’ll find in places like Arita or Kutani. Historically the town produced everyday items — tea bowls, water jars, roof tiles — but from the 1950s onward it became famous almost exclusively for one product: tanuki statues.

    Why Tanuki? Japan’s Luckiest Raccoon Dog

    The tanuki boom traces back to 1951, when Emperor Showa visited Shigaraki and was greeted by rows of ceramic tanuki waving little Japanese flags. Photos of the visit ran nationwide, and the tanuki became inseparable from the town’s identity. Traditional Shigaraki tanuki carry eight symbolic items representing good fortune: a big hat (protection from bad weather), wide eyes (alertness), a sake bottle (virtue), a large belly (calm decisiveness), a promissory note or ledger (trustworthiness in business), a bushy tail (steadiness), and an ever-present smile (amiability). Shopkeepers across Japan display them by their entrance for exactly this reason — a tanuki is meant to bring in customers and good luck.

    Getting to Shigaraki

    From Kyoto Station, take the JR Biwako Line toward Maibara/Kusatsu and change if needed to reach Kibukawa Station (貴生川駅), roughly 60–70 minutes including the transfer. From Kibukawa, switch to the Shigaraki Kogen Railway (信楽高原鐵道), a single-track local line that winds through forest for about 25 minutes to Shigaraki Station — the fare is around ¥490 one way. Total travel time from Kyoto is about 90 minutes to two hours depending on connections; from Osaka, add another 30–40 minutes. There’s no need for a car, though driving from Kyoto takes about 75 minutes via the Shin-Meishin Expressway if you want more flexibility to visit multiple kiln sites. The moment you step outside Shigaraki Station, you’ll see dozens of tanuki statues lined up on the platform and forecourt — it’s the single most photographed spot in town and free to visit any time.

    If you’re coming straight from Kyoto sightseeing and have bags with you, it’s worth stashing them before the trip out — see this guide to coin lockers in Japan for sizes and prices at major stations.

    Where to Buy: Shops, Kilns, and the Ceramic Park

    The main shopping stretch runs along Nagano-dori (長野通り), a 15–20 minute walk uphill from Shigaraki Station, lined with dozens of independent kilns and retail shops selling everything from ¥300 chopstick rests to museum-grade tea ware. Most shops open around 9:00 or 9:30am and close by 17:00 or 17:30, and a fair number close on Wednesdays or Thursdays, so it’s worth checking ahead if you have a specific shop in mind. Two useful stops:

    • Shigaraki Ceramic Cultural Park (信楽陶芸の森) — a hillside complex with a ceramics museum, gallery space, and outdoor sculpture park, a short taxi or bus ride from the station. Museum admission is modest, typically in the ¥500–800 range depending on the exhibition, and the park grounds themselves are free to walk.
    • Shigaraki Traditional Industry Hall (信楽伝統産業会館) — a good first stop for an overview of techniques and historical pieces before you start shopping, with a small attached sales corner.

    Many working potters also sell directly from their own kiln showrooms, which is where you’ll find one-of-a-kind pieces rather than mass-produced tanuki. If you like hunting through craft towns for something with a maker’s story attached, this is similar territory to browsing the stalls at the Toji Temple flea market in Kyoto, just with everything made on-site rather than secondhand.

    Best Time to Visit

    Shigaraki holds its biggest event, the Shigaraki Ceramic Festival (信楽陶器まつり), twice a year — during Golden Week in early May and again in mid-October — when the main street fills with stalls selling seconds and studio overstock at discounted prices, often 20–40% below regular shop prices. Outside festival weekends, autumn (October–November) is the most pleasant season for walking the hilly shopping street, with cooler temperatures and good light for photos among the outdoor tanuki. Summer is workable but humid; winter is quiet and cold but shops stay open, and you’ll often have the street largely to yourself.

    Budget, Mid-Range, and Splurge Buys

    Shigaraki’s price range is enormous, which is part of the fun:

    • Budget (¥500–3,000): Palm-size tanuki figurines, chopstick rests, small sake cups, and unglazed incense holders. These pack easily and make good gifts.
    • Mid-range (¥5,000–30,000): Hand-thrown tea bowls (chawan), flower vases, and 20–40cm tanuki statues from named kilns. This is where you start seeing genuine bidoro ash-glaze effects rather than uniform factory glaze.
    • Splurge (¥50,000 and up): Large garden tanuki (life-size statues can run ¥150,000–300,000+ and weigh well over 20kg), and signed pieces from established studio potters, some of which are collector items sold with certificates.

    If you’re already thinking about how ceramics fit into the rest of your Japan souvenir shopping, it’s worth browsing other regional crafts for comparison — Shigaraki’s tanuki occupy a similar “lucky charm” niche to Daruma dolls or the folk-art appeal of Tohoku’s kokeshi dolls, so it’s easy to build a themed collection across regions.

    Common Mistakes to Avoid

    Shigaraki is a small town, and a few planning slips can waste half your day:

    • Underestimating the train connection. The Shigaraki Kogen Railway runs infrequently — often just one or two trains per hour — so check the timetable before you leave Kibukawa, not after you’ve missed one.
    • Not budgeting for shipping. Large or heavy tanuki won’t fit in a suitcase. Most established shops can arrange domestic or international shipping (kokusai takuhaibin), but ask before you buy — fees for a large statue can run several thousand yen or more.
    • Assuming every shop takes cards. Many small studio shops in Shigaraki are cash-only or have a minimum for card payments, so carry enough yen.
    • Treating it as a quick photo stop. The tanuki outside the station are free and fun, but the real value of Shigaraki is up on Nagano-dori and at the Ceramic Cultural Park — allow at least three to four hours to see both properly.

    Shigaraki rewards a slow visit: wander the kiln-lined streets, watch for the glassy green streaks that mark a well-fired piece, and pick something that will actually mean something back home — not just another tanuki keychain, though there’s nothing wrong with one of those too.

  • Toji Temple Market: Kyoto’s Best Flea Market for Vintage Kimono & Antiques

    Toji Temple Market: Kyoto’s Best Flea Market for Vintage Kimono & Antiques

    Photo by Rebecca Clarke on Unsplash

    Once a month, the grounds of Toji Temple in southern Kyoto fill with hundreds of vendors selling folded stacks of silk kimono, cast-iron kettles, ceramics, obi sashes, and boxes of unsorted trinkets under the shadow of Japan’s tallest wooden pagoda. Known locally as Kobo-san (弘法さん), it’s one of the largest and most reliable flea markets in the country — and for visitors hunting genuine vintage textiles and antiques rather than souvenir-shop reproductions, it’s hard to beat. Here’s what to know before you go.

    What Is Kobo-san, and Why Does It Happen at Toji?

    The market takes place on the 21st of every month, rain or shine, in honor of Kobo Daishi (the monk Kukai, founder of Shingon Buddhism), who died on that date in 835. Toji Temple, a UNESCO World Heritage site and the headquarters of Shingon Buddhism in Kyoto, has hosted the memorial market for centuries, and it has grown into a full-blown flea market with an estimated 1,000 to 1,200 stalls on a good month. Locals call it “Kobo-san” out of affection for the monk, and you’ll hear vendors and regulars use that name more than “Toji Market.”

    Two dates matter more than the rest: January 21st is Hatsu Kobo (the first market of the year, popular for New Year lucky charms and decorations) and December 21st is Shimai Kobo (the last market of the year), which draws the biggest crowds and the most stalls, often over 1,000, as vendors clear out stock before winter. If you can time a Kyoto trip around either of these, expect bigger selection but also bigger crowds and less room to browse comfortably.

    Getting There and Opening Hours

    Toji Temple sits about a 15-minute walk southwest of Kyoto Station’s Hachijo (south) exit — an easy walk if you don’t mind carrying purchases back. Alternatively, take the Kintetsu Kyoto Line one stop from Kyoto Station to Toji Station, then walk roughly 10 minutes to the temple gates. City buses also stop nearby, but on market day the streets around Toji get congested, so walking or the train is usually faster.

    Stalls generally open around sunrise (roughly 6:00–7:00am) and start packing up by mid-to-late afternoon, with most gone by 4:00–4:30pm. There’s no single official opening hour — vendors set their own pace — so don’t expect much before 7am even if a stall or two is already open. If you’re not an early riser, arriving by 9 or 10am still gives you a full market to explore, though the rarest antique pieces tend to sell within the first hour or two.

    What to Buy: Vintage Kimono, Obi, and Antiques

    This is the main draw for many visitors, and prices vary enormously depending on the stall and your bargaining. Rough benchmarks to calibrate expectations:

    • Casual cotton or synthetic kimono (yukata-weight): ¥500–1,500
    • Everyday silk kimono, gently worn: ¥2,000–8,000
    • Obi sashes: ¥500–3,000 for simple ones; ornate or vintage silk obi can run ¥5,000–15,000
    • Haori jackets: ¥1,000–4,000, a great lightweight souvenir that doubles as a kimono-style coat back home
    • Ceramics and lacquerware: ¥300 for a single bowl up to several thousand yen for signed or antique pieces
    • Small antiques (tea utensils, old coins, prints, wooden boxes): anywhere from ¥100 to well over ¥10,000

    You’ll also see vendors selling old noren doorway curtains and hand-painted folding fans mixed in among the textiles — worth a look if those are on your shopping list, since market prices usually beat department store prices for comparable secondhand quality. Condition varies stall to stall, so check for stains, tears, and odor before buying, especially with silk.

    Budget, Mid-Range, and Splurge Approaches

    If you’re on a tight budget, plan for ¥2,000–3,000 total and stick to the cotton kimono, small ceramics, and bric-a-brac tables — there’s genuinely interesting stuff at every price point. Mid-range shoppers (¥5,000–15,000) can walk away with a nice silk kimono-and-obi combination or a small piece of antique furniture or lacquerware. For a splurge, some vendors specialize in higher-end antique kimono, obi, and古美術 (kobijutsu, fine antiques) — a well-preserved formal silk kimono with hand-painted detail or a signed ceramic piece can run ¥20,000–50,000 or more. These specialist stalls tend to cluster closer to the pagoda and main hall, while the cheaper household-goods stalls spread out toward the temple’s outer edges.

    Bargaining Etiquette and Common Mistakes

    Light haggling is expected and welcomed, especially for multiple items or if you’re paying cash on the spot — a polite “sukoshi yasuku narimasu ka?” (“could you make it a little cheaper?”) often works, particularly in the afternoon when vendors would rather discount than repack unsold stock. Don’t expect big discounts on already-cheap items (under ¥1,000); save the negotiating for larger purchases.

    The most common mistakes visitors make: bringing only large bills (most stalls are cash-only and can’t break a ¥10,000 note early in the day — bring plenty of ¥1,000 notes and coins); assuming all kimono are wearable as-is (many are meant for display or fabric reuse, so ask if you plan to actually wear it); and underestimating how heavy and bulky purchases get. If you’re continuing to sightsee afterward, it’s worth stashing bags in a locker — see this guide to coin lockers in Japan for sizes and pricing at Kyoto Station, a short walk away.

    Nearby Markets Worth Combining

    If your trip dates don’t line up with the 21st, Kyoto has two solid alternatives. Kitano Tenmangu Shrine hosts Tenjin-san, a similarly sized antique and flea market on the 25th of each month. Toji itself also runs a smaller, more antique-focused market called Garakuta-ichi on the first Sunday of the month, with around 200–250 stalls and a slightly calmer browsing pace — good if crowds aren’t your thing.

    Pair a Kobo-san morning with an afternoon further west: Arashiyama’s bamboo grove and monkey park is about 30–40 minutes away by train and makes for a full, well-rounded Kyoto day that mixes shopping with nature.

    Practical Tips Before You Go

    Wear comfortable shoes and clothes you don’t mind getting a little dusty — this is an outdoor market on temple gravel, not a polished retail space. Bring a tote bag or two, since few vendors provide sturdy carrying bags. Entry to the market stalls themselves is free; if you also want to tour Toji’s Kondo Hall or climb up to view the five-story pagoda up close, there’s a separate small admission fee at the temple’s paid inner precinct. Finally, check the date before you plan around it — if the 21st falls on a day when the temple has a special closure, the market can shift; a quick search for “Toji Kobo-san [month] [year]” a week or two ahead will confirm the exact schedule.