Japan Trove

Category: Travel

Practical, up-to-date guides for traveling in Japan — itineraries, rail passes, eSIMs, where to stay, seasonal timing, etiquette, and the local know-how that makes a trip smoother. Written with real Japanese sources so you get the answer that actually works on the ground, not the recycled tourist one.

  • Osaka/Kobe to Shanghai: Japan’s International Ferry Route to China

    Osaka/Kobe to Shanghai: Japan’s International Ferry Route to China

    Photo by Nabil Naidu on Unsplash

    Most visitors leaving Japan for China book a two-hour flight and never think twice. But a slower, stranger option still exists: a passenger-and-cargo ferry that crosses the East China Sea between Osaka or Kobe and Shanghai in roughly two nights. It’s not faster, and it’s rarely cheaper than a budget flight once you add up time — but for travelers hauling serious luggage, shipping a vehicle, or simply wanting the only way to watch Japan disappear over the horizon, it’s worth knowing about.

    The Route at a Glance

    The service alternates its Japanese departure port week to week: one sailing leaves from Osaka, the next from Kobe, both landing at Shanghai’s Waigaoqiao port. The crossing takes about 45 hours — roughly two full nights at sea — which is long enough that this is genuinely a “cruise” experience rather than a quick hop, even though the ships are working passenger-cargo vessels, not cruise liners. Sailings run about once a week, not daily, so this needs to be built into your itinerary well in advance rather than booked as a last-minute alternative to a cancelled flight.

    Because frequency is low and schedules shift with fuel costs, dry-dock maintenance, and seasonal demand, always confirm the current timetable and fare directly with the operator (or a licensed travel agent in Osaka/Kobe/Shanghai) before building a trip around it — do not rely on an old printed schedule or a secondhand date.

    Cabin Classes and What They Cost

    Pricing is tiered by cabin class rather than a flat ticket, similar in spirit to an overnight domestic ferry but for an international crossing:

    • Economy (shared multi-berth cabin): the budget option, roughly ¥20,000–¥25,000 one way. Bunks in a shared room, communal washrooms.
    • Special/Japanese-style cabin: tatami-floored rooms shared with fewer passengers, generally in the ¥30,000–¥40,000 range.
    • First class / suite: private Western-style cabins with en-suite facilities, typically ¥45,000–¥60,000 and up.

    Treat these as ballpark figures — fuel surcharges and seasonal pricing move fares year to year, and the final price will include Japan’s consumption tax on the domestic portion of services purchased in Japan (see our guide to Japan’s consumption tax if the sticker price at the ticket counter doesn’t match what you expected to pay). Meals onboard are usually sold separately from the cabin fare, either à la carte or as set-price packages, so budget an extra few thousand yen per day for food unless you bring your own.

    Getting to the Terminal

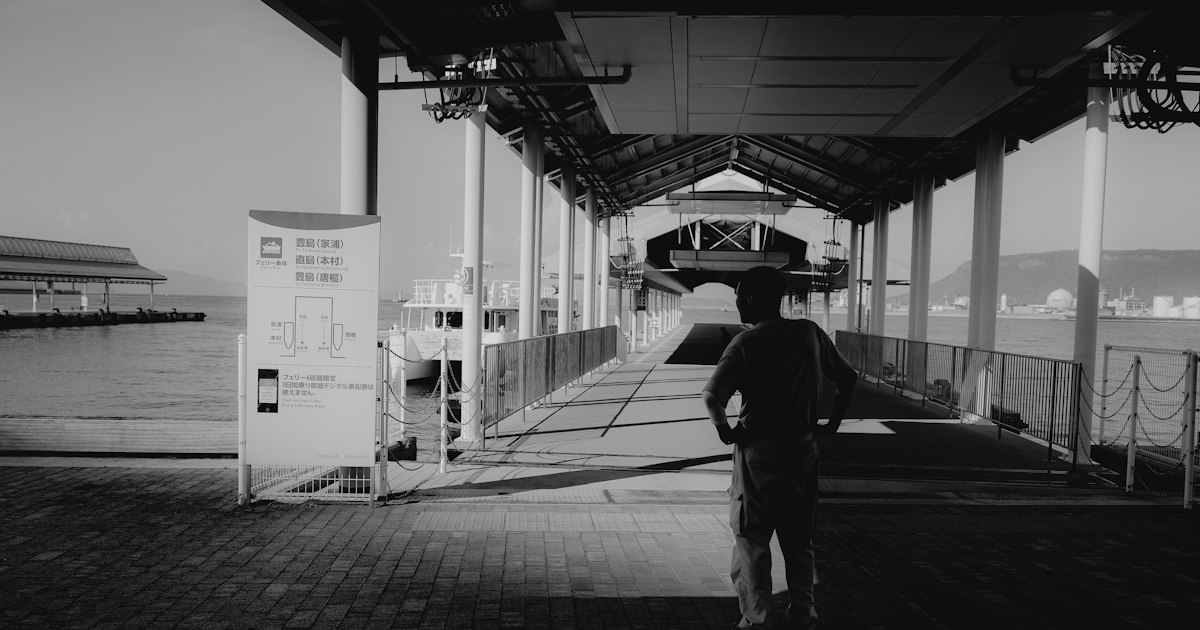
    In Osaka, the ferry departs from the Nanko international ferry terminal in the bay area, reachable via the New Tram (Nanko Port Town Line) to Cosmosquare Station and then a connecting shuttle bus, since the terminal isn’t walkable from the nearest rail stop. In Kobe, the terminal sits in the port area accessible by bus from Sannomiya or Kobe Station. Both terminals are designed around check-in times that start a couple of hours before departure — arrive early, since cargo and passenger processing (plus Chinese customs paperwork started on the Japan side) takes longer than a typical domestic ferry check-in.

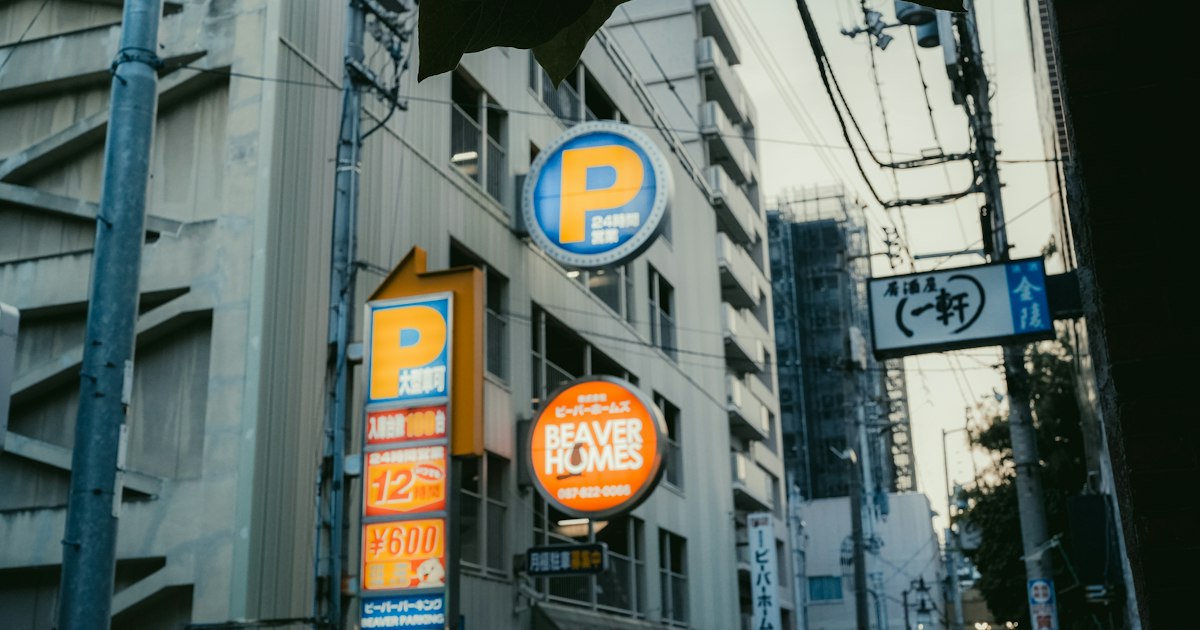
    If you’re driving to the terminal rather than taking transit, note that Japanese ports generally don’t allow casual roadside waiting or free parking near the gates — you’ll want a proper paid lot. Our guide to coin parking lots and apps in Japan covers how to find and pay for legal parking near the terminal if you’re not taking public transport in.

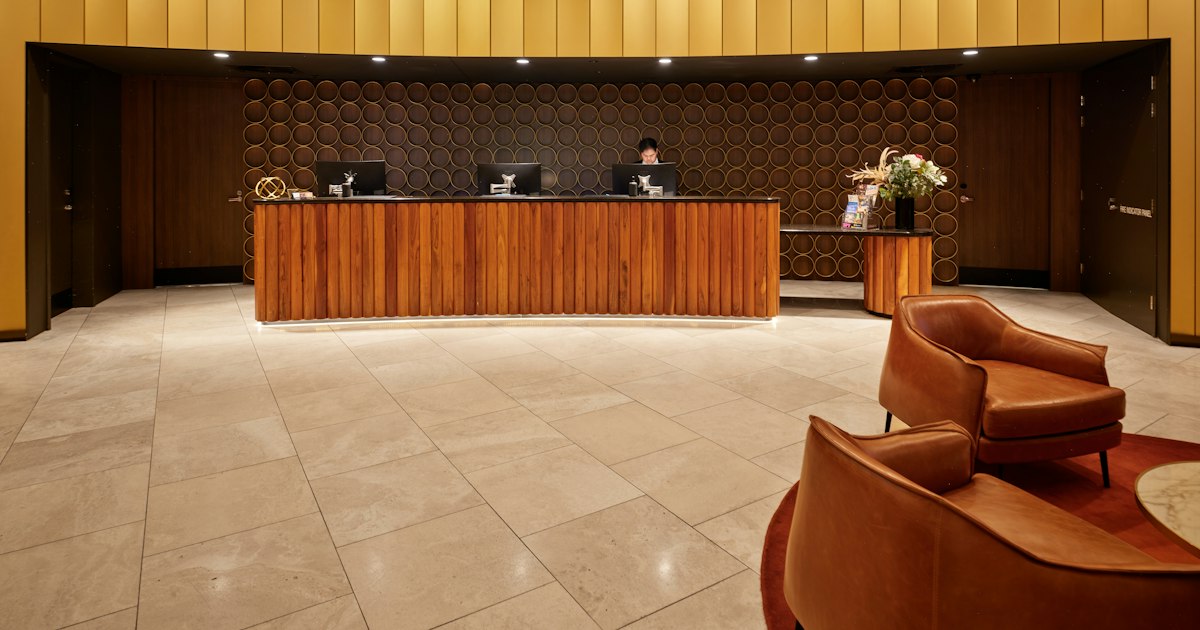
    If you’re staying overnight in Osaka or Kobe before an early departure, remember that Japanese hotels are required to copy your passport at check-in if you’re a foreign guest without a Japanese address — worth knowing in advance so it doesn’t slow you down the morning of a tight ferry connection. See our guide to hotel check-in rules for foreign guests for what to have ready.

    Life Onboard for Two Nights

    These ships are built for a mixed load of passengers and freight, so don’t expect cruise-ship entertainment. Amenities are modest: a dining hall, a shop selling snacks and basic goods, sometimes a small lounge or karaoke room, and deck space for watching the sea. Wi-Fi, if offered at all, is typically weak to nonexistent once you’re a few hours out from either coast — plan to be offline. Bring your own entertainment, snacks beyond what’s sold onboard, and anything you’d need for seasickness, since the East China Sea crossing can get choppy, especially outside the calmer months.

    Best Season and Timing

    Spring and autumn generally offer the calmest seas and most comfortable temperatures on deck. Summer brings the risk of typhoons moving through the same waters the ferry crosses, which can delay or cancel sailings with little notice — if you’re traveling June through October, build in slack time on both ends of the trip and don’t schedule a flight connection for the same day you’re due to land. Winter crossings are workable but colder and windier on deck, and the sea can be rougher.

    Common Mistakes to Avoid

    • Assuming daily departures. This isn’t a shuttle — sailings are weekly and alternate ports, so the wrong week means a long wait for the next one.
    • Booking a same-day onward flight from Shanghai. Arrival times can shift with weather or port congestion; leave a buffer day.
    • Not checking China visa requirements in advance. Unlike a flight where an airline may flag an issue at check-in, ferry operators expect your documentation sorted before you book — don’t assume visa-free transit rules that apply to airports automatically apply to a sea port.
    • Underestimating the lack of connectivity. Two nights with little to no internet surprises travelers who assumed a “ferry” would be like a short domestic hop.

    Who This Route Actually Suits

    This isn’t the choice for someone optimizing for speed or price against a budget flight. It makes sense for travelers moving a car or motorcycle between Japan and China, people with cargo-level luggage (bulk purchases, business goods, a houseful of belongings during a relocation), or anyone who simply wants the experience of a slow sea crossing between two countries instead of a cramped economy cabin in the sky. If you’re drawn to international ferries as travel rather than just transport, it’s worth comparing this crossing with Japan’s other international sea route, the Fukuoka–Busan ferry to South Korea, which is shorter, far more frequent, and a gentler introduction to the idea before committing two nights to the Shanghai run.
  • Parking in Japan: Coin Parking Lots, Apps & Why You Can’t Just Park on the Street

    Parking in Japan: Coin Parking Lots, Apps & Why You Can’t Just Park on the Street

    Photo by Johnny Ho on Unsplash

    If you’re renting a car in Japan — for a Hokkaido road trip, a dive into the Japanese Alps, or a slow crawl through Kyushu’s onsen towns — parking will trip you up before the driving does. There’s no casual curbside parking here, no feeding a meter outside a restaurant, and no circling the block looking for a free spot. Japan’s parking system is dense, automated, and surprisingly logical once you understand the rules, but it punishes guesswork. Here’s what you actually need to know before you turn the key.

    Why You Can’t Just Park on the Street

    Street parking is illegal almost everywhere in Japan unless a spot is explicitly marked with a parking meter or sign permitting it, and those are rare outside small towns. This isn’t a loosely enforced rule — it’s backed by a law that most foreign visitors don’t know about: to register a car in Japan, owners must prove they have access to a private parking space (called a shako shomei, or garage certificate). The entire infrastructure assumes nobody is parking on the street, so there’s little tolerance for it.

    Enforcement is handled by private parking patrol officers (contracted by local police) who photograph illegally parked cars and slap a bright yellow violation sticker on the windshield — one that’s genuinely difficult to remove. Once that sticker is on, the violation is logged against the car’s plate, and if you’re driving a rental, the fine (typically ¥15,000–¥20,000, variable by prefecture) gets billed to you later via the rental company, usually with an added administrative fee. Worse, officers can and do immobilize cars left unattended in genuinely obstructive spots. The bottom line: find a lot before you park, every time, even for five minutes.

    How Coin Parking Lots Work

    The default parking option in Japanese cities is the coin parking lot (koin pakingu), and you’ll recognize the two main formats instantly once you’ve seen them:

    • Flap-lock lots: You pull into a numbered space, and a metal plate rises out of the ground behind your rear wheels, locking the car in place. To leave, you walk to the payment kiosk, enter your space number, pay the displayed amount, and the plate lowers.
    • Gate lots: Function like Western parking garages — take a ticket on entry, pay at a machine before returning to your car, then feed the stamped ticket into the exit gate.

    Pricing is almost always tiered: a per-30-or-60-minute daytime rate (commonly ¥200–¥400 per 30 minutes in major cities, less in rural areas) plus a capped daily maximum (saidai ryoukin), often ¥1,000–¥1,500 for the first 24 hours, sometimes less overnight. Always check the rate sign at the entrance before pulling in — rates vary wildly between adjacent lots, and the cheapest-looking sign sometimes only applies to a specific time window. In central Tokyo, Osaka, or Kyoto during peak season, a full day can easily run ¥2,500–¥3,500 if there’s no daily cap, so reading the fine print matters more than the location itself.

    Parking Apps Worth Downloading

    Several apps let you reserve and sometimes prepay parking before you arrive, which is especially useful around festivals, sumo tournaments, or busy weekends when lots fill fast:

    • akippa — Japan’s largest parking-reservation marketplace, listing individually owned driveways and private lots, often cheaper than commercial coin parking. Reservations are made and paid for entirely in-app.
    • Times Parking (B-Times app) — Run by Park24, the company behind the ubiquitous “Times” branded lots you’ll see everywhere. The app shows real-time vacancy and current rates at nearby Times lots.
    • Google Maps — Increasingly shows nearby paid parking icons with approximate pricing, which is useful for a quick gut check even if you don’t book through it.

    Both akippa and the Times app have English-language support, though it’s not always complete — having a Japanese-registered phone number or at least a working credit card on file smooths things considerably. Note that many of these reservation spots are tight residential driveways sized for Japanese kei cars, so double-check the listed dimensions if you’re driving a larger rental SUV or minivan.

    Hotel and Ryokan Parking

    If you’re staying in a city hotel, don’t assume parking is included — many business hotels in Tokyo, Osaka, and Kyoto either have no lot at all or charge ¥1,500–¥3,000 per night for a small on-site garage, which is often tighter and harder to maneuver into than it looks online. When you book, check the listing for a parking note, and if you’re arriving after hours, this is also the kind of detail worth confirming at check-in — see our guide on checking into a Japanese hotel for what else staff will ask you at the front desk. Rural ryokan and onsen inns are far more generous, typically offering free gravel lots since they assume most guests arrive by car.

    Best Season and Timing to Plan Around

    Parking demand in Japan spikes hard around three windows: cherry blossom season (late March–early April), Golden Week (April 29–May 5), and New Year (December 29–January 3). During hanami season especially, popular parks and riverside spots sell out their adjacent lots by mid-morning — the same crowds angling for a good blossom-viewing spot, as covered in our hanami picnic etiquette guide, are also competing for parking nearby. If you’re road-tripping during any of these windows, book a reservation-based spot through akippa the night before rather than hoping to find something on arrival.

    Winter road trips in snow regions (Hokkaido, Tohoku, Nagano) bring a different problem: some outdoor coin lots partially close or reduce capacity when plowing is needed, and flap-lock mechanisms can jam with ice. If you’re overnighting somewhere cold enough for kerosene heaters to still be in use — our piece on kerosene stoves and where to find fuel covers that old-school heating culture — call ahead or check the lot’s status online rather than assuming it’s open 24/7.

    Common Mistakes Visitors Make

    • Misreading the rate sign. Japanese coin parking signage often lists multiple time-based rates in dense grids (daytime vs. nighttime, weekday vs. weekend). Take a photo of the sign before you walk away so you can double-check the cap later.
    • Parking in a convenience store or restaurant lot without buying anything. These are private lots for customers only, monitored by camera, and non-customers get towed or fined just as readily as illegal street parkers.
    • Forgetting the flap-lock delay. After paying, the ground plate takes 10–20 seconds to lower — drivers who gun it immediately after paying can damage the undercarriage.
    • Assuming a “full” sign means the whole facility. Large multi-level coin lots sometimes mark individual floors full while others have space; a quick loop inside is worth it before giving up and leaving.
    • Not budgeting for sightseeing stops. A scenic coastal drive with five short stops can rack up ¥5,000+ in parking alone if each stop resets a new per-hour clock — factor this into your road trip budget the same way you’d factor in Japan’s consumption tax catching you off guard at checkout.

    Get the basics down — read the sign, use an app when lots look scarce, and never assume a curb is fair game — and parking becomes one of the easier parts of a Japan road trip, not the stressful part.

  • Exporting Bonsai Trees from Japan: Customs, Phytosanitary Certificates & Shipping Rules

    Exporting Bonsai Trees from Japan: Customs, Phytosanitary Certificates & Shipping Rules

    Photo by Chuck Eugene on Unsplash

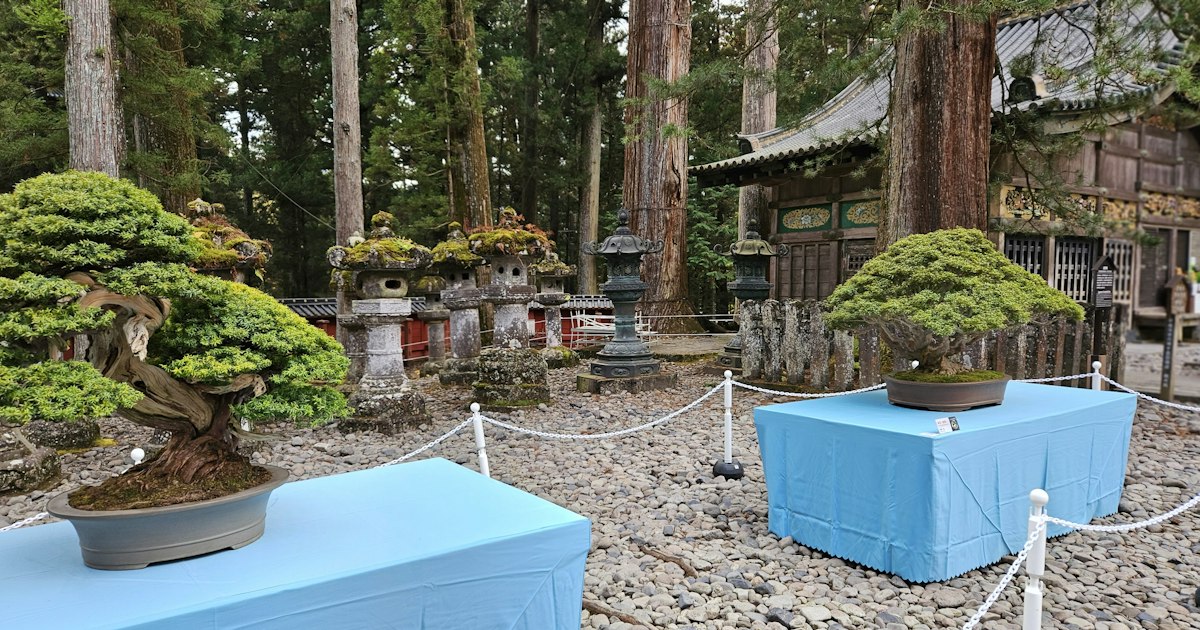
    Buying a bonsai tree in Japan is the easy part. Getting it home — alive, legal, and not confiscated at your destination’s border — is where most first-time buyers run into trouble. Japan has strict plant export rules, and your home country almost certainly has its own import restrictions layered on top. None of it is impossible, but it requires paperwork, patience, and usually a few weeks of lead time. Here’s exactly what’s involved, from the nursery floor to customs clearance on the other end.

    Why Japan Is the World’s Bonsai Capital — and Where to Buy

    If you want a serious, well-trained bonsai rather than a souvenir-shop sapling, two places dominate the trade. Omiya Bonsai Village in Saitama City (about 30 minutes north of central Tokyo) is a cluster of historic nurseries — Mansei-en, Toju-en, Seikou-en, and others — many of which have decades of experience preparing trees for international export. The adjacent Omiya Bonsai Art Museum (nearest station: Toro, a 5-minute walk, or Omiya-Koen on the Tobu Urawa Line) is open roughly 9:00–16:30, closed Thursdays, with admission around ¥310 — worth visiting even if you’re not buying, to see museum-grade trees up close.

    The other major hub is Kinashi, in Takamatsu, Kagawa Prefecture on Shikoku — Japan’s largest bonsai-growing region, famous for black pine, and the source of a large share of the pines exported worldwide. Nurseries there are used to shipping abroad and can usually walk you through the paperwork. In Tokyo itself, the Shunkaen Bonsai Museum in Edogawa, run by master Kunio Kobayashi, sells trees by appointment and is a good stop if you want expert guidance on which species travel well.

    Budget shohin (palm-sized) trees start around ¥5,000–¥20,000. Trained specimens with real age and shape run ¥50,000–¥300,000. Museum-quality trees — decades old, exhibition-grade — can run ¥500,000 to several million yen. The export process costs roughly the same regardless of price, so factor shipping and certification into your decision at the budget end especially; it can easily add 20–50% to a cheap tree’s total cost.

    The Phytosanitary Certificate: Japan’s Non-Negotiable Export Document

    Every bonsai leaving Japan as a live plant needs a phytosanitary certificate issued by Japan’s Plant Protection Station (植物防疫所), under the Ministry of Agriculture, Forestry and Fisheries (MAFF). This certifies the tree is free of pests and diseases and meets the destination country’s specific import conditions. You cannot skip this by claiming the tree as “personal luggage” — airlines and customs in most destination countries will ask for it, and without it the plant is typically destroyed or sent back at your expense.

    In practice, most established nurseries handle this for you as part of the sale, since they already have a relationship with their local Plant Protection Station office. If you’re buying privately or want to arrange it yourself, you (or the nursery) need to bring the plant to the Plant Protection Station office for inspection before shipping, which usually takes several business days and may require the soil removal step below to happen first. Build at least 1–2 weeks of lead time into your plans, longer during spring and autumn when nurseries are busiest. If language is a barrier, a private guide or concierge service who can liaise with the nursery and the inspection office in Japanese is often worth the cost for a high-value purchase.

    Preparing a Tree for Export: Bare-Rooting and Soil Rules

    This is the step that surprises most buyers: almost no country allows soil to cross its border with a live plant. Japan and most importing countries require the tree to be shipped bare-root or soil-free — the nursery washes all soil from the roots and repacks them in an inert, inspected medium (commonly sphagnum moss or a similar approved material) wrapped in plastic. This is stressful for the tree, which is why timing (see below) and nursery experience matter so much.

    Reputable export-savvy nurseries in Omiya and Kinashi have done this hundreds of times and know how to bare-root a pine or maple without killing it. If a seller seems unfamiliar with the process or suggests just “wrapping the root ball in soil and declaring it as a houseplant,” walk away — that tree will not clear customs legally, and you risk a confiscated or destroyed plant and a customs flag on your passport for future trips.

    Shipping Options and Costs: Air Cargo vs. Hand-Carry

    Live bonsai almost always travel as temperature-controlled air cargo, not as checked luggage or in a courier envelope. A crated, bare-rooted tree shipped internationally typically costs somewhere in the range of ¥30,000–¥150,000 depending on size, destination, and whether you use a specialist plant-shipping agent versus a general freight forwarder — small shohin trees are far cheaper to ship than large specimens requiring custom crating. On top of that, budget a modest fee for the phytosanitary inspection itself (often a few thousand yen) and, if the nursery doesn’t handle it, a packing/export-agent fee.

    Hand-carrying a bonsai onto a flight is technically possible for very small trees in some cases, but it’s risky: airline staff and destination immigration officers may not recognize or accept a phytosanitary certificate presented informally at the gate, and soil-free roots dry out fast without proper humidity packing. Most experienced buyers let the nursery crate and air-freight the tree directly to their home address, arriving days or weeks after they do.

    What Happens on the Other End: Your Country’s Import Rules

    Japan’s export certificate is only half the equation — your destination country has its own import permit requirements, and they vary enormously:

    • United States: Requires an APHIS import permit arranged in advance, and certain conifers (notably pines, due to pinewood nematode concerns) must spend time in a USDA post-entry quarantine facility — sometimes a year or more — before you can take them home.
    • European Union: Requires an EU phytosanitary import notification and inspection on arrival; rules differ slightly by member state, so check with your own country’s plant health authority before buying.
    • Australia and New Zealand: Among the strictest in the world for live plant imports; confirm permit requirements before you even visit the nursery, as some species may be effectively unimportable.

    Contact your home country’s agricultural/plant-import authority before you buy, not after. Nothing is more disappointing than falling in love with a 40-year-old black pine only to learn your country won’t admit that species at all.

    Best Season to Buy and Ship

    Bare-rooting is hardest on a tree during peak summer heat or deep winter freeze. Most nurseries recommend shipping in spring (March–May) or autumn (October–November), when temperatures are mild and deciduous species are either not yet in full leaf or have dropped leaves, reducing transplant stress. Avoid arranging shipment during the humid, hot peak of summer (late July–August) or the coldest weeks of January–February unless the nursery specifically says the species tolerates it. If your trip coincides with cherry blossom season, note that nurseries get extremely busy — plan a visit around, not during, the week-long hanami peak if you want unhurried attention from staff.

    Common Mistakes to Avoid

    • Buying before checking import rules at home. Confirm your country will admit the species before you commit money.
    • Assuming a certificate can be arranged after the fact. Inspection has to happen before the soil is removed and the tree is packed — it cannot be retrofitted once the box is sealed.
    • Underestimating shipping costs relative to tree price. A ¥15,000 shohin tree with ¥60,000 of air freight and agent fees is a very different purchase than it first appeared.
    • Trying to mail it via standard courier or EMS. Most carriers will not accept live plants without the proper permits already attached, and unauthorized attempts are routinely intercepted.
    • Not asking about CITES status. Common nursery species (black pine, Japanese maple, shimpaku juniper) are not restricted, but wild-collected (yamadori) specimens of some species can be — ask the nursery directly if a tree was collected from the wild.

    Done properly, exporting a bonsai is a well-worn path — Japanese nurseries ship trees abroad every year, and the process is routine for them even if it’s new to you. The key is sequencing: confirm your home country’s rules first, buy from a nursery that regularly exports, and build in enough time for bare-rooting, inspection, and air freight before you expect the tree on your doorstep.

  • Checking Into a Japanese Hotel: Passport Rules, ID Checks & What Foreign Guests Need to Know

    Checking Into a Japanese Hotel: Passport Rules, ID Checks & What Foreign Guests Need to Know

    Photo by Neon Wang on Unsplash

    Japan’s hotel check-in process trips up more first-time visitors than almost any other part of the trip. You’ve flown for twelve hours, you’re jet-lagged, and the person at the front desk is now asking for your passport — even though you booked under a foreign credit card and already paid online. This isn’t arbitrary bureaucracy. It’s Japanese law, it applies to every hotel and ryokan in the country, and knowing the rules in advance will save you a confusing five minutes at 11pm.

    Why Japanese Hotels Legally Require Your Passport

    Under Japan’s Hotel Business Act (旅館業法), accommodations are required to record the name, address, and nationality of any guest who does not have an address in Japan — and to verify this by checking a passport. This applies regardless of nationality, visa type, or how you booked the room. It’s not a hotel policy that can be waived; front-desk staff who skip it are the ones risking a fine, not you. The rule exists for immigration and public-safety record-keeping, and it’s been standard practice nationwide for decades, tightened further after the 2003 and 2005 amendments explicitly extended it to apply to all non-resident foreign guests, not just those on tourist visas.

    In practice, this means: bring your physical passport to check-in, every single time, even for one-night stays at budget chains. A photo of your passport on your phone is sometimes accepted by smaller properties in a pinch, but it’s not guaranteed and shouldn’t be your plan.

    What Happens at the Front Desk

    Expect the following sequence almost everywhere, from a 4,500 JPY capsule hotel to a 150,000-JPY-a-night ryokan:

    • Passport check: staff photocopy or photograph the identification page and your most recent entry stamp (or the digital arrival record most visitors now get at airports with automated gates).
    • Registration form: you fill in name, nationality, passport number, and next destination in Japan — a legal requirement, not hotel curiosity.
    • Payment confirmation: many budget and mid-range hotels in Japan still take full payment at check-in rather than check-out, even if you prepaid through a booking site — in that case, they’re simply confirming the reservation and may ask for the card used.
    • Key handover: physical keys are increasingly rare in cities; expect a keycard, and at business hotels, a small deposit (500–1,000 JPY) refunded when you return it.

    Standard check-in time is 3:00pm–4:00pm, with check-out at 10:00am–11:00am. Arriving earlier is common after long-haul flights — most hotels will hold luggage for free even if the room isn’t ready, which is worth doing rather than dragging suitcases around for hours.

    Common Mistakes Foreign Guests Make

    The single biggest mistake is not bringing a passport at all — leaving it in the room safe or at a different hotel because “I already checked in once this trip.” Staff cannot accept a driver’s license or a foreign ID card as a substitute. If you’re on a multi-city itinerary, the passport travels with you to every new front desk, full stop.

    A second common issue is name mismatches: if your booking was made by a travel agent or group organizer under a slightly different spelling or a middle name arrangement that doesn’t match the passport exactly, some hotels will ask for clarification or a re-booking confirmation. Double-check the name field matches your passport before you travel, especially for bookings made on Japanese platforms.

    Third, guests sometimes assume online prepayment exempts them from showing ID — it doesn’t. Payment and identity verification are separate legal requirements. And fourth, some travelers don’t realize that unmarried couples or groups of friends sharing a Japanese-style room may be asked for each adult’s passport individually, not just the person who made the booking.

    Budget, Mid-Range, and Splurge Check-In Experiences

    The passport rule is identical everywhere, but the check-in experience itself varies a lot by price tier:

    • Budget (capsule hotels, business hotel chains like Toyoko Inn or APA, roughly 4,000–9,000 JPY/night): fast, efficient, often a kiosk machine that scans your passport itself. Staff speak limited English but check-in is usually under five minutes.
    • Mid-range (3-star city hotels, 10,000–20,000 JPY/night): a short front-desk process with an English-speaking staff member, usually including a map and local tips. This tier is common in neighborhoods like Akasaka, where Tokyo’s embassy district has a dense cluster of business hotels within walking distance of government offices and sake bars.
    • Splurge (ryokan and luxury hotels, 30,000 JPY+ per person per night): check-in is often done seated, with tea served while a staff member handles your passport and registration paperwork out of sight, then explains the ryokan’s bath and dinner schedule in detail.

    Your Hotel Bill and the Consumption Tax Line

    When you get your final bill, don’t be alarmed to see the total differ from the room rate you booked. Japan’s accommodation tax (in cities like Tokyo, Kyoto, and Osaka) is added per person per night on top of the 10% consumption tax already baked into most quoted rates — the same tax mechanic that catches visitors off guard in shops, explained in more detail in Japan’s Consumption Tax: Why Sticker Prices Don’t Match What You Pay at Checkout. Tokyo’s accommodation tax, for example, is 200 JPY per person/night for stays priced 10,000–14,999 JPY, and 300 JPY for 15,000 JPY and above — small, but it’s why your receipt rarely matches the number you saw on the booking site.

    If You’re Overwhelmed, Get Help With the Whole Process

    If you’re juggling passport logistics across multiple hotels, language barriers, and an unfamiliar booking system all at once — especially on a short trip packed with transfers — it can be worth bringing in outside help rather than troubleshooting every check-in solo. Hiring a Private Tour Guide or Concierge Service in Japan covers when this kind of support actually pays for itself, including handling hotel liaison and paperwork for travelers managing complex itineraries, large groups, or elderly family members who find the registration process stressful.

    Timing It Right

    Check-in rules don’t change by season, but queues do. Late March to early April (cherry blossom season) and the Golden Week holiday (late April–early May) see front desks at major city hotels backed up at the 3pm rush, since everyone arrives off the same shinkansen and flight waves. If you’re arriving during these windows, consider booking a hotel with 24-hour front desk staff (most mid-range and above chains have this) so you can check in early or late and skip the crowd entirely. Outside peak season, check-in is typically a non-event — just have that passport ready, every time, at every hotel.

  • Fukuoka–Busan Ferry: Japan’s International Sea Route to South Korea

    Fukuoka–Busan Ferry: Japan’s International Sea Route to South Korea

    Photo by Johnny Ho on Unsplash

    Most travelers fly between Japan and South Korea, but Fukuoka has a quieter option: a direct sea crossing to Busan that skips the airport entirely. The Korea Strait here is only about 200 km wide, which makes Hakata Port one of the few places in Japan where you can combine two countries into a single trip without ever touching a departure gate. Here’s how the route actually works, what it costs, and the mistakes that trip up first-timers.

    Two Ways to Cross: Jetfoil or Car Ferry

    Two companies run this route, and they’re genuinely different experiences, not just price tiers of the same service.

    • JR Beetle — a high-speed jetfoil (hydrofoil) that skims across the strait in about 3 hours. It feels more like a short domestic flight than a boat ride: assigned airline-style seating, several sailings a day, and almost no sense of the ocean beneath you. It’s the faster, more expensive option and the one most tourists choose.
    • Camellia Line — a conventional car ferry with open decks, a restaurant, and cabins. It runs a daytime sailing of roughly 5.5–6 hours and an overnight sailing of around 8 hours where you can sleep in a cabin instead of a hotel. It’s slower but noticeably cheaper, and it’s the only way to bring a vehicle across.

    If you get seasick easily, know that the Beetle’s speed can make strait crossings feel bumpier in choppy weather than the heavier, slower Camellia ferry.

    What It Actually Costs

    Fares fluctuate with season and promotions, so treat these as ballpark figures rather than fixed prices:

    • Beetle one-way, economy: roughly ¥13,000–15,000. Round-trip “saver” fares bring the per-leg cost down noticeably if booked together.
    • Camellia one-way, economy: from around ¥9,000, with business class and private cabins costing more, especially on the overnight sailing.
    • Port tax / terminal fee: a small departure fee (a few hundred yen) is added on top of the ticket price at both terminals.

    Because this is an international service, ticket prices are not subject to Japan’s consumption tax the way most in-country purchases are — if you’re unsure why your shopping receipts in Fukuoka look different from this fare, it’s worth reading up on Japan’s consumption tax and why sticker prices don’t match checkout totals before you fly home with a pile of duty-free receipts.

    Getting to Hakata International Terminal

    The ferry terminal (Hakata Port International Terminal) is separate from Hakata Station and sits on the waterfront, about 2–3 km from the city center. From Hakata Station, a direct shuttle bus (often branded as a port connector bus) takes about 15 minutes and costs a few hundred yen; a taxi takes roughly the same time for around ¥1,000–1,500. From Tenjin, it’s a similarly short bus or taxi ride. There is no train line directly to the terminal, so budget extra time if you’re hauling luggage and relying on buses with limited frequency.

    Check-in and immigration close well before departure — arrive at least 1 to 1.5 hours ahead for the Beetle and closer to 2 hours for the Camellia ferry, since car and cargo loading adds time. This is not like a domestic Shinkansen where you can sprint on five minutes before departure.

    Immigration, Passports, and What to Bring

    Because you’re leaving Japan and entering South Korea (or vice versa), full passport control applies on both ends — this is a genuine international border, not a regional hop. Most Western passport holders, along with many other nationalities, can enter South Korea visa-free for tourism, but check your specific requirement before booking, since rules vary and change. You’ll fill out an arrival card for Korea unless you’ve already registered through Korea’s electronic travel authorization system in advance. Bring your passport to the terminal counter even if you booked online — tickets are usually confirmed against passport details at check-in, and luggage is lighter to handle if you’ve already consolidated shopping into one bag.

    Best Time to Sail

    Spring (April–May) and autumn (October–November) offer the calmest seas and the most reliable schedules. Summer brings typhoon season (roughly August–September), when both the Beetle and Camellia services can cancel sailings on short notice due to high swells — the jetfoil is more sensitive to rough water than the ferry and cancels first. If you’re traveling in late summer, build a buffer day into your itinerary rather than booking a same-day flight connection in Busan or Fukuoka right after your crossing. Winter crossings are generally fine but occasionally choppy; dress warmly if you plan to stand on the Camellia’s open deck.

    Common Mistakes to Avoid

    • Assuming it’s as casual as a domestic ferry. You need a passport, you clear customs and immigration on both sides, and gates close earlier than you’d expect for a 3-hour hop.
    • Booking the cheapest Camellia fare without checking the sailing time. The overnight sailing saves a hotel night but means losing a travel day to sleep; the day sailing is faster door-to-door if you want to actually see Busan or Fukuoka that same day.
    • Underestimating transit time to the terminal. It’s not downtown Fukuoka, and taxis can be scarce during peak departure windows.
    • Not checking weather alerts in typhoon season. Cancellations happen with little warning, and refund/rebooking policies differ by operator.

    Before You Board: Make the Most of Hakata

    Fukuoka’s Hakata district, right by the port, is one of the best food neighborhoods in Japan, so don’t treat the terminal as just a transit point. If you’ve got a few hours before departure, this is the home turf of mizutaki, Hakata’s delicate chicken hot pot, and a reliable teishoku set lunch near the station is a fast, satisfying way to eat before a multi-hour crossing without committing to a long sit-down meal. If you’re stitching together a more complex multi-country itinerary around this crossing, it may also be worth looking into hiring a private tour guide or concierge service to handle logistics on tight connections.

    The Fukuoka–Busan ferry isn’t the fastest way between the two countries, but it’s a genuinely useful option for travelers building a Japan–Korea combination trip, avoiding airport transfers, or simply wanting to see the Korea Strait from the water instead of 30,000 feet above it.

  • Japan’s Consumption Tax: Why Sticker Prices Don’t Match What You Pay at Checkout

    Japan’s Consumption Tax: Why Sticker Prices Don’t Match What You Pay at Checkout

    Photo by PJH on Unsplash

    You pick up a bento for ¥498, hand over a 500-yen coin, and the cashier asks for more money. Welcome to one of the most common moments of confusion for first-time visitors to Japan: consumption tax (shohizei) that sometimes is and sometimes isn’t baked into the number on the shelf. It’s not a scam and it’s not random — but the rules depend on where you’re shopping, what you’re buying, and whether you’re eating it on the spot or taking it home. Here’s how to stop being surprised at the register.

    The Basics: 10% Standard, 8% Reduced

    Japan’s consumption tax is a national value-added tax, similar to VAT or GST elsewhere. It was introduced in 1989 at 3%, rose to 5% in 1997, 8% in 2014, and reached its current structure in October 2019, when the government split it into two rates:

    • 10% standard rate — applies to most goods and services: clothing, electronics, souvenirs, hotel rooms, taxis, admission tickets, alcohol.
    • 8% reduced rate — applies to food and non-alcoholic beverages purchased for home consumption (takeaway), plus newspaper subscriptions.

    The 2% gap sounds small, but on a ¥10,000 shopping basket it’s the difference between ¥11,000 and ¥10,800 — enough to throw off a tight cash budget if you weren’t expecting it.

    Zeikomi vs. Zeinuki: Reading Japanese Price Tags

    Since April 2021, Japanese law has required retailers to display zeikomi (tax-included) prices as the primary number on tags and menus. In practice, though, you’ll still see plenty of zeinuki (tax-excluded) pricing, especially at:

    • Restaurants and izakaya with printed menus from before the rule change that haven’t been reprinted
    • Electronics stores like Bic Camera or Yodobashi, where big discount signage sometimes shows the pre-tax price in large font with tax-included in small print
    • Department store boutiques and some airport duty-free-adjacent shops

    Look for the words 税込 (zeikomi, “tax included”) or 税抜 (zeinuki, “tax excluded”) near the price. If you only see a plain number with no label, assume it’s tax-included — that’s now the legal default — but at restaurants it’s worth a quick glance at the bottom of the menu, which often states “all prices include 10% tax” or lists a separate service charge on top (common in hotel restaurants and some robatayaki grills, where a 10-15% service charge can stack on top of the tax).

    The Eat-In vs. Takeout Trap

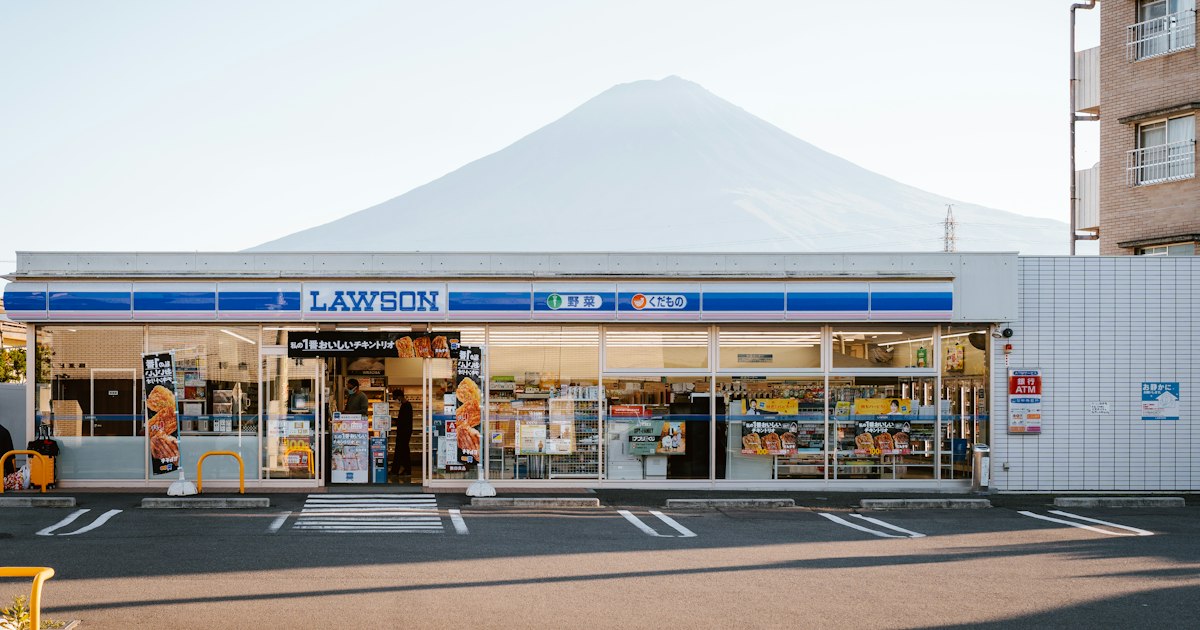
    This is the one that catches almost every visitor at least once. Convenience stores (conbini) and bakery counters charge 8% if you’re taking food out, but 10% if you eat in at their small seating counter — because dining-in is legally classified as a restaurant service, not a grocery purchase. At Lawson, 7-Eleven, and FamilyMart, the cashier will ask “Kochira de meshiagemasu ka, omochikaeri desu ka?” (eating here, or taking away?). Say “omochikaeri” for takeout and you’ll get the lower rate.

    The same split applies at department store food halls and some bakery chains with a few stools by the window. It rarely changes the total by more than a few yen on a single item, but on a family’s worth of conbini breakfast every morning for a week, it adds up. If you’re planning sit-down meals instead, it’s worth knowing how ordering actually works — see our guide to ordering a teishoku set lunch, where the 10% rate is simply built into the price you see on the shop’s outdoor menu board.

    Tax-Free Shopping for Tourists: What Changed

    Japan has long offered consumption-tax exemption to overseas visitors on a temporary tourist visa, but the mechanics changed significantly with the shift to a refund-based system that rolled out around November 2026. Instead of the old instant-exemption model — where you showed your passport at checkout and simply paid a lower, tax-free price on the spot — the current system generally has you pay the full tax-included price at the register, then claim the consumption tax back at a dedicated refund counter at the airport when you depart, after customs verifies you’re actually leaving with the goods.

    A few things stay consistent regardless of exactly how a given store processes it:

    • You need your passport (the physical one, not a photo of it) at the time of purchase
    • The minimum purchase amount to qualify is ¥5,000 (before tax) per store, per day, combining general goods and consumables
    • Consumable items — cosmetics, supplements, food, drinks — must stay sealed in a special tamper-evident bag until you leave Japan; opening one early can void the exemption
    • There’s a ¥500,000 cap on tax-free consumables per person
    • Large electronics stores, department stores, and malls have a dedicated tax-free counter (usually signed “Tax-Free Counter” or 免税カウンター) rather than processing it at the regular register

    Because the refund now happens at departure, build in extra time at the airport — the refund/verification counters at Narita and Haneda can have lines during peak morning and evening departure banks, so budget at least 30-45 minutes before you’d otherwise need to be at security if you’re carrying tax-free purchases. This is the same kind of last-day admin as sorting out your transit card — see our guide on getting your Suica or Pasmo deposit refunded before you leave for the other end-of-trip errand worth planning around.

    Classic consumable souvenirs that frequently qualify for the exemption include skincare and Japanese beauty supplements like collagen and bihaku pills, while general goods like a souvenir sukajan jacket fall under the non-consumable category with no sealed-bag requirement.

    Common Mistakes That Cost Visitors Money

    • Assuming a displayed price already includes tax at an older restaurant. Always check for 税込/税別 near the menu price if the restaurant looks like it hasn’t updated signage recently.
    • Opening a sealed tax-free consumable bag before leaving Japan. Customs can deny the refund if the seal is broken, even if you simply wanted to use the item during your trip.
    • Not keeping the tax-free purchase receipt/record attached by the store. You’ll need it at the airport refund or verification step — don’t toss it with the shopping bag.
    • Forgetting the ¥5,000 minimum applies per store, per day — not across your whole trip, and not combined across different shops in the same mall unless they share a single cashier/tax-free counter.
    • Mixing up “service charge” with tax. A 10% service charge at a nicer restaurant or ryokan is separate from and added on top of the 10% consumption tax — two different line items, not the same thing twice.

    Budgeting Rule of Thumb

    When you’re pricing out a trip in advance from product pages or store websites, add 10% to any listed price unless it explicitly says tax-included, and expect food takeout purchases to run about 8% over the shelf number. If you’re using a concierge or private guide to help navigate shopping and dining decisions, it’s also worth asking them to flag tax-free-eligible stores in advance — something covered in our piece on hiring a private tour guide or concierge in Japan. A little arithmetic at the planning stage saves you from doing surprised mental math at the register.

  • Akasaka: Tokyo’s Embassy District of Sake Bars and the Toyokawa Inari Shrine

    Akasaka: Tokyo’s Embassy District of Sake Bars and the Toyokawa Inari Shrine

    Photo by Clay Banks on Unsplash

    Sandwiched between the political power of Nagatacho and the neon of Roppongi, Akasaka rarely makes a first-time visitor’s checklist — and that’s exactly why it rewards the ones who show up. This is where foreign embassies, the National Diet, and century-old geisha-district backstreets sit a five-minute walk from a Shinto-Buddhist shrine lined with hundreds of stone foxes. Add a dense cluster of serious sake bars and you have a neighborhood built for an unhurried evening, not a rushed photo stop.

    Why Akasaka Is Different From Tokyo’s Other Nightlife Districts

    Akasaka was one of Tokyo’s major hanamachi (geisha quarters) through the 20th century, alongside Shimbashi and Yanagibashi, and it later became the after-hours haunt of politicians and bureaucrats working in nearby Nagatacho. That history is still legible in the street layout: narrow lanes like Hitotsugi-dori and the backstreets around Akasaka-mitsuke are packed with small, counter-only restaurants and bars rather than the big chain izakaya you’ll see in Shinjuku or Shibuya. Since the 1960s, embassies — including the US Embassy, which borders the Akasaka Palace grounds — have clustered here too, giving the district a quieter, more international daytime character than its nightlife reputation suggests.

    Toyokawa Inari Tokyo: The Fox Shrine Businesspeople Swear By

    The neighborhood’s spiritual landmark is Toyokawa Inari Tokyo (officially Myogon-ji Temple’s Tokyo branch), a short walk from Akasaka-mitsoke or Nagatacho stations at 1-4-7 Motoakasaka. It’s technically a Soto Zen Buddhist temple, not a pure Shinto shrine, enshrining Dakiniten — a fox-associated deity of prosperity — which explains the hundreds of small stone fox statues packed into the grounds, many wrapped in red bibs left by worshippers.

    Because it sits a few minutes from the Diet building, it has long attracted politicians, executives, and salarymen praying for business success before work, which gives it a very different energy from the tourist-heavy shrines in Asakusa. The grounds are open to visitors essentially from early morning until evening (roughly 6:00am–8:00pm), and admission is free. The small office selling omamori (charms) and goshuin (shrine stamps) typically operates from around 8:00am to 4:00pm — go before 9am if you want the grounds close to empty. Budget 20–30 minutes to walk the compound and photograph the fox statue rows.

    Akasaka’s Sake Bar Scene

    This is where Akasaka earns its keep for drinkers. Unlike Shibuya’s standing bars or Golden Gai’s tiny theme bars, Akasaka specializes in sake bars with real breadth — regional labels from Niigata, Akita, and Yamagata poured by staff who can actually explain the difference between junmai and honjozo.

    • Budget (¥3,000–5,000 per person): Standing sake bars and small izakaya along Hitotsugi-dori pour by the glass from ¥600–900, with tasting flights of 3 small cups running ¥1,200–1,800. Food is simple — grilled fish, tofu, pickles — at ¥400–900 a plate.
    • Mid-range (¥6,000–10,000 per person): Sit-down sake specialists near Tameike-sanno and Akasaka-mitsuke offer curated lists of 20–40 labels, often with a seasonal tasting course. Expect a cover or seating charge (seki-ryo) of ¥300–500 per person, common across Japanese izakaya and worth knowing about in advance so it doesn’t feel like a surprise on the bill.
    • Splurge (¥12,000+): A handful of reservation-only counters pair rare, limited-release sake with kaiseki-style small plates. These typically require a same-day or advance phone reservation in Japanese — this is where a private guide or concierge booking service genuinely pays for itself, since many of these counters don’t take walk-ins or English bookings.

    Before you drink, know the basics of serving and sipping etiquette — the same rules that apply to whisky and shochu service apply to sake, and getting the pouring order and glass-holding customs right makes a noticeably better impression on staff and fellow drinkers. You’ll also be handed a hot towel the moment you sit down at almost every bar here; there’s a right way to use it, covered in this guide to oshibori etiquette.

    Getting to Akasaka

    Three stations effectively bracket the district: Akasaka (Chiyoda Line), Akasaka-mitsuke (Ginza and Marunouchi lines), and Tameike-sanno (Ginza and Namboku lines). All sit within a 5–10 minute walk of both Toyokawa Inari and the main sake bar strips, so there’s no need to pick a “wrong” station. From Tokyo Station, the trip is roughly 15 minutes with one transfer; from Shinjuku, about 20 minutes via the Marunouchi Line direct to Akasaka-mitsuke.

    Best Time to Visit

    Go to Toyokawa Inari in the morning — before 9:00am on a weekday, you’ll often have the fox statues to yourself, and you may spot local office workers stopping in before their commute continues. For the bars, Akasaka’s crowd skews toward after-work salarymen and embassy staff, so the backstreets fill up fast between 7:00pm and 9:00pm on weeknights. Arriving at bar-opening time (usually 5:00 or 5:30pm) gets you a seat without a wait, especially at the smaller counter bars that can’t take reservations for solo or two-person groups. Weekends are noticeably quieter here than in Tokyo’s youth-oriented districts, since Akasaka’s identity is tied to the workweek.

    Common Mistakes to Avoid

    • Confusing it with a pure Shinto shrine. Toyokawa Inari is Buddhist, so the etiquette (how you clap, bow, and what you say) differs slightly from a Shinto jinja — staff are used to foreign visitors and won’t mind simple, quiet respect either way.
    • Showing up to a reservation-based bar without calling ahead. Many of Akasaka’s best counters seat fewer than 10 people and are booked solid by regulars; walk-ins work fine at the standing bars and larger izakaya, but not at the splurge-tier spots.
    • Skipping the seating charge line on the menu. The otoshi (a small starter dish you didn’t order) and seki-ryo cover charge are standard at Japanese izakaya and sake bars — not a scam, just local practice.
    • Treating Akasaka as a quick stop between Roppongi and Ginza. The neighborhood’s appeal is in lingering — a rushed 20-minute visit misses both the shrine’s quiet morning atmosphere and the bars’ after-dark energy.

    A Simple Half-Day Plan

    Visit Toyokawa Inari first thing in the morning, then grab a set lunch at one of the teishoku counters that cater to the area’s office workers — if you haven’t ordered this way before, it helps to know how a teishoku lunch actually works before you sit down. Spend the afternoon wandering the embassy-lined streets toward Akasaka Palace’s exterior grounds, then return after 5:00pm for sake bar hopping along Hitotsugi-dori. It’s a low-key, walkable day that doesn’t require advance tickets — just a willingness to duck into places without English signage.

  • Hiring a Private Tour Guide or Concierge Service in Japan: When It’s Worth the Cost

    Hiring a Private Tour Guide or Concierge Service in Japan: When It’s Worth the Cost

    Photo by David Emrich on Unsplash

    Japan is one of the easiest countries in the world to travel independently — trains run on time, signage is increasingly bilingual, and apps like Google Maps handle almost everything. So why do so many visitors still end up hiring a private guide or concierge service? The honest answer is that a good guide doesn’t just translate — they unlock places, timing, and context that no amount of solo research replicates. The question isn’t whether guides are “worth it” in general, but which specific situations justify the cost. Here’s a realistic breakdown.

    What Private Guides and Concierges Actually Cost

    Rates vary more by credentialing and demand than by region. As a general guide:

    • Licensed national guide-interpreters (certified by the government, required to legally guide for a fee in some contexts): roughly ¥25,000–¥45,000 for a full day (6–8 hours), often plus transport costs.
    • Freelance guides via platforms (Govoyagin, ToursByLocals, Japan Wonder Travel, Magical Trip): ¥8,000–¥20,000 per person for group walking tours; private full-day tours for a family or small group run ¥20,000–¥50,000 total.
    • Hotel concierge desks (Park Hyatt, Aman, Four Seasons, Peninsula): often free for guests for restaurant bookings and basic itinerary help, but arranging a private guide or driver through them typically costs ¥15,000–¥60,000 depending on the service, billed as a package.
    • High-end bespoke concierge services (companies that build entire trips, secure reservations at exclusive restaurants, arrange private cultural experiences): ¥50,000–¥150,000+ per day, sometimes with a flat trip-planning fee of ¥100,000–¥300,000 on top.

    Transport (a private car with driver) is usually separate: expect ¥35,000–¥60,000 for a full day within a city like Tokyo or Kyoto, more for long-distance trips.

    When It’s Genuinely Worth It

    First-time visitors with 3 days or less in Tokyo or Kyoto. If your entire trip is short, the time a guide saves navigating, queueing, and choosing between options can recover the cost in experience alone. A guide who knows that Fushimi Inari is nearly empty before 7:00 AM but packed by 10:00 AM, or that teppanyaki restaurants worth visiting require reservations weeks out, pays for themselves on day one.

    Multi-generational or mixed-mobility groups. If you’re traveling with grandparents, young children, or anyone with mobility concerns, a guide who pre-plans routes around stairs, crowds, and rest stops removes a huge amount of stress that no app can manage.

    Deep cultural or historical sites where context matters. Temples, shrines, and museums in Japan rarely have detailed English signage. A guide at a site like Nijo Castle or the Hiroshima Peace Memorial adds genuine depth — the difference between seeing a building and understanding what happened there.

    Access-dependent experiences. Private tea ceremonies, visits to artisan workshops, sumo stable practice viewings, or restaurants that don’t take foreign-card reservations often require a local intermediary. This is also true for more niche interests — if you’re trying to track down something like a specific original sukajan jacket from a specific maker, or want a guided introduction to a regional specialty, a well-connected local fixer can get you into shops and workshops that don’t welcome walk-ins.

    Rural or off-the-beaten-path regions. Somewhere like Shimabara or Lake Tazawa rewards local knowledge — bus schedules are sparse, English signage is minimal, and a guide who knows the area can get you to the right viewpoint at the right time of day instead of burning hours on logistics.

    When It’s Probably Not Worth It

    If your itinerary is mostly major cities (Tokyo, Osaka, Kyoto) and you’re comfortable with apps and basic planning, a full-day guide is often overkill. Japan Rail and subway systems are genuinely navigable solo, convenience stores and chain restaurants require zero Japanese, and most major attractions have English information boards. Spending ¥40,000 on a guide to walk through Senso-ji or Dotonbori — places designed for independent tourism — is usually money better spent on experiences or better hotels.

    It’s also not worth it for food-focused wandering. Half the fun of Japanese dining is stumbling into a counter-seat teishoku spot or an izakaya on your own, learning the small rituals — like how to use the oshibori hot towel — as you go. A guide can’t replicate that discovery, and paying for one to simply order on your behalf removes part of the experience.

    Budget, Mid-Range, and Splurge Options

    Budget (¥8,000–¥15,000/day): Join a small-group walking tour through Magical Trip or Arigato Travel rather than booking a fully private guide. You still get a knowledgeable local, just shared across 4–8 people.

    Mid-range (¥25,000–¥45,000/day): A licensed private guide for one specific day — typically the day you’re tackling something complex, like a day trip to Nikko or Nara, or a half-day in Kyoto’s eastern temple district plus transport logistics.

    Splurge (¥60,000+/day): A dedicated private guide and driver for your entire trip, or a concierge service that pre-books restaurants, ryokan, and experiences you couldn’t access on your own. This makes the most sense for honeymoons, anniversary trips, or travelers who simply want zero logistics to manage.

    How to Book and What to Check

    Book at least 3–4 weeks ahead for popular guides, especially during cherry blossom season (late March–early April) and autumn foliage (mid-November), when both guides and private cars get reserved early. Confirm three things before paying: whether the guide is licensed (ask directly — unlicensed “guides” technically can’t legally charge a fee for guiding in some situations, though informal arrangements are common and generally tolerated for casual tours), what’s included in the quoted price (entrance fees and transport are usually separate), and cancellation policy, since many require 48–72 hours’ notice for a full refund.

    Most reputable platforms let you read guide reviews and message them directly before booking, which is worth doing — ask about their specialty. A guide who’s excellent on samurai history may not be the right fit if you actually want someone who can walk you through, say, Nerima’s connection to anime history at the Toei Animation Studio, or someone who can take you surfing based on conditions at the right beach from the best surf spots near Tokyo.

    A Middle Path: Partial-Day Guides

    If a full-day rate feels steep, many guides offer half-day blocks (3–4 hours) for roughly 60% of the full-day price. This works well for front-loading your trip: hire a guide for your first morning to get oriented — how to use an IC card, basic train etiquette, where to find good food near your hotel — then spend the rest of the trip solo with confidence. It’s a low-cost way to get the benefits of local expertise without committing to guided days throughout.

    The bottom line: a private guide earns its cost when it buys you access, context, or time you genuinely can’t get on your own — not simply as a substitute for basic trip planning you’re capable of doing yourself.

  • Surfing in Japan: Best Beaches, Rental Shops & Where Tokyoites Ride Waves

    Surfing in Japan: Best Beaches, Rental Shops & Where Tokyoites Ride Waves

    Photo by erika m on Unsplash

    Japan isn’t the first place most people picture when they think “surf trip,” but it has one of the most developed surf cultures in Asia — complete with 24-hour surf shops, Olympic-grade waves, and a weekend exodus of Tokyoites hauling boards onto commuter trains. Whether you’ve got a free Saturday in Tokyo or you’re planning a dedicated surf-focused leg of your trip, here’s where to go, what it costs, and how not to embarrass yourself in the lineup.

    Shonan: Tokyo’s Home Beach

    Shonan is the stretch of Kanagawa coastline running from Kamakura through Enoshima to Chigasaki, and it’s the default answer to “where do Tokyo people surf.” It’s close, it’s social, and it’s where most Japanese surfers learned to stand up.

    • Getting there: From Tokyo or Shinjuku, take the Odakyu Line or JR Shonan-Shinjuku Line to Fujisawa, then switch to the Enoden Line for Enoshima or Kamakura-area beaches. Total travel time is about 60–75 minutes, and a round trip costs roughly ¥1,500–2,000. If you’re using a Suica or Pasmo card for the whole trip, don’t forget you can get the deposit and remaining balance back before you fly home — see Getting Your Suica or Pasmo Deposit Refunded Before You Leave Japan for how.
    • Best spots: Kugenuma Beach and Chigasaki (near the famous Southern Beach torii gate photo spot) are beginner-friendly beach breaks with gentle, consistent swell. Enoshima’s eastern side gets slightly more punch and is popular with the local shortboard crowd.
    • Crowds: Heavy on weekends, especially summer mornings before work. Go on a weekday if you can, or get in the water by 6:30am.

    Chiba’s Pacific Coast: Where the Olympic Waves Are

    Cross Tokyo Bay east and you hit Chiba’s Pacific-facing coastline, which generally gets bigger, more consistent swell than Shonan because it faces open ocean rather than being tucked inside Sagami Bay.

    • Tsurigasaki Beach (Shidashita), Ichinomiya: This was the official surfing venue for the Tokyo 2020 Olympics, and it remains one of Japan’s best-known breaks — a reliable beach break that handles both small and sizeable swell well. It’s about 90 minutes from Tokyo Station via the JR Wakashio limited express to Oamishirasato, then a short taxi or bus ride.
    • Kamogawa and Isumi: Further south along the same coast, these towns have a laid-back, surf-town feel with a higher concentration of surf shops and cafes catering to boarders. Worth a stay if you want more than a day trip — and if you’re hunting beach-town souvenirs between sessions, this stretch of coast is also good territory for the kind of finds covered in Ukidama: Hunting Vintage Glass Fishing Floats at Japan’s Coastal Flea Markets.

    Beyond Tokyo: Shikoku and Miyazaki for Serious Surf

    If you’ve got more than a weekend and actually want quality waves rather than convenience, two regions stand out to Japanese surfers themselves:

    • Kaifu and Ikumi, Tokushima (Shikoku): Often called Japan’s surfing capital, the Kaifu river-mouth break has hosted international competitions and produces long, shapely waves that outclass most of the Tokyo-area spots. It’s remote — plan on flying into Tokushima Airport and renting a car, since bus service to the coast is sparse.
    • Miyazaki, Kyushu: Warmer water year-round and a lower-key vibe, Miyazaki’s beaches (especially around Kisakihama) draw surfers escaping Honshu’s cold winter swells. It’s a longer trip from Tokyo (flight plus local transport), but worth it if winter is your only window.

    Rental Shops, Lessons and What It Costs

    You don’t need to bring your own board. Surf shops cluster around every beach mentioned above, and most offer the same basic menu:

    • Board + wetsuit rental only: typically ¥3,000–5,000 for a half or full day, depending on season and board type (soft-top beginner boards are cheaper than performance shortboards).
    • Beginner lesson package: a 90–120 minute group lesson with board, wetsuit, and basic instruction usually runs ¥7,000–10,000 per person. This is the better deal if it’s your first time in the water, since Japanese surf etiquette (where to sit, how beach breaks are shared) is easier to pick up with someone translating the unwritten rules.
    • Splurge option: private one-on-one lessons at the bigger Shonan and Chiba schools run ¥15,000–20,000 and usually include video review of your sessions.

    Shops will also rent you a wetsuit separately if you’ve brought your own board — handy since checking a board as flight luggage within Japan isn’t always cheap. After a cold-water session, a hot meal is non-negotiable; most surf towns have a teishoku counter nearby, and knowing how to order one properly (see Teishoku 101: How to Order Japan’s Set-Meal Lunch Like a Regular) will get you fed fast between sessions.

    Best Season and Timing

    Japan’s surf calendar is shaped by typhoons, not just sun:

    • August–October: Typhoon season brings the biggest and most consistent swell to the Pacific coast (Chiba, Shikoku). Water is warm (wetsuit optional in a rash guard for many), but check typhoon tracking before you commit — some systems make conditions dangerous rather than fun, and beaches will close with red flags when that happens.
    • December–February: Consistent winter swell on Honshu’s Pacific coast, but water temperature drops to around 15°C, so you’ll want a 5/3mm wetsuit, which most rental shops stock seasonally.
    • March–July: Smaller, gentler waves — the best window for first-timers and anyone taking a lesson.

    Common Mistakes to Avoid

    • Ignoring the flags: Japanese beaches with lifeguards mark a strict swimming zone and a separate surfing zone with colored flags. Paddling out in the wrong area will get you whistled back in fast.
    • Skipping jellyfish season: Kurage (jellyfish) become a real problem on many Honshu beaches from mid-summer onward; some beaches post warnings or close swimming areas entirely, though surfing is often still fine further out — ask the rental shop.
    • Missing the last train home: A day trip to Shonan or Chiba is easy, but post-surf fatigue plus a few vending-machine beers can make you lose track of time. Check shuden (last train) times before you even paddle out — the rules around what happens if you miss one are covered in Last Trains in Japan: How Shuden Times Work and What Happens If You Miss One.
    • Not budgeting for the après-surf izakaya round: Post-session beers and small plates are a core part of Japanese surf culture. Knowing how otoshi charges and nomihodai deals work (detailed in Izakaya Ordering 101) will save you from an awkward bill surprise.

    Surfing in Japan rewards a little planning — a train schedule here, a tide check there — but the payoff is real waves, genuinely good rental infrastructure, and a surf culture that’s been building for decades, not a tourist add-on bolted onto a beach town.

  • Nerima: Tokyo’s Birthplace of Anime and the Toei Animation Studio Tour

    Nerima: Tokyo’s Birthplace of Anime and the Toei Animation Studio Tour

    Photo by PJH on Unsplash

    Most first-time visitors chase anime in Akihabara or Ikebukuro, but the industry’s actual birthplace is a quiet residential ward most tourists never think to visit: Nerima. This is where Toei Animation opened its Oizumi studio in 1958, where Leiji Matsumoto and a cluster of other manga and anime creators lived and worked in the 1960s, and where the local ward government now runs a small but genuinely rewarding trail of museums, statues, and an annual festival built around that history. It’s an easy half-day add-on if you’re staying anywhere on the Seibu Ikebukuro Line, and it costs almost nothing to see.

    Why Nerima, and not Akihabara?

    Toei Animation (then called Toei Doga) set up its production studio in the Oizumi Gakuen neighborhood of Nerima in 1958, and it’s still there today, making it the oldest continuously operating anime studio location in Japan. The company produced the first color anime feature in Japan, “Hakujaden” (1958), and went on to make long-running series including Dragon Ball, Sailor Moon, One Piece, and Digimon. Separately, Oizumi Gakuen became known as a cheap, quiet place for young artists to live in the postwar decades, and a number of manga creators — Leiji Matsumoto among the best known — had homes and studios in the area, earning it the nickname “Mangaka no Mura” (Manga Artists’ Village) among local historians. Nerima Ward leans into this heritage hard, with character statues, manga-themed manhole covers, and official signage you won’t find anywhere else in Tokyo.

    Toei Animation Museum

    The Toei Animation Museum sits right next to the working Oizumi studio at 3-16-15 Oizumigakuenmachi, a roughly 12-15 minute walk from Oizumi-Gakuen Station (Seibu Ikebukuro Line), or a short bus ride if you’d rather not walk. Admission is free, which is unusual for a studio-affiliated museum and makes it an easy add-on even if you only have an hour to spare. Inside you’ll find production cels, character design sheets, storyboards, and memorabilia spanning the studio’s full history, from early black-and-white works through Dragon Ball Z and modern series, plus a small theater showing clips and a gift shop with Toei-exclusive goods you won’t find in Akihabara chain stores. The museum is closed on Mondays (check for shifted holiday closures), and it’s small enough to see properly in 45-60 minutes — this is not the Studio Ghibli Museum in scale, and going in with that expectation will leave you disappointed. Go in expecting a focused, free, fan-run archive rather than a theme-park-style attraction, and it’s a satisfying stop. Because it’s an official studio facility rather than a tourist attraction, hours and holiday closures do shift, so confirm the current schedule on Toei Animation’s own site before making a special trip out.

    The Oizumi Gakuen character trail

    Around Oizumi-Gakuen Station, Nerima Ward has installed bronze statues and plaques of characters tied to the area’s anime history — look for figures connected to Galaxy Express 999 and other Matsumoto-era works near the station plaza. It’s a self-guided, free walk that takes maybe 20-30 minutes if you’re just photographing the statues, longer if you follow the ward’s printed anime-walk maps (sometimes available at the station or local tourist information points) that route you past the artists’ former residences and studio sites. Spring is the best season for this walk specifically — cherry blossoms along the quieter residential streets make for much better photos than the bare branches of winter, and the humidity of Tokyo summer makes the uphill stretches from the station unpleasant.

    Nerima Anime Carnival

    If your trip dates are flexible, time a visit around the Nerima Anime Carnival (ねりまアニメカーニバル), a ward-run festival usually held in spring at the Nerima Culture Center near Nerima Station (served by the Toei Oedo Line and the Seibu Ikebukuro Line). It’s free to attend and features stage events, voice actor appearances, exhibition panels, and booths tied to studios with Nerima connections. Exact dates move year to year, so check Nerima Ward’s official tourism or culture pages for the current year’s schedule before building a trip around it — but if the timing lines up, it’s a far less crowded, more local alternative to Tokyo’s big anime conventions.

    Shopping for anime goods while you’re in the area

    Nerima itself isn’t a shopping destination — don’t expect figure shops or merchandise stores near the museum. For that, hop back onto the Seibu Ikebukuro Line toward Ikebukuro (about 20 minutes), which has a serious concentration of anime goods stores, or head further to the specialty shops covered in our guide to Kaiyodo, Figma & Good Smile Company’s collectible figures and where to shop for them, several of which have outlets in Ikebukuro and Akihabara. It’s a natural way to bookend the day: history and production culture in Nerima in the morning, retail therapy on the way back into central Tokyo in the afternoon.

    Getting there, timing, and avoiding mistakes

    From Ikebukuro, take the Seibu Ikebukuro Line — a Limited Express or Express train gets you to Oizumi-Gakuen Station in about 15-20 minutes for around ¥280-320 one-way; local trains take a few minutes longer for the same fare. Your Suica or Pasmo card works the whole way, and since this is a side trip from central Tokyo rather than a final destination, it’s worth remembering the money on that card before you fly home — see our guide on getting your Suica or Pasmo deposit refunded before you leave Japan. The most common mistake visitors make here is treating Nerima like a full-day destination: it isn’t. Budget half a day at most — the museum is small, the character trail is short, and there’s little else aimed at tourists in the immediate area, so pair it with Ikebukuro, Nakano, or another Seibu Line stop rather than making it the day’s sole plan. The second common mistake is showing up on a Monday without checking — the museum’s weekly closure catches people who assumed a free, low-key museum would be open daily. Lunch options near the station are ordinary neighborhood restaurants rather than tourist-oriented spots, which is actually a good opportunity to practice ordering a teishoku set meal like a regular rather than hunting for an English menu. If you’re staying out this way and it gets late, double-check when the last trains run — the Seibu Ikebukuro Line’s suburban stretch has an earlier last-train cutoff than the major central Tokyo lines tourists are used to.

    Nerima won’t replace Akihabara as Tokyo’s anime shopping hub, and it doesn’t try to. What it offers instead is the actual origin point — the studio that’s still running, the neighborhood where the early creators lived, and a ward government that has quietly built a free, low-crowd way to see all of it. For anime fans willing to go one stop further than the obvious destinations, it’s worth the half-day.