Japan Trove

Category: Travel

Practical, up-to-date guides for traveling in Japan — itineraries, rail passes, eSIMs, where to stay, seasonal timing, etiquette, and the local know-how that makes a trip smoother. Written with real Japanese sources so you get the answer that actually works on the ground, not the recycled tourist one.

  • Sangenjaya: Tokyo’s Izakaya-Packed Local Nightlife Neighborhood

    Sangenjaya: Tokyo’s Izakaya-Packed Local Nightlife Neighborhood

    Photo by Denys Nevozhai on Unsplash

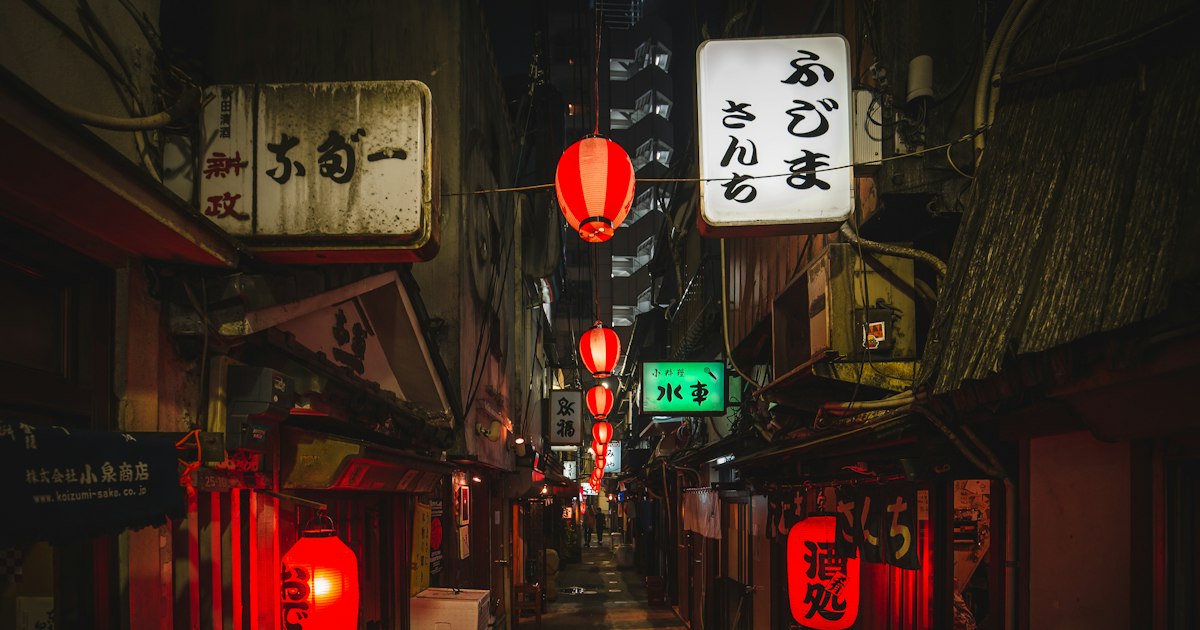
    One train stop past Shibuya, Sangenjaya trades neon megascreens for a tangle of alleyways packed with izakaya the size of a living room. Locals call it “Sancha,” and on any given weeknight you’ll find off-duty salarymen, university students, and neighborhood regulars elbow-to-elbow at counters that seat eight people max. It’s one of the easiest places in Tokyo to have a genuinely local night out without a reservation, a dress code, or a language barrier that can’t be solved by pointing at the menu.

    Why Sangenjaya Is Worth the Detour

    Sangenjaya sits in Setagaya Ward, a mostly residential part of Tokyo with none of the tourist infrastructure of Shinjuku or Shibuya. That’s the appeal. The area immediately south and west of the station is a grid of narrow lanes — some barely wide enough for two people to pass — lined with izakaya, yakitori counters, standing bars, and tiny late-night ramen shops that have operated in the same spot for decades. Unlike Shinjuku’s Golden Gai, which now sees as many tourists as regulars, Sangenjaya’s bars are still overwhelmingly used by the people who live and work nearby. Expect curiosity and friendliness if you walk in as a visitor, not a tourist trap.

    Getting There

    Sangenjaya Station is one stop from Shibuya on the Tokyu Den-en-toshi Line (about 4 minutes, roughly ¥140 with an IC card). It’s also the eastern terminus of the Tokyu Setagaya Line, a charming old-fashioned two-car tram that trundles through residential Setagaya toward Shimotakaido — worth riding at least one stop for the novelty, even if you’re not continuing anywhere. From the station, exit toward “Chazawa-dori” or the south side and you’re immediately in alley territory. Note that the five-way intersection right outside the station exits is notoriously confusing even for Tokyoites; if you get turned around, just pick an alley and start walking — that’s half the fun.

    Last trains back toward central Tokyo run until roughly 00:30–01:00 depending on the line and direction, but they get crowded and unpredictable in exact timing near year-end. If you’re staying out past that, see the taxi notes below. If you’re basing yourself in Shibuya for convenience, the guide on business hotel chains in Japan is useful for finding a reliably clean, affordable room within one stop of Sangenjaya’s nightlife.

    What to Eat and Drink

    Sangenjaya’s specialty is motsuyaki — grilled skewers of beef and pork offal (intestine, liver, heart) — alongside standard yakitori. Individual skewers typically run ¥120–¥300 each; a satisfying meal of 6–8 skewers plus drinks lands around ¥2,500–¥3,500 per person. Almost every seated izakaya charges an otoshi (a small unordered starter dish, ¥300–¥600) the moment you sit down — this isn’t a scam, it’s standard practice nationwide and functions like a cover charge.

    • Budget (¥1,500–¥2,500): Standing bars (tachinomi) around the station sell draft beer and highballs for ¥450–¥600 a glass, with no table charge and no obligation to order food. Great for a quick first or last stop of the night.
    • Mid-range (¥3,000–¥5,000): A proper seated izakaya with a motsuyaki or yakitori course, a few rounds of drinks, and otoshi. Many offer a 2-hour nomihodai (all-you-can-drink) add-on for ¥1,500–¥2,500, which is worth it if your group is drinking beer or highballs steadily.
    • Splurge (¥6,000+): A handful of small sake- or whisky-focused bars in the alleys stock harder-to-find bottles and charge accordingly, but Sangenjaya isn’t really a high-end destination — if you want a splurge dinner, this isn’t the neighborhood for it.

    If the alleys feel like too much of a gamble on a given night, there’s a reliable fallback: a gyudon counter near the station for a ¥500–¥700 bowl. The comparison in Gyudon Chains Compared: Yoshinoya vs Sukiya vs Matsuya is handy for knowing what to expect before you sit down.

    How to Actually Choose a Bar

    With no English signage and dozens of nearly identical doorways, decision paralysis is real. A few practical tips: look for a plastic food model case or photo menu out front (common and tourist-friendly); peek in — if it’s full of regulars mid-conversation with the owner, it’s a good one; and don’t be afraid of the tiny 6-seat counters, since those are often the most memorable. The lanes just south of the station around Chazawa-dori and the area locals call “Sanchaka” have the highest density, but wandering two streets further out usually turns up quieter, cheaper spots with the same quality.

    Best Time to Visit

    Thursday through Saturday nights, from about 19:00 onward, is when the alleys are liveliest — many of the smallest bars don’t bother opening before 18:00 and get going around 20:00–21:00. Weeknights (Monday–Wednesday) are quieter and better if you want actual conversation space at the counter rather than standing-room-only. Winter is comfortable since most bars are small and well-heated; summer visits mean narrow, humid alleys, so an early start before the evening crowd builds up is more comfortable. Avoid arriving right at opening expecting festival energy — Sangenjaya builds slowly and peaks late, closer to 22:00–23:00.

    Common Mistakes to Avoid

    • Walking in as a large group without calling ahead. Most izakaya here seat 8–15 people total. Groups of 5+ should call or have accommodation staff call to check space, especially Friday/Saturday.
    • Assuming cash isn’t needed. Many of the smallest, best bars are cash-only. Bring ¥10,000–¥15,000 in notes for a night out to avoid an awkward moment at the register.
    • Forgetting the last train. It’s easy to lose track of time hopping between three or four tiny bars. If you’re not confident you’ll make the last train, budget for a taxi — the guide on Taking a Taxi in Japan: Fares, Apps & Etiquette covers how to flag one down or book through an app late at night (expect roughly ¥2,000–¥3,000 back to central Shibuya/Shinjuku).
    • Skipping the otoshi line item. It’s not optional and not a mistake on your bill — budget an extra few hundred yen per person per venue.

    Beyond the Alleys

    If you arrive before dark, Carrot Tower — the tall building directly connected to the station — has a free public observation lobby on the 26th floor with views over Setagaya and, on clear days, Mount Fuji to the west. It’s a good, free way to kill 20 minutes before the alleys fill up. From there, it’s a short walk back down into the lanes to start the night properly.
  • Omotesando: Tokyo’s Architecture-Lined Luxury Shopping Boulevard

    Omotesando: Tokyo’s Architecture-Lined Luxury Shopping Boulevard

    Photo by Denys Nevozhai on Unsplash

    Omotesando is the broad, zelkova-lined boulevard connecting Harajuku to Aoyama, and it’s as much an open-air architecture museum as it is a shopping street. Luxury flagships designed by Tadao Ando, Herzog & de Meuron, and Toyo Ito line the main avenue, while the backstreets hide tiny boutiques, cafés, and galleries that most first-time visitors walk right past. Here’s how to actually spend a few hours here without just window-shopping brands you can find at home.

    Getting There and Getting Oriented

    The easiest approach is Tokyo Metro’s Omotesando Station (Chiyoda, Ginza, and Hanzomon lines) — exit A2 puts you right at the base of the boulevard. Alternatively, walk from Harajuku Station (JR Yamanote Line) down Omotesando itself, which takes about 10 minutes and lets you see the street unfold gradually. The main avenue runs roughly 1.2 km from the Harajuku end down to Aoyama-dori, with the famous Omotesando Hills complex sitting about two-thirds of the way down. Budget at least 2-3 hours if you want to browse both the main street and the side alleys (Ura-Harajuku and Cat Street run parallel and are where a lot of the interesting independent shops are).

    The Architecture Worth Stopping For

    Even if you don’t buy anything, it’s worth slowing down to look up. Tadao Ando’s Omotesando Hills (built on the site of the old Dojunkai Aoyama Apartments) uses a sloped internal spiral ramp instead of stairs — walk the full loop inside even if you’re not shopping. The Prada Aoyama building by Herzog & de Meuron, a few minutes further toward Aoyama-dori, has a distinctive diamond-shaped glass-and-concrete lattice facade that’s one of the most photographed buildings in the neighborhood. Dior’s building, designed by SANAA, uses a translucent white screen that glows at night. None of these require entry to appreciate from outside, so it’s a good 20-30 minute detour even on a tight schedule.

    Where to Shop by Budget

    Budget (under ¥5,000 per item): Head to Takeshita Street near Harajuku Station for youth fashion, crepes, and cheap accessories, or duck into Cat Street for skate and streetwear brands with more reasonable price points than the main boulevard. Kiddy Land, a multi-floor character goods store on Omotesando itself, is a reliable stop for Studio Ghibli, Sanrio, and Snoopy merchandise in the ¥1,000-3,000 range.

    Mid-range (¥5,000-30,000): Omotesando Hills has around 100 shops spanning Japanese and international mid-tier brands, plus a basement food floor. Aoyama also has several good select shops (multi-brand boutiques curating both Japanese and international labels) in this price bracket, often with better service and less crowding than the flagships.

    Splurge: The stretch between Omotesando Hills and Aoyama-dori is lined with flagship stores for Louis Vuitton, Chanel, Dior, Prada, and Tod’s, many of which stock Japan-exclusive colorways or limited collaborations not available elsewhere. If you’re building out cold-weather or outdoor gear while you’re in the area, Aoyama also has flagship stores for several of Japan’s outdoor and camping brands — see our guide to Snow Peak and Japan’s outdoor gear brands if that’s on your list.

    Hours and When to Go

    Most shops open between 10:00 and 11:00 and close around 20:00-21:00; Omotesando Hills runs 11:00-21:00 (restaurants until 23:00). The street is noticeably quieter on weekday mornings — arrive by 10:30 on a Tuesday or Wednesday and you’ll have the architecture and most boutiques nearly to yourself. Weekends, especially Sunday afternoons, bring heavy foot traffic and the occasional closure of the main road to vehicle traffic, which is pleasant for walking but crowded for browsing inside stores. Early December through early January, the zelkova trees are strung with illuminations that make for one of Tokyo’s best free nighttime displays — worth a return visit after dark even if you shopped the street earlier in the day.

    Common Mistakes to Avoid

    • Treating it as a half-day trip without side streets. The main boulevard is the architecture tour; the real shopping discoveries are one block off it, especially in the grid of streets behind Omotesando Hills and along Cat Street.
    • Expecting tax-free shopping everywhere. Not every boutique processes tax-free purchases on-site — some route you to a central counter, and the ¥5,000 minimum spend (before tax) per store per day still applies. Bring your passport.
    • Visiting during Golden Week or peak cherry blossom season without a plan. Omotesando connects directly to Harajuku, one of Tokyo’s most crowded areas during these periods — expect slow walking pace and long waits at popular cafés.
    • Skipping the food floor at Omotesando Hills. The basement level has solid, reasonably priced options if you want a break from browsing without leaving the complex.

    Pairing It with the Rest of Your Day

    Omotesando sits conveniently between Harajuku’s Takeshita Street scene and Shibuya, so it works well as a midday stop on a walking route between the two. If you’re staying nearby and want a practical, no-frills base, Tokyo has plenty of reliable options — see our comparison of business hotel chains in Japan for a sense of what to expect at different price points. And if you need to get across town afterward, it’s worth knowing when a taxi makes more sense than the subway, particularly late in the evening after the illuminations.

  • Niigata: Japan’s Sake Country and Snow Gateway

    Niigata: Japan’s Sake Country and Snow Gateway

    Photo by Queensland, Australia on Unsplash

    Ninety minutes from Tokyo by Shinkansen, Niigata Prefecture quietly produces more sake breweries than almost anywhere else in Japan — and in winter, some of the heaviest, most reliable powder snow in the country. It’s the kind of destination that rewards travelers who want a genuine regional experience without the multi-hour transfers that Hokkaido or Tohoku demand. Here’s how to actually plan the trip, not just dream about it.

    Why Niigata Is Sake Country

    Niigata has around 90 active sake breweries (kura), the most of any prefecture in Japan, thanks to a combination of heavy snowmelt producing exceptionally soft, mineral-light water, cold winters ideal for slow fermentation, and rice paddies that yield prized varieties like Koshihikari. Brands such as Hakkaisan, Kubota (Asahi Shuzo), and Koshi no Kanbai are sold nationwide, but tasting them near the source is a different experience entirely.

    The single best stop for sake tourism is Ponshukan, located right inside Niigata Station (Bandai City side, open daily roughly 9:00–20:00). For a 500 yen coin you get 5 tasting coins and a small sake cup, which you exchange at vending-machine-style dispensers offering around 100 different local sakes, from dry junmai to sweet nigori. It’s touristy by nature but genuinely useful for figuring out what you like before buying bottles (750ml bottles typically run 1,500–4,000 yen in the attached shop).

    If you have a car or are willing to take a local bus, visiting an actual brewery is worth the extra effort. Hakkaisan Brewery in Minami-Uonuma offers free self-guided tours of its aging cellar and a pleasant on-site soba restaurant; Imayotsukasa Brewery in Niigata City runs English-friendly tours (reservation required, around 1,000–2,000 yen depending on the course) that end with a proper tasting flight.

    Getting There: The Joetsu Shinkansen

    Niigata City is reached directly from Tokyo Station via the Joetsu Shinkansen in about 1 hour 37 minutes on the fastest Toki services; a one-way reserved seat costs roughly 10,370 yen. The JR East Rail Pass (Tohoku area) or the nationwide JR Pass both cover this line, which makes Niigata an easy add-on to a Tokyo-based itinerary rather than a special trip. If you’re traveling at a busy time — New Year, Golden Week, or peak ski weekends — it’s worth understanding how seat reservations actually work before you board; our guide to reserved vs non-reserved Shinkansen seats explains when jiyuseki (non-reserved) cars make sense and when they don’t.

    For the ski towns, you don’t even need to go all the way to Niigata City. GALA Yuzawa Snow Resort has its own Shinkansen station exit, so you can go from Tokyo Station straight to the slopes in about 77 minutes without a bus transfer — genuinely one of the most convenient ski access points in the world.

    The Snow Gateway: Yuzawa and Myoko

    Niigata’s snowbelt towns sit on the Sea of Japan side of the mountains, which means they catch enormous amounts of moisture-laden snow — Myoko Kogen and Nozawa Onsen-adjacent areas regularly report snowfall totals that rival Hokkaido’s famous resorts, but with far shorter travel times from Tokyo.

    • GALA Yuzawa — best for a day trip; lift ticket plus gondola around 6,500–7,500 yen for a full day, rental gear available on-site. Season roughly mid-December to early May.
    • Naeba — a large, well-developed resort with extensive beginner and intermediate terrain, popular with families; direct bus access from Tokyo (Naeba Shuttle) in addition to Shinkansen + bus.
    • Myoko Kogen — the powder-hunter’s choice, with multiple interconnected ski areas and a more backcountry feel; requires a transfer to limited express train or bus from Joetsu-Myoko Shinkansen station, adding 30–45 minutes versus Yuzawa.

    Best timing: late January through February for the deepest, driest snow; December and March are cheaper and less crowded but less reliable for powder. Weekday visits cut lift-ticket and lodging costs noticeably, and weekday slopes are dramatically less crowded than weekends, when Tokyo day-trippers pour in on the early Shinkansen.

    Where to Stay

    Niigata City and Yuzawa both have a good mix of options. In the city, business hotels near the station are the practical budget/mid-range choice — if you’re unfamiliar with how Japan’s major chains differ, our comparison of Toyoko Inn, APA, and Dormy Inn is worth reading before booking, since Dormy Inn locations often include an onsen bath, a nice bonus after a day of skiing or walking between breweries. Expect roughly 7,000–12,000 yen per night for a standard double at these chains in Niigata.

    In Yuzawa, onsen ryokan are the splurge option — many resorts here pair hot spring bathing with ski access, with rooms (often including dinner and breakfast) running 15,000–35,000 yen per person per night depending on season and room grade. Budget travelers can instead stay in Niigata City or Echigo-Yuzawa and day-trip to the slopes, saving significantly on lodging.

    Food Beyond Sake

    Niigata’s food scene is built around the same rice and water that make its sake good. Koshihikari rice grown locally is considered some of the best in Japan, and it’s worth ordering a simple bowl of plain rice at a local restaurant to taste the difference. The prefecture is also known for nodoguro (blackthroat seaperch) and other Sea of Japan fish, as well as regional fish cake traditions — if you’re curious about Japan’s broader kamaboko culture before you go, see our guide to artisan kamaboko, since several Niigata producers sell their own versions at Ponshukan and at Niigata’s Furumachi area shops.

    For a casual lunch between sake tastings, Niigata City’s Furumachi district and the Honcho market area have reasonably priced seafood-donburi shops in the 1,000–1,800 yen range.

    Common Mistakes and Practical Tips

    • Underestimating distances within the prefecture. Niigata City and the Yuzawa/Myoko ski areas are roughly an hour apart by Shinkansen and serve different purposes — don’t plan to “do sake and skiing” in the same half-day.
    • Skipping reservations at Ponshukan on weekends. No reservation is needed, but the tasting counter gets crowded with tour groups midday; arrive before noon for a calmer experience.
    • Not checking road conditions if self-driving in winter. Snow tires or a rental car with them pre-fitted are mandatory in practice; taxis and trains are far less stressful for short-stay visitors. If you do take taxis around Niigata City, our guide to taxi fares and etiquette in Japan covers what to expect cost-wise.
    • Forgetting that many breweries close on Sundays or require advance booking for tours. Always check the brewery’s own site or call ahead; English support varies widely between kura.

    Niigata works well as a 2-3 day extension to a Tokyo trip, or as a dedicated sake-and-snow weekend on its own. Because the Shinkansen connection is so fast and frequent, it’s one of the easier “real regional Japan” destinations to slot into an itinerary without sacrificing convenience.

  • Hakodate: Hokkaido’s Morning Market, Night View & Easy Ferry Access

    Hakodate: Hokkaido’s Morning Market, Night View & Easy Ferry Access

    Photo by Daniel Beauchamp on Unsplash

    Hakodate doesn’t get the crowds of Sapporo or the ski hype of Niseko, but it packs more into 48 hours than almost anywhere else in Hokkaido: a seafood market you fish your own breakfast out of, one of the three most-photographed night views in Japan, and a genuinely interesting way to arrive — by ferry across the Tsugaru Strait instead of just another train. Here’s how to time it and what it actually costs.

    Getting to Hakodate: Shinkansen, Plane, or Ferry

    Most travelers arrive by Shinkansen. The Hayabusa line runs from Tokyo to Shin-Hakodate-Hokuto Station in about 4 hours (roughly ¥23,000–24,000 one-way with a reserved seat — see our guide on reserved vs non-reserved Shinkansen seats for how to decide which to book). Shin-Hakodate-Hokuto is not downtown, though — you transfer to the “Hakodate Liner” local train for the final 20 minutes into Hakodate Station proper.

    Flying is faster and often cheaper: Hakodate Airport is a 20-minute bus or taxi ride from the city center, with regular flights from Tokyo (Haneda), Osaka, and Sapporo.

    The more memorable route is the ferry from Aomori, across the Tsugaru Strait that separates Honshu and Hokkaido. Seikan Ferry runs Aomori–Hakodate in about 3 hours 40 minutes for roughly ¥2,000 per foot passenger. If you’re coming from the Shimokita Peninsula, the Oma–Hakodate crossing (Shimokita Kotsu) is shorter, around 90 minutes for about ¥2,380. Both let you bring a car or bike on for an extra fee, and both dock a short bus ride from central Hakodate. If you’re assembling a slow, budget-first route up from Tokyo on local trains before catching the ferry, the Seishun 18 Ticket can cover the Honshu legs, though note it doesn’t work on the ferry itself or on Hokkaido’s Shinkansen segment.

    Hakodate Morning Market: Fish Your Own Breakfast

    Hakodate Asaichi (the Morning Market) sits in a covered arcade literally one minute’s walk from JR Hakodate Station’s east exit — you’ll see it before you’ve even figured out which exit leads to your hotel. It’s open daily, roughly 5:00 am to 2:00 pm from spring through autumn, and a bit later-starting (around 6:00 am) with earlier closing in winter. Go before 9 am; by mid-morning the best crab and uni can sell out, and tour groups fill the aisles by lunchtime.

    The signature activity is “ikatsuri” — squid fishing. For about ¥500–700 you drop a line into a tank, reel up a live squid, and a stall right there will slice it into sashimi on the spot for a small extra prep fee (often ¥300–500). It sounds gimmicky but the squid is genuinely some of the freshest you’ll eat in Japan, and kids love it. Otherwise, a kaisendon (seafood rice bowl) with uni, salmon roe, and crab runs roughly ¥1,500–3,000 depending on how loaded it is — many stalls let you build your own bowl, picking toppings à la carte, which is a fun way to control the price if you’re traveling on a budget.

    Common mistake: assuming the market is purely a tourist trap and skipping it for a “real” restaurant. It is touristy, but it’s also where locals still buy fish — the two aren’t mutually exclusive here. Bring cash; many smaller stalls don’t take cards.

    Mt. Hakodate’s Night View: Tickets and Timing

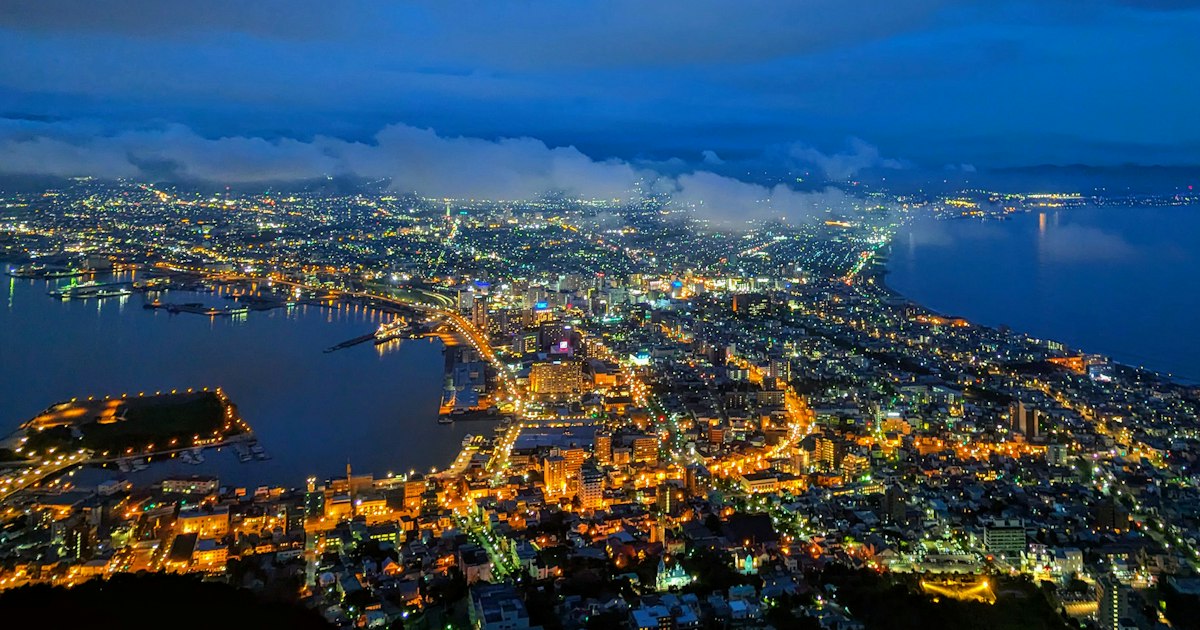
    The night view from Mt. Hakodate is routinely ranked alongside Nagasaki and Kobe as one of Japan’s three best, and it’s easy to see why: the city sits on a narrow isthmus, so the lights form an hourglass shape between two dark stretches of sea on either side.

    The ropeway (Hakodate Ropeway) from the base near Motomachi to the 334-meter summit takes about 3 minutes and runs roughly every few minutes. A round-trip adult ticket is about ¥1,800 (one-way around ¥1,200), with discounted child fares. Operating hours vary seasonally — typically 10:00 am to around 9:00 or 10:00 pm, with last ascent roughly 30–50 minutes before closing — so check the current schedule before you go, especially in winter when hours shrink.

    Timing matters more than most visitors expect. Arrive 30–45 minutes before sunset to catch the transition from daylight to lit-up city, which is the most dramatic version of the view — then stay for full darkness. Weekends and the first clear night after a stretch of bad weather get crowded fast, with lines for the ropeway stretching well past 30 minutes; a clear weekday evening is far more comfortable. Winter nights are colder but the air is drier and the view is often sharper, while summer brings warmer waits but occasional haze. If the ropeway line looks brutal, a taxi up the toll road to the summit parking lot is a reliable backup — see our guide on hailing a taxi with apps like GO and S.Ride for how that works in a smaller city like Hakodate.

    Motomachi and the Red Brick Warehouses

    Between the ropeway base and the bay, the Motomachi district is Hakodate’s old foreign-settlement neighborhood — a walkable slope of former consulates, an Orthodox church, and a Catholic church, all free to view from outside and genuinely pretty regardless of season. Down at sea level, the Kanemori Red Brick Warehouses have been converted into shops and cafés; it’s a reasonable place to browse for an hour before or after the ropeway, though prices lean toward souvenir-shop rates rather than market-stall bargains.

    Where to Stay

    • Budget: Chain business hotels cluster around Hakodate Station, often ¥5,000–8,000 a night for a single. If you’re unfamiliar with Japan’s business hotel brands, our comparison of Toyoko Inn, APA, and Dormy Inn is worth a look — Dormy Inn locations in particular often include an onsen bath, a nice touch after a day of hill-walking.
    • Mid-range: Hotels near Motomachi or the bay area, often with partial sea or mountain views, generally run ¥10,000–18,000.
    • Splurge: Yunokawa Onsen, a hot spring district near the airport with a tram connection downtown, has ryokan-style hotels with private or communal baths from around ¥20,000 up — a good way to end a day that started with a cold squid-fishing tank.

    Best Time to Go and Common Mistakes

    Hakodate works year-round, but late spring through autumn (May–October) gives you comfortable walking weather for Motomachi’s hills, while winter (December–February) gives the sharpest night views and a snow-dusted old town, at the cost of icy slopes and a shorter ropeway schedule. Avoid arriving on the first Shinkansen of the day expecting a leisurely market breakfast — the best seafood often sells out by mid-morning, so plan the market for the day you arrive, not the day you leave. And don’t treat Hakodate as a single half-day stop between Tokyo and Sapporo; between the market, the ropeway, and the ferry terminal logistics, it comfortably fills one full day, two if you add Yunokawa Onsen or a side trip to the Goryokaku star fort.

  • Business Hotel Chains in Japan: Toyoko Inn, APA & Dormy Inn Compared

    Business Hotel Chains in Japan: Toyoko Inn, APA & Dormy Inn Compared

    Photo by ZENG YILI on Unsplash

    If you’ve ever searched for a place to stay in Japan, you’ve almost certainly stumbled across the same three names over and over: Toyoko Inn, APA Hotel, and Dormy Inn. These “business hotel” chains are the backbone of budget-to-midrange travel in Japan, with locations clustered around nearly every major train station in the country. They’re compact, efficient, and reliably clean — but they’re not identical, and picking the wrong one for your travel style can mean a cramped room with no bath when you really wanted a soak after a long day of sightseeing. Here’s how the three actually compare.

    What “Business Hotel” Means in Japan

    A “business hotel” (ビジネスホテル) is a no-frills hotel built around functionality: small single or double rooms, a unit bathroom (tub/toilet/sink combined into one molded plastic pod), and a location within a few minutes’ walk of a train station. They were originally designed for traveling salarymen on tight budgets and tight schedules, which is why rooms rarely exceed 15–20 square meters. Don’t expect American or European-style hotel room sizes — a “double” room is often just a slightly wider single bed, not two beds. If you’re arriving from the airport by train, check our guide on reserved vs non-reserved Shinkansen seats so you know what to expect when connecting onward to your hotel’s local station.

    Toyoko Inn: The Reliable Budget Standard

    Toyoko Inn is Japan’s largest hotel chain by number of properties, with well over 350 locations nationwide and a growing number overseas (Seoul, Honolulu, and several Chinese and Southeast Asian cities). The appeal is consistency: every Toyoko Inn follows almost the same floor plan, the same simple free breakfast (rice balls, miso soup, salad, and coffee served from around 6:30–9:00 AM), and the same no-nonsense pricing. Standard singles typically run ¥6,000–¥9,000 a night; doubles and twins are closer to ¥8,000–¥12,000, though Tokyo and Osaka locations near major stations can push higher during peak season.

    Joining the free Toyoko Inn Club membership (sign up at check-in or online) earns you a discount voucher after your first stay and member-only rates thereafter — worth doing if you’ll stay at more than one Toyoko Inn on your trip. Standard check-in is 16:00 and checkout is 10:00, both earlier than most chains, so plan your arrival accordingly if you’re coming straight from a late flight.

    Common mistake: booking a Toyoko Inn expecting a bathtub big enough to stretch out in, or blackout curtains that fully block city light — rooms are functional, not plush. If you want a proper soak, that’s where Dormy Inn has the edge.

    APA Hotel: Scale and City-Center Convenience

    APA Hotel is Tokyo’s biggest hotel operator and has an enormous footprint across the capital, plus strong coverage in Osaka, Nagoya, and other major cities. The chain leans into skyscraper-style properties right next to stations like Shinjuku, Shibuya, and Akasaka, so it’s a strong pick if your priority is minimizing walking distance with luggage. Rooms run a similar size to Toyoko Inn but often feel a touch more modern, with some locations offering larger “wide” rooms, in-room humidifiers, and — at select properties — rooftop or basement public baths and saunas separate from the standard unit bath.

    Pricing is more variable than Toyoko Inn because APA uses dynamic, demand-based pricing similar to airlines: a room that’s ¥7,000 three weeks out can jump to ¥15,000+ if booked the same week during a busy period (cherry blossom season, Golden Week, or major conventions). Check-in is usually 15:00, checkout 11:00. If you’re flexible on dates, booking 1–2 months ahead saves significantly. APA’s own app and website frequently beat third-party booking sites on price, so it’s worth comparing both before committing.

    Dormy Inn: The Midrange Upgrade

    Dormy Inn sits a notch above the other two in both price and amenities, and it’s the chain most frequent travelers to Japan tend to seek out specifically. The signature feature is a communal bath (often a proper hot-spring-style rotenburo or indoor onsen-style bath using mineral-added water) included free for all guests — a genuine treat after a day of walking, and a nice lower-effort alternative if a dedicated onsen trip like Kurokawa Onsen isn’t on your itinerary. Most locations also offer a free late-night bowl of soba or ramen (yonaki soba), typically served around 21:30–23:00, which is a genuinely useful perk if you’re coming back from dinner plans that ran long or an evening at a baseball game or izakaya crawl.

    Expect to pay ¥9,000–¥16,000 for a standard room depending on city and season, with breakfast (a hot buffet, not just rice balls) often included or available as a reasonably priced add-on around ¥1,500–¥2,200. Check-in is usually 15:00, checkout 11:00. Dormy Inn has fewer locations than Toyoko Inn or APA — around 100 nationwide — so availability in smaller cities can be limited, and popular locations in Tokyo, Kyoto, and Naha (Okinawa) book out weeks ahead during peak travel seasons.

    Side-by-Side: Which One Should You Book?

    • Budget priority, multi-city trip: Toyoko Inn — most consistent pricing and the widest network, so you can rely on the same experience in Sapporo, Osaka, or Fukuoka.
    • Need to be dead-center in a huge city: APA Hotel — best odds of finding a tower hotel steps from a major station, but book early to avoid surge pricing.
    • Want a bit of comfort and a bath to unwind: Dormy Inn — worth the extra ¥2,000–¥4,000 a night, especially after mountain or hiking days like Mount Takao.
    • Splurge option: Dormy Inn Premium properties (a step up from standard Dormy Inn) add larger rooms and nicer baths for roughly ¥14,000–¥22,000.

    Booking and Arrival Tips

    Book directly through each chain’s official website when possible — all three run loyalty programs and occasional direct-booking discounts that third-party sites don’t show. Rooms at all three chains are genuinely small, so if you’re traveling with large suitcases, look for photos confirming floor space before booking, or request a “wide” or “comfort” room category if offered.

    Since nearly every property sits within a few minutes of a train station, you’ll rarely need a taxi for the hotel itself — but if you’re hauling luggage late at night or arriving somewhere unfamiliar, it helps to know the basics in advance; see our guide on taking a taxi in Japan for fares and etiquette. One last common mistake: assuming check-in works like a Western hotel with 24-hour flexibility. All three chains enforce their check-in times fairly strictly, and if you arrive before 15:00–16:00, you’ll typically just be able to drop luggage, not enter your room — plan your itinerary for arrival day accordingly.

  • Taking a Taxi in Japan: Fares, Apps & Etiquette

    Taking a Taxi in Japan: Fares, Apps & Etiquette

    Photo by Matthieu Bühler on Unsplash

    Japanese taxis have a reputation for being expensive, and in big cities that’s often true — but they’re also spotlessly clean, scrupulously metered, and sometimes the fastest way to close the “last mile” between a train station and your hotel or a hard-to-find restaurant. Knowing the fare structure and a couple of app tricks before you land will save you both money and the awkwardness of not knowing which door to use.

    How Taxi Fares Work in Japan

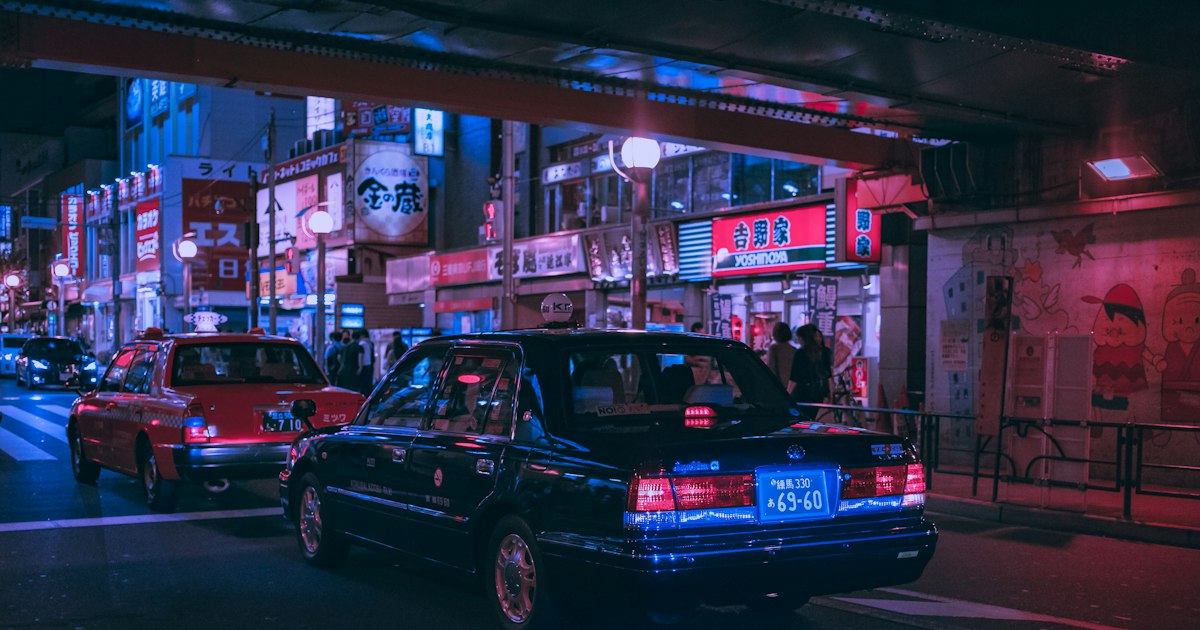
    Every licensed taxi runs on a government-regulated meter, so there’s no haggling and no surge pricing like you’d see with rideshare apps elsewhere. In Tokyo, the flagfall is ¥500 for the first 1.096 km, then ¥100 for each additional 255 meters. When traffic crawls below a set speed, a time-based charge of roughly ¥100 per 1 minute 35 seconds kicks in instead of the distance charge — this is why a taxi stuck in Shibuya traffic can feel like it’s “ticking” even when you’re barely moving. Osaka and Kyoto use a similar ¥500–600 flagfall with slightly different per-metre increments. A late-night surcharge of about 20% applies between 22:00 and 5:00, and tolls (expressway, bridges) are added on top and shown separately on the receipt.

    For budgeting purposes: a short 2 km hop across central Tokyo typically runs ¥1,200–1,600; crossing a whole ward might be ¥2,500–4,000. Tolls make airport-to-airport or city-to-city runs the real splurge category — see the Airport & Station Transfers section below.

    Booking a Taxi: Apps vs. Street Hailing

    You can still flag a taxi on the street — look for a red “空車” (vacant) light in the windshield versus a green “迎車” (en route to pick someone up) — but apps are faster and remove any language barrier. The three worth having on your phone:

    • GO — Japan’s largest taxi-hailing app, covering most major cities. English interface, credit card payment built in, and a fare estimate before you confirm.
    • S.Ride — backed by major taxi operators including some Toyota-affiliated fleets; strong coverage in Tokyo and Osaka, similar functionality to GO.
    • Uber — in Japan, Uber doesn’t run private rideshare; it dispatches licensed taxis, so pricing is the same metered fare plus a small booking fee. Useful if you already have the app set up from home.

    All three let you set a pickup pin, see the car’s plate number and location in real time, and pay in-app so you don’t fumble with cash at the end. Expect a ¥400–500 “convenience” surcharge on top of the metered fare for app-based dispatch, which is standard and not a scam.

    Taxi Etiquette: What to Know Before You Get In

    A few habits will mark you as someone who’s done this before:

    • Doors open automatically — the driver controls the rear left door with a lever. Don’t yank it open or slam it shut; let the driver handle both ends.
    • No tipping. Tipping isn’t expected and can genuinely confuse a driver who then has to chase you down with change.
    • Pay at the end, by cash, IC card (Suica/Pasmo), or credit card — most fleets now accept all three, but smaller local or rural operators may be cash-only, so carry some yen as backup.
    • Sit in the back unless you’re traveling alone and the front passenger seat is offered; solo riders often get waved to the back regardless.
    • Keep conversation low-key. Drivers are professional and polite but not chatty by default — a quiet ride is normal, not rude.

    Airport & Station Transfers by Taxi

    Taxis from Narita Airport into central Tokyo cost roughly ¥20,000–23,000 and take 60–90 minutes depending on traffic — fine for a group of three or four splitting the cost with heavy luggage, but a poor choice solo when the Narita Express or Keisei Skyliner will get you there for a fraction of the price. Haneda is far more taxi-friendly: central Tokyo runs about ¥6,000–8,000 and 30–45 minutes, a reasonable splurge if you land late or are hauling shopping-trip luggage.

    Within cities, taxis shine for the final leg after a long train ride — say, from Kyoto Station to a ryokan in Arashiyama (roughly ¥2,500–3,000), or from a small rural station to an onsen town like Kurokawa Onsen or Atami, where bus schedules are sparse and a taxi rank is usually waiting right outside the station.

    Common Mistakes to Avoid

    • Trying to split a fare across two taxis to save money — group travel is almost always cheaper by taxi than by buying multiple train tickets, so do the math before defaulting to rail for a group of four.
    • Assuming credit cards work everywhere. Rural taxis and some older Tokyo cabs are still cash-only; always have ¥3,000–5,000 in small bills as backup.
    • Forgetting the address isn’t enough. Japanese addresses can be hard for drivers to locate directly; pull up the destination on Google Maps or have a hotel business card with the address in Japanese to show the driver.
    • Grabbing your own bags from the trunk. The driver handles the boot; reaching back to open it yourself is unnecessary and can startle them mid-maneuver.

    When a Taxi Beats the Train (and When It Doesn’t)

    Taxis win for short hops with luggage, late-night travel after trains stop running (most urban lines shut down around midnight to 1 a.m.), and groups of three or more splitting a fare. They lose badly for anything over about 10 km in heavy traffic, where even a non-reserved local train or the Shinkansen will be faster and cheaper — if you’re covering real distance between cities, compare against options like reserved vs. non-reserved Shinkansen seats or, for budget day-tripping, the Seishun 18 Ticket. The smartest approach on most Japan itineraries is to use trains for the backbone of your trip and taxis for the awkward, heavy-luggage, or late-night edges around it.

  • Reserved vs Non-Reserved Shinkansen Seats: Jiyuseki Explained

    Reserved vs Non-Reserved Shinkansen Seats: Jiyuseki Explained

    Photo by Fikri Rasyid on Unsplash

    If you’ve bought a Shinkansen ticket and seen two confusingly similar options at the vending machine — one cheaper, one not — you’ve run into Japan’s reserved vs. non-reserved seat system. Getting this choice right can save you money on a long trip, or it can leave you standing in the aisle for two hours with a suitcase wedged against your legs. Here’s how jiyuseki (non-reserved) and shiteiseki (reserved) actually work, what they cost, and how to pick the right one for your trip.

    What “Jiyuseki” Actually Means

    Jiyuseki (自由席) literally translates to “free seating” — it doesn’t mean the seat is free, it means seating is unassigned. You buy a jiyuseki ticket, walk to the designated non-reserved cars (usually clearly marked on the platform signage and on the side of the train itself), and sit in any open seat. First come, first served. If every seat is taken, you stand or sit on the floor near the doors, which does happen during peak travel.

    Shiteiseki (指定席) is the opposite: a specific seat, specific car, specific train, guaranteed. You pick your seat (window or aisle, sometimes even the exact row) at the time of purchase, and it’s yours regardless of how crowded the train is.

    How the Pricing Actually Breaks Down

    Every Shinkansen ticket is made up of two fares: the base fare (kijun unchin) and the limited express surcharge (tokkyu-ken). The reserved/non-reserved difference lives entirely inside that surcharge. As a concrete example, on the Tokyo–Shin-Osaka route aboard a Nozomi:

    • Non-reserved (jiyuseki), ordinary car: approximately ¥13,870
    • Reserved (shiteiseki), ordinary car: approximately ¥14,720
    • Green Car (reserved only, more legroom and quieter cabin): approximately ¥19,560

    So the premium for a guaranteed seat is roughly ¥850–¥1,000 on a long route like this — not huge, but it adds up for a family of four, and it drops to almost nothing on shorter hops between neighboring cities. Prices shift slightly by season and are higher on Nozomi/Mizuho services than on Hikari or Kodama, which are the only Shinkansen types the Japan Rail Pass covers.

    When Jiyuseki Makes Sense

    Non-reserved seating is genuinely the smarter choice in a few situations:

    • Short, frequent routes. Between Tokyo and Shizuoka, or Osaka and Kyoto on the Tokaido line, trains run every few minutes. If you miss one, the next is barely 10 minutes behind, so the risk of not finding a seat is low outside peak hours.
    • Flexible schedules. If you’re not sure which train you’ll catch — say, you’re finishing lunch at Kuromon Ichiba Market and don’t know exactly when you’ll leave — jiyuseki tickets don’t lock you into a specific departure. Any non-reserved car on any train that day works.
    • Budget trips. Travelers already squeezing costs with something like the Seishun 18 Ticket for local legs will appreciate that jiyuseki shaves a little more off Shinkansen segments too.

    Where it gets risky: Golden Week (late April–early May), Obon (mid-August), New Year (late December–early January), and Friday evenings/Sunday afternoons on popular routes. During these windows, non-reserved cars fill up at the originating station and stay full. If you’re boarding mid-route during one of these periods, strongly consider paying the small premium for a reserved seat.

    Finding and Boarding the Non-Reserved Cars

    Each Shinkansen has designated jiyuseki cars, almost always the lowest-numbered cars at one end of the train (commonly cars 1–3 on a 16-car Tokaido Shinkansen Nozomi, for example). The platform has floor markings and overhead signs showing exactly where each numbered car will stop, plus color-coded lines for reserved vs. non-reserved queuing. Arrive at least one train earlier than you plan to depart if you want a good shot at a seat, and line up at the marked spot rather than wherever looks convenient — queue order matters here and locals take it seriously.

    If you board with large luggage, note that oversized bags (any dimension sum over 160cm) technically require a free luggage reservation on Tokaido/Sanyo/Kyushu Shinkansen, and oversized racks are only in specific reserved cars — another point in favor of booking ahead if you’re hauling big suitcases full of souvenirs.

    Booking a Reserved Seat: Your Options

    You can reserve shiteiseki seats at any JR ticket counter (midori-no-madoguchi), at the green ticket vending machines found in most stations, or online through apps like JR East’s “Train Reservation” or the Smart-EX/EX-IC services (useful mainly for the Tokaido/Sanyo/Kyushu lines). Reservations open about a month in advance and are free to make beyond the surcharge itself — the only cost is the shiteiseki fare difference noted above. If you’re arriving into Tokyo and connecting onto a Shinkansen the same day, it’s worth comparing airport transfer options first — our Narita Express vs. Keisei Skyliner guide covers which service gets you into the city fastest to make that connection.

    Common Mistakes to Avoid

    • Sitting in a reserved seat with a jiyuseki ticket. The conductor will politely but firmly move you, and if the seat’s rightful occupant boards mid-route, you’ll be standing anyway. Always check the car number against the platform signage.
    • Assuming the Japan Rail Pass covers every train. It doesn’t cover Nozomi or Mizuho — only Hikari and Kodama — so Pass holders should default to those and check jiyuseki/shiteiseki car numbers, which differ by train type.
    • Not checking seasonal crowding. If your trip overlaps a national holiday week, reserve ahead rather than gambling on jiyuseki, especially for day trips where you need a guaranteed return seat.
    • Forgetting both tickets. A reserved Shinkansen trip requires the base fare ticket plus the tokkyu-ken limited express ticket (often printed as one combined ticket, but sometimes two separate slips) — keep both until you exit the gate.

    Budget, Mid-Range, and Splurge: Quick Picks

    For a short hop like a day trip to the retro hot-spring town covered in our Atami guide, jiyuseki is the easy budget call — trains run constantly and the savings are real. For long cross-country routes during busy season, mid-range travelers should spend the extra ¥800–¥1,000 for shiteiseki peace of mind. If you want the full splurge experience — guaranteed wide seats, quieter cabin, and no scramble for a window view of Mt. Fuji — book a Green Car seat in advance. And if you’re relying on taxis for the legs on either end of your Shinkansen ride, our guide to hailing a taxi in Japan covers the apps and fares worth knowing before you land.

  • Seishun 18 Ticket: Japan’s Budget Local Train Pass Explained

    Seishun 18 Ticket: Japan’s Budget Local Train Pass Explained

    Photo by Yoko Correia Nishimiya on Unsplash

    If you’ve spent any time in Japanese train-enthusiast forums, you’ve seen people rave about the Seishun 18 Ticket (青春18きっぷ, Seishun Juhachi Kippu). It’s one of the cheapest ways to cover huge distances in Japan — but it only works on slow trains, only during a few weeks a year, and JR recently rewrote the rules. Here’s what it actually gets you, what it costs, and who should (and shouldn’t) bother with it.

    What the Seishun 18 Ticket Actually Is

    Despite the name (“youth 18”), it has no age limit — anyone can buy and use one. It’s a JR Group ticket that gives unlimited rides on ordinary local (futsu) and rapid (kaisoku) trains anywhere on the JR network nationwide, including JR ferries to Miyajima. The catch is right there in “local and rapid”: you cannot use it on shinkansen, limited express (tokkyu) trains, or sleeper trains. You’re riding the same trains commuters and students use, which means more transfers, longer journeys, and occasionally standing room only during rush hour.

    For travelers comfortable with slower travel, it’s a genuinely fun way to see the country — you end up passing through small stations and rural scenery that the shinkansen simply flies over. For anyone on a tight schedule trying to get from Tokyo to Osaka in an afternoon, it’s the wrong tool; that trip alone can take 8+ hours by local train versus about 2.5 hours on the Tokaido Shinkansen.

    How It’s Priced — and a Rules Change to Know About

    For decades the classic format was simple: one ticket, five one-day stamps, priced at ¥12,050 total (around ¥2,410 per day of unlimited travel), and usable by a group splitting the five days among multiple people on the same day. It was one of the best-value rail products in the country.

    In 2024, JR announced a significant overhaul of the ticket starting with the winter 2024–2025 sales period, changing it toward single-person use with a different day structure and pricing. Because JR revises these terms by season, don’t assume the old ¥12,050/five-day structure is still current — check the exact price, number of valid days, and whether sharing is allowed on JR’s official site or at a JR ticket counter (Midori no Madoguchi) before you build an itinerary around it.

    When You Can Buy and Use It

    This isn’t a year-round pass. It’s sold and valid only during three seasonal windows tied to Japan’s school holidays:

    • Spring: roughly late February through early April
    • Summer: roughly mid-July through early September
    • Winter: roughly mid-December through mid-January

    The sale period and the usable period overlap but aren’t identical — tickets usually go on sale a couple of weeks before the usable window opens. If your trip falls outside these three seasons, the Seishun 18 Ticket simply isn’t an option, and you’ll want to look at regional JR passes instead.

    What You Can (and Can’t) Ride

    Unlimited local and rapid trains on JR lines across Japan, including the New Rapid services in the Kansai area and most JR commuter lines in greater Tokyo. What’s excluded: shinkansen, all limited express trains (even for a short hop), sleeper trains, and non-JR private railways and subways (Tokyo Metro, Hankyu, Keikyu, etc. all require separate fares). If your plan involves the airport, note that the Narita Express and the Keisei Skyliner are both excluded from this pass — for airport transfers, compare your options in our Narita Express vs Keisei Skyliner guide rather than trying to stretch the Seishun 18 Ticket to the airport.

    How to Buy One

    Seishun 18 Tickets are sold at JR ticket counters (Midori no Madoguchi) inside major JR stations and at JR-affiliated travel agencies. You can’t buy them from a Shinkansen ticket machine or convenience store. At the counter, staff stamp the ticket with the date each time you start a day of travel, so keep it somewhere you won’t lose it — a damaged or illegible ticket can cause problems with conductors checking tickets along the route.

    Who This Pass Is Actually For

    It suits a specific traveler: someone with flexible time, a tolerance for long travel days, and an interest in the journey itself rather than just the destination. Classic uses include:

    • A one-day round trip from Tokyo to a seaside town like Atami via the Tokaido Line — about 1.5–2 hours each way by local/rapid train, well within a single day’s budget.
    • Multi-day loops through regional Japan for travelers chasing low cost over speed, including long hauls toward destinations like Kurokawa Onsen in Kyushu, which can take a full day of connections by local train alone.
    • Students and backpackers on a tight budget who have more vacation time than money.

    It’s a poor fit if you’re juggling hotel check-ins, tours, or dinner reservations with hard start times — local-train connections run less frequently than shinkansen and delays cascade. If your itinerary depends on precise timing, book a regular ticket or a JR regional pass instead, and save cash elsewhere — for instance by comparing taxi apps when you land, covered in our guide to hailing a taxi in Japan.

    Common Mistakes to Avoid

    • Assuming it covers limited express trains. It doesn’t — not even for one stop. Boarding a tokkyu by mistake means paying the limited express surcharge on top.
    • Forgetting the seasonal windows. The ticket isn’t sold or valid outside the three windows above; there’s no year-round version.
    • Not budgeting extra time. A route that takes 3 hours by limited express can take 5–6 hours by local trains with multiple transfers. Build slack into your plan, especially for the last train of the day in rural areas, where service can stop surprisingly early in the evening.
    • Buying without checking current terms. Given the 2024 rule changes, confirm the current price, day structure, and whether it’s still shareable before you commit — rules can differ by sales season.

    Used with the right expectations, the Seishun 18 Ticket turns a simple train ride into one of the more memorable, low-cost ways to see rural Japan — just go in knowing you’re trading speed for savings and scenery.

  • Hailing a Taxi in Japan: Apps, Fares & Etiquette (GO, S.Ride)

    Hailing a Taxi in Japan: Apps, Fares & Etiquette (GO, S.Ride)

    Photo by Matthieu Bühler on Unsplash

    Japan’s taxis are clean, famously punctual, and driven by people who will not slam a door, demand a tip, or take a roundabout route to pad the fare. They’re also one of the easiest things for a visitor to get wrong — not because the system is confusing, but because it runs on conventions nobody explains to you until you’re standing on a curb with a suitcase, wondering why the car with its light on just drove past. Here’s how to actually use a Japanese taxi, from booking it on your phone to paying without fumbling for cash.

    When a Taxi Actually Makes Sense

    Japan’s trains and subways are so good that taxis are usually the backup plan, not the default. But there are real situations where a taxi is worth the extra cost: last trains stop running around midnight to 1am in most cities, and after that a taxi is often your only option besides walking. Taxis also make sense when you’re hauling luggage to or from a hotel, traveling as a group of three or four where the per-person cost splits down to train-ticket territory, or visiting a rural area — like a hot spring town — where buses run twice a day and the nearest station is a 20-minute walk from anywhere useful. If you’re staying somewhere like Kurokawa Onsen, a taxi from the nearest train or bus station is often the only practical way in, especially with bags.

    The Two Big Apps: GO and S.Ride

    GO is Japan’s largest taxi-hailing app, formed from a merger of JapanTaxi and DeNA’s MOV, and it has by far the widest coverage — it works in Tokyo, Osaka, Kyoto, Sapporo, Fukuoka, and dozens of smaller cities. You enter your pickup pin and destination, see an estimated fare range before you confirm, and watch the car approach on the map in real time. Payment can be registered in-app (credit card or GO Pay) so you can skip handling cash or a card reader entirely, or you can simply pay in the car as normal.

    S.Ride is the other major player, backed by Sony along with Daiwa Motor Transportation, Kyocera, and Toyota-affiliated taxi groups, and it’s strongest in Tokyo specifically. Functionally it’s very similar to GO: live map, fare estimate, in-app payment. In practice, many frequent visitors install both, since availability can vary by neighborhood and time of day — if GO shows a 10-minute wait, S.Ride might have a car two minutes away.

    One practical snag: both apps generally want to verify your account via SMS to a phone number, which can be awkward if you’re on an eSIM or haven’t activated a Japanese number yet. Download and set up whichever app you plan to use before your trip, or as soon as you land, rather than discovering the hurdle at 11pm when you actually need a ride.

    Other Ways to Get a Taxi

    You don’t need an app at all. Taxi stands (タクシー乗り場) are standard outside every major train station, airport terminal, and large hotel — just join the queue. You can also hail one on the street by raising a hand; look at the small lit sign on the dashboard: red characters (空車, “vacant”) mean it’s free to stop, while green characters (賃走) mean it’s occupied. DiDi also operates in several Japanese cities including Osaka, Kyoto, and Sapporo, with an interface similar to GO. Uber exists in Japan too, but in most cities it dispatches the same licensed taxis as GO rather than private drivers — it’s a familiar app, not a cheaper option.

    How Much a Taxi Actually Costs

    In Tokyo, the flag-drop fare is ¥500 for the first 1.096 km, then ¥100 for every additional 255 meters — so a short 2 km hop might run ¥900–1,100 before traffic. A 10-minute ride across a neighborhood often lands around ¥1,500–2,000. Fares rise 20% between 10pm and 5am, and metered time is added when the car is stuck below a certain speed in traffic, so a jam during rush hour will cost more than the distance alone suggests. Osaka and Kyoto use a similar flag-drop-plus-distance structure with slightly different numbers — the app will always show you an estimate before you confirm, so there’s no need to memorize exact rates city by city.

    Airport runs are where taxis get expensive: Narita to central Tokyo by taxi typically costs ¥20,000–23,000 and takes 60–90 minutes depending on traffic, while Haneda to central Tokyo runs roughly ¥6,000–8,000 for 30–45 minutes. For Narita in particular, the train is almost always the better value — see our comparison of the Narita Express vs. Keisei Skyliner if you’re deciding how to get into the city. A taxi from the airport is worth it mainly late at night after trains stop, or if you’re traveling with a group where the per-person cost competes with train tickets anyway.

    Taxi Etiquette: Doors, Seats, and Payment

    The back doors are automatic — the driver opens and closes them from a control near the steering wheel, so don’t pull the handle or try to close it yourself. Get in the back seat; the front passenger seat is generally left empty unless the car is full. Tipping is not expected and can actually cause an awkward moment as the driver tries to give your money back — the fare on the meter is the fare. Most taxis in major cities now accept IC cards (Suica, Pasmo), credit cards, and QR payment apps, but smaller cities and older cars are more likely to be cash-only, so carry some yen as a backup. Always ask for a receipt (レシート, “reshiito”) if you’ll need to track the expense later — drivers hand them over automatically in most cases, and it’s useful to know what’s expected if you’re ever navigating receipts and paperwork in Japan more broadly.

    Common Mistakes to Avoid

    Don’t assume every taxi app works everywhere — GO has the broadest coverage, but a car that’s five minutes away in central Tokyo might not exist at all in a small town; in rural areas, a taxi stand or a phone call to a local taxi company (ask your ryokan or hotel to call for you) is often more reliable than an app. Don’t try to flag a taxi that already has its green “occupied” light on — drivers won’t stop, and waving harder doesn’t help. Don’t expect drivers to speak much English; typing your destination into the app, or showing a pinned location or hotel business card, works far better than trying to pronounce an address. And don’t overload a standard taxi with luggage for four people — Japanese taxis are often smaller than they look from outside; if you’re a group with suitcases, look for a “jumbo taxi” (a larger van-style vehicle bookable through GO) or split into two cars.

    A Few Situational Tips

    Heading somewhere with specific opening hours — a boutique strip like Daikanyama or a department-store district like Nihonbashi — a taxi is often faster than the train for that last stretch from the station, especially if you’re carrying shopping bags on the way back. In heavy rain, taxi demand spikes and wait times on apps can jump sharply, so budget extra time or just join a station queue instead of watching the app countdown climb. And if you’re island- or countryside-bound, confirm with your accommodation in advance whether taxis are even available on demand — some areas have only one or two taxi companies with limited cars, and a reservation ahead of time beats hoping one appears.

  • Nihonbashi: Tokyo’s Historic Merchant District & Flagship Department Stores

    Nihonbashi: Tokyo’s Historic Merchant District & Flagship Department Stores

    Photo by Cem Ersozlu on Unsplash

    Long before Shibuya or Ginza existed as shopping names, Nihonbashi was already Tokyo’s commercial heart. This is where the Edo-period merchant class built fortunes, where Japan’s oldest department store still rings a brass bell at opening time, and where the official “kilometer zero” marker for Japan’s entire road network sits quietly under a bridge most tourists walk past without noticing. It’s one of the few places in central Tokyo where you can trace four centuries of commerce in a single afternoon.

    A Brief History of Japan’s Merchant Capital

    Nihonbashi (“Japan Bridge”) takes its name from the wooden bridge first built here in 1603, the same year Tokugawa Ieyasu made Edo his capital. The bridge marked the starting point of the Five Routes, the highway system connecting Edo to the rest of Japan, and the district around it filled with wholesalers, moneylenders, and fish markets (the original Tsukiji market started life here before relocating). The current stone bridge dates to 1911 and still carries a small bronze “Nihon no Michi no Genten” (Center of Japan) marker at its midpoint — easy to miss, but a nice two-minute detour if you’re walking between the department stores.

    Nihonbashi Mitsukoshi: Japan’s Oldest Department Store

    Mitsukoshi traces its roots to a kimono shop called Echigoya, opened in 1673 on this exact spot. The current main building (completed in stages between 1914 and 1935) is a designated Important Cultural Property, and it still has the theatrical flourishes that made department stores a spectacle a century ago: bronze lion statues modeled on the ones in London’s Trafalgar Square guard the main entrance, a carved wooden “Tenjin” staircase rises through the center hall, and a pipe organ on the upper floors is played live several times a day (schedules are posted near the atrium).

    Store hours run 10:30 to 19:00 (some restaurant floors stay open later). The basement food hall — a depachika in Japanese — is the easiest entry point for souvenir shopping: individually wrapped sweets and tea generally run ¥500–¥2,000, and most stalls have English-speaking staff used to tourists. Tax-free counters exist but are usually on a separate floor from the registers, so keep your passport and receipts handy and ask staff where the “tax-free counter” is before you start piling up bags. For a refresher on how Japanese retail refund and receipt rules actually work, see Returns, Exchanges & Receipts in Japan.

    Takashimaya Nihonbashi: A National Important Cultural Property

    A five-minute walk away, Takashimaya’s Nihonbashi flagship (opened 1933, expanded over the decades) is the first department store building in Japan to receive Important Cultural Property status, awarded in 2009. The exterior blends Japanese and Western Art Deco motifs, and the store has since grown into a small complex with a connected “Watch Maison” annex for luxury timepieces and a rooftop garden that’s a quiet rest stop on a hot day. Hours are 10:30 to 19:30, slightly later than Mitsukoshi, which makes it a good last stop if you’re doing both in one day. Its depachika is smaller than Mitsukoshi’s but strong on regional Japanese sweets and bento boxes if you want a picnic-quality lunch for under ¥1,500.

    COREDO Muromachi and the Modern Mix

    Facing Mitsukoshi across the street, the COREDO Muromachi 1, 2, and 3 complex (opened between 2010 and 2014) shows how Nihonbashi has modernized without bulldozing its identity. Long-running merchant shops that have operated here since the Edo period — including Ninben, a bonito-flake and dashi specialist founded in 1699 — now share floors with contemporary cafés and a cinema. Ninben’s “Nihonbashi Dashi Bar” sells a cup of fresh dashi broth for around ¥100, a cheap and genuinely interesting way to taste what Japanese cooking is actually built on. If you’re assembling a pantry of condiments and seasonings to bring home, this area pairs well with what you’d find in a guide like Yuzu Kosho and Beyond: A Japanese Condiment Pantry Souvenir Guide, and pickle shops in the COREDO basements make good use of the ideas in Tsukemono: Japan’s Pickled Vegetable Tradition and Where to Buy.

    Getting There and the Best Time to Visit

    Nihonbashi is genuinely central: it’s about a 10-minute walk from Tokyo Station’s Yaesu side, or one stop on the Tokyo Metro Ginza or Tozai Line to Nihonbashi Station, which connects directly underground to both Mitsukoshi (via Mitsukoshimae Station) and Takashimaya. If you’re coming straight from the airport, decide your route in first — our comparison of Narita Express vs Keisei Skyliner covers which train gets you into central Tokyo fastest depending on which airport you land at.

    Weekday mornings right after opening (10:30–11:30) are the quietest time to browse the historic buildings and take photos without crowds. Depachika basements get busiest in the late afternoon, especially after 17:00, when staff start marking down prepared foods and bento — good for bargain hunting, less good for a leisurely look around. Early January is uniquely chaotic: Japanese department stores sell “fukubukuro” lucky grab bags starting January 1–2, and lines can form before opening. If you want to see the stores at their calmest and still photograph the New Year decorations, aim for the first week of January but arrive well before 10:30, or wait until mid-January when the rush has passed.

    Common Mistakes to Avoid

    The biggest one is treating Nihonbashi as a single store rather than a district — Mitsukoshi, Takashimaya, and COREDO Muromachi are a 10-minute walking loop, and most visitors only budget time for one. Another is assuming every item in the depachika can leave the country: fresh prepared foods, fish, and some produce are not airport-friendly, so if you’re shopping for omiyage to carry home, look for shelf-stable sweets instead. The classic choice is covered well in Tokyo Banana and Japan’s Iconic Omiyage Sweets: A Buyer’s Guide. Finally, don’t assume tax-free shopping is automatic — you need to spend a minimum (typically ¥5,000 before tax at a single store in one day) and present your passport at the designated counter, not the regular register.

    Budget, Mid-Range, and Splurge Options

    On a tight budget, the Ninben dashi bar and depachika sample counters let you taste Nihonbashi’s food culture for a few hundred yen. Mid-range shoppers will find plenty in the ¥2,000–¥8,000 range among tea sets, lacquerware, and seasonal sweets across both department stores’ basement and first floors. For a splurge, Takashimaya’s upper floors and Watch Maison annex carry Japanese and European luxury goods, while Mitsukoshi’s kimono and tableware departments stock pieces that run well into six figures — browsing them is free, and the sales staff are generally happy to explain what makes a piece valuable even if you’re not buying.