Japan Trove

Category: Travel

Practical, up-to-date guides for traveling in Japan — itineraries, rail passes, eSIMs, where to stay, seasonal timing, etiquette, and the local know-how that makes a trip smoother. Written with real Japanese sources so you get the answer that actually works on the ground, not the recycled tourist one.

  • Kappabashi Kitchen Town: Tokyo’s Restaurant Supply Street and What to Buy

    Kappabashi Kitchen Town: Tokyo’s Restaurant Supply Street and What to Buy

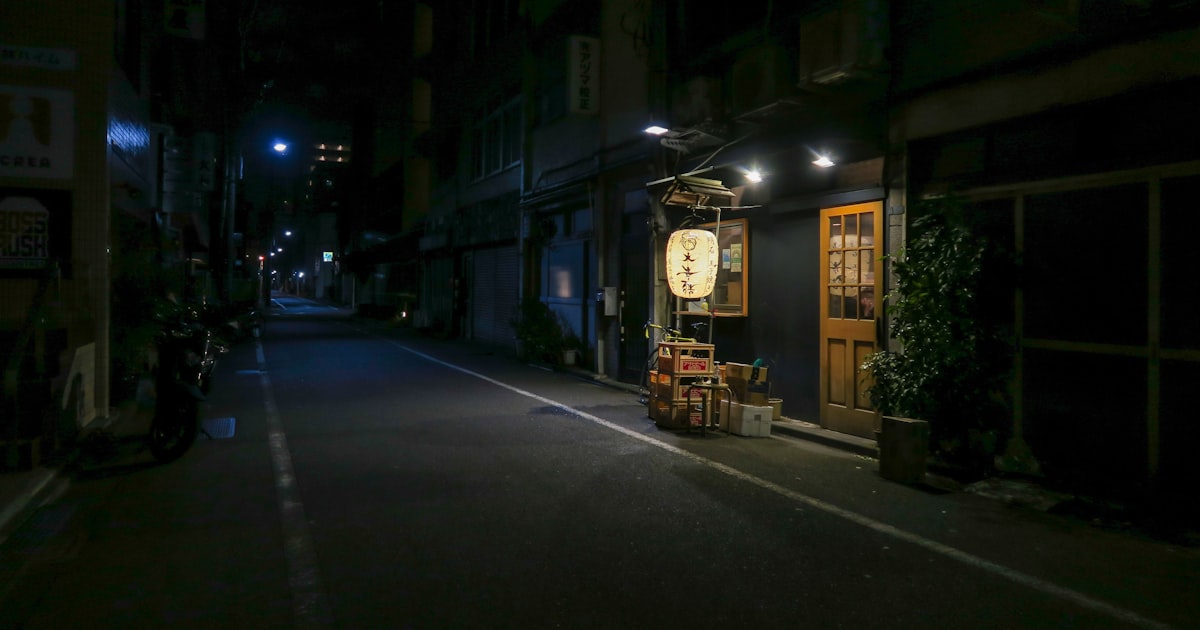
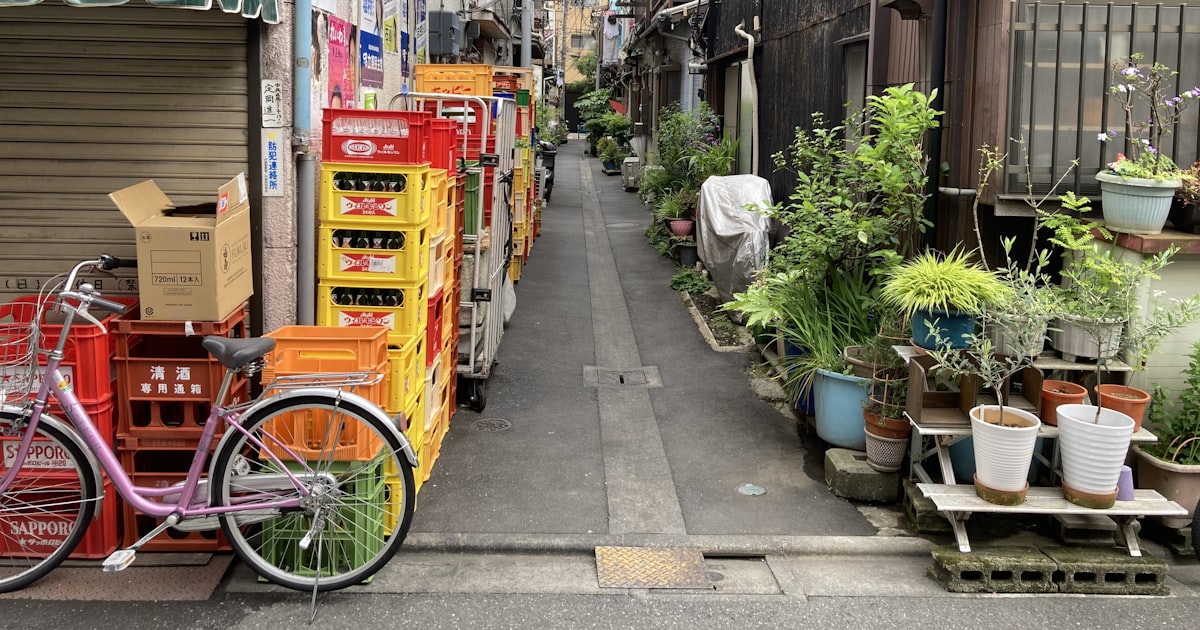
    Photo by Louie Martinez on Unsplash

    Between Asakusa and Ueno sits a street most tourists walk past without noticing it’s there — until they spot a giant golden chef’s head grinning down from a rooftop. That’s Kappabashi Dogu Suji, better known as Kappabashi Kitchen Town, a roughly 800-meter strip of shops that has supplied Tokyo’s restaurants, hotels, and food stalls with everything from sushi knives to plastic tempura since the early 20th century. It’s not a tourist market dressed up for visitors — it’s a working trade street where chefs still stock their kitchens — which is exactly why it’s worth a couple of hours if you care about Japanese cooking, design, or just want souvenirs that aren’t keychains.

    What Kappabashi actually is

    Kappabashi runs along Kappabashi Dogu Suji between Asakusa-dori and Kototoi-dori, lined with roughly 150 specialist shops. Each one tends to sell exactly one category of thing: a knife shop sells only knives, a ceramics shop only tableware, a signage shop only noren curtains and lanterns. This specialization is the whole appeal — instead of a general souvenir shop with a shelf of “Japanese knives,” you get a shop where the owner has sharpened knives for 40 years and will talk you through blade steel for ten minutes if you let them.

    The street’s unofficial mascot is the enormous white chef’s head statue on top of the Niimi Corporation building near the Kototoi-dori end — it’s the easiest landmark to navigate by and a popular photo stop.

    How to get there

    The closest station is Tawaramachi on the Ginza Line, about a 5-7 minute walk to the start of the shopping street. It’s also an easy 15-20 minute walk from Asakusa Station (handy to combine with a visit to Senso-ji) or from Ueno Station. If you’re staying near Ueno or Asakusa, there’s no need to bother with buses or taxis — walking is simplest, and it’s a good way to pass through quieter backstreets on the way. If you’re basing yourself further out and traveling around Japan by long-distance bus rather than the Shinkansen, see our guide to overnight buses in Japan for budget options into Tokyo.

    Opening hours and best timing

    Most shops open around 9:00-10:00am and close between 5:00 and 6:00pm. A meaningful number of shops close on Sundays, since this is a trade street built around restaurant supply chains rather than weekend shopping — Tuesday through Saturday mornings are the most reliable time to find everything open. Arrive by early afternoon to have real browsing time before shutters start coming down.

    If you can time your visit for early-to-mid October, look out for the annual Kappabashi Dogu Matsuri (tool festival), when the street strings up decorations, some shops run discounts, and the atmosphere is livelier than usual. Outside of that, any season works — this is an indoor, shop-to-shop street, so it’s a good rainy-day or extreme-heat option compared to an outdoor market. If you’re visiting in the muggier months, our guide to Japan in summer has tips on managing the heat between stops.

    What to buy

    Knives. This is Kappabashi’s headline category. Kama-asa Shoten is one of the best-known shops on the street, with cutlery running from workaday kitchen knives to serious hand-forged pieces, plus engraving service for gifts. Expect roughly ¥3,000-8,000 for a solid entry-level Japanese kitchen knife (a santoku or nakiri is a good all-rounder for home cooks), ¥15,000-50,000 for professional-grade steel, and beyond ¥50,000 for damascus or custom-forged blades. Bring your passport — many shops offer tax-free purchases on top of ¥5,000, and reputable shops will wrap blades for flight travel, but always pack knives in checked luggage, never carry-on.

    Plastic food samples (sampuru). Kappabashi is the historic center of Japan’s fake-food industry, the hyper-realistic plastic dishes displayed in restaurant windows nationwide. Shops like Maizuru sell everything from a single ¥500-1,500 sushi-piece keychain or magnet to full plates of “tempura” or “ramen” for ¥3,000-15,000, and some stores let you try a hands-on workshop to make your own tempura or lettuce piece for around ¥2,000-4,000 — a genuinely fun, kid-friendly activity.

    Ceramics and tableware. Donburi bowls, sake cups, plates, and serving dishes in both mass-produced and handmade styles, often cheaper than equivalent pieces sold as souvenirs elsewhere in Tokyo. If you want to go deeper into Japanese ceramics at the source rather than buying retail, our guide to Arita and Imari’s porcelain towns covers the production regions themselves.

    Bento boxes, tools, and small kitchen gear. Lacquered and plastic bento boxes, rice paddles, graters, molds, and copper tamagoyaki pans are all here at trade prices — a nice pairing if you’ve gotten interested in Japan’s bento culture after reading about station bento (ekiben) on the rails.

    Noren, lanterns, and shop signage. Fabric curtains and paper lanterns in traditional patterns, sold both as functional shop items and as decor souvenirs, typically ¥2,000-8,000 for a noren depending on size and fabric.

    Budget, mid-range, and splurge picks

    • Budget: a food-sample keychain or magnet (¥500-1,500), a basic paring or utility knife (¥2,000-4,000), or a single ceramic rice bowl (¥800-2,000).
    • Mid-range: a quality santoku knife (¥8,000-20,000), a copper tamagoyaki pan (¥5,000-10,000), or a full plastic food display piece (¥5,000-10,000).
    • Splurge: a hand-forged, custom-engraved chef’s knife from a specialist shop (¥30,000-80,000+), built to last decades with proper care.

    Common mistakes to avoid

    Don’t visit on a Sunday expecting everything open — you’ll find some shops shuttered and miss the specialists you came for. Don’t assume every knife shop offers tax-free processing or sharpening on the spot; ask before you commit, since policies vary shop to shop. Don’t pack a purchased knife in carry-on luggage — it will be confiscated at security, so plan to check your bag or ship the knife home separately if you’re traveling on to another city by air. And don’t rush through in twenty minutes — the value here is in the specialist shops, and a fast walk-through will just look like a slightly odd hardware street.

    Kappabashi pairs naturally with a wider wander through old-town Tokyo: it sits close to the low-rise, backstreet character of Yanaka’s shitamachi neighborhood, and if you’ve shopped a kitchen street like this before, it’s a fun comparison to Kyoto’s food-focused Nishiki Market — one sells the tools, the other sells what you’d cook with them.
  • Overnight Buses in Japan: The Budget Alternative to the Shinkansen

    Overnight Buses in Japan: The Budget Alternative to the Shinkansen

    Photo by Shigeki Wakabayashi on Unsplash

    The Shinkansen gets all the attention, but Japan’s overnight highway buses (夜行バス, yakō basu) are how a huge number of students, backpackers, and budget-minded locals actually get around the country. For a fraction of the bullet train fare, you can cover 500-1,000 km while you sleep, waking up in a new city with a full day ahead of you and a hotel night saved. They’re not for everyone, but for the right traveler and the right route, they’re one of the best value moves in Japan.

    Why Take a Bus Instead of the Shinkansen

    The math is simple: a Tokyo-Osaka overnight bus runs roughly ¥3,500-¥9,000 depending on the operator, season, and seat type, versus about ¥14,000-14,720 for an unreserved Nozomi seat one way. On longer routes the gap widens further — Tokyo to Hiroshima by bus is typically ¥8,000-¥13,000 against a Shinkansen fare north of ¥19,000. Because the bus departs late evening and arrives early morning, you also skip a night of hotel costs, which is often the bigger saving. The trade-off is time and comfort: a Tokyo-Osaka bus takes 7-9 hours versus 2.5 by rail, and you’re sitting (or semi-reclining) the whole way rather than lying flat.

    How Much You’ll Actually Save

    Pricing on Japanese overnight buses moves with demand, much like airline tickets, so booking early matters. As a rough guide: standard 4-row seating (yonretsu) on routes like Tokyo-Kyoto or Tokyo-Osaka starts around ¥3,000-¥5,000 on off-peak weeknights and climbs to ¥8,000-¥10,000 on Friday and Saturday departures. Premium 3-row or independent-seat buses run ¥8,000-¥15,000. On the busiest travel weeks — Golden Week (April 29-May 5), Obon (August 13-16), and New Year (December 28-January 3) — prices spike sharply and popular departures sell out weeks in advance, so the discount over the Shinkansen shrinks or disappears entirely. Outside those windows, a bus booked 2-3 weeks ahead is almost always your cheapest way to cover long distances.

    Choosing Your Seat: Bus Classes Explained

    Not all overnight buses are equal, and the seat type matters more than the operator name on most routes.

    • 4-row (yonretsu): The cheapest option, four seats across with a center aisle, similar to a standard coach seat with a bit more recline. Fine for shorter overnight hops (5-6 hours) but tiring on longer ones.
    • 3-row (sanretsu): Three seats across, meaningfully wider with deeper recline and usually a curtain or partition for privacy. This is the sweet spot for most travelers — a noticeable comfort jump for maybe ¥2,000-¥4,000 more.
    • Independent/pod seats: High-end buses (Willer Express’s Cocoon and Relax seats, JR Bus’s Dream Sleeper) offer individual shell-like seats or even flat-ish sleeping pods with privacy curtains, USB ports, and reading lights. Expect ¥12,000-¥20,000+, which starts to approach Shinkansen pricing but still beats it on very long routes while saving a hotel night.

    Booking an Overnight Bus

    The two biggest platforms for foreign travelers are Willer Express (willerexpress.com), which has a full English booking site and issues an e-ticket you show as a QR code, and Kosoku Bus / Bus Hikaku (aggregator sites comparing multiple operators, though largely Japanese-language). JR Bus (JR each region’s bus subsidiary) also runs reliable overnight routes bookable via their Japanese sites or at any JR ticket counter. For English-speakers, Willer is the easiest starting point — search your route and date, filter by seat class, and pay by credit card. Buses depart from major terminals: in Tokyo, that’s mostly the Shinjuku Expressway Bus Terminal (Busta Shinjuku), directly above Shinjuku Station’s south exit; in Osaka, it’s the Osaka Umeda Bus Terminal or Namba OCAT. Counters at these terminals are typically staffed from early morning until the last departure, often past midnight, and have coin lockers if you need to store bags beforehand.

    What to Expect on Board

    Boarding usually happens 15-20 minutes before departure, and drivers are strict about on-time boarding — arrive at your gate number with margin. Most buses have onboard toilets, though budget services on shorter routes sometimes don’t, relying instead on one or two rest-area stops (called SA or PA) roughly every 2-3 hours, where you can use the bathroom, buy a drink, or grab a snack from vending machines. Lights go off and the driver announces quiet hours shortly after departure — talking, phone calls, and even phone screen brightness are expected to be kept to a minimum out of consideration for sleeping passengers. Bring an eye mask, a neck pillow, and a light layer, since air conditioning can run cold. Buses typically arrive at their destination terminal between 5:30 and 7:30 AM, which is earlier than most hotel check-in times — plan to store luggage in a station locker and start your day with breakfast or a visit to a public bath before checking in.

    Best Routes and When to Use Them

    Overnight buses shine most on routes where the Shinkansen either doesn’t reach directly or costs disproportionately more for the distance. Heading to the Japan Alps, an overnight bus from Shinjuku to Matsumoto lets hikers arrive early enough to head straight into the mountains — worth pairing with our guide to Matsumoto, Castle, Soba & Gateway to the Japan Alps. For Shikoku, where Shinkansen coverage is limited, overnight buses from Tokyo to Takamatsu or Tokushima are a genuinely practical way in — see our Shikoku Travel Guide for what to do once you arrive. Kansai-to-Kyushu overnight buses, such as Osaka to Beppu, are another strong value route for onsen-bound travelers — pair it with our Beppu & Yufuin guide. Once you land at your destination, remember that regional IC cards work differently from Tokyo’s Suica/Pasmo network for local transit — our guide to IC cards beyond Tokyo covers ICOCA, SUGOCA, and the rest.

    Common Mistakes to Avoid

    The most frequent regret travelers report is booking the cheapest 4-row seat for a route over 7-8 hours and arriving too exhausted to enjoy the first day — pay the extra ¥2,000-¥3,000 for a 3-row seat on longer hauls. Second, don’t assume every bus has a toilet; check the listing before booking if that matters to you. Third, avoid booking overnight buses during Obon, New Year, or Golden Week unless you’ve reserved weeks ahead, since both prices and availability move fast. Finally, note that most overnight bus tickets are non-refundable or carry steep cancellation fees close to departure, unlike a flexible Shinkansen reserved ticket, so only book once your plans are firm.

    Used strategically — on the routes where the price and time savings are real, and with a seat class that matches how many hours you’ll actually be on board — overnight buses are one of the best budget tools for covering ground in Japan without burning through your travel fund on rail passes alone.

  • Yanaka: Tokyo’s Old Shitamachi Neighborhood — Cats, Senbei & Backstreets

    Yanaka: Tokyo’s Old Shitamachi Neighborhood — Cats, Senbei & Backstreets

    Photo by Y Y on Unsplash

    Why Yanaka Feels Different From the Rest of Tokyo

    Most of central Tokyo was flattened twice in the 20th century — first by the 1923 Great Kanto Earthquake, then by the firebombing raids of 1945. Yanaka, along with its neighbors Nezu and Sendagi (together nicknamed “Yanesen”), largely escaped both. The result is a district of narrow lanes, wooden houses, small temples, and family-run shops that still operate the way they did a century ago. There’s no single blockbuster attraction here — no castle, no five-story pagoda dominating the skyline — which is exactly why it rewards slow walking. You come to Yanaka to wander, not to check off a landmark.

    It’s also become known, somewhat unofficially, as Tokyo’s cat neighborhood. Between the old cemetery, the low rooftops, and a population of residents who feed and tolerate them, stray and semi-stray cats have become a genuine local identity, showing up on shop signs, snacks, and souvenirs throughout the area.

    Getting There and When to Go

    The easiest approach is Nippori Station (西日暮里/日暮里), reachable directly on the JR Yamanote Line and JR Keihin-Tohoku Line, about 20 minutes from Tokyo Station and 5 minutes from Ueno. Nippori is also a stop on the Keisei Line, so travelers arriving via the Keisei Skyliner from Narita Airport can detour into Yanaka with luggage in tow before checking into a hotel, though coin lockers at the station make that easier. From Nippori’s north exit, it’s about a 5-minute walk to the start of the main shopping street. Sendagi Station on the Chiyoda Line is a second option if you’re coming from Omotesando or Otemachi. If you haven’t used Tokyo’s rail system before, it’s worth reading up on how to get around Tokyo before you go, since Yanaka involves a mix of JR and subway lines depending on where you’re staying.

    Go on a weekday morning if you can — Yanaka Ginza gets genuinely crowded on weekend afternoons, with tour groups filling the narrow street. Weekday visits between 10:00 and noon are far more pleasant. Late afternoon, around 16:00–17:00, is the other sweet spot: this is when the neighborhood’s famous sunset staircase earns its name. Cherry blossom season (typically late March to early April) is the single busiest period, since Yanaka Cemetery is one of Tokyo’s best low-key hanami spots — see our guide to Japan in spring for bloom timing if you’re planning around it.

    Yanaka Ginza: The Sunset Stairs to Senbei and Cat Everything

    The heart of the district is Yanaka Ginza, a roughly 170-meter pedestrian shopping street lined with about 70 small shops. You reach it by descending Yuyake Dandan (“Sunset Steps”), a short staircase that frames a postcard view down into the street, especially striking around golden hour. Most shops here open around 10:00 and close by 19:00, though hours vary by owner and a fair number close one day a week (often Wednesday), so don’t build your whole visit around one specific store.

    Senbei (rice crackers) are the street’s signature snack. Several old-fashioned senbei shops grill crackers to order right in the doorway, filling the street with the smell of soy sauce and toasted rice; expect to pay roughly ¥150–400 depending on size and flavor, sold loose by the piece or in small gift bags. For something sweeter, look for Yanaka Shippoya, known for cat-tail-shaped imagawayaki (a thick, pan-fried cake similar to dorayaki) for around ¥250–300 each — it’s one of the more photographed food stalls on the street, but the queue rarely takes more than a few minutes on weekdays. If you want a broader primer on Japanese snack culture before you go, our street food guide covers what else to look for on streets like this one.

    Yanaka Cemetery: Cherry Blossoms and Quiet Backstreets

    A five-minute walk from Yanaka Ginza brings you to Yanaka Reien, a sprawling public cemetery that doubles as one of the area’s most atmospheric public spaces. It’s free to enter and open all day, though it’s a working cemetery, so keep voices down and don’t treat gravesites as photo props. The central cherry-tree-lined avenue is a popular but far less crowded alternative to Ueno Park during hanami season, and the grounds are pleasant to walk through even outside bloom, since the old stone lanterns, moss-covered graves, and resident cats give it a genuinely calm, almost rural feel in the middle of the city. The last Tokugawa shogun, Yoshinobu, is buried here, along with several other notable historical figures. Tennoji Temple, at the edge of the cemetery, has a large seated bronze Buddha dating to the early 1700s that survived the era’s disasters largely intact.

    Beyond the Main Street: Temples, Galleries and Old Kissaten

    Yanaka rewards ducking off the main street more than almost anywhere else in Tokyo. Within a 10–15 minute walk of Yanaka Ginza you’ll find dozens of small temples (the area has over 70), quiet residential lanes, and a handful of small museums and galleries worth the detour:

    Asakura Museum of Sculpture, the former home and studio of sculptor Fumio Asakura, is built around a striking interior garden courtyard and costs around ¥500 to enter; it’s typically closed Mondays and Thursdays, so check before you walk over. SCAI The Bathhouse is a contemporary art gallery installed in a converted 200-year-old sento (public bathhouse) — entry is usually free, and it’s a good stop if you’re already interested in bathhouse culture; for context on how sento differ from onsen, see our guide to super sento. For a coffee break, Kayaba Coffee occupies a beautifully preserved early-1900s wooden building and serves coffee for around ¥600–700; it gets busy on weekends, so aim for a weekday visit.

    What to Buy: Senbei, Cat Goods and Paper Crafts

    Beyond senbei, Yanaka’s other classic purchase is washi (traditional paper) goods from Isetatsu, a chiyogami paper shop founded in 1864 that’s still making and selling block-printed paper crafts — small items like paper boxes, fans, and origami sheets start around ¥300–500, with larger boxed sets running into the thousands of yen. If you’re building out a broader interest in traditional Japanese sweets while you’re in the area, the shops along Yanaka Ginza and Nezu sell wagashi alongside the senbei; our beginner’s guide to wagashi is useful background if you want to know what you’re looking at before buying. Cat-themed goods — magnets, tote bags, small ceramic figures — are sold from souvenir stalls throughout the street, generally in the ¥300–1,500 range depending on the item; quality varies a lot stall to stall, so it’s worth browsing two or three before buying rather than grabbing the first cute thing you see.

    Common Mistakes and Practical Tips

    The most common mistake is treating Yanaka as a 30-minute stop between other Tokyo sights. The neighborhood is small on a map but slow in practice — the backstreets, not the main shopping street, are the actual point, and rushing through Yanaka Ginza alone will make it feel like a slightly quainter version of any other Tokyo shopping street. Budget at least two hours, and ideally a half day if you want to include the cemetery and a museum.

    Second, don’t assume every shop takes cards — many of the older senbei and craft shops in Yanaka are cash-only or IC-card-only (Suica/Pasmo), so carry some cash. Third, if you’re visiting specifically for cats, know that they’re wild or semi-feral animals living around a cemetery and temple grounds, not a curated attraction — feeding them, especially without knowing local rules, is discouraged, and sightings can’t be guaranteed on any given day. Finally, avoid weekend early afternoons if you can; the single narrow street of Yanaka Ginza becomes a slow shuffle of tour groups from around midday Saturday and Sunday, which undercuts exactly the unhurried atmosphere that makes the area worth visiting in the first place.

  • IC Cards Beyond Tokyo: ICOCA, Manaca, SUGOCA & Regional Transit Explained

    IC Cards Beyond Tokyo: ICOCA, Manaca, SUGOCA & Regional Transit Explained

    If you’ve read our Suica vs Pasmo guide, you already know Tokyo’s two IC cards work almost identically and are basically interchangeable for tourists. What that guide doesn’t cover is what happens once you leave the Kanto region — because Japan’s IC card system is actually a patchwork of roughly ten regional cards, and knowing how they interact saves real confusion once you’re traveling beyond Tokyo.

    The good news: national interoperability

    Since 2013, the ten major IC cards — Suica and Pasmo (Kanto), ICOCA (Kansai/JR West), TOICA (Chubu/JR Central), Manaca (Nagoya area), PiTaPa (Kansai private railways), Kitaca (Hokkaido/JR Hokkaido), SUGOCA (Kyushu/JR Kyushu), nimoca and Hayakaken (Fukuoka) — can all be used interchangeably on trains and buses across almost the entire country. In practice, this means a Suica card bought at Narita Airport works fine on the subway in Osaka, Fukuoka, or Sapporo. For a tourist, this is the single most important fact: you generally only need to buy one card, ever.

    Where it gets complicated

    • A small number of local/rural lines opt out of the national system, particularly some regional third-sector railways and small city bus networks in less-touristed areas — always check signage or ask if you’re heading somewhere remote.
    • PiTaPa is a postpaid card tied to a Japanese bank account, so tourists can’t get one directly, but PiTaPa readers still accept Suica, ICOCA, and the other prepaid cards without issue.
    • Vending machines and konbini payments using an IC card work nationwide the same way regardless of which regional card you’re holding — this part is fully seamless.
    • Card issuance has occasionally been limited due to chip shortages (Suica notably suspended sales of new physical cards for a period), so check current availability before you fly, or plan to use a mobile IC card via Apple Pay/Google Pay instead, which sidesteps physical stock issues entirely.

    Should you buy a card in Tokyo, or wait?

    Buy it wherever you land first — there’s no advantage to waiting. A Suica or Pasmo bought at Narita or Haneda on arrival, per our Narita and Haneda guide, works the rest of your trip regardless of which regions you visit afterward. If your trip starts in Osaka or Fukuoka instead, an ICOCA or SUGOCA bought there works just as well everywhere else, Tokyo included. The names differ by region mostly for historical and corporate reasons (each card is issued by a different regional JR company or transit operator), not because of any functional difference that matters to a visitor.

    Mobile IC cards

    If your phone supports it, adding a Suica (or, in some cases, another regional card) to Apple Pay or Google Pay lets you top up with a credit card instantly, skip physical card queues, and avoid the risk of losing a physical card with your balance on it. This has become the recommended option for many travelers with a compatible iPhone or Android device, especially given past physical card shortages — though Apple Pay’s Suica implementation currently works more reliably for foreign-issued credit cards than some Android equivalents, so test it before you fly if you’re relying on it.

    Refunds and leftover balance

    • Physical cards can be refunded at major stations before you leave the region that issued them — an ICOCA is refunded at a JR West window, a Suica at a JR East window, and so on; a small non-refundable service fee is usually deducted.
    • Simpler option: spend down the balance on your last day using konbini purchases or vending machines rather than dealing with a refund queue, since the amounts left over are typically small.
    • Mobile IC cards tied to Apple Pay or Google Pay don’t need a physical refund — just stop topping up, and the balance simply sits unused on your phone for a future trip.

    Quick reference by region

    • Tokyo/Kanto — Suica or Pasmo
    • Kansai (Osaka, Kyoto, Kobe) — ICOCA
    • Nagoya/Chubu — TOICA or Manaca
    • Fukuoka/Kyushu — SUGOCA, nimoca, or Hayakaken
    • Hokkaido — Kitaca
    • All of the above work on trains, subways, and most buses in every region listed — pick whichever is easiest to buy where your trip starts.

    What IC cards don’t cover

    • Shinkansen reserved seats — IC cards work for unreserved shinkansen seating on some routes when linked to an online booking system (like JR East’s Suica-linked Shinkansen e-ticket service), but many long-distance and reserved bookings still require a separate paper or app-based ticket; don’t assume tapping your card works everywhere.
    • Overnight and sleeper trains, most long-distance highway buses, and domestic flights all require separate booking regardless of which IC card you’re carrying.
    • Some rural single-car “one-man” trains use a boarding-ticket system even where IC readers exist, requiring you to take a numbered ticket and pay the driver on exit — pay attention to boarding instructions in unfamiliar rural areas rather than assuming a simple tap-in, tap-out process.

    Bottom line

    Don’t overthink regional IC cards. Buy one card at your first airport or major station, use it everywhere from Tokyo’s trains to a Sapporo subway to a Kagoshima bus, and only worry about a refund if the leftover balance is more than pocket change. The regional names are a historical artifact of Japan’s privatized rail system, not a puzzle you need to solve before you travel.

  • Earthquake & Disaster Prep in Japan: What Travelers Should Know

    Earthquake & Disaster Prep in Japan: What Travelers Should Know

    Japan sits on the Pacific Ring of Fire, and small earthquakes are a genuine, routine part of life there — most are too minor to notice, but the country’s history includes major ones, and typhoons hit with predictable seasonal regularity. None of this should scare you out of a trip; Japan is arguably the best-prepared country on Earth for natural disasters. But a little know-how turns a confusing situation into a manageable one.

    Earthquakes: what actually happens

    Japan records thousands of earthquakes a year, and the overwhelming majority are small tremors that locals barely register. Buildings are built to extremely strict seismic codes — modern high-rises are engineered to sway and absorb energy rather than collapse — so the biggest real risk to a tourist is falling objects, not structural collapse, in all but the most severe events.

    • If you feel a quake indoors — get under a sturdy table if one’s nearby, or move away from windows, glass, and tall furniture; in a hotel room, protect your head and stay low until the shaking stops.
    • If you’re outside — move away from building facades, vending machines, and power lines, which can topple or drop debris.
    • Elevators — most modern elevators in Japan automatically stop at the nearest floor and open during a quake; avoid using elevators until you’ve confirmed things are safe.
    • Aftershocks — expect them after any noticeable quake; they’re usually weaker than the initial shock but can continue for days.

    The Safety Tips app

    Download the free “Safety tips” app (published by the Japan Tourism Agency) before you arrive — it’s available in multiple languages and pushes real-time alerts for earthquakes, tsunami warnings, extreme weather, and volcanic activity, along with basic phrasebook and evacuation information. It also has an offline mode, which matters if a disaster knocks out mobile networks temporarily. This is genuinely the single most useful thing a traveler can do to prepare, and it takes five minutes to set up.

    Typhoons

    Typhoon season runs roughly from June through October, peaking in August and September. Unlike earthquakes, typhoons are forecast days in advance, so preparation is mostly about flexibility:

    • Trains and flights are often suspended pre-emptively, sometimes a day ahead of a major typhoon’s arrival, to get staff and passengers home safely — check JR and airline websites directly rather than assuming your booked train will run.
    • Build slack into itineraries during typhoon season; avoid scheduling a can’t-miss event (a flight home, a non-refundable tour) on a day when a typhoon is forecast to make landfall nearby.
    • Convenience stores and supermarkets sell out fast right before a major typhoon, as locals stock up — if a warning is issued, buy water and snacks early rather than waiting.

    Tsunami basics

    If you’re near the coast and feel a strong or prolonged earthquake, move to higher ground immediately rather than waiting for an official tsunami warning — the shaking itself is the warning in a genuinely dangerous scenario. Coastal towns have blue-and-white tsunami evacuation signs pointing toward higher ground or designated shelters (marked 津波避難場所); it’s worth knowing this sign exists before you’re looking for it under stress. Hotels in coastal areas typically post evacuation routes in guest rooms — take thirty seconds to check them on arrival, the same way you’d note fire exits.

    What to actually pack

    • A portable phone charger/power bank — useful for daily travel anyway, and essential if you need the Safety Tips app or maps during a power outage.
    • A basic paper map or offline map download of your area, in case data networks are overloaded after a major event.
    • A few days’ worth of any essential prescription medication in carry-on luggage, not checked bags.
    • Copies (photo or paper) of your passport and travel insurance details stored separately from the originals.

    Hotel and ryokan preparedness

    Japanese hotels and ryokan are required to post evacuation maps and flashlight locations in every room, and staff run regular safety drills. If an alert sounds or staff give evacuation instructions, follow them immediately and calmly — Japanese emergency response protocols are methodical and well-rehearsed, even if the announcements are only in Japanese. Front desk staff at any mid-range or larger hotel can usually communicate basic safety instructions in English, or will use the Safety Tips app’s translated alerts as backup.

    Keeping perspective

    Millions of tourists visit Japan every year without ever experiencing anything beyond a barely-felt tremor. The country’s disaster infrastructure — early warning systems, seismic building codes, and public drilling — exists precisely because earthquakes are common, which is also why the systems are so mature and effective. Preparation here isn’t about anxiety; it’s the same five minutes of setup you’d spend checking a fire exit at home, and then you can get back to planning your itinerary and your packing list without giving it another thought.

  • Shikoku Travel Guide: Iya Valley, Naruto Whirlpools & the 88 Temple Pilgrimage

    Shikoku Travel Guide: Iya Valley, Naruto Whirlpools & the 88 Temple Pilgrimage

    Shikoku is Japan’s smallest and least-visited main island, and most first-time (and even second-time) visitors skip it entirely. That’s a mistake if you want dramatic mountain scenery, a genuinely unique pilgrimage culture, and one of Japan’s strangest natural phenomena, all without the crowds of Honshu’s major routes. Here’s what’s worth building a few days around.

    The Iya Valley: Japan’s hidden gorge

    Deep in Tokushima Prefecture, the Iya Valley is a steep, forested gorge historically so remote it sheltered defeated Heike clan warriors after the 12th-century Genpei War. Today it’s known for:

    • Vine bridges (kazurabashi) — swaying bridges woven from mountain vines, rebuilt every few years using traditional methods; crossing one, with the river visible through the gaps in the vines, is the valley’s signature experience. Entry costs around 550 yen.
    • Remote onsen — small hot-spring ryokan tucked into the gorge, some accessible only by a cable car down the cliff face from the road above.
    • Dramatic mountain roads — narrow, winding routes with viewpoints over the gorge; a rental car is genuinely the best way to explore, since bus service is infrequent.
    • The valley is roughly a 2–2.5 hour drive from Tokushima city, or reachable by a combination of train and infrequent local bus if you’re not driving.

    The Naruto whirlpools

    At the Naruto Strait, between Shikoku and Awaji Island, powerful tidal currents create some of the largest whirlpools in the world, up to 20 meters across at peak tide. Sightseeing boats run close to the vortices for a dramatic view, and the Onaruto Bridge above has a glass-floor observation deck (Uzu-no-Michi) where you can watch the whirlpools form directly beneath your feet. Whirlpool activity is tide-dependent, so check the tide charts (posted at the sightseeing dock and most hotel front desks) before planning your visit — the biggest whirlpools appear around the spring and neap tide cycles, not every day equally.

    The 88 Temple Pilgrimage

    Shikoku is home to Japan’s most famous pilgrimage route: a roughly 1,200-kilometer loop connecting 88 temples associated with the Buddhist monk Kukai (Kobo Daishi), who was born on the island. Completing the full walking pilgrimage traditionally takes about 40–60 days, and pilgrims (called henro) are recognizable by their white jackets, conical straw hats, and wooden walking staffs. You don’t need to walk the whole route to experience it:

    • Visit a handful of temples by car or bus as part of a shorter trip — many are near Tokushima, Kochi, Matsuyama, and Takamatsu, so it’s easy to fold two or three into a city visit.
    • Local hospitality (osettai) — a distinctive part of the culture is residents offering pilgrims small gifts of food, drinks, or money as a form of merit-sharing; travelers who visit temples respectfully are sometimes included in this, even without walking the full route.
    • For context on the broader shrine-versus-temple etiquette involved, see our shrines vs temples guide before visiting.
    • Compare this with the Kumano Kodo on Honshu if you’re deciding between Japan’s two most famous pilgrimage routes — Kumano Kodo is shorter and more forest-focused, while the Shikoku pilgrimage is a full island circuit connecting temples through cities and countryside alike.

    Matsuyama and Dogo Onsen

    Matsuyama, Shikoku’s largest city, is home to one of Japan’s three original wooden castles still standing on its original site, and to Dogo Onsen — reputed to be Japan’s oldest hot spring, with a history stretching back over a thousand years and a mention in Japan’s earliest written records. The main bathhouse building, a wooden structure dating to 1894, is said to have partly inspired the bathhouse in Studio Ghibli’s Spirited Away (see our Ghibli guide). A basic bath here costs around 700 yen; private family bath options cost more and require reservations.

    Getting to and around Shikoku

    • By train — no shinkansen serves Shikoku directly; from Okayama on Honshu, limited express trains cross the Seto-Ohashi Bridge to Takamatsu in about an hour, making Okayama the main gateway.
    • By plane — regional airports at Takamatsu, Matsuyama, Kochi, and Tokushima connect to Tokyo, Osaka, and other major hubs.
    • Getting around the island — a rental car is strongly recommended, especially for the Iya Valley; the four prefectural capitals (Takamatsu, Tokushima, Kochi, Matsuyama) are connected by train and highway bus, but rural attractions are far easier with your own vehicle.

    Planning your visit

    • How long to stay — three to four days covers Iya Valley, Naruto, and one city (Matsuyama or Takamatsu) at a comfortable pace.
    • Best time to visit — spring and autumn for comfortable hiking and driving weather; summer is hot and humid but works for whirlpool viewing since tidal strength doesn’t depend on temperature.
    • Combine it with — Naoshima and the Seto Inland Sea art islands (see our Naoshima guide) sit just off Shikoku’s north coast near Takamatsu, making an easy add-on to a Shikoku itinerary.
  • Sado Island: Gold Mines, Taiko & Rural Japan

    Sado Island: Gold Mines, Taiko & Rural Japan

    Sado Island, off the coast of Niigata Prefecture in the Sea of Japan, is Japan’s sixth-largest island and one of its least-visited major destinations. It has a strange, layered history — a place of exile for emperors and monks in the medieval era, then Japan’s largest gold mine for over 400 years — plus rice paddies restored specifically to bring back the crested ibis, and one of the country’s most famous taiko drumming groups. It’s a genuine off-the-beaten-path trip, not a polished tourist stop, and that’s the appeal.

    A quick history

    For centuries, Sado was Japan’s official place of exile — Emperor Juntoku and the Buddhist monk Nichiren were both sent here, which left the island with an unusually dense concentration of temples and shrines for its size. Everything changed in 1601 with the discovery of gold at Aikawa, and the Sado Gold Mine became the largest in Japan, operated continuously until 1989. The mine complex and its surrounding mining town were inscribed as a UNESCO World Heritage Site in 2024, giving the island a fresh reason to visit.

    What to see and do

    • Sado Gold Mine (Sado Kinzan) — walk through actual mining tunnels dating from the Edo period, with animatronic dioramas showing historical mining techniques, plus the newer Doyu-no-Warito open-pit site, a dramatic V-shaped cleft carved into the mountain by centuries of digging.
    • Taraibune (tub boats) — round, tub-shaped wooden boats originally used by local women to gather seaweed and shellfish among the rocky coves near Ogi; short rides are now a popular, slightly whimsical tourist activity.
    • Toki Forest Park — dedicated to the crested ibis (toki), a bird that went extinct in the wild in Japan before a captive-breeding and reintroduction program on Sado brought it back; you can see the birds up close and, with luck, spot reintroduced ones in the surrounding rice paddies.
    • Sado’s rice and sake — the island’s ibis-friendly farming methods (avoiding pesticides to protect the birds’ food source) have become a selling point for its rice, and several small breweries produce sake worth seeking out; if you’re building out a sake trip, pair this with our sake guide.
    • Ogi and traditional villages — quiet fishing towns and the Shukunegi preserved district, a cluster of Edo-period wooden houses built by shipwrights, packed tightly into a narrow cove.
    • Kodo — the world-renowned taiko drumming ensemble is based on Sado and trains at a dedicated village on the island; their summer Earth Celebration festival draws visitors from well beyond Japan, though tickets and accommodation sell out months ahead.

    Getting there

    • By ferry from Niigata — the main gateway. A car ferry takes about 2.5 hours to Ryotsu port; a faster jetfoil covers the same route in around 1 hour.
    • By ferry from Naoetsu (Joetsu, south of Niigata) — a car ferry runs to Ogi port, seasonally, taking roughly 2 hours 40 minutes.
    • Reaching Niigata — the Joetsu Shinkansen connects Tokyo to Niigata Station in about 2 hours; from there it’s a short bus or taxi to the ferry terminal.

    Getting around the island

    Sado is large — about the size of Tokyo’s 23 wards combined — and public transport is sparse. A rental car is by far the easiest way to see more than one corner of the island in a day; cars can be rented at the ferry terminals in Ryotsu or Ogi. Limited bus routes connect the main towns for travelers without a license, but expect long waits between services, and plan around the timetable rather than around your itinerary.

    Planning your visit

    • How long to stay — a rushed day trip from Niigata is possible for the gold mine alone, but two nights lets you cover the mine, the toki park, and at least one coastal village without rushing between ferry times.
    • Best time to visit — late spring through early autumn for the mildest weather and calmest ferry crossings; the Sea of Japan side can get rough and cold in winter, and some ferry schedules are reduced.
    • Where to stay — Ryotsu and Aikawa have the most accommodation options, from business hotels to small family-run inns; compare options on Booking.com before you go, since choices thin out compared to mainland cities.
    • Budget — the gold mine entry runs around 1,300 yen, taraibune rides around 800–1,000 yen per person, and a rental car for a full day is typically 6,000–9,000 yen — reasonable compared to more touristed regions.

    Who it’s for

    Sado isn’t a first-Japan-trip destination — it rewards travelers who’ve already covered Tokyo and Kyoto and want somewhere genuinely quiet, with real history and no crowds. If you’re already planning a Niigata detour (skiing in winter, or the Echigo-Tsumari art triennial in summer), adding two or three days on Sado turns a regional trip into something memorable rather than a simple add-on.

  • Yakushima: Japan’s Ancient Forest Island

    Yakushima: Japan’s Ancient Forest Island

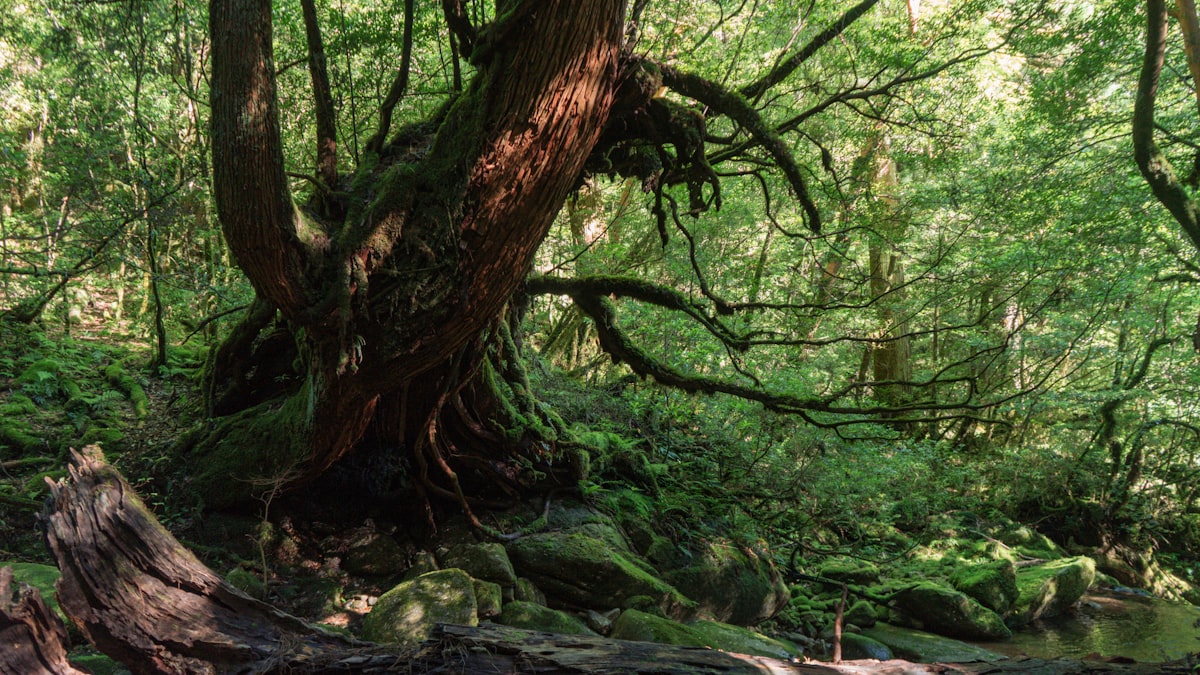
    Yakushima is a small, round, mountainous island off the southern tip of Kyushu, covered in a primeval cedar forest so old and mossy it inspired the forest scenes in Studio Ghibli’s Princess Mononoke — see our Studio Ghibli guide if that’s what brought you here. It’s one of Japan’s two original UNESCO World Heritage natural sites, and it feels almost nothing like the rest of the country: wetter, wilder, and far less visited than Okinawa or Hokkaido.

    Why Yakushima is different

    The island receives extraordinary rainfall — locals joke that “it rains 35 days a month” — which is exactly why its interior supports ancient yakusugi cedar trees, some estimated at over 1,000 years old, with the oldest specimens possibly exceeding 7,000 years. The climate shifts dramatically with elevation: subtropical palm trees near the coast give way to cool temperate forest, then near-alpine conditions at the island’s highest peaks, which top 1,900 meters — genuinely unusual for such a small landmass this far south.

    What to do

    • Jomon Sugi hike — the trek to Japan’s most famous ancient cedar is a full-day commitment: roughly 10 hours round trip, starting well before dawn, with a shuttle bus required to reach the trailhead (private cars are restricted). This is a serious hike, not a casual walk.
    • Shiratani Unsuikyo Ravine — the more accessible option, and the specific forest that inspired the Mononoke imagery. Trails range from an easy 1-hour loop to a 4-hour hike, making it realistic for most fitness levels.
    • Yakusugi Land — an easier forest park with boardwalk trails from 30 minutes to 2.5 hours, good if Jomon Sugi’s full-day hike isn’t feasible.
    • Sea turtles — Yakushima’s beaches (notably Inakahama) are a major loggerhead turtle nesting site from May to July; guided night viewing tours run in season, though flash photography and unguided visits are restricted to protect nesting turtles.
    • Onsen with ocean views — several outdoor hot springs sit right at the coastline, including tidal baths that are only accessible at low tide.

    Getting there

    • By plane — regional flights connect Yakushima Airport with Kagoshima (about 35 minutes) and, seasonally, Osaka and Fukuoka.
    • By high-speed ferry — the Toppy/Rocket jetfoil runs from Kagoshima port in roughly 1 hour 50 minutes to 2 hours 40 minutes depending on the route, a scenic and often cheaper alternative to flying.
    • By slow ferry — an overnight or several-hour car ferry option exists for those bringing a vehicle or on a tighter budget.
    • Kagoshima itself is reachable from Fukuoka and Kumamoto by train, or directly from Tokyo and Osaka by air.

    Getting around the island

    Yakushima is genuinely rural — there’s no train, and bus service is limited outside the main trailhead shuttles. Most visitors rent a car at the airport or port; the coastal ring road takes only about 2–3 hours to circle the entire island without stops, but the interior mountain roads are narrow and slow. If you don’t want to drive, most hotels can arrange trailhead transfers and a handful of local tour operators run day trips that include transport, guiding, and permits where required.

    Planning your visit

    • Best time to visit — spring (March–May) and autumn (October–November) bring the most stable weather; given how much it rains year-round, pack for rain regardless of season.
    • How long to stay — two to three nights is the realistic minimum to fit in a major hike plus the coastal sights without rushing; the Jomon Sugi trek alone should be its own dedicated day.
    • What to pack — proper rain gear, layered clothing for the elevation swing, and sturdy hiking shoes; the popular trails are well-maintained but can be muddy and root-covered.
    • Guides — not required for Shiratani Unsuikyo or Yakusugi Land, but strongly recommended for the full Jomon Sugi trek if you’re not an experienced hiker, since the early start and distance catch people off guard.

    Combining it with the rest of Kyushu

    Yakushima pairs naturally with a wider Kyushu trip that includes Fukuoka and the hot-spring towns of Beppu and Yufuin — fly into Fukuoka, work your way south, and end with the ferry or flight from Kagoshima to Yakushima as the trip’s final, quietest chapter. It’s a demanding add-on rather than a relaxing one, but for travelers who’ve already done Tokyo and Kyoto and want to see a side of Japan that feels genuinely remote, it’s hard to beat.

    Food and where to stay

    Accommodation on Yakushima leans toward small family-run guesthouses (minshuku) and mid-size hotels rather than large resorts, concentrated in the towns of Miyanoura and Anbo near the two ferry ports. Many include two meals a day, which is worth taking given how few restaurant options exist near the trailheads. Local specialties include flying fish (tobiuo), often served as sashimi or deep-fried, and the island’s own citrus, ponkan, in season during winter. Because options are limited compared to mainland cities, book accommodation well ahead for peak seasons — Golden Week and the summer school holidays fill up fastest, and some of the smaller guesthouses only take a handful of guests a night.

  • Super Sento: Japan’s Modern Bathhouses (and How They Differ from Onsen)

    Super Sento: Japan’s Modern Bathhouses (and How They Differ from Onsen)

    Not every hot bath in Japan is an onsen. If you’re staying in a city and don’t want to travel to a hot-spring town, a super sento — a large, modern public bathhouse — gives you almost the same experience for the price of a movie ticket. Here’s what makes them different from both onsen and old neighborhood bathhouses, and how to use one properly.

    Sento vs. super sento vs. onsen

    • Sento — traditional neighborhood public baths, historically for people without a bath at home. Simple, cheap (around 500 yen in most cities thanks to local price caps), usually just a couple of tubs and a washing area.
    • Super sento — large, modern bathhouse complexes, often on the edge of cities or near highways, with multiple indoor and outdoor baths, saunas, sometimes carbonated or electric baths, relaxation lounges, restaurants, and occasionally capsule-style rest areas. Entry typically runs 700–1,500 yen.
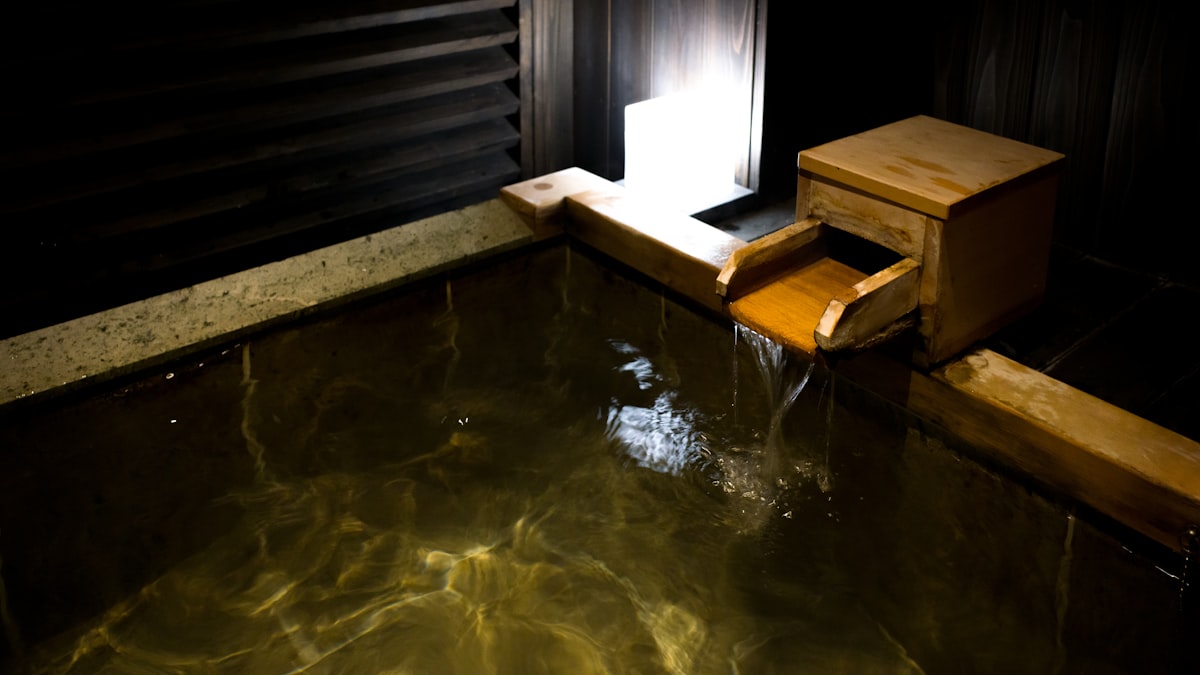
    • Onsen — legally must use natural geothermal spring water with a minimum mineral content and temperature. A facility can call itself an onsen even in the middle of Tokyo if it pumps genuine hot-spring water from underground; see our onsen etiquette guide for the bathing rules, which apply here too.

    Many super sento actually pipe in real onsen water (some pump it from hundreds of meters underground even in central Tokyo or Osaka), which is worth checking for if you want the genuine mineral-bath experience without leaving the city.

    What a typical visit looks like

    1. Pay at the entrance — often a vending-machine ticket system or a wristband/locker key that tracks charges (food, drinks, extra towels) to settle when you leave.
    2. Undress completely in the locker room — swimwear is not worn in the bathing area, and this applies to everyone regardless of gender or nationality.
    3. Wash thoroughly while seated at the shower stations before entering any bath — this is the one rule that matters most and is taken seriously.
    4. Move between baths — most super sento have several: a large soaking bath, an outdoor rotenburo, a cold plunge, sometimes a “electric” tingling bath (mild and harmless, just unusual), a sauna, and often a salt or steam room.
    5. Rinse and dry off before returning to the locker room — a small hand towel is used for modesty and for wiping down, not for soaking in the bath.
    6. Relax afterward — most super sento have a communal lounge with reclining chairs, a restaurant serving ramen or set meals, and sometimes massage chairs or manga corners, encouraging you to stay for hours, not minutes.

    Tattoos

    Policies vary by facility. Large chain super sento in bigger cities are increasingly tattoo-tolerant or offer cover-up stickers (sold or lent at the front desk) for small tattoos; older or more traditional sento are stricter. If you have visible tattoos, check the facility’s website in advance or see our tattoo and onsen guide, which covers the same etiquette that applies at super sento.

    What to bring (or rent)

    • A small hand towel and a large bath towel — most super sento rent or sell both for a few hundred yen if you come empty-handed.
    • Basic toiletries are usually provided (shampoo, body soap), but bring your own if you have specific skin needs.
    • Cash or IC card for lockers and food — many older facilities still don’t take credit cards, though this is changing.
    • A change of clothes if you’re planning to spend the evening — many travelers use a super sento as an end-of-day reset after a long train journey or hiking day.

    Why travelers should bother

    Super sento solve a real problem: you get the soaking, sauna, and relaxation of an onsen ryokan stay (see our ryokan guide if you want the full overnight version) without needing to leave the city or book a room. They’re also open late — often until midnight or later — which makes them a good option after a long day of sightseeing when your legs are tired and your hotel bath is a cramped unit bath. Families with children, groups, and solo travelers are all common, and unlike some ryokan onsen, super sento rarely require reservations.

    Finding one

    • Search “スーパー銭湯” (super sento) plus your city name on Google Maps — most have English reviews from past visitors noting tattoo policy and crowd levels.
    • Popular chains include Spa LaQua (Tokyo), Oedo Onsen Monogatari-style theme baths, and regional chains like Manyo no Yu, which has locations near several airports — handy for a wash and soak before a late flight home.
    • Weekday afternoons are quietest; weekend evenings and holidays get crowded with local families.

    Quick etiquette checklist

    • Wash before bathing, every time — no exceptions.
    • No swimwear in the water.
    • Keep your towel out of the bathwater — fold it on your head or set it aside.
    • Tie up long hair so it doesn’t touch the water.
    • Photography is not allowed in bathing areas, for obvious reasons.
    • Speak quietly — even busy super sento maintain a calm, low-key atmosphere.
  • Matsumoto: Castle, Soba & Gateway to the Japan Alps

    Matsumoto: Castle, Soba & Gateway to the Japan Alps

    Matsumoto doesn’t get the crowds of Kyoto or the neon of Tokyo, and that’s exactly the point. This compact city in Nagano Prefecture has one of Japan’s finest original castles, a walkable old town, some of the country’s best soba noodles, and — for much of the year — it’s the easiest gateway into the Northern Japan Alps. If you’re heading to Kamikochi or Shirakawa-go, or you simply want a slower, less-touristed stop between Tokyo and Kyoto, Matsumoto earns a full day or an overnight.

    Matsumoto Castle: the “Crow Castle”

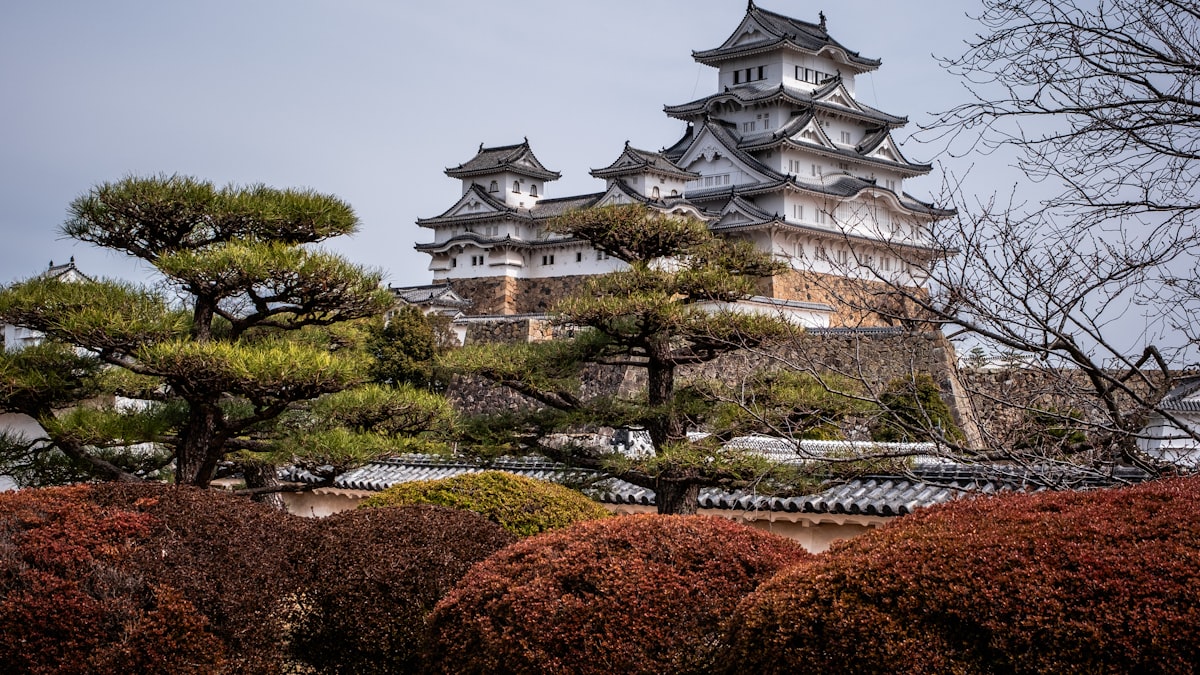
    Matsumoto Castle (Matsumoto-jo) is one of only twelve Japanese castles with an original wooden keep that survived war, fire, and the Meiji-era demolitions — see our guide to Japan’s original castles for the full list. Its black-and-white exterior earned it the nickname “Crow Castle,” and unlike many rebuilt-in-concrete castles elsewhere in Japan, the inside is the real, centuries-old timber structure.

    • Entry fee — around 700 yen for adults; combination tickets with the nearby Nakamachi museum are sometimes available.
    • Hours — typically 8:30am–5:00pm (last entry 4:30pm), extended during cherry blossom and summer weekends.
    • Inside the keep — steep, narrow wooden staircases (some almost ladder-like), low ceilings, and a hidden third floor built to fool attackers. Wear socks you don’t mind showing — shoes come off at the entrance.
    • Best photo spot — the moat’s edge on the castle’s north side, where the keep reflects in the water; arrive near opening time for the fewest people and the softest light.
    • Cherry blossom season (late March–mid April, though timing shifts year to year) — the castle grounds fill with sakura and it’s genuinely one of the best blossom-and-castle combinations in Japan.

    Nakamachi and Nawate: the old town

    A 10–15 minute walk from the castle, the Nakamachi district preserves rows of white-walled kura (storehouses) that now hold cafes, sake breweries, craft shops, and a small museum. Running alongside the Metoba River, the Nawate Street market area is a shorter strip of stalls selling grilled snacks, folk crafts, and — appropriately for a “frog” pun on the river’s old name — frog-themed souvenirs. Neither district takes more than an hour or two, which is exactly why Matsumoto works so well as a single-day stop.

    Eat: soba country

    Nagano Prefecture is one of Japan’s best regions for soba (buckwheat noodles), thanks to the cool mountain climate that suits buckwheat cultivation. In Matsumoto, look for:

    • Zaru soba — cold noodles served on a bamboo tray with dipping sauce, the classic way to judge a shop’s noodle quality.
    • Togakushi-style soba — a Nagano specialty served in small bundles on a round basket, originating from the nearby Togakushi region.
    • Basashi (horse sashimi) — a Nagano izakaya specialty if you’re feeling adventurous; it’s mild and lean, closer to beef tataki than you’d expect.
    • A bowl of good soba typically runs 900–1,500 yen; the oldest shops near Nakamachi have been running for generations and often sell out of noodles before dinner.

    Getting to Matsumoto

    • From Tokyo (Shinjuku) — the JR Azusa or Super Azusa limited express runs directly to Matsumoto Station in about 2 hours 30 minutes to 2 hours 45 minutes, roughly 7,000–7,700 yen one-way (no shinkansen on this route).
    • From Nagoya — the JR Shinano limited express takes about 2 hours direct.
    • From Kyoto or Osaka — take the shinkansen to Nagoya, then transfer to the Shinano limited express; total journey is roughly 3–3.5 hours.
    • The castle and old town are a 15–20 minute walk from Matsumoto Station, or a short taxi/bus ride if you’re short on time.

    Why Matsumoto matters for Alps travel

    Matsumoto’s bus terminal is the main departure point for Kamikochi, the dramatic alpine valley that’s one of Japan’s best hiking destinations, with direct buses taking around 1 hour 5 minutes during the open season (roughly mid-April through mid-November; the road closes to traffic in winter). It’s also a reasonable base for reaching Takayama and Shirakawa-go if you’re building a Japan Alps loop rather than backtracking through Nagoya each time. Staying overnight in Matsumoto — rather than day-tripping from Tokyo — lets you catch the castle at dusk when the crowds thin and the illumination (on select evenings) reflects in the moat.

    Practical tips

    • Best time to visit — early April for cherry blossoms with the castle, or October for the start of Alps autumn color; midsummer is pleasantly cooler than Tokyo or Kyoto thanks to the elevation.
    • How much time to allow — a half-day covers the castle and old town; a full day lets you add a soba lunch and a slower wander through Nakamachi’s shops.
    • Luggage — coin lockers at Matsumoto Station are plentiful but fill up on weekends; if you’re continuing to Kamikochi the same day, use the lockers rather than carrying bags on the mountain bus.
    • Combine it — Matsumoto sits neatly between Tokyo and the Japan Alps/Takayama route, so it fits well into a two-week itinerary without much backtracking.