Japan Trove

Category: Uncategorized

  • Awaji Island: Hyogo’s Onion Fields, Flower Parks & Naruto Whirlpool Views

    Awaji Island: Hyogo’s Onion Fields, Flower Parks & Naruto Whirlpool Views

    Photo by Julian Hochgesang on Unsplash

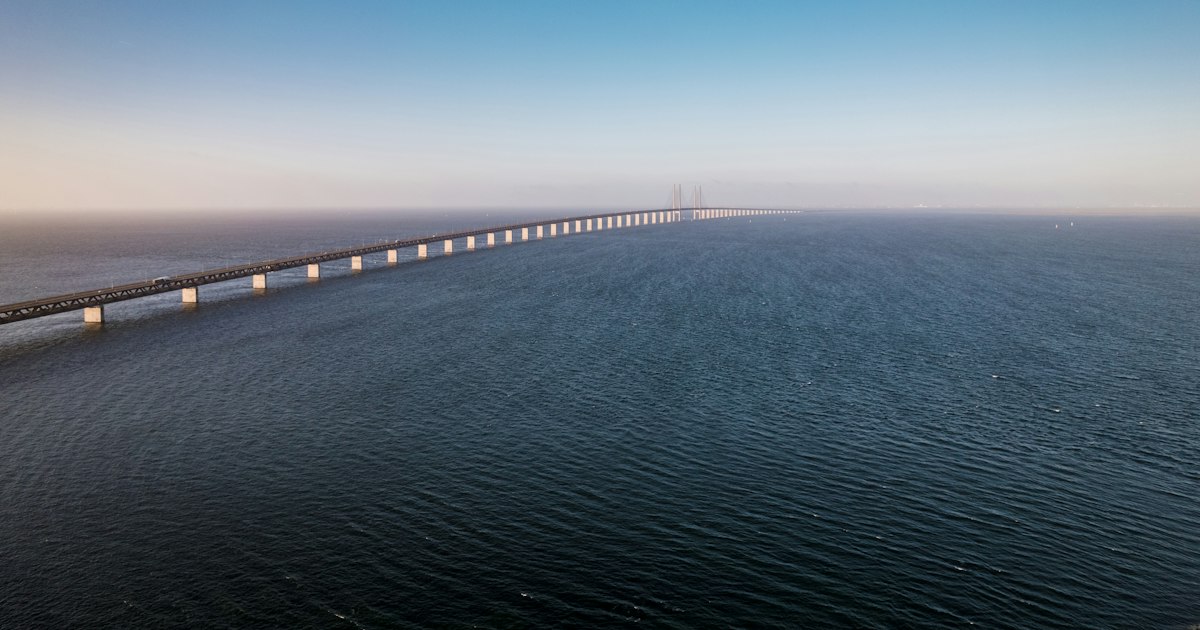
    Awaji Island sits in the Seto Inland Sea between Kobe and Tokushima, connected to the mainland by one of the world’s longest suspension bridges rather than by train. That makes it an easy-to-reach but easy-to-underestimate day trip: there are onion fields rolling right up to the coastline, a flower garden designed by one of Japan’s most famous architects, and a glass-floored walkway where you can watch one of the planet’s largest tidal whirlpools churn below your feet. Here’s how to actually plan the visit.

    Getting to Awaji Island

    There is no rail line onto Awaji. The island is reached via the Akashi Kaikyo Bridge, a suspension bridge with a central span of nearly 2 km that links Maiko, on the Kobe side, to Awaji’s northern tip. Most visitors arrive one of two ways:

    • Highway bus — Direct buses run from Sannomiya (Kobe) and from Osaka (Umeda/Shin-Osaka area) to stops like Awaji-IC or Higashiura Bus Terminal, taking roughly 60–90 minutes depending on origin and traffic. One-way fares are typically in the ¥1,500–2,500 range.
    • Rental car — Because Awaji’s main sights are spread across a fairly large island, a car is genuinely useful if you want to see more than one attraction in a day. Rental counters exist near Sannomiya and at a few spots on the island itself; tolls across the bridge add a few thousand yen each way.

    If you’re coming from Kobe, it’s worth building in time at Nankinmachi Chinatown near Sannomiya before or after, since most buses to Awaji depart from that same station area.

    Onion Fields and Awaji’s Famous Sweet Onions

    Awaji tamanegi (Awaji onions) are a genuine point of local pride — the island’s mineral-rich soil and climate produce an unusually sweet, mild onion that shows up in everything from curry to ice cream at local shops. Harvest season runs roughly April through May, when you’ll see fields of onions drying on their stalks along the island’s back roads, especially in the central and southern areas around Sumoto and Minamiawaji.

    You don’t need a special itinerary to see them — they’re visible from ordinary roads and from the Awaji Service Area on the expressway, which also sells onion-based snacks (onion soup, onion curry bread, onion ice cream) and bags of fresh onions for around ¥300–500. Farm stands elsewhere on the island sell them even cheaper directly from growers. Note that this is a working agricultural landscape, not a tourist park — enjoy the view from the road rather than walking into private fields.

    Awaji Yumebutai and Hanasajiki: The Island’s Flower Parks

    Awaji has two flower-focused sites worth knowing about:

    • Awaji Yumebutai — A conference and garden complex near the Akashi Kaikyo Bridge designed by architect Tadao Ando, built partly as a memorial after the 1995 Great Hanshin earthquake. Its centerpiece is the Hyakudanen, a “hundred-step garden” terraced down a hillside and planted with rotating seasonal flowers. Walking the garden terraces is free; some indoor facilities within the complex charge separately.
    • Awaji Hanasajiki — A large, free hilltop flower park overlooking Osaka Bay, most famous for its spring nemophila (baby blue eyes) fields in April and cosmos in autumn (September–October). It’s dog-friendly and makes for an easy, no-cost stop with genuinely good photo views back toward the mainland. Hours run roughly 9:00–17:00, with seasonal variation, so check ahead if visiting early or late in the day.

    If you’re traveling with kids, Nijigen no Mori, an anime- and manga-themed park elsewhere on the island, is a popular add-on, though it’s a separate paid attraction rather than part of the flower park circuit.

    Naruto Whirlpools: Uzu no Michi and Boat Tours

    The Naruto whirlpools (Naruto no Uzushio) form in the Naruto Strait between Awaji and Tokushima, where tidal currents from the Pacific and the Seto Inland Sea collide under the Onaruto Bridge. There are two main ways to see them:

    • Uzu no Michi — A walkway suspended under the Onaruto Bridge on the Awaji side, with glass floor panels that let you look straight down at the strait. Admission is around ¥510 for adults, and it’s open roughly 9:00–18:00 (shorter hours outside peak season). This is the easier, cheaper option if you’re staying on the Awaji side.
    • Boat tours — Larger sightseeing boats (Wonder Naruto) and a glass-bottomed semi-submarine boat (Aqua Eddy) depart from the Tokushima side near the Naruto Park area, putting you much closer to the actual whirlpools. Fares run roughly ¥1,800–2,500 for adults. This requires crossing onto the Tokushima side, so it adds time if you’re based on Awaji.

    The single most important thing to know: the whirlpools are tide-dependent. They’re strongest around spring tides (near the new and full moon) and at specific times each day when the tidal flow peaks — not a constant, always-on spectacle. Uzushio Kisen, the boat operator, publishes a tide/viewing time calendar online; check it before you go, because visiting at a slack tide can mean a nearly flat strait with no whirlpools at all.

    Best Time to Visit

    Spring (late March through May) is the strongest all-around season: nemophila blooms at Hanasajiki, onion harvest is visible across the island, and weather is mild for walking the Yumebutai terraces. Autumn (late September–October) is a good second choice for cosmos at Hanasajiki and comfortable temperatures. Whichever season, the whirlpools can be seen year-round — timing within the day matters far more than the time of year, so plan that piece around the tide calendar rather than the calendar date.

    Budget, Mid-Range, and Splurge Options

    • Budget: Take the highway bus, walk Awaji Hanasajiki for free, and pick up a bag of onions from a farm stand (~¥300–500). Skip Uzu no Michi and just view the Onaruto Bridge from the Awaji-side rest areas.
    • Mid-range: Rent a car for the day, pay the Uzu no Michi entrance (~¥510), walk the Yumebutai gardens, and have an onion-centric lunch (onion curry or onion-topped beef) at a roadside restaurant.
    • Splurge: Stay overnight at the Westin hotel within the Yumebutai complex, or cross to the Tokushima side for a whirlpool boat cruise (Wonder Naruto or Aqua Eddy) timed to peak tidal flow, paired with an Awaji beef dinner.

    Common Mistakes to Avoid

    • Assuming there’s a train. There isn’t — plan around the highway bus schedule or a rental car, not a rail pass.
    • Ignoring the tide calendar. Showing up to view whirlpools at the wrong time of day is the single biggest letdown visitors report. Check the published tide times before committing to a boat tour or Uzu no Michi visit.
    • Underestimating the island’s size. Awaji’s attractions are spread across a large island with limited public transit between them; without a car, pick one or two sights per day rather than trying to see onions, flowers, and whirlpools all in one trip.
    • Visiting outside onion season expecting field views. The visible drying fields and harvest activity are mainly an April–May phenomenon; later in the year the fields look like ordinary farmland.
    • Running low on cash. Many farm stands and smaller restaurants on the island are cash-only — if you’re not carrying enough yen, see this guide on using foreign cards at Japan Post Bank ATMs before you leave the mainland, since ATM options thin out once you’re on the island.

    Awaji rewards a slow pace more than a checklist — even hitting just the flower park and the whirlpool walkway in a single day, with a bag of onions in your bag for the trip home, makes for one of the more distinctive day trips out of the Kobe–Osaka area. For a similar low-key Kansai day trip with different scenery, Lake Biwa is worth comparing if you have a second free day. Anglers on the island can also look into rental fishing gear and license rules, since several spots along Awaji’s coast are popular with local shore anglers.
  • Oki Islands: Shimane’s Remote UNESCO Geopark and Rugged Coastline

    Oki Islands: Shimane’s Remote UNESCO Geopark and Rugged Coastline

    Photo by Walter Coppola on Unsplash

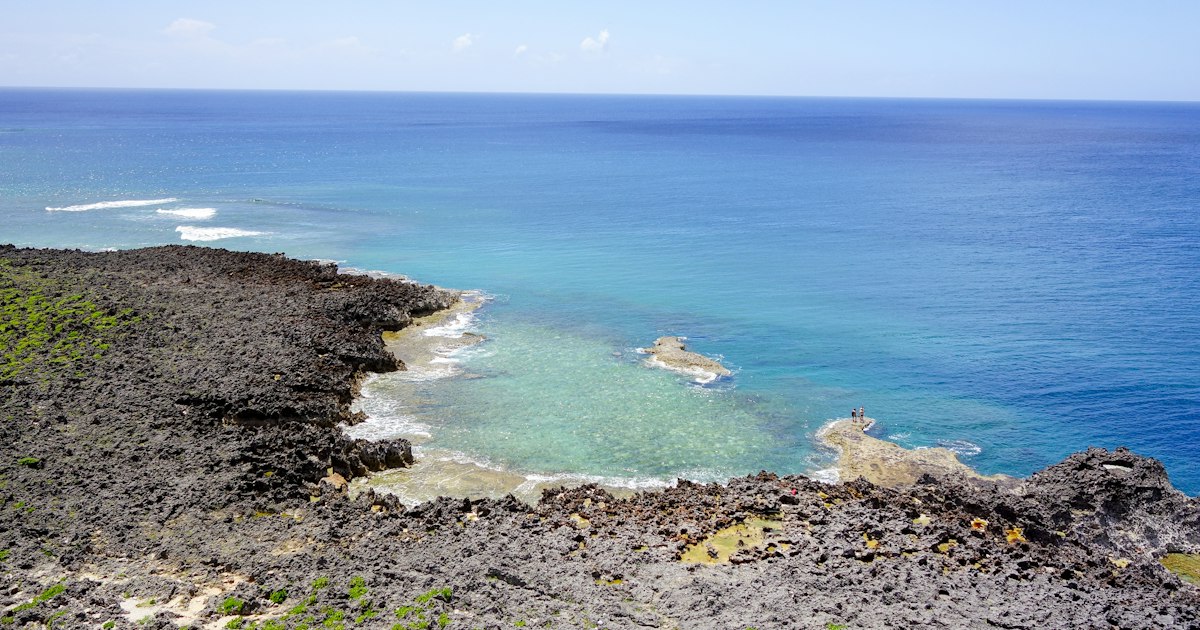
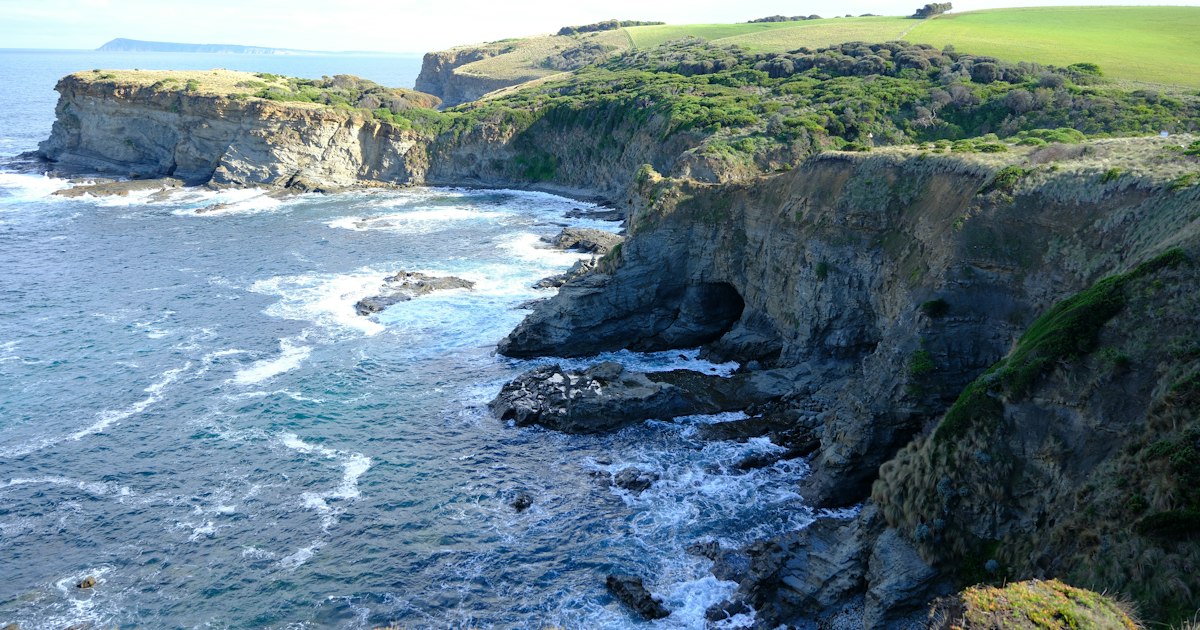
    Four hours by ferry from the Shimane coast, the Oki Islands feel like a different country — windswept cliffs, grazing cattle on seaside pastures, and villages where the last ferry of the day genuinely matters. Designated a UNESCO Global Geopark in 2013, this small archipelago in the Sea of Japan rewards the effort it takes to reach it, but that effort is real: this is not a destination you improvise. Here’s what you need to know to plan it properly.

    Where the Oki Islands Are and Why They’re Special

    The Oki Islands sit roughly 40-80km off the coast of Shimane Prefecture, split into two groups: Dogo, the large, round main island, and the Dozen group — three smaller islands (Nishinoshima, Nakanoshima, and Chiburijima) clustered together to the west. The whole archipelago is volcanic in origin, and millions of years of erosion have carved the kind of dramatic sea cliffs and caldera-rim scenery that earned the UNESCO Global Geopark designation. Unlike Japan’s more polished geopark sites, Oki still feels lightly visited — most tourists here are domestic hikers, divers, and retirees on slow travel, not tour buses.

    Getting There: Ferries and Flights

    There is no bridge and no train — you’re arriving by sea or air, and both options need to be booked with the schedule in hand rather than decided on the fly.

    • Ferry: Oki Kisen operates the crossing from Shichirui Port (near Matsue) and Sakaiminato Port (Tottori side) to Saigo Port on Dogo and on to the Dozen islands. The high-speed “Rainbow” jet does Sakaiminato-Dogo in about an hour for roughly ¥6,500-7,000 one-way (2nd class); the regular car ferries take 2.5-3 hours and cost closer to ¥3,000-3,500 one-way. Ferries run once or twice daily depending on season and are frequently cancelled or delayed in rough winter seas — build in a buffer day if you’re connecting to a flight home.
    • Flight: ANA flies to Oki Airport on Dogo from Osaka (Itami) and from Izumo, with flight time around 30-50 minutes. Fares vary widely by how far ahead you book, from roughly ¥12,000 to ¥25,000+ one-way. This is the more reliable option in winter, though smaller aircraft mean it’s also more weather-sensitive than you’d expect.

    Most visitors base themselves on Dogo first, then take the inter-island ferry (a separate, smaller service connecting Dogo and the three Dozen islands) to reach Nishinoshima’s cliffs — budget a full day for that leg alone.

    Getting Around the Islands

    Public buses exist but run infrequently and aren’t built around tourist sightseeing routes. Renting a car at Saigo Port or Oki Airport is close to essential if you want to see more than the port town — expect around ¥6,000-9,000 per day for a compact car, and reserve well ahead in July-August and during Golden Week, when the handful of rental counters sell out. On Nishinoshima and the smaller islands, car rental is even more limited, so some visitors book a local taxi tour or join a minibus sightseeing course instead. If you’re relying on a rental car for mobility needs, note that accessible vehicle options here are far scarcer than in mainland Japan — check our guide on renting a wheelchair or mobility scooter in Japan if that’s a factor, since island terrain around the cliffs is largely unpaved and not wheelchair-friendly.

    The Must-See Natural Sights

    Nishinoshima’s Kuniga coast is the headline act: Matengai Cliff, at around 257 meters, is one of Japan’s tallest sea cliffs, and a walking trail along the top takes you past cows and horses grazing right at the cliff edge with nothing but ocean beyond them — genuinely vertiginous and unlike anywhere else in the country. On Dogo, the sightseeing boat to Candle Rock (Rosoku-jima) is the other must-do: on calm evenings close to sunset, boats position so the sun appears to balance directly on top of the rock pillar, lighting it up like a candle flame. Tours run roughly ¥3,000-3,500 per person, depend entirely on clear weather and calm seas, and are typically only bookable same-day or one day ahead through local operators at Saigo Port — ask your accommodation to help arrange it, as English booking online is limited.

    Best Season and Weather Considerations

    Late April through October is the reliable window, with May-June and September-October offering the best combination of mild temperatures and calmer seas for ferry crossings and boat tours. July-August brings peak domestic tourism (and diving season — the waters here are known for clarity) along with higher humidity; this is also when mosquitoes and biting insects are at their worst on the grassy cliff trails, so it’s worth packing repellent — see our rundown of what actually works in Japan’s mosquito repellent aisle. Winter (December-March) sees the Sea of Japan turn rough, with frequent ferry cancellations and flights more exposed to wind delays; it’s also when the islands’ famous crab and other winter seafood are at their best, similar to the seasonal logic behind Japan’s winter snow crab season, but it’s a trip for travelers with flexible schedules, not tight itineraries.

    Where to Eat and What to Buy

    Oki beef (Oki-gyu) rivals better-known wagyu brands at a fraction of the price and reputation — look for it at restaurants near Saigo Port. Sazae (horned turban shell), grilled or in rice, is the signature seafood, along with Oki salt produced by traditional evaporation methods, sold in small shops as a souvenir. Oki soba, a firmer buckwheat noodle than the mainland style, is served at simple lunch counters island-wide for around ¥700-900 a bowl. Anglers will find the islands are genuinely excellent for shore and boat fishing thanks to the clean, deep water — if you want to try it, our guide to rental gear, licenses, and where tourists can fish in Japan covers what’s needed before you cast a line here.

    Practical Tips and Common Mistakes

    The single biggest mistake visitors make is underestimating inter-island logistics: the Dozen ferry doesn’t run on a frequent loop, and missing the one return sailing of the afternoon can strand you overnight unplanned. Cash still matters more here than in Tokyo or Osaka — many small restaurants, minshuku, and the boat tour operators are cash-only or accept only limited digital payment, so don’t assume QR code payments like PayPay or Rakuten Pay will cover you everywhere. ATMs are limited to the main settlements on Dogo and Nishinoshima, so withdraw what you need before heading to the smaller villages — Japan Post Bank ATMs are your most reliable option island-wide, and it’s worth knowing how foreign cards actually work at them before you need the cash urgently. If you’re coming from a rugged-coastline trip elsewhere in Japan and comparing notes, Oki shares a lot of DNA with the Noto Peninsula’s remote fishing towns — both reward travelers willing to rent a car and slow down, but Oki’s ferry dependency makes advance planning even more important. Book accommodation early: the islands have a genuinely small number of ryokan and minshuku rooms, and they fill fast around regional festivals and summer weekends.

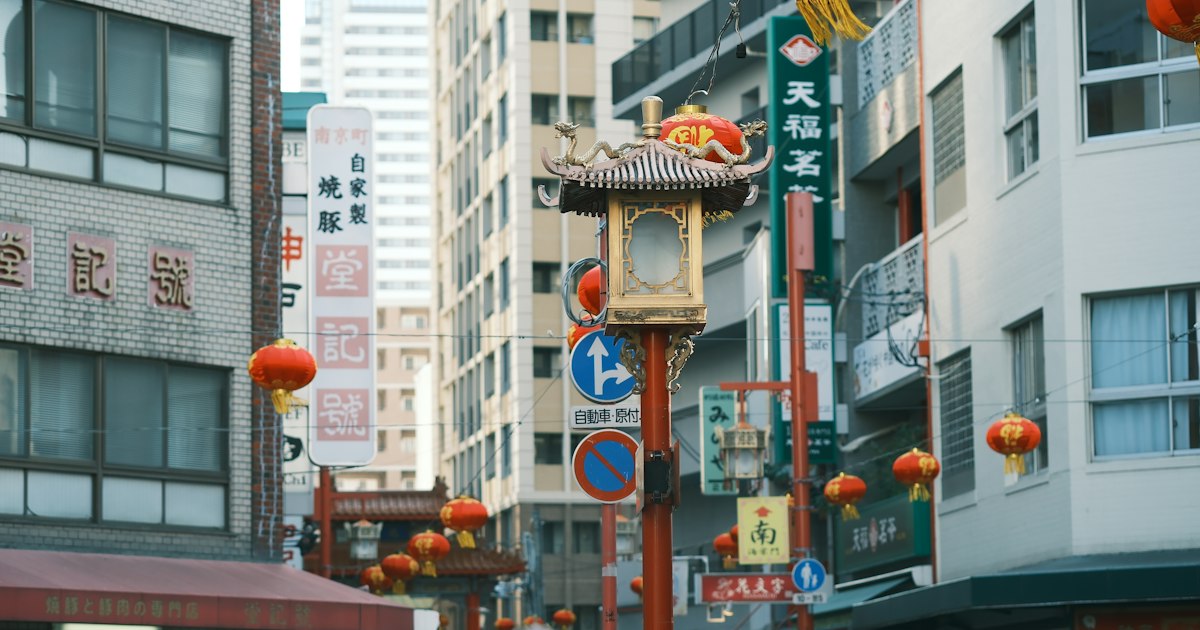
  • Kobe’s Nankinmachi Chinatown: A Quick Food Crawl Between Sannomiya and the Harbor

    Kobe’s Nankinmachi Chinatown: A Quick Food Crawl Between Sannomiya and the Harbor

    Photo by Life.Time.Values on Unsplash

    Nankinmachi is Kobe’s answer to Yokohama’s and Nagasaki’s Chinatowns, but it’s smaller, cheaper to graze through, and sits almost exactly between Sannomiya Station and the harbor — which makes it one of the easiest “extra” stops to slot into a Kobe day without derailing your plans. You can eat your way through the whole district in under an hour, or stretch it into a longer walk down to the water. Here’s how to do it without wasting time or money.

    Getting There From Sannomiya or the Harbor

    Nankinmachi sits between Kobe’s two main downtown stations, Sannomiya and Motomachi, so you’ll almost never go out of your way to reach it.

    • From Sannomiya Station (JR, Hankyu, Hanshin, or the subway): walk south through the Motomachi covered shopping arcade for about 7–8 minutes.
    • From Motomachi Station (JR, Hanshin, or the subway): it’s a 2–3 minute walk south of the station — the closer option if you’re coming from Osaka on the Hanshin or JR line.
    • From the harbor (Meriken Park / Kobe Harborland): it’s a flat, pleasant 15–20 minute walk north, passing through the Kyu-Kyoryuchi (Old Foreign Settlement) district, where Kobe’s 19th-century trading-house architecture now houses boutiques and cafés. It’s a nice contrast to walk from European-style stone buildings straight into red-and-gold Chinese gates.

    Because of this geography, the easiest way to use Nankinmachi is as a midpoint: start at Sannomiya, eat your way through Nankinmachi, then keep walking south to the harbor for the view and call it a loop.

    What to Eat First: The Street-Food Crawl

    The main draw of Nankinmachi isn’t sit-down dining — it’s the dense cluster of walk-up counters selling steamed buns, skewers, and small Chinese-style snacks along the main street and the side alleys branching off the central square.

    Butaman (pork buns) are the signature item. The most famous shop, Roushouki, has been making a stripped-down version since the early 20th century — thin-skinned, just pork and onion inside, sold a few pieces at a time for a few hundred yen. It regularly sells out and closes for the day once it does, so if you want to try it, go before midday rather than after lunch. Most other stalls sell a more generously sized, sauce-dipped version of the same bun, usually in the ¥150–¥400 per piece range.

    Beyond buns, look for:

    • Chinchin / goma dango — fried sesame balls with sweet bean paste, a good ¥150–¥300 snack.
    • Tenshinhan — a crab-omelette rice bowl, usually only at the sit-down restaurants rather than the stalls.
    • Kobe beef skewers or nikuman — a handful of stalls lean on local pride and sell wagyu-beef versions of standard street snacks for ¥800–¥1,500. These are the closest thing to a “splurge” bite in the district and worth doing once rather than filling up on.

    Budget-wise, ¥1,000–¥1,500 in cash is enough to sample four or five different stalls and leave full. That’s the appeal of doing Nankinmachi as a crawl rather than sitting down at one restaurant: you get variety for less money and less time.

    If You Want to Sit Down: Mid-Range and Splurge Options

    The streets ringing the square also have proper restaurants if you’d rather eat a full meal. Set lunches at mid-range Chinese restaurants here typically run ¥1,200–¥2,500 and include a main, rice, and soup. A few higher-end spots serve fukahire (shark fin soup) and other banquet-style dishes, where a meal can run ¥3,000–¥8,000 per person — these are worth it only if you specifically want that style of Chinese banquet cooking rather than street food, since the quality-to-price ratio is much better at the stalls for everyday eating.

    One practical note: sit-down restaurants in Nankinmachi get genuinely busy at lunch on weekends, with queues forming outside the more photogenic storefronts. If you want a table rather than a bun in hand, aim for an early lunch around 11:30, or shift to a late lunch after 1:30pm.

    The Square, the Gates, and the Walk South

    At the center of the district is Nankinmachi Square, a small open plaza ringed by red lanterns and flanked by ornate Chinese-style gates at either end — it’s the obvious photo spot and also where festival events are staged. The whole walkable area is compact: a single main street plus the square and a couple of side lanes, so don’t plan on spending more than 45–60 minutes here unless you’re eating slowly at a restaurant.

    Once you’ve eaten, continue south toward the water rather than backtracking to the station. The walk takes you past the old foreign settlement’s brick buildings, then opens up at Meriken Park, home to the red Kobe Port Tower and the Kobe Maritime Museum, and continues into Kobe Harborland, a shopping-and-waterfront complex with a Ferris wheel and evening illuminations. It’s an easy way to turn a 45-minute food stop into a half-day out.

    Best Time to Go

    Nankinmachi is at its most crowded on weekend afternoons and during its biggest annual event, the Nankinmachi Spring Festival, usually held over a weekend in mid-March, with lion and dragon dances in the square. It’s fun to see once, but expect dense crowds and longer stall lines if you’re there that weekend.

    For a calmer visit, go on a weekday around 11am, right as stalls are opening and before the lunch rush. Kobe’s harbor-facing location also means it’s worth checking the forecast if you’re visiting in late summer — see our guide to typhoon season in Japan if your trip falls between August and October, since a direct hit can shut down outdoor stalls for the day. Spring (March–April) and autumn (October–November) are the most comfortable seasons for standing around eating outdoors.

    Paying and Common Mistakes

    Most of the small stalls are cash-only or accept only one or two payment apps, which catches a lot of visitors off guard after getting used to card payments elsewhere in Kobe. Many now take PayPay — our guide to QR code payments in Japan covers how to set it up as a tourist — but it’s still worth carrying ¥2,000–¥3,000 in small bills and coins specifically for this crawl. If you’re low on cash, there are Japan Post Bank ATMs around Sannomiya and Motomachi Stations that reliably accept foreign cards; see our breakdown of how foreign cards work at Japan Post Bank ATMs before you go.

    The other common mistake is treating Nankinmachi like a destination in itself worth a half-day. It’s genuinely small — one main street and a square — so the best use of it is exactly what this guide describes: a focused 45-minute to one-hour food stop wedged between Sannomiya and the harbor, not a standalone outing. Go hungry, bring cash, and keep walking south when you’re done.

  • Hakata Station’s Basement Food Floor: A Souvenir-Buying Strategy for Your Last Hour in Fukuoka

    Hakata Station’s Basement Food Floor: A Souvenir-Buying Strategy for Your Last Hour in Fukuoka

    Photo by Money Knack on Unsplash

    If your Fukuoka trip is ending at Hakata Station — whether you’re catching the Shinkansen back to Tokyo or Osaka, or heading to the airport just five minutes away — you have a built-in souvenir-shopping window that most visitors waste wandering in circles. The food halls packed into the station’s basement and ground floor sell nearly every classic Fukuoka omiyage (souvenir) under one roof, and if you know the layout and the timing, you can do all your shopping in under an hour without missing your train.

    Why Hakata Station Is Fukuoka’s Best Last-Stop Souvenir Hub

    Hakata Station isn’t just a transit point — it’s attached to the Hakata City complex, which combines Amu Plaza Hakata, Hakata Hankyu department store, and dozens of food and souvenir stalls clustered around the station concourse and basement levels. This matters because Fukuoka’s most famous edible souvenirs are concentrated here in competing shops, which means you can compare prices and packaging side by side rather than hunting across the city. For a traveler with a train to catch, that density is the whole point: you don’t need a separate trip to a department store or an airport duty-free counter, because the station itself functions as one.

    Getting There and Timing Your Visit

    Hakata Station is served by the JR lines, the Shinkansen, and the Fukuoka City Subway (Kuko Line), which connects directly to Fukuoka Airport’s domestic terminal in about 5 minutes and roughly 11 minutes to the international terminal with the shuttle bus connection. Most food and souvenir shops in the station complex open between 8:00 and 9:00 AM and stay open until 9:00 or 10:00 PM, though a handful of smaller confectionery counters inside the ticket gates close earlier, around 8:00 PM. If you’re departing on an evening Shinkansen, you’re generally fine — but if your train is a very early morning departure, call ahead or shop the night before, since some shops don’t open until after 9:00 AM.

    Build in at least 45 minutes before your train, not 15. Gift-wrapping, vacuum-sealing fresh items like mentaiko, and checkout lines during peak travel times (Friday evenings, Sunday afternoons, holiday weekends) can easily eat 10–15 minutes on their own.

    The Core Souvenir List: What Fukuoka Is Actually Known For

    Skip the generic Tokyo Banana-style shelves near the ticket gates and head for these Fukuoka specialties instead:

    • Mentaiko (spicy marinated cod roe) — Fukuoka’s single most famous food export. Shops like Fukuya and Kaneshichi sell vacuum-packed or chilled gift sets ranging from about ¥1,000 for a small single pack to ¥3,000–¥5,000 for a multi-pack gift box. If it’s refrigerated rather than shelf-stable, ask the shop for an ice pack and factor in how long you’ll be traveling — mentaiko needs to stay cold, and gel ice packs over 100ml can’t go in carry-on luggage, so plan for checked bags or a short trip home.
    • Hakata Torimon — a soft, bird-shaped mochi-and-bean-paste confection that’s become Fukuoka’s signature sweet. A box of 10–12 pieces typically runs ¥1,100–¥1,600 and doesn’t need refrigeration, making it the easiest “safe” souvenir to grab last-minute.
    • Instant tonkotsu ramen kits — Ichiran and Hakata Ippudo both sell take-home versions of their shop ramen (dried or chilled noodles with a soup packet) in multi-packs of 2–5 servings for roughly ¥1,200–¥2,000. These pack flat and are a genuinely useful souvenir for ramen fans back home, unlike most novelty food gifts.
    • Karashi mentaiko snacks — mentaiko-flavored rice crackers, chips, and mayonnaise are shelf-stable spinoffs of the regional specialty, usually ¥300–¥800 per bag, and a good low-commitment option if you’re not sure the full fresh version is worth the hassle.

    Budget, Mid-Range, and Splurge Picks

    For a budget haul under ¥2,000 total, stick to individually wrapped Hakata Torimon (sold in small bags of 2–4 pieces at some counters) and a bag of mentaiko crackers — both travel well and need no cold storage. For a mid-range gift run around ¥3,000–¥5,000, a mentaiko gift box plus an instant ramen multi-pack covers both “fresh regional specialty” and “something to eat at home” categories. For a splurge, the larger mentaiko gift sets (often including yuzu or karashi variations) or boxed assortments combining several Hakata sweets can run ¥5,000–¥8,000, and make for a solid single gift rather than several small ones.

    Common Mistakes to Avoid

    • Buying chilled mentaiko too early in the trip. If you still have several travel days ahead, the fresh version won’t survive without refrigeration — buy it on your actual departure day, or choose the shelf-stable, pasteurized versions some shops sell specifically for travel.
    • Underestimating suitcase space. Food gift boxes are bulkier than they look once stacked. If you’re arriving at this stage of the trip already full, it may be worth reviewing buying a suitcase in Japan before you reach the station, rather than trying to cram everything into a carry-on at the last minute.
    • Not having cash on hand. Most station shops accept IC cards and major credit cards, and PayPay is increasingly common at smaller counters — our guide to QR code payments in Japan explains how to set that up — but a few of the older mom-and-pop sweets stalls are still cash-only. If you’re low on yen, there’s a Japan Post Bank ATM inside the station building; see our breakdown of how foreign cards actually work at Japan Post Bank ATMs if you haven’t used one yet.
    • Skipping the price comparison. Because multiple mentaiko brands sit within a few minutes’ walk of each other, it’s worth a quick lap past two or three counters before buying — gift box contents and per-gram pricing vary more than you’d expect.

    A Suggested 45-Minute Route

    Enter the station basement or ground-floor food hall with your suitcase already packed except for the souvenir space you’ve reserved. Spend the first 15 minutes scanning two or three mentaiko counters without buying, just comparing gift-box sizes and prices. Spend the next 15 minutes picking your mentaiko and a shelf-stable backup (torimon or crackers) in case the chilled option won’t survive your remaining travel time. Use the last 15 minutes for instant ramen packs and any wrapping or shipping requests, then head to your platform with time to spare. Shopping in that order — compare first, commit second — is the single biggest time-saver, since indecision in front of a register during a rush period is what actually makes people miss trains.

  • Hiroshima-Style Anago Rice: Miyajima’s Lesser-Known Eel Dish

    Hiroshima-Style Anago Rice: Miyajima’s Lesser-Known Eel Dish

    Photo by Nicki Eliza Schinow on Unsplash

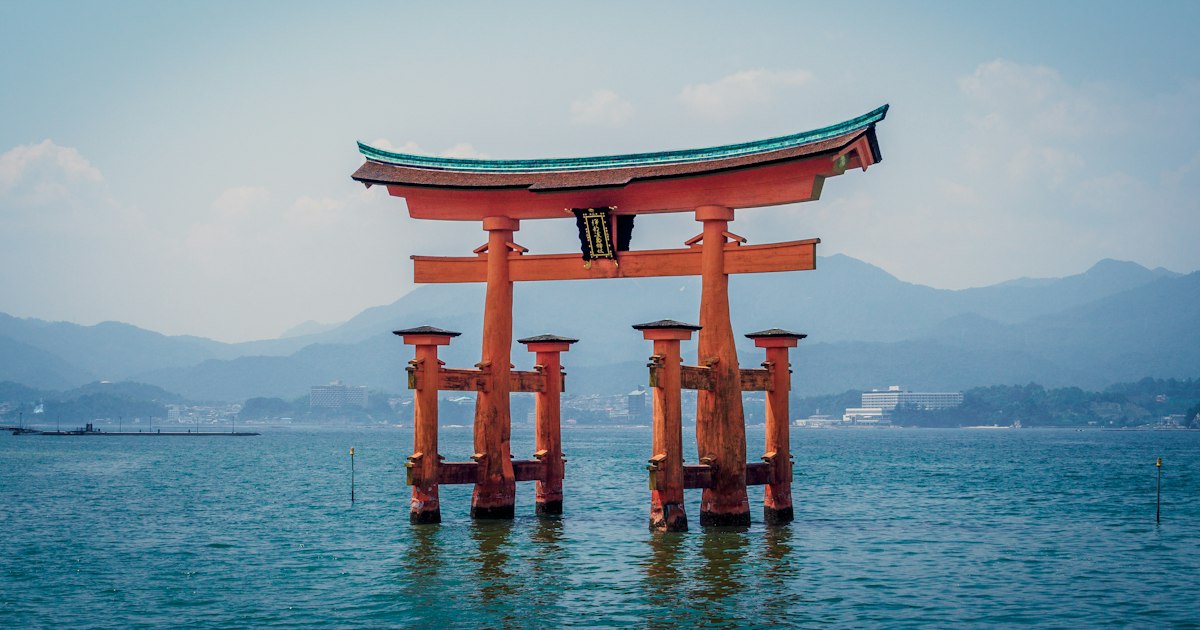
    Everyone who visits Miyajima comes home talking about the floating torii gate and the grilled oysters. Almost nobody mentions the dish locals actually order for lunch: anagomeshi, a bowl or box of warm rice topped with glazed conger eel. It’s cheaper than premium unagi, lighter in texture, and tied to this exact stretch of the Seto Inland Sea — conger eel has been pulled from the waters around Hiroshima for well over a century. If you’re planning a day trip to the island, it’s worth building your schedule around this dish rather than treating it as an afterthought.

    What Makes Anago Different From Unagi

    Anago (conger eel, a saltwater species) and unagi (freshwater eel) get lumped together by visitors, but they’re prepared and served quite differently. Unagi is typically steamed then grilled with a thick, sweet-savory glaze (kabayaki), giving it a dense, fatty bite. Anago has a leaner, more delicate flesh, and the Hiroshima style usually simmers it in a soy-dashi sauce before a light grilling, then lays the fillets over rice that’s been cooked in the same simmering liquid — so the rice itself carries the flavor, not just the eel on top. The result is a lighter, more savory dish that doesn’t sit as heavy as a unagi box, which is part of why it works so well as a midday meal before more walking around the island.

    Where to Eat It: Budget to Splurge

    You don’t need to hunt far — Miyajima’s anago restaurants cluster around the ferry pier and the main shopping street (Omotesando).

    • Budget (around 1,000–1,500 JPY): Small stalls and casual counters near the pier sell anago-don (a simpler rice bowl version) without the lacquered box presentation. Good for a quick, honest version of the dish if you’re short on time between ferries.
    • Mid-range (roughly 2,000–3,200 JPY): Sit-down restaurants serving anagomeshi in a proper lacquer box, usually with a small side of pickles and clear soup. This is the classic experience — expect a wait of 20–40 minutes around midday, since most of these places are small and don’t take reservations for lunch walk-ins.
    • Splurge (3,500 JPY and up): A handful of longer-established restaurants add seasonal sides, a larger portion, or table service in a traditional building. Worth it if you want to sit and linger rather than eat and move on.

    One detail that surprises first-timers: some of the most famous anago restaurants aren’t on Miyajima island itself but right by JR Miyajimaguchi Station on the mainland, where you catch the ferry. If you’re rushing straight for the boat, you might walk past a well-known anagomeshi spot without realizing it.

    How to Get to Miyajima

    From central Hiroshima, take the JR Sanyo Line to Miyajimaguchi Station (about 25–30 minutes). From there it’s a short walk to the ferry terminal, and the crossing to Miyajima pier takes roughly 10 minutes. The JR ferry is covered by the Japan Rail Pass and most regional JR passes; the privately-run Miyajima Matsudai Kisen ferry is a paid alternative that runs a similar route and sometimes swings closer to the famous torii gate depending on tide and season. Either way, budget about an hour total from downtown Hiroshima to stepping onto the island. Most restaurants, including the anago specialists, are a short walk from the pier along or just off the main shopping street.

    Best Time to Go

    Lunch is the busiest window on Miyajima, roughly 11:30am to 1:30pm, when day-trippers from Hiroshima and tour buses arrive at once. If you want to avoid queuing for your rice box, aim for an early lunch around 11am or a late one closer to 2pm. The island itself is also worth timing around tides — the torii gate photo looks completely different at high tide (appears to float) versus low tide (you can walk up to it), so it’s worth checking a tide chart for the day rather than just showing up and hoping.

    Seasonally, Hiroshima sits in the same typhoon-exposed part of the country as the rest of the Seto Inland Sea coast, so if you’re traveling between June and October, it’s worth checking how typhoon season in Japan might affect ferry schedules — the Miyajima ferry suspends service in strong wind or storm conditions, and that’s the only way on or off the island.

    Common Mistakes to Avoid

    • Assuming it’s the same as unagi and skipping it: If you’ve already had a unagi don elsewhere in Japan, don’t write this off as more of the same — the sauce, texture, and rice are noticeably different.
    • Only budgeting time for oysters: Oyster stalls and anago restaurants are often steps apart, but the anago shops are smaller and slower to turn tables. If you want both, eat the anago first while you’re hungry and patient, then graze on oyster stalls afterward.
    • Forgetting cash or cards for small counters: Some of the smaller anago stalls and older restaurants are cash-only or card-only with no in-between. QR code payment apps are increasingly accepted on the island’s main street, so it’s worth having PayPay or Rakuten Pay set up as a tourist as a backup if you’re caught without the right cash denomination.
    • Trying to eat it as a quick snack: A proper anagomeshi box is a sit-down meal, not street food. Plan at least 30–45 minutes if you want the full lacquer-box version rather than the faster bowl.

    Taking the Idea Home

    If you fall for the dish, some shops sell vacuum-packed or frozen anago fillets with the simmering sauce included, meant to be reheated and served over rice back home — look for these near the register at the larger restaurants rather than at the casual stalls, which usually only serve food on-site. It’s a reasonable souvenir if you’ve got refrigerated luggage space and a flight home that isn’t too long.

    Hiroshima rewards this kind of deeper regional-food digging more than most Japanese cities. If you enjoy chasing a specific seasonal or regional specialty like this one, the same instinct pays off elsewhere too — snow crab season in winter works the same way, built around a short window and a handful of towns that do it best. And if your trip continues on to Kyoto afterward, a similarly local, lesser-publicized dining scene is tucked into Pontocho Alley’s lantern-lit lane, where the good places are also easy to walk past if you don’t know to look for them.

  • Noto Peninsula: Ishikawa’s Rugged Coastline and Its Rebuilding Fishing Towns

    Noto Peninsula: Ishikawa’s Rugged Coastline and Its Rebuilding Fishing Towns

    Photo by Zion C on Unsplash

    The Noto Peninsula juts out from Ishikawa Prefecture into the Sea of Japan like a crooked finger, lined with pine-covered cliffs, terraced rice fields that run down to the water, and fishing towns that have made lacquerware, salt, and squid for centuries. It’s one of the least-visited corners of Honshu — which is exactly the appeal — but it’s also a place still working through the aftermath of the magnitude 7.6 earthquake that struck on January 1, 2024, badly damaging Wajima, Suzu, and much of the peninsula’s northern coast. Visiting now means seeing both sides of Noto: a genuinely wild, uncrowded coastline, and a region rebuilding in real time. Travelers who loved the raw, far-flung drama of Hokkaido’s Shiretoko Peninsula will recognize the same appeal here, just a lot closer to Tokyo and Kyoto.

    A Coastline Still Finding Its Footing

    The 2024 earthquake and the tsunami warnings that followed caused major damage across the northern half of the peninsula, especially in Wajima and Suzu. Roads buckled, the port areas were hit hard, and a fire that broke out near Wajima’s morning market destroyed a large stretch of the old town center. Reconstruction has been ongoing through 2025 and into 2026, and it’s uneven: some stretches of coast road and some businesses are back to normal, while others — particularly parts of Suzu and the far northern tip — are still visibly working through repairs. This isn’t a reason to skip Noto, but it is a reason to check current conditions before you go, keep your itinerary flexible, and not expect every shop, inn, or road to be open exactly as described in older guidebooks.

    Getting There and Getting Around

    Kanazawa is the gateway. From Tokyo, the Hokuriku Shinkansen reaches Kanazawa in about 2 hours 30 minutes (roughly ¥14,000 one-way, more with a reserved seat). From there, Noto is best explored by rental car — public transport thins out fast once you leave the Kanazawa area. The JR Nanao Line runs from Kanazawa to Wakura Onsen (about 1 hour), and the Noto Railway continues from there to Anamizu; beyond that, buses (run by Hokutetsu and local municipal services) cover the rest of the peninsula, but on limited, infrequent schedules that aren’t built around tourist sightseeing. A rental car from Kanazawa Station (budget ¥7,000–¥12,000/day for a compact car) gives you the freedom to actually see the coastline at your own pace, and it’s the only realistic way to reach some of the more remote viewpoints and rice terraces. Expect winding, narrow roads, and build in extra time — some sections near Suzu may still be under repair, so it’s worth checking recent road status before setting out rather than trusting an old map app blindly.

    Wajima: Lacquerware, the Morning Market, and the Long Road Back

    Wajima is the peninsula’s best-known town, famous for Wajima-nuri, a lacquerware tradition built on an unusually durable, multi-layered technique that’s been refined here for over 500 years. Before the fire, the Wajima Morning Market (Asa-ichi) was ranked among Japan’s three great morning markets, with vendors selling fresh seafood and local crafts along a street that had operated daily for generations. That street was largely destroyed, and the market has been rebuilding in phases, with vendors operating from temporary stalls as the area is reconstructed — a moving thing to see in person, but worth checking current status on, since hours and exact locations have shifted repeatedly since 2024. Lacquerware workshops and the Wajima Kiriko Art Museum (dedicated to the elaborate lantern floats used in the town’s summer festival) are good anchors for a visit regardless of what’s open on the market street that day. If you’re drawn to regional craft towns, this fits alongside day trips like Seki’s blade workshops or Mino’s pottery kilns — small towns where a single traditional craft defines the whole place.

    The Noto Kongo Coast and Shiroyone Senmaida Rice Terraces

    The western coastline, known as Noto Kongo, is the peninsula’s visual highlight: wind-carved rock formations, sea caves, and cliffs facing directly into the Sea of Japan. Ganmon, a natural rock arch near the town of Monzen, is the best-known stop and easily reached by car with roadside parking. Further north, Shiroyone Senmaida is a set of roughly 1,000 small terraced rice paddies cut into a hillside that drops straight to the ocean — one of the most photographed rural scenes in Ishikawa. In the colder months (typically October through March), the terraces are lit up at night with thousands of small solar-powered lights, a popular and free evening stop if you’re staying nearby. Both sites survived the 2024 quake without major structural loss, though access roads in the area have seen intermittent repair work, so build slack into your schedule.

    Best Time to Visit

    Late spring (May–June) and early autumn (September–October) offer the mildest weather and the clearest coastal views. Summer brings Noto’s lively local festivals, including Wajima’s Kiriko lantern float festival, but also Japan’s typhoon season, which can disrupt coastal roads and ferry access to nearby islands — worth checking forecasts closely if you’re visiting August through September. Winter (roughly November through March) is prime season for zuwaigani snow crab, which Noto’s fishing ports are known for alongside Fukui and the rest of the Hokuriku coast — many local inns build their winter menus entirely around it. Winter also means rougher seas, grayer skies, and a real chance of snow inland, so it suits travelers more interested in food than coastal photography.

    Where to Stay and What to Budget

    Lodging options have thinned since 2024 as some properties remain closed for repairs, so book further ahead than you would for most of Japan. On a budget, minshuku (family-run guesthouses) around Wajima or Wakura Onsen run roughly ¥7,000–¥10,000 per person with breakfast. Mid-range travelers can find onsen ryokan in Wakura Onsen, Noto’s main hot spring town, from around ¥18,000–¥28,000 per night including a seafood-heavy dinner. For a splurge, a handful of high-end ryokan serving kaiseki built around the day’s catch — crab in winter, local squid and sea bream the rest of the year — run ¥35,000 and up per person per night. Cash is still king in smaller fishing towns; while QR code apps like PayPay are spreading in Japanese cities (see our guide to using PayPay and Rakuten Pay as a tourist), don’t count on card or app payment at small markets, family-run inns, or roadside stalls out here — carry enough yen for a day or two at a time.

    Common Mistakes to Avoid

    The biggest mistake is treating Noto like a normal, fully-serviced tourist region — it isn’t right now, and that’s worth respecting rather than working around. Don’t assume a train or bus will get you everywhere; without a car, you’ll miss most of the coastline. Don’t assume every restaurant, inn, or market stall listed online is currently operating — call ahead or check recent reviews, since recovery status changes month to month. Don’t rush the drive: coastal roads are narrow and slower than GPS estimates suggest, especially after rain. And don’t skip talking to locals if you get the chance — many Wajima and Suzu residents are glad to share what’s reopened and what’s worth seeing, and it’s often more current than anything online.

  • Lake Biwa: Shiga’s Easy Day Trip from Kyoto and Japan’s Largest Lake

    Lake Biwa: Shiga’s Easy Day Trip from Kyoto and Japan’s Largest Lake

    Photo by Wu Hsien Yu on Unsplash

    Most visitors glimpse Lake Biwa for about ninety seconds, through a shinkansen window somewhere between Kyoto and Maibara, and never think about it again. That’s a shame, because Japan’s largest lake — big enough to have its own weather, its own fishing culture, and a 200-kilometer shoreline — starts practically at Kyoto’s back door. You can be standing on a national-treasure castle keep or riding a canal boat through a 400-year-old merchant town less than an hour after leaving Kyoto Station, and be back in time for dinner in Pontocho. Shiga Prefecture, which wraps almost entirely around the lake, is one of the easiest “second day” additions to a Kyoto itinerary and one of the least crowded with foreign tourists.

    Why Lake Biwa Is Kyoto’s Easiest Big Day Trip

    Lake Biwa covers about one-sixth of Shiga Prefecture and supplies drinking water to much of the Kyoto-Osaka region, which is part of why the area feels so well connected by rail. The lake is roughly 235 km around, so “doing Lake Biwa” in a day doesn’t mean circling it — it means picking one or two towns along the southern or western shore and going deep rather than wide. Unlike Nara or Arashiyama, you won’t be shuffling through crowds; even on a weekend, Hikone Castle or the Omi-Hachiman canals feel unhurried. The trade-off is that sights are spread out, so decide on a theme (castle town, canal town, sacred island, cycling) before you leave Kyoto rather than trying to improvise on the day.

    Getting There From Kyoto

    Everything in this guide runs off the JR Biwako Line, which is simply the Kyoto–Maibara stretch of the Tokaido Line, plus its northward extension, the JR Kosei Line, which hugs the lake’s west shore up toward Nagahama. From Kyoto Station:

    • Otsu (south tip of the lake): about 10 minutes, roughly ¥240 — the closest and easiest stop, good for a lakeside cruise or a quick look at the water.
    • Hikone (castle town): 45–55 minutes on a shinkaisoku (special rapid) train, around ¥1,200.
    • Omi-Hachiman (merchant/canal town): about 40–45 minutes on the shinkaisoku, around ¥990.
    • Omi-Imazu / Omi-Takashima (north shore, boats to Chikubushima, Shirahige Shrine): 50–70 minutes via the Kosei Line.

    An IC card (ICOCA/Suica) works on every train and bus in this guide, and increasingly at shop registers too, though smaller lakeside restaurants and souvenir stalls in places like Omi-Hachiman still sometimes prefer cash or a QR code app — if you’re relying on your phone for payment, it’s worth skimming our guide to using PayPay and Rakuten Pay as a tourist before you go, since signal and setup are easier to sort out in Kyoto than in a small rural town.

    Hikone Castle: The Must-See Highlight

    Hikone Castle is the headline attraction on the lake, and for good reason — it’s one of only twelve Japanese castles with a keep that survives in its original Edo-period wood (not a postwar concrete rebuild), and one of just five castle keeps nationwide designated a National Treasure, alongside Himeji, Matsumoto, Matsue, and Inuyama. The compact hilltop keep is steep and low-ceilinged inside, which is part of the appeal — it still feels like a functioning fortress rather than a museum piece. Admission runs around ¥800 for the castle alone, with a combination ticket covering Genkyu-en, the Edo-period garden at the base of the hill, for a bit more. The castle grounds are typically open from around 8:30am to 5pm (last entry 4:30pm), and the moat is still patrolled by a small fleet of boats you can ride for a different angle on the walls. Hikone’s old town, just outside the castle moat, has a handful of Omi-beef restaurants worth timing your visit around — Shiga is one of the lesser-known producers of wagyu-grade beef, alongside Kobe and Matsusaka.

    Omi-Hachiman’s Canal Boats and Merchant Streets

    Omi-Hachiman was built in the 1580s as a planned merchant town, and the Omi merchants who trained here went on to found businesses that still exist today (Takashimaya and Itochu both trace roots back to Omi trading families). The draw now is the Hachiman-bori, a willow-lined canal that once carried cargo boats to and from the lake, now plied by small sightseeing boats (roughly ¥1,000–1,500 for a 30–35 minute ride) past white-walled storehouses and samurai-era residences. It’s a quieter, smaller-scale cousin of Kurashiki or Omihachiman’s own castle-town neighbors, and far less visited than Kyoto’s canal-adjacent streets. Climb (or take the ropeway up) Hachiman-yama for a wide view over the old town and the lake beyond — it’s a good 20–30 minute add-on if you’ve got the legs for it.

    Shirahige Shrine, Chikubushima, and the North Shore

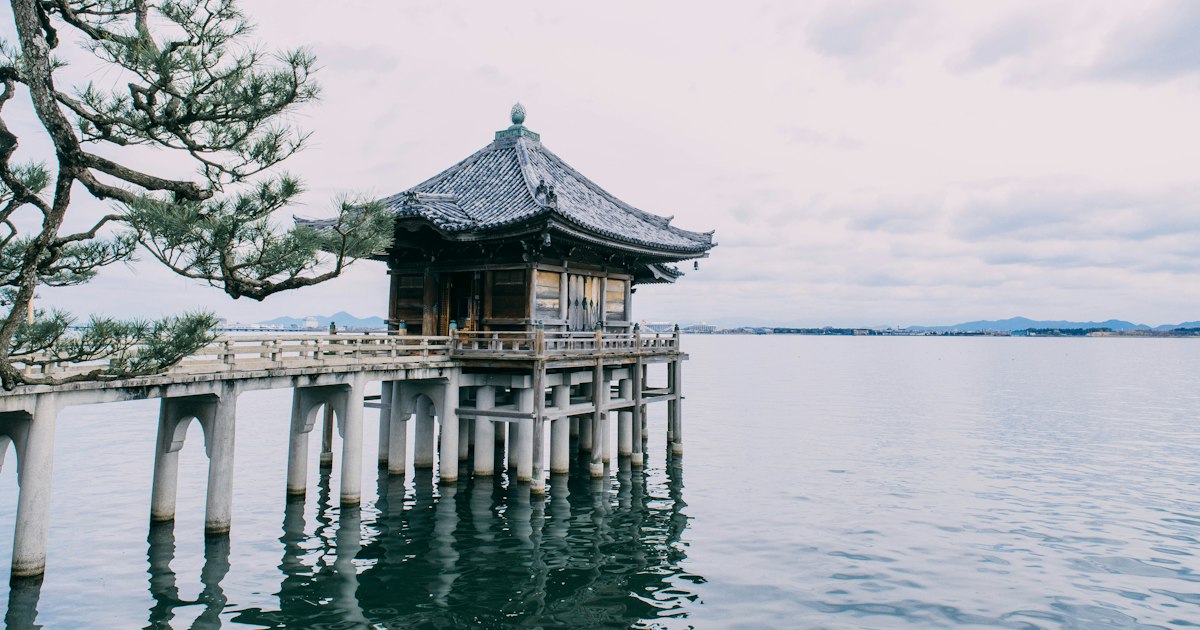
    If you have more than half a day, the north shore has two sights found almost nowhere else in Japan. Shirahige Shrine, near Omi-Takashima station, is one of Japan’s oldest Shinto shrines and is known for a vermillion torii gate standing out in the lake itself — it’s often described as a smaller, quieter version of Miyajima’s floating gate, and unlike Miyajima it’s free to visit any time, though the best photos are from the road above rather than the shrine grounds. Chikubushima, a small sacred island near the lake’s north end, is reachable by sightseeing boat from Imazu port or Nagahama (round trip roughly ¥3,000–4,000, about 25–40 minutes each way) and holds Hogon-ji Temple, part of the Saigoku Kannon pilgrimage route, plus a shrine built partly over the water. Boats run a limited number of departures per day and don’t operate in rough weather, so check the return time before you commit — getting stuck on the island overnight is a real (if rare) possibility.

    Best Season, Food to Try, and Common Mistakes

    Spring (late March–early April) is the standout season: the Kaizu-Osaki stretch on the northwest shore has roughly 800 cherry trees forming a tunnel along the lakeside road, and it’s far less congested than Kyoto’s cherry blossom spots. Early autumn is pleasant for cycling the lake’s flatter southern sections, but late summer brings the same humidity and typhoon risk as the rest of central Japan — if you’re planning a visit between August and October, it’s worth checking our rundown of typhoon season timing, since boat services to Chikubushima are the first thing to get cancelled when weather turns. On the food side, don’t leave without trying funazushi, a pungently fermented crucian-carp sushi that predates the vinegared sushi most visitors know — it’s an acquired taste but a genuine piece of culinary history, served in small portions at Omi-Hachiman and Otsu restaurants.

    The most common mistake is treating Lake Biwa as a single destination rather than several separate towns strung along two different rail lines — trying to combine, say, Hikone and the north-shore boats in one day usually means over an hour of extra train time eaten into sightseeing. Pick a southern-shore day (Otsu, Omi-Hachiman) or a day centered further north (Hikone, Chikubushima) rather than both. Budget travelers can see a lot for well under ¥3,000 in train fares and entry fees; a splurge day adds a canal boat ride, the castle-and-garden combo ticket, and an Omi-beef lunch for closer to ¥8,000–10,000 per person. Either way, book your return train loosely rather than tightly — boats and ropeways here run on their own schedules, and missing the last direct train back to Kyoto from the north shore means a longer, less convenient transfer.

  • Seki: Gifu’s Blade City for Samurai Swords and Kitchen Knives

    Seki: Gifu’s Blade City for Samurai Swords and Kitchen Knives

    Photo by Richard Iwaki on Unsplash

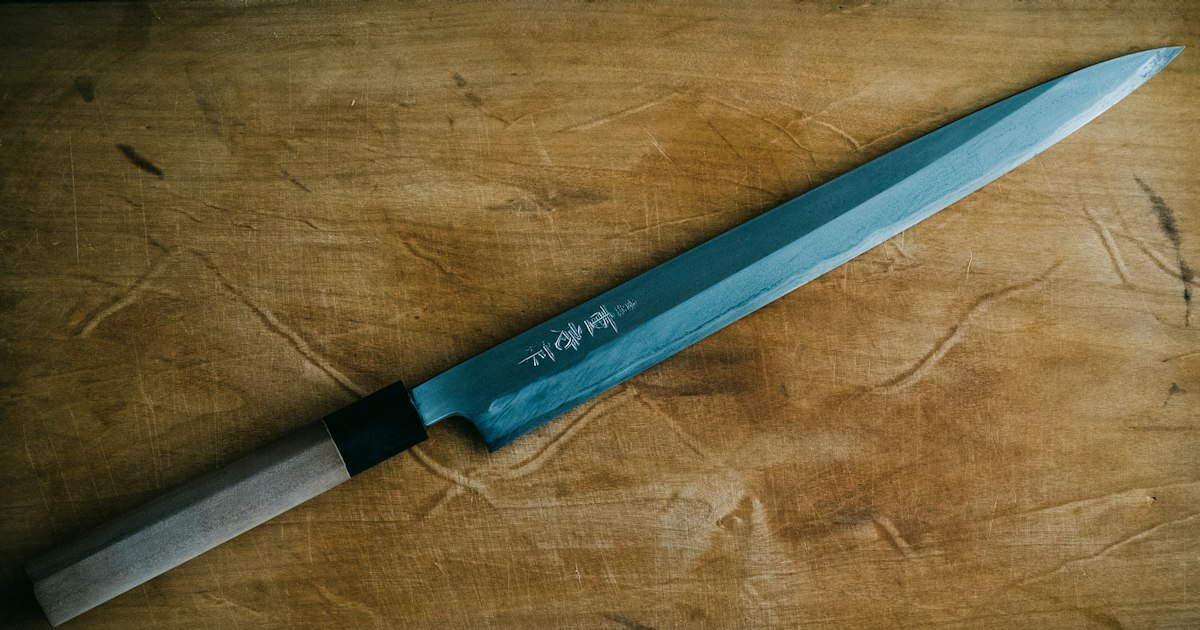
    An hour from Nagoya by train, the quiet city of Seki in Gifu Prefecture has been hammering out blades since the Kamakura period. Swordsmiths settled here 700 years ago because the Nagara River provided clean water for tempering, the surrounding mountains supplied charcoal and clay, and the trade routes made it easy to sell. That lineage never really stopped — it just changed shape. Today Seki forges some of the best kitchen knives in the world, alongside a small, serious community of licensed swordsmiths still making authentic nihontō by hand. If you care about blades, whether for cooking or collecting, this is one of the most rewarding day trips in central Japan.

    Why Seki Became Japan’s Blade City

    Seki’s swordsmiths reached their peak during the Warring States period, when demand for battle-ready katana was high and the “Seki-mono” reputation for blades that wouldn’t chip or bend spread across Japan. When swordmaking declined after the Meiji Restoration banned the public carrying of swords, Seki’s craftsmen redirected their metallurgy skills into cutlery, scissors, and razors. That pivot is why a city of roughly 85,000 people is now home to major cutlery manufacturers, including Kai Corporation (the company behind the Shun and Kai House knife lines sold worldwide) and smaller family-run forges like Moritaka Hamono, Fujitora, and Zenpachi.

    Where to Buy: Museum Shops, Hamono Kaikan, and Factory Outlets

    The easiest place to start is the Hamono Kaikan (Cutlery Center), a retail hall near Seki-shi Station that gathers products from multiple local makers under one roof, so you can compare brands without hopping between factories. Staff are used to foreign visitors and many can explain steel types (stainless vs. carbon, Damascus-pattern laminates) in simple terms.

    For a more specialized visit, several forges run their own small shops, and some will do a basic blade engraving or sharpening while you wait — ask at the counter, since this isn’t always advertised. Budget ranges to expect:

    • Budget (¥2,000–¥6,000): single-bevel paring knives, basic stainless petty knives, and sharpening stones from local makers.
    • Mid-range (¥8,000–¥25,000): a proper Gyuto (chef’s knife) or Santoku in VG-10 or similar steel from a recognized brand like Kai or Fujitora — the sweet spot for most home cooks.
    • Splurge (¥30,000–¥150,000+): hand-forged Damascus-pattern knives, custom-fitted handles, or a signed piece from an independent smith. Genuine hand-made nihontō from a licensed swordsmith run well into the millions of yen and are a different purchase entirely (see the mistakes section below).

    Most shops accept credit cards, but smaller forge outlets may be cash-only or IC-card only — it’s worth having PayPay set up as a backup since it’s spreading even into traditional craft towns; see our guide to QR Code Payments in Japan if you haven’t used it before.

    The Seki Hamono Matsuri (Cutlery Festival)

    If your trip is flexible, time it around the Seki Hamono Matsuri, held annually over the first weekend of October in front of Seki City Hall. Dozens of manufacturers set up factory-direct outlet stalls with discounts of 20–50% off retail, and there are live demonstrations of traditional sword forging and blade-sharpening. It’s free to attend and draws serious knife buyers from across Japan, so arrive early on the first morning for the best selection — popular models from well-known brands can sell out by midday. Exact dates shift slightly year to year, so confirm with the Seki City tourism site before booking travel.

    Seki Swordsmith Museum and Watching a Real Forging Demonstration

    The Seki Swordsmith Museum (Seki Kaji Denshokan) displays finished swords, forging tools, and tamahagane steel, with English-language panels explaining the multi-week process of folding and tempering steel into a katana. It’s typically open from around 9:00 to 16:30 and closed on Mondays, with admission in the few-hundred-yen range. On select days, licensed swordsmiths perform live forging demonstrations in the attached smithy — these draw crowds, so check the current schedule locally rather than assuming a fixed date, since smiths rotate and sessions aren’t held every week.

    Getting There and Planning Your Visit

    From Nagoya, take a JR or private-line train to Mino-Ota Station, then transfer to the Nagaragawa Railway’s Etsumi-Nansen Line to Seki-shi Station — the whole trip takes roughly an hour and a half with the transfer. Alternatively, a direct highway bus runs from Meitetsu Bus Center in Nagoya to Seki in under an hour, which is often simpler if you’re not planning to use a rail pass that day. From Gifu Station, a local bus to Seki takes about 30–40 minutes. The city itself is compact enough to cover on foot or by rental bicycle once you arrive, with the museum, Hamono Kaikan, and several forge shops all within a 20-minute walk of each other.

    Seki pairs naturally with a broader Gifu itinerary. Mino City’s old paper and pottery quarter is a short trip away if you also want to see Mino ware pottery being made, and since Nagoya is your gateway in and out, it’s worth saving an appetite for Nagoya’s tebasaki chicken wings before or after your blade shopping. Spring and autumn are the most comfortable seasons to walk around; summer in the Nagara valley gets hot and humid, so go early in the day if you visit between July and August.

    Common Mistakes to Avoid

    • Trying to carry a knife in hand luggage. Any bladed item, regardless of length, must go in checked baggage on flights out of Japan. Ask the shop to wrap and box it securely for transport.
    • Not checking your home country’s import rules. Countries including the UK and Australia restrict certain blade lengths, locking knives, or sword imports. Research your destination’s customs rules before buying an expensive piece.
    • Assuming any “katana” is a genuine antique or hand-forged sword. Decorative and display swords are sold freely as souvenirs, but authentic nihontō made by a licensed swordsmith come with a required registration certificate (Tōken Shoyū Shōmeishō) issued by the prefecture. Reputable sword shops handle this paperwork and export shipping for you — never buy a “real” sword from a stall that can’t explain the certificate.
    • Overpaying for a mass-market knife mistaken for a handmade one. Ask explicitly whether a blade is machine-stamped or hand-forged (tanzo); prices and sharpening needs differ significantly, and staff will tell you honestly if you ask directly.

    Seki rewards a slower visit — budget at least half a day, more if you want to watch a forging demonstration or attend the autumn festival. Few places let you walk from a 700-year-old sword tradition straight into a shop selling the kitchen knife you’ll actually use every day back home.

  • Japanese Craft Gin Guide: Ki No Bi, Roku & the Botanical Gin Boom

    Japanese Craft Gin Guide: Ki No Bi, Roku & the Botanical Gin Boom

    Photo by Yuri Li on Unsplash

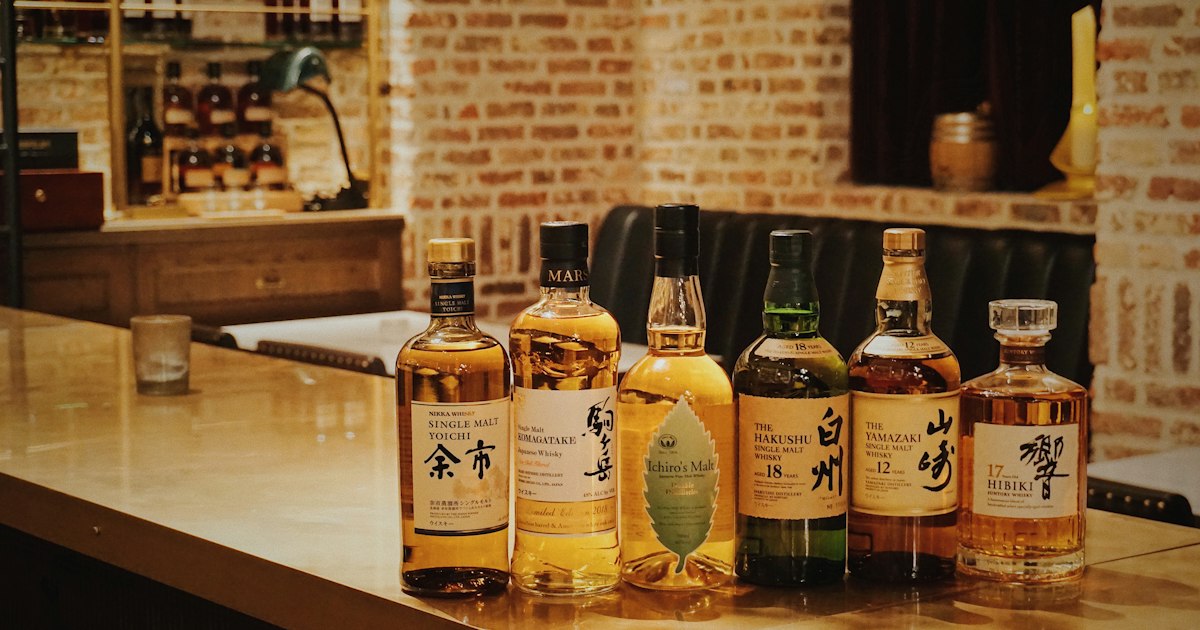
    Ten years ago, “Japanese gin” wasn’t really a category. Today it’s one of the fastest-growing souvenirs leaving Narita and Kansai airports, with bottles like Ki No Bi and Roku showing up on cocktail menus from London to Los Angeles. If you’re planning a Japan trip and want to understand what’s actually worth drinking or packing home, here’s how the boom started, which bottles matter, and how to shop for them without overpaying.

    Why Japan Suddenly Makes World-Class Gin

    Japan’s gin boom is really a whisky boom in disguise. When Suntory and other distillers saw global whisky stocks tighten and demand for Japanese spirits spike in the mid-2010s, gin became the obvious side door: it doesn’t need years of barrel aging, it can use the same stills and distilling talent already on-site, and it lets a brand showcase distinctly Japanese botanicals — yuzu, sansho pepper, green tea, hinoki (Japanese cypress) — in a format Western drinkers already understood. Kyoto Distillery released Ki No Bi in 2016 as Japan’s first dedicated craft gin, and Suntory followed with Roku in 2017. Dozens of regional distilleries, from Hokkaido to Okinawa, have since launched their own.

    Ki No Bi: Kyoto’s Craft Pioneer

    Ki No Bi (“the beauty of the seasons”) is distilled by the Kyoto Distillery in Fushimi, the same southern Kyoto district famous for sake brewing because of its soft, iron-free groundwater — the distillery uses that water too. It’s a six-still, small-batch operation using eleven botanicals distilled separately and blended, including yuzu, hinoki wood chips, gyokuro green tea, bamboo, and sansho pepper, giving it a drier, more savory, almost tea-like profile than a typical London Dry.

    A standard 700ml bottle of Ki No Bi Kyoto Dry Gin runs roughly ¥4,000–4,800 at retail in Japan; the distillery also sells a higher-proof Ki No Tea and limited cask-finished editions that run considerably more. The distillery itself offers paid tastings and occasional tours by advance reservation through its website — book before your trip, as slots are limited and English availability varies. If you’re based in Kyoto, Fushimi is a short train ride (Keihan Line to Fushimi-Momoyama or Momoyama-Minamiguchi) from the city center and pairs naturally with an afternoon at the sake breweries nearby, or an evening afterward at Pontocho Alley, where several bars stock Ki No Bi by the glass.

    Roku: Suntory’s Gateway Gin

    Roku means “six,” referring to its six core Japanese botanicals — sakura flower, sakura leaf, yuzu peel, sencha, gyokuro, and sansho pepper — each distilled at different times of year to capture peak seasonal character, then blended. It’s made at Suntory’s Osaka facility and designed to be more approachable and floral than Ki No Bi, with a lighter, citrus-forward finish that works well in a simple gin and tonic.

    Roku is the easier bottle to find and the better value: expect around ¥2,200–2,900 for 700ml at a Japanese supermarket, drugstore, or convenience-store liquor section, and often a bit less at airport duty-free. It’s also the gin most likely to appear pre-mixed in canned highballs in convenience store fridges, which is a cheap, no-commitment way to try the flavor profile before buying a full bottle.

    Beyond the Big Two: Other Bottles Worth Seeking Out

    • Nikka Coffey Gin — distilled in Nikka’s distinctive Coffey column stills, with a noticeably citrus-heavy, almost fruity profile; roughly ¥4,500–5,500 for 700ml.
    • Sakurao Gin (Hiroshima) — uses local botanicals like wasabi and sea salt from the Seto Inland Sea; usually ¥3,500–4,500, and sold at the distillery’s visitor center near Hiroshima.
    • Wa Bi Gin — a boutique small-batch gin that’s harder to find outside specialist shops and sells closer to ¥6,000–8,000.
    • Okinawan options — some southern distillers are now blending gin botanicals with local citrus; if you’re island-hopping, it’s worth comparing to the region’s traditional spirit, awamori, for a sense of how differently Okinawa and mainland Japan approach distilling.

    Where and How to Buy Gin in Japan

    Budget: Supermarkets, Don Quijote, and convenience stores carry Roku and a few other mainstream bottles at normal retail price — no markup, and a reliable backup if a specialty shop is closed.

    Mid-range: Department store liquor floors (the basement food halls at Isetan, Takashimaya, or Daimaru) carry the widest range, including Ki No Bi and regional craft bottles, often with gift boxing included at no extra charge — useful if you’re bringing a bottle home as a present.

    Splurge: Limited editions, cask-finished Ki No Bi, and small-batch releases are sold directly through distillery shops or specialist bottle shops in Tokyo (Shibuya and Nihonbashi have good concentrations) and tend to sell out fast around year-end gift season.

    Airport duty-free (Narita, Haneda, Kansai) is worth checking last — prices on Roku specifically are often a little lower than in-town retail, and it saves carrying a heavy bottle around for the rest of your trip. Most shops now take IC cards and QR payment apps; if you haven’t set one up yet, our guide to using PayPay and Rakuten Pay as a tourist covers how to get started before you shop.

    Best Ways to Drink It Like a Local

    A gin and tonic is the default order at almost any Japanese bar, but ask for it “Japanese style” and many bartenders will build it with a single large ice sphere, a twist of yuzu instead of lime, and a slow pour of tonic down the side of the glass to preserve carbonation — a technique borrowed from highball service. Standing bars and hotel lounges in Tokyo’s Jiyugaoka and Nakameguro neighborhoods have leaned into the craft gin trend with multi-page gin menus; if you’re already exploring boutique shopping streets, Jiyugaoka is a pleasant place to combine both in one afternoon. Expect to pay ¥1,200–2,000 for a well-made gin and tonic at a proper bar, less at a casual izakaya.

    Common Mistakes to Avoid

    • Assuming “Japanese gin” means it tastes light or neutral. Ki No Bi and several craft bottles lean savory and botanical-forward — taste before committing to a full bottle as a gift for someone who only drinks London Dry.
    • Buying at the first souvenir shop you see. Prices on the same bottle can vary by ¥1,000 or more between a tourist-area shop and a department store basement or duty-free.
    • Forgetting duty-free liquid limits. If you’re flying onward internationally, duty-free gin bought in Japan may need to go in checked luggage or be repackaged at a connecting airport — check your onward carrier’s rules before buying multiple bottles.
    • Skipping the tasting menu at distilleries. Kyoto Distillery and several regional producers offer flighted tastings for a modest fee, which is a far better way to find a bottle you’ll actually like than buying blind.

    Japan’s gin boom shows no sign of slowing, and the quality gap between the early leaders and newer regional distillers keeps narrowing. Start with a Roku and tonic to calibrate your palate, then work up to Ki No Bi or a regional bottle — by the end of a two-week trip, most visitors leave with a much clearer sense of which flavor profile is actually theirs, rather than just the one on the airport shelf.

  • Yakisoba: Japan’s Stir-Fried Festival Noodles and How to Order Them

    Yakisoba: Japan’s Stir-Fried Festival Noodles and How to Order Them

    Photo by Julien on Unsplash

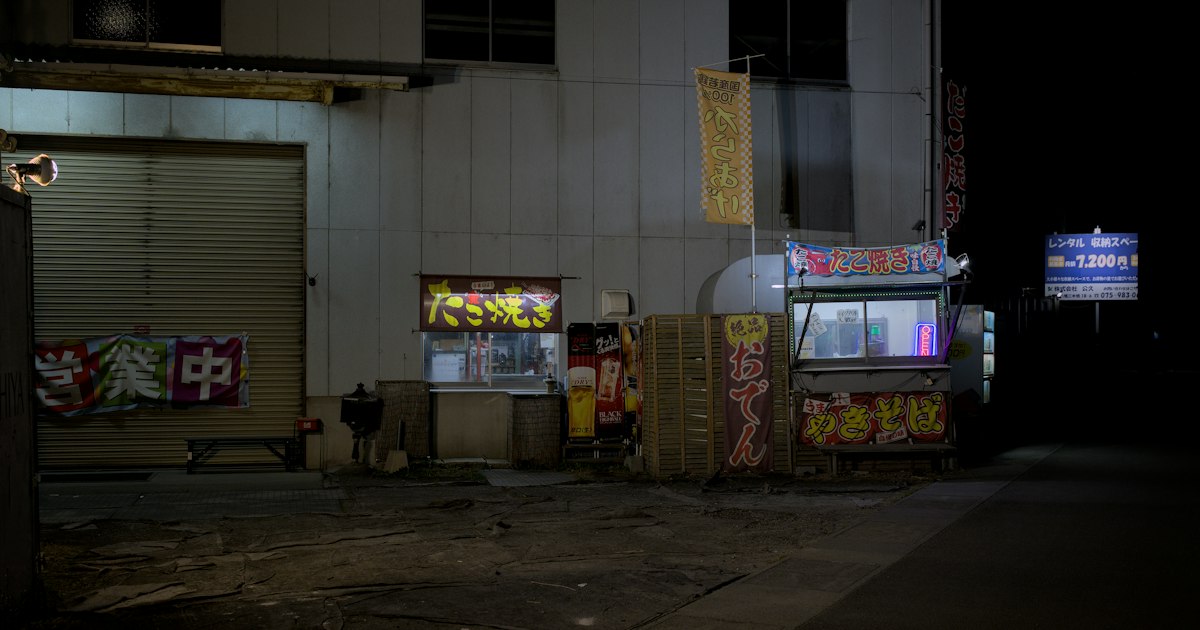
    If you’ve ever walked through a Japanese summer festival and followed your nose to a smoking iron griddle piled with noodles, cabbage, and pork, you’ve found yakisoba. It’s one of the cheapest, most satisfying things you can eat in Japan, sold everywhere from neighborhood matsuri to convenience store coolers — but the name trips up a lot of visitors, and ordering at a crowded yatai stall has its own unwritten rules. Here’s how to find good yakisoba and order it without confusion.

    What Yakisoba Actually Is

    Despite the name, yakisoba isn’t made with soba (buckwheat noodles). It uses the same steamed, curly wheat noodles as ramen, stir-fried on a hot iron griddle (teppan) with shredded cabbage, carrot, onion, and thin strips of pork belly. The defining flavor is the sauce: a thick, dark, Worcestershire-based blend that’s sweet, tangy, and slightly smoky from the hot griddle — similar in spirit to okonomiyaki sauce but usually cooked into the noodles rather than drizzled on top. A finished plate gets topped with aonori (dried green seaweed powder), beni shoga (pickled red ginger), and sometimes a dusting of katsuobushi (bonito flakes) or a squiggle of mayonnaise.

    Where You’ll Actually Find It

    Yakisoba lives in three very different worlds, and the experience changes a lot depending on which one you’re in:

    • Festival yatai stalls: This is the classic setting — a griddle-cook working a mountain of noodles with two metal spatulas at a matsuri, hanami cherry-blossom gathering, or fireworks festival. A tray costs roughly ¥500–700 and comes in a paper boat you eat standing up.
    • Convenience stores: Lawson, 7-Eleven, and FamilyMart all stock refrigerated yakisoba packs (noodles plus a sauce sachet, ¥150–250) you microwave at the store, and instant cup versions like Peyoung (¥200–250). You’ll also find yakisoba-pan — the noodles stuffed into a hot dog-style bun — for around ¥150–250, a beloved only-in-Japan snack food.
    • Restaurants: Okonomiyaki and monjayaki restaurants, teppanyaki counters, and casual izakaya almost always have yakisoba on the menu, typically ¥700–1,200, cooked fresh in front of you.

    How to Order at a Festival Stall

    Yatai lines move fast and the cook is usually working several orders at once on the same griddle, so keep it simple. Queue up, and when you reach the window say “Yakisoba hitotsu kudasai” (one yakisoba, please) — hold up fingers for more than one. Most stalls only make one size, though some offer a “大盛り” (omori, large portion) for an extra ¥100–200. Pay when you order, not after; small stalls are frequently cash-only, so carry ¥1,000 notes and coins. Larger festivals increasingly take PayPay or other QR codes — our guide to QR code payments in Japan explains how to set one up before you go, but don’t count on it at every stall. You’ll eat standing at a shared table or on a curb nearby — there’s rarely seating, and lingering once you’ve finished isn’t the norm when a line is still forming behind you.

    Best Season and Timing

    Yakisoba is sold year-round, but it’s at its festival best during natsu matsuri (summer festival) season, roughly July through August, when towns across Japan hold evening festivals with fireworks, yukata-clad crowds, and rows of food stalls. Weekend and holiday-evening festivals draw the biggest stall lineups and the longest queues, so arrive right when stalls open (often 4–5pm) if you want to avoid a 20-minute wait. Late summer festivals can run into typhoon season, which can cancel or shorten outdoor events with little notice — check our guide to typhoon season in Japan if you’re planning a trip specifically around a summer matsuri. Outside summer, you’ll still find yakisoba stalls at New Year shrine fairs, autumn harvest festivals, and school or neighborhood sports days.

    Regional Styles Worth Seeking Out

    Yakisoba has real regional variation, and a few towns have built food tourism around their version:

    • Fujinomiya yakisoba (Shizuoka Prefecture) uses firmer, chewier noodles cooked with pork lard instead of oil, giving it a distinctly richer bite.
    • Moji yakisoba (Kitakyushu, Fukuoka) is cooked with a curry-spiced sauce, a holdover from the port city’s history as an import hub.
    • Yokote yakisoba (Akita Prefecture) is topped with a fried egg and a few slices of boiled pork, eaten with a side of pickles called fukujinzuke.

    If you’re already building a food-focused itinerary around regional specialties, pairing a yakisoba detour with something like Nagoya’s tebasaki chicken wings makes for a solid izakaya-crawl theme.

    Common Mistakes to Avoid

    • Assuming it’s vegetarian. The sauce and noodle broths frequently contain bonito (fish) extract, and pork belly is standard — always ask “butaniku nashi de onegaishimasu” (without pork, please) if you need it removed, though the sauce itself usually can’t be changed.
    • Confusing it with “soba.” If you order “soba” expecting the stir-fried dish, you’ll get cold or hot buckwheat noodles in broth instead — a completely different meal.
    • Expecting it to be bland. The sauce is assertively sweet-savory, closer to a thick teriyaki-Worcestershire hybrid than a light soy flavor.
    • Not bringing cash to festivals. Even in cities with heavy QR-code adoption, individual yatai operators often run cash-only, and ATMs aren’t nearby once you’re inside festival grounds.

    Budget, Mid-Range, and Splurge Options

    For budget eating, a convenience store microwave pack or cup noodle runs ¥150–250 and is available any hour. A festival yatai tray at ¥500–700 is the sweet spot for the authentic experience — smoky griddle flavor, eaten outdoors, part of the matsuri atmosphere. For a seated mid-range meal, an izakaya or okonomiyaki restaurant plate at ¥800–1,200 comes with more generous toppings and a drink menu alongside it — a cold beer or a glass of amazake if you’re at a shrine festival and want something non-alcoholic. For a splurge, some teppanyaki restaurants serve yakisoba made with premium wagyu scraps and seafood for ¥2,000–3,000, cooked table-side — a different league from the festival version but a fun way to see the same technique applied with higher-end ingredients.