Japan Trove

Category: Uncategorized

  • Tachigui Sushi: Tokyo’s Standing Sushi Bars for a Fast, Affordable Meal

    Tachigui Sushi: Tokyo’s Standing Sushi Bars for a Fast, Affordable Meal

    Photo by Hennie Stander on Unsplash

    In a city where a single omakase dinner can run past ¥30,000, Tokyo’s standing sushi bars are the antidote: fresh, market-grade sushi eaten on your feet in fifteen minutes for the price of a casual lunch. Tachigui-zushi (立ち食い寿司, literally “stand-and-eat sushi”) strips away the ceremony of a traditional sushi counter — no reservations, no multi-course omakase, often no seats at all — and replaces it with speed, volume, and prices that make daily sushi habits realistic even on a travel budget. Here’s how the system works and where to try it.

    What Tachigui Sushi Actually Is

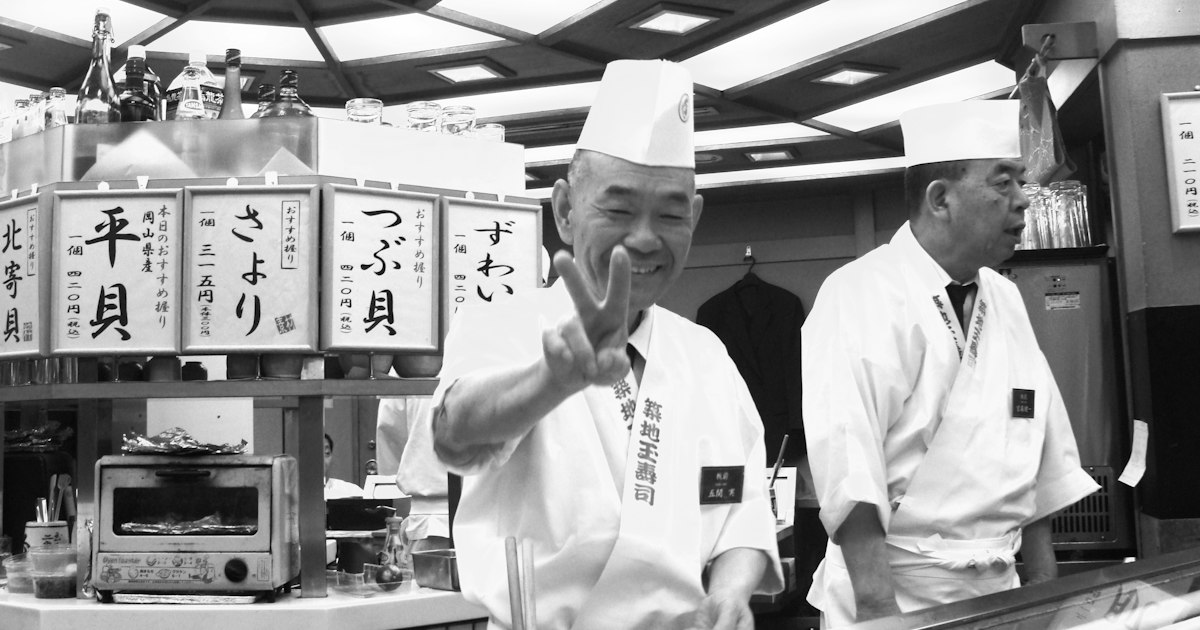
    Standing sushi bars grew out of Tokyo’s wholesale fish market culture, where workers needed good sushi fast, before or after their shifts. The format stuck because it solves a real problem: sushi is expensive mainly because of labor, rent, and the time a customer occupies a seat. Remove the seat, speed up the turnover, and a chef can serve far more customers per hour at a much lower price per plate. You’ll usually order one or two pieces at a time rather than a fixed set menu, pay as you go or settle up at the end, and eat standing at a narrow counter — sometimes under 10 minutes, sometimes lingering for 30 if the shop allows it.

    Quality varies by shop, but the better-known chains use the same wholesale seafood routes as their sit-down counterparts, just with less overhead. It’s a genuinely different economic model, not a “budget” version of sushi in terms of taste.

    Where to Find the Best Ones in Tokyo

    Uogashi Nihon-Ichi (魚がし日本一) is the chain most associated with the format. It began near the old Tsukiji market and now has branches scattered across the city, including Shimbashi, Shibuya, Ikebukuro, and locations near Toyosu Market. Individual plates (usually one or two pieces of nigiri) typically run from around ¥100 for everyday items like tamago or kanpyo up to ¥400–¥600 for premium cuts like uni, otoro, or seasonal specials. Most branches open early — some from 7:00 or 7:30 — catering to market workers and early risers, and close by late afternoon or evening depending on the location.

    Standing Sushi Bar, run by the Genki Sushi group, is the more tourist-friendly option, with English menus, credit card acceptance, and locations in Shibuya and Shinjuku within easy walking distance of the stations. It’s less about market authenticity and more about convenience for visitors who want good sushi without navigating an all-Japanese menu.

    If you’re visiting the current Toyosu Market (which replaced Tsukiji’s wholesale functions in 2018), the surrounding complex and the nearby Tsukiji outer market still have several standing and quick-counter sushi options worth checking once you’re there, since opening hours and shop names shift more often than sit-down restaurants.

    How to Order: A Step-by-Step Guide

    The etiquette differs from a conventional sushi restaurant, and knowing it in advance avoids an awkward first visit:

    • Find a spot at the counter. There are no seats, no waiting list, and often no reservations — you simply walk up to an open space.
    • Order directly from the chef, usually one or two pieces at a time rather than a full set, by pointing at the display case or reading a posted price list.
    • Pay as you go or keep a running tab, depending on the shop — ask “o-kaikei wa?” (how do I pay?) if you’re unsure, since some places expect cash per item and others total up at the end.
    • Eat promptly and move on. Standing bars run on turnover; lingering for an hour isn’t really the point, and during lunch rush you may feel gentle pressure to free up space.
    • Bring cash as a backup. Market-adjacent, old-school shops like Uogashi Nihon-Ichi can be cash-only or card-limited; the more tourist-oriented chains accept cards and sometimes IC transit cards.

    Budget, Mid-Range, and Splurge Picks

    Budget (¥800–� ¥1,500 total): Stick to Uogashi Nihon-Ichi basics — tamago, kappa maki, ika, and a few value nigiri — and you can eat well for the price of a convenience store meal upgrade. It’s a similar value logic to the fast-casual chains covered in our guide to ordering at Marugame Seimen, where you build a cheap meal piece by piece instead of paying for a fixed course.

    Mid-range (¥2,000–¥3,500): Mix in otoro, uni, and seasonal fish at either chain, or try a few of the chef’s recommended items of the day — often chalked up separately and tied to what came in at the market that morning.

    Splurge (¥4,000+): Some standing bars near Toyosu offer a short omakase-style tasting even without seats — a handful of the best cuts of the day served in sequence. It won’t match a seated ¥20,000+ omakase experience, but for a quick, high-quality seafood splurge between sightseeing stops, it’s a reasonable middle ground. If grilled river fish rather than raw sushi is more your interest, our piece on ayu, Japan’s grilled sweetfish, covers a different seasonal seafood specialty worth seeking out.

    Best Time to Go, and Mistakes to Avoid

    Morning is genuinely the best time for tachigui sushi, especially at market-linked shops — fish is freshest right after the wholesale auctions, and the shops themselves are often built around an early-morning customer base, closing by mid-afternoon or early evening. Arriving at 7:30–9:00am avoids both the thinnest selection (late in the day, popular cuts sell out) and the worst lunchtime crowding, which peaks around 12:00–13:00 near business districts like Shimbashi.

    Common mistakes: showing up at 2pm expecting full variety (many choice items are gone), assuming every shop takes cards (many market-style ones don’t), and treating it like a sit-down restaurant by camping at the counter during a lunch rush. Another one: skipping the posted daily specials board because it’s in Japanese only — these often include the best seasonal fish, and pointing works fine if you can’t read it.

    Getting There and Practical Tips

    Shibuya, Shimbashi, and Ikebukuro branches sit within a five-minute walk of their respective JR or subway stations, making them easy to slot between sightseeing stops rather than a dedicated trip. If your itinerary includes a Toyosu Market morning visit, pair it with a standing sushi breakfast before heading elsewhere — the market itself is a short ride from central Tokyo via the Yurikamome line from Shimbashi. For travelers arriving or departing via Narita or Haneda, it’s worth checking our comparison of routes between Narita and Haneda if your flights land at one airport and depart from the other, since both connect reasonably well into central Tokyo where most standing sushi bars are located.

    If seafood specialties are a trip theme for you, it’s also worth reading about Shimonoseki, Japan’s pufferfish capital, for a very different, more formal seafood experience outside Tokyo. But for a fast, honest, no-frills taste of what makes Tokyo’s sushi culture work — the market connections, the speed, the respect for the fish over the ceremony — a standing counter is one of the most efficient ways to spend a half hour and a few hundred yen.
  • Famichiki vs Karaage-kun: Japan’s Convenience Store Fried Chicken Rivalry

    Famichiki vs Karaage-kun: Japan’s Convenience Store Fried Chicken Rivalry

    Photo by Frank Huang on Unsplash

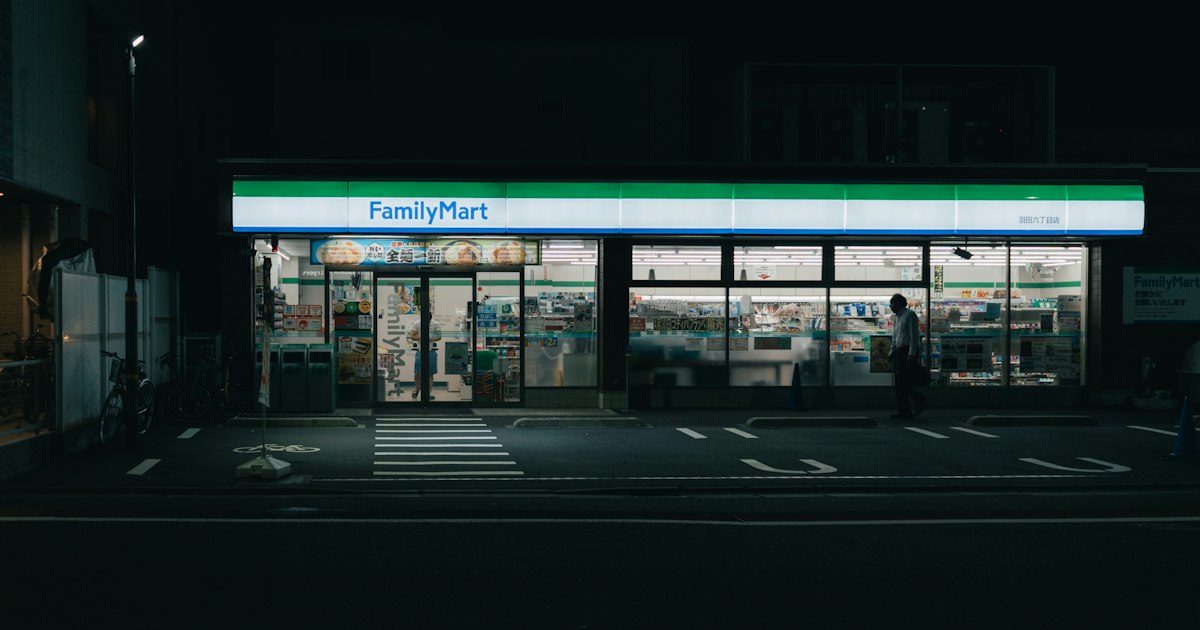
    Ask any Japan regular where to find the country’s best fast food and you’ll get the same two answers, usually argued about with surprising passion: Famichiki, the single golden fillet sold at FamilyMart, and Karaage-kun, the bite-sized nuggets sold at Lawson. Both are convenience store fried chicken, both cost less than a coffee, and both have loyal followings that border on tribal. If you’re spending any real time in Japan, you will walk past dozens of these stores, and knowing what you’re looking at — and how to order it without fumbling — will save you confusion and get you a better snack.

    What Makes Famichiki and Karaage-kun Different

    Famichiki, sold exclusively at FamilyMart, is one large boneless chicken thigh fillet, battered and fried to order (or kept warm in a heated case) and handed over in a small paper sleeve. It’s juicy, thick, and meant to be eaten in a few big bites — closer to a fast-food chicken sandwich patty than nugget-style karaage. It was introduced in 2006 and has become one of FamilyMart’s signature products, with the chain selling hundreds of millions of pieces a year.

    Karaage-kun, sold exclusively at Lawson, is the older of the two, launched back in 1986. It comes in a small paper bag of five bite-sized pieces rather than one fillet, and it’s designed to be eaten with a wooden pick or your fingers while walking. The chicken is marinated before frying, so the flavor goes deeper into the meat rather than sitting mostly in the crust. Lawson leans hard into the branding too — Karaage-kun has its own cartoon mascot and even its own commemorative merchandise over the years.

    In short: Famichiki is one big juicy piece built for a quick, filling bite; Karaage-kun is a shareable, snackable bag with more complex marinated flavor. Neither is “better” — they’re built for slightly different cravings.

    How to Order (and What to Expect)

    Both are sold from a heated glass case near the cash register, usually next to the oden pot in winter or iced drinks in summer. You don’t need much Japanese — point and say “Famichiki, onegaishimasu” or “Karaage-kun, onegaishimasu” and the staff will grab one with tongs and bag it. At busier stores near train stations, staff may ask if you want a sauce packet (mayo or spicy mayo is common with Famichiki) — nod or say “hai” if you want it.

    If you’ve already used a self-service ordering system like the ones at Marugame Seimen, this is far simpler by comparison — there’s no tray line or customization menu, just a case, a clerk, and a quick exchange at the register.

    Price, Portion Size, and Value

    Prices tick up periodically with inflation, so treat these as ballpark figures rather than fixed numbers: a single Famichiki fillet typically runs somewhere in the ¥230–280 range (tax included), while a five-piece bag of Karaage-kun (the “Red,” spicy original) is usually a touch cheaper, often ¥210–260 for the pack. Per-bite, Karaage-kun is arguably the better value if you’re sharing or just want a few bites; Famichiki is better value if you want one substantial snack that functions almost like a light meal.

    Budget move: either one, eaten standing at the counter or on a park bench, is one of the cheapest hot proteins you’ll find in Japan. Mid-range: pair it with a convenience store rice ball and canned coffee for a full meal under ¥600. Splurge: some FamilyMart locations sell a “Famichiki” sandwich or a double-size version during promotions — worth grabbing if you see it, since it’s not always on the menu.

    Flavor Variations and Seasonal Specials

    Karaage-kun’s lineup includes the original spicy “Red,” a milder “Shio” (salt) version sometimes called “L,” a cheese flavor, and rotating limited editions — curry, plum-and-shiso, and regional collaborations have all appeared over the years. Lawson treats these rotations like seasonal events, so if a flavor you tried last trip isn’t there this time, that’s normal.

    Famichiki’s standard version is a straightforward savory fried chicken, but FamilyMart also runs its own limited flavors and spin-offs — a spicier “Famichiki Red,” cheese-stuffed versions, and occasional collaborations tied to anime or other brands. Both chains announce new flavors on in-store posters and at the register display, so it’s worth glancing at the case even if you think you know what you want.

    Best Time to Buy for Maximum Freshness

    Convenience stores are open 24 hours at most locations (a shrinking number have scaled back late-night hours due to staffing, mostly in smaller towns), but freshness depends on cook batches, not store hours. The best windows are right around lunch (11:30am–1pm) and early evening (5pm–7pm), when staff restock the warmer most frequently to meet demand from office workers and students. Late at night, chicken may have been sitting in the case for longer, and at very quiet rural stores in the early morning, the case may be empty until the next batch is fried. If you’re near a major train station, turnover is fast enough that freshness is rarely an issue.

    Common Mistakes Travelers Make

    • Assuming they’re interchangeable. Walking into a Lawson expecting Famichiki (or vice versa) — they’re chain-exclusive, so plan around whichever store is actually in front of you rather than hunting for a specific brand across town.
    • Skipping the sauce. Famichiki is often sold with an optional mayo or spicy mayo packet that isn’t automatically included — ask if you want it.
    • Not checking spice level. Karaage-kun “Red” has a mild kick that can surprise people expecting plain fried chicken; the “Shio/L” version is the safer bet for kids or spice-sensitive travelers.
    • Eating it cold on purpose to save for later. Both are genuinely best eaten within minutes of purchase — the crust softens quickly, so this isn’t great take-back-to-the-hotel food.
    • Forgetting cash isn’t required. Nearly all FamilyMart and Lawson locations take IC transit cards (Suica, Pasmo, ICOCA) and most major credit cards, so there’s no need to break a bill just for a ¥250 snack.

    Beyond the Big Two: Other Convenience Store and Fast-Food Finds

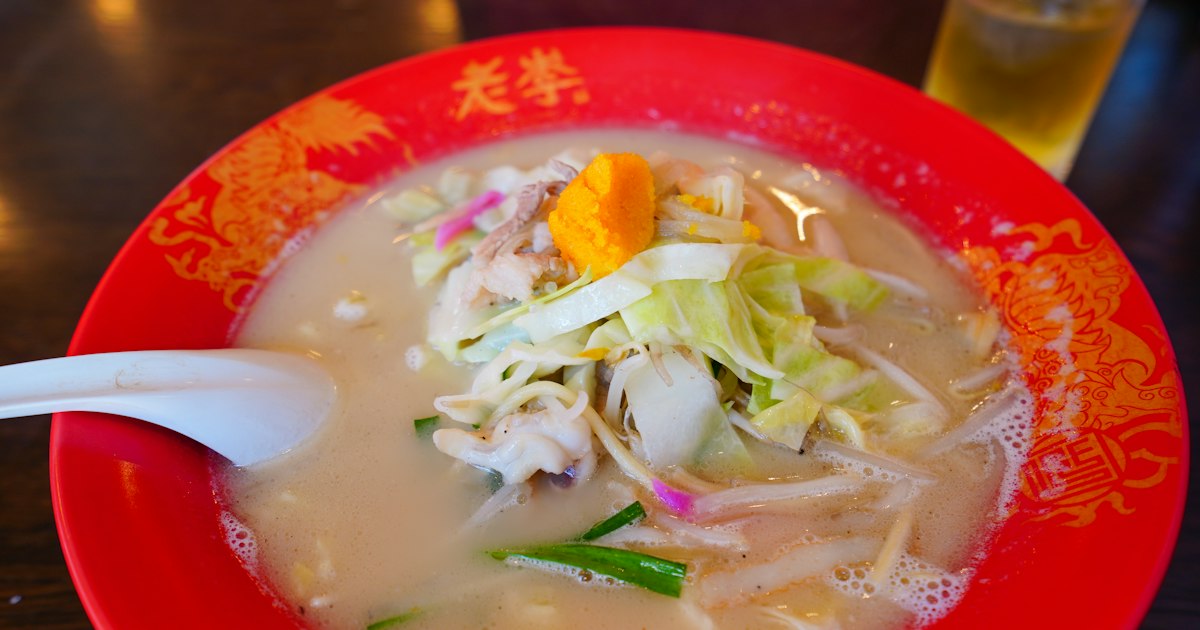
    Seven-Eleven has its own fried chicken, generally less famous than Famichiki or Karaage-kun but worth a try if that’s the store you’re near. And if convenience store food gets you curious about Japan’s other regional comfort dishes, two worth seeking out on a longer trip are Okinawa’s taco rice, a totally different kind of American-influenced comfort food, and Nagasaki’s champon, a seafood noodle dish with its own hybrid origin story. Both make a good contrast to the quick convenience-store bite and show how far Japan’s casual food culture extends beyond what’s sitting in a glass case by the register.

    Ultimately, the Famichiki-versus-Karaage-kun debate isn’t one you need to settle before you land — just try both within the first few days of your trip, pick a side if you want to join the argument, and enjoy one of the easiest, cheapest, and most reliably satisfying snacks Japan has to offer.

  • Taco Rice: Okinawa’s American-Influenced Comfort Food and Where to Try It

    Taco Rice: Okinawa’s American-Influenced Comfort Food and Where to Try It

    Photo by Leo Okuyama on Unsplash

    Order “taco rice” anywhere outside Okinawa and you might get a confused look from the kitchen. On the island, though, it’s a staple — a bowl of warm rice topped with seasoned taco meat, shredded cheese, lettuce, tomato, and salsa, eaten with a spoon rather than folded into a tortilla. It’s one of the clearest edible reminders of Okinawa’s decades-long relationship with the US military, and it’s genuinely good, cheap, and easy to find once you know where to look.

    What Taco Rice Actually Is

    Taco rice swaps the tortilla for a bed of steamed white rice, then piles on taco-seasoned ground beef (or pork, or a mix), a handful of shredded lettuce, a few cubes of tomato, melted cheese, and a drizzle of salsa or ketchup-based sauce. Many shops offer a fried egg on top as an add-on, and most places leave a bottle of koregusu — Okinawa’s fiery awamori-steeped chili liquor — on the table so you can heat it up yourself. The flavor profile sits somewhere between American Tex-Mex and Japanese home cooking: familiar, salty, a little sweet, and very filling for the price.

    Where It Began: Kin Town and Parlor Senri

    Taco rice was invented in 1984 by Matsuzo Gibo, owner of a small restaurant called Parlor Senri in Kin Town, a small municipality on Okinawa’s eastern coast right next to Camp Hansen, one of the US Marine Corps bases on the island. Gibo wanted something filling and cheap for young Marines who didn’t have much money or time between duty shifts, so he built taco fillings on top of rice instead of a tortilla. The dish spread from base-adjacent diners into mainstream Okinawan food culture over the following decades, and it’s now sold everywhere from convenience stores to izakaya menus across the prefecture.

    Parlor Senri (パーラー千里) is still open in Kin Town today, serving the original-recipe taco rice for around ¥850–¥950. It’s a modest, old-school diner rather than a polished tourist stop, open roughly 11:00–20:00 most days, though hours can shift without much notice, so it’s worth calling ahead if you’re making a special trip. Kin Town itself has no train access — you’ll need a rental car, and it’s about a 60–75 minute drive north from Naha along the Okinawa Expressway and Route 329.

    Best Places to Try It Without a Rental Car

    If you’re based in Naha or don’t want to drive, you still have good options. King Tacos, a local chain with several locations around the base towns of Kin and Okinawa City, is the most famous name in taco rice and sells a basic order for roughly ¥500–¥650 — cash often preferred, and some branches are stall-style with outdoor seating only. For travelers staying near central Naha, Chatan’s American Village area (accessible by bus from Naha, or by taking the Yui Rail to a station with onward bus connections) has several American-influenced diners and bars serving taco rice alongside burgers and tacos proper, which makes it an easy half-day outing without a car.

    You don’t even need a sit-down restaurant to try it: Okinawan convenience stores, especially Lawson locations, sell taco rice onigiri and bento boxes for about ¥200–¥350, which is a perfectly legitimate (and fast) way to sample the dish if you’re short on time between flights or sightseeing stops.

    Budget, Mid-Range, and Splurge Versions

    • Budget (¥200–¥650): Convenience store onigiri/bento, or a basic plate at King Tacos or a small local diner. Fine for a quick, authentic taste.
    • Mid-range (¥700–¥1,200): Sit-down diners and casual restaurants in Chatan or Okinawa City that add a fried egg, extra cheese, or a side of Okinawan soba. A&W Okinawa — the root beer chain that’s unique to the island — also serves a taco rice plate with onion rings for around ¥900–¥1,100.
    • Splurge (¥1,300+): A handful of resort hotel restaurants and modern Okinawan cafés plate taco rice as a composed dish with premium Okinawan beef, local Agu pork, or an upgraded cheese blend. It’s not a dish with a true “luxury” tier the way kaiseki or wagyu is, so spending more mainly buys you a nicer setting and bigger portions rather than a fundamentally different experience.

    Getting There and Timing Your Visit

    Most of the dish’s heartland — Kin, Camp Hansen’s surroundings, and the central-east coast — requires a rental car, since Okinawa’s rail network is limited to the short Yui Rail line in Naha. If you’re not driving, Chatan and American Village are the practical compromise: reachable by bus, walkable once you’re there, and dense with options. Any season works for eating taco rice itself, but if you’re road-tripping up to Kin Town, avoid the peak of typhoon season (August–September), when heavy rain and occasional road closures can derail day trips. Spring and early winter (outside Japan’s Golden Week and the Silver Week holiday cluster, when domestic tourist traffic spikes) tend to be the calmest times to explore Okinawa’s base towns without crowds or inflated accommodation prices.

    Common Mistakes to Avoid

    • Expecting Mexican flavors: Taco rice seasoning is a Japanese interpretation of Tex-Mex, closer to a mildly spiced ketchup-and-cumin beef than anything from an actual taqueria. Go in expecting Japanese comfort food, not Mexican food, and you won’t be disappointed.
    • Skipping the koregusu: The dish is often served fairly mild. A few drops of the table chili liquor (it’s potent — start with one or two drops) brings it much closer to how locals actually eat it.
    • Assuming every place looks like a restaurant: Some of the best-known spots, including King Tacos branches, are stalls or windows with a few plastic tables outside. Don’t drive past them looking for a storefront.
    • Not checking hours before a long drive: Small, family-run diners in Kin Town and Okinawa City sometimes close early, take irregular holidays, or sell out of ingredients. If a specific shop is the goal of your day trip, call ahead or check recent reviews the morning of your visit.

    Why It’s Worth Seeking Out

    Taco rice is a small, edible piece of Okinawa’s postwar history — a dish born out of necessity near a military base that became a genuine regional comfort food, the way other Japanese regions have turned outside influences and local ingredients into dishes travelers now seek out on purpose, from Nagasaki’s champon to Morioka’s jajamen. It’s cheap, it’s filling, and unlike a lot of “must-try” foods, it’s genuinely hard to find outside Okinawa — so eat it while you’re there.

  • Zenzai & Oshiruko: Japan’s Warm Red Bean Soup Dessert and Where to Try It

    Zenzai & Oshiruko: Japan’s Warm Red Bean Soup Dessert and Where to Try It

    Photo by Zion C on Unsplash

    On a cold afternoon in Japan, nothing fixes a day of walking faster than a bowl of thick, sweet red bean soup with a piece of grilled mochi melting in the middle. It’s called zenzai or oshiruko depending on where you are and what’s in the bowl, and it’s one of the easiest traditional sweets for a foreign visitor to order, eat, and genuinely enjoy — no acquired taste required. Here’s what the names actually mean, how the regional versions differ, and where to find a good bowl without wasting a trip.

    What’s the difference between zenzai and oshiruko?

    Both are made from azuki (red beans) simmered with sugar until they break down into a thick, warm soup, served with mochi or shiratama dango (soft rice flour dumplings). The confusing part is that the two names mean different things depending on the region:

    • In Kanto (Tokyo and the east): oshiruko is any sweet red bean soup, whether it’s smooth (koshian, strained of skins) or chunky. Zenzai specifically refers to a version with little to no liquid — almost a thick paste with whole beans, mochi dropped on top.
    • In Kansai (Osaka, Kyoto and the west): oshiruko means the smooth, strained version, while zenzai means the chunky, liquid version made with tsubuan (coarse bean paste, beans left whole or partly mashed).

    In practice, don’t overthink it ordering — most shop menus clarify with a photo or a short description, and either word will get you a hot bowl of sweet beans with mochi. If a menu lists both, zenzai in Kansai tends to be the heartier, more rustic bowl and oshiruko the silkier one.

    Regional variations worth knowing

    Beyond the Kanto/Kansai naming split, a few regional styles stand out:

    • Izumo zenzai (Shimane Prefecture): Izumo claims to be the birthplace of the word “zenzai” itself, tied to the Jinzaimochi offered at Izumo Taisha shrine. Shops around the shrine serve a version with whole beans and a thinner broth than the Kansai style.
    • Kyoto-style shiratama zenzai: often served with chewy shiratama dango instead of grilled mochi, plus a small dish of pickled vegetables (shiokonbu or similar) on the side to cut the sweetness between bites — a classic pairing at Kyoto’s old-style kissaten (coffee shops) and wagashi sweets counters.
    • Hokkaido-style: given Hokkaido grows most of Japan’s azuki beans, cafes there sometimes serve zenzai with extra-plump, freshly harvested beans, especially in autumn right after the September–October harvest.

    Best season and timing to go

    Zenzai and oshiruko are sold year-round at sweets shops, but they’re treated as a winter comfort food — menus often swap in warm zenzai for summer’s cold anmitsu or kakigori shaved ice around late September or October and keep it through March. If you’re traveling during Japan’s cooler shoulder seasons, this is prime zenzai weather; see Japan’s Silver Week for how the September holiday cluster affects crowds and hours at popular dessert shops. Many specialty shops also only open for a few hours in the afternoon (roughly 11:00–17:00), so check hours before making a special trip, especially for smaller family-run spots that close once the day’s beans run out.

    Where to try it: budget, mid-range, and splurge

    Budget (¥300–¥600): Convenience stores and supermarkets sell canned or retort-pouch oshiruko (just heat and pour) for around ¥150–¥300, and it’s a legitimately decent way to try the flavor on day one. Standing-bar sweets stalls near shrines and old shopping streets (shotengai) often sell a simple cup of zenzai with one mochi for ¥300–¥500.

    Mid-range (¥600–¥1,200): This is where most visitors should eat. Traditional wagashi shops and kissaten serving zenzai or oshiruko as a set with tea typically charge ¥700–¥1,000. Kyoto’s Gion and Kiyomizu-dera approach areas, Tokyo’s Asakusa (especially the Nakamise-dori side streets) and Yanaka Ginza, and Kanazawa’s Higashi Chaya district all have long-running sweets shops with zenzai on the menu, often alongside anmitsu and dango. Look for shops with a noren curtain and a handwritten menu board — these tend to make bean paste in-house daily rather than buying it pre-made.

    Splurge (¥1,200–¥2,500): High-end wagashi houses and ryokan tea rooms sometimes serve zenzai as part of a seasonal kaiseki-style dessert course, with premium Hokkaido Tokachi-region azuki and hand-pounded mochi. A few department store restaurant floors (Isetan, Takashimaya) have dedicated sweets counters where a deluxe zenzai set with extra toppings (kuri chestnut, matcha ice cream) runs ¥1,500–�part2,000.

    How to order and eat it

    If there’s table service, just say “zenzai onegaishimasu” or point at the menu photo. You’ll usually get a lacquered or ceramic bowl, a flat spoon, and sometimes a small cup of hot tea or hojicha on the side — the slight bitterness balances the sugar. Eat the mochi first while it’s soft; it hardens as the bowl cools. If whole mochi feels like a lot, some shops offer a half-size “ko-mochi” portion or shiratama dango instead, which are easier to eat in smaller bites.

    Common mistakes to avoid

    • Confusing it with anko on toast or anmitsu: those are related red-bean sweets but served differently (cold, or spread rather than soup) — if you want the warm soup specifically, say “atatakai” (warm) when ordering, since some shops serve a cold version in summer under the same name.
    • Assuming it’s always very sweet: traditional recipes use less sugar than Western desserts, but mass-market canned versions can be sweeter. If you prefer less sugar, shops that make their own anko daily are usually more balanced than packaged versions.
    • Showing up late at small shops: many wagashi shops sell out of fresh anko and close early, particularly on weekends — arriving by early afternoon is safer than going at 4 or 5pm.
    • Skipping the mochi because it looks like it might be chewy or hard to bite: grilled mochi in zenzai is meant to be soft and stretchy from the hot soup; if it still feels firm, it may need another minute sitting in the broth.

    A simple souvenir option

    If you’d rather bring the flavor home than hunt down a shop, instant zenzai and oshiruko packets (just add hot water) are sold at any supermarket or train station kiosk for ¥150–¥400 per packet, and they pack flat in a suitcase. They’re a good complement to other pantry souvenirs — if you’re already building a Japan snack haul, pair it with something like binchotan charcoal for home cooking or grab a treat after a shopping trip to somewhere like Gotemba Premium Outlets, where food courts often carry a warm bowl during the colder months.

  • Ayu: Japan’s Grilled Sweetfish and the Riverside Restaurants That Serve It

    Ayu: Japan’s Grilled Sweetfish and the Riverside Restaurants That Serve It

    Photo by Loris Boulinguez on Unsplash

    If you’re traveling in Japan between May and September and see restaurants building wooden platforms out over a river, you’ve stumbled onto one of the country’s most seasonal food traditions: ayu, or sweetfish, grilled whole over charcoal and eaten on the riverbank where it was caught. It’s not flashy like sushi or ramen, and most foreign visitors never hear about it — but for a few months a year, it’s one of the most atmospheric meals you can have in Japan.

    What Is Ayu, and Why Is It Called “Sweetfish”?

    Ayu (鮎) is a small freshwater fish, usually 15–25cm long, that lives in Japan’s clean rivers and feeds on algae growing on rocks. That diet is why it’s nicknamed “sweetfish” in English — its flesh has a faint, clean sweetness and a distinct aroma that fans compare to melon or cucumber, totally unlike the fishy taste of most grilled seafood. The skin crisps up over charcoal while the flesh stays soft, and you eat the whole fish, including the slightly bitter internal organs, which locals consider the best part.

    Ayu is also a symbol of early summer in Japanese cuisine. Restaurants that serve kaiseki (multi-course traditional meals) often treat the first ayu of the season the way other countries treat the first asparagus or strawberries — as something worth celebrating on the menu.

    Best Season and Time to Go

    Ayu fishing season officially runs roughly from early June to September, though some rivers allow catches from May. The fish are smallest and most delicate early in the season, then grow larger and fattier by August. Late August into September is often considered peak flavor by locals, just before the season closes.

    Riverside ayu restaurants, especially the open-air platform type described below, are strictly seasonal businesses — most close completely from autumn through spring and reopen the following May or June. If you’re planning a trip for later in the year, note that this is a summer-only experience; it won’t overlap with cooler-season travel windows like the one covered in Japan’s Silver Week guide, so build it into a June–September itinerary instead.

    For lunch, arrive right at opening (usually 11:00 or 11:30) to get a table with a river view before tour groups arrive. For dinner, platforms lit by lanterns after sunset are the more memorable experience, but book ahead — many of these restaurants only have 20–40 seats total.

    How It’s Cooked: Shioyaki Over Charcoal

    The classic preparation is shioyaki — the whole fish is skewered through the mouth into an S-curve (so it looks like it’s still swimming), salted generously, and grilled slowly over charcoal until the skin is crackly and the tail and fins are fan-shaped and crisp enough to eat. Many of the better riverside restaurants use binchotan, the same slow-burning white charcoal prized by yakitori and unagi chefs, because it holds steady heat without flaring and doesn’t impart smoky off-flavors. If you’re curious about the charcoal itself, we cover it in our guide to binchotan, which is also sold as a souvenir.

    Other common preparations include tempura (whole small ayu, bones and all), sushi, and a simmered dish called ujakani for larger or less photogenic fish. But shioyaki is what people travel for, and it’s almost always the centerpiece of a set meal.

    Where to Eat It: Japan’s Classic Ayu Rivers

    A handful of rivers have built entire dining cultures around ayu:

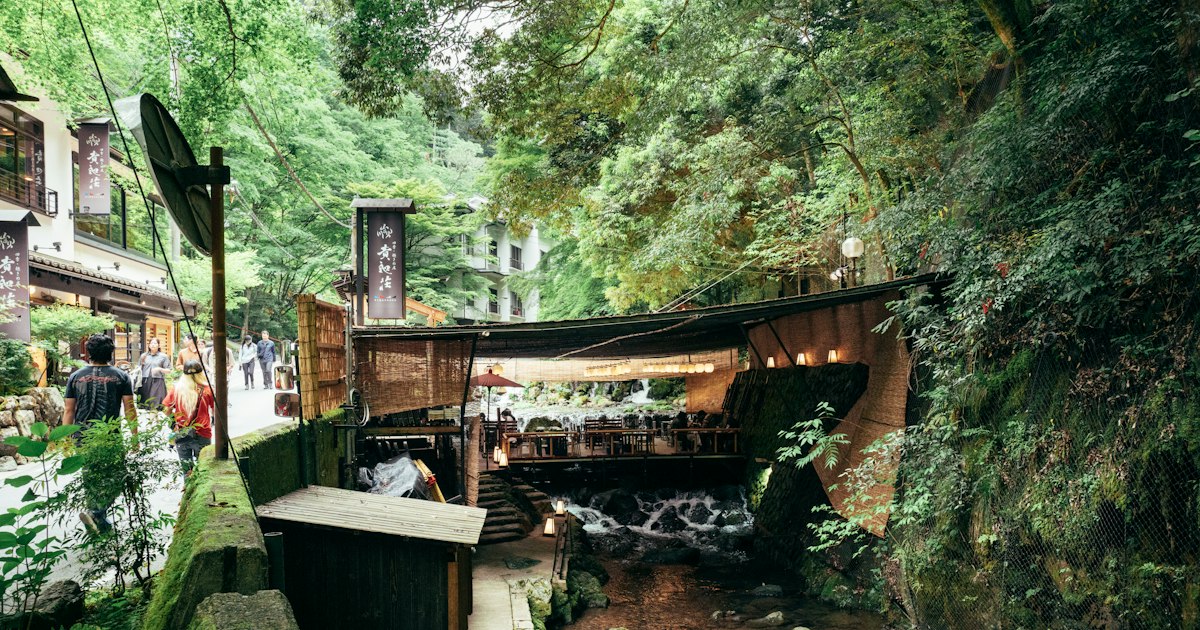
    • Kamo River, Kyoto (Kibune and Takao): From May to September, dozens of traditional restaurants build kawadoko — wooden dining platforms suspended directly over the river — in the Kibune and Takao districts north of the city. Meals here range from casual noodle lunches to full multi-course kaiseki with ayu as the summer highlight. Expect roughly ¥5,000–¥8,000 for a riverside lunch set with ayu, and ¥15,000–¥30,000+ per person for an evening kaiseki course. Reserve at least a few days ahead for dinner in July and August.
    • Nagara River, Gifu City: This is the most famous ayu river in Japan, home to ukai — traditional cormorant fishing, where handlers in straw skirts use trained birds to catch ayu by torchlight, a practice over 1,300 years old. Riverside restaurants and ryokan around Gifu City serve ayu caught from the same river, and some offer dinner packages that include watching the ukai boats pass. Casual riverside shops sell a single grilled ayu on a stick for about ¥500–¥800; full dinner courses run ¥8,000–¥20,000.
    • Tama River, Okutama (western Tokyo): The easiest option for travelers based in Tokyo without a long-distance trip. Okutama, about 90 minutes from central Tokyo by JR train, has several riverside restaurants and simple outdoor grill stands serving ayu through summer, with lunch sets around ¥2,500–�art ¥5,000.
    • Shimanto River, Kochi: Known as one of Japan’s last major rivers without a dam, the Shimanto is prized for especially clean-tasting ayu, served at small family-run spots along its banks.

    Outside Honshu, Kyushu’s rivers have their own ayu culture too — if you’re already visiting the dramatic river canyon at Takachiho Gorge in Miyazaki, ask locally about small eateries near the Gokase River serving ayu caught just upstream; it’s a natural pairing with a gorge visit in summer.

    Budget, Mid-Range, and Splurge Options

    You don’t need a reservation-only kaiseki restaurant to try ayu. Here’s roughly what to expect at each level:

    • Budget (¥500–¥1,500): A single grilled ayu bought from a riverside stall or festival stand, often near fishing spots or rural train stations in ayu regions during summer.
    • Mid-range (¥2,500–¥8,000): A set lunch or casual dinner at a riverside or riverside-adjacent restaurant, usually including one grilled ayu alongside rice, soup, and small sides.
    • Splurge (¥15,000–¥35,000+ per person): A full kaiseki dinner on a kawadoko platform in Kyoto, or a ryokan dinner package in Gifu combined with watching ukai cormorant fishing — these usually require reservations well in advance, especially for weekend dates in July and August.

    Common Mistakes to Avoid

    • Showing up without a reservation in peak season. Kawadoko platforms and well-known ukai-viewing restaurants fill up fast on summer weekends; call or book online several days ahead.
    • Trying to eat ayu in winter. Most riverside platform restaurants close completely outside the May–September window; some inland restaurants serve frozen or farmed ayu off-season, but it’s not the same experience.
    • Removing the skewer and eating with utensils only. It’s normal — even expected — to pick up the whole fish by hand, eat along the spine, and leave a clean skeleton. Staff won’t mind.
    • Skipping the innards out of caution. The slightly bitter taste from the internal organs is considered part of the point, not a flaw; try at least one bite before deciding it’s not for you.
    • Underestimating travel time to rural riverside spots. Many of the best-known ayu restaurants are outside major city centers and run on limited rural bus or taxi schedules — check the last return bus or train time before you go, especially for evening meals.

    Ayu won’t show up on most “must-eat Japan” lists aimed at first-time visitors, which is exactly what makes it worth seeking out — a seasonal, place-specific meal eaten where it’s caught, on a river, in the one stretch of the year when it’s actually available.

  • Japan’s Silver Week: The Autumn Holiday Cluster and How to Plan Around It

    Japan’s Silver Week: The Autumn Holiday Cluster and How to Plan Around It

    Photo by Samuel Berner on Unsplash

    If you’ve heard of Golden Week but not “Silver Week,” you’re not alone — even some Japanese residents get confused about which years it actually happens. Silver Week is a cluster of national holidays in mid-to-late September that, in the right year, lines up into a five-day weekend. It’s smaller and less famous than Golden Week, but for the weeks it occurs, it quietly reshapes train bookings, hotel prices, and crowd levels across the country. Here’s how it works and how to plan a trip around it, whether or not you land on a “true” Silver Week year.

    What Exactly Is Silver Week?

    Silver Week refers to two national holidays that fall within days of each other in September: Respect for the Aged Day (Keiro no Hi, 敬老の日), which is fixed as the third Monday of September, and Autumn Equinox Day (Shuubun no Hi, 秋分の日), which is set astronomically and usually lands on September 22 or 23. Most years, these two holidays sit several days apart and just give you two separate three-day weekends. But in certain years, the equinox falls exactly two days after Respect for the Aged Day — and Japanese law fills the single gap day in between with a “Citizen’s Holiday” (Kokumin no Kyujitsu). That turns Saturday through Wednesday into one unbroken five-day holiday. This full version happened in 2009, 2015, and again in 2026 (September 19–23). It’s genuinely rare — the next full alignment won’t come around again for several years — so always check Japan’s official holiday calendar for the specific year you’re traveling rather than assuming it repeats annually.

    Why It Matters Even in “Normal” Years

    Even when the full five-day version doesn’t occur, both holidays still exist independently every year, and each one creates its own three-day weekend when it falls near a Saturday or Sunday. September is also when many Japanese families observe Ohigan, a Buddhist tradition of visiting family graves around the equinox, which means regional trains and expressways heading toward hometowns get busy regardless of whether it’s an official “Silver Week.” So the practical upshot is the same most years: expect elevated domestic travel for a stretch of mid-to-late September, just with varying intensity.

    Booking Transport Before It Sells Out

    Shinkansen reserved seats go on sale exactly one month before the travel date, at 10:00 am Japan time, through services like Smart EX (Tokaido/Sanyo lines) or JR East’s reservation site. For Silver Week travel, set a reminder and book the moment the window opens — popular routes like Tokyo–Kyoto–Osaka and anything heading toward Hokkaido or Kyushu for autumn foliage can sell out within hours. If you’re flying internationally around these dates, double-check your connecting routes; our guide to getting between Narita and Haneda is worth reading beforehand, since airport transfer options and prices (roughly ¥3,200–¥3,600 one-way by Limousine Bus, cheaper by train) get tighter when everyone’s moving at once. Within Tokyo itself, understanding how the city’s two subway networks connect — covered in our piece on the Tokyo Metro vs. Toei Subway systems — saves real time when stations are more crowded than usual and you don’t want to backtrack through an unfamiliar transfer.

    Weather and Crowd Realities

    September is peak typhoon season in Japan. It’s entirely possible for a typhoon to brush the main islands during Silver Week, which can delay or cancel Shinkansen services and flights with little warning. Buy refundable or flexible tickets where the price difference is small, and build at least one buffer day into your itinerary if your flight home is right after the holiday ends. Temperature-wise, late September is still warm and humid in most of Japan — Tokyo and Kyoto often sit in the high 20s°C — so it’s not yet foliage season in central Japan (that peaks November), though Hokkaido and parts of Tohoku can start turning in late September.

    Smart Day Trips and Things to Do

    Because central Tokyo and Kyoto get crowded during the holiday stretch, it’s a good window for an outlet-mall day trip instead of fighting crowds at major temples. Gotemba Premium Outlets, about 90 minutes from Tokyo by direct bus (around ¥2,060–¥3,000 one-way depending on departure point), is open its usual hours (10:00 am–7:00 pm, until 8:00 pm in summer months) through the holiday period and gives you Mt. Fuji views without the shrine-and-temple bottlenecks. If you do want a shrine visit, the equinox is actually a meaningful day to start one — pick up a goshuincho stamp book (typically ¥1,500–¥3,000 at shrine offices) and get your first stamp while the seasonal atmosphere is genuine, just expect a short queue at well-known shrines on the holiday itself.

    Common Mistakes to Avoid

    • Assuming it happens every year. Most years give you two separate three-day weekends, not one five-day one. Check the actual calendar for your travel year before building an itinerary around a “Silver Week.”
    • Booking hotels too late. In true Silver Week years, popular areas like Kyoto, Hakone, and Okinawa can sell out of mid-range hotels six to eight weeks ahead. Lock in lodging as soon as your dates are firm.
    • Ignoring Monday/holiday closures. Many museums and smaller shops that normally close on Mondays stay open on the holiday itself but then close the following (otherwise ordinary) Tuesday instead — always check the specific venue’s calendar rather than assuming standard weekday hours apply.
    • Skipping travel insurance during typhoon season. Given September’s storm risk, insurance that covers trip delays and cancellations is worth the modest cost.

    Budgeting for the Holiday Crunch

    Expect a price bump across the board compared to a quiet September week. On a budget, hostel dorm beds (¥3,000–¥5,000/night normally) can rise ¥500–¥1,500 during the holiday and book out fastest, so reserve early. For mid-range travel, business hotel rooms that run ¥8,000–¥12,000 on a normal weeknight often climb to ¥15,000–¥22,000 for Silver Week dates in popular cities. If you want to splurge, a ryokan stay with a kaiseki dinner and onsen bath typically runs ¥35,000–¥60,000 per person during peak holiday pricing — still reasonable compared to Golden Week or New Year rates, since Silver Week’s smaller profile keeps top-tier demand a notch lower. Whichever tier you’re in, locking in dates the moment you know them is the single biggest lever you have over the final price.

  • Obi Belts: A Buying Guide to Japan’s Kimono Sashes as Everyday Fashion Accessories

    Obi Belts: A Buying Guide to Japan’s Kimono Sashes as Everyday Fashion Accessories

    Photo by Karori Production on Unsplash

    Long before Western belts arrived in Japan, the obi was already doing the job of cinching a waist, anchoring an outfit, and making a quiet statement about taste. These days you don’t need a kimono to own one. Vintage shops, flea markets, and fashion-forward boutiques across Japan sell obi as standalone accessories—wrapped over a trench coat, knotted around straight-leg jeans, or worn as a wide waist-cincher with a plain dress. This guide covers the types worth knowing, where to actually buy one, what to expect to pay, and the mistakes that make a beautiful textile look like a Halloween costume instead of an outfit.

    The Four Obi Types You’ll Actually Encounter

    Obi come in a confusing range of widths and formalities, but for everyday fashion purposes you only need to know four:

    • Fukuro obi – the most formal, about 30cm wide and 4m+ long, often densely woven with gold or metallic thread. Beautiful but heavy and stiff; better as wall art or a statement piece than a daily belt.
    • Nagoya obi – everyday formal wear, pre-sewn narrower at one end to make tying easier. A good middle-ground weight for repurposing as a sash.
    • Hanhaba obi – “half-width,” roughly 15–17cm wide and 3.6m long, originally for yukata and casual kimono. This is the one most people buy for fashion use: soft, light, and easy to wind around a waist two or three times.
    • Heko obi – a soft, almost scarf-like sash, often in silk crepe, used by children and with yukata. Good for a loosely tied, bow-style look.

    If you’re shopping with “everyday belt” in mind, look for hanhaba or lighter nagoya obi first—fukuro obi are gorgeous but genuinely hard to wear outside formal kimono styling.

    Where to Buy: Budget, Mid-Range, and Splurge

    Budget (¥300–¥3,000): Secondhand and recycle kimono shops are the best value by far. Chains like Tansu-ya have multiple locations in Tokyo (Asakusa, Harajuku), Kyoto (Gion), and Osaka, with used hanhaba and nagoya obi often priced between ¥1,000 and ¥3,000, sometimes less for worn or stained pieces that still look fine once tied. Flea markets go even lower—bins of loose, slightly damaged obi for ¥300–¥500 are common.

    Mid-range (¥3,000–¥15,000): Vintage and antique kimono boutiques sell cleaner, better-condition obi with intact silk and no stains, often curated by color or pattern. Shimokitazawa and Koenji in Tokyo have several small shops like this mixed in among the secondhand clothing stores, and Kyoto’s Nishijin district (the historic weaving neighborhood) has shops selling both new and quality used obi at these prices.

    Splurge (¥20,000–¥300,000+): New fukuro and nagoya obi from established weavers—especially Nishijin-ori from Kyoto or Hakata-ori from Fukuoka—are genuine textile art, hand-woven with silk and sometimes gold thread. Department store kimono floors (Takashimaya, Mitsukoshi) carry these, with staff who can explain the weaving technique. This tier makes more sense as an heirloom or display piece than a casual accessory.

    Best Time to Shop: Flea Market Dates

    Japan’s best obi hunting happens at recurring temple and shrine flea markets, not regular shops, so timing matters:

    • Toji Temple Kobo-ichi (Kyoto) – the 21st of every month, largest on weekends.
    • Kitano Tenmangu Tenjin-ichi (Kyoto) – the 25th of every month.
    • Oedo Antique Market (Tokyo International Forum) – held on select Sundays, roughly 9:00–16:00; check the current month’s schedule since it isn’t weekly.

    Vendors at these markets often have stacks of folded obi you can dig through, and prices are negotiable, especially late in the day. Spring (March–May) and autumn (September–November) also bring more secondhand kimono stock onto the market generally, since that’s when families clear out closets ahead of seasonal wardrobe changes. If you’re mapping out how to reach these markets by train, the Tokyo Metro vs. Toei Subway guide is useful for the Tokyo International Forum stop near Yurakucho and Tokyo Station.

    How to Wear One Without Looking Like a Costume

    The trick to making an obi read as modern fashion rather than a kimono accessory worn wrong is to break it away from the rest of the kimono ensemble entirely. A few approaches that work:

    • Wide waist belt – fold a hanhaba obi in half lengthwise and wrap it twice around the waist over a simple dress or oversized shirt, tying a flat knot or bow at the side or back rather than the traditional center-back knot.
    • Sash over outerwear – wrap a nagoya obi over a coat or blazer and tie loosely at the front; the stiffness of the fabric holds its shape well.
    • As a bag strap or accent – some vintage shops sell obi already cut and finished into bag straps or headbands, which sidesteps the “am I wearing this right” question entirely.

    Pairing an obi with other traditional footwear like geta or zori sandals pushes the look back toward full kimono styling—fine if that’s the intent, but if you want the “everyday fashion” effect, keep the rest of the outfit entirely Western: jeans, sneakers, a plain tee.

    Common Mistakes

    • Buying fukuro obi for casual wear. They’re stiff, heavy, and formal-looking—gorgeous on a kimono, awkward over everyday clothes.
    • Skipping the smell and stain check. Secondhand obi can carry mothball odor or faint mildew smells; air it outside for a day or two before wearing, and check the fold lines under bright light for stains that don’t show in shop lighting.
    • Not asking about silk vs. polyester. New obi are sometimes polyester (cheaper, machine-washable, less drape) rather than silk; shop staff will tell you honestly if you ask “kinu desu ka?” (is this silk?).
    • Assuming all obi are the same length. A too-short obi won’t wrap twice around a Western waist comfortably—measure or ask length (nagasa) before buying if you’re larger than a typical Japanese kimono size.

    Buying Secondhand Obi From Abroad

    If you’ve already left Japan or can’t find the pattern you want in person, Mercari Japan has an enormous secondhand kimono and obi market, often cheaper than in-store because sellers are clearing out family collections. The beginner’s guide to buying on Mercari Japan from abroad walks through the proxy-shipping services needed to get items sent internationally, which is exactly the workaround you’ll need for an obi purchase after your trip. Search terms like “半幅帯” (hanhaba obi) or “名古屋帯” (nagoya obi) will surface far more listings than searching in English.

    Whether you spend ¥500 at a temple flea market or ¥50,000 on a hand-woven Nishijin piece, an obi is one of the few souvenirs that’s genuinely wearable the moment you get home—no alterations, no occasion required, just a length of beautiful fabric and a knot.

  • Buying on Mercari Japan from Abroad: A Beginner’s Guide to Japan’s Biggest Flea Market App

    Buying on Mercari Japan from Abroad: A Beginner’s Guide to Japan’s Biggest Flea Market App

    Photo by Giorgio Trovato on Unsplash

    Mercari is Japan’s answer to a flea market in your pocket — tens of millions of secondhand listings ranging from ¥300 manga volumes to ¥200,000 vintage cameras, all posted by regular people clearing out their closets. If you’ve heard Japan-based friends rave about the deals they’ve found, you’ve probably also discovered the catch: Mercari Japan won’t actually let you sign up from abroad. Here’s how to get around that, what’s worth the effort, and where people usually trip up.

    What Mercari Japan Is, and Why You Can’t Just Sign Up From Overseas

    Mercari Japan (メルカリ) is a consumer-to-consumer marketplace app, similar in spirit to eBay or Depop, but far more dominant — it’s the default way Japanese households sell used clothes, electronics, kitchenware, and hobby goods. The catch for international shoppers is that account verification requires a Japanese mobile phone number for SMS confirmation, a Japanese shipping address, and a Japanese payment method (credit card, konbini payment, or bank transfer). Without those three things, you cannot create an account or check out, even if you’re reading the app from a hotel room in Shinjuku. This trips up a lot of first-time visitors who assume Mercari works like an international marketplace with a “ship overseas” toggle — it doesn’t, because sellers are individuals shipping domestically through Japan Post or convenience-store drop-off, not businesses set up for customs paperwork.

    How Proxy Shopping Services Bridge the Gap

    The standard workaround is a proxy (daiko) shopping service — Buyee, ZenMarket, FROM JAPAN, and Neokyo are the most commonly used. You browse and pick items yourself (often via the proxy’s own Mercari-integrated search), the proxy buys the item on your behalf using their Japanese account, receives it at a warehouse in Japan, and then forwards it to your home address. Expect to pay the item price, plus a per-item service commission (commonly in the range of a few hundred yen or a percentage of the item price, depending on the service), plus domestic shipping to the warehouse, plus international shipping out. For a small item like a used paperback or accessory, the combined fees and shipping can easily cost more than the item itself, so proxy buying makes the most financial sense for mid-to-high value items rather than impulse ¥500 purchases. Most of these services also offer optional add-ons — extra photos of an item before you commit, consolidation of multiple purchases into one international shipment, and basic English-language support — which is worth it the first time you use the system.

    How to Actually Search and Read Listings Like a Local

    Mercari’s search works far better in Japanese than in romanized English, so it helps to search by brand name, character name, or model number rather than generic English terms — typing “Leica M6” or a specific figure’s Japanese name will surface more results than “vintage camera.” Pay close attention to the condition tags sellers select: 新品未使用 (new, unused), 未使用に近い (almost unused), 目立った傷や汚れなし (no notable damage), 傷や汚れあり (some damage), and 全体的に状態が悪い (poor overall condition). Also check whether the listing says 送料込み (shipping included in price) or 送料別 (shipping charged separately) — this affects the item price but not your proxy’s separate warehouse-to-you shipping. Seller reliability is shown as a star-style evaluation (良い/普通/悪い — good/average/bad) along with a transaction count; a seller with dozens of positive trades and no bad marks is a safer bet than a brand-new account.

    What’s Actually Worth Buying (Budget to Splurge)

    On the budget end (roughly ¥500–¥2,000), secondhand manga sets, used anime merchandise, and everyday items like secondhand hasami kitchen or sewing scissors show up constantly and cheaply, though the shipping-to-item-value ratio means these only make sense bundled with other purchases. In the mid-range (roughly ¥3,000–¥15,000), vintage Japanese denim, discontinued cosmetics sets, and secondhand kimono or geta and zori sandals in good condition are genuinely good value compared to buying new. For splurge territory (¥20,000 and up), collectors hunt Mercari for discontinued camera lenses, graded trading cards, and secondhand designer bags — prices on rare items can spike fast once a listing catches attention, so this category rewards checking the app frequently rather than waiting.

    Best Timing for Fresh Listings

    New listings cluster in the evening Japan Standard Time, roughly 8–11pm, when individual sellers photograph and post items after work. Volume also surges around two points in the calendar: late December into early January, when year-end decluttering (大掃除, “big cleaning”) floods the app with household goods, and late March, Japan’s fiscal year-end and the peak of the moving season (引っ越し), when people selling furniture and appliances before relocating creates a glut of listings. If you’re hunting for something specific and rare, these windows are worth checking daily rather than weekly.

    Common Mistakes First-Time Buyers Make

    • Assuming you can just sign up while visiting. The phone number and payment method requirements apply regardless of your physical location — a proxy service is required, not optional, for non-residents.
    • Hesitating too long on popular items. Mercari culture favors instant purchase; asking a seller a question in the comments can cost you the item if someone else buys it in the meantime. If the listing clearly states 即購入可 (instant purchase OK) and you want it, buy first.
    • Ignoring Japanese clothing sizing. Listings give measurements in centimeters, not S/M/L — always check the flat-lay measurements in the photos rather than relying on a size label.
    • Underestimating total cost on cheap items. A ¥400 item can end up costing ¥2,000+ once warehouse shipping, proxy commission, and international postage are added — batch small purchases together when possible.
    • Skipping the seller’s rating. A low transaction count combined with vague photos is a reasonable signal to pass, especially on higher-value electronics or bags.

    Mercari vs. Buying In Person During Your Trip

    If you’re actually traveling to Japan rather than shopping purely from home, it’s often faster and cheaper to buy certain categories in person instead of gambling on a Mercari listing and proxy fees. Musicians will find better selection and the chance to test gear at Ochanomizu, Tokyo’s guitar and instrument shopping street, while collectors chasing otaku goods aimed at women can browse in person at Ikebukuro’s Otome Road, often finding the exact item a Mercari seller is reselling at a markup. Save Mercari for the things you genuinely can’t find in stores — discontinued items, one-off vintage pieces, or regional goods sold by individuals rather than retailers — and use your in-person shopping time for everything else.

  • Unzen Onsen: Nagasaki’s Boiling Hell Valley Hot Spring Town

    Halfway up a volcano on the Shimabara Peninsula, Unzen Onsen is the kind of place that smells like trouble before you even see it. Sulfur hangs in the air, steam rises out of cracks in the rock right next to the sidewalk, and the whole town is built around a boiling, hissing valley that locals have called “jigoku” — hell — for centuries. It’s an easy overnight or day trip from Nagasaki City, and it mixes genuine volcanic spectacle with old-fashioned hot spring ryokan culture in a way few towns in Kyushu manage.

    What Unzen Jigoku Actually Is

    Unzen Jigoku is a cluster of volcanic vents, boiling mud pools, and fumaroles spread across a barren, rust-colored hillside right in the middle of town. Wooden boardwalks loop through the vents so you can walk within a few meters of pools that hit well over 100°C, with plumes of sulfurous steam drifting across the path depending on the wind. The ground itself is loud — a constant low roar and hiss from pressure escaping underground.

    The valley also has a dark history. During the Edo-period persecution of Japanese Christians in the 1620s and 1630s, the shogunate used Unzen’s boiling pools as a site of execution, scalding believers who refused to renounce their faith. A stone memorial near the Daikyokan Jigoku area marks this history, and it’s worth reading the posted signage rather than walking past — it’s part of why this valley carries more weight than a typical sightseeing stop.

    Getting There

    Unzen has no train station — you’ll finish the journey by bus or ferry no matter where you start.

    • From Nagasaki City: A direct highway bus runs from Nagasaki Station to Unzen Onsen in roughly 1 hour 40 minutes to 2 hours, for around ¥1,900 one-way. This is the simplest option if you’re based in Nagasaki.
    • From Fukuoka/Hakata or Isahaya: Take the JR line to Isahaya Station, then transfer to a Shimatetsu bus bound for Unzen Onsen — about 1 hour 20 minutes, around ¥1,250. This route is faster if you’re coming from the Nagasaki Airport side or northern Kyushu.
    • From Kumamoto, via ferry: If you’re routing through central Kyushu, take a ferry from Kumamoto Port across the Ariake Sea to Shimabara Port (roughly 30–60 minutes depending on the boat, ¥800–¥1,000), then a local bus from Shimabara up to Unzen Onsen (about 40 minutes, around ¥800). This combination is a nice way to link Unzen with Shimabara Castle and the Shimabara Peninsula without backtracking through Nagasaki City.

    There’s no train shortcut to speed this up, so budget a half-day of travel each way if you’re coming from Fukuoka.

    Walking the Hell Valley

    The main jigoku walking course is free, unstaffed, and open to walk through at any hour, though you’ll see the most activity (and steam against the morning chill) earlier in the day. The full loop through the main vents — Daikyokan Jigoku, O-jigoku, and the smaller pools around them — takes about 30 to 60 minutes depending on how often you stop to read signage or take photos.

    Several vendors near the entrance boil eggs directly in the jigoku’s natural heat and sell them as “jigoku tamago” (hell eggs) for around ¥200–¥300 for a few eggs — a simple, slightly sulfurous souvenir snack that’s genuinely worth trying once. Wear shoes you don’t mind smelling faintly of sulfur afterward, and keep young kids on the boardwalk; the ground beside the path is genuinely hot.

    Best Time to Visit

    Unzen sits at roughly 700 meters elevation, which is exactly why it became a hot spring retreat in the first place — it stays noticeably cooler than Nagasaki City in summer, and foreign residents and diplomats used it as a mountain escape as far back as the Meiji era (the town’s golf course, built in 1913, is one of the oldest in Japan).

    • Late May: Miyama kirishima azaleas bloom across nearby Mt. Unzen’s slopes, drawing hikers up the ropeway for the color.
    • Autumn (mid-to-late November): The hills around the jigoku turn red and gold, and the contrast with the steaming white vents is the most photogenic the valley gets.
    • Winter evenings: The jigoku area is occasionally lit up at night in colder months, turning the steam into a glowing haze — check locally since dates shift year to year.
    • Midsummer: The cooler elevation makes this the most comfortable season to actually linger outdoors, even if the valley loses some of its moody, misty atmosphere.

    Where to Soak: Budget to Splurge

    Unzen’s baths run the full range from coin-operated public pools to century-old resort hotels.

    • Budget: Several free public foot baths (ashiyu) are scattered around town for a quick soak with no entry fee. The local public bathhouse, Yunosato, charges a small entry fee (around ¥100–¥250) if you just want to dip in without booking a ryokan.
    • Mid-range: Standard onsen ryokan with half-board (dinner and breakfast included) run roughly ¥15,000–¥25,000 per person per night — a reasonable range for a proper kaiseki dinner and a private or semi-private bath.
    • Splurge: The Unzen Kankou Hotel, a Western-style building dating to the 1930s, and a handful of higher-end ryokan with private open-air baths push past ¥30,000 per person and are worth it if you want the full historic-resort experience.

    Most ryokan lend out yukata and geta for the evening — if you want your own pair to bring home, it’s worth a look at this guide to buying geta and zori before your trip. And if the sulfur smell convinces you to bring the onsen experience home, Unzen’s gift shops sell local bath salts alongside the national brands covered in this bath salt souvenir guide.

    Common Mistakes to Avoid

    • Treating it as a quick stop from Nagasaki City without checking bus times. Buses to Unzen aren’t frequent — check return times before you arrive so you’re not stuck waiting hours.
    • Skipping Nagasaki City food in the rush to get to Unzen. Nagasaki’s signature noodle dish is worth eating before or after your trip — see this guide to champon and where to try it.
    • Wearing white or light-colored shoes. The mineral-rich steam and ground discoloration around the jigoku will stain fabric.
    • Assuming it’s a summer-only or winter-only destination. Unzen genuinely has four distinct seasonal draws — plan around what you want to see, not just convenience.
    • Not booking ryokan dinner in advance. Many smaller ryokan need advance notice for kaiseki dinners and won’t serve walk-ins.

    Unzen rewards an overnight stay more than a rushed day trip — the jigoku valley is dramatic in daylight, but it’s the evening soak afterward, with the sulfur smell still faintly in the air, that makes the town memorable.

  • Takachiho Gorge: Miyazaki’s Mythical Canyon and Boat Rentals

    Takachiho Gorge: Miyazaki’s Mythical Canyon and Boat Rentals

    Photo by Luo Jin Hong on Unsplash

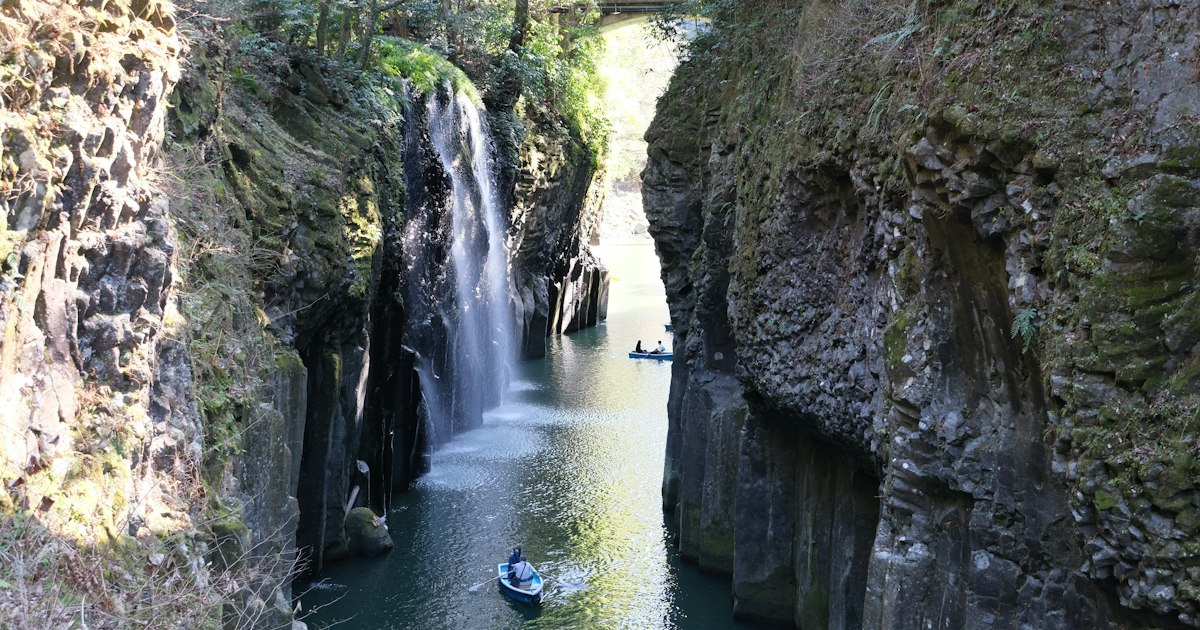
    Takachiho Gorge, carved into the mountains of northern Miyazaki Prefecture on the southern island of Kyushu, is the kind of place that photos don’t quite prepare you for. Sheer basalt columns, stacked like organ pipes by an ancient Mt. Aso eruption, drop straight into the Gokase River, and a single waterfall — Manai Falls — pours 17 meters into the water below. The signature way to see it is from a rented rowboat, gliding right under the falls, but getting there and timing your visit well takes a bit of planning since this isn’t a day trip you can do by train.

    Getting There: Why There’s No Train

    Takachiho’s old JR rail line was damaged by a typhoon in 2005 and never reopened, so there is no direct train service to the town. Your realistic options are:

    • Rental car (recommended): About 1.5–2 hours from Miyazaki Airport or Miyazaki City, and roughly 2 hours from Kumamoto via the Kyushu Expressway and local roads. A car also lets you combine Takachiho with Mt. Aso in Kumamoto Prefecture, which is a popular pairing.
    • Highway bus: Direct buses run from Kumamoto Station/Kumamoto Airport (around 2 hours) and from Fukuoka (around 3.5–4 hours). Book ahead during peak seasons, as seats sell out.
    • Local bus from Nobeoka: If you’re relying on JR trains, take a Nippo Line train to Nobeoka Station, then transfer to a Miyazaki Kotsu bus bound for Takachiho (roughly 70–90 minutes).

    There’s no shortcut here — budget extra transit time compared to more rail-friendly destinations, and don’t assume you can wing it with just a Japan Rail Pass.

    Renting a Rowboat Under Manai Falls

    The gorge’s main draw is the boat rental dock near Manai Falls, where you can hire a small rowboat and paddle out toward the waterfall yourself. Rentals typically run around 3,000 yen for 30 minutes per boat, with a maximum of three people (or two adults plus a small child) per boat, and life jackets are provided. Operating hours generally run from around 8:30 or 9:00 to 17:00, shifting earlier in winter — but these details change with the season and management, so confirm current hours and pricing locally or via the Takachiho tourism office before you go.

    Two things catch visitors off guard. First, boats are suspended whenever the river rises after heavy rain — common during the rainy season in June and after typhoons — so there’s no guarantee you’ll get on the water even if you’ve traveled a long way for it. Second, demand massively outstrips supply on weekends, holidays, and especially during autumn foliage season (November). It’s not unusual to wait two to three hours for a boat slot, and the gorge now uses a numbered ticket or reservation system at peak times to manage the queue. Arrive right at opening on a weekday morning if a boat ride is non-negotiable for you.

    Walking the Gorge for Free

    If the boat line is too long, or you’d rather not pay at all, the paved walking path along the gorge’s rim is free and takes about 20–30 minutes round trip. It offers excellent views down into the canyon and of Manai Falls from above, and in many ways is less crowded than the dock itself. This is also the better option with small children or anyone uneasy about boats, and it’s a good fallback plan if rentals are suspended for high water.

    Best Time to Visit

    Spring (cherry blossoms, usually early April) and autumn (foliage, peaking mid-to-late November) are the most beautiful — and most crowded — windows. Early morning on a weekday, right at opening, is consistently your best bet for short lines and soft light for photos. Summer brings lush green walls and cooler air inside the gorge itself, a welcome break from Kyushu’s humidity, but also a higher chance of rain-related boat suspensions. Winter is quietest overall, though rental hours run shorter and it can be genuinely cold on the water.

    Beyond the Gorge: Shrines and Myth

    Takachiho’s name comes from Japanese creation mythology — this area is said to be where the sun goddess Amaterasu’s grandson descended to earth. Two sites make that tangible:

    • Takachiho Shrine: A short drive from the gorge, free to enter, and home to a nightly kagura dance performance (around 1,000 yen, roughly 8:00–9:00 pm) where local performers act out mythological stories in traditional costume — worth the detour even if you don’t understand the narration.
    • Amano Iwato Shrine: About 10 minutes from the gorge by car, this shrine marks the cave where Amaterasu is said to have hidden herself, plunging the world into darkness. The actual cave is viewed from across the river and isn’t entered, but the adjacent Amanoyasugawara riverbed — stacked with thousands of small stones left by visitors — is a striking, quiet stop.

    If you’re collecting shrine stamps on your trip, both locations sell goshuin, and our guide to starting a goshuincho covers the etiquette and cost (usually 300–500 yen per stamp) if this is new to you.

    Budget, Mid-Range, and Splurge

    • Budget: Skip the boat, walk the free rim trail, and visit both shrines (free or near-free) — a satisfying half-day for well under 2,000 yen per person.
    • Mid-range: Add the rowboat (~3,000 yen per boat) and the evening kagura performance (~1,000 yen), and plan to eat in town — local specialties include Takachiho beef and freshwater fish like ayu.
    • Splurge: Stay overnight in one of Takachiho’s small ryokan or guesthouses so you can hit the boat dock at opening before day-trippers arrive, then continue on to Mt. Aso the next day rather than rushing back.

    Takachiho rewards visitors who come prepared rather than those who show up expecting Tokyo-level convenience. If dramatic, myth-steeped landscapes like this appeal to you, Shimane’s Oki Islands and Iwate’s Tono — another folklore-rich rural pocket of Japan — are worth bookmarking for a future trip north.