Japan Trove

Category: Uncategorized

  • Shiretoko Peninsula: Hokkaido’s Remote UNESCO Wilderness and Wildlife Cruises

    Shiretoko juts out from the northeastern tip of Hokkaido into the Sea of Okhotsk, and it feels like it — this is one of the few places in Japan where brown bears outnumber convenience stores and the coastal road simply stops because the land gets too wild to pave. UNESCO listed it as a World Heritage Site in 2005 for the unbroken chain from sea ice to ocean to forest to mountain, and that chain is exactly what makes the wildlife cruises here unlike anything else in the country. This guide covers how to get there, what the boat trips actually cost, and the mistakes that trip up first-time visitors.

    Where Is Shiretoko and Why It’s Different

    The peninsula sits between two small fishing towns, Utoro on the Okhotsk (west) coast and Rausu on the Nemuro Strait (east) coast, connected by the Shiretoko Pass road through the interior. There’s no train, no highway, and very little mobile signal once you’re past Utoro’s town center. That isolation is the point: Shiretoko’s waters support one of the densest concentrations of brown bears in Japan, plus Steller’s sea eagles, white-tailed eagles, and pods of orcas that pass through the strait every spring. It’s a genuine wilderness destination, closer in spirit to Japan’s other far-flung coastal escapes like the Goto Islands than to anything on a typical Hokkaido itinerary.

    Getting There: Trains, Flights, and Buses

    There’s no way to reach Shiretoko quickly, so budget a full travel day each direction. From Sapporo, the standard route is JR limited express to Abashiri (about 5–5.5 hours), then the local JR Senmo Line to Shiretoko-Shari Station (about 1 hour), then a Shari Bus to Utoro (roughly 50 minutes, around ¥1,000). All told, Sapporo to Utoro takes 7–8 hours by train and bus.

    Flying cuts this down significantly. Memanbetsu Airport near Abashiri has flights from Haneda (about 1.5 hours) and connects to Utoro by bus (roughly 2 hours, around ¥3,500). If you’re headed to the Rausu side first, Nakashibetsu Airport is closer, with a bus or taxi transfer of about 50 minutes. Renting a car at either airport is the easiest way to move between Utoro and Rausu once you’re there, since the local bus network inside the peninsula is thin and the Shiretoko Pass road is closed by snow roughly from early November to late April.

    Wildlife Cruises: Utoro vs. Rausu

    This is the main reason people come, and the two coasts offer genuinely different trips. From Utoro, sightseeing boats run along the dramatic sea cliffs and waterfalls of Shiretoko Cape; a shorter one-hour course runs around ¥3,000–3,500, while the longer 3.5-hour course to the cape itself runs closer to ¥9,000–10,000. These boats occasionally spot bears foraging on the shoreline, but sightings aren’t guaranteed.

    From Rausu, the small bear-and-wildlife-watching boats are built specifically for close encounters — operators here report high summer sighting rates because bears come down to the shore to fish for salmon and scavenge. Expect to pay roughly ¥9,000–10,000 for a 2–3 hour trip, and book the morning departure if you have a choice, since seas tend to calm earlier in the day. Rausu is also the base for orca-watching cruises in April and May, similarly priced, when pods pass through the Nemuro Strait on their northward migration.

    Shiretoko Five Lakes and the Boardwalk Rules

    Shiretoko Goko (Five Lakes) is the peninsula’s signature walk, a loop through forest to five small lakes with views back toward the Shiretoko mountains. There are two ways to see it. The elevated wooden boardwalk to the first lake is free, open year-round during visitor center hours (roughly May to late October, 7:30am–6pm in peak summer, shorter in shoulder season), and doesn’t require a guide — this is the right choice for most casual visitors. The ground-level trail around all five lakes is more tightly controlled because it passes directly through bear habitat: during peak bear activity (mid-May to late July), you can only walk it as part of a paid guided group tour, around ¥5,000 per person for roughly three hours. Outside that window, from August through late October, you can walk independently after attending a mandatory short lecture, usually around ¥250. The trail is closed entirely in spring (roughly late April to mid-May) due to deep snow and bear activity. Check current status at the Shiretoko Goko Field House before setting out — rules shift based on real-time bear sightings.

    Best Time to Visit

    June through September is the core season: the Goko lake trails are accessible, cruises run full schedules, and bears are actively foraging along the coast, making sightings most likely in July and August. April and May bring the orca cruises out of Rausu and the first stretch of the Goko boardwalk reopening, though the full ground trail may still be snowed in. Winter, roughly late January through March, is a completely different trip — drift ice (ryuhyo) floats down from the Sea of Okhotsk and reaches the Utoro coast, and operators run ice-breaker cruises and guided “ice walking” tours in dry suits directly on the frozen sea. It’s a striking, very cold experience, but note that the Shiretoko Pass is closed and Utoro and Rausu are not connected by road in winter. As with any trip timed around a specific season, cross-check your dates against Japan’s public holiday calendar — Golden Week and the summer Obon stretch push accommodation prices up sharply in a town with only a handful of hotels.

    Common Mistakes to Avoid

    • Assuming you can drive straight through. The Shiretoko Pass closes for roughly six months a year, and even in summer it can shut temporarily for wildlife or weather. Always check road status before planning a same-day Utoro-to-Rausu loop.
    • Booking only one cruise type. Utoro’s cape cruise and Rausu’s bear-watching boat show you completely different things. If bears are your priority, book Rausu, not the Utoro sightseeing boat.
    • Skipping cancellation flexibility. These are small boats on open water; cruises are frequently cancelled or shortened for swell, especially on the Nemuro Strait side. Book operators that offer same-day rebooking or refunds, and avoid scheduling your only full day around a single cruise.
    • Underestimating the cold, even in summer. Sea breezes off the Okhotsk and Nemuro Strait are sharp year-round; bring a windproof layer for every boat trip regardless of the season.

    Where to Stay

    Utoro has the larger lodging base. Budget travelers can find simple business hotels or guesthouses from around ¥6,000–8,000 per night. Mid-range options include onsen hotels with ocean-facing rooms, typically ¥15,000–25,000 per person with dinner included. For a splurge, a handful of ryokan-style properties along the Utoro waterfront offer private onsen baths and kaiseki dinners featuring local seafood, running ¥30,000 and up per person. Rausu has far fewer options — mostly small family-run minshuku — so if you’re doing the bear cruise from there, it’s often easier to stay in Utoro and drive or bus over for the morning departure rather than overnighting in Rausu itself.
  • Meishi Etiquette: How Business Cards Work in Japan

    Meishi Etiquette: How Business Cards Work in Japan

    Photo by Nathalie Lays on Unsplash

    In Japan, a business card is rarely just contact information — it’s a small, ritualized stand-in for the person handing it to you. If you’re attending meetings, conferences, or trade shows in Japan, getting the meishi (名刺) exchange right signals respect before you’ve said a word of substance. Get it visibly wrong — jamming a card in your back pocket, say — and you can undercut an otherwise good first impression. None of this requires fluent Japanese or years of training; it just requires knowing a handful of concrete rules and having the right cards on hand.

    Why Meishi Matter More Than They Look

    Meishi exchange (meishi koukan) descends from older customs of formally presenting oneself, and the card itself is treated as an extension of the giver — their name, title, and company affiliation all in one object. That’s why it’s handled with both hands, read carefully rather than glanced at, and never defaced, folded, or stuffed away carelessly in front of the other person. Seniority and hierarchy are baked into the exchange too: cards typically go from the lower-ranking or visiting side first, and the most senior person in a group is usually greeted and exchanges cards before their subordinates.

    None of this means you need to study a manual. Japanese counterparts generally extend grace to foreign visitors who show basic effort — a two-handed receive, a moment spent reading the card, and careful storage will cover 90% of what matters.

    Before You Travel: Getting Cards Made

    Bring enough cards. For a multi-day conference or a week of client meetings, 30–50 cards is a reasonable minimum; for a major trade show, closer to 100. Running out and apologizing repeatedly is a minor but recurring embarrassment for visiting businesspeople.

    • Budget: Online printers in your home country (Vistaprint, Moo) run roughly $15–40 USD for 50–100 cards, but turnaround before a trip needs 1–2 weeks.
    • Mid-range, done in Japan: Convenience store multi-copy machines (Seven-Eleven, Lawson, FamilyMart) have simple meishi templates for a few hundred yen per sheet if you need an emergency batch, though quality is basic.
    • Splurge / most authentic: A proper Japanese print shop (meishi insatsu) can produce cards with your name in both English and Japanese (often with furigana pronunciation guides) for around ¥3,000–¥6,000 for 100 cards. This is the version that reads as most polished to a Japanese counterpart, and it’s worth it if you’ll be doing repeat business in Japan.

    Double-sided cards — English on one side, Japanese on the other — are the standard professional solution for foreign visitors and widely considered a thoughtful touch rather than a necessity.

    What Goes On a Proper Meishi

    At minimum: full name, job title, company name, and one contact method (email or phone). Japanese business cards generally skip personal flourishes — no photo, no slogan, no QR code to a personal social account. Company logo and address are standard. If your title doesn’t translate neatly (common with flatter Western org structures), pick the closest conventional equivalent — “Director,” “Manager,” “Representative” — since an ambiguous title can confuse where you sit in the hierarchy, which affects how you’ll be treated and seated at meetings.

    The Exchange Itself: Step by Step

    • Carry a card case (meishi-ire). Keeping cards loose in a wallet or pocket is a visible faux pas. A simple case costs ¥500–¥1,500 at any stationery store or department store basement, and a nicer leather one makes a reasonable souvenir purchase — stationery-focused neighborhoods like Kuramae have craft shops selling well-made leather goods if you want something higher quality than a convenience version.
    • Present with both hands, card facing the recipient so they can read it right-side up, text oriented toward them, while giving a slight bow and saying your name.
    • Receive with both hands as well, saying “thank you” or itadakimasu-style thanks, and take a few seconds to actually read it — commenting on the company name or title is a small, appreciated gesture.
    • In a group, exchange with the most senior person first, then work down; if you’re unsure of rank, follow the lead of whoever on your own side goes first.
    • During the meeting, lay received cards on the table in front of you, arranged in the seating order of the people across from you, rather than putting them away immediately. This helps you keep names straight and is itself a sign of respect.
    • After the meeting, place cards carefully in your case — never in a back pocket, and never write on someone else’s card in front of them.

    Common Mistakes Foreign Visitors Make

    • Handing cards with one hand or sliding them across the table — minor, but noticeably casual.
    • Writing notes on a card immediately in front of its owner. Wait until you’re back at your hotel or desk to jot context on the back.
    • Bending, folding, or fanning cards like a deck while waiting your turn to hand them out.
    • Running out of cards partway through a conference — pack more than you think you need.
    • Giving a card that’s visibly worn, bent, or has an outdated title — treat the card’s condition as part of the impression you’re making.
    • Forgetting the hierarchy order in group meetings — if genuinely unsure, it’s fine to hang back a beat and mirror what your Japanese hosts do first.

    Timing, Logistics, and Packing Notes

    If you’re attending a specific trade show or conference, check Japan’s public holiday calendar before booking — Golden Week (late April–early May) and the New Year period see many offices closed, so business meetings are hard to schedule then. Outside of those windows, meishi exchange happens year-round regardless of season.

    A card case and spare cards pack flat and weigh almost nothing, so there’s no reason to skimp on quantity. If you’re also bringing electronics for presentations, it’s worth double-checking Japan’s plug type and voltage — see this guide to electrical outlets and voltage in Japan so you’re not caught out at a venue with the wrong adapter. And if you’re combining business travel with remote work days in Japan, the practicalities of visas and reliable wifi are covered in this digital nomad guide to Japan.

    Bringing It Home

    The underlying principle is simpler than the list of rules suggests: treat someone’s card the way you’d want your own treated — read, handled deliberately, stored with care. Visitors who show that baseline respect, even imperfectly, are judged far more on effort than on precision. Bring enough cards, use two hands, and don’t be the person patting down three pockets looking for their meishi case while a room waits.

  • Goto Islands: Nagasaki’s Hidden Christian Heritage and Remote Coastline

    Goto Islands: Nagasaki’s Hidden Christian Heritage and Remote Coastline

    Photo by Soff Garavano Puw on Unsplash

    Two hours off the coast of Nagasaki by boat, the Goto Islands feel like a different country — jagged volcanic coastline, turquoise coves, and a scattering of small wooden and brick churches built by communities who practiced Christianity in secret for over 200 years. The islands are part of the UNESCO World Heritage listing “Hidden Christian Sites in the Nagasaki Region,” inscribed in 2018, and they remain one of the least-visited corners of mainstream Japan travel. That’s exactly the appeal: empty beaches, no crowds at the churches, and a slower pace than almost anywhere else in Kyushu.

    Where the Goto Islands Are and Why They Matter

    The Goto archipelago sits roughly 100 km west of Nagasaki city in the East China Sea, made up of five main inhabited islands — Fukue, Naru, Hisaka, Wakamatsu, and Nakadori — plus dozens of smaller ones. From the 1600s, Japanese Christians fled here to escape persecution after the shogunate banned the religion, hiding their faith for generations until it was legalized in 1873. When they could finally worship openly, these “Hidden Christian” communities built modest churches, often blending Western religious architecture with local timber and stone techniques. That history is why Goto’s churches feel different from cathedrals elsewhere — small, weathered, and built by fishing villages rather than dioceses.

    Getting There: Ferry, Jetfoil, or Flight

    Everyone starts from Nagasaki. The fastest option is the Taiho jetfoil (operated by Kyushu Shosen) from Nagasaki Port to Fukue Port, taking around 90 minutes and costing roughly ¥7,500–8,000 one way. Regular car ferries take about 3.5–4 hours and cost closer to ¥4,000–5,000 one way — slower but cheaper, and useful if you’re bringing a rental car across. There’s also a short flight on Oriental Air Bridge from Nagasaki Airport to Fukue Airport, about 30 minutes for roughly ¥10,000–13,000, which is worth it if rough seas have you worried about cancellations (more on that below).

    Reserve jetfoil and flight seats a few days ahead in peak season (Golden Week, O-bon in mid-August, and New Year), since capacity is limited and these aren’t routes with frequent backup departures. If you’re mapping your trip around Japan’s calendar, check our guide to Japanese public holidays to avoid or plan around in 2026 before booking.

    Island-Hopping: Getting Around Once You Arrive

    A rental car is close to essential. Public transport exists but runs infrequently, and the best church sites and beaches are spread across islands connected by bridges and short local ferries. Fukue Island (where you’ll land) has several rental agencies right at the port and airport — book ahead in summer, as the fleet is small and sells out. Fukue, Hisaka, Naru, and Wakamatsu are linked by road bridges, so you can drive between them without a car ferry, but double-check which crossings require one, since a few outlying spots still need a short boat hop with limited daily sailings.

    Budget a full day just for driving distances — roads are narrow, winding coastal routes, and what looks like a short hop on the map can take 45 minutes. Fuel up before heading to smaller islands; gas stations thin out fast once you leave Fukue’s main town.

    The Hidden Christian Churches You Shouldn’t Miss

    Start with Dozaki Church on Fukue Island, the islands’ first permanent church (completed 1908) and now a small museum of hidden-Christian artifacts — open daily, roughly 9:00–17:00, admission around ¥300. It’s an easy, low-commitment introduction before heading further out.

    Kashiragashima Church, on a small bridge-connected islet off Nakadori, is the most photographed building in Goto: a red-brick Gothic church against open water, built in 1919 by the small fishing community that worshipped there. It’s free to view from outside and usually unlocked for quiet visits during the day.

    The centerpiece, though, is Egami Church on Naru Island — the actual UNESCO-listed site, a pale yellow wooden church from 1918 with a simple, beautiful ribbed-vault interior. Because it’s a protected World Heritage property, interior visits are limited and require advance reservation through the Goto tourism visitor system (arranged via the local tourist information center before you go, not walk-up). Don’t skip this step — travelers who show up without booking are often turned away from the interior, though the exterior and churchyard remain viewable.

    Best Time to Visit

    Spring (April–May) and autumn (late September–November) offer the calmest seas and most reliable ferry schedules, plus comfortable hiking and driving weather. Summer (July–August) brings the best beach conditions — Takahama Beach on Fukue is routinely ranked among Japan’s most beautiful, with pale sand and clear shallow water — but also typhoon season, which can cancel jetfoil sailings with little notice. If you’re traveling in August or September, build in a buffer day before any onward flight out of Nagasaki, and consider the plane route as backup. Winter is quieter and cheaper but rougher at sea, with a real chance of ferry cancellations.

    Where to Stay and Eat

    Budget travelers will find simple guesthouses and minshuku on Fukue from around ¥5,000–7,000 a night, often family-run with home-cooked dinners featuring local fish and the islands’ famous Goto udon (hand-stretched noodles served with a flying-fish broth — worth seeking out at any small shokudo in Fukue town). Mid-range means business hotels near Fukue Port, generally ¥8,000–13,000 a night with private bathrooms and parking, convenient if you have an early jetfoil or ferry. For a splurge, a handful of restored kominka (traditional farmhouses) on the smaller islands rent as private stays, and a few operators run boat charters around the coastline and sea caves — these need to be booked well ahead through the local tourism office since availability is tiny.

    Restaurant menus outside Fukue’s main town are almost entirely in Japanese with no English support, so a translation app or printed phrase card helps; if you have dietary restrictions, our guide to food allergy cards and menu translation in Japan is worth preparing before you go, since remote areas like this have far fewer English-speaking staff than Nagasaki city.

    Common Mistakes to Avoid

    The biggest one is treating Goto as a single-day trip — between travel time to and from Nagasaki and the driving distances once you’re there, two full nights is the realistic minimum to see Fukue and Naru without rushing. Second, don’t assume you can visit Egami Church’s interior without a reservation; it’s a working protected site, not a tourist attraction with open hours. Third, charge your devices and bring a compact adapter if you’re coming from overseas — outlets are standard Japanese type A, and our guide to electrical outlets and voltage in Japan covers what you’ll need. Finally, keep a close eye on weather forecasts in typhoon season; sailings can be suspended same-day, and there’s no train alternative to fall back on the way there is on the mainland. If you lose something on a ferry or at a port terminal, Japan’s lost-and-found system still applies here — see our breakdown of how koban police boxes and lost-and-found offices work for what to do next.

    If you’ve already done a remote-island day trip like the Kerama Islands off Okinawa, Goto scratches a similar itch for solitude and clear water, but with a completely different historical layer underneath it — one that rewards slowing down rather than rushing through.

  • Kerama Islands: Okinawa’s Day-Trip Dive Spot for World-Class Visibility

    Kerama Islands: Okinawa’s Day-Trip Dive Spot for World-Class Visibility

    Photo by Kirk Thornton on Unsplash

    Thirty-plus meters of visibility, a turquoise so saturated locals call it “Kerama Blue,” and a ferry ride short enough to do as a day trip from Naha—the Kerama Islands are the reason divers add an extra day to their Okinawa itinerary. You don’t need dive certification or an overnight stay to see what the fuss is about. Here’s how to plan the trip properly, from the ferry schedule to what actually ruins people’s day out there.

    Why the Water Looks Different Here

    The Kerama Islands sit about 30–40km west of Naha and were designated Kerama Shoto National Park in 2014, largely to protect the coral reefs that give the water its clarity. Unlike the main Okinawa coastline, there’s little river runoff or urban sediment feeding into the sea around these islands, so visibility regularly hits 20–30 meters on calm days—genuinely rare for a spot this accessible. The reef systems here also support sea turtles that are commonly spotted on snorkeling trips, which is a big part of the draw for travelers who aren’t divers at all.

    Getting There: Ferries from Tomari Port

    Almost everyone departs from Tomari Port (Tomarin) in Naha, about a 15-minute taxi ride from Naha Airport or a short walk from Miebashi Station on the Yui Rail monorail. Two ferry companies run from here, each serving a different island group:

    • To Zamami Island: the high-speed ferry (Queen Zamami) takes around 50 minutes one way; the slower car ferry (Ferry Zamami) takes about 90 minutes. Round-trip fares are roughly 6,900 yen for the high-speed boat and 4,100 yen for the slow ferry.
    • To Tokashiki Island: the high-speed ferry (Marine Liner Tokashiki) takes about 35–45 minutes; the slow ferry takes roughly 70 minutes. Round-trip fares run approximately 6,000 yen for the fast boat and 3,500 yen for the slow one.

    Sailings are limited—often just 2–4 round trips a day per island—so book seats in advance during Golden Week, Obon, and summer weekends, when boats sell out. If you’re timing your trip around other national holidays, it’s worth cross-checking against our guide to Japanese public holidays before locking in ferry tickets, since those are exactly the dates when seats disappear fastest.

    Best Time to Go

    The diving and snorkeling season runs roughly April through October, with the most reliable combination of warm water and good visibility from May to June and again in September to October. Peak summer (late July–August) brings the warmest water but also typhoon season, which can cancel ferries with little notice—always build a buffer day into your itinerary if you’re traveling in August or September rather than scheduling an inter-island flight the same evening. Early morning departures tend to have calmer seas and better underwater light, so take the first boat out if you have the choice.

    Zamami vs. Tokashiki: Which Island for a Day Trip

    Zamami is the more popular day-trip choice, mainly because Furuzamami Beach is a flat 15-minute walk from the port and is consistently ranked among Japan’s best beaches for snorkeling right off the shore—no boat required if you just want to swim out and look at coral. Tour operators also run snorkeling and diving boats out to nearby uninhabited islets like Agenashiku and Kerama Kaigan, where visibility is noticeably better than near the port.

    Tokashiki is quieter, with fewer crowds and two excellent beaches—Tokashiku and Aharen—both reachable by the island’s local bus from the ferry terminal. It suits travelers who want a slower, less touristy day. If you only have one day and want options stacked close together (beach, dive shops, rental gear, food), Zamami is the easier choice; if you want space and don’t mind a short bus ride, go Tokashiki.

    Budget, Mid-Range, and Splurge Options

    • Budget (self-guided snorkeling): Walk to Furuzamami or Aharen beach, rent a mask and fins from a beachside shop for around 1,000–1,500 yen, and swim out from shore. Total cost beyond the ferry fare can be under 2,000 yen.
    • Mid-range (guided day tour): Snorkeling boat tours booked in Naha or on the island, including gear, a guide, and sometimes lunch, typically run 7,000–12,000 yen. These are the best option if you want to reach the clearer water further from the port without arranging your own transport.
    • Splurge (certified diving): Two-tank boat dives with a local dive shop, including full gear rental, generally cost 20,000–25,000 yen for certified divers, or a bit more for a trial/discovery dive with an instructor if you’re not certified. Shops on both islands offer English-speaking guides, but confirm this when booking if it matters to you.

    Common Mistakes to Avoid

    • Booking the last ferry back: if the afternoon sailing is cancelled for weather, you could be stuck overnight with no lodging arranged. Build in slack, especially outside of May–June and September–October.
    • Underestimating the sun: Okinawa’s UV index is brutal even on cloudy days. Reef-safe sunscreen, a rash guard, and a hat for the ferry ride are not optional extras.
    • Forgetting cash: gear rental shops and small restaurants on both islands are frequently cash-only, and ATMs are limited once you’re off the ferry. Withdraw what you need in Naha first.
    • Skipping travel insurance for diving: standard travel policies sometimes exclude scuba diving; check this before booking a dive-shop trip, not after.
    • Not charging devices beforehand: there’s little in the way of charging infrastructure on the islands themselves. If you’re bringing an underwater camera or action cam, top it off the night before—our guide to Japan’s outlets and voltage covers what plugs and adapters you’ll need if you’re traveling with gear bought overseas.

    Practical Tips for the Day

    Pack a dry bag, a change of clothes, and sandals you don’t mind getting wet—most ferry terminals have simple changing rooms but no real storage beyond coin lockers. If you’re staying in Naha afterward and want something cool and breathable for the evening once you’re sunburnt and salty, a traditional jinbei set makes a surprisingly practical souvenir for Okinawa’s climate. And if Kerama’s beach scene has you craving more of the same further south, Honshu’s own white-sand counterpart, Shirahama in Wakayama, is worth comparing notes on for a different kind of coastal day trip later in your Japan itinerary.

    Done right, a Kerama day trip is one of the easiest ways to pair a major city stay in Naha with genuinely world-class water—no overnight bag, no inter-island flight, just an early ferry and a reef that lives up to the photos.

  • Big & Tall Shopping in Japan: Where Larger-Sized Travelers Can Find Clothes and Shoes That Fit

    Big & Tall Shopping in Japan: Where Larger-Sized Travelers Can Find Clothes and Shoes That Fit

    Photo by ayumi kubo on Unsplash

    Japan’s reputation for small sizing is not a myth, but it’s also not the whole story. If you’re broad-shouldered, tall, wide-footed, or simply larger than a Japanese “LL,” you can still shop successfully here — you just need to know which chains actually stock your size and which ones will waste your afternoon. This guide covers the specific stores, price ranges, and timing tricks that make big & tall shopping in Japan workable instead of frustrating.

    Why Japanese Sizing Catches Larger Travelers Off Guard

    The core problem is that Japanese letter sizes (S, M, L, LL) don’t map onto Western sizes the way visitors expect. A Japanese “L” is usually closer to a US/EU size M, and most domestic brands stop at LL or 3L (roughly a snug XL). Tags rarely list inches — everything is in centimeters, and the fit is cut for a narrower average frame through the shoulders and chest.

    Before you shop, know your own chest, waist, and inseam in centimeters rather than relying on your home country’s letter size. Most stores post a size chart in cm near the register or on a tag — comparing your actual measurements against it is far more reliable than matching “XL to XL.”

    Uniqlo and GU: The Easiest Starting Point

    Uniqlo is the most reliable first stop. Larger flagship locations (Ginza, Shinjuku, Harajuku) carry sizes up to 3L or 4L in core items like T-shirts (around ¥990–1,500), hoodies (¥3,990), and jeans (¥4,990), though smaller neighborhood branches may stock only up to LL. If a store is out of your size, the Uniqlo Japan website lets you check stock at nearby branches before you walk over.

    GU, Uniqlo’s sister brand, runs a similar size range at lower prices — hoodies around ¥1,500–2,500 and jeans under ¥3,000 — and is worth checking as a backup when Uniqlo is sold out in your size, which happens often with larger sizes since they’re stocked in smaller quantities.

    Sakazen and Dedicated Big & Tall Chains

    For sizes beyond what Uniqlo offers, Sakazen is Japan’s best-known big & tall specialist, with a long-standing reputation for fitting customers well above standard Japanese sizing — including sumo-adjacent builds. Its stores (concentrated in Tokyo, with branches also in Osaka) carry casual wear and dress shirts from roughly 3L up to 10L, with dress shirts typically ¥3,000–6,000 and casual pants ¥4,000–8,000. Store locations shift occasionally, so check the current branch list on Sakazen’s own site before making a special trip.

    These stores are functional rather than fashionable — think reliable basics and workwear rather than trend pieces — but for a traveler who needs a shirt that actually buttons, that’s exactly the point.

    Suits and Business Wear for Larger Builds

    If your trip includes a business meeting or formal event, Japan’s major suit chains — AOKI, Aoyama (Yofuku no Aoyama), and Konaka — all carry “big size” lines in-store, generally up to around a 130cm chest and waist sizes approaching 120cm. Staff will measure you and can usually handle basic hemming or waist adjustments within a few days, sometimes same-day for simple alterations, so build in at least 2–3 days of buffer before you need the suit rather than shopping the morning of an event.

    Shoes: Big and Wide Feet

    Shoe shopping is tighter in Japan than clothing. ABC-Mart, the largest nationwide shoe retailer, stocks international athletic brands (Nike, New Balance, Converse, Vans) up to around 29–30cm, which covers most larger US/EU men’s sizes in athletic styles, though dress shoes run smaller. For wider feet or sizes above that, Marutaka is a specialist large-and-wide shoemaker with sizes up to roughly 32cm and extra-wide widths (4E/5E) — it has fewer physical locations than ABC-Mart, so check stock or order through its online store in advance rather than hunting for a branch on arrival.

    Costco, Imports, and Online Backups

    Costco Japan is an underrated option for basics: Kirkland Signature clothing is cut to American sizing, so hoodies, underwear, and socks in XXL–3XL are easy to find, and a day pass is available at the door for non-members in some locations. For anything you can’t find in person, Amazon.co.jp and Rakuten carry both Japanese big & tall brands and imported Western sizing with size filters, and ZOZOTOWN’s marketplace lets you filter by size across dozens of smaller Japanese labels that don’t have standalone stores.

    If you’d rather travel light and buy loose, unstructured pieces instead of fitted clothing, traditional loungewear like jinbei is cut generously and often sold in just a handful of broad size bands, making it a forgiving souvenir option even if you haven’t found your exact size elsewhere.

    Timing and Common Mistakes to Avoid

    Shop early in a sale season, not late. Japan’s seasonal clearance sales (hatsuuri around January 2, and the summer sale in late June/early July) bring the best prices, but larger sizes sell through fast since stores stock fewer of them — by the final week of a sale, your size is often the first one gone. It’s usually better to buy in your size at full price early than to wait for a discount that no longer comes in your size.

    Also build shopping days around the calendar: major holiday weeks bring crowds and occasional store closures that eat into the time you have to hunt across multiple branches. Check Japan’s public holiday dates before locking in a shopping day, especially if you’re planning to cross cities — say, checking Sakazen’s Tokyo branch one day and its Osaka branch the next. If that day trip runs long, Japan’s shinkansen rules are more flexible about missed trains than most travelers expect, so a delayed return isn’t the disaster it might seem — see our guide on what happens if you miss your Shinkansen.

    Finally, don’t assume department stores are your best bet. Department stores like Isetan or Takashimaya carry international brands (Zara, H&M) that run larger than Japanese domestic labels, but their own in-house lines skew small — treat them as a secondary option, not your first stop.

  • Food Allergy Cards & Menu Translation in Japan: A Traveler’s Safety Guide

    Food Allergy Cards & Menu Translation in Japan: A Traveler’s Safety Guide

    Photo by Roméo A. on Unsplash

    Japan is one of the best food destinations on earth, which makes it frustrating when a shellfish, egg, or wheat allergy forces you to stare blankly at a menu with zero English and no obvious way to ask what’s inside. Unlike many Western countries, Japan has no law requiring restaurants to list allergens on menus — the detailed labeling you may be used to at home mostly applies to packaged supermarket food, not what’s handed to you at a counter. The good news is that a little preparation, a printed card, and a few phrases go a long way. Here’s how to actually eat safely.

    Why Japanese Food Is Trickier Than It Looks

    The biggest trap for allergy sufferers isn’t the obvious dish — it’s the invisible base ingredients used in almost everything. Dashi, the stock underlying miso soup, simmered dishes, and most sauces, is typically made from bonito flakes (fish) and/or kelp, so “vegetarian-looking” food is often not fish-free. Soy sauce and miso contain wheat, which is a problem for people managing wheat or gluten allergies, even in dishes that look rice-based. Soba noodles are buckwheat but are frequently cooked in water shared with wheat udon, and even “100% soba” shops often dust work surfaces with wheat flour. If you’re curious what a genuinely wheat-noodle dish looks like for comparison, the hand-stretched noodles described in our Inaniwa udon guide are a good example of how much wheat shows up in dishes that don’t look like bread or pasta. Eggs, dairy, and peanuts/tree nuts also sneak into batters, dressings, and desserts far more often than visitors expect.

    Build an Allergy Card Before You Land

    An allergy card is a small printed sheet, in Japanese, that states your allergies clearly enough for kitchen staff to act on without needing to understand English. It works far better than an app translation in the middle of a busy lunch rush because staff can read it themselves and show it to the chef. A good card includes:

    • A short opening line: “アレルギーがあります。下記の食材が入った料理は食べられません。” (I have a food allergy. I cannot eat dishes containing the following ingredients.)
    • A bullet list of your specific allergens in Japanese (e.g., 卵 egg, 乳 milk/dairy, 小麦 wheat, えび shrimp, かに crab, そば buckwheat, 落花生 peanut, くるみ walnut, 大豆 soy, ごま sesame)
    • A line asking about shared cooking surfaces or oil if cross-contamination is a concern for you: “調理器具や油を他の料理と共有していますか?”
    • Severity, in plain terms: “少量でも危険です。アナフィラキシーの可能性があります。” (Even a small amount is dangerous. Anaphylaxis is possible.)

    You can type this up yourself with a translation tool and have a Japanese-speaking friend or hotel concierge check it before the trip, or search for free printable “food allergy card Japan” templates from nonprofit and tourism-support sites — several exist specifically for English-speaking travelers. Print two or three copies at home, or at any convenience store multi-copy machine in Japan (Lawson, FamilyMart, and 7-Eleven all have them) for roughly ¥10 per black-and-white page. Laminating one copy at a stationery shop for under ¥500 keeps it readable after it’s been pulled out of a wallet fifty times.

    Where the Card Actually Works — and Where It Doesn’t

    Allergy cards are most effective at sit-down restaurants, ryokan dinners, and izakaya, where a staff member can take a moment to walk to the kitchen and ask the chef. They’re far less effective at fast-moving chains, standing soba counters, and food stalls at festivals, where staff often can’t pause to investigate and may simply decline to serve you rather than risk a mistake — which is actually the safer outcome, just not a satisfying one. Convenience stores and supermarkets are your most reliable fallback: packaged food sold in Japan must by law list seven specific allergens (egg, milk, wheat, buckwheat, peanut, shrimp, and crab) on the package in small print, with walnut being phased in as an eighth. About twenty more ingredients, including soy, sesame, and various nuts, are recommended for labeling but not legally mandatory, so don’t assume absence means safety — check for 大豆 (soy) and ごま (sesame) yourself. Department store basement food halls (depachika) are a strong mid-range option because staff are used to detailed questions and products are individually labeled, even if prices run ¥800–¥2,500 per item versus a konbini bento at ¥400–¥700.

    If you’re traveling with other dietary restrictions alongside allergies — for instance, needing both allergen-free and halal-certified food — our halal food in Japan guide covers certified restaurants that are generally more accustomed to detailed ingredient conversations, which can make them a safer bet for complex allergy needs too.

    Apps and Tools Worth Having on Your Phone

    Google Translate’s camera mode is genuinely useful for reading printaged ingredient lists on konbini food, though it stumbles on handwritten menus and stylized restaurant signage. Save a photo of your printed allergy card to your phone’s lock screen or camera roll so you can show it even if your phone is low on battery and you can’t open an app. If you have a specific severe allergy, it’s worth translating the exact Japanese term for your emergency medication too — EpiPen-equivalent auto-injectors are sold in Japan under the name エピペン, but they require a prescription and aren’t stocked behind every pharmacy counter, so bring your own rather than planning to buy one locally.

    Common Mistakes Travelers Make

    • Assuming “no meat” means safe for a fish allergy. Dashi is in almost everything, including miso soup served with a “vegetable” set meal.
    • Ordering during peak lunch or dinner rush. Staff have less time to relay allergen questions to the kitchen between 12:00–13:00 and 18:30–20:00. Eating slightly off-peak, or avoiding the busiest national holiday weeks covered in our Japanese public holidays guide, gives staff more bandwidth to take your card seriously.
    • Trusting an English menu translation at face value. English menus are often shortened and omit sauce or garnish ingredients that the Japanese version lists.
    • Not asking about frying oil. Tempura and katsu oil is frequently shared across shrimp, egg-battered, and wheat-battered items even when the final dish looks “safe.”

    If a Reaction Happens Anyway

    Know your plan before you need it. Japanese pharmacies (drugstores like Matsumotokiyoshi, typically open 10:00–21:00) sell antihistamines over the counter, but anything beyond mild symptoms means getting to a clinic or hospital, not waiting it out. Our guide on what to do if you get sick in Japan walks through exactly which type of facility to go to, how to call an ambulance (dial 119, free), and what an ER visit costs without Japanese insurance — often ¥10,000–¥30,000 for a basic visit, more if treatment is involved. This is exactly the scenario travel insurance exists for: a single anaphylaxis-related ER visit and any follow-up care can easily run past what most people are comfortable paying out of pocket, so check that your policy explicitly covers emergency allergic reactions before you go, as detailed in our travel insurance for Japan guide.

    None of this means skipping Japan’s food scene — it means arriving with a card in your pocket, a few key phrases memorized, and a realistic sense of where to relax and where to double-check. Most restaurant staff genuinely want to get it right; they just need the information in a form they can act on.

  • Halal Food in Japan: Mosques, Certified Restaurants & Travel Tips

    Halal Food in Japan: Mosques, Certified Restaurants & Travel Tips

    Photo by Aanya Chakravarti on Unsplash

    Japan isn’t an easy country for halal dining — pork and alcohol-based seasonings (mirin, sake, pork-derived dashi) turn up in dishes that look perfectly safe, and halal certification is still a niche concept outside a handful of neighborhoods. The good news is that the halal food scene has grown fast over the past decade, driven by rising Muslim tourism from Southeast Asia and the Middle East. With a bit of planning — knowing which apps to use, which neighborhoods to target, and which questions to ask — you can eat well in Tokyo, Osaka, Kyoto, and Kobe without constant anxiety.

    Certified Halal vs. “Muslim-Friendly”: Know the Difference

    In Japan you’ll see two very different labels, and mixing them up causes most of the confusion:

    • Certified halal means a body like the Japan Halal Association, Japan Muslim Association, or NAHA (Nippon Asia Halal Association) has audited the kitchen’s sourcing, storage, and preparation. Look for their logo stickers near the entrance or on the menu.
    • Muslim-friendly is a self-applied, non-audited label meaning the restaurant avoids pork and alcohol on request, but the kitchen may still use shared utensils, pork-based stock as a base, or alcohol in sauces unless you specify otherwise.

    Neither label is wrong to trust — but if you keep strict halal, prioritize certified spots and always confirm with staff whether mirin (sweet rice wine) or sake has been used, since both are common even in dishes that look meat-free.

    Japan’s Mosques: Where to Pray and Shop

    Tokyo Camii, in Shibuya’s Yoyogi-Uehara area (1-19 Oyama-cho), is Japan’s largest mosque and the easiest for visitors — it’s a 1-minute walk from Yoyogi-Uehara Station on the Odakyu and Chiyoda lines. Entry is free, it’s open daily roughly 10:00–18:00 outside prayer times, and modest dress is required (scarves are provided for women at the entrance). The ground-floor shop sells halal meat, spices, dates, and snacks imported from Turkey and beyond — useful for stocking up if you’re self-catering.

    Kobe Muslim Mosque, built in 1935 in Kobe’s Kitano district, is Japan’s oldest mosque and survived both WWII bombing and the 1995 Great Hanshin earthquake. Smaller mosques with prayer rooms also operate in Osaka (Osaka Masjid in Ibaraki), Nagoya, Fukuoka, and Tokyo’s Otsuka and Asakusa neighborhoods. Most welcome respectful non-Muslim visitors outside of prayer times, and many hold public iftar gatherings during Ramadan that tourists can join if they ask in advance.

    Best Neighborhoods for Halal Restaurants

    Shin-Okubo (Tokyo) is the single best concentration of halal and Muslim-friendly food in the country — a Korean-town-turned-multicultural strip near Shin-Okubo Station (Yamanote Line) packed with Turkish, Pakistani, and Indonesian restaurants and halal grocery stores selling frozen meat to take home.

    Elsewhere:

    • Tokyo — Asakusa and Ueno have several certified halal ramen shops; expect to pay ¥900–1,400 for a bowl.
    • Osaka — Namba and Umeda have halal-certified yakiniku and curry houses; a halal wagyu yakiniku course runs roughly ¥4,000–8,000 per person.
    • Kyoto — fewer certified options, but several Muslim-friendly udon and kaiseki restaurants near the main tourist temples now post English/Arabic menus.

    Budget tip: halal-certified fried chicken and curry chains (some CoCo Ichibanya branches in Tokyo, for example) let you eat a full meal for ¥800–1,200 without hunting down a specialty restaurant.

    Halal Versions of Japanese Classics

    You don’t have to give up on trying signature Japanese dishes:

    • Ramen — most broths use pork (tonkotsu) or contain mirin, but certified halal ramen shops in Tokyo and Osaka now make chicken- or seafood-based broths without alcohol seasoning.
    • Yakiniku — halal-certified wagyu grills exist in Tokyo and Osaka; this is where you can splurge, since halal wagyu courses are priced similarly to regular wagyu (¥6,000+).
    • Curry rice — Japanese curry is naturally close to halal (no pork, no alcohol in most recipes), but always confirm the roux doesn’t contain lard, which some mass-market brands use.
    • Sushi — seafood sushi is halal-friendly by default; the risk is mirin brushed on nigiri or sauces containing sake, so ask for sashimi-style pieces without glaze if unsure.

    If you’re building a food-focused itinerary around regional specialties, it’s worth checking which traditional dishes, like Inaniwa udon, are naturally alcohol-free before you travel, since broth bases vary a lot by region.

    Airports and Flights: Prayer Rooms and In-Flight Meals

    Both major Tokyo airports have dedicated multi-faith prayer rooms: Narita has them in Terminals 1, 2, and 3, and Haneda has one in the international terminal — all free to use and clearly signed. If you’re connecting from the airport into central Tokyo, the Narita/Haneda airport limousine bus drops you directly at major hotels, which is convenient if you’re carrying halal groceries or are too jet-lagged to navigate train transfers.

    For the flight itself, ANA and JAL both offer halal/Muslim meal options, but you must request them when booking or at least 24–48 hours before departure — walk-up requests at the airport are usually too late.

    Common Mistakes to Avoid

    • Assuming vegetarian means halal. Japanese vegetarian dishes frequently use dashi made from bonito or pork, and mirin is common even in “vegetable” dishes.
    • Trusting convenience store bento boxes. Seasonings and sauces in konbini food often contain alcohol-derived flavoring that isn’t obvious from the packaging photo.
    • Not planning around Ramadan or major holidays. Restaurant hours and mosque event schedules shift during Ramadan, and if your trip overlaps with Japanese holiday weeks, popular halal restaurants in Shin-Okubo and Asakusa get crowded fast — check the Japanese public holiday calendar before locking in dates.
    • Forgetting travel insurance covers dietary emergencies too. If a mislabeled dish causes an allergic or religious dietary issue requiring a clinic visit, confirm your travel insurance for Japan covers outpatient care, since many budget policies have low caps.

    Apps and Tools Worth Downloading Before You Land

    Halal Gourmet Japan and Halal Media Japan are free apps maintained specifically for this market, with searchable maps of certified restaurants, mosques, and halal grocery stores by city. Muslim Pro’s restaurant finder and Google Maps reviews (search “halal” plus your neighborhood) fill in gaps for smaller towns where dedicated apps have thin coverage. Download these on Wi-Fi before arrival, since halal options thin out quickly once you leave Tokyo, Osaka, and Kobe.

  • Inaniwa Udon: Akita’s Silky Hand-Stretched Noodles and Where to Try Them

    Inaniwa Udon: Akita’s Silky Hand-Stretched Noodles and Where to Try Them

    Photo by Kirill Tonkikh on Unsplash

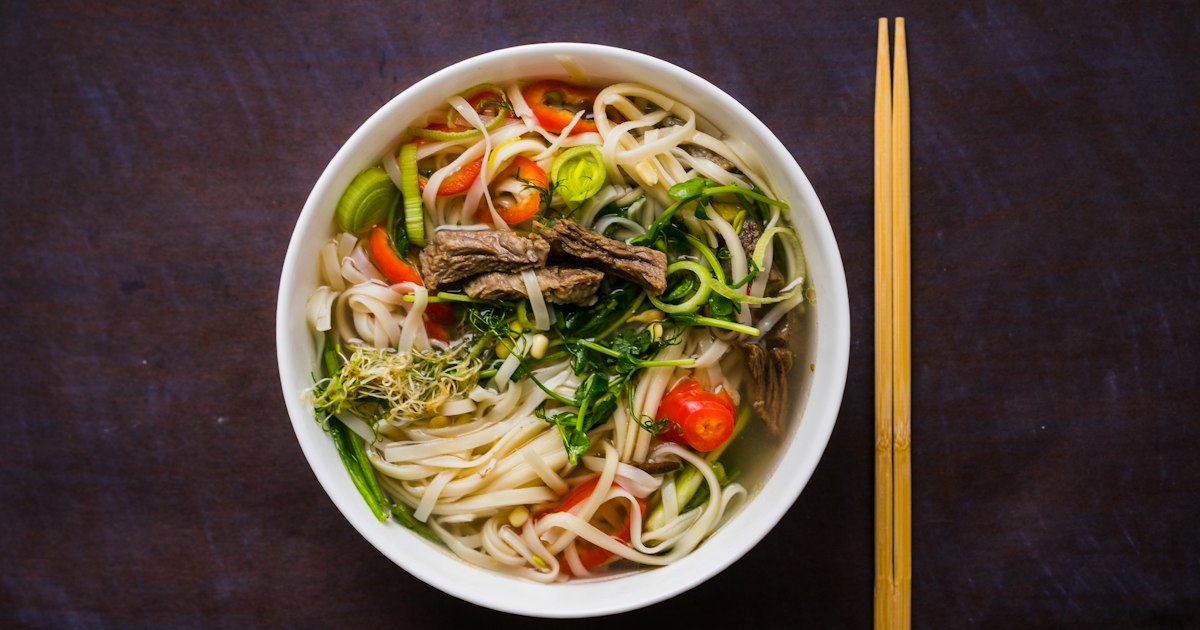
    Most visitors to Japan know udon as the thick, chewy noodle served in big bowls of hot broth. Inaniwa udon breaks that mold entirely: it’s flat, thin, almost translucent, and so smooth that it practically slides down your throat. It’s one of the country’s most distinctive regional noodles, and unless you make a point of seeking it out, you can spend weeks in Japan without ever encountering it. Here’s what makes it different, where it actually comes from, and how to track down a good bowl — or a box to take home.

    What Makes Inaniwa Udon Different

    Most udon is made by rolling out dough and cutting it into strands with a knife. Inaniwa udon is made more like somen: the dough is kneaded, rested, coiled around rods, and hand-stretched (a technique called tenobe) over the course of several days, with repeated resting periods in between. While it’s being stretched, the noodle is gently flattened by hand rather than cut, which gives it its signature ribbon-like cross-section. It’s then dried slowly, a process that typically takes three to four days from start to finish.

    The result is a noodle with a springy, slightly chewy bite and an unusually smooth, slippery texture (what the Japanese call good nodogoshi, or “throat-feel”). It’s often grouped with Sanuki udon (Kagawa) and Mizusawa udon (Gunma) as one of Japan’s “three great udon,” though which third noodle makes the list varies depending on who you ask.

    Where Inaniwa Udon Comes From

    The noodle takes its name from Inaniwa, a small district now absorbed into Yuzawa City in southern Akita Prefecture. Production there dates back to the mid-1600s, and the noodle became a prized gift sent to the shogunate and feudal lords — it was expensive to make by hand and didn’t travel in large quantities, which kept it a specialty item for centuries rather than an everyday food. The most famous producer, Sato Yosuke, has been making it in Yuzawa since 1860 and still runs its original shop there, alongside a handful of other long-established makers like Kanbun Gonendo.

    Today Yuzawa has a small tourism infrastructure built around the noodle, including facilities where you can watch the stretching process and eat freshly made noodles on-site. It’s a worthwhile detour if you’re interested in food craft, but it does require some planning to reach (more on that below).

    How to Order It: Hot, Cold, and With What

    Inaniwa udon is traditionally served cold (hiyashi or zaru style) with a dipping sauce, especially in summer — the chilled noodle’s texture is the whole point, and this is the version most restaurants consider the classic preparation. Toppings are usually minimal: grated ginger, chopped scallion, myoga, and sometimes a raw egg yolk stirred into the dipping sauce. Some shops also serve it with a sesame-based dipping sauce, traditionally ground fresh in a suribachi mortar for a nuttier, thicker dip than the standard soy-based tsuyu.

    In colder months, you’ll also find it served hot in broth (kake or nikomi style), sometimes with duck, chicken, or mountain vegetables. It’s worth trying both if you have the chance, since the texture reads very differently warm versus chilled.

    Where to Try It

    Akita City is the easiest base, since it’s the direct terminus of the Akita Shinkansen and has several dedicated Inaniwa udon restaurants, including a Sato Yosuke branch. Expect to pay roughly ¥900–¥1,400 for a simple zaru set, and ¥1,800–¥2,800 for a set meal with tempura or regional sides like kiritanpo. Most lunch-focused noodle shops in Akita keep hours around 11:00–15:00 and 17:00–20:00, with an irregular closed day (often Wednesday), so it’s worth calling ahead if you have a specific shop in mind.

    Yuzawa City, the noodle’s birthplace, has the original Sato Yosuke shop and smaller family producers where you can sometimes see noodles being stretched by hand. It’s a genuinely interesting stop for food-focused travelers, but it’s a detour from the main shinkansen line — see the next section for how to get there.

    Tokyo also has options if a trip to Akita isn’t on your itinerary. Akita Prefecture’s official antenna shop in Yurakucho stocks multiple brands of dried Inaniwa udon to buy, and often has a small restaurant counter serving it as well. It’s a convenient way to try the noodle, and pick up regional Akita products like sake, without leaving central Tokyo.

    For budget, mid-range, and splurge framing: a basic zaru set at a casual noodle shop (budget, under ¥1,000) is the baseline way to try it; a set meal with tempura and small Akita side dishes (mid-range, ¥1,800–¥3,000) is the better introduction if it’s your only meal of the noodle on the trip; and a multi-course Akita kaiseki meal built around Inaniwa udon alongside kiritanpo hot pot and local Hinai-dori chicken, offered at some ryokan and specialty restaurants, runs roughly ¥5,000–¥8,000 per person and makes a memorable splurge if you’re staying overnight in the region.

    Getting There and Best Timing

    From Tokyo, the Akita Shinkansen “Komachi” runs directly to Akita Station in roughly 3 hours 40 minutes, with no transfer required — this is the simplest way to reach the region and gives you full access to Akita City’s restaurant scene. If you specifically want to visit Yuzawa, you’ll need to take the Komachi to Omagari Station and transfer to a local Ou Main Line train heading back south toward Yuzawa, adding roughly 30–40 minutes each way, so budget extra time and check the local train schedule in advance since services can be infrequent outside peak hours. If your connection is tight, it’s worth knowing that Japan’s shinkansen transfer rules are more forgiving than you’d expect if you end up running late.

    There’s no strong seasonal reason to visit — the noodles are dried and available year-round, and both hot and cold preparations are offered in most restaurants regardless of season. That said, summer (especially Obon week in mid-August) sees the heaviest domestic travel and the biggest crowds at Akita’s noodle shops, while national holiday weekends can also fill up regional trains; it’s worth checking Japan’s 2026 public holiday calendar before locking in dates if you want to avoid both.

    Common Mistakes to Avoid

    The biggest mistake is cooking it like regular udon. Because Inaniwa udon is thin and dried, it cooks much faster than the thick fresh udon most people are used to — typically 2–3 minutes at a rolling boil, versus 10–13 minutes for standard dried udon. Oversleeping on timing turns the noodle mushy and destroys the silky texture that’s the entire point of eating it. If you buy a box to cook at home, follow the package instructions exactly rather than guessing based on other noodles you’ve made before.

    The second mistake is assuming any “udon” dish in Akita is Inaniwa-style — ask specifically, since standard thick udon is also served regionally. And if you’re trying it cold for the first time, don’t skip the dipping sauce in favor of eating it plain; the tsuyu (or sesame sauce) is balanced specifically for the noodle’s mild flavor and is part of the intended experience, not an optional add-on.

    Bringing It Home

    Because it’s a dried product, Inaniwa udon travels well and makes a practical, lightweight souvenir — a real advantage over fresh regional foods that don’t survive a flight. Boxed sets (usually 300–600g, enough for several servings) run roughly ¥1,000–¥1,500 for a standard box and ¥2,000–¥4,000 for a nicer gift set with a dipping sauce included, and are sold at Akita airport, Akita and Yuzawa train station shops, and the Yurakucho antenna shop in Tokyo. Check the box for a reasonably long shelf life (often a year or more unopened) before buying multiples to give as gifts. If you’re building out a wider list of edible Japan souvenirs, regional specialty sweets like Kyoto’s yatsuhashi travel just as easily and make a nice pairing in a suitcase alongside a box of noodles.

  • Christmas in Japan: KFC, Illuminations & a Secular Holiday Tradition

    Christmas in Japan: KFC, Illuminations & a Secular Holiday Tradition

    Photo by Yuika Takamura on Unsplash

    If you’re picturing a quiet, church-centered holiday with a day off work, recalibrate: Christmas in Japan is a sparkly, commercial, date-night affair squeezed between two ordinary workdays. There’s no manger scene competing for attention — instead there’s fried chicken, strawberry shortcake, and some of the best light displays in the world. Here’s how it actually plays out, and how to join in as a visitor.

    Why Japan’s Christmas Is Secular — and Not a Day Off

    Christians make up roughly 1–2% of Japan’s population, so Christmas never took root as a religious holiday. It’s also not a public holiday: offices, schools, and most businesses operate normally on December 25. The real family holiday in Japan is New Year (Oshogatsu), when the whole country shuts down from around December 29 to January 3, trains get booked solid, and families gather for mochi and shrine visits. Christmas, by contrast, got imported mainly through postwar department store marketing and became something closer to a couples’ and kids’ holiday — a date night on the 24th, a family dinner with cake, and presents for children, but nothing resembling a Western religious observance.

    Because it’s a normal workday, don’t expect reduced crowds or closed shops — if anything, restaurants and illumination spots are busier in the evenings as people squeeze celebrations in after work.

    The KFC Christmas Tradition

    This one genuinely surprises first-time visitors: fried chicken, specifically from KFC, is Japan’s unofficial national Christmas dish. It traces back to a 1974 “Kentucky for Christmas” marketing campaign that filled the void left by the absence of a turkey tradition, and it stuck so thoroughly that KFC Japan now sells what’s effectively a holiday party set — fried chicken pieces, sides, and sometimes a small cake — under names like “Christmas Dinner” or “Party Barrel.”

    Prices for these sets typically run from around ¥4,000 up to ¥7,000–8,000 depending on the size and whether cake is included. The catch: Japanese families pre-order weeks in advance, and walk-in demand on December 24 is intense, with lines out the door and some stores selling out of walk-in stock entirely. If you want in on the tradition, check the KFC Japan app or website in early December and reserve a pickup slot — most pre-orders need to be placed by mid-to-late December for Christmas Eve or Christmas Day collection. If you miss the window, regular menu items are still available, just not the special boxed sets.

    Christmas Cake: The Other Must-Have

    Alongside chicken, the other fixture is “Christmas cake” — almost always a light sponge cake layered with whipped cream and fresh strawberries, decorated simply with a Santa figurine or chocolate plaque. You’ll see it everywhere from late November onward: convenience stores sell small individual-size versions for roughly ¥1,500–2,500, neighborhood bakeries and supermarkets sell whole cakes from about ¥2,500–5,000, and department stores and hotels offer elaborate versions from well-known patissiers for ¥6,000 and well upward of ¥10,000 for a splurge. As with the chicken, pre-ordering is standard practice in Japan — popular bakery and hotel cakes often sell out, so if you have your eye on something specific, reserve it by early-to-mid December rather than hoping to walk in on the 24th.

    Where to See the Best Illuminations

    Winter illuminations are arguably the most visitor-friendly part of the season, since they run for weeks and cost nothing to view. A few reliable options:

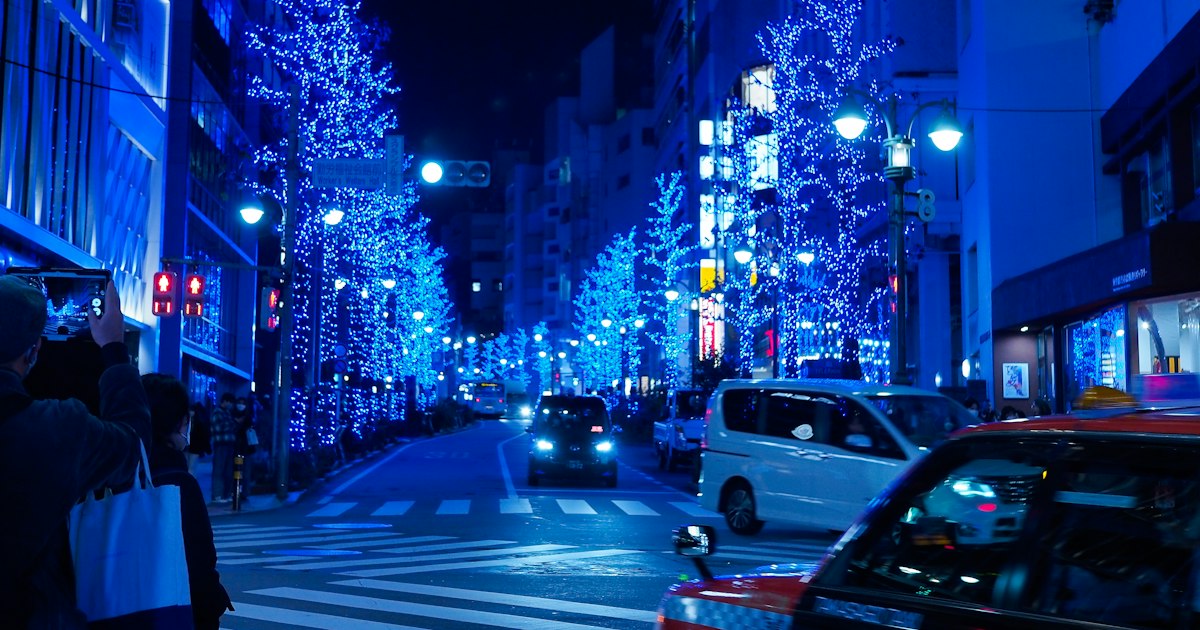
    • Marunouchi Illumination (Tokyo) — hundreds of thousands of LED lights along Naka-dori Avenue near Tokyo Station’s Marunouchi exit, typically lit mid-November through mid-February. Free, and an easy add-on if you’re already near Tokyo Station.
    • Roppongi Hills “Artelligent Christmas” — the Keyakizaka-dori approach to Roppongi Hills gets a blue-and-white light tunnel from mid-November through December 25. Free, short walk from Roppongi Station.
    • Shibuya’s “Blue Cave” (Aoi Dokutsu) — a tunnel of blue lights running through the Shibuya/Yoyogi Park area most evenings in December, usually from around 17:00. Free and popular with couples, so expect crowds on weekends.
    • Kobe Luminarie — a memorial light installation commemorating the 1995 Great Hanshin earthquake, held for about 10–12 days in early December near Kobe’s Motomachi/Sannomiya area. Entry is free (donations encouraged), and it’s an easy day trip from Osaka or a worthwhile detour if you’re already riding the Shinkansen through the Kansai region — see our guide to booking Shinkansen tickets online if you’re routing a trip from Tokyo.

    Common mistake: assuming illuminations are a one-night event. Most run for six to twelve weeks starting in mid-November, so you don’t need to visit on Christmas Eve specifically — in fact, going a week or two earlier avoids the heaviest date-night crowds.

    Getting Around During Illumination Season

    Illumination-hopping in Tokyo usually means hitting two or three neighborhoods in one evening (Marunouchi, Roppongi, Shibuya are all doable in a single night), which makes an unlimited subway pass worth the cost rather than paying per ride. If you’re deciding between options, our comparison of the Tokyo Subway Ticket vs the Tono Furii Kippu breaks down which pass actually saves money for an evening of hopping between light displays. If your Christmas trip continues outside Tokyo — say, to Kobe Luminarie or a snowy detour — check the Shinkansen booking guide above, and keep in mind that December 29–January 3 is peak New Year travel, so booking those specific dates well in advance matters more than booking around Christmas itself.

    Common Mistakes to Avoid

    • Expecting a holiday atmosphere during the day. December 25 is a regular workday — shops, banks, and offices operate normally. The festive mood is concentrated in evenings, especially December 24.
    • Walking in for KFC on December 24 without a reservation. Lines form early and stock runs out; pre-order through the app if the tradition matters to you.
    • Confusing Christmas with Japan’s real holiday season. If you’re also in Japan for New Year, be aware that transport, restaurants, and many shops close or run reduced hours from roughly December 31 to January 3 — a completely different rhythm from the commercial bustle of Christmas week.
    • Booking a Christmas Eve dinner reservation late. In Japan, December 24 functions like Valentine’s Day for couples — upscale restaurants get booked out weeks ahead.

    None of this requires planning a trip specifically around the holiday — Christmas in Japan works well as a festive bonus layered onto an existing December itinerary, whether that’s a city-based Tokyo trip or a longer loop that continues on to winter destinations like Nozawa Onsen for snow and hot springs once the lights come down.

  • Shirahama: Wakayama’s White-Sand Beach Resort and Kii Peninsula Gateway

    Shirahama: Wakayama’s White-Sand Beach Resort and Kii Peninsula Gateway

    Photo by Jaipreet Singh on Unsplash

    Most visitors picture Japan’s beaches as an afterthought to temples and neon cities, but Shirahama (白浜) in Wakayama Prefecture flips that script. It pairs a genuinely white-sand beach with one of the country’s three oldest hot spring towns, dramatic sea cliffs, and a front door to the Kumano Kodo pilgrimage trails further down the Kii Peninsula. It’s close enough for a day trip from Osaka yet feels like a proper coastal escape once you’re there.

    Why Shirahama Is Worth the Trip

    Shirahama’s onsen (Nanki-Shirahama Onsen) is recorded in the 8th-century Nihon Shoki chronicle alongside Dogo Onsen in Ehime and Arima Onsen near Kobe, making it one of Japan’s oldest documented hot spring sources. Unlike many onsen towns tucked into mountains, Shirahama’s baths sit right on the Pacific coast, so you can soak while looking directly out at the ocean. Add a bright white beach, a safari-and-aquarium park, and rugged cliff scenery, and you get a resort town that works for families, couples, and solo travelers equally well.

    How to Get There

    By train: take a JR Kuroshio limited express from Shin-Osaka or Osaka Station directly to Shirahama Station — about 2.5 to 3 hours one-way, with fares typically in the ¥6,000–¥7,500 range depending on reserved vs. unreserved seating. If you’re coming from further afield, you’ll likely connect through a Shinkansen to Shin-Osaka first; it’s worth knowing the booking systems in advance, which is covered in Booking Shinkansen Tickets Online: Smart EX, EX App & Ekinet Explained. From Shirahama Station, local buses run to the beach, onsen district, and Adventure World (about 10–25 minutes, ¥220–¥470 depending on stop).

    By air: Nanki-Shirahama Airport has a handful of daily JAL flights from Tokyo Haneda (roughly 70 minutes), which is the fastest option if you’re based in Tokyo and only have a few days. The airport is about 10 minutes from the beach by taxi or bus.

    By car: Shirahama sits just off the Kinki Expressway, about 2.5 hours from Osaka — convenient if you plan to continue south toward Kushimoto, Nachi-Katsuura, or the Kumano Kodo trailheads, since public transit thins out quickly past Shirahama.

    Best Time to Visit

    July and August are peak beach season — warm water, full facilities, and the busiest crowds and hotel prices. Late April through June and September through early November offer mild weather, thinner crowds, and lower rates, with the onsen and cliff scenery just as enjoyable without swimming. Winter is quiet and cool but the baths stay open year-round, and a hot outdoor soak with a sea breeze is arguably at its best in December and January. Typhoon season (roughly August–September) can disrupt the Kuroshio train line, so build in flexibility if you’re traveling then.

    Shirarahama Beach and the Sand That Isn’t Local

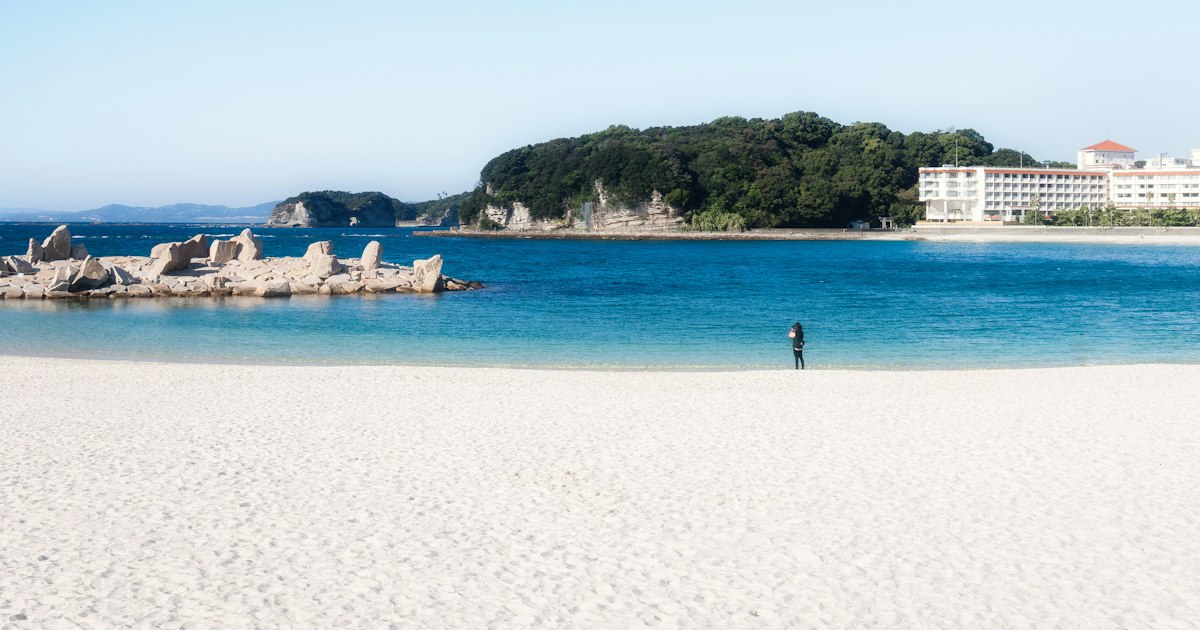
    The main beach, officially Shirarahama, is the reason for the town’s name — “shira” (white) + “hama” (beach). The sand is strikingly pale and fine, but much of it isn’t originally from Japan: decades of erosion led the city to import replacement sand from Western Australia starting in the 1980s to keep the beach intact. It’s a detail most visitors never learn, and it doesn’t make the beach any less pleasant — just a fun bit of trivia while you’re lying on it. Swimming season runs roughly early July to the end of August, with lifeguards, showers, and rental huts (parasol and chair sets run around ¥2,000–¥3,000 per day) only operating in that window. Outside summer, it’s still a nice walk, just not a place to swim.

    Soaking in Japan’s Ancient Onsen

    The must-do bath is Saki-no-yu, an open-air rotenburo built directly into the rocks at the ocean’s edge — waves sometimes splash near the lower pools at high tide. Entry is about ¥500 for adults, and it’s open roughly 8:00 am to 5:00 pm (extended in summer), with irregular closures for maintenance, so check the current schedule before heading over. It’s a public bath with minimal privacy screening, so go in with realistic expectations — it’s about the view and the history, not luxury fittings. Most hotels and ryokan in town also pipe in the same onsen water for private or indoor baths if you’d rather skip the open-air crowd. As with any onsen town, pack or buy a light cotton robe for lounging between soaks — the same kind of garment covered in Jinbei: Japan’s Traditional Summer Loungewear and Where to Buy It is commonly worn by guests walking between their ryokan and the baths in summer.

    Beyond the Beach: Cliffs, Islands, and Pandas

    Sandanbeki is a line of sheer cliffs about 50 meters high on the town’s west side; an elevator (around ¥1,300 round trip) drops you into a sea cave once used to hide pirate boats, with walkways out to the cliff base. Nearby, Engetsu-to is a small island with a natural circular hole worn through its center — best seen at sunset, and free to view from the shore. For families, Adventure World is a combined safari park, aquarium, and amusement park about 15 minutes from the station by bus, known for its giant panda breeding program (Shirahama has bred more pandas than almost anywhere outside China); a one-day adult pass runs in the ¥4,500–¥5,500 range, so check the official site for current pricing before you go. Toretore Market, a large seafood market near the airport, is a good stop for a cheap, fresh lunch — grilled seafood sets commonly run ¥1,000–¥2,000.

    Shirahama as a Gateway South

    Shirahama’s real strategic value is its position on the Kii Peninsula. From here, local trains and buses continue toward Kushimoto (the Hashigui-iwa rock formations) and Nachi-Katsuura, home to Nachi Falls and the Kumano Kodo pilgrimage network — a UNESCO World Heritage trail system with a completely different pace and scenery from the coast. If you’re building a longer Kii Peninsula itinerary, Shirahama makes a natural first or last stop: relax at the beach and onsen, then head inland or further south for shrines and waterfalls, or reverse the order on the way back to Osaka.

    Common Mistakes and Budget Tips

    Don’t assume you can swim at the beach outside July–August; the sand is still worth seeing, but lifeguard season is short. Don’t skip booking the Kuroshio limited express seat in summer or around holidays — it sells out, and the local-only alternative adds well over an hour. Budget travelers can day-trip from Osaka for well under ¥10,000 round-trip train fare plus a few hundred yen for Saki-no-yu; mid-range visitors should budget one night in a seaside ryokan (roughly ¥15,000–¥25,000 per person with dinner and breakfast); splurge travelers can book an oceanview room with a private in-room onsen bath, often ¥30,000+ per person at the nicer properties. Whatever your budget, it’s worth having travel insurance for Japan sorted before you go, and knowing what to do if you get sick in Japan — Shirahama is a resort town, not a major city, so medical options are more limited than in Osaka or Tokyo.