Japan Trove

Category: Uncategorized

  • Miso: A Buyer’s Guide to Japan’s Regional Pastes (Red, White & Awase)

    Miso: A Buyer’s Guide to Japan’s Regional Pastes (Red, White & Awase)

    Photo by Leio McLaren on Unsplash

    Walk into any Japanese supermarket and you’ll find an entire aisle of miso — dozens of tubs in red, beige, and deep brown, with labels that give no hint to a first-time buyer about which one to choose. Miso isn’t one product; it’s a category, shaped by region, grain, and fermentation time the way wine is shaped by grape and terroir. This guide breaks down the three base types, the regional styles worth seeking out, and where to buy paste that will actually taste different from what you can get at home.

    The Three Base Types: Red, White, and Awase

    Almost every miso you encounter falls into one of three categories, and understanding them solves 80% of the confusion at the shelf:

    • Aka miso (red miso) — fermented longer (often 1-3 years), darker, saltier, and more savory. Good for hearty miso soup, simmered dishes like buta-jiru pork soup, and glazes that need to stand up to grilling.
    • Shiro miso (white miso) — fermented for weeks to a few months, higher in rice koji, sweeter and milder. Best for light soups, dressings, and delicate dipping sauces.
    • Awase miso (blended miso) — a mix of red and white, sold specifically to split the difference. If you only buy one tub for an everyday miso soup, awase is the safest, most versatile choice and what most households actually use day to day.

    Within these three, the other variable that matters is the base grain: most miso is made with rice koji, but mugi miso (barley) is common in Kyushu and has a rounder, slightly sweet edge, while mame miso (soybean-only, no rice or barley koji) is the base of the Chubu region’s distinctive red pastes.

    Regional Styles Worth Seeking Out

    Miso is intensely regional — a Nagano household and a Kyoto household are not using the same product, even if both call it “miso.”

    • Hatcho miso (Aichi) — a mame miso made in Okazaki for over 400 years, aged two years in cedar barrels weighted with river stones. It’s almost black, intensely umami, and barely sweet at all. Two historic breweries, Kakukyu and Maruya Hatcho, still operate within a few minutes’ walk of each other in Okazaki’s old town and run self-guided or short factory tours (roughly 9:00-17:00, small or no entry fee, closed on some weekdays — check ahead). Okazaki is an easy rail detour if you’re flying through Chubu Centrair Airport on the way to Nagoya.
    • Shinshu miso (Nagano) — Japan’s biggest-volume miso style, a light rice miso with a clean, slightly tart flavor. This is likely the awase-style miso you’ve already eaten in a chain restaurant’s miso soup without knowing its origin.
    • Saikyo miso (Kyoto) — a very sweet, very pale white miso with low salt content, traditionally used for saikyo-yaki (miso-marinated grilled fish) and in Kyoto kaiseki cooking. It’s the style behind many simmered tofu and vegetable dishes in the city, including the kind of miso-dressed tofu served alongside Nanzen-ji’s yudofu.
    • Sendai miso (Miyagi) — a reddish-brown rice miso with a firmer, saltier profile, historically a samurai-era specialty that’s still a point of regional pride in Tohoku.
    • Kyushu mugi miso — barley-based and mildly sweet, common across Fukuoka and Kumamoto; if you’re in Fukuoka trying mentaiko, look for mugi miso in the same local food shops.

    Where to Buy It

    Supermarkets are the budget option and genuinely fine for daily cooking: a 500g-1kg tub of mainstream awase or Shinshu miso runs roughly ¥300-600. Brands like Marukome and Hikari are reliable everywhere.

    Department store basement food halls (depachika) stock a noticeably better tier — regional artisan brands in 500g-1kg tubs for about ¥700-1,500, often with tasting samples available at the counter.

    Specialty kitchen and market stalls are where regional character really shows up. At Omicho Market in Kanazawa, several stalls sell Hokuriku-region miso alongside the seafood and knives, usually in smaller 300-500g packs (¥500-1,000) that are easier to fit in a suitcase. Miso breweries selling direct from the source — like the Okazaki shops above — are the splurge-but-worth-it option: aged, barrel-fermented Hatcho miso in a gift-boxed jar can run ¥1,500-4,000 for 500g-1kg, and some offer small sampler sets (¥1,000-2,000) if you want to compare red, white, and aged side by side before committing.

    Reading the Label: Common Mistakes

    A few things trip up first-time buyers:

    • “Shelf-stable” vs. refrigerated — miso in a vacuum pouch on a dry shelf has usually been pasteurized or dosed with alcohol to stop fermentation, which flattens the flavor and aroma. Refrigerated tubs (in the chilled section, not the dry goods aisle) are live, unpasteurized miso and taste noticeably better. Always check the fridge case first.
    • Dashi-iri miso — “miso with dashi already mixed in.” Convenient for quick soup, but it means you can’t control the stock separately, and the flavor is less clean. If you want to actually learn how dashi and miso interact, buy plain miso and make your own stock — our dashi buyer’s guide covers the kombu and katsuobushi basics.
    • Assuming darker always means saltier or stronger — generally true, but Hatcho miso is dark and intense while some Sendai miso is lighter in color but still quite salty. Taste before you buy a large tub if a sample is offered.
    • Buying too much — opened miso keeps for months refrigerated, but flavor does drift. Buy the smaller size unless you’re committed to using it regularly.

    Best Time to Buy and How to Get It Home

    There’s no strong seasonal window for buying miso itself — breweries age it year-round — but factory shops and market stalls are least crowded on weekday mornings, and depachika food halls are calmest right after opening (typically 10:00) before lunchtime crowds arrive. For travel, miso in a sealed tub is fine in checked luggage; it won’t leak if the lid is properly seated, and it’s not a restricted item for carry-on either, though liquids rules obviously don’t apply to a paste this thick — just don’t rely on that if an individual airline agent disagrees at the gate. If you’re island-hopping afterward, say toward Miyakojima or the Yaeyama Islands, pack miso in your main suitcase rather than a carry-on day bag to avoid any ambiguity at smaller regional airport security checks.

    Quick Buying Guide by Budget

    • Budget (¥300-600): supermarket awase miso, 500g-1kg — fine for everyday soup, no regional character.
    • Mid-range (¥700-1,500): depachika or market-stall regional miso (Shinshu, Saikyo, Sendai) — worth the upgrade, noticeably more complex.
    • Splurge (¥1,500-4,000): barrel-aged Hatcho miso or a brewery’s limited sampler set — buy this as a gift or for a dish where miso is the star, not background seasoning.

    If you only bring home one jar, make it something you can’t easily buy outside Japan — an aged mame miso or a true Saikyo white miso will do far more for your cooking than another bag of instant soup packets.
  • Wanko Soba: Iwate’s All-You-Can-Eat Noodle Challenge

    Wanko Soba: Iwate’s All-You-Can-Eat Noodle Challenge

    Photo by Yosuke Ota on Unsplash

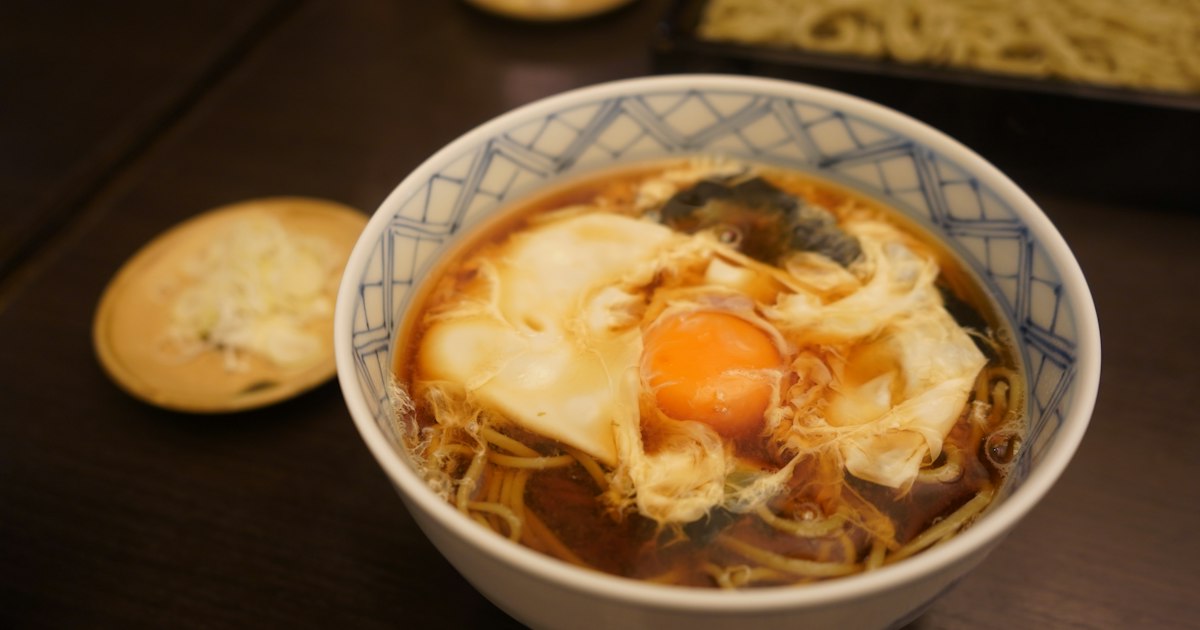
    In Morioka, soba isn’t just a bowl of noodles — it’s a counting game. Wanko soba (わんこそば) serves buckwheat noodles in bite-sized portions, one tiny bowl at a time, refilled continuously by a server standing at your shoulder until you physically stop them. Visitors who’ve only had soba in Tokyo or Kyoto are often surprised by how theatrical — and how filling — this Iwate specialty turns out to be. Here’s what to actually expect, what it costs, and how to avoid the rookie mistakes that leave people either starving or sick.

    What Is Wanko Soba?

    Each “wanko” bowl holds roughly one or two mouthfuls of noodles — about a tenth of a normal serving. You eat, the server drops in a fresh bowlful the instant yours is empty (often with a rhythmic “hai, dontesu! hai, dontesu!” chant), and the pile of empty lacquered bowls stacks up in front of you as a visible scoreboard. It sounds gimmicky, but it solves a real problem: soba noodles go soft and clumpy if left sitting, so serving them in small, constantly-refreshed portions keeps every bite at peak texture. The dipping broth is a simple soy-and-dashi base, and most sets rotate through seven or eight toppings — tuna, mountain yam, green onion, sesame, nameko mushroom, pickles — so you’re not eating the same flavor 60 times in a row. If you want to understand what’s actually in that broth, our dashi buyer’s guide covers the kombu and katsuobushi stock that underpins it.

    Where to Eat It: Morioka vs. Hanamaki

    Morioka, Iwate’s capital, has the highest concentration of dedicated wanko soba restaurants, and two names come up constantly: Azumaya (東家), whose honten sits a short walk from Morioka Castle Ruin Park, and Yabuya (やぶ屋), near Morioka Station. Both have been serving the dish for generations and run it as a full sit-down experience with tatami seating, not a novelty stall. Hanamaki, about 30 minutes further south by train, is sometimes cited as the dish’s historical birthplace — local lore connects it to noodles served to a feudal lord in small portions as a mark of hospitality — and several ryokan in the Hanamaki Onsen area still offer it as part of a dinner course.

    Both cities are compact enough to combine with other Iwate or Tohoku stops. If you’re building a longer loop through the region, Akita’s Kakunodate samurai district and Aomori’s Nebuta Matsuri both sit on the same Tohoku Shinkansen corridor north of Morioka, making a multi-city Tohoku itinerary straightforward by rail.

    How the Challenge Works (and How to Stop)

    The one piece of etiquette every first-timer needs: to end the meal, you must slam the lid onto your bowl the instant it’s empty, before the server can drop in another. Hesitate for even a second and a fresh bowl lands in your lap — literally, servers will toss noodles from a distance once you’re both in a rhythm. Some restaurants let you signal “stop” verbally, but the lid method is universal and far more reliable. Staff genuinely expect you to struggle with the pacing early on; they’ll often start fast to build momentum, then slow down once they sense you’re near your limit.

    As a rough benchmark, about 15 wanko bowls equal one normal serving of soba. Most adult visitors land somewhere between 40 and 70 bowls before they’re full — that’s roughly 3 to 5 regular bowls’ worth of noodles. Competitive eaters at Iwate’s official tournaments have cleared well over 500 bowls in a 15-minute sitting, but that’s a specialized sport, not a realistic dinner goal.

    Prices and What’s Included

    This is a flat-rate, all-you-can-eat format, so there isn’t much of a budget/splurge spread — the real variable is what comes alongside the noodles.

    • Standard course (most travelers): around ¥2,750–2,900 at Azumaya or Yabuya, which includes unlimited wanko bowls, the rotating toppings, and usually a small side dish or dessert. This is the course most restaurants default to.
    • Lunch sets: some locations offer a slightly cheaper midday version, often ¥2,000–2,500, with fewer topping varieties.
    • Splurge / kaiseki-style: a handful of restaurants and ryokan dinners pair wanko soba with a multi-dish seasonal kaiseki spread for ¥4,000–6,000+, turning the noodle challenge into one course within a larger meal rather than the main event.

    Expect most wanko soba restaurants in central Morioka to be open roughly 11:00 AM to 7:00–8:00 PM, with last entry 30–60 minutes before closing — call or check locally, as hours shift seasonally and some close one weekday. Reservations aren’t usually required for solo travelers or couples, but groups of four or more should book ahead, especially on weekends.

    Best Time to Go

    Wanko soba is served year-round and isn’t weather-dependent, so there’s no wrong season to try it. That said, freshly milled buckwheat (“shin-soba”) from Iwate’s autumn harvest — roughly late October through November — gives the noodles a more fragrant, slightly sweeter flavor, and several restaurants highlight shin-soba menus during this window. If you want to combine the meal with a competitive angle, the All Japan Wanko Soba Championship is held in nearby Shiwa Town in February, drawing serious competitive eaters for timed matches — worth checking the current year’s date if you want to watch rather than eat.

    Getting to Morioka and Hanamaki

    Morioka is a direct Tohoku Shinkansen ride from Tokyo Station — about 2 hours 10 minutes on the fastest Hayabusa services, with no transfers. Hanamaki is roughly 30 minutes further south on the same line via Shin-Hanamaki Station, or a quick local JR connection from Morioka. Both stations have wanko soba restaurants or signage within a few minutes’ walk, so you don’t need a car for a straightforward day trip.

    Flying is also an option: Hanamaki Airport (HNA) has domestic connections, though schedules are limited compared to Shinkansen frequency. If you’re weighing whether to fly or take the bullet train for this leg of a Japan trip, our comparison of LCC vs. JAL/ANA domestic flights breaks down when flying actually saves time over rail on longer hops — for Morioka specifically, the Shinkansen usually wins once you factor in airport transfers.

    Common Mistakes to Avoid

    • Skipping breakfast to “save room”: arriving starving just means you eat too fast in the first ten bowls, hit a wall, and miss the chance to pace yourself through 40–50 more.
    • Forgetting the lid trick: if you don’t clamp the lid down immediately, servers will keep refilling — plan your stopping point a few bowls before you’re actually full, since momentum carries you past comfortable.
    • Chasing the bowl count instead of the food: the rotating toppings are the actual flavor variety; slow down enough to notice them rather than treating every bowl as an identical sprint.
    • Going in a large group without a reservation: popular honten locations fill their tatami rooms on weekends and holidays — call ahead for parties of four or more.
    • Drinking too much water beforehand: servers pace refills to your eating speed, but a full stomach from pre-loading on tea or water shortens your count fast.

    Wanko soba rewards a bit of strategy more than raw appetite — pace yourself, enjoy the topping rotation, and know your stopping signal before the first bowl lands.

  • Nebuta Matsuri: Aomori’s Giant Lantern Float Festival

    Nebuta Matsuri: Aomori’s Giant Lantern Float Festival

    Photo by Melanie Magdalena on Unsplash

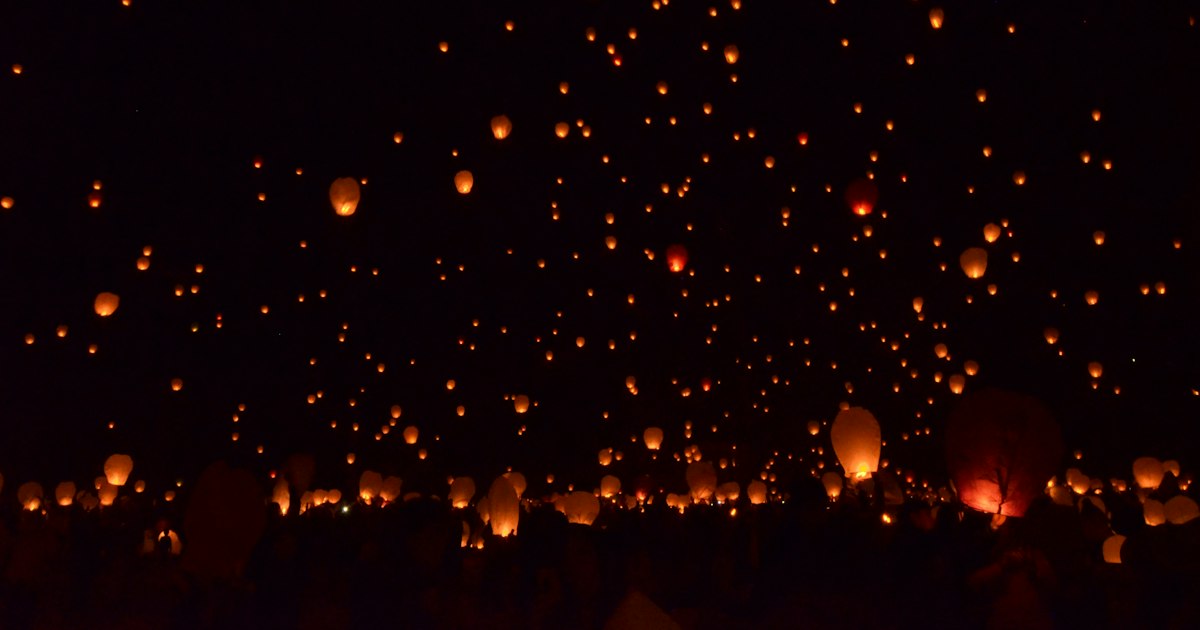
    Every August, the port city of Aomori shuts down its main streets so that two-ton paper lanterns shaped like warriors, demons, and dragons can rumble past on wheeled floats, lit from within and trailed by thousands of dancers shouting “Rassera!” Nebuta Matsuri is one of Japan’s three great Tohoku fire-and-light festivals, and unlike many matsuri that reward insider knowledge to enjoy, this one is genuinely easy for a first-time visitor to show up to, understand, and love. Here’s how to plan around it.

    What Nebuta Matsuri actually is

    Nebuta floats are built from wire frames wrapped in washi paper, hand-painted in fierce reds and blues, and lit from the inside by hundreds of LED bulbs (older floats used candles). Each float is 5m tall, up to 9m wide, and weighs around 4 tons — built by local neighborhood associations and companies over most of the year, then retired after a single festival. Around 20 floats take part each year. In front of and around each float, teams of “haneto” dancers in colorful tasseled costumes hop and spin through the streets, and anyone can join them if they rent a costume (see below).

    Dates, hours, and how the week is structured

    • August 2–3: Children’s Nebuta parade and early evening parades, floats begin appearing on the route.
    • August 4–6: Main evening parades, roughly 7:10pm–9pm, all floats on the route together.
    • August 7: Daytime parade (around 1pm–3pm, your best chance to see the artwork and detail in full light) followed by the Nebuta Ocean Parade in the evening, where select floats are loaded onto boats in Aomori Bay and circle the harbor accompanied by a fireworks display — this is the festival’s finale and the single most crowded night.

    Exact timings shift by 10–20 minutes year to year, so confirm the current schedule on the Aomori Nebuta Matsuri official site or through the Aomori tourist information office once you’re close to your travel dates.

    Where to watch, and what it costs

    The parade route runs through central Aomori on a loop of wide streets near Aomori Station. You have two realistic options:

    • Free standing viewing: Arrive 60–90 minutes early and claim a spot along the sidewalk curb. This is completely free and is how most locals watch, but front-row spots fill up fast on the big nights (Aug 5–7).
    • Paid reserved seating: Numbered folding-chair seats are sold in blocks along the route, typically ¥2,700–¥3,500 per seat depending on the date and block. These go on sale a few weeks ahead through the official Nebuta Matsuri website and sell out for the final weekend, so book as soon as sales open if your trip lands on Aug 6 or 7.

    Budget tip: a free spot near the start of the route lets you see every float up close as it turns the corner, which can actually beat a mediocre paid seat further down the line.

    Joining as a dancer

    You don’t have to just watch. Haneto costume rental shops near the station (several, including counters run by local hotels and tourist associations) rent the full outfit — jacket, obi sash, hat, bells — for roughly ¥3,000–¥4,000 for the evening, plus a small deposit. Once dressed, anyone can join the dancing crowd behind any float; there’s no audition or sign-up, just etiquette (follow the lead dancers’ steps, don’t block the float’s path). It’s the single most memorable way to experience the festival rather than just photograph it.

    Seeing the floats outside festival week

    If your Japan trip doesn’t line up with early August, go to Nebuta Museum Wa Rasse, right next to JR Aomori Station. It permanently displays several prize-winning floats from recent years at full size, indoors, lit up, with no crowds. Entry is ¥630 for adults (cheaper combo tickets exist with other Aomori attractions), and it’s open roughly 9am–7pm (to 6pm in winter) most days. It’s genuinely worth a visit even if you do catch the live festival, since the museum lets you examine the brushwork and paper construction up close in a way the parade never allows.

    Getting to Aomori and planning the trip around it

    Aomori City sits at the northern tip of Honshu. The fastest route from Tokyo is the Tohoku Shinkansen to Shin-Aomori Station (about 3 hours 10 minutes, covered by the JR East-South Hokkaido or JR East rail passes), then a short local train or walk-adjacent transfer into central Aomori Station. Flying is the other option — Aomori Airport has routes to Tokyo Haneda and a handful of other domestic cities; if you’re weighing the shinkansen against a flight for this leg, our comparison on LCC vs JAL & ANA for domestic flights covers which tends to win on longer hops like this one.

    Hotel rooms in Aomori City sell out and prices spike well above normal during festival week — if you’re traveling early August, book accommodation as early as you can, or consider staying in nearby Hirosaki or even Aomori’s wider Tohoku region and day-tripping in for the evening parade. Many visitors pair Nebuta with a wider Tohoku rail itinerary; the scenic Resort Shirakami sightseeing train runs along the Akita–Aomori coastline and connects well to this trip, and Akita’s Kakunodate samurai district makes a good stop a few hours south if you want a quieter contrast to the festival crowds.

    Common mistakes to avoid

    • Showing up on August 7 without a plan. It’s the best day (daytime parade plus fireworks finale) and also by far the most crowded — decide in advance whether you want the calmer Aug 2–4 parades or the big finish, and book seating accordingly.
    • Assuming you can walk the route freely during the parade. Once floats start moving, cross streets close off; plan which side of the route you want to be on before the parade begins.
    • Skipping the museum because “I saw the real thing.” The live parade moves fast and floats are often back-lit against the night sky — Wa Rasse is where you actually see the painted detail.
    • Not confirming rain plans. Nebuta floats run rain or shine (they’re built to handle light rain), but seating and standing comfort change a lot — bring a compact poncho rather than a large umbrella, which isn’t practical in a packed crowd.

    Nebuta Matsuri rewards simple planning more than most Japanese festivals: pick your night, book a seat or stake out a curb early, and budget a few thousand yen if you want to dance rather than just watch. Do that much, and the festival does the rest.

  • Iga-ueno & Koka: Japan’s Ninja Heritage Towns and Museums

    Iga-ueno & Koka: Japan’s Ninja Heritage Towns and Museums

    Photo by Ramzi Belaidi on Unsplash

    Long before ninjas became a cartoon trope, two rural valleys in central Japan trained the real thing. Iga-ueno in Mie Prefecture and Koka in neighboring Shiga Prefecture were the historical home bases of the Iga-ryu and Koka-ryu schools of ninjutsu — rival clans of farmer-spies who hired themselves out to feudal lords from the 15th century onward. Today both towns lean into that history with museums, reconstructed trick houses, and castle grounds that make for an easy, genuinely interesting day trip (or overnight) from Osaka, Nagoya, or Kyoto. Here’s how to actually plan the visit.

    Iga-ueno: the original ninja capital

    Iga-ueno (now part of Iga City) sits in a mountain-ringed basin that made it hard for outside armies to invade and easy for its own agricultural clans — the Hattori, Momochi, and Fujibayashi families among them — to develop ninjutsu as a mix of espionage, guerrilla tactics, herbal medicine, and psychological warfare. The town’s compact core still centers on Ueno Park, which holds the castle, the ninja museum, and a museum dedicated to haiku master Matsuo Basho, who was born here in 1644. You can walk between all three in under 15 minutes, which makes Iga-ueno one of the more efficient half-day history stops in the Kansai region.

    Inside the Iga-ryu Ninja Museum

    The main draw is the Iga-ryu Ninja Museum (伊賀流忍者博物館), inside Ueno Park. A single ticket covers three parts:

    • Ninja House — a real Edo-period farmhouse fitted with revolving walls, trapdoors, and hidden weapon compartments, explained with a short live demonstration by a guide.
    • Ninjutsu Experience Hall — exhibits on shuriken, poison darts, climbing tools, and the chemistry/herbalism side of ninja tradecraft.
    • Ninja show — a live performance of shuriken-throwing and sword/chain-sickle techniques, held several times a day in a small outdoor arena.

    As of recent seasons, admission runs roughly ¥800 for adults, ¥500 for students, and ¥400 for children, with hours generally 9:00–17:00 (last entry 16:30), open daily except occasional winter maintenance closures. Prices and showtimes do shift year to year, so check the official site or ask at the tourist information counter outside Iga-Ueno Station before you build your schedule around a specific show time.

    Ueno Castle and the town itself

    A two-minute walk from the museum, Ueno Castle (also called Hakuho-jo) is a 1935 ferro-concrete reconstruction, but its original Edo-period stone walls — among the tallest in Japan at close to 30 meters — are the real attraction, especially viewed from the moat path below. Admission is a modest separate fee (roughly ¥600 for adults), same general hours as the museum. Outside the park, Iga-ueno’s Ninja-themed arcade near the station sells wooden shuriken, cloth ninja hoods, and locally made Iga-kumihimo braided cords — a nice counterpart if you’ve already browsed craft districts like Sakai’s knife-making district near Osaka and want another regional handmade souvenir. Late April into early May, the town runs its Ninja Festa, when staff and shopkeepers dress in costume and extra performances pop up around the shotengai shopping street — a fun but noticeably busier time to visit.

    Getting to Iga-ueno

    Iga-Ueno Station is the hub, served by both JR and the local Iga Railway:

    • From Osaka: Kintetsu Osaka Line from Osaka-Namba to Iga-Kambe (around 1 hour), then transfer to the Iga Railway to Iga-Ueno/Uenoshi Station (about 15 minutes). Total roughly 1.5–2 hours.
    • From Nagoya: Kintetsu Nagoya Line to Iga-Kambe via a transfer at Yamato-Yagi, then the Iga Railway — or JR Kansai Main Line via Kameyama. Either way, budget around 2 hours. If you’re flying into the region, our guide to Chubu Centrair Airport covers onward rail connections toward Nagoya that feed into this route.
    • From Kyoto: JR Nara Line to Kizu, then the Kansai Main Line via Kameyama to Iga-Ueno — roughly 2 hours with a transfer or two.

    There’s no shinkansen station in Iga, which is exactly why it still feels undertouristed — most visitors are day-tripping from a bigger base rather than staying overnight, though a night in town means you’ll have the castle grounds nearly to yourself at dusk.

    Koka: Iga’s ninja rival in Shiga

    Over the mountains in Shiga Prefecture, Koka City was home to the Koka-ryu school — technically allied with, but historically competitive with, the Iga clans. Koka ninjutsu leaned more on poison and medicine craft than Iga’s espionage focus, a legacy that partly explains why the region later became a center for traditional Japanese pharmaceuticals (Koka is still known for its historic medicine-making trade alongside its ninja reputation). The city also encompasses Shigaraki, famous nationwide for Shigaraki-yaki pottery and its ubiquitous tanuki (raccoon dog) statues — worth folding into the same day if you’re into ceramics shopping.

    Koka’s ninja attractions are smaller and more spread out than Iga’s, centered on restored ninja residences with trick doors and hidden-weapon displays, similar in concept to Iga’s Ninja House but on a quieter, more local scale. Important practical note: some of Koka’s ninja-themed facilities have had periods of closure or reduced hours in recent years due to funding and staffing issues, so confirm current opening status by phone or through the Koka City tourism site before making the trip — this is the single most common mistake visitors make here, showing up on the assumption that everything runs daily like Iga’s museum does.

    Getting to Koka and planning the combined trip

    Koka is reached via the JR Kusatsu Line — from Kyoto or Maibara, change at Kusatsu onto the Kusatsu Line toward Koka Station or Mikumo Station (roughly 1–1.5 hours from Kyoto). The ninja sites and Shigaraki pottery area aren’t within easy walking distance of each other or the station, so a rental car or local taxi makes the day far more efficient than relying on the infrequent local buses. Because Iga-ueno and Koka sit on opposite sides of the same mountain range rather than on a direct rail line, treat them as two separate day trips from a Kansai base (Kyoto or Osaka) rather than one combined itinerary — trying to do both in a single day usually means rushing one or both.

    Best time to go and budget tips

    Spring (April–May) and autumn (October–November) are the most comfortable months, with the Ninja Festa in late April/early May as a lively but crowded bonus if you don’t mind company. Summer is hot and humid in the Iga basin; winter is quiet and cold but means empty castle grounds and shorter museum lines. For budget planning, a half-day in Iga-ueno covering museum, castle, and a bowl of local soba for lunch comes in comfortably under ¥3,000 per person; splurging means adding the kumihimo cord-making workshops some shops offer, or staying overnight in a ryokan near Ueno Park instead of day-tripping. If you enjoy themed heritage towns like this, Mie and Shiga sit alongside similar day-trip-friendly destinations covered elsewhere, like the samurai streets of Kakunodate up north, or the festival-driven Chichibu day trip from Tokyo if your itinerary runs through the Kanto side instead.

  • Omicho Market: Kanazawa’s Seafood and Kitchen Market Crawl

    Omicho Market: Kanazawa’s Seafood and Kitchen Market Crawl

    Photo by Jong Hyuk Lee on Unsplash

    Locals call it “Kanazawa’s kitchen,” and after one visit you’ll understand why. Omicho Market is a tangle of nearly 200 stalls packed into a few covered arcades in the heart of the city, selling everything from live snow crab to lacquered chopstick rests. It’s not a sanitized tourist food court — it’s where Kanazawa’s restaurants and home cooks have shopped for over 300 years, which is exactly what makes it worth building a few hours of your trip around.

    What Omicho Market Actually Is

    Omicho (近江町市場) dates back to 1721, making it one of the oldest continuously operating markets in Japan. It survives today as a working market first and a tourist attraction second — fishmongers still shout prices, restaurant buyers still haggle over the morning’s catch, and plenty of stalls don’t bother with English signage. That’s part of the appeal. The market sits inland from the Sea of Japan but draws directly from Kanazawa’s own fishing port and from Noto Peninsula boats, so the seafood here is as close to source as you’ll find without standing on a dock.

    The market is a grid of narrow covered streets, roughly split between fresh-food stalls (fishmongers, produce sellers, butchers) and small eat-in counters and restaurants tucked between them. Budget at least 90 minutes if you want to eat and browse; a serious photography-and-tasting crawl can easily fill half a day.

    Getting There and the Best Time to Go

    Omicho is about 1.3 km from Kanazawa Station — a 15 to 20 minute walk, or a 5-minute ride on the Kanazawa Loop Bus or a Hokutetsu city bus to the Omicho Ichiba stop (flat fare around 200 yen). If you’re flying in rather than taking the Hokuriku Shinkansen, Komatsu Airport is about 30 minutes from the city by limousine bus; it’s worth comparing that route against the shinkansen using our guide to LCC vs JAL & ANA for domestic flights if you’re coming from western Japan or Kyushu.

    Most stalls open between 7:00 and 9:00 and run until 17:00 or 17:30; eat-in restaurants tend to stay open a bit later for dinner. There’s no single market-wide closing day, but a number of individual fishmongers close on Wednesdays, and Sundays run noticeably quieter with fewer wholesale buyers around. Go before 10:00 for the best selection and shortest lines at the popular kaisendon counters — by midday on weekends, queues for the well-known rice-bowl shops can run 30-45 minutes.

    Seasonally, winter (November through March) is peak season for Kano crab, Omicho’s signature brand of local snow crab, and for plump Noto oysters. Summer brings excellent sweet shrimp and squid; if crab is your main goal, come in the cold months.

    What to Eat: Crab, Sweet Shrimp and Kaisendon

    The single most popular thing to do at Omicho is eat a kaisendon — a bowl of rice piled with an assortment of raw seafood. Standard bowls with five or six varieties (tuna, salmon, sweet shrimp, squid, a bit of roe) run roughly 1,500 to 3,500 yen. Loaded “special” bowls with sea urchin, extra crab, and a thick cap of salmon roe climb to 4,000-6,000 yen or more at the sit-down restaurants along the market’s edges. Budget travelers can do just as well grazing standing-stalls: a grilled Noto oyster typically costs 500-800 yen, a skewer or small pack of amaebi (sweet shrimp) runs 500-1,000 yen, and grilled scallops or small seafood skewers are similarly priced.

    For a splurge, whole Kano crab is sold both live and cooked, with prices scaling steeply by size and season — expect anywhere from 5,000 yen for a smaller crab to well over 15,000 yen for a prime specimen in peak winter. Some stalls will pack crab for travel or ship it, which is worth asking about if you can’t eat it on the spot.

    A few etiquette notes that matter here: most stalls expect you to eat standing or at a small counter, not while walking through the arcades, and many are cash-only or have low card minimums, so carry yen. If a stall has a visible line of locals rather than tourists, that’s usually the better sign of quality than the one with the biggest English menu board.

    Shopping for Souvenirs: Dashi, Crafts and Kitchen Tools

    Beyond the raw seafood, Omicho is a good place to buy the dried and preserved goods that stock a Japanese kitchen. Several stalls sell kombu, bonito flakes (katsuobushi), and bagged dashi packs — if you’re unfamiliar with how these fit together, our buyer’s guide to dashi explains what to look for before you commit to a bag. Ishikawa Prefecture is also home to Wajima lacquerware and Kutani pottery, and a handful of shops inside and around the market sell smaller, travel-friendly pieces — lacquered chopsticks, small bowls, sake cups — at prices generally starting around 1,000-2,000 yen for simple items and climbing quickly for hand-finished lacquerware.

    If you’re in the market for a proper Japanese kitchen knife as a souvenir, you’ll find a modest selection here, though the serious destination for that purchase is Osaka’s historic blade district — worth a look at our guide to Sakai’s knife-making shops if cutlery is a priority for your trip rather than a side purchase.

    Common Mistakes to Avoid

    • Arriving with a rolling suitcase. The arcades are narrow and crowded; if you’re traveling onward the same day, leave bags at the station’s coin lockers first.
    • Skipping breakfast beforehand and arriving starving at noon. Lines for the famous kaisendon counters peak between 11:30 and 13:30. Eating at 9:00 or waiting until 15:00 avoids the worst of it.
    • Assuming every stall takes cards. Many small fishmongers and food stands are cash-only. Bring enough yen for the day.
    • Buying crab or fresh fish without asking about transport. Fresh seafood doesn’t travel well without proper packing or refrigeration — ask the stall whether they offer vacuum-sealed or chilled packaging for hotel or flight transport before you buy.
    • Treating it purely as a photo stop. Vendors are friendly but this is a working market, not a staged attraction — a little courtesy (not photographing people’s faces without asking, not blocking narrow aisles) goes a long way.

    Pairing Omicho With the Rest of Your Day

    Omicho sits close enough to Kanazawa Castle Park and Kenrokuen Garden that a market breakfast or lunch fits naturally into a half-day loop through the city center, with the Higashi Chaya geisha district reachable afterward by a short bus ride. If you’re building a longer Hokuriku itinerary, Kanazawa pairs well with onward trips to Takayama via the Chubu region — our guide to Chubu Centrair Airport and getting to Nagoya, Takayama and Ise is useful if you’re routing through that side of the country rather than backtracking to Tokyo.

  • Ishigaki & the Yaeyama Islands: Okinawa’s Coral Reefs and Southernmost Gateway

    Ishigaki & the Yaeyama Islands: Okinawa’s Coral Reefs and Southernmost Gateway

    Photo by Chor Tsang on Unsplash

    Closer to Taipei than to Tokyo, Ishigaki and the Yaeyama Islands feel like a different country stitched onto Japan’s southern edge. This is where Okinawa’s turquoise-water reputation is actually earned — fringing coral reefs, mangrove rivers, water buffalo carts, and a scattering of small islands you can hop between in a single morning. It’s also the launch point for Japan’s southernmost inhabited territory. Here’s how to plan the trip properly.

    Getting There (and Around)

    New Ishigaki Airport (ISG) has direct flights from Tokyo Haneda and Narita (around 3.5 hours), as well as Osaka, Nagoya, and Fukuoka; ANA and JAL run the bulk of these routes, with seasonal and LCC capacity shifting year to year, so it’s worth comparing fares before booking — our guide to LCC vs JAL & ANA for long domestic hops explains when the budget carriers are actually worth it. If you’re coming from mainland Okinawa, it’s a quick 45-minute hop from Naha.

    Once on Ishigaki, a rental car is close to essential — budget roughly ¥5,000–8,000/day in peak season, and book weeks ahead for summer. Public buses exist but run infrequently and won’t get you to the best beaches or the Kabira Bay viewpoint on a convenient schedule. Ishigaki Port, right in town, is the hub for ferries to the outer islands.

    Island-Hopping: Taketomi, Iriomote, and Beyond

    This is the real draw. High-speed ferries from Ishigaki Port reach Taketomi Island in about 10–15 minutes (roughly ¥1,500 round trip) — a village of sand-covered lanes and red-tiled houses where water buffalo carts (around ¥2,000 for a 30-minute loop with a shamisen-playing driver) are genuinely worth the tourist-trap price tag. Iriomote, about 35–40 minutes away, is almost entirely covered in subtropical jungle and mangrove forest; kayaking up the Urauchi or Nakama River, or hiking to Pinaisara Falls, feels more like Borneo than Japan. Smaller islands — Kohama, Hatoma, Aguni — are quieter still and make good half-day add-ons if you base yourself in Ishigaki City for a few nights.

    Ishigaki is also the departure point for Yonaguni, Japan’s westernmost inhabited island, reachable by a roughly 30-minute flight or a long ferry crossing. If diving the disputed underwater “ruins” or spotting hammerhead sharks interests you, it’s a worthwhile extension — see our guide to Yonaguni for logistics. For a different flavor of Okinawan island-hopping with bridges instead of ferries, Miyakojima is a separate trip north of here, not part of the Yaeyama chain, but a common point of comparison when people are deciding between the two.

    Best Time to Visit

    April through June is the sweet spot: warm water, good visibility, and before the worst of the heat and typhoons. July and August bring the hottest temperatures and the most reliable sunshine, but also peak crowds, peak prices, and real typhoon risk — August and September see the most storm activity in this part of Okinawa, and ferries to the outer islands suspend service when one approaches, sometimes stranding travelers for a day or two. Winter (December–February) is mild (around 18–22°C) and a legitimate low-season option if you don’t mind water too cool for comfortable snorkeling; it’s also whale-watching season, with boat tours (roughly January–April, around ¥5,000–6,000) heading out to spot humpbacks. Avoid planning a tight, single-day island-hop during peak typhoon season — build in a buffer day.

    Diving, Snorkeling & Beaches

    Kabira Bay is the postcard shot, but swimming is banned there to protect the black pearl farms — go for the glass-bottom boat tour (around ¥1,000) instead and swim elsewhere. Yonehara Beach has an easily accessible reef right off the sand, good for snorkelers who don’t want a boat. For diving, the Manta Scramble and Manta Way sites near the Kabira area are Ishigaki’s signature draw, with manta ray encounters most reliable from November to May; dive shops in town run trips from around ¥12,000–15,000 for a two-tank day including gear. Budget travelers can skip the boat entirely and snorkel reef edges at Fusaki Beach or Sunset Beach for free.

    Where to Stay & What to Bring Home

    Ishigaki City has the widest range: budget guesthouses from around ¥3,000–5,000/night, mid-range resort hotels near the harbor from ¥10,000–18,000, and splurge options like beachfront resorts on the north shore (ANA InterContinental Ishigaki, for instance) running ¥25,000+ in peak season. Staying in Taketomi overnight (a handful of small inns) is a nice way to see the village without day-trip crowds, but book well ahead since rooms are limited.

    Before you fly home, pick up Yaeyama salt (mineral-rich sea salt, sold in small bags from around ¥500), Ishigaki beef (a lesser-known but well-regarded wagyu brand), kokuto black sugar blocks, and minsa textiles — a traditional striped weave originally used for obi sashes, now sold as coasters and bags in Taketomi and Ishigaki City shops.

    Common Mistakes to Avoid

    • Underestimating ferry schedules. Outer-island ferries run less frequently than they look on paper, and the last boat back to Ishigaki is often mid-afternoon, not evening. Check return times before you commit to an itinerary.
    • Not booking a car early enough. Rental agencies sell out fast in Golden Week (late April–early May) and summer; without a car, Kabira Bay and the northern beaches are a frustrating bus transfer away.
    • Ignoring typhoon contingencies. If you’re traveling August–September, buy travel insurance and avoid scheduling a flight home the same day as an inter-island ferry — a one-day delay can cascade.
    • Swimming at Kabira Bay. It’s prohibited, patrolled, and fined — go for the boat tour and swim at Yonehara or Fusaki instead.
    • Treating Ishigaki City as the whole trip. The city itself is pleasant but unremarkable; the reason to come is the surrounding islands and reefs, so leave at least two full days free for Taketomi and Iriomote.
  • Kakunodate: Akita’s Samurai District and Weeping Cherry Trees

    Kakunodate: Akita’s Samurai District and Weeping Cherry Trees

    Photo by kaori kubota on Unsplash

    Kakunodate, a small town tucked into the mountains of Akita Prefecture, is often billed as “Little Kyoto of Tohoku,” but that nickname undersells it. Unlike most preserved samurai districts in Japan, Kakunodate’s Bukeyashiki quarter still has real weeping cherry trees towering over its black wooden fences—some planted more than 350 years ago. It’s a half-day trip that rewards almost any season, but it becomes something extraordinary for about ten days in late April and again in mid-to-late October. Here’s what you actually need to know to plan the visit.

    Getting to Kakunodate

    Kakunodate sits on the Akita Shinkansen line, which makes it more accessible than its remote-sounding location suggests. The Komachi shinkansen runs directly from Tokyo Station in about 3 hours 10 minutes to 3.5 hours, with reserved-seat fares typically around ¥17,000–18,500 one way. If you’re coming from Akita City, the same Komachi train takes roughly 45 minutes and costs around ¥3,000. From Morioka, it’s about 45–50 minutes as well.

    If you’re building a longer Tohoku itinerary, Kakunodate pairs naturally with Lake Tazawa (one stop further on the Komachi line) and with the Resort Shirakami sightseeing train, which runs along the Akita coastline and is one of the best scenic rail trips in the region. If flying into Akita Airport instead of taking the shinkansen the whole way, it’s worth comparing options on domestic carriers—our LCC vs. JAL/ANA comparison covers when a budget flight actually beats the train on longer hops from Tokyo or Osaka.

    The station itself is a 10–15 minute walk from the samurai district. Rental bicycles are available right outside the station for around ¥300–500 per hour or roughly ¥1,500 for a full day, and they’re genuinely useful since the cherry-tree-lined river is about 1.5 km from the samurai houses.

    The Samurai District (Bukeyashiki): What to See

    The Bukeyashiki-dori is a roughly 400-meter street of former samurai residences, still shaded by soaring black pine and cherry trees. Walking the street itself is free, but several houses charge small admission fees to go inside:

    • Aoyagi Family Samurai Manor – the largest and most elaborate complex, with multiple buildings and a small museum of armor, tools, and period artifacts. Admission is around ¥600. Open roughly 9:00 am–5:00 pm, with shorter winter hours.
    • Ishiguro Family Samurai House – smaller and quieter, and notable because descendants of the original family still live there part-time. Admission is around ¥400.
    • Matsumoto and Odano houses – more modest residences where you can usually peer into the gardens without an entry fee.

    Budget travelers can see the whole street, including the cherry canopy, for free and just pick one paid house (Aoyagi is the best single choice if you only do one). Give the district 1.5–2 hours if you’re going inside a house or two; 45 minutes is enough for a walk-through only.

    Weeping Cherries and the Best Time to Visit

    The weeping cherries (shidarezakura) in the samurai district are a designated National Natural Monument—roughly 400 trees, many over 300 years old, descended from cuttings brought from Kyoto when a bride married into the Sano family generations ago. Because Akita is far north, Kakunodate blooms noticeably later than Tokyo or Kyoto: expect peak bloom in the last week of April to the first few days of May, rather than late March. Check seasonal forecasts close to your trip date since the window is short and weather-dependent.

    Separately, along the Hinokinai River about a 15-minute walk from the samurai street, there’s a roughly 2 km tunnel of around 400 Yoshino cherry trees (Shidarezakura-bashi to Kakunodate Bridge). This is a different, pinker variety from the weeping cherries in town, and it usually blooms around the same window—visiting both in one afternoon is easy and worthwhile.

    If you’re traveling outside cherry season, don’t skip Kakunodate. The same tree canopy turns deep red and gold in autumn, typically peaking from mid-to-late October through early November—which makes this a genuinely good time to visit right now. Winter brings heavy snow that dusts the black fences and thatched roofs, and summer gives you full green shade along the same street, with far fewer crowds than April.

    Shopping for Kabazaiku Cherry-Bark Crafts

    Kakunodate’s other claim to fame is kabazaiku, a traditional woodworking technique using cherry tree bark that dates back over 200 years to the local samurai, who made tea caddies and small boxes as a side income. It’s one of the more distinctive regional crafts in Japan and genuinely unlike what you’ll find elsewhere—if you’ve browsed the Sakai knife district in Osaka for craft souvenirs, this is Akita’s equivalent stop.

    Several workshops and the Kakunodate Kabazaiku Museum (admission around ¥300) sit right along or near the samurai street, and most shops let you watch craftspeople working. Prices run from around ¥1,000–2,000 for small coasters or business card cases, ¥5,000–15,000 for mid-size tea caddies (chazutsu), up to ¥30,000–80,000+ for larger, finely grained pieces made from wild mountain cherry bark. The dark, semi-glossy texture is the real giveaway of authentic kabazaiku—cheaper printed imitations exist, so buy from the dedicated shops on or near Bukeyashiki-dori rather than generic souvenir stands near the station.

    Food and Practical Tips

    Akita’s regional noodle, inaniwa udon, is thinner and more delicate than standard udon and is served cold with a dipping sauce in summer; several small restaurants along the samurai street serve it for around ¥900–1,300. It’s a good, quick lunch between houses.

    Common mistakes to avoid: don’t try to do Kakunodate as a rushed stop between shinkansen connections—allow at least 2.5–3 hours including travel buffer, more if you want to see both the samurai street and the riverside cherry tunnel. Also, don’t assume all samurai houses are open; a couple of smaller ones close on rotating days or in winter, so if a specific house matters to you, check ahead rather than discovering a shut gate. Finally, during the narrow late-April bloom window, both lodging in town and the shinkansen itself sell out well in advance—book your train seats and any overnight stay as early as you can if you’re targeting peak cherry season.

  • Chichibu: Saitama’s Night Festival, Shibazakura Hill & Easy Tokyo Day Trip

    Chichibu: Saitama’s Night Festival, Shibazakura Hill & Easy Tokyo Day Trip

    Photo by Athanasia Andrikopoulos on Unsplash

    Less than ninety minutes from Ikebukuro by train, Chichibu is one of the easiest ways to swap Tokyo’s crowds for mountain air, a genuinely historic festival, and (depending on the season) a hillside carpeted in pink. It’s a working town in the Saitama mountains rather than a polished tourist set piece, which is exactly why it’s worth the trip — you get real shrine festivals, real soba shops, and real sake and whisky producers instead of a reenactment. Here’s how to time it right.

    Getting to Chichibu from Tokyo

    The main route is the Seibu Railway from Ikebukuro Station. The limited express “Laview” (also called the Red Arrow line) runs direct to Seibu-Chichibu Station in about 80 minutes, with a one-way fare plus reserved-seat surcharge totaling roughly 1,500–1,700 yen for adults. If you don’t mind a transfer at Hanno and a slower ride (around two hours), regular and rapid trains cost about 790 yen one-way and don’t require a reservation.

    Seibu also sells a “Chichibu Free Kippu” discount ticket that bundles a round trip from Ikebukuro-area stations with unlimited local travel around Chichibu for a couple of days — useful if you’re combining the festival or flower fields with Nagatoro or a shrine-hopping day. Prices shift seasonally, so check the current fare at a Seibu ticket counter or their website before you go.

    A second option is JR to Kumagaya (via the Takasaki or Shonan-Shinjuku Line), then the Chichibu Railway onward to Chichibu Station — slower, but it’s the line used by the seasonal “SL Paleo Express” steam train, a fun add-on if you enjoy scenic rail, similar in spirit to the sightseeing trains covered in our guide to Japan’s best scenic sightseeing trains. Note that Seibu-Chichibu Station and Chichibu Station (Chichibu Railway) are separate buildings about a 15-minute walk apart — know which one you need before you arrive.

    The Chichibu Night Festival: One of Japan’s Three Great Float Festivals

    Held every year on December 2 and 3, the Chichibu Yomatsuri (Night Festival) is ranked alongside the Takayama and Kyoto Gion festivals as one of Japan’s three most celebrated float festivals, and it’s part of the UNESCO-inscribed “Yama, Hoko, Yatai” float festival group. Four enormous wooden floats (yatai) and two parasol-shaped floats (kasaboko), some weighing several tons, are hauled through the streets by teams of parishioners with drummers and flute players riding aboard.

    The climax comes on the evening of December 3, when the floats are physically dragged up a steep slope near Chichibu Shrine — a dramatic, rope-and-muscle spectacle lit by lanterns — while a fireworks display lights the winter sky, an unusual pairing since fireworks in Japan are normally a summer event. The main action runs roughly 7–9 pm, and the whole thing is free to watch with no tickets or reservations needed.

    The catch: hundreds of thousands of people attend over the two days, and it’s December in the mountains, so temperatures drop well below what Tokyo visitors expect. Dress in proper layers, bring hand warmers, and expect to be standing in a packed crowd for hours. Arrive at the shrine area well before dark if you want a clear view of the climb, and plan your return train in advance — services back toward Ikebukuro get crowded and thin out as the night goes on.

    Shibazakura Hill: Hitsujiyama Park’s Pink Carpet

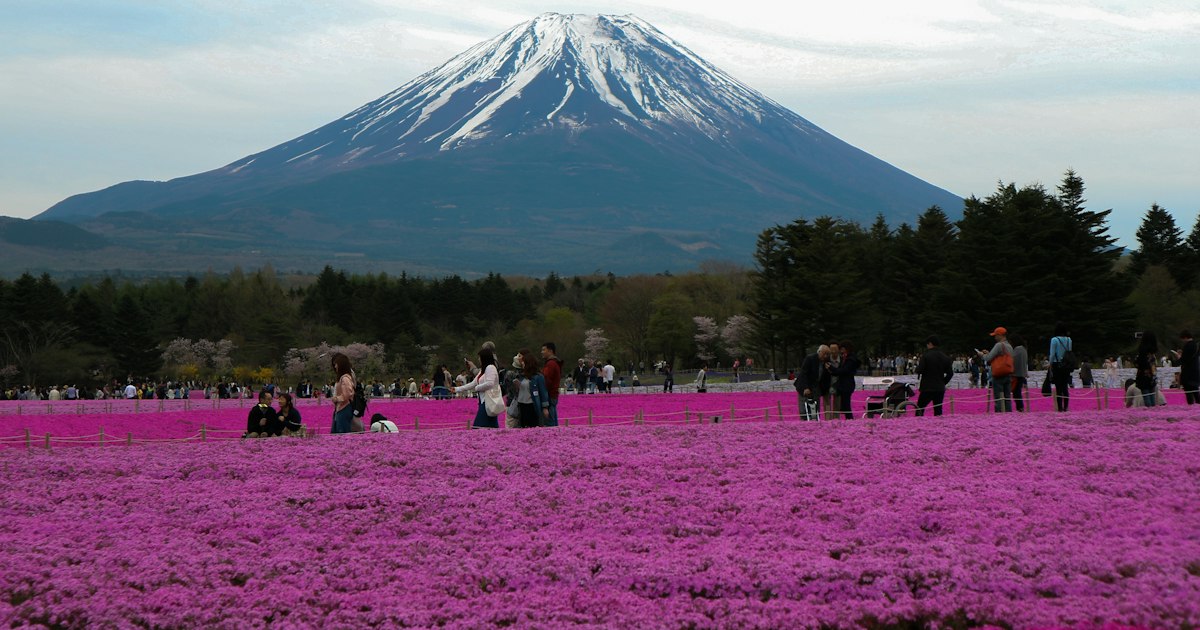
    If December crowds and cold aren’t your thing, come back in spring. Hitsujiyama Park — known locally as “Shibazakura Hill” — fills roughly 17,600 square meters with about 400,000 moss phlox (shibazakura) plants across nine color varieties, arranged in sweeping bands of pink, white, and purple with Mt. Buko rising behind as a backdrop.

    Bloom season typically runs from mid-April through early May, peaking around Japan’s Golden Week holidays, though exact dates shift with the weather each year — check the official bloom-status updates before committing to a date, since a cold spring can push the peak back by a week or two. During the festival period there’s an entrance fee of around 300 yen for adults; outside that window the park is free to enter but the flowers won’t be in bloom.

    The park is an easy walk from either Seibu-Chichibu Station (about 15–20 minutes) or Ohanabatake Station on the Chichibu Railway, which is only a few minutes from the entrance and the better choice if you’re carrying camera gear or traveling with kids.

    Beyond the Headliners: What Else to Do in Chichibu

    Chichibu rewards a full day. Chichibu Shrine itself is worth a slow look even outside festival season, with carved wooden panels depicting local legends. Mitsumine Shrine, higher in the mountains, is a quieter pilgrimage site with sweeping views if you have extra time and don’t mind a bus transfer. Nagatoro, one stop further on the Chichibu Railway, is popular for river-rafting and seasonal illuminations and pairs well with a Chichibu morning.

    Serious whisky fans should know Chichibu is home to Venture Whisky’s Chichibu Distillery, maker of the internationally acclaimed Ichiro’s Malt — tours and tastings exist but require reservations well in advance and sell out fast, so this is a plan-ahead splurge, not a walk-in option. Local soba shops near the shrine serve the region’s buckwheat noodles, a specialty worth seeking out — if you’re curious about Japan’s broader noodle traditions, our piece on toshikoshi soba is a good companion read given how close the Night Festival falls to New Year.

    Budgeting Your Day Trip

    • Budget (~3,000–4,000 yen total): Regular Seibu trains (skip the limited express), walk between sights, grab breakfast or coffee from a convenience store before you leave — our guide to convenience store coffee machines is handy if you’re making an early departure from Tokyo.
    • Mid-range (~6,000–8,000 yen): Limited express round trip with reserved seats, a sit-down soba lunch (1,200–1,800 yen), Shibazakura entry fee in season, and a stop at a local sake or craft beer shop.
    • Splurge (15,000 yen+): A reserved Chichibu Distillery tour and tasting, a private taxi to skip the Night Festival crowds, or an overnight stay at a local ryokan so you’re not racing for the last train home.

    Common Mistakes to Avoid

    • Assuming shibazakura dates are fixed — they move with the weather each year, so check current bloom reports rather than relying on last year’s calendar.
    • Underestimating December cold at the Night Festival — this is a mountain town after dark, not central Tokyo.
    • Confusing Seibu-Chichibu Station with Chichibu Station — they serve different railway companies and are a 15-minute walk apart.
    • Not checking last-train times back to Tokyo on festival nights, when trains fill up fast and gaps between departures widen late in the evening.
    • Showing up at Venture Whisky’s distillery without a reservation — tours there don’t accept walk-ins.
  • Yudofu: Kyoto’s Simmered Tofu Tradition at Nanzen-ji

    Yudofu: Kyoto’s Simmered Tofu Tradition at Nanzen-ji

    Photo by Omkar Jori on Unsplash

    On a cool morning in Kyoto’s Higashiyama hills, there’s no better reason to walk up to Nanzen-ji than the promise of a steaming clay pot of tofu simmering in kombu dashi at the end of the path. Yudofu — literally “hot water tofu” — looks almost too simple to be famous: cubes of tofu gently poached in broth, dipped in sauce, eaten slowly. But around Nanzen-ji, this plain dish has been refined into a centuries-old ritual, and the restaurants that serve it are as much a part of the temple experience as the Zen gardens themselves.

    What Yudofu Actually Is

    Yudofu is tofu simmered tableside in a shallow earthenware pot over a small burner, in water or light dashi steeped with a sheet of kombu seaweed. You lift the tofu out with a slotted ladle and dip it into one of two sauces: a soy-based ponzu with grated daikon and scallion, or a warm soy-sesame sauce, usually topped with katsuobushi flakes, chili flakes, and ginger. On its own, the tofu is deliberately bland — the point isn’t the tofu itself but the contrast between its soft, warm neutrality and the sharp, salty sauce you add. If you’re curious about the kombu and bonito stock that underpins not just yudofu but most Japanese cooking, it’s worth reading up on dashi before you go — it changes how you taste the dish.

    Why Nanzen-ji, Specifically

    Nanzen-ji is one of Kyoto’s most important Zen temples, head temple of its own branch of Rinzai Buddhism, tucked into the base of the Higashiyama hills near Lake Biwa Canal. Kyoto’s broader tofu culture grew out of Buddhist monastic cooking (shojin ryori), which avoided meat and fish and leaned on tofu, vegetables, and grains for protein and texture. Soft Kyoto water and a concentration of tofu makers in the temple district made the area a natural home for tofu specialty restaurants, and several have operated right outside Nanzen-ji’s gates for thousands of meals a year, some tracing their history back over 300 years. Eating yudofu here isn’t just convenient — it’s eating the dish more or less where its reputation was built.

    Where to Eat It Near Nanzen-ji

    A handful of long-established restaurants cluster around the temple’s approach and inside its outer precinct, each with its own atmosphere:

    • Budget (around ¥1,500–2,500): Smaller shokudo-style eateries along the approach to Nanzen-ji serve a simpler yudofu teishoku (set meal) with rice, pickles, and a small side — a good option if you just want to try the dish without a full multi-course experience.
    • Mid-range (around ¥3,000–5,000): Okutan, right by Nanzen-ji’s gate, is one of the oldest tofu-specialty restaurants in the area, serving yudofu sets alongside sesame tofu, tempura, and seasonal vegetables in a traditional tatami setting. Expect a short wait at lunch, especially on weekends.
    • Splurge (¥6,000–15,000+): Junsei, housed in a Meiji-era building near the temple with its own garden, serves multi-course yudofu kaiseki — several small dishes building up to and around the tofu pot. This is the version worth booking ahead for, particularly in the evening.

    Prices and set menu contents shift year to year, so treat these as a planning range rather than a quote — check current menus once you’ve picked a spot. Most of these restaurants stop taking orders 30–60 minutes before their stated closing time, so don’t cut it close.

    Getting There and Pairing It With the Temple

    Nanzen-ji sits in Sakyo-ku, a 5–10 minute walk uphill from Keage Station on the Tozai subway line. It’s also reachable by city bus, and it sits at the northern end of the Philosopher’s Path (Tetsugaku no Michi), the canal-side walking route that connects it to Eikan-do temple and eventually Ginkaku-ji — so a yudofu lunch pairs naturally with an afternoon of temple-hopping on foot. The temple’s main grounds are generally open from around 8:40am to 5:00pm (slightly earlier closing in winter), free to enter, with small separate fees (roughly ¥500–600) to enter specific sub-areas like the Hojo garden or the San-mon gate’s upper floor. Plan to see the temple first and eat afterward — most of the tofu restaurants are busiest right around standard lunch hours (11:30am–1:30pm).

    Best Time to Visit

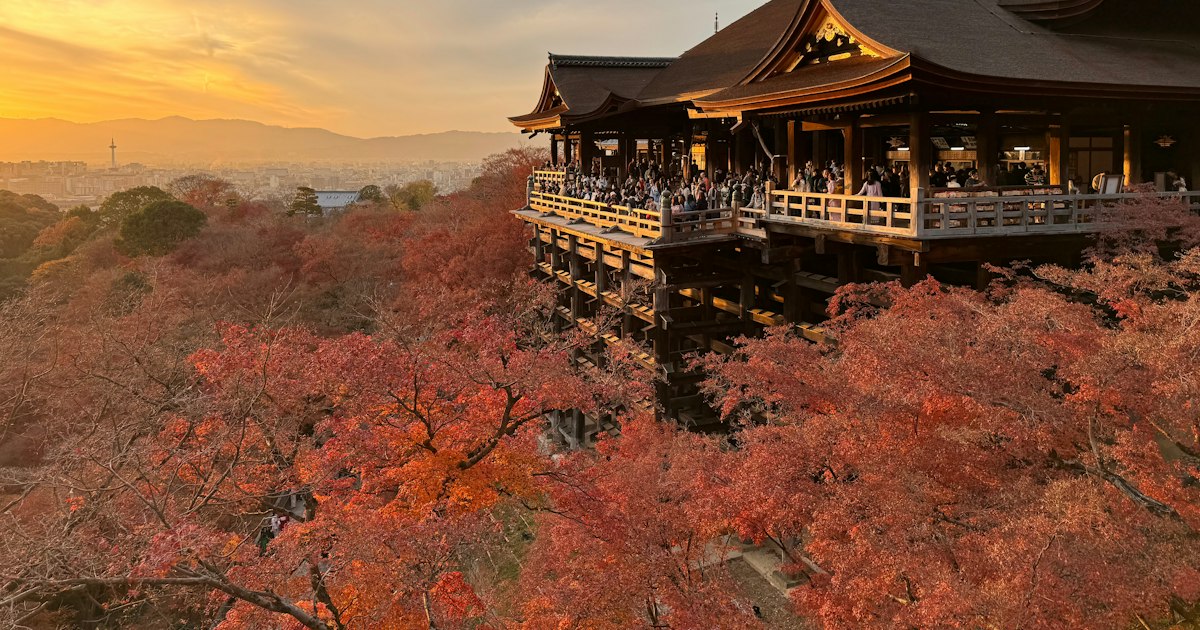
    Yudofu is served year-round, not just in winter, but it earns its reputation most in the colder months — late autumn through early spring — when a hot pot by a garden window actually makes sense with the weather. November is peak season for a reason beyond foliage: Nanzen-ji’s maples turn around early-to-mid November, and a yudofu lunch afterward is the classic way to warm up. That said, November is also when reservations and walk-in waits are longest, so booking ahead (where possible) or arriving right at opening for lunch is worth the effort. Summer visits are quieter and the dish is still available, usually served in a shaded tatami room rather than outdoors.

    Common Mistakes to Avoid

    • Skipping the sauce. Yudofu is intentionally unseasoned — the dipping sauce isn’t a garnish, it’s half the dish. Don’t eat the tofu plain and conclude it’s bland; that’s the design, not a flaw.
    • Treating it as a quick bite between temples. The kaiseki-style courses are meant to be eaten slowly, course by course. Rushing a multi-dish yudofu set defeats the point and wastes the price.
    • Confusing it with other tofu dishes. Yudofu (simmered) is different from hiyayakko (cold tofu with toppings) and agedashi dofu (lightly fried tofu in broth) — if a menu lists several tofu dishes, make sure you’re ordering the simmered pot.
    • Showing up right before closing. Last order is often well before the posted closing time, especially for the sit-down kaiseki restaurants — call ahead if you’re cutting it close.
    • Skipping it in summer because it “sounds wrong for hot weather.” It’s genuinely served all year in cooled tatami rooms, and the contrast of warm tofu in an air-conditioned room is pleasant, not odd.

    Taking a Bit of the Tradition Home

    You can’t bring yudofu itself back on a plane, but you can bring back pieces of what makes it work: a block of good kombu for your own dashi, or a quality Japanese kitchen knife if the trip has gotten you interested in home cooking more broadly — Kyoto’s tofu culture and Osaka’s knife-making tradition both grew out of the same attention to simple ingredients done precisely, and it’s worth a look at Sakai’s blade-making district if you want a souvenir that actually gets used. Either way, the real takeaway from a Nanzen-ji yudofu meal is less about the tofu and more about the pace — a reminder, like many of Japan’s food rituals, from New Year’s toshikoshi soba to a slow temple lunch, that some dishes are built around the occasion as much as the flavor.

  • Mentaiko: Fukuoka’s Spicy Cod Roe and Where to Try It

    Mentaiko: Fukuoka’s Spicy Cod Roe and Where to Try It

    Photo by blackieshoot on Unsplash

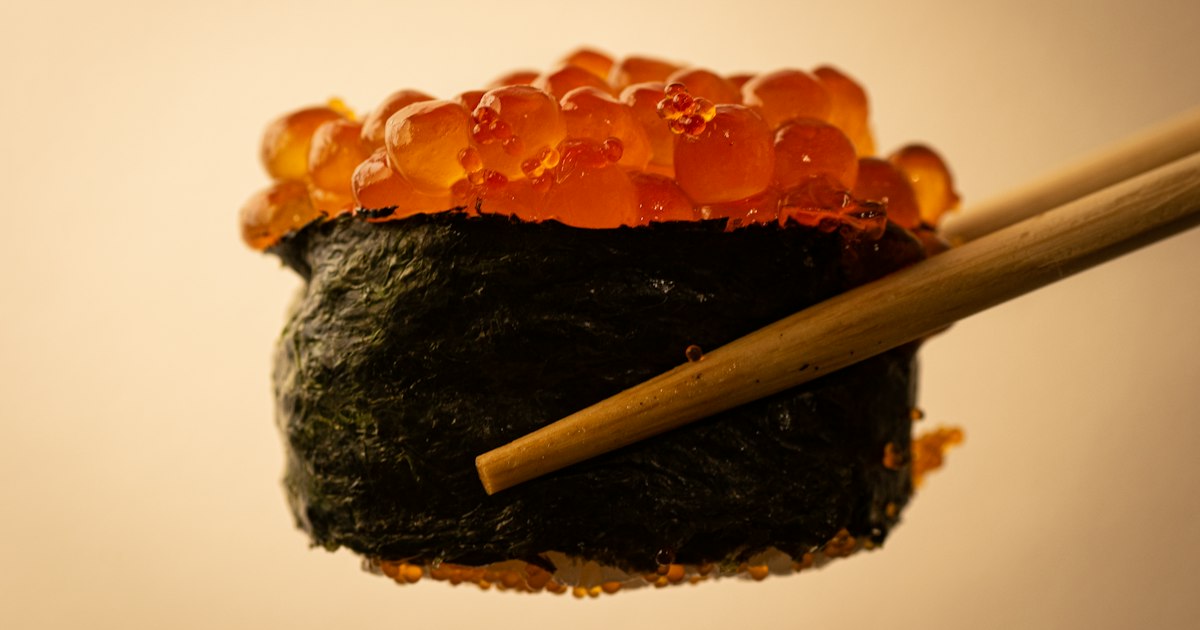
    Walk into any souvenir shop in Hakata Station and you’ll see the same bright orange-red packages stacked by the thousands: mentaiko, the spicy marinated cod roe that put Fukuoka on Japan’s culinary map. It’s salty, faintly fiery, deeply savory, and nothing like the bland tarako (plain cod roe) you might have tried elsewhere. If you’re flying through Fukuoka or routing a Kyushu trip around food, mentaiko deserves a dedicated stop—here’s how to buy it, eat it, and get it home without ruining your suitcase.

    What Mentaiko Actually Is

    Mentaiko is the roe (egg sac) of Alaskan pollock, cured in a brine of salt, chili pepper, and seasonings like sake or kombu dashi. The name comes from “mentai,” the Korean word for pollock, and the technique traces back to Korean-style spicy pollock roe (myeongnan jeotgal) that migrated to Japan through Fukuoka’s long trading ties with the Korean peninsula. A Fukuoka shop owner adapted the recipe to local Japanese palates after World War II, and the rest of the country fell in love with it over the following decades.

    Texture-wise, think of a sac of tiny, slightly chewy orange eggs that pop between your teeth, releasing a briny, spicy-umami hit. It’s sold raw (namamentaiko, kept chilled) or lightly grilled (yaki mentaiko), and quality varies enormously by grade—larger, unbroken sacs with even color command much higher prices than broken or smaller roe sold at a discount.

    Fukuya: The Shop That Started It All

    Credit for popularizing mentaiko goes to Fukuya, founded in 1949 by Toshio Kawahara near Hakata Station. Fukuya never patented its recipe, which is partly why dozens of competing mentaiko makers—Fukutaro, Yamaya, Kanefuku, Hakata Mentaiko Honpo, and others—now operate across the city, each with slightly different spice blends and marinating times. Fukuya’s main store and several branches are still in central Fukuoka (Chuo-ku), typically open from around 9:00 to 18:00; staff can vacuum-seal purchases for travel on request. Because so many brands compete side by side, it’s worth tasting before you commit—most shops offer small sample pieces at the counter.

    Where to Buy It in Fukuoka

    Budget: The basement food halls inside JR Hakata Station (Hakata 1-Bangai and the Hakata City building) stock nearly every major mentaiko brand under one roof, with travel-sized vacuum packs starting around ¥1,000–¥1,500 for 100g. This is the easiest option if you’re short on time before a train or flight—Hakata Station connects directly to Fukuoka Airport by subway in about 11 minutes.

    Mid-range: A standard 200g pack of good-quality karashi mentaiko from a named brand like Fukuya or Yamaya runs roughly ¥1,500–¥2,500. Gift boxes with multiple sacs packed in branded tins, aimed at omiyage-giving, land in the ¥3,000–¥6,000 range depending on grade.

    Splurge: Premium, large-grain roe sold as a gift set (ichiban-grade, sometimes labeled “tokusen” or “koku-ichi”) can run ¥8,000–¥12,000 or more for a kilogram box—these are the sacs with the least breakage and the most even color, often bought as formal gifts.

    For something more experiential, Kanefuku runs Mentai Park in Itoshima, a free-admission factory outlet about 40 minutes by car from central Fukuoka. You can watch roe being processed through viewing windows, get a free grilled mentaiko onigiri sample, and buy direct-from-factory packs at a discount in the attached shop. There’s no train station nearby, so go by rental car or taxi.

    How to Eat Mentaiko Like a Local

    • On rice: The simplest preparation—a spoonful of raw or lightly grilled mentaiko over hot white rice, sometimes with a pat of butter melted in.
    • Mentaiko pasta: A Japanese-Italian “yoshoku” staple found on cafe menus nationwide: spaghetti tossed with mentaiko, butter, and a little cream or mayonnaise, often finished with shredded nori. If you enjoy Japan’s Western-inspired comfort dishes, it sits in the same lineage as omurice.
    • Mentaiko onigiri: Sold at every convenience store in Fukuoka and increasingly nationwide—a safe, cheap (around ¥150–¥200) way to try it without committing to a full pack.
    • Ramen topping: Several Hakata tonkotsu ramen shops offer a mentaiko option, stirred into the rich pork-bone broth for extra umami depth—a dashi-adjacent flavor boost if you’re into Japan’s broth culture (see our dashi guide for the science behind why this works).
    • Izakaya style: Grilled whole and served with a wedge of lemon, or folded into a fluffy tamagoyaki (rolled omelette)—common on izakaya menus throughout Nakasu and Tenjin.

    Best Timing and Common Mistakes

    Mentaiko is sold year-round and isn’t seasonal in the way produce is, but freshness matters more than timing: raw mentaiko is highly perishable and should be eaten within a few days unless frozen. A few mistakes to avoid:

    • Buying it too early in your trip. If you’re traveling onward for days before flying home, raw mentaiko in a hot bag won’t survive. Buy it near the end of your trip, or choose a frozen/vacuum-sealed pack specifically marketed for travel (“okurimono” or “oみやげ用” packs sold with a cold pack).
    • Confusing mentaiko with tarako. Tarako is the same cod/pollock roe without the chili marinade—plain, salty, and much milder. If you want the spicy version, look for “karashi mentaiko” or “pepper mentaiko” on the label.
    • Expecting intense heat. Mentaiko’s spice is subtle compared to Southeast Asian chili pastes—it’s more of a warm tingle than a burn. Don’t be scared off, but also don’t expect fireworks.
    • Not checking refrigeration needs before flying. Vacuum-sealed, unopened mentaiko can usually go in checked luggage with an ice pack for a same-day domestic flight, but for international travel, check your destination country’s customs rules on seafood products before packing it—some countries restrict raw roe, others allow small quantities for personal use if commercially sealed.
    • Overpaying for the omiyage wrapping. Elaborate gift boxes with ribbons and tins cost more for the same roe inside. If you just want to eat it yourself, ask for the simpler vacuum pack—staff are used to the request.

    Getting There

    Hakata Station is the obvious hub: it’s a single subway stop from Fukuoka Airport’s domestic terminal (about 5 minutes) or a short walk/taxi from the international terminal, and the station’s basement food halls mean you can buy mentaiko minutes before boarding. If you have half a day free, pair a mentaiko shopping trip with nearby Fukuoka crafts—the city’s Hakata ningyo clay dolls make a nice non-perishable souvenir to pick up on the same outing, since you won’t have to worry about keeping them cold on the flight home.